
This page covers a detailed guide on how to manage your Planetary Settlement in No Man’s Sky. Includes how to construct the Overseer’s Office, improve settlement overview stats and settlement features, how to respond to citizen requests, citizen disputes, construction opportunities, and new arrivals. We’ll also cover the types of features related to population, happiness, productivity, maintenance cost, policy decisions, and sentinel alert level.
How to Construct the Overseer’s Office in No Man’s Sky
The first thing you’ll need to do once you become the new overseer of a planetary settlement is construct the Overseer’s Office. This will become the place where you make important decisions using the Administration Terminal within the office, and it will also serve as an introduction to constructing new buildings in the settlement. In general, most buildings will have two or three phases to their construction, and some will have four. These cover the foundations, upper levels (if there are any for the specific building being constructed), roofing, and final fitting. You’ll need different types of materials for each construction phase, which will be noted when you interact with the Construction Terminal for a specific building. Most of the materials required to construct buildings should be easily accessible to you, but if you’re having trouble you can always go to a Space Station and trade with visiting pilots, each of which will offer different materials for trade. It shouldn’t take long to find some of the more rare materials required such as Ionised Cobalt and Paraffinium.
To construct the Overseer’s Office, you will need the following materials:
 210 Silicate Powder
 5 Metal Platings
 3 Microprocessors
You won’t need to wait too long between each construction phase after you provide one set of materials for the construction of the Overseer’s Office, with about 90 seconds elapsing between each phase. However, you’ll often be waiting anywhere between 30 minutes to 1h 30m (real time) between each construction phase for other buildings, so you should prioritize getting the materials for these as soon as they become known to you.
Once you’ve constructed the Overseer’s Office, you’ll have access to the Administration Terminal and a Base Teleport Module, allowing you to fast travel to the settlement using any other teleporter in the universe. You’ll notice that your settlement will be assigned a specific class, from C tier to S tier. You will almost certainly begin with a C tier settlement, but you can quickly bring it to B and beyond as you construct new buildings and increase productivity.
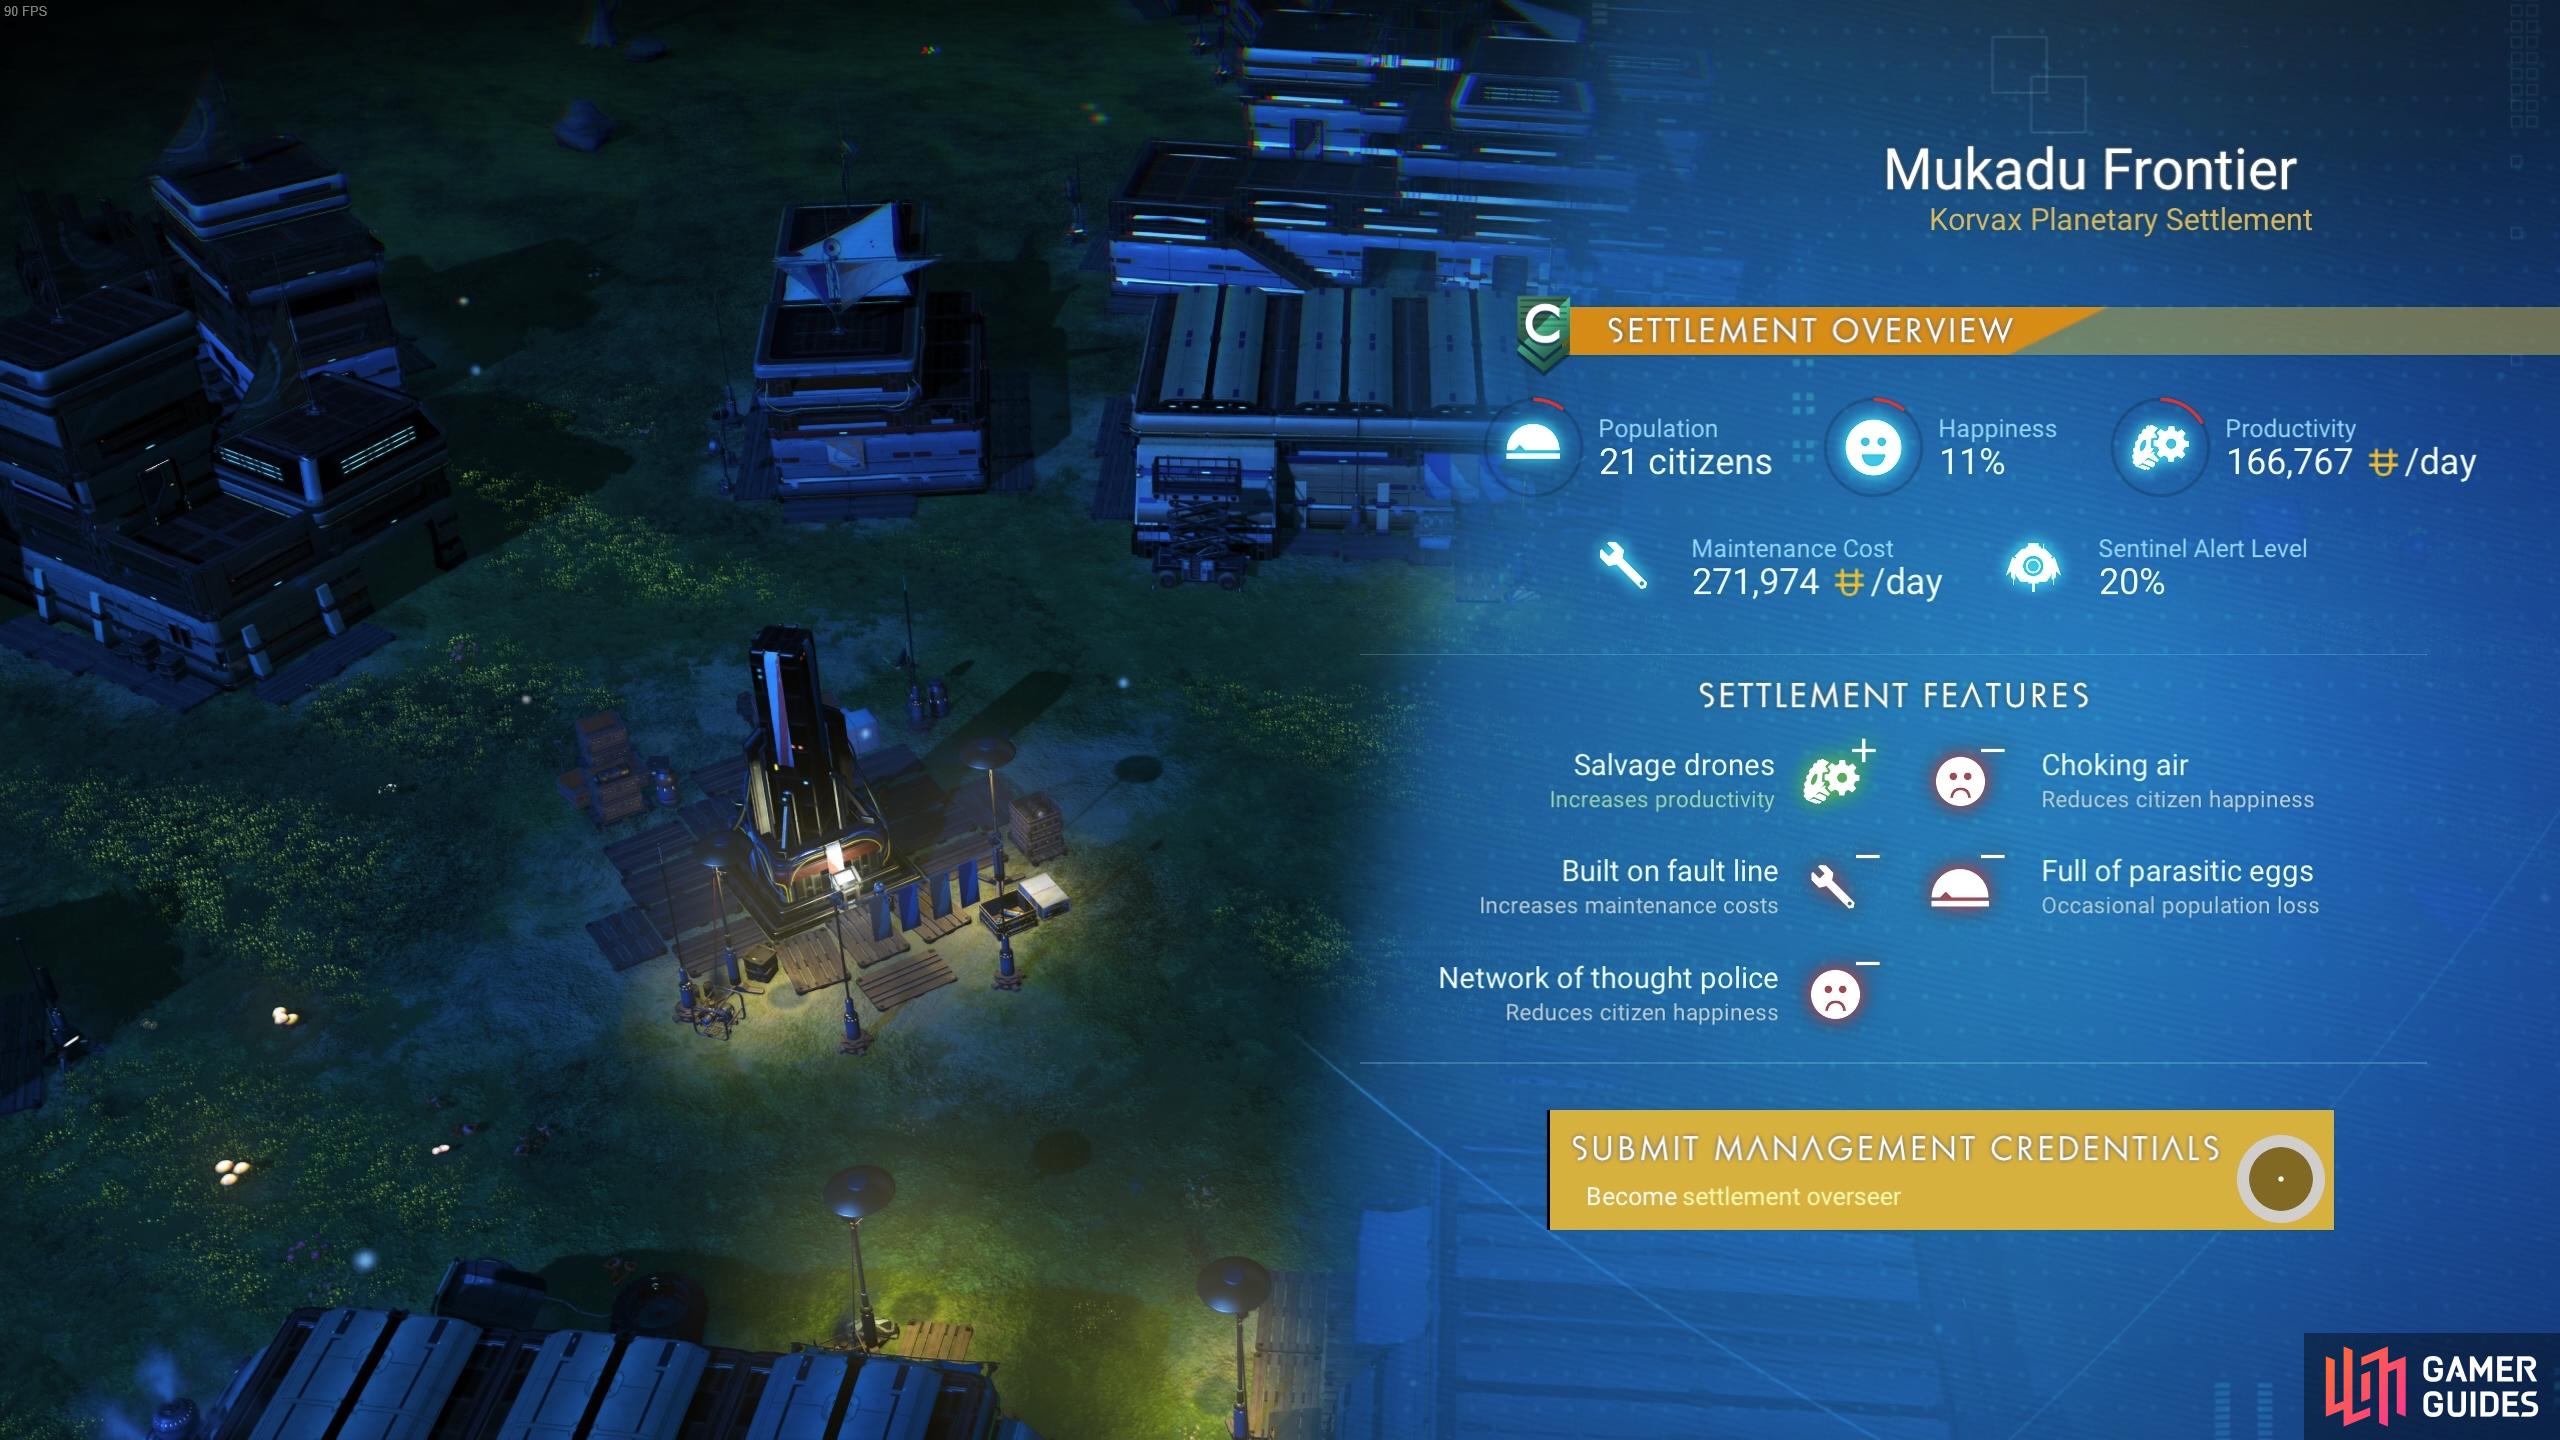
(1 of 3) Once you’ve chosen an appropriate planetary settlement, you’ll need to submit your credentials to become overseer.
How to Improve Settlement Overview Stats in NMS
Productivity, Maintenance Cost, Happiness
The overview stats for planetary settlements relate to Population, Happiness, Productivity, Maintenance Cost, and Sentinel Alert Level. These will improve or deteriorate over time in accordance with the decisions that you make. The first decisions that you’ll be confronted with relate to the construction of new buildings. The types of buildings that can be constructed at any given time are determined by your own settlers, which means you don’t have much input in terms of what you build first. However, each time a construction opportunity presents itself, you’ll be notified of two buildings that the settlers have proposed to construct, and asked to choose between them. At least one of these will almost always offer increased productivity, and we highly recommend that you choose these first to ensure that your productivity outpost exceeds the settlement maintenance costs as soon as possible.
As you construct new buildings and increase productivity, you’ll find that happiness levels gradually increase. However, the happiness of your settlers is more directly tied to the decisions that you make with regard to Citizen Requests, Citizen Disputes, New Arrivals, Policy Decisions and Construction Opportunities. You may sometimes find that you’re presented with two options for any one of these decisions, which have both positive and negative effects on your settlement. For example, you might be asked to make a decision which increases your settlement productivity but decreases happiness, or vice versa. In general, although it’s a good idea to focus on increasing productivity to offset the loss from maintenance costs at the beginning, you should always opt for the choices which improve citizen happiness over increased productivity, since the opportunities to increase happiness will be less frequent.
Another thing to consider as you attempt to improve settlement overview stats is that each construction opportunity will not only present the amount of increased productivity gained from it, but it will also reveal what percentage of the population supports the construction of one building over another. You don’t need to worry about this too much where the construction of one building is only slightly favored over another (e.g. 50% vs 42%), but in scenarios where one building is greatly favored over another, you should consider the impact on settler happiness that this might have if you choose to ignore the will of the settlers. You may be losing out on slightly more productivity in some cases, but it’s worth the sacrifice when you consider that opportunities to improve settlement happiness are more difficult to come by than those for productivity.
So long as you’re frequently constructing new buildings and making decisions which favor the happiness of your settlers where possible, you should see both happiness and productivity increase fairly quickly. If you selected a settlement with productivity output nearly equal to maintenance costs, it won’t be long before you begin to make a profit. As soon as you’re making a profit, the settlement will begin to produce specific items that you can harvest each day. The type of item will depend on the buildings you’ve constructed, but most will be of good value and the quantity will increase as your productivity increases.
Population and Sentinel Alert Level
Now that we’ve covered how happiness, productivity, and maintenance costs are intricately connected, once you’ve got these stats in a comfortable place you can begin worrying about population size and sentinel alert level. The population of your settlement will slowly increase over time, so long as your productivity exceeds maintenance costs. However, to gain more direct boosts to population you will need to focus on making the right decisions to improve settlement features (more on those below). You will often be notified which choices will increase population size, and by how much, but you can find a full list of these in the population features table below. Keep in mind that the higher the population, the greater the maintenance costs, but your productivity will also increase more quickly at the same time.
The final overview stat to consider is sentinel alert level. This will always be increasing from 0% to 100%, regardless of your choices. You can make some decisions which will slow down the rate at which the alert level increases, but we wouldn’t recommend choosing these unless other options are actively detrimental, since most sentinel raids are easy to deal with and can actually provide you with valuable loot. As the percentage of sentinel alert level increases, the chances of an attack increase. An attack is guaranteed once it reaches 100%. At this point you will usually be invaded by roughly 6 Sentinel Drones, each of which can be defeated fairly easily, even with a Mining Beam. You’ll kill the sentinels much quicker with proper ammunition however, and you should consider using this if you want to preserve the settlement population levels. The longer a sentinel attack goes on, the more settlers you’ll lose. Kill the sentinels as soon as they appear and you shouldn’t have to worry about this stat.
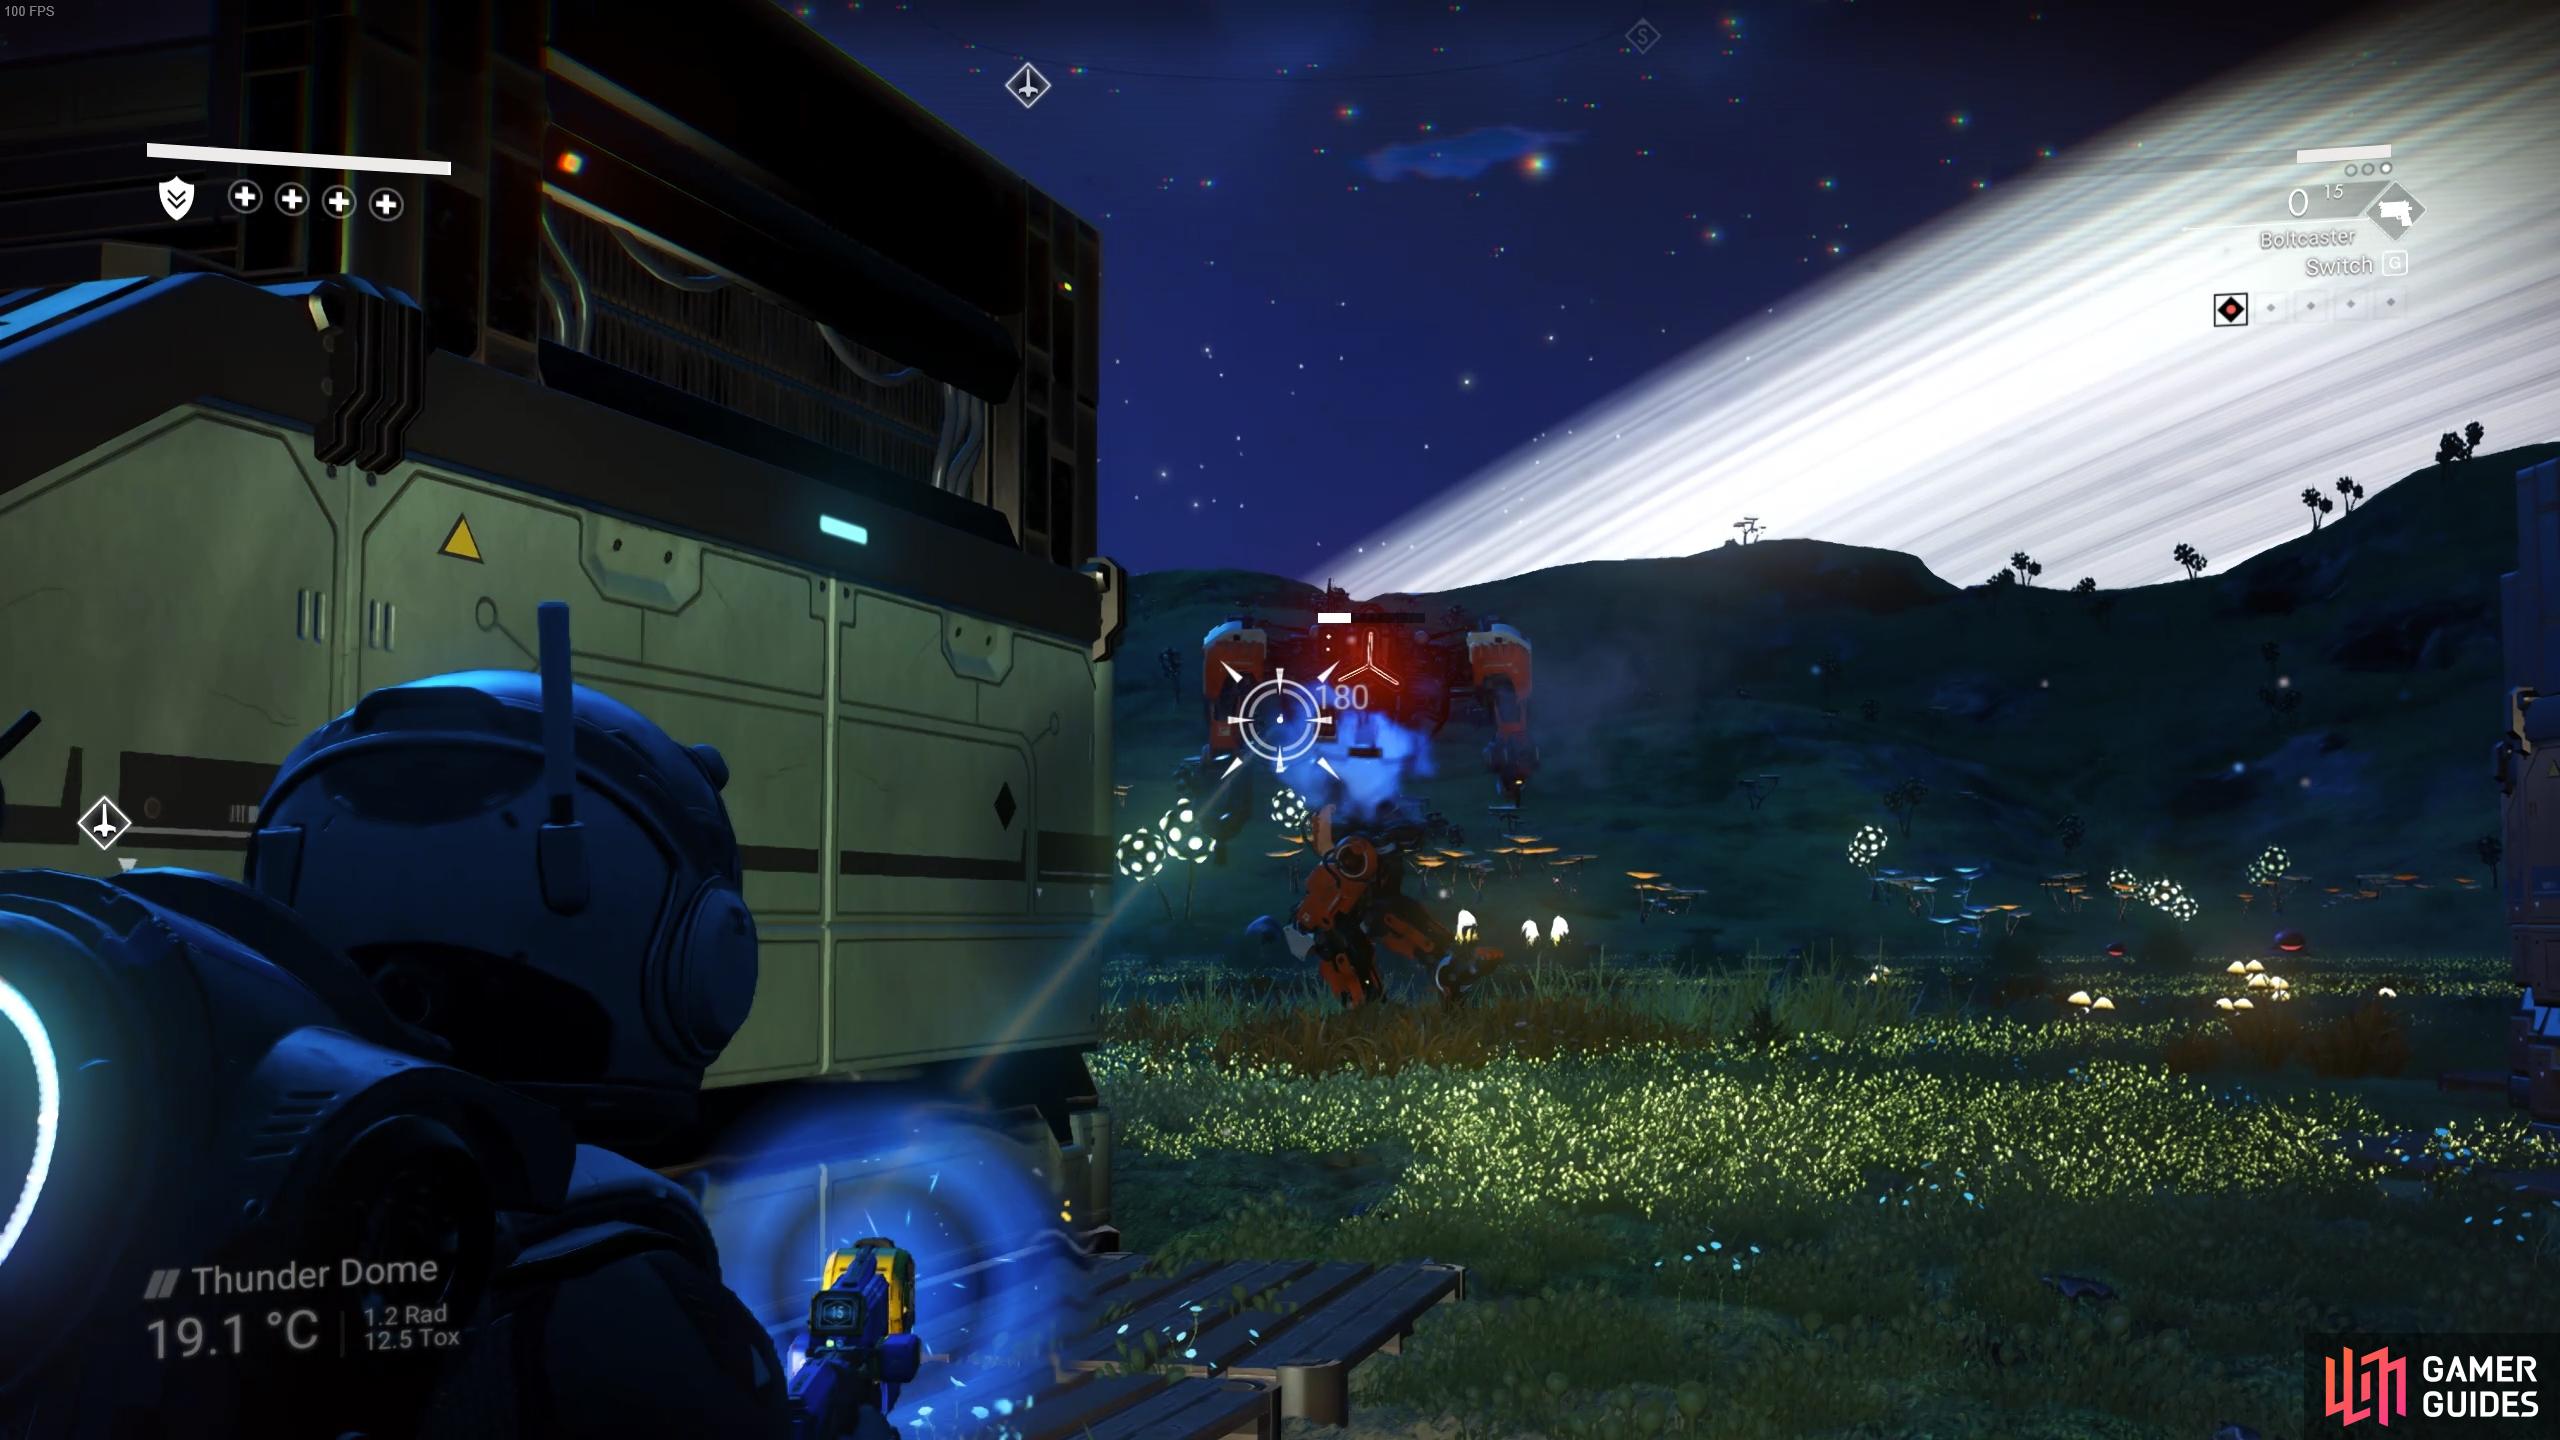
(1 of 3) You’ll sometimes encounter tougher Sentinel Drones in mech suits, so be ready to use decent ammunition to take them down quickly.
As a general rule, you’ll fare far better against sentinels if you stay on foot. This will ensure that only regular Sentinel Drones spawn most of the time, which are easy to deal with. However, if you get in your Starship you’ll trigger Fighter Drones to spawn. These are much more deadly with a real chance of killing you if you don’t have a decent ship. If you play smart and use buildings for cover on the ground, you can take your time as you wait for your health to regenerate between fights. You’ll also benefit from picking up Combat Supplies during fights, which replenish your health and ammunition, while also providing some valuable loot. Almost every Sentinel you kill will drop these.
No Comments