
You’d better get used to seeing Zubat and Geodude!
Wild Pokémon
| Pokémon | Type | Location | Chance (%) |
|---|---|---|---|
 Clefable Clefable |
Fairy | Cave | 1 (B2F) |
 Onix Onix |
Rock/Ground | Cave | 1 |
 Clefairy Clefairy |
Fairy | Cave | 4 (1F-B1F), 9 (B2F) |
 Paras Paras |
Bug/Grass | Cave | 15 |
 Geodude Geodude |
Rock/Ground | Cave | 34 (B2F), 40 (1F-B1F) |
 Zubat Zubat |
Poison/Flying | Cave | 40 |
 Chansey Chansey |
Normal | Cave | Rare spawn |
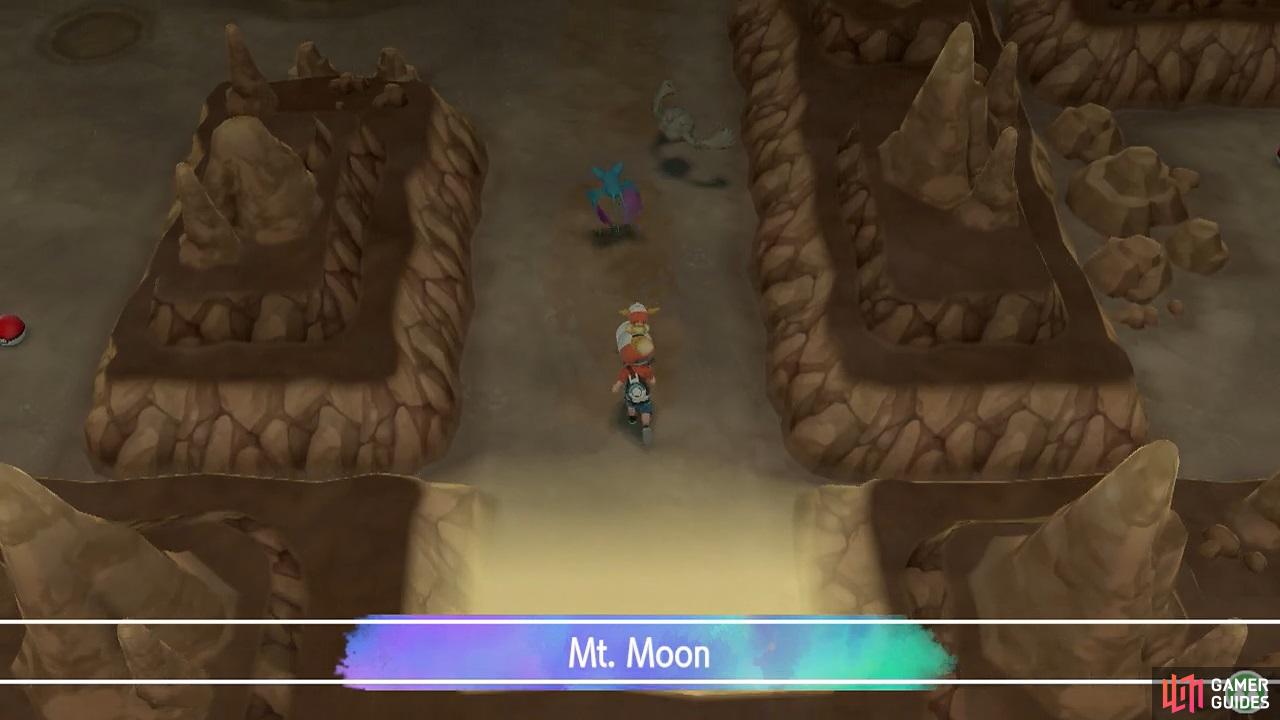
Floor 1F
Hopefully you’ve come prepared because you’ll be in here for a while–at least half a hour or so, unless you’re speeding through. As you enter the caverns of Mt. Moon, a dubious duo will notice you before running deeper in. Ignore the urge to follow them for now and instead search around the west side.
On the other side of the wall to the left of the entrance, check the bottom-right corner to find a Potion that somebody must have dropped. Still on the west side, towards the north is a Bug Catcher blocking the way to 5 Great Balls on the floor.
Bug Catcher Kent
| Pokémon | Level | Type |
|---|---|---|
 Butterfree Butterfree |
7 | Bug/Flying |
Lucky Kent must have caught a wild Butterfree in Let’s Go  Pikachu. This fully evolved
  Caterpie is pretty weak at Level 7, so you should have an easy time. Don’t bother using Grass-types though as their attacks only do a quarter damage. Pikachu or
  Charmander are ideal.
Return to the entrance and now follow the Team Rocket duo east. As you turn the next corner, there will be a Lass intent on stopping travelers from proceeding.
Lass Evelyn
| Pokémon | Level | Type |
|---|---|---|
 Bellsprout Bellsprout |
8 | Grass/Poison |
Bellsprout can be handled similarly to  Oddish. Stick to Fire and Flying-types if possible. At the very least, don’t use Pikachu’s Thunder Shock since it will only do halved damage.
Past Evelyn, you should see a set of ladders going downstairs. Before you can approach it though, you’ll catch up to Team Rocket–and once again, they will flee. Go down the ladder to reach a short tunnel. Follow this tunnel in a south-westerly direction to reach another ladder.
Floor B2F (center)
Downstairs, there’s a Team Rocket member dressed in black just ahead. If you time it right, you can walk past him, but surely you want to take down these villains head on?
Team Rocket Grunt
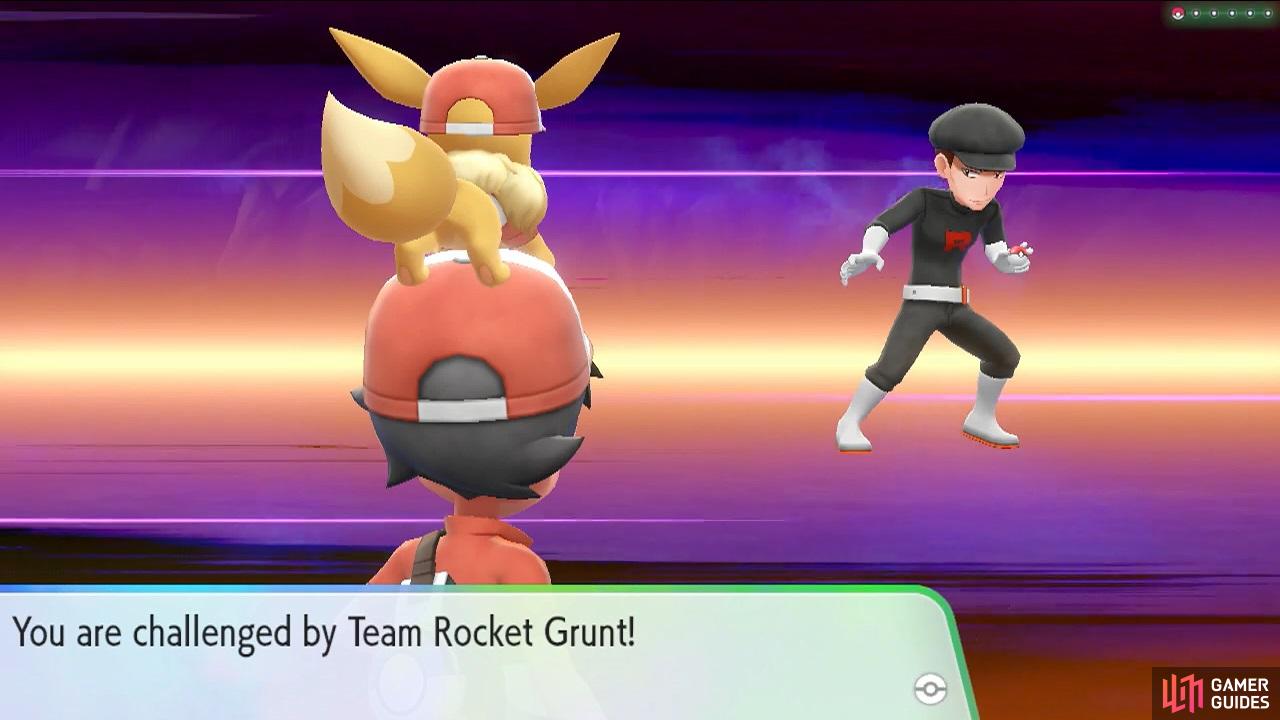
| Pokémon | Level | Type |
|---|---|---|
 Rattata Rattata |
9 | Normal |
For your first battle with Team Rocket, a Rattata as your opponent is fairly underwhelming. Don’t hold back and show Team Rocket you’re not to be messed with. Maybe next time they’ll learn to bring out the big guns.
Having dealt with the Grunt or otherwise, head east and up the ramp to find a Rare Candy. If you give this sweet treat to a Pokémon, it will instantly increase their Level by 1. We suggest saving it for the later Levels, when you need more experience to Level Up. Or maybe give it to  Magikarp so it can evolve slightly faster.
Floor 1F (again)
From here, retrace your steps until you’re back on the top-most floor. Then from the top of the ladder, head south, while keeping towards the west. Eventually you should reach a peculiar-looking trainer standing in the middle of a crater and an Awakening nearby to the left.
Super Nerd Jovan
| Pokémon | Level | Type |
|---|---|---|
 Grimer Grimer |
10 | Poison |
Geez, a nerd has a stronger Pokémon than a member of Team Rocket. Anyway, Grimer is an unevolved Poison-type, so you can fight it just like Nidoran. It’s a bit more bulkier though, but nothing your developing Pokémon army can’t tackle.
Next, head east from Jovan, until you reach the far corner where you can pick up an Ether. Then go directly north along the east-most passage. Along the way, there’s a Repel on the floor. If you’re tired of being swarmed by Zubat, feel free to use it, but you can probably avoid them by carefully walking around.
Soon, you’ll reach the north-east corner of this floor; nearby, there should be a small rock formation. Feel free to go around the wall that was on your left and follow it south. In-between two walls, there’s a Youngster that you may have spotted. He’s probably feeling a bit lonely, so go ahead and entertain him if you want.
Youngster Robby
| Pokémon | Level | Type |
|---|---|---|
 Mankey Mankey |
8 | Fighting |
 Eevee users might be slightly worried since Eevee is weak to Fighting-types. Luckily, this Mankey doesn’t know any Fighting-type moves, so that worry is unwarranted. Flying-types are the best choice here, but pretty much any well-raised Pokémon can hold its ground.
Assuming you battled Robby, head back towards the far north-eastern corner of this floor, where the small rock formation was. Then proceed west. About halfway along, there’s a Lass standing right in the centre. A battle with her can be avoided if you go around her when she’s not looking.
Lass Miriam
| Pokémon | Level | Type |
|---|---|---|
| Clefairy |
8 | Fairy |
Old-school fans beware as Clefairy is no longer a Normal-type, since X and Y. Instead, it’s now a Fairy-type, just like its name. As such, Fighting-type moves aren’t effective, but Poison-types are. It’s still a fairly weak Pokémon though, so just hit it with your best shot.
After turning the next corner, there will be more ladders going downstairs and the other half of the nefarious Rocket duo. Once he runs off, go down the ladder to another short tunnel–if it’s even long enough to be called a tunnel. Go down the next ladder to reach the bottom-most floor.
Floor B2F (north-east)
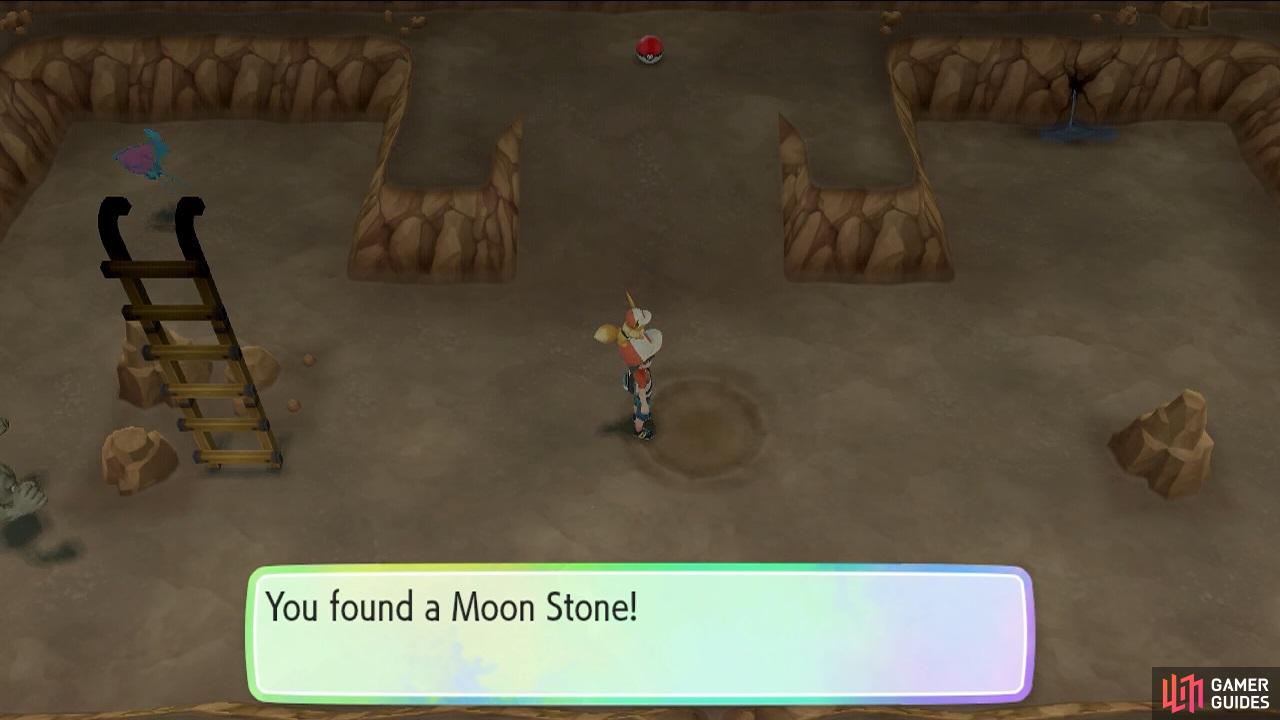
It’s hard to find Moon Stones unless you know where to look.
Here, go east a few paces and search in the centre of the nearby crater to discover a hidden Moon Stone. This can be used to instantly evolve the likes of Clefairy and both genders of Nidoran. If you return here later, you may find another Moon Stone, useful if you need to evolve multiple Pokémon. Also grab the obvious Nugget just above the ramp.
Floor 1F (once more)
Return to the top floor and carry on south. Towards the left is a young kid blocking the way. There’s no way to avoid a fight, so just try your best not to make him cry too much.
Youngster Josh
| Pokémon | Level | Type |
|---|---|---|
 Sandshrew Sandshrew |
8 | Ground |
Whatever you do, don’t embarrass yourself by using Pikachu, since Sandshrew is immune to Electric-type moves. Grass and Water-types are ideal. But as usual, it’s pretty weak, so any of your experienced Pokémon will more than suffice.
From Josh, carry on west, then head north. Nearby, there is a Hiker standing in the middle of a crater. If you’re sneaky, you can run past him when he’s looking in the wrong direction.
Hiker Marcos
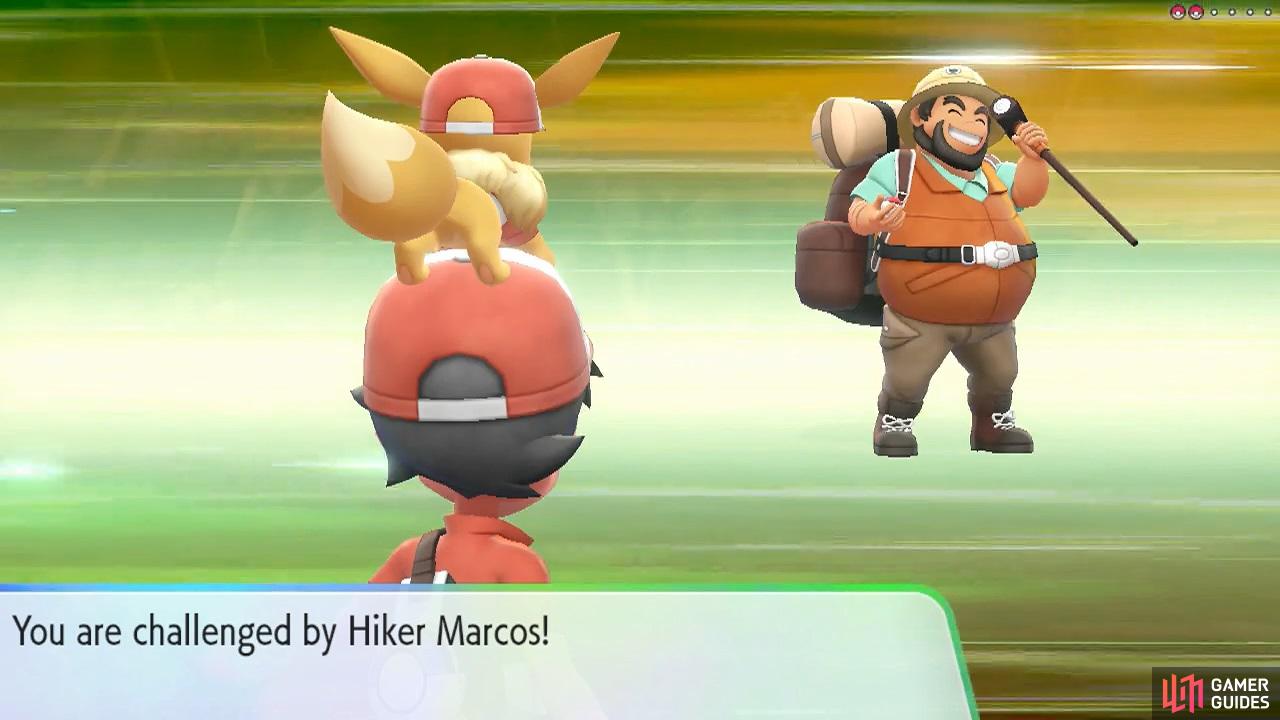
You should be familiar with Geodude from the Pewter City Gym; this guy has two of them! Like before, Grass and Water-types are the way to go, since their moves do a whopping four times damage. Ground-types and Fighting-types are also good to use.
Further north, there’s a ladder towards the left and a precious Pearl near the right. There’s also a friendly guy near the top-left corner who will offer to top up your Poké Balls if you’ve ran out. When you’re done here, go down the ladder to reach another tunnel.
Near the corner, you’ll run into Team Rocket’s  Meowth, but it’ll run away in fear. Carry on east after the tricky feline, then go down the ladder at the end.
Floor B2F (main)
You’ll be back in the bottom-most floor, below the area where the Moon Stone and Nugget were.
From the ladder, go directly north and scoop up the Revive from the crater by the corner. Go back towards the ladder, then head east and down the ramp. At the bottom, there’s a Team Rocket Grunt that you’ll need to beat up to get past.
Team Rocket Grunt
| Pokémon | Level | Type |
|---|---|---|
 Drowzee Drowzee |
9 | Psychic |
Keep your Poison-types such as Nidoran,  Bulbasaur, etc. and Fighting-types away as Drowzee is super-effective against them. Any other Pokémon should do the trick, but beware of Drowzee’s Hypnosis that can cause Sleep.
After barging your way through, go up the next ramp and follow the rest of the cavern in a clock-wise direction. Halfway along the east side, you will end up going past Team Rocket, but they’ll be too distracted to see you. When you reach the west side, keep going till you see another Rocket Grunt in black. Be sure to grab the Revive to the right.
Team Rocket Grunt
| Pokémon | Level | Type |
|---|---|---|
| Zubat |
9 | Poison/Flying |
This lady Grunt has a Zubat common around these parts. It’s a Flying-type so Pikachu will get a lot of mileage here. Otherwise, keep your Grass-types away and you’ll wipe the smile off her before long.
Once the path is clear, carry on north, but save your game before you get too far. After going up the ramp, you’ll have to make possibly the most important choice in the game. But first things first, you’ll need to bully a nerd into submission.
Super Nerd Miguel
 Voltorb is only weak to Ground-types, so Pikachu players who caught Sandshrew will have an advantage. If that’s not you, don’t worry as it’s not particularly strong. Grass-types also work as they can resist Electric-type moves.
 Magnemite is also weak to Ground-types, but it takes four times damage rather than two times. For those who never played beyond Red, Blue and Yellow, Magnemite is also a Steel-type. Therefore Fire and Fighting-types are super-effective as well.
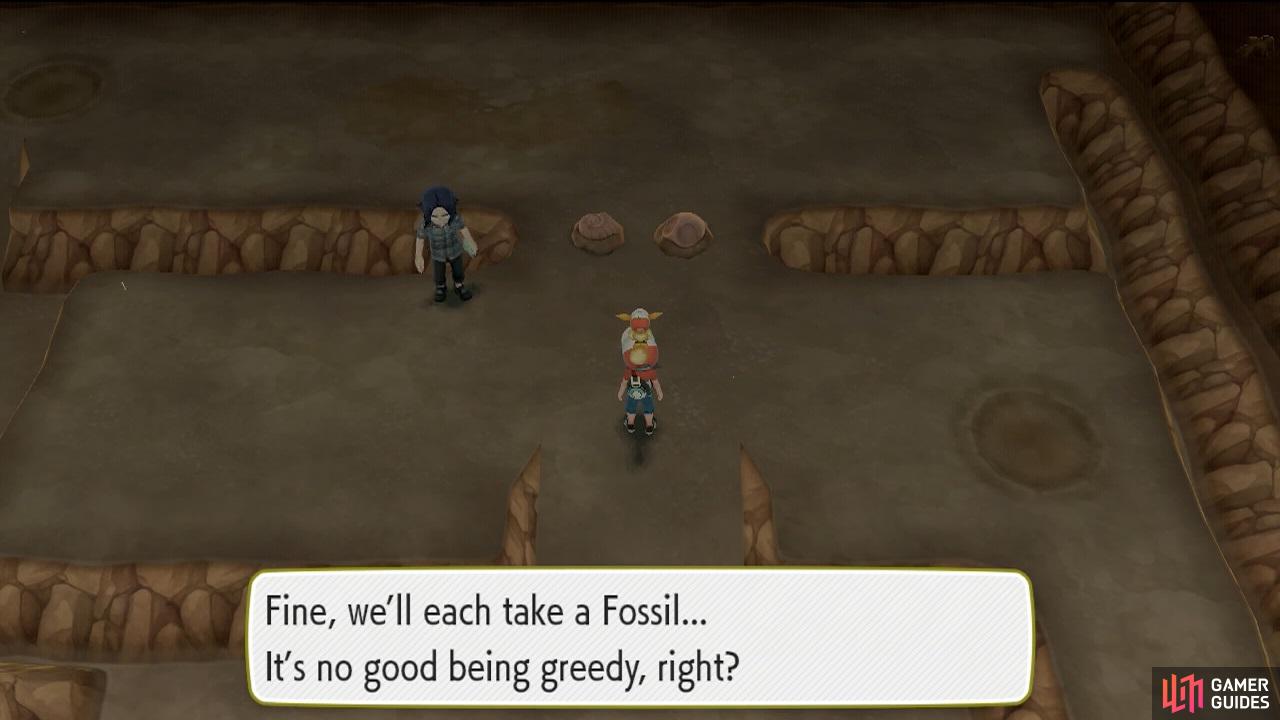
These fossils can be revived when you get to Cinnabar Island.
Succeed and Miguel will yield to your wishes.
Having chosen your destined fossil, head west to exit the area. As you try to leave, the Team Rocket weirdos from before will come to stop you.
Team Rocket Jessie and James
This is a Double Battle where you and your opponent can both fight with two Pokémon. Similar to normal battles, you’ll send out the first two Pokémon in your party. If you are worried, feel free to re-order your party before this battle, but it’s not too hard anyway.
If you ever played Pokémon Yellow or watched the early years of the cartoon, you may recognize their team. Jessie and James both have Poison-types, so Ground-types are recommended, so pretty much just Sandshrew. However, as long as you’re not careless, any non-Grass will work.
To begin with, we recommend focusing on the same target for both of your Pokémon. That way if you manage to KO it, you only have to worry about handling one opponent afterwards.  Ekans is probably the easier target since
  Koffing is a bit more bulky in terms of Defense.
Send Team Rocket blasting off and you can continue past them, towards the ladder to the south. Upstairs, you’ll be in another very short tunnel with a second ladder nearby. Go up this ladder to say goodbye to Mt. Moon.
No Comments