


Map of the battlefield.
S-Rank Requirements
| Time | Objectives | Casualties |
|---|---|---|
| 35:00 | 9 | 0 |
This is another RTS mission, so you have the option to skip it if you want, but it’s best to do it since you cannot replay it via the Missions option on the main menu. In order to reach the objective area, you will need to head east from Rubrum, going through both Eibon and the Roshana Province. Once you reach Rilochy Province, the actual mission will begin.
Capturing Shakara
Your overall objective is to capture Rilochy, but you won’t be able to do that right away since you can’t direct any troops there yet, plus there are other obstacles in the way. So, the first order of business is to go after Shakara, but you’ll need some more troops in order to bring down its energy wall. To do this, go straight towards Domain 2 and capture it.
As you’re going to Domain 2, you will see a large dragon’s shadow pass overhead. This one is an Atmosvern and it acts independently from any of the strongholds. As such, it means you can dodge its attacks and, considering the strength this enemy holds, it’s best to attack it until it manages to retreat, letting you concentrate on Domain 2. A strong chocobo or a few charged shots from Trey should do the trick. It is very powerful though so be very careful when attacking it. If you don’t make it retreat, it will constantly disrupt your efforts when trying to take over strongholds.
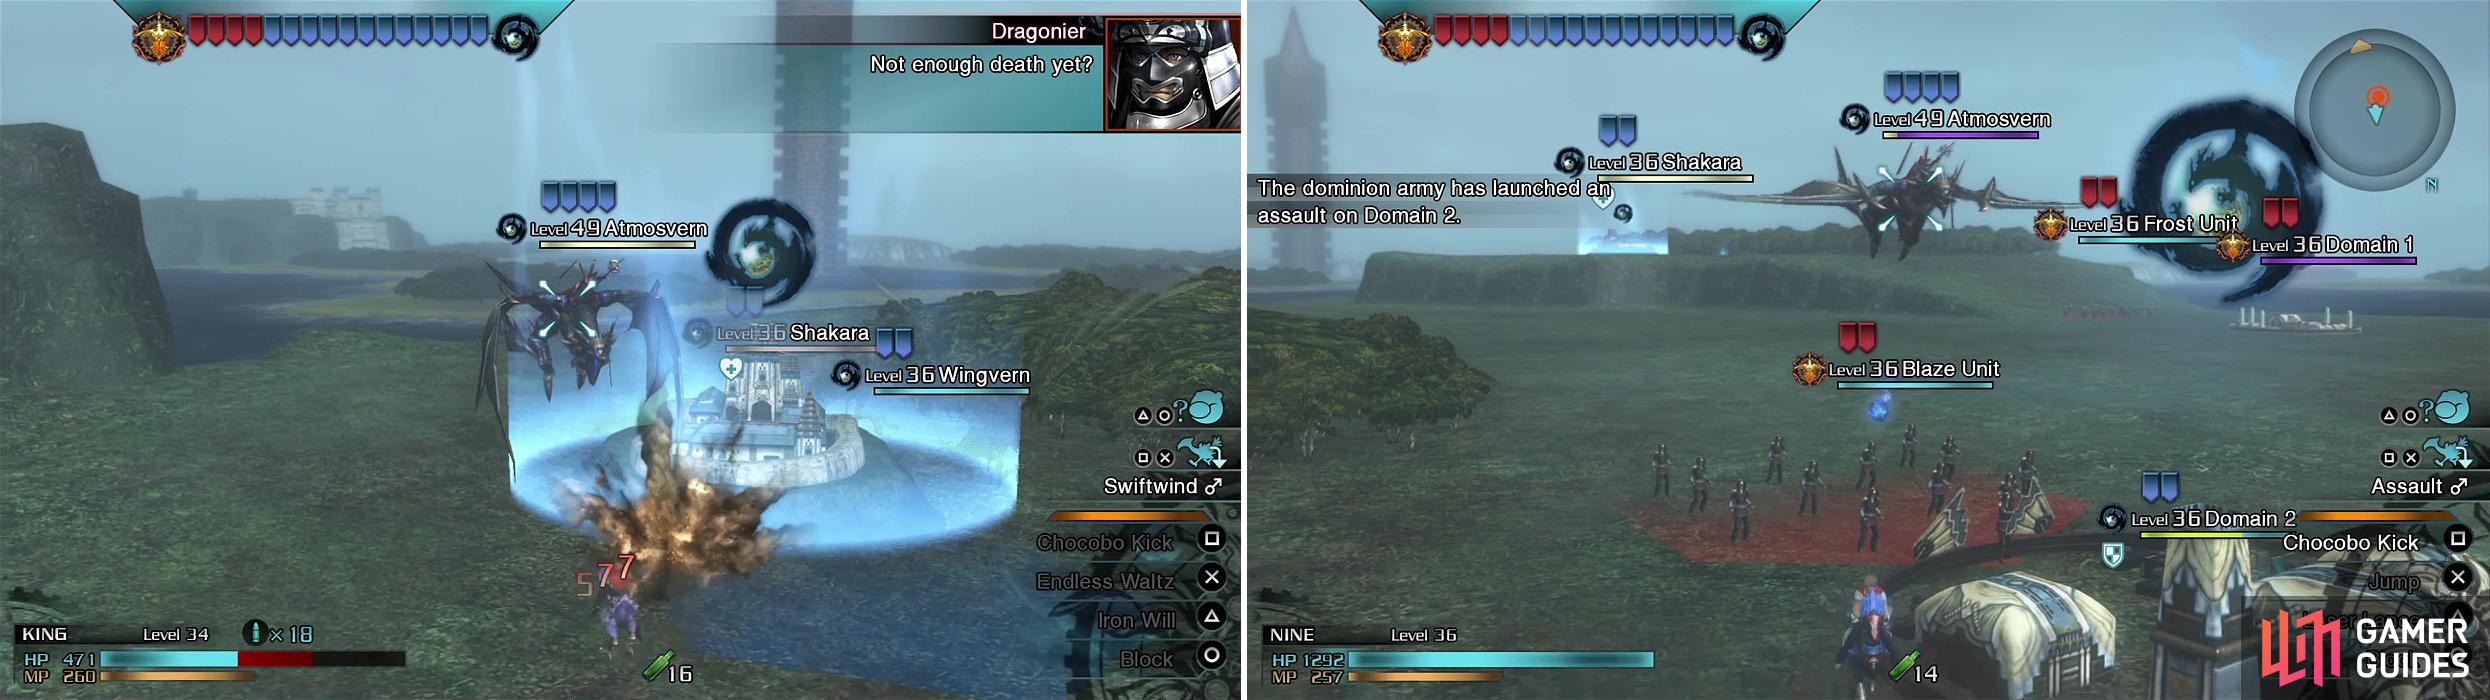
The Atmosvern is an elite unit and will cause more problems than anything else, so keep attacking it until it retreats. If you attack Domain 2, it will fly over to help (right).
Once you’ve captured Domain 2, you now have enough firepower to bring Shakara’s energy wall down. So, move all efforts to remove the enemies coming out of Shakara, allowing your troops to focus on the energy wall and when it’s gone, invade the town.
Invading Shakara
There actually isn’t much you have to do in order to capture Shakara, as, when you invade the town, you will see a Demonicorn and a Dualistag in the first area. The Dualistag is basically a bigger version of the Demonicorn, so treat it as such. If you don’t remember, they will charge you as their main attack if you’re far away from them, as well as swipe with their claws if in melee range. Once enough time passes or you do enough damage, they will howl and cast Aura, upping their damage.
You will automatically be transported to another area, with a Dracoknight enemy CO named Tonogiri. This enemy is nothing special, other than being buffed with Haste, and has the typical Dracoknight moves, such as spinning his lance to reduce damage or jumping into the air and throwing the lance towards you. Defeat Tonogiri and absorb his Phantoma to get a unique one that doesn’t have any use outside of this mission, as well as take control of Shakara. Absorbing his Phantoma allows you to take control of a powerful unit.

Tonogiri has a Breaksight opportunity when he leaps in the air (left) and also after he whirls his spear while on the ground (right).
Attack on Rilochy
You now have control over the troops at Shakara, with an elite unit (Shijima Unit) at your disposal, so let them loose and get ready for the Atmosvern’s return. It’s a good idea to concentrate on it until you manage to bring it down, else it might cause trouble for any captured strongholds or any objectives you’re heading to.
With the Atmosvern out of the picture, you can take over both Domains 3 and 4, which shouldn’t give you much of a challenge. Now you can concentrate solely on removing the energy wall at Rilochy. It shouldn’t take too long, since you have a lot of troops and there’s nothing in your way now. Once the energy wall is gone, invade the town.
Invading Rilochy
In the first area of Rilochy, you’ll initially face off against some Dracoknights, so you should remember by now on how to take them out without too much effort. After that, there will be some Créme Bruleés (Flans) and some Pyronades. While the latter aren’t a problem, the Flans can be annoying if they continually collapse and rise from underneath you.
Move onto the next area to find some Vilifeyes (the flying eyeball enemies) and Cryonades, and you’ll notice that there’s a chill in the air. Continue a little more into the area to find more of the same, as well as an Ironfist Giant. This is one of those ape-like enemies that will attempt to “hug” you, create an ice area of effect by smacking the ground or a sweep attack with one of its arms. Wait for the latter attack, dodge it and a Breaksight will appear. Continue this until the Giant is defeated.
The last area only contains a few enemies, but it can be the most difficult, due to those enemies. There will be two Wingverns that show up, which aren’t too bad, since you can dodge their breath attack and hit the Breaksight that appears right after. Note that the Wingverns like to stop flying with no ground beneath them, so hitting a Breaksight will make them fall into oblivion, where they will die and you won’t get the Phantoma.
The only other enemy in the area is a Diepvern, which should look familiar to you, as you faced one during The Battle of Judecca (it was named Mikazuchi). It goes through four phases, depending on how much health it has left, with each one having different attacks. It will probably be easier this time, due to the fact it’s a normal enemy. There will be a few more Wingverns after the Diepvern, but they’re easy to bring down.
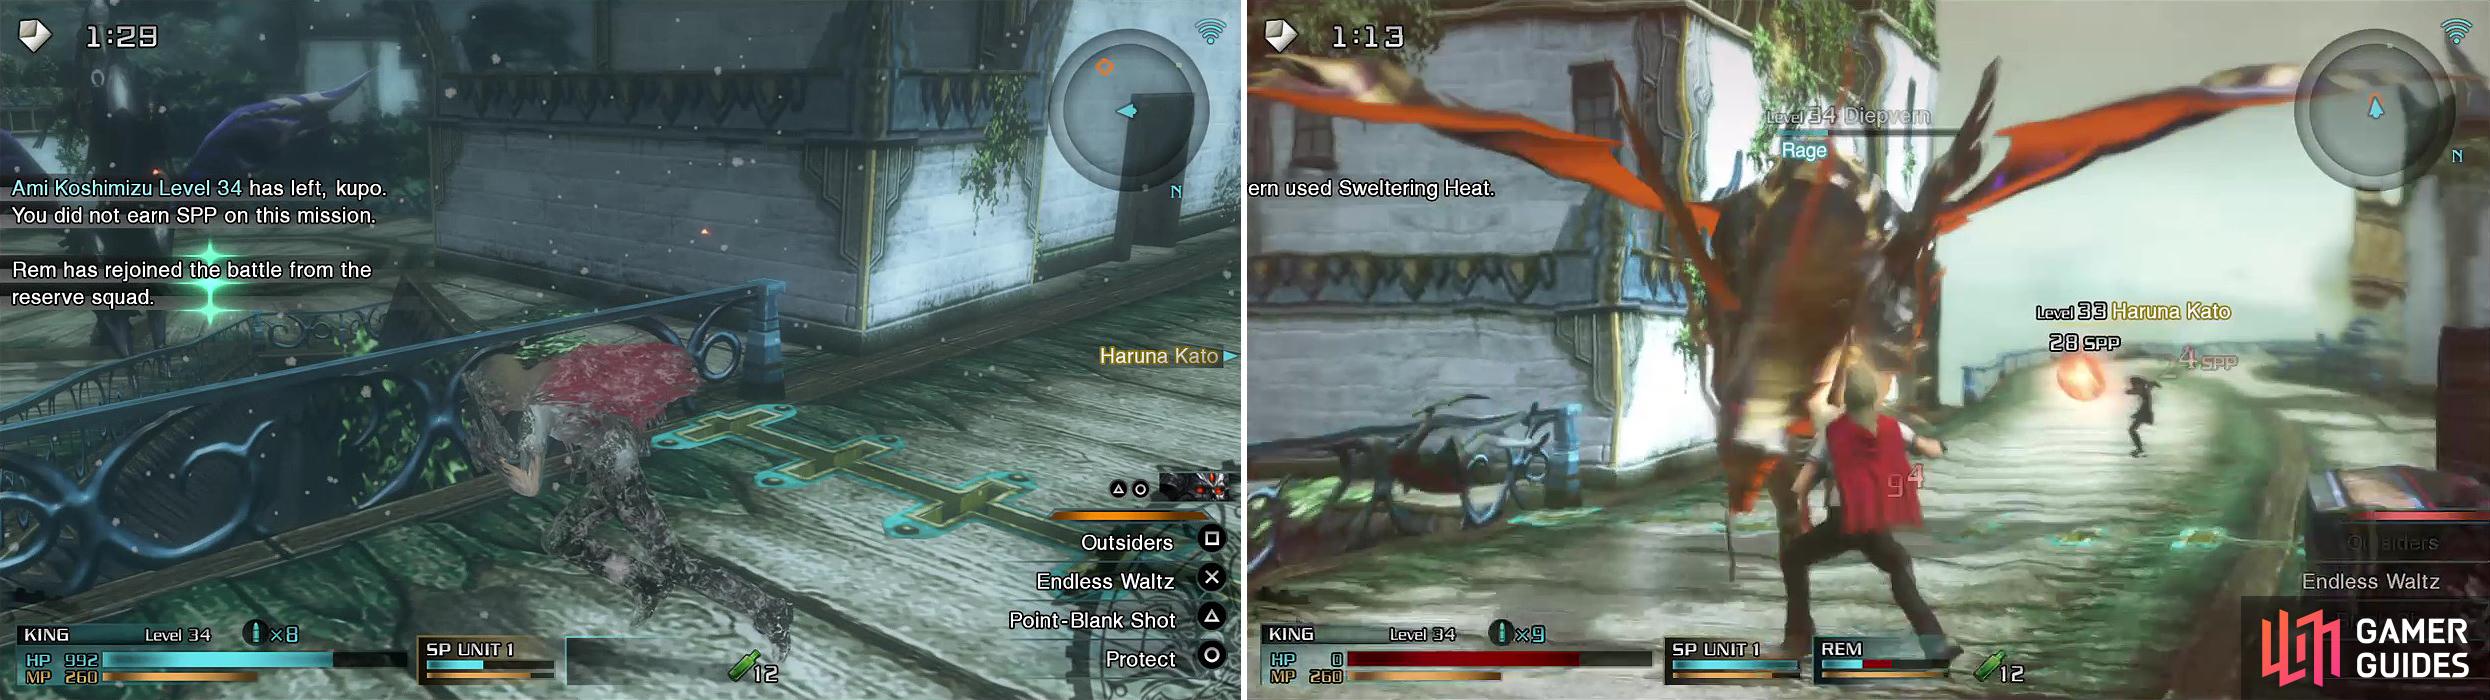
The Diepvern can change the weather conditions (left) affecting its attacks and yours too. Watch near death as it will become enraged and charge at you (right).
Storming Mahamayuri
Upon defeating the Diepvern and the rest of the enemies, you will have one more task at hand, which is to make your way to Mahamayuri. Fortunately, it’s a simple task, as the only thing standing between you and the city is three Flyverns, but the catch is that you don’t even have to bother with them. You can simply hop on a chocobo and go straight towards the city, ending the mission. You may wish to kill them for the experience though.
No Comments