

S-Rank Requirements
| Time Limit | Phantoma | Casualties |
|---|---|---|
| 5:00 | 30 | 0 |
1 - Rokol Caverns (1)
| Objective | Time Limit | Effect | Reward |
|---|---|---|---|
| Defeat Supersoldier with leader | 2:00 | Invincible 0:30 | Mythril Gloves |
This is the first area with enemies, with there being some Imperial Troopers and a Supersoldier. The above SO will require you to defeat the Supersoldier with your active leader, so make sure you go after him first to avoid your other party members from downing him.
2 - Rokol Caverns (2)
Another room with more Imperial Troopers and a single Supersoldier.
3 - Rokol Caverns (3)
This room mixes it up a little bit by adding a few Coeurls into the group of enemies you face, which also include Troopers and a Supersoldier.
4 - Rokol Caverns (4)
| Objective | Time Limit | Effect | Reward |
|---|---|---|---|
| Destroy Autoturret with leader | 1:00 | Endure 0:30 | Gold Bangle |
More Imperial Troopers will be here, but there will also be an Autoturret behind a barrier on the left side whenever you enter. The SO will require you to destroy the Autoturret with your party leader, so if you want a Gold Bangle , then do that.
5 - Rokol Caverns (5; Optional)
This is the eastern path, leading to another room with more Imperial Troopers. There’s also a treasure chest here that contains an item for you, although it’s nothing special.
6 - Rokol Caverns (6)
| Objective | Time Limit | Effect | Reward |
|---|---|---|---|
| Defeat commander quickly | 1:00 | Aura 0:30 | Mythril Ring |
Yet more Imperial Troopers and even some Coeurls, but there’s also an enemy commander here and the SO will require you to defeat him within a minute.
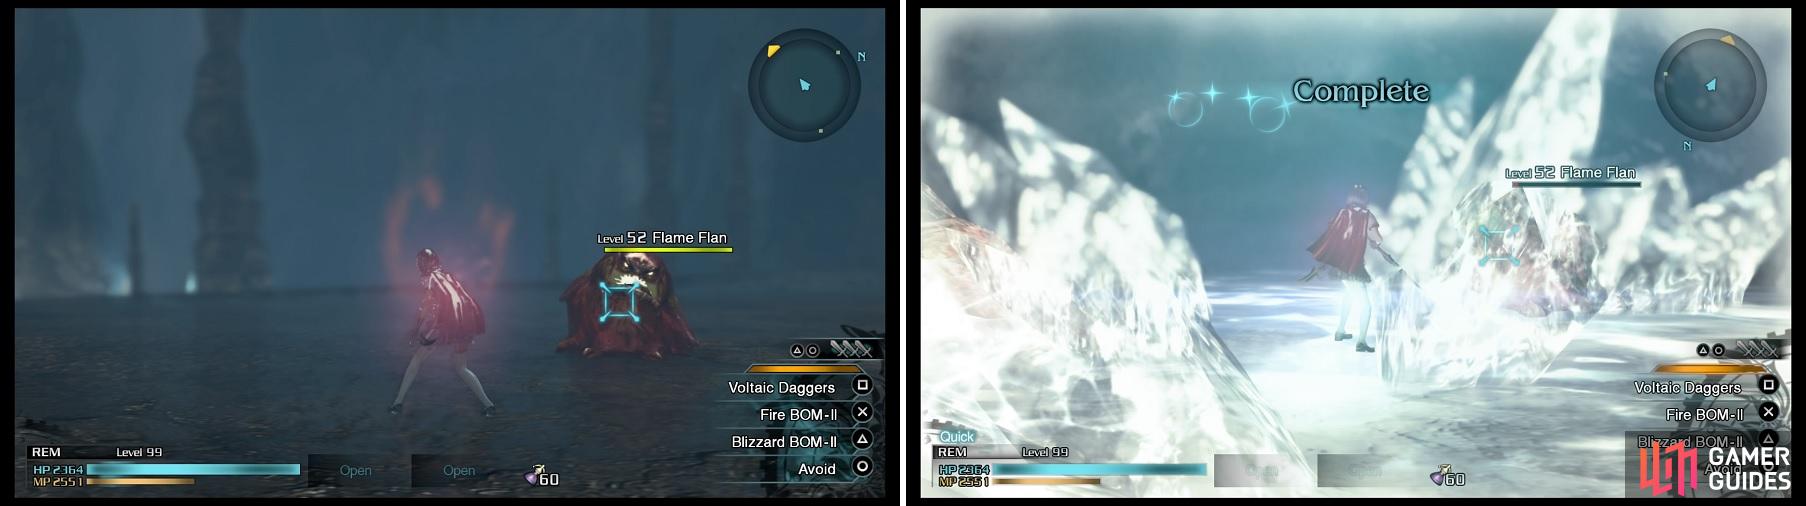
The Flame Flans (left) you will encounter shortly are a lot higher in level than the suggested one. For the SO you will get against them, any ice-elemental attack will do (right).
7 - Cavern Depths
No enemies will be present here and you only have to examine the object on the ground before you’re told to exit the caverns. However, things will be a little difficult in your exit, as high-leveled enemies will be trying to stop you.
8 - Rokol Caverns Revisited (1)
At the second area, after seeing the briefcase, you will encounter some Flame Flans. These enemies are roughly level 50 and while they’re not tough, it will take a while to bring them down, unless you have one of the Blizzard spells. There will be quite a few of these Flans and you can simply bypass them all to go to the next area…
9 - Rokol Caverns Revisited (2)
| Objective | Time Limit | Effect | Reward |
|---|---|---|---|
| Exploit the enemy’s weakness | 3:00 | Endure 0:30 | Phoenix Pinion |
Where you will find more Flame Flans waiting for you. Once again, you don’t need to fight these, but you might want to do the SO here, which is to exploit the enemies’ weakness. Of course, being named Flame Flans, it should be obvious that it’s ice, so if you have any kind of attack with ice, use it to finish the SO.
The final two areas have nothing more than Flame Flans and there’s no other SOs for this mission, so blow past them and make it to the entrance to finish the mission.
No Comments