

S-Rank Requirements
| Time Limit | Phantoma | Casualties |
|---|---|---|
| 7:00 | 50 | 0 |
1 - Mt. Nesher Ascent (1)
| Objective | Time Limit | Effect | Reward |
|---|---|---|---|
| Defeat an Evil Eye | 1:00 | Endure 0:30 | Megalixir |
The only thing you’ll encounter in the first area with enemies are four Evil Eyes, which are the flying eyeball enemies you should be used to fighting by now. Trigger the SO to kill one of the Evil Eyes within a minute for an easy Megalixir.
2 - Mt. Nesher Ascent (2)
You will encounter Hundlegs and Evil Eyes here, which keep respawning. There are two exits in this area, with one going west and another going north. Let’s take the north one first.
3 - Mt. Nesher Ascent (3)
There are more Evil Eyes here, as well as some Bombs, all of which will continually respawn. There’s a cave entrance about halfway up, which leads to the Hidden Cavity, a safe area with some imperial soldiers, so go there first.
4 - Hidden Cavity (1)
This is a safe area with some imperial soldiers hiding in it. There’s a recovery portal here and you can also get an item by talking to one of the soldiers. When you’re ready to continue, go back one area and head straight north first.
5 - Mt. Nesher Ascent (4)
There will be two Tonberries here, who can be tricky little enemies. One of their attacks is to toss their lanterns at you, which explode like a grenade. They can also inflict Stop on you with another of their attacks, plus they have a lot of health for such small things. The one plus side to fighting them is that they can drop Anima Lanterns , which give Reraise to the person who used it, making them very valuable on Finis difficulty or when doing optional bosses/dungeons.
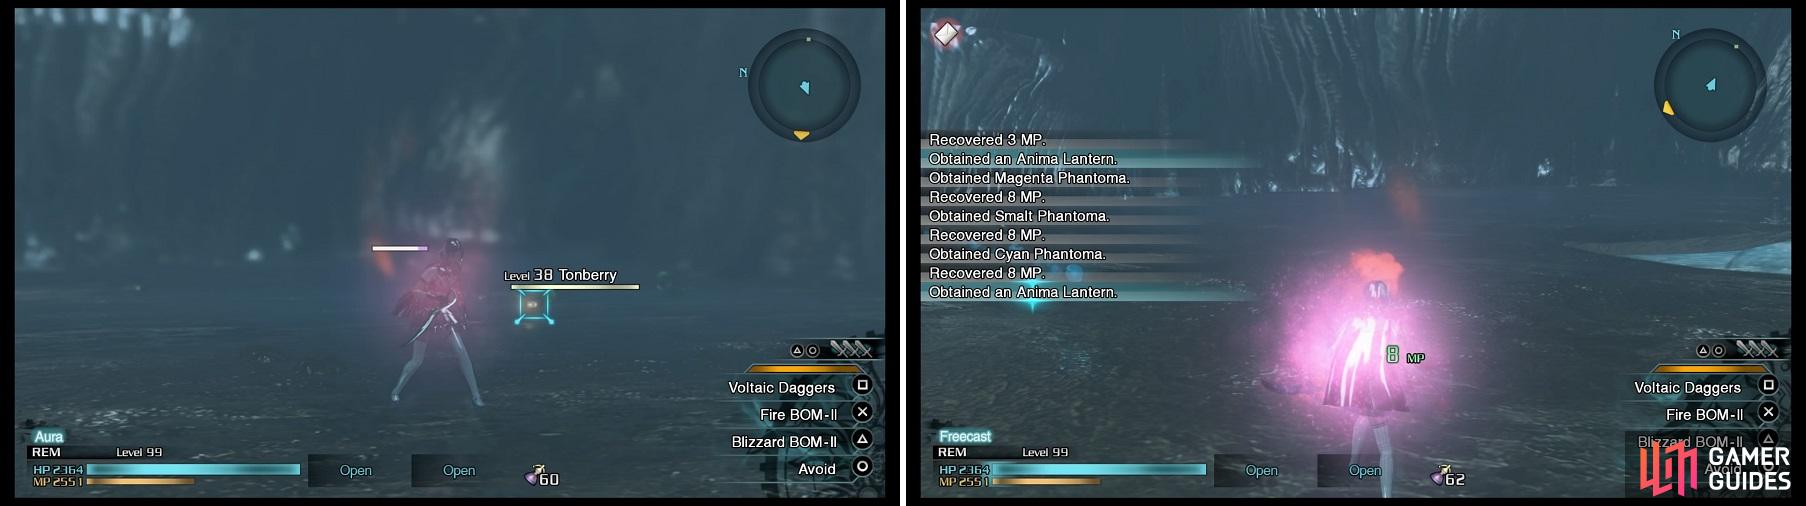
This is the only mission, outside of the postgame, where you encounter Tonberries (left). They drop Anima Lanterns (right), which grant Reraise status, similar to Phoenix Pinions.
6 - Hidden Cavity (2)
This room has two chests in it, so loot them and continue on your merry way, going northwest to Mt. Nesher Ascent (3) .
7 - Mt. Nesher Ascent (5)
| Objective | Time Limit | Effect | Reward |
|---|---|---|---|
| Defeat 12 enemies without allied assistance | 3:00 | Haste 0:30 | Rune Trigger |
You will fight nothing but Bombs here, and a lot of them. The SO mentioned above will require you to defeat 12 of them without any help from your teammates, meaning they cannot damage them. This can be challenging if you actually have party members, as you never know if they will attack or not.
Note that going west from here will place you at the objective and there’s much more to explore, so head back to Mt. Nesher Ascent (2) and go west from there.
8 - Mountain Cave (1)
There is nothing but a finite amount of Tonberries here.
9 - Mountain Cave (2)
| Objective | Time Limit | Effect | Reward |
|---|---|---|---|
| Harvest a Phantoma from a Tonberry | 1:00 | Quick 0:30 | Regal Armor |
There are more Tonberries here, as well as some Evil Eyes thrown in to mix things up. Go south first.
10 - Mountain Cave (3)
There’s a single chest here that, upon opening it, will spawn some Tonberries by the entrance to the area.
11 - Mountainside
There’s a few Hundlegs here harassing a poor Imperial soldier, so help him out by defeating them all.
12 - Mountain Cave (4)
This is similar to the cave with the Tonberries and Evil Eyes, but replace the latter with Bombs.
13 - Communications Facility
| Objective | Time Limit | Effect | Reward |
|---|---|---|---|
| Defeat the enemy without any soldiers being killed | 5:00 | Aura 0:30 | Armlet of Shiva |
Upon entering this area, you will see a Sledgefist Giant charging towards you. This enemy is the same as the Snow Giants you’ve fought previously, except it has A LOT of health. So, you just have to dodge its attacks, damaging it when necessary and hitting the Breaksight that appears whenever it misses with its wide swing move. Keep your attention on it at all times.
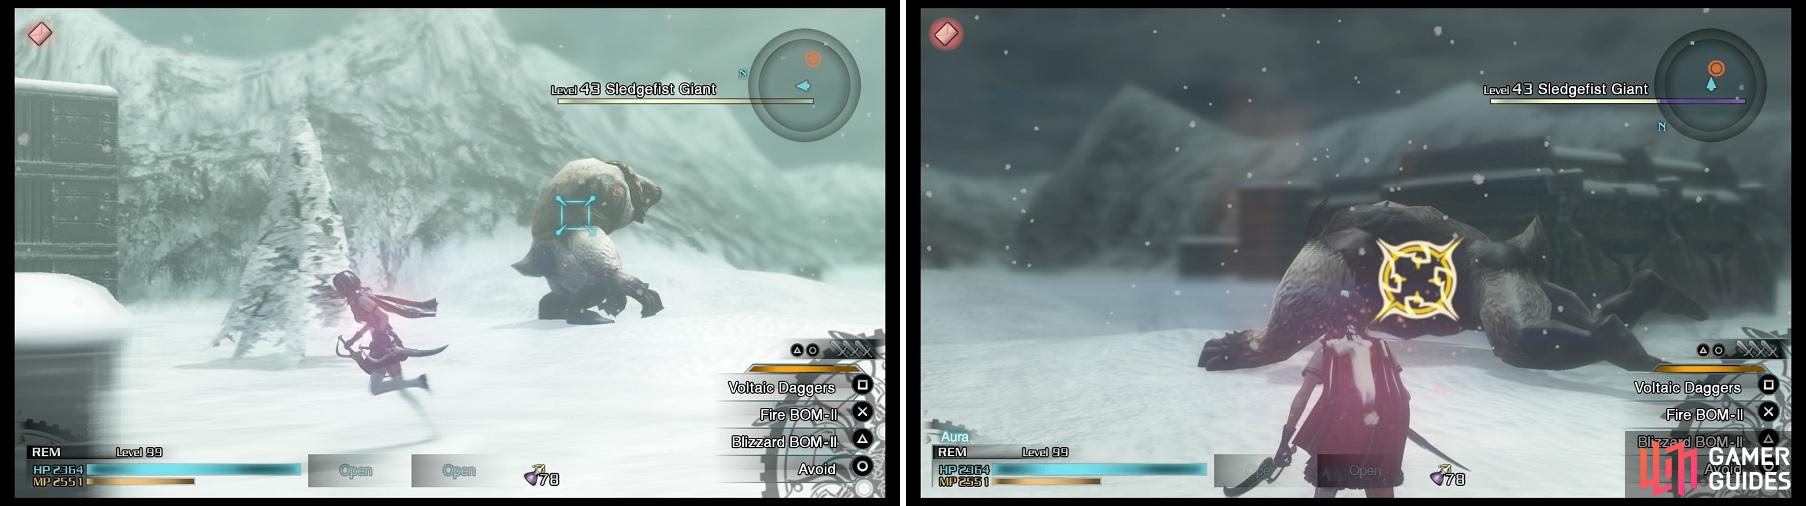
The Sledgefist Giant (left) is just a normal Snow Giant, except it has a lot of health. Use Breaksights (right) to whittle its HP down.
The SO here requires you to defeat the Giant without any Imperial soldiers dying, which can be quite the challenge, since they like to charge in with no regard for their lives. It also doesn’t help that the Giant can pretty much kill them with 1-2 hits. However, if you wait until you’re about to defeat the Giant, you can trigger the SO and quickly finish the enemy off, completing it without too much hassle.
No Comments