

S-Rank Requirements
| Time Limit | Phantoma | Casualties |
|---|---|---|
| 12:00 | 110 | 0 |
1 - Mi-Go Midtown (1)
There’s nothing in this area, so move onto the next.
2 - Town Square
This is the first area where you will encounter enemies, with there being nothing but Imperial Troopers. Feel free to defeat the first batch, then pick one of the three paths available to you (this walkthrough will go west first).
3 - Mi-Go Midtown (2)
This section of the town can be somewhat of a maze (there’s a few more like it in this mission), but the waypoint on your map should be more than enough help to navigate it. Anyway, there will be an Autoturret straight ahead, as well as some Imperial Troopers. If you wish to go south, you can, but there’s nothing there except for some more Troopers and an enemy commander. To continue with the mission, go north.
4 - Mi-Go Midtown (3)
| Objective | Time Limit | Effect | Reward |
|---|---|---|---|
| Use Datalink to disable communication tower | 3:00 | Protect 0:30 | Thunderbolt Armlet |
Head into the large clearing and you’ll see some kind of machine in the middle of it. Ignore that for now and clear out the enemies, including the few you see on the balconies. After this, a few more will trickle in, so wait and take them all out until no more spawn, which is the point at which you need to interact with the tower.
The communication tower, when you interact with it, will create a circle around it. You will need to stay in this circle until it disappears (it will change colors). Step outside, or be knocked outside by an enemy, of the circle while it’s doing its thing and you’ll have to start over. There is an SO for completing this, which will be very easy if you defeat all of the enemies first.
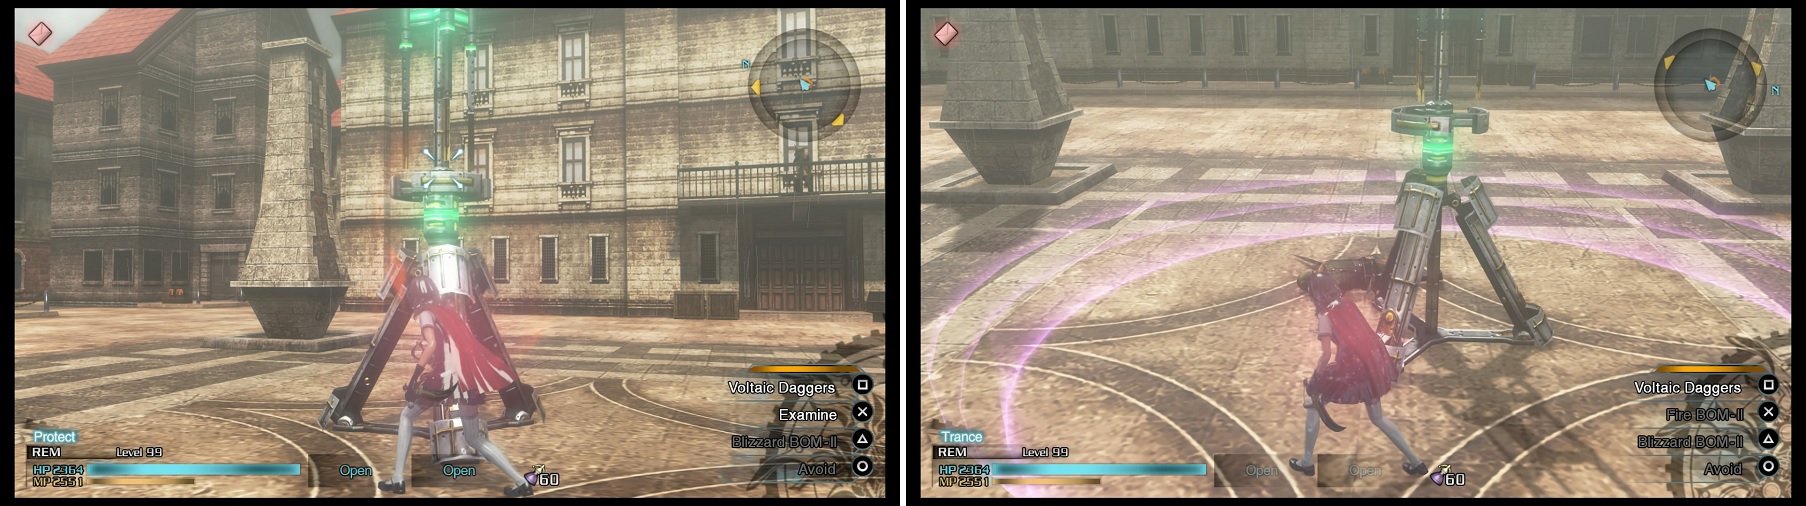
Interact with the communication tower (left) to make a colored circle appear (right). Stay inside it until it disappears to disable the communications.
5 - Mi-Go Midtown (4)
| Objective | Time Limit | Effect | Reward |
|---|---|---|---|
| Eliminate all Shock Troopers | 1:00 | Haste 0:30 | Sentinel Emblem |
This is the northwestern exit from the previous room, which will place you in another mini-maze like area of town. There aren’t a lot of enemies here, but you will face some Imperial Troopers and Shock Troopers. The SO here is to eliminate all of the Shock Troopers, so make sure you accept it if you’re going to do it.
6 - Mi-Go Midtown (5)
Yes, this is the second area with a communication tower (according to this guide) and it’s pretty much the same as the previous one. All of the Imperial Troopers you face will be on the ground this time, and it’s best to defeat them all before you mess with the communication tower. Head east now, towards the last tower.
7 - Plaza
Nothing but some Imperial Troopers here, so continue on.
8 - Mi-Go Midtown (6)
Another maze-like area of the town, with two Autoturrets and more Imperial Troopers
9 - Mi-Go Midtown (7)
There will be a lone enemy commander waiting for you in the middle of this area, but don’t be fooled, as there will be two Imperial Troopers on balconies in the area. Down those and more Troopers will appear on ground level. Defeat the enemy CO and move on to the last tower.
10 - Mi-Go Midtown (8)
You will find two Heavy Gunners standing in front of the communication tower and there will be a lone Trooper on the other side of the wall, which you won’t be able to access, so you’ll have to hit him with ranged magic or attacks from this side. As you did with the other towers, defeat the enemies that come charging in, then interact with the tower so you don’t get distracted.
After disabling all of the communication towers, you will be ordered to eliminate the remaining imperial commanders, with three of them marked on your map, so let’s start with the northernmost one, since we’re closest to him.
11 - Plaza (Revisited)
| Objective | Time Limit | Effect | Reward |
|---|---|---|---|
| Allow ally to defeat an enemy | 5:00 | Endure 0:30 | Blaze Armlet |
Upon returning to this area, you will see some level 61 Prometheus units battling it out with your allies (the Bombs are your allies, if you didn’t know). The best way to complete the SO is to get one of the non-commander enemies down to low health, then let the Bombs finish it off. Note that if you kill any of the enemies while the SO is active, then you will fail it. Move straight south next.
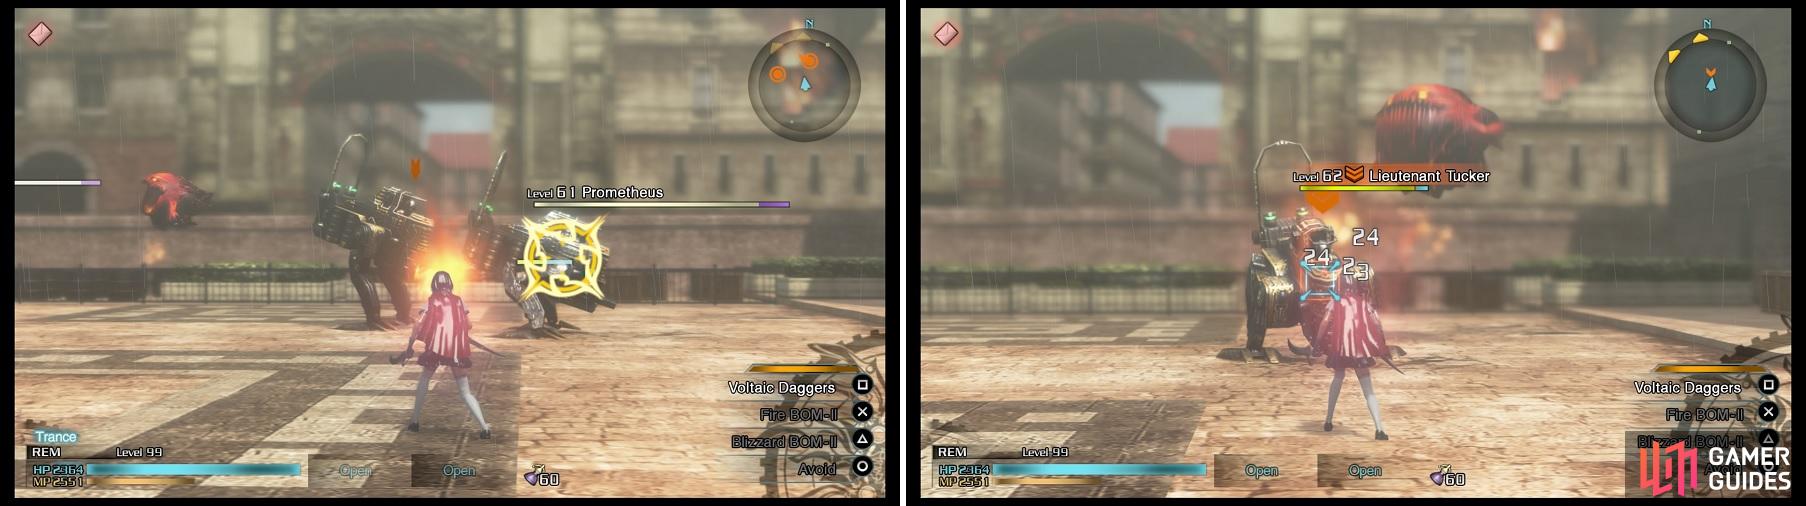
The Prometheus enemies (left) are quite a high level, but you have help from the friendly Bombs (right), making things slightly easier.
12 - Mi-Go Midtown (9)
Despite it not being marked on your map, there is another enemy commander here, who appears to be hiding according to Moglin. In order to draw him out, you’ll have to defeat his troops, who are on the balconies in the area. Do that and the commander will appear, then take the exit that goes straight south (the southeastern of the two).
13 - Town Square (Revisited)
| Objective | Time Limit | Effect | Reward |
|---|---|---|---|
| Defeat commander with leader | 3:00 | Aura 0:30 | Platinum Deck |
This one is the same as the last area, with three Prometheus units to defeat, although you only have to go after the enemy commander. Getting the SO here will reward you with a new weapon for Ace, the Platinum Deck . All that’s left is one more enemy commander, so go west one screen and north one.
14 - Mi-Go Midtown (3; Revisited)
The same three Prometheus units from the last two times will be back again, so there’s nothing new here. Defeat the enemy commander to finish the mission for good.
No Comments