

S-Rank Requirements
| Time Limit | Objectives | Casualties |
|---|---|---|
| 21:00 | 12 | 0 |
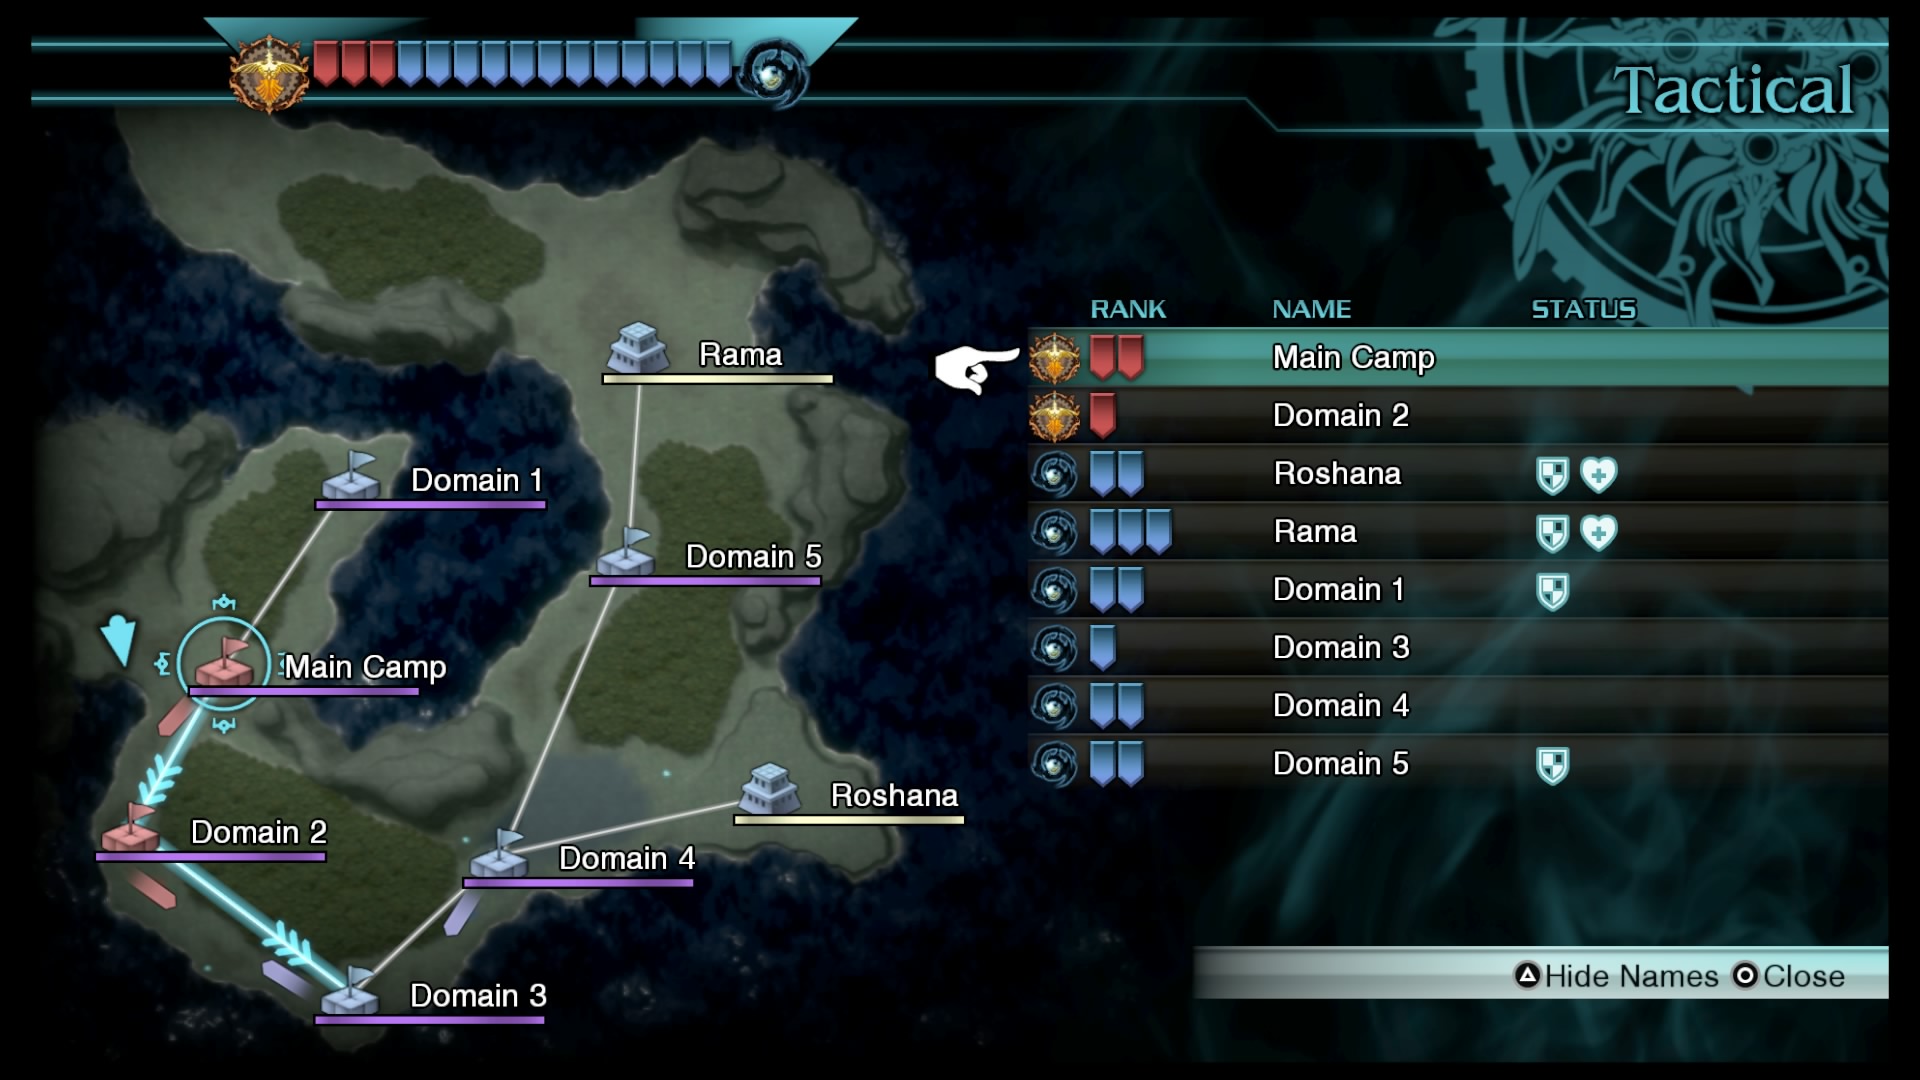
Capturing Roshana
First of all, keep an eye out for Domain 1, which is isolated from the rest of the enemy bases, but it’s dormant for now, so start off by concentrating your efforts on Domain 3. That particular stronghold is spitting out Petrifeyes, while Domain 4 is using Wingverns.
While your own troops can hold their own, they can’t make any leeway on Domain 3 without your help. So, attack the Petrifeyes and Wingverns until your troops reach Domain 3, then hold off the latter so they can capture it. Once that’s done, immediately go back to your main camp, as Wingverns from Domain 1 will be attacking it now.
You have to defend your main camp for a total of one minute, allowing you to command troops from it once you’re successful. However, leave them alone for now and help them capture Domain 1, then turn your attention towards Roshana. At this point, a Flyvern will appear and start flying around, so try to quickly shoot it down before it manages to do any damage. Once the energy wall surrounding Roshana is down, invade the town.
Invading Roshana
You will encounter some Dracoknights in the town, but the main focus will be elemental monsters. Your goal, as Moglin points out, is to harvest specific types of Phantoma from the enemies. First, it will be two of an elemental type, then three of another and lastly, four of the third elemental type. If you run out of enemies in an area, move onto the next. Upon finishing, the town will be yours.
Capturing Rama
With Roshana under your belt, start making your way towards Domain 5. However, the Flyvern will rear its ugly head once more, making its way to your main camp, so follow it and shoot it down to put an end to it. It’s likely that your troops haven’t captured Domain 5, due to Rama’s giant turtles, so help them out by keeping their attention and moving them towards the city. With Rama’s energy wall down, invade it.
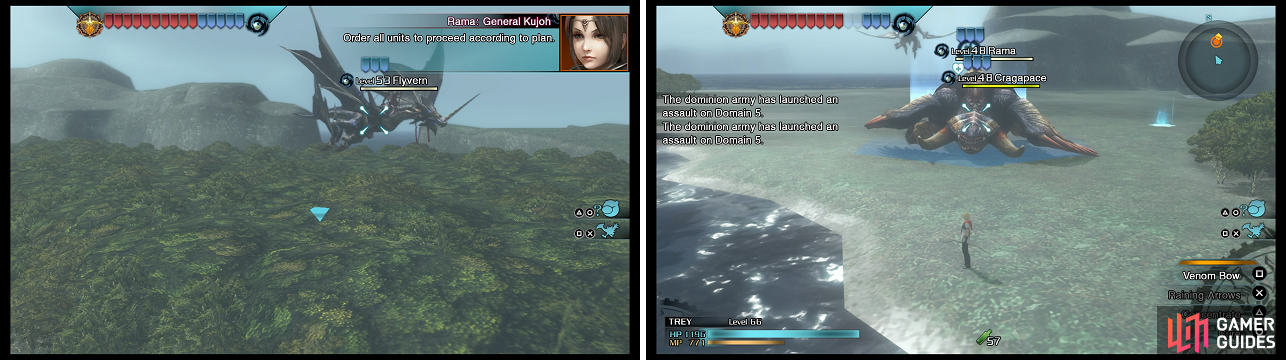
The Flyvern will head to your main camp (left), so quickly take it out before it does any damage. You’ll have to contend with Cragapaces (right) coming out of Rama before your troops can get to it.
Invading Rama
The first area will have some Dracoknights, so take care of them, then move until you come to an energy wall. To remove it, defeat the Wingvern and one more enemy will be standing before you can move to the next area, a Demonicorn.
In the second area, there will be more Dracoknights, as well as some Pyronades and Cryonades. Halfway through there, you will receive another mission from Moglin, who says to track down the spy and take “appropriate action.” He can be found in the first area, and you can simply kill him from the other side if you have a ranged character.
Still in the second area, if you didn’t progress far enough, you will encounter another Wingvern. Bring it down and move onto the third area, where you’ll be fighting a Behemash. Defeating this monstrosity will give you the town, as well as complete the mission.
No Comments