
Tuck and Roll
When you have however much Materia you care to grind for and are all rested up, head to the train station and board the train. Once inside, Barret will chase off his underlings, harass a Shinra employee, then finally tell you the dubious details of this mission. After he’s done talking, Tifa will invite you to come look at some boring train stuff with her. What is it with these girls and this train?
Before long, however, the security alarm goes off, and instead of locking the entire train down at once, Shinra’s security system apparently decides to lock the train car by car, giving ne’er-do-wells like us enough time to run from car to car. This is timed, and if you take too long, you’ll have to jump off early and walk a bit further to your objective which isn’t a huge deal, but it’s still best avoided if you want to score some loot.
Run into the next car, then after the chatter run through the second car, stopping near the end of the car to talk to a dark-skinned man near the area transition. He’ll ask you if you want something - the top option “Yeah…” accepts his offer, so just click through to score a Hi-Potion . In the third car, some spiky-haired punk will rob you, snatching 100 Gil. Talk to him and tell him he’s busted and he’ll give it back… only to have his girlfriend at the end of the train do the same thing. If you can catch her as she runs through the next train, you can get your money back. If not, well, 100 Gil isn’t a huge loss either way. Once you’re in the last train, you need only make your way to the end of the train (no time limit here) and talk to Tifa. Barret wisely interrupts their chatter; even if there’s no real time limit, one is implied! Talk to her again and, after some more dialogue you’ll jump out.
Winding Tunnel
The smart thing to do would have been to call the operation off. After all, why try to finish a terrorist attack when the security is alerted? Oh well… Depending on which train car you made it to, you’ll be somewhere in a “Winding Tunnel”. The better you did, the closer to your destination - Reactor 5 - you’ll be. Best case scenario, you’re one screen (head north/away from the camera) to reach the security outskirts of the reactor. If you go south (towards the camera) you’ll head down clone tunnels until you find a security checkpoint, where some Shinra guards, “Special Combatants”, await you, and will attack in endless waves until you retreat. It’s a good spot to grind if you want to pack on a few levels and earn some Gil, but like the last grind, completely unnecessary.
Grind, or not, then head north until you reach the northern-most tunnel - the security lasers are a dead give-away that you’re in the right place. Approach a conveniently-placed air duct on the tunnel floor and, after some chatter, you can choose to head inside. In the first duct head north-east and grab an Ether along the way, then climb down a ladder.
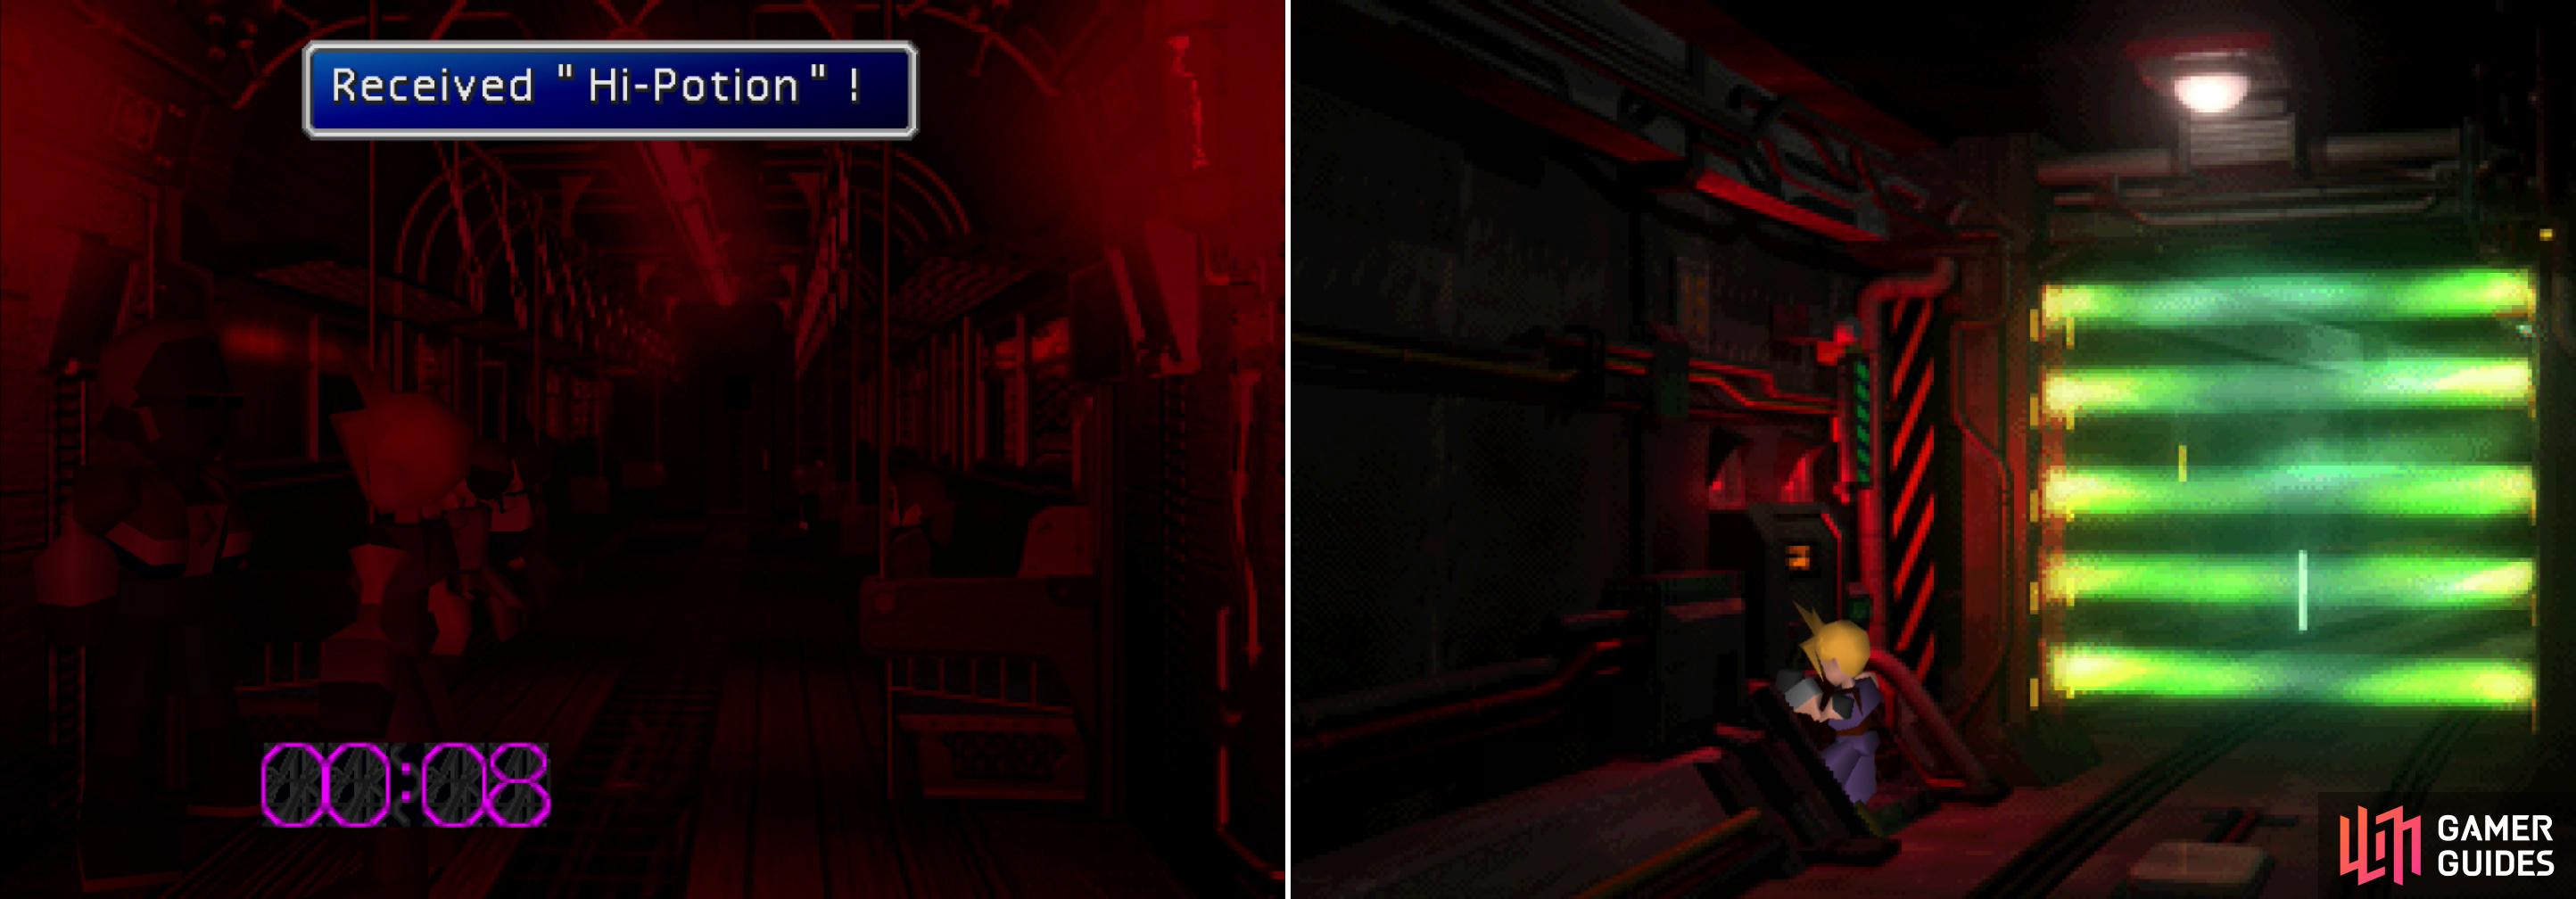
There might be perils on the train when the security alarm goes off, but there are opportunities, as well (left). To get to the reactor you’ll have to climb under the plate (right).
Lower Sector 4 Plate
Climb down another ladder to reach a large, open maintenance area. There are two new ladders to the south-west, both of which will lead to your objective. Head to the south-western most one to find Wedge standing in front of it, who will simply tell you that the ladder near his is the right one (even though both of them are).
Climb the ladder and you’ll find Jessie in the ducts beyond. Talk to her and she’ll admit to causing the problem on the train. Wonderful. Grab a partially obscured Potion south-west of her, then find another ladder down a tunnel to the south-west.
Go down another ladder and make your way along a walkway until you find Biggs standing in front of… another ladder. Joy. Talk to him and he’ll depart, then travel north-east along another walkway to reach a Save Point, grabbing a Tent along the way. If you expended a significant store of energy leading up to this point, you can use the Tent at the Save Point to fully recover your HP/MP, but against these weak foes, it’s doubtful that you’ll need to bother. When you’re ready to press on, head up the ladder and down a tunnel to reach the No. 5 Reactor.
No. 5 Reactor
Slide down a pipe to reach the floor then head north-west to reach a doorway opposite some stairs. This reactor has the same layout as the No. 1 Reactor you blew up earlier, more or less, so go through the doorway, leap a gap, climb down a ladder, walk down a ladder/ramp, then go down another ladder. Walk across some pipes and go down yet another ladder to reach the bottom of the reactor, where you’ll find a Save Point in the same location as in the No. 1 Reactor. The enemies here are ever-so-slightly more powerful than the ones you’ve faced earlier, but aside from afflicting the odd status effect (which will be cleared after battle), none of the enemies are really noteworthy.
Head south-east from the Save Point to reach the reactor core, near which Cloud will flip out again and have another flashback where the name “Sephiroth” is dropped again. After Barret and Tifa check to see if Cloud is alright (in their own ways) Cloud will recover and you’ll be free to set the bomb, which is on a more sophisticated timer than the last one.
Backtrack to the first area you reached in this reactor and head up the previously neglected stairs opposite the doorway you went through earlier. Enter an elevator at the top of the stairs and ride the elevator up. When you’re in the rooms above, loot a chest in the first room to score an Ether , then head north-west into another room with a table upon which there are three terminals. The party will split up to activate three terminals at the same time, which takes a bit of timing on your part. When you get it right, head back south-east and go through the doors you opened, save your game at the Save Point, then continue to the next area.
Continue north along the walkway until you get a visit from, well, the man. Sephiroth is name-dropped again, but before anything productive can come from this unwelcome meeting, Barret will run your visitor off. He has a gun attached to his arm. Shoot him! Ah well… A helicopter will deprive you of your new friend, but he’ll leave you with a playmate to make up for his early departure.
Boss Battle: Air Buster
An oddity among bosses, you start out flanking Air Buster. Attacking it from behind will deal massive damage (especially if you hit it with a Limit Break!), otherwise simply cast Bolt. It can do a good bit of damage, especially with its “Big Bomber” attack (100~ damage), which it can do a total of four times but if you keep everybody’s HP well above 100 you’ll be fine. Otherwise, it has an “Energy Ball” attack (60~ damage) which it’ll use later on in the fight. It’ll counter-attack if you strike it from behind (30~ damage) but the cost is usually well worth the damage. If you deal enough damage to it from behind, you can deprive it of its ability to turn around, which makes the fight even easier.
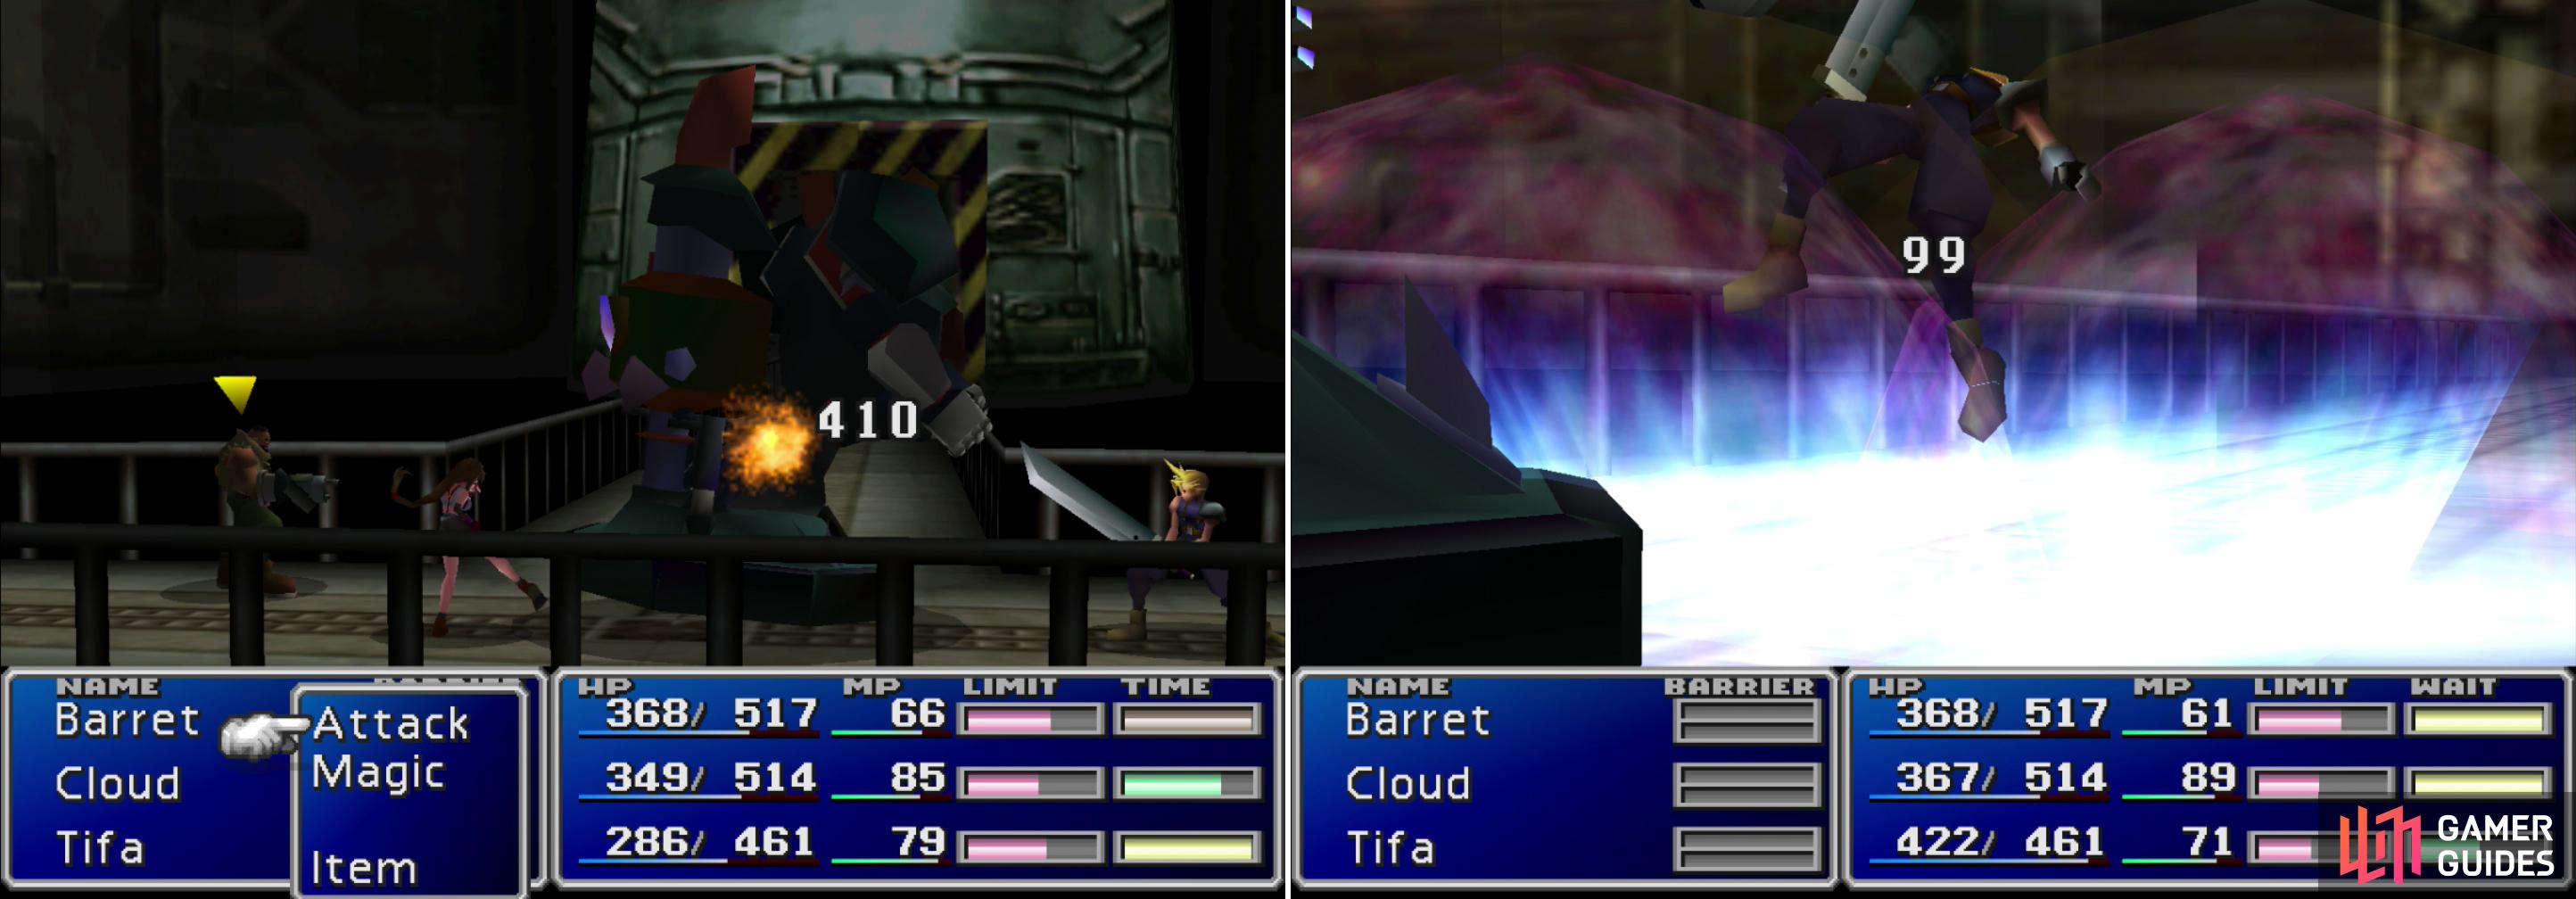
Attack Air Buster from behind to deal massive damage (left). Air Buster’s “Big Bomber” attack can be quite painful (right).
| Air Buster | Stats |
|---|---|
| HP: | 1200 |
| MP: | 0 |
| Weaknesses: | Lightning |
| Resistances: | Earth (negates), Fire (halves), Gravity (negates) |
| XP: | 180 |
| AP: | 16 |
| Steal: | n/a |
| Drop: | Titan Bangle |
| Gil | 150 |
When it’s defeated it’ll go out with a bang, leaving Cloud hanging precariously over the slums below. Tell them to “Be strong” to increase Barret’s approval (Barret +2) or say “I don’t know if I can hold on” to slightly increase Tifa’s approval, and reduce Barret’s (Tifa +1, Barret -3). Either way, the bomb you set earlier explodes, and Cloud decides to take the quick way down.
No Comments