
| Important Items in this Area | Enemy Skills in this Area |
|---|---|
| Counter Materia* | Angel Whisper |
| Guard Source* | Bad Breath |
| Imperial Guard* | Pandora’s Box* |
| Luck Source | Roulette |
| Magic Counter Materia | Shadow Flare |
| Magic Source* | |
| Mega All Materia* | |
| Mind Source* | |
| Mystile* | |
| Shield Materia* | |
| Speed Source* | |
| W-Magic Materia | |
| *It is possible to obtain duplicates of these items, depending on where you send your chracters. | *This enemy skill will only be cast once in the entire game as a final attack by the Zombie Dragon enemy. Make sure you have all your Enemy Skill Materia equipped before you kill it. |
Divide and Conquer
Climb down a pair of pillars to reach the rest of the party who has gathered here. Seems there’s a split in the road; one path leads to the south-west (left) and another leads east (right), and it’s up to Cloud to coordinate where everybody is going. Different characters will find different items when sent along the different paths, which can vary greatly in quality and rarity. The left path will also shortly split again into northern (up) and south (down) paths, which again have their own unique loot for your characters to get. These rewards are as follows:
| Character | Right Path Treasure | Left/Up Path Treasure | Left/Down Path Treasure |
|---|---|---|---|
| Barret | Guard Source | Vaccine | Remedy |
| Cait Sith | Elixir | Remedy | X-Potion |
| Cid | Speed Source | Imperial Guard | Elixir |
| Red XIII | Mind Source | Shield Materia | Speed Source |
| Tifa | Mystile | Hero Drink | Turbo Ether |
| Vincent | Megalixir | Magic Source | Mega All Materia |
| Yuffie | Megalixir | Counter Materia | Vaccine |
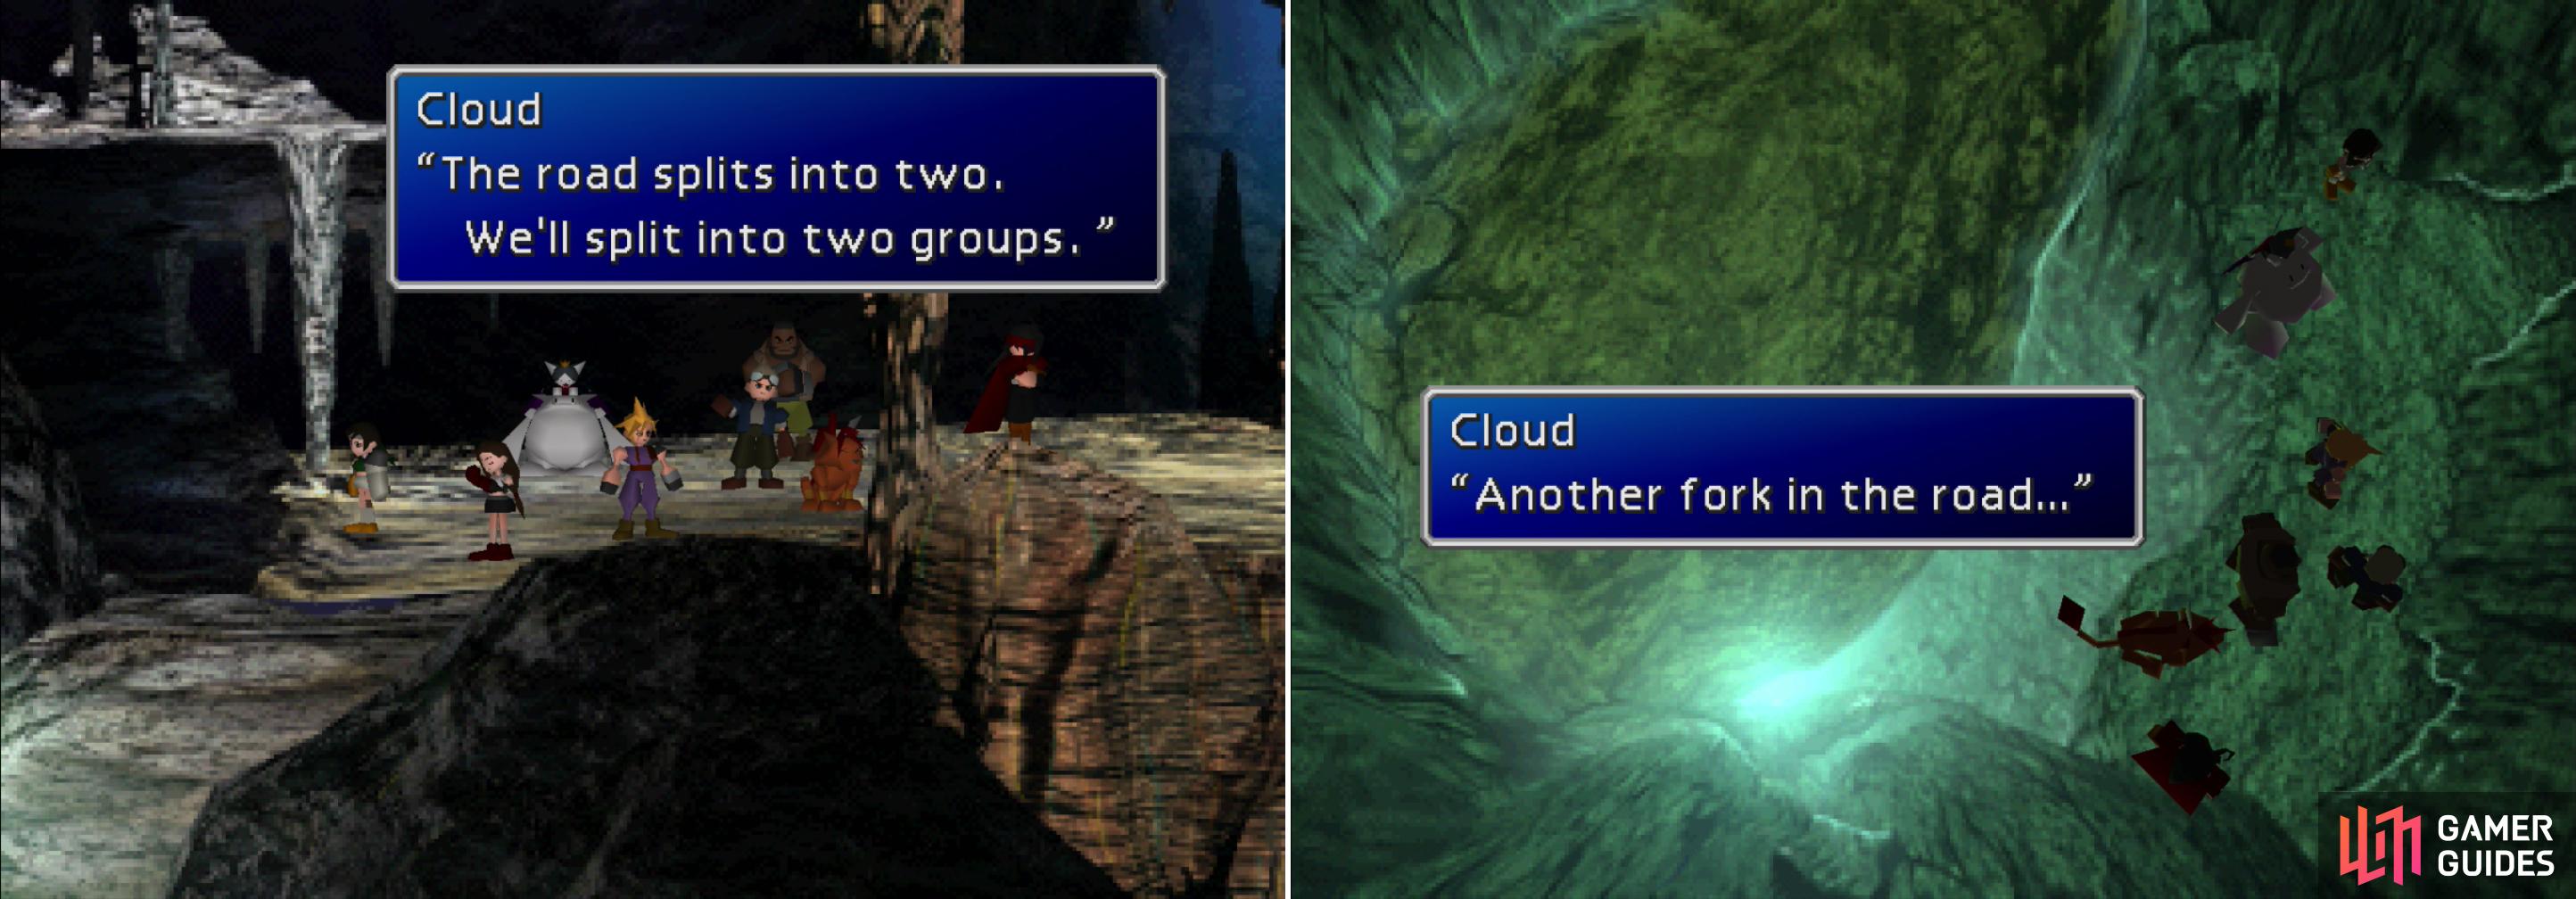
Spilt your party up by sending everybody but Tifa to the left (left) then split them again by sending Cid, Red XIII and Yuffie down, while sending Vincent up (right). Keep Barret and Cait Sith in your party.
Almost everybody has at most one unique item that can’t be gained anywhere else (save by mastering Materia, anyways). Barret and Cait Sith, however, have no unique items, so they should be put into your party (which you’ll get to reform after sending people their own ways). Tifa alone should be sent right to get the Mystile, Red XIII, Cid, Vincent and Yuffie should be sent left, as should Cloud, Barret, and Cait Sith.
Once done, exit the screen to the south-west (left) and you’ll be forced to send everybody you just sent left either north (up) or south (down). Send Cid, Red XIII and Yuffie up to have them discover an Imperial Guard, a piece of Shield Materia and a piece of Counter Materia, respectively. Vincent alone should be sent down, where he’ll find some Mega All Materia. Send Cloud, Barret, and Cait Sith down south as well, after which you’ll get to reform your party once again, where you should confirm your party as Cloud, Barret and Cait Sith.
Pretty simple, right? Just go one direction and let your party handle the rest and score sweet loot? Well… yeah, that’s one way to do it. But there’s nothing stopping you from back-tracking and exploring the places you sent everybody else to, as well. Best of all, if you do this before you regroup at the bottom of the North Cave, you’ll loot all the treasure your party is going to get, and they’ll also give you a copy of that treasure when you regroup! Considering the quality of some of this loot, it’s well worth taking the effort to get.
There’s one rub, however; whichever path you end up going down will prevent the character(s) going down that path from finding the treasure they’d otherwise obtain if you didn’t go down that path. It doesn’t matter if you actually reach the bottom of the North Cave via that route, it just matters where you said you were going. All things considered, it’s probably best to forfeit Vincent’s Mega All Materia. It’s good stuff, but it can be duplicated by mastering it, and compared to the irreplaceable Mystile on Tifa’s path and the three items on the Left/Up path, the Mega All Materia just seems to be an unfortunate sacrifice. If you find that argument compelling, opt to explore the Left/Up path and send Cid, Red XIII and Yuffie somewhere else.
Left/Down Path
Well, since you selected to head left then down, you might as well explore that path first. Send everybody out, head left, then divide the party again and head down to reach an area with numerous stone platforms you can leap on. Leap south down several platforms to reach a larger stone platform with a chest on it. Loot the chest to score a Remedy , then head east and leap across more platforms to reach another chest, this one containing an Elixir . Return to the platform with the Remedy chest on it and leap to some more platforms to the south, one of which has yet another chest on it, wherein you’ll find an X-Potion . Once you have this continue south to the next area.
Continue south-east, cross a narrow stone bridge and leap off a circular stone pillar to the west. Once you’re on the low ground travel east behind the stone pillar in the foreground and loot a chest which contains a Vaccine , then head south and west along a narrow stone walkway which loops around to the southern end of the stone pillar. Search a chest to the west of the pillar to obtain a Turbo Ether , then jump and climb your way back up onto the stone pillar by using a convenient ledge on its southern face. Leap off the pillar again to the west and continue west, grabbing a chunk of Magic Counter Materia before heading south, leaping across some stone platforms to the east, then exiting the area to the south.
Head south along the stone platform you start out on and leap down onto a lower ledge to find a chest which houses an X-Potion . Make your way west across a narrow stone walkway, then east along another. Drop down a series of stone ledges and loot a chest containing a Turbo Ether , then make your way west to find a floating orb of Materia on a stone platform. You will automatically jump from this ledge, staying on it for only a short period of time, so be sure to tap the [Circle] button ([OK] on the PC) when you land on the platform to obtain the Mega All Materia . Once done, plunder the chest on the stone platform west of the Mega All Materia platform to gain a Speed Source .
![Grab the Magic Counter Materia humbly floating around in plain sight (left) then, while jumping between ledges, time pressing [Circle] (PS) or [OK] (PC) to obtain the MegaAll Materia (right).](/assets/guides/91/116412-1443999600.jpg)
Grab the Magic Counter Materia humbly floating around in plain sight (left) then, while jumping between ledges, time pressing [Circle] (PS) or [OK] (PC) to obtain the MegaAll Materia (right).
If you leap onto another platform to the south and continue on to the next screen, you’ll reach the “Bottom of the Northern Cave”, where the party will regroup. This is all well and good, but there’s still more loot to plunder, so instead backtrack to where the party split up for the second time (the up/down split) and this time take the northern (up) path… which is actually a passage leading east, the northern-most passage on the second party-split screen takes you back to the first party-split screen with the scalable stone pillars. While at the “Bottom of North Cave” do not continue clockwise! If you regroup with your party right now, the treasures they were supposed to obtain will… well, be obtained, maning you can’t get yourself a second copy.
Left/Up Path
Jump off a ledge and onto some coiled roots floating in mako-water; the remains of the structure that held the Materia Sephiroth was encased in during the Reunion (hence the music). This area is the most lucrative area in the game as far as AP growth is concerned, mostly due to two enemies; the Magic Pot and Movers. Magic Pots are annoying critters that wobble around and demand Elixirs. They are invulnerable until you supply them with an Elixir, after which they can be easily dispatched. This might seem to be a hefty cost, but with the W-Item dupe trick, you can easily stock up on Elixirs. Movers are bouncing orange orbs that always appear in groups of three, which don’t pose a threat, and can be easily killed with physical attacks. Magic Pots are worth 1000 AP each, and Movers will give you 800 AP and 30,000 Gil each, or 2400 AP and 90,000 Gil per encounter. It’s hard to beat easy AP like that… but you can come back and level Materia later, when you’ve got all the Materia worth leveling.
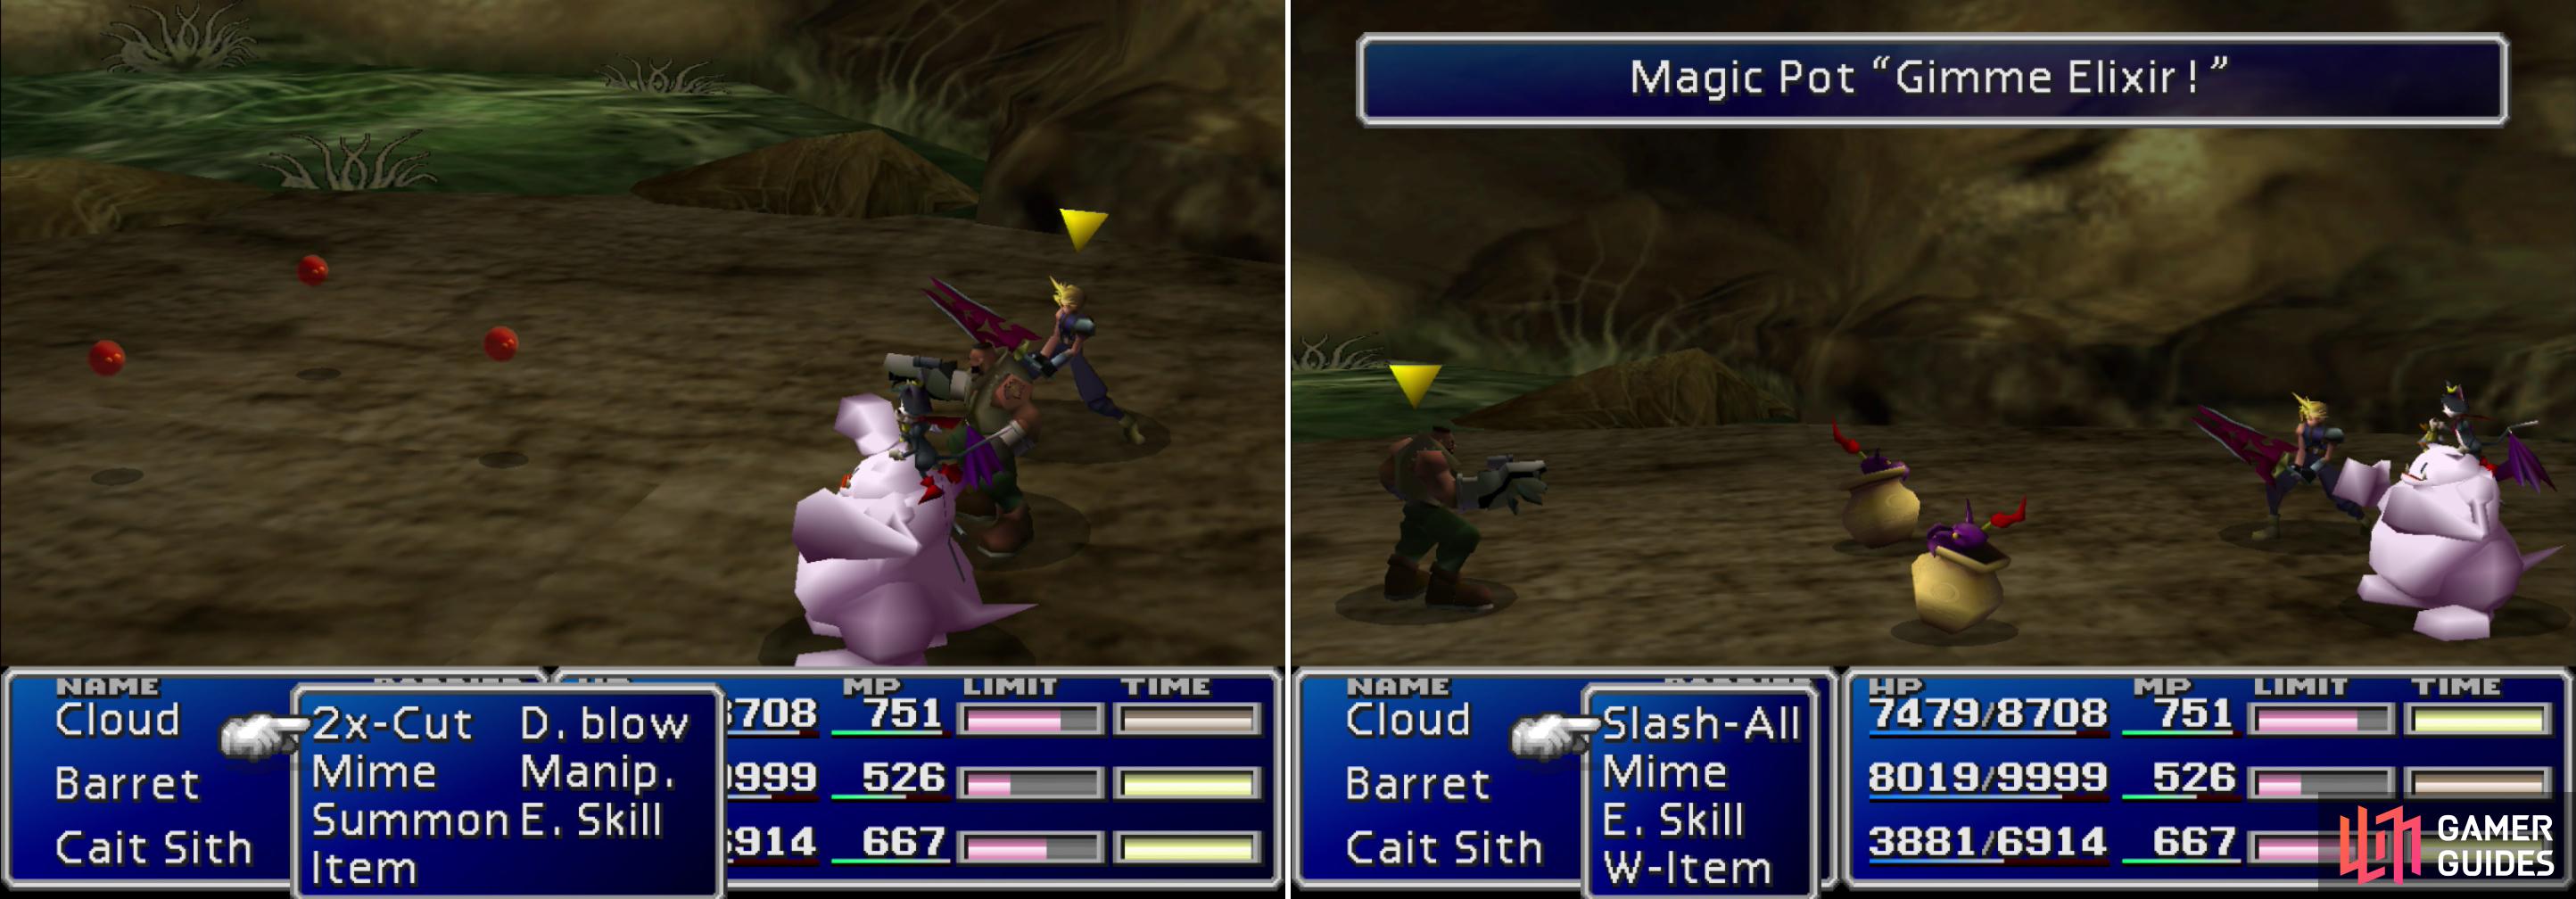
Magic Balls are nearly harmless foes that are worth massive amounts of AP (left). Feed Magic Pots Elixirs to leave them vulnerable to attack (right). You can duplicate Elixirs by using the W-Item trick to score loads of XP and AP from Magic Pots.
From the entrance head east along the southern tangle of branches, jump north onto a smooth stone, then loot a chest to the west to obtain a Magic Source . Backtrack to the entrance and this time follow the twisted root bridge to the north-east, jump onto a rock formation to the north, then make your way to the eastern side of the rocks and Cloud will run underwater and surface to the east. Grab a Remedy out of a chest to the north, then exit to the next screen, which is to the east.
Make your way north along the vine-covered path and, at the fork head north to reach another fork. Go north-west and search a chest to find a Vaccine , then backtrack to the fork and head north-east up onto some rocky high ground where a piece of Shield Materia sits out in the open. Head south down the face of the rocky ledge opposite where the Shield Materia was and Cloud will go spelunking again, surfacing near a chest to the south. Raid it to secure another Imperial Guard armor, then head north to dive again and return to the where the Shield Materia was. Backtrack to the south and return to the first of the forks, this time taking the previously unexplored path to the east. At yet another fork along the eastern end of the screen make a quick trip south and loot a chest which holds a Hero Drink . After you’re done plundering this area, return north and keep heading that direction until you leave the vine-covered walkway behind and mount a stone ledge, which you can follow to the east to reach the next area.
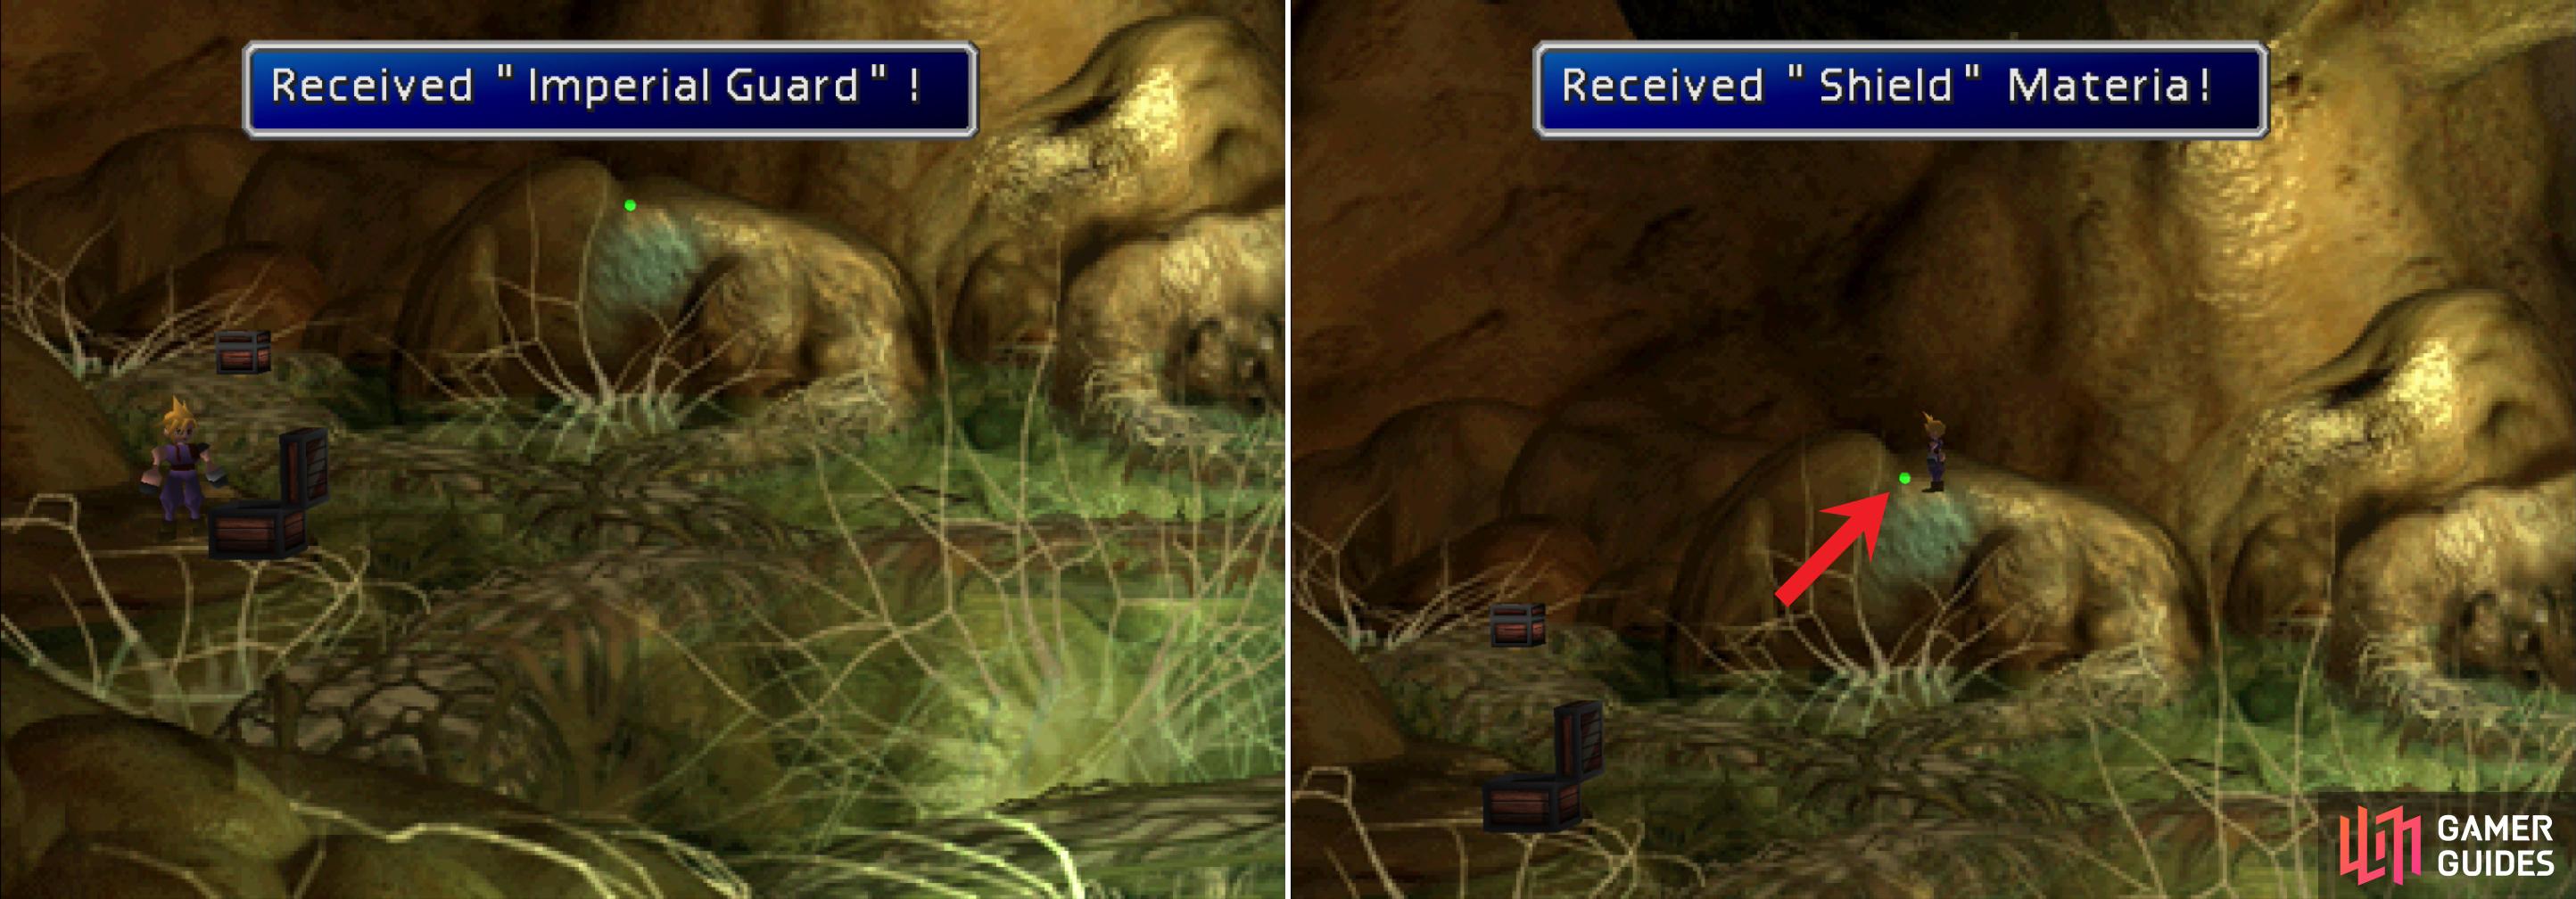
After some light spelunking loot a chest to score some Imperial Guard armor (left), then grab the Shield Materia off the ledge nearby (right).
The next area is a stepped stone crater leading to a glowing pit. If you head west you should see a small pink sphere - more like a dot, really - just below the treeline. This orb just happens to be W-Magic Materia , which, when equipped, allows you to cast two “Magic” spells at once. Head south, picking your way down to the light at the bottom of the crater and search along the northern end of the light to find a piece of Counter Materia . If you continue west you’ll reach the “Bottom of North Cave” screen, jumping off a ledge onto the circular walkway automatically. If you head north you can loot a chest containing a Luck Source , then backtrack through the “Left/Down Path” you passed through earlier, or you can just backtrack through the “Left/Up Path”. Either way, return to the area where the party first split near the stone pillars. It’s time to travel down the path Tifa was sent down.

You can find some W-Magic Materia hiding behind some leaves (left) and hidden in a glowing pool of light is the immensely useful Counter Materia (right).
Right Path
Once you’re back in the area where the party split up originally, head east down a slope to reach a far grander stone pillar with a spiraling path orbiting it. Trot down to the end of the path, then jump down a ledge and loot a chest to obtain another Mystile . To the east is the path down, which is obstructed by an Elixir . Well, since you’re obliged to take it, might as well… Continue down the spiraling path and, when you reach the ground loot another chest to the north to score a Speed Source . Head south from this chest to find another chest nestled in between two structures, wherein you’ll find a Tetra Elemental ; an accessory that absorbs fire, cold, lightning and earth attacks.
Return north a bit and head east between two circular structures, turning north again when you run out of east. When the path splits head west until this fork terminates at a chest containing a Megalixir . Loot it, backtrack east, then head north and search another chest for another Megalixir . Continue north to make it to the next area, which is just a transitional area that has you running along the spine of some thankfully long-deceased critter.
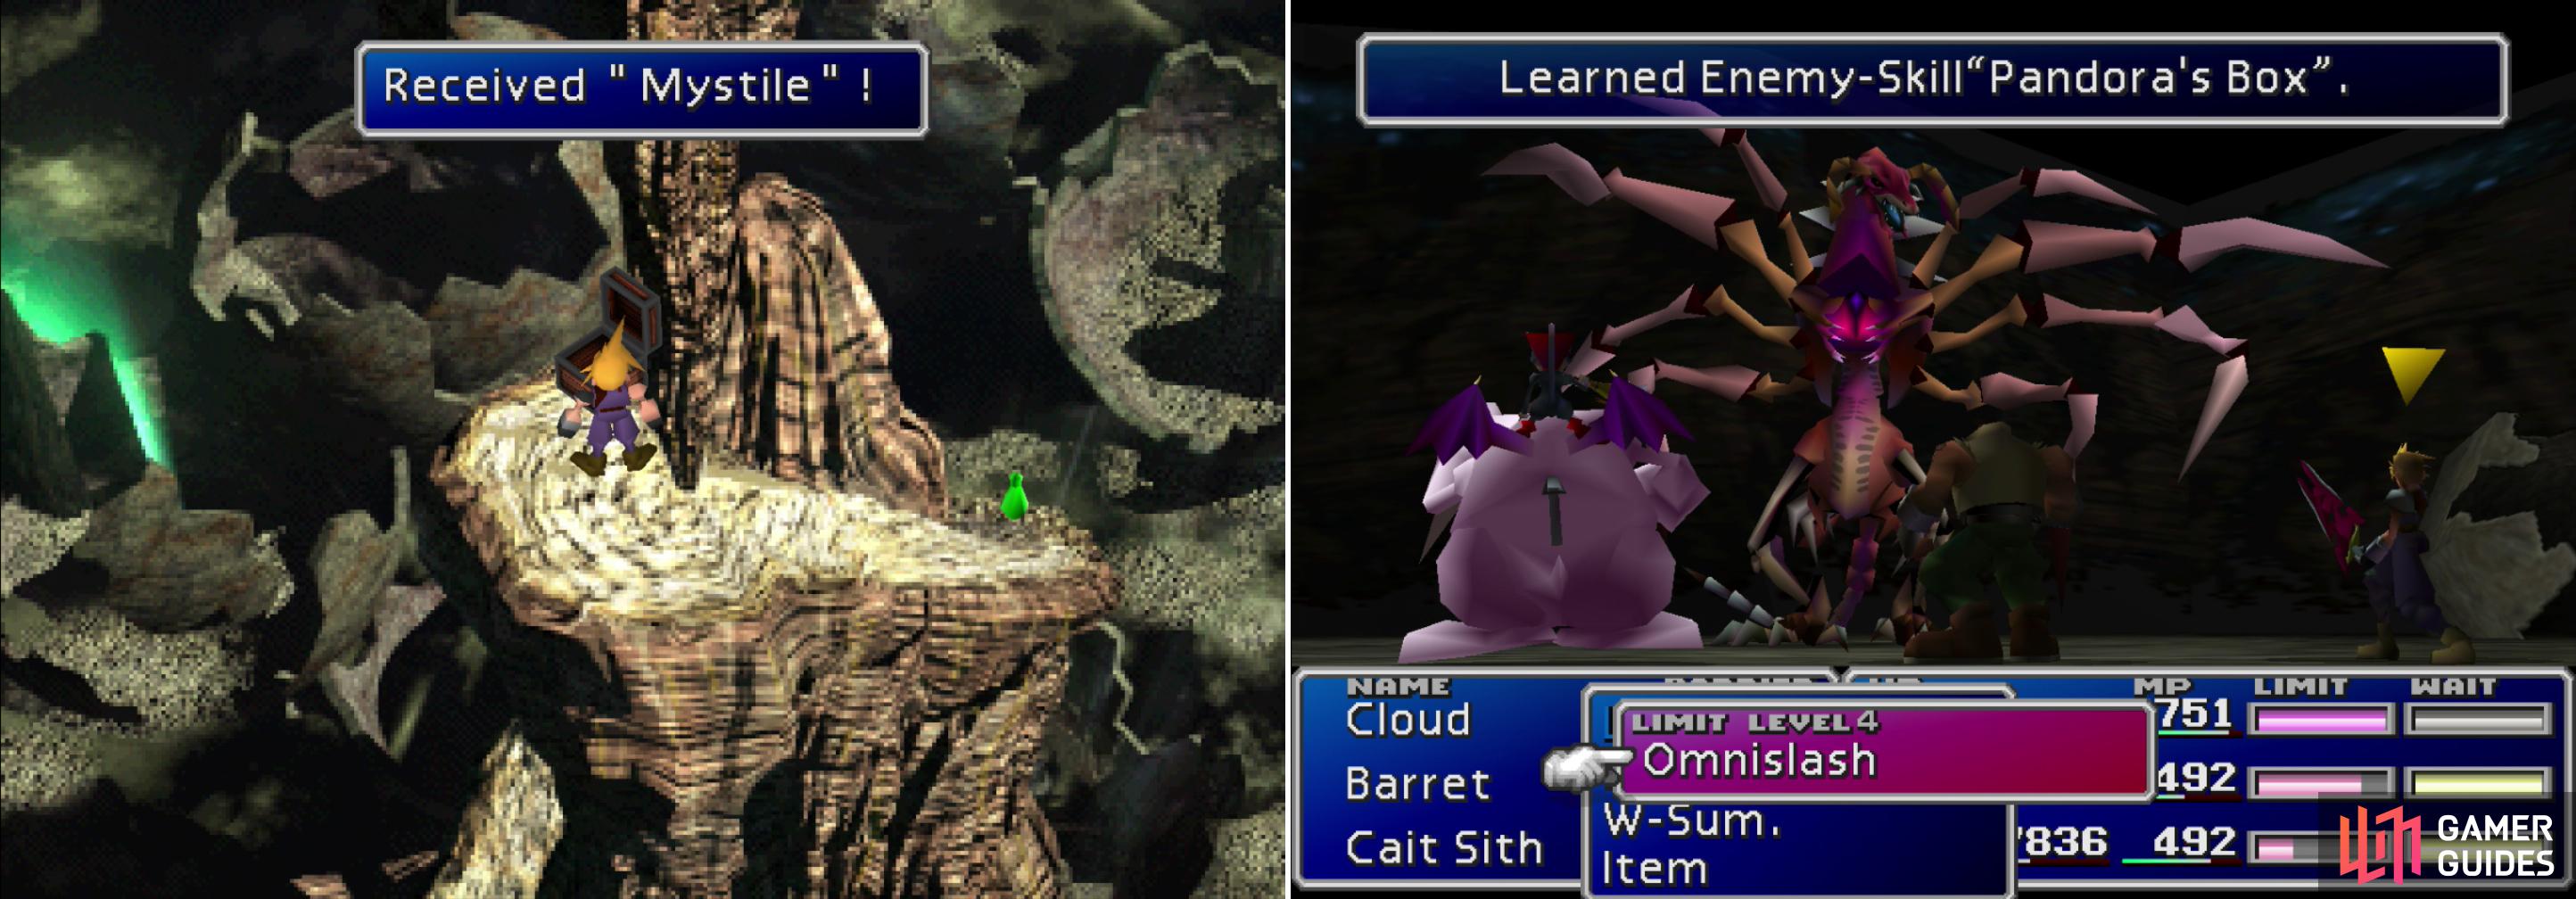
Be sure to grab the Mystile (left) as a second piece of this excellent armor is a great catch. The Zombie Dragon is the only foe in the game who will cast the “Pandora’s Box” Enemy Skill, and it will only cast it once in the entire game, as a final attack (right).
Enemies Along the Right Path
While the foes in the upper reaches of the North Cave were arguably more dangerous (pretty much everything there had an instant death attack) the creatures along the “Right Path” are pretty interesting, too. In addition to the foes discussed below, Parasites can be found here (if you still need “L5 Death” or “Magic Breath”), as well as Malboros, previously encountered in the exterior areas of the now-unreachable Gaea’s Cliff. They’ll be kind enough to lend you their “Bad Breath” Enemy Skill if you pester them enough.
Death Dealer:
The Death Dealer enemy will - like the Joker enemies near the Gold Saucer - use a variety of cards to damage you, although their equivalent of the “Joker” attack their weaker cousins possess is actually less dangerous. The aforementioned attack, “Roulette” is an instant death effect that randomly targets one character on the battlefield, and is on of the last Enemy Skills in the game. To get it, cast “Death Force” on the party and the Death Dealer(s), then Manipulate them and keep casting “Roulette” until everybody has it.
Pollensalta:
The somewhat out-of-place women in leotards possess the “Angel Whisper” Enemy Skill, which is one of the few healing spells comparable to “White Wind” in the game. It will, when cast, revive one character and restore them to full health. If a party member is dead, use “Angel Whisper”, if not, use “White Wind”. Just Manipulate a Pollensalta and get her to cast it on everybody and you’re good to go.
Zombie Dragon:
The only creature in the game with the “Pandora’s Box” Enemy Skill is the Zombie Dragon, which can be found along the “Right Path” of the North Cave. If that’s not obscure enough, the Zombie Dragon will only cast “Pandora’s Box” once in the entire game (per save file, anyways) and only as a final attack. Make sure all your Enemy Skill Materia is equipped while you explore this area, as if you don’t learn it on the first casting for whatever reason, you’ll never get another chance. The Zombie Dragon can also cast “Shadow Flare” if you failed to learn it from Ultimate Weapon.
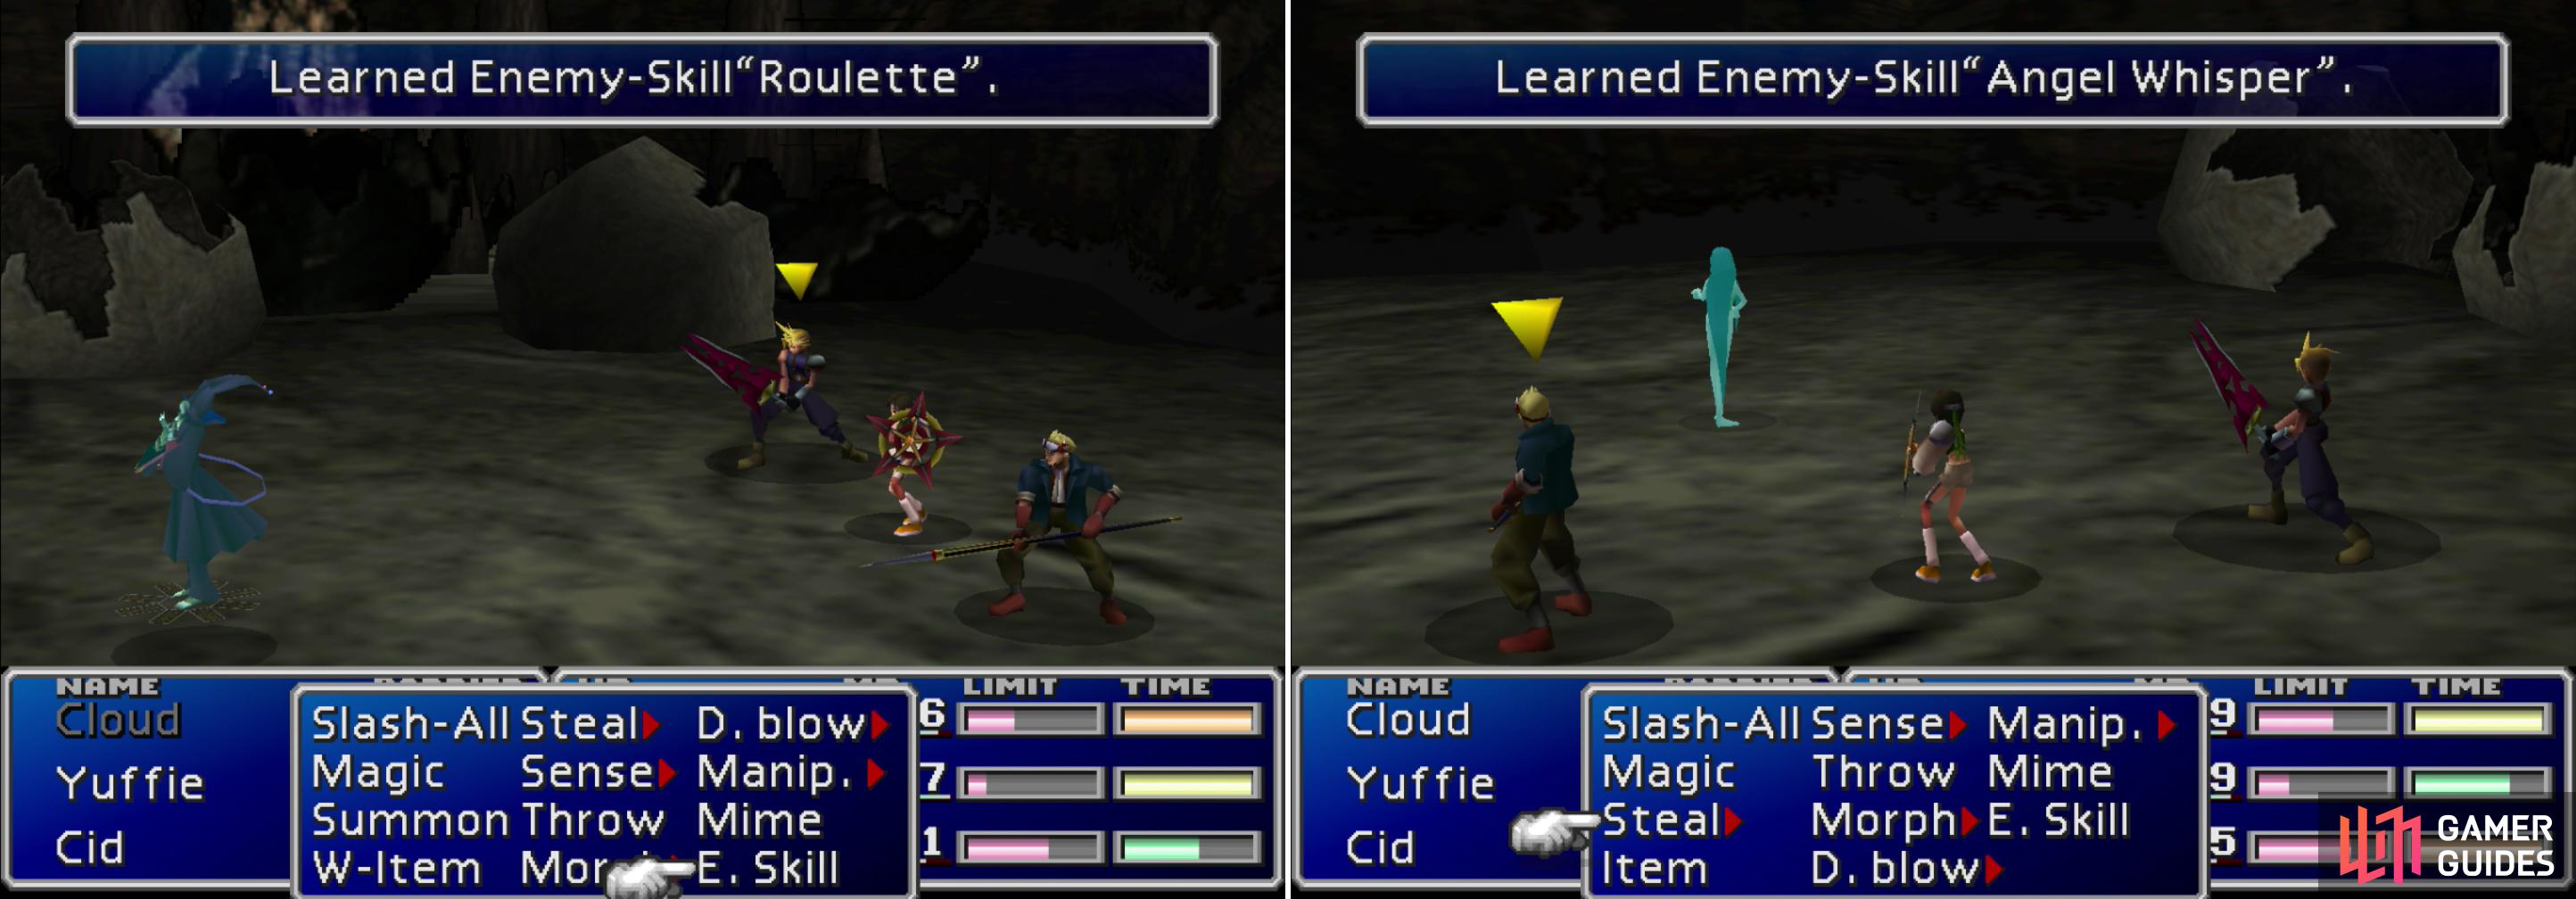
Learn the “Roulette” Enemy Skill from the Death Dealer (left) and the more useful “Angel Whisper” Enemy Skill from the Pollensalta (right).
Regrouping at the Bottom of the North Cave
Make it through this screen to reach the “Bottom of North Cave” again, this time running clockwise along the circular walkway to meet up with your party again. Talk to the gathered goons and each one will give you the treasure they found based on where you sent them. If you follow this guide’s advice, you’ll now get another Mystile (incorrectly displayed as “Mythril”) from Tifa, an Imperial Guard from Cid, a piece of Shield Materia from Red XIII and a piece of Counter Materia from Yuffie. This isn’t a bad spot to use your Save Crystal to create a permanent Save Point down here, in case something goes wrong in the battles ahead, or you just need to change out gear or characters during grinding sessions.
You’re at the bottom of the North Cave. Sephiroth looms below you, the blight that is blocking Holy and is trying to mortally injure the planet to spark his deification. If you’re ready to engage Sephiroth and fight for the future of the plant skip ahead to “Showdown With Sephiroth” . On the other hand, there’s a lot of late-game grinding that can be done and two more Weapons to kill. Even a moderate amount of grinding will make your final fight with Sephiroth much easier. This is all covered in the following section, “The End-Game Grind and Super Bosses” .
No Comments