
| Important Items in this Area |
|---|
| Shiva Materia |
Lower Junon
Now it’s time to visit Junon, which is north-west of Fort Condor, along the northern tip of the western coast. It’s built into a cliffside facing the ocean, so it can be somewhat hard to initially spot but if you have your world map up, you’ll see the marker on the map. Head into the city, which is dominated by its signature cannon, and head into the shop, which is the first store to the north-east. It sells a variety of junk but it might as well be pointed out in case you somehow need some of it.
Item Shop
| Item | Gil |
|---|---|
| Mythril Armlet | 350 |
| Potion | 50 |
| Phoenix Down | 300 |
| Grenade | 80 |
| Tent | 500 |
Leave the shop and head south-west, past the huge remains of some large fish, then down some stairs. Be sure each character has Fire Materia equipped (Fire + All will work great here). If you can, also consider equipping a character with Choco/Mog + Elemental in their weapon, and make sure this character has a long range weapon or Long Range Materia. Once done, continue down the stairs to reach a beach, where a girl named Priscilla is trying to communicate with a dolphin - the last remaining vestige of marine life in the polluted waters around Junon. She’ll assume you’re members of Shinra (and given Cloud’s clothing, how can you blame her?) and try to run you off. Shortly, however, a mutated aquatic beast will surface and attack Priscilla, leaving you do-gooders with no choice but to fight it off.
Boss Battle: Bottomswell
Bottomswell is a fairly challenging foe, it’s got a number of attacks that will deal around 100 damage to a single character, which make up the least of its arsenal. It also has a lunge attack that will deal about 200 damage to a single character. As with most bosses, it can occasionally perform these normal attacks in quick succession, effectively making an attack that targets the party out of three separate single-target attacks.
Like Aps, it can summon a wave (smartly called “Big Wave”) that’ll hit the entire party for around 100 damage. Unlike Aps, however, Bottomswell is an aerial (yet aquatic?) beast, and won’t be hit by its own attack. It’s most interesting attack is to spit a stream of water at a foe, which will encase it in a “Waterpolo”. This functions like Reno’s “Pyramid” attack with a few differences. It isolates them from combat, but it also deals damage to them while they’re trapped inside of it. Like the “Pyramid” attack, it can be disrupted by attacking it… except this time you must use magic, not physical attacks, and you won’t be prevented from accidentally targeting your own character, so be sure you’re targeting the Waterpolo before you hit it with magic; a single casting of Fire should do the trick, and Fire + All will hit both Bottomswell and any Waterpolo effects. You can also use Matra Magic to do the same thing, if you have it.
As for offense, your end of things is pretty simple. Bottomswell is flying, so unless you have Barret (with the right weapon) Yuffie, or you have the Long Range Materia, you won’t be able to rely on physical attacks. Fortunately Fire works just fine - simply pummel it with Fire spells. As mentioned earlier, Choco/Mog + Elemental on a weapon works wonders, as Bottomswell is weak against Wind damage. Just be sure the character this is equipped on has a long range weapon or Long Range Materia. Lastly, if you have “Beta”, you can use it to nuke Bottomswell into submission.
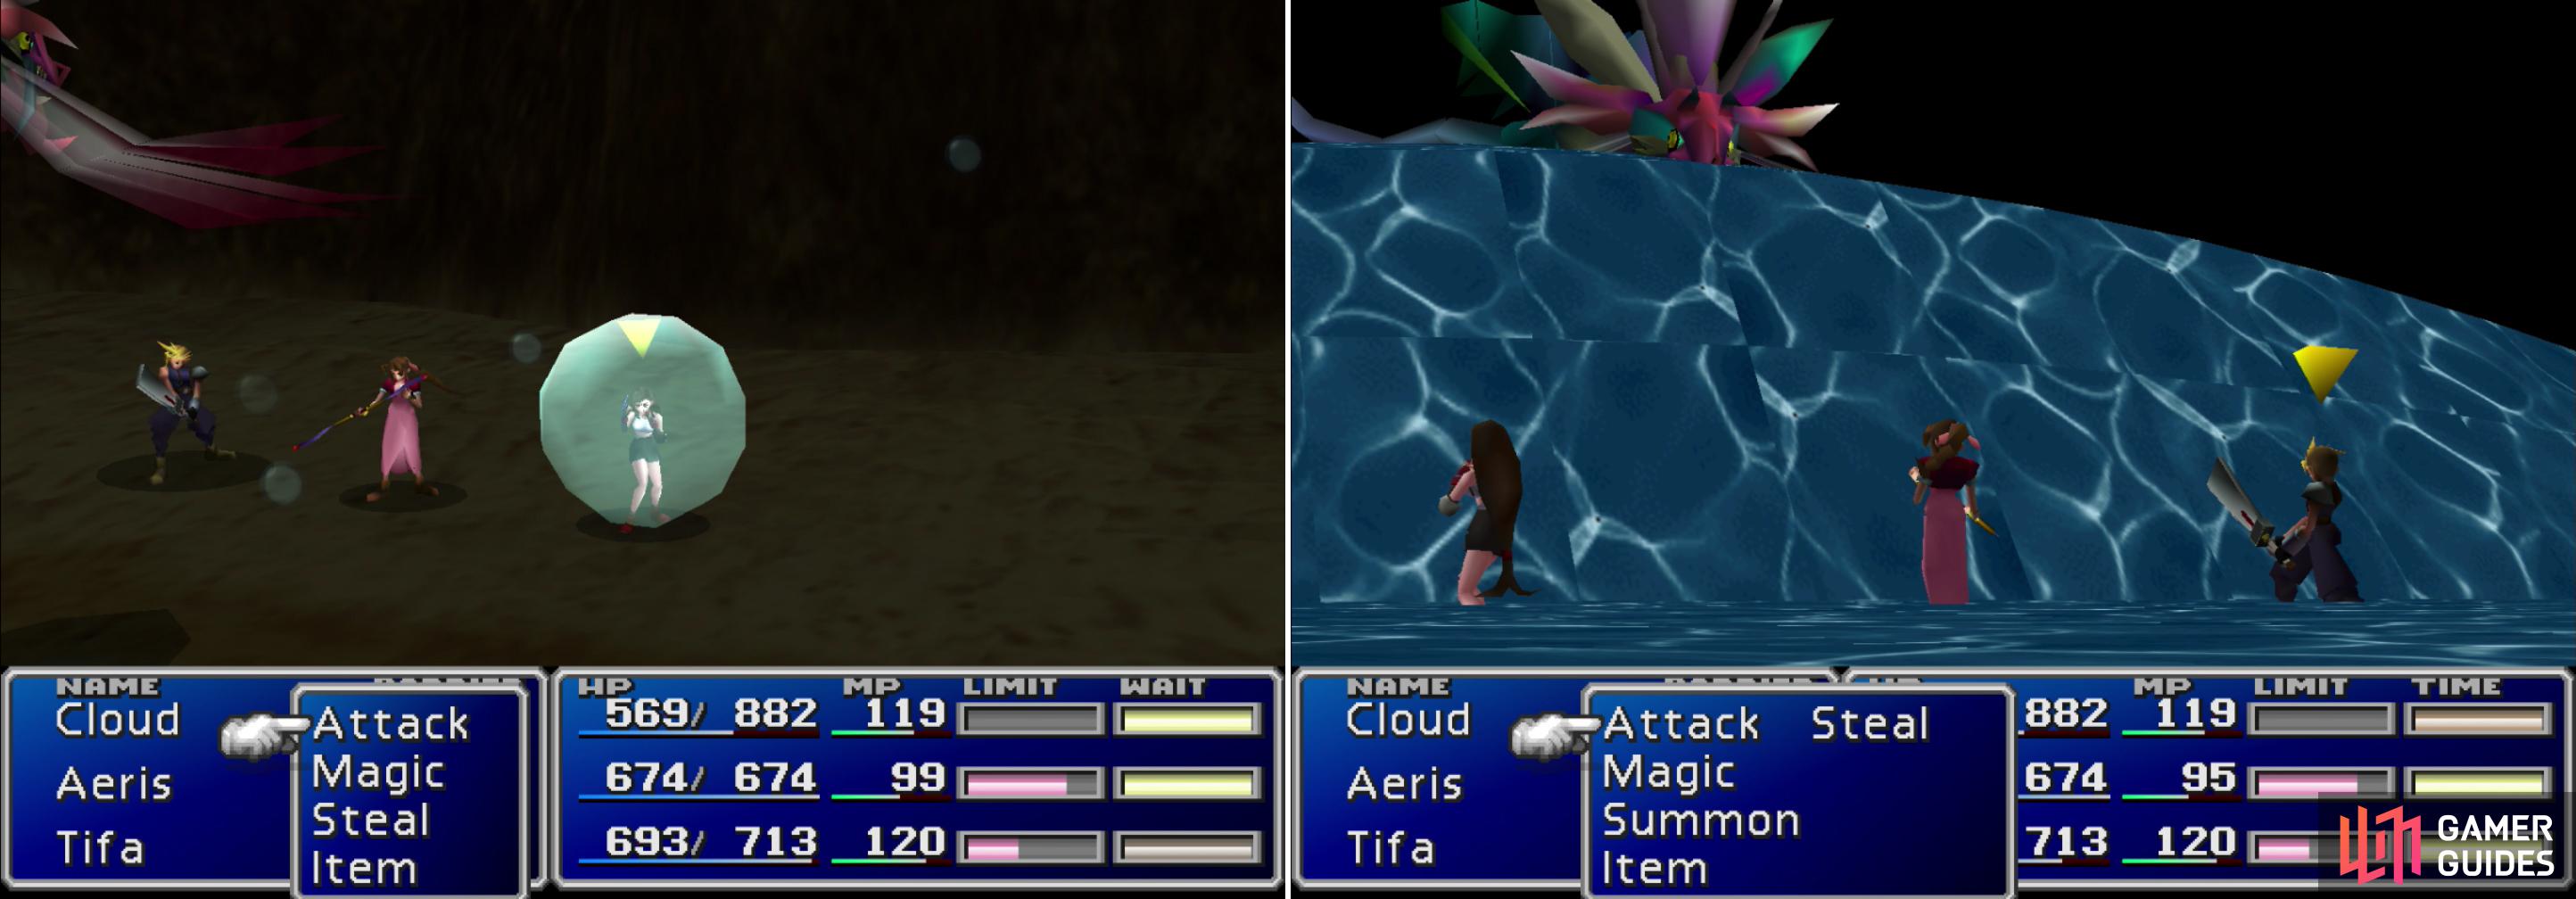
A character trapped in Bottomswell’s “Waterpolo” will constantly take damage (left). It’s “Big Wave” attack will hit the entire party, like Aps’ “Sewer Tsunami”, save Bottomswell is wise enough not to hit itself (right).
| Bottomswell | Stats |
|---|---|
| HP: | 2500 |
| MP: | 100 |
| Weaknesses: | Wind |
| Resistances: | Earth (negates), Gravity (halves) |
| XP: | 550 |
| AP: | 52 |
| Steal: | N/A |
| Drop: | Power Wrist |
| Gil | 1000 |
Leaping With Dolphins
After the battle (which usually ends with a “Big Wave” cheap-shot) Priscilla will be recovered. Unfortunately, she’s not breathing. Falling unconscious in water will do that. Cloud will be told to do CPR, and he will initially balk at the idea, because, after all, Priscilla’s “just a girl”. Get your mind out of the gutter, Cloud. What comes next is an especially pointless mini-game, the entire goal of which is to fill up your lungs, wait until the breath meter is as far up as possible, then exhale. It can take some time to get the timing right so be persistent. After a few lungfuls of air, Priscilla will come to, and will be whisked away by an older townsperson.
Back in the village, you’ll need to head east to return to where you entered town. South-west of here is a house with an old lady standing outside of it. Talk to her and she’ll invite you inside and allow you to rest for the night (why not? It’s free!) and during your nap a voice will nag Cloud. After waking up, he’ll put the voice’s suggestions into action, but the results are wanting. Evil, opportunistic Tifa. Anyway, there’s a commotion outside which just begs for investigation, so leave the house.
Head north-west along the road running through lower Junon and find your party standing around. Go up the stairs they’re encircling and Priscilla will come out and give you some rewards. The first reward, “an amulet’, is actually Shiva Materia , an ice element Summon Materia. The second reward she’ll give you is information concerning the ruckus, which turns out to be Rufus-related. The third is a viable way to reach the upper city, albeit in a rather silly way. After hearing the details the rest of your allies will decide this is a task best left for Cloud.
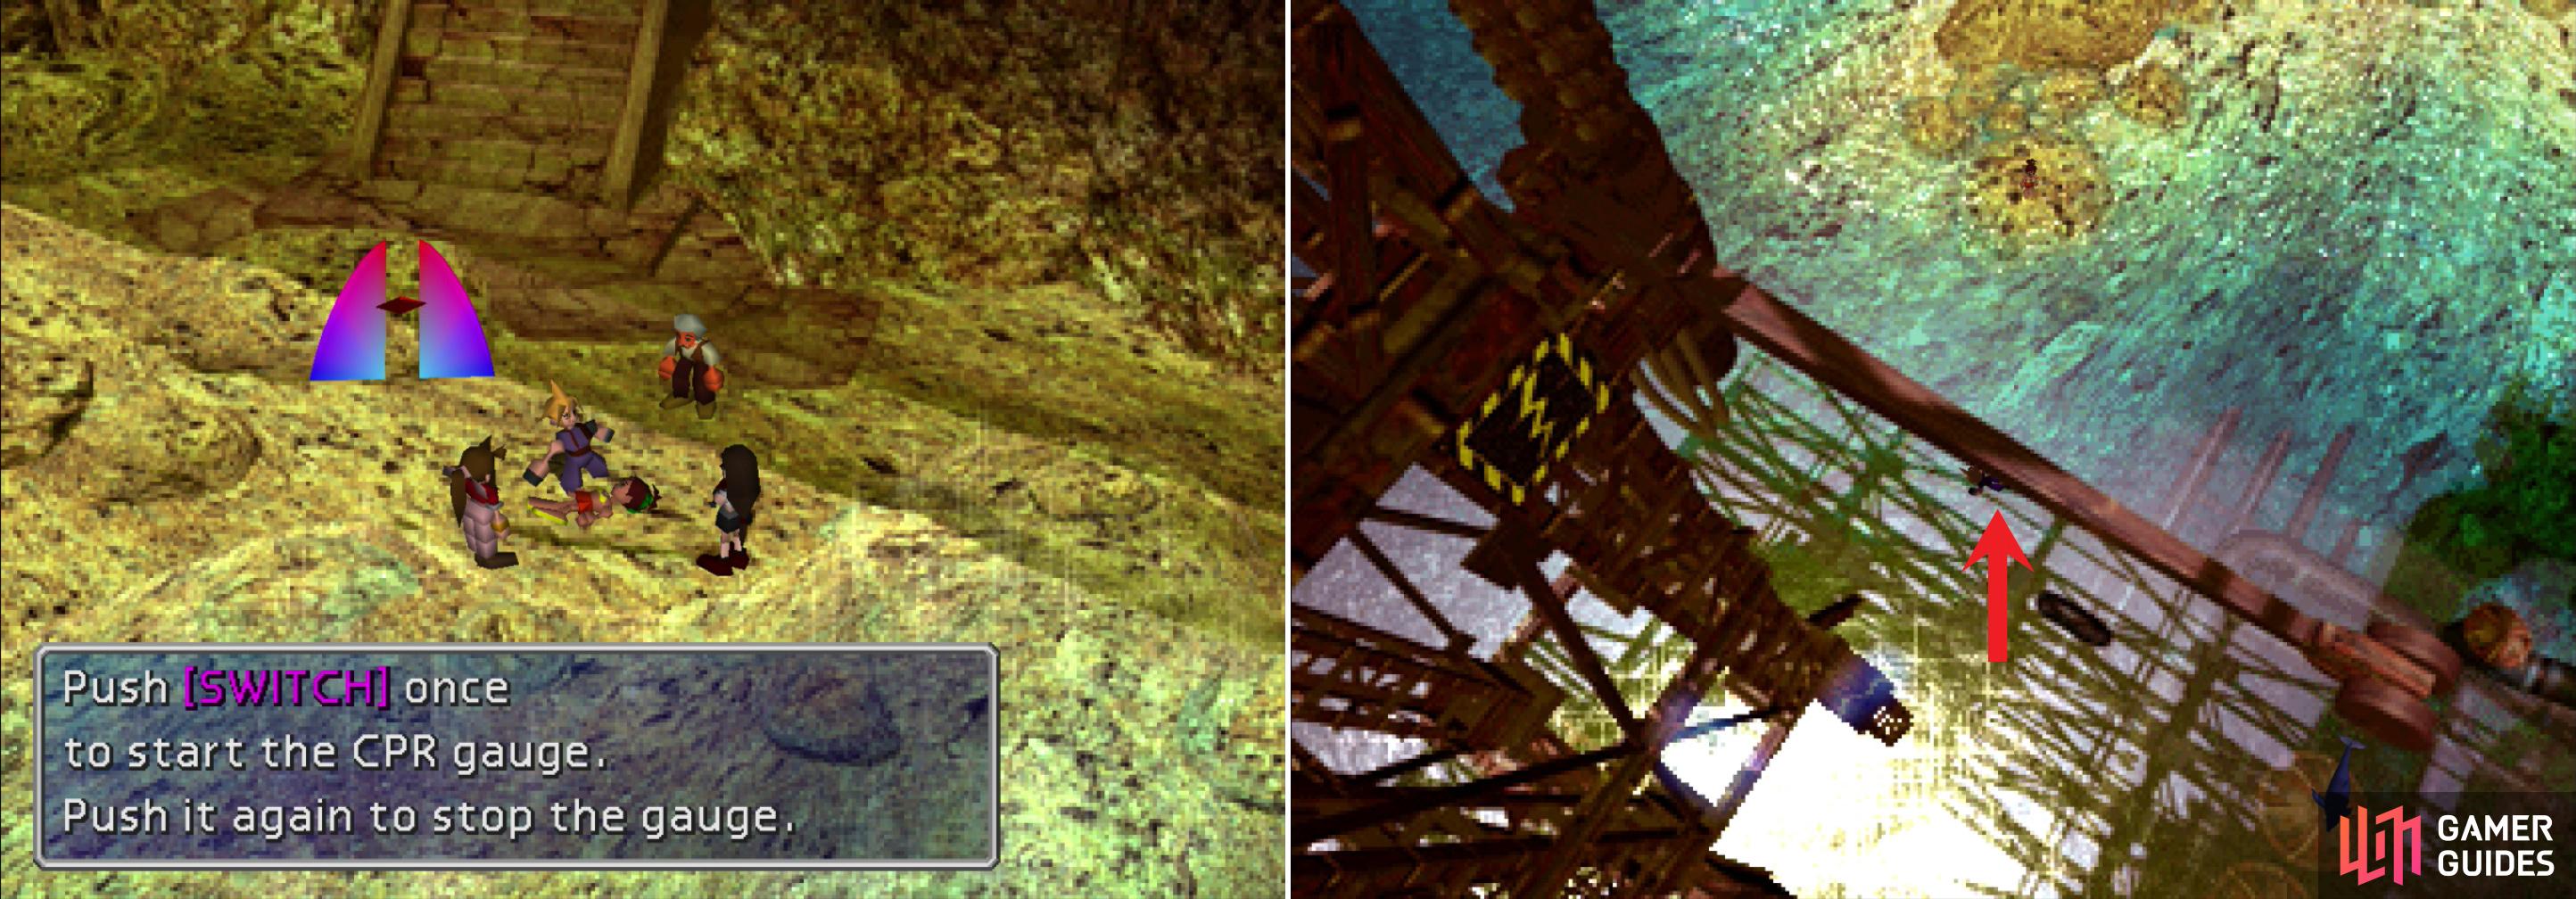
Perform some CPR on Priscilla (left) then, afterwards, leap onto the tower with Mr. Dolphin’s help (right).
Return to the beach and talk to Priscilla, who will elaborate - when you’re in the water, you’ll need to blow a whistle to get Mr. Dolphin to propel you into the air. You’ll need to reach a pole atop the tower to make your way safely to the upper city. Simply put, find the magic spot that’ll get Mr. Dolphin to boost you to the pole, and try not to swim too far south to avoid getting electrocuted, which isn’t fatal, it’ll just knock you out, place you back on the beach, and force you to endure a lecture from Priscilla. If this happens (or if you run off to complete the third Fort Condor battle) just talk to Priscilla again to get back in the water. Now, to hit that magic spot, swim about two body-lengths to the north-west from where you appear in the water until Cloud is partially obscured by the pole you’re aiming for - you should only see his feet. Or, you can just stay where you start out in the water and whistle for Mr. Dolphin twice. The first will miss, but the second leap will get you to the pole, so long as you don’t move anywhere in the water. Be warned that once you reach the pole, you won’t be able to get back down to lower Junon for a while and by extension, you won’t be able to return to Fort Condor or any previous locations. It might be a good idea to ensure you have some spare Gil to spend before you continue on.
No Comments