

| Important Items in this Area | Enemy Skills in this Area* |
|---|---|
| Aurora Armlet | Aqualung |
| Comet Materia | Death Sentence |
| Enemy Skill Materia | |
| Guard Source | |
| Magic Source | |
| Mop | |
| Water Ring |
Waking the Sleeping Forest
Cloud will wake up back in Mideel and get some bad news, after which he’ll voice some well-founded concerns. His lack of self-control notwithstanding, he’ll be bullied into “manning up” and going after Sephiroth once more. Leave the inn and get a pep-talk, then exit Mideel to the world map and board the Tiny Bronco. Our goal is Bone Village on the northern continent, but first…
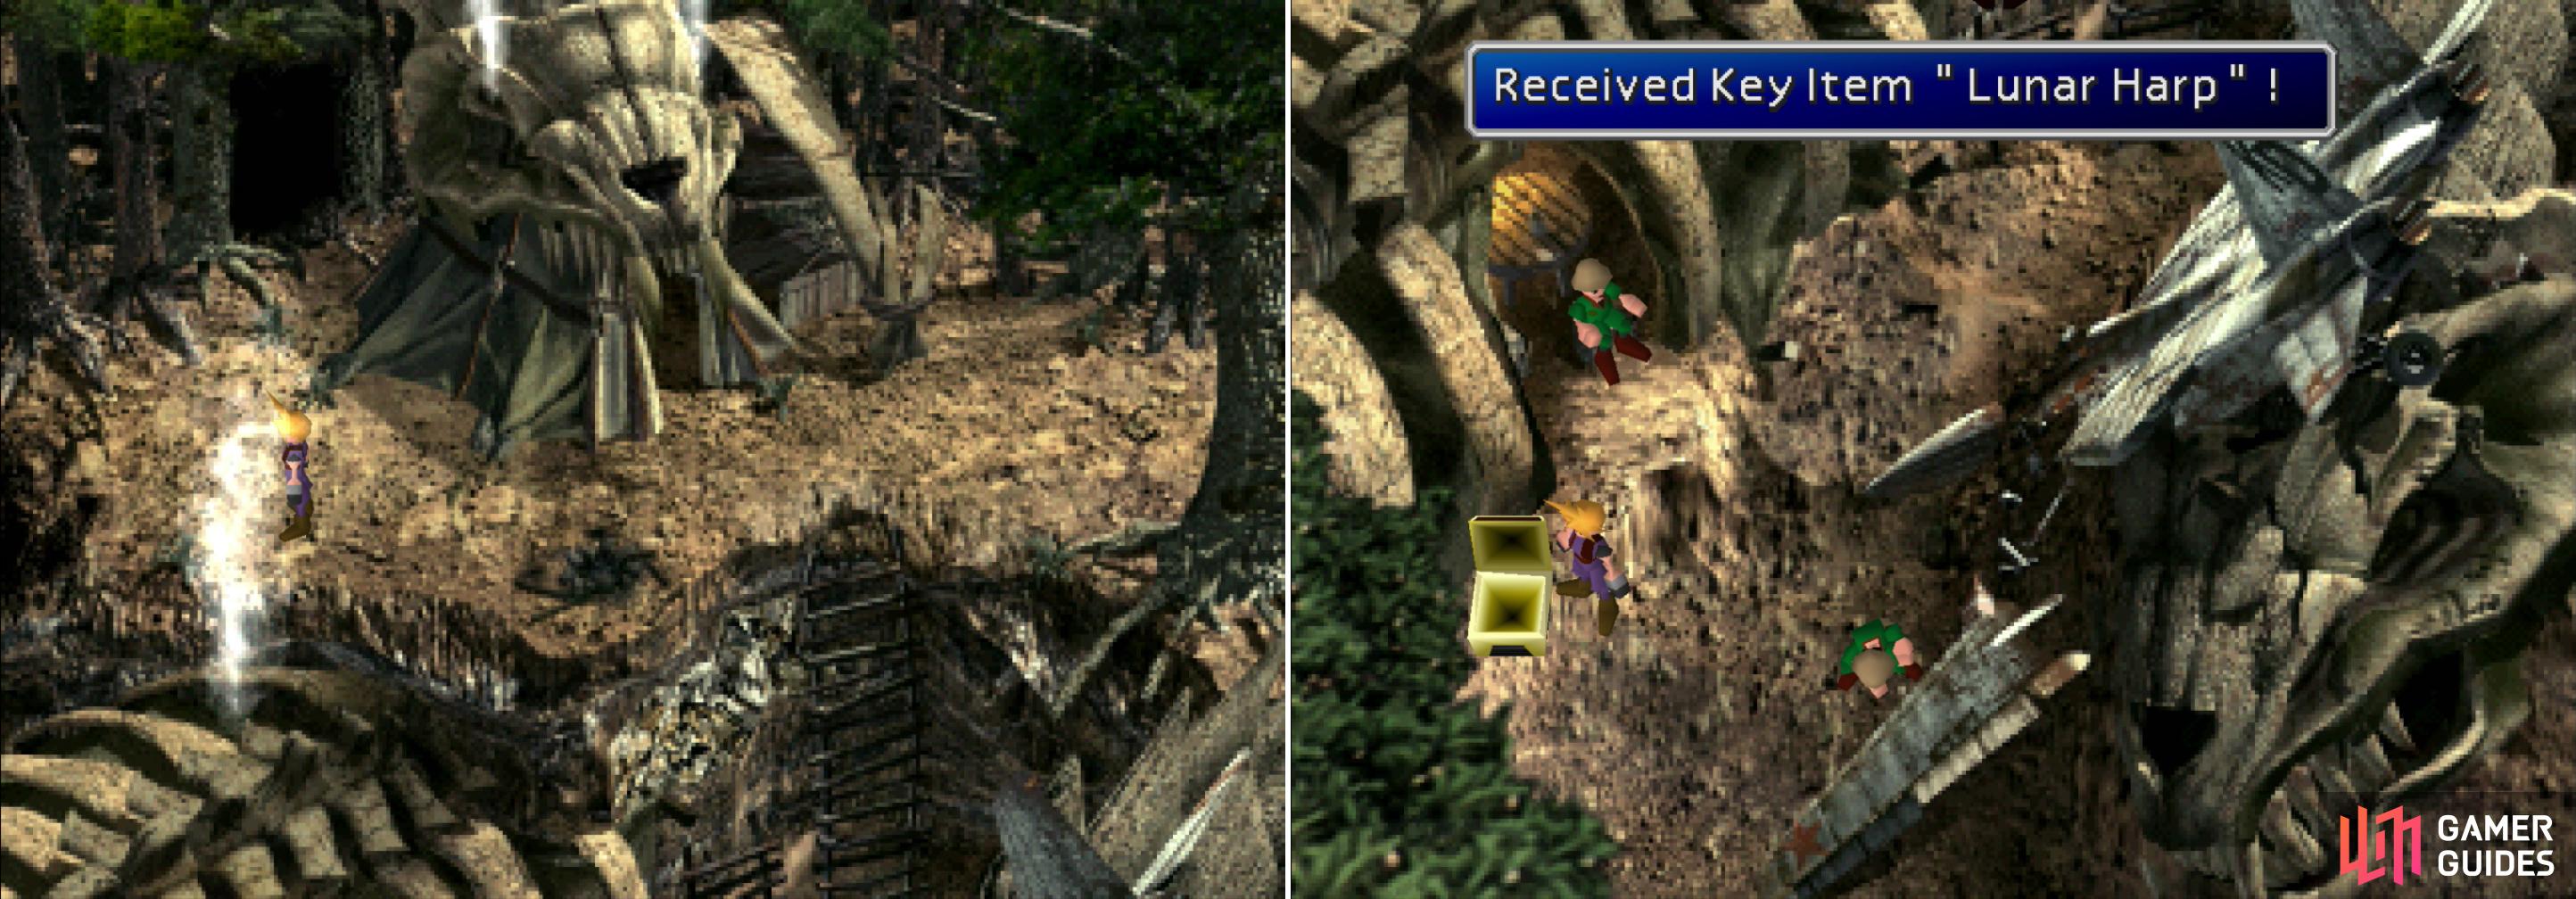
To find the Lunar Harp, dig near the edge of the chimney’s smoke on the upper level (left). If you picked the right spot, you’ll gain the Lunar Harp from the chest (right).
Return to Bone Village and talk to the shopkeep (the man in green sitting in the doorway west of the crashed plane), who will babble about some Lunar Harp. If you talk to the other excavators, they’ll fill you in; to get to the City of the Ancients (aka: Forgotten City) you’ll need to get through the Sleeping Forest, which can be “awoken” with a Lunar Harp. To get the Lunar Harp, you need to dig. Tell the shopkeeper that you want to find the Lunar Harp (showing you don’t understand the words “other than”) and he’ll lend you some staff… for 100 Gil each. The game works like this; you strategically place people around Bone Village, and when you’re done you detonate a bomb. The staff members will look in the direction of the treasure. The more staff you hire, the better idea you can get of where the treasure is, ideally digging where their gazes intersect. Or… you don’t have to pick any staff, just detonate the bomb and select to dig blindly. The magic spot you’re looking for is within the smoke coming from the building the shopkeeper stand so Cloud is touching the eastern edge of the smoke, near - but not quite on - the ledge to the south. Pick that spot, then search the chest the next morning to claim the Lunar Harp . Score. You can obtain a few other items here, including a Mop and a Megalixir , if you’re willing to dig around for them. You’ll need to come back and dig later, though, so don’t waste too much time on it right now.
With the Lunar Harp in your possession make your way through the Sleeping Forest, which will awaken. Continue north to exit the forest, then follow a dirt path under a fallen log to find a chest containing a Water Ring . Once this treasure is yours scale some ledges and head through the collapsed log you just crossed under and continue north to the next screen. Follow the linear path to reach the world map, then head north to reach the Forgotten Capital.
Forgotten Capital
Head north until you reach a four-way fork, at which turn west and follow this branch to the next screen. Continue north and enter a house, within which is a Save Point on the ground floor and a chest containing a Magic Source on the upper floor. Leave the house and head north-east to reach another screen, then head down some stairs to find another chest, within which is an Aurora Armlet . This four socket (two pairs of two sockets) piece of armor has excellent defensive stats and it absorbs cold damage.
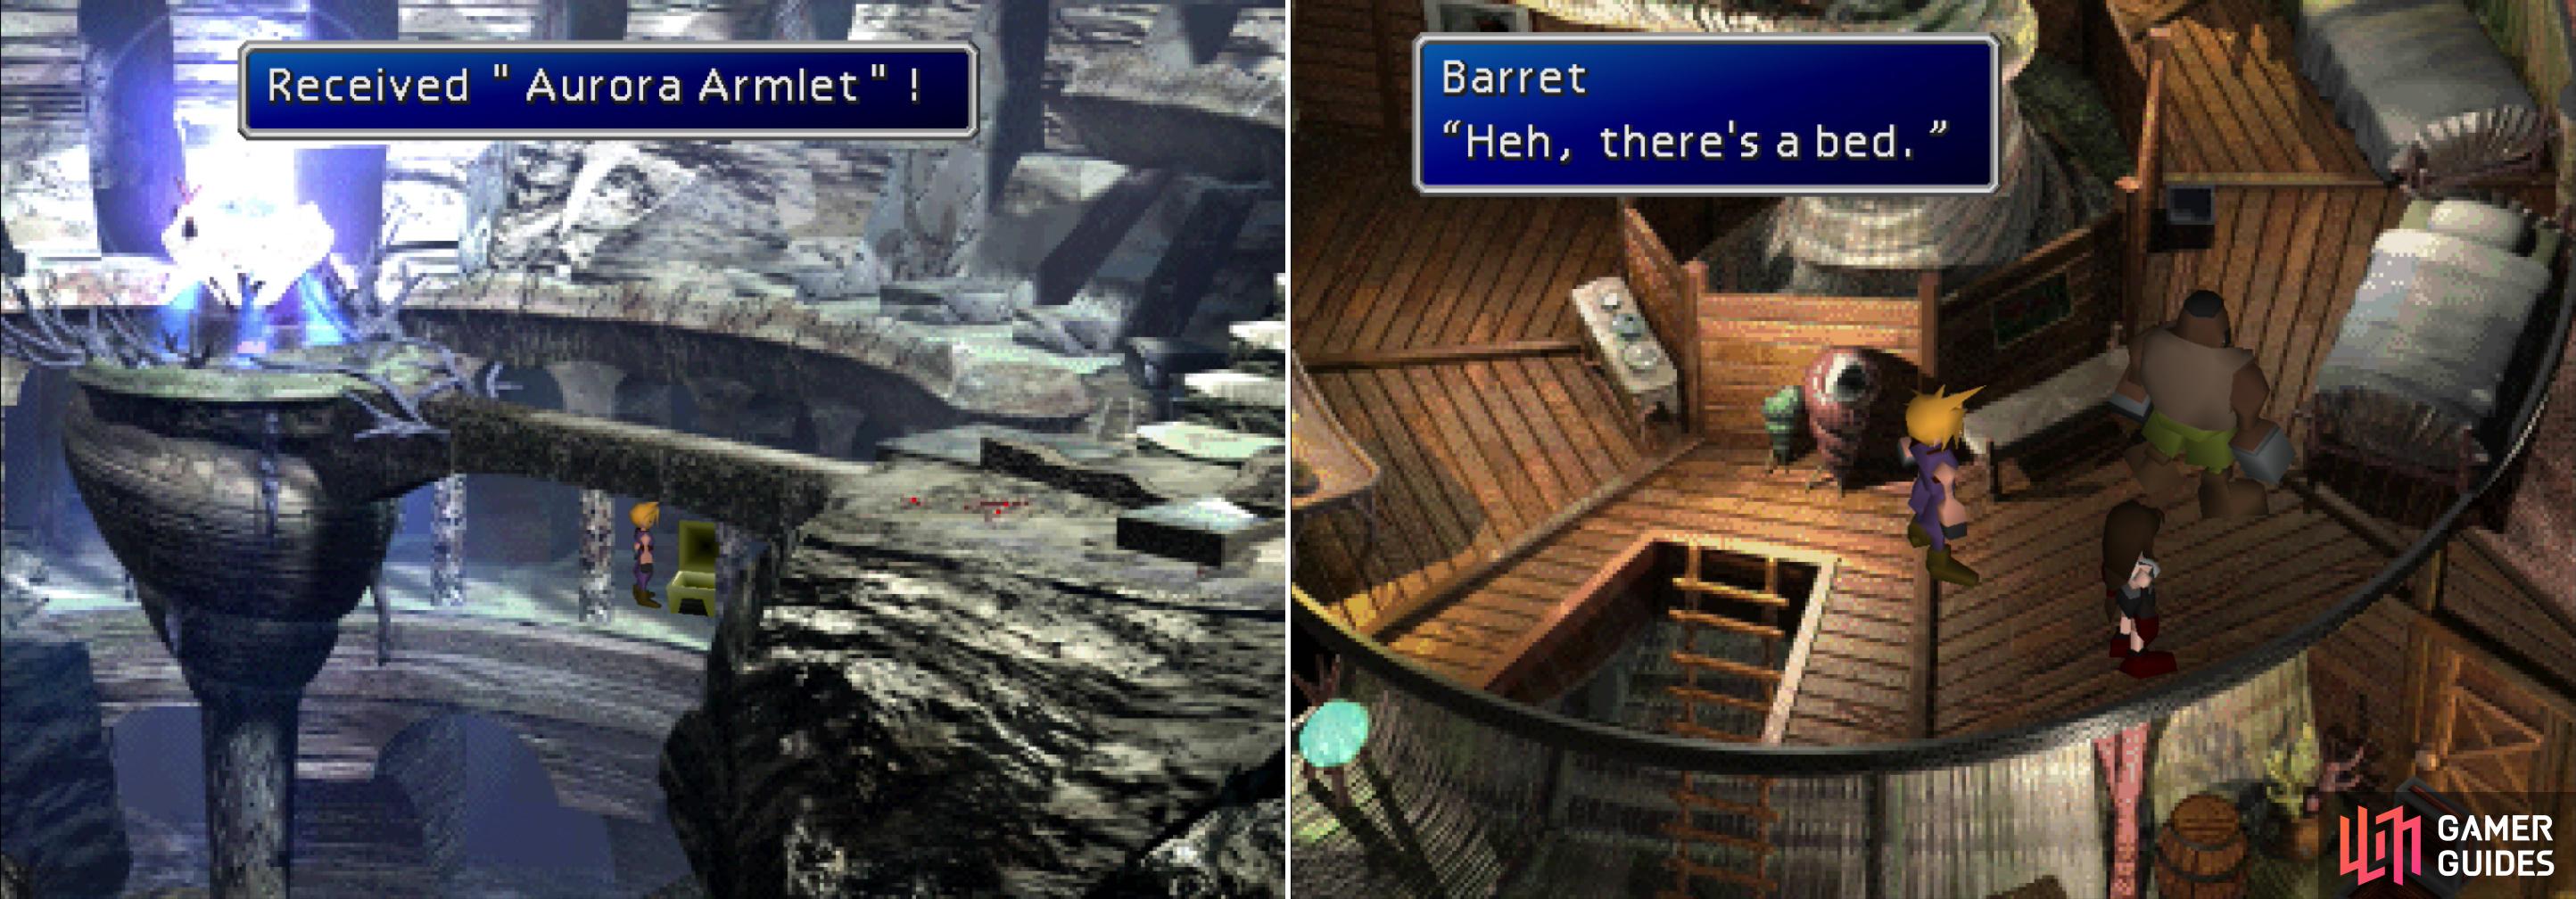
Loot a chest in the amphitheatre to claim an Aurora Armlet (left). When you reach a house along the eastern edge of the ruins, the party will stop to rest for the nigth (right).
Return to the fork near the entrance to the city and follow the eastern branch to the next screen. Once there, continue to the north-east to reach another fork, at which point take the eastern fork and enter a house. Follow the coiling path and climb a ladder to claim a Guard Source from a chest. Leave the house and follow the previously neglected north-eastern path to find a third house to enter. Grab an Elixir from a chest on the ground floor, then climb a ladder to find some beds. This seems like a rather silly place and time to rest, but do so anyways. Later, Cloud will make an unfounded statement on blind faith, and, despite his mental state as of late, his companions decide to believe his hunch. Before you leave the house, search behind the third bed (the one furthest away from the ladder) to find your third Enemy Skill Materia .
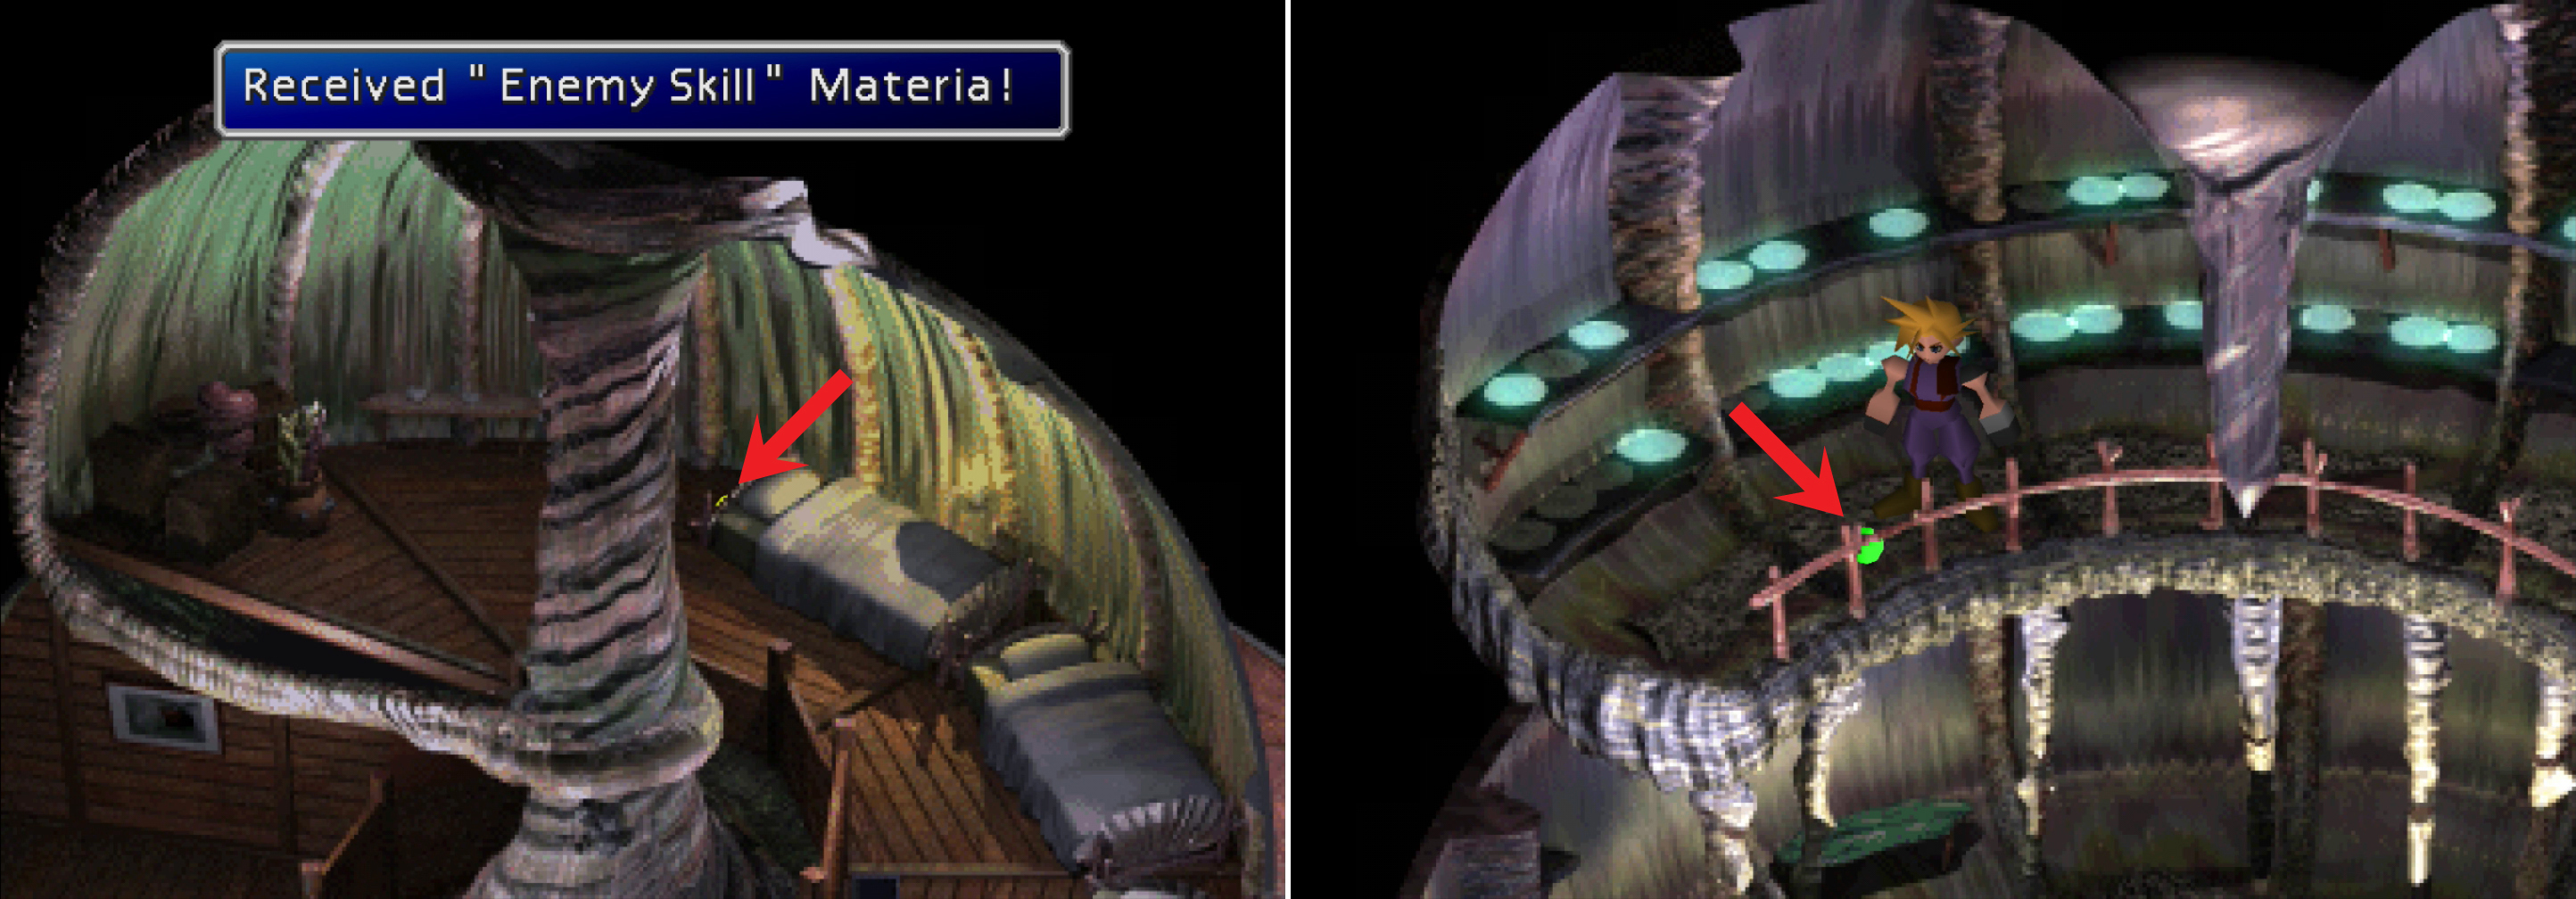
In the house the party rested in you can score a hidden bit of Enemy Skill Materia, barely visible behind one of the beds (left). In the structure near the lake you can find some Comet Materia (right).
Backtrack to the entrance to the city and follow the as-of-yet unexplored road to the north. Pass through a linear screen to reach a small lake in the heart of the city, then head around the western shore to reach a building to the north. Ascend to the top of the building and claim a piece of Comet Materia , then backtrack and head down a flight of smooth, blue stairs, which continues at length through another screen. Make your way to the intact towers below, save your game at a Save Point, then head down two flights of stairs and approach some pillars. Cloud decides to go ahead alone and spots Aeris praying in the distance. Leap across the pillars to reach the platform she’s on and ascend the stairs, where Cloud once again starts to lose control. Attempt to talk to Aeris and your allies will prevent you from doing something awful, only for Sephiroth to show up and finish the job. A glowing orb of Materia will fall into the water, and Sephiroth will add insult to injury, before tossing another piece of Jenova at you to contend with.
Boss Battle: Jenova-LIFE
This battle is stupidly easy for a few reasons, but especially after following Demons Gate, Jenova-LIFE just seems incredibly impotent. First, all her attacks consume MP, meaning it’s technically possible to cast “Magic Hammer” until she’s helpless. This is complicated by the fact that she’ll cast “Reflect” the first time you hit her with a spell, but if you had Reflect, you could always cast it on yourself, and bounce the spell back at her. Long-standing rule of Final Fantasy; a Reflect spell will only reflect once. Alternatively, if you’re wearing the Water Ring you found earlier, she’ll be incapable of harming that character at all.
Failing either of these two approaches, she just isn’t powerful enough to pose a serious threat the way Demons Gate was. Her “Blue Light” and “Blue Flame” attacks deal around 300 and 400 damage (respectively) to one character, although she will sometimes use them in quick succession. Other than that, she can cast Aqualung, which will deal around 1300 damage to every character.
No elaborate strategy is really needed for this fight, however. Just cast “Big Guard” at the outset of the battle and pummel her with melee attacks and Limit Breaks, with the odd “White Wind” if the damage starts to pile up and you’ll be fine.
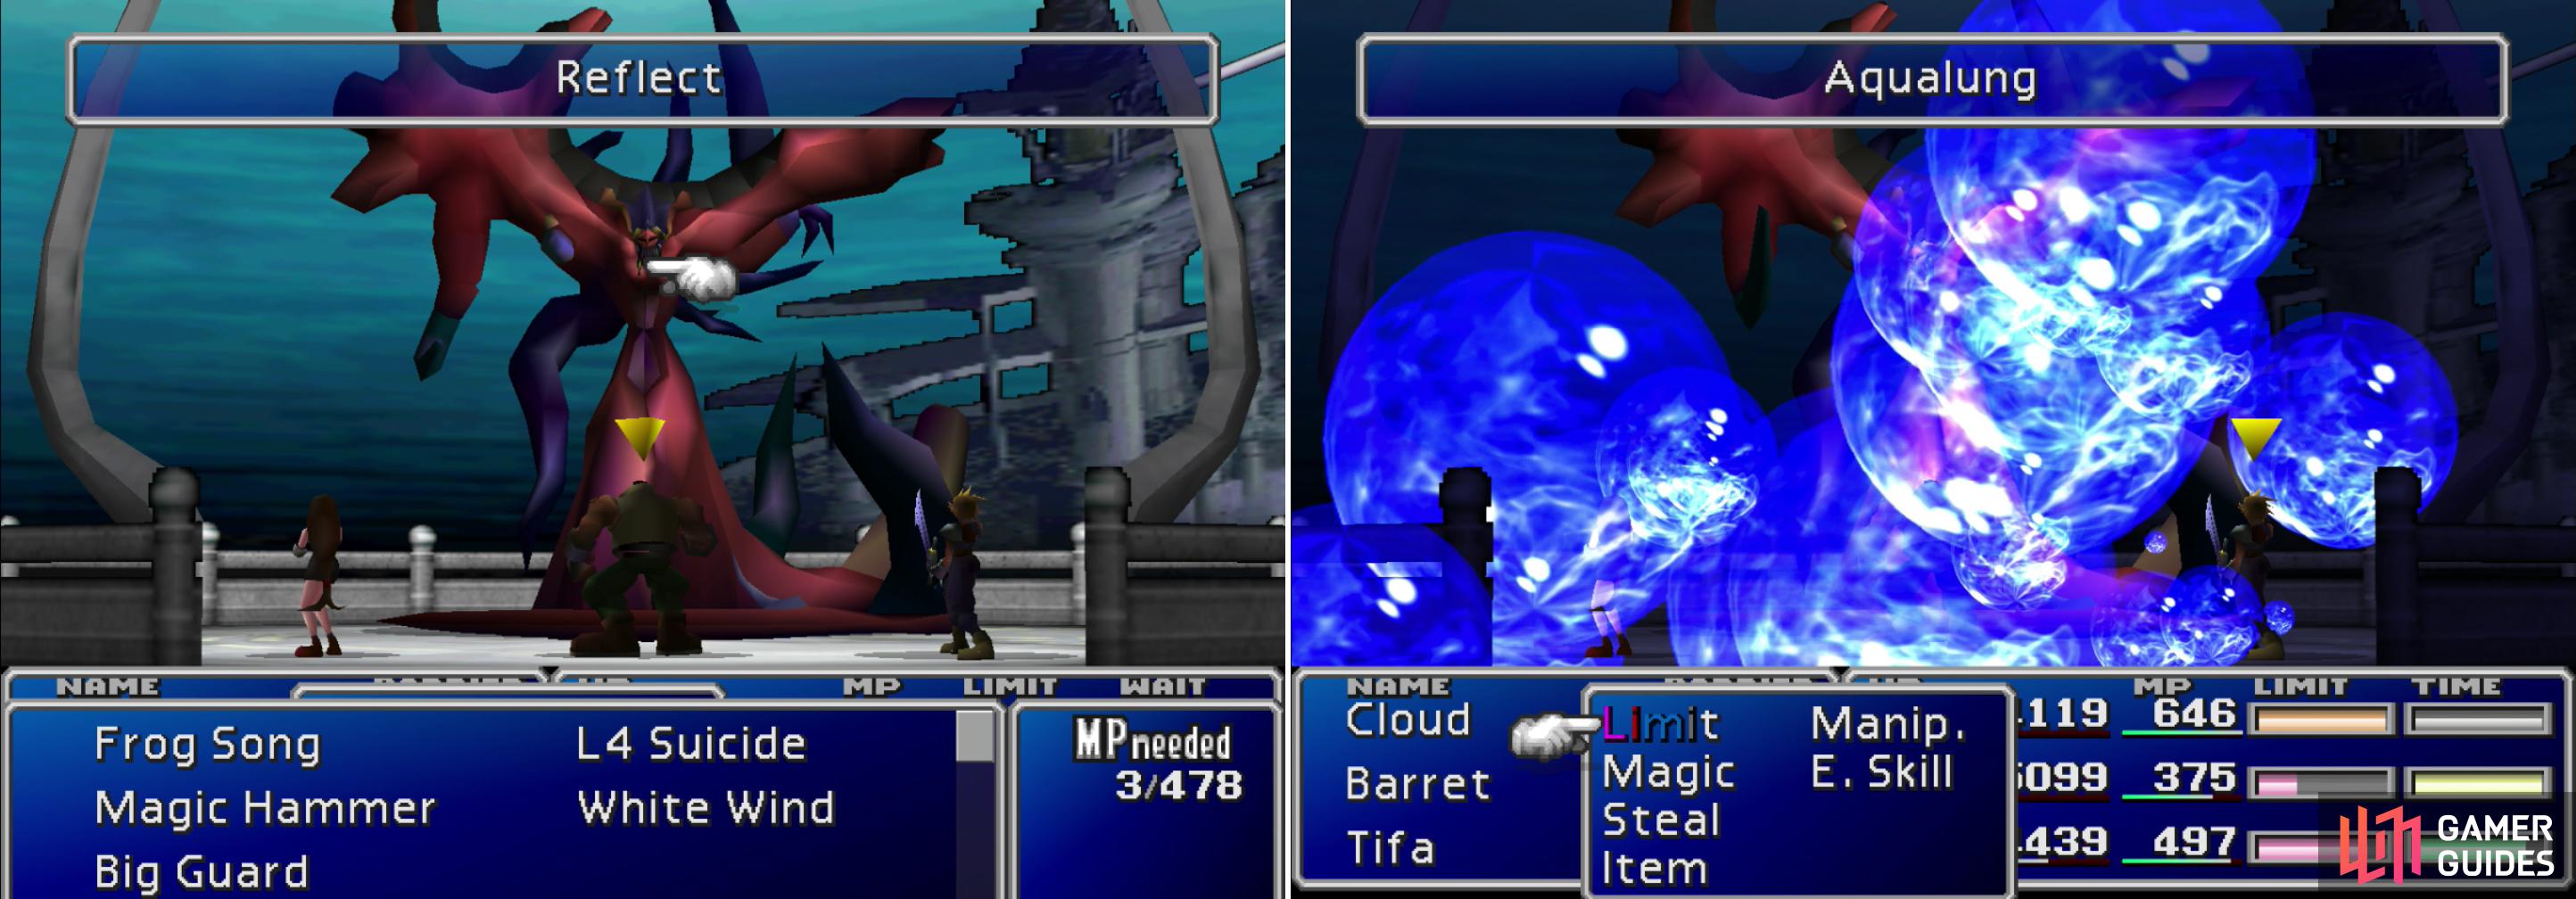
Once struck by magic, Jenova-LIFE will respond by casting “Reflect” (left). She also knows the “Aqualung” Enemy Skill (right).
| Jenova-LIFE | Stats |
|---|---|
| HP: | 10000 |
| MP: | 300 |
| Weaknesses: | Earth |
| Resistances: | Gravity (negates), Water (absorbs) |
| XP: | 4000 |
| AP: | 350 |
| Steal: | N/A |
| Drop: | Wizard Bracelet |
| Gil | 1500 |
After the battle Jenova will call Cloud a “puppet” and Aeris will be laid to rest. Later on, Cloud will make some admissions (it seems like he’s speaking for his own benefit) and ask his allies for a favor; to keep him from doing something awful. With that, the chase will begin again with renewed vigor, and disc one will end.
No Comments