
| Important Items in this Area | Enemy Skills in this Area |
|---|---|
| Magic Comb | Flamethrower |
| Long Range Materia | |
| Mind Source |
Through the Mythril Mines
From the entrance of the mines head east, then north to reach another screen. Head north until the path forks in front of some stairs. Ignore the stairs for now and turn left to find some vines you can climb. Do so, then search the ledge to find a purple orb of Long Range Materia glowing happily away. Climb back down to the lower part of the cavern and ascend the stairs. Grab an Ether to the right midway up the staircase, then continue to the top to loot a chest for a Tent .
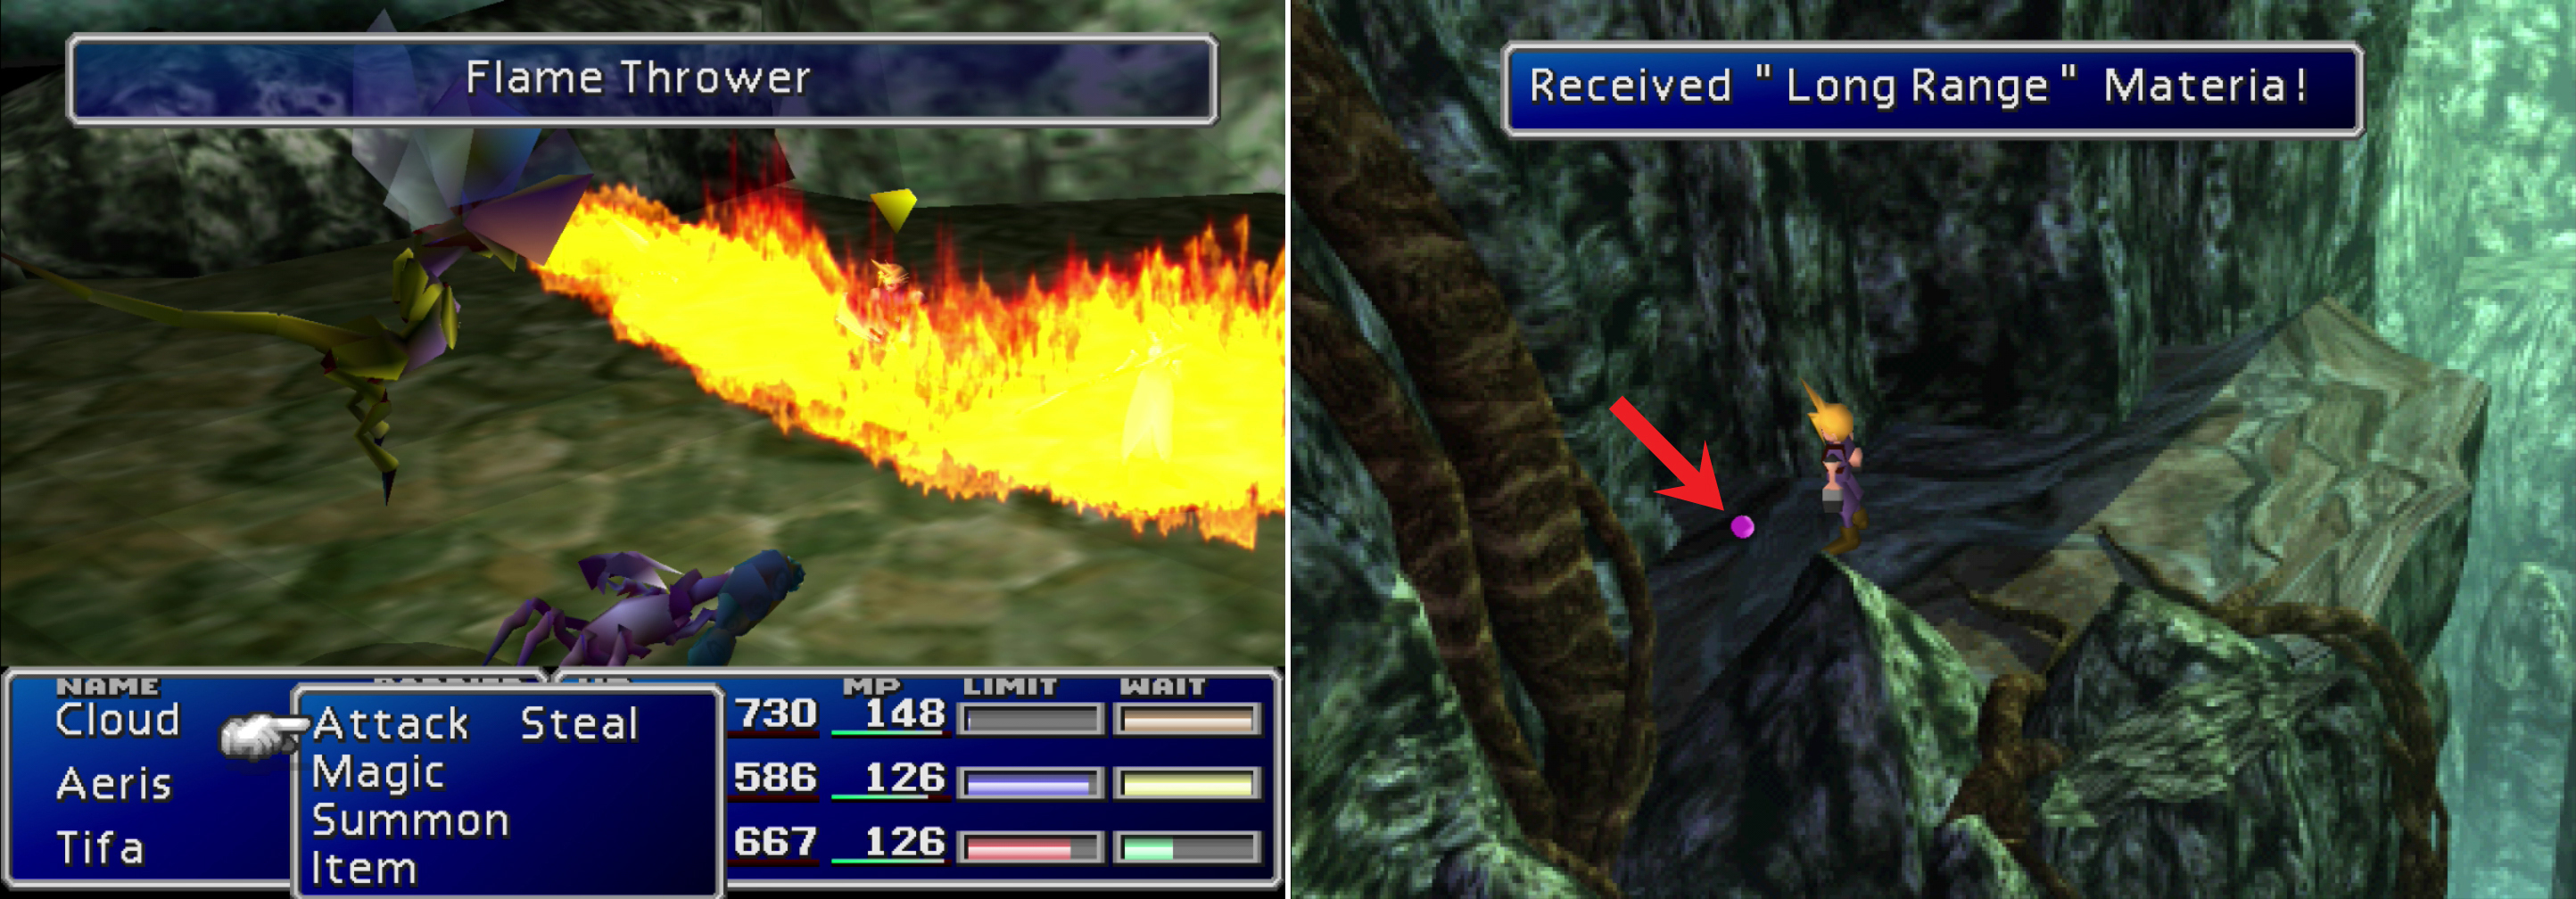
You can learn the “Flamethrower” Enemy Skill from Ark Dragons (left). Be sure to grab the Long Range Materia on your way through the Mythril Mines.
Return back south to the first screen, then make your way back to the entrance and head west, then south until the path forks. Go down a short, dead-end tunnel to the south-east to find a chest containing a Mind Source then return to the fork and head west, then north when you reach the end. When the path forks again head west to reach yet another screen. Here you’ll run into some old friends, and their new recruit, who spills the beans and lets slip that Sephiroth is heading to Junon Harbor. If you have Aeris in your party, Tseng will have some words with her.
In any event, they depart without a fight. Head north to reach another screen, wherein you can find a chest near the entrance that contains an Elixir , and further north you can grab a Hi-Potion . Backtrack to the south, then climb a vine to reach the ledge Tseng was standing on earlier and continue north-west to exit the mines.
Recruiting Yuffie
To the south is Fort Condor - a Mako Reactor with a huge bird perched on it in the midst of some badlands. To the west are some forests, and beyond them, Junon. Save your game and head west, first - visiting Fort Condor is worth doing, but first, let’s try to find a specific encounter.
In the forests you can occasionally meet a “Mystery Ninja”. Defeat her and after the battle she’ll be lying prone on a field. Where did the forest go? Oh well… Don’t use the Save Point and don’t enter your menu. Instead, walk up to her and talk to the Mystery Ninja and say “Not interested”. After her bluster, talk to her again and say “Petrified…”, then “Wait a second!” when she goes to leave. Say “That’s right” and and the conversation with “Let’s hurry on” to get her to join your party. This character will be known by her default name, Yuffie. If you botch the encounter, she’ll end up stealing Gil from you, so it’s best to just follow instructions.
Yuffie is one of two optional characters in the game, and arguably the more annoying, yet more powerful of the two. Her weapons are long ranged, and she comes with the Throw Materia. There are also some quests you can do later, which involve Yuffie, that are rather lucrative.
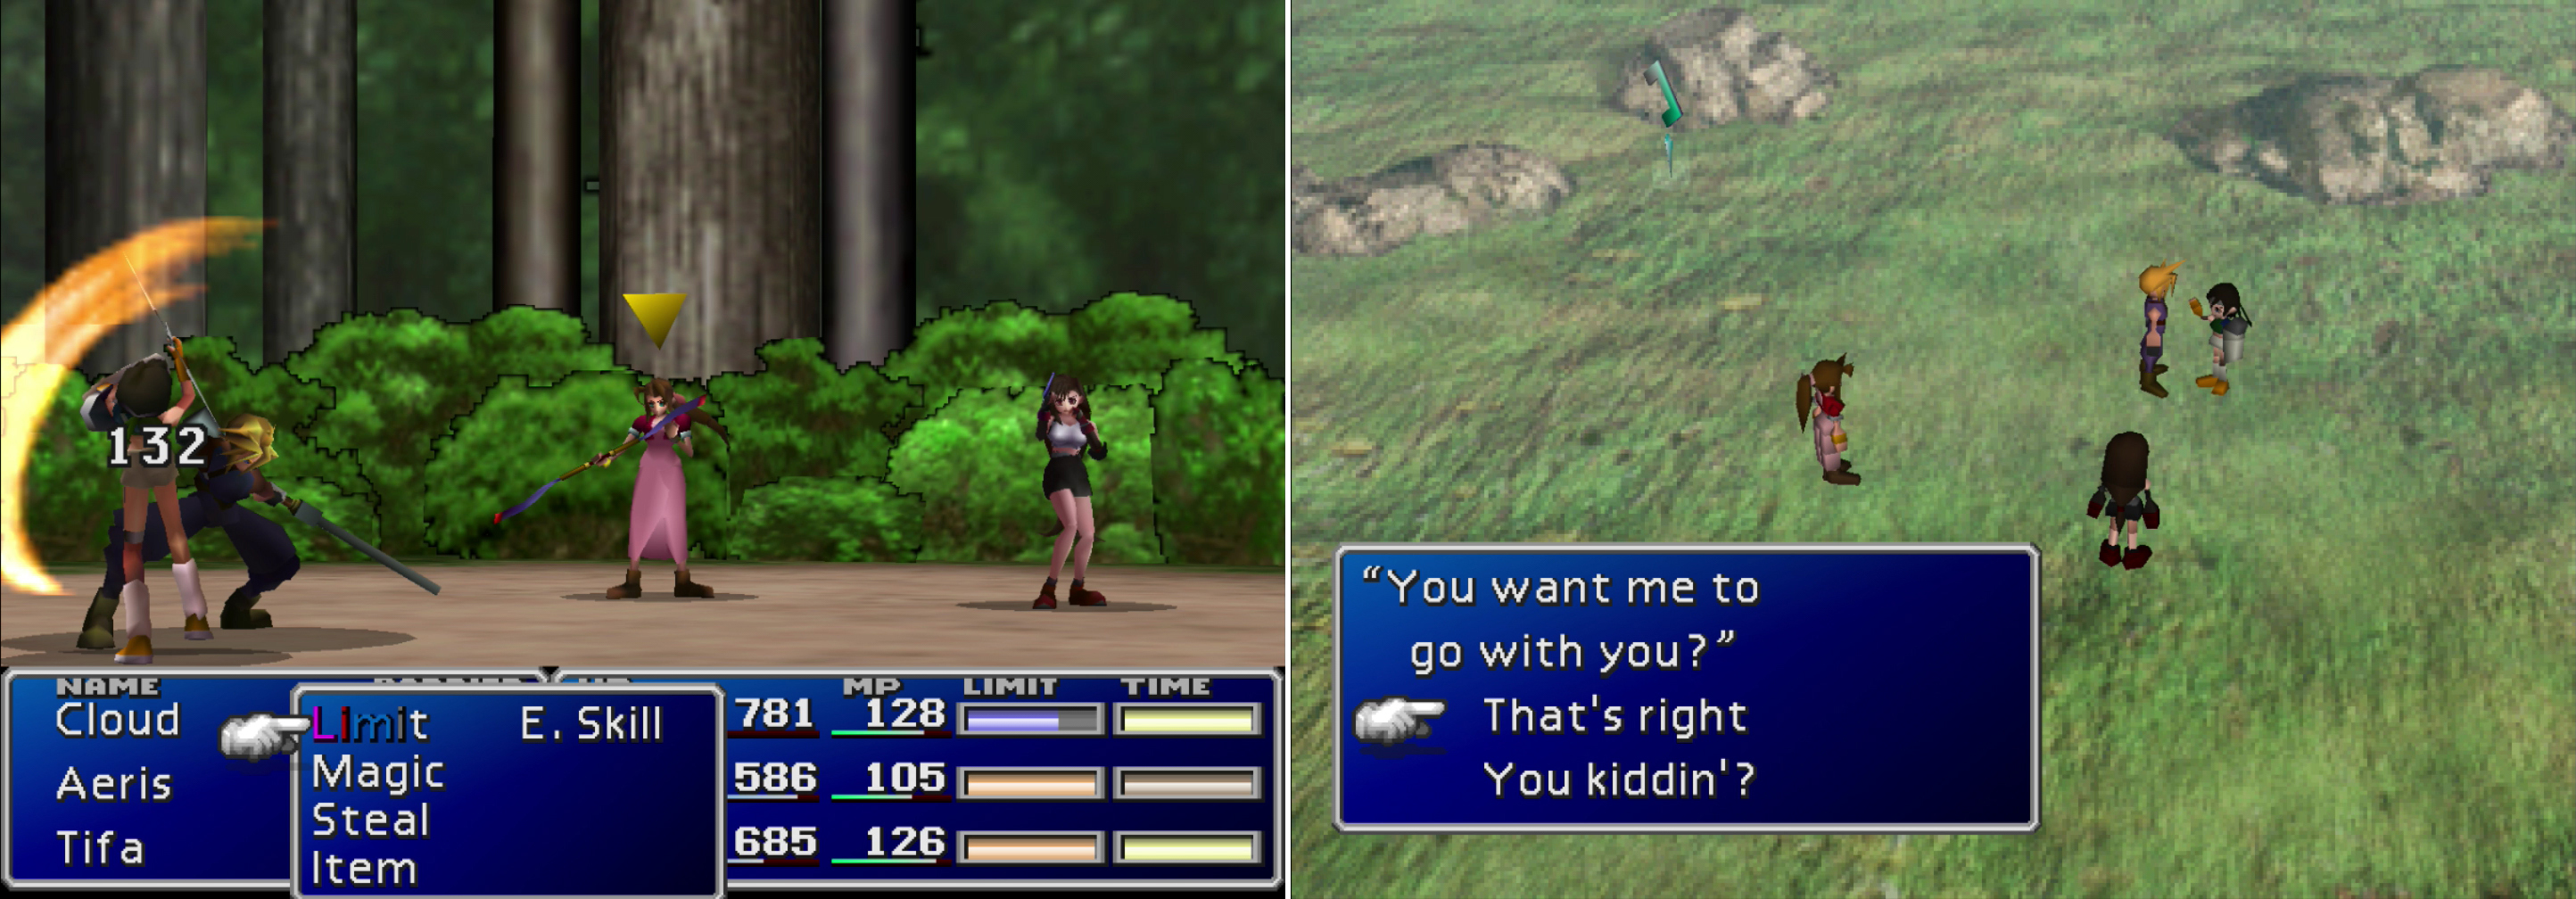
If you explore the forests outside of Junon you can encounter a “Mystery Ninja” (left). Beat some sense into her and pick the right responses and she’ll agree to tag along (right).


Fort Condor
Once you have Yuffie in your party (and perhaps a new weapon for her) head south to reach Fort Condor. Talk to the man outside and he’ll tell you that the inhabitants of this reactor has been at war with Shinra for a while, but they need help. Offer to lend a hand then follow him inside. Climb a rope, then a rope-ladder, then talk to an old man sitting at a wooden table and he’ll tell you the whole story; Shinra wants some big dumb bird gone so they can get some Materia, and these people want to let the bird hatch its egg. Of course, they suck at fighting and they’re poor, so they’ll need soldiers to provide the muscle, and you to provide the funds.
What’s more interesting however, is how your responses affect your party member’s disposition. When you get a chance to respond the first time you can say “I guess so” which will massively boost the dispositions of your allies, especially Barret (+3 Aeris, +5 Barret, +3 Tifa, +2 Yuffie) while saying “Not interested” has the opposite effect (-3 Aeris, -5 Barret, -3 Tifa, -1 Yuffie). The second time you get a chance to respond you can repeat the process; saying “All right” will give the same massive boosts as above, and repeating “Not interested” will likwise tank dispotion as much as it did last time. That’s a net gain for Barret of +4 disposition, which will go a good way towards “Best Bromance”.
Agree to help them fight, then head east to find a rope ladder which leads down to a room where you can save your game at the Save Point and rest… for free! Rest up, return to the upper level, and climb another rope ladder next to an “ITEM” sign to find, well, two shops, one selling basic items, the other selling basic Materia.
Item Shop
| Item | Gil |
|---|---|
| Potion | 50 |
| Phoenix Down | 300 |
| Hyper | 100 |
| Tranquilizer | 100 |
| Tent | 500 |
Materia Shop
| Item | Gil |
|---|---|
| Fire Materia | 600 |
| Lightning Materia | 600 |
| Ice Materia | 600 |
| Restore Materia | 750 |
The Fort Condor Mini-Game
Buy what you need then climb down the ladder back to the level with the old man. Find - and climb - yet another rope ladder to the west then head up some stairs to reach an observation post, where the man you talked to outside will be… observing. Talk to him and he’ll give you the run-down, telling you all about this mini-game: Shinra will send some generic foes (like Beasts, Barbarians, and Commanders) up the side of the mountain, and you have to hire, place, and command your own batch of generic troops and repel the enemies. In general each foe has a counter - Attackers defeat Beasts, but lose to Barbarians, for example. You can mix and match units, set up traps and all that sophisticated stuff… or you can just hire “Fighters” en mass and spend whatever Gil it takes to defeat the Shinra troops. It’s only complicated if you want it to be.
You can also choose to give them money instead of directing combat yourself, but this is, honestly, a waste of Gil. Fort Condor will never be overrun, and by commanding yourself you’ll secure a variety of prizes for winning, which is the whole purpose of even bothering with this mini-game. So, either put in the time and Gil, or don’t bother with it at all.
Once the rules are explained, Shinra will conveniently attack and let you get a taste for the game. Agree to go ahead and deploy your troops, which you can only do on your “side” of the battlefield. Again, it might be inelegant, but you can just load up Fighters - starting with about a dozen of them spread along a line on your side of the mountain should be fine. Once done, have them advance to attack any enemies that show up, hopefully moving so you’re engaging them near the bottom of the battlefield, and… yeah, just make sure more of your Fighters are attacking any one foe, and the war of attrition will favor you. That’s all you need to do to win all these battles: a dozen Fighters to start, blitz to the bottom, quickly kill all the enemies, and the fight will end in short order, often before you’ve lost a single unit.
On the other hand, if you’re not quite fast enough and the battle drags on, a Commander unit will show up, which you should mob as soon as its minions are defeated. When it dies, you’ll win the battle. You’ll “lose” if any unit reaches the observation shack at the top of the mountain, behind your lines. Of course, this isn’t a game-over, it just means you’ll have to fight a Grand Horn monster in a conventional battle. Winning tends to get you a good bit of Gil, and the battle is laughably easy but you won’t win the special reward you’d otherwise get for succeeding at the mini-game. Also, for every surviving soldier on the field you have, you’ll get a refund of 200 Gil because dead soldiers keep their money, but living ones decide they only really needed half their pay. Or something. Anyway, you only get this refund if you won the battle conventionally.
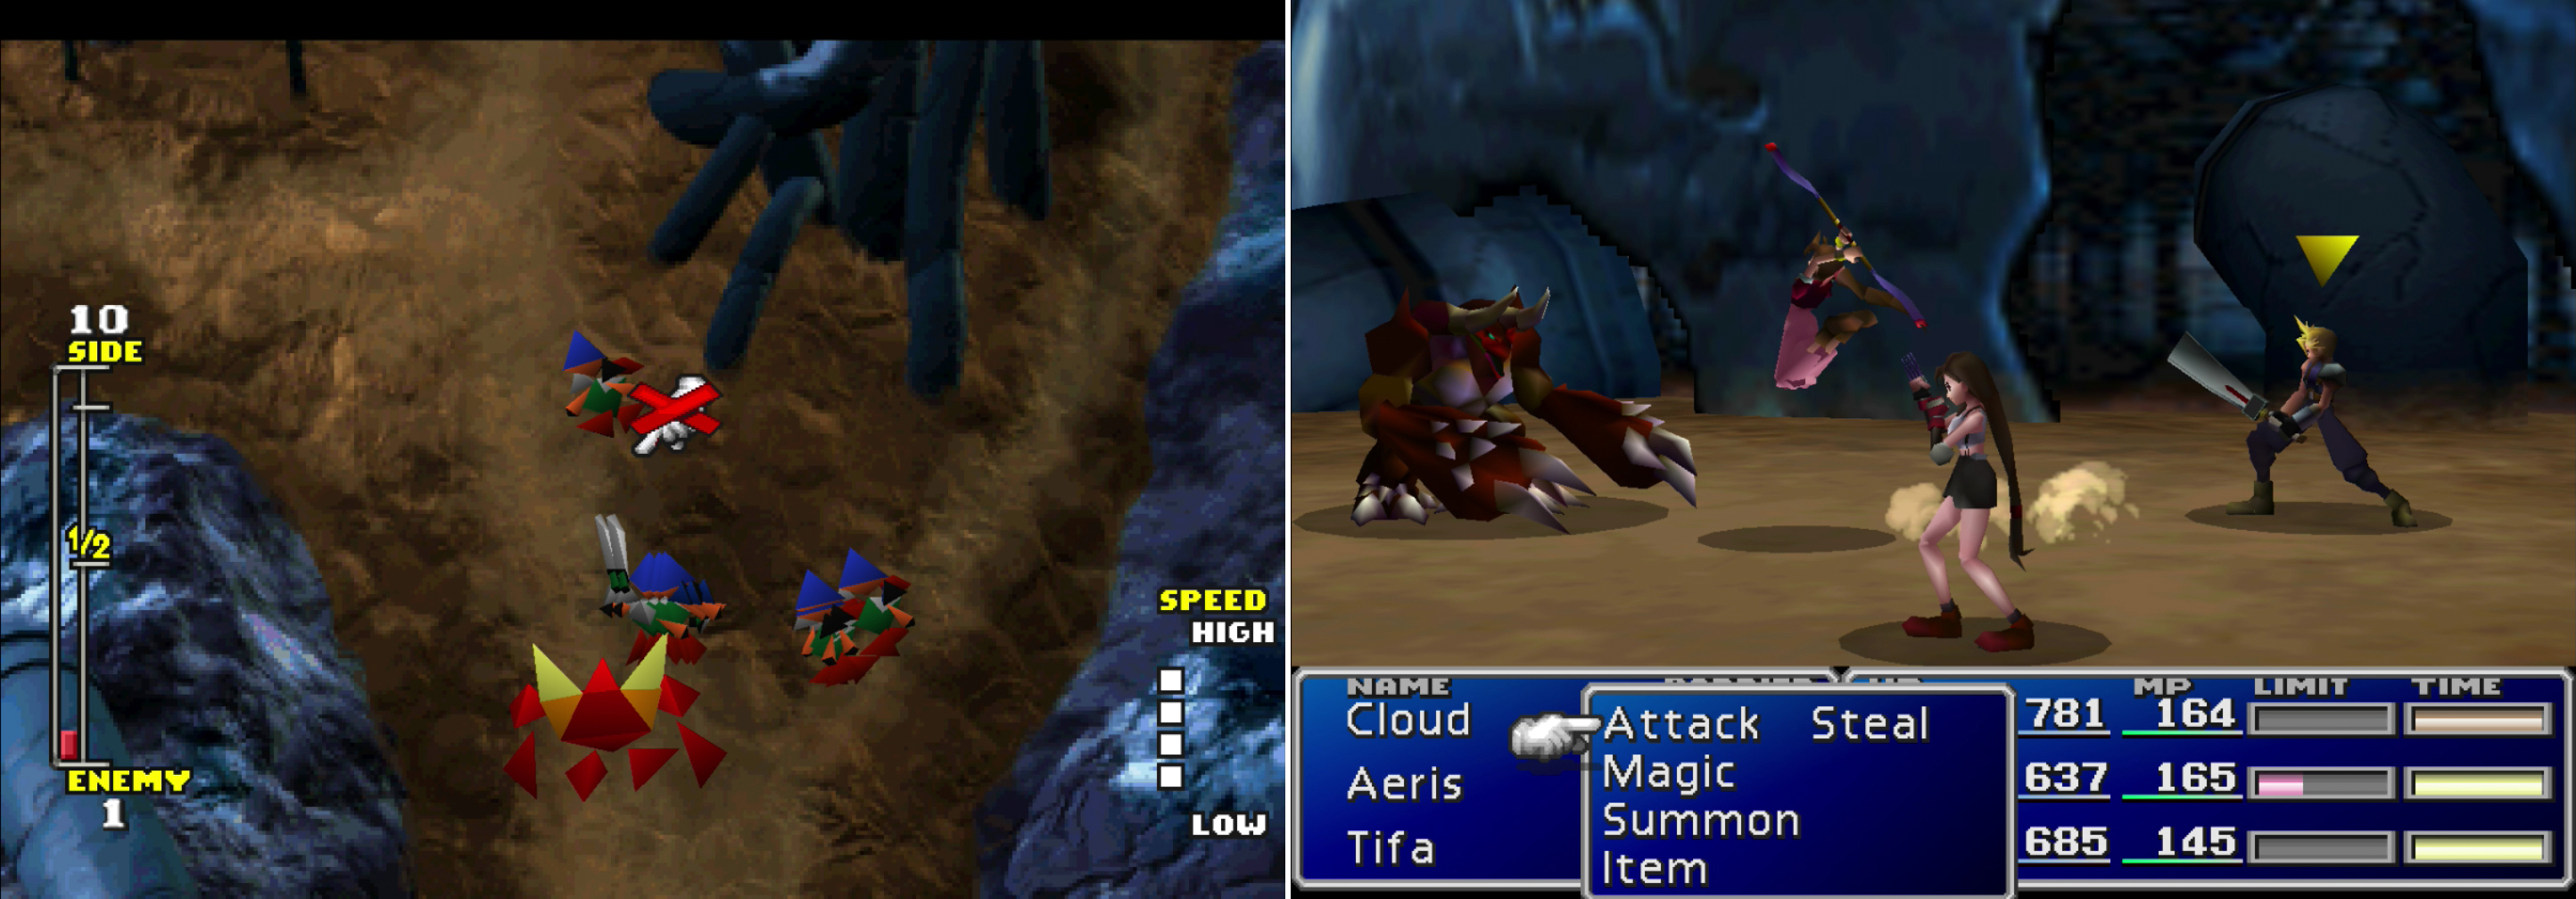
Hire mercenaries and fight off the Shinra attackers (left). If you fail you’ll have to personally fight off the enemy commander, and forfeit any reward you otherwise would have obtained (right).
The first time you’ll win a Magic Comb , which is a nice weapon upgrade for Red XIII, having 13 more Attack than his Mythril Clip default equip. It also has three Materia slots with double the normal growth rate. If you’ll remember, this means that Materia equipped in these Materia slots will earn twice as much AP from battles as normal. Once you’re victorious you can leave Fort Condor. You’ll have to return here periodically (and often at stupidly inconvenient times) to fight off Shinra troops; assuming you care about the other rewards. These rewards can be somewhat valuable, but none of them are really unique.
No Comments