
| Important Items in this Area | Enemy Skills in this Area |
|---|---|
| Battle Trumpet | Matra Magic |
| Leviathan Scales | |
| Scimitar |
The first story mission after recovering Cloud is to snatch a third chunk of Huge Materia from Shinra’s clutches. If you bred and raced Chocobos and subsequently explored the Ancient Forest, it could have been a while since you’ve done anything story-related… and a party which did those optional steps will be much, much stronger than one that did not. Either way, this mission isn’t too tough, but some of the optional exploration after it will force us to fight some of the baddest non-boss enemies in the game. Once again, it’s highly suggested you bother with Chocobo breeding and racing before continuing on, as it’ll make the game much, much easier in the long run.
To the Underwater Reactor
Return to lower Junon and pay the Shinra guard 10 Gil to use the elevator and make your way across the store-lined street of upper Junon, past the lifts used by Rufus and Heideggar a lifetime ago, and to the street leading to the Underwater Reactor. Along the way Cloud will realize that the massive Junon cannon, Sister Ray, is missing. Shinra’s up to something, but it’s something to worry about later.
On the road to the Underwater Reactor, head south-west to reach the Shinra officer drilling his troops, whom he decides his troops are ready for combat. Unfortunately, when he puts this to practice, he’ll find out that they’re not quite up to snuff. Now you will be able to normally fight the enemies that previously could only be fought by triggering an alarm. By now, however, they’re just trash mobs.
Continue south-west to reach an elevator and ride it down, during which some Shinra soldiers will make a bet they can’t live up to. Dispatch the two Submarine Crew soldiers, leave the elevator, and dispose another pair of them, then continue south-east down a tunnel to reach the next area. Travel south-west through an uninteresting transitional screen, then south-east through another, stopping only to save your game at the Save Point near the end of the tunnel. Once done, ride another elevator down to reach the Underwater Reactor, then head north through a maintenance tunnel to reach a scenic, glass, underwater tunnel.
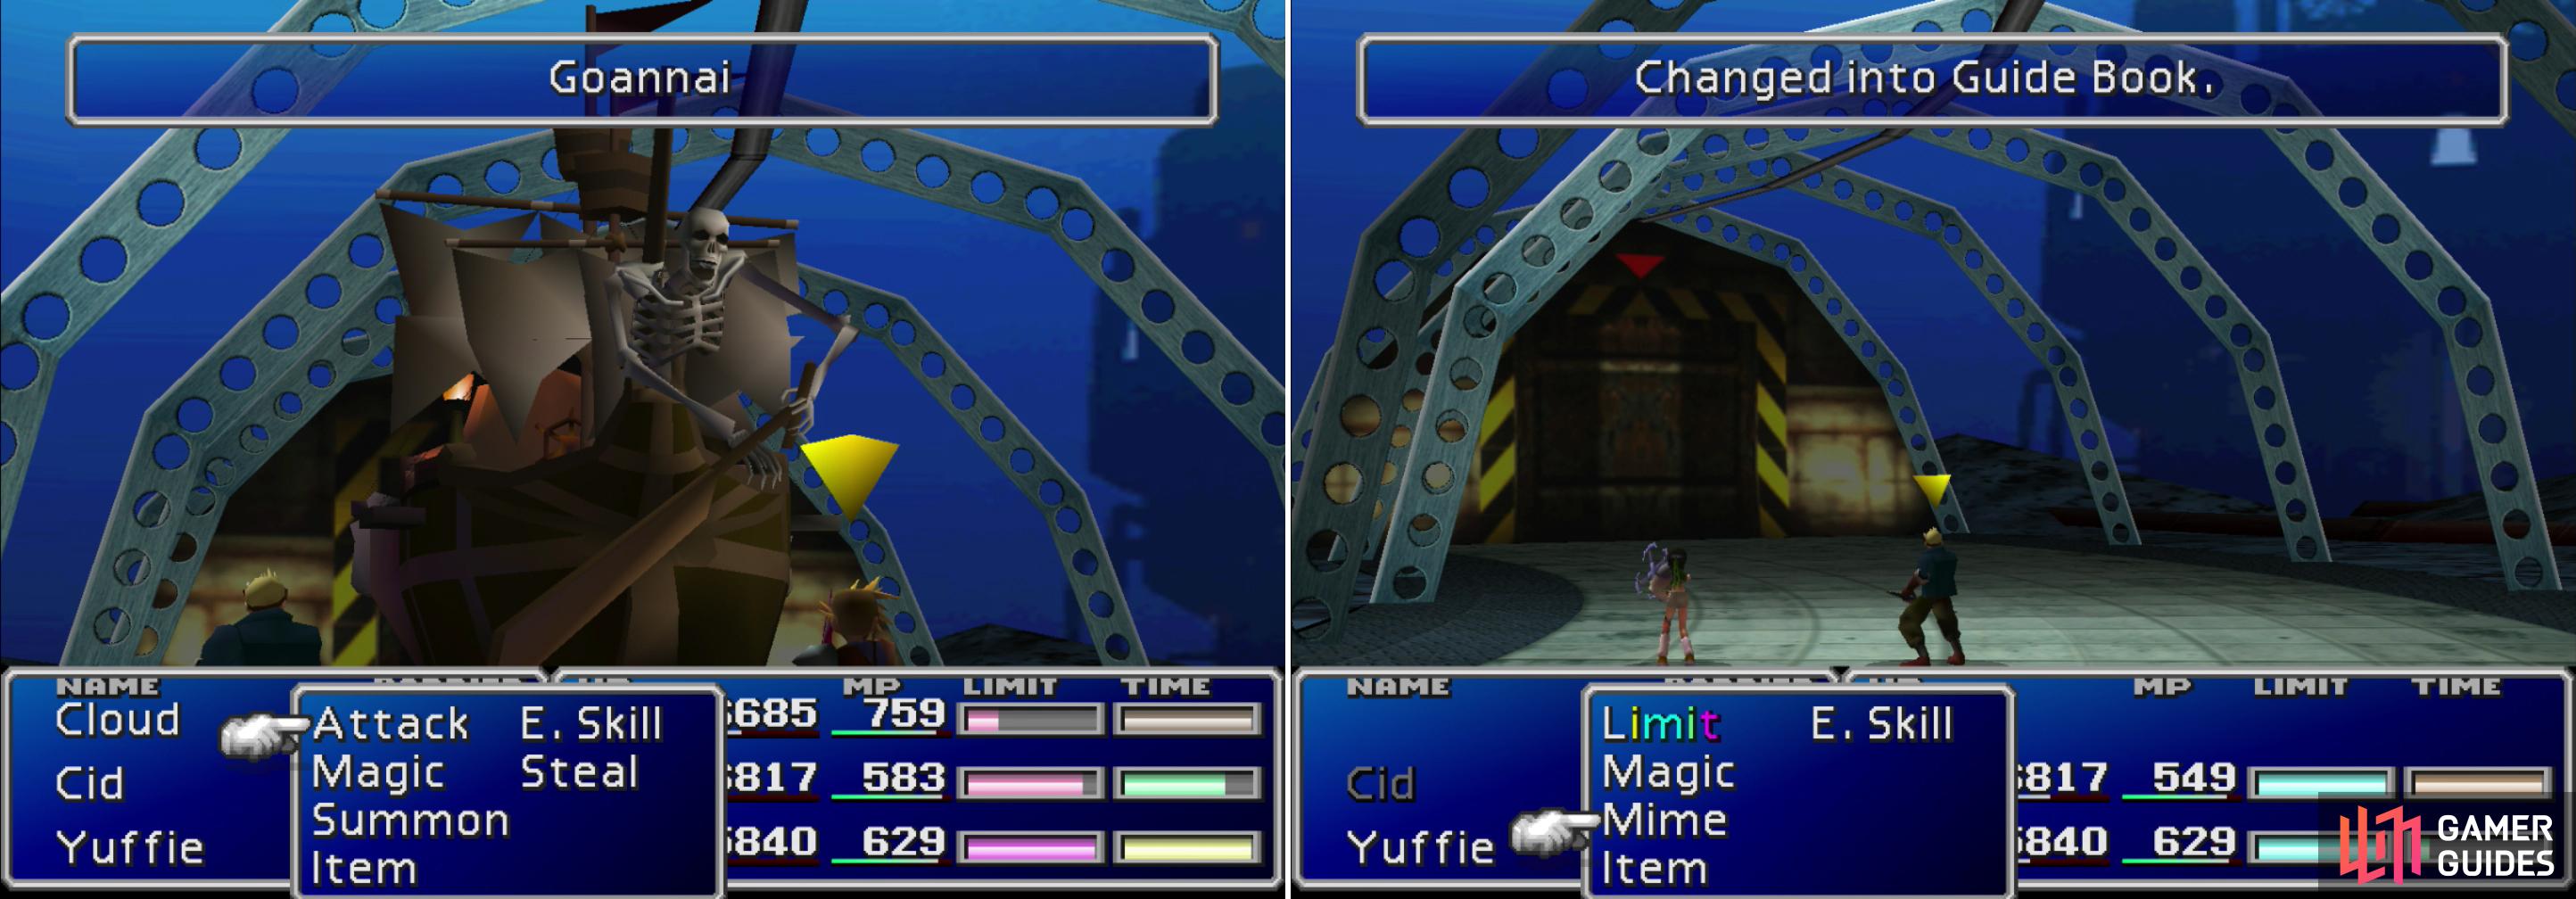
The Ghost Ship’s “Goannai” attack removes a character from the battle (left), but it’s worth facing this foe, as you can Morph it into a Guide Book (right).
Make your way through the glass tunnel and press a shiny red button to ride an underwater elevator down. Exit the elevator and run west along a metal walkway and past some submarines to reach the next screen. Save your game at the Save Point, then continue north to reach a room with a patrolling Shinra soldier, and a pair of more idle soldiers to the east. Defeat all three, then find another pair of doomed Shinra troops further east; this time a pair of Underwater MPs.

You can rob Underwater MPs for their unique Shinra Alpha armor (left). Shinra snatches the Huge Materia from the reactor right before your eyes! (right)
Go through the doorway to the two Underwater MPs were guarding and proceed east along a metal walkway to see Shinra pluck the Huge Materia from the Underwater Reactor. Right in front of you, too! How rude. Continue east to find Reno, who will attempt to delay you as the Huge Materia is shipped away on a bright red submarine.
Boss Battle: Carry Armor
Carry Armor isn’t too tough, despite having a boatload of HP. It has a few attacks to watch out for; its “Lapis Laser” will hit the whole party for around 1300 damage, while its normal attacks deal over 400. Nothing that you haven’t dealt with before. Its most troublesome attack, however, is its “Arm Grab” attack, which will take a character of the fight until the arm is destroyed, meaning this boss can potentially eliminate the offensive capabilities of two of your characters. While imprisoned, each victim will be subjected to three of Carry Armor’s physical attacks each round. Carry Armor selects its “Arm Grab” victims based on their HP, favoring the characters with the most HP as targets.
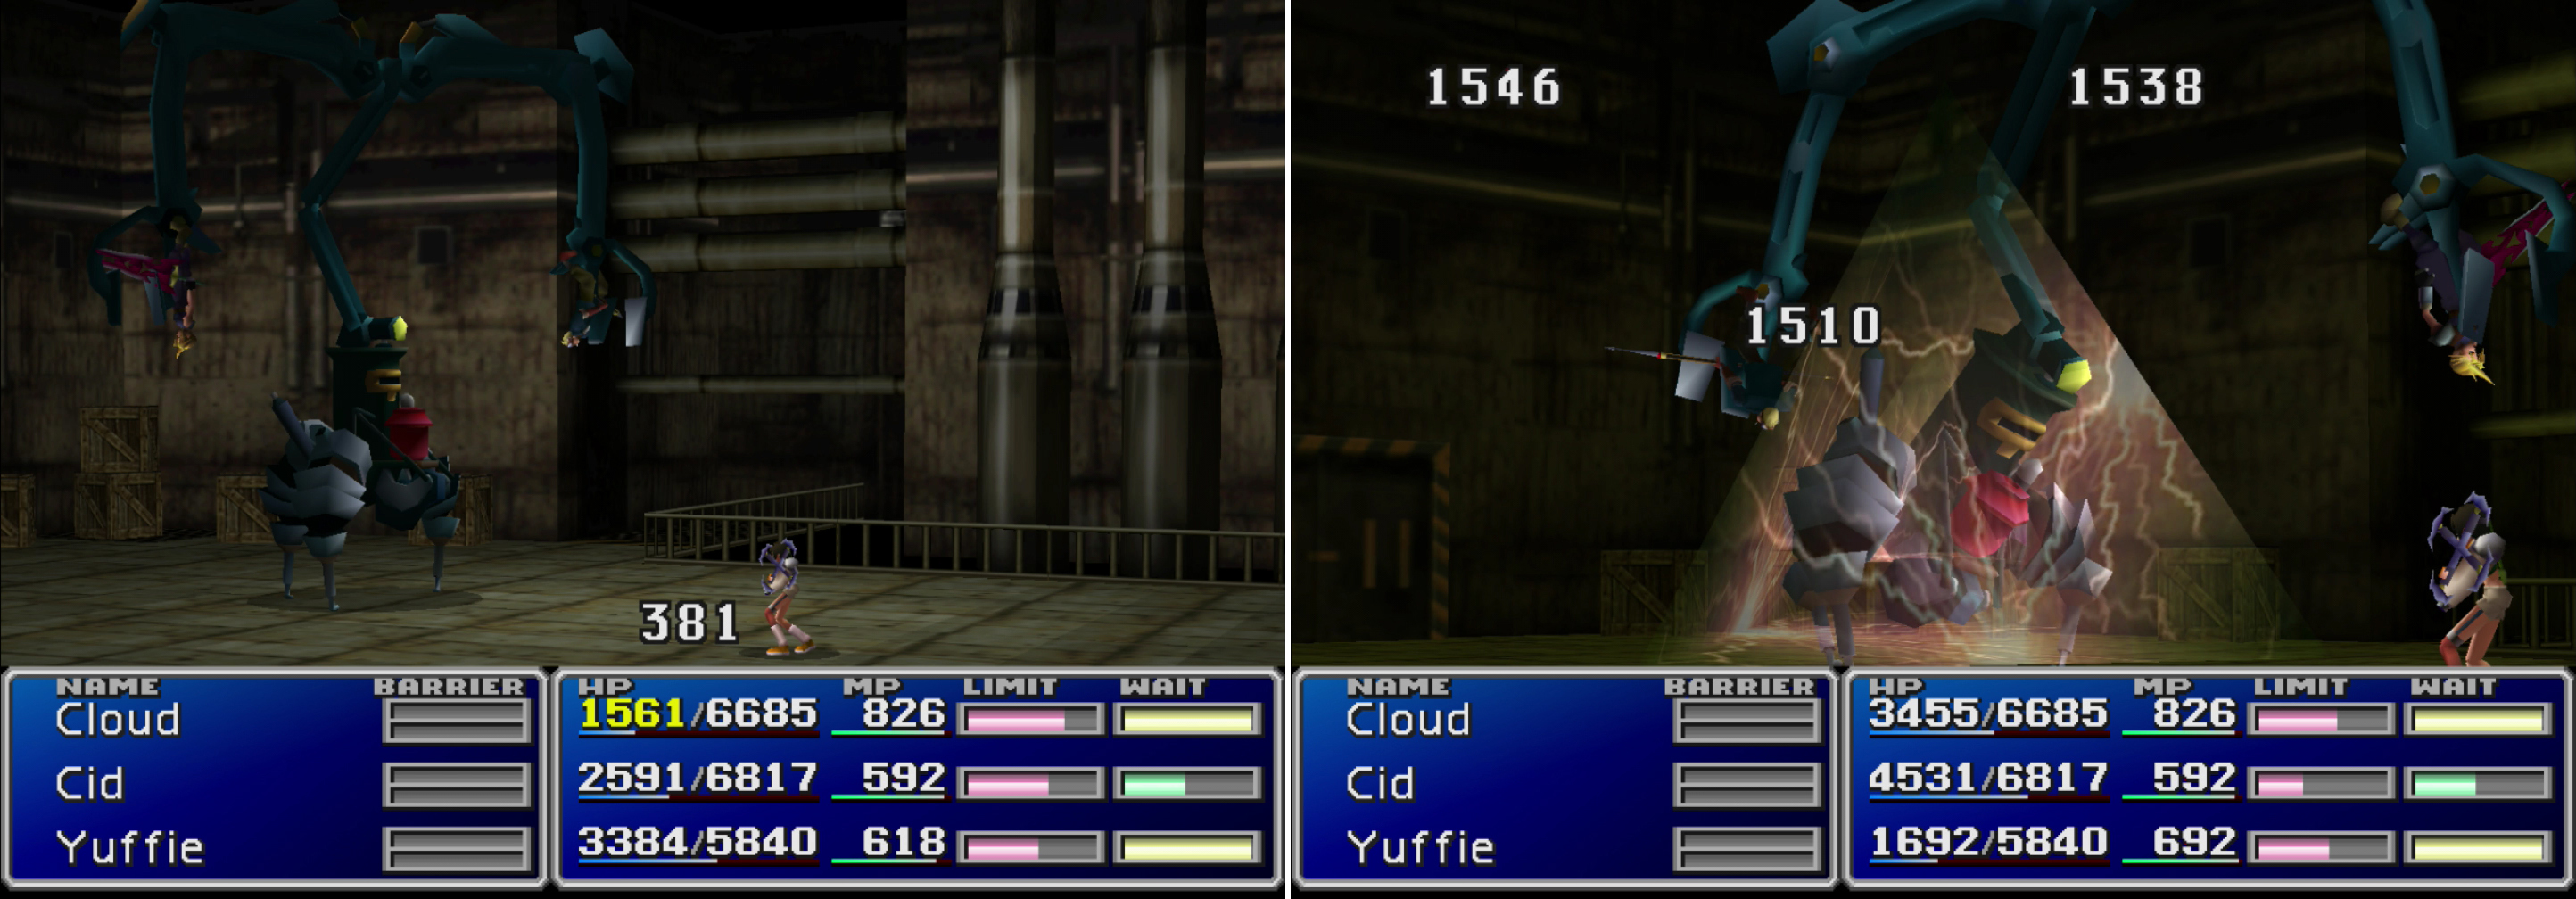
The Carry Armor’s arms will grab characters, rendering them helpless and occasionally damaging them (left). “Trine” is an effective attack to use against the lightning-weak Carry Armor (right).
With “Big Guard” and “White Wind” at your disposal it shouldn’t be too hard to keep whatever characters remained unimprisoned by Carry Armor alive and well. If you hit the body of Carry Armor with two “Magic Hammer” spells, you’ll deprive it of the ability to use “Lapis Laser”, and reducing it to its relatively weak melee attacks all but ensures victory. As for your offense, it’s weak against lightning, which just screams for you to bombard it with “Trine”, two rounds of which should leave Carry Armor in pretty bad shape. Once its arms are destroyed and its MP drained, just pelt it with physical attacks until it falls. If you were diligent about Chocobo racing and breeding, you can also use your Knights of the Round to end the fight outright.
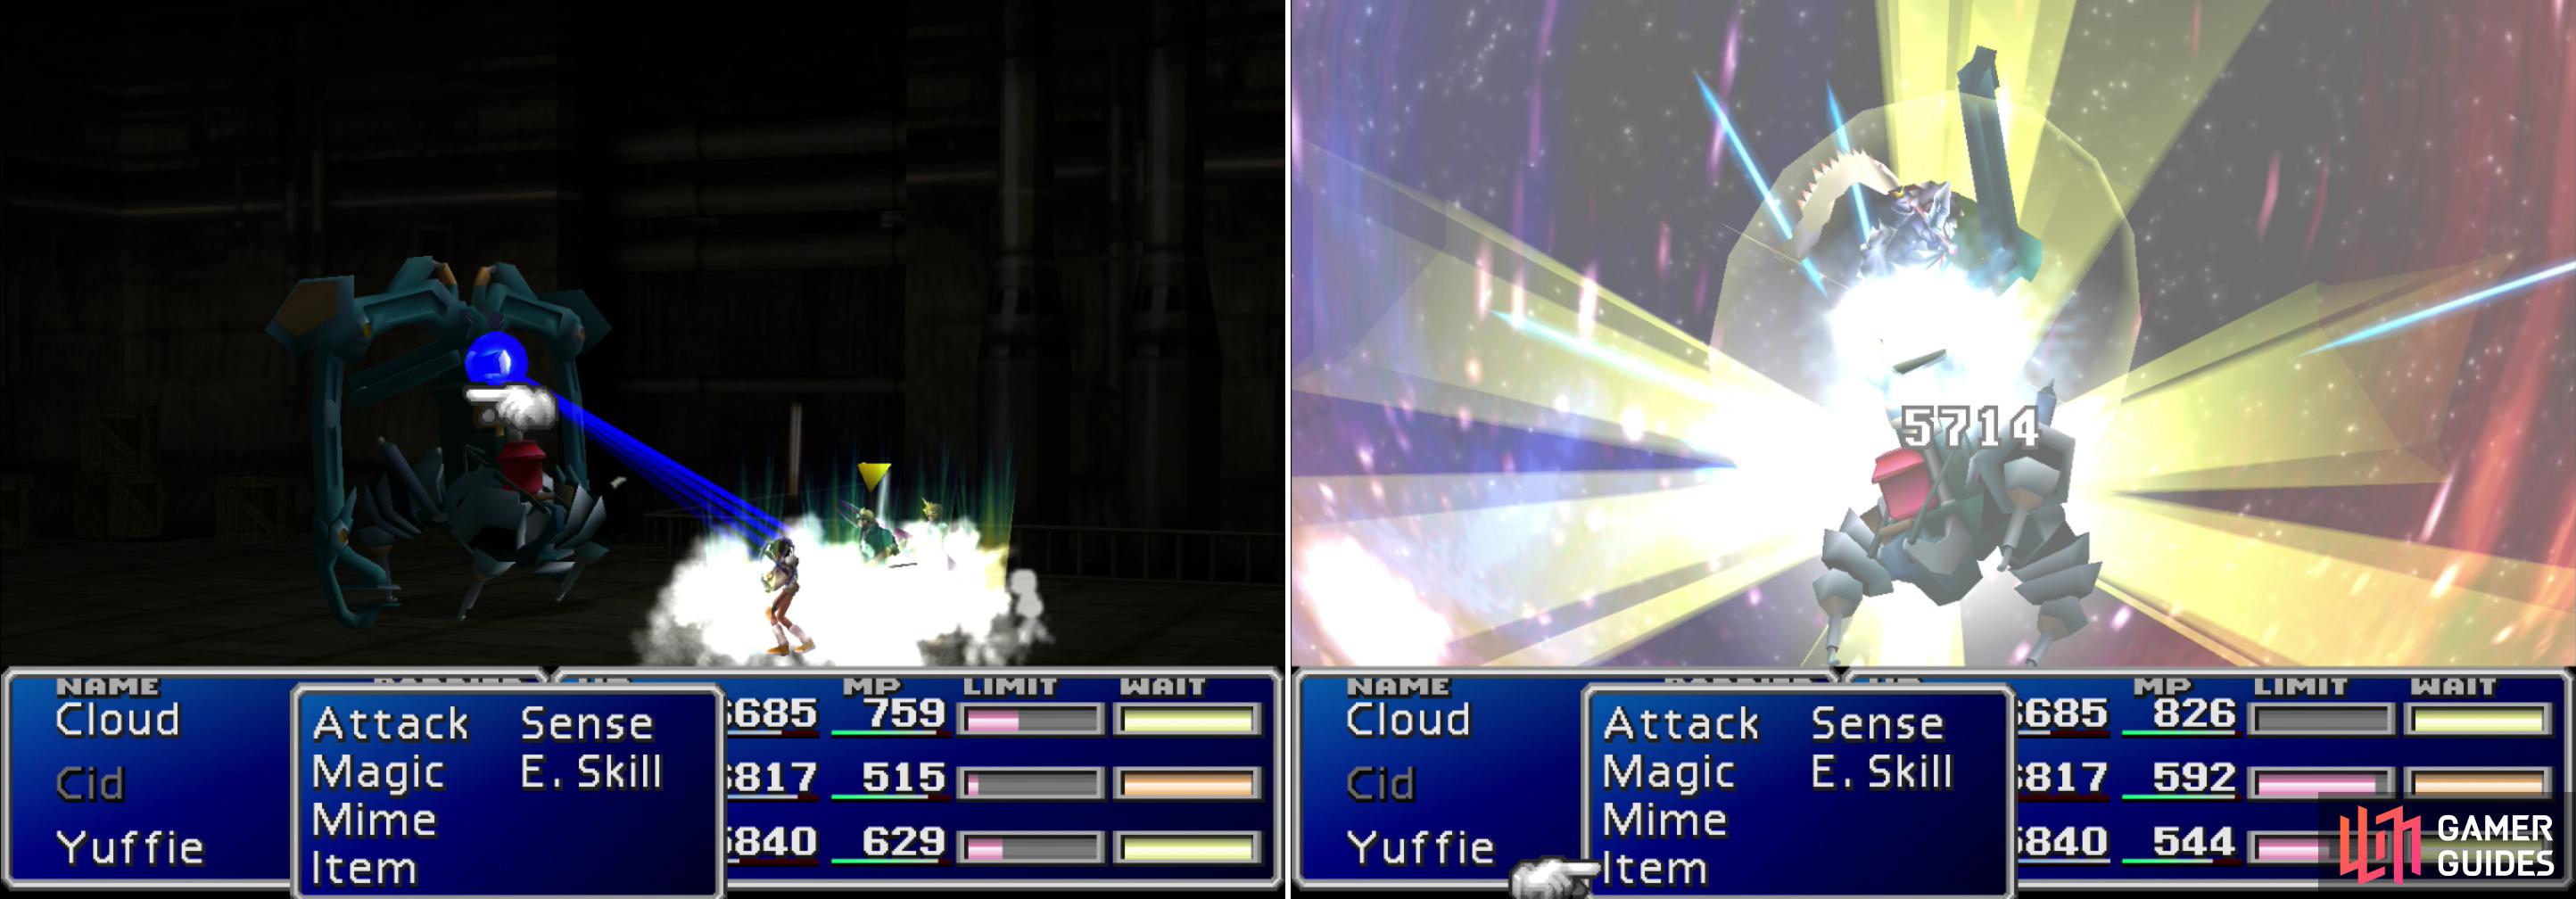
Aside from its arms, Carrry Armor’s “Lapis Laser” is its most powerful attack (left). If you have it, Knights of the Round will end the fight in one casting (right).
| Carry Armor | Stats | Left Arm/Right Arm | Stats |
|---|---|---|---|
| HP: | 24000 | HP: | 10000 |
| MP: | 200 | MP: | 100 |
| Weaknesses: | Lightning | Weaknesses: | Lightning |
| Resistances: | Gravity (negates), Poison (negates) | Resistances: | Gravity (negates), Poison (negates) |
| XP: | 2800 | XP: | N/A |
| AP: | 240 | AP: | N/A |
| Steal: | N/A | Steal: | N/A |
| Drop: | God’s Hand | Drop: | N/A |
| Gil | 4000 | Gil: | N/A |
Search and Destroy
After the fight you’ll win the God’s Hand , a nice weapon for Tifa which boasts 86 Attack, a whopping 255% Attack% rating, and four (two pairs of joined) Materia sockets. Don’t get caught up by the music and the supposed urgency of the situation; head west and loot a chest to obtain the Battle Trumpet , which is a weapon for Cait Sith (95 Attack, but no Materia growth in its three pairs of joined Materia sockets). Once you have that, head east, then north across the docks to reach the drab submarine atop which a host of Shinra soldiers are nervously running in place. Search a chest near the ramp to the ship to find a Scimitar , which… well, shows that Squaresoft didn’t know what a Scimitar is (or the translators didn’t). Despite the mis-naming, it’s an 86 Attack weapon for Cid with two joined Materia sockets and Triple AP Growth, making it the second most potent AP-growing weapons in the game, behind only Cloud’s Apocalypse. Continue west to find yet another chest, this one holding Leviathan Scales , which will allow us to get some treasure shortly.
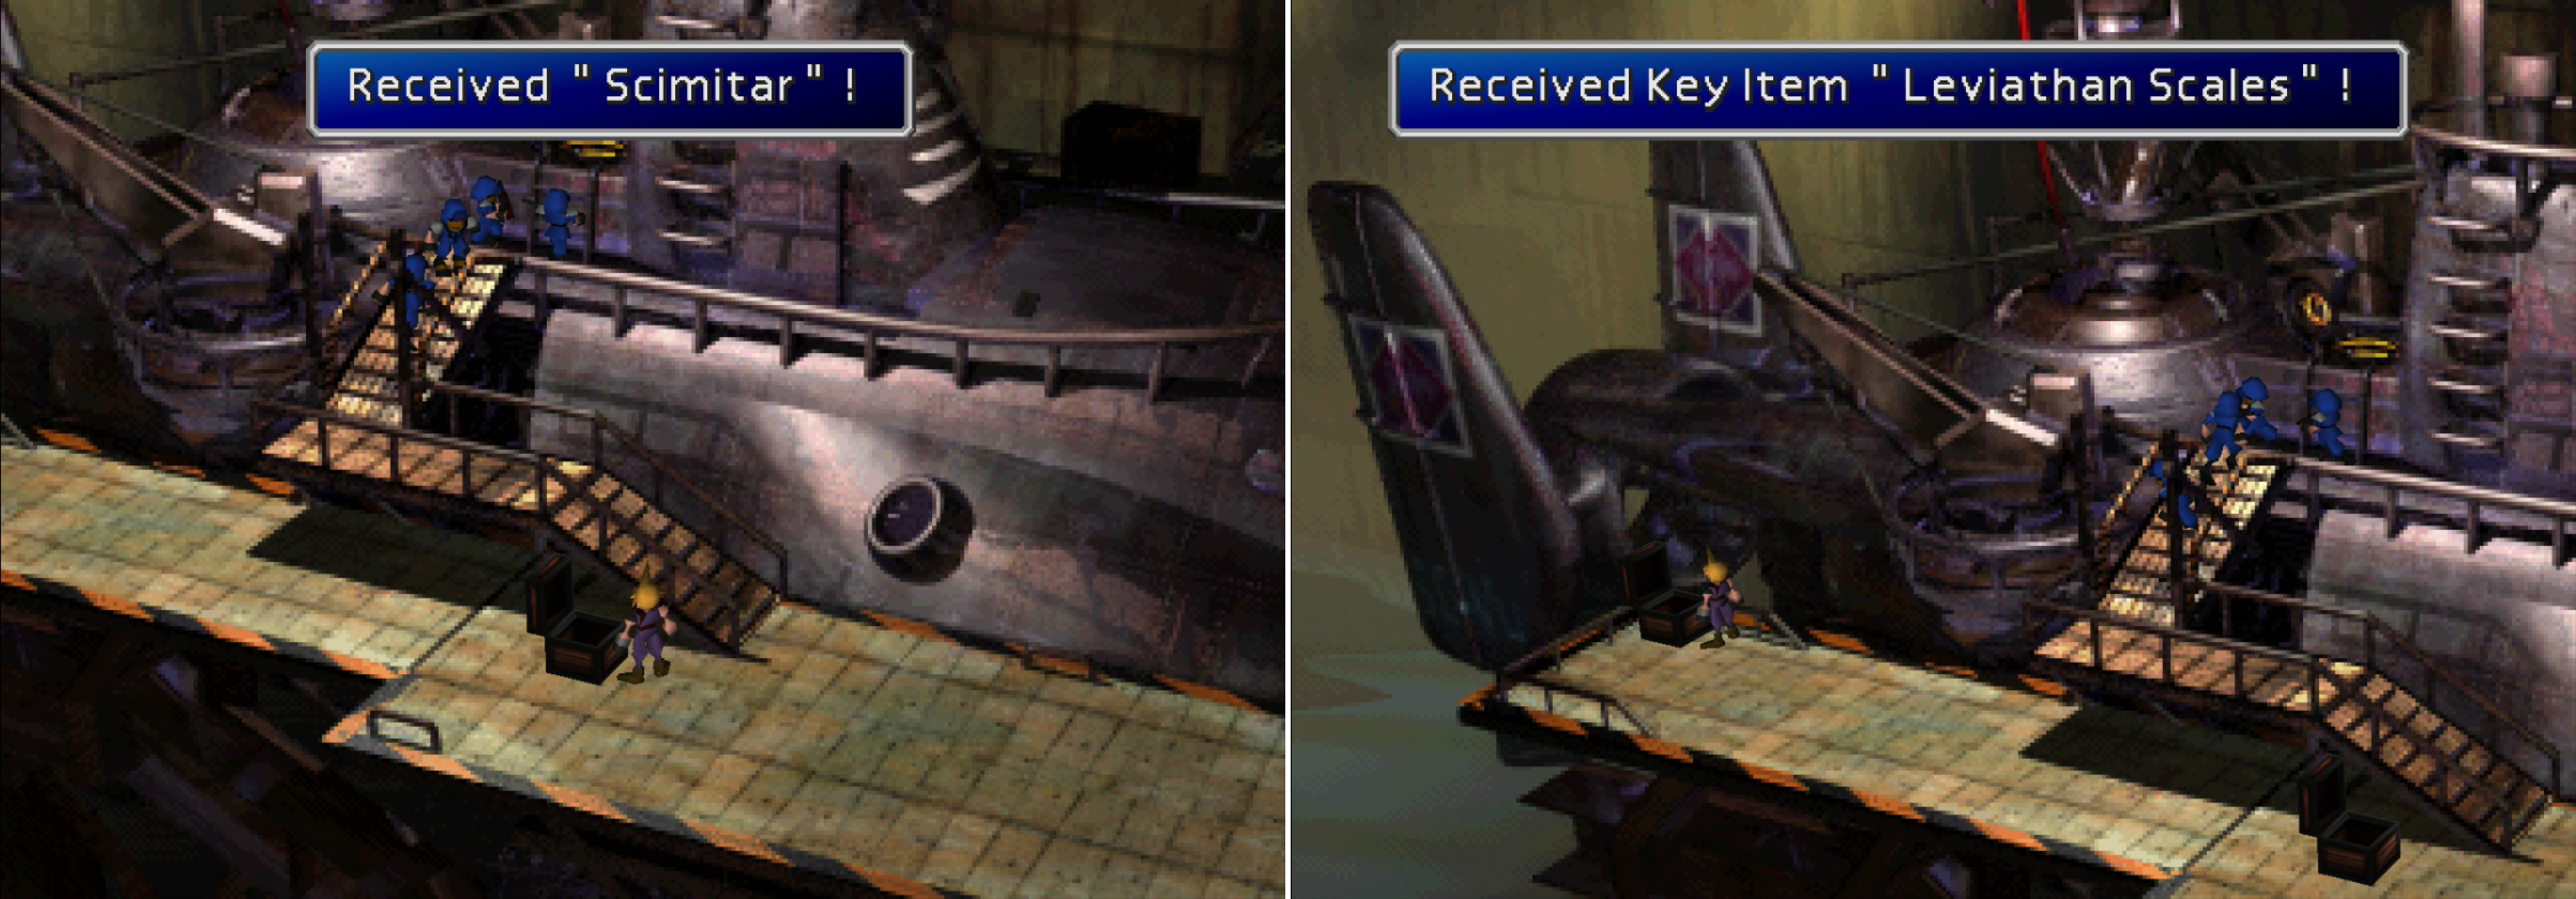
After defeating Carry Armor, pick up the Scimitar, a great weapon for Cid (left) and the Leviathan Scales (right) an item that’ll allow you score even more gear, shortly.
Once all that sweet loot belongs to you, make your way up the gangplank and defeat two pairs of Submarine Crew soldiers, the last obstacle preventing you from entering the submarine. Once inside the sub you’ll have to kill another three Submarine Crew soldiers who catch you in a pincer attack. After the fight save at the nearby Save Point, as there’s a mini-game coming up, and failure should not be viewed as an option.
Make your way through a door near the Save Point to reach the bridge, where you can either fight some more puny Shinra troops, or take them hostage. Afterwards Cloud will realize that he’s not a fan of submarines before realizing that so long as he’s piloting it, he’ll be fine. He might not spaz out anymore, but he’s still a dink. Head up to the controls and read the Submarine Operation Manual to learn the basic controls; [Triangle] speeds the submarine up, [Square] fires torpedoes, and [X] slows the submarine down ([Menu], [Switch] and [Cancel] on PC).
Once done, proceed with your mission; that being to shoot down the red submarine trying to make off with the Huge Materia. You’ve got ten minutes before it gets away and you lose the Huge Materia forever, in which event, you’re better off reloading the game. This mini-game isn’t too hard, just stay behind the red submarine, don’t lose sight of it, and fire torpedoes at it when the red targeting reticle shows up. When it sinks, Cloud will celebrate, then get a message from Shinra, who proves their ineptitude yet again by telling him their next plans. After exiting the submarine, you’ll get the controls for the vehicle on the world map. Where are you getting the crew and fuel for all these devices? Whatever, that’s unimportant. What matters is, now you have a submarine! Nothing is now hidden from you, land, sea, or air.
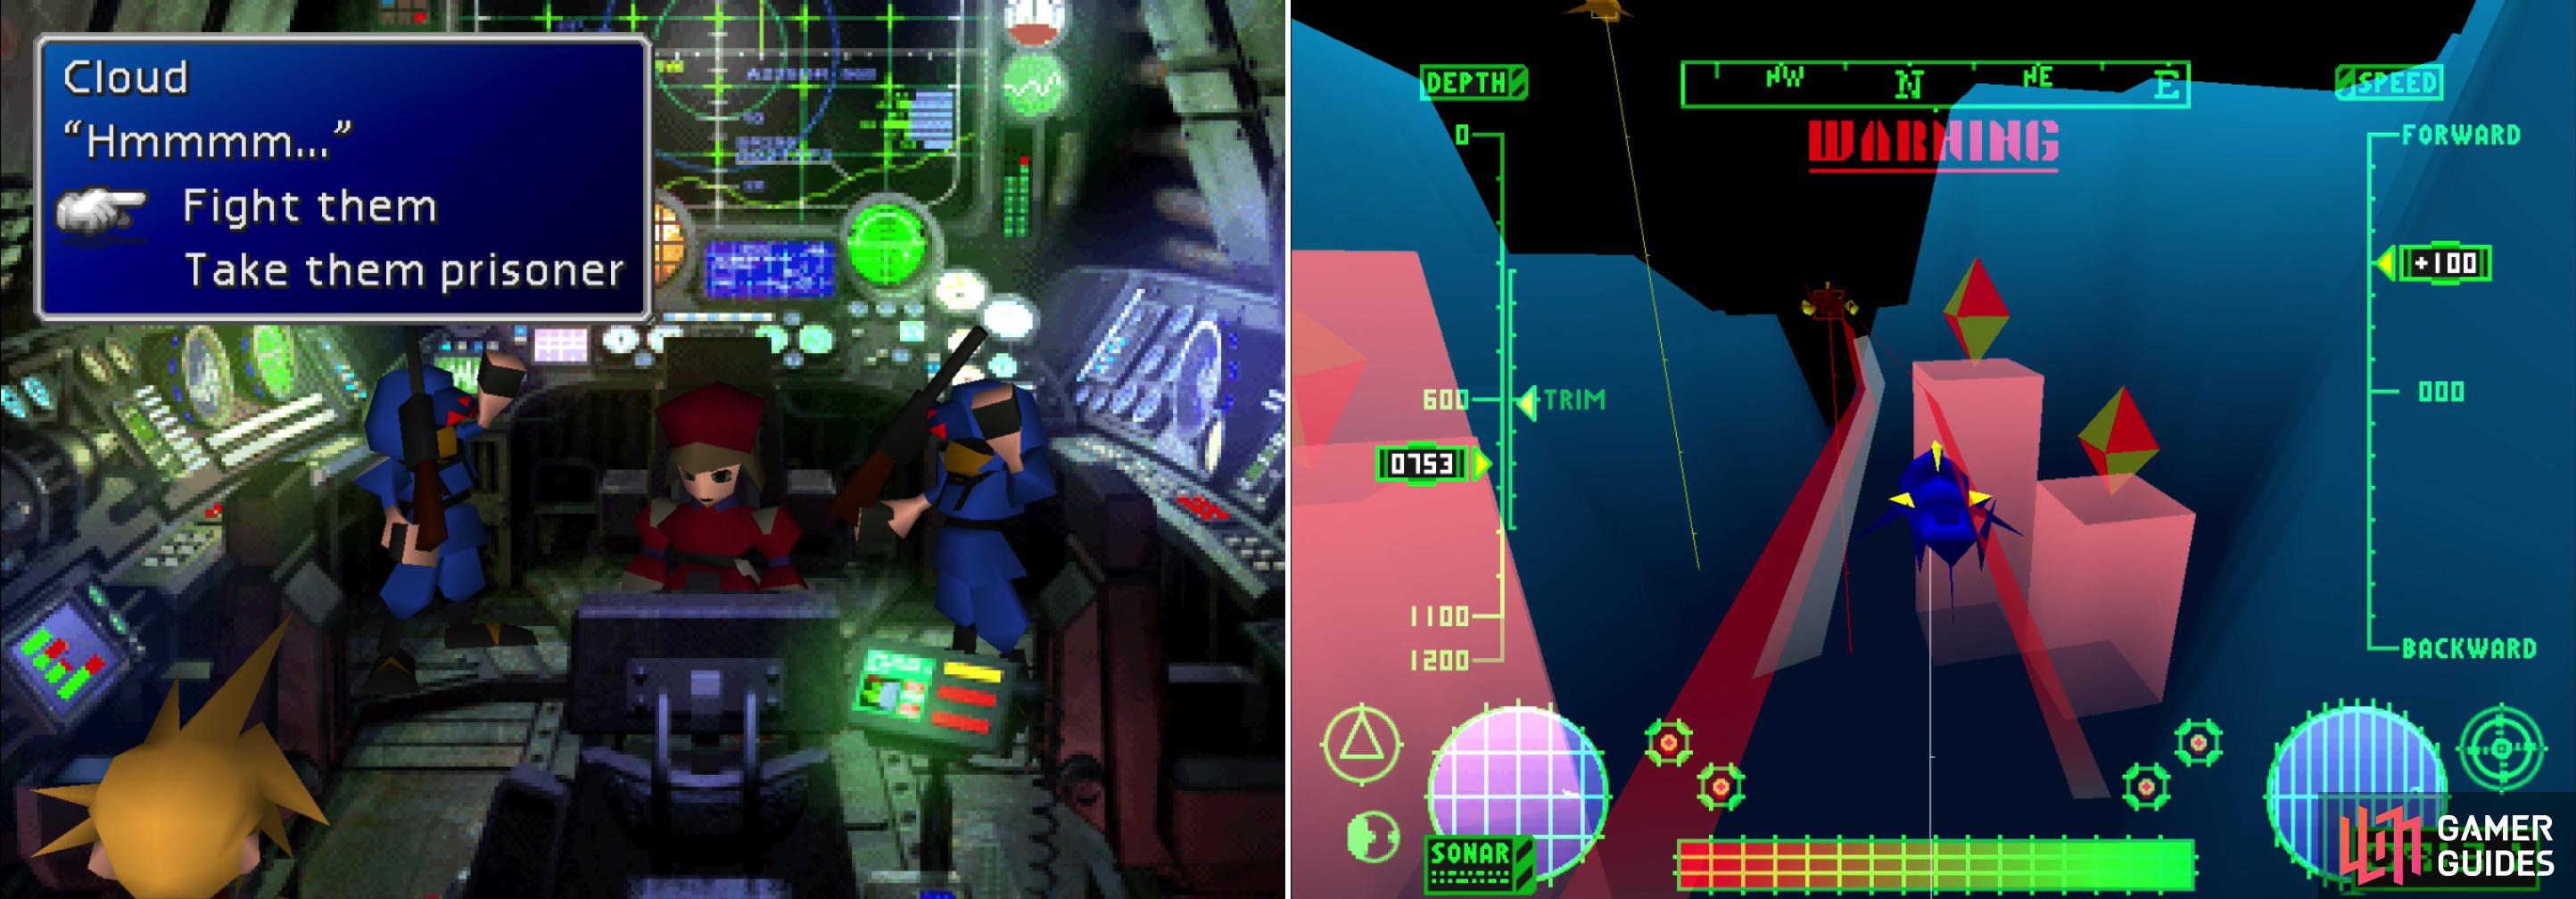
Either kill or capture the command crew on the submarine (left) then hunt down and destroy the enemy submarine with the Huge Materia on it! (right)
Return to lower Junon yet again and make your way to the airport by paying the guard at the elevator 10 Gil (he’s almost earned enough Gil from us to buy himself a Potion!), riding said elevator up, and exiting the room beyond by heading through the exit to the east. Once here, head towards the huge cargo elevator to witness the cargo plane Gelnika take off. Looks like the last piece of Huge Materia is already headed to Rocket Town. Before you chase the Shinra, though, you have a new vehicle, which means there are new places to explore, new loot to obtain. If that appeals to you (and it should, considering the quality of the loot involved), read the section “Exploring With the Submarine” . On the other hand, if you want to continue with the story, skip ahead to the “Space Race” section. As with all optional content, grabbing the loot in “Exploring With the Submarine” comes recommended, especially if you already did the “Chocobo Breeding and Racing” and “Ancient Forest” sections, earlier.
No Comments