
| Important Items in this Area | Enemy Skills in this Area |
|---|---|
| Choco/Mog Materia | Beta |
| Chocobuckle | |
| L4 Suicide |
To the Chocobo Ranch
The next leg of your journey can be somewhat difficult. If your levels are still in the low teens, or you’re itching for some cash (or both), consider grinding near Kalm for a bit and steal Ethers from Kalm Wolves. Not only will this probably boost you a bit, but having a few spare thousand Gil will come in handy. When you’re ready to go, head south-east from Kalm, through a pass with mountains on either side, until you reach the grasslands beyond. Here you’ll find new foes, the Chocobo Ranch, and some Choboco tracks on the ground.
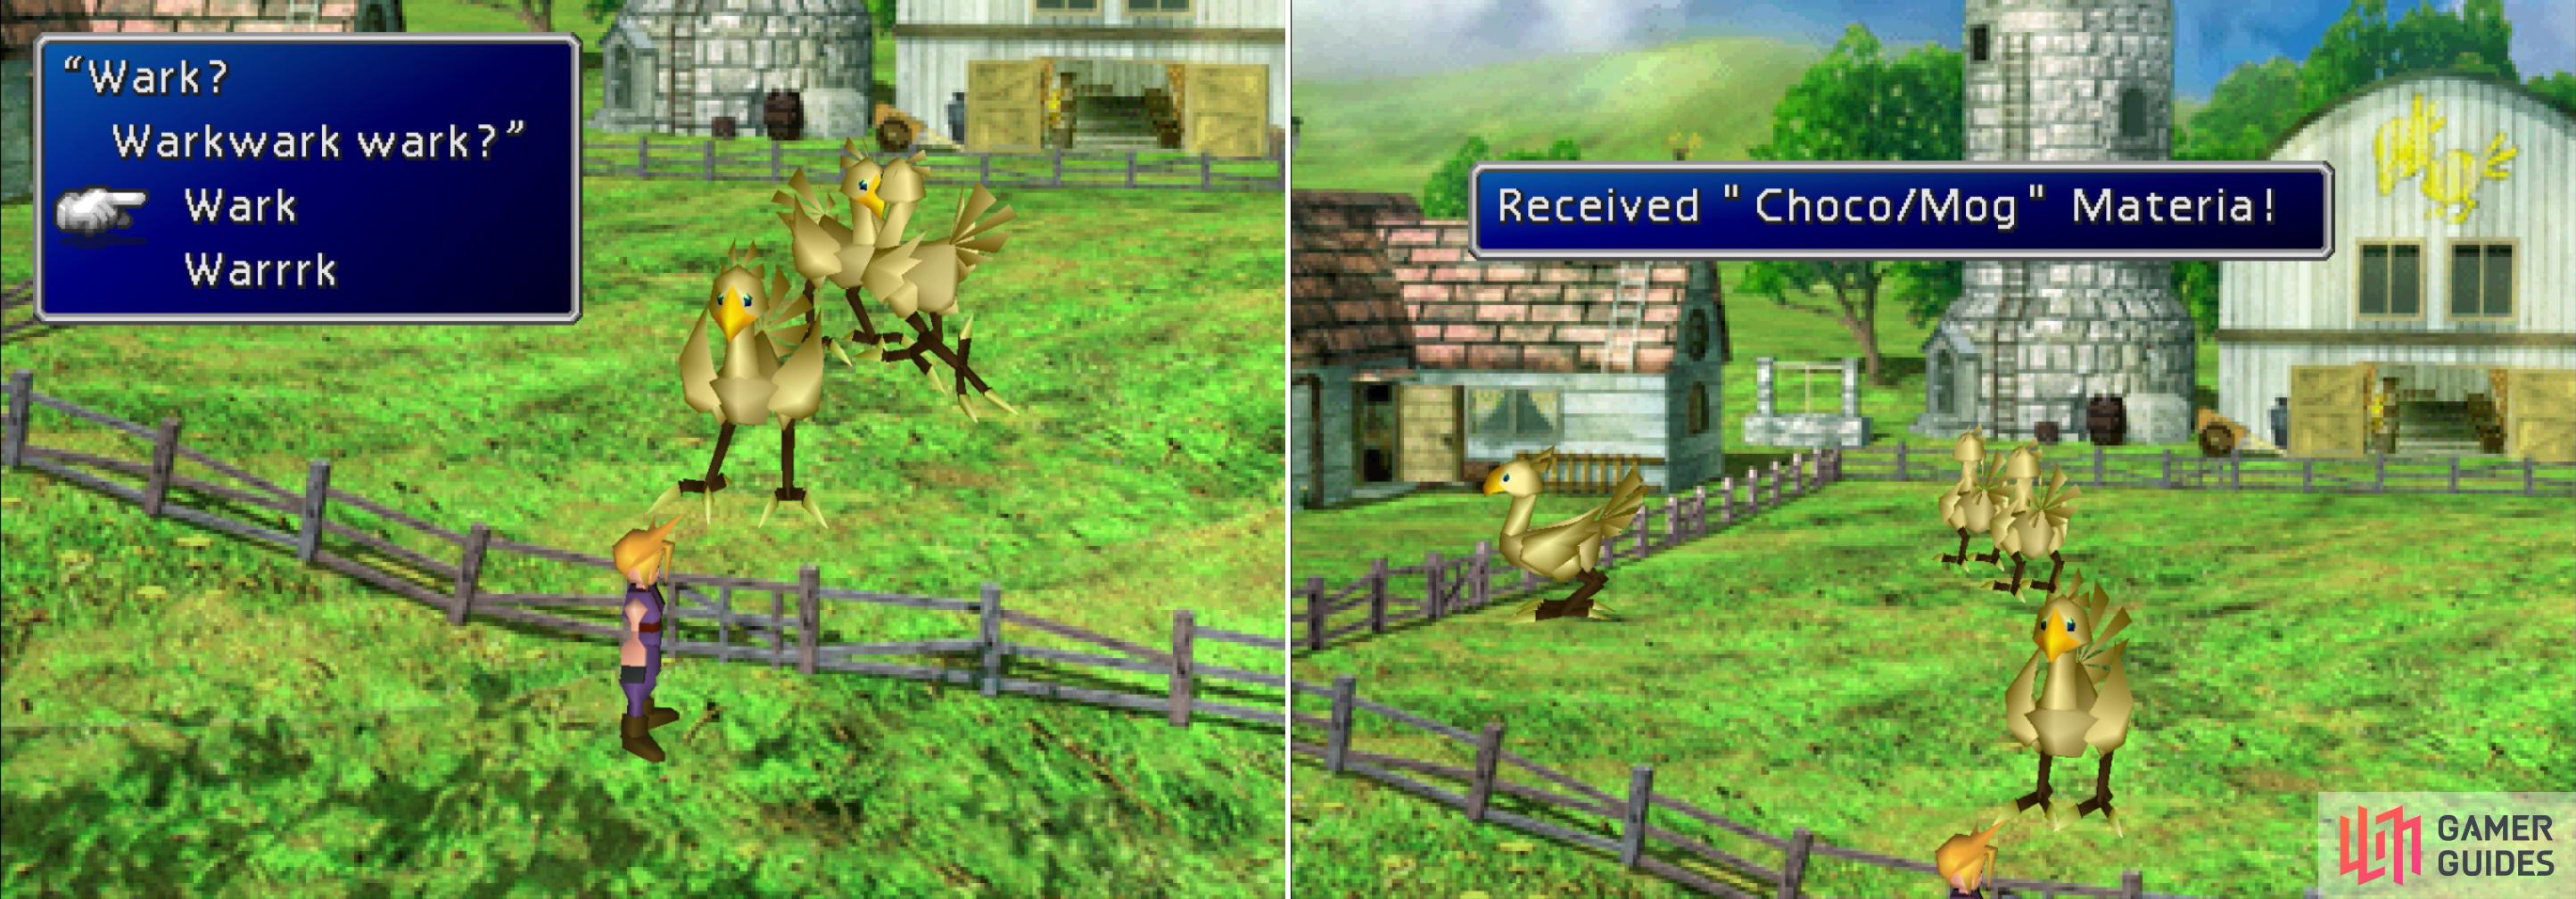
Respond to the Chocobos correctly (left) and, after their elegant dance, you’ll obtain the Choco/Mog Materia (right).
Enter the Chocobo Ranch and talk to the Chocobo near the gate and respond to its inquisitive “Wark? Warkwark wark?” With a confident “Wark” of your own. This will prompt the birds to dance majestically, and reward you with the Choco/Mog Materia . Nice. It’s your first bit of Summon Materia, which will conjure a powerful creature that’ll deal massive damage to your foes. Each Summon Materia can only be cast once per battle per level of the Materia, and they tend to be relatively expensive casts. This particular bit of Materia is a wind-elemental spell, and will bestow that element to your weapon or armor if you pair it with the Elemental Materia, making it very handy against flying foes. It’ll be a while before you get other Materia that will do this.
Head into the farm house and talk to the old man, who will tell you that you should probably get yourself a Chocobo if you want to cross the marshes, and avoid the dreaded Midgar Zolom, a monstrous serpent that’s most likely beyond your power right now. To avoid this menace, he’ll refer you to his grandson, who is in the barn. If you head into the back room, he’ll also let you spend the night… for 100 Gil. Yikes.
Leave the farm house and head to the barn, where you’ll find Choco Billy and his sister, Chole. The latter isn’t very helpful right now, so deal with Billy, who will tell you that you’re just out of luck when it comes to renting a Chocobo. The ones out front are reserved, but… you can catch your own. Ask him about how to perform this task and he’ll humor you; simply put, equip Chocobo Lure Materia and run around on the world map near where Chocobo prints are. When the Chocobo (and its monster buddies) appear, you’ll have to feed the stupid bird to keep it occupied while you deal with the monsters, else it’ll run away. Once he’s done explaining, he’ll proceed to rip you off by charging you 2000 Gil for the Chocobo Lure. He’ll also kindly sell you the “Greens” you’ll need.


Chocobo Ranch Shop
| Item | Gil |
|---|---|
| Mimett Greens | 1500 |
| Curiel Greens | 1000 |
| Pahsana Greens | 800 |
| Tantal Greens | 400 |
| Krakka Greens | 250 |
| Gysahl Greens | 100 |
As you can see, a lot of Gil can be wasted on Greens. Buy the cheapest one - ten Gysahl Greens will serve, being generous - then leave the barn considerably poorer. Equip the Chocobo Lure Materia and head outside. A few more changes will improve your odds of succeeding in this endeavor. First, in the menu’s “Config” sub-menu, set the ATB to “Wait”, which will pause ATB progression while you pick targets. This will let you attack with one character at a time, while another character readies the next attack. Hovering over the enemy will keep the ATB paused, and after the current attack plays out, you’ll be able to ensure you attack the right target - not the Chocobo. Hitting a Chocobo in combat will make it go berserk, deal minor damage to the whole party, and run away, which you don’t want. It will also help you get the most out of each Green you throw. Speaking of which, your second change; in the “Item” sub-menu, choose to “Arrange” your items and move your greens to the top of the list, which will make them easier to find in combat.
Once done, run around near the tracks until a Chocobo shows up, at which point immediately feed it greens with your first character, then attack the monsters joining the Chocobo methodically with the rest, being ready to throw more greens at the Chocobo when it makes its way through them. Ideally you’ll be able to do this with only one unit of greens, but if not, having spares will help. Once all the enemies are dead, the Chocobo will be captured. If you want to obtain the “ Chocobuckle “ Enemy Skill, however, you’ll have to take a somewhat different approach to hunting Chocobos…
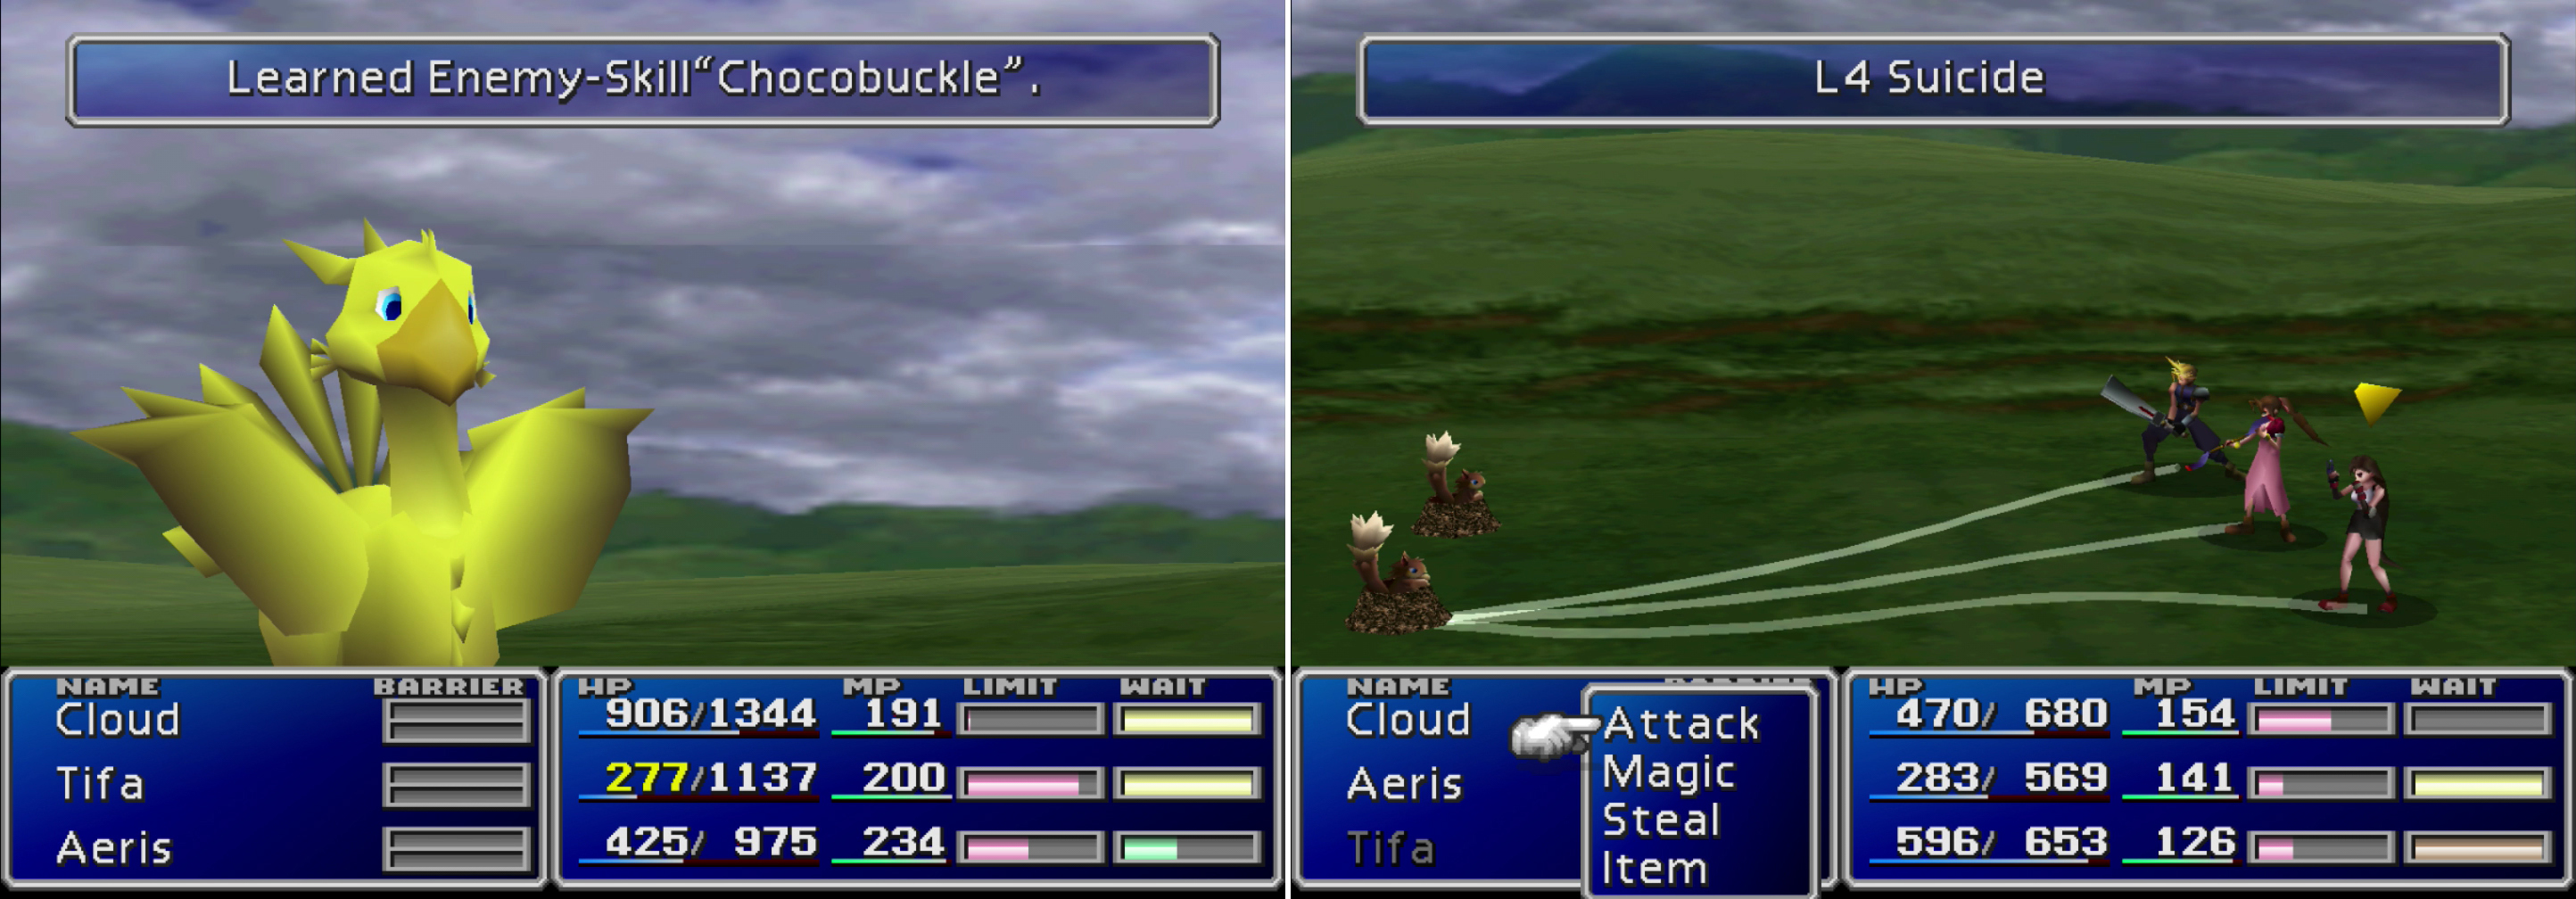
Learn “L4 Suicide” from Mu enemies (right) then, after feeding a level 16 Chocobo some Mimett Greens, cast “L4 Suicide” on it to have it respond with “Chocobuckle”.
Learning Chocobuckle
To get this Enemy Skill you’ll need to splurge on some Mimett Greens, which, at 1500 Gil a pop, are quite an investment. Also equip some Sense Materia (on the characters not using the Enemy Skill Materia, preferably), then wander around with Chocobo Lure Materia equipped until you get into a fight with a Chocobo. Use “Sense” on the Chocobo and, if it’s level sixteen, feed it some Mimett Greens to keep it around. While it’s occupied, cast L4 Suicide on it and the bird will freak out and cast “Chocobuckle” on you. The Mimett Greens are, unfortunately, a necessary prerequisite to provoking the Chocobo into casting “Chocobuckle”, and not some frivolous expenditure.
On the surface, this spell looks pretty useless - it deals non-elemental damage to one foe for the low, low price of 3 MP. The damage is very underwhelming at first, however, so what gives? Well… the spell charges every time you flee from battles. The more battle you flee from, the more this spell will do, potentially dealing quite heavy damage at insignificant cost… if you’re willing to run away from an obscene number of fights.
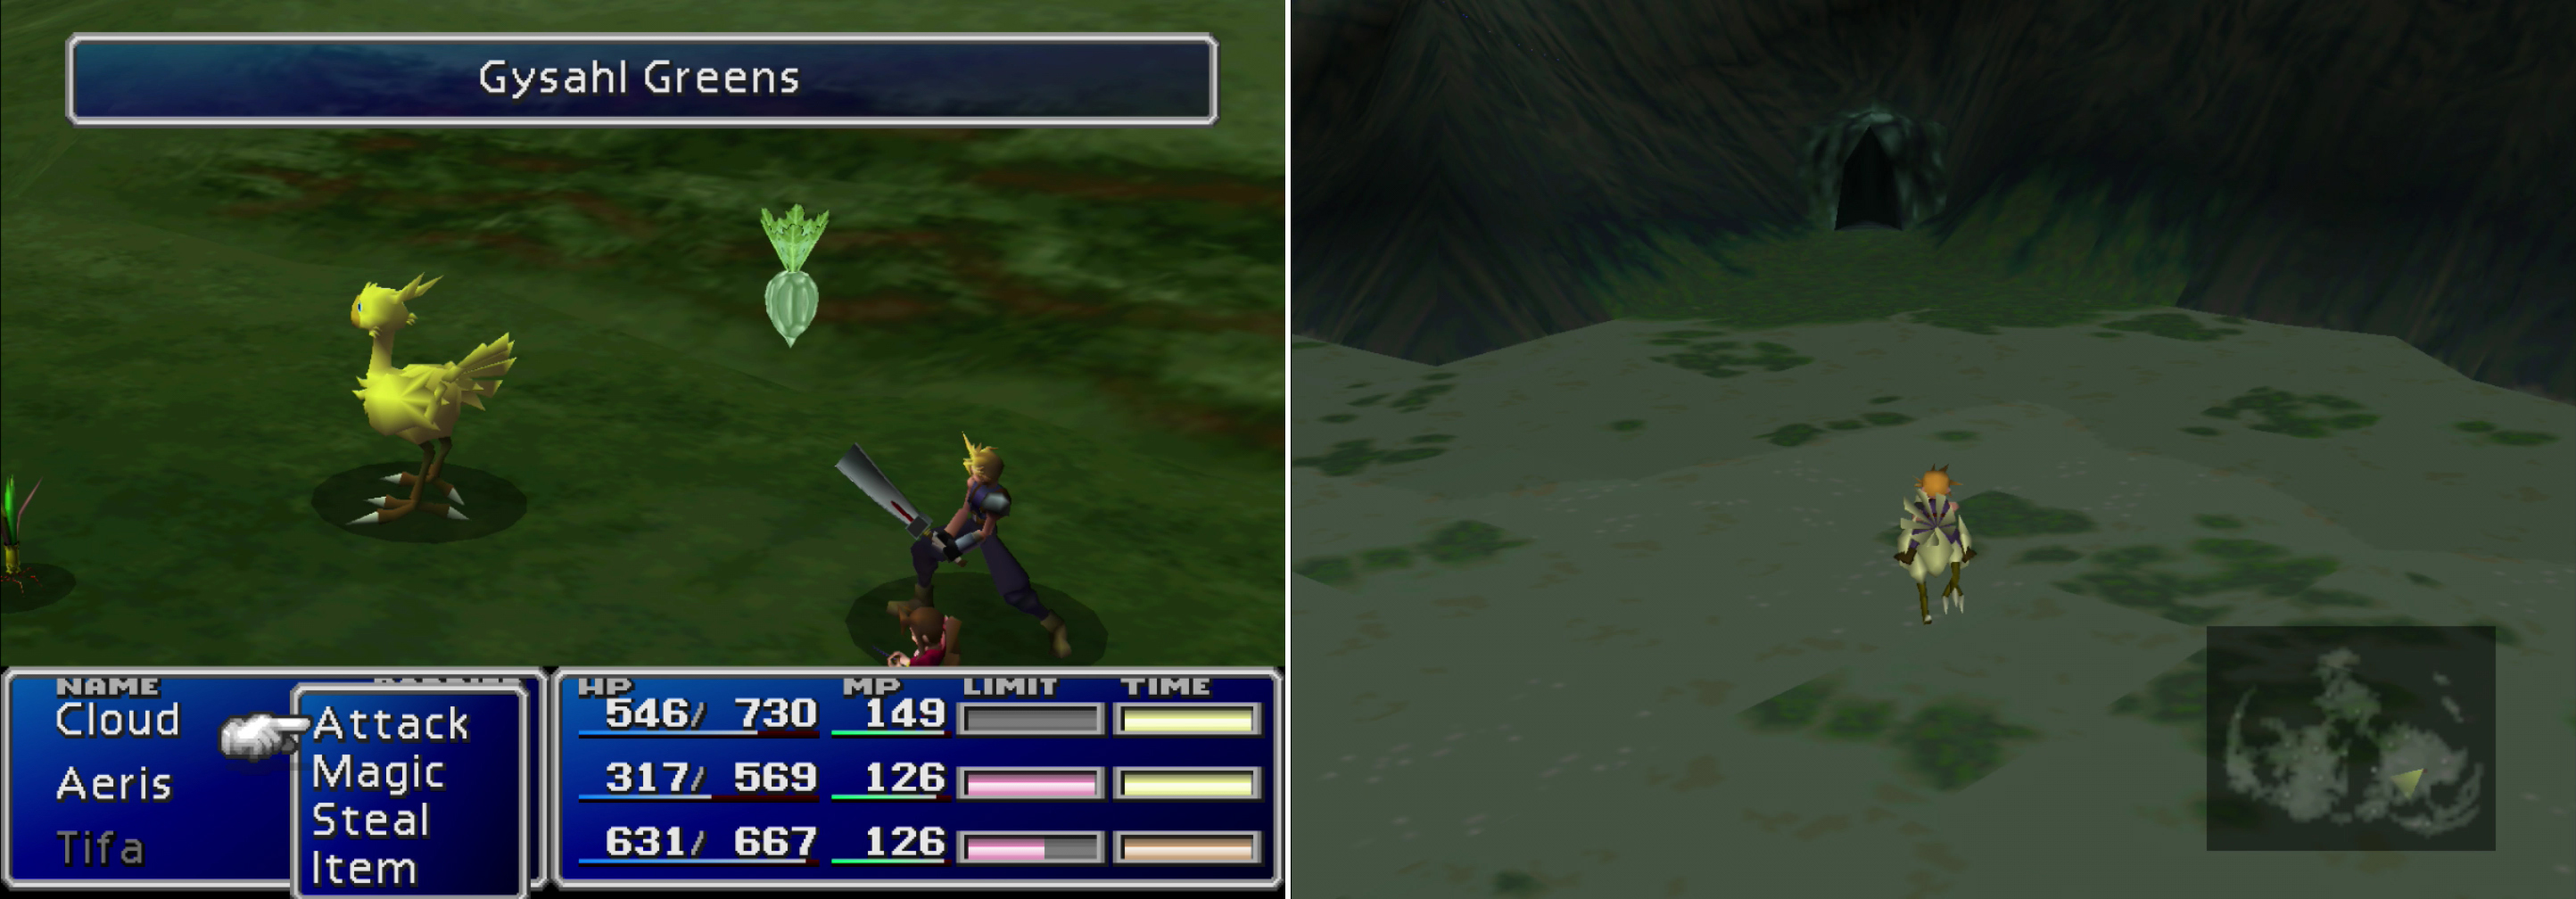
Distract Chocobos by feeding them some Greens (left) then ride the captured bird across the swamp, evading the Midgar Zolom (right).
Your next destination are the Mythril Mines to the south, past the marsh where the Midgar Zolom lurks. You can see the serpent moving around on the world map if you look for its snaky silhouette slipping beneath the surface of the swamp. Midgar Zolom is a tough foe, and ideally should not be fought here, even though it has one of the best Enemy Skills in the game. It technically can be fought, the Enemy Skill obtained, and the battle won at this point, but it’s a lot of trial and error and preparation, and there’s really no need for it just yet. It’ll be easier to obtain later on when you’ve got an item that will allow you to weather its “Beta” attack easier, and when you can do more damage to it. Just wait for it to get out of the way, and when the coast is (temporarily) clear, ride south through the swamp to evade the Midgar Zolom. Note that it is possible (although unlikely) for it to catch you while riding a Chocobo, and it’s also possible to cross the swamp on foot.
| Midgar Zolom | Stats |
|---|---|
| HP: | 4000 |
| MP: | 348 |
| Weaknesses: | N/A |
| Resistances: | N/A |
| XP: | 250 |
| AP: | 25 |
| Steal: | N/A |
| Drop: | N/A |
| Gil | 400 |
Learning Beta
For you brave souls who want to try to gain this Enemy Skill now, well, you have to go about things very specifically to succeed. Remember that you need to survive the attack to learn the Enemy Skill, then you need to win the battle to keep it. To go about completing the first task, move everybody in to the back row and use Tranquilizers on them to cause Sadness. Equip the Talisman accessory on your character with the most HP, then equip Fire + Elemental in their armor. Being at, or above, level twenty will help ensure you’ve got enough HP to weather Midgar Zolom’s attacks (we were successful with a level twenty Cloud boasting 760 HP). It should go without saying, but to be safe, make sure this privileged, protected character has the Enemy Skill Materia equipped, as well.
Once that’s done go stand at the edge of the swamp until Midgar Zolom shows up. You will need to have stolen Graviballs from Deenglow in the Train Graveyard to pull this off - three of them will suffice. Remember each one casts Demi on the foe, reducing their HP by 1/3. The first will do 1000 damage, the second 750, and the third 562. If you have spares, tossing a fourth will deal 442 damage, for a grand total of 2754 damage. You need not use the fourth one, however, after three spells will do fine, your goal being to reduce the serpent to below 1500 HP.
While you do this, be sure not to attack with your protected character. After a few Graviballs the Midgar Zolom will rear up and flick a party member out of combat with its tail. This is permanent, and cannot be blocked. The Midgar Zolom will favor foes who have harmed it the most, so keep your defended character on the defensive, healing their allies (and themselves) when they’ve taken damage. Its normal attacks will, if your characters are afflicted with Sadness and in the back row, deal about 150-200 damage, if it doesn’t score a critical hit.
After it falls below 1500 HP, though (and probably ejected one of your allies along the way) it’ll cast “Beta” , which will easily one-hit kill all your surviving party members, except your properly protected character, who will take a mere 400~ damage. Anticipate it casting “Beta” and try to sneak a Cure cast in there, or failing that, do so immediately after “Beta”, as the Midgar Zolom will probably attack physically shortly afterwards. If you survive its “Beta” spell and melee follow-up, you should be close to winning. Once you’re healed, cast a “Beta” of your own, which will deal about 1000~ damage to Midgar Zolom. If you’re lucky, it won’t eject your surviving character from combat or score a nasty critical hit. Follow up with a second “Beta” and the battle is yours. Congrats. The rest of disc one and most of disc two is now going to be mind-numbingly easy. Beta is a fire-based spell that strikes all enemies, and far, far out-competes most early summons and even the Fire3 spell.
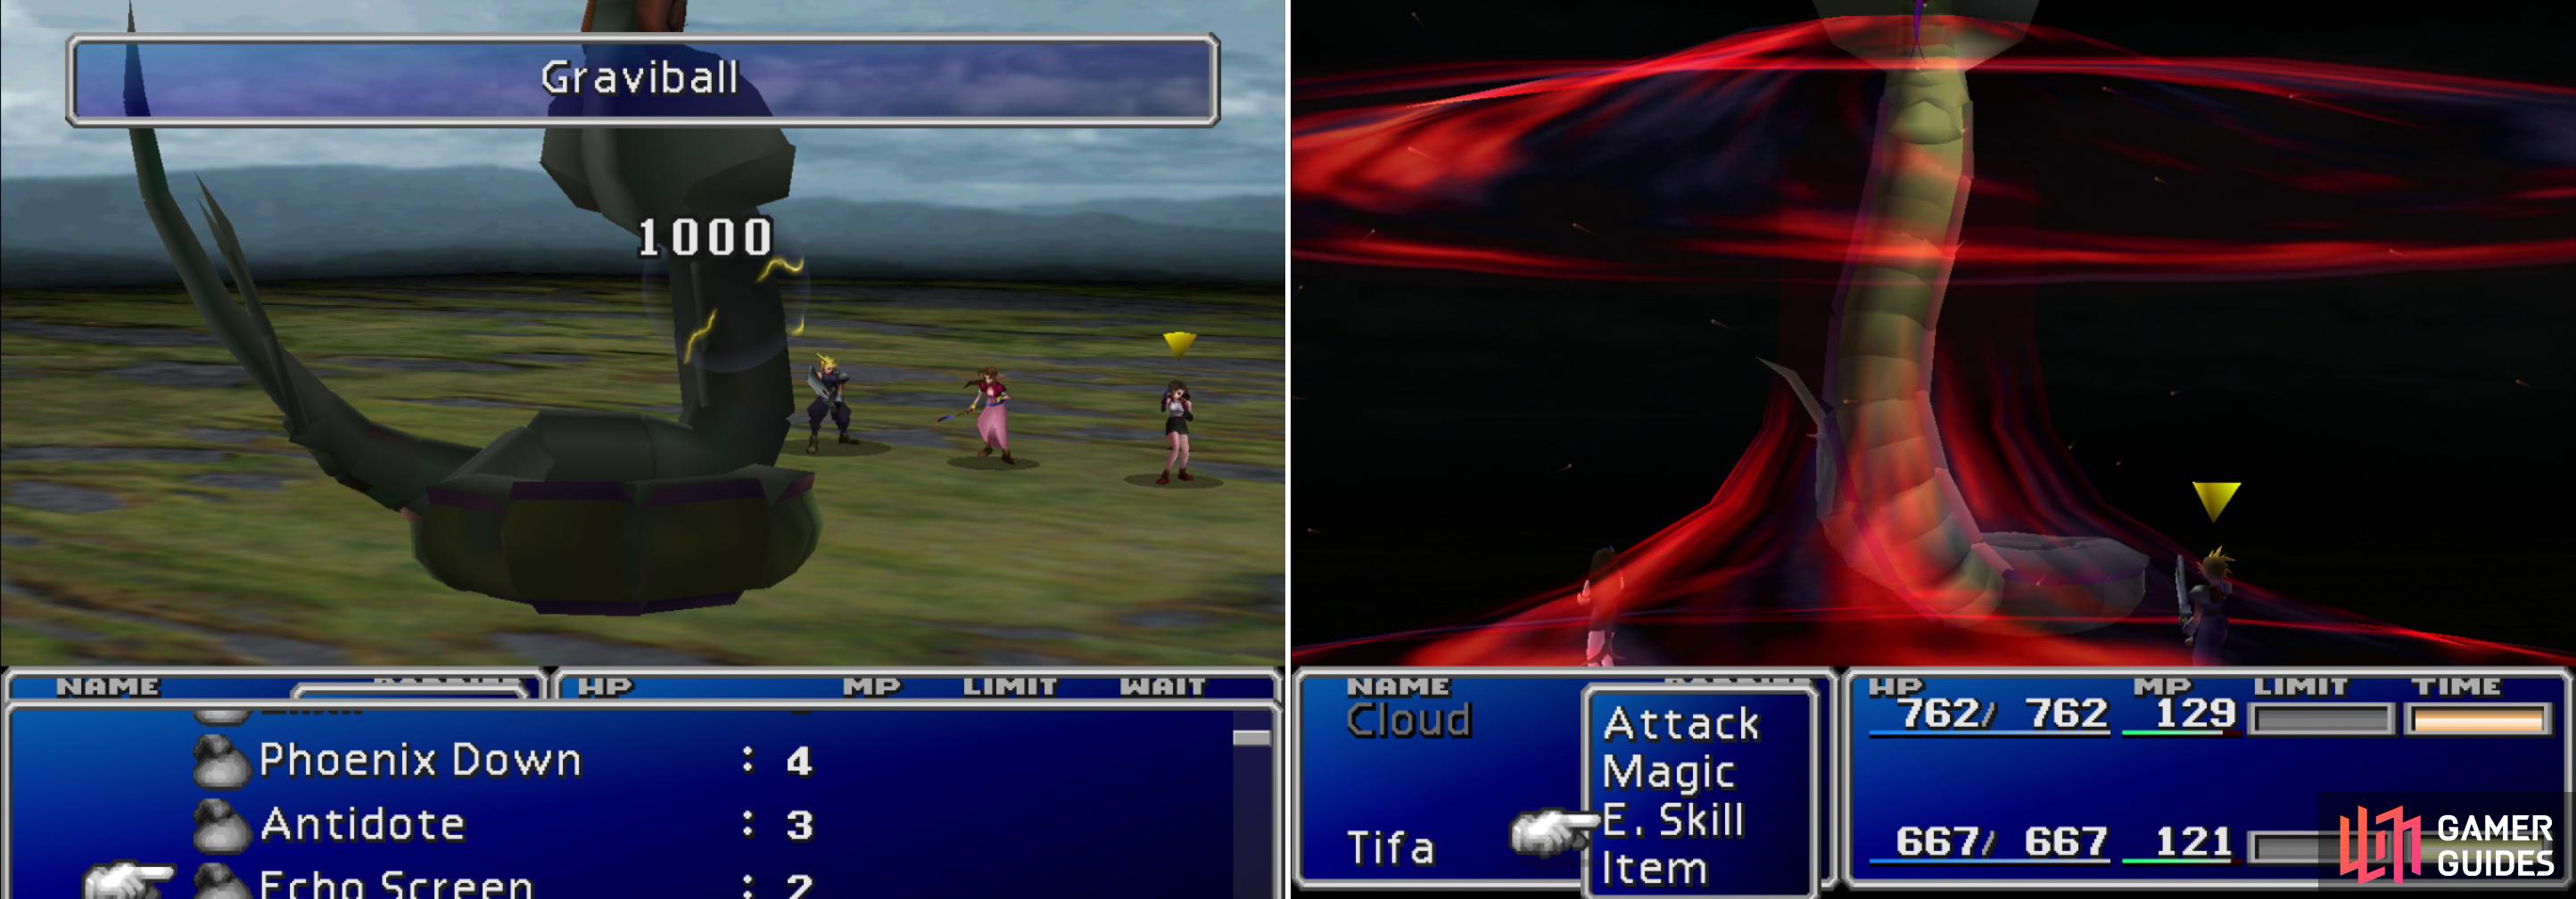
If you’re brave enough to engage the Midgar Zolom, weaken it with Graviballs (left) and try to survive its “Beta” attack to learn it (right).
After you’ve evaded Midgar Zolom (even if you killed it and claimed its “Beta” attack as your own, it just respawns, so you’ll most likely have to catch a Chocobo at some point) head into a cave to reach the Mythril Mines, after first observing Sephiroth’s own inelegant solution to dealing with the Midgar Zolom.
No Comments