
| Important Items in this Area |
|---|
| Added Cut Materia |
| Alexander Materia |
| All Materia |
| Mind Source |
| Safety Bit |
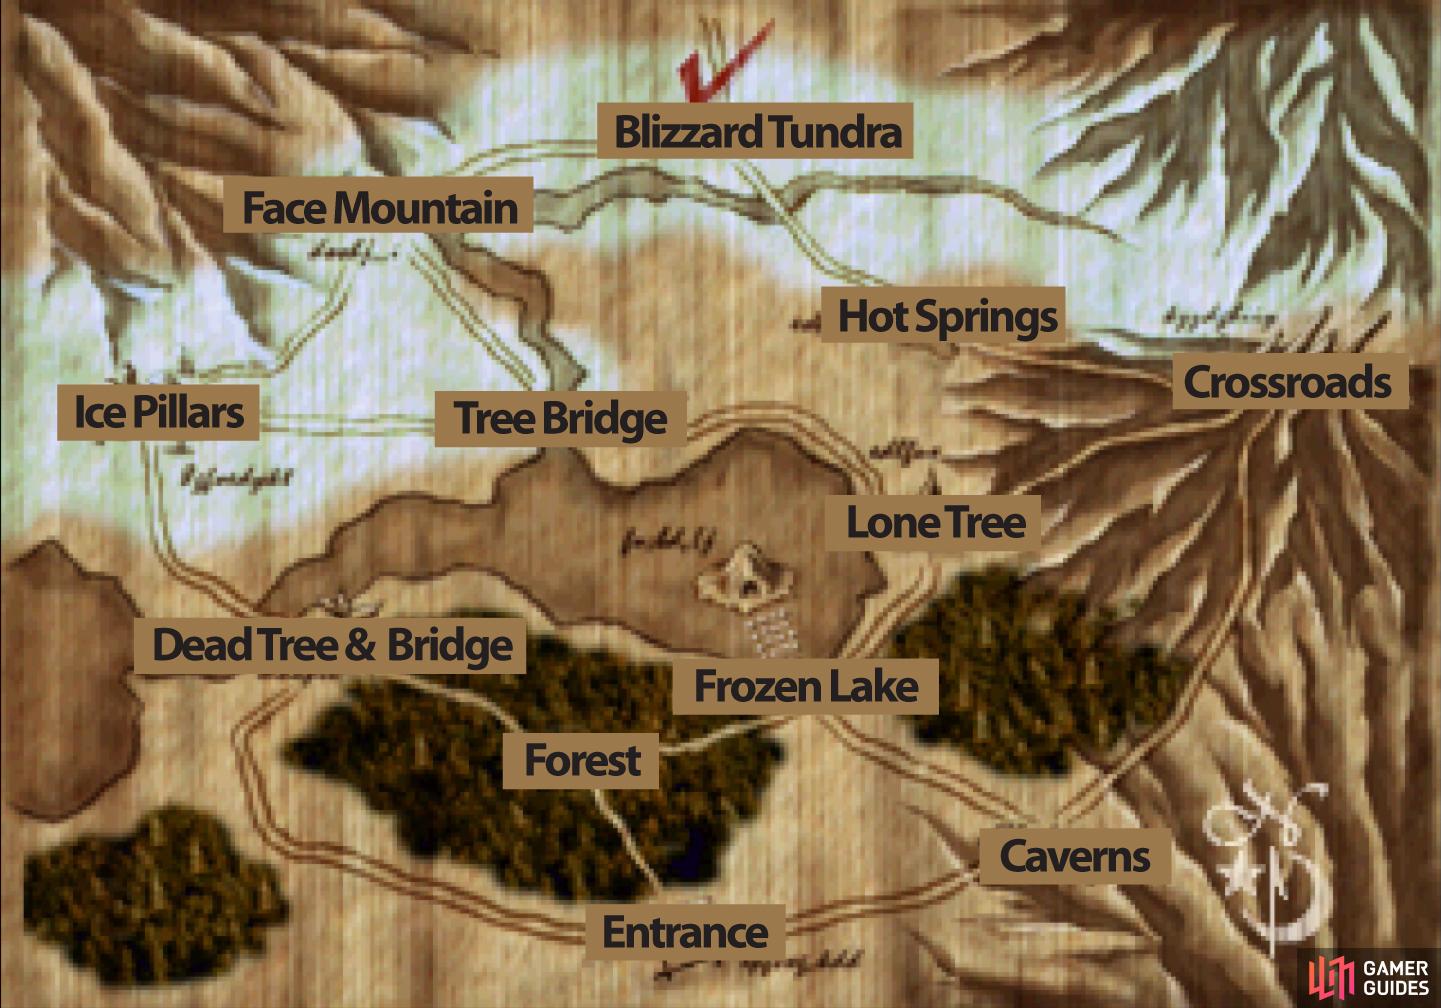
Wherever you land, the party will regroup and you’ll be told how to access the map, as well as the fact that staying out in the cold might not be good for your health. Strictly, it’s not the amount of time you spend standing around that’ll cause trouble, it’s the number of steps you take. After a bit of running around out in the Great Glacier, you’ll pass out and end up at “Holfzoff’s Cabin” at the Base of Gaea’s Cliff. This is inevitable, and it’ll probably take you multiple runs through the area before you’ve found everything the Great Glacier has to offer.
If a route had to be suggested, however, start out in the “Entrance” and head north to reach the “Forest” where you can find a Mind Source. Then head east to the “Frozen Lake” and complete the ice platform puzzle to score the Safety Bit accessory. From the first screen of the “Frozen Lake” area travel north-east to reach the “Lone Tree” area, then head east to the “Crossroads” area. Exit to the north-east and grab the Added Cut Materia and end up at the “Hot Springs”, which you should touch. At this point you’re probably close to passing out, but you can try to get the Elixir in the cave in the “Ice Pillar”, which you can reach by returning to the “Lone Tree” area and heading west, then west again through the “Tree Bridge” area. After you pass out and wake up at “Holfzoff’s Cabin” head south to reach the “Blizzard Tundra” and score the All Materia in a cave in the center of the area, then exit via the eastern end of the screen to reach the “Snow Witch’s Cave” where, after defeating the witch you’ll gain the Alexander Materia. One paragraph to explain, but it’ll take a bit of doing to get all that. As mentioned earlier, the areas are covered individually, below.
Entrance
If you went left then right during the snowboarding mini-game, you’ll appear at the “Entrance” to the Great Glacier, complete with an “Ice Gate” sign and elevation information. This area is otherwise uninteresting save for being the easily recognizable start of the Great Glacier. There are four exits on this screen; going south will take you to the world map, while going north will take you to the “Forest” area. To the east you’ll find the “Dead Tree and Bridge” area, and finally to the east lies the “Caverns” area.
Caverns
You will have landed here if you went right twice during the snowboarding event. Between some rocky outcroppings along the eastern side of the screen is the entrance to a cavern. In the first cavern screen you’ll have to jump across some ledges to ultimately exit via the north-eastern end of the screen. In the second screen you really only need to choose whether to tumble down an icy chute and out onto the world map or not. Yep. This area is just another way to reach the world map. Outside the cavern you can exit the screen to the north-east to reach the “Crossroads” area or to the north-west to reach the “Frozen Lake” area. Heading south will take you to the “Entrance” area.
Dead Tree and Bridge
Another uninteresting area, it only serves as a hub for the “Entrance” area (south), the “Forest” area (east) and the “Ice Pillars” area (north).

If you went left then right during the snowboarding mini-game, you’ll end up at the Entrance area (left). Grab the Mind Source hidden in the Forest area (right).
Forest
You can reach this area by taking two lefts during the snowboarding mini-game, or alternatively by heading north from the “Entrance”, west from the “Dead Tree and Bridge” area, or east from the “Frozen “Lake”. Either way, there’s a linear transition area consisting of two rows of trees, the forest area itself is somewhat more expansive and zoomed out. Along the northern central part of the forest you can find a bag containing a Mind Source , but otherwise, this area isn’t too interesting.
Frozen Lake
The north-western half of this area is covered by a lake, which in turn is mostly frozen over. On the ice nearest the shore you can score a Potion . Wee… Other than that, this screen is mostly just a land mark. If you cross the ice and exit the screen to the north-west, however, you’ll reach the second part of the “Frozen Lake”, which is more interesting if you’re looking for something more than a landmark. If you exit to the north-east you’ll reach the “Lone Tree” area, the south-eastern exit will take you to the “Caverns” area, and the south-western exit leads to the “Forest” area.
On the second screen you’ll find five rows of five pieces of ice, twenty five in total. They’re all of various sizes; the big ones can be leapedupon, while the small ones cannot. When you leap on one, the adjacent pieces of ice will change size. If you find yourself surrounded by small pieces of ice, you’ll fall into the water and recover on whatever shore you started out on.
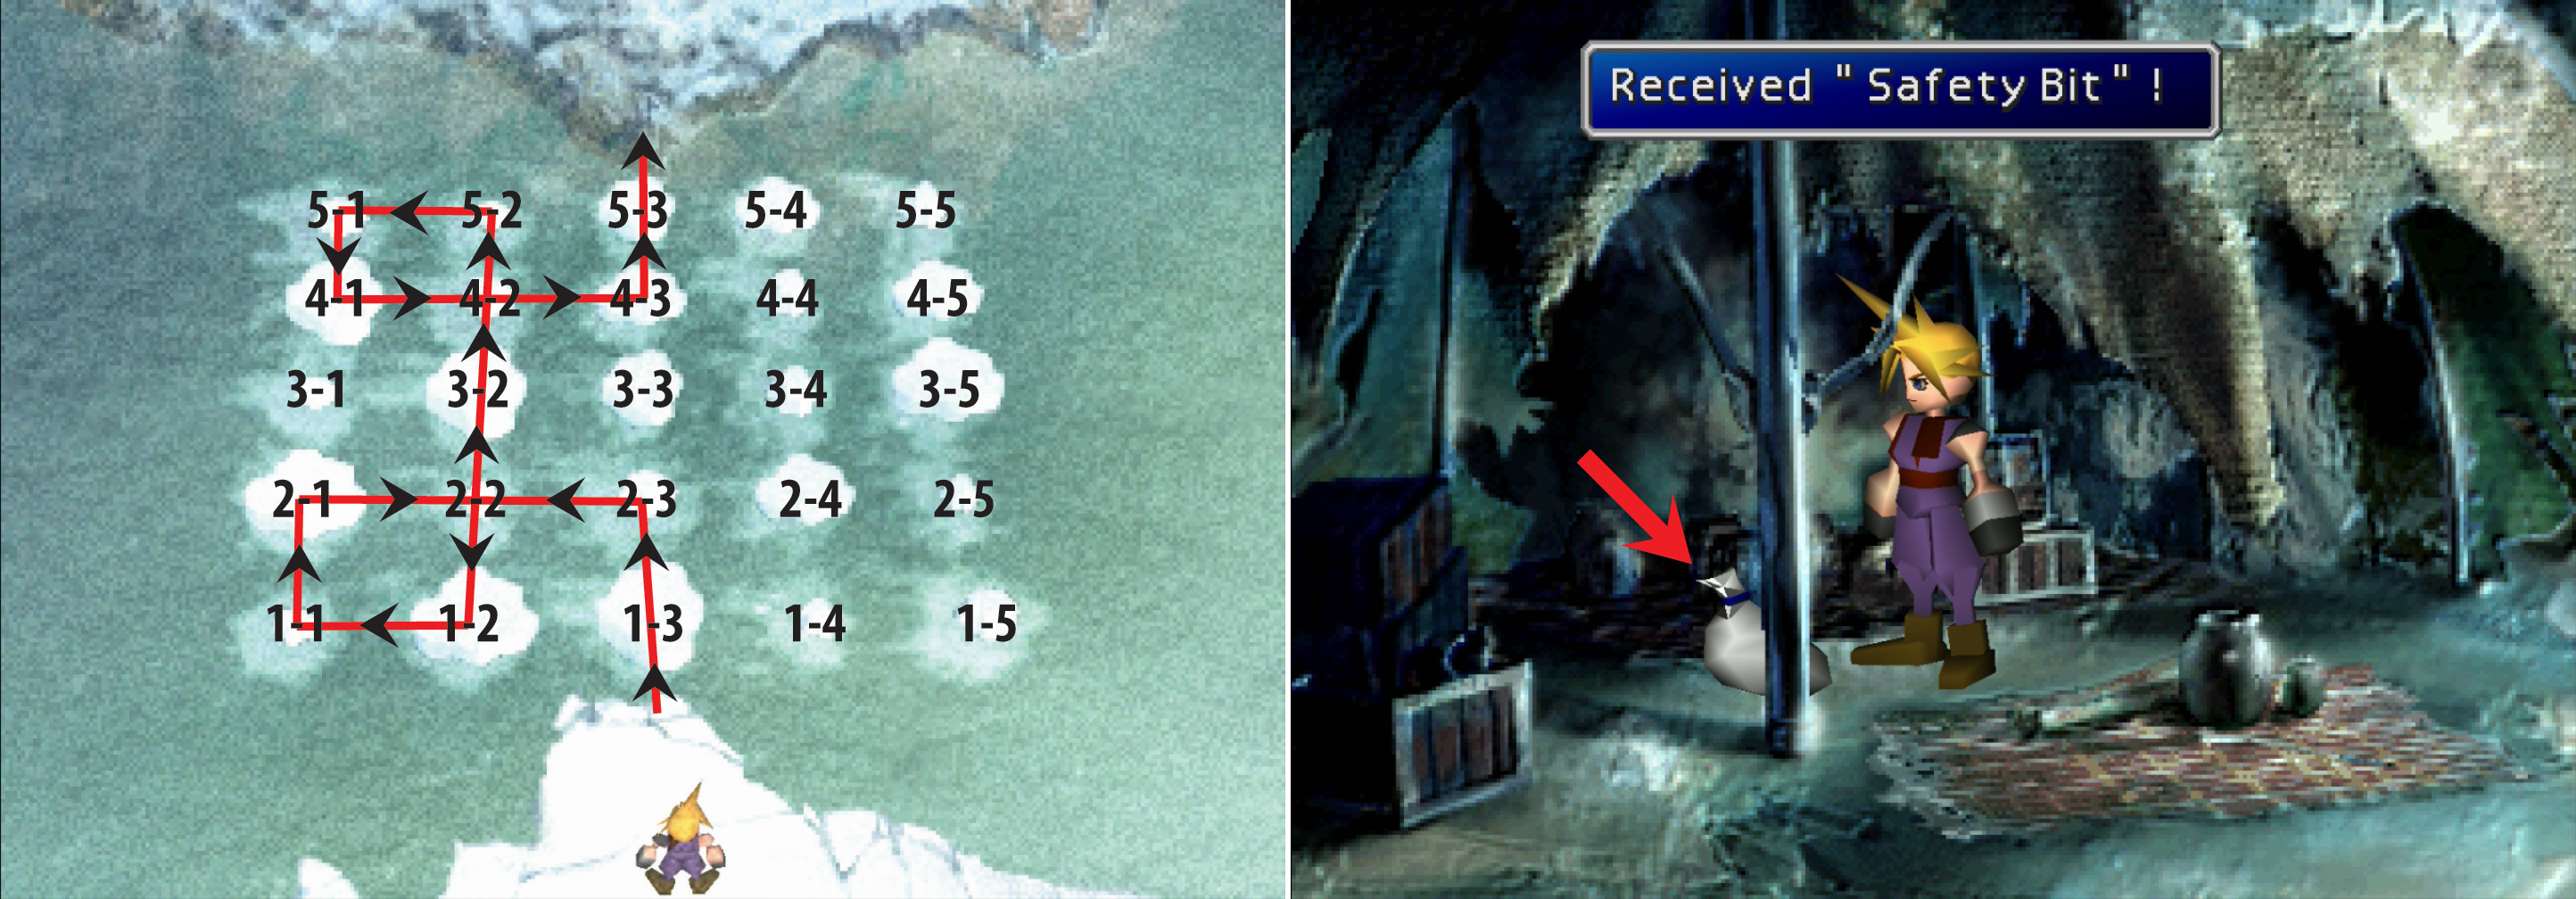
Follow the following path to make it across the Frozen Lake (left) where, in a cave on an island you can find a Safety Bit (right).
For the purposes of solving this puzzle and reaching the other (currently, the northern) side, imagine each bit of ice is numbered, starting with #1 at the left and working your way to #5 to the right on the first row, and repeating the process with every row, with the ice adjacent to the southern shore being Row #1 and the ice near the northern shore being Row #5. The first piece of ice you can leap on therefore is the third from the left on row one, so call it 1-3. Make sense? Good. Jump onto 1-3, then 2-3 → 2-2 → 1-2 → 1-1 → 2-1 → 2-2 → 3-2 → 4-2 → 5-2 → 5-1 → 4-1 → 4-2 → 4-3 → 5-3 and finally onto the northern shore. Now, that wasn’t so bad, was it?
Exit the screen to the north and enter a cave where you’ll find a shelter, in which is a Safety Bit accessory. Grab it and return south to the ice platforms, which will have to be crossed to return to the southern shore… or you should just run around until you pass out, whichever. The solution for the way back (using the same method as before) is 5-3 → 5-2 → 4-2 → 4-3 → 4-4 → 3-4 → 3-3 → 2-3 → 2-4 → 1-4 and 1-3.
Lone Tree
You will end up here if you went right at the first fork, then left at the second during the snowboarding event. A landmark and nothing more, there’s a lone pine tree standing in a field of snow here. Exiting the screen to the east will take you the “Crossroads” area, going east leads to the “Tree Bridge” area, and you can reach the “Frozen Lake” by heading south.
Crossroads
The name should describe the area well enough; there are four exits to this area, each one being an elevated snowy path easily distinguishable from the impassable lowlands. The north-eastern path leads to the “Hot Springs” area, as does the north-western path, but if you leave the “Hot Springs” area from the southern edge of the screen you’ll appear at the end north-western on the “Crossroads”. If you take the north-eastern path leading to the “Hot Springs” you can score some Added Cut Materia lying around in the snow in the second transition screen between the two locations. Sneaky, sneaky, Squaresoft… Anywho, the western path leads to the “Lone Tree” area, and the southern path will take you to the “Caverns” area.
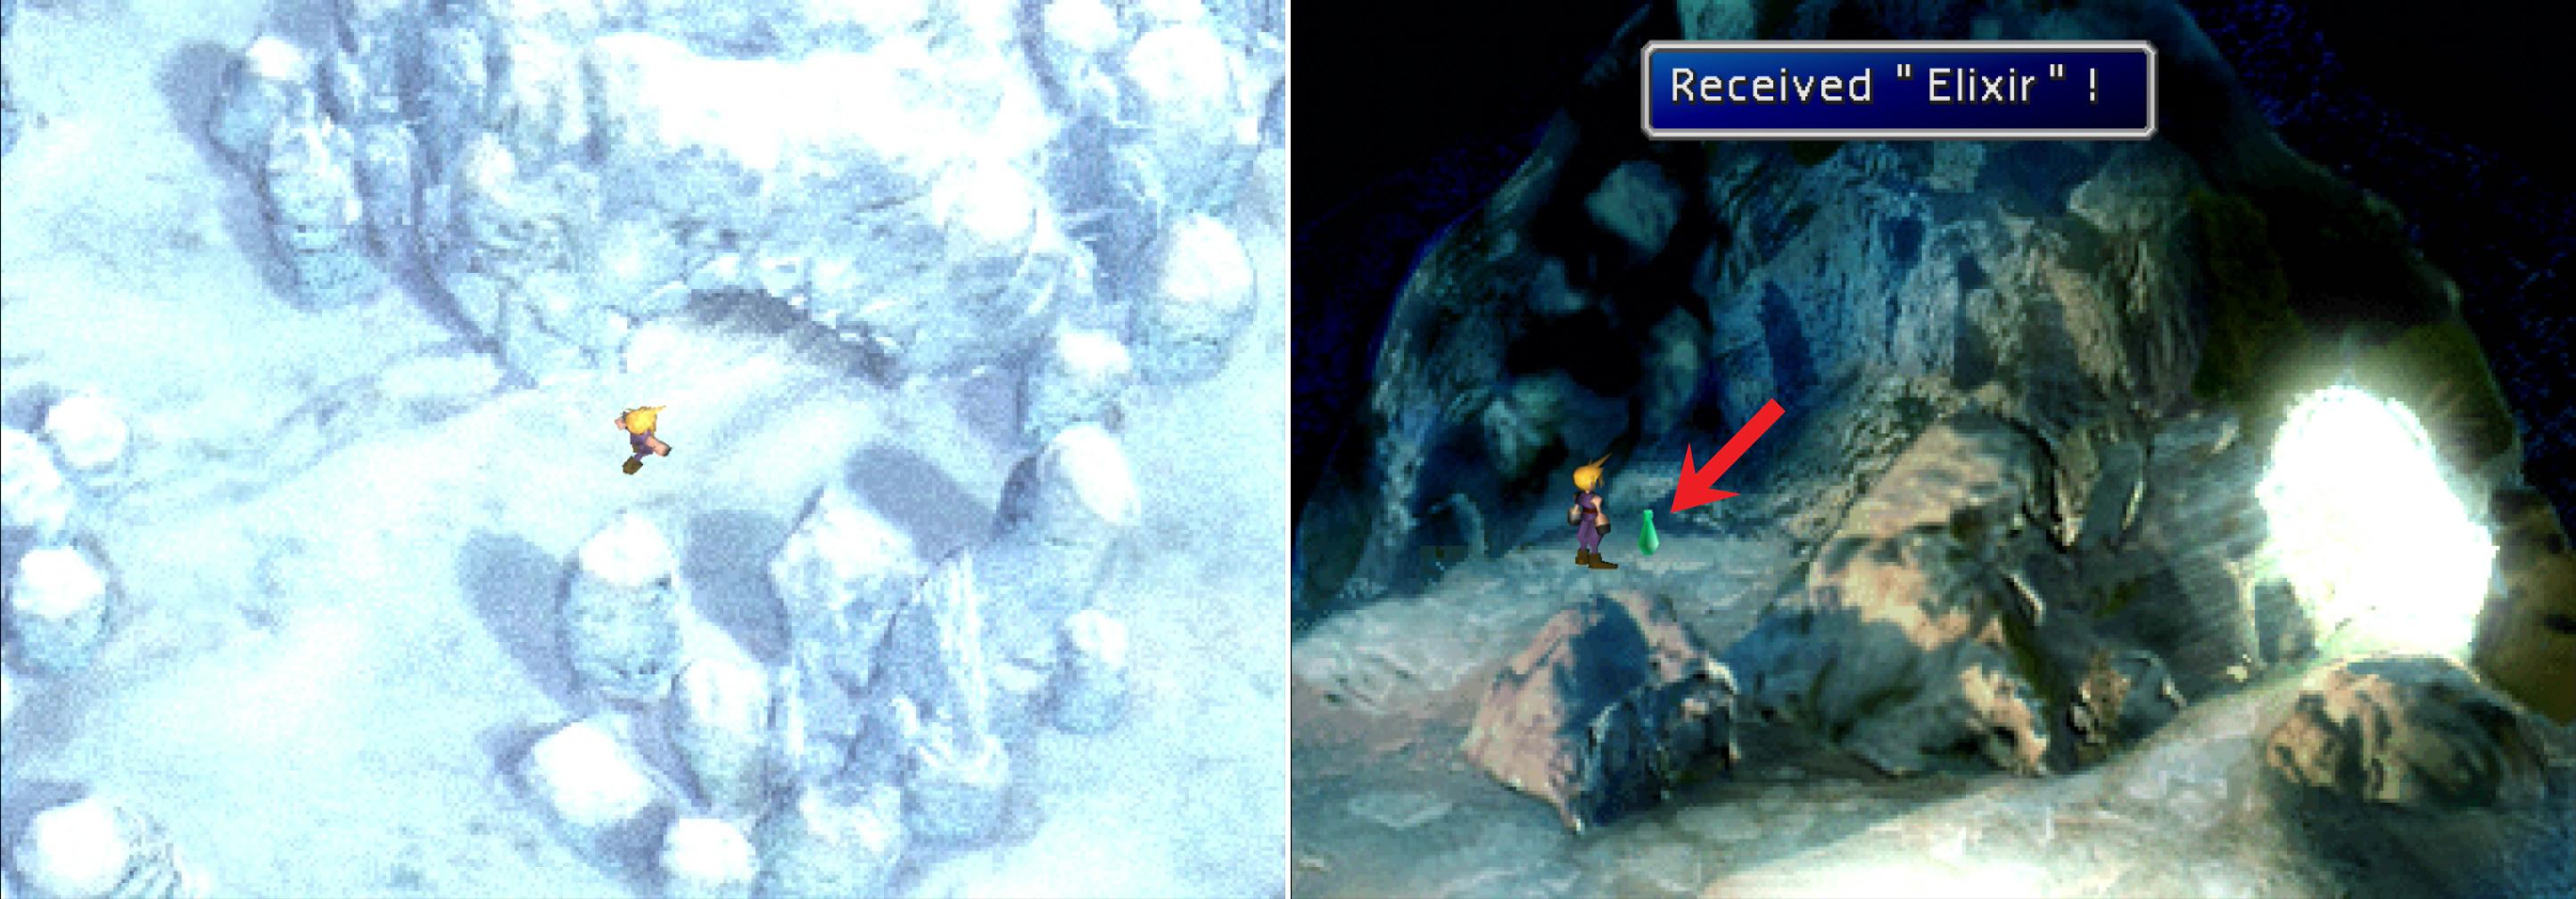
In the Ice Pillars area, enter the cave (left) and grab the Elixir inside (right).
Ice Pillars
This area is populated by mounds - or pillars - of ice. In the center of the area you’ll find a cave wherein you can score an Elixir . If you exit to the east you’ll reach the “Tree Bridge” area and if you take either of the two exits to the north you’ll reach the “Face Mountain” area.
Tree Bridge
Not to be confused with the “Dead Tree and Bridge” area, this area is divided by a snow-filled ravine spanned by a fallen tree. If you exit out of either of the two northern routes on the western side of the screen you’ll reach the “Face Mountain” area, whereas if you exit to the east you’ll end up at the “Hot Springs” area.
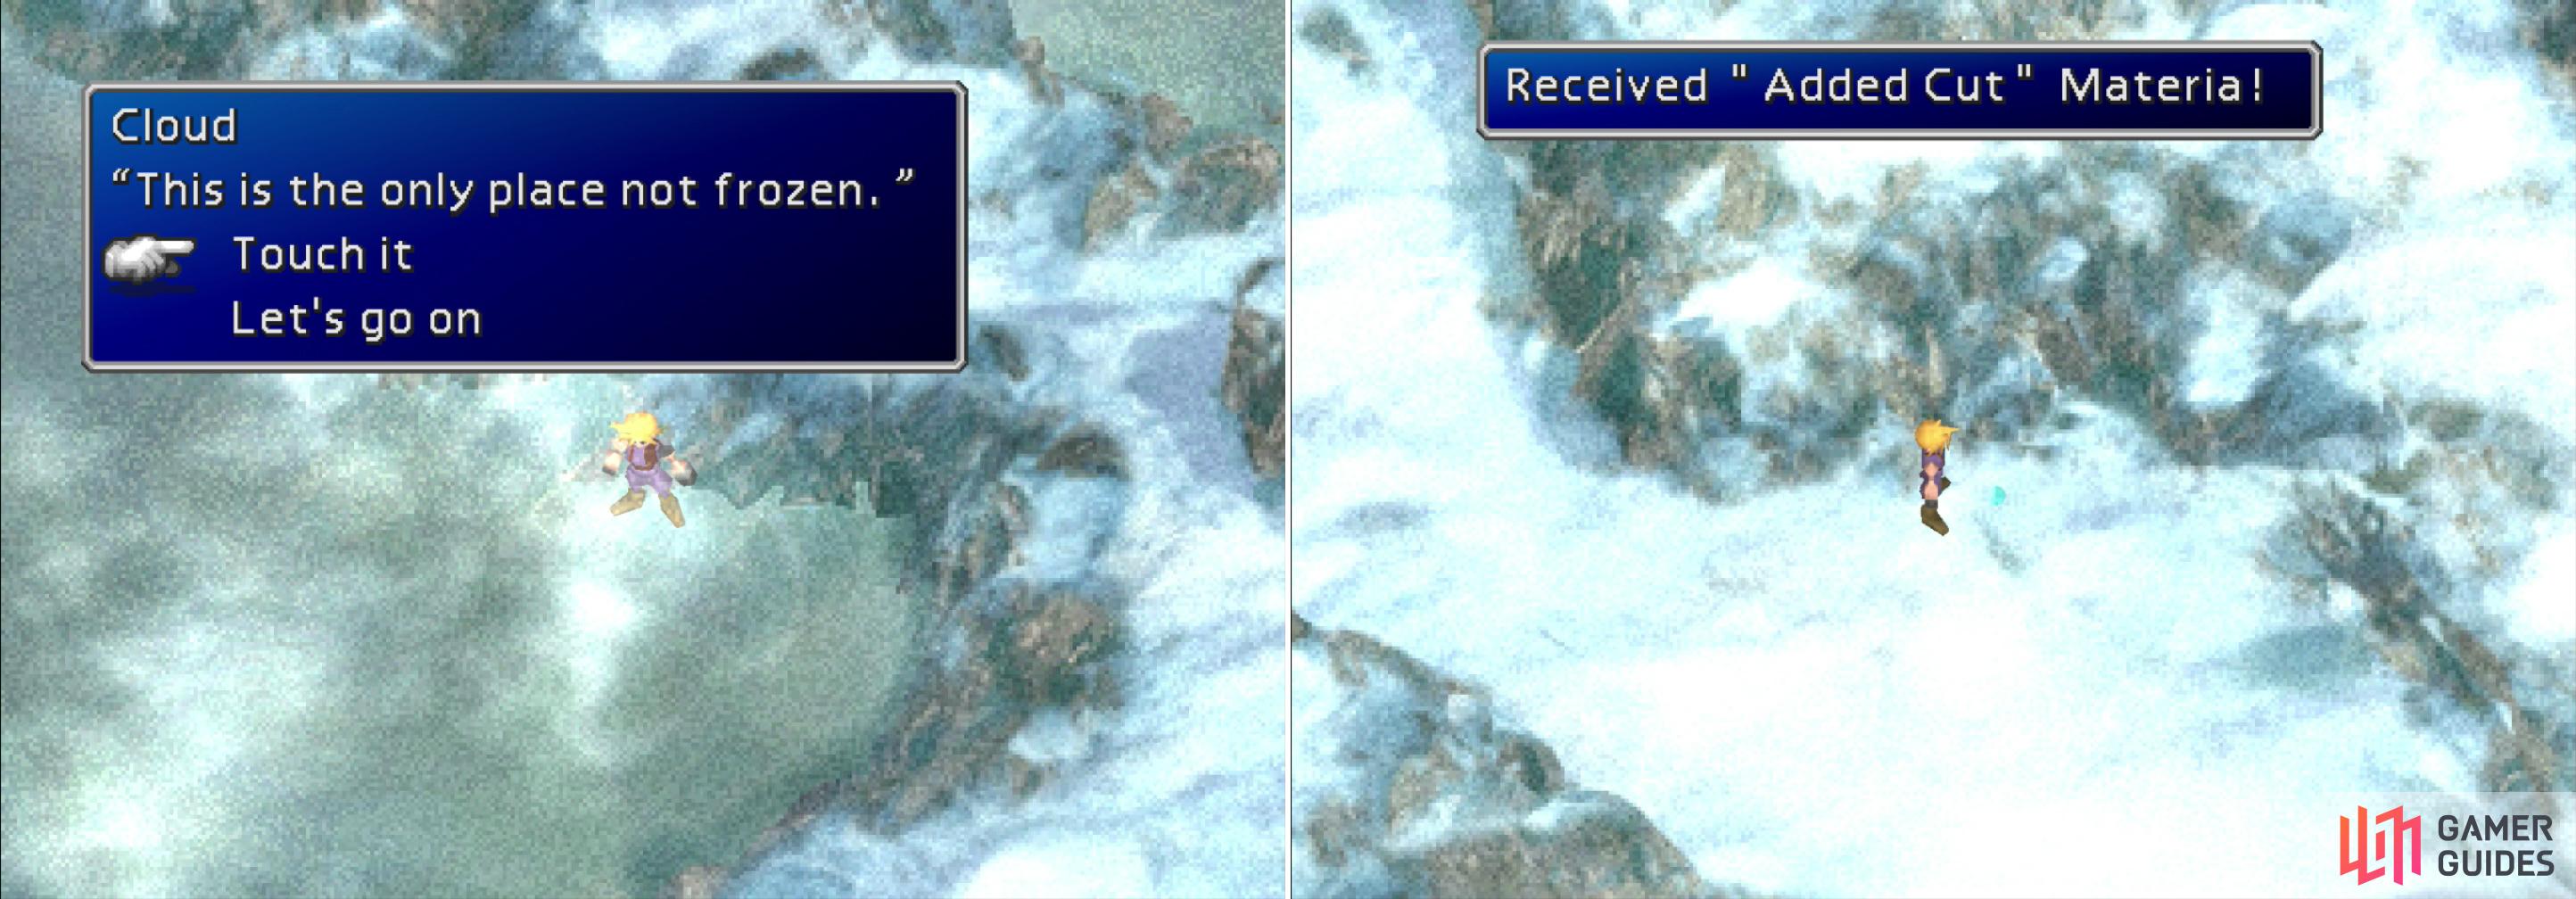
Touch the Hot Spring when you pass through the area to provoke an encounter later on (left). If you venture north-east form the Crossroads you can find some Added Cut Materia (right).
Hot Springs
A rocky, snow-covered strip of land runs between two pools of steaming water. Make your way halfway across the bridge and examine the southern shore to find a thawed spot you can touch. Molesting this water is the sole purpose of this area, and it will enable you to trigger an encounter later, to be sure to do it before you leave. If you exit to the north-west you’ll reach the “Blizzard Tundra” area, whereas if you head to the south-east you’ll find yourself at the “Crossroads” area.
Face Mountain
While wanting for any interesting loot, there’s a fine landmark in this area in the form of a face carved into a mountain along the north-western end of the screen. The exit to the south will lead you to the “Tree Bridge” area, the route to the west will take you to the “Ice Pillars” area and finally if you exit the screen to the east find yourself at the “Blizzard Tundra” area.

In the center of the Blizzard Tundra you’ll find a cave (left) inside of which you can find some All Materia (right).
Blizzard Tundra
You can reach this area by heading east from the “Face Mountain” area, by going north from the “Hot Springs” area, or more likely, by heading south from “Holzoff’s Cabin”. This place looks like a barren snow field right off the world map, but almost totally bereft of landmarks. You’ll also be caught in snow storms intermittently, which will rotate the camera automatically, making it difficult to navigate through this area. You can drop markers as you go by hitting [Circle] ([OK] on PC), and it’s best to do so at close intervals so that when a storm hits you can stop, wait it out, then continue in the direction you were originally heading.
There are several locations you can reach by challenging this storm-swept tundra, including, of course, all the areas that lead here; if you head west you’ll return to the “Face Mountain’ area, north will take you to “Holzoff’s Cabin” and south will see you to the “Hot Springs” area. In the center of the tundra is a cave where you can score a chunk of All Materia , but the most interesting area is to the east. If you make it to the eastern edge of the “Blizzard Tundra” you will, after a few obligatory transitional screens that serve only to waste your precious time, find the “Snow Witch’s Cave”.
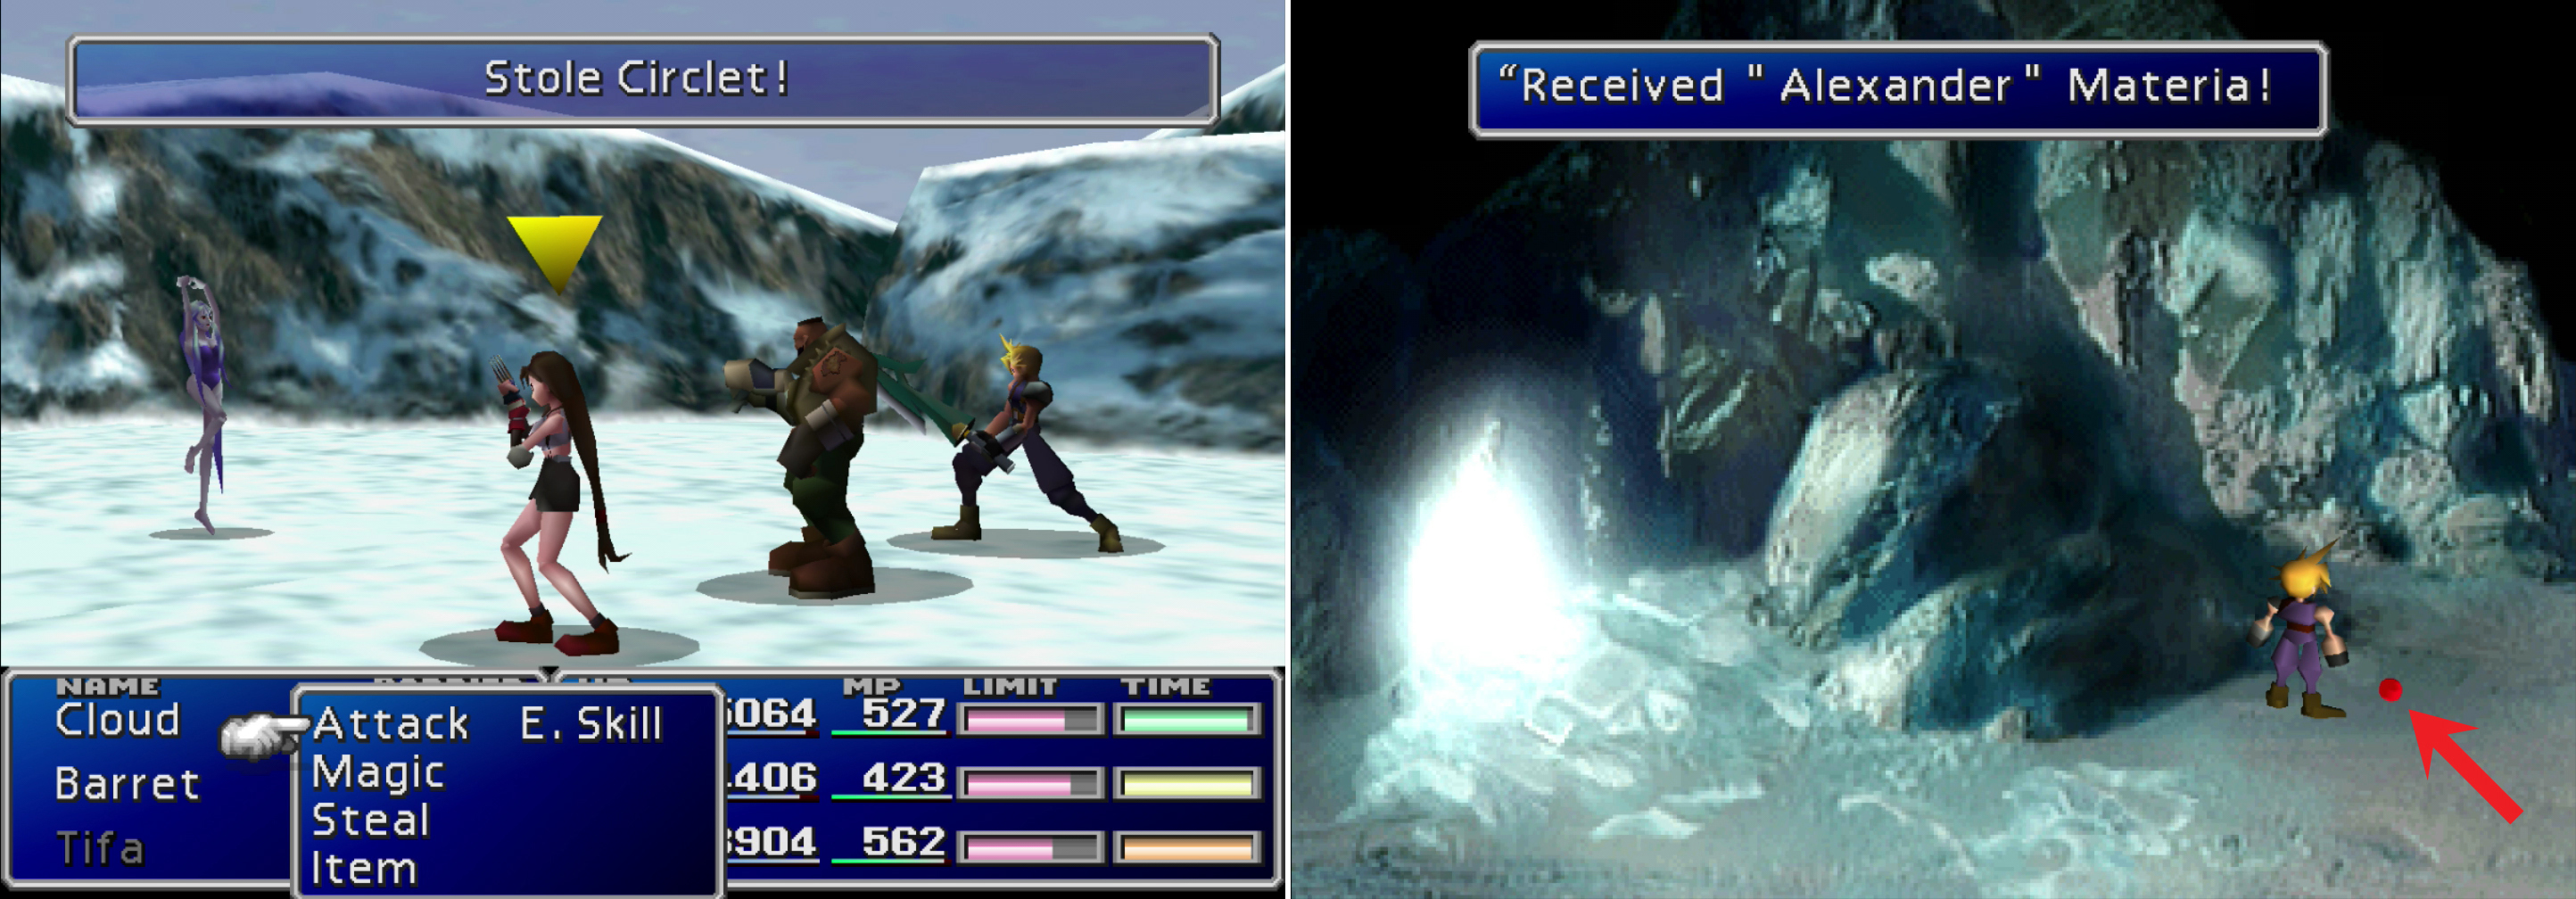
During your fight with the “Snow” witch, steal a Circlet (left) and afterwards claim the real prize; Alexander Materia (right).
Snow Witchs Cave
You can only reach this area by traveling to the eastern edge of the “Blizzard Tundra”. Make your way through several barren junk screens to reach an area with a cave, within which is a witch. If you’ve touched the hot spring in the “Hot Springs” area and talk to the witch, she’ll turn violent. Although the game plays boss battle music when you fight her, she’s no different from any of the other Snow enemies you could randomly encounter out in the Great Glacier. Steal a Circlet from her, then dispatch her with whatever means you wish. She’ll try to confuse characters with her “Fascination” attack and will counter with “Ice2”, but otherwise, she’s a push-over. When she falls she’ll leave behind a chunk of Materia; Alexander Materia to be precise. If you exit the area outside the witch’s cave by heading south you’ll reach the “Crossroads” area
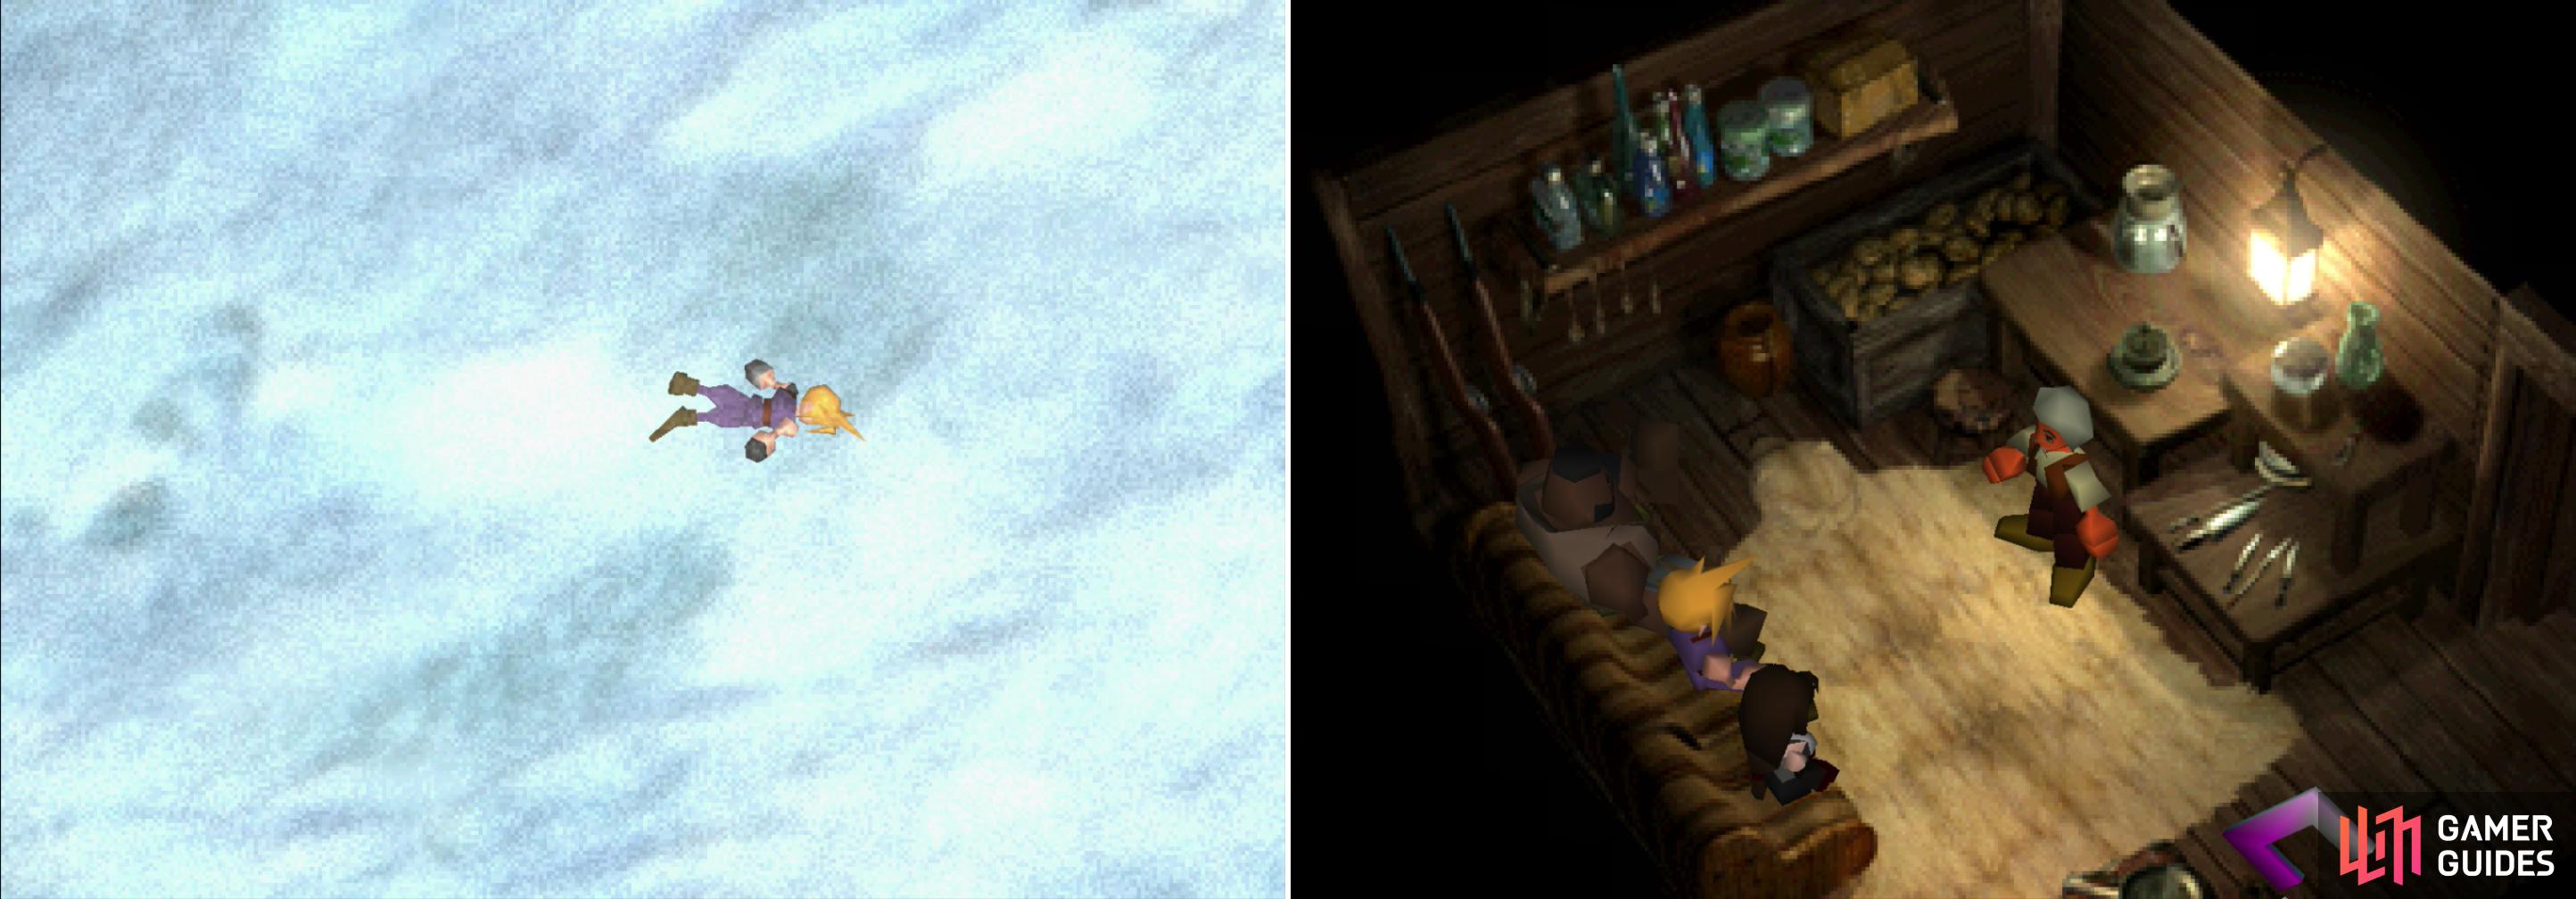
If you stay out on the Great Glacier too long, you’ll pass out from exposure (left) only to be rescued by Holzoff, whose cabin is along the northern reaches of the Great Glacier (right).
Holzoffs Cabin
When you pass out from over-exposure, you’ll be rescued by Holzoff, who will chat with you a bit in the room you wake up in, and at greater length in another, more cozy room. Listen to his story to get the idea that, well, the cliff you need to scale is indeed dangerous. While you climb, you’ll need to raise your body temperature whenever you reach level ground. He’ll let you rest for free, after which take advantage of the Save Point then leave to cabin, where the group will have gathered again. Barret will have a crisis of faith, and you’ll be able to change party members by talking to them. If you’re done in the Great Glacier head north to tackle Gaea’s Cliff, if not, head south to reach the “Blizzard Tundra” area. When she falls she’ll leave behind a chunk of Materia; Alexander Materia to be precise. If you exit the area outside the witch’s cave by heading south you’ll reach the “Crossroads” area.
No Comments