
| Important Items in this Area | Enemy Skills in this Area |
|---|---|
| Conformer | Aqualung |
| Double Cut Materia | |
| Escort Guard | |
| Hades Materia | |
| Heaven’s Cloud | |
| Highwind | |
| Key of Ancients | |
| Oritsuru | |
| Outsider | |
| Spirit Lance | |
| Steal As Well Materia |
Dousing Da-Chao
Yeah, this section is called “Exploring With the Submarine”, but the first bit of loot you can get doesn’t involve the submarine at all. Return to Wutai for the final time (final time in this guide, anyways) and make your way to the Da-chao Statues carved into the cliffs. Enter the cave with the fire in it and head north past the chest where you obtained the Dragoon Lance during your hunt for Don Corneo.
As you approach the raging inferno you’ll get the text “The Scale of the Sea God” shines, by which they mean the Leviathan Scales you picked up in the Underwater Reactor. Clear out all the flames in the cubby to reveal a chest, which contains the Oritsuru ; a very nice weapon for Yuffie which has 90 Attack and eight Materia sockets, two pairs of which are joined. After claiming your prize, head north to the top of the cavern, then travel east down a corridor before turning south when you run out of east. Douse some more flames by exposing them to the Leviathan Scale to uncover the Steal As Well Materia .
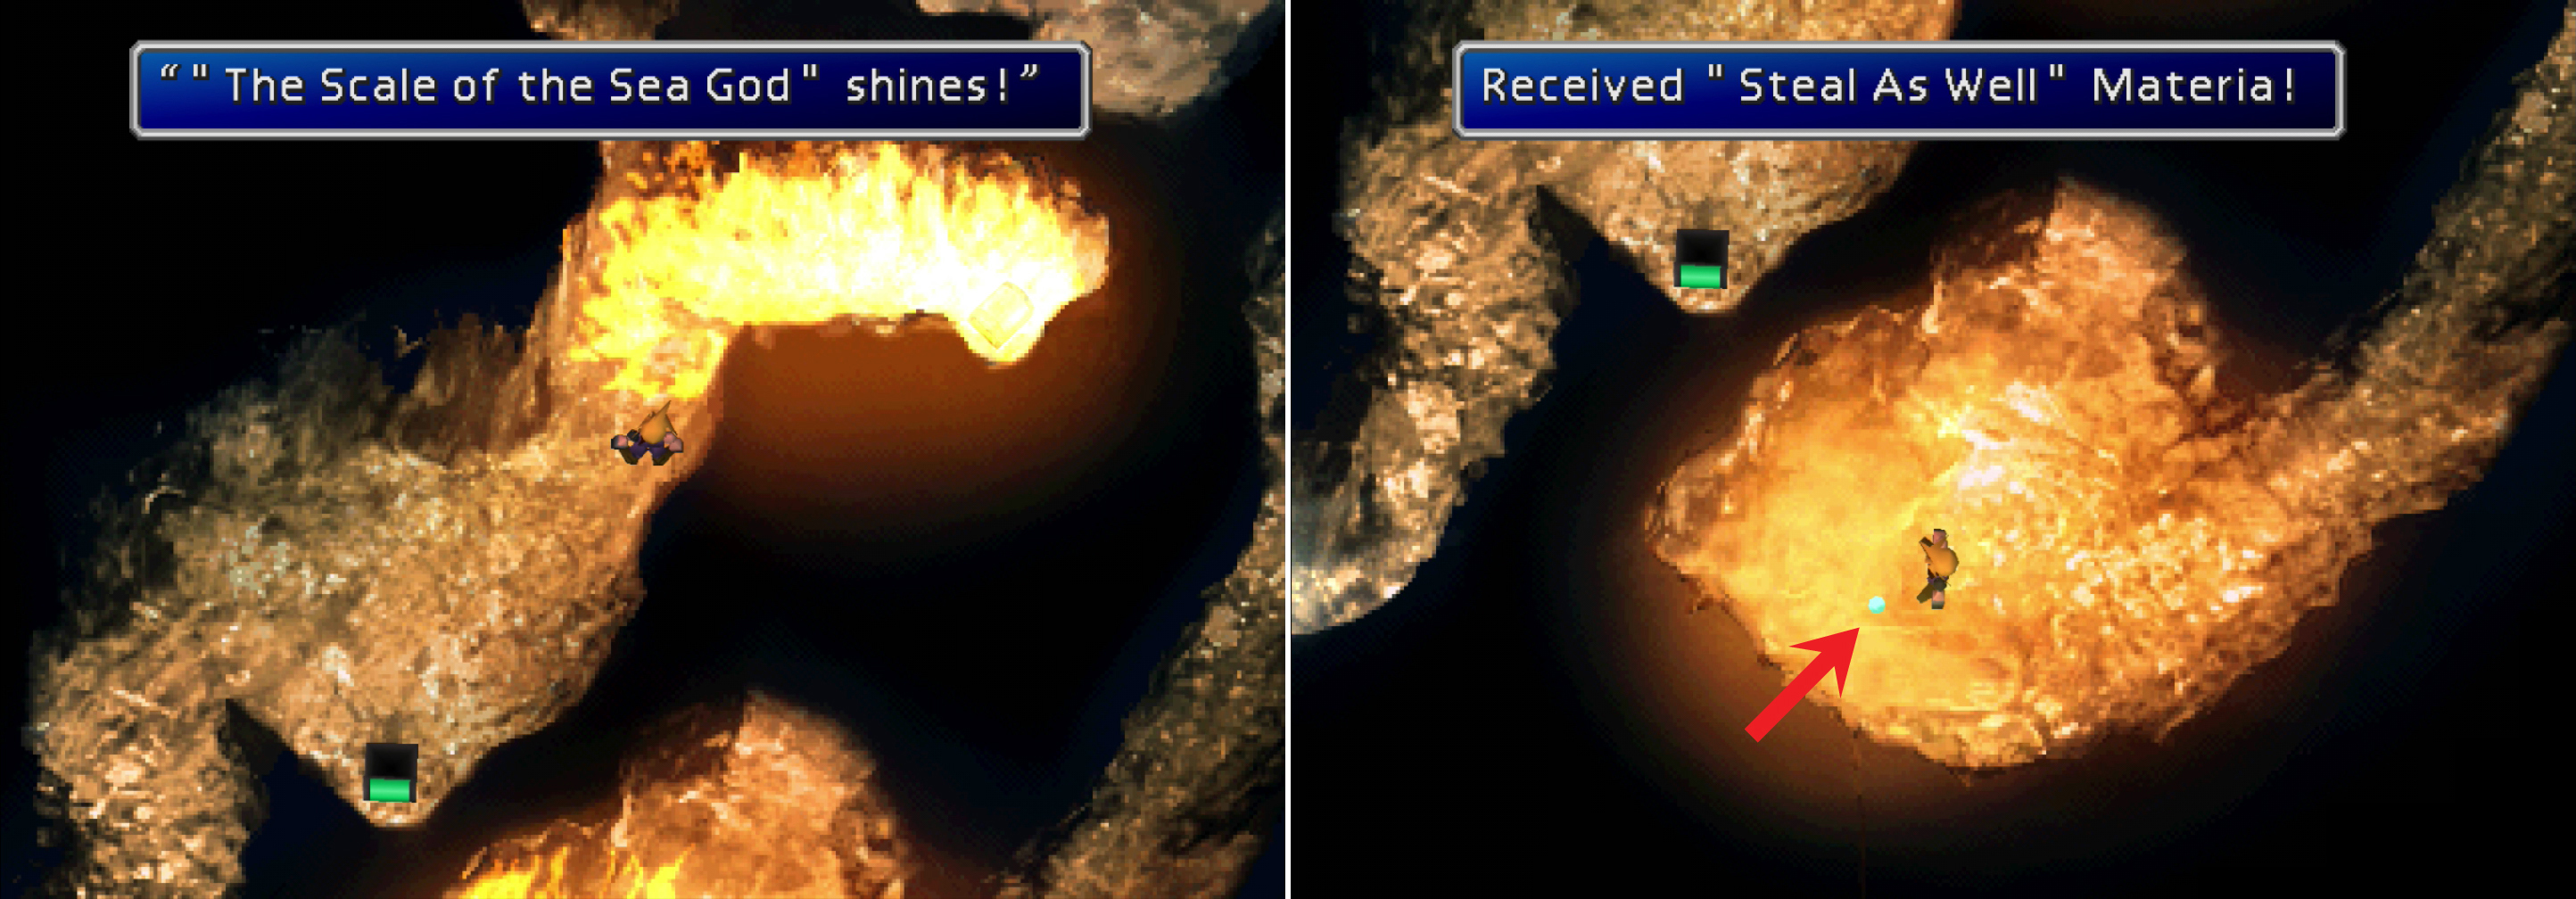
Use the Leviathan Scales to extinguish the flames in the caves on Da-chao (left) and claim some otherwise inaccessible loot, including the Steal As Well Materia (right).
Secrets of the Sea
Return to the world map outside of Junon and save your game, as there’s a singular danger in the deep that can spell disaster at this point in the game. Once you’re ready, board the submarine and dive by pressing [X] ([Cancel]). While underwater, pressing the same button will cause you to surface. Before you sail too far around here, note that there’s a giant green creature swimming around down here, which just so happens to be Emerald Weapon. If you run into it, you’ll be in a fight that you probably can’t win yet. It’s an optional super boss that is worth fighting… but not until you’ve obtained some better gear. Avoid Emerald Weapon at all costs, which is easier said than done, since the beastie likes to rest near areas of interest. Hence the game saving earlier, right?
Sail south and keep an eye open for the red submarine you sunk earlier (you did sink it, right?). In a cubby to the west you’ll find the submarine, on the ocean floor. Approach it and Cloud will have a moment of squeamishness about the fate of the submarine’s crew. More importantly, you recover the Huge Materia the submarine was transporting.

No, it’s not a giant gold fish, it’s Emerald Weapon, a superboss. Avoid it at all costs (left). Locate the red Shinra submarine you sunk earlier to recover the Huge Materia it was carrying (right).
Backtrack north along the continental shelf of the eastern continent and pass Junon, following the cliffs to the east until you reach the continental shelf of the northern continent. Sail through a narrow spot north of Costa del Sol and keep following the wall as you head into cubby to the north. At this apparent dead-end, turn your submarine to face east and you’ll see a a tunnel in the cliffs. Sail down it and run into a strange object at the end of the tunnel to find the “Key of Ancients” . You don’t need this item yet, but you will need it later, so why not collect it now?
Sail out of the tunnel and follow the continental shelf south - this time, however, stick to the western cliffs. After a short distance you’ll find a path leading east, at the end of which is another tunnel which, if you follow will lead to a circular cavern where you can surface. This will get you to the lake encircled by mountains where Lucrecia lurks, and is worth visiting (with Vincent in your party) if you didn’t already come here with a Chocobo.
Continue following the continental shelf of the western continent as it leads east at first, then head south through the narrow gap north of Costa del Sol. Keep following the western cliffs south until you find a passage running south-west, at the end of which is an airplane lying on the ocean floor. Sail into the plane to land on Shinra’s flooded Gelnika plane. Be wary, however, as the foes inside are some of the strongest in the game. Make sure you have both Ribbons equipped before entering. Also, Emerald Weapon likes to occasionally rest near the Gelnika, so be sure to save before entering or leave the ship.
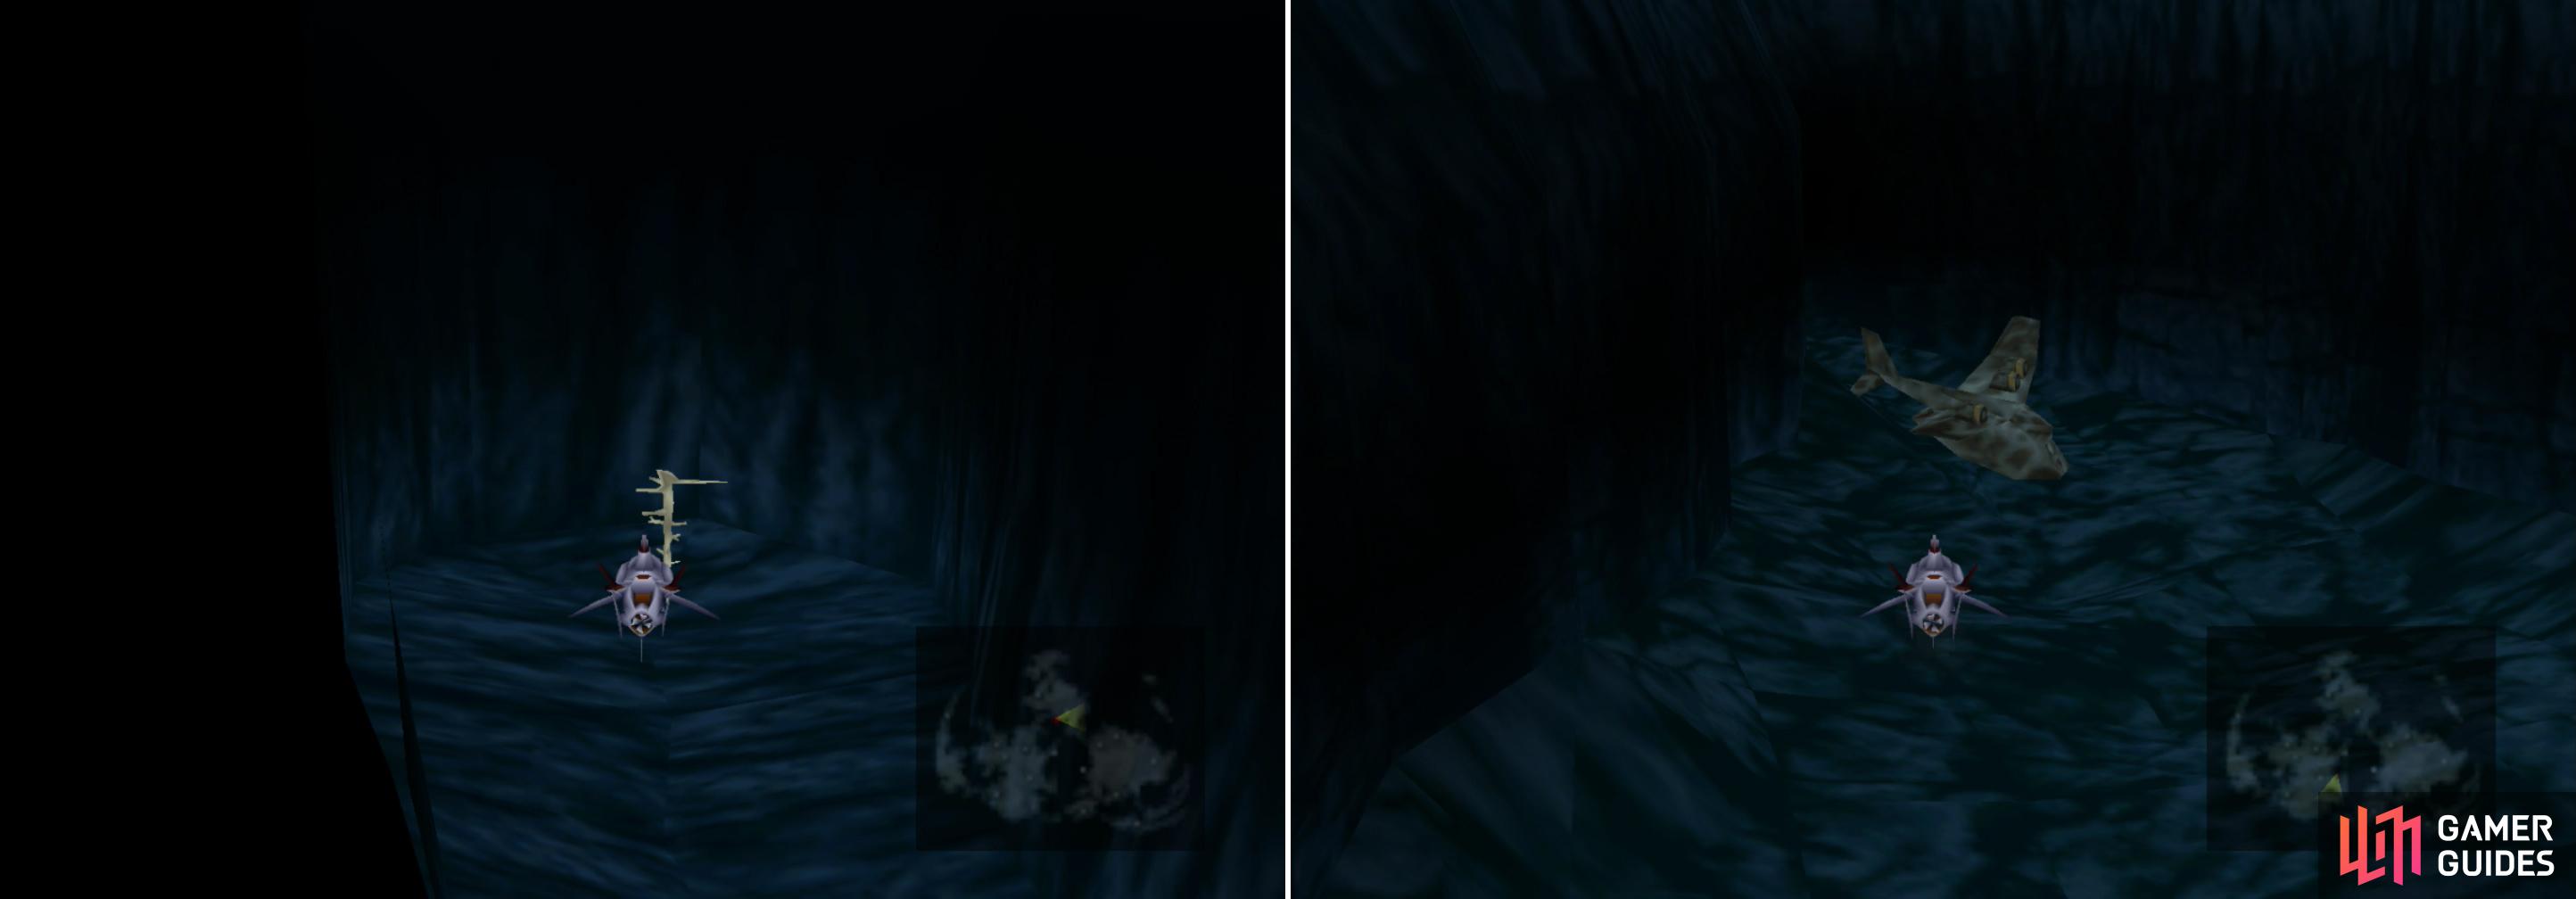
Find a cave along the northern continental shelf, in which you’ll find the Key of Ancients (left), then locate the sunken Gelnika on the sea floor near Costa del Sol (right).
Gelnika
Climb down the ladder to reach the partially flooded hallway and continue west to find a Save Point, which you should take advantage of. Loot a chest to the west to obtain the sword Heaven’s Cloud (93 Attack and six unjoined Materia sockets) then continue through the doorway to the west to find some old friends apparently in the midst of an investigation. They’re not too happy to see you (even though they’ll tell you all about this ships’ contents and fate), and a fight ensues.
Boss Battle: Reno and Rude
These guys have certainly improved since the last time you fought them. Fortunately, however, so have you. Before getting into the strategy, be sure to steal from both Reno and Rude, as they brought some nice toys along with them; Reno has a Tough Ring (or on the Playstation version, a “Touph Ring”) and Rude has a Ziedrich . Don’t feel bad, the company will probably give them new toys later.
The most dangerous attack the two have is Reno’s “Neo Turk Light” which costs no MP, but inflicts Confusion on the target. Fortunately, Ribbons will block this, as will Added Effect + Mystify. Otherwise, Reno’s normal attack will deal around 500 damage, and Rude’s magic (Bolt2, Fire2 and Ice2) will do around the same amount. Rude tends to become much less active if you drain his MP with “Magic Hammer”, but otherwise, if you’re not overly susceptible to Confusion, “Big Guard”, “White Wind” and physical attacks should do a fine job of ending the fight in your favor. Otherwise, the only noteworthy part about this fight is the fact that if you defeat one before the other, the survivor won’t flee; you’ll have to defeat them both to win this fight.
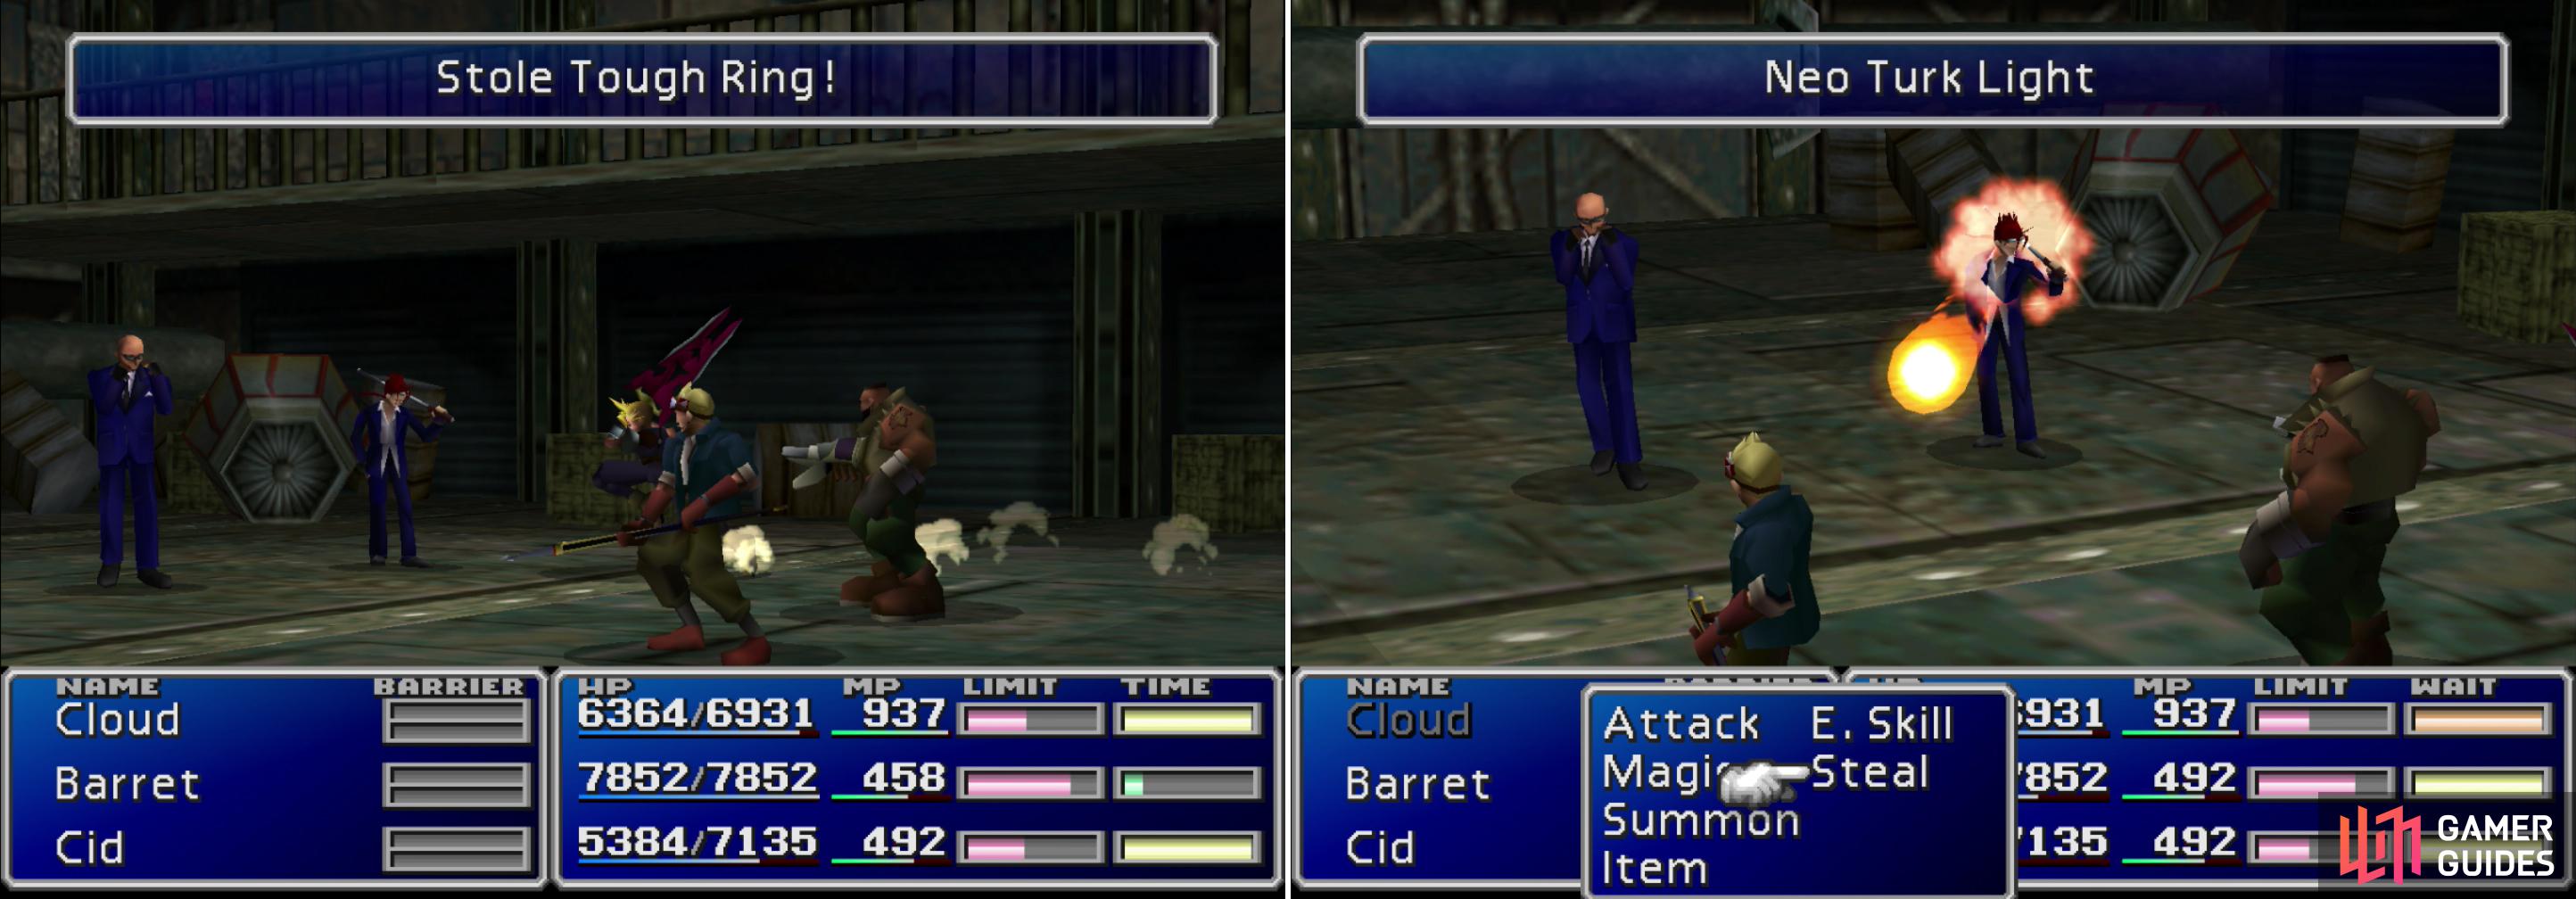
Steal a Ziedrich from Rude and a Tough Ring from Reno (left). Be wary of Reno’s “Neo Turk Light” attack, which causes Confusion in addition to dealing damage (right).
| Reno | Stats | Rude | Stats |
|---|---|---|---|
| HP: | 15000 | HP: | 20000 |
| MP: | 230 | MP: | 280 |
| Weaknesses: | N/A | Weaknesses: | N/A |
| Resistances: | Gravity (negates) | Resistances: | Gravity (negates) |
| XP: | 5000 | XP: | 5500 |
| AP: | 300 | AP: | 360 |
| Steal: | Tough Ring | Steal: | Ziedrich |
| Drop: | N/A | Drop: | N/A |
| Gil | 4000 | Gil: | 5000 |
The Tough Ring you obtained from Reno grants the wearer 50 Vitality and Spirit, which is a hefty boost to those two defensive stats. It’s also the accessory Sephiroth wore back during the Nibelheim Incident, unless, of course, Cloud was lying about that, too. The Ziedrich is a massively potent defensive piece of armor with unmatched defensive stats. It also grants resistance t0 (halves) all elemental damage. The downside, however, is that it has no Materia sockets.
Enemies in the Gelnika
After the battle head through the door to the north to reach the cargo room, where plenty of loot waits to be found. It is advisable that you equip some Enemy Away Materia on to reduce encounters here; the enemies are strong enough to be legitimately dangerous, capable of both sustaining and dealing thousands of damage. Worse comes to worse, don’t be afraid to flee from battle. You should be able to win, but don’t expect to breeze through these creatures the way you conquer most foes.
The enemies here are worth tangling with, despite being so powerful, as the treasure in this room (the Cargo Room) and the room adjacent to the hallway (the Research Room) are filled with epic treasure. Better yet, pretty much everything on the Gelnika can be Morphed into a Source item, which permanently raises the stats of a character. The key to taking advantage of these enemies and boosting your stats at the same time can be found on this very ship, in the form of Yuffie’s ultimate weapon; the Conformer. Because the enemies aboard the Gelnika are so unique and powerful, they deserve discussion, which will be handled immediately below, with coverage of the Cargo Room and the Research Room below that.
Bad Rap/Poodler:
Both of these critters can be found in the Hallway, often in the company of each other. Both are, compared to the rest of the creatures in the Gelnika, relatively weak. Bad Raps can be Morphed into Luck Sources and Poodlers can be Morphed into Speed Sources .
Serpent:
Well… they can’t all be winners. The Serpent is the weakest critter you can encounter in the Cargo Room and Research Room. It’s standard attack, “Viper Breath” deals around 600 damage to one character. As it gets injured it’ll use “Huge Tidal Wave” and “Aqualung” to hit the whole party for around 600 and 1400 damage, respectively. Unfortunately for it, all its attacks consume MP, so “Magic Hammer” can render it harmless. You can steal Water Rings from them, and they Morph into Mind Sources .
Unknown:
A brute force beast which haunts the Cargo Room and Research Room, the Unknown (presumably #1?) employs its “Tongue” attack to deal around 2000 damage to one target. Once it’s injured, it will also use its “Blaster” attack. You can steal Fire Armlets from them, and Morph them into Power Sources .
Unknown 2:
Lurking in the Cargo Room and the Research Room is an odd creature known only as “Unknown 2”. It will counter aggression with either “Abnormal Breath” (which causes Confusion) or “? Needle” (which causes Paralysis). Obviously you’re going to want Ribbons equipped when fighting them. It’s normal attack can also deal well over 2000 damage, so it’s not lacking in brute force, either. On the plus side, you can steal Aurora Armlets from them, and they Morph into Guard Sources .
Unknown 3:
Unknown 3s, like other Unknowns, can be found in the Cargo Room and the Research Room. Not only do they have two nasty attacks, “Slap” and “Poison Fang”, the former of which can deal over 3000 damage, and the latter of which deals over 2500 damage and inflicts poison (but will always miss if the wearer is immune to poison) they also counter every attack with “Creepy Touch”, which inflicts Sadness. Aside from that, their Bolt2 attacks is relatively tame. You can rob them to obtain Bolt Armlets , and they Morph into Magic Sources .
Cargo Room
Anyways, obligatory warning out of the way, continue north and loot a chest on the walkway to score a Megalixir , then head to the northern end of the walkway. Ignore the stairs for now and head east to find another chest, this one containing the Spirit Lance (92 Attack, two pairs of joined Materia sockets). Backtrack to the west and head down the stairs, then search near the ruined helicopter to find the Hades Materia . Next make your way to the southern end of the cargo room to find a chest near some water wherein you’ll find Cid’s ultimate Limit Break; Highwind . In another chest to the west you’ll find the Outsider (80 Attack, eight Materia sockets, two pairs of which are joined).
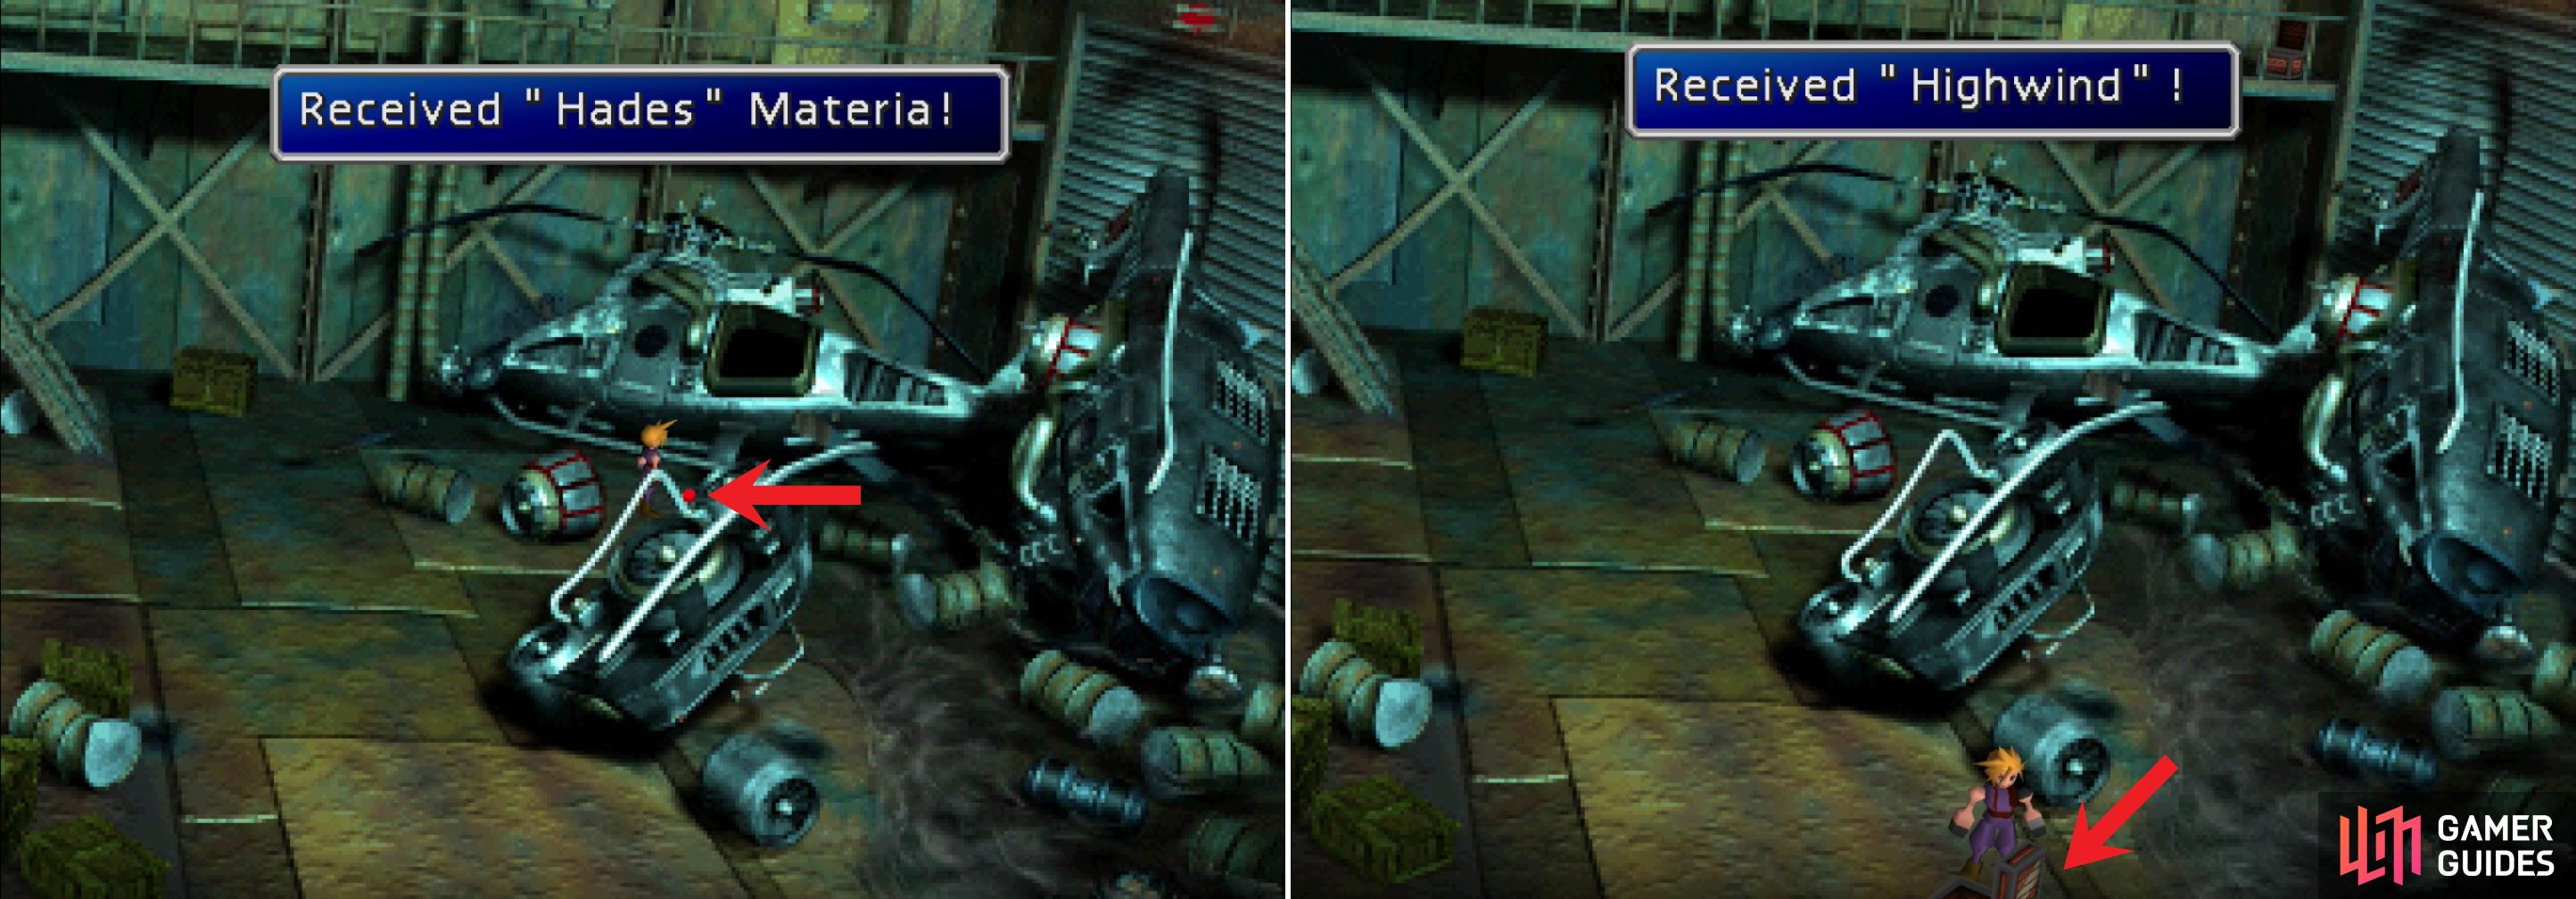
Find a piece of Hades Materia near a ruined helicoptor in the Cargo Room (left) then find Cid’s ultimate Limit Break “Highwind” in a chest along the southern end of the Cargo Room (right).
Research Room
Leave the Cargo Room and return to the hallway with the Save Point. Save your game to ensure you keep your ill-gotten gains, then head through a door to the north. Head east and loot a chest to score an Escort Guard , a male-only piece of armor that has decent defensive stats, six Materia sockets (three joined pairs) and which grants immunity to lightning, earth, water, and poison damage. Head down some stairs to the west and run until you reach the western wall, which you should then follow north. Obscured by a pipe is a chest nestled against the western wall, which you can loot to score Yuffie’s ultimate weapon, the Conformer . Now head east to find a chest above us, which is partially obscuring a purple orb of Materia below it. Investigate the orb to obtain the Double Cut Materia , then return to the entrance of the room. Before you leave, head north along the western wall, across a metal grate, and above the chest that contained the Conformer. From here follow another metal walkway east to reach the chest that was above the Double Cut Materia, within which is another Megalixir . Once all that’s in your possession, return to the hallway, save your game, then return to your submarine.
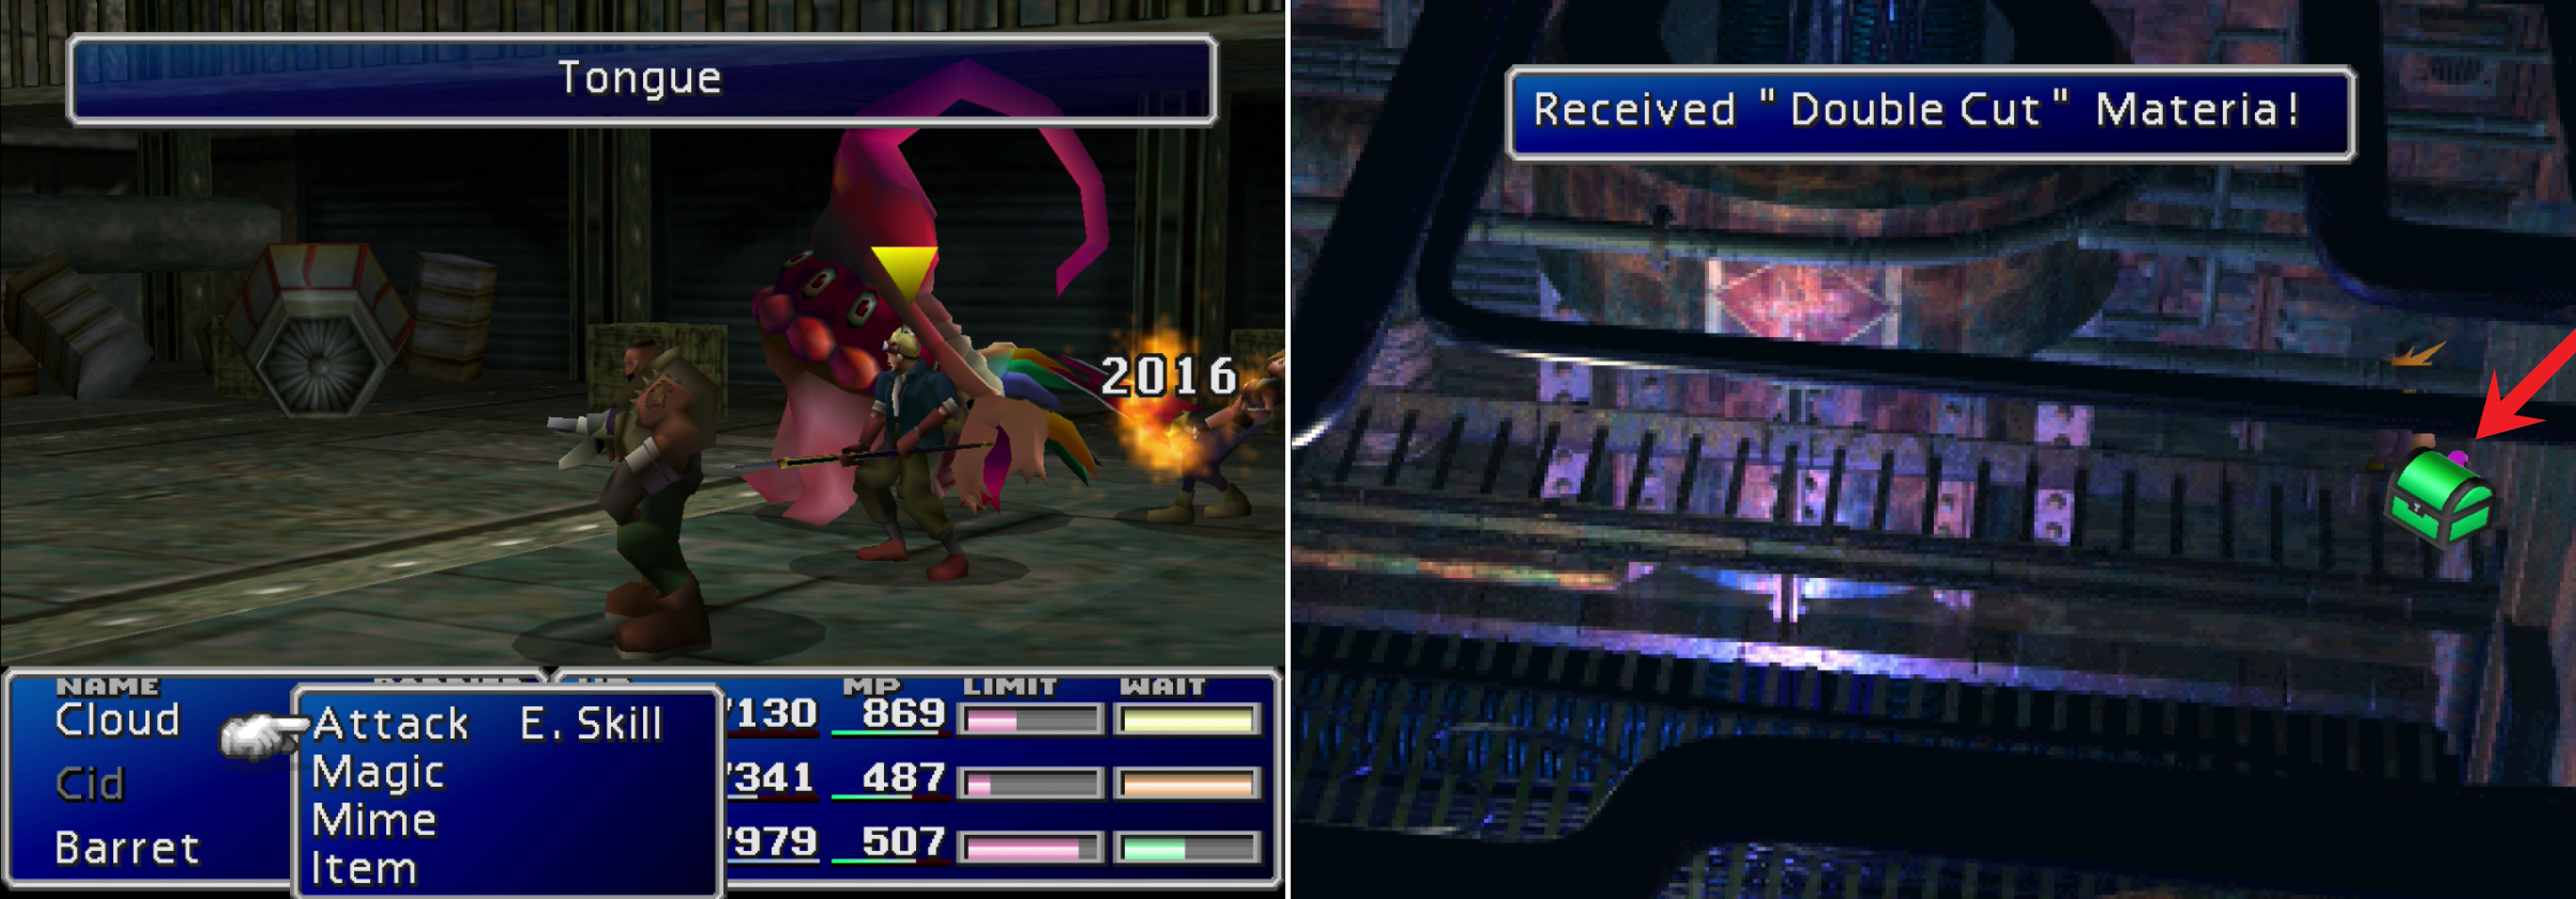
Be wary of the enemies in the Cargo Room and Research Room, as they’re some of the most dangerous foes in the game (left). Find Double Cut Materia behind a chest in the Research Room (right).
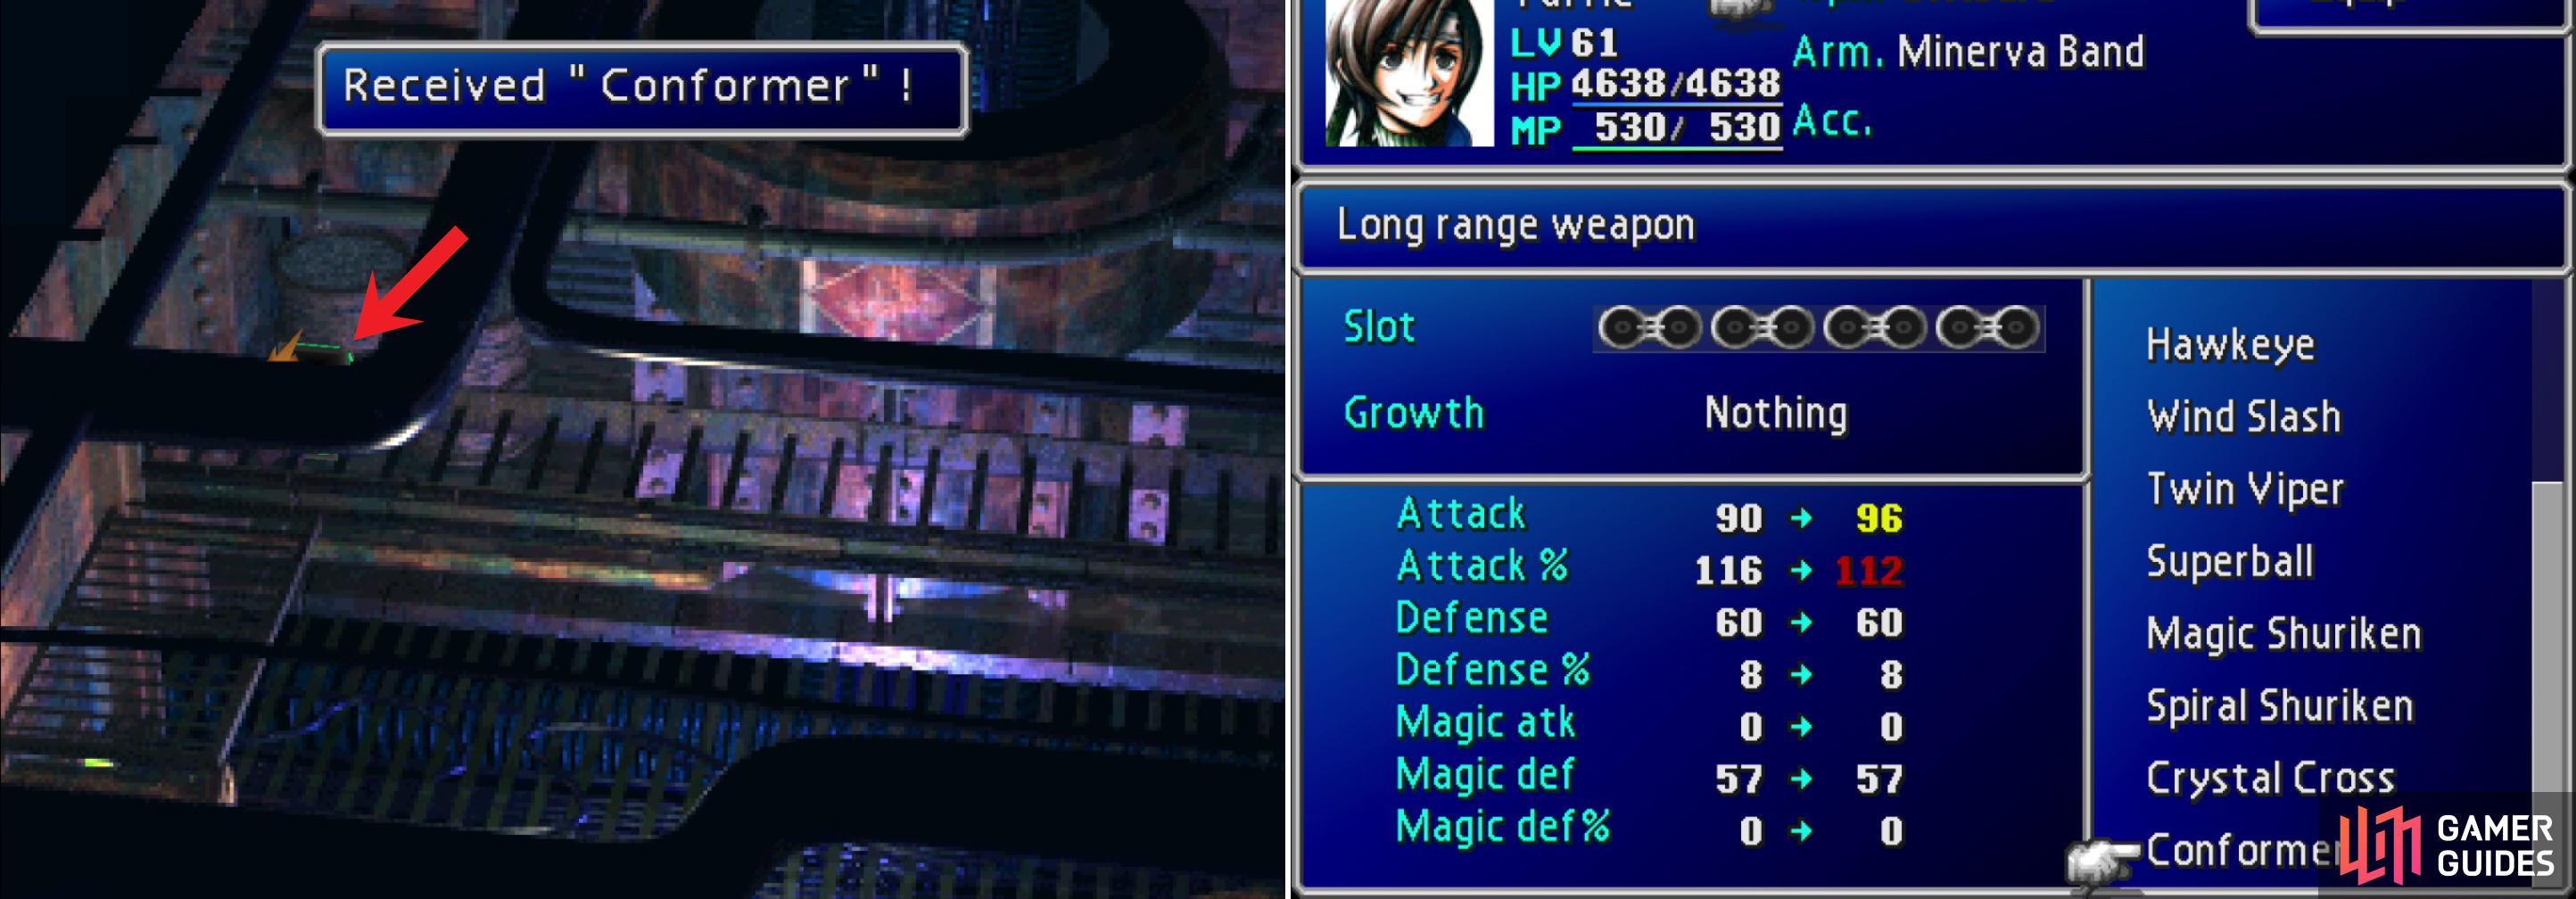
In a chest obscured by the foreground you’ll find Yuffie’s ultimate weapon, the Conformer (left). Not only is it Yuffie’s most powerful weapon, it’s also one of the strongest weapons in the game, thanks to how it charges (right).
No Comments