
| Important Items in this Area |
|---|
| Sense Materia |
| Steal Materia |
After the cutscene involving Shinra’s top brass, you’ll find yourself in a sewer. Whichever girl you talk to first will have an approved opinion of you, although the other won’t lose any. Talk to them both and you’ll get jinxed - did you think that Corneo would be content with just forcing you to get dirty? His pet sewer-guardian, Aps, shows up to finish you off.
Boss Battle: Aps
If you equipped Fire and Restore Materia earlier, this fight will be easy. Your strategy is simple: - pelt him with Fire spells (each will do around 150~ damage to him if you’re not insanely over-leveled), only stopping to perform a Limit Break or cast Cure, if your HP falls to around 100. Cloud’s Cross-Slash Limit Break can paralyze Aps, if you have it. If not, it really doesn’t matter; you don’t need to paralyze Aps to defeat him handily.
Of his own attacks, the “Sewer Tsunami” is the most note-worthy one. When he casts it, a wave will crash into all combatants - including Aps himself. It can be summoned either from behind Aps (in which case he’ll take the brunt of the damage) or from behind the party. In either case every party member will suffer around 50-100 points of damage. In the former case, Aps will take around 150~ damage, and in the latter, around 50~. He’s also got a “Lick” ability which deals paltry damage, but causes the Sadness debuff, which is the opposite of what a Hyper does meaning it slows down the rate at which your Limit Gauge fills.
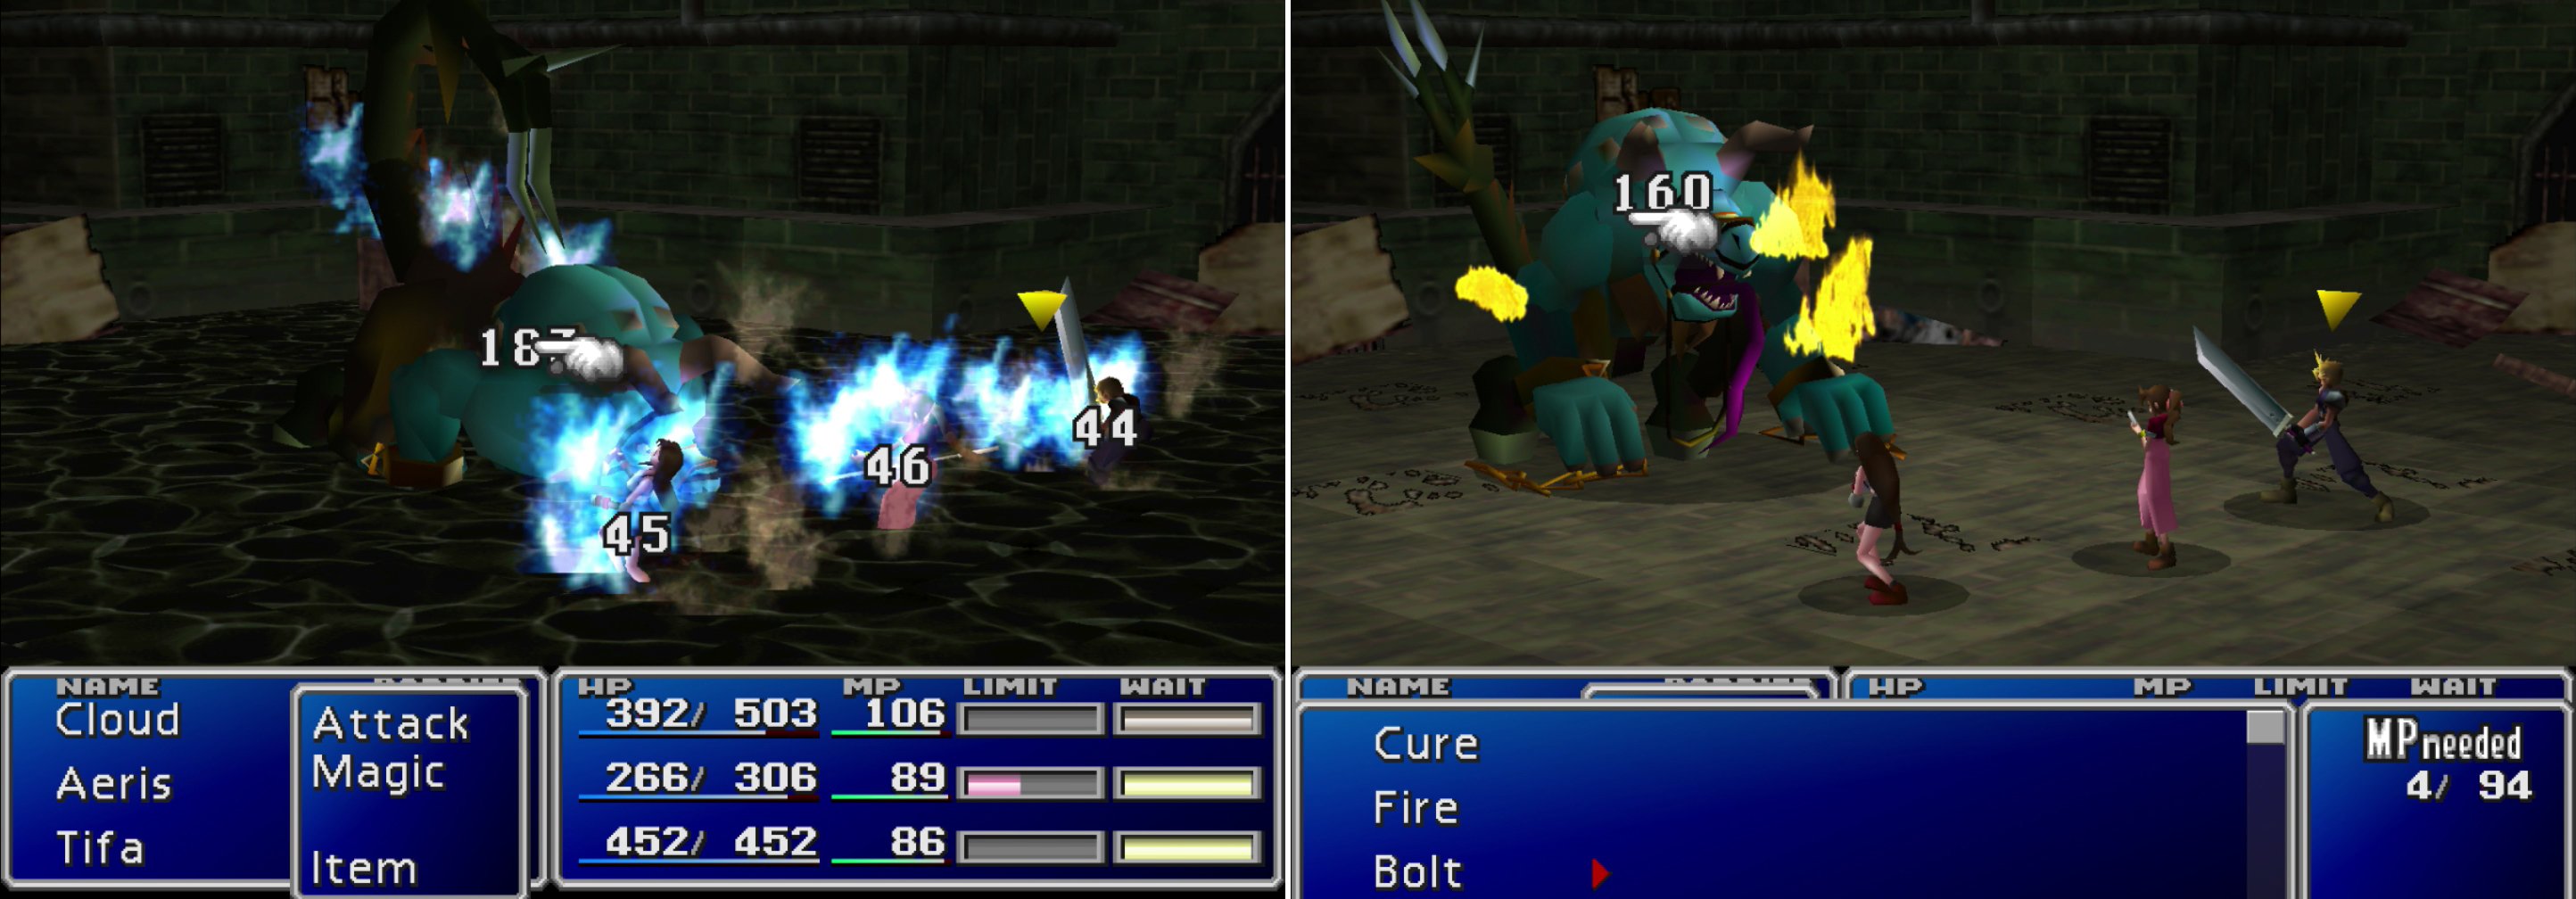
Aps’s “Sewer Tsunami” attack will hit everybody in the battle… including Aps! (left). Aps is vulnerable to fire, so be sure to take advantage of his weakness by pummeling him with magic (right).
| Aps | Stats |
|---|---|
| HP: | 1800 |
| MP: | 0 |
| Weaknesses: | Fire |
| Resistances: | Gravity (negates) |
| XP: | 240 |
| AP: | 22 |
| Steal: | n/a |
| Drop: | Phoenix Down |
| Gil | 253 |
Sewer
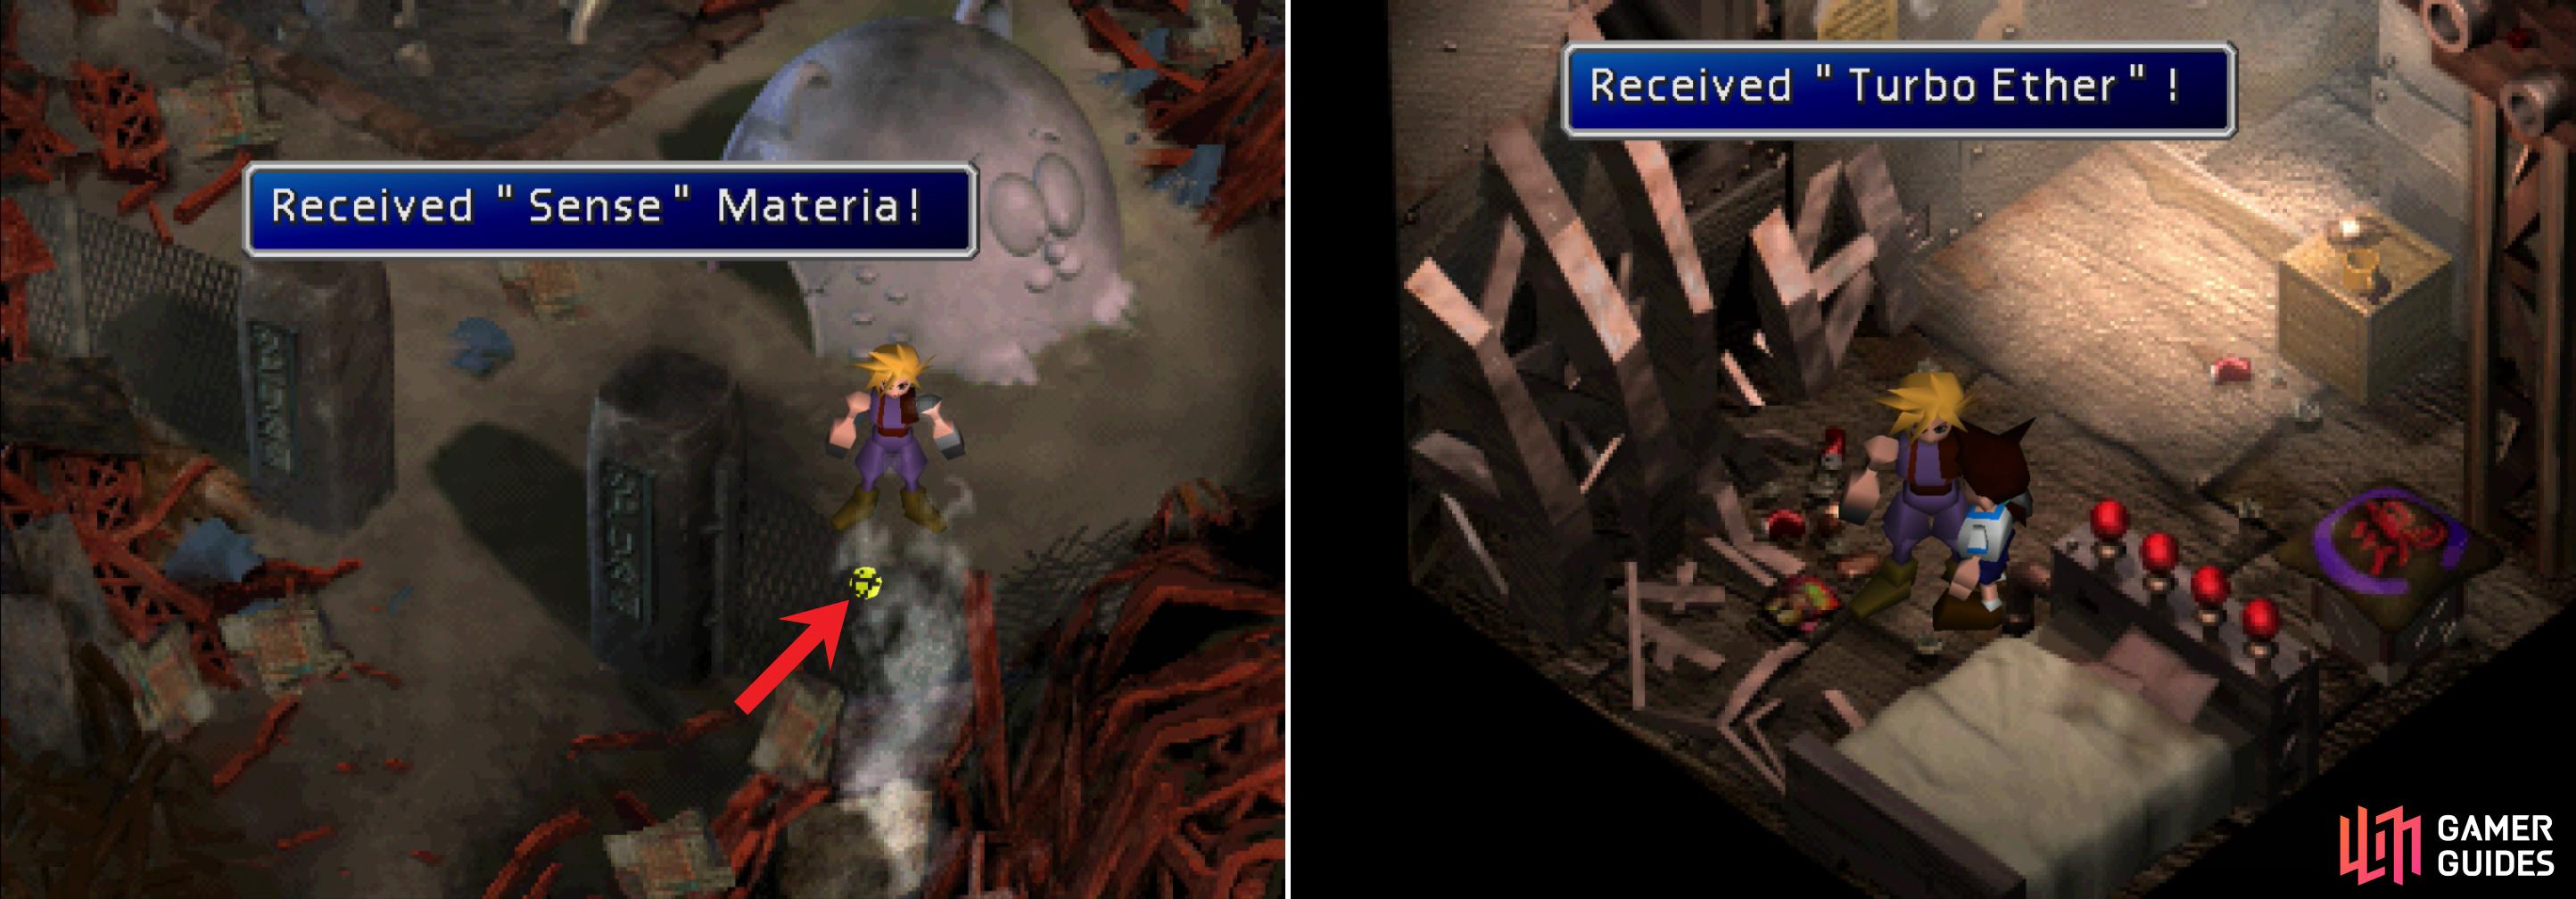
Pummel Aps with Fire spells and Limit Breaks until he falls, helped at least in small part by his own “Sewer Tsunami” attacks. After the fight (and some chatter) head up some stairs to the south-east to reach a walkway, at the north-western end of which is a Potion . Backtrack down into the murk and climb a ladder to reach another walkway and follow it until you find another ladder back down into the water. Find some more stairs which leads to another walkway, on which you’ll find a chunk of Steal Materia , then continue north-east and jump down a hole.
When you reach the lower level of the sewers head down some stairs and travel north-west through the waste. You can scale a green brick structure where the fence is to reach another walkway. Once done, head south-east to find another ladder, which will lead you out of the sewers.
Train Graveyard
You’ll surface in the Train Graveyard, the northern end of which is just east of the Sector 7 train station. Getting there is going to take a bit of doing, however, as the way is blocked by many decommissioned trains. After some chatter, head east to find a Save Point and save your game.
For now, however, you can use the Steal Materia to lift lesser goods from the normal monsters you face. At the present, you can steal Ethers from Deenglow monsters you encounter, which can be useful, and sell well. Keep in mind that if you Steal, you won’t get a monster’s normal drop, as well. In this case, Deenglow can drop Graviballs , which allow you to cast Demi, a spell that reduces a monsters HP by 1/4. These aren’t necessary to win any fights, but they can come in handy as first-strike attacks against some bosses. They are especially useful if you wish to try to learn a very powerful spell early on. Try to win at least four of them before moving on.
When you’re done saving and messing around with the Steal Materia, turn your attention to the nearby train to the north. Ignore the ladder leading to the top for now, and instead enter the hole in the side, cross to the northern end of the train, exit out another hole, and search a rather large open barrel that sticks out like a sore thumb amidst all the gray.
After you’ve claimed the Hi-Potion , return to the Save Point and climb the ladder, walk across the top of the train (grabbing another Hi-Potion on the way), then cross to another adjacent train. Jump on some collapsed metal scaffolding and follow it down to the ground by heading west. Go north and find another barrel - this one contains an Echo Screen - then run under the scaffolding you used as a ramp and board a train to the east, grab a Potion , then exit out the other side of the train.
Climb a ladder to the east, then head north along the top of the train until you find a ladder back down to the ground. Continue north, enter another train, keep going north inside the train, then exit once you’re able to near the top of the screen. Grab the Potion on the ground then head north to reach the next area.
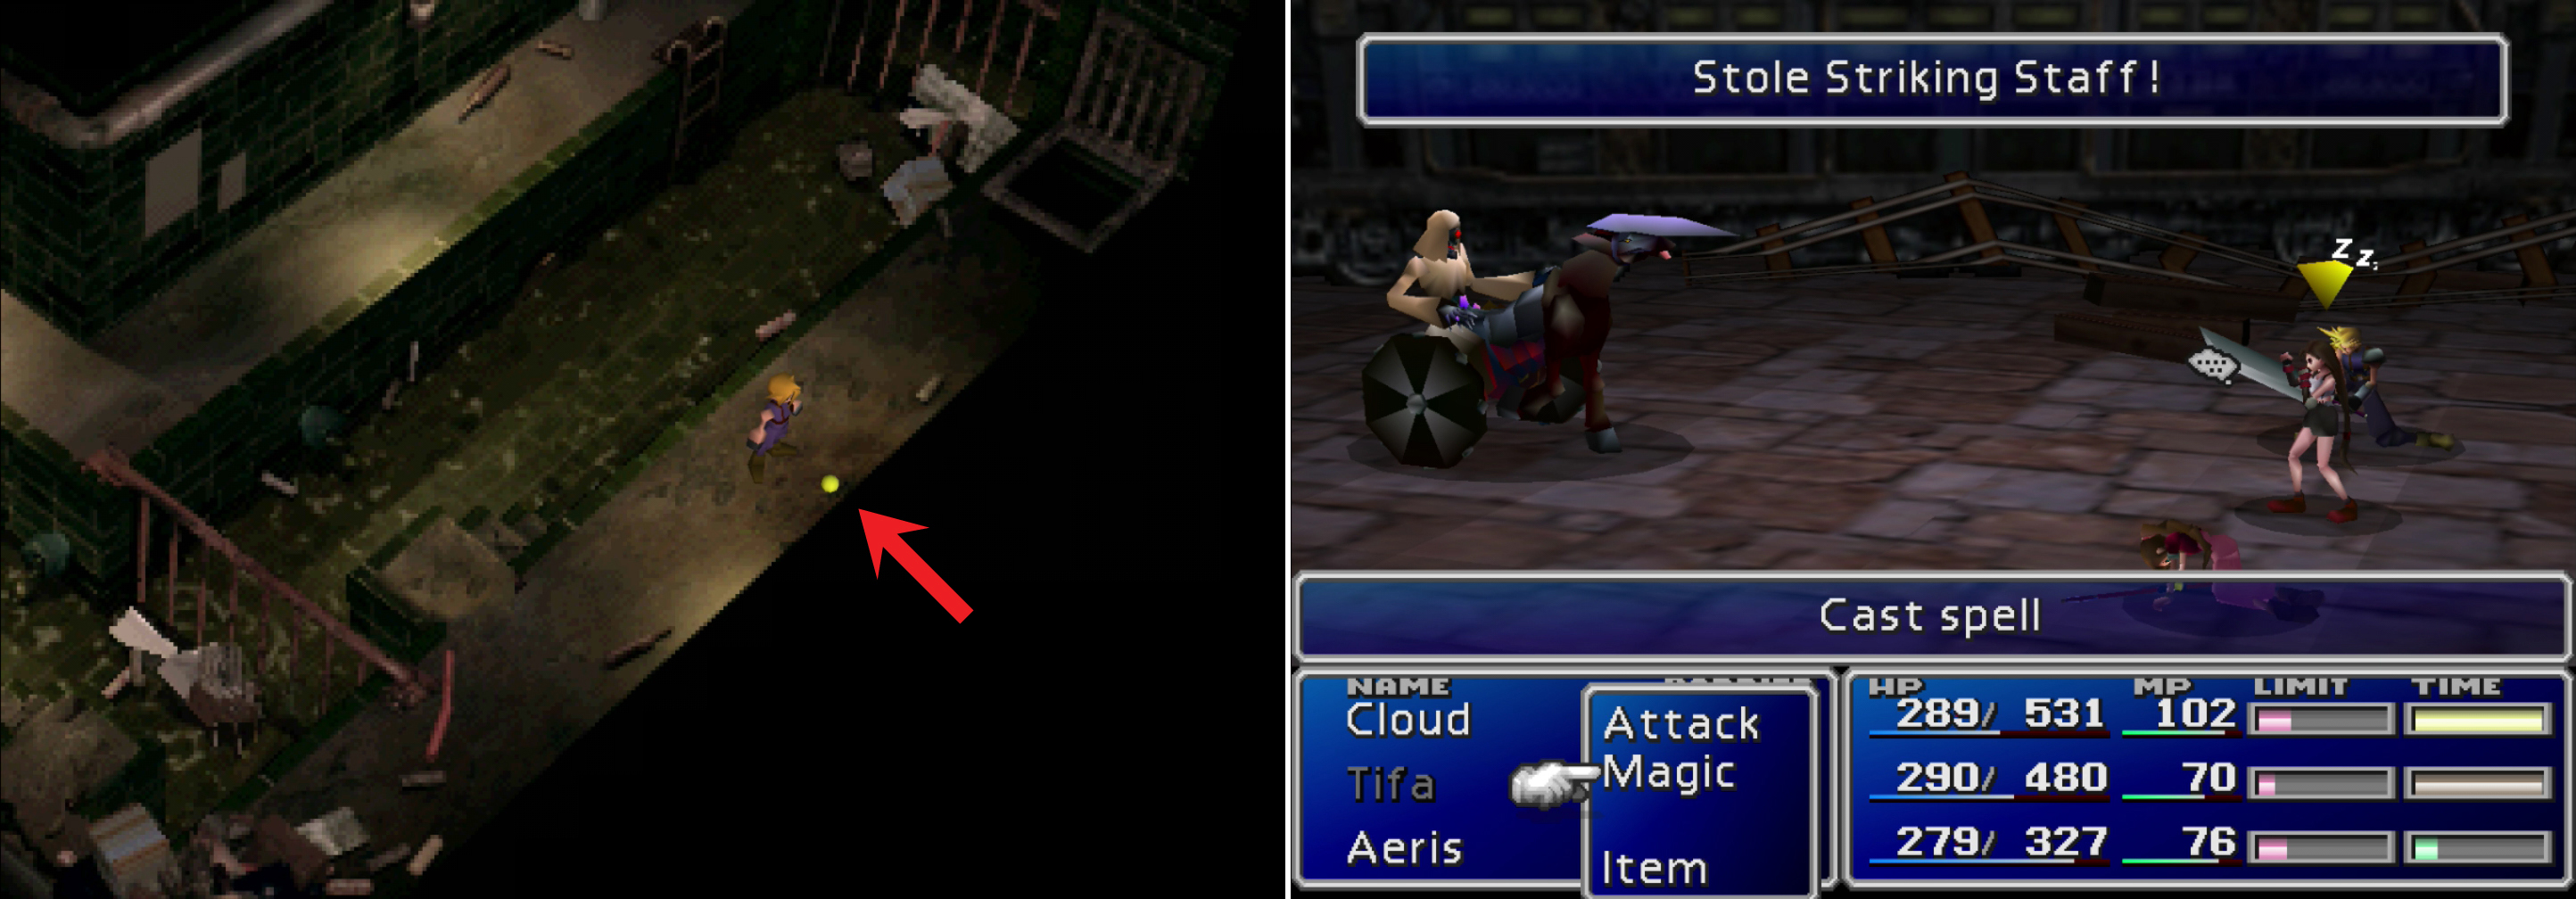
Pick up the Steal Materia before leaving the sewers (left). You can steal a Striking Staff from Eligor enemies in the Train Graveyard (right).
Head north to get around the trains flanking you, then turn west when you can, then head south to find a Potion lying orphaned on the ground. Make your way west around another train (and the debris north of it) to find a barrel that contains an Ether , then backtrack to the beginning of the area.
Venture north to find a train that’s oddly lit. It’s the game’s way of saying “Look here! A train you can interact with!” And so you can. Enter the train and Cloud will somehow learn to drive it forward, knocking aside another train in the process. Hop in it again to move it out of the way, then head around it to the north to find another, duller train with a ladder leading to its roof, upon which you can score a Hi-Potion . Before claiming this prize, however, drive another, smaller train to the north forward until it touches another bit of fallen metal scaffolding. When you climb the immobile train, you can then leap onto the northern-most mobile train and use the scaffolding to climb down and out of the Train Graveyard; or at least, to the northern end of it, from which you can head west to reach the station.
Fight for the Pillar
Continue through the station to reach the pillar, where AVALANCHE is busy trying to prevent something from blowing up, for once. Class warfare, folks. If they’re blowing up reactors near where rich people live, they’re all for it. If rich people are trying to smash a slum, they don’t like it. Kind of stupid, too, considering that Shinra plans to frame AVALANCHE for the pillar bombing, so fighting at the base of the pillar is just not smart.
After some chatter Wedge will take the quick way down and will tell you to help Barret, who is fighting on the pillar. With some uncharacteristic resolve, Cloud vows to make his way to the top of the pillar, while Aeris stays behind to tend to Wedge. Talk to the overweight man in the red shirt (hey, wasn’t he outside of the Honey Bee Inn? Damn clones!) and he’ll serve as a merchant, who will sell you various items. When you’re ready to go, head inside the fence and save your game at the Save Point, which migrated here for some reason. Don’t worry, your HP/MP have been fully restored, so you won’t have to do this next bit with exhausted characters.
Item Shop
| Item | Gil |
|---|---|
| Potion | 50 |
| Phoenix Down | 300 |
| Antidote | 80 |
| Grenade | 80 |
| Hyper | 100 |
| Tranquilizer | 100 |
| Tent | 500 |
Head up the stairs, passing by Biggs as you go. On the second screen of stairs you’ll find Jessie. It seems Barret’s the only one who made it to the top. Continue past her and you’ll reach the platform upon which the pillar’s control terminal is on. Talk to Barret and take the opportunity to equip him with new armor and Materia. When you’re good to go, the man who chased Cloud and Aeris in the church will show up and activate the bomb, after which he’ll pick a fight to ensure you don’t tamper with the bomb.
Boss Battle: Reno
Reno isn’t too tough, his attacks do around 60 damage, and he’s only got 1000 HP, which is about half of what Aps had. Just pummel him with physical attacks (using Limit Breaks when possible) and you’ll be fine. The only thing to watch out for is his “Pyramid” attack, which traps a party member in a pyramid. The character inside the Pyramid can’t act, but if you attack the pyramid with another character, it’ll dissipate.
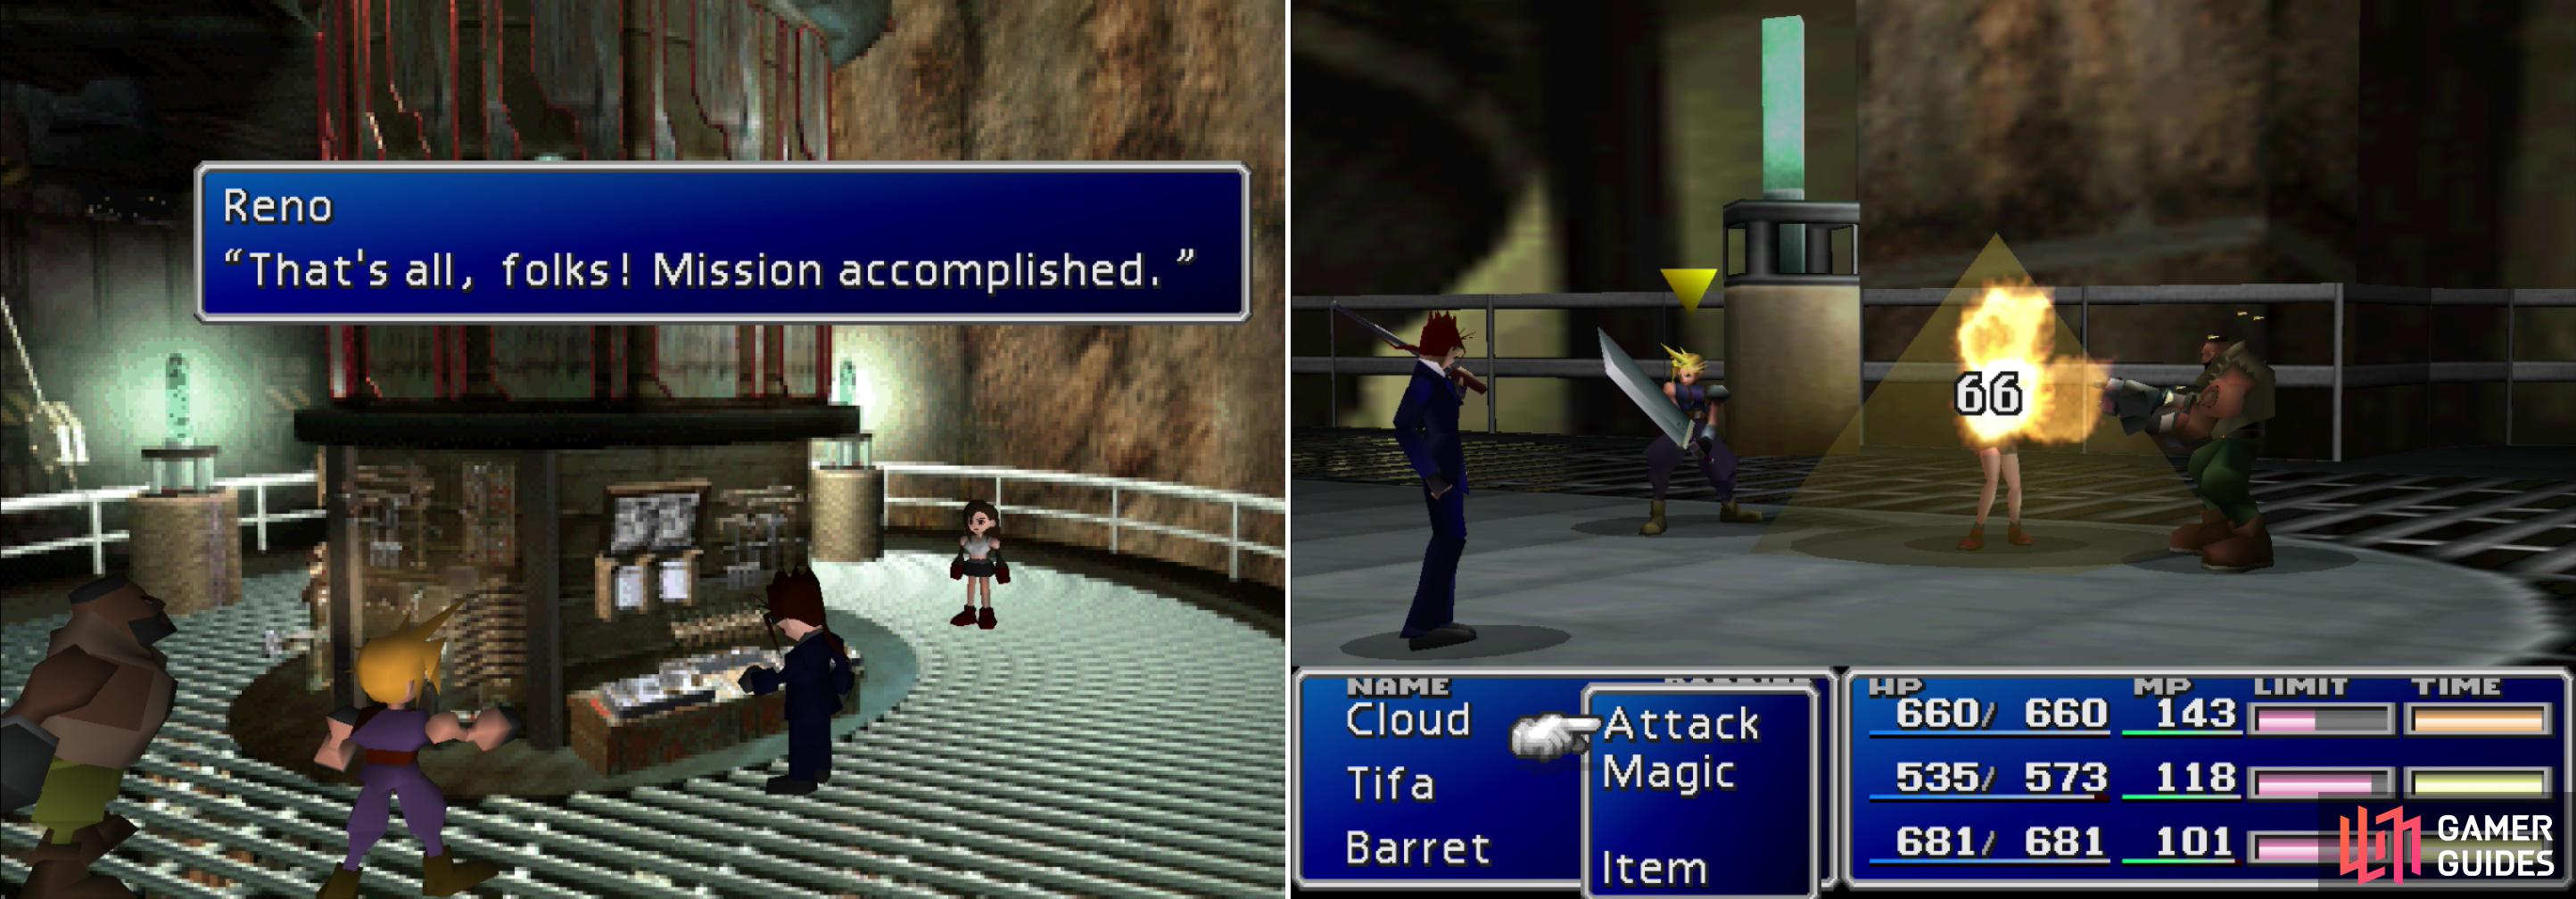
Despite your valient efforts, Reno of the Turks sets Shinra’s diabolical scheme in motion (left). Dispel Reno’s “Pyramid” spell by attacking the pyramid imprisoning a character (right).
| Reno | Stats |
|---|---|
| HP: | 1000 |
| MP: | 0 |
| Weaknesses: | N/A |
| Resistances: | Gravity (negates), Lightning (halves) |
| XP: | 290 |
| AP: | 22 |
| Steal: | n/a |
| Drop: | Ether |
| Gil | 500 |
When Reno falls (or rather, jumps) talk to Tifa, then investigate the bomb. Tseng, another Shinra employee, will show up and show off a “special guest” he has with him, and after some more chatter, he’ll fly off. Talk to Barret as he scrambles around, and he’ll locate a possible way off the pillar. Everybody piles on him and swings for their lives just before the bomb goes off. President Shinra, for his part, watches the destruction he’s caused while listening to classical music.
The threesome will land at the playground between Sector 5 and Wall Market, and Barret will throw a fit. During some more chatter Cloud will walk off. When you’re in control, pick your way through across the road leading to Sector 5 and shortly you’ll be stopped by Tifa and Barret. They’ll chat, Cloud will hear voices, and the two will rejoin the party. Make your way through Sector 5 to Aeris’s House, where Aeris’s mother, Elmyra, will tell you the whole sad story.
Afterwards, head upstairs and check on Barret, who is going all daddy-bear on Marlene. As you go to leave, Barret will confirm his desire to take the fight to Shinra, and Marlene will tell you about Aeris’s peculiar topic of inquisitiveness. If you say “I don’t know” Aeris will lose favor with you, but Tifa’s disposition will improve (Aeris -3, Tifa +3). If you say “Let’s hope so” the opposite will occur (Aeris +3, Tifa -3). Go and the leave the house and Tifa will throw in her support.
With the gang all gathered, leave the house. Your ultimate destination is Wall Market, but on your way stop by the house south of the weapon store in Sector 5. Head into the back room and talk to the kid. If you didn’t rob him earlier, he’ll give you a Turbo Ether , which is worth far, far more than 5 Gil. Well, not really, but it’s more useful than 5 Gil, anyway.
The Climb
Breaking into Shinra Headquarters is daunting enough, but considering that there’s a train going up there, it’s going to be an adventure just reaching the place. Make your way back to Wall Market, stopping at the playground long enough to pick up the Sense Materia , which is behind a fence near the southern end of the playground, partially obscured by some smoke.
Grab the Sense Materia from the playground (left) and talk to the budding entrepreneur in Sector 5 to get a Turbo Ether (right)… at least, if you didn’t steal his 5 Gil earlier.
When you reach Wall Market, visit the Materia shop - owned by the guy who gave you the tiara for performing some corporate espionage. He’ll now sell you his wares which, incidentally, aren’t terribly impressive. But if you absolutely need a second piece of Cover Materia, wait, no, that kind of defeats the purpose… He also sells Fire, Ice, Lightning and Restore, if you need any more of the basics. You should endeavor to obtain three Fire Materia, three Restore Materia, and three Lightning Materia before you leave, as that much spell power will make assaulting Shinra Headquarters much, much easier. You can also return to Corneo’s Mansion and pick up any loot you may have missed - namely the Phoenix Down in the eastern room (which you didn’t get if Corneo picked Cloud).
Materia Shop
| Item | Gil |
|---|---|
| Fire Materia | 600 |
| Ice Materia | 600 |
| Lightning Materia | 600 |
| Restore Materia | 750 |
| Cover Materia | 1000 |
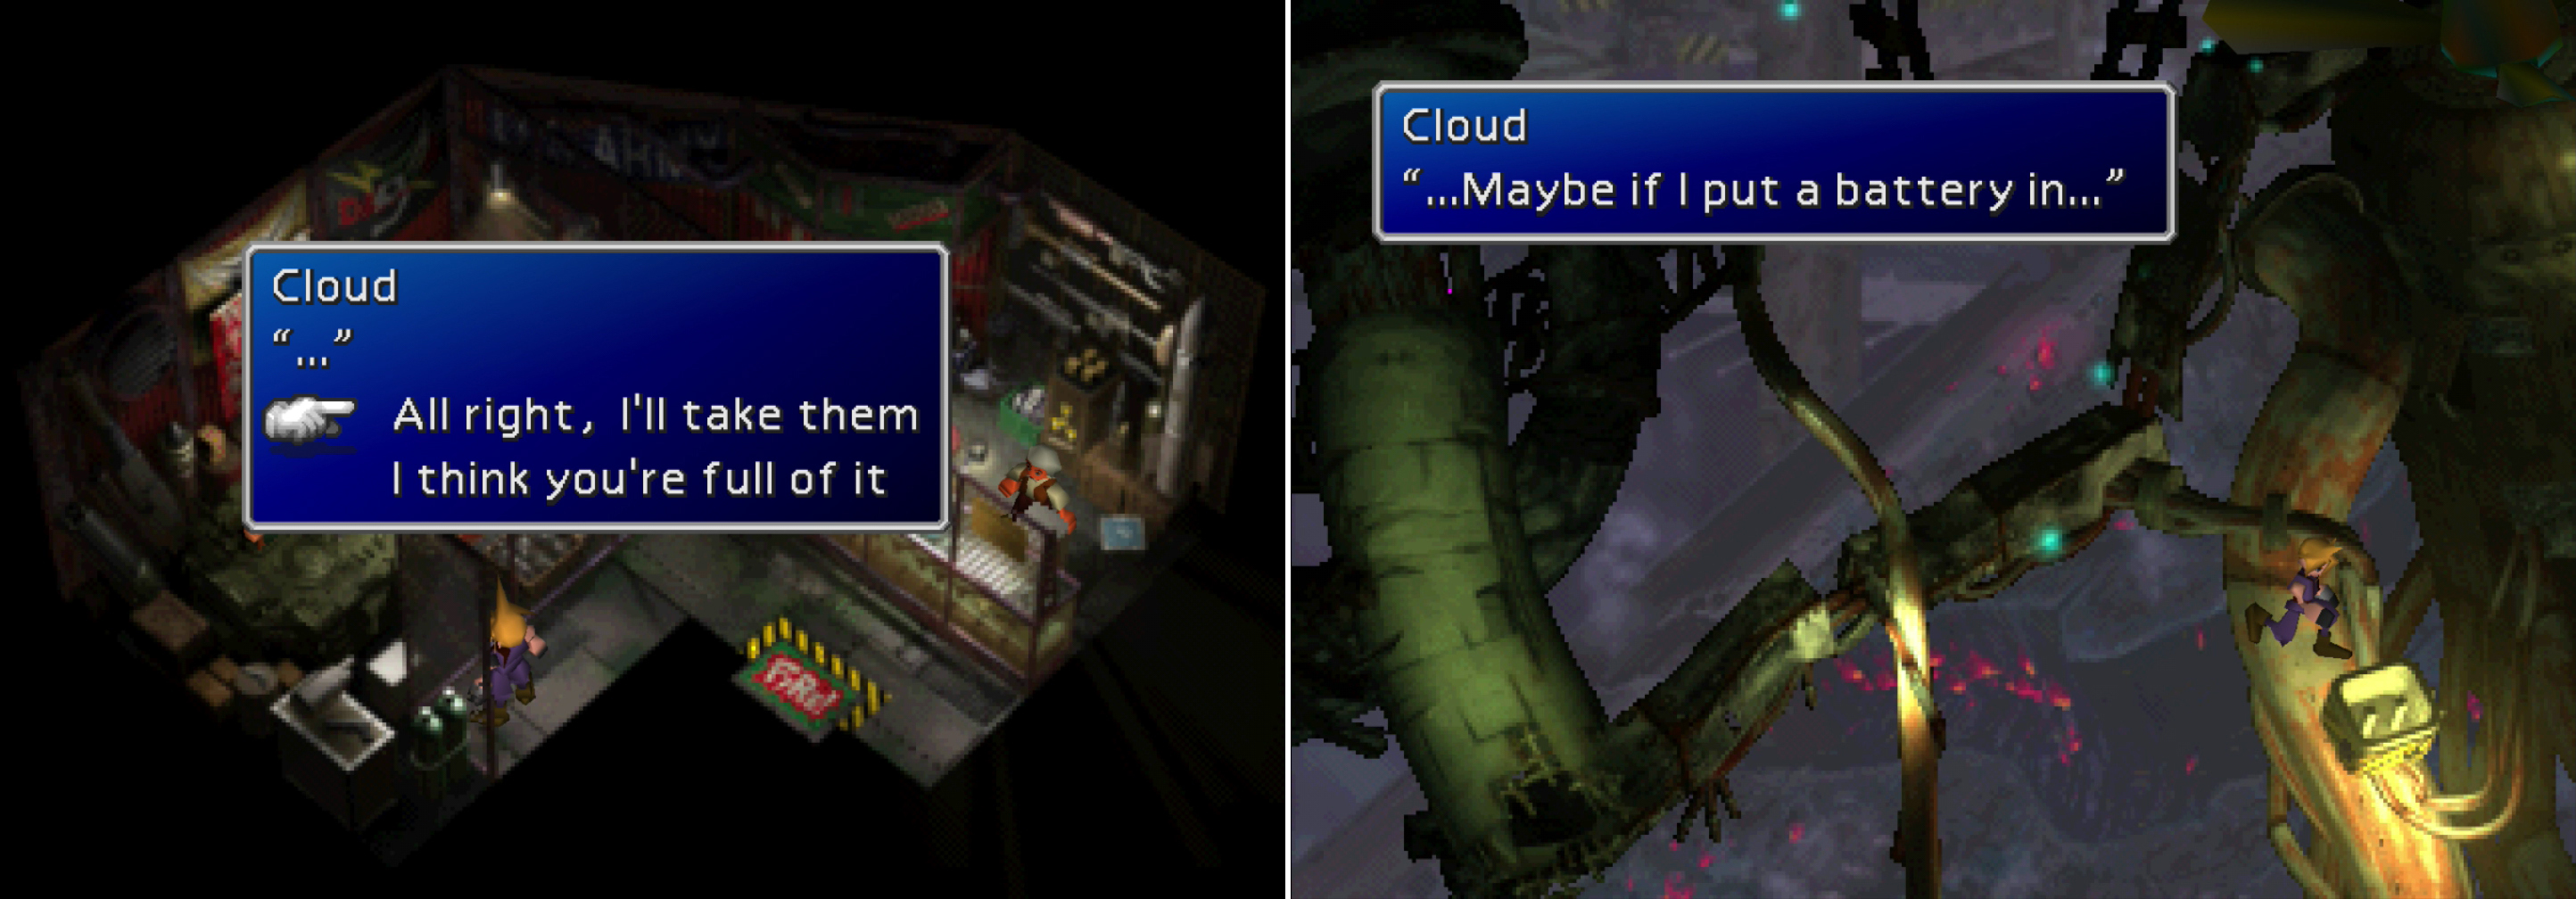
In the second screen of Wall Market, enter the weapon shop and talk to the man sitting in the tank. The heavy mechanized war machine. He’ll offer to sell you some refurbished, lovingly-used batteries for 100 Gil each. Since you can’t progress without them, you might as well pony up 300 Gil to get them all.
Once you possess the batteries, return to the front of Don Corneo’s mansion and exit the screen to the east (just follow the kids) to find, well, a huge wall. Perhaps where Wall Market got its name from? No, probably not. Talk to the wussy kid standing near the wall and after Barret gives a pep-talk, climb the wire.
Make your way to the next screen and when you stop climbing, run north along the wire, jump onto the debris to the west, then run south, then east under the wire you climbed. Run across another wire and onto a pipe in the bottom corner of the screen to find the first battery outlet. Plug the battery in, then run north along the pipe and climb your way atop the propeller, which you can use as a bridge to reach some more debris above you.
Buy batteries from the junk-collector in Wall Market (left) then use them to climb the debris leading to the upper plate (right).
Jump on the ruined train tracks to the west and climb to the next battery pack, which, if plugged in will cause a car barrier to raise. Plug it in and use the barrier as a ramp (that’s some dexterity!) and climb a wire to reach a swinging bar. As Cloud points out, you’ll need to time your jump to grab it. Of course, he says “Should make it if I jump before it comes too close”, which is just wrong. You want to jump as it closes in on you, right when it makes that squeaking noise.
When you make the jump, climb the pipe to the next screen until you find a wire to the west of the pipe. Abandon your pipe and climb the wire, instead, until it loops over a piece of junk. If you climb down a wire you’ll reach another battery which, if placed, will open a nearby chest, granting you an Ether . Of course, this means you’ll have to climb down to the previous screen and make the jump again. Return to the junk the wire wrapped around and climb up this time to reach a broken pipe, then climb down another wire to reach a vertical pipe you can run up to the next screen.
No Comments