
| Important Items in this Area | Enemy Skills in this Area |
|---|---|
| Bolt Ring | Aqualung |
| Mythril | Beta |
| Big Guard | |
| Chocobuckle | |
| Flamethrower | |
| L4 Suicide | |
| Matra Magic | |
| White Wind |
Big Guard
The first Enemy Skill you should pick up s “Big Guard”, because it’s incredibly useful, and the beasties with it are nearby. Just drive to the shore until you find Beachplugs, Manipulate one of them, and cast it on yourself. Easy-peasy. The peninsula south-east of the Gold Saucer is an ideal spot for you to hunt them. Once you’ve obtained it, you can go after a somewhat more dangerous Enemy Skill… Since it hasn’t be covered yet, it gets its own little caption box. Everybody gets one, right? Except for the ones that won’t later, but anyways…
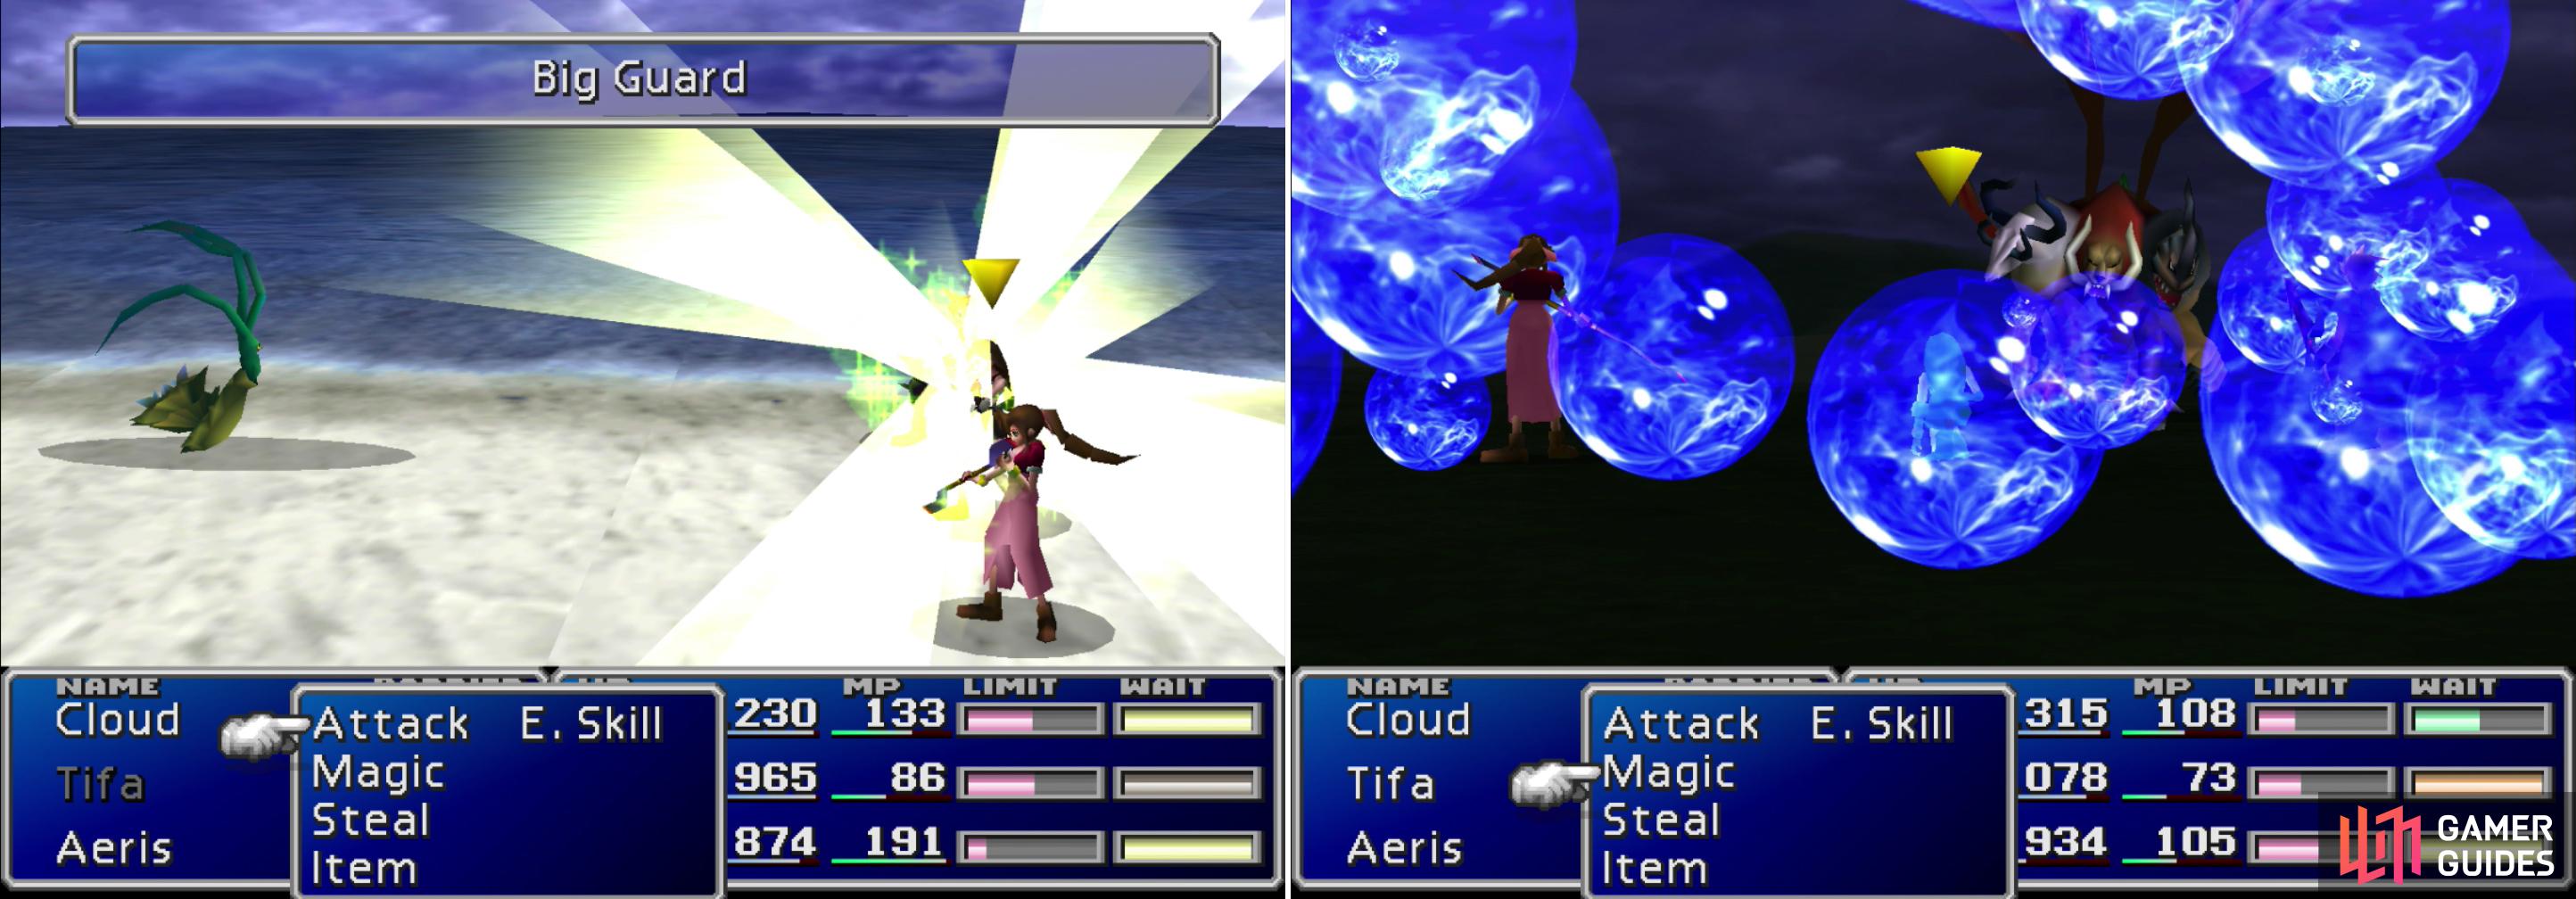
You can Manipulate Beachplugs to learn the wonderful “Big Guard” Enemy Skill (left). “Harpies” will oblige you by casting “Aqualung”, a potent water element attack (right).
Back to Junon
Once those two Enemy Skills are yours, it’s time to sail back across the sea. There’s a river north of the Gold Saucer which can be crossed (just look for the lighter-colored water), so you don’t even need to bother with backtracking through Mt. Corel. Simply drive your buggy into Costa del Sol, head to the port, and talk to the sailor standing near the transport ship. For the low price of 100 Gil he’ll help you sneak aboard, which isn’t bad considering the goodies you’re about to get…
Back in Junon, make your way though the city on foot. In the second street area (the first from this direction) you’ll find a sailor who will offer heli-taxi services, who will take you to the “next sector” (the other street screen) or “outside Junon”, which actually takes you out to the world map. As convenient as this is, stay on the ground, as there’s something to do in Junon.
Return to the road leading to the Underwater Reactor (between the two lifts - which can now also be used) to find some soldiers drilling. On the wall to the north-west near these troops you’ll find a red alarm box, which, if tampered with, will sound an alarm. While the alarm blares you can encounter high-level foes meant for later in the game, including Death Machines (Sweeper robots who can cast “Matra Magic”) and Slaloms. If you want to grind… this is a good place to do it, as these enemies will give you far more XP, AP, and Gil than anything you’ve faced so far. They are high-level foes, though, so expect to take several hundred damage from each attack.
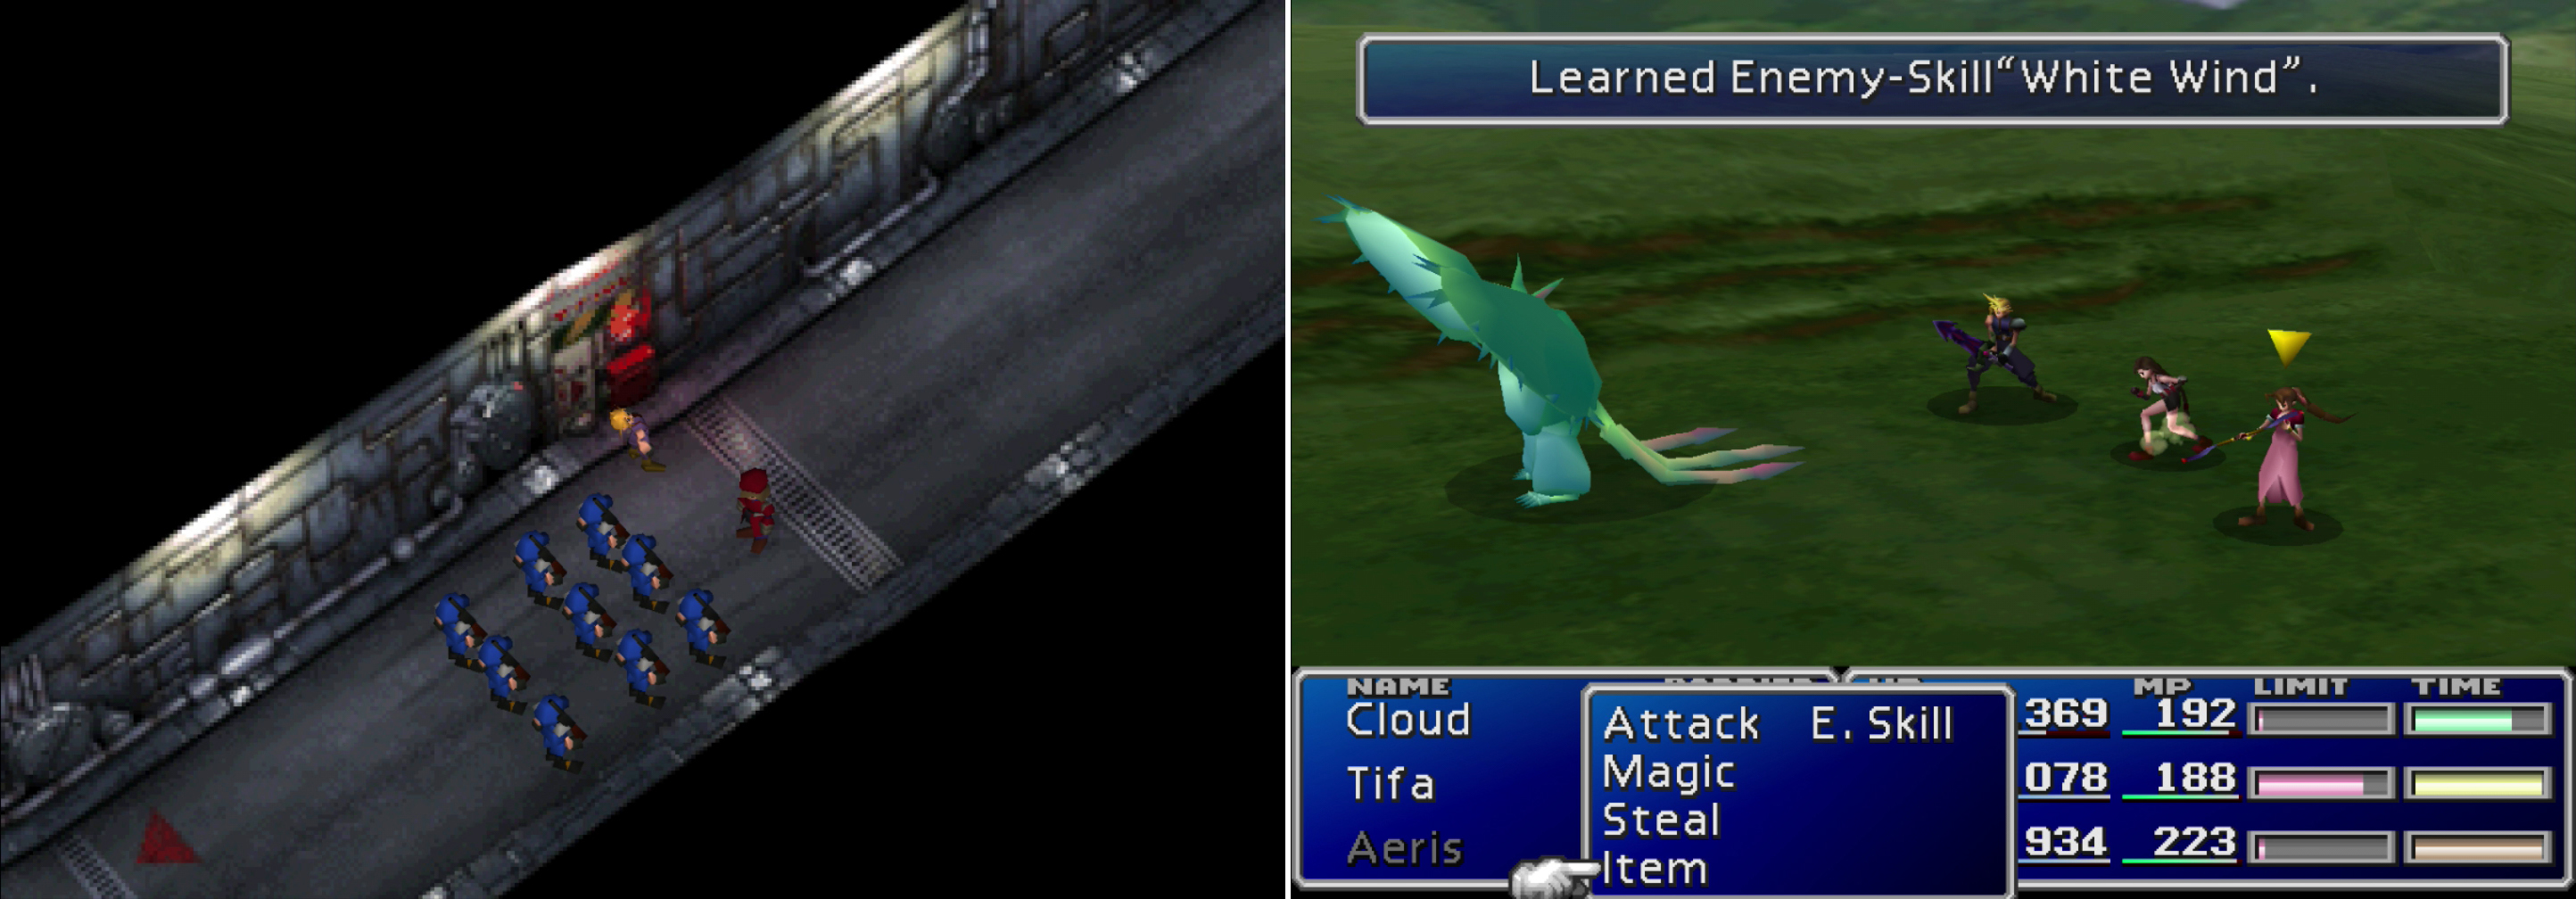
Return to Junon and fiddle with an alarm if you want to fight high-powered foes early (left). The Zemzelett can be Manipulated into casting “White Wind”, quite possibly the best Enemy Skill in the game (right).
White Wind and Older Enemy Skills
When you’re done messing around in Junon, leave by whatever means appeal to you - you can now take the elevator down, although getting back up will cost you 10 Gil. Thankfully corruption is rampant in Shinra. Wander around the grasslands outside of Junon until you encounter a Zemzelett, which has the coveted Enemy Skill “White Wind”, as was pointed out earlier. Manipulate it and have it cast “White Wind” on your party to learn what is probably the best healing spell in the game. If it uses up all its MP beforehand, just toss it an Ether to bring it back up to speed.
Next… you can try to get “Beta” on your second Enemy Skill Materia. This shouldn’t be as hard as it was last time, as you can now just cast “Laser” and “Beta” with one character until the Midgar Zolom is weakened, instead of using Graviballs. You know the drill; put everybody in the back row, use Tranquilizers and equip Fire + Elemental Materia or the Fire Ring. Remember to keep the character with the empty Enemy Skill passive until they learn it… then finish the Midgar Zolom off. You can also learn “Flamethrower” from the Ark Dragons in the Mythril Mines, “L4 Suicide” from the Mus near the Chocobo Ranch, and of course, “Chocobuckle” from Chocobos in the same area, but these are are far less useful skills, so you’d just be doing it to star up your Enemy Skill Materia.
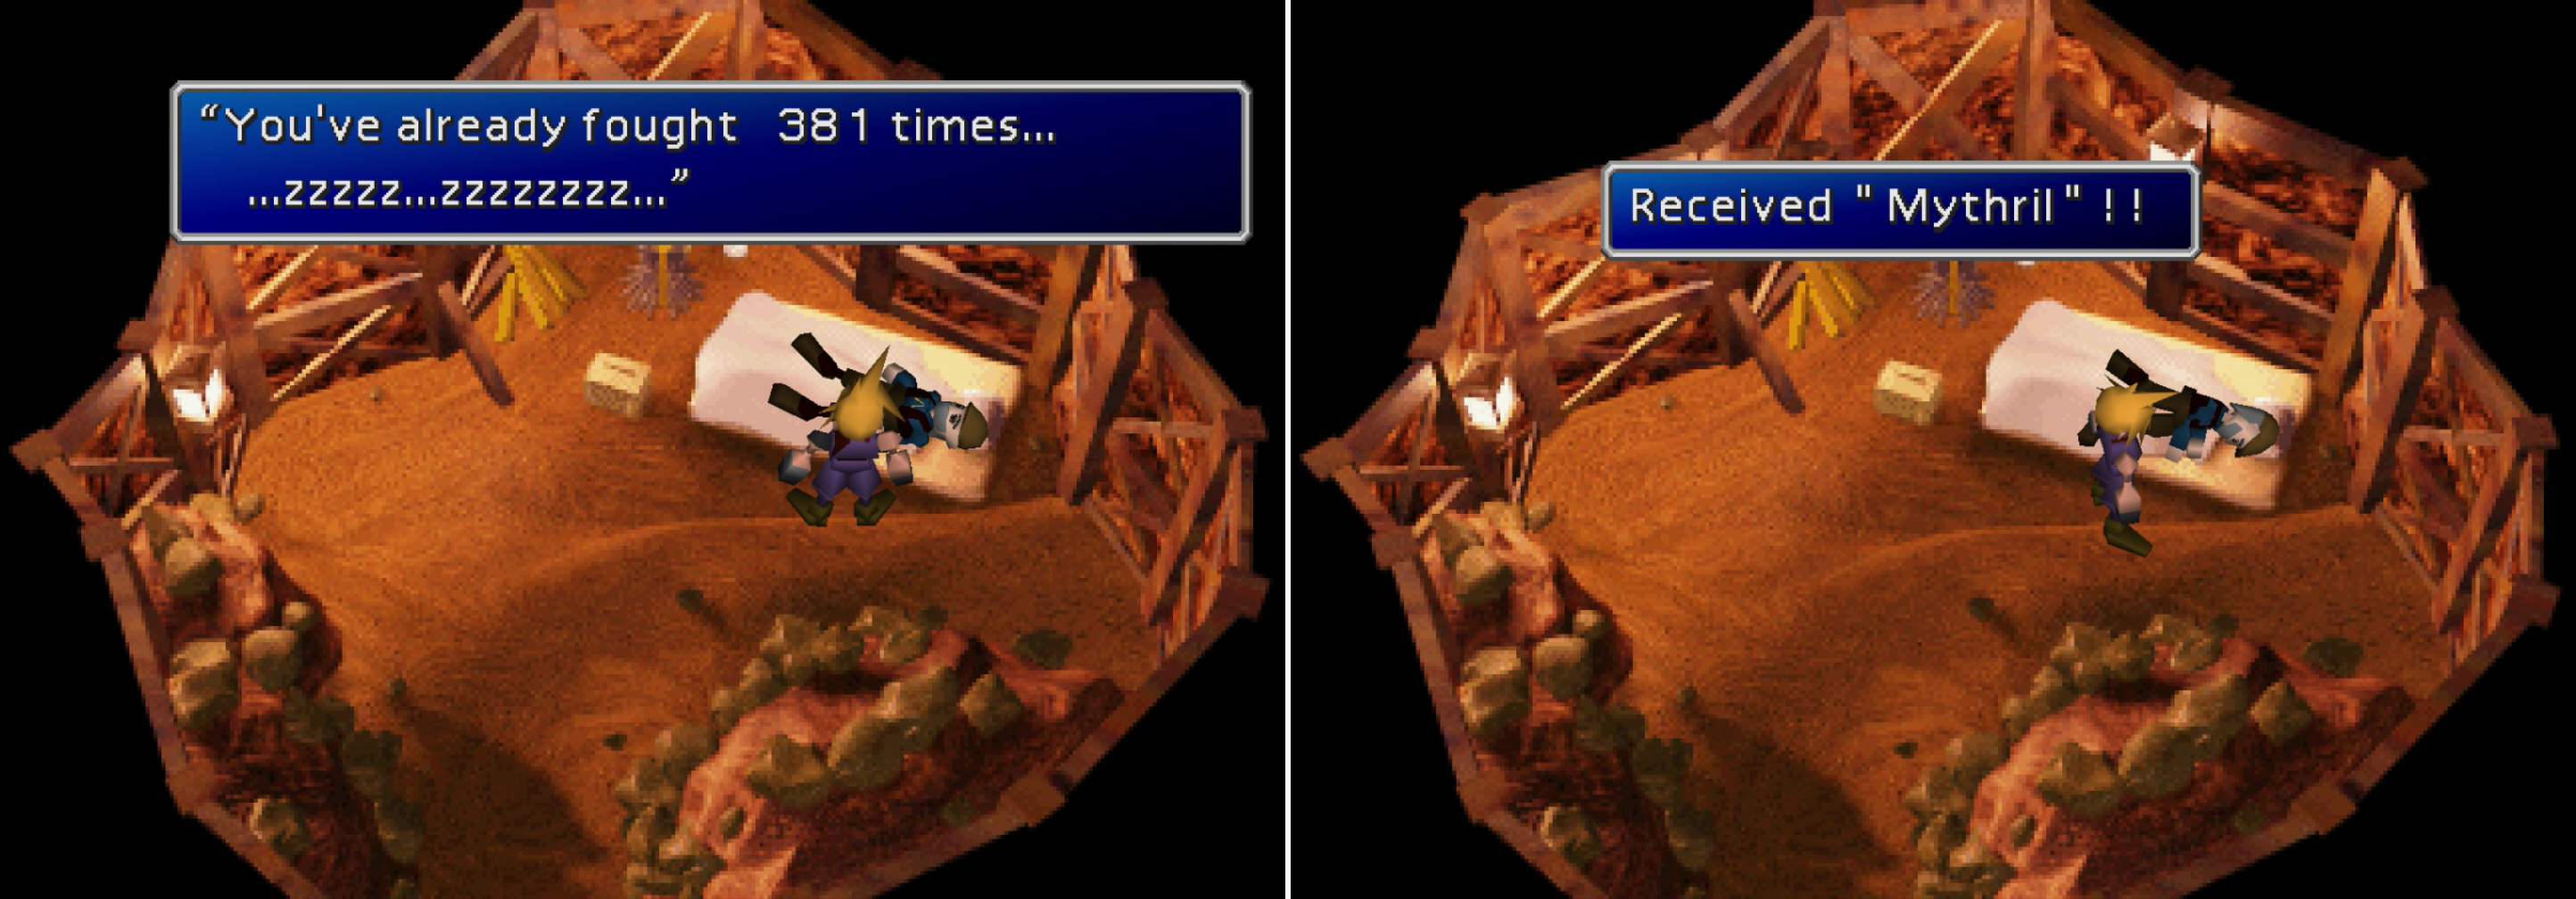
With the Buggy in your possession, you can visit the perpetually sleeping miner in the caves near Junon. He will tell you how many battles you’ve fought (left) and if the last two digits are certain numbers, will give you one of two items (right).
The Sleeping Mythril Miner
There’s only one more thing to do before heading back across the see and continuing our hunt for Sephiroth. North of Fort Condor and east of Junon there’s a river running along - and through - the mountains. Near a forest are some shallows that can be crossed with the buggy. North of the river you’ll find a cave, inside of which is a sleeping man, who has nothing better to do but mumble random things, and tell you various battle stats, like how many battles you’ve fought. However, if the last two digits of the number of battles you’ve fought are the same numbers, he’ll wake up and give you something. If the last two digits are odd (11, 33, 55, 77 or 99) he’ll give you some Mythril . If the last two digits are even (22, 44, 66 or 88) he’ll give you a Bolt Ring , which nullifies lightning damage that character otherwise would suffer. To get these items now, just run around outside of the cave and check back with the sleeping man after every battle. When you have both, it’s time to return to where you left off; outside of the Gold Saucer.
No Comments