
| Important Items in this Area |
|---|
| Missing Score |
| Mystile |
| White M-Phone |
Leave Shinra headquarters for the final time and, if you want to make the most out of another massive dose of AP, equip yourself with appropriate AP boosting arms and armor. Once done make your way back to the Winding Tunnel again, then take the path leading to the scaffolding under the Sister Ray. Head up the scaffolding to automatically climb it, then head north to find just what exactly Heidegger and Scarlet have been up to all this time…
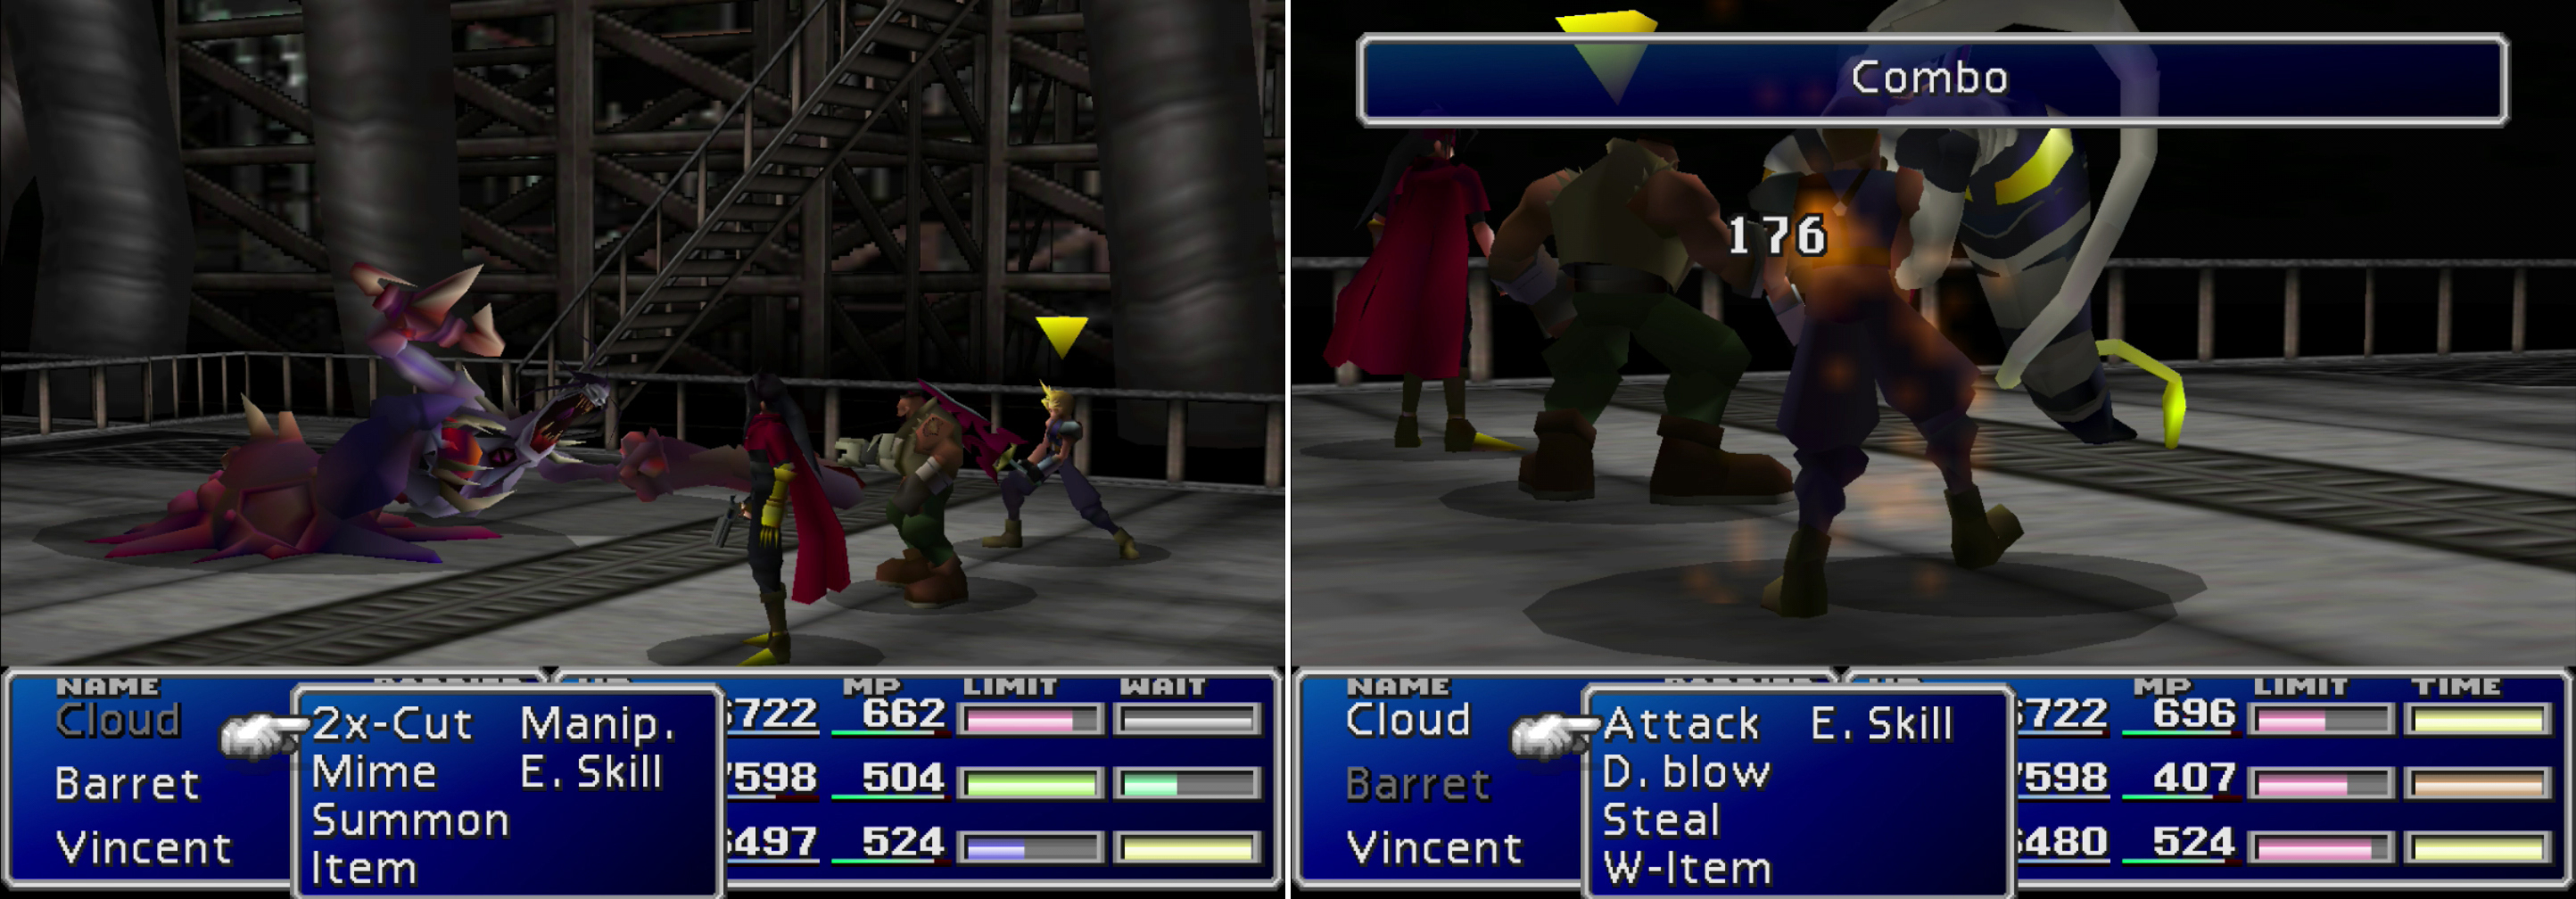
Boss Battle: Proud Clod
Despite being called “anti-Weapon artillery” by Heidegger, the Proud Clod really isn’t up to snuff. In all fairness, however, that could be due to Gya Ha Ha and Kya Ha Ha’s inept handling as much as inherent weaknesses with the device. It comes equipped with “Jamar Armor” which serves an additional target which allows Proud Clod to cast “Materia-Jammer”, which will cast Reflect on one party member. This is annoying, but hardly crippling. Taking out Jamar Armor will prevent this, and score you greater rewards at the end of the battle, to boot. Note that a Ribbon will block “Materia-Jammer”.
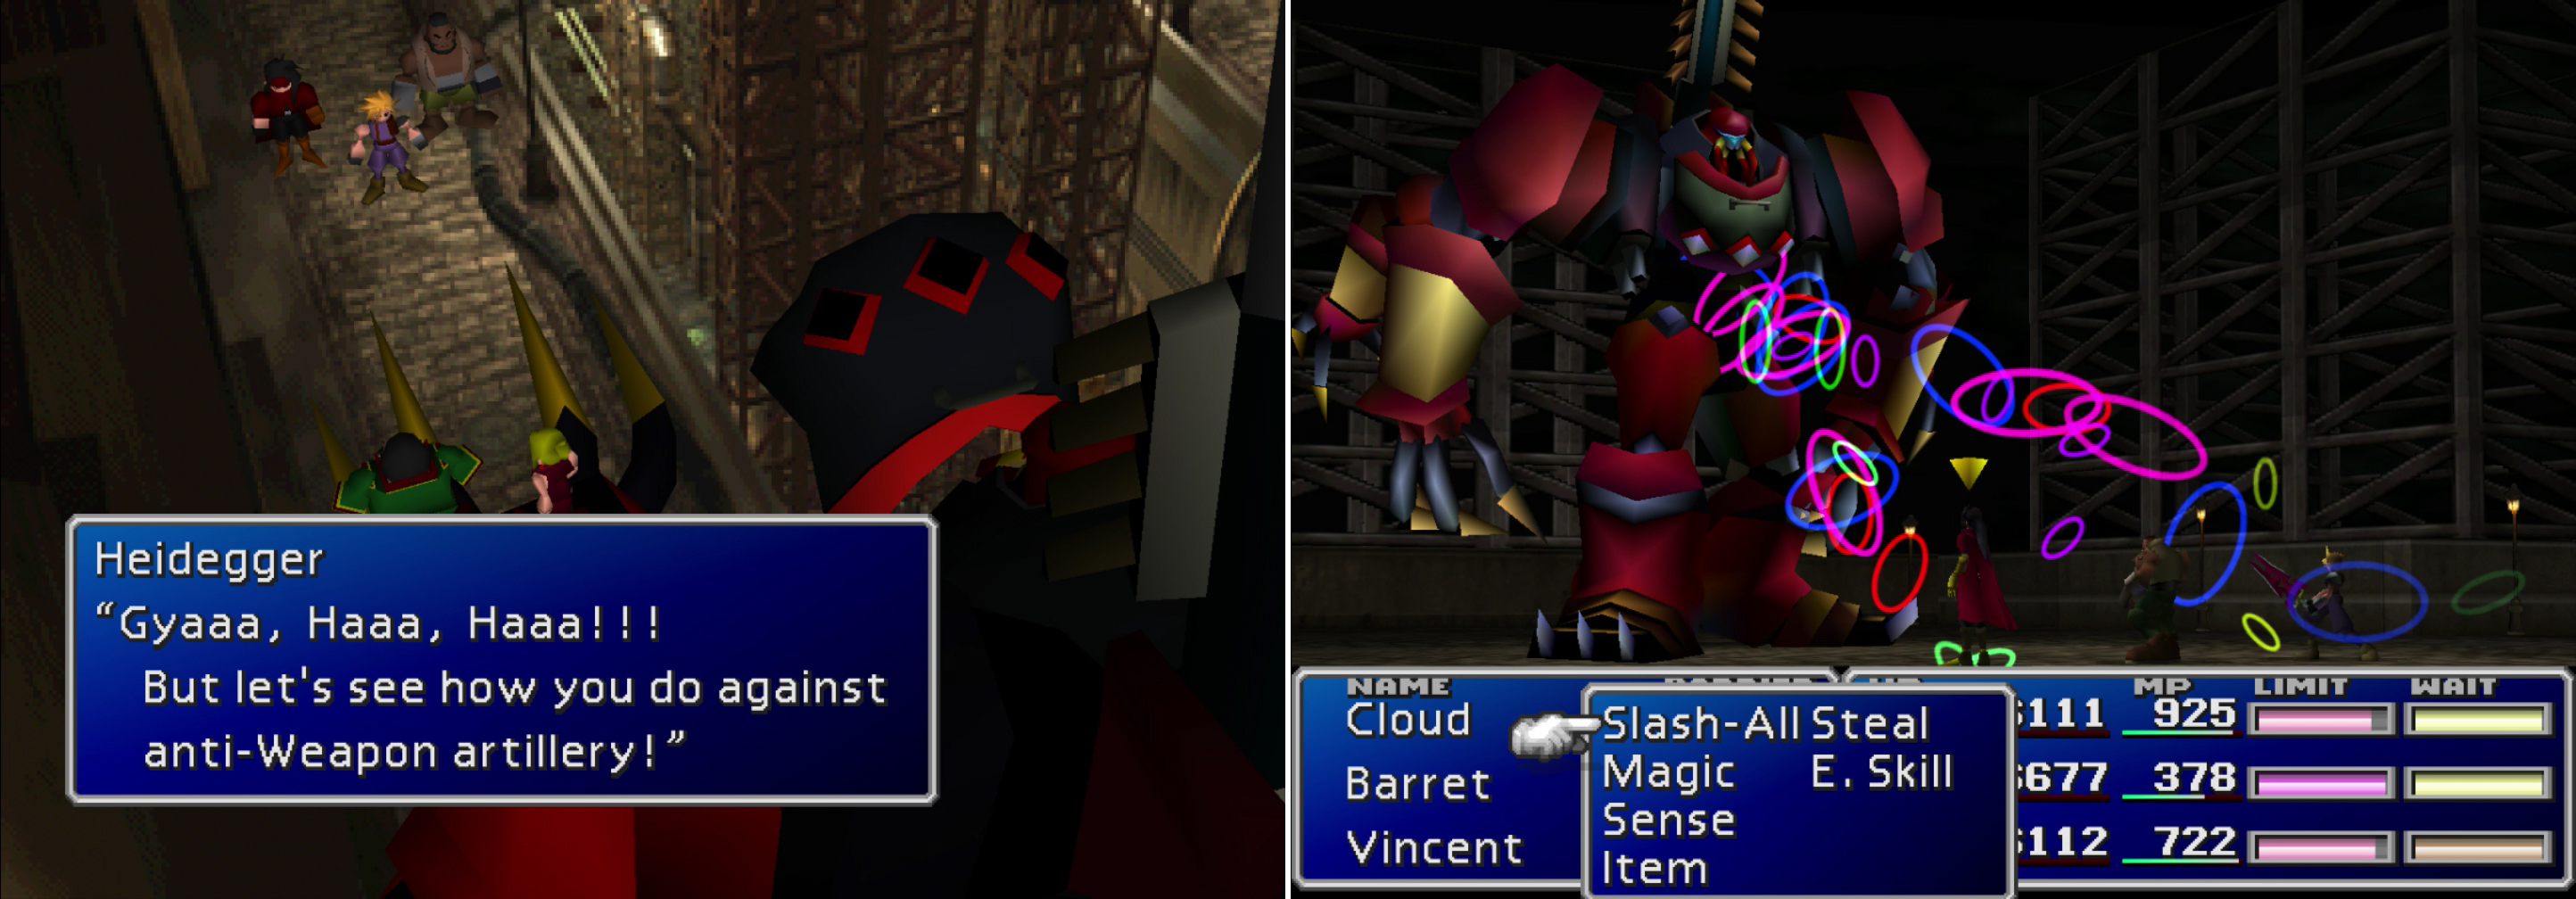
Heidegger and Scarlet will finally take a stand again you, piloting Proud Clod; an anti-Weapon unit developed by Shinra (left). Its “Materia-Jammer” attack will cast Reflect on a character, but Proud Clod can only use it as long as its Jamar Armor is intact (right).
As for Proud Clod itself, it has a variety of uninteresting and weak attacks, most of which deal around 500 damage to one target. Its machine gun attack will deal a bit more, clocking in at nearly 900 damage, but that’s hardly a fearsome amount of damage anymore. Once Proud Clod has been reduced to half (or less) of it’s 60,000 HP, it’ll start using its most dangerous attack; “Beam Cannon”. This attack will hit all characters for about 900 damage, but since it costs MP, you can “Magic Hammer” Proud Clod a few times to prevent it from ever being cast.
So, simple battle strategy; kill Jamar Armor with physical attacks, then “Magic Hammer” Proud Cloud (three times will prevent it from using “Beam Cannon”), then finish the fight by pummeling Proud Clod. Flavor with Limit Breaks as necessary.
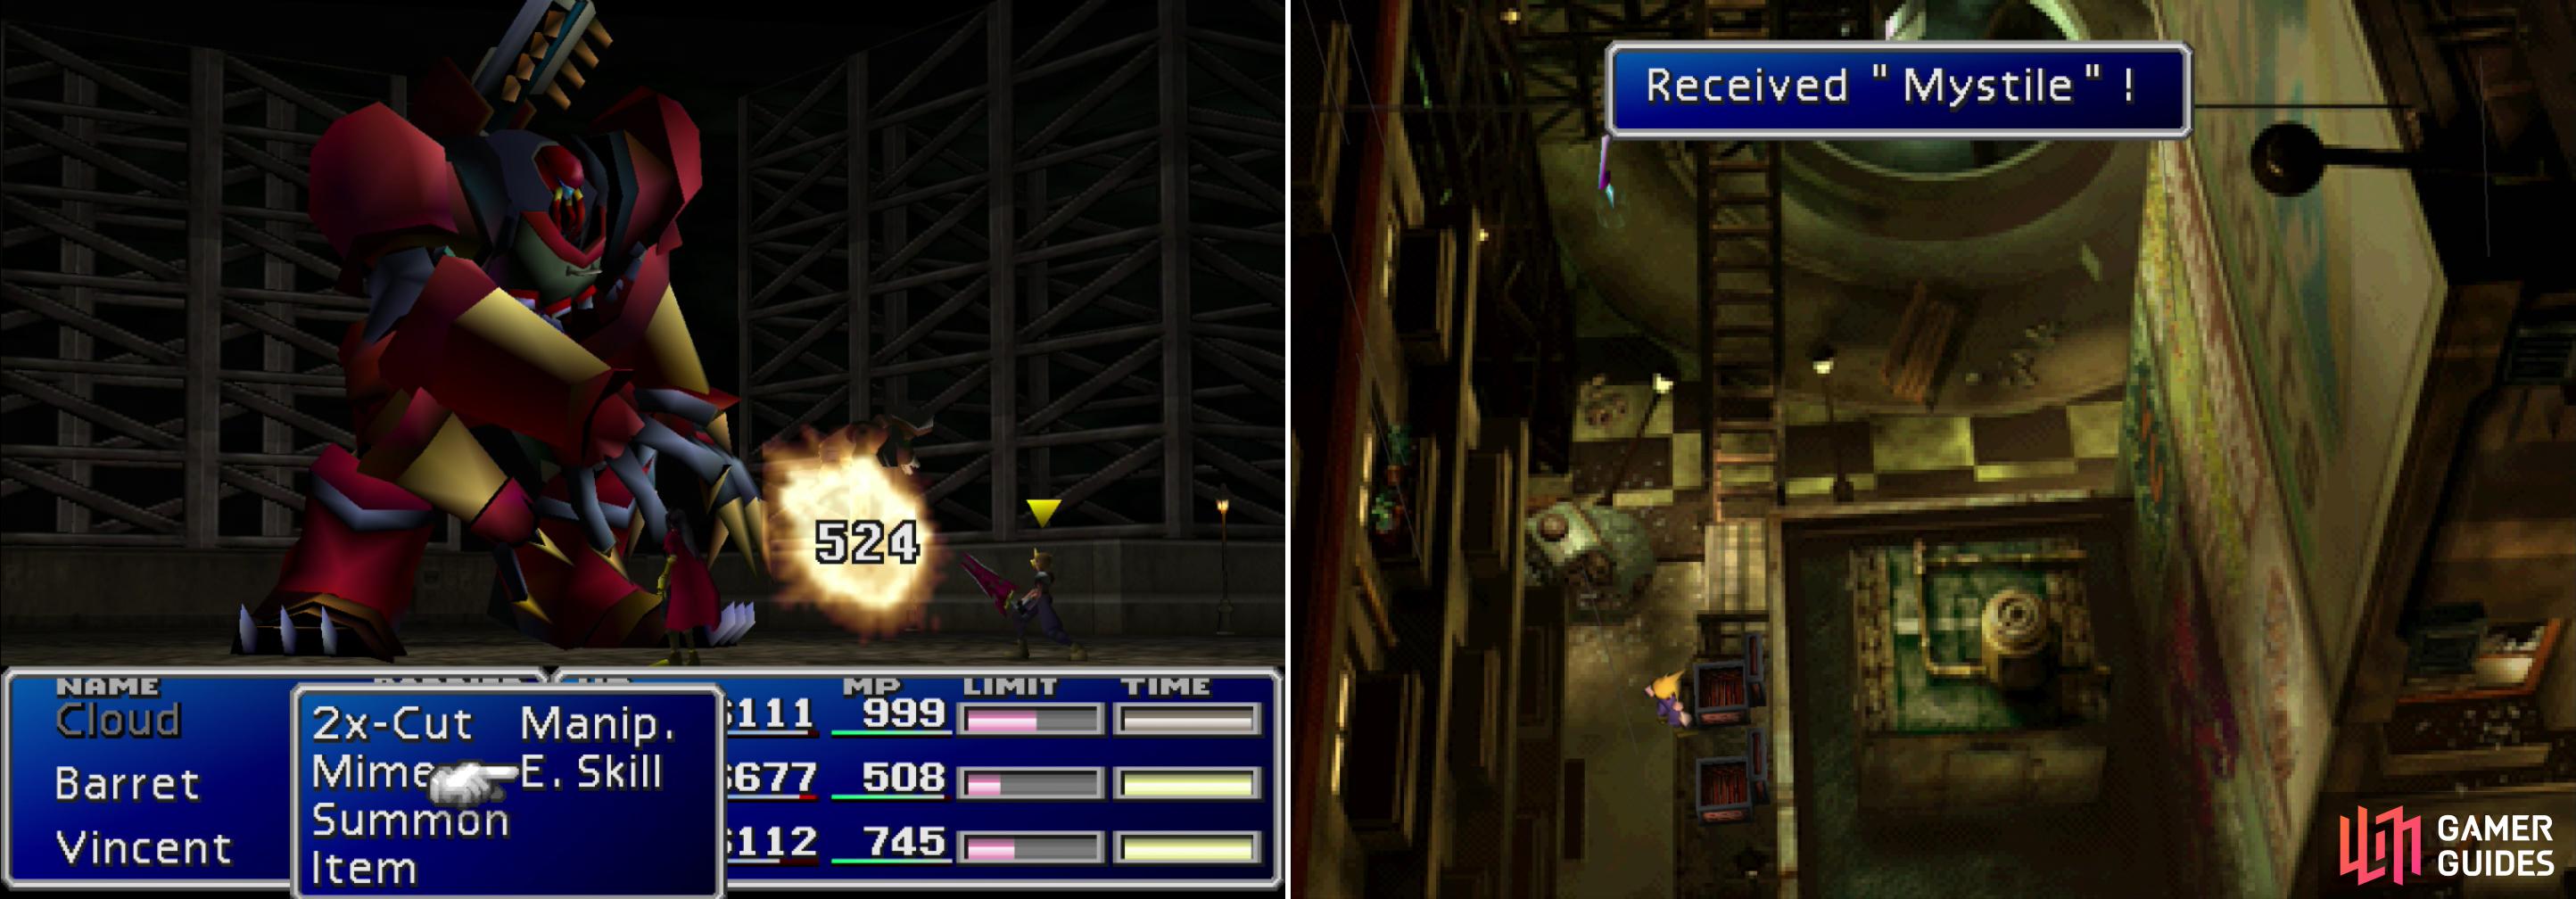
Although Proud Clod has a lot of HP, its offensive power isn’t too intimidating (left). After the fight, be sure to grab the Mystile armor from a nearby chest (right).
| Pround Clod | Stats | Jamar Armor | Stats |
|---|---|---|---|
| HP: | 60000 | HP: | 20000 |
| MP: | 320 | MP: | 300 |
| Weaknesses: | N/A | Weaknesses: | N/A |
| Resistances: | Gravity (negates) | Resistances: | Gravity (negates) |
| XP: | 7000 | XP: | 8000 |
| AP: | 1000 | AP: | 1500 |
| Steal: | N/A | Steal: | N/A |
| Drop: | Ragnarok | Drop: | N/A |
| Gil | 10000 | Gil: | 10000 |
The Mako Cannon
After the battle you’ll score the sword Ragnarok , which has 97 Attack and six Materia sockets (three pairs of joined sockets), making it the best weapon for Cloud in the game save his ultimate weapon… providing you don’t care about AP growth, in which case Apocalypse is king. His weapon names are kind of doom and gloom, aren’t they? Oh well. Head north to reach the fountain plaza near where Cloud met Aeris for the first time, loot two chests containing and Elixir (south) and a Mystile (north). The latter is a high-defense piece of armor which puts the Aegis Armlet to shame by boasting 50 Defense% and 60 Magic Def%. It’s good armor for Vincent, whose Limit Break can be a liability. It also has six Materia sockets (three joined pairs), which is standard for high-end armor. Save your game at the Save Point to the north and make sure you put Barret in your party, if he wasn’t there already. Once done, continue up the stairs between the Save Point and the ladder, chat with Cait Sith, then follow him up to the next screen.
On the next screen you’ll reach a metal platform. Take the stairs up to the north and on a landing search a chest to find a chest containing the Missing Score ; Barret’s ultimate weapon. As has been said a few times already, this chest will not appear if Barret is not in your party, so return to the Save Point and use your PHS to summon him. You don’t want to miss out on this weapon.
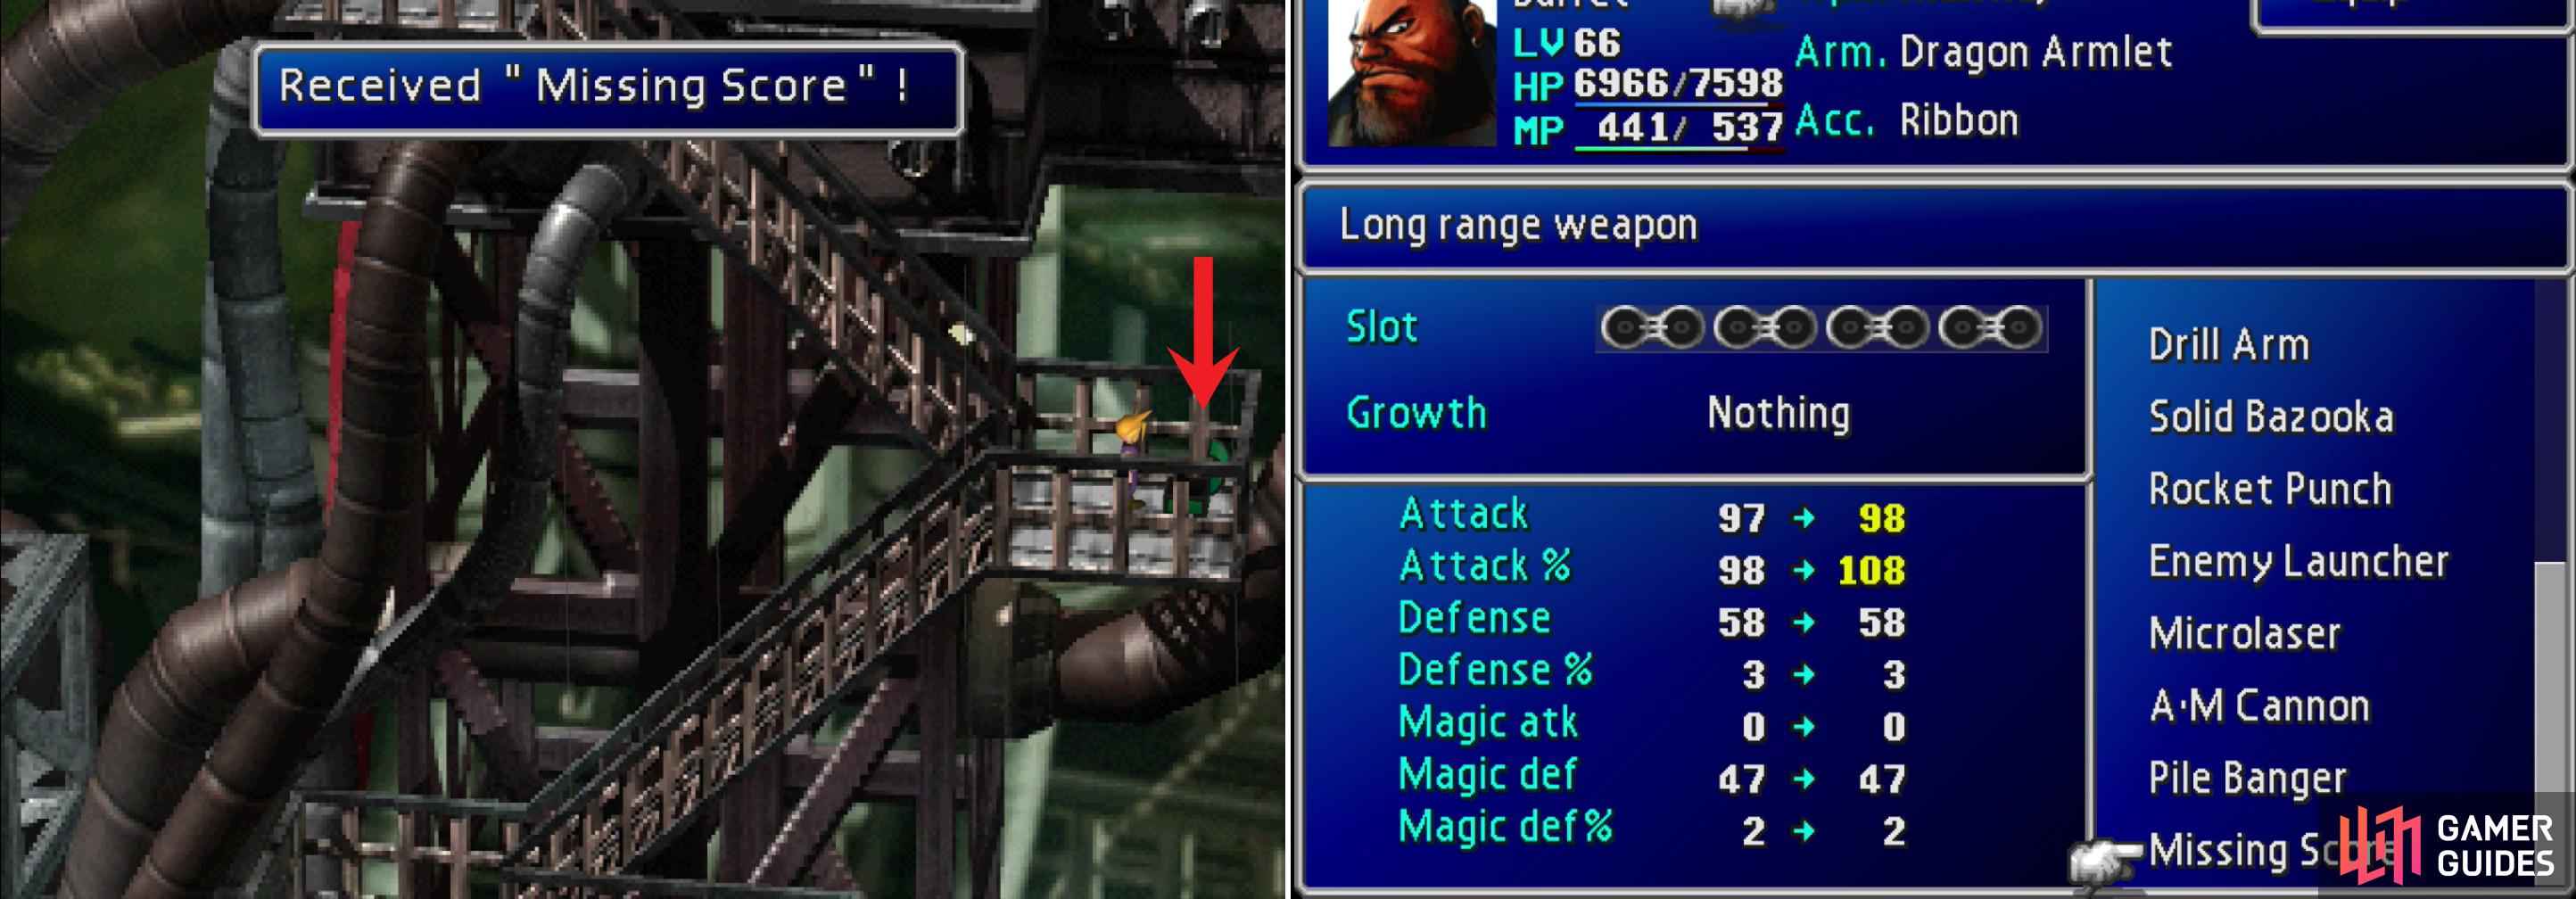
If Barrett is in your party you can find his ultimate weapon, the Missing Score, on the scaffolding leading up to the Sister Ray (left). This wonderful weapon charges based on how much AP is equipped in it (right), allowing him to do massive damage when he’s properly equipped.
Continue up another flight of stairs and exit the screen to the east to find Hojo eagerly tapping away at the Sister Ray’s control panel. Cloud will confront Hojo, who will reveal another surprise about Sephiroth’s paternity before showing you the results of his latest ill-advised experiment.
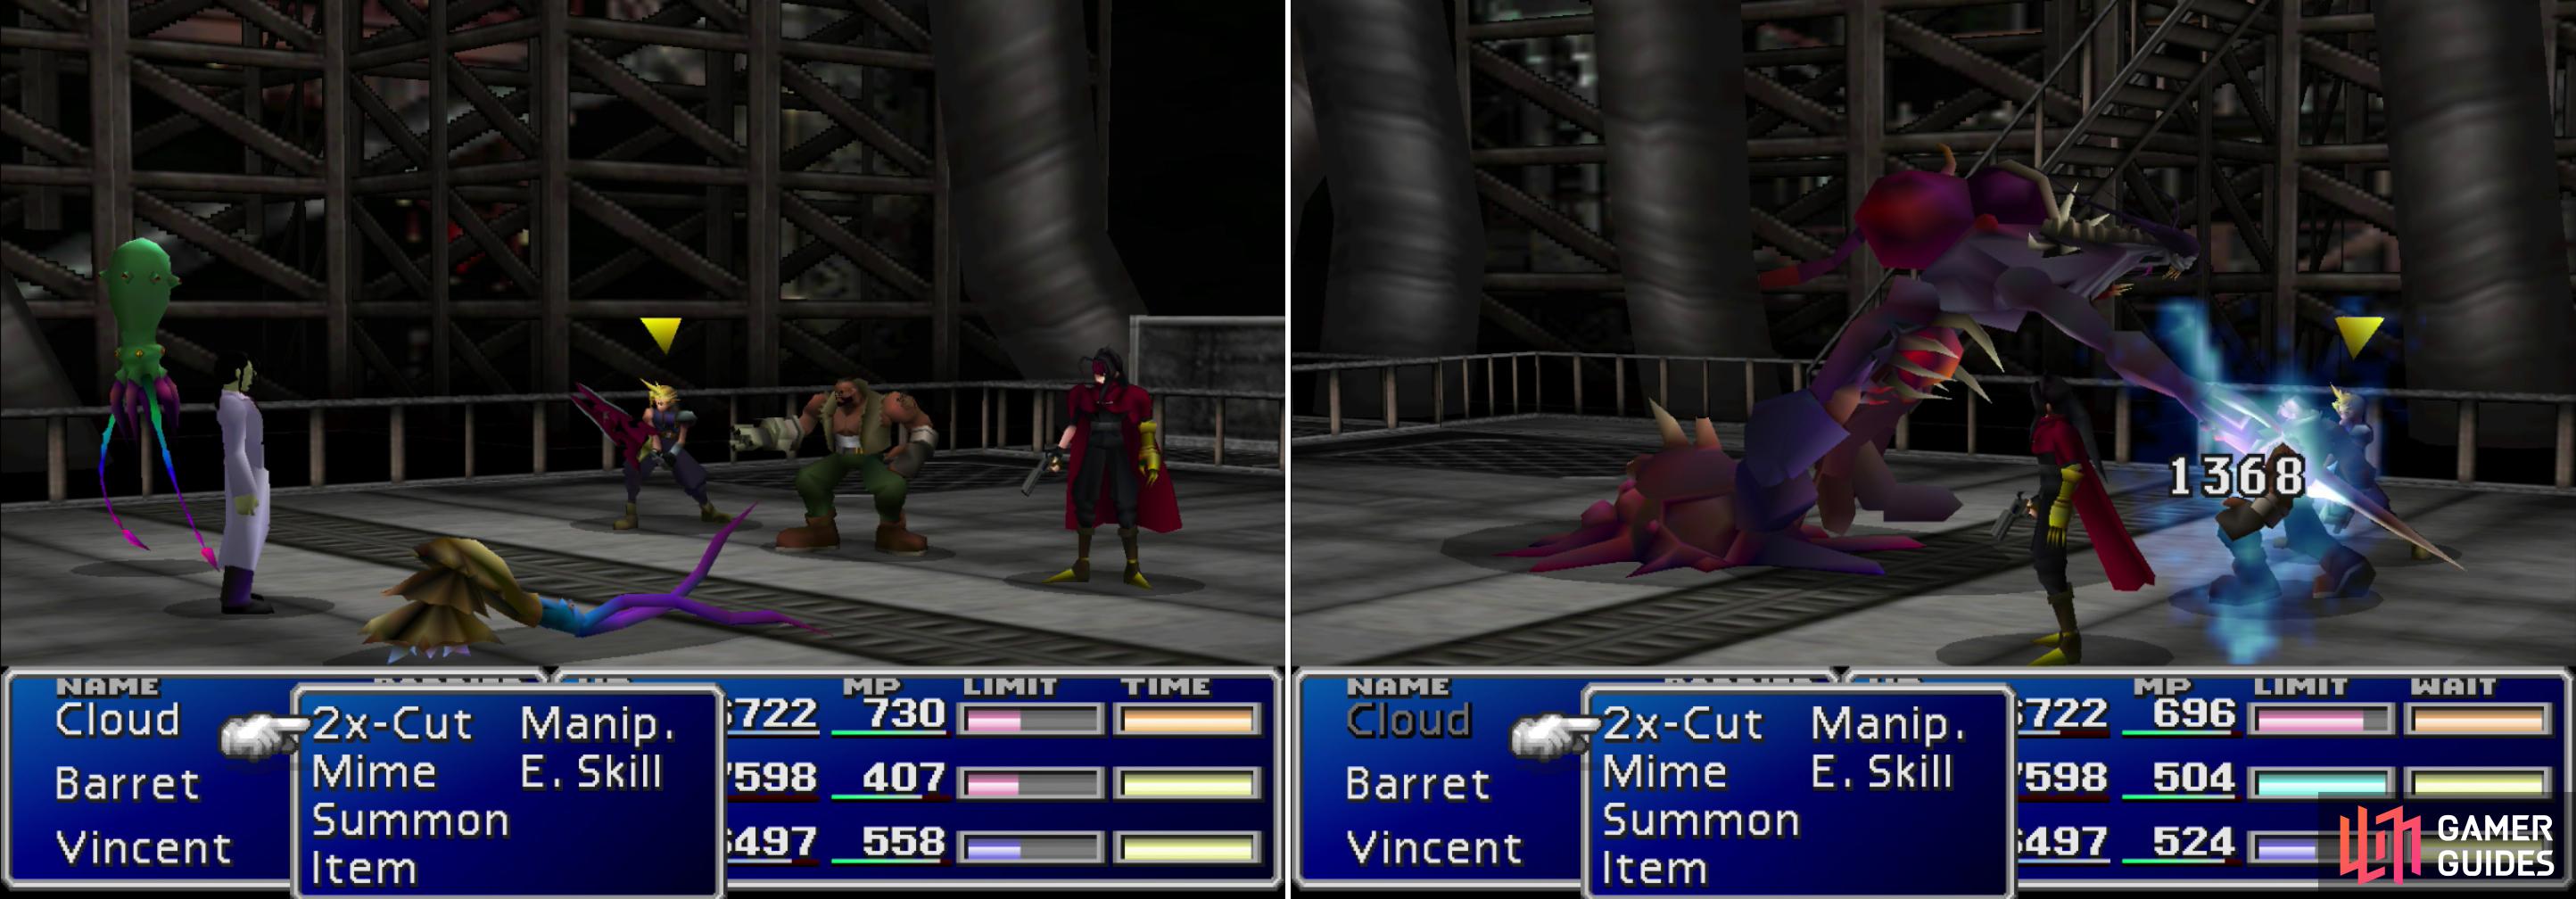
Boss Battle: Hojo
Hojo takes the standard three-form boss battle that is so popular in JRPGs (and will appear again in this one). The first form is pretty tame, it’s just a zombie-looking Hojo who will use a “Capsule” to summon a Poodler Sample and Bad Rap Sample, which are the weakest of the critters found on the Gelnika. Ignore the beasties and chop Hojo down, who only boasts a paltry 13,000 HP.
Once the first form of Hojo is defeated, he’ll morph into the disgustingly monstrous Helletic Hojo, which has two arms which can be independently attacked in addition to the body. Doing so will prevent him from using certain attacks, and if you destroy both arms the battle will end. This isn’t necessary, however, as you can focus on the body to achieve the same result. If you destroy the right arm, he’ll regenerate it almost instantly, but he won’t revive the left arm, so if you want to target the arms, start with the left.
As for Helletic Hojo’s attacks, his right arm can hit for around 1300 damage, and he can use a “Bio Gas” attack which inflicts paltry damage and poisons the target. In addition he can cast Confu, Sleepel and Silence, which won’t inconvenience you too much if you have Ribbons or Added Effect + Mystify Materia equipped.
Hojo will spawn some critters to help him out (left). His second form’s right arm can inflict grievous damage (right).
After either defeating Helletic Hojo’s body or both arms, he’ll collapse only to rise again as Lifeform-Hojo N. In this form he’ll counter spells with Silence, can cast Slow and has a normal melee attack dealing about 400 damage. His most dangerous attack is “Combo”, which will deal over 1300 damage over four hits and inflict Poison, Darkness and Sleep. If you hit him with a single “Magic Hammer” you’ll prevent him from doing anything but “Combo”, which is not suggested. Just cast “Big Guard” and pummel him to death, using “White Wind” as necessary.
If you defeat Hojo’s right arm you’ll temporarily deprive him of its offensive powre. Disable its left arm and he’ll fall to the ground (left). Defeat both and he’ll turn into his third - and final - form. Hojo’s third form can perform a damaging “Combo” attack (right).
| Hojo | Stats | Helletic Hojo | Stats | Lifeform-Hojo N | Stats |
|---|---|---|---|---|---|
| HP: | 13000 | HP: | 26000 (5000 Right Arm/24000 Left Arm) | HP: | 30000 |
| MP: | 250 | MP: | 200 (300 Right Arm/400 Left Arm) | MP: | 100 |
| Weaknesses: | N/A | Weaknesses: | N/A | Weaknesses: | N/A |
| Resistances: | Gravity (negates) | Resistances: | Gravity (negates) | Resistances: | Gravity (negates) |
| XP: | N/A | XP: | N/A | XP: | 25000 |
| AP: | N/A | AP: | N/A | AP: | 2500 |
| Steal: | N/A | Steal: | N/A | Steal: | N/A |
| Drop: | N/A | Drop: | N/A | Drop: | Power Source |
| Gil | N/A | Gil: | N/A | Gil: | 6000 |
Rufus, Heidegger, Scarlet and Hojo are all out of commission. With all of Shinra’s leadership effectively gone (save Reeve, who is on our side), Shinra is all but out of the fight. On the plus side, they opened the way to Sephiroth and are no longer in your way. On the other hand, you can’t on Shinra’s odd moment of brilliance to help out. The party is pretty much the only thing that can oppose Sephiroth now, and with a scant seven days left before Meteor hits, time is running out. Despite this, Cloud gives everybody leave on the Highwind and encourages them to confirm their reasons for fighting and take care of any unfinished business… because self-preservation isn’t motivation enough? This leaves only Cloud and Tifa, who no longer have homes or family to return to. After they share an intimate scene together they’ll return to the Highwind and wait for everybody else to show up. The Highwind will get itself an upgrade and the party will head off to the Northern Cave, where Sephiroth lurks.
No Comments