
Train Even More at Martial Training can now be suggested at the Dark Assembly, allowing you to unlock the Third Trial. There’s also a new Quest available, which will allow you to unlock the Horseman monster class.
It should be noted that the difficulty from hereon will ramp up considerably. While the final enemies in the last episode were level 75, the ones in the first battle here will start at level 90, so you’ll likely need to train some. If you’ve barely squeaked by in the previous battle, start with the First Trial at Martial Training, then up the difficulty by one star to make them level 99.
This will make your leveling a breeze and probably will be the only thing needed to get through the story, although it doesn’t hurt to pass the Better Items at the Store bill to get strong weapons and armor (can always get just one), then go through them to level them up some. If you don’t want to level up too much, getting to level 90-95 should be a good stopping point, especially if you are up to date on weapons.
You can find the free chests at the following locations:
- In between the Equipment and Item shops
- On top of one of the pillars leading to Seraphina’s room
- On the red platform near the Dimensional Prinny
Reserve Squad
| Enemies | Equipment | Evility |
|---|---|---|
| Lv. 90 Immortal Fox | Warrior’s Medal, Samurai Armor | Good Fortune |
| Lv. 90 Sapphire Knight (x3) | Dynastic Guandao, Samurai Armor | Hero’s Shield |
| Lv. 90 Battle Maiden (x6) | Bloody Blade, Samurai Armor | Bushido |
| Lv. 90 Battle Maiden (x2) | Stymphalia, Samurai Armor | Bushido |
| Geo Symbols | Geo Effect |
|---|---|
| Blue | Movement +1 |
| Yellow | Movement +1 |
| Purple | Magic Range +1 |
| Aqua | Ally Boost +50% |
| Red | Enemy Weaken -50% |
| Null | DEF +50% |
The Sapphire Knights should be your first priority, as they are the closest and the most annoying of the bunch, especially if they start defending. Going this way also helps in avoiding the Immortal Fox sitting on the one ship, where she can peg you with magic spells. Another option at the beginning of the battle is to sit by the enemy portal near your Base and kill the Knights that come out of it, waiting for the Lady Samurai to rush your position. The enemy portal at the top of the map will spit out Wrestlers (each one has around 4 enemies each), so keep a lookout for them once they start moving your direction. As long as you stay out of range of the Immortal Fox, you should be able to manage the enemies as they come to you.
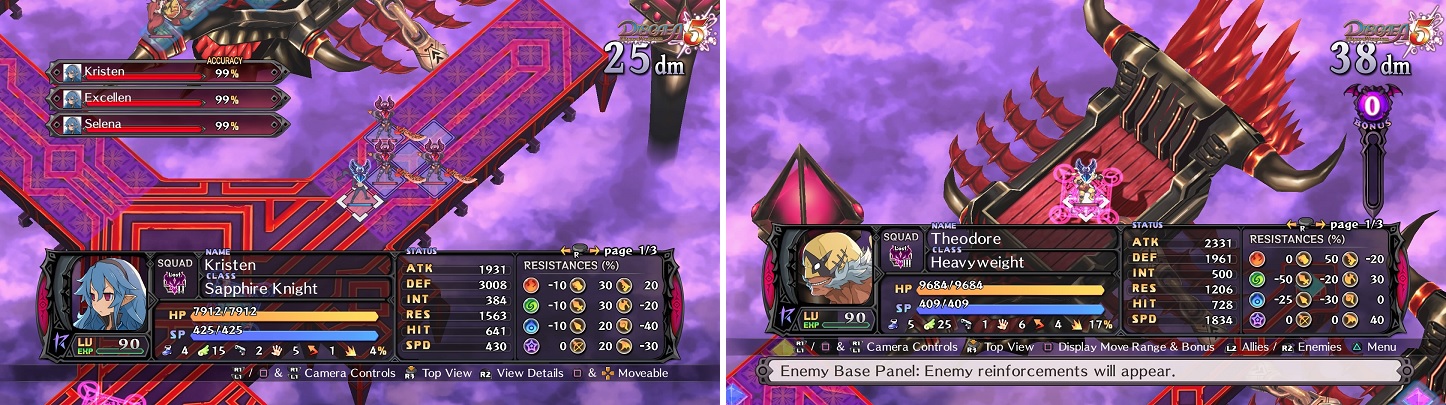
As always, go after the Armor Knights first (left), as they pose the biggest threat. Keep an eye on the Wrestlers that come out of the enemy portals (right).
Dist A - Main Army
| Enemies | Equipment | Evility |
|---|---|---|
| Lv. 95 Beheritas | Panzer Blaster, Bloody Blade, Samurai Armor | Acceleration Shot |
| Lv. 92 Pilgrim | Requiem, Samurai Armor | Medical Heal |
| Lv. 92 Bishop | Requiem, Samurai Armor | Expert Hands |
| Lv. 92 Bow Master (x2) | Stymphalia, Samurai Armor | Support Attack |
| Lv. 92 Hitman (x2) | Panzer Blaster, Samurai Armor | Assist |
| Lv. 92 Star Mage | Requiem, Samurai Armor | Magic Moderation |
| Lv. 92 Professional Skull | Requiem, Samurai Armor | Magic Bundle |
| Lv. 90 Scharfrichter (x4) | Raiju’s Howl, Samurai Armor | Immortal Body |
Despite the lack of any extra Evilities, there are a lot of enemies and a huge variety of them in this battle, making it a challenge. Beheritas is an Overlord and has an Overload skill, which hits all allies within 5 panels with damage. He’s also a Pirate and will likely sit back, hitting you at a long range with Nether Buccaneer, a 3x3 skill, although he has both a gun and sword equipped (with skills for both). The Bishop and Pilgrim next to him will likely sit there and buff him, as well as other enemies if they can. Both the Skull and Mage have access to one element of the first and third tier, then the first and second tier of Star.
It wasn’t mentioned in the previous battle with them, but the Horsemen have a skill that can inflict Poison, Paralysis and Shrink. The first two should be familiar to you, but Shrink might not be. It makes your character tiny and unable to use attacks or skills, although they can still lift and throw. Them and the mages will likely be your first opponents, unless you try to go after Beheritas, although that might do you more harm than not.
If you have characters with ranged attacks, especially elemental ones, try to sit near your Base Panel to thin out some numbers as enemies come to you. One last thing to keep in mind is the Netherworld Effect, which will summon a random enemy unit (usually weaker than what’s there and seems to be the same kinds) at the end of the enemy’s turn. There seems to be no end to this, so once you get a Bonus Gauge level, summon your own Netherworld to get rid of it.
Dist B - Expansion
| Enemies | Equipment | Evility |
|---|---|---|
| Lv. 96 Majorita | Alice’s Magic Wand, Alice’s Magic Wand, Samurai Armor | Queen of Coffins, Seal of Betrayal, Double Bladed |
| Lv. 94 Fungus | Dark Aura, Imperial Crown | Shroom Power |
| Lv. 94 Observer | Raiju’s Howl, Samurai Armor | Spreading Miasma |
| Lv. 94 Immortal Fox | Warrior’s Medal, Samurai Armor | Good Fortune |
| Lv. 94 Dinasy | Warrior’s Medal, Samurai Armor | Magic Creation |
| Lv. 94 Housekeeper | Requiem, Samurai Armor | Efficient Work |
| Lv. 94 Housekeeper (x2) | Panzer Blaster, Samurai Armor | Efficient Work |
| Lv. 60 Ghast (x24) | Dark Aura, Imperial Crown | Predation, Undead |
Majorita is back, once again, to torment you with her Overload and other usual crap. As you can see from the start, there are a lot of Ghasts, 24 to be exact, which spells trouble if you decide to defeat them all before going after Majorita, as this would boost her attack power by a lot (Queen of Coffins Evility). On their first turn, the four monsters around Majorita will Magichange with her, netting her four new Evilities in the process. Spreading Miasma is probably the biggest problem out of them, with Good Fortune coming after, since your Bonus Gauge is likely to increase a lot from kill all of the enemies. Things get even more complicated when she triggers Revenge Mode, as all of those enemies come back, although they are neutral.
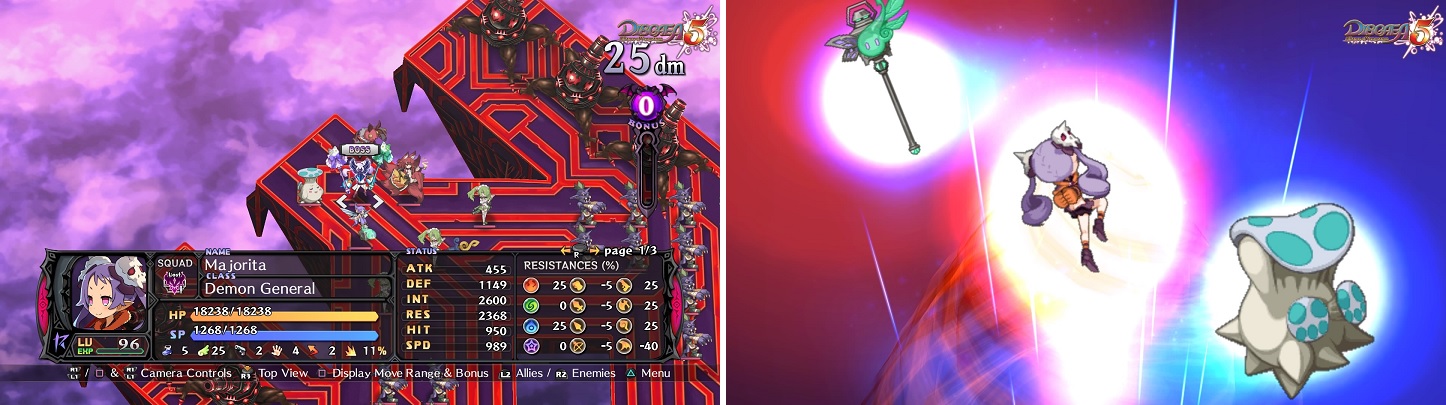
Majorita and her army of Undead have returned (left). She’ll also get an added boost from Magichanging with four monsters (right).
You will want all of your characters equipped with Poison Vaccine and Weaken Vaccine, to combat that from the Ghasts and Majorita’s one skill that inflicts it. You either need to go after Majorita first, to prevent her attack power from getting too high, or bear it and defeat all of the zombies first. The Maids aren’t a big problem, so it might be better to leave them alone for now to avoid powering up Majorita even more. Look at the placements and range of Majorita’s skills to figure out where to put your characters, so if she does get quite powerful, you can avoid all of your characters dying at once.
Dist C - Battle Port
| Enemies | Equipment | Evility |
|---|---|---|
| Lv. 98 Humbaba | Lamia’s Coil, Spartan Shield | Greedy Disposition |
| Lv. 96 Orc Master (x2) | Raiju’s Howl, Samurai Armor | Group Strategy |
| Lv. 95 Hitman (x3) | Hanarr’s Hammer, Spartan Shield | Assist |
| Lv. 94 Carmilla | Medal of Hell, Spartan Shield | Sexy Aura, Bones Out |
| Lv. 94 Succubus (x3) | Medal of Hell, Spartan Shield | Sexy Aura, Temptation, Punishing Punisher |
| Lv. 90 Sapphire Knight (x4) | Trident, Spartan Shield | Hero’s Shield |
| Geo Symbols | Geo Effect |
|---|---|
| Yellow | ATK -50% |
| Null | Enemy Weaken -50% |
That annoying Reinforcements Netherworld Effect is back, so as soon as you get a level in the Bonus Gauge, summon your own Netherworld to get rid of it. You definitely don’t want the effect to summon more Succubi or Knights. The first enemies you face will be the three Succubi, who have Evilities that either have a chance to inflict Charm on you with their normal attacks or cause more damage if you do get charmed; this can all be easily thwarted by equipping Charm Vaccine. The Succubi and the lone Carmilla have access up to a single Giga-tier spell, so the Carmilla will likely sit near its initial position and sling spells at you.
You will notice that there is a single line of Geo Panels running horizontally across the map, with no effects on them. There is a single symbol near your Base Panel that has the ATK -50% Geo Effect, which you can throw onto the panels to mitigate the enemy’s attack, but this will also likely do the same for your party, since you need to travel on those panels to get to the other enemies. If you can, try to get rid of two Succubi on your first turn, before the Knights have a chance to defend and take the attacks for them. The Hitman can prove to be meddlesome because of their ability to hit you from the ship at the start, so if you can hit them with spells, do that.
Bridge to Depths
| Enemies | Equipment | Evility |
|---|---|---|
| Lv. 100 Bloodis | Hero Punch, Spartan Shield, Royal Ring, Angel’s Shoes | Fighting Aura, Heavy Armor |
| Lv. 100 Ifrit (x6) | Lamia’s Coil, Spartan Shield | Anti-Element |
It looks like Bloodis is back again for another beatdown, bringing six Dragon Kings with him this time. The Dragon Kings (Ifrits) have pretty high attack and their Evility will reduce all non-Star elemental resistances by 30 if they are adjacent to your characters. Of course, the only one that matters is fire, since all of their skills have the fire element attached to them. As far as Bloodis goes, you should know what to expect from him, as he is no different than your previous battle. The area you fight him in is pretty narrow, so you don’t have a lot of room for maneuvering. If using a team of characters, have the strongest ones attack towards the end of the combo for maximum damage.


No Comments