
Nothing major unlocks, once again, except for two new Quests. One of these will unlock a new unique Generic Overlord, while the other will unlock a new monster class, the Twin Dragon.
You can find the free chests at the following locations:
- By the Item Worlder
- On top of a lamppost above the Skills NPC
- By the Curry Shop
The Netherworld Effect for this area will decrease your wind resistance by 50 points, which means that a lot of the enemies in the area will have wind spells and skills.
Field of Winds
| Enemies | Equipment | Evility |
|---|---|---|
| Lv. 65 Fairy (x2) | Enthusiastic Medal, Brigandine | Magic Creation, Windy Body |
| Lv. 65 Cath Palug (x4) | Thunder Bird, Brigandine | Final Blow, Desperation, Windy Body |
| Lv. 65 Belladonna (x4) | Enthusiastic Medal, Brigandine | Sweet Aroma, Herbal Therapy, Windy Body |
| Lv. 60 Fungus (x5) | Thunder Bird, Brigandine | Shroom Power, Macho Splendor, Windy Body |
As you can see, all of the enemies in this battle have the Windy Body Evility equipped to counteract the Netherworld Effect in play. The first enemies you come across are the Fungi, who should be taken out by your male units, as they take 30% less damage from female units. If you have any mages or character with strong elemental skills, you definitely don’t want the Belladonnas getting next to any other enemy units, as this will boost their elemental resistances by 50% (except for Star).
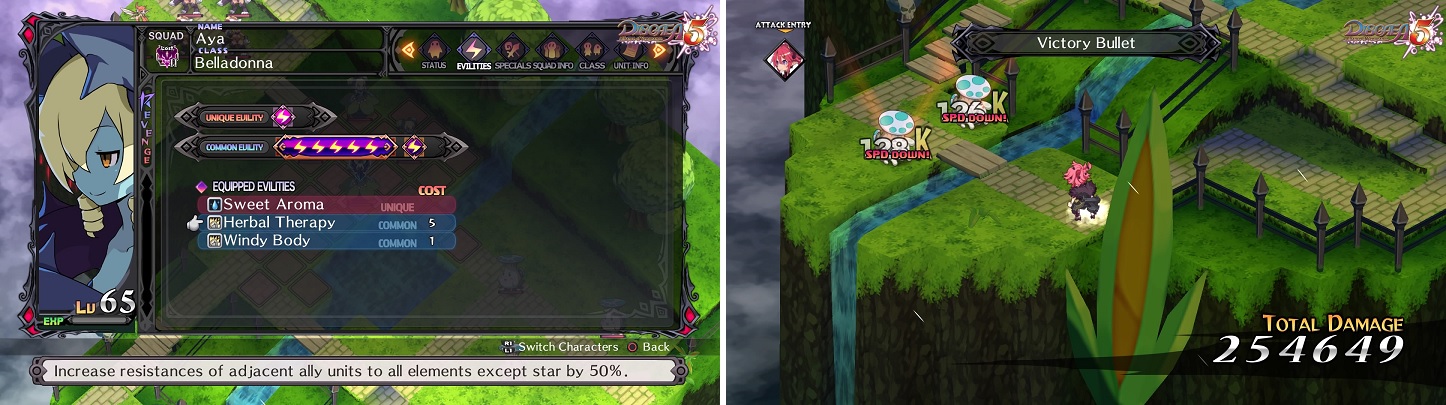
Try to avoid having the enemies stand next to the Belladonnas (left). If using female characters, use ranged attacks on the Fungi (right).
The Cath Palugs have an Evility that increases their ATK by 50%, but it also decreases their DEF by 100%, so they will take more damage than usual. As for skills, the Fairies and Belladonnas have access to Wind spells (up to Giga-tiered for the latter) and the Fairies also have access to a bunch of stat-reducing debuffs.
Fairys Prank
| Enemies | Equipment | Evility |
|---|---|---|
| Lv. 67 Bandit (x2) | Gjallarhorn, Brigandine | Thief Skills, Windy Body |
| Lv. 67 Sylph (x2) | Enthusiastic Medal, Brigandine, Aero Sneakers | Magic Creation, Sleep Powder, Windy Body |
| Lv. 67 Observer (x2) | Enthusiastic Medal, Brigandine, Aero Sneakers | Spreading Miasma, Paralysis Dust, Windy Body |
| Lv. 65 Belladonna (x2) | Enthusiastic Medal, Brigandine | Sweet Aroma, Windy Body |
| Lv. 62 Fairy (x3) | Enthusiastic Medal, Brigandine, Aero Sneakers | Magic Creation, Sleep Powder, Windy Body |
| Lv. 62 Watcher (x2) | Enthusiastic Medal, Brigandine, Aero Sneakers | Spreading Miasma, Paralysis Dust, Windy Body |
| Geo Symbols | Geo Effect |
|---|---|
| Red | Wind Element -50% |
| Null | Silence |
The entirety of the map is covered in Geo Panels, with the red ones having the Silence effect and the green ones having Wind Element -50%. Despite the Netherworld Effect not being in play, the one Geo Effect still functions as the same thing, so watch who you bring out as your party. The Mothmen have an Evility that gives them a percent chance to inflict Paralysis with a regular attack, should they use one; the Fairies have the same thing, but with Sleep. Make sure you standing on the Silence panels, as you want to make sure you have access to your skills as you fight. It’s probably a good idea to concentrate on the Mothmen, due to their ailment chance increasing Evility, then the Belladonnas because they can heal enemies that are next to them.
Road of Bewilderment
| Enemies | Equipment | Evility |
|---|---|---|
| Lv. 67 Dinasy (x3) | Enthusiastic Medal, Brigandine, Winged Boots | Magic Creation, Windy Body |
| Lv. 57 Grimalkin (x9) | Thunder Bird, Brigandine | Weakening Aura, Asleep Attack, Windy Body |
There’s not a large variety in the enemies on this map, but you still need to be careful. The Grimalkin have a new Evility, which increases their attack against sleeping targets, but the only skill/spell that can do that on the map belongs to the Dinasy (Slumber spell). So, once you take out the three on the map, you don’t have to worry about that Evility anymore. The Netherworld Effect isn’t in play, so you don’t have to worry about anything regarding your wind resistances. The enemy portal at the top of the map will only spit out more Grimalkins (a total of six), so there’s nothing new to worry about there. As long as you take out the Dinasy and don’t go too quickly, you’ll be fine.
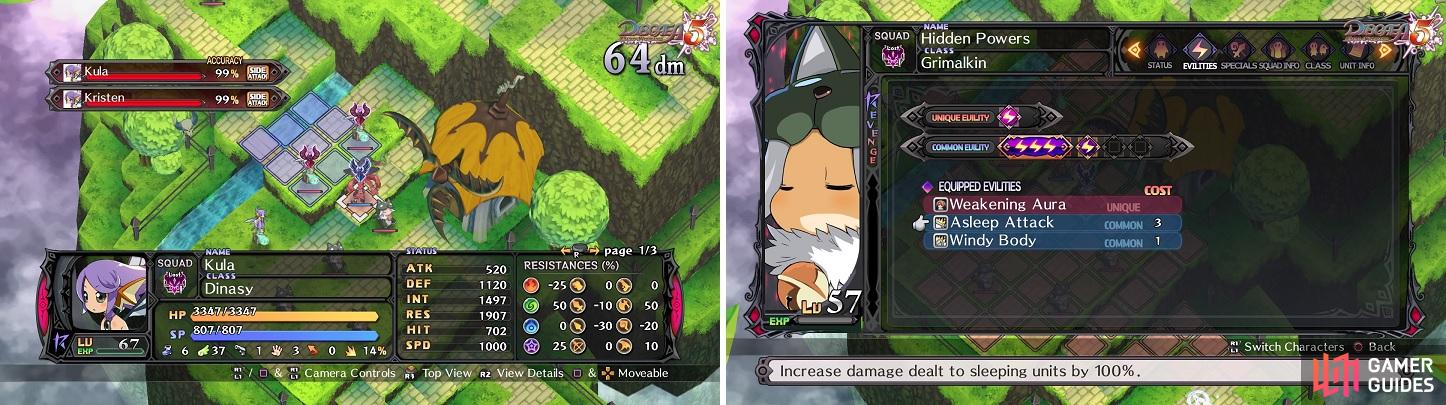
Take out the Dinasy enemies (left) and the Grimalkins’ Evility related to sleep (right) will be useless.
Hill of Loneliness
| Enemies | Equipment | Evility |
|---|---|---|
| Lv. 69 Dinasy | Medal of Happiness, Revenge Cloth | Magic Creation, Sleep Powder, Windy Body |
| Lv. 68 Observer (x2) | Medal of Happiness, Revenge Cloth | Spreading Miasma, Poison Accelerator, Windy Body |
| Lv. 68 Belladonna (x5) | Medal of Happiness, Revenge Cloth | Sweet Aroma, Windy Body |
| Lv. 68 Cath Palug (x4) | Pegasus Hoof, Revenge Cloth | Final Blow, Windy Body |
| Lv. 62 Ochre Jelly (x4) | Pegasus Hoof, Revenge Cloth | Gel Body, Poison Gel, Windy Body |
The Netherworld Effect is back in action and some of this map seems to be focused on you getting poisoned, with the Ochre Jellies doing just that if you attack with a non-elemental attack while next to them and the Belladonnas/Observers having access to Poison in their spells/skills. This works in conjunction with the Poison Accelerator Evility that the Observers have, boosting the damage taken by Poison should you not have it covered. If you have elemental spells/skills at your disposal, try to use your first turn to quickly take out the Jellies so you don’t have to worry about poison, although if you have Poison Vaccine equipped, then you’re golden. Outside of the Jellies, you should be accustomed to the rest of the enemies, so just take it slow.
Beast Claw Tip
| Enemies | Equipment | Evility |
|---|---|---|
| Lv. 70 Bloodis | Burning Karate, Revenge Cloth, Aero Sneakers | Fighting Aura, Heavy Armor |
| Lv. 67 Observer (x2) | Medal of Happiness, Revenge Cloth | Spreading Miasma, Windy Body |
| Lv. 65 Bigfoot | Pegasus Hoof, Revenge Cloth | Rage Charge, Windy Body |
| Lv. 65 Fungus (x2) | Pegasus Hoof, Revenge Cloth | Shroom Power, Self-Sacrifice, Windy Body |
| Lv. 65 Cath Palug (x3) | Pegasus Hoof, Revenge Cloth | Final Blow, Windy Body |
It’s time for another battle with Bloodis, who will be getting some help from some of the monsters that are on the field. Before delving into that, he is equipped with the Heavy Armor Evility, which increases his defense by 50% at the expense of not being able to be lifted. At the beginning of the enemy’s turn, the Bigfoot will Magichange with Bloodis, granting him the Rage Charge Evility as well.

Killia will be forced on you in this battle (left), in his Overload form. Bloodis will have some extra strength from the Bigfoot’s Evility (right).
This combination of Evilities will make Bloodis a truly formidable opponent, as every attack he receives will increase his own by 5%. To go even further, should he be able to reach a full Revenge Gauge, his stats will be further enhanced another 100%. Unless you’re massively overleveled, you’re likely not going to defeat Bloodis (or the Bigfoot) on the first turn by throwing a character to where he’s located.
It should be mentioned that you have some new power with this battle, as Killia has awakened and learned a new skill. He begins the battle on the map, in his new form and cannot go back in the Base Panel. Although the game doesn’t mention it, Killia gets three turns in one before he can do no more, which is extremely helpful on this map. Once you take out all of the other enemies, performing Avidya Holy Water three times on Bloodis should do a lot of damage (unless you’ve neglected Killia for some reason). It’s a good idea to have everyone else attack Bloodis first to build up a combo and make Killia’s skill do more damage, although you can’t combo the subsequent attacks you can do.


No Comments