
The Shooting Range in the Resident Evil 4 Remake is first encountered during Chapter 3. You’ll find it at the Merchant’s Hideout that you go through just before you reach the lake shore and fight the Del Lago monster. We’ll show you exactly where to find it and how to get the highest scores for the 1-A, 1-B, and 1-C shooting challenges, each of which provide Silver and Gold tokens that can be used to barter for new Tokens and Charms for your Attache case.
Where to Find the Shooting Range Gallery in Chapter 3 - RE4 Remake
The first shooting range that you encounter is in the Merchant’s Hideout towards the end of Chapter 3 in the main story. This is a safe area where you can speak with the Merchant to buy, sell, trade, or tune your weapons. You’ll also find a typewriter here which you can use to save your game, customize your Attache case or access storage.
The shooting range itself can be accessed via the elevator in the southwest corner of the hideout, as shown in the screenshots below. This will take you to an area that contains a slot machine, which can be used to exchange the silver and gold tokens that you earn from the shooting range challenges for common or rare Attache case charms, each of which will provide specific buffs.
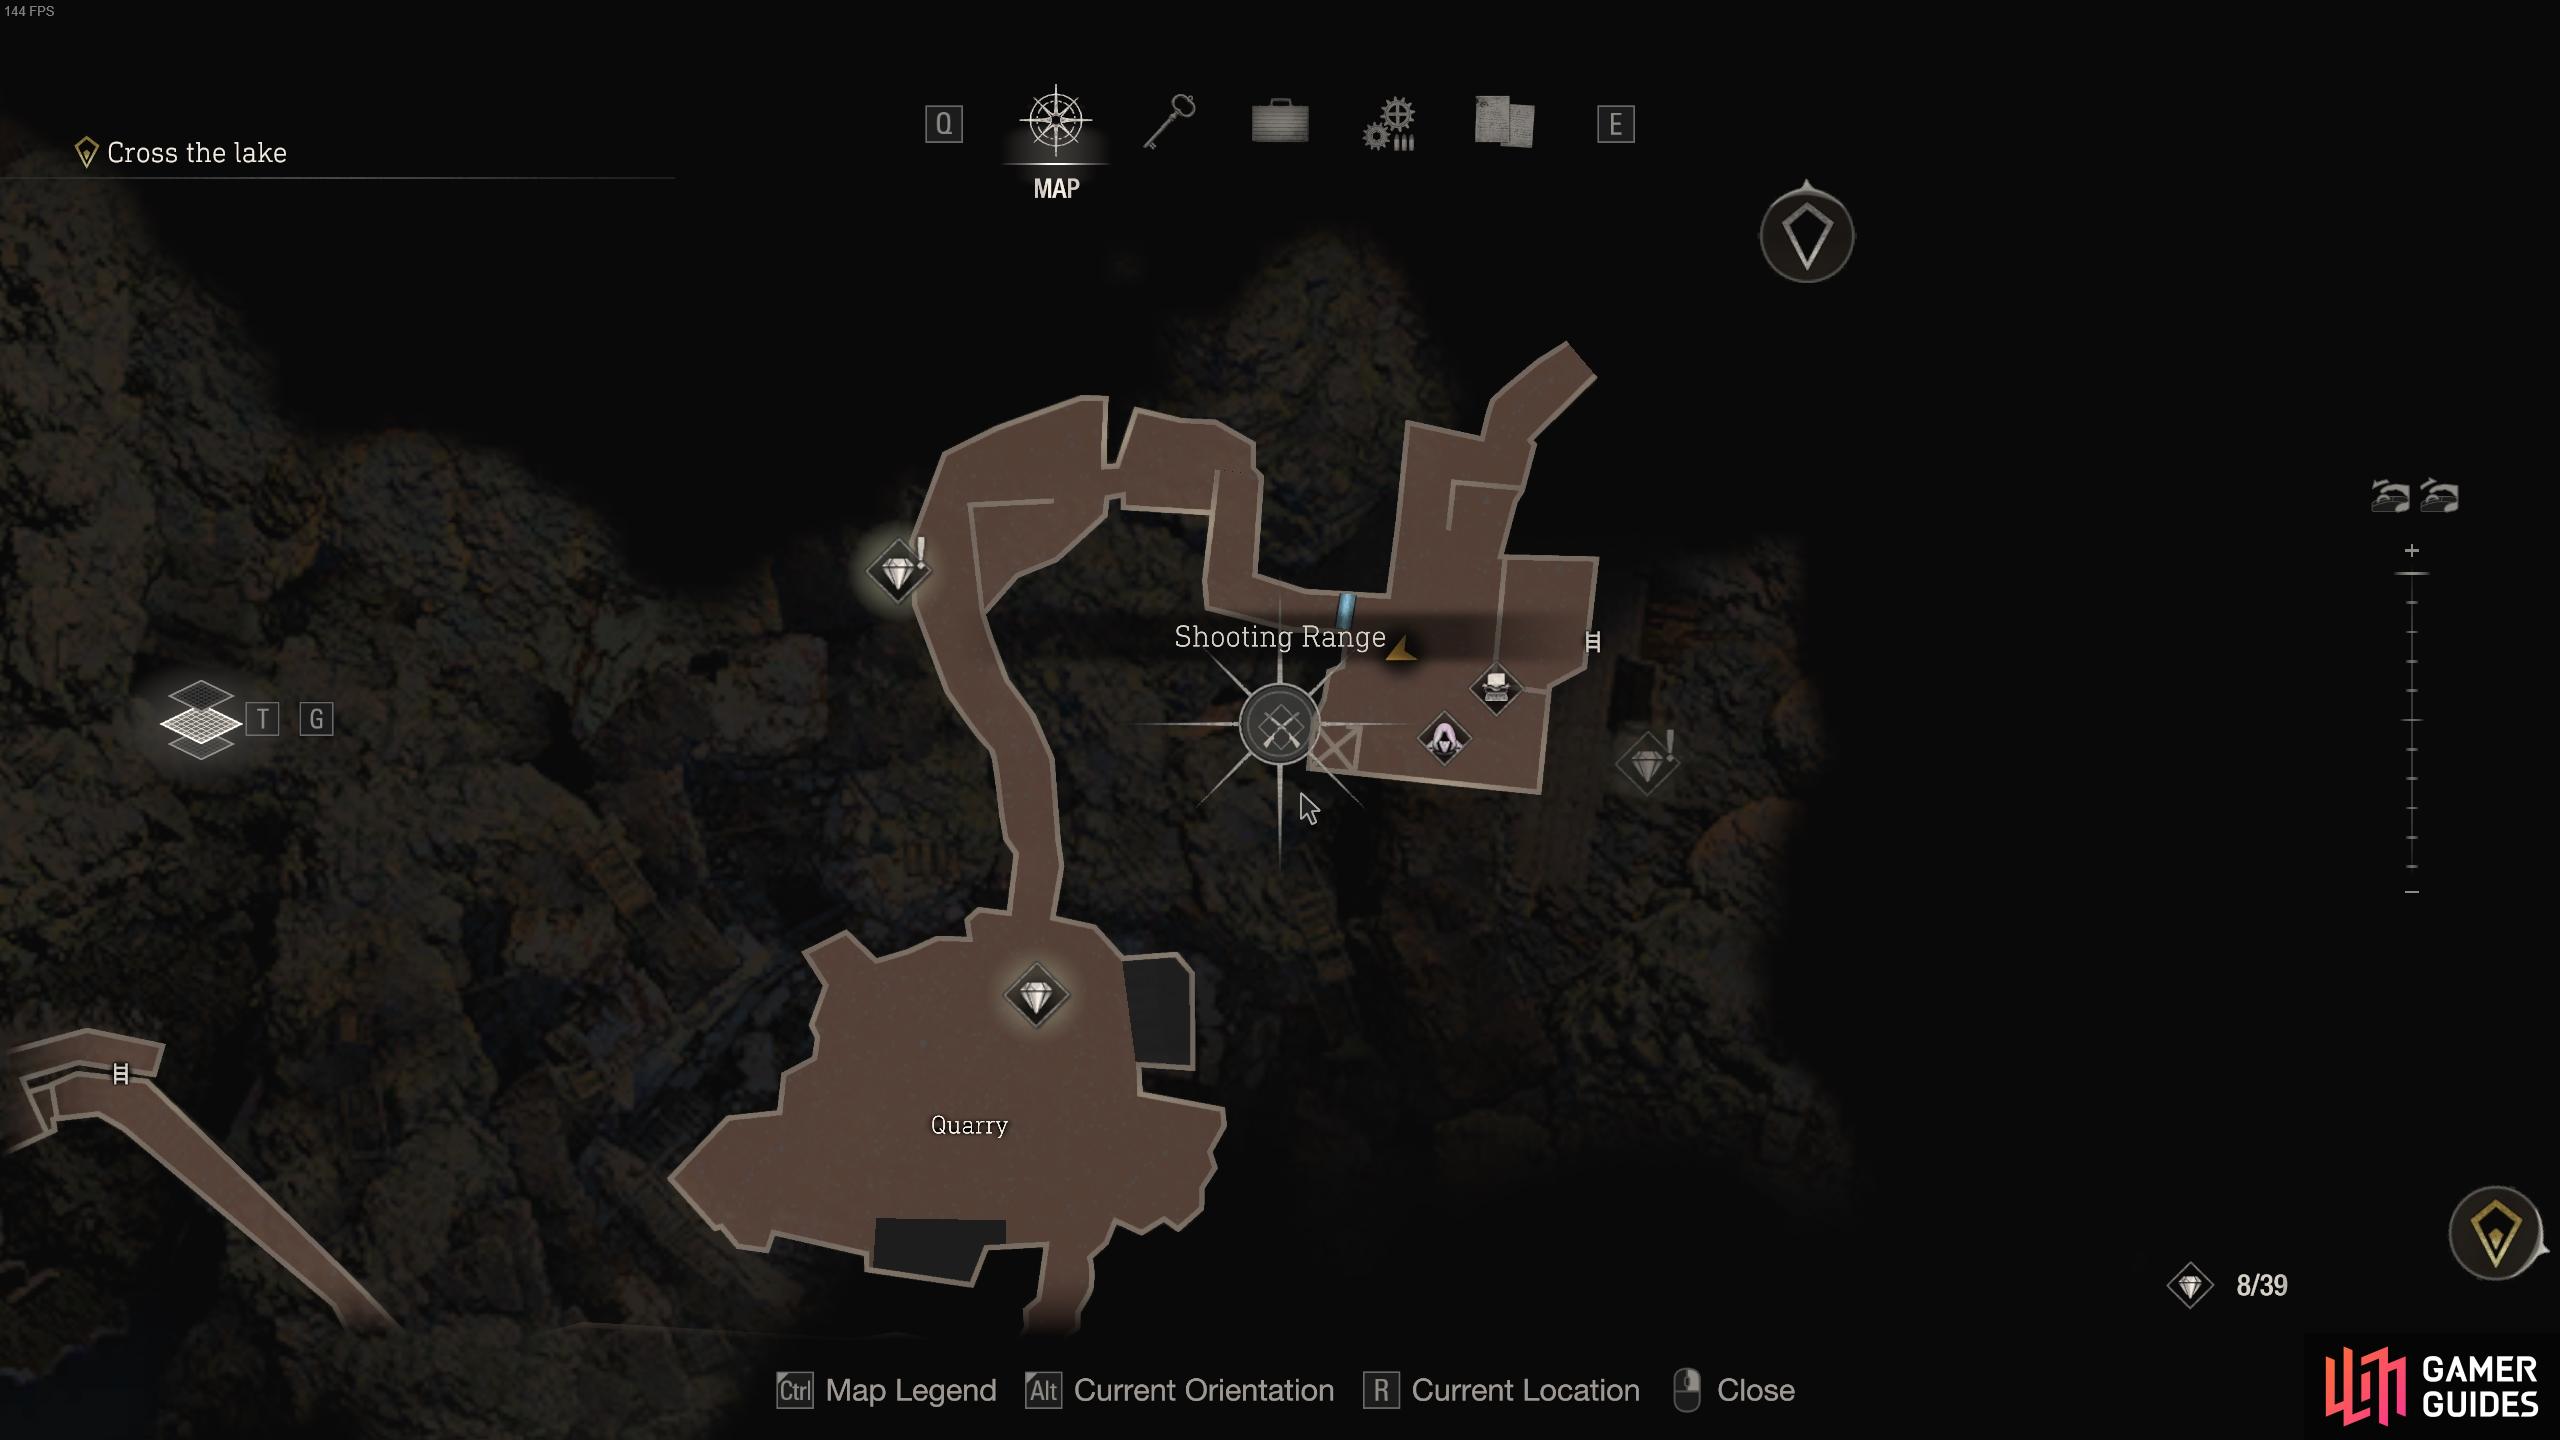
The location of the shooting range in the Merchant’s Hideout during chapter 3.

You can access the shooting range by going down the elevator here.
Shooting Range Challenges Explained
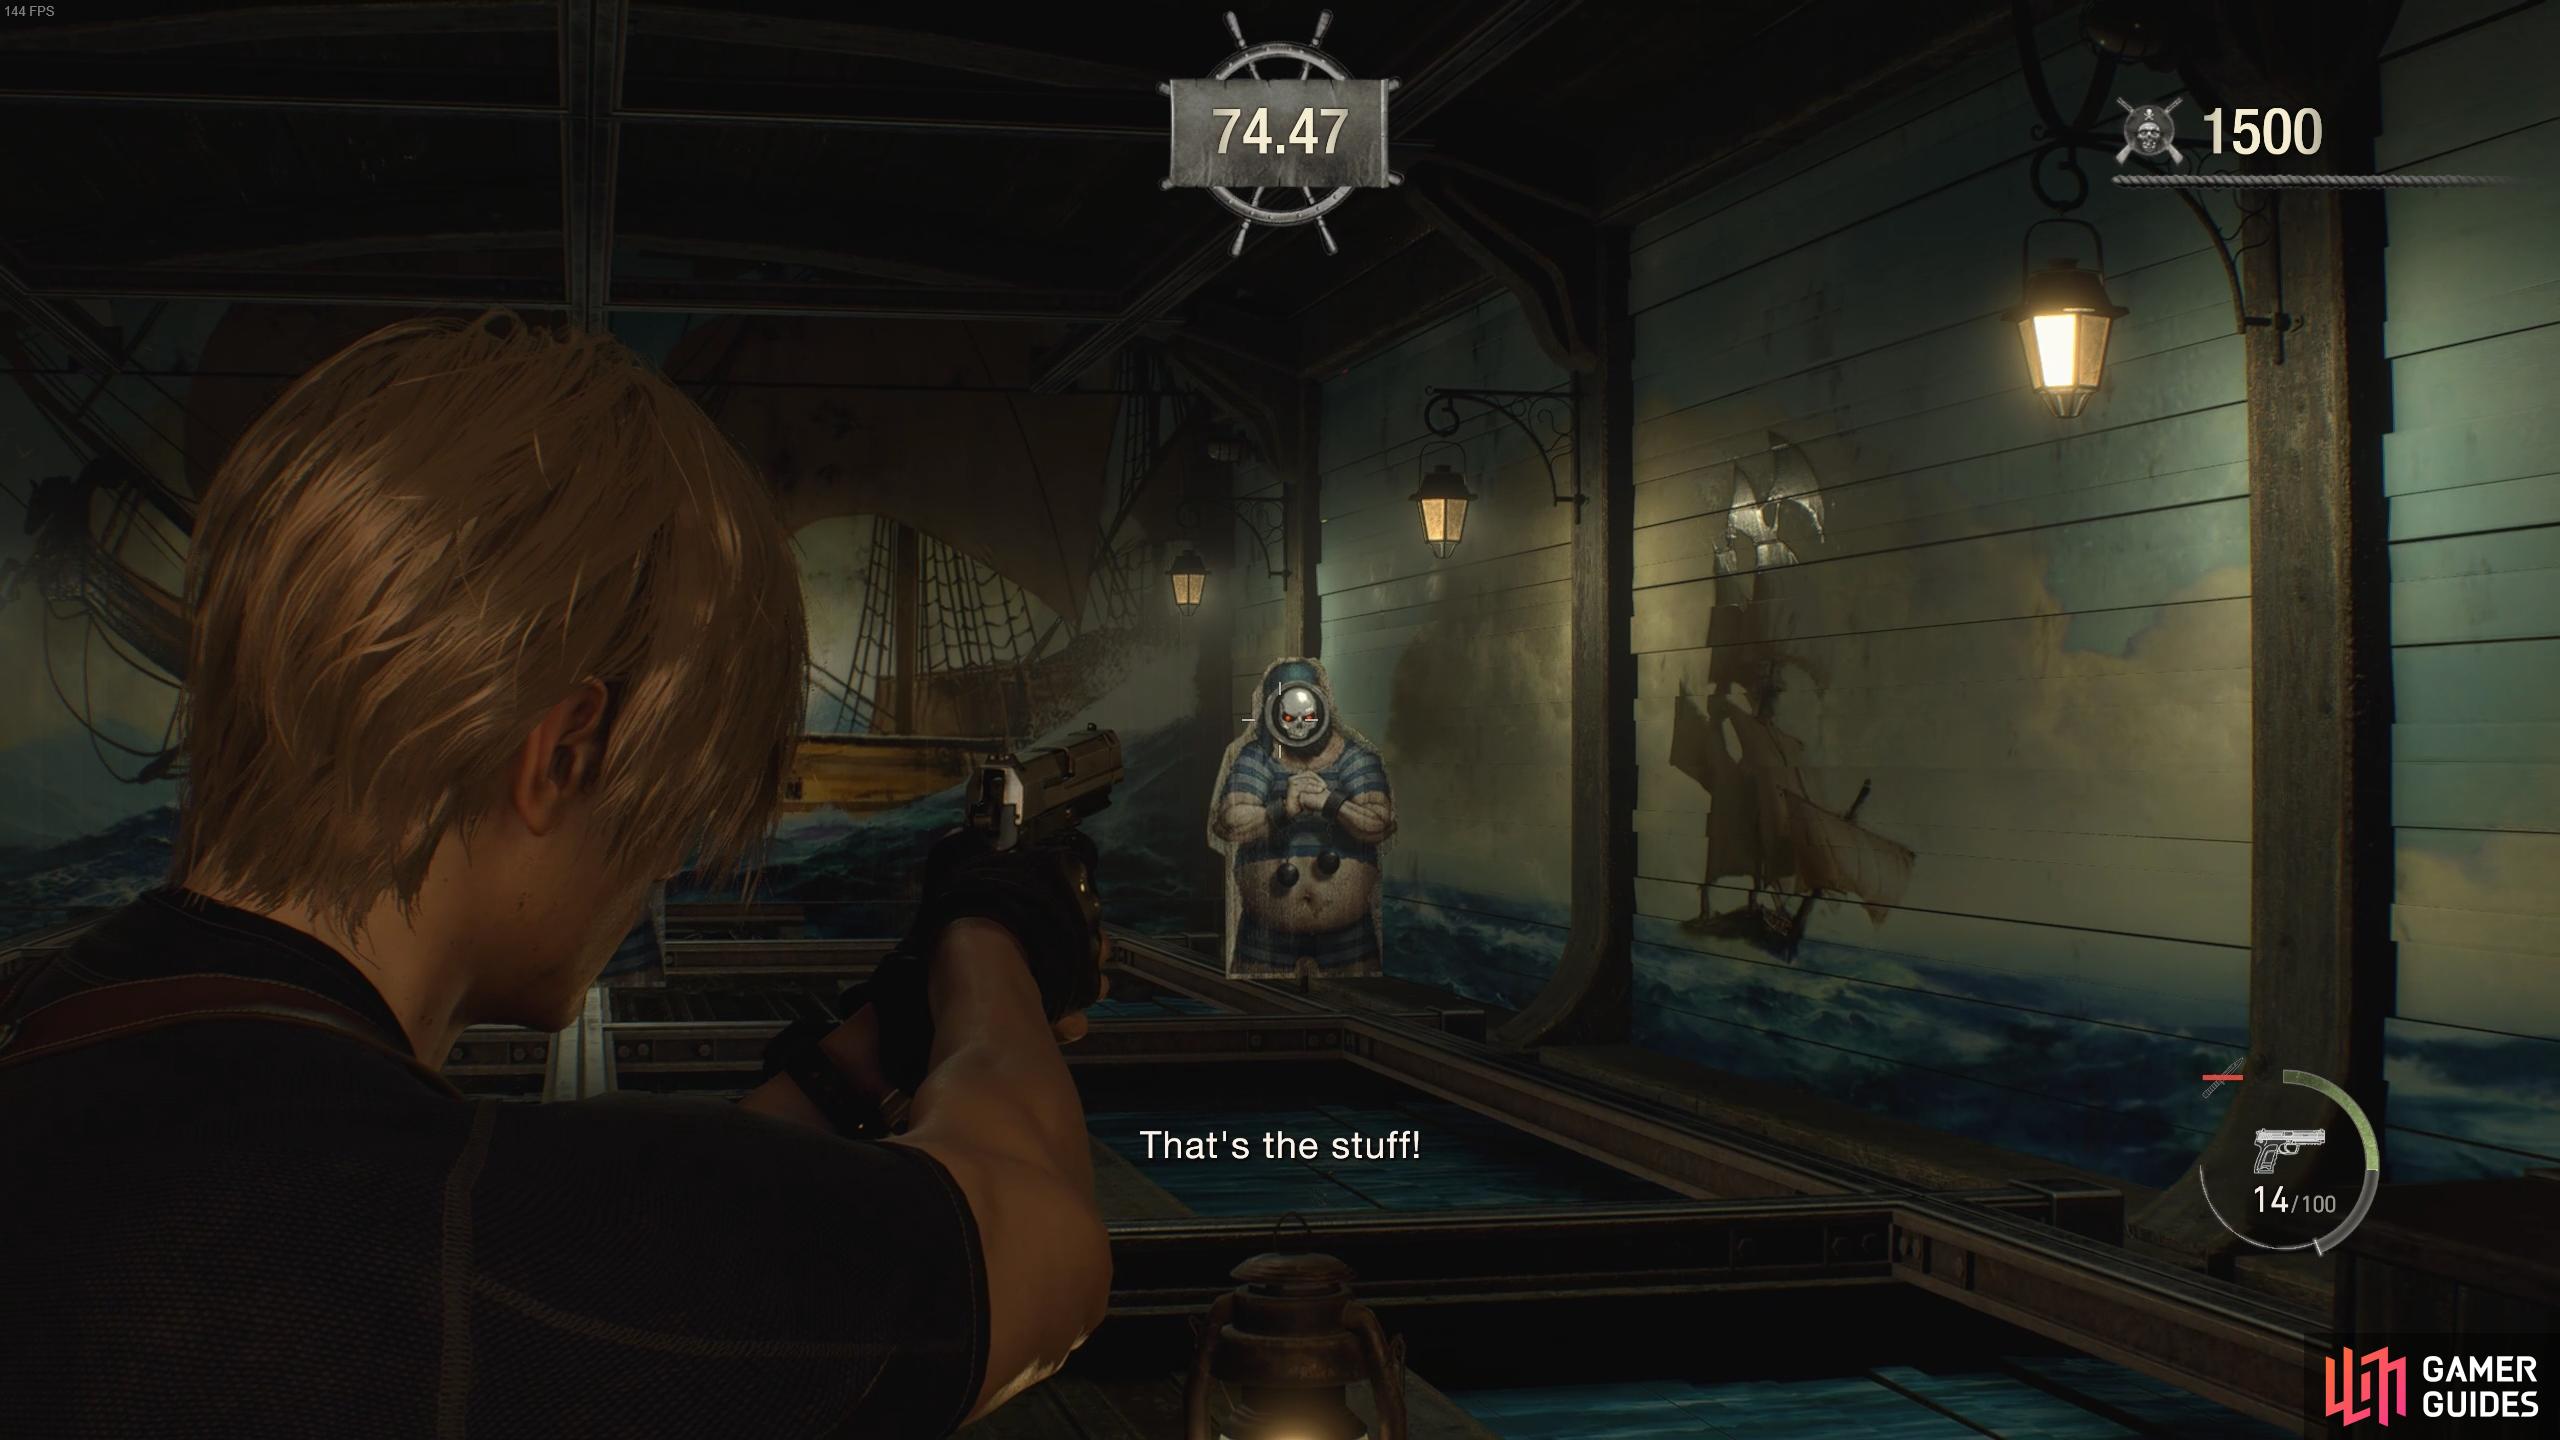
Further down the stairs you’ll see the actual shooting range, and you can interact with a bell on the table to access the first three challenges, which are referred to as 1-A, 1-B, and 1-C. Each challenge restricts you to using a specific weapon or combination of weapons, but the basic principle is the same: you need to kill as many pirates as possible, while avoiding to shoot the sailors. You’ll earn points for each pirate that you kill, but you’ll lose points for killing sailors.
You will also notice that some pirates have skulls attached to them on various parts of their body. You’ll need to shoot these skulls to earn extra points, and shooting all the skulls in one challenge will grant you an extra gold token. You’ll earn silver or gold tokens in accordance with the amount of points that you score (shown in the table below), and you can increase the number of tokens earned if you meet certain requirements. For example, for each extra +1,000 points that you score during the Bonus Round, you’ll earn a silver token. The Bonus Round can only be accessed if you kill all of the pirates present in a specific challenge.
Your overall score will be measured by ratings from C, B, A, to S, but also by a numbered value which will be stated at the end of the round based on the total number of regular objectives you achieved (reaching specific point thresholds as shown in the table below), in combination with any points you received from bonus objectives. If you don’t achieve at least the minimum threshold for a regular objective, you’ll score a C. You can obtain the S score rating without necessarily shooting all the skulls, but you’ll need to at least reach every regular point threshold and then score some bonus points.
1-A Shooting Range Challenge - How to Get the Highest Score
The first challenge, referred to as 1-A, restricts you to using the SG-09 R pistol. This is a powerful weapon which will destroy each pirate with just one hit, but it can’t shoot through two pirates at once. The objective is fairly straightforward: you need to kill all the pirates before they despawn, and avoid hitting any sailors. The scoring for this challenge is as follows:
| Points | Reward |
|---|---|
| At least 3,000 points | Silver Token |
| At least 5,000 points | Silver Token |
| At least 7,000 points | Gold Token |
| Every +1,000 points from bonus round | Silver Token |
| Shoot all Skulls | Gold Token |
How to Shoot All the Skulls in the 1-A Shooting Range Challenge
The 1-A challenge with the SG-09 R pistol is a fairly easy one to score the S tier with, but earning the maximum amount of points and obtaining both gold tokens is another matter entirely. To do this, you’ll need to shoot every pirate, every bonus objective in the form of the gold chests during the bonus round, and hit every skull. If you’re struggling to hit some of the moving targets, you can wait until they’re moving directly towards you rather than from side to side, since this will remove the need for you to track the movement and aim slightly further to the side in the direction that it’s moving.
There will be a point towards the end of the challenge where a large number of pirates appear and move in the same direction all at once. You can kill all of these before they reach their despawn point if you’re quick enough, but a simpler way to deal with them is to wait for the pirate with the dynamite in his hands to spawn in the center of the shooting range. If you hit the dynamite, all of the pirates active in the range will die at the same time.
(1 of 4) You need to hit the skulls to get bonus points. Shooting all the skulls in one challenge earns you a gold token.
The most difficult part of this challenge is the fast-moving skull which appears right at the end of the bonus round. You’ll only have a split second to shoot this as it moves from the top right of the screen to the top left. The key to hitting it is to track the skull as it moves by aiming your reticle just beyond where it’s moving. If you shoot in this way by prefiring slightly to the left of where the target is moving, you should be able to hit it. This is a tricky part of the challenge so don’t beat yourself up if you fail to hit it the first few times!
You can see us hitting the last skull in the video below.
1-B Shooting Range Challenge - How to Get the Highest Score
The 1-B challenge in the shooting range restricts you to using the SR M1903 rifle. This is much more powerful than the SG-09 R pistol and it will allow you to shoot through two pirates at once. This can be both a blessing and a curse, since it gives you the opportunity to kill multiple pirates at the same time so you can get through the challenge more quickly, but if you’re not careful you may end up shooting through a pirate only to find that you’ve also hit a sailor positioned behind them. The scoring for this challenge is as follows:
| Points | Reward |
|---|---|
| At least 3,000 | Silver Token |
| At least 4,000 | Silver Token |
| At least 5,000 | Gold Token |
| Every +1,000 points from bonus round | Silver Token |
| Shoot all Skulls | Gold Token |
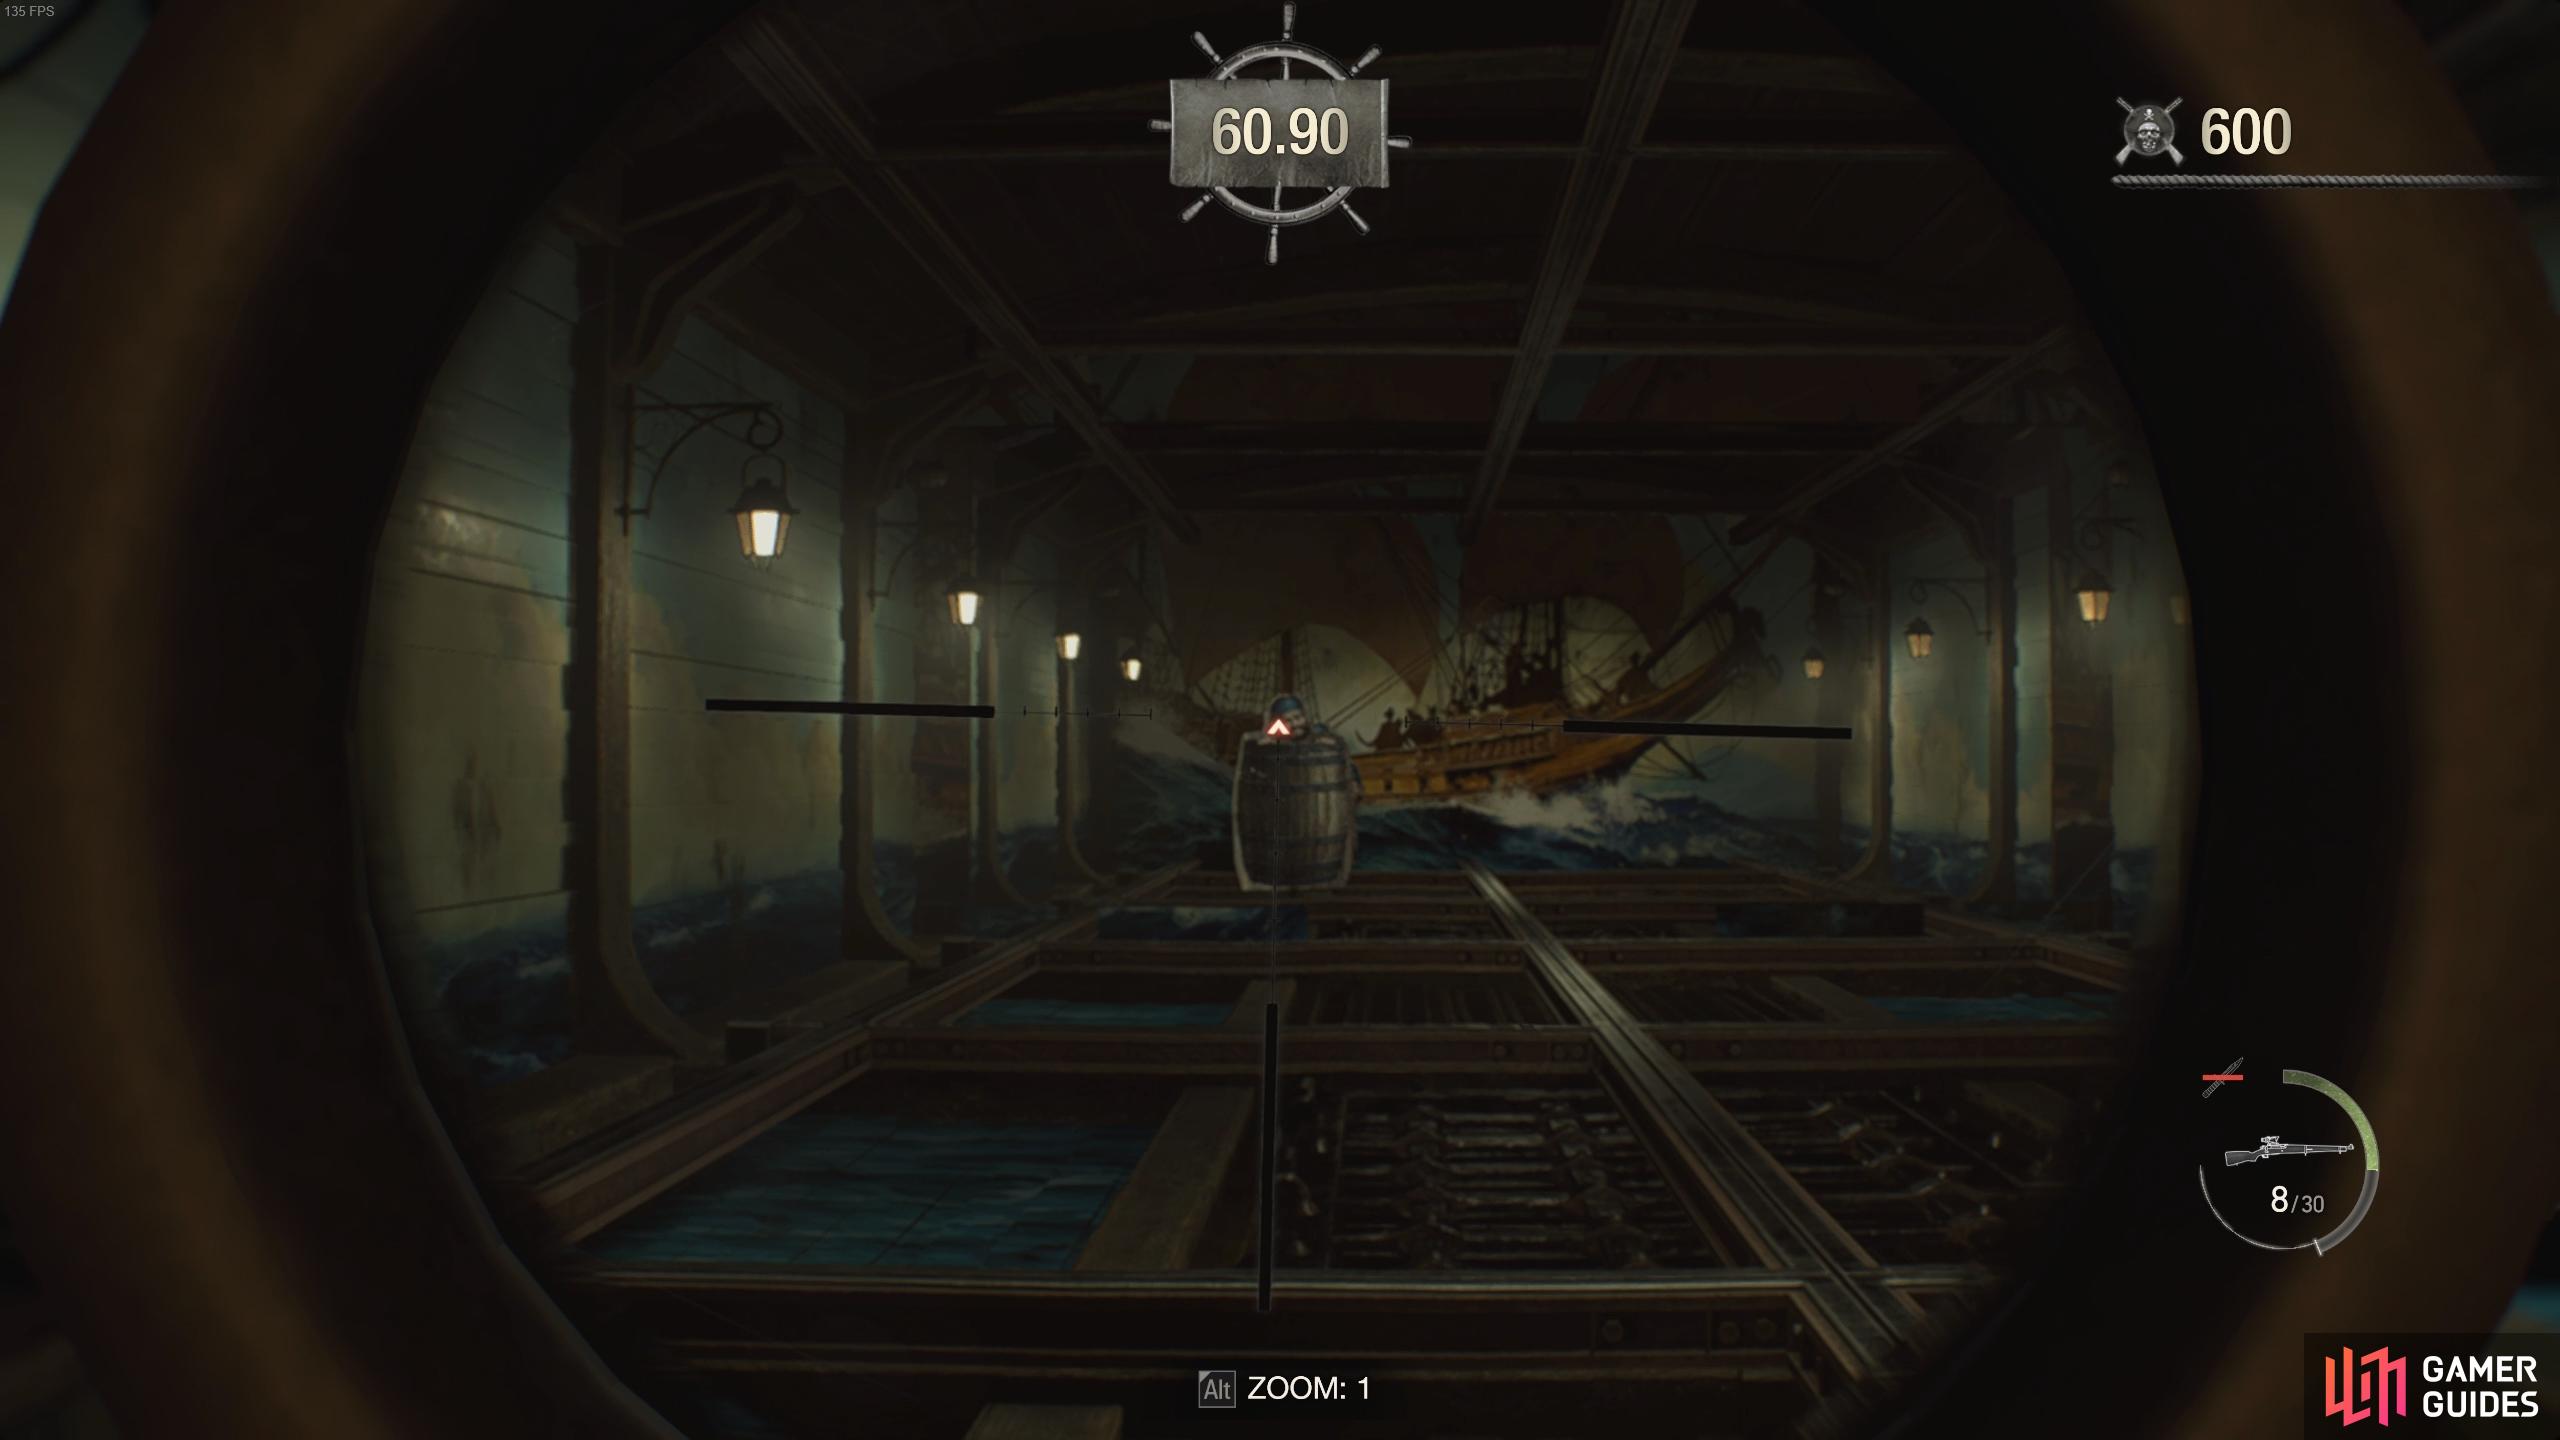
There are two new types of pirates introduced with this challenge. The first is the presence of pirates who hide behind barrels, with only their heads which poke up from the top of the barrel as they peek up and down. You’ll need to hit these just as their head pops up and avoid wasting bullets by shooting the barrel itself.
The second new type of pirate comes in the form of a spinning pirate. These will move in different directions while spinning, making it difficult to shoot them when their profile is facing you side-on. You’ll need to time your shots properly to shoot them as they’re facing towards or away from you, when their profile is at its largest.
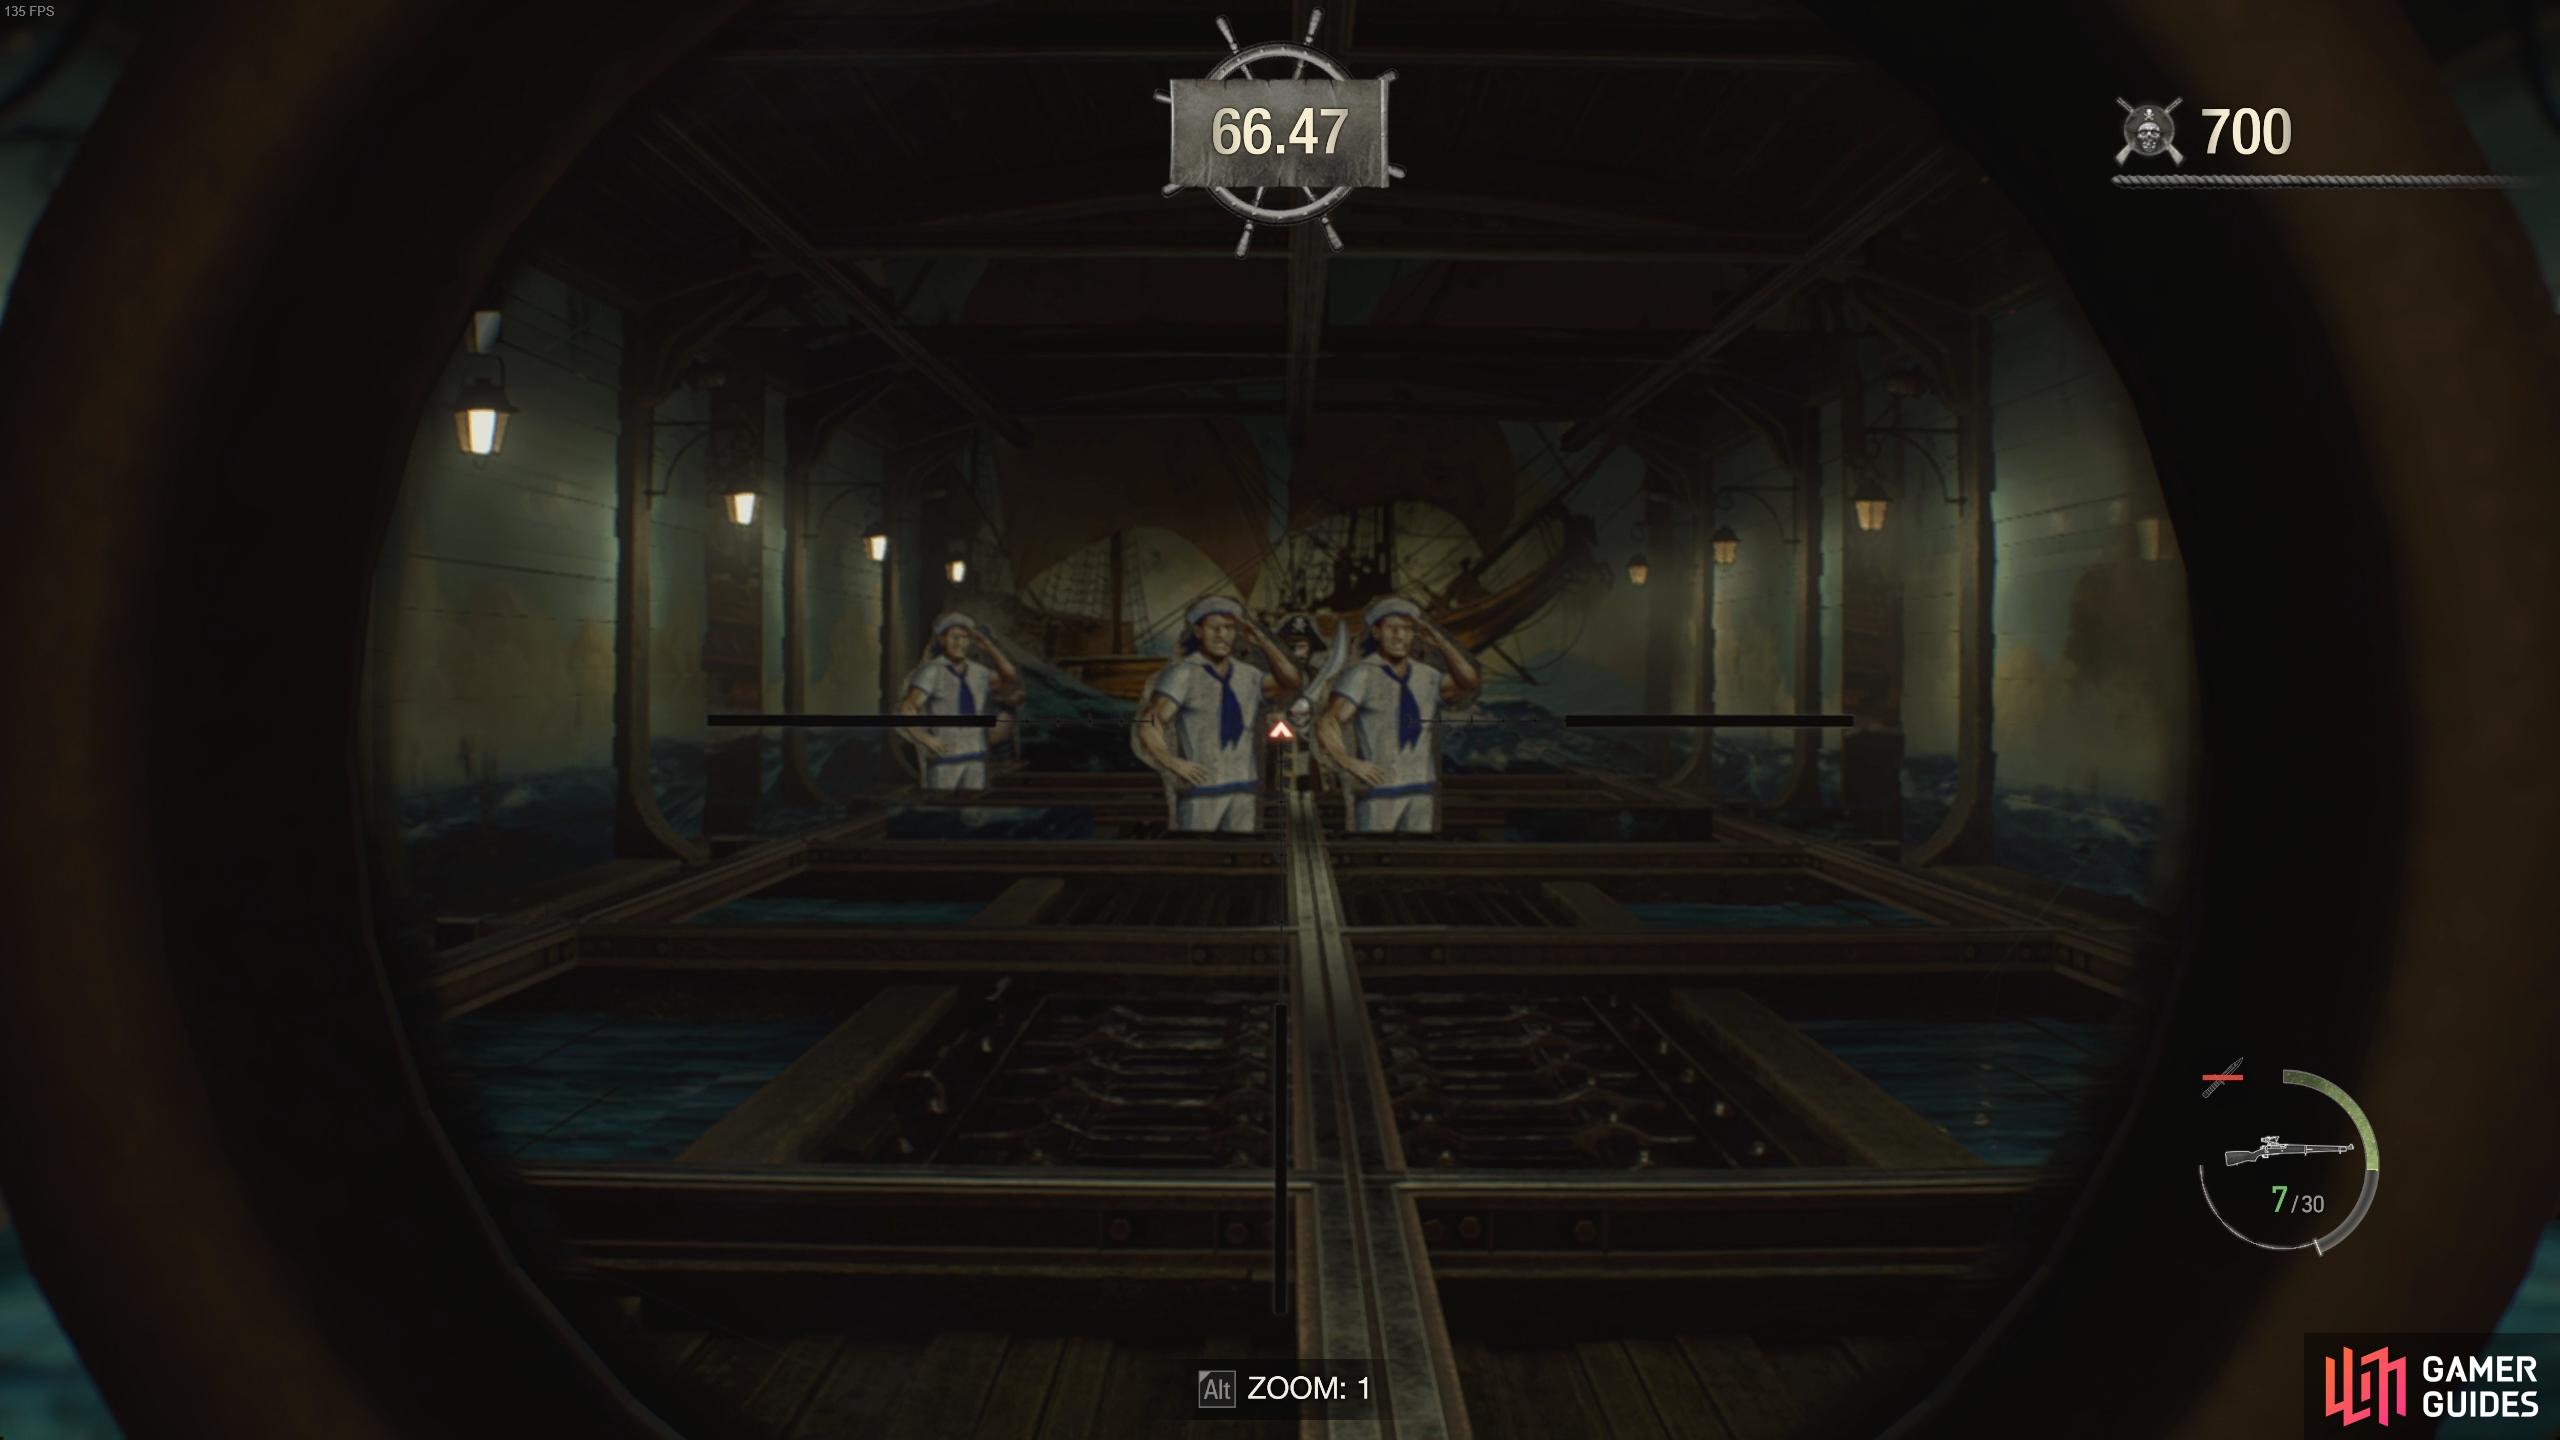
There will also be some pirates in this challenge which hide behind sailors, with only their heads poking up from behind their shoulders. You’ll need to be particularly careful here to hit the pirate heads while avoiding to hit any part of the sailor. As mentioned above, in some cases there will be sailors positioned directly behind pirates, so be careful not to shoot through these.
How to Reach the Bonus Round for the 1-B Shooting Range Challenge
In general, the more you practice this one the more familiar you’ll become with the movements. It isn’t particularly difficult but you’ll need to make sure that you hit the skulls when you see them to ensure that you earn the maximum score. You should aim to hit two pirates at once whenever they overlap, and the key to reaching the bonus round requires you to be patient with the last two pirates, as one slow pirate appears while a faster one comes later. You need to hit these two just as they overlap in the center of the shooting range.
The bonus round will have some moving gold chests with skulls on them, but these are much easier to hit with the scope from the rifle. You should aim to hit all of the hanging targets at the top of the shooting range first, since these will disappear when once they’ve moved from one side to the other. The chests will remain even as they move from side to side, but you’ll need to be quick if you want to shoot them all before the bonus round ends.
1-C Shooting Range Challenge - How to Get the Highest Score
The 1-C challenge is the final one from the first shooting range, and it’s the most difficult you’ll face yet. Here you’ll have access to both weapons that you’ve used previously: the SG-09 R pistol and the SR M1903 rifle. This means that you’ll need to switch between them based on which weapon is most suited to the type of pirate that you’re trying to hit. It’s not as easy as simply sticking to either the pistol or the rifle here, since you can only use the pistol for some shots. This is because some pirates will be standing in front of sailors, so if you use the rifle you will inevitably hit the sailor behind them too.
The scoring for this challenge is as follows (you’ll notice that the minimum thresholds are higher than the two previous challenges):
| Points | Reward |
|---|---|
| At least 4,000 | Silver Token |
| At least 6,000 | Silver Token |
| At least 8,000 | Gold Token |
| Every +1,000 points from bonus round | Silver Token |
| Shoot all Skulls | Gold Token |
There’s one new type of pirate introduced with this challenge, and it comes in the form of a spinning pirate with a skull attached to them, but the skull is only visible on one side. This means that you’ll have to be careful not to be too eager to shoot every pirate that you see as soon as you see it. Instead, look out for the spinning pirates in particular, and be sure to check whether they have a skull present on one side of their model before you take the shot. If you spot a skull, wait for it to appear before you shoot!
Switch Between the SG-09 R Pistol and the SR M1903 Rifle
There are also some sneakier pirates here which are fairly well hidden behind sailors. Look out for one in particular on the left side of the shooting range after you see three sailors pop up. It appears alongside the spinning pirate with the skull present on one side of it, in the center of the range between two sailors. Be ready to switch to the rifle to get double kills wherever possible, but as mentioned if you see a sailor behind one, switch to the pistol so that you only kill the pirate in front of them.
You’ll see more of the other types of pirates here including those which hide behind barrels, and the overlapping pirates in the center of the shooting range. Take your time to wait for these to overlap before you hit them, and be sure to hit the point where the skull is for bonus points. Some pirates will overlap where one is hiding behind a barrel, so you’ll need to be accurate to hit the head just as they overlap.
At one point you’ll encounter some pirates who spin much faster than those previously, and some of these have skulls on only one side of their body which you’ll need to hit. To make things worse, there are sailors behind these pirates so if you time the shot poorly, you’ll kill the sailor while missing the pirate entirely. Take your time with these tricky pirates.
The bonus round for this challenge is nothing short of abject chaos. There will be more gold chests and more parrots, both with skulls on them and all of which will be moving. You’ll benefit from using the scoped rifle here to hit each one, and you should prioritize hitting the skulls first for bonus points.
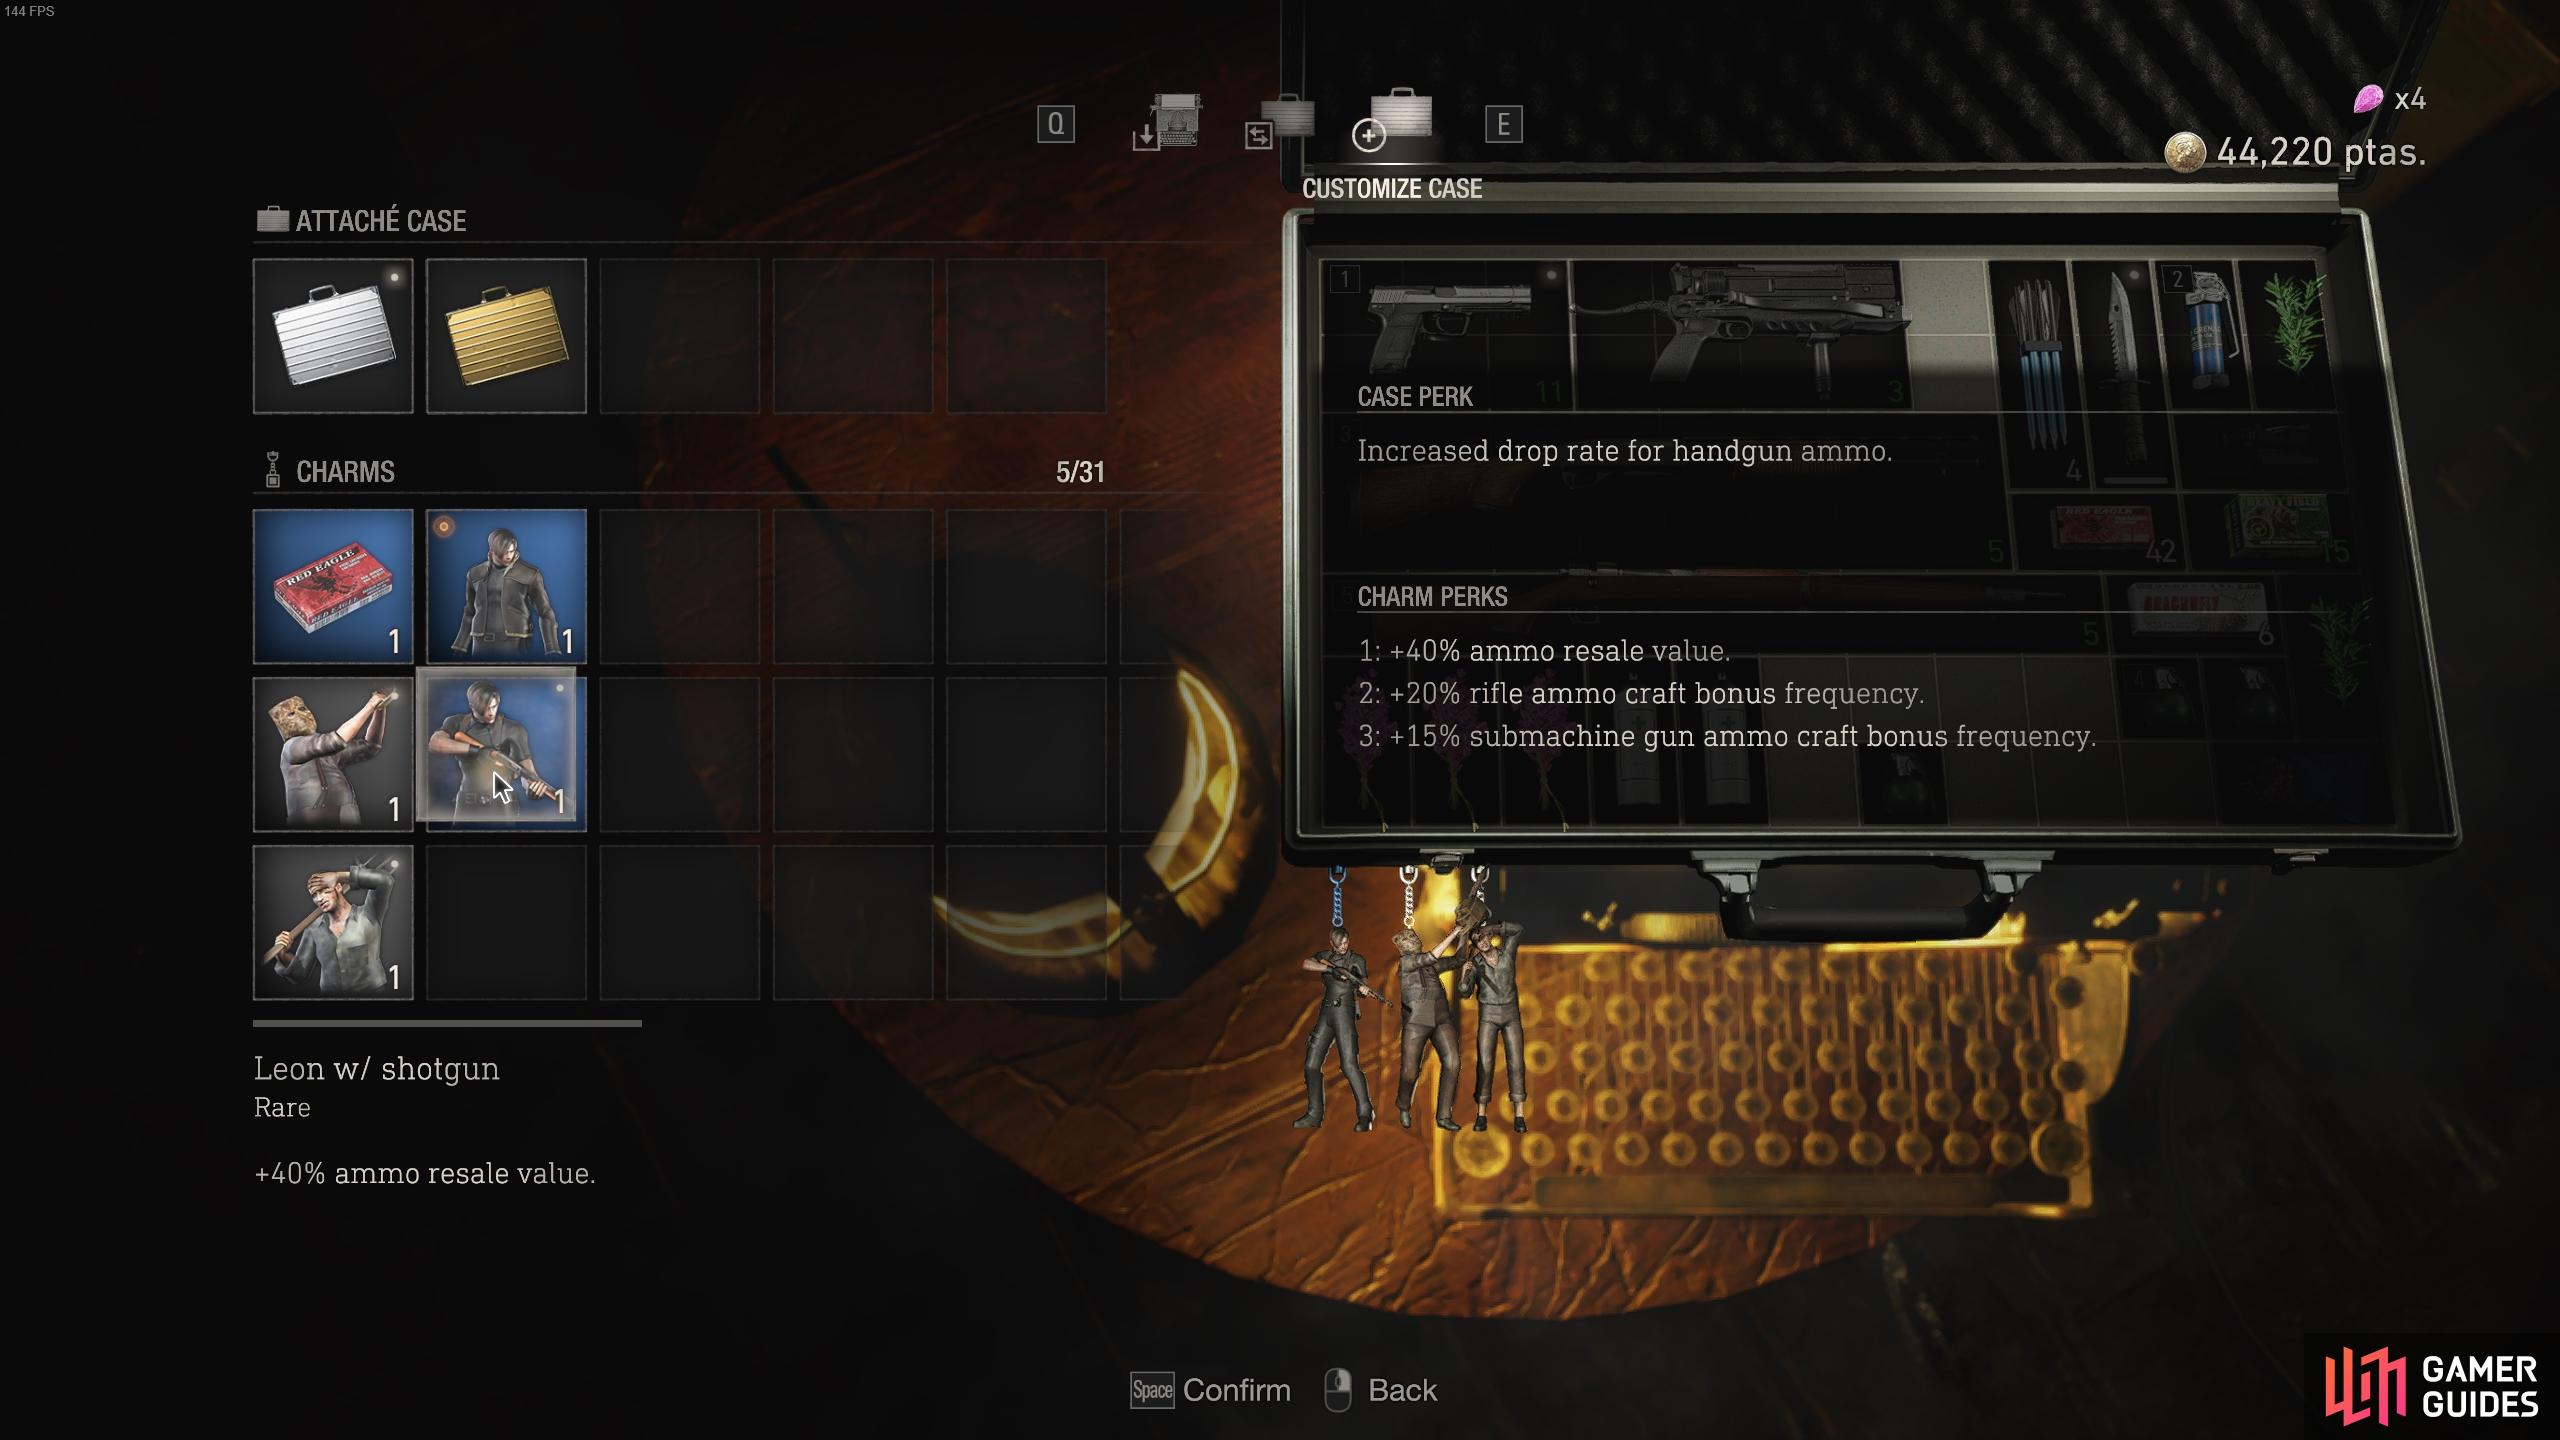
How the Shooting Range Tokens and Charms Work in Resident Evil 4 Remake
Once you’ve completed all of the challenges you should have a decent amount of silver and gold tokens. These can be taken to the slot machine near the elevator in the shooting range, and exchanged for various charms which will be randomly generated. In general, you’ll receive common charms if you input silver tokens, but the more gold tokens you input, the better the chance for receiving a rare charm is. You can use up to three tokens at once, and using three gold tokens will guarantee a rare charm, but the bonus effects from the charm will vary depending on which one you get.
You can equip up to three charms by default on your Attache case whenever you visit the typewriter, which has an option that allows you to customize the case.
No Comments