
Resident Evil 4 Remake features many iconic battles, and the rematch against former colleague Jack Krauser takes place at the end of Chapter 14. Unlike the first battle, guns are permitted but the battle will take you across a large area. This page will detail how to defeat the mutated Jack Krauser and avoid his various traps.
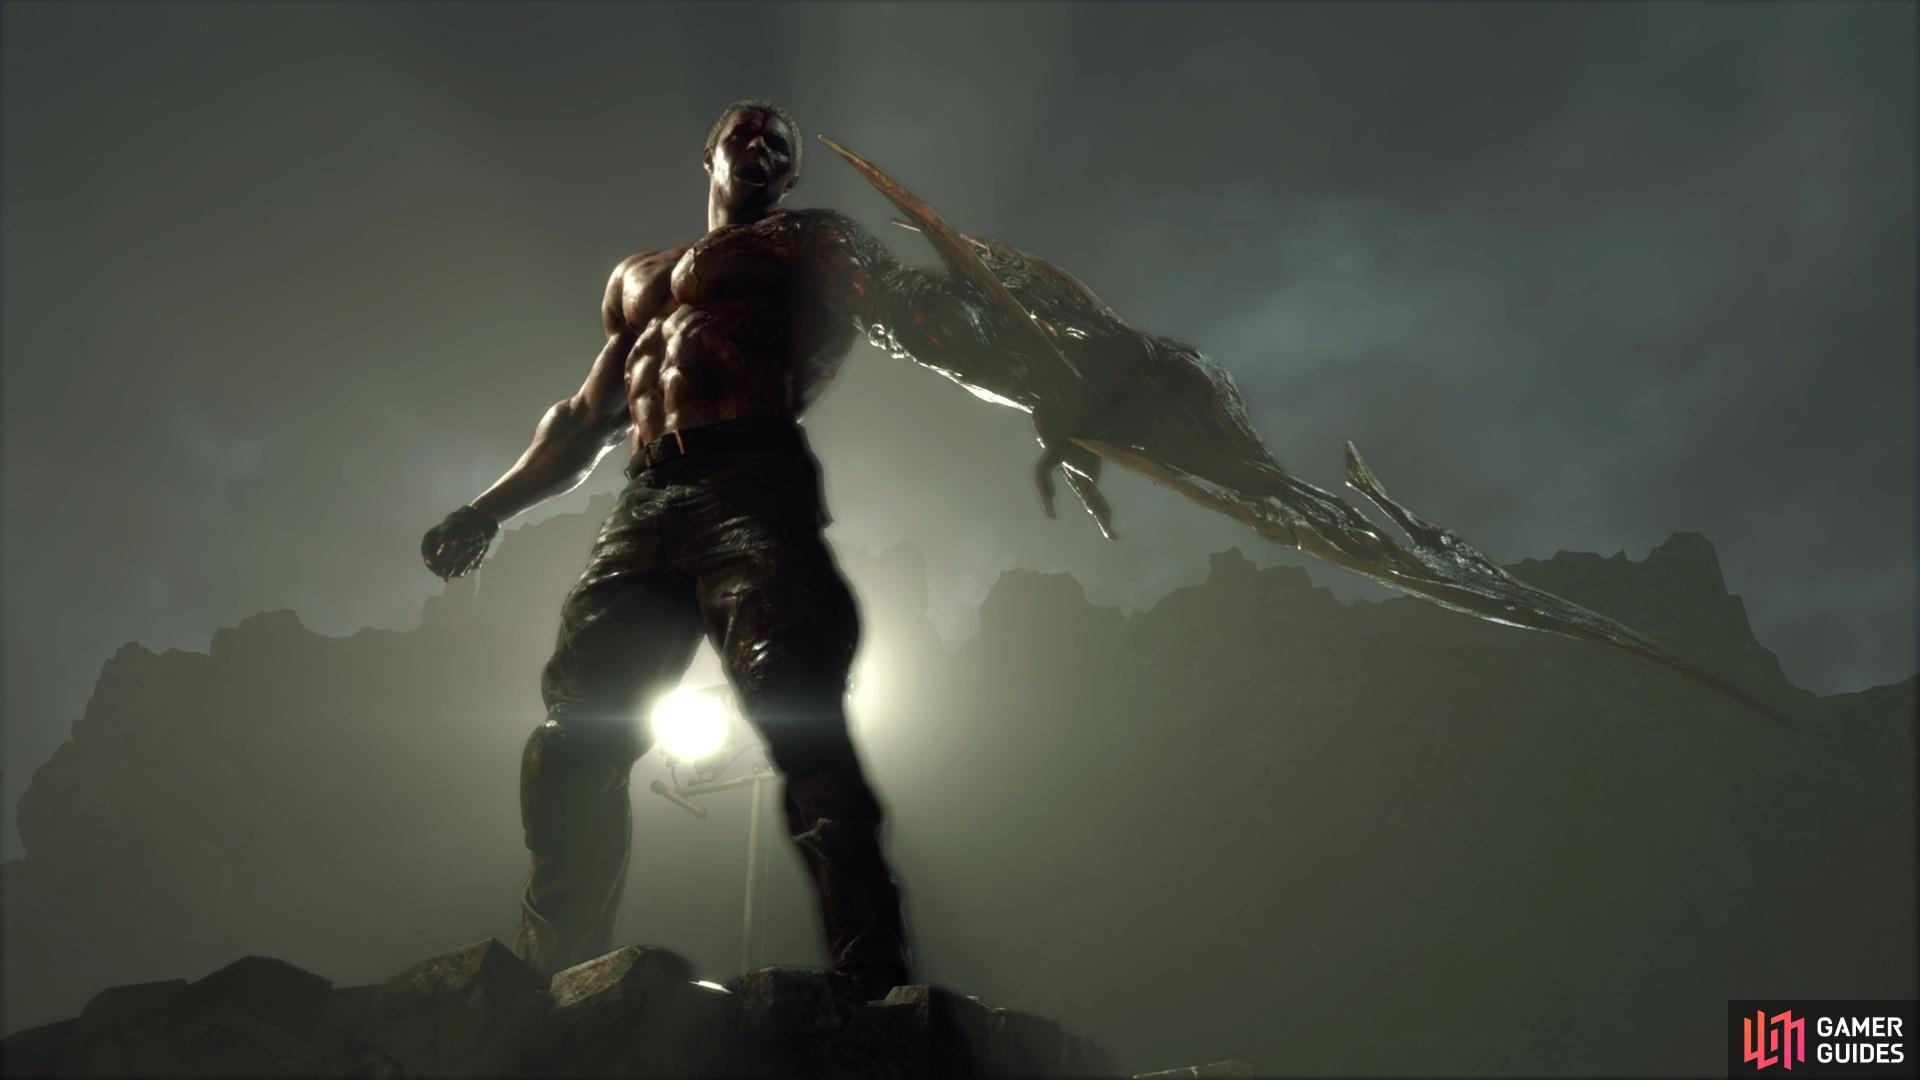
You will fight a mutated Krauser in Chapter 14 of Resident Evil 4 Remake.
Krauser Boss Fight in the Ruins - Chapter 14
You’ll find a Merchant just before you reach the ruins, make sure to stock up on any healing items if possible, and look to upgrade your guns as much as possible, the forthcoming battle with Krauser will allow you to use your weapons this time. Once you’re ready to continue, proceed towards the ruins and you’ll run into Krauser for the second, and final time.
The battle against Krauser in Chapter 11 was just a taster, and although you can make use of the tactic to parry his knife attacks, there’s a lot more going on here in a much larger area. Krause has access to both his bow and SMG in this battle, meaning he can and will fire at you from range while you’ll need to proceed through the ruins as the battle progresses which are full of traps that he has set for you.
Krauser has plenty of tricks up his sleeve across the entire battle, and you can learn more about them below:
-
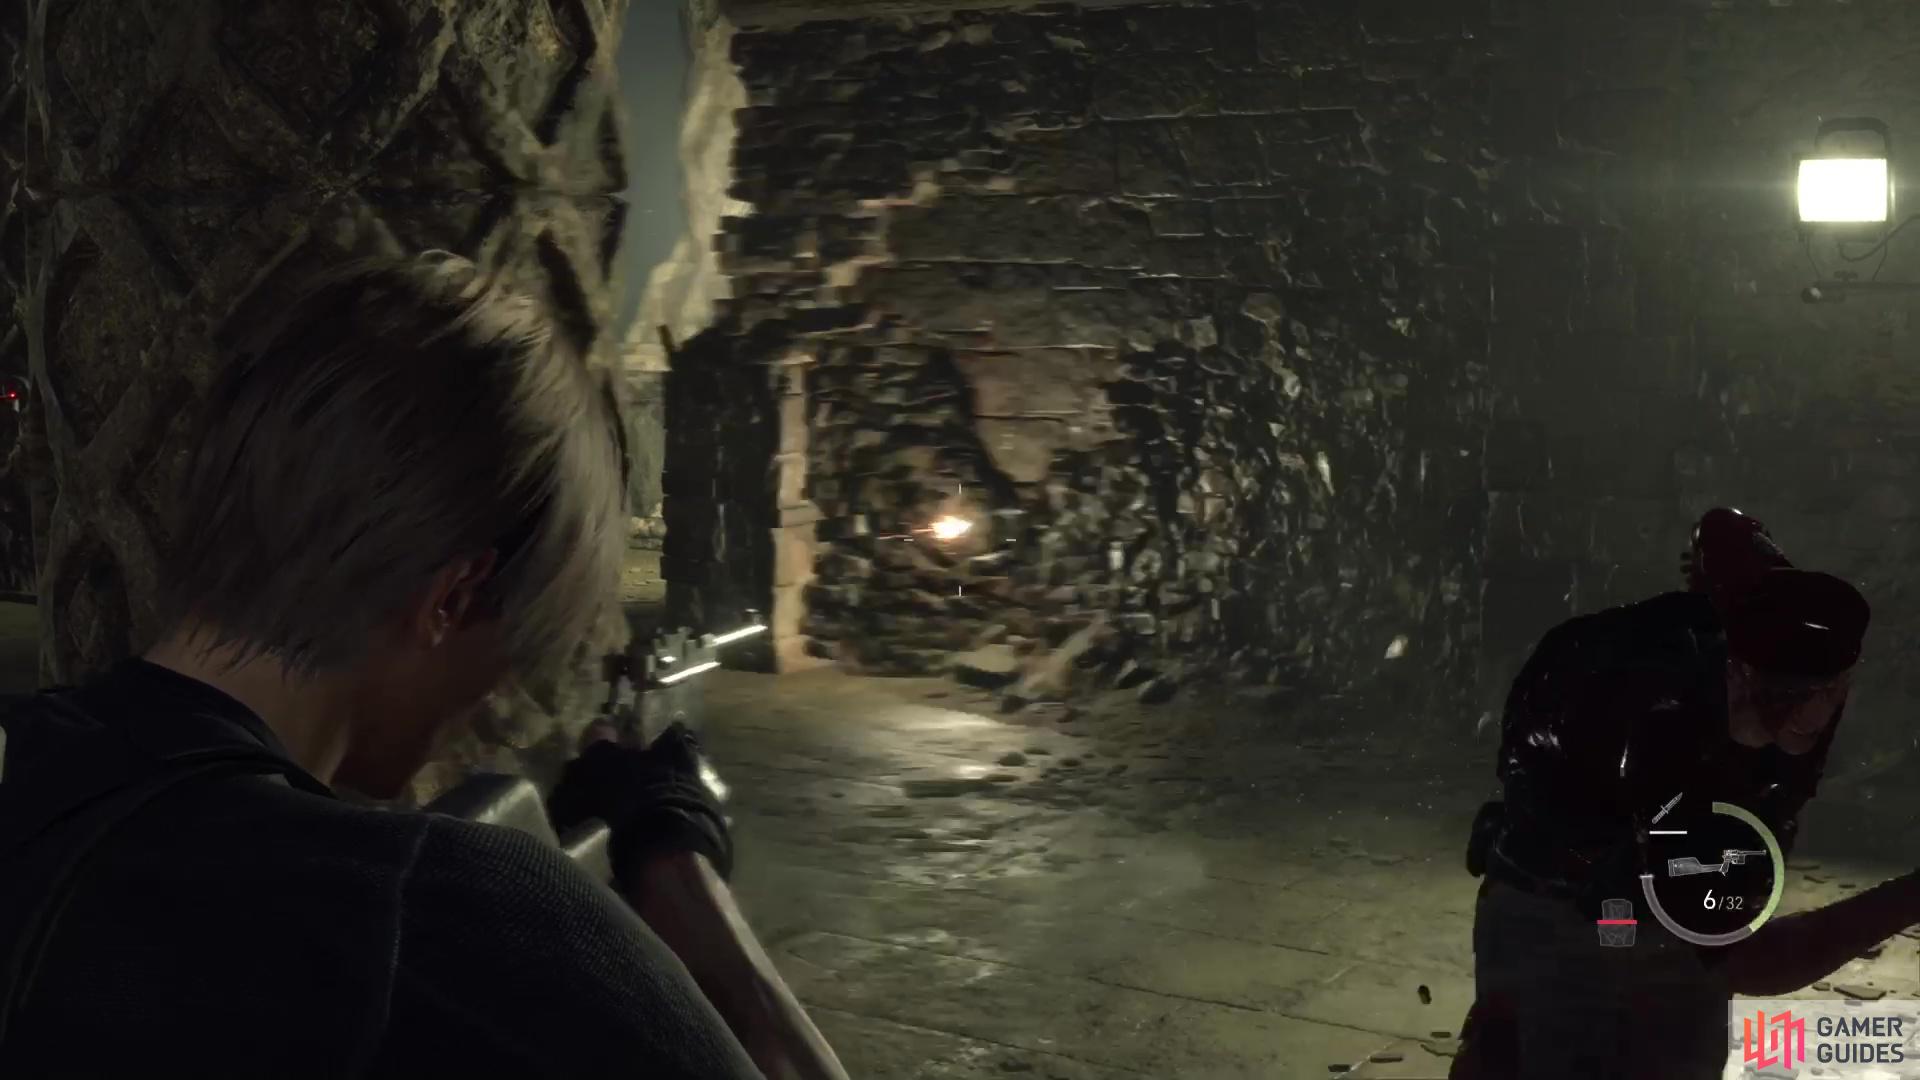
SMG: Krauser will shoot at you with a barrage of bullets from his SMG. Avoid this by finding some cover and wait for him to reload.
-
Bow: Krauser has greater range with his bow, and will fire explosive arrows which will explode on impact, be sure you’re in cover.
-
Knife Combos: Krauser will use his knife in several ways against you, ranging from a combo, to a quick strike from behind. All of these can be parried with the right timing.
-
Knife Toss: If Krauser is at medium range to Leon, he will toss a knife at Leon that can knock him back a little.
-
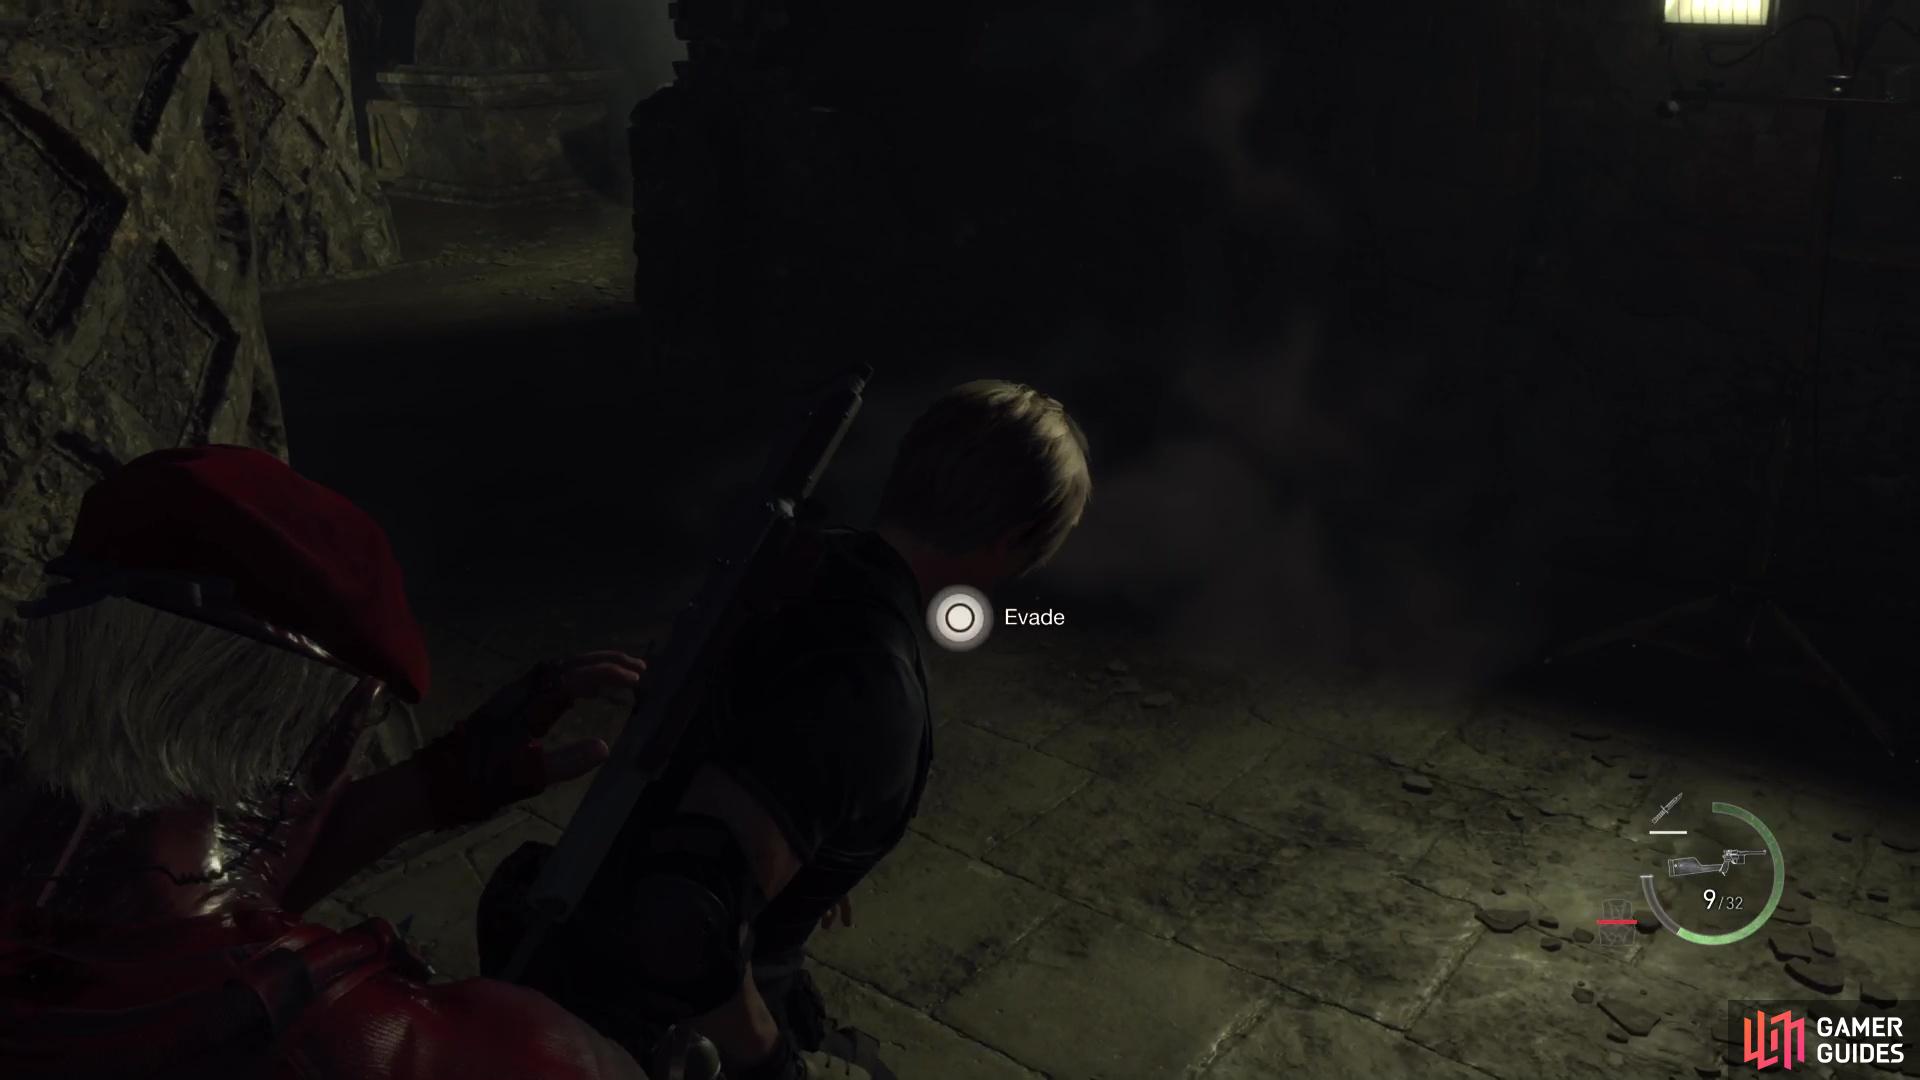
Flash Grenade: Krauser will use a flash to mask his escape earlier in the battle, but later, he will use it as a means to come behind and grab you, get ready to evade when you see it.
Navigating the Ruins
The battle begins with Krauser pinning you down while firing both his SMG and Bow. The bow uses explosive arrows, so while you can take some hits from the SMG, make sure you’re behind cover when he draws the bow. Alternatively, there is time to headshot him while he’s preparing to use the bow, this will prevent him from using it and cause him to leap over to you.
At this point, he’ll focus on his knife and closing the gap to Leon, so get ready to parry some attacks. If you’re at medium range, he may toss a knife at you which will knock you back, he’ll then dash at Leon for some follow-up slashes with his knife. This is the best time to remember your tactics from the first battle and parrying, only this time, when you get an opening, use a Shotgun or another powerful weapon to blast him. He’ll use a flash grenade once you deal enough damage and retreat deeper into the ruins.
Take this moment to heal up, reload your weapons and then get ready to pursue him. As you head into the ruins, you’ll notice a door that is shut tight, continue up top and you’ll find the valve needed to open it, then return and continue through to the next section of the ruins.
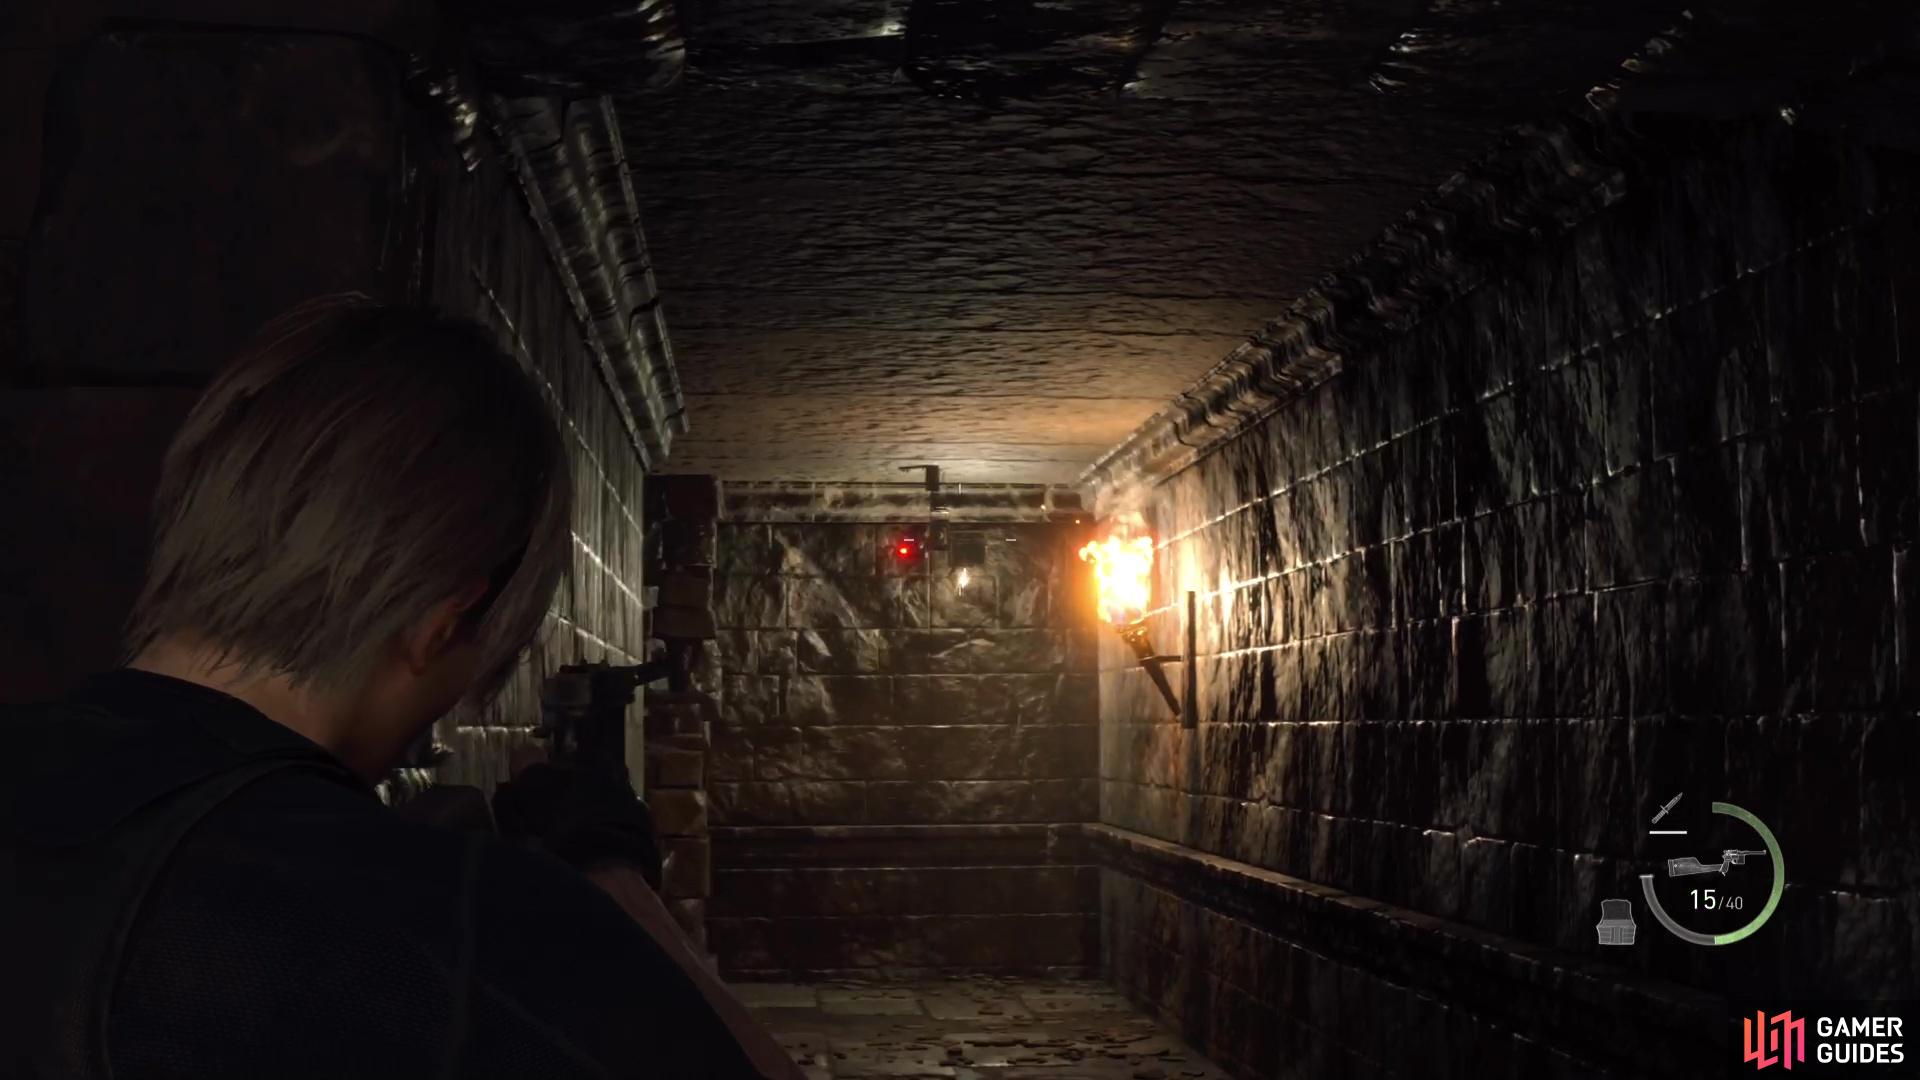
You’ll need to deal with traps in this next section, starting with a tripwire. Crouch under it and drop down, but as you go to approach the breakable box, get ready for Krauser to appear behind you (listen for the sound of him landing). He’ll charge you and should he catch you, knock you to the ground and attempt to stab you, so get ready to mash the button to break free.
He’ll use a flash grenade to escape again, and if the tripwire is still there, crouch under it to continue through the ruins. The next tripwire is bait, just in front of it is a bear trap so shoot it to deactivate it and then shoot the mine when you can see it (edge slowly towards it until it comes into view). At the same time, Krauser will be taking aim at you with his bow, use the nearby cover and then return fire once he’s let loose the arrow.
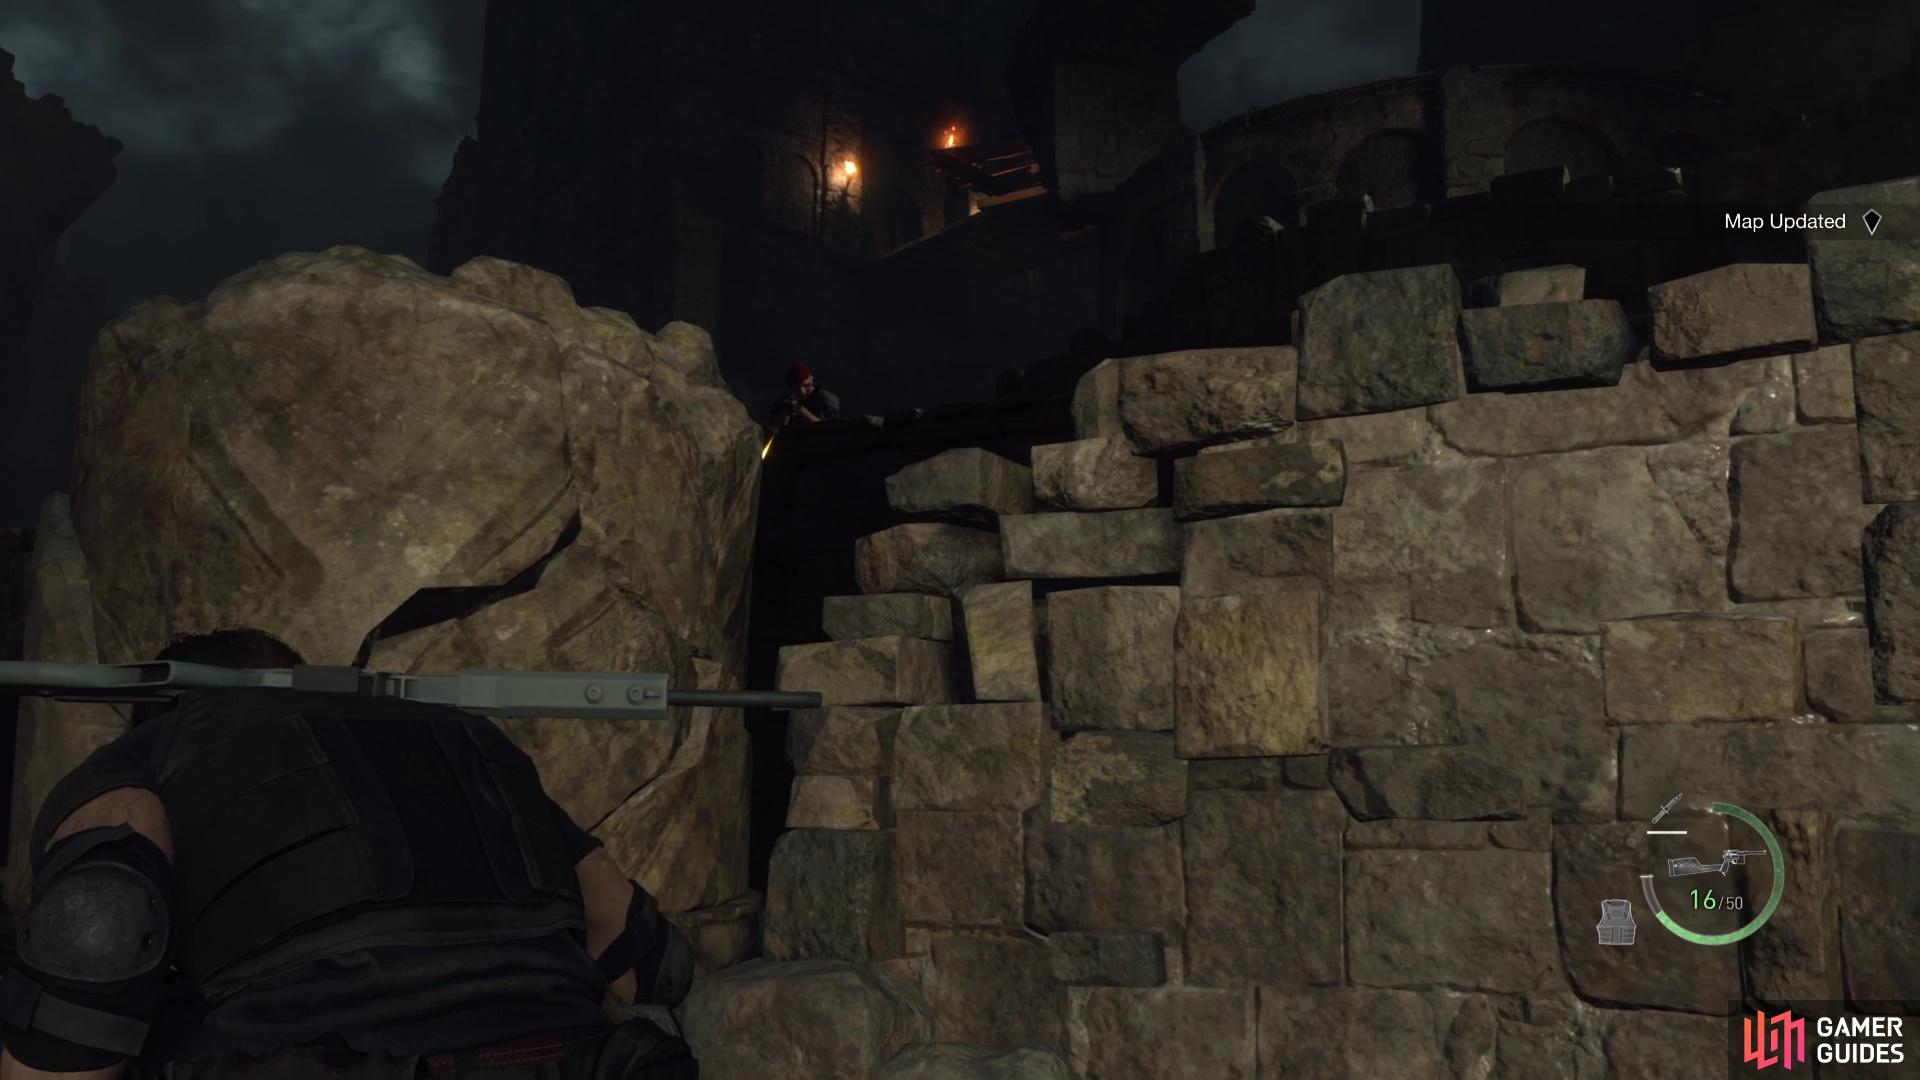
Krauser will attempt to sneak behind you in the ruins
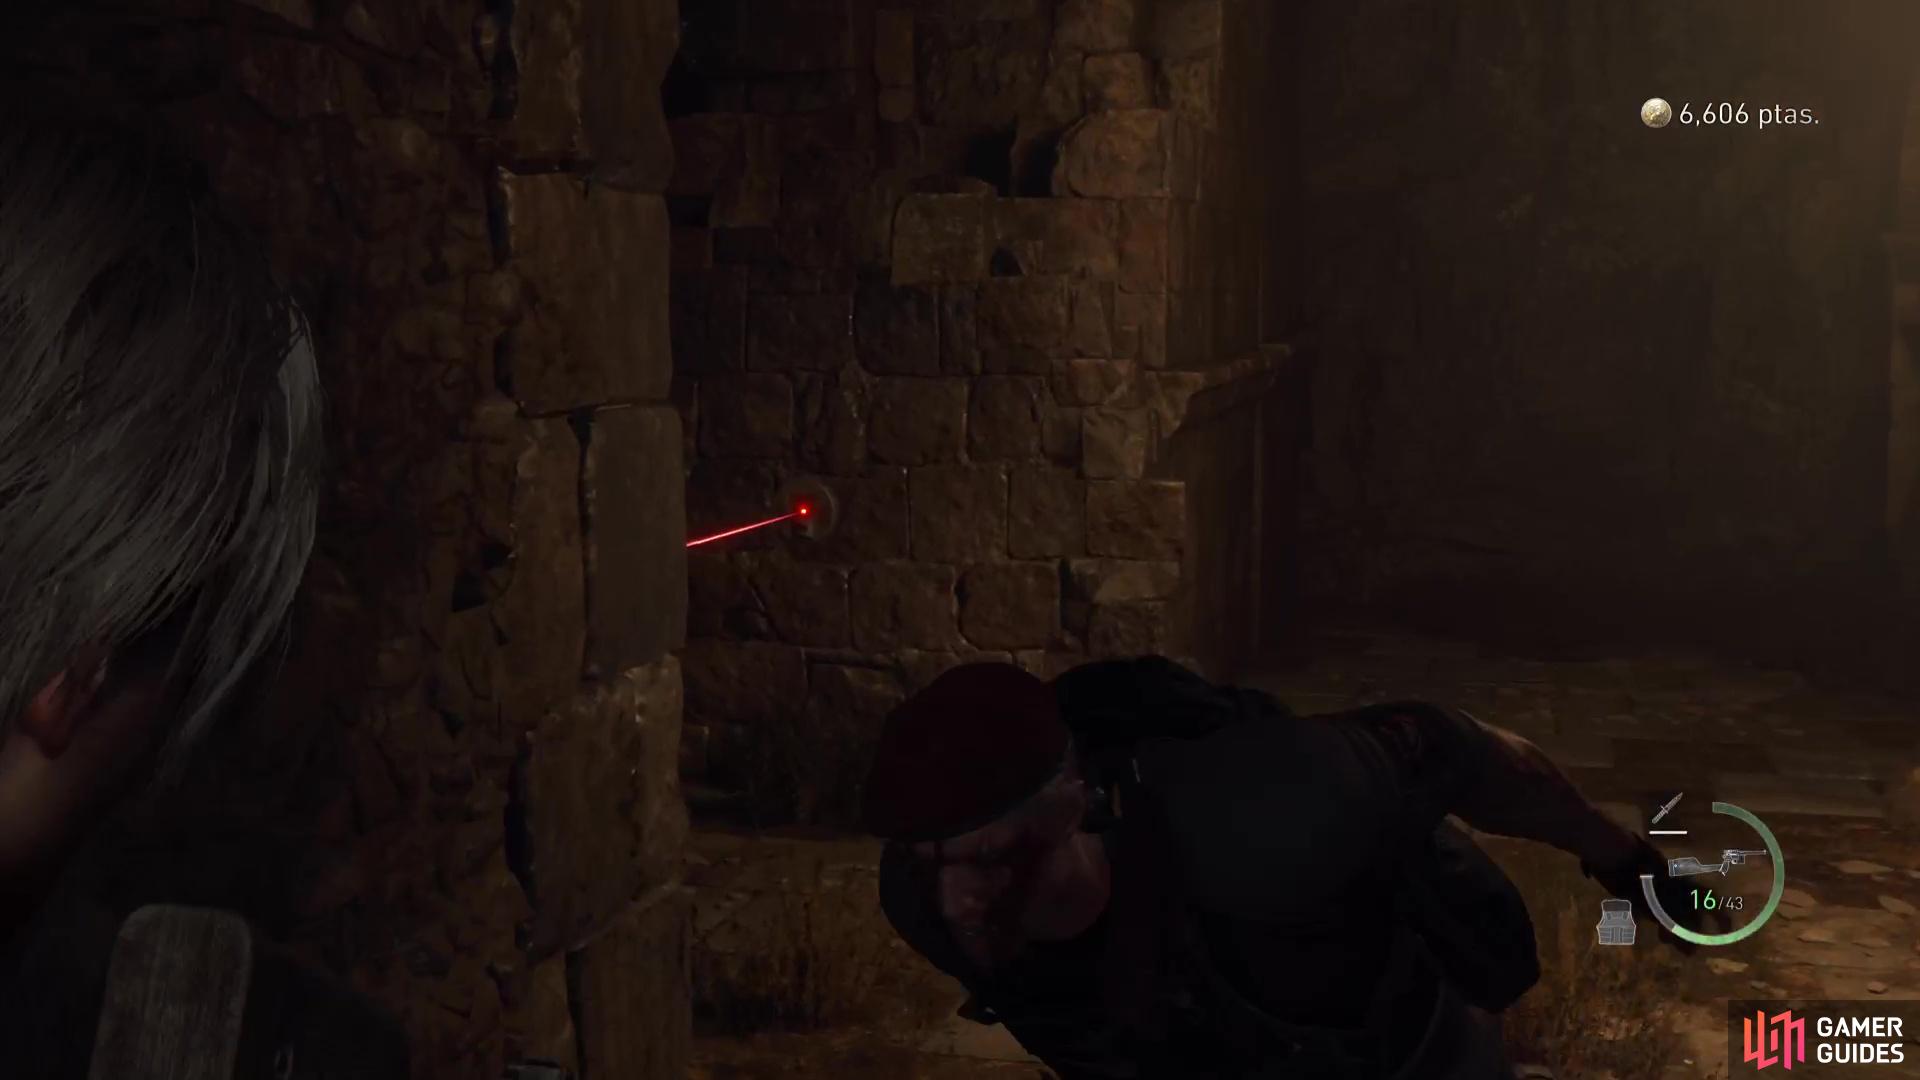
shoot the turrets to deactivate them.
As you step into the next hallway, you’ll be detected by a turret, quickly dash to cover and then shoot at it to deactivate it once it’s done firing. Beware though, there’s another turret in the corridor to the far right so be prepared for it should you run that way. You’ll need to head down the far-right corridor (watch the bear trap) to get an angle on the tripwire from the other corridor.
Another bear trap and turret await you in the next corridor, deal with them and then slowly approach the exit as Krauser will ready an explosive arrow. Once you head up the stairs, break the boxes and pocket the Red Herb, then get ready for another skirmish with Krauser.
Krauser will be positioned at the back of this pathway, aiming at you with his bow and explosive arrows. Dash from cover to cover as you get closer, where he’ll then switch to tossing some grenades at you as you pass through the doorway at the end. Look for gaps in his shooting and hit him with your own guns.
You will need to switch to the knife when Krauser starts dodging your gunfire
watch out for Krauser appearing from behind after using a Flash Grenade.
Once you pass through the gate, Krauser will close the distance again and look to attack you with his knife and SMG once more. Shoot him whenever he’s above and get ready to parry when he runs towards you. Krauser will use a flash grenade here, only this time, it will be to allow him to appear behind you and attempt to grab you, so look out for the Evade prompt or be prepared to mash the button to break free.
You’ll need to use a mixture of guns and parries here, as if you stick to just guns, Krauser will simply dodge to the side. There are also tripwires here that could catch you if you’re not careful, alternatively, you can bait Krauser into them. Once you deal enough, a scene will trigger with Krauser’s mutation and he’ll destroy the ground, knocking you below.
The visibility is poor here, and as you walk down the corridor, Krauser will appear and dash at you. His mutated arm functions the same as a knife, so hold your ground and look the parry indicator to deflect the attack. The path is a linear one here though, and despite Krauser dropping in for an attack here and there, make sure you get all of the resources. Once you’re ready, reload and heal up and climb the large ladder, the final confrontation with Krauser begins at the top.
Mutated Krauser Boss Fight
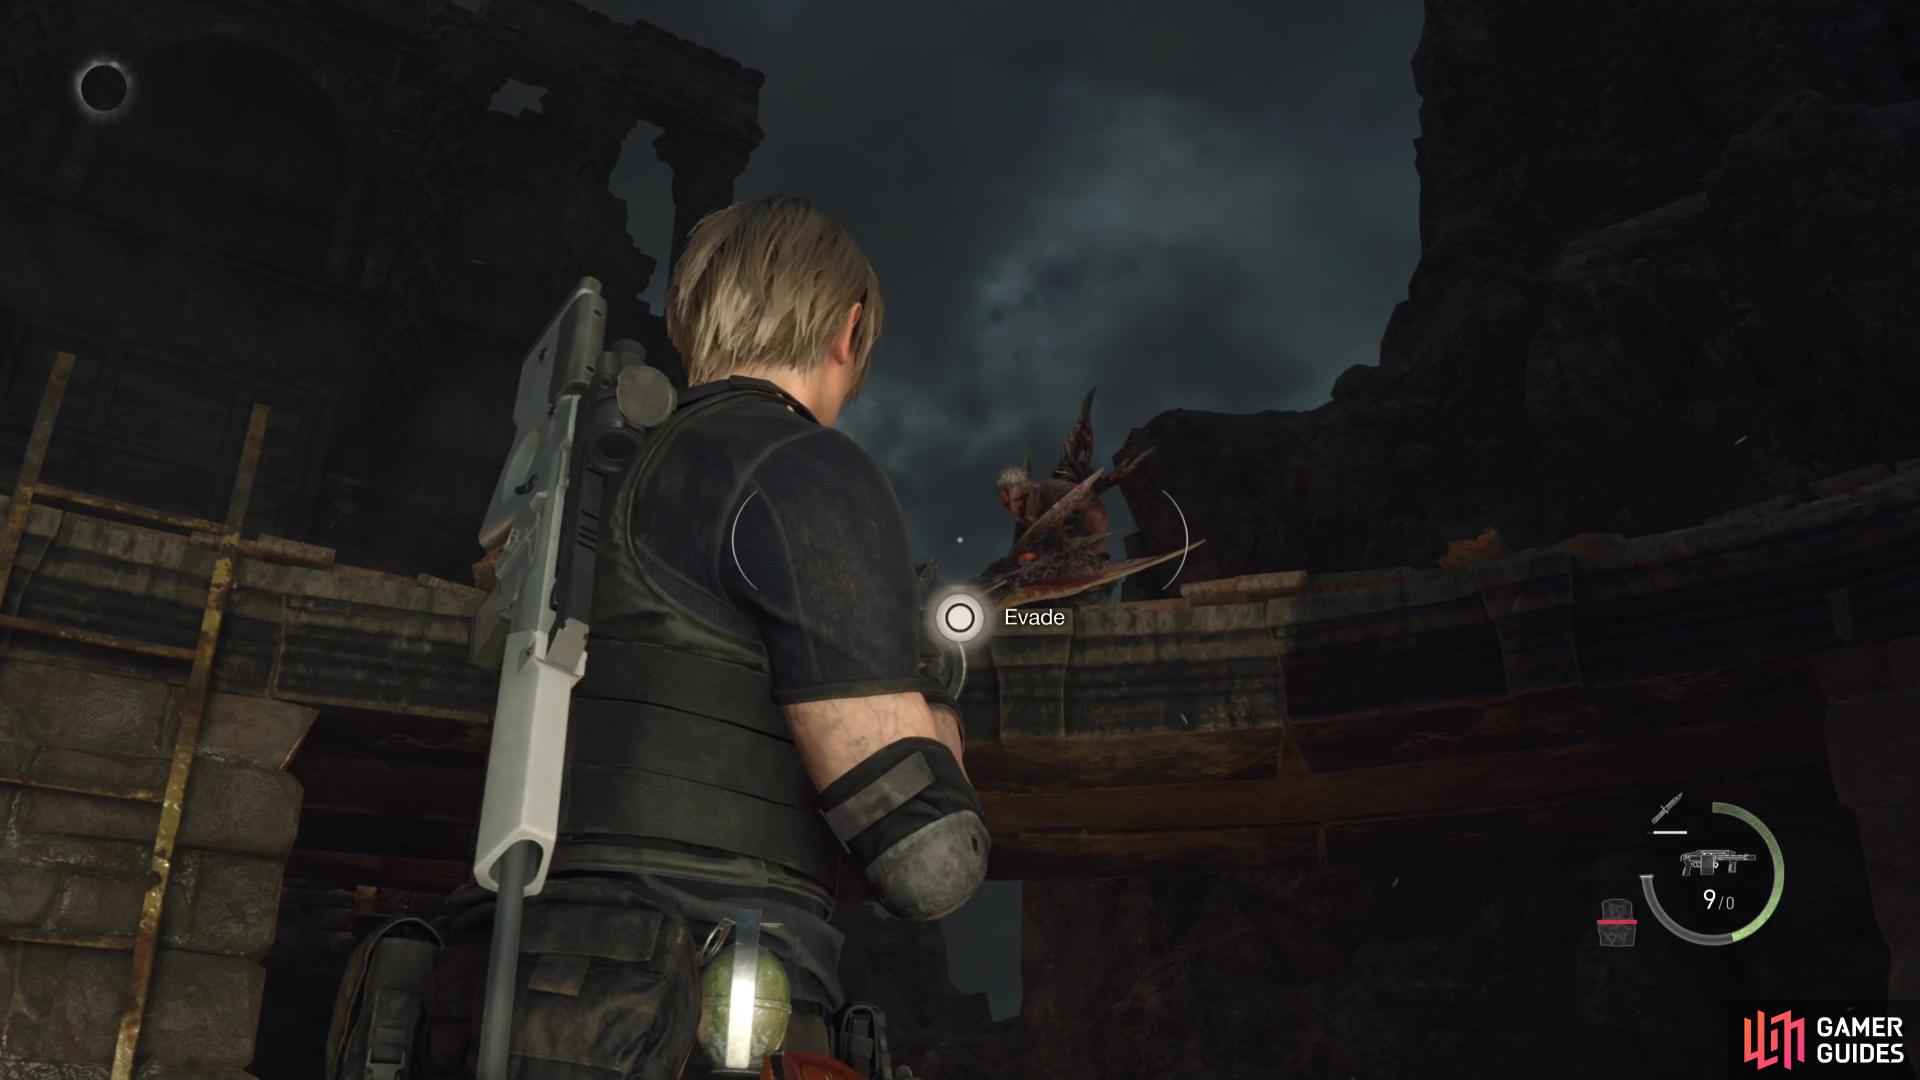
There’s nowhere left for Krauser to run, and you’ll need to take him down once and for all here on this platform. Pay attention to the ladders in the arena, you can use these to reach barrels that contain resources, or to try and gain some distance from Krauser. Don’t expect to be safe for long though, he can easily leap up there.
The battle will begin with Krauser leaping towards you, get ready to evade as he gets close and turn around to get a few shots on him. As mentioned before, Krauser’s mutated arms function the same as if he was wielding his knife and you should look to parry them whenever he gets close and attempts to use them against you.
Look for when he raises his right arm in front of him, this acts as a shield and will block all damage so stop shooting her to prevent needlessly wasting ammo. This is, however, a good time to pepper him with bullets once he drops his guard, a Shotgun being ideal and should allow you to follow up with a melee prompt.
As you may expect, his head is his weak point, so focus your shots there. A fully upgraded Red9 can open him for a melee with a few headshots on Standard. Watch for when he leaps out of the arena, he’ll soon follow it up by slamming into the ground so use one of the ladders and get to higher ground to avoid it. If you’re caught by it, you’ll most likely be struck by Krauser with a follow-up, dealing heavy damage.
Keep up the assault, get some distance when you need to heal or reload and parry any of his arm strikes and Krauser will eventually go down for good. You’ll obtain Krauser’s excellent Fighting Knife upon your victory, along with the You Used to Be a Good Guy Trophy/Achievement.


No Comments