
At the start of Chapter 7 in Resident Evil 4 Remake, you can purchase the Treasure Map from the Merchant for 3 Spinels who is in the first door to the right. This will display all the treasure locations on the map for the entire Castle section including Chapter 9 as well as give you a small progression counter in the bottom right corner of the map. Although this will show you their general location, it won’t show you how to get them. Read below how to get all ten treasures in Chapter 9.
Treasure: 1 - Depraved Idol
This treasure is extremely easy to miss as you need to backtrack into the Wine Cellar during this Chapter. If you miss it now, you won’t be able to get it until the next play-through. At the start of the level, walk down the stairs, turn right, then turn right again. Follow the path north, past the Merchant into the Wine Cellar.
When you’re in the Wine Cellar, turn right and go through the door which will bring you to a room full of Knight Armor’s. You will be attacked by one of them, so take it out and face the eastern gate. If you look up, you’ll notice a hole in the wall where you can boost Ashley to unlock the gate. Head into the room, open the chest, and collect the Depraved Idol. There is also a file to pick up to the right of the chest.
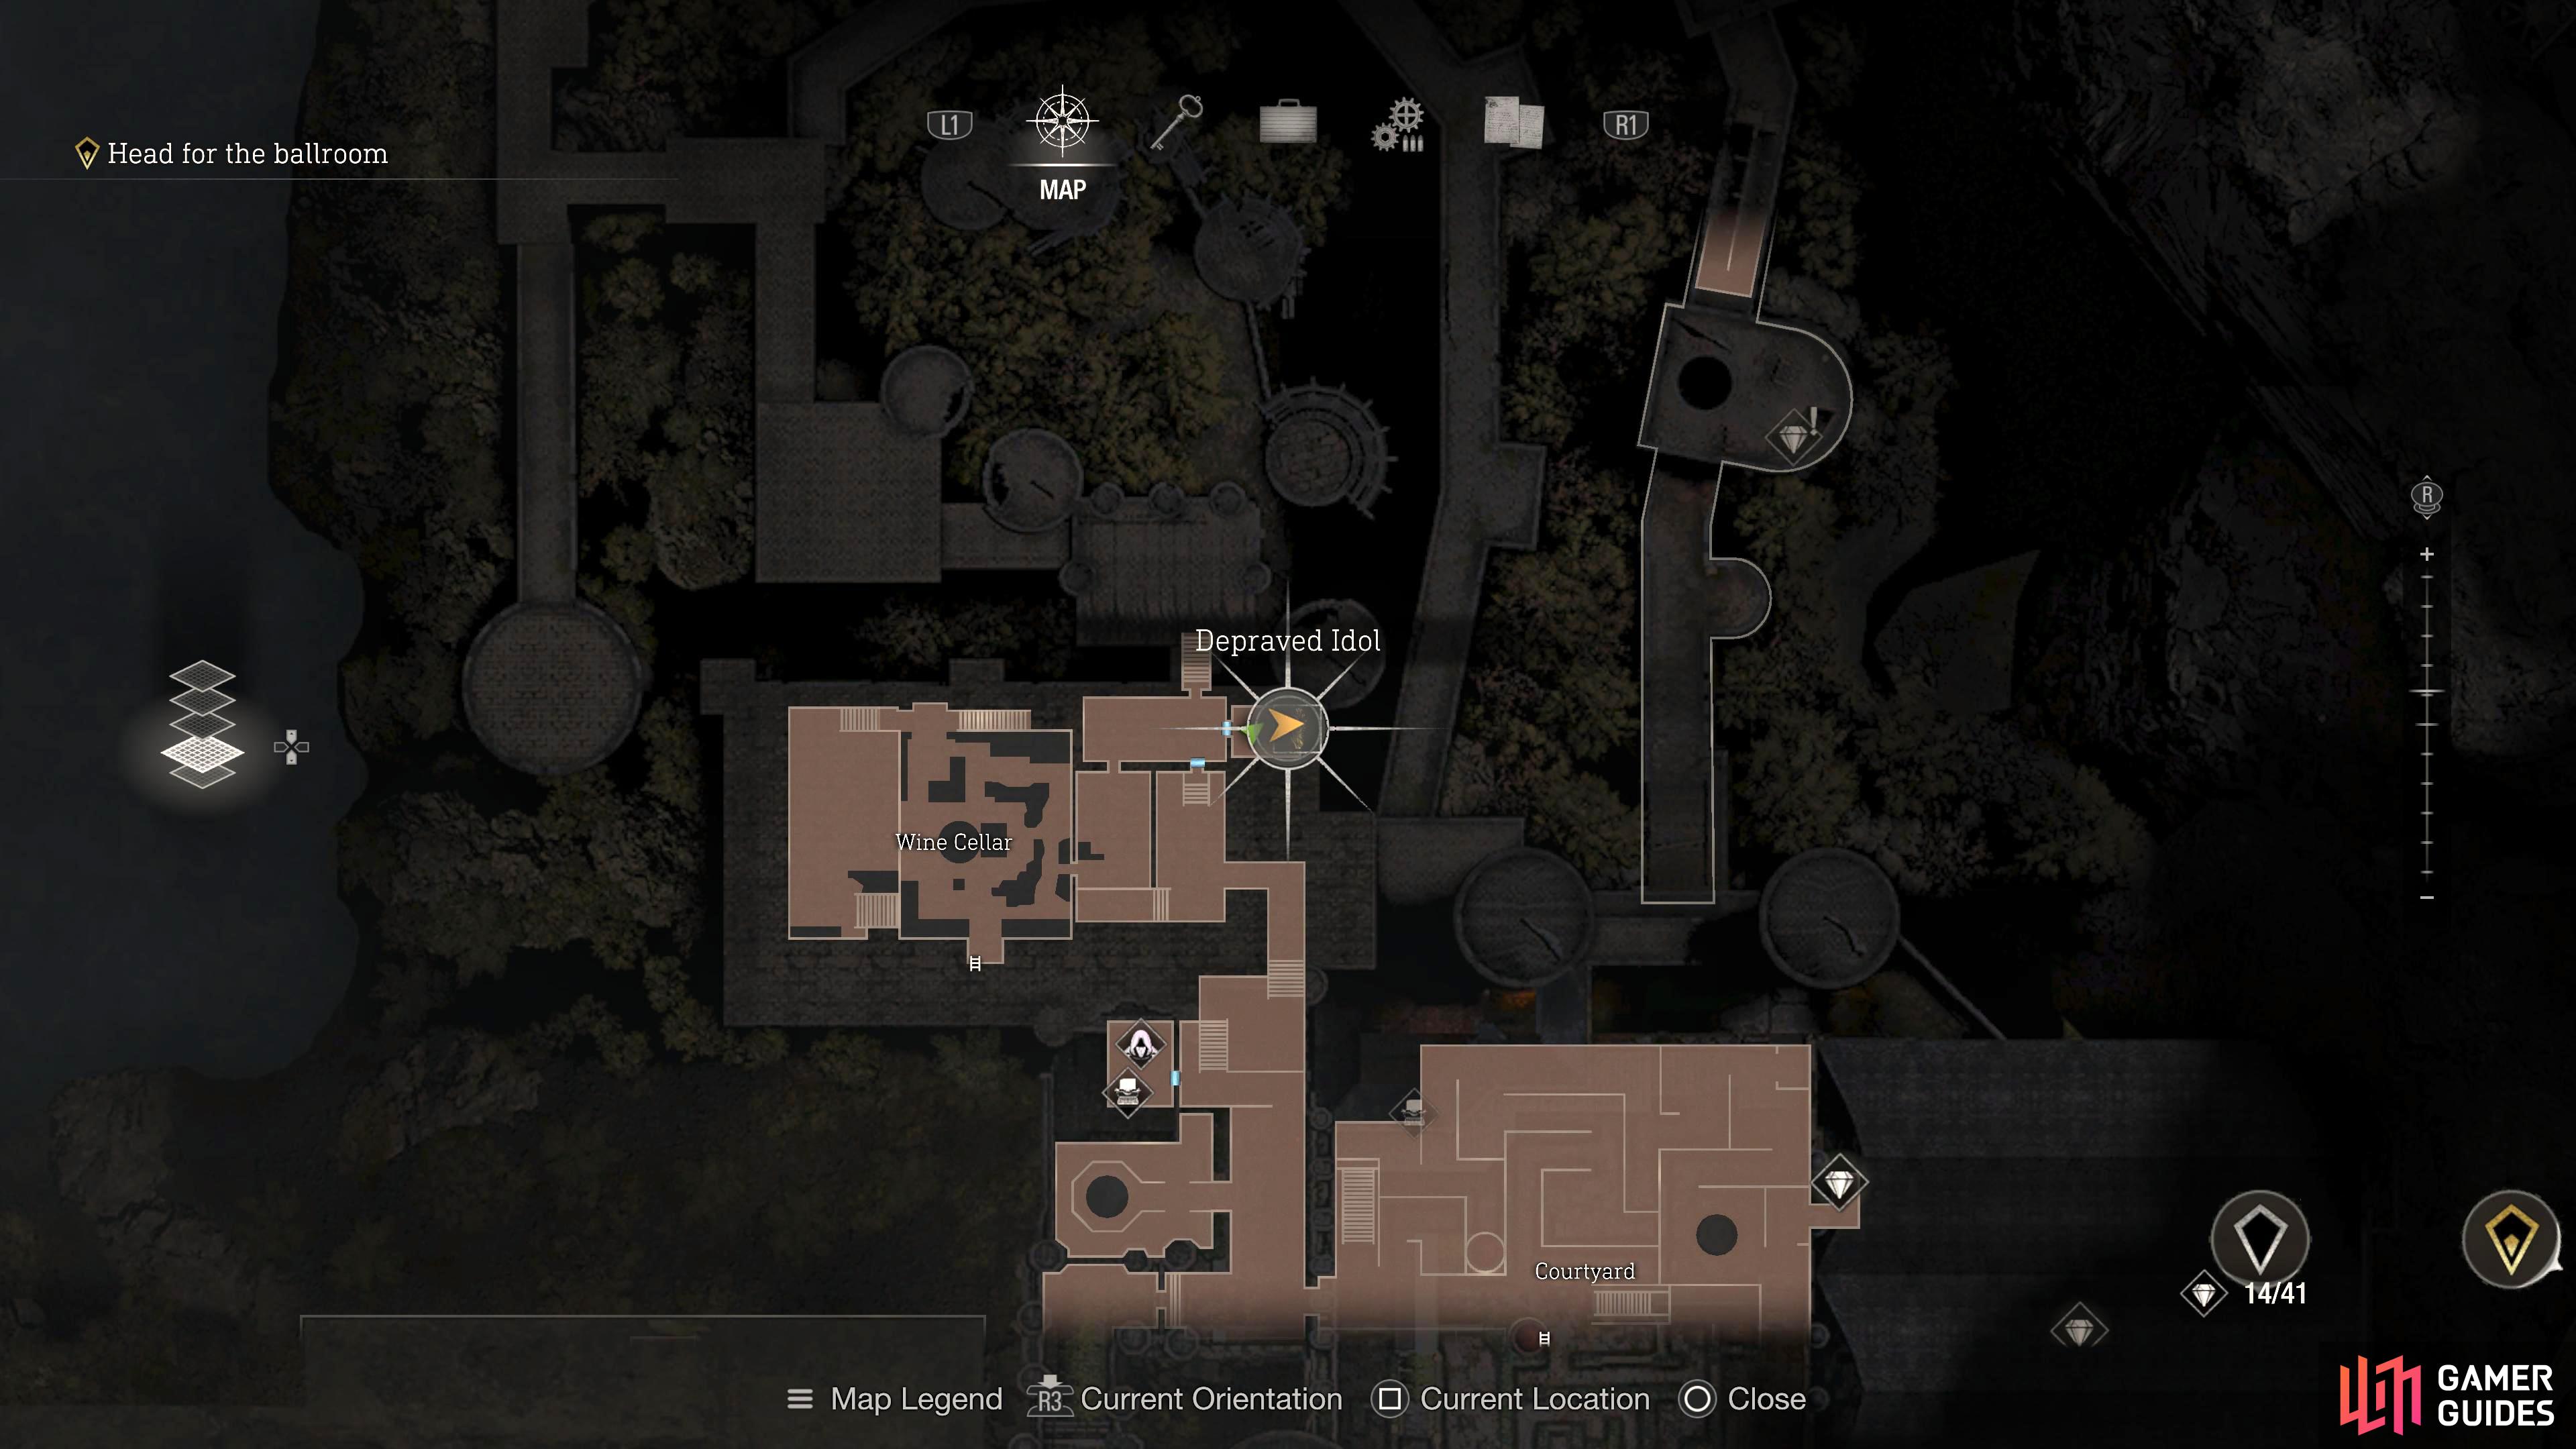
At the start of the mission, backtrack to the Wine Cellar and head to the eastern room.
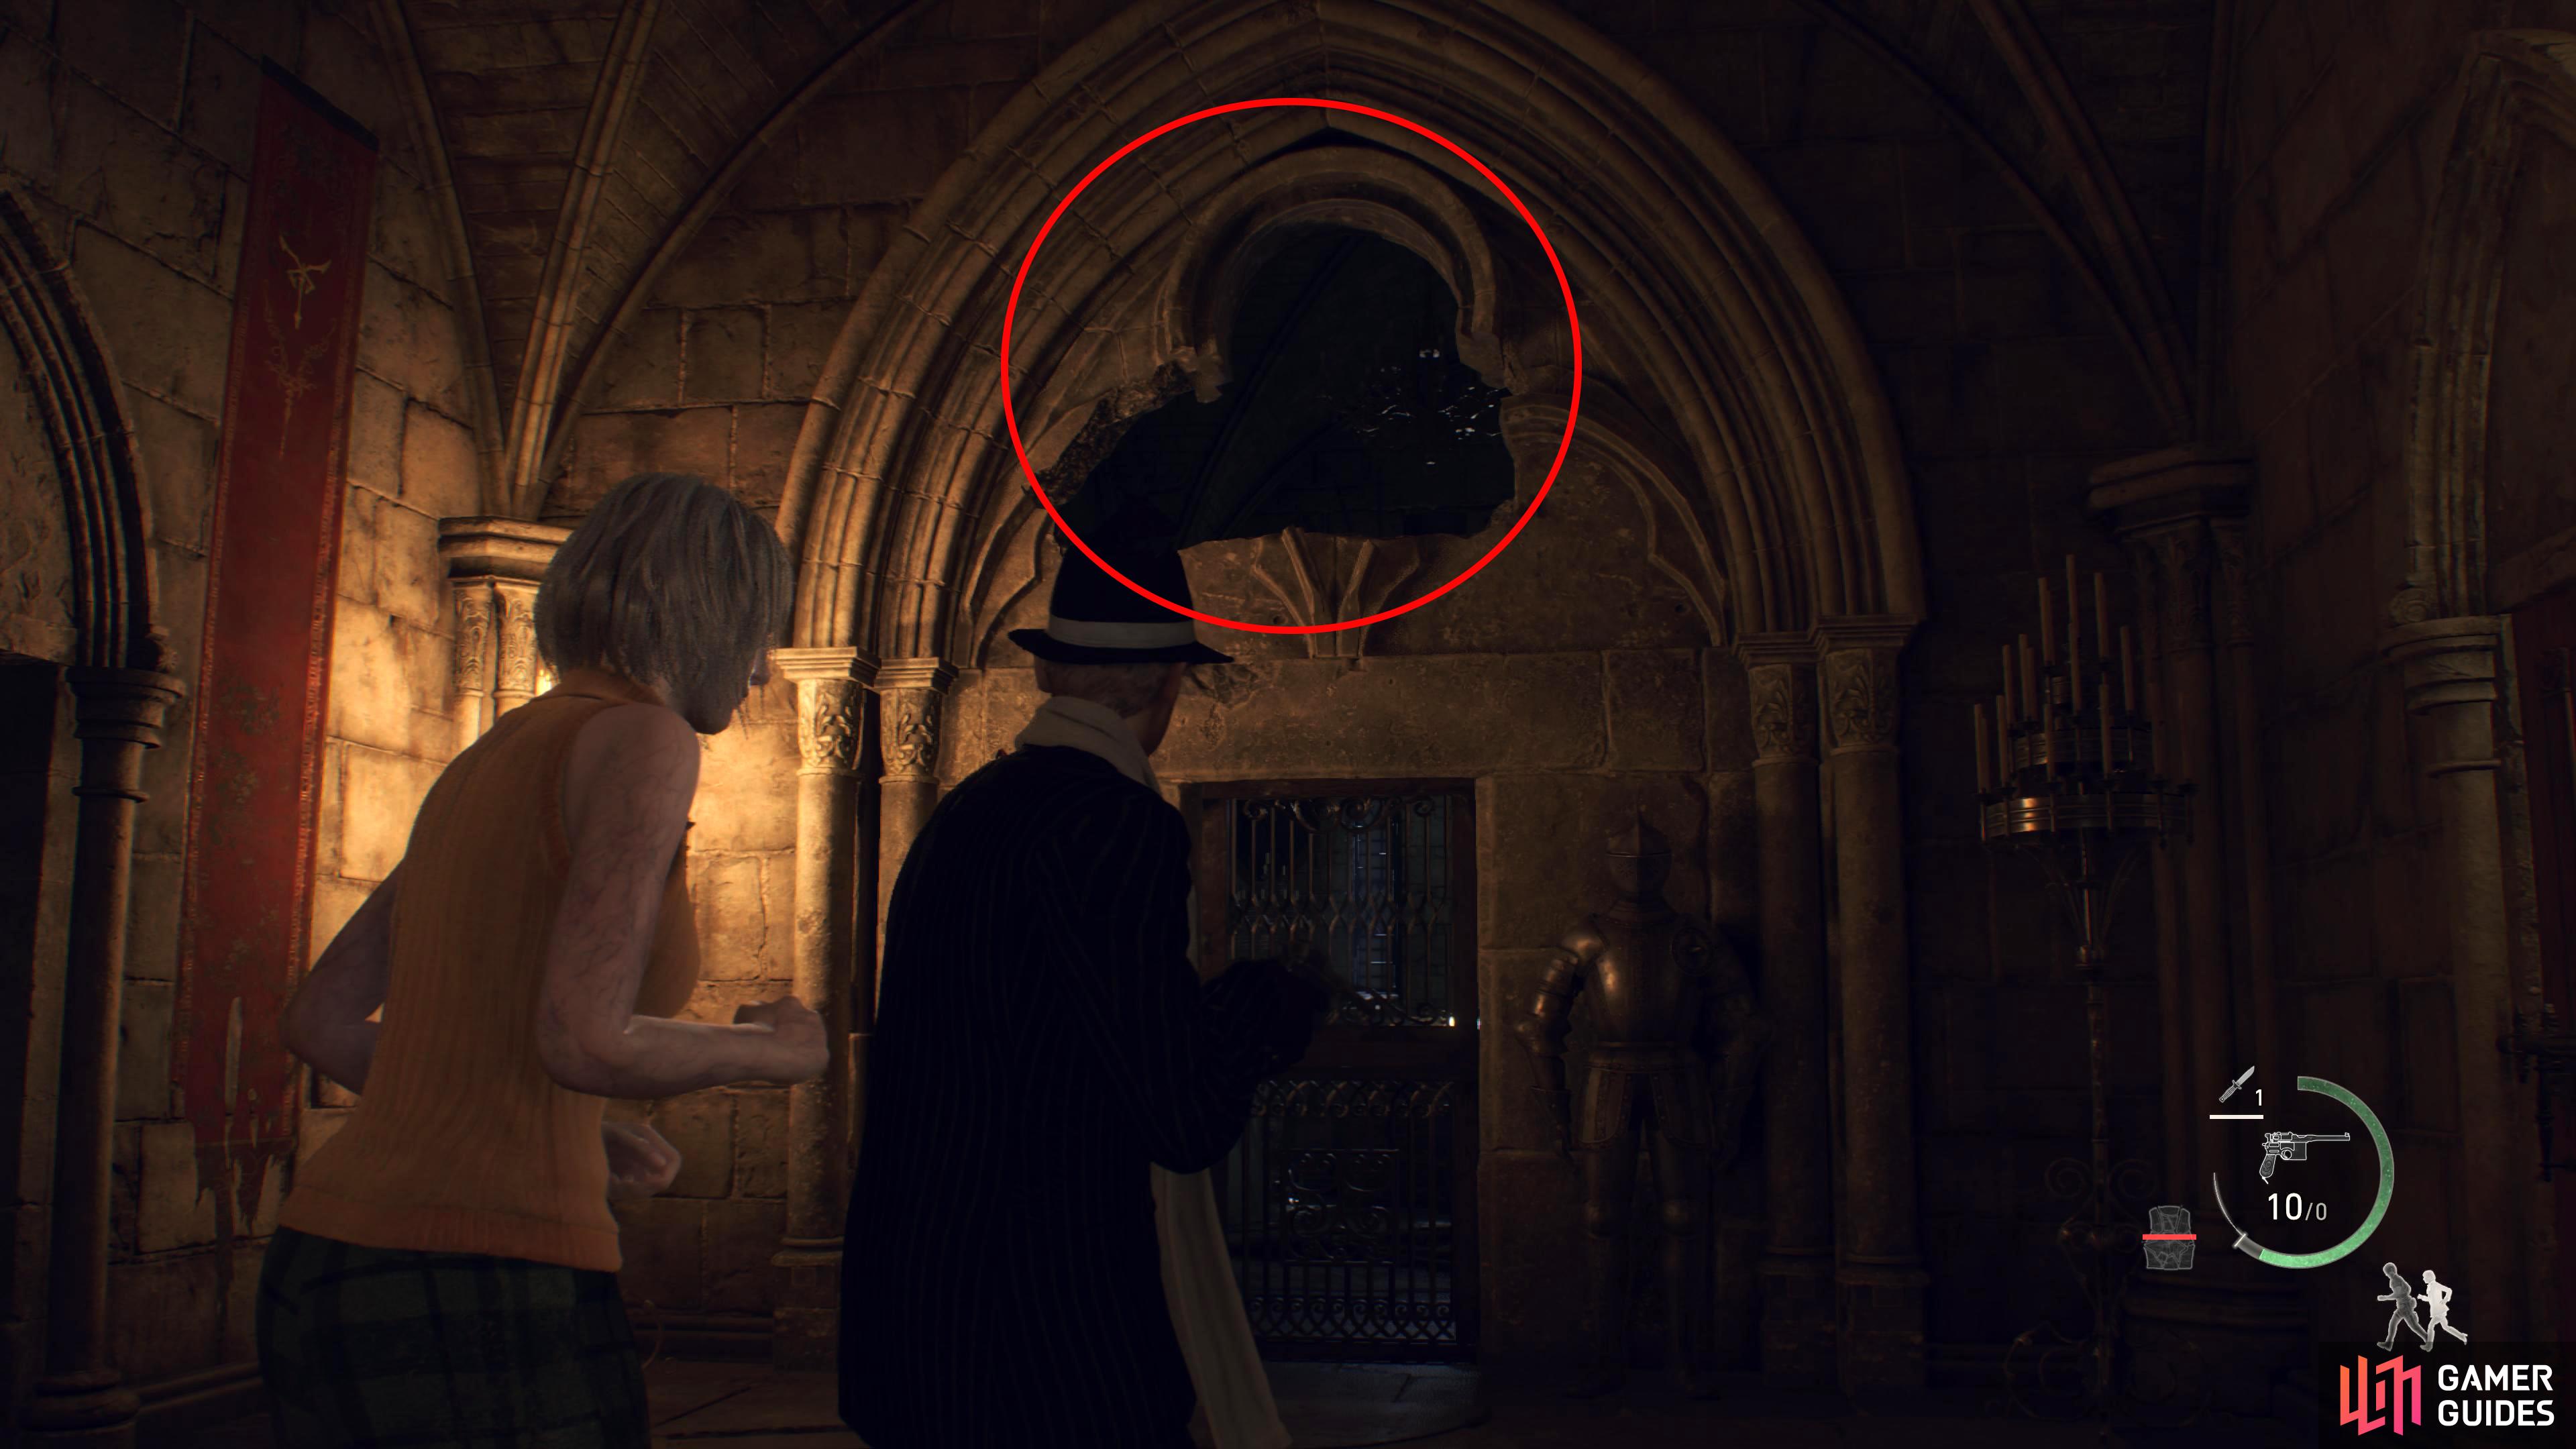
Boost Ashley through the hole to unlock the gate where you can find the Depraved Idol.
Treasure: 2 - Elegant Chessboard
Head back to the courtyard where you’ll find the Elegant Chessboard hidden snugly inside a treasure chest at the east end of the maze. Unfortunately, this place is a maze filled with plaga-infested dogs who’ll ambush you at every corner. Stocking up on some Flash Grenades is a good idea for this area. This is also one of the few times when the TMP gun is actually helpful.
From the Courtyard entrance, head east (straight forward) ignoring the first left near the stairs. Take the second left (north), and follow it around the corner to the east. Head north when you can, and follow that to the next intersection where you’ll want to turn east. From here you can only go one way, which will eventually lead to a small room with a treasure chest containing the Elegant Chessboard. As mentioned above, there are multiple dogs in the maze, and they will attack you from every direction, have fun.
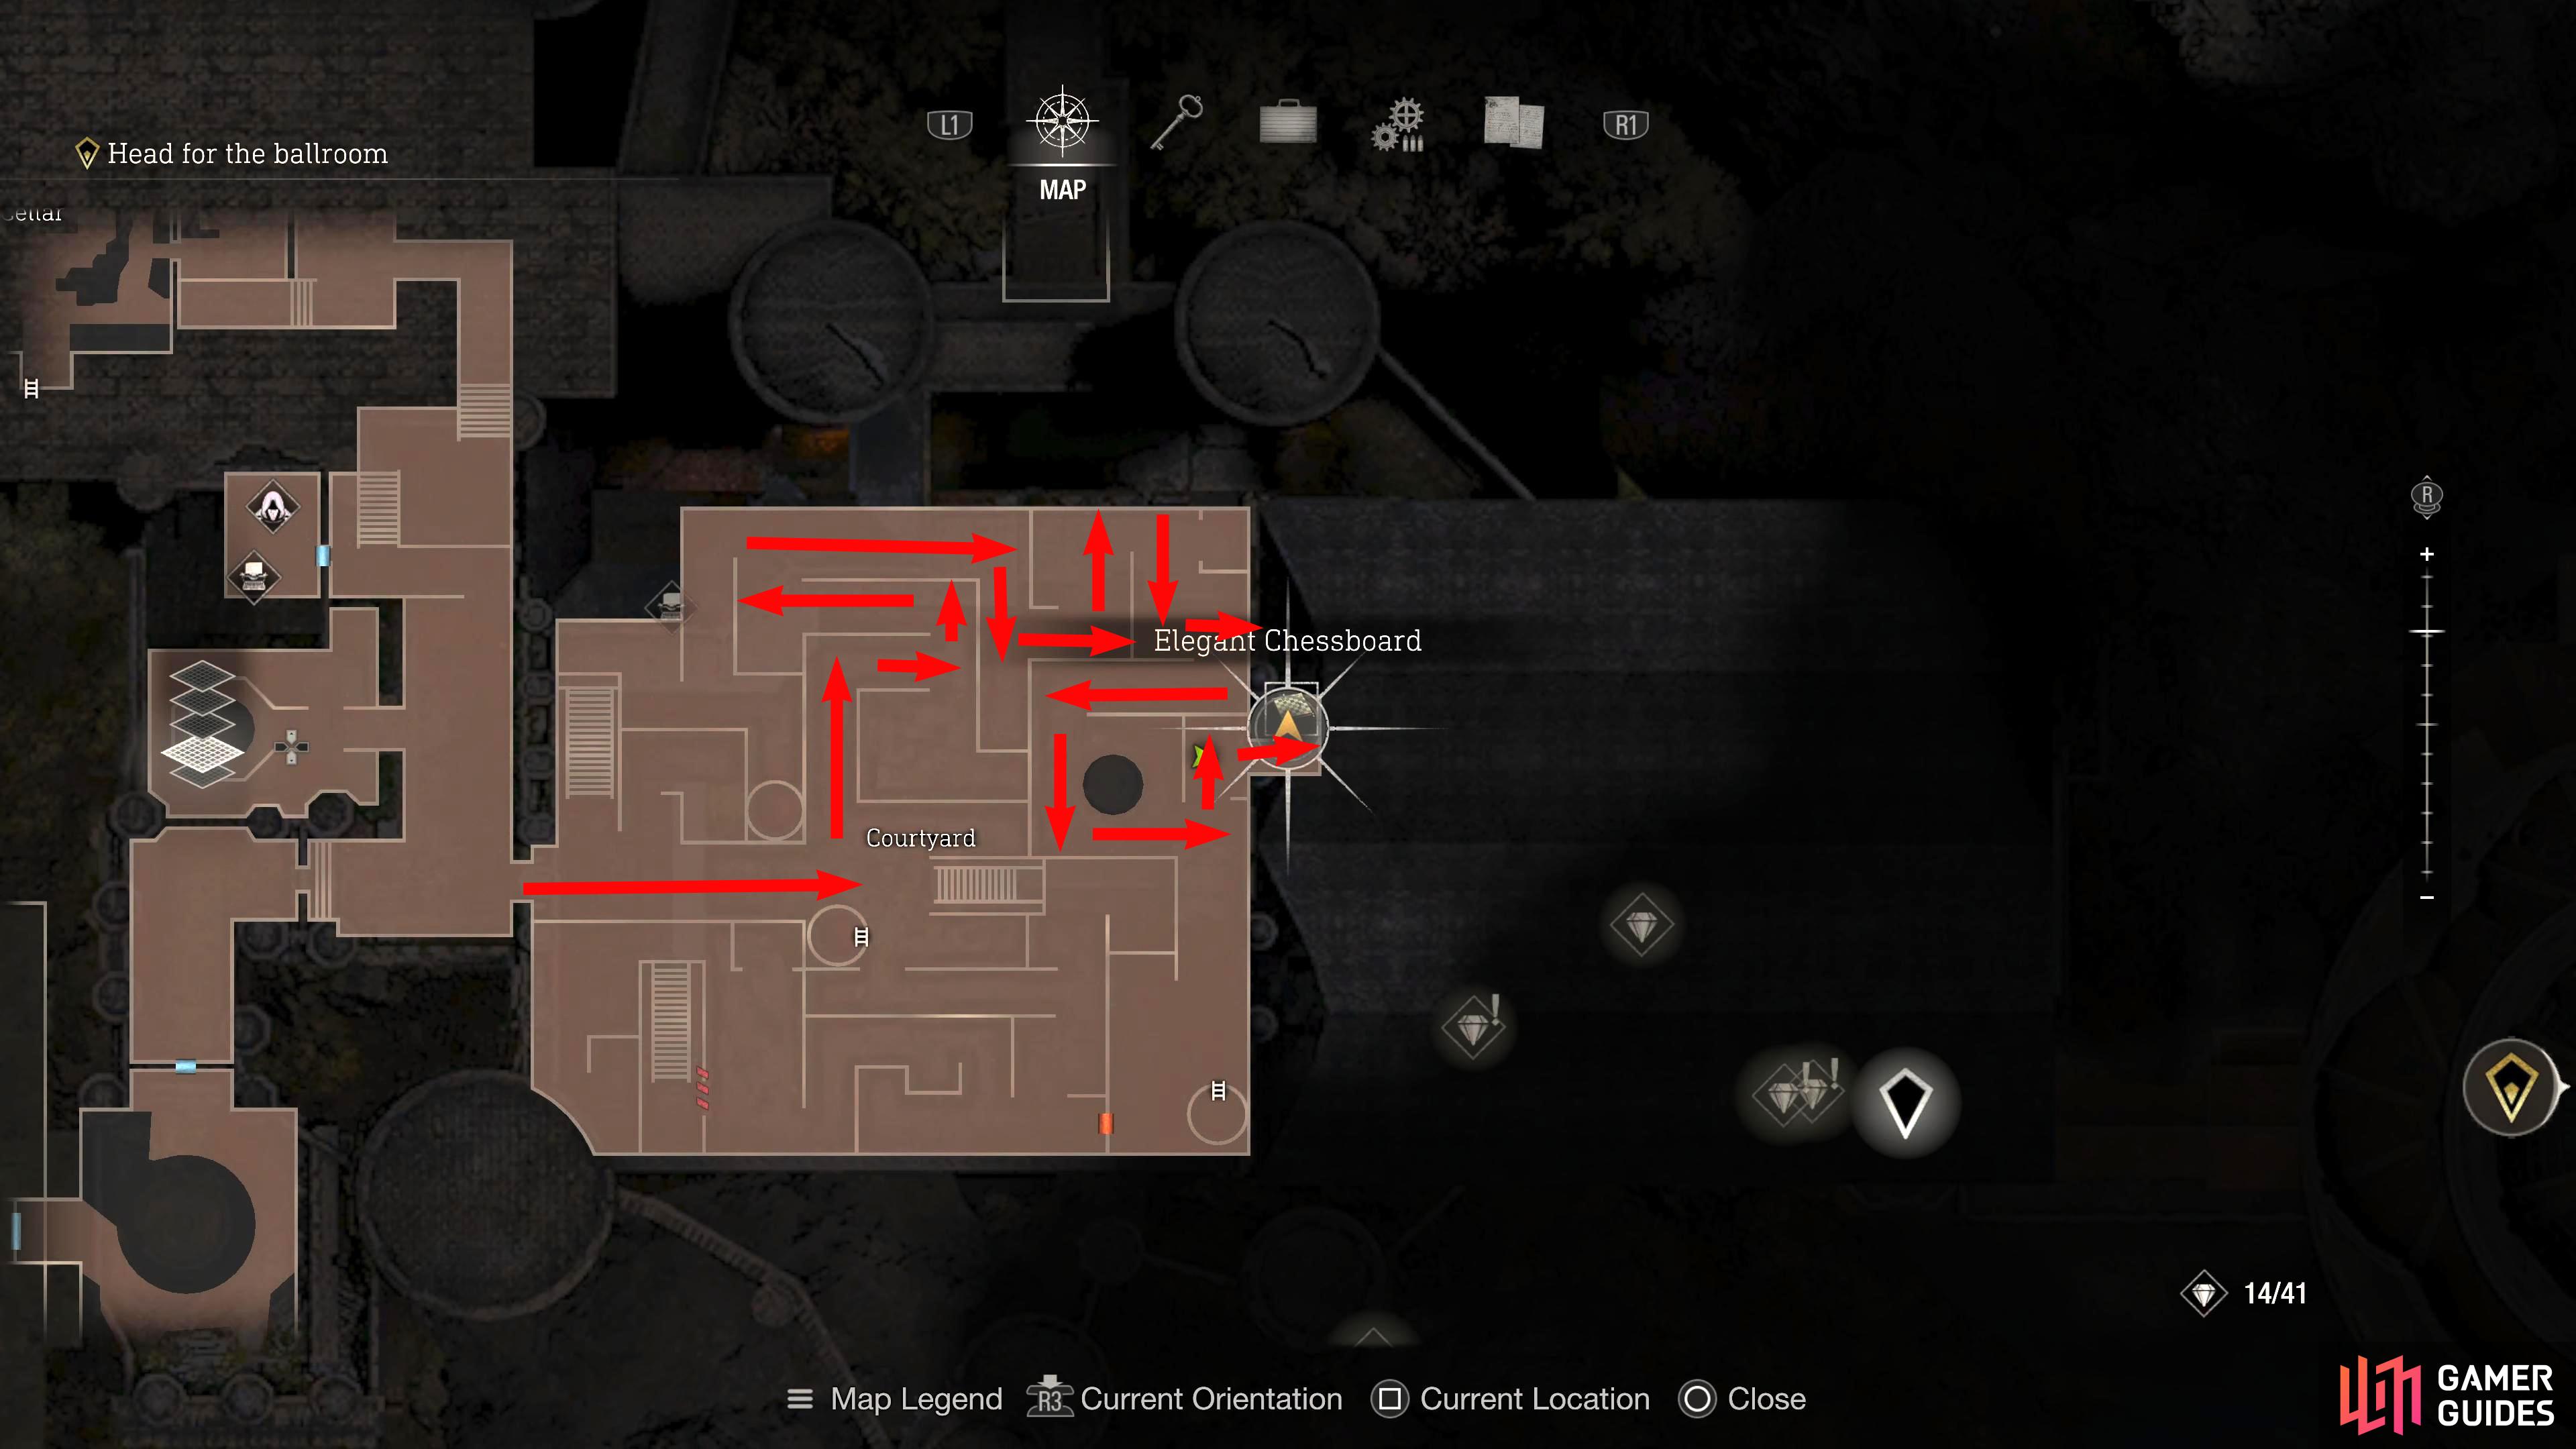
Make your way through the Courtyard Maze to the room in the east.
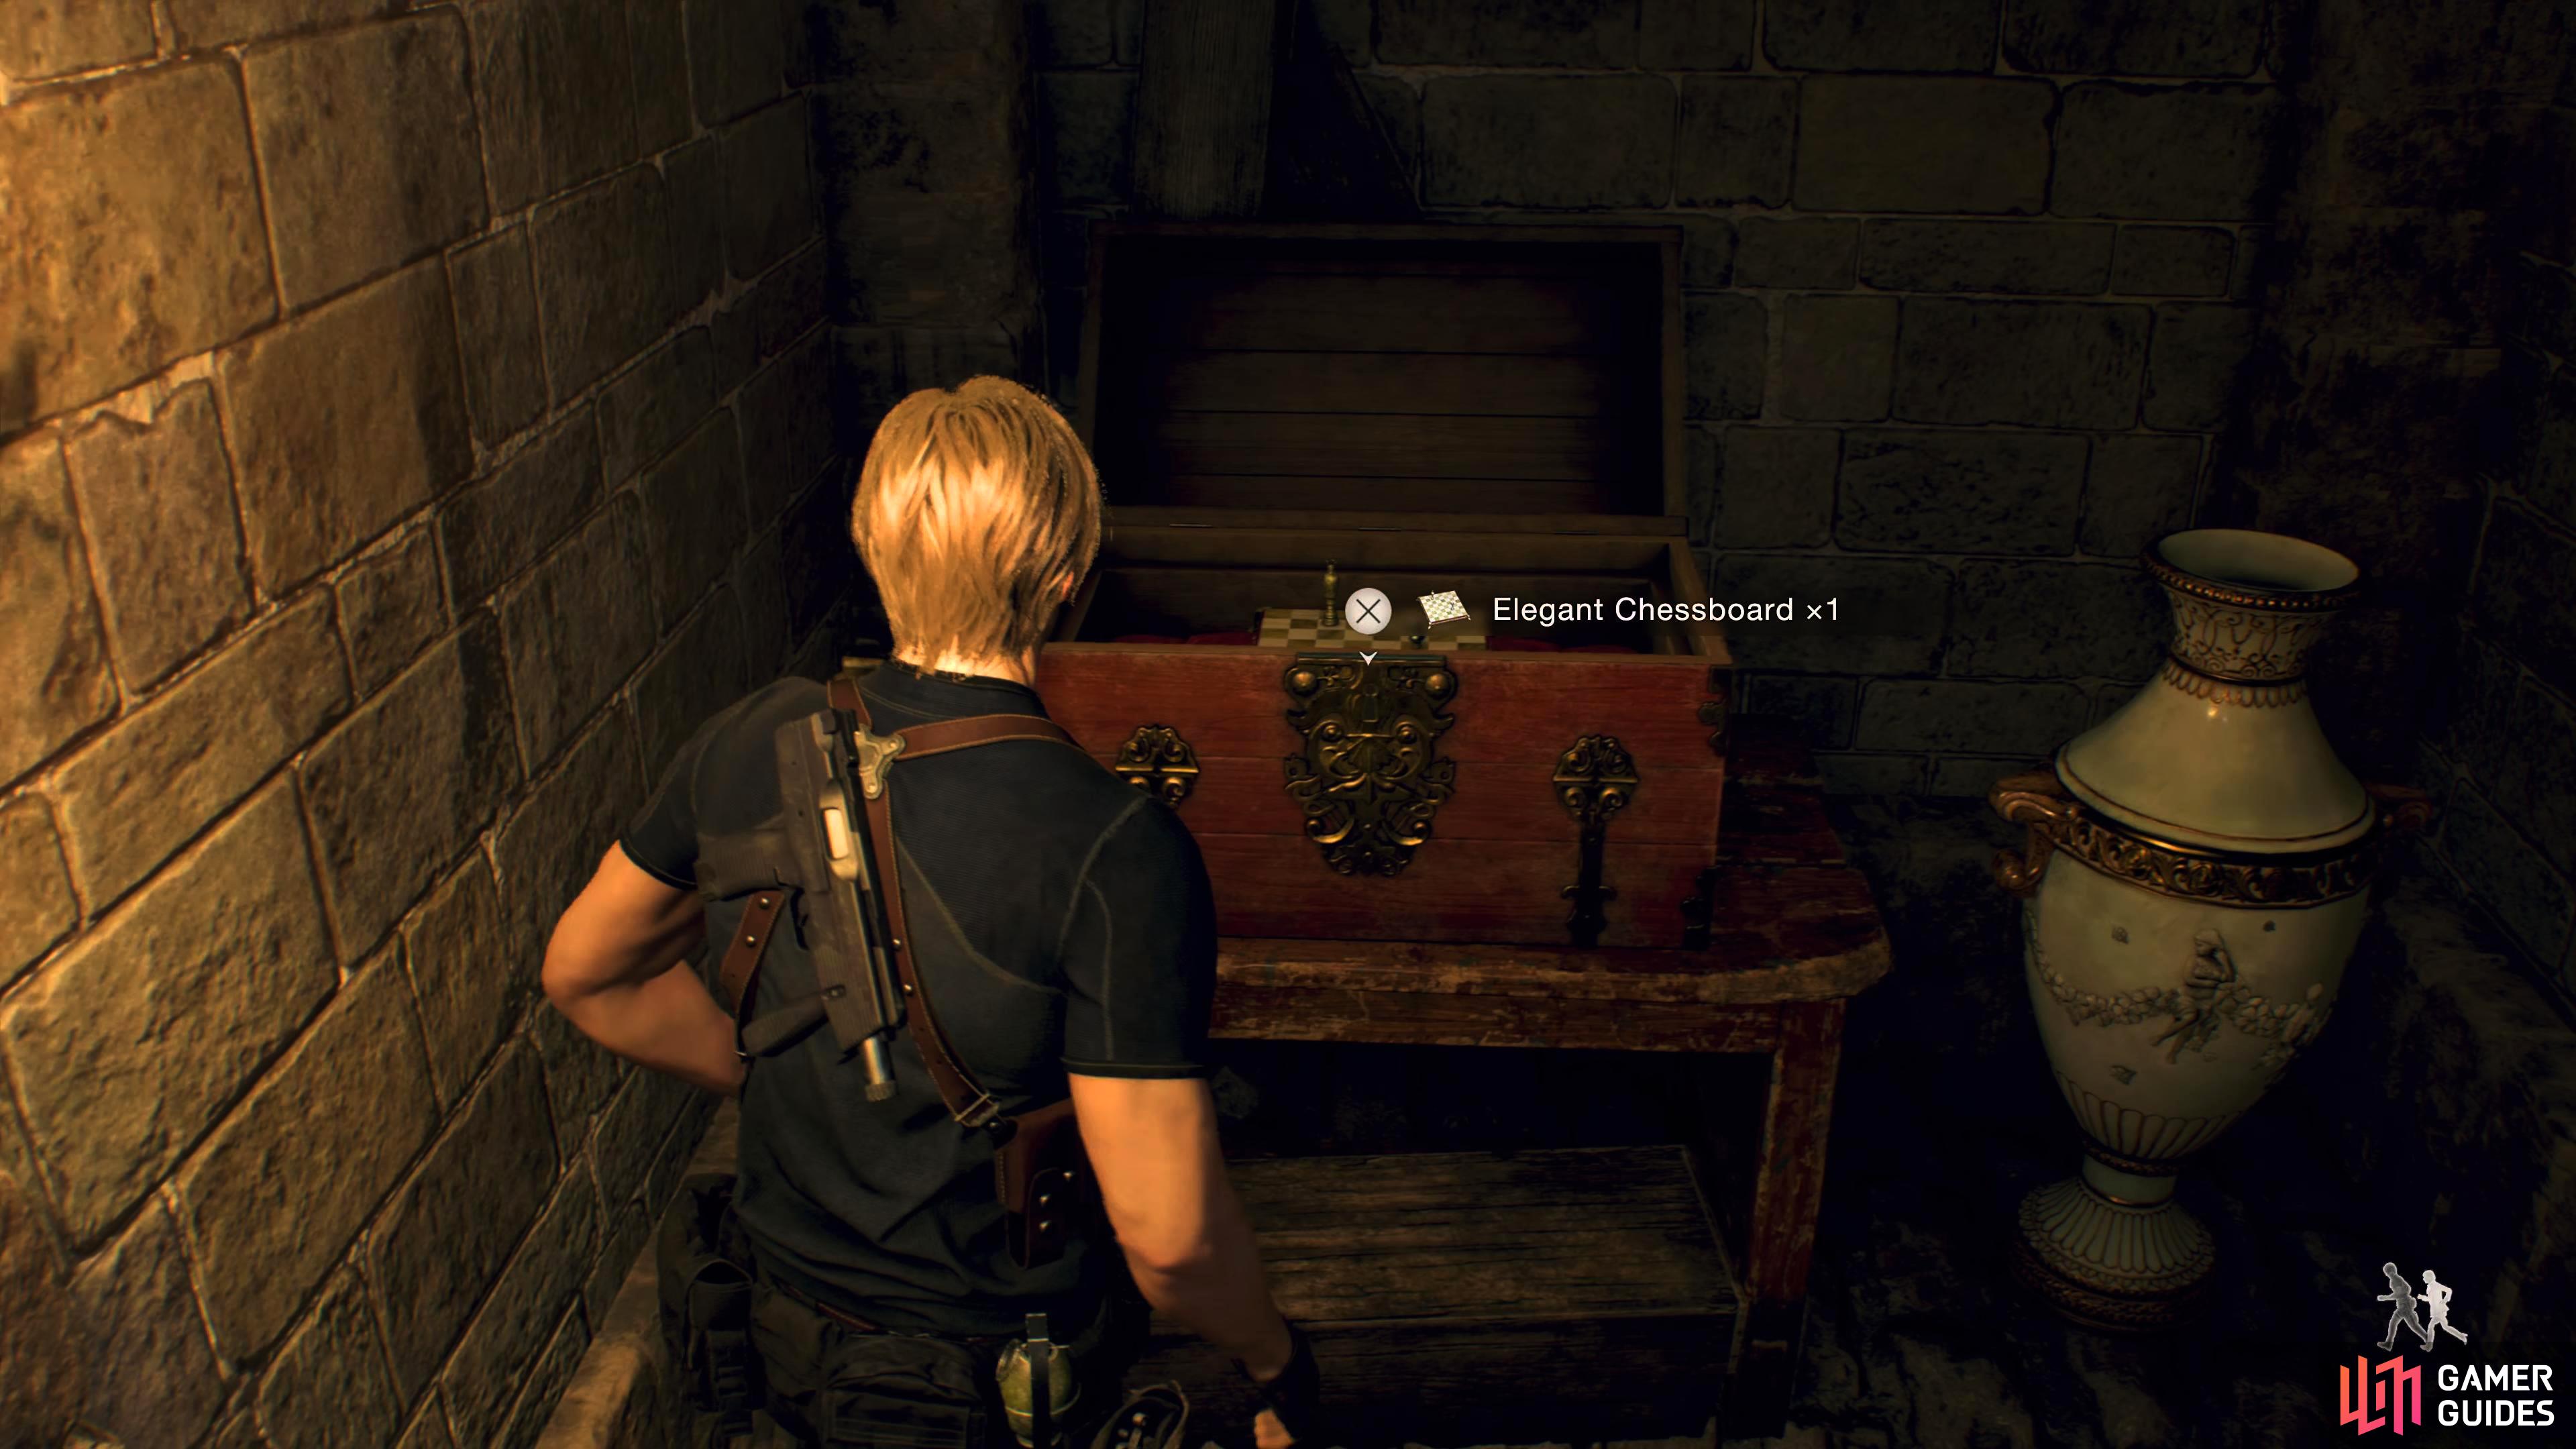
The treasure will be guarded by a plaga-infested dog.
Treasure: 3 - Alexandrite
Once you’re done with the courtyard section, you’ll end up in the Grand Hall. There is a treasure in the Merchant’s room to your right, but it’ll require the Cubic Device to unlock it which you’ll get later. Just in front of the Merchant room is a statue holding a silver container. Shoot it to obtain the Alexandrite.
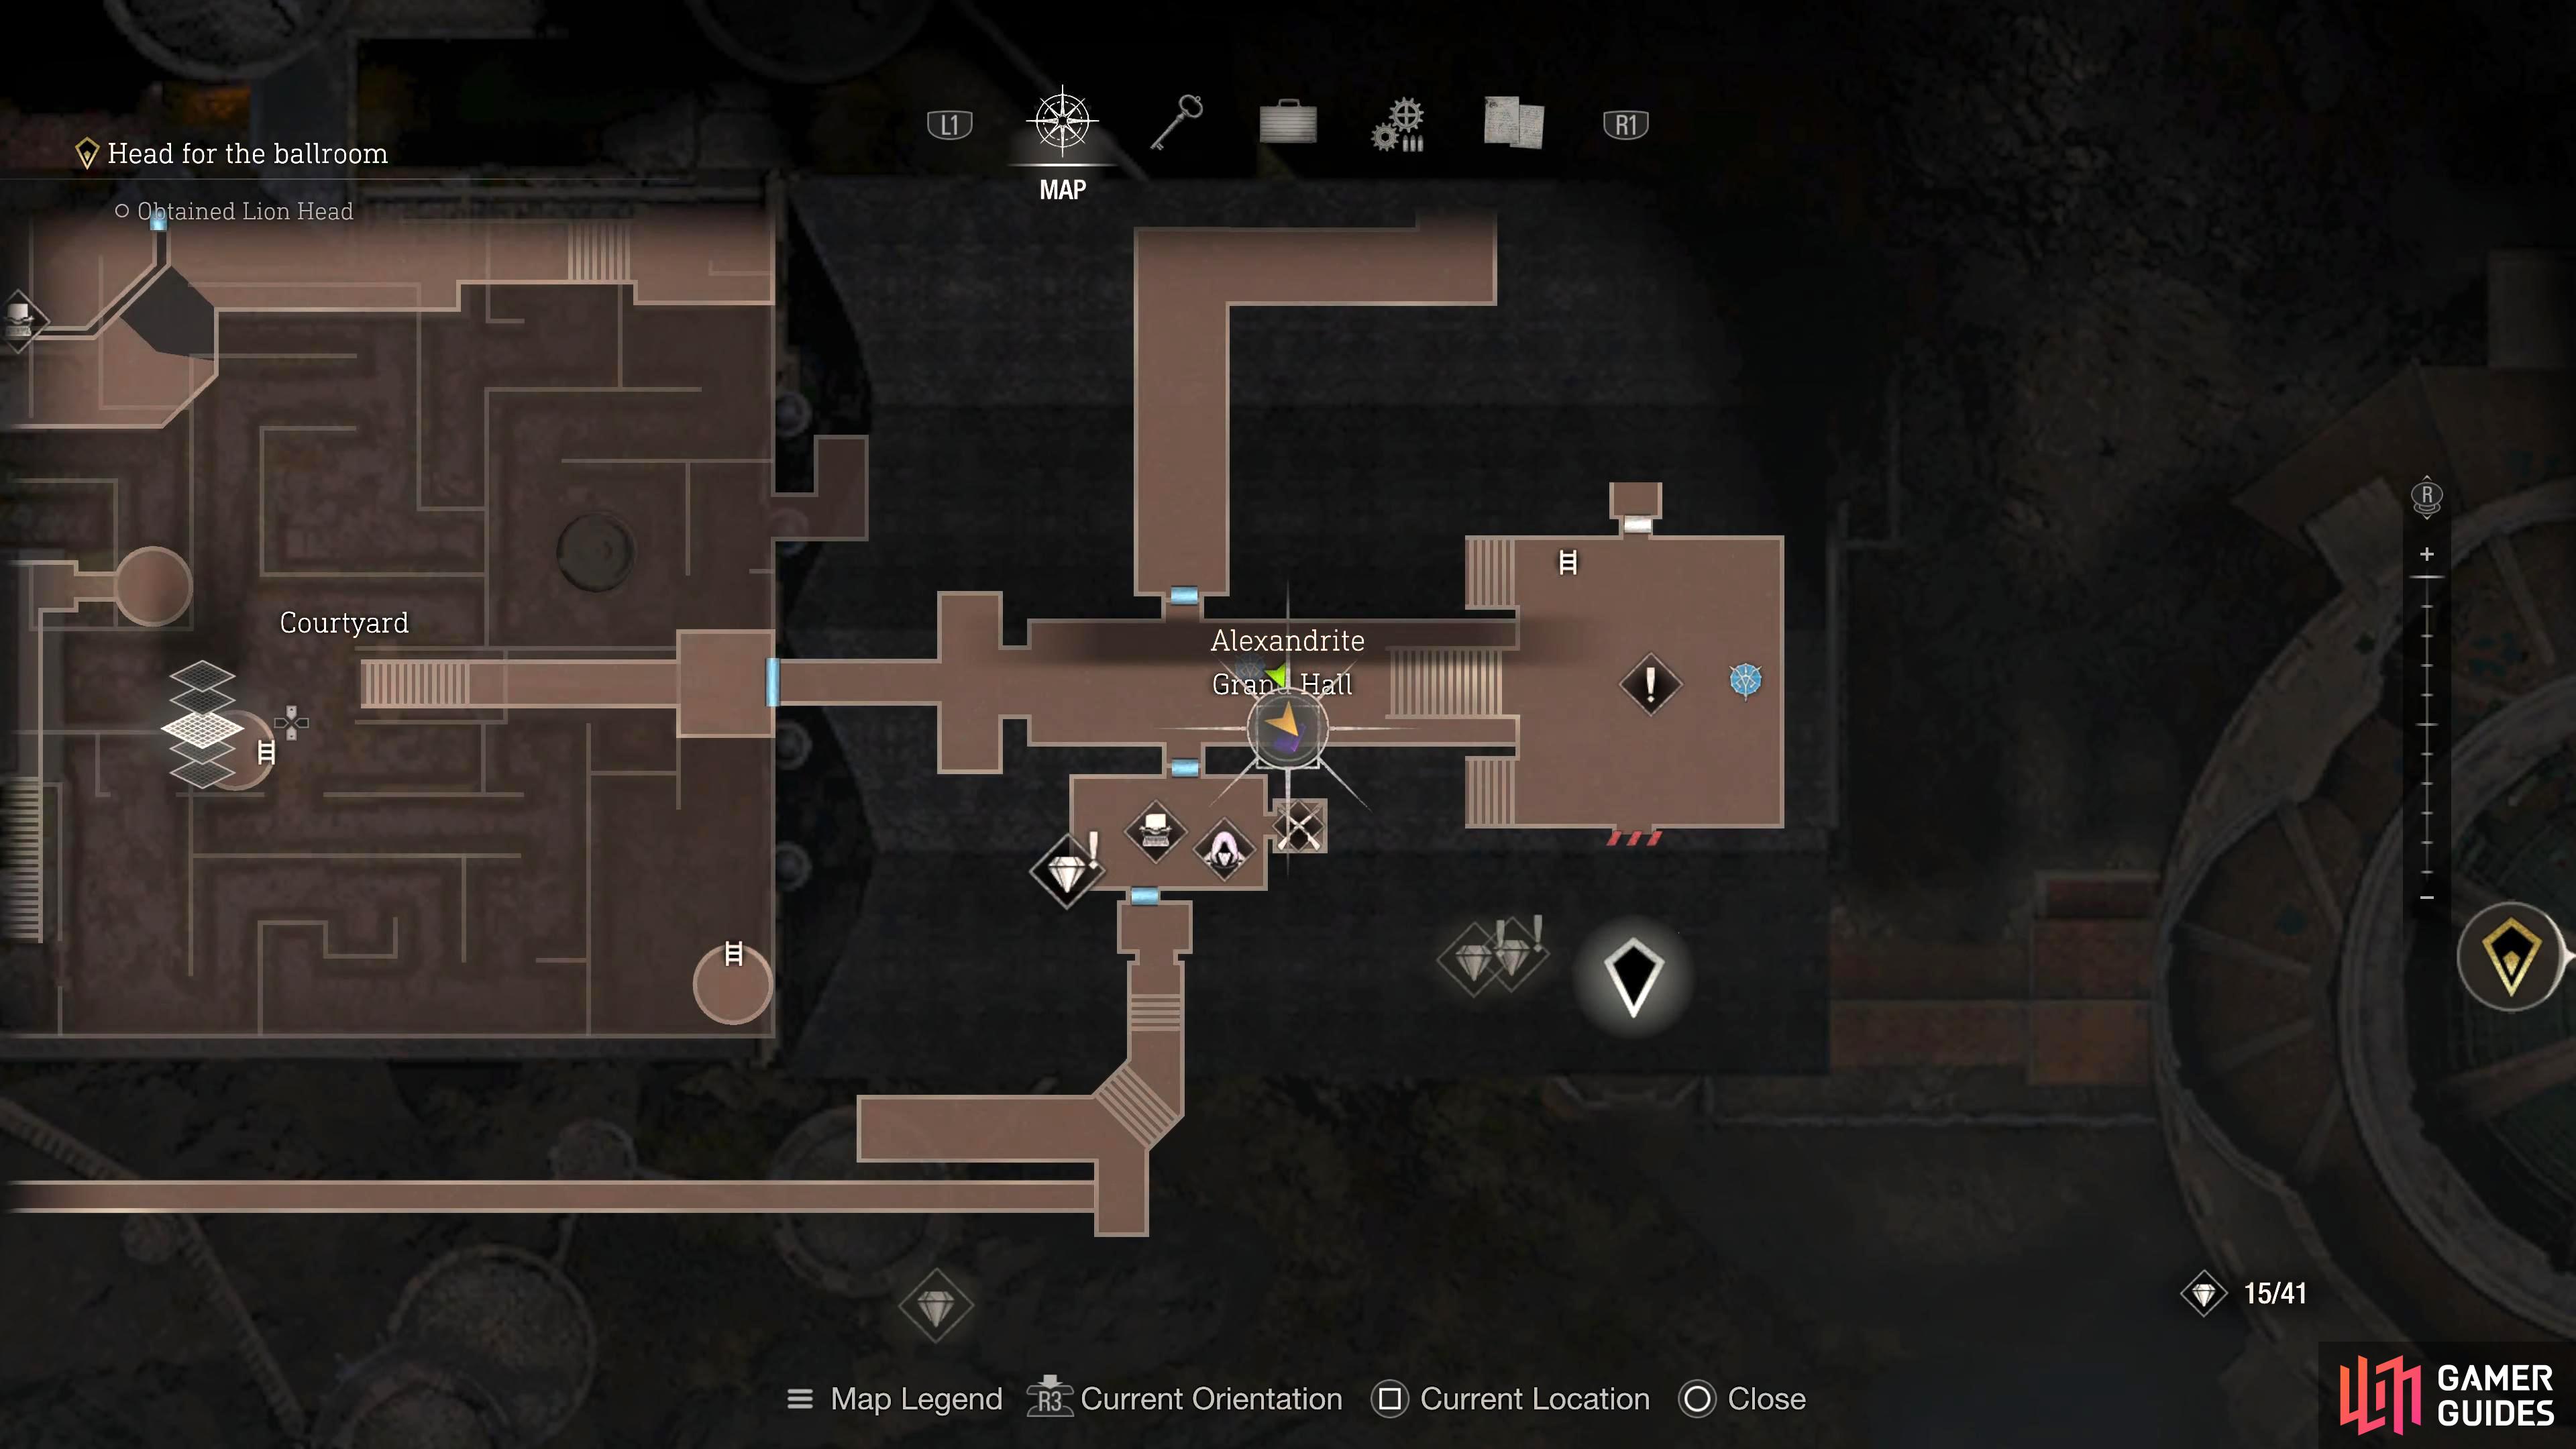
In the Grand Hall, near the Merchant Room.
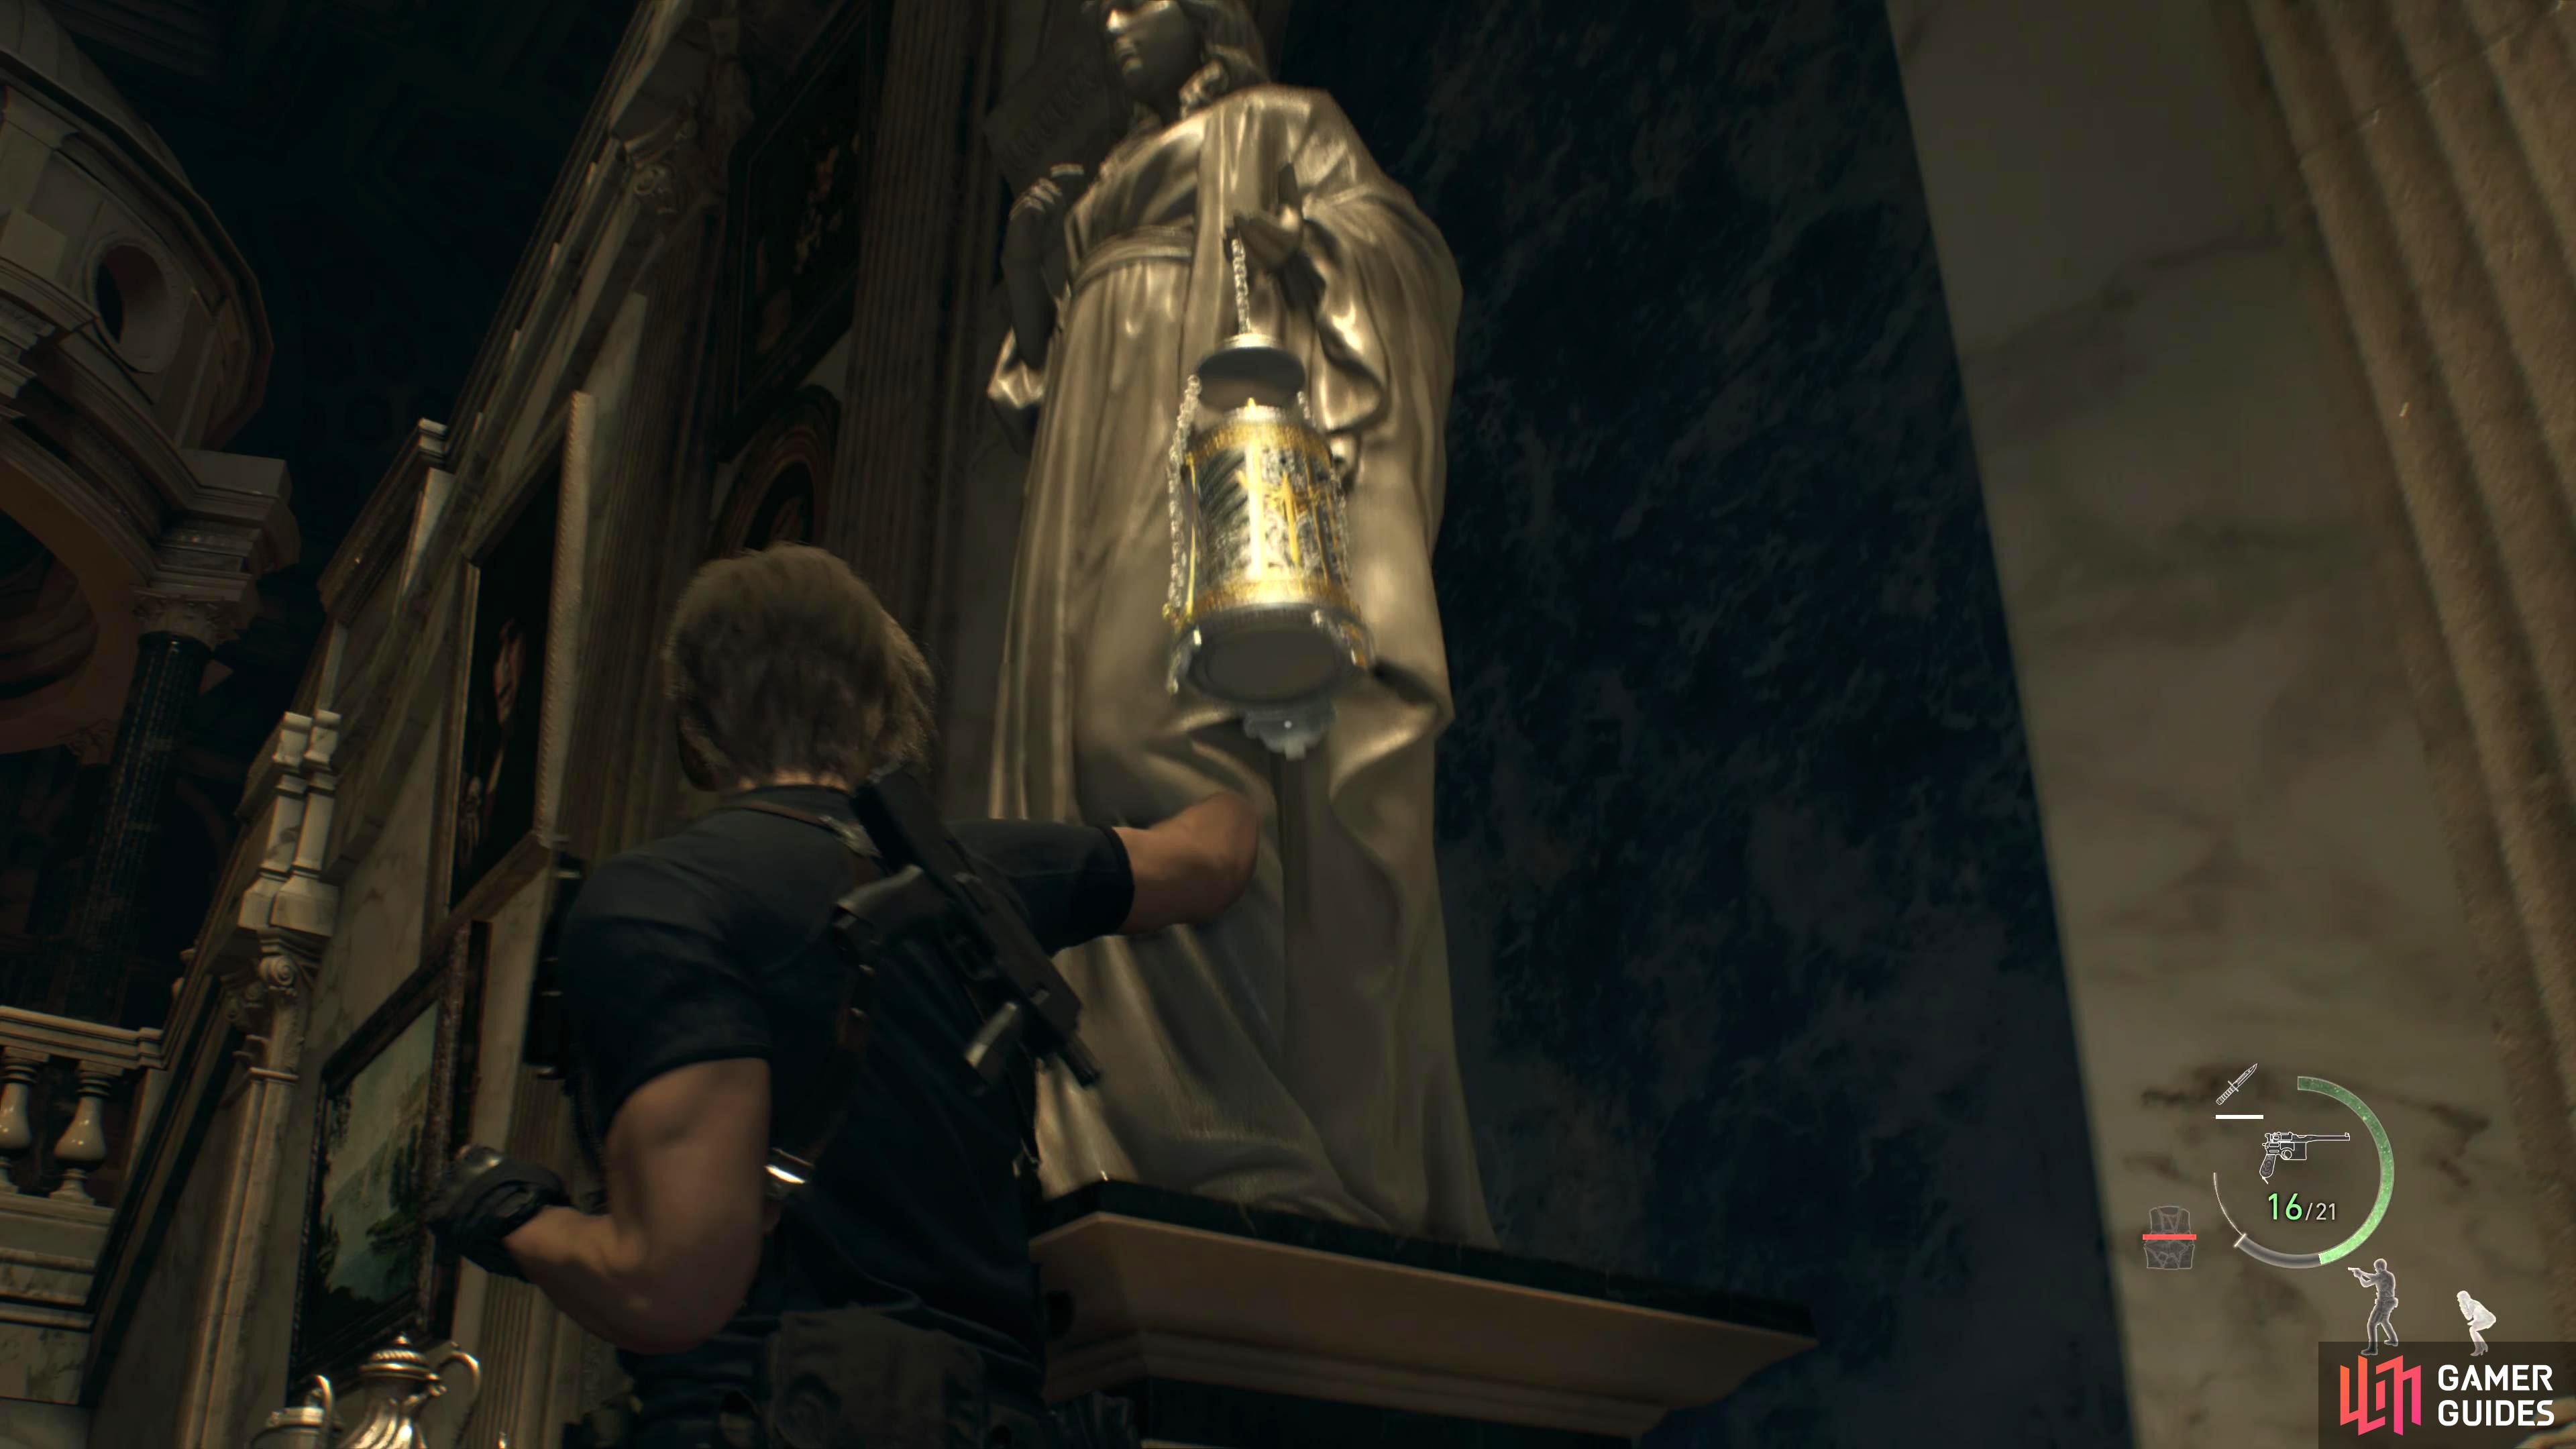
Attack the silver contained in the statue’s hand to find the Alexandrite.
Key Items: - Small Key and Cubic Device
Although these aren’t considered treasures, you won’t be getting many more of them if you don’t collect these key items.
- Small Key - From the previous treasure, head up the stairs in front of you, and turn left to reach the upper balcony. Follow the balcony towards the back, and enter the door to your right. Continue through the hallway until you reach the next room, and you’ll find a small set of drawers in the northwest corner. Inside them, you’ll find the Small Key.
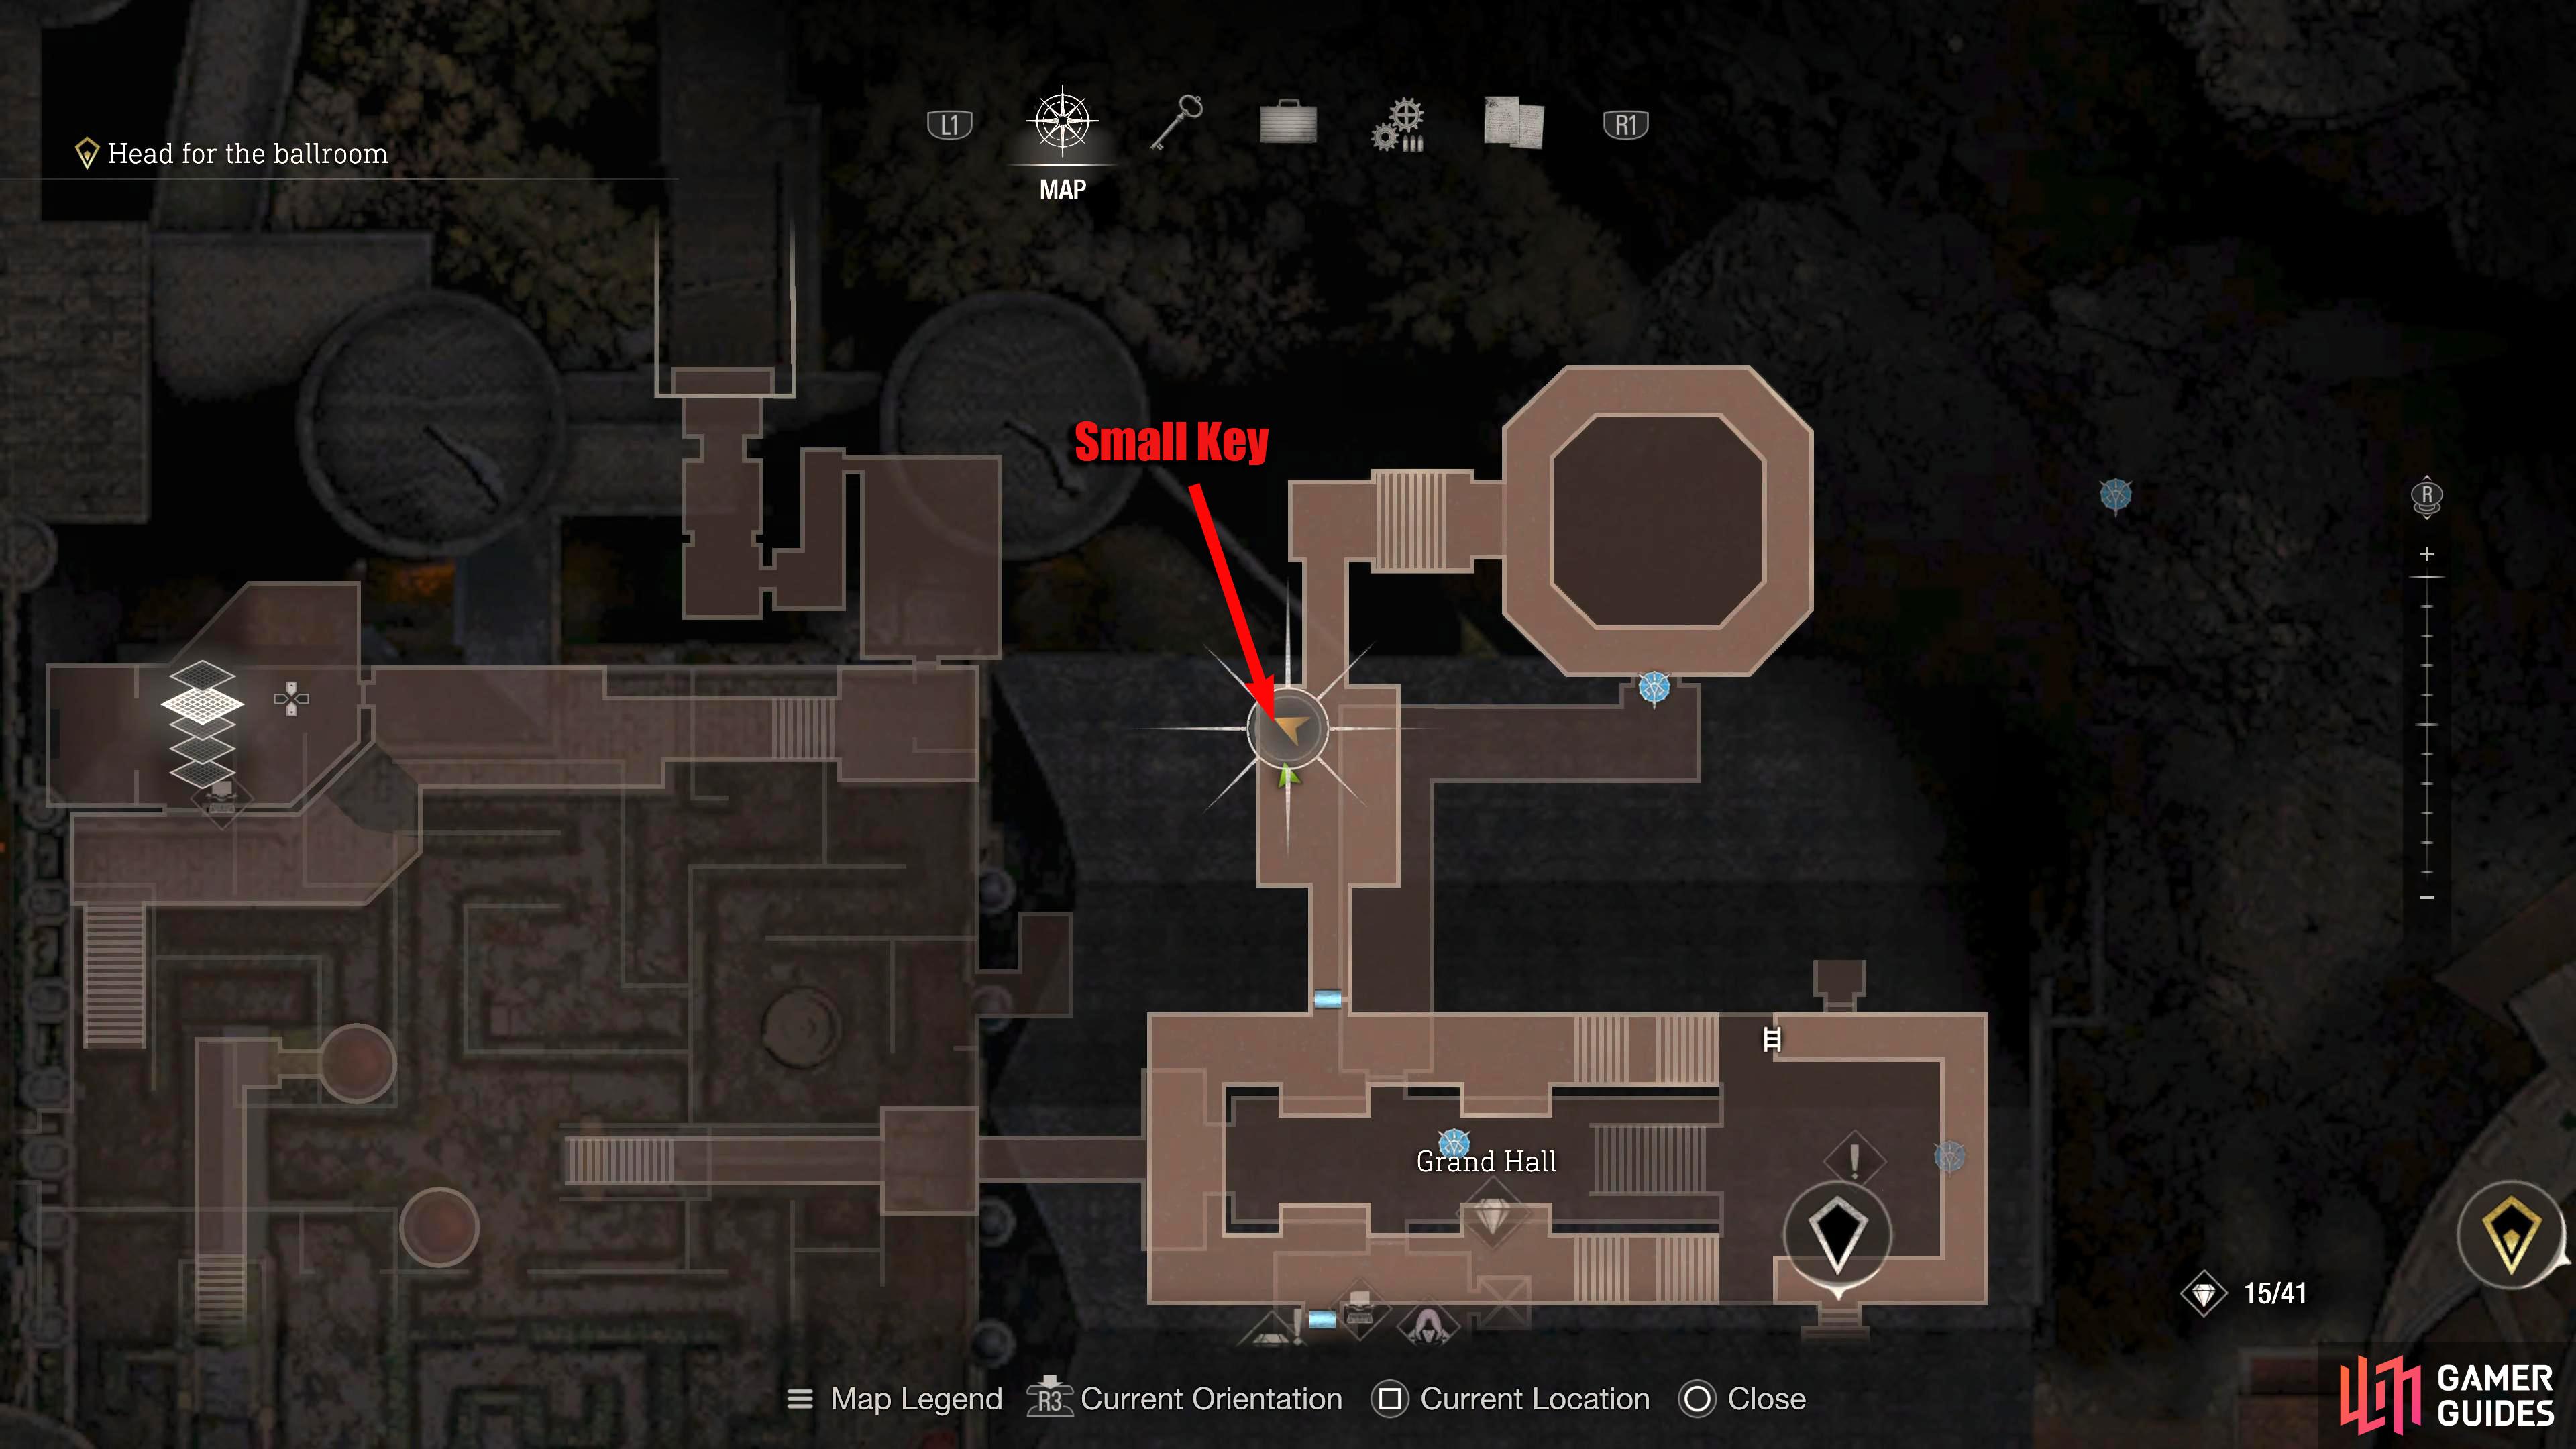
Head through the northern door from the balcony.
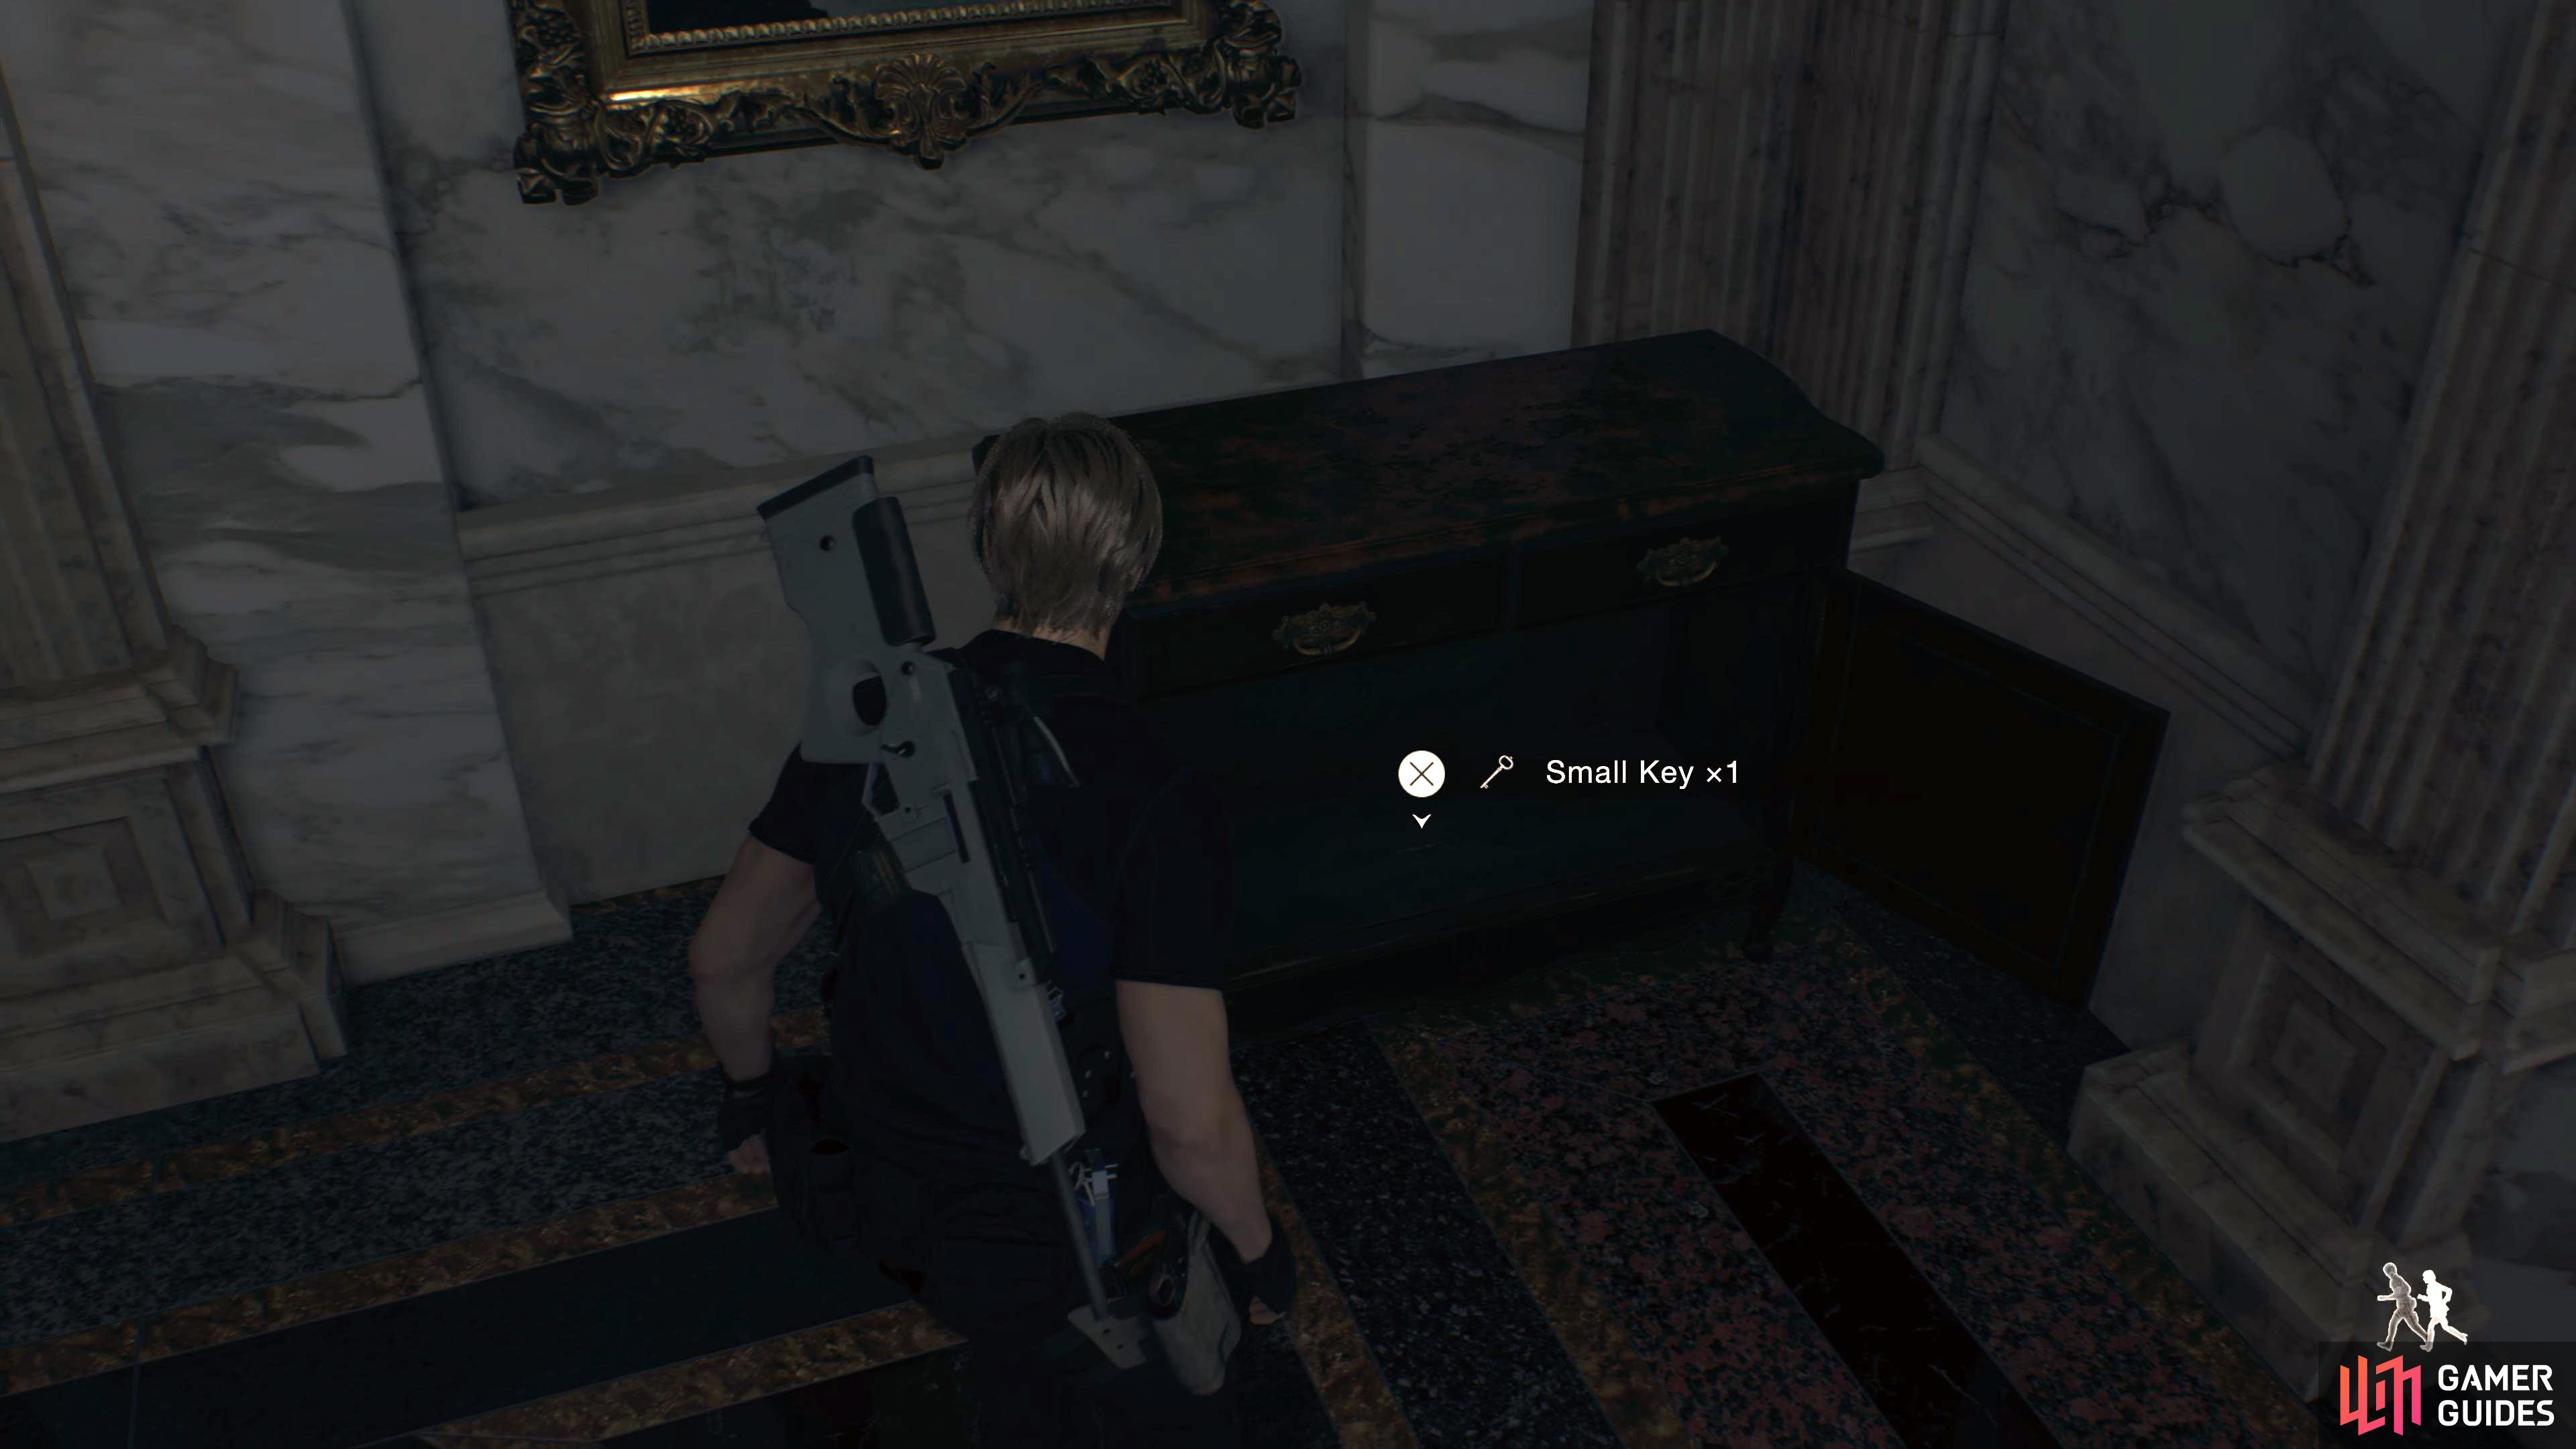
To find a set of drawers in the northwest corner of the room. In here will be a Small Key.
- Cubic Device - Progress the story until you reach the Armory. You will need to come here to get one of the statue heads. When you drop into the room below to retrieve the statue head, you’ll be ambushed by numerous Knight enemies. These can be difficult to defeat as you’ll need to aim at the plagas coming out of their necks to defeat them. Once you defeat the knights, you’ll need to catch Ashley to help you open the door. Go through the door, and follow the hallway to open a chest containing the Cubic Device.
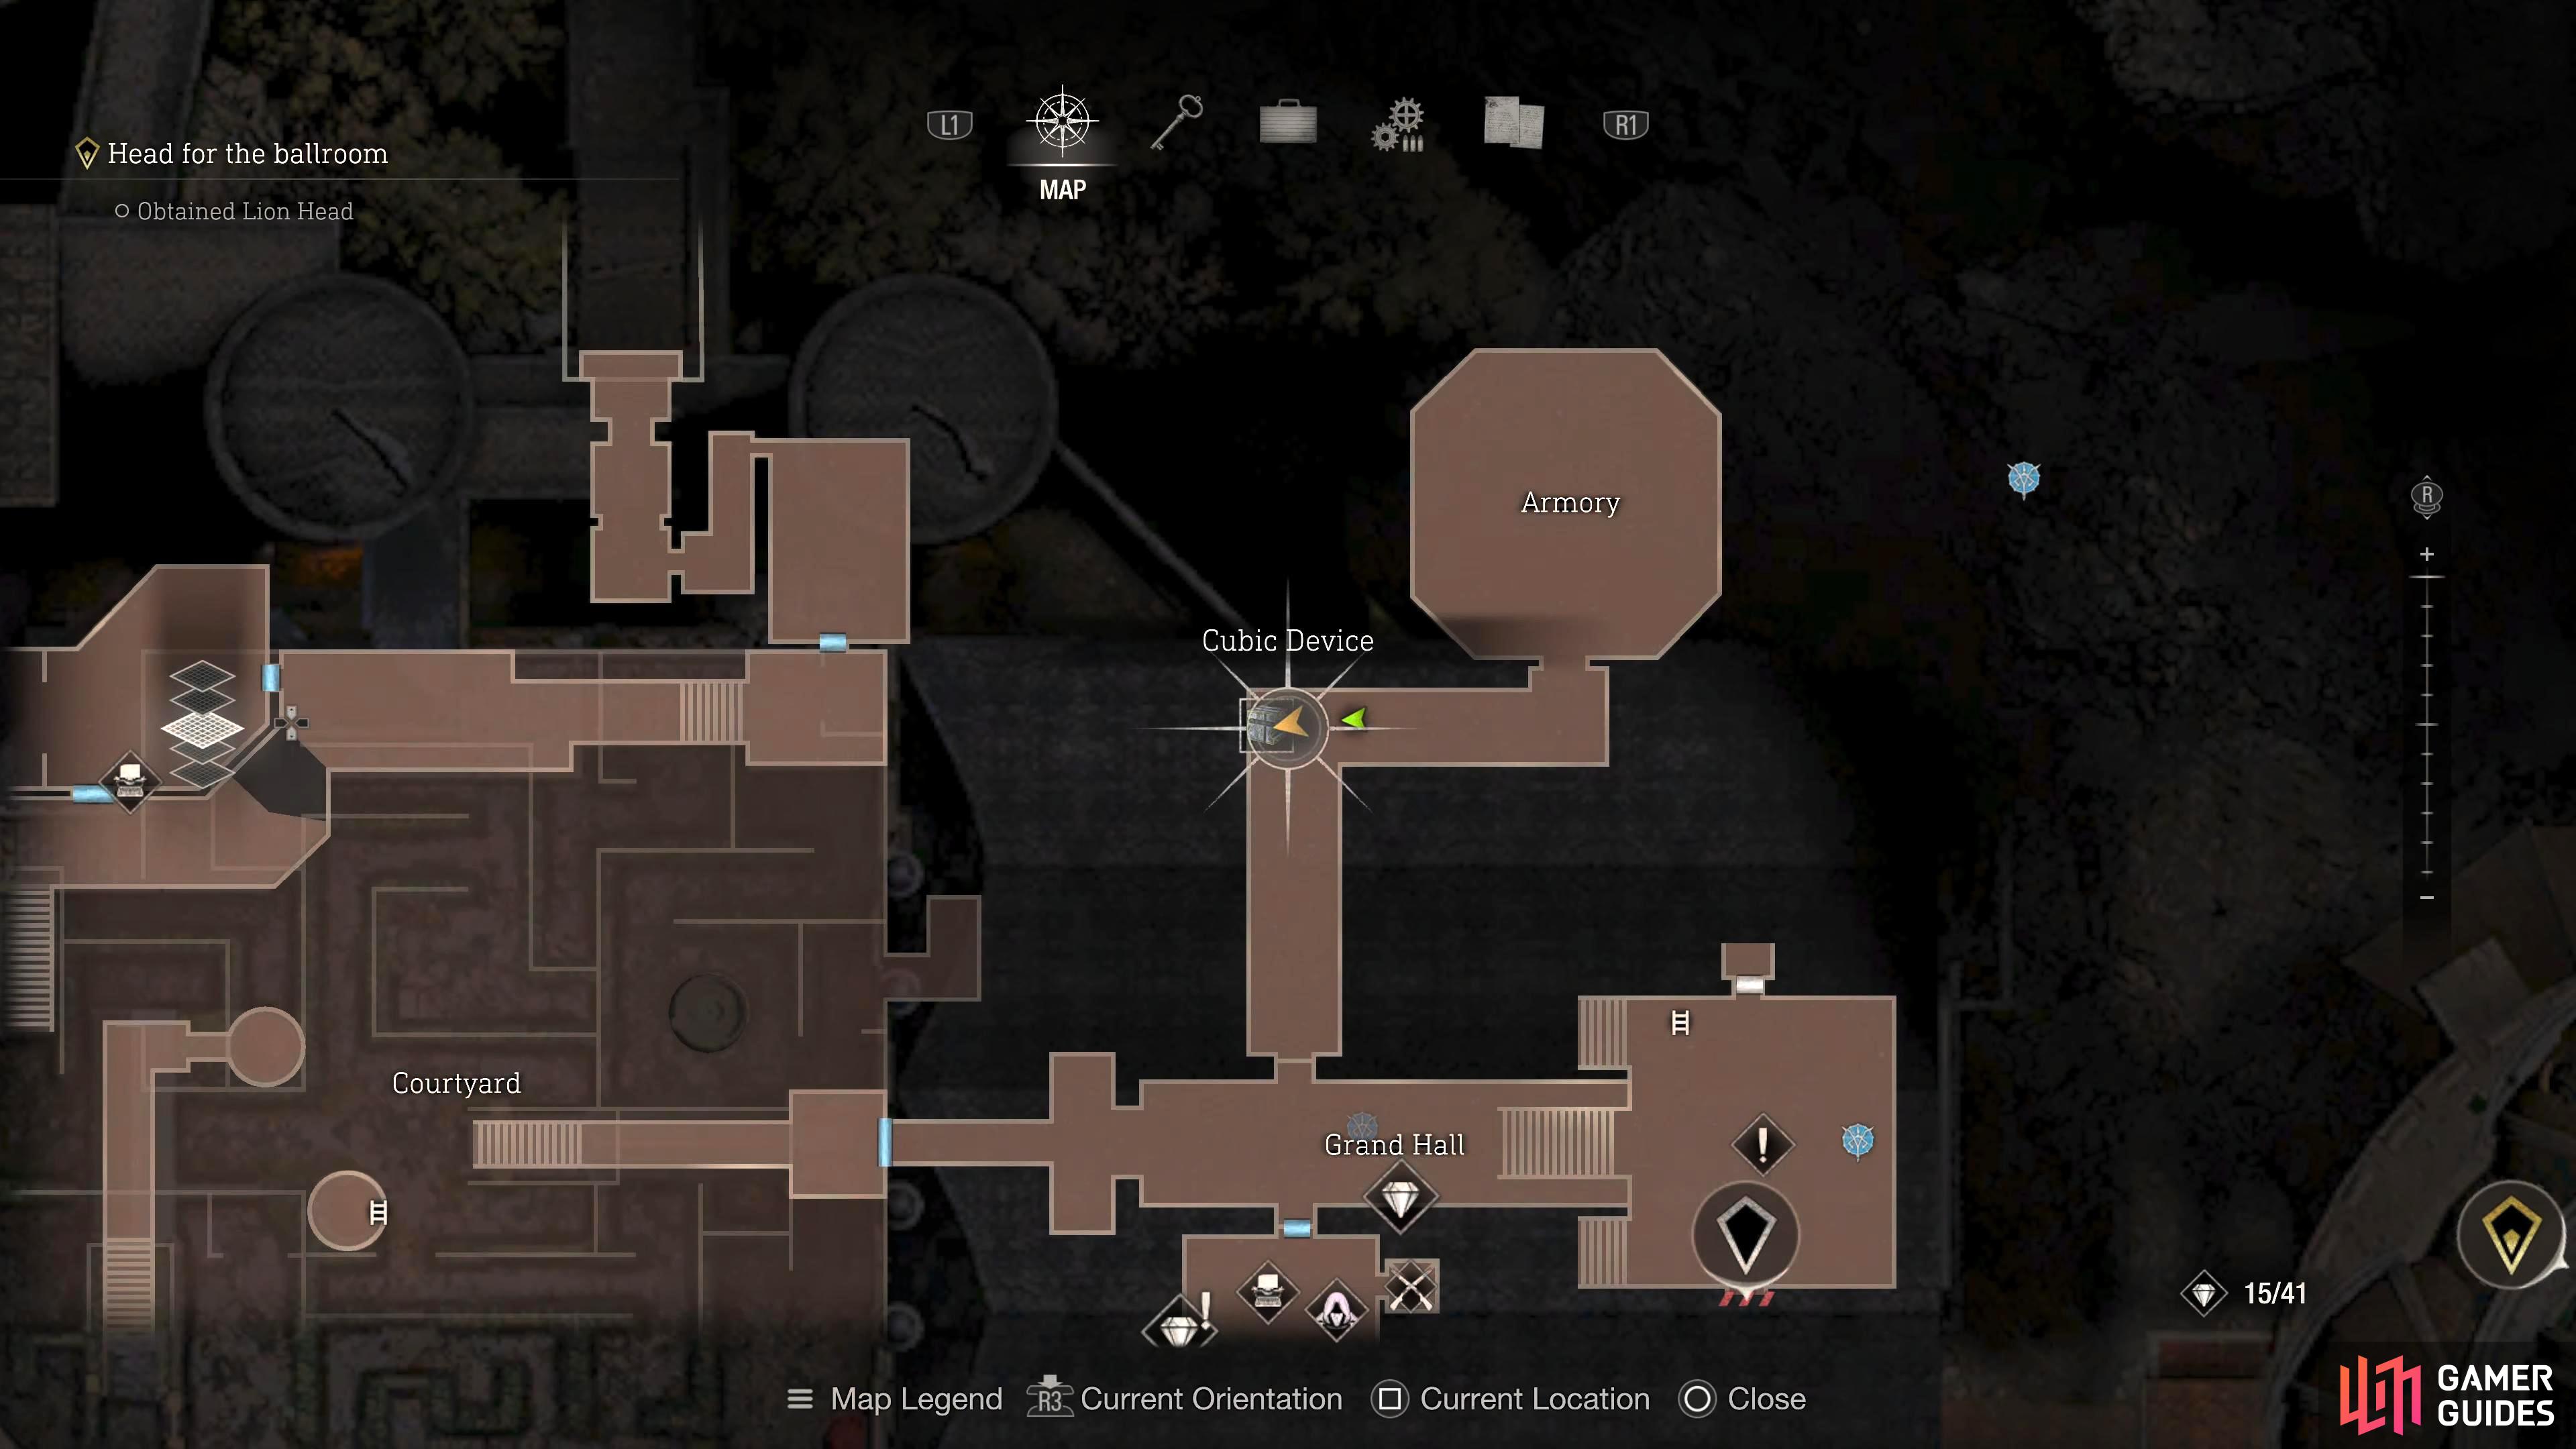
After finishing the Armory story section, head through the door.
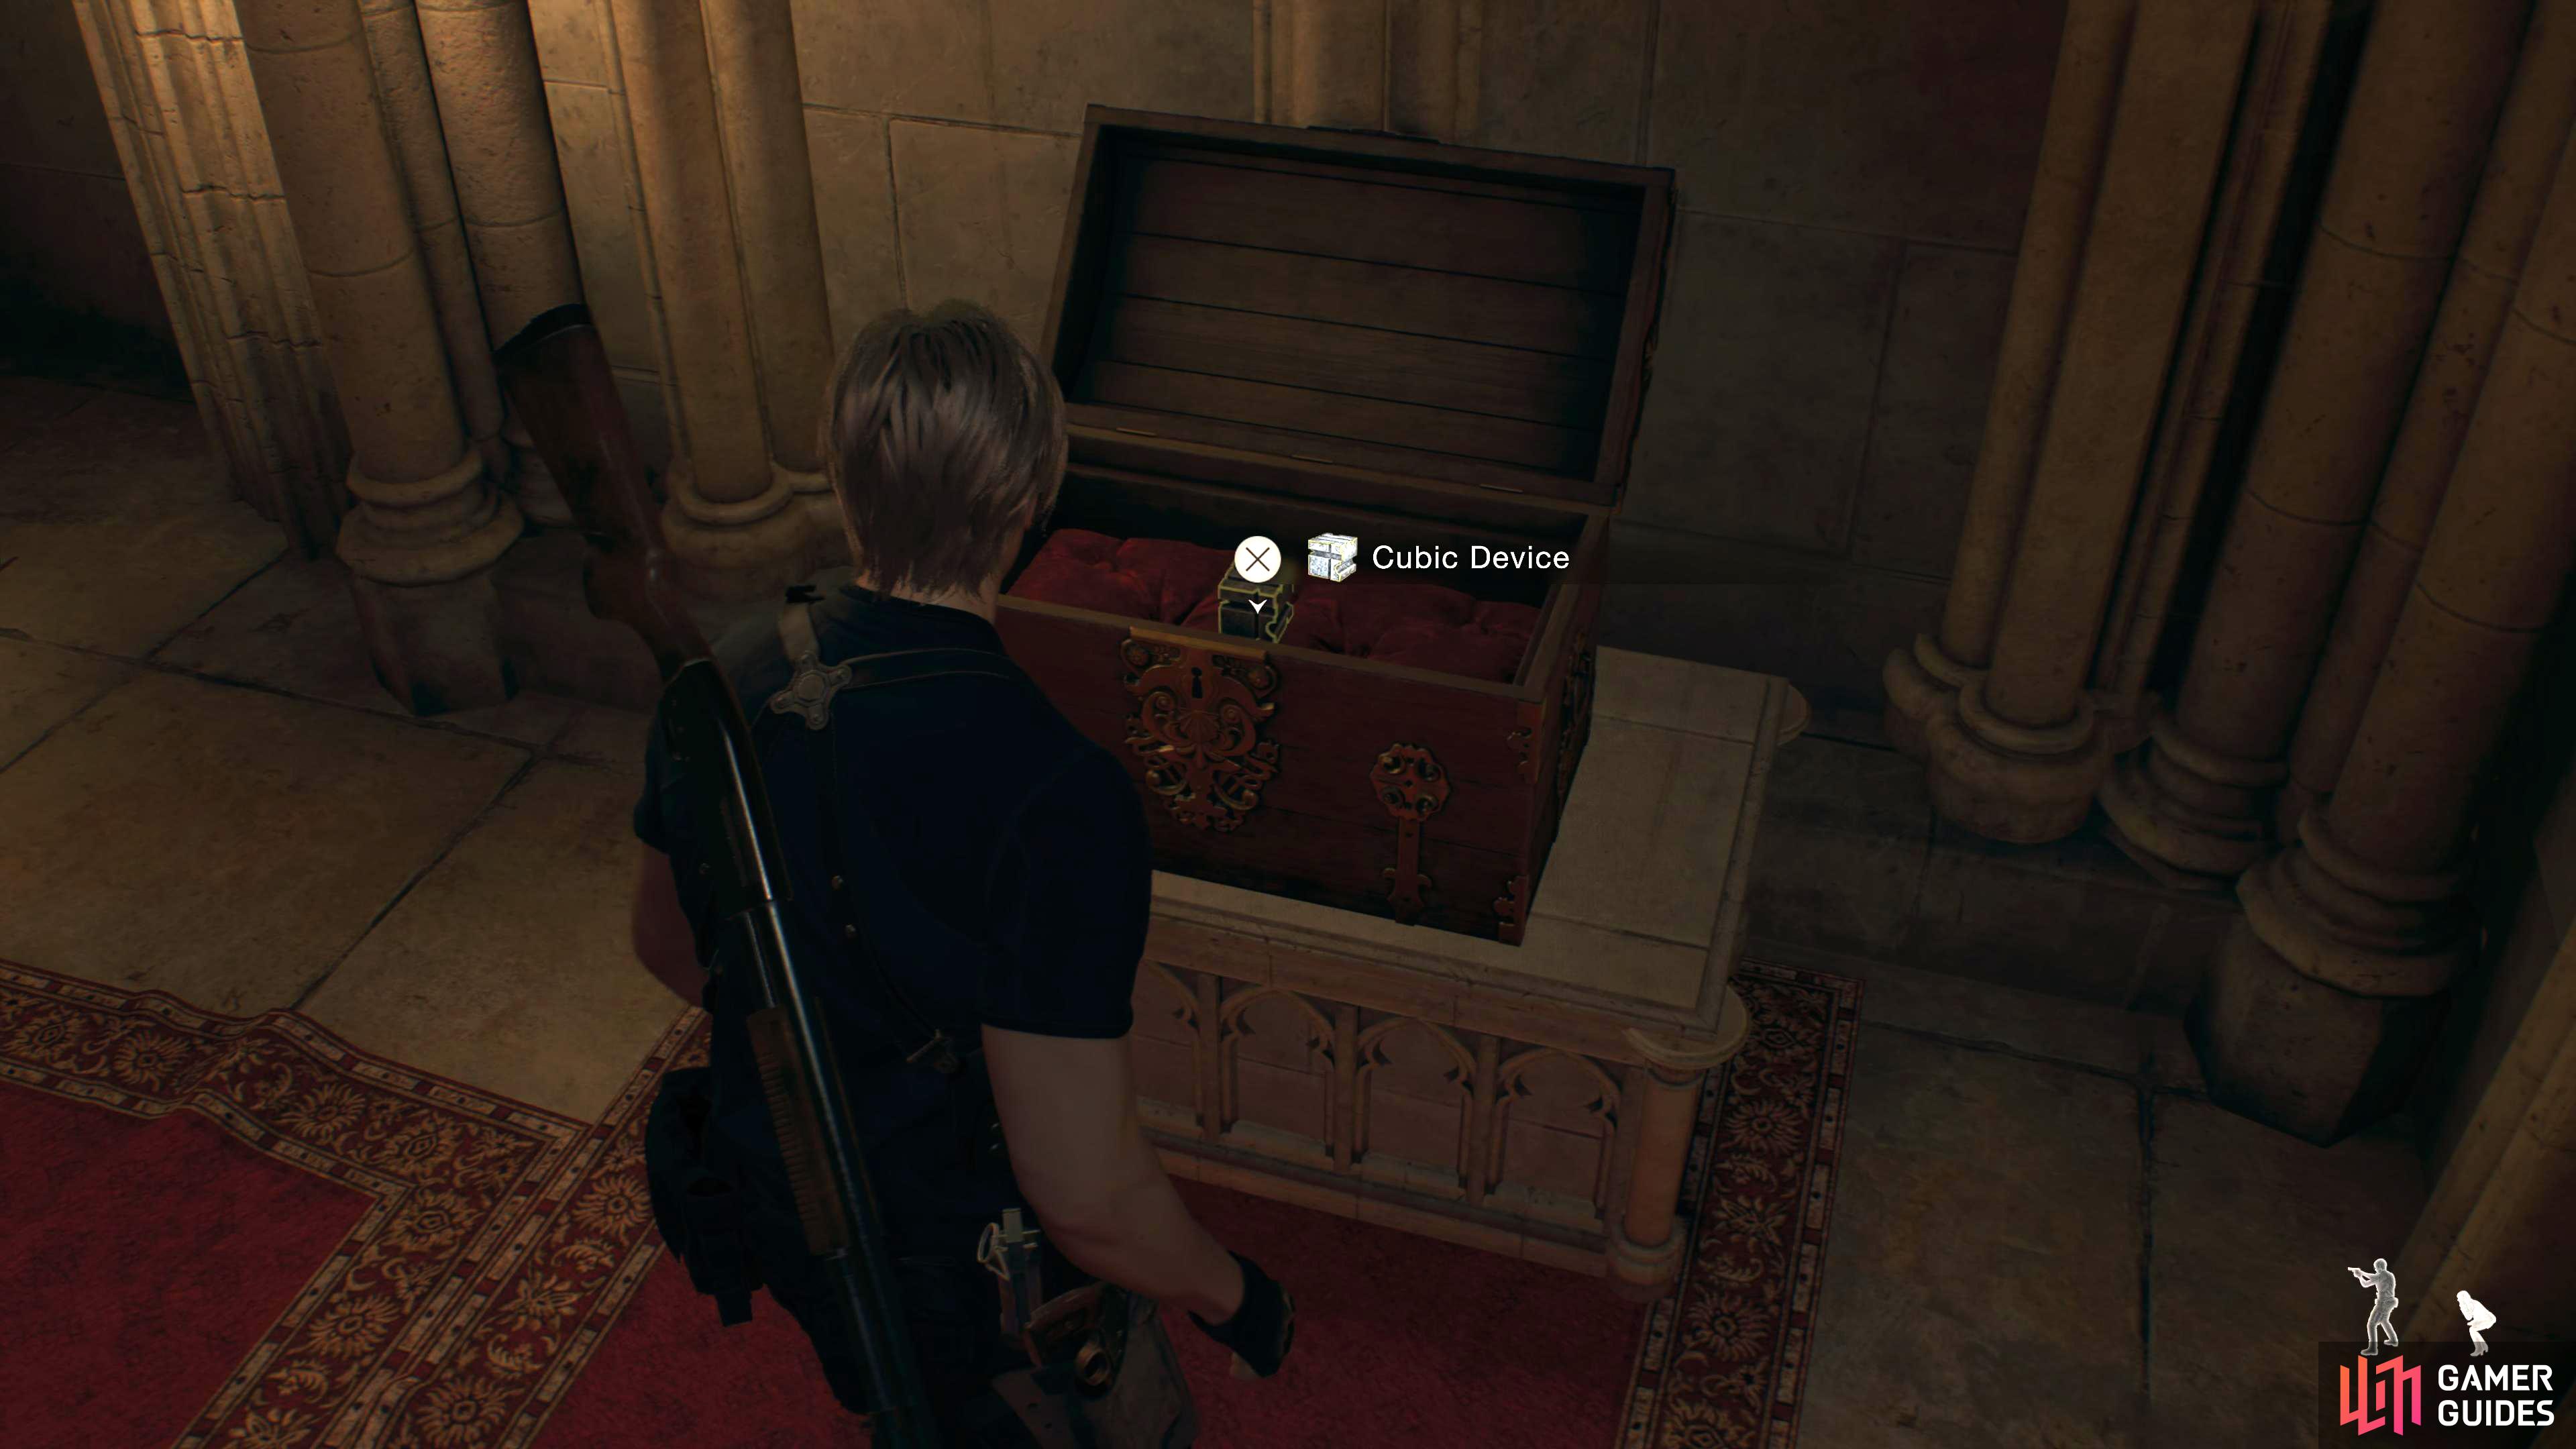
Follow the hallway to find a chest containing the Cubic Device.
Treasure: 4 - Yellow Diamond
Now head into the Gallery room which can be reached via the door on the southern balcony in the Grand Hall. This is a tricky room with a lot of enemies including a Summoner on the balcony at the back. What you want to do is rush the Summoner to stop him transforming the enemies, but there are a lot of obstacles before you. One such obstacle is Ashley, she will get caught by an enemy, and you’ll have to babysit her as you progress through the area.
Only defeat what you need to otherwise you’ll be there for days. Head towards the ladder to the right of the entrance while dealing with the plethora of enemies. A grenade or two will work wonders here if you have them. Climb the ladder, and run past the shield guys. If that isn’t an option, you can shoot the fire lantern above them. Up here, you’ll find the incredibly frustrating Summoner. Waste your few shotgun shells you have on them, and throw one more in for good measure then use the nearby lever to raise the bridge.
The treasure chest containing the Yellow Diamond will be in a chest on the bottom floor, under the now-raised bridge, nearer to the entrance.
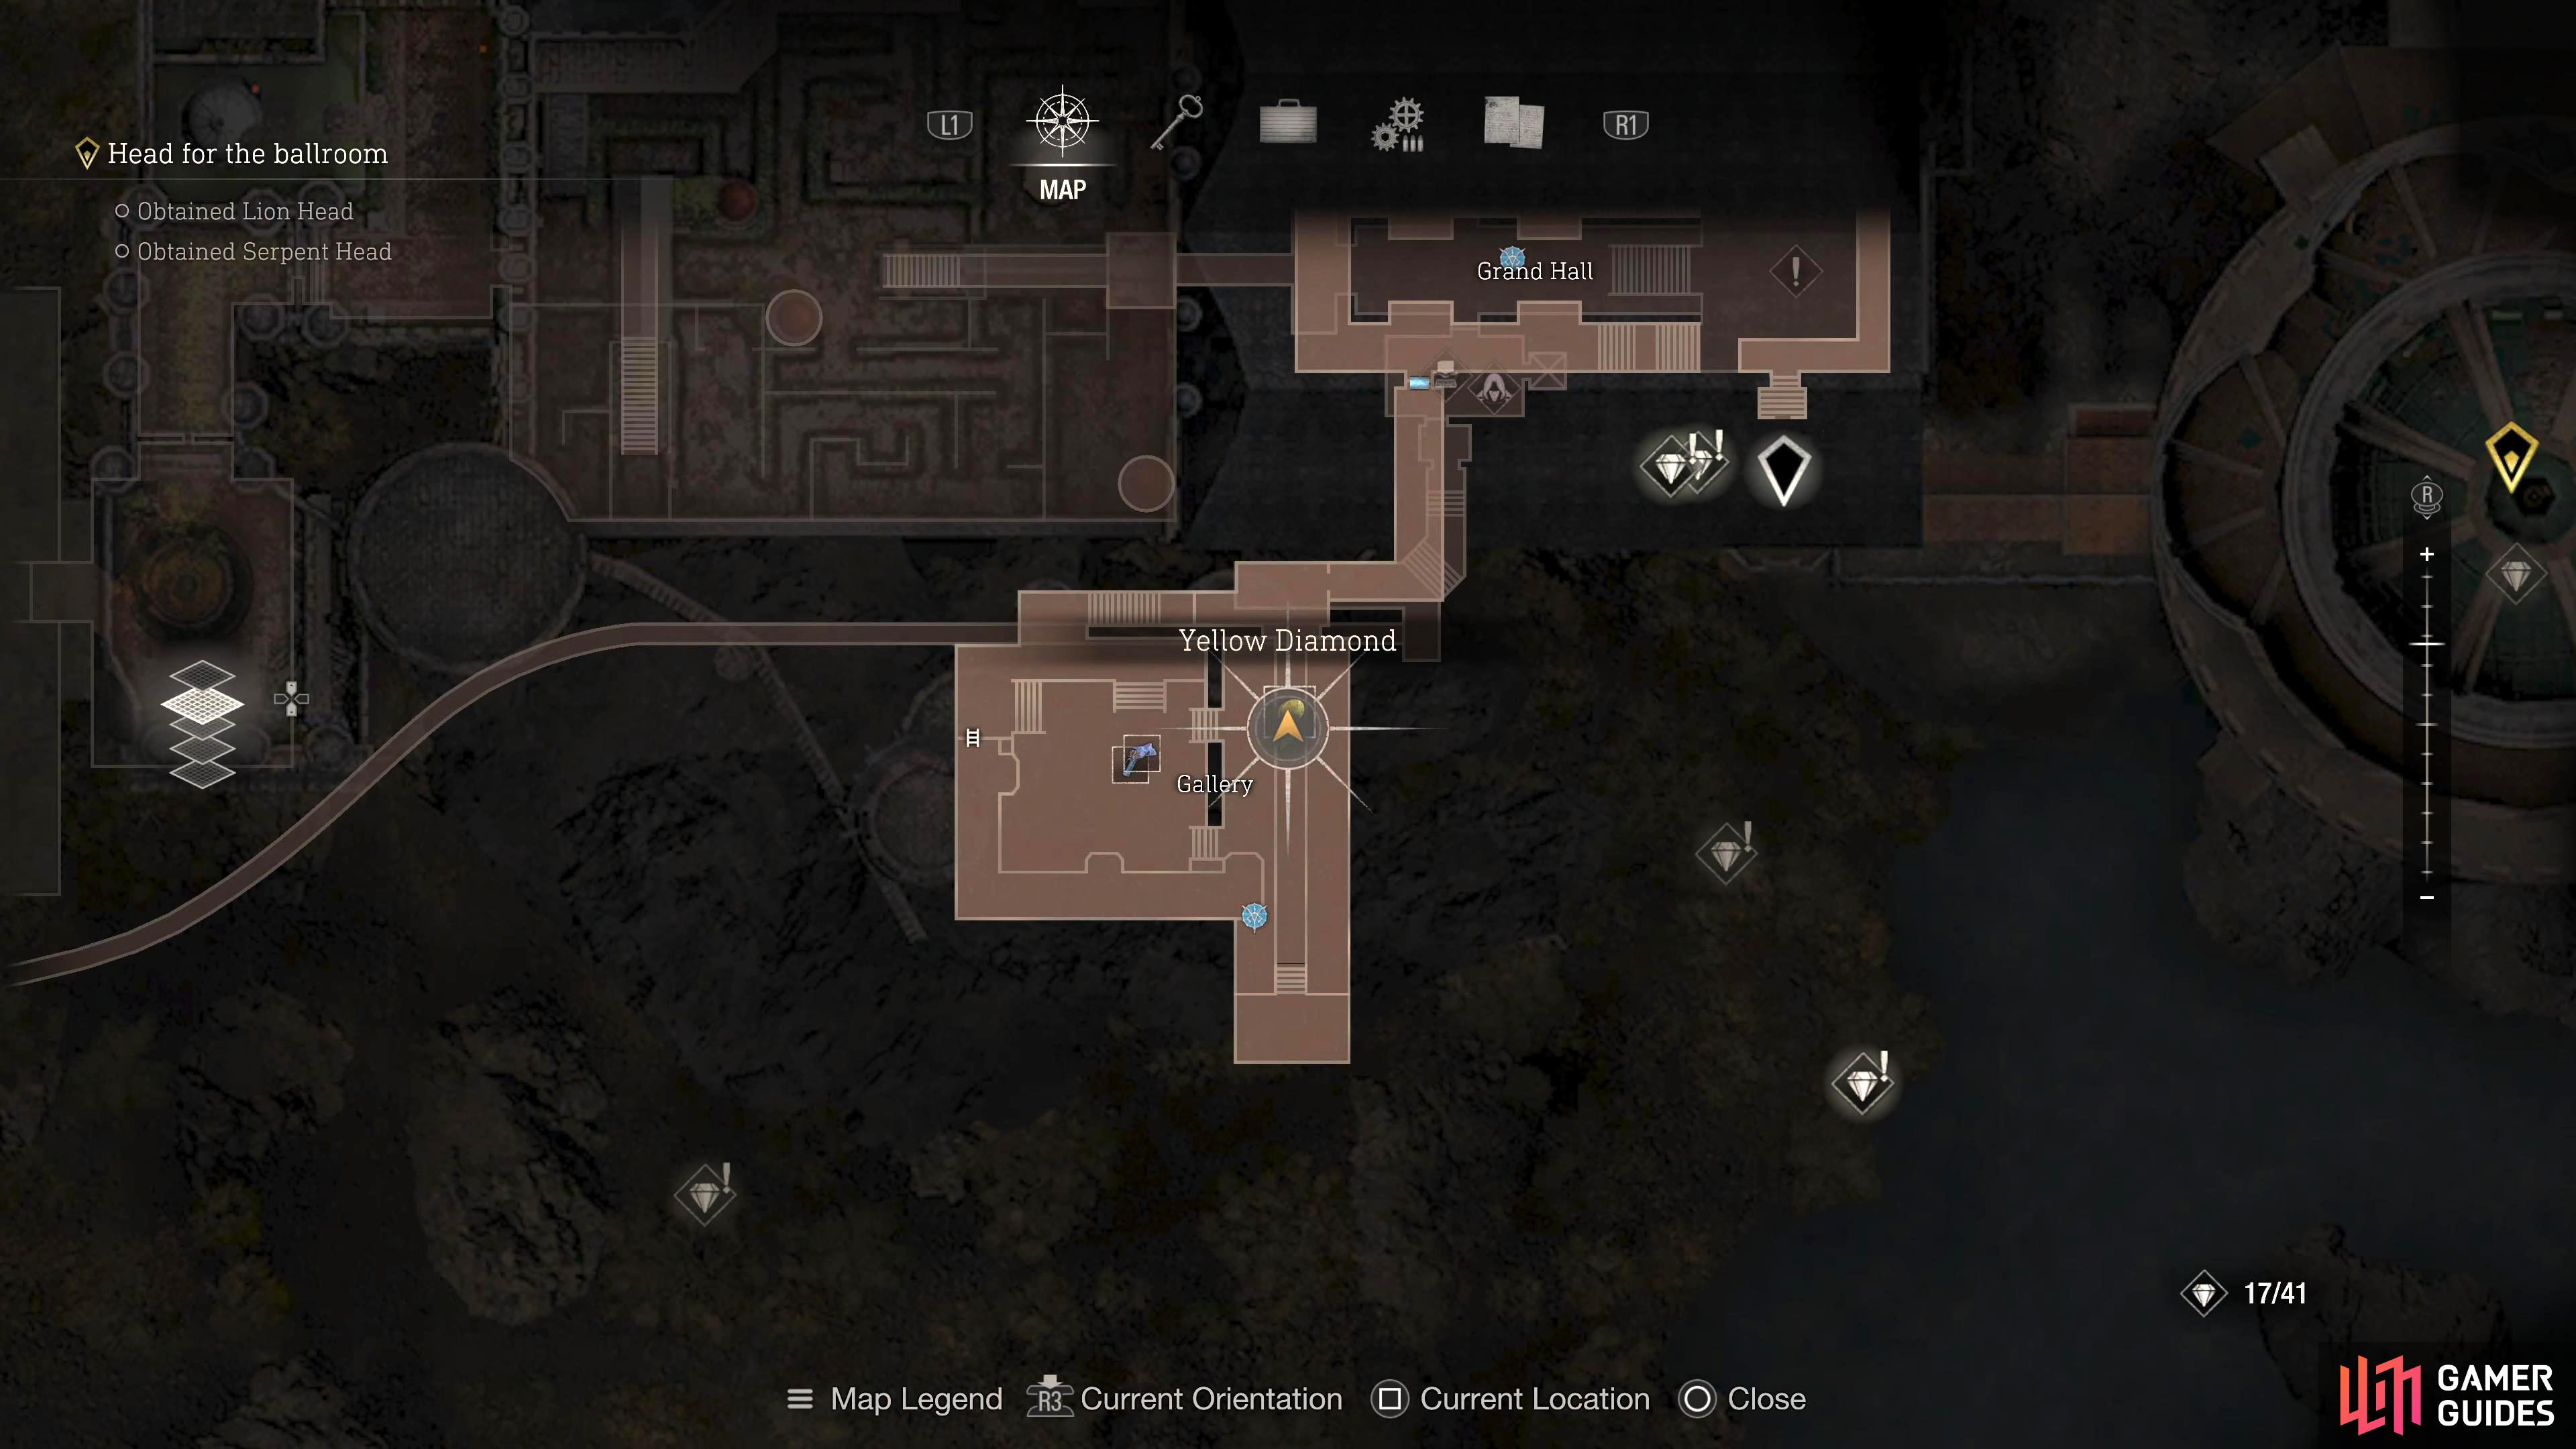
In the Gallery defeat the Summoner, and all the numerous enemies then pull the lever to raise the bridge.
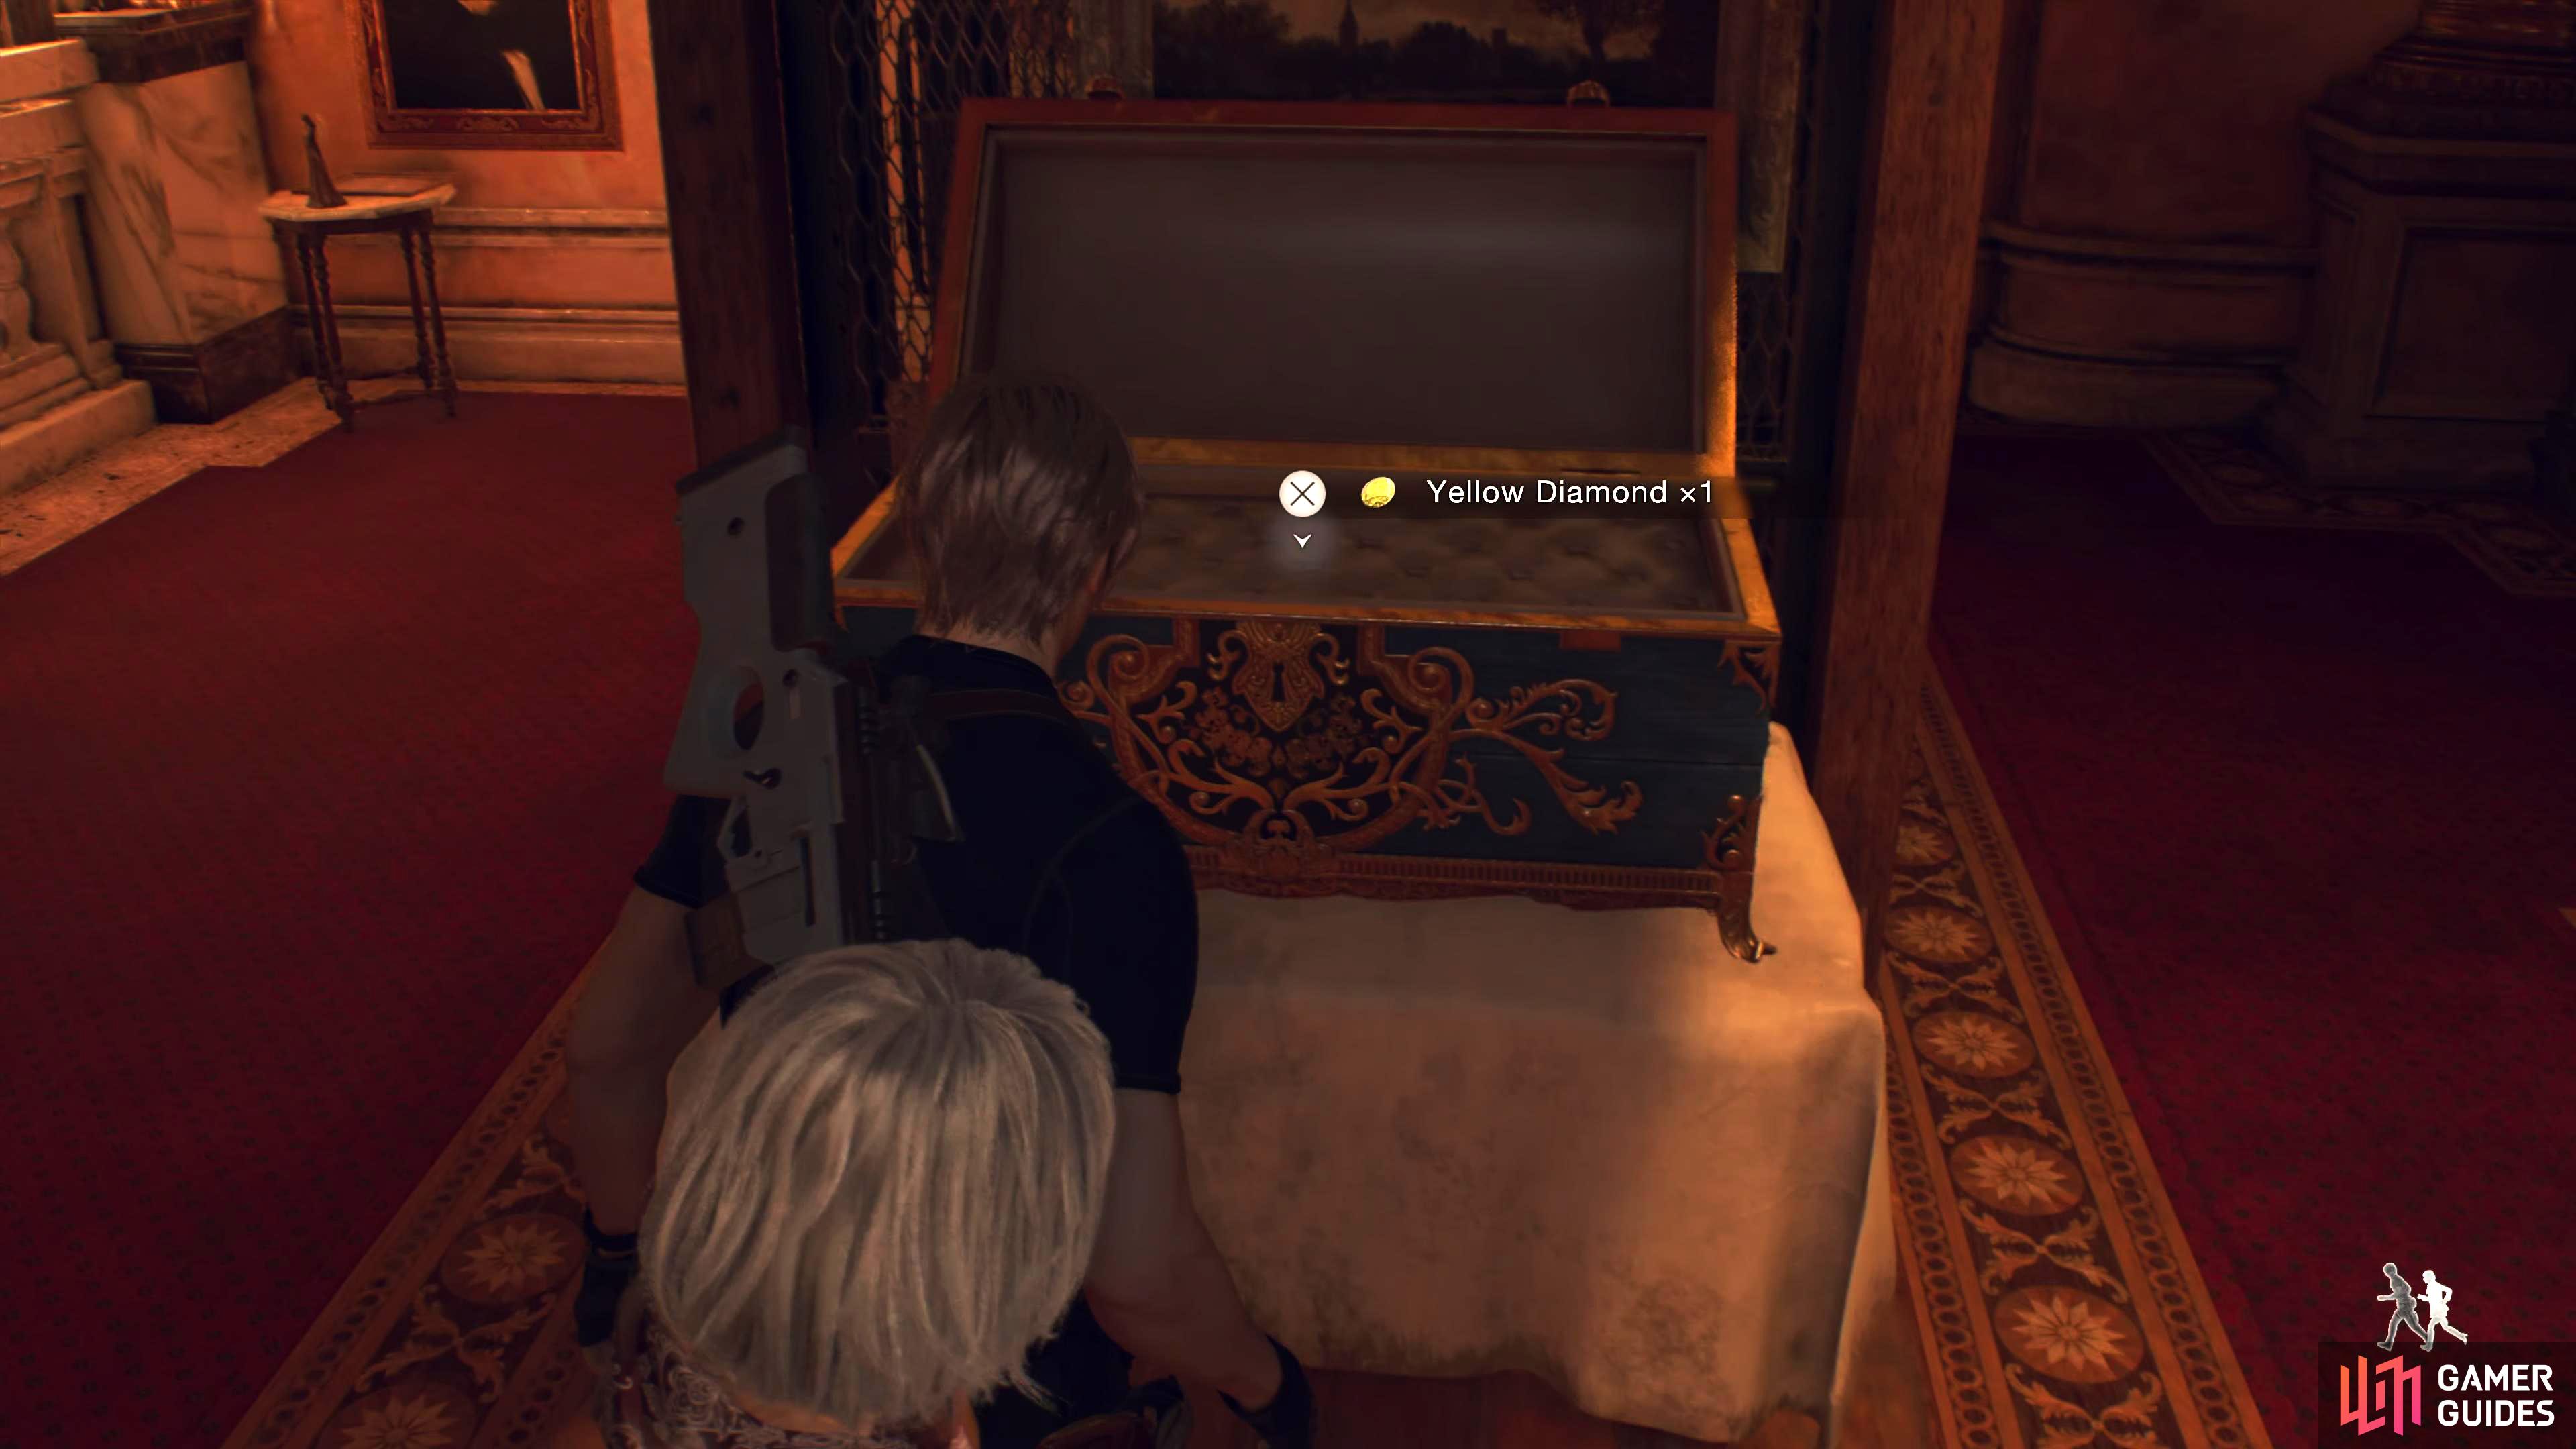
The chest containing the Yellow Diamond can be found in a chest under it in the north side of the room.
Treasure: 5 - Butterfly Lamp
Head back to the Merchant room, and unlock the Square Lock Box behind him to obtain the Butterfly Lamp. As this will be your first time using the Cubic Device, what you’ll want to do is rotate the cube, so it fits inside the hole. Look at the outside of the hole, and you’ll see that there are two triangle-like shapes at the bottom, and one at the top, and a square-like shape on the lower right side. Rotate the cube so both shapes around the hole, and the cube match up.
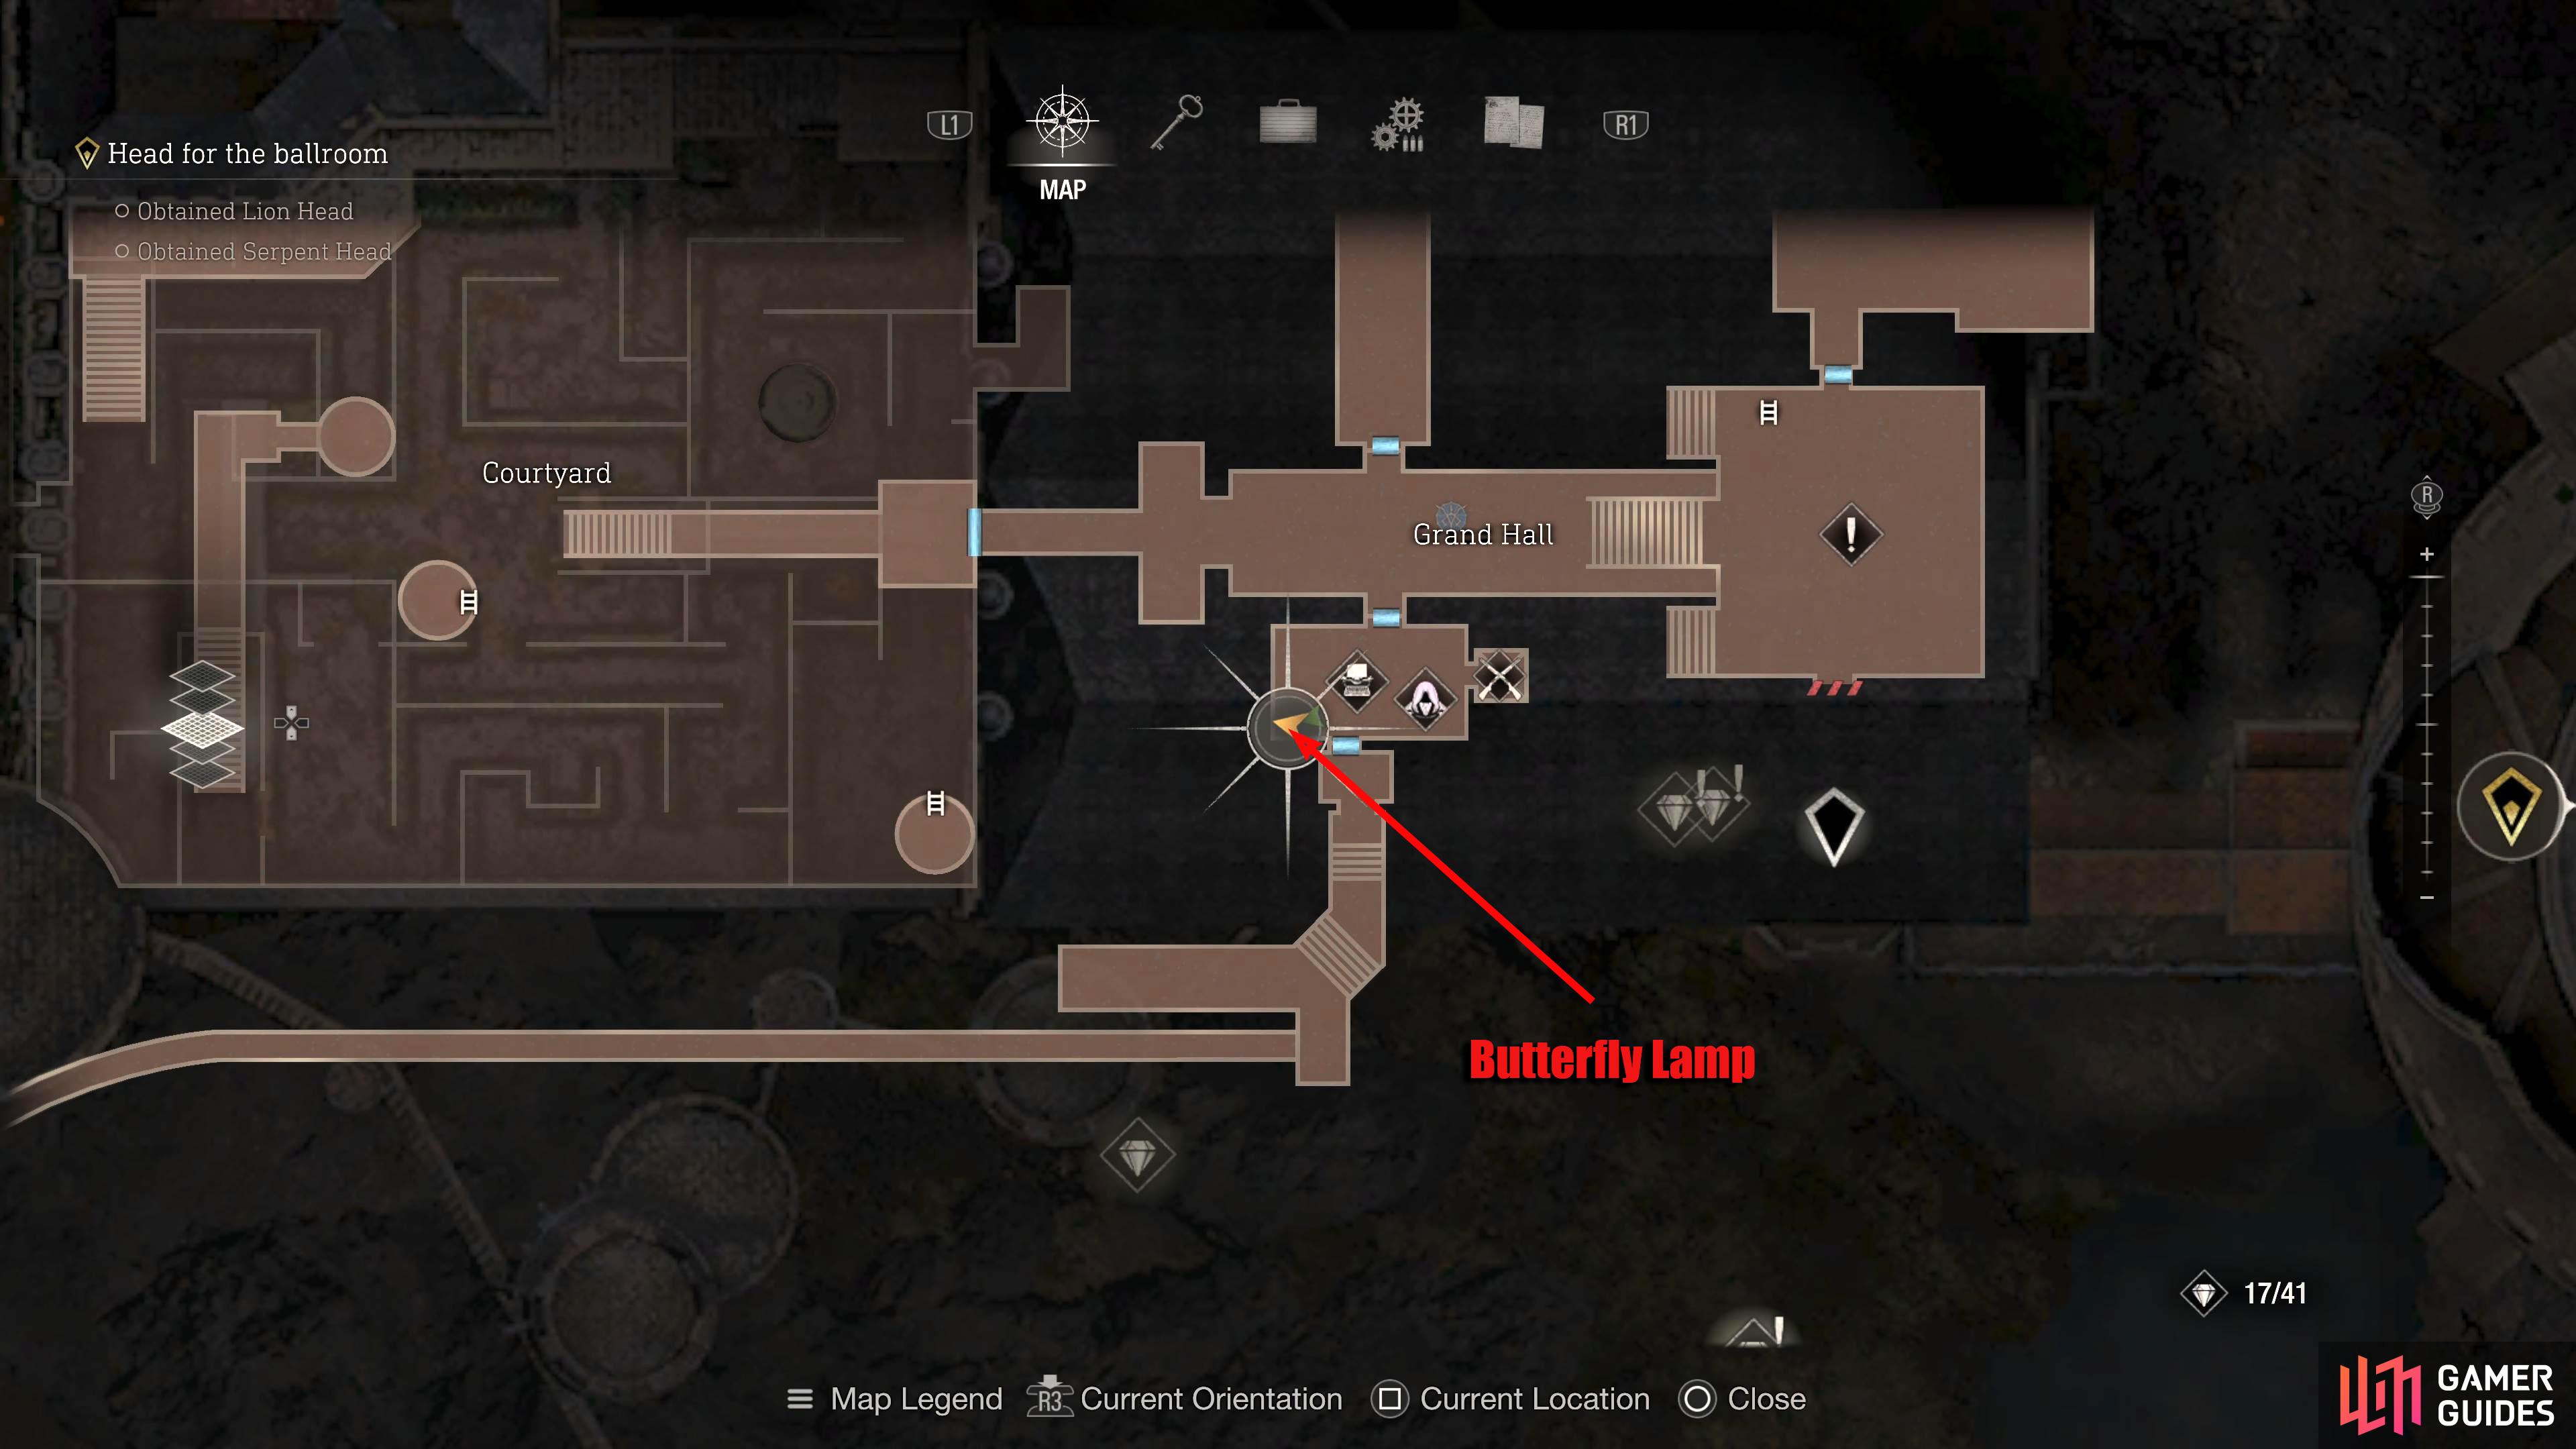
In the Merchant Room locked in a Square Lock Box.
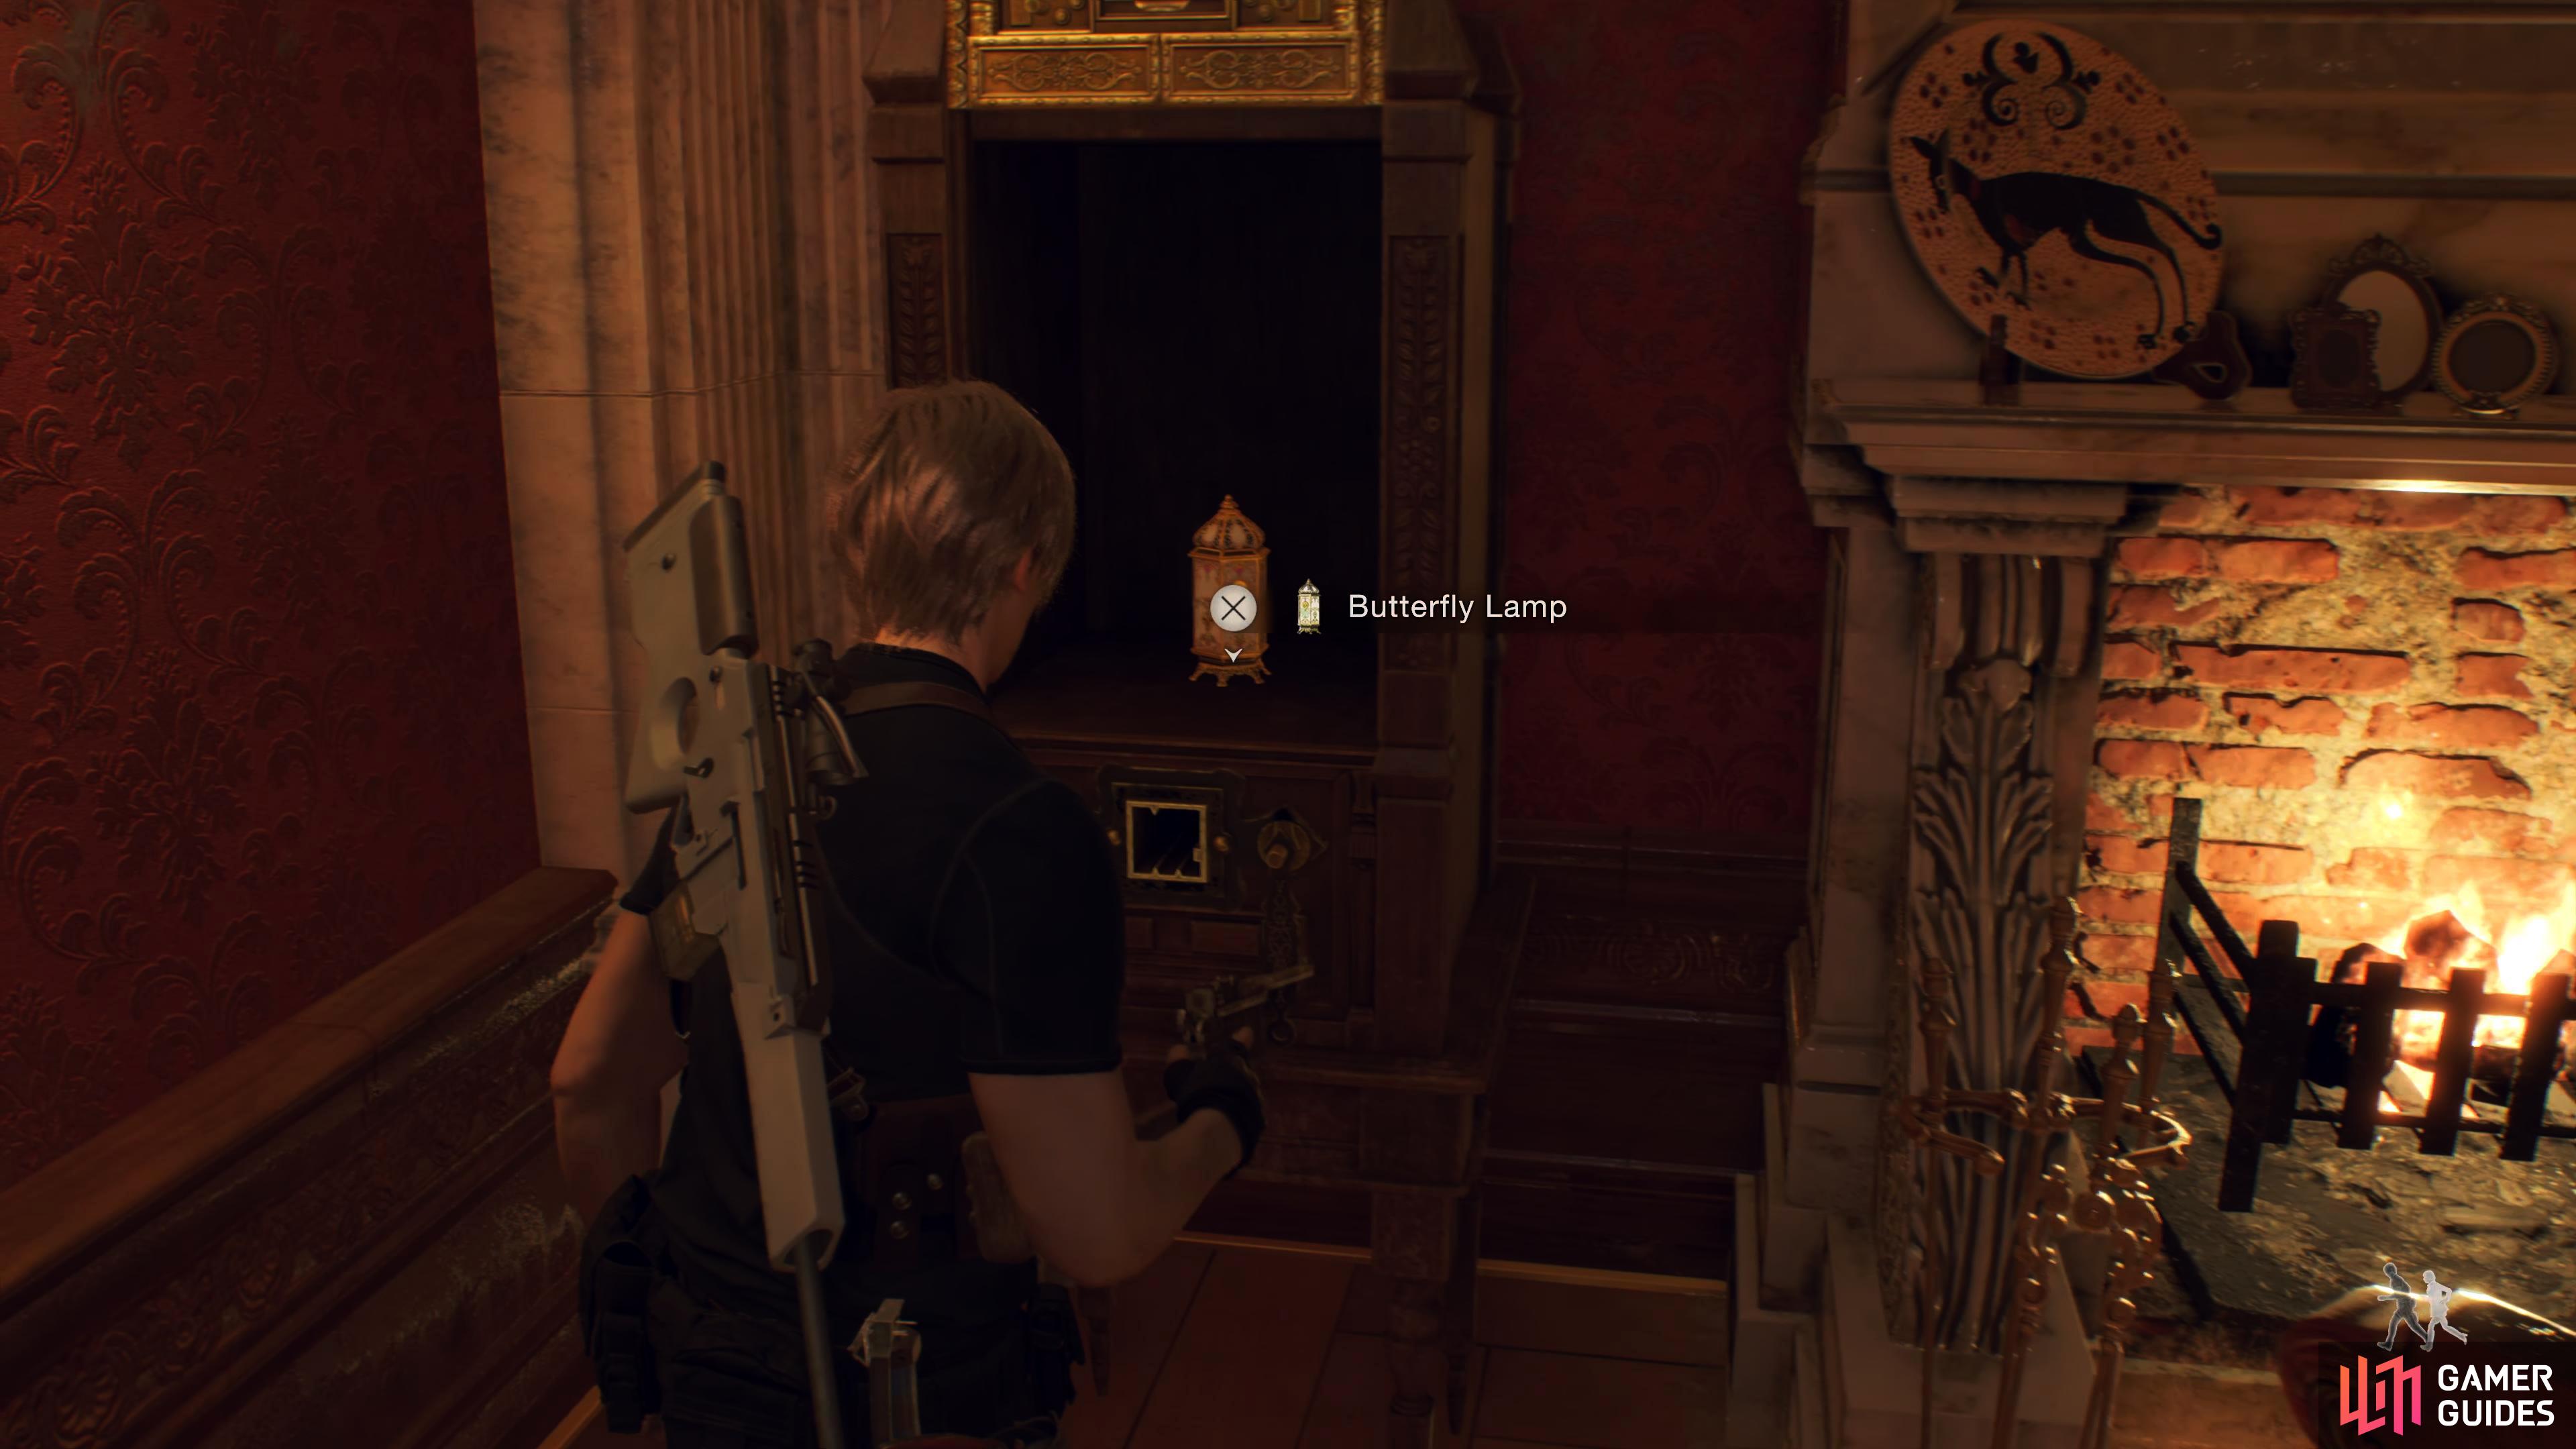
You’ll need the Cubic Device to unlock this treasure.
Treasure: 6 - Justitia Statue
Now that you have both the Small Key, and the Cubic Device, it’s time to do some backtracking. Head out the door in the Merchant room to find a golden Gondola. This will take you back near the Water Hall. Follow the hallway and unlock the door that leads to the typewriter. Continue heading back until you reach the Audience Chamber. There will be some enemies on the first floor, most noticeably, the Summoner. Pull out your Sniper, and take down the enemies from the balcony, and go down the ladder at the end. The Justitia Statue will be in the Square Lock Box behind you. Match up the Cubic Device with the hole, and collect your treasure.
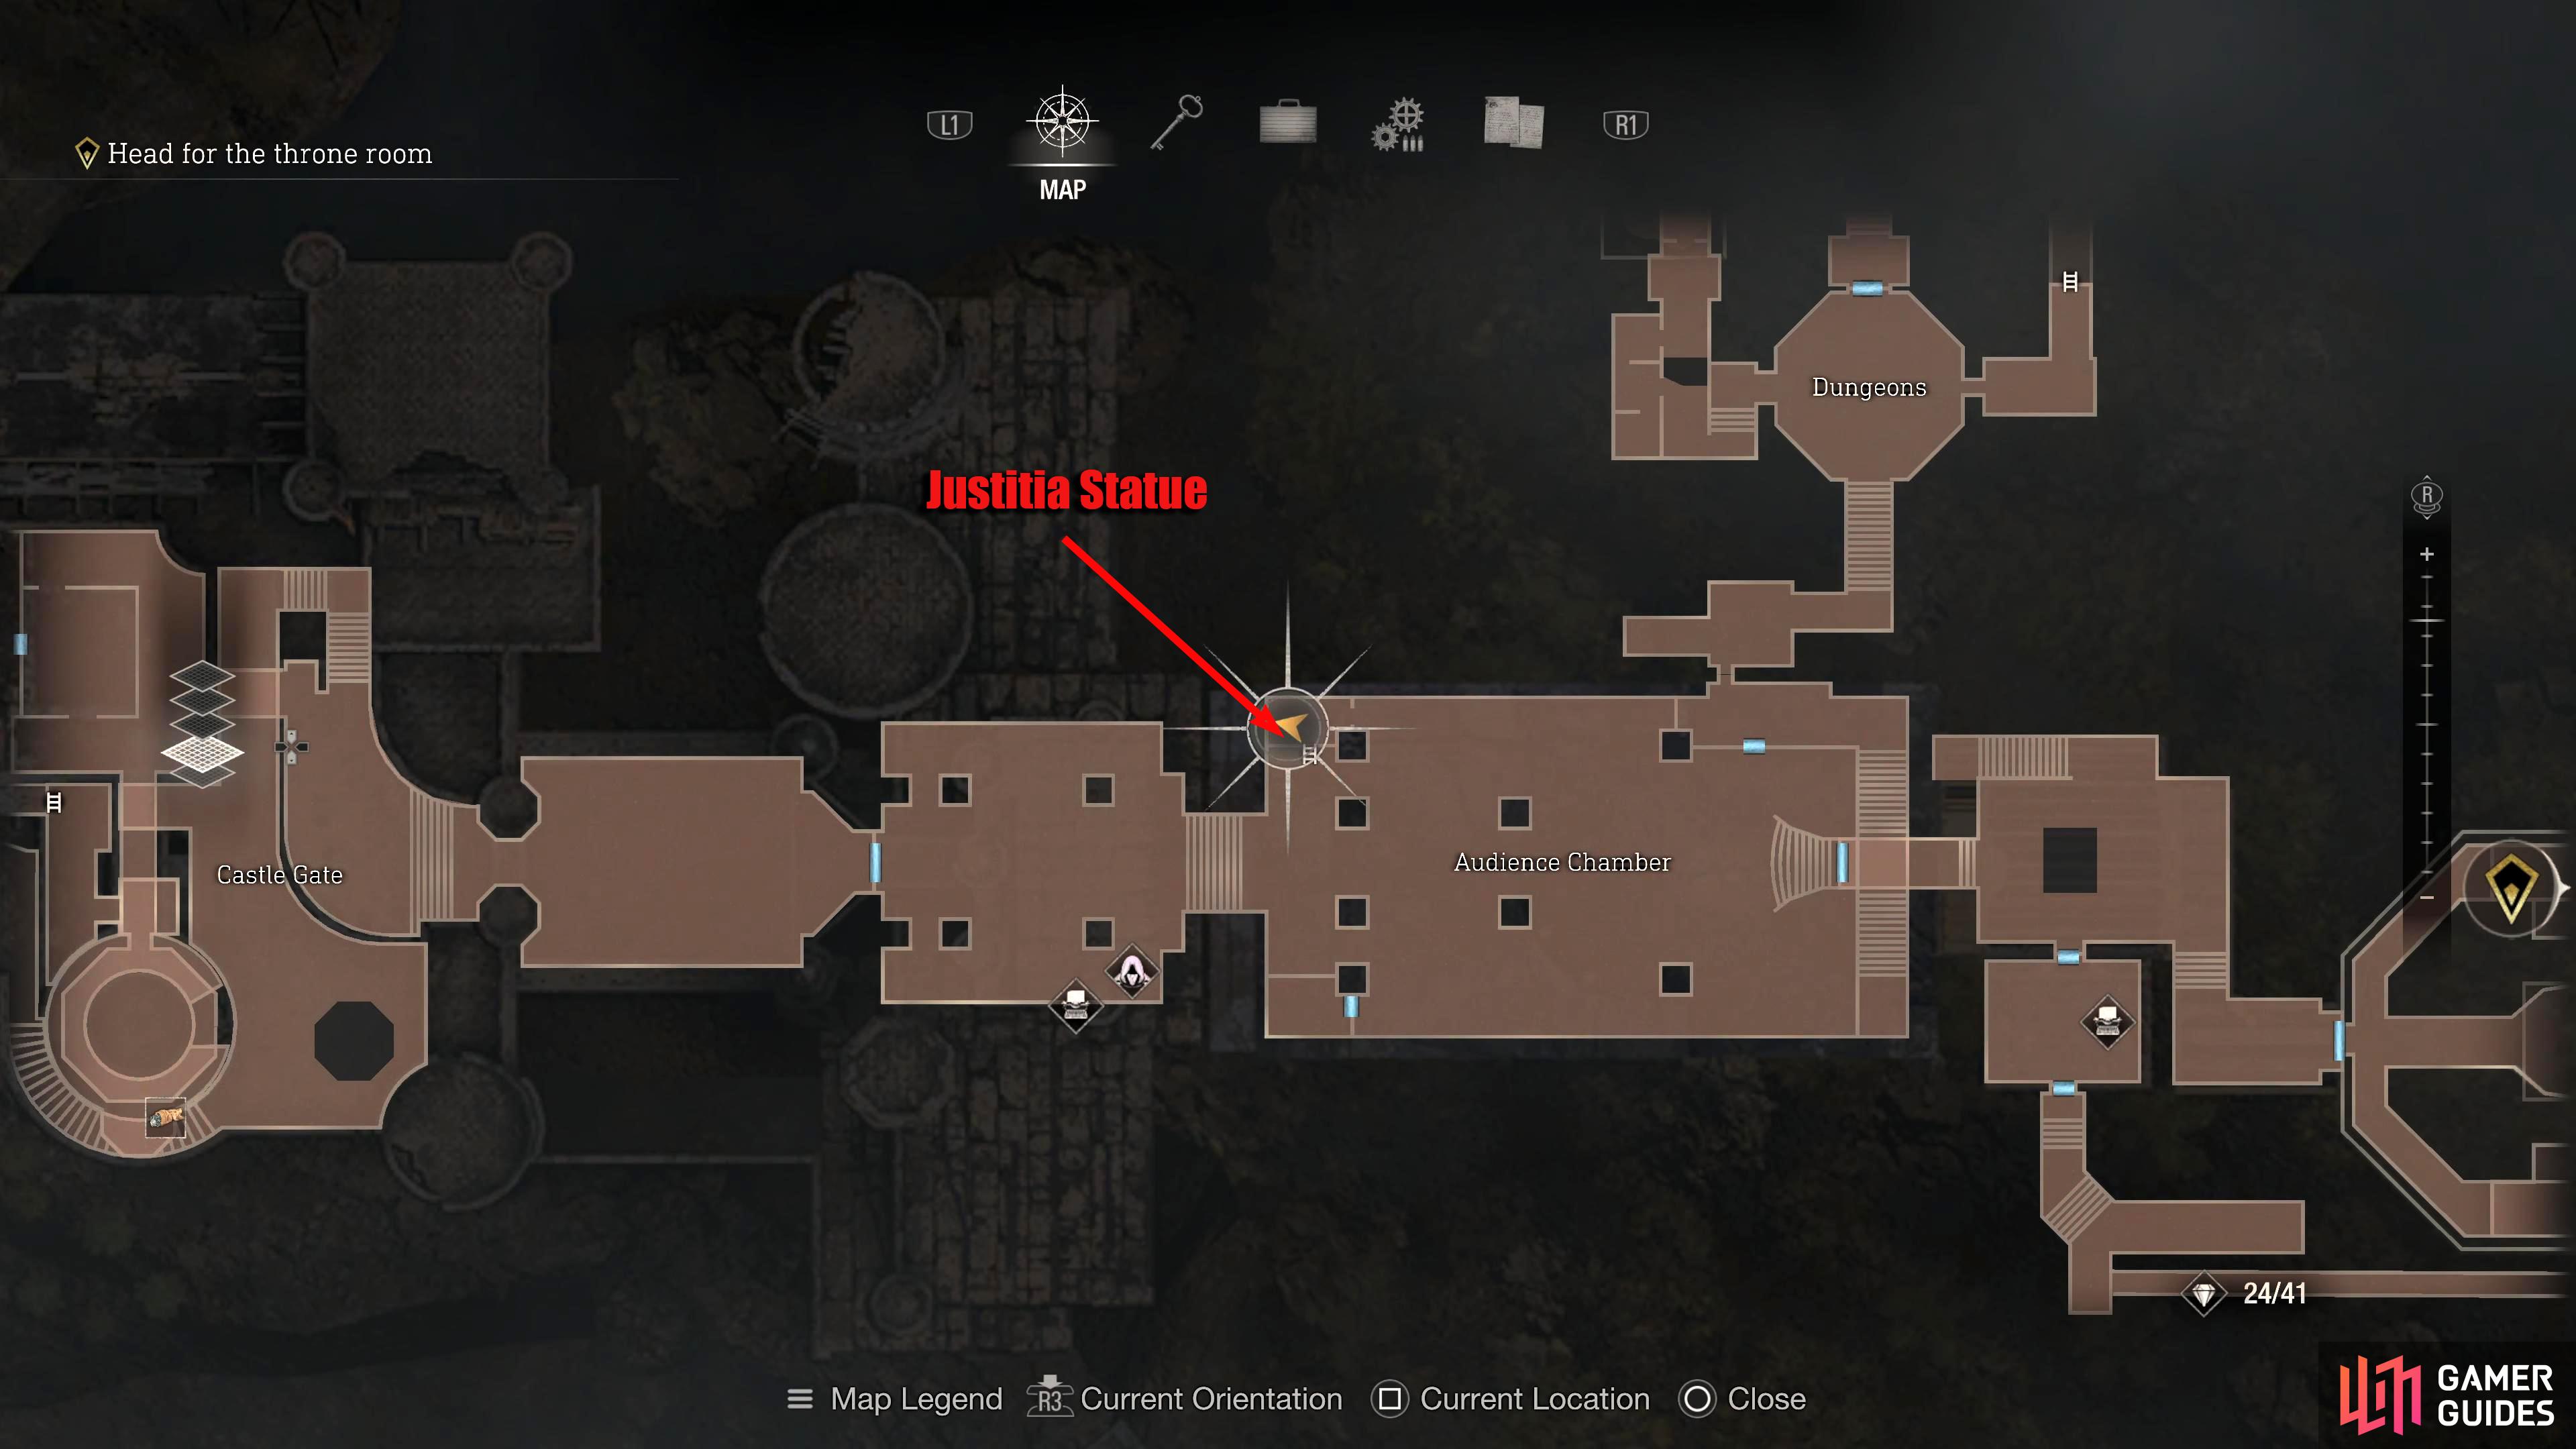
After collecting the Cubic Device, backtrack to the Audience Chamber.
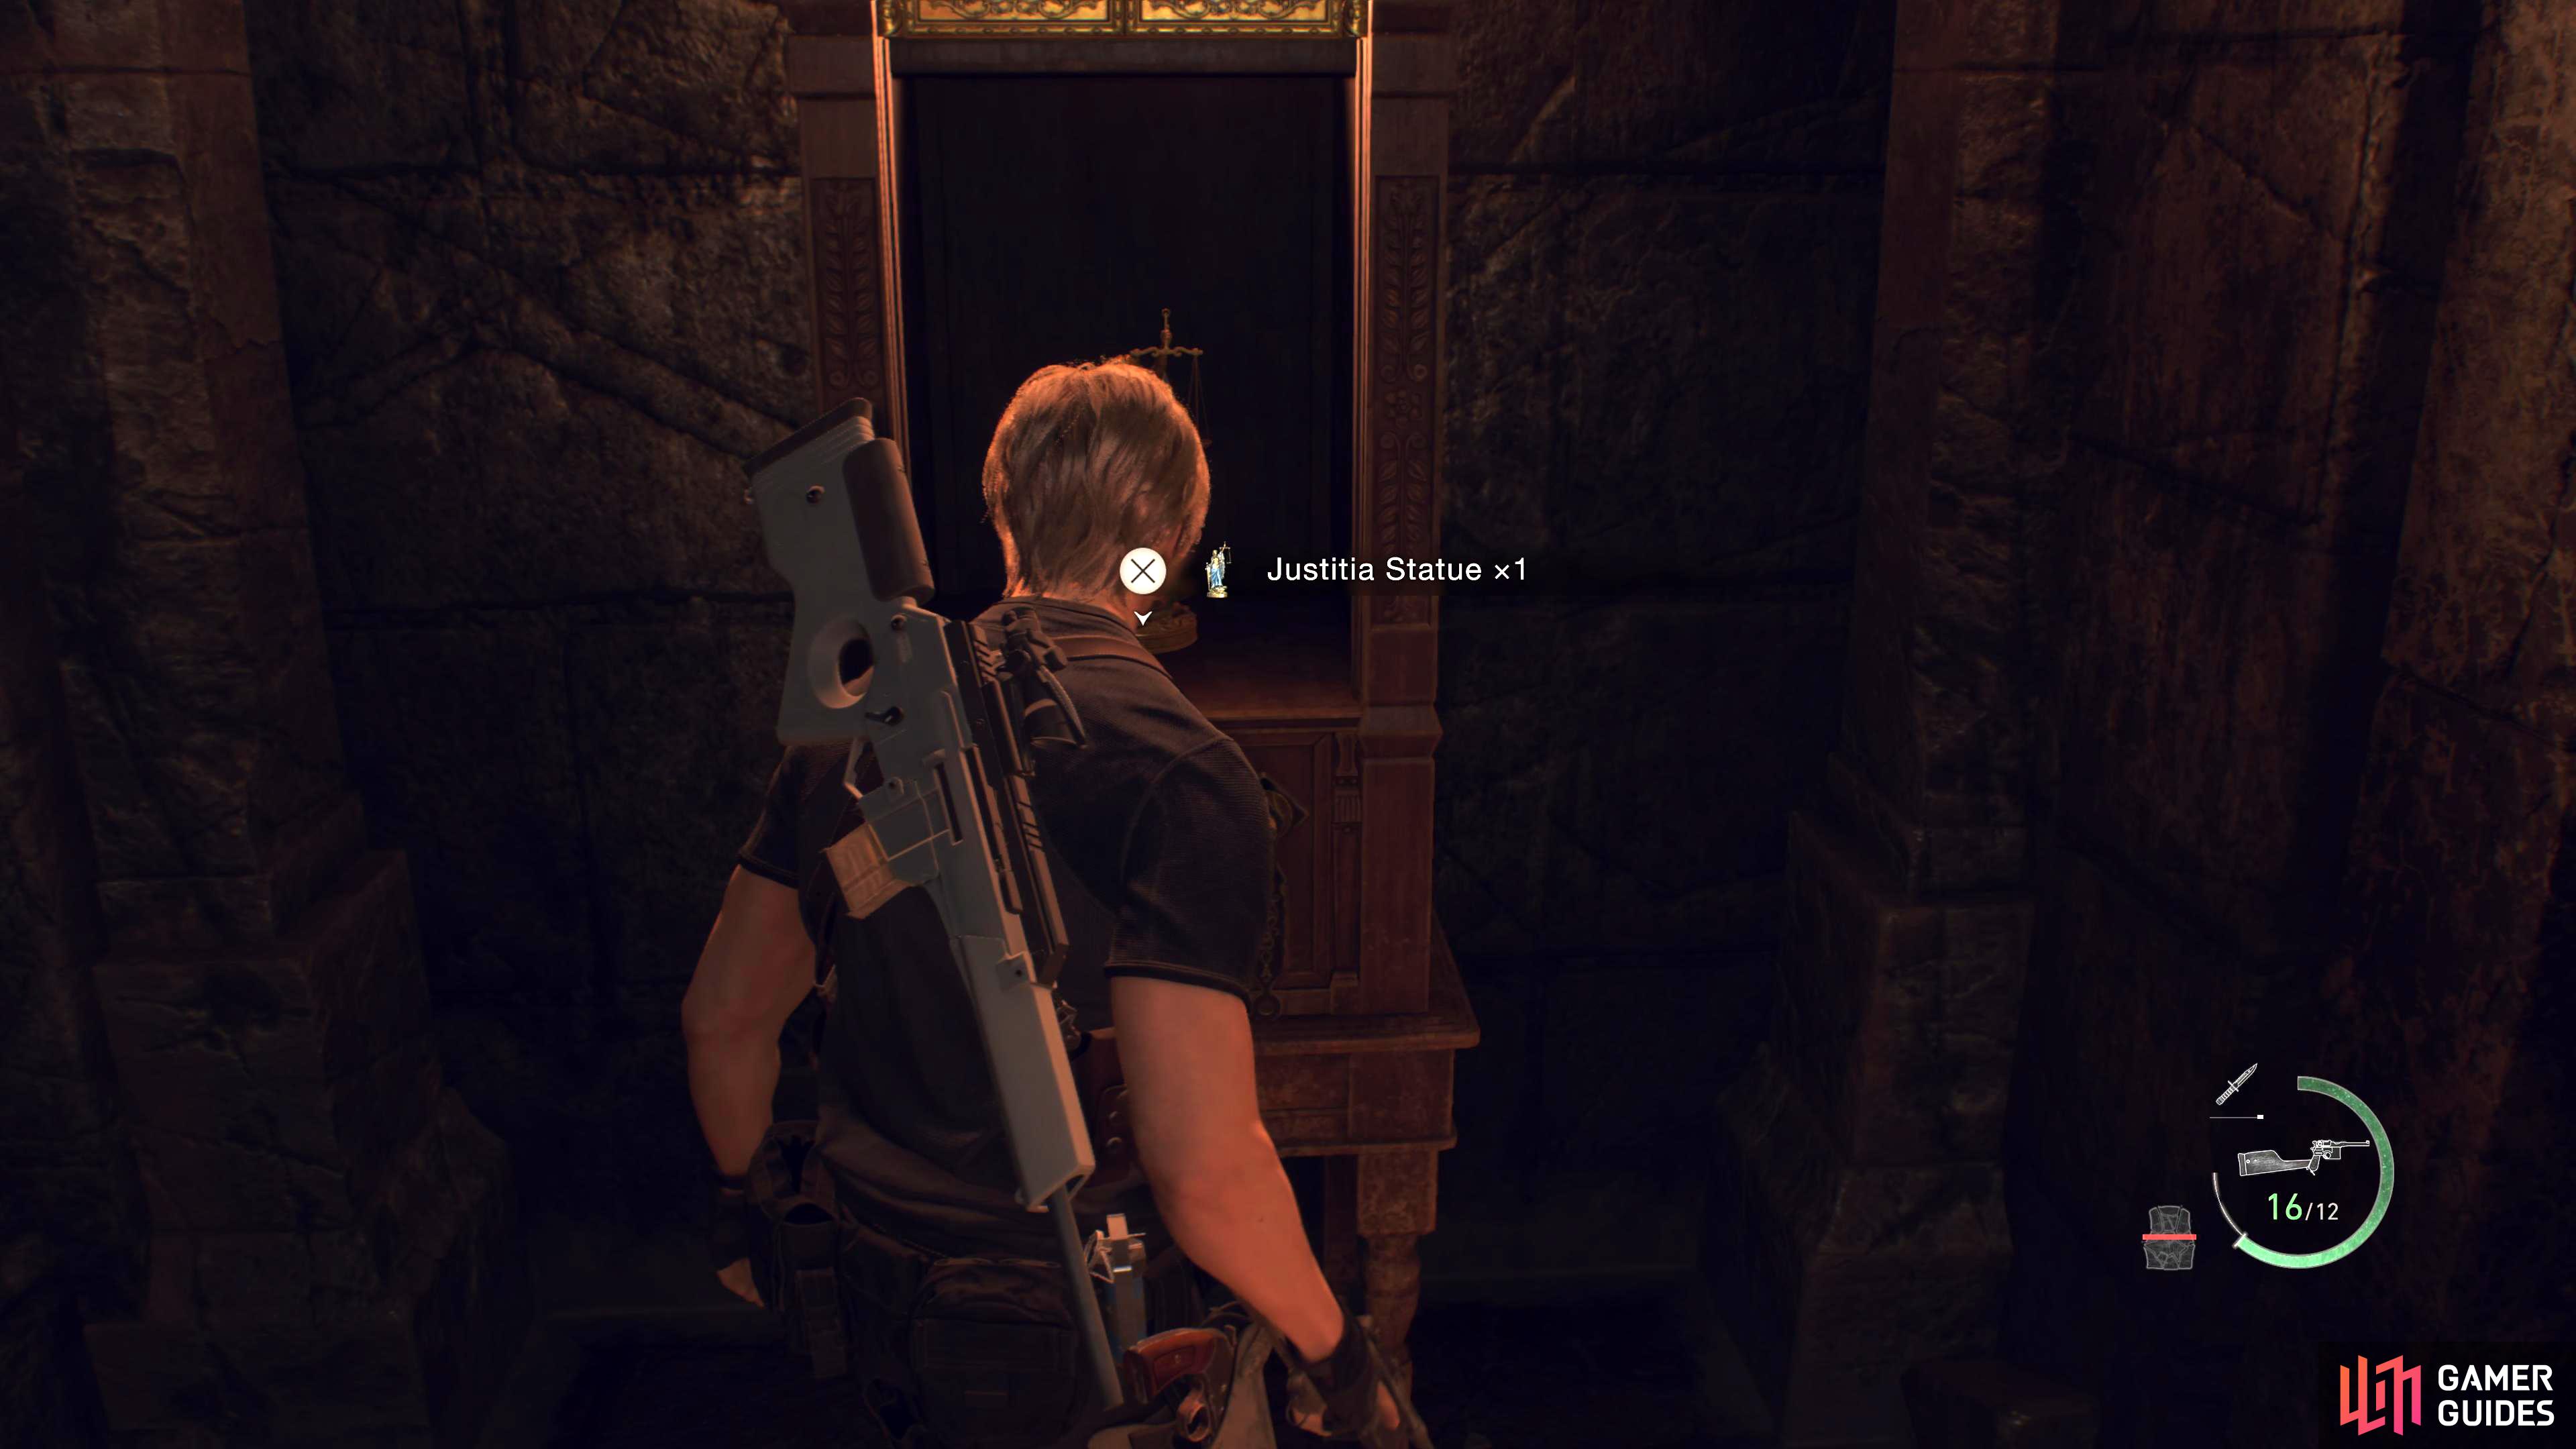
The Justitia Statue can be found within the Square Lock Box in the northeast corner on the bottom floor.
Treasure: 7 - Gold Bar
In the same room, on the same side. Walk north until you find a set of locked drawers on your left. Unlock it with the Small Key to obtain the Gold Bar. You may have gotten this earlier, if you had a spare Small Key.
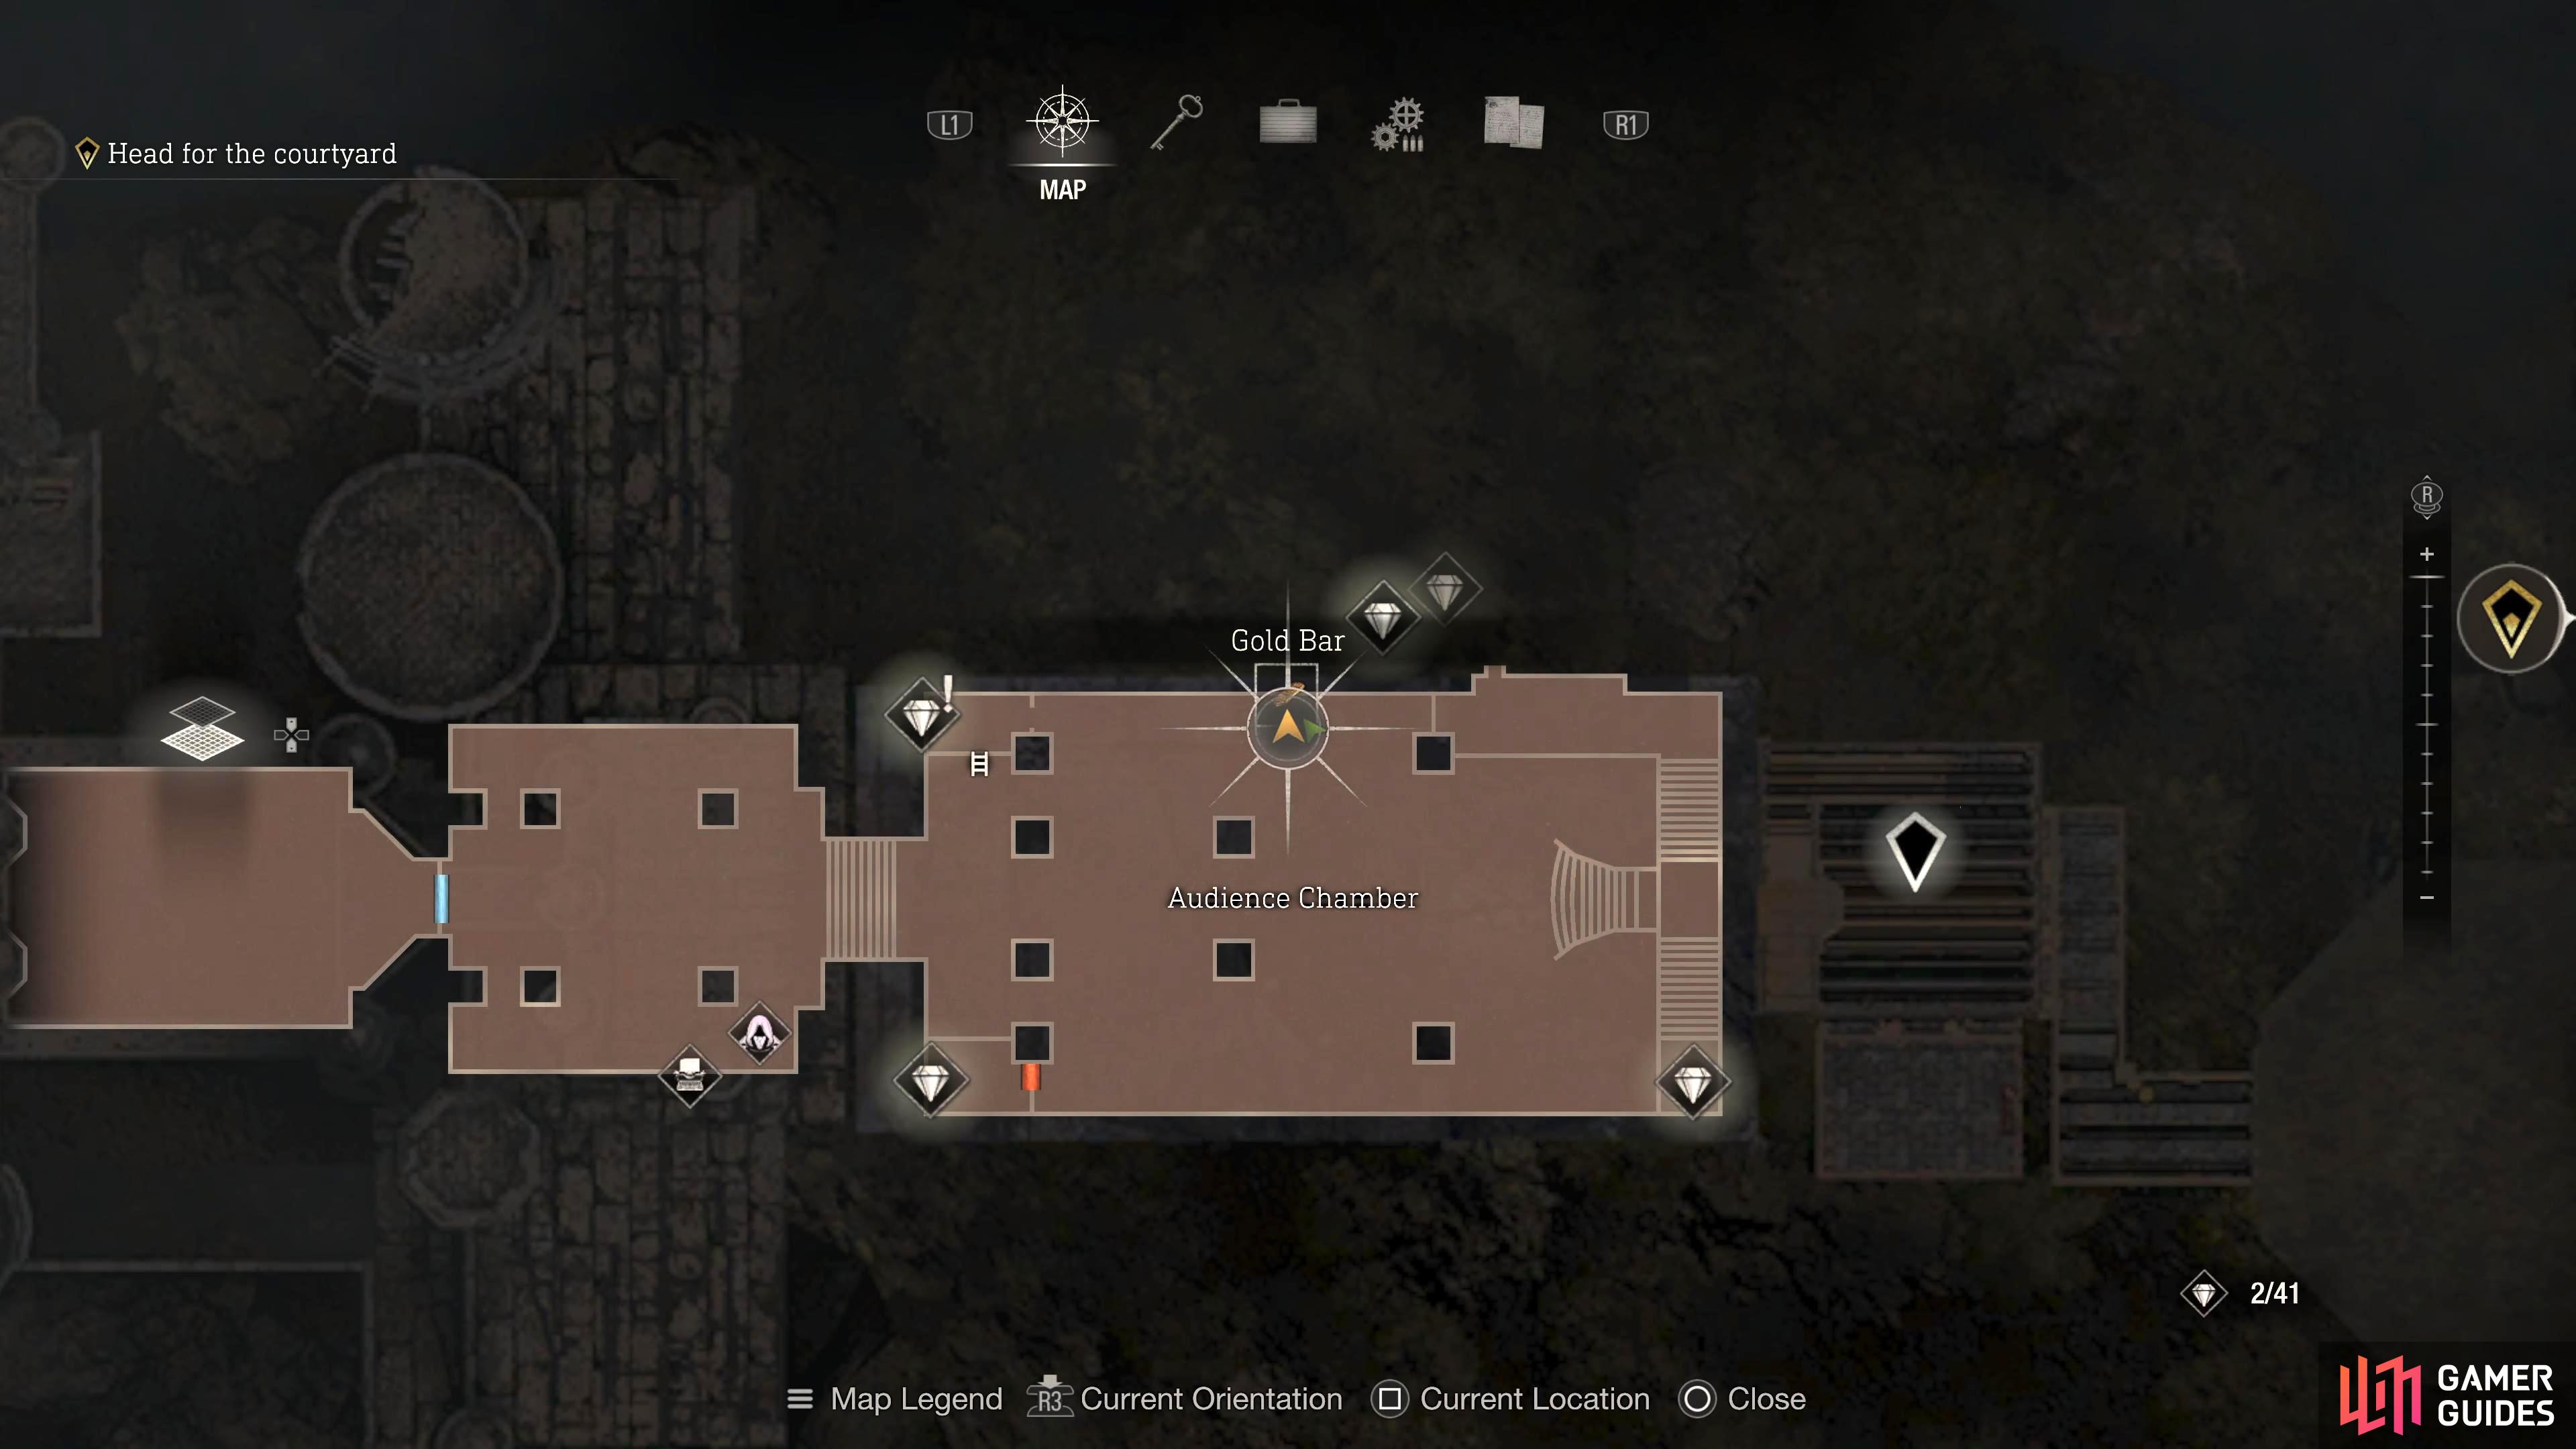
After collecting the Small Key, head back to the Audience Chamber.
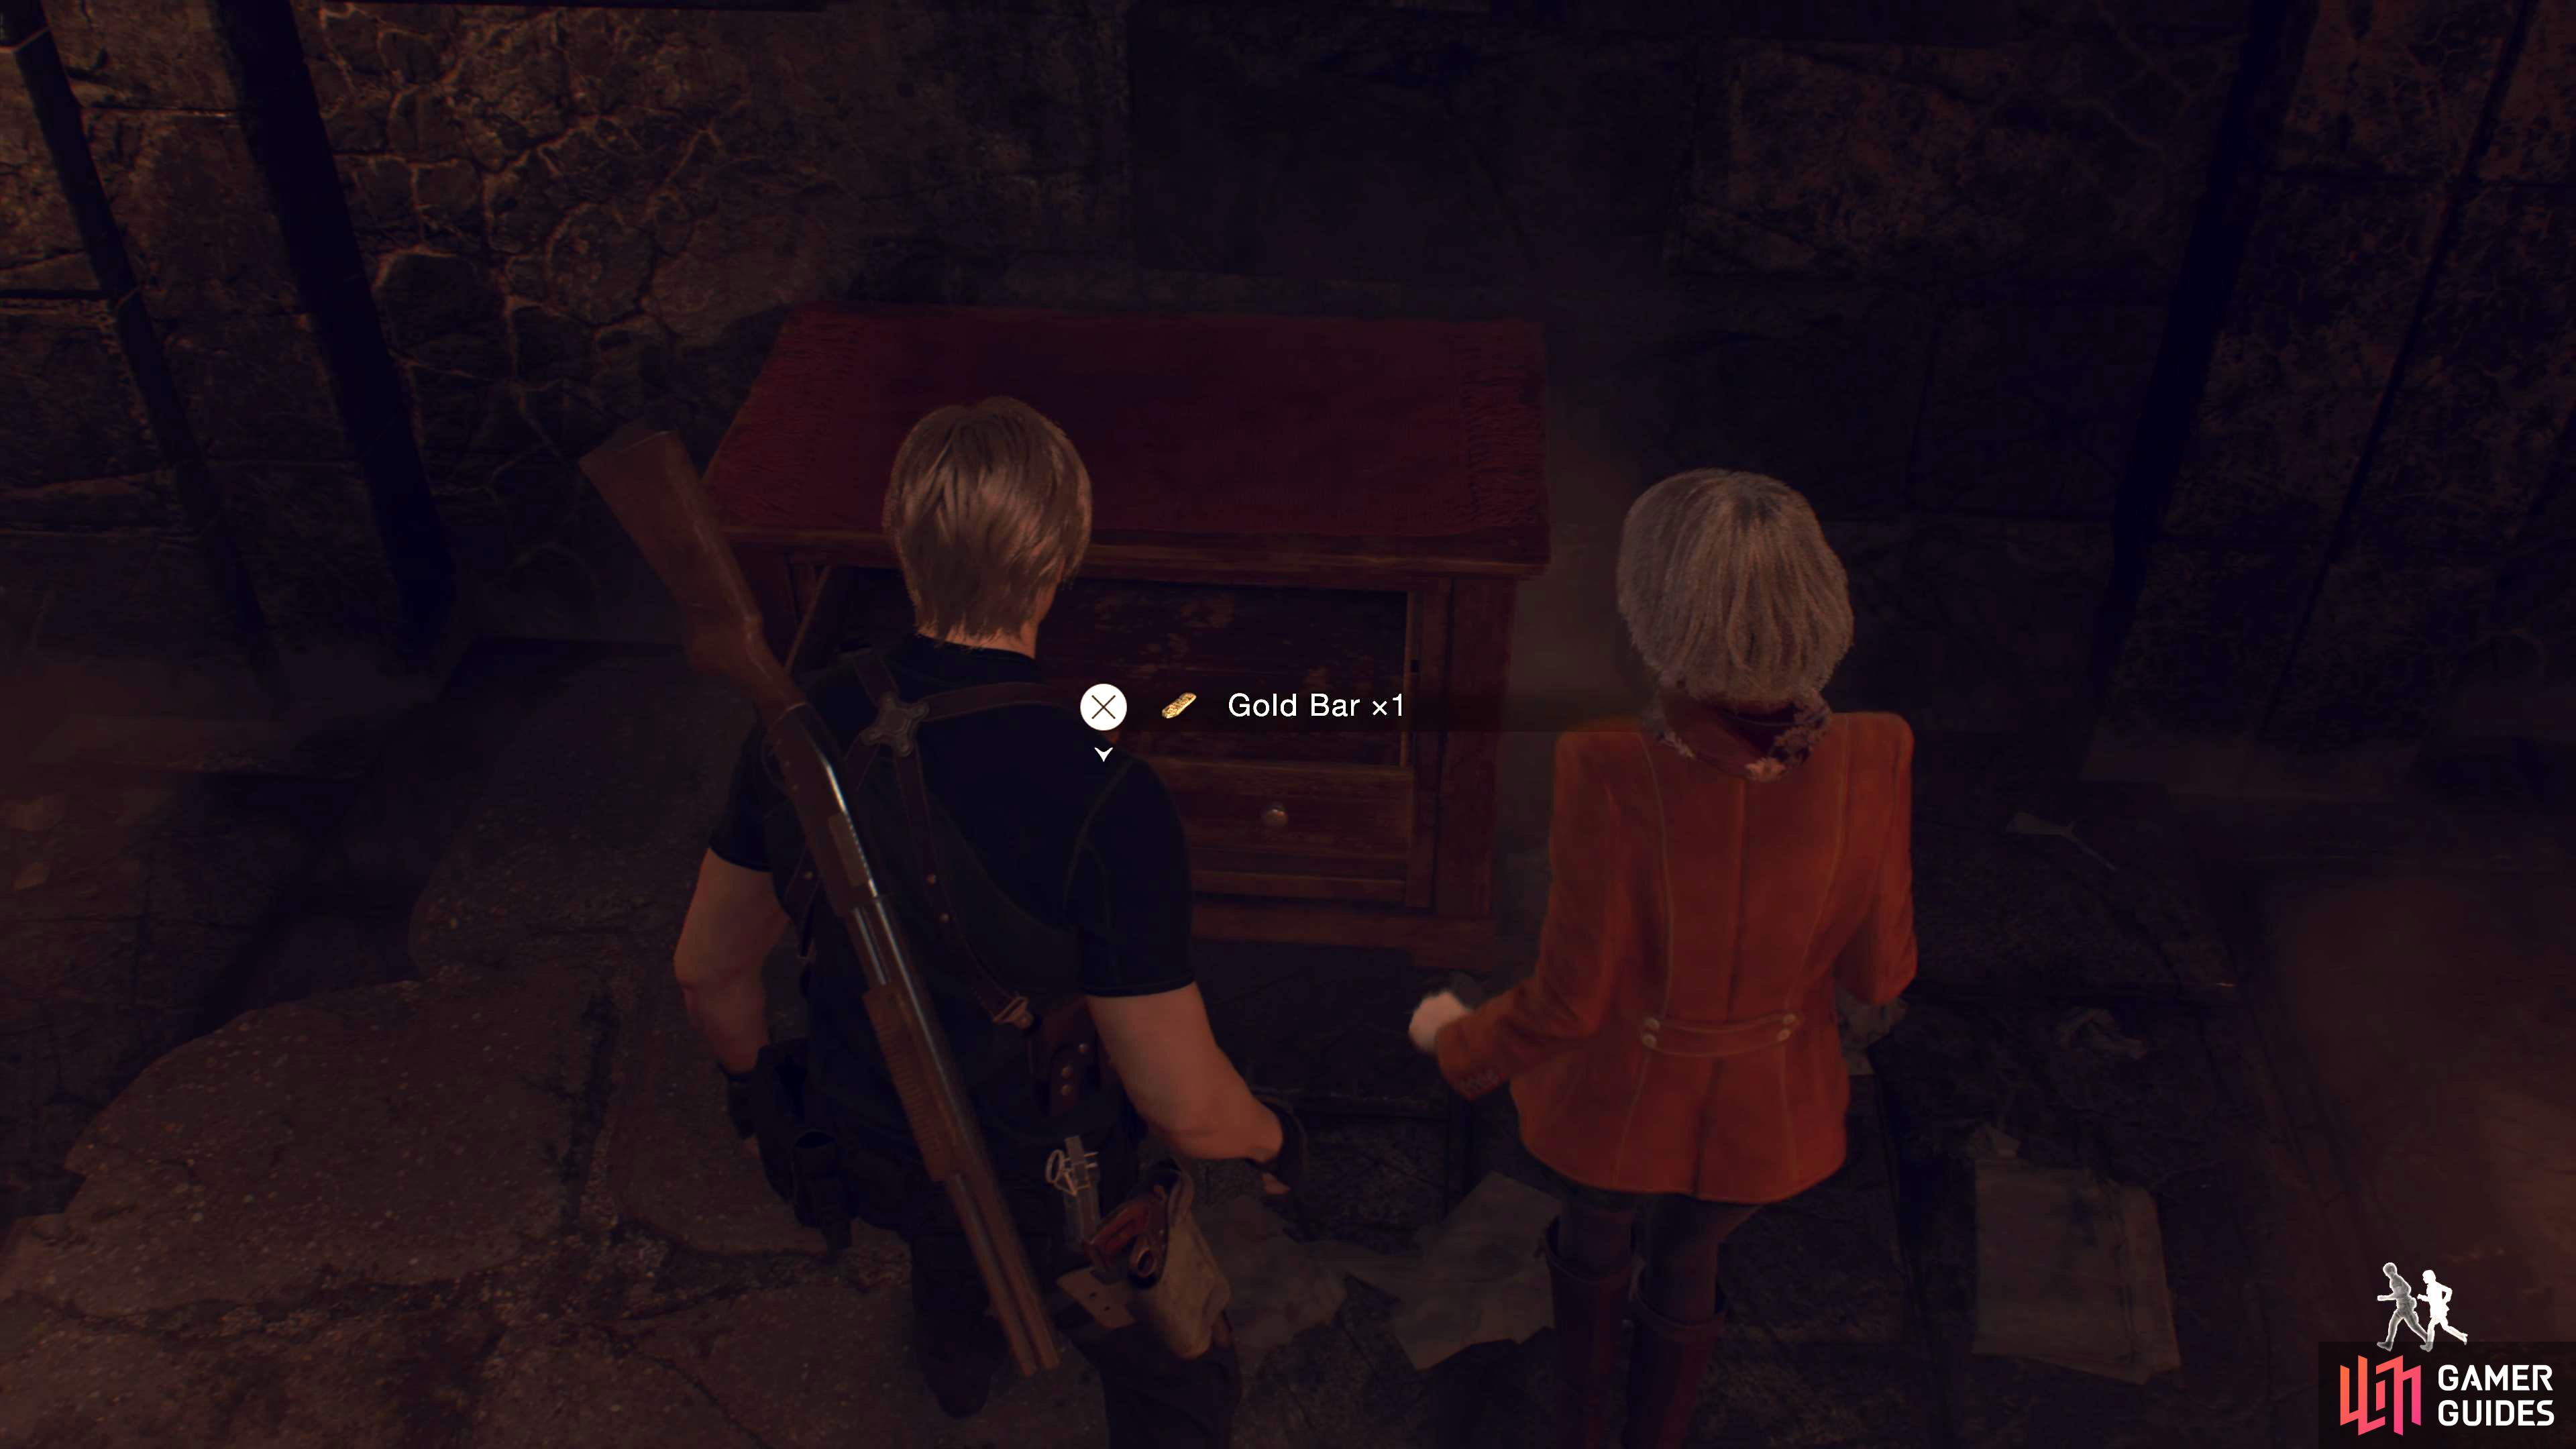
The Gold Bar will be in some locked drawers in the northern center of the room.
Treasure: 8 - Elegant Perfume Bottle
When you’re controlling Ashley, you’ll eventually find yourself in a library where two knight enemies will chase you around the area. Head right of the entryway and go around the long bookcase then turn right, and right again. Crouch under the bookcase to find a treasure chest containing the Elegant Perfume Bottle. This’ll require the second key to unlock it.
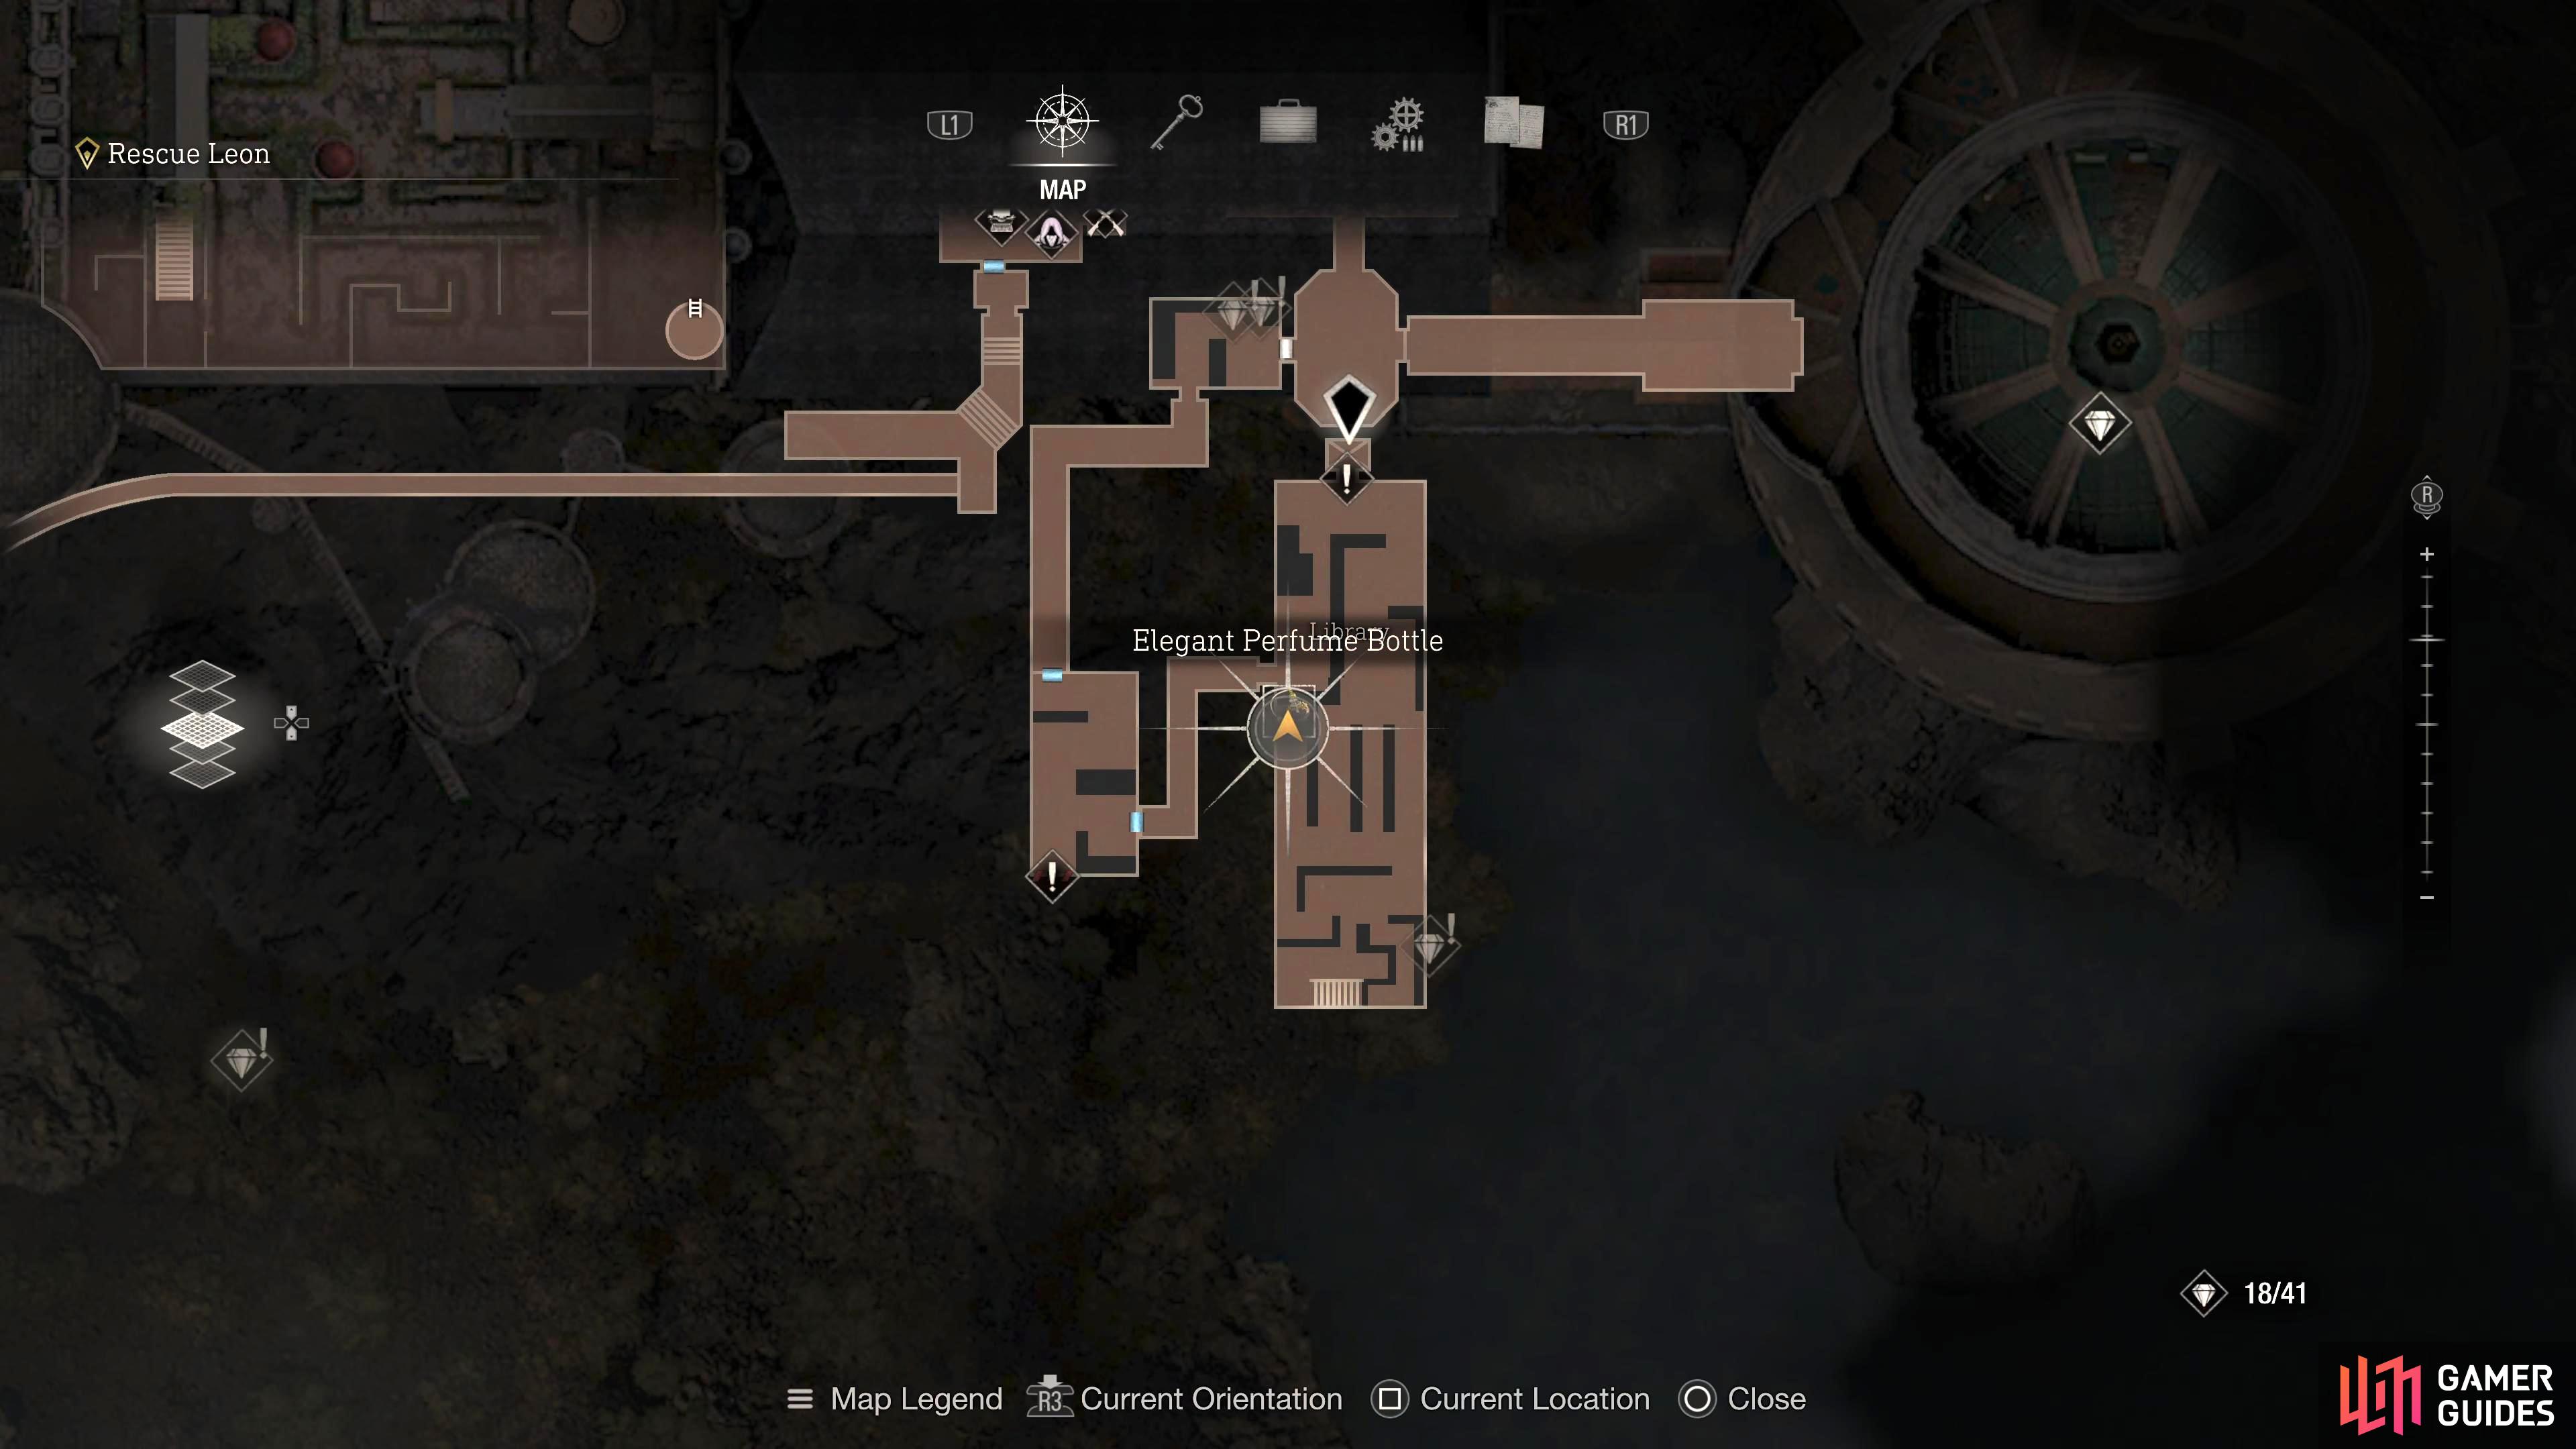
Head right when you enter the library and follow the long row of books.

Turn right again at the end, and follow it north, and crouch under the bookcase to find the Elegant Perfume Bottle in the chest.
Treasure: 9 - Sapphire
In the same room as the previous treasure head north, and use the third key to unlock the elevator. Head to the next floor, save your game, and unlock the chest on the right side of the room. This will require the fourth key to open it.
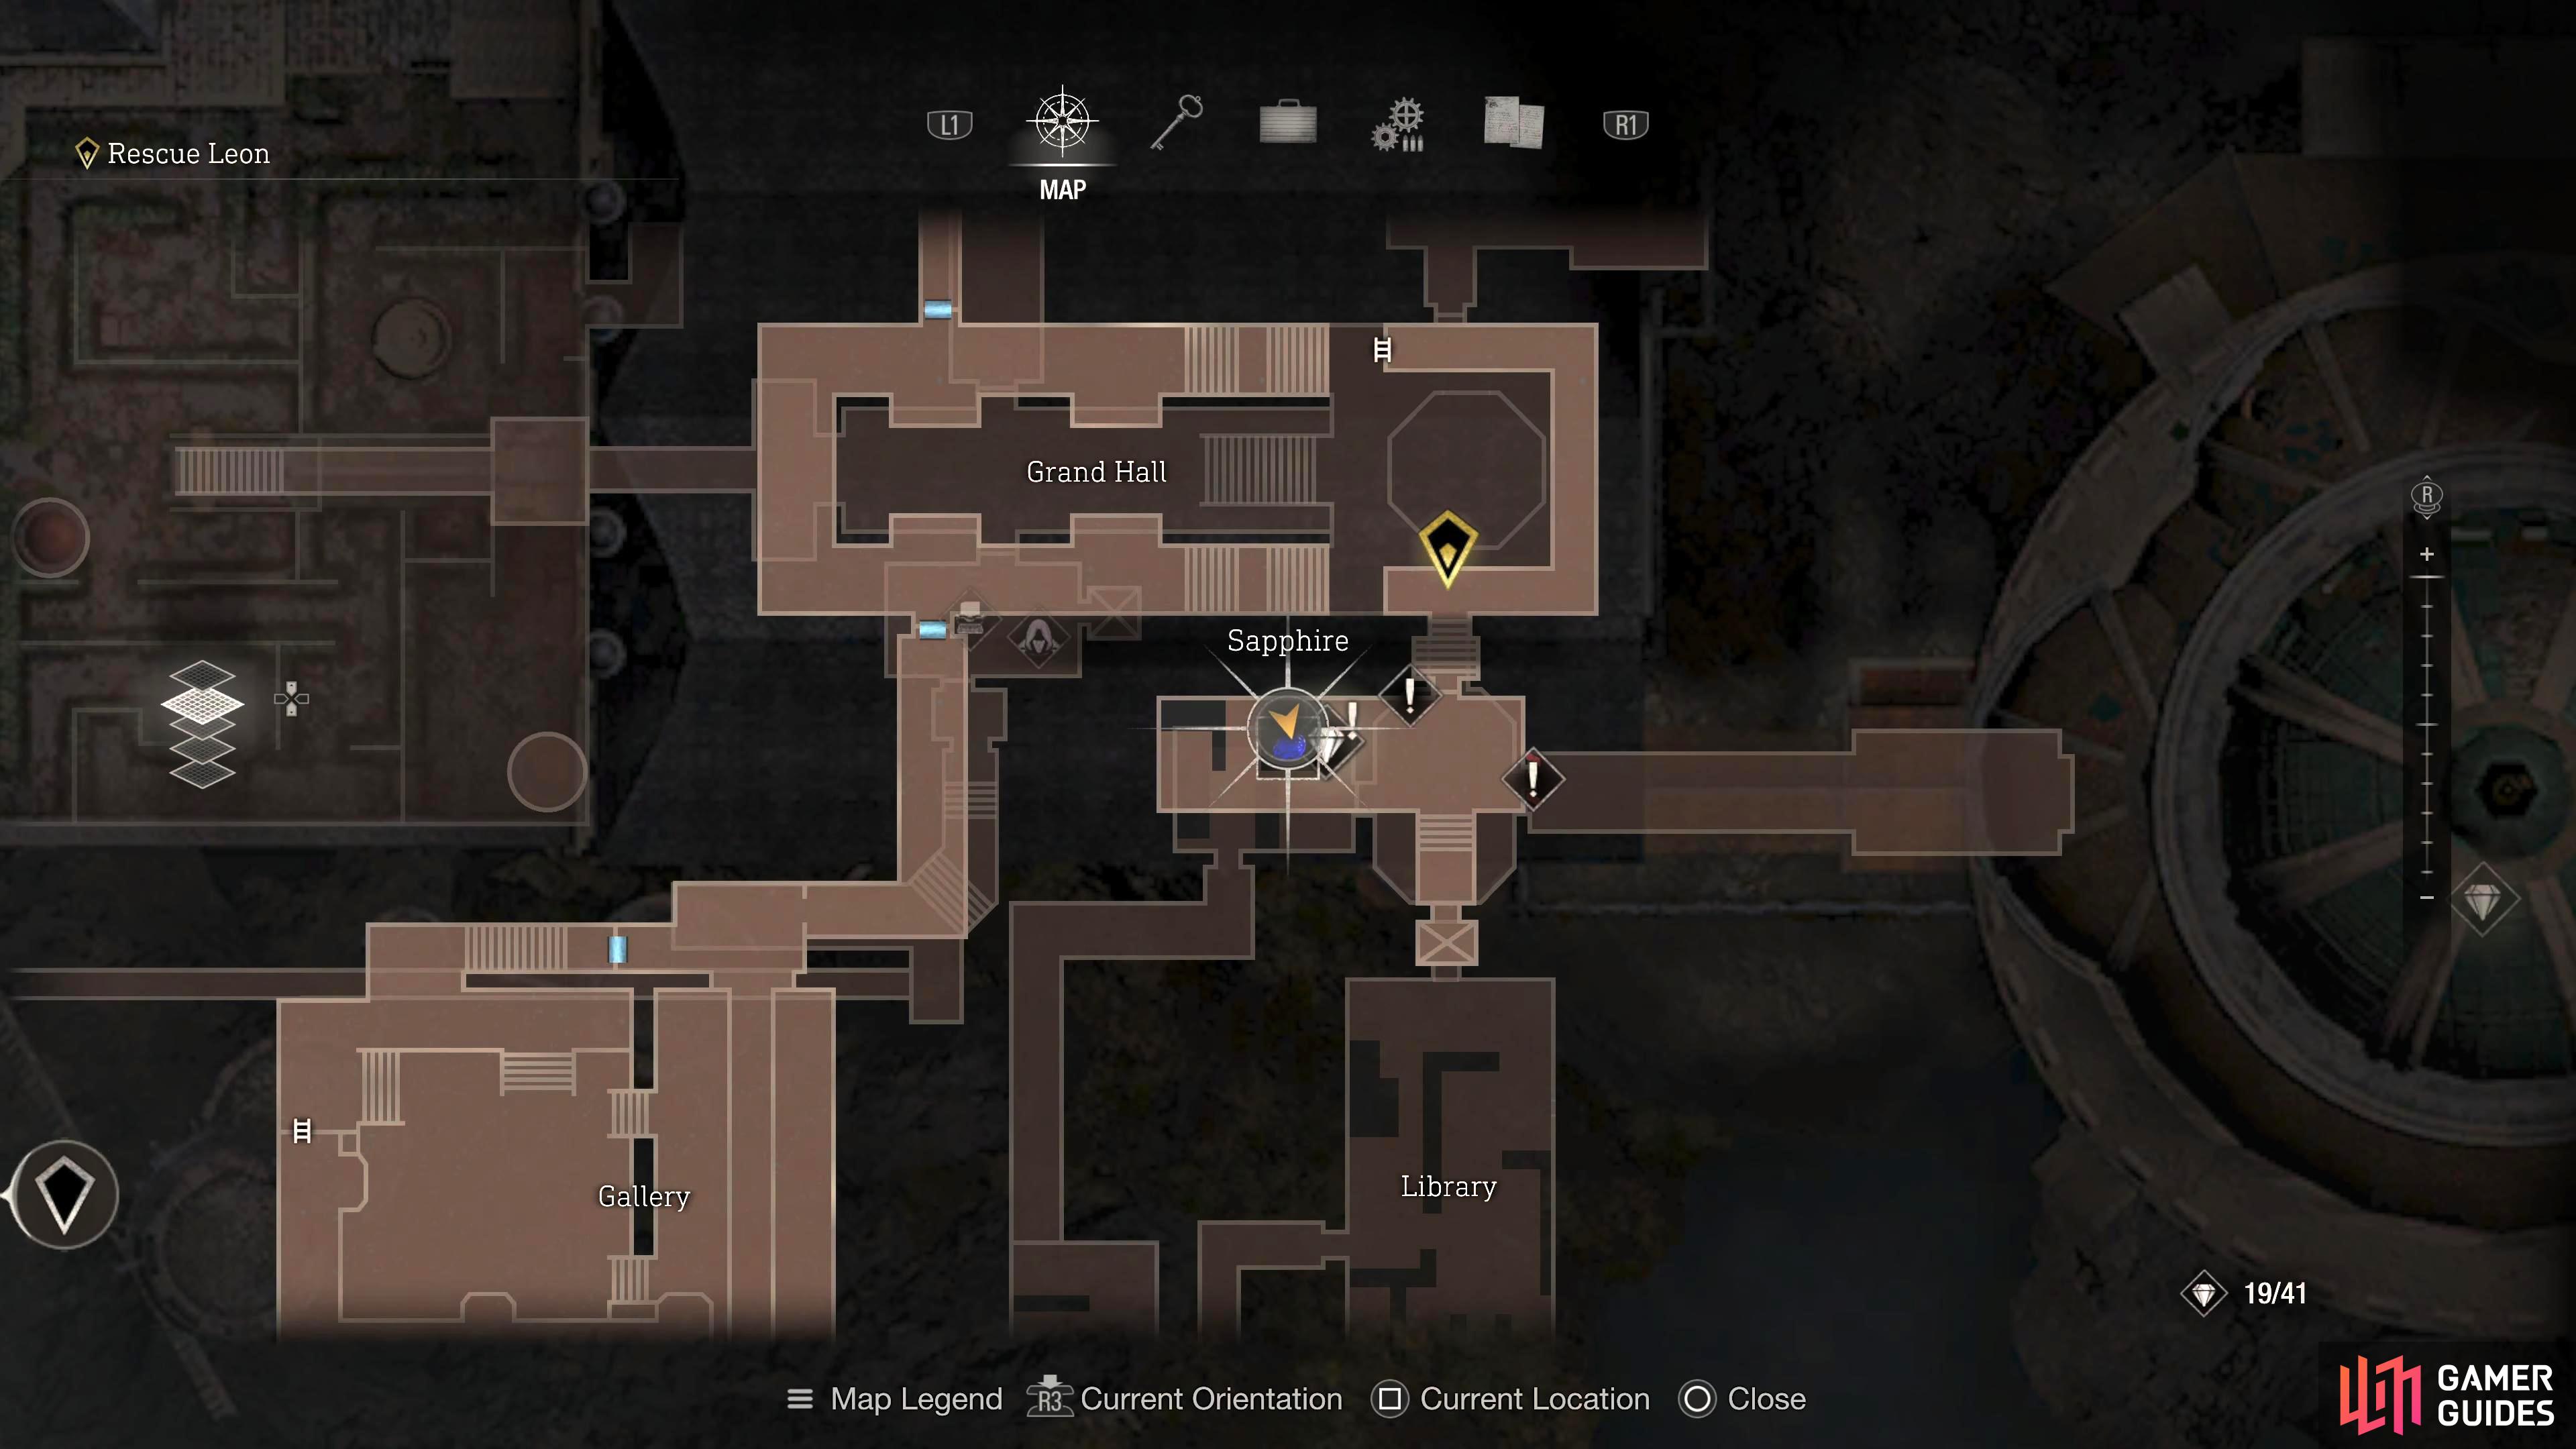
Head up the elevator in the library to head to the next floor.

The chest containing the Sapphire can be found on the right side of the room.
Treasure: 10 - Emerald
In the same room, next to the typewriter, you’ll find a clock. Enter the correct time which is 11:04 on any difficulty other than Professional which is 7:00. The note for this answer is on a table in the same room, near the Sapphire treasure. Head down the stairs, freeze the incoming knight with the lantern, and run past it. Quickly open up the wall with the nearby crank to enter the library again.
Make your way back to the room where you first entered the library, and follow the hallway to the next room, and turn left to find the second clock. Input the same time again (11:04/7:00) and follow it to another elevator which leads to the Mausoleum.
This room is a large room full of knight enemies, and your goal is to pull four strings connected to some symbols to open the door. There are two on the left side of the room, and two on the right. If a knight gets close, freeze them with your lantern. Once the door is unlocked, continue through the door. The blue torches in here will freeze the previous knights permanently. In this room, walk forward, and turn right to go around the wooden folding screen to find the chest. This will require the first key.
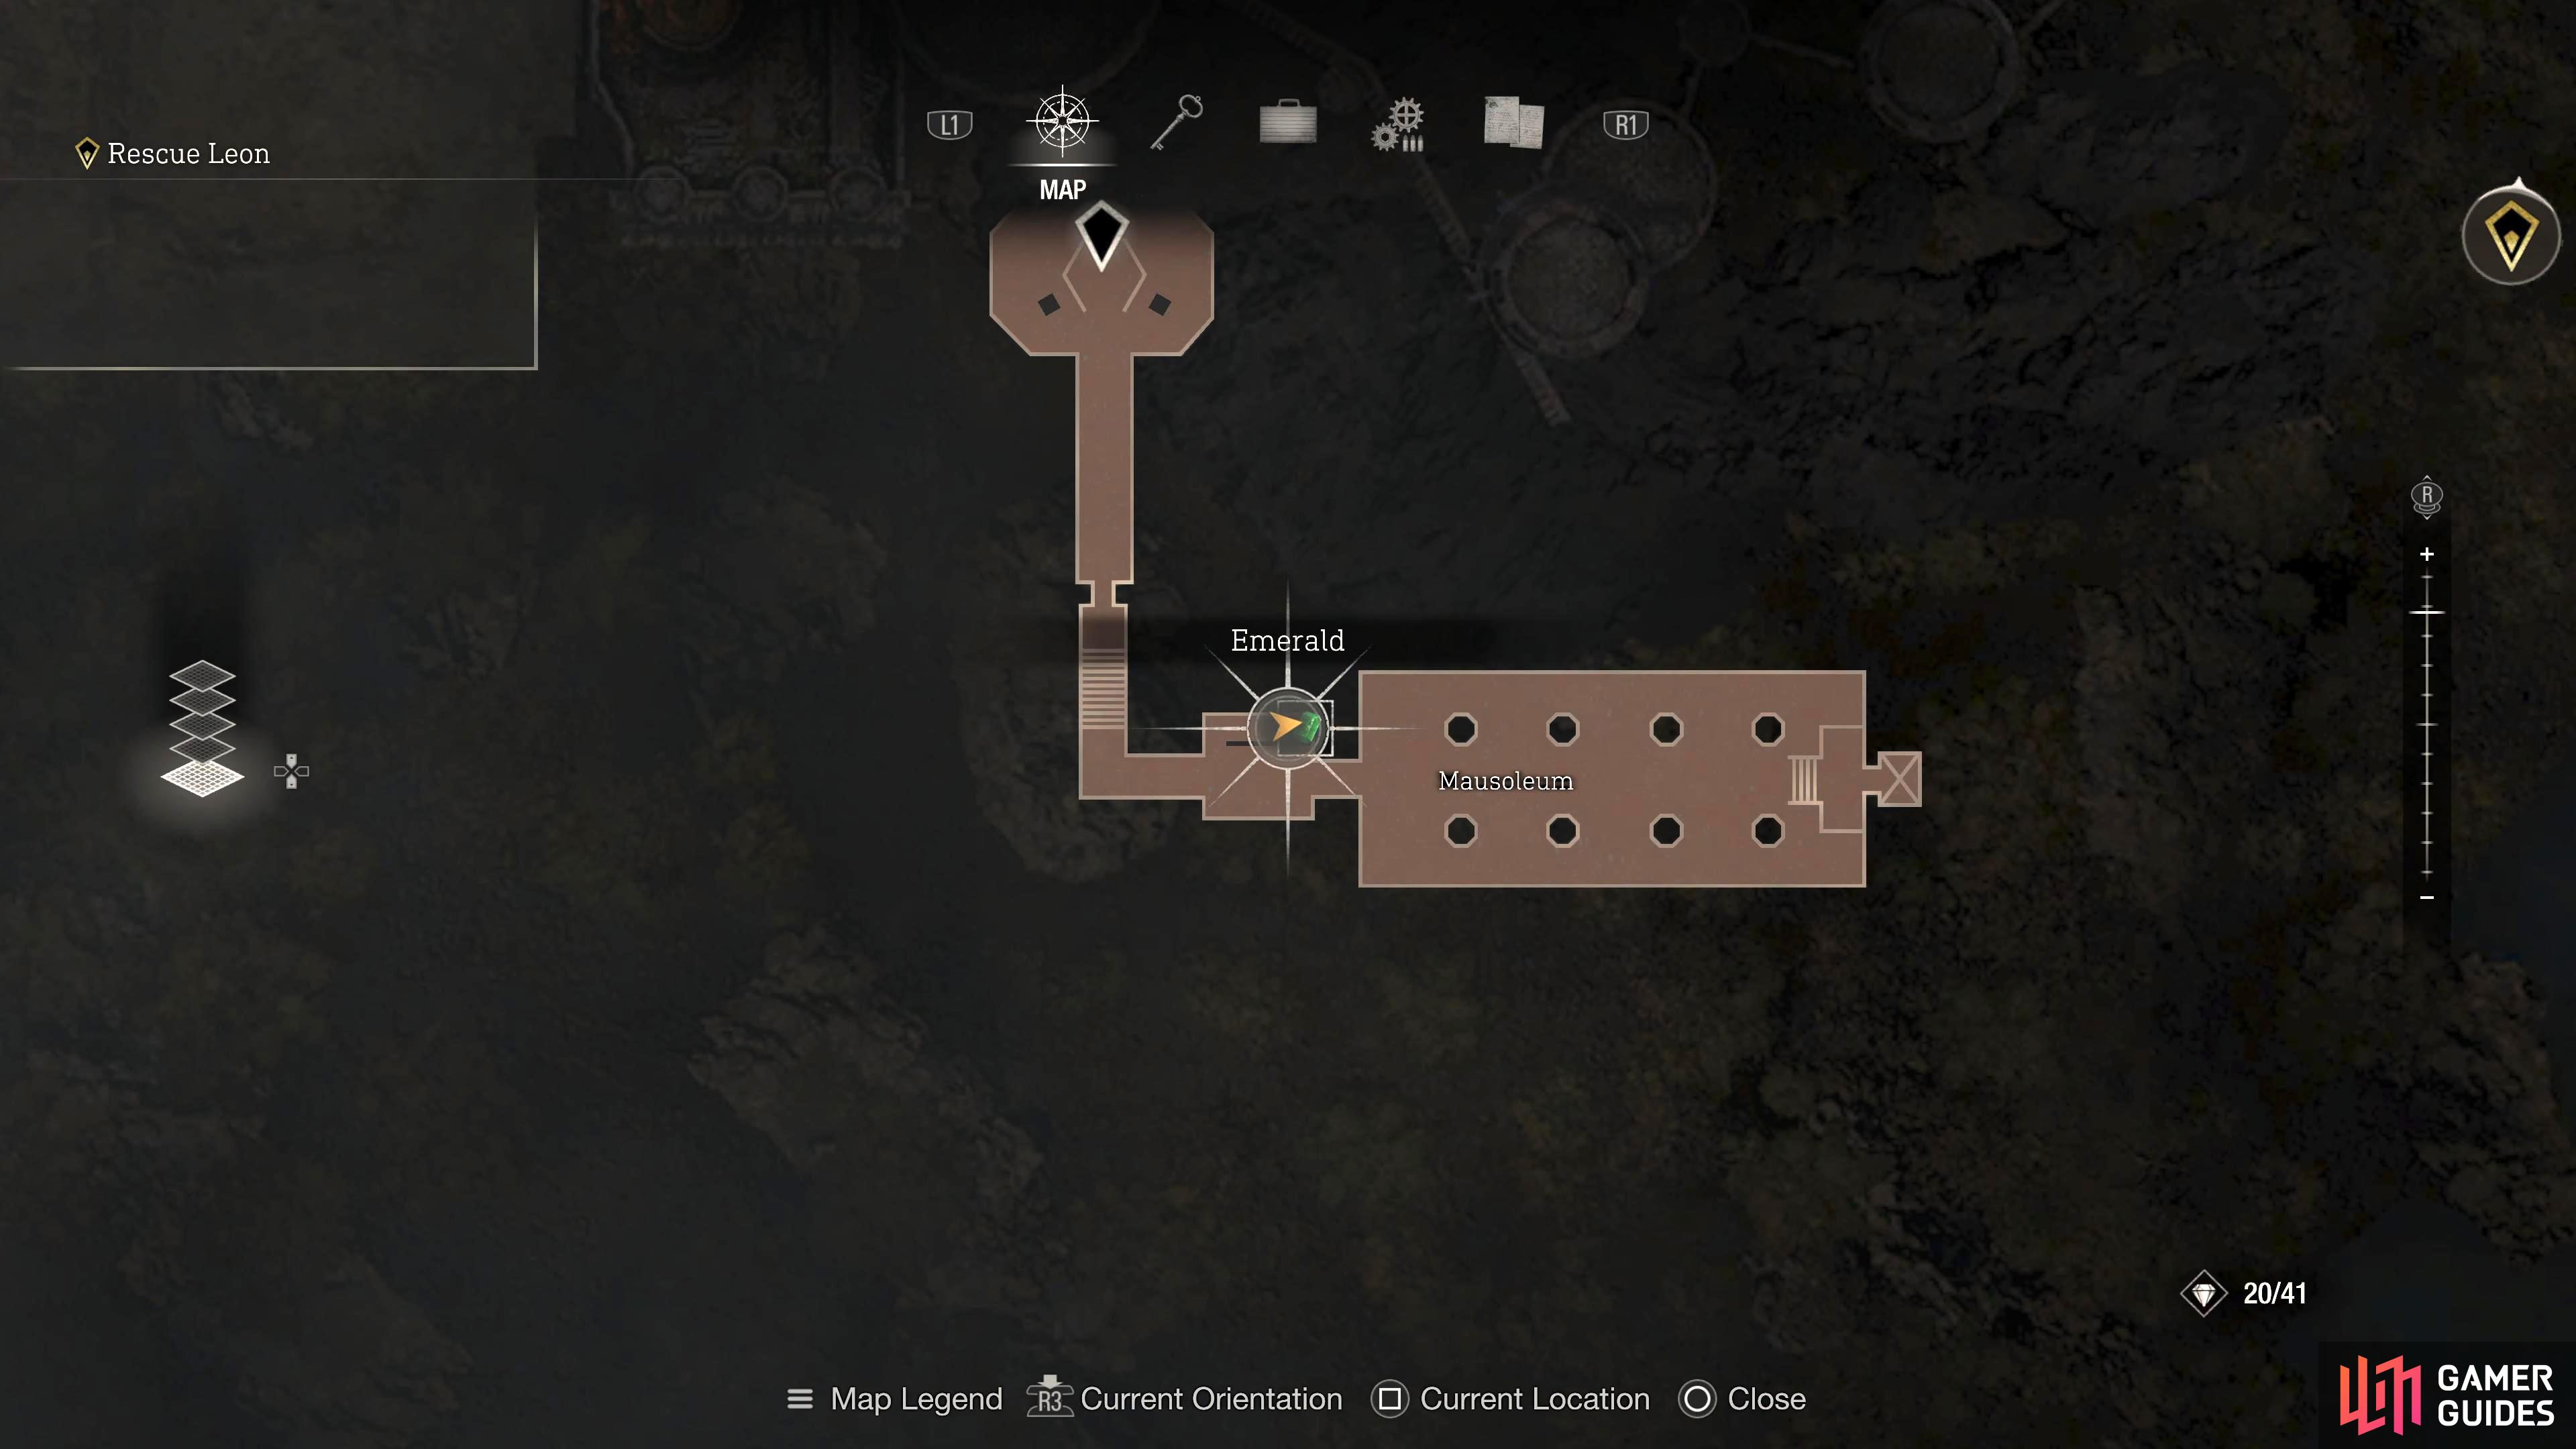
Head through the western door in the Mausoleum by pulling the four strings.
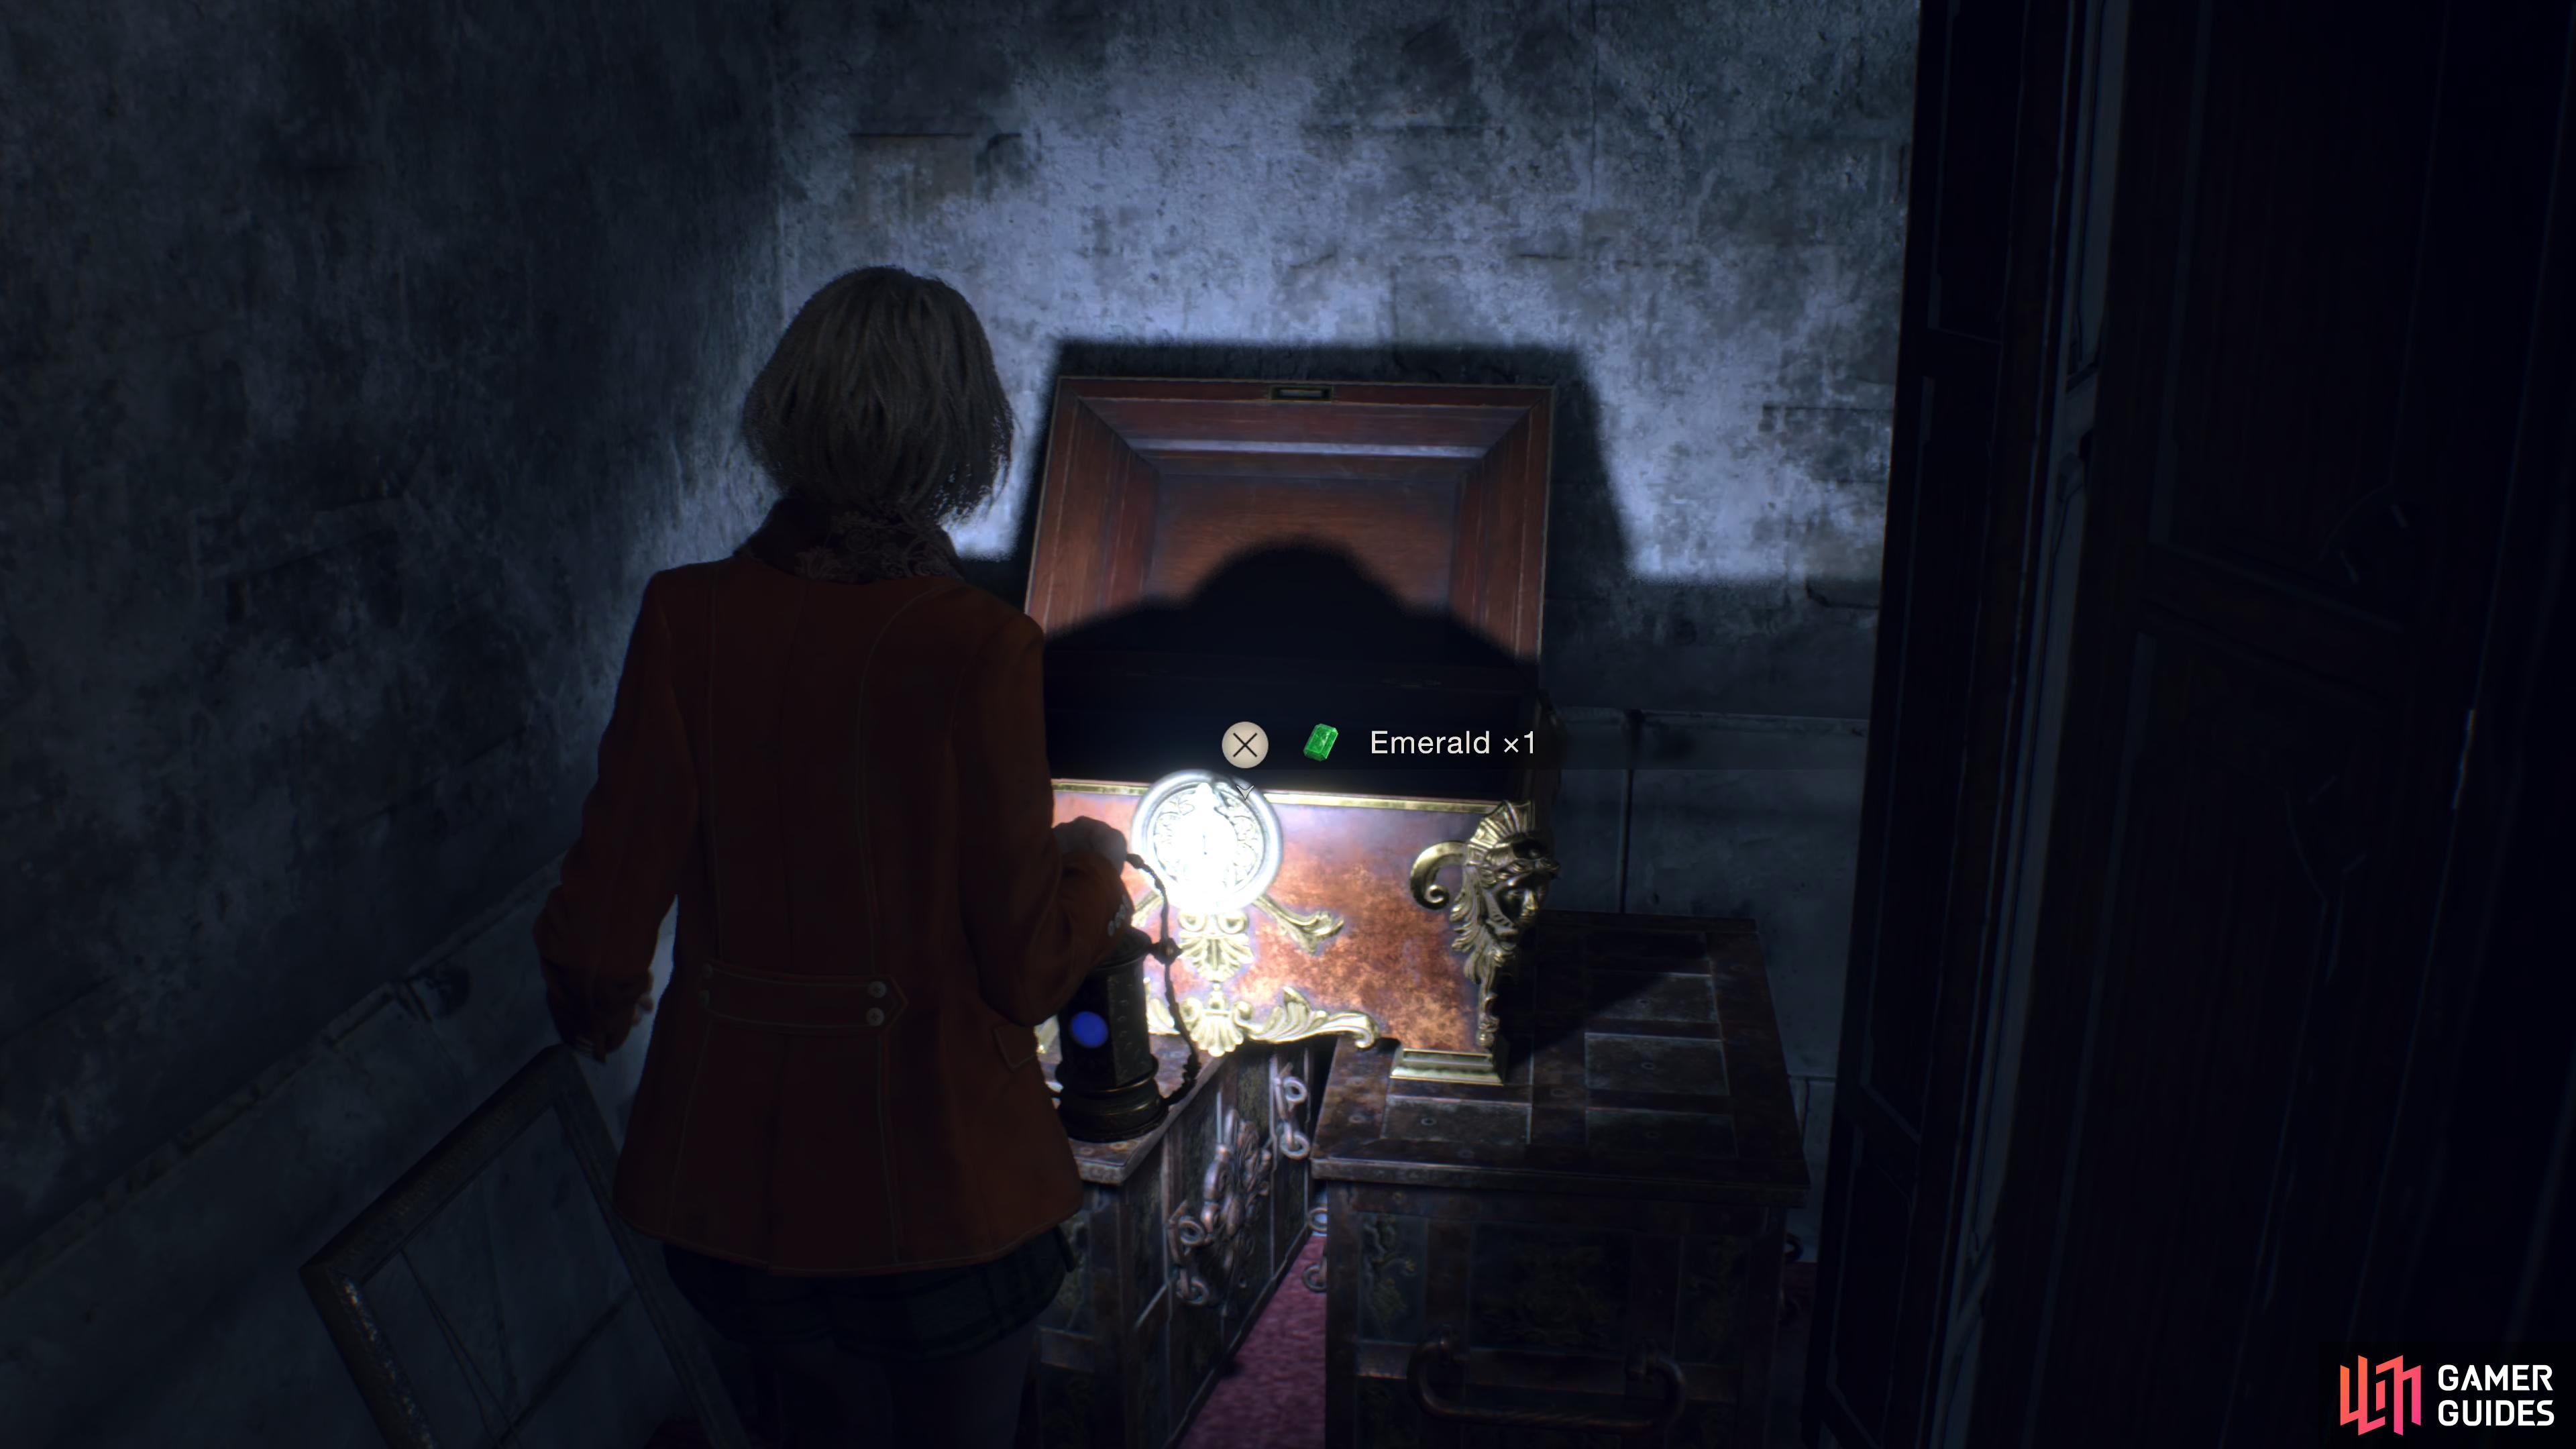
The chest will be to your right after the door, behind the folding screen.
No Comments