Objective: Return to Oracle’s Clock Tower
We can now return to Oracle’s Clock Tower on Bleake Island. Head to the roof and enter the secret doorway to access the main room. Do your usual thing with the sculptured head on the desk to activate the Batcomputer.
Following the scene, we’ll have our objectives updated – time for a quick detour to Panessa Studios!
Objective: Stop Harley Quinn
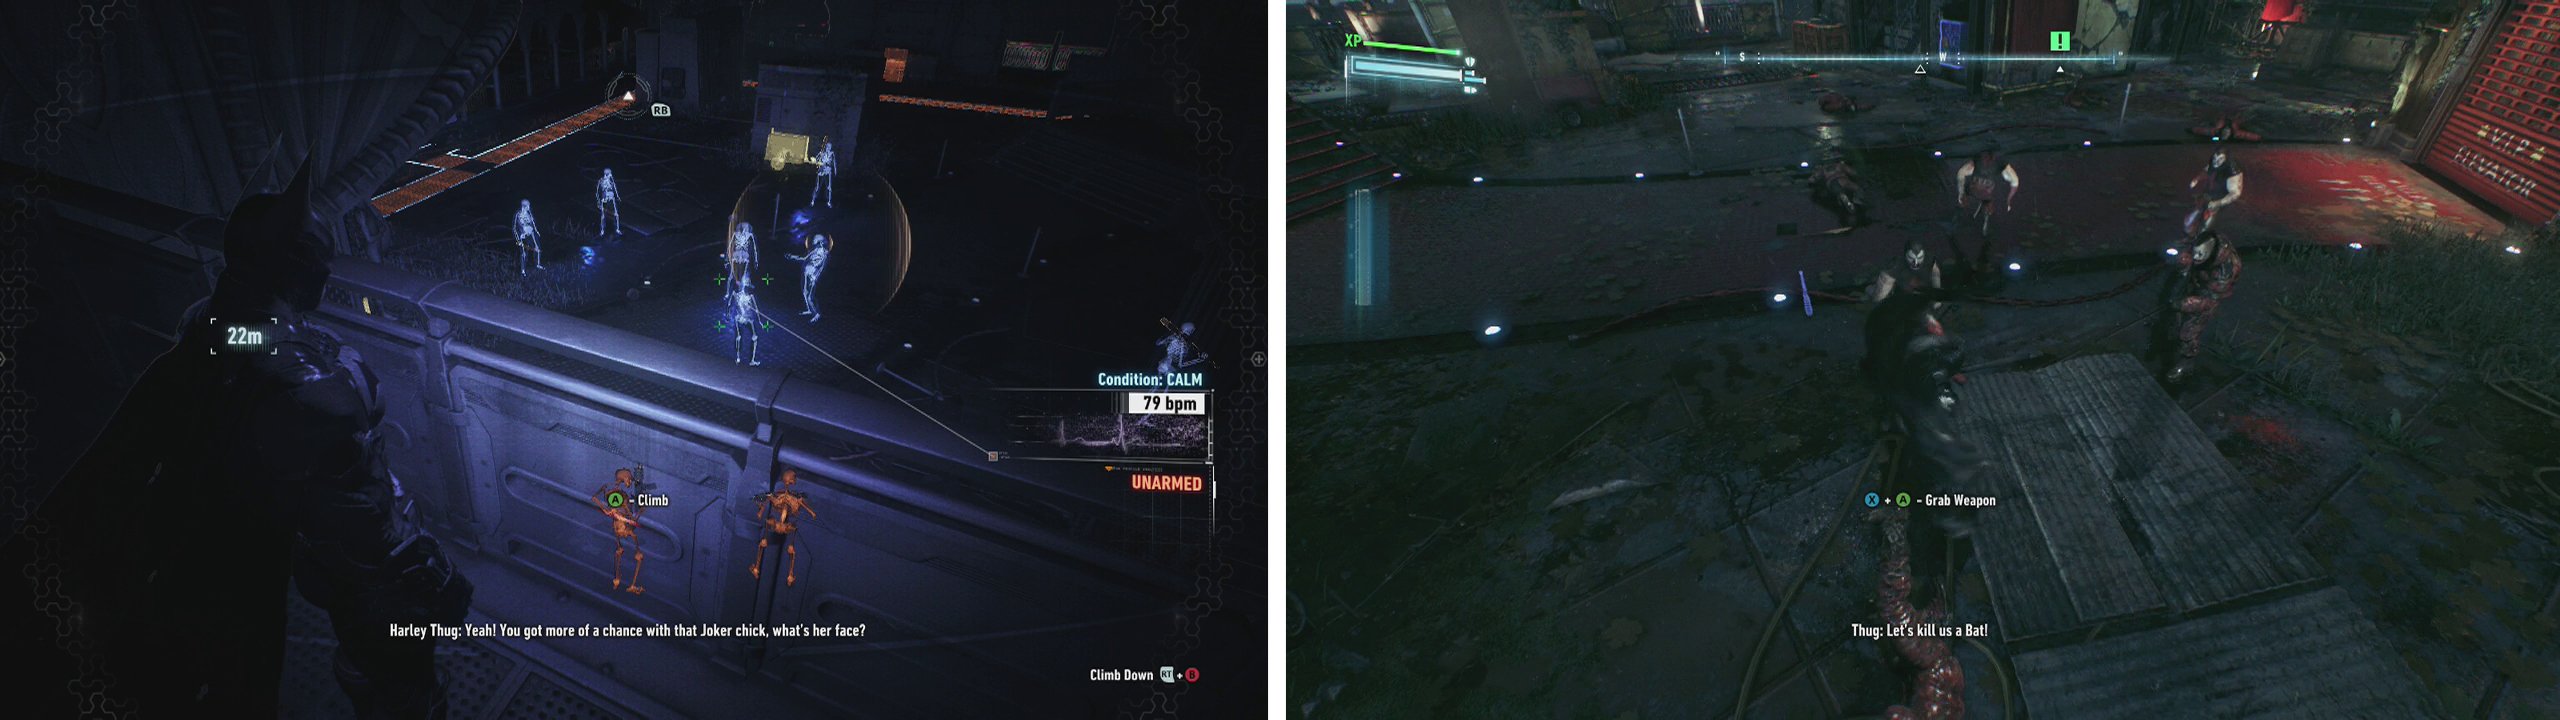
Make your way over to Panessa Studios in north-eastern Bleake Island and take position on one of the upper platforms or towers that has a view of the rooftop entrance. You’ll see a large number of Thugs guarding the entrance.
There are nine Thugs in total and two of them are armed with guns, two have knives and a third has a melee weapon. Be sure to utilise your Disruptor to disable the firearms and to sabotage the nearby weapon crate to make things a little easier. Afterwards, drop down and fight the enemies.
Use the Dirsuptor to disable the guns (left) and then jump in to fight the enemies below (right).
Following the fight you can approach the doorway and attempt to open it – damn, it’s locked. Fortunately, at this point you’ll be given a new gadget – the Voice Synthesizer . This is a handy addition to the utility belt as not only will it will enable us to open voice-locked doors, we can also use it in predator sequences to direct enemies about.
We’ll now need to complete an on-screen mini-game in which we can synthesize a sample of Harley’s voice. To do this we can move the mixers on the left (to control pitch) and on the bottom of the screen (to control speed) so that the voice sample becomes nice and clear. For me the following settings seemed to work:
- Move the left hand mixing bar so that its lowest point is in line with the third green bar from the top on the left.
- Move the lower mixing bar all the way to the left so that it is around halfway across the green bar in the bottom left corner.
Once you have the correct settings, you’ll synthesize the voice. Use the Voice Synthesizer on the control panel by the elevator for a scene… And a new predator section.
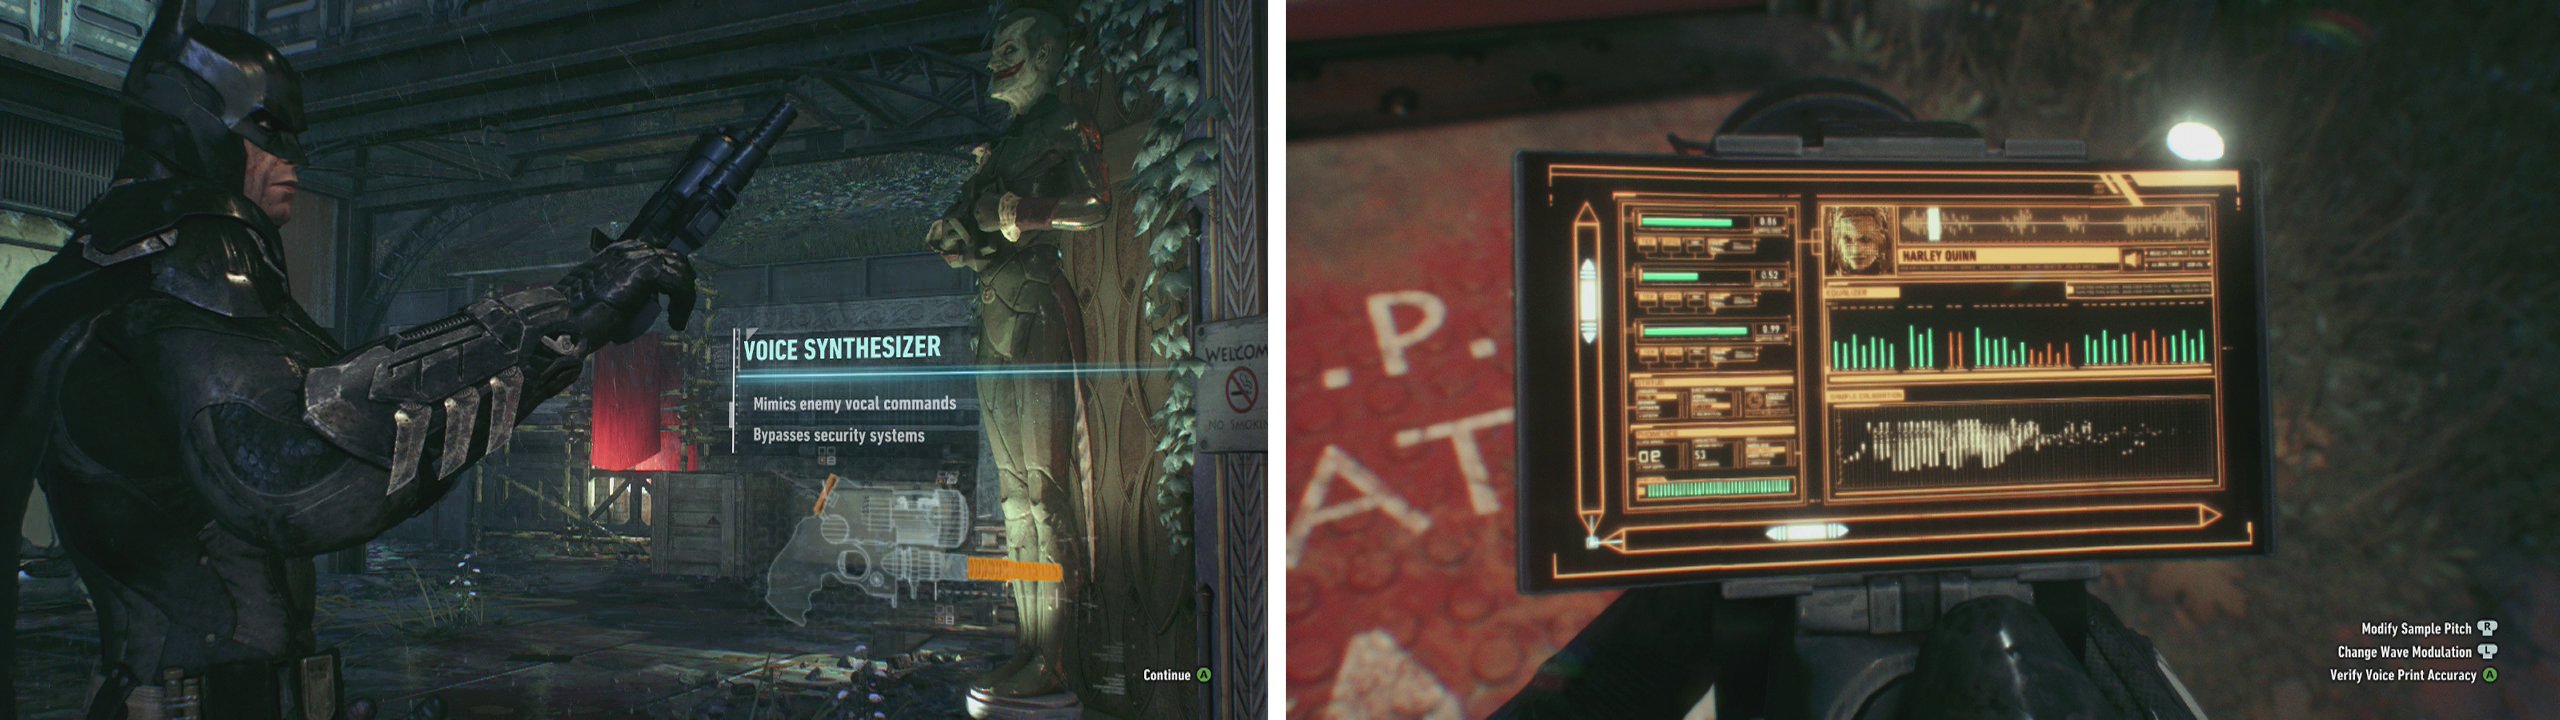
After nabbing the Voice Synthesizer (left) organise the mixers as above (right).
Predator Section 10
Following the scene, we’ll now have a large force of hostiles on the rooftop and we’ll need to take them all out before proceeding inside. There are 10 Thugs and a Minigunner patrolling the area as well as a pair of Sentry Guns guarding the elevator entrance.
The guards seem to walk about wherever they wish in this scenario, so it’s hard to suggest a solid strategy that will work in every instance. After taking down a few enemies, they will start to plant proximity mines and additional Sentry Turrets around the rooftop, so keep that in mind whilst performing your stealth shenanigans.
Fortunately, the rooftop is quite large and Batman can make use of several environmental factors to make things easier, including:
- There are several large under-ground floor ventilation areas across the rooftop, providing access beneath walls.
- We can use the Voice Synthesizer to target Thugs and direct them to generators. We can then use the Remote Hacking Device to blow these up for an instant incapacitation.
- There are several radio towers and cables strung between them, allowing you to drop down behind unsuspecting guards.
- There is also an indoor-type area in the centre of the rooftop providing plenty of corners that are especially useful for corner takedowns.
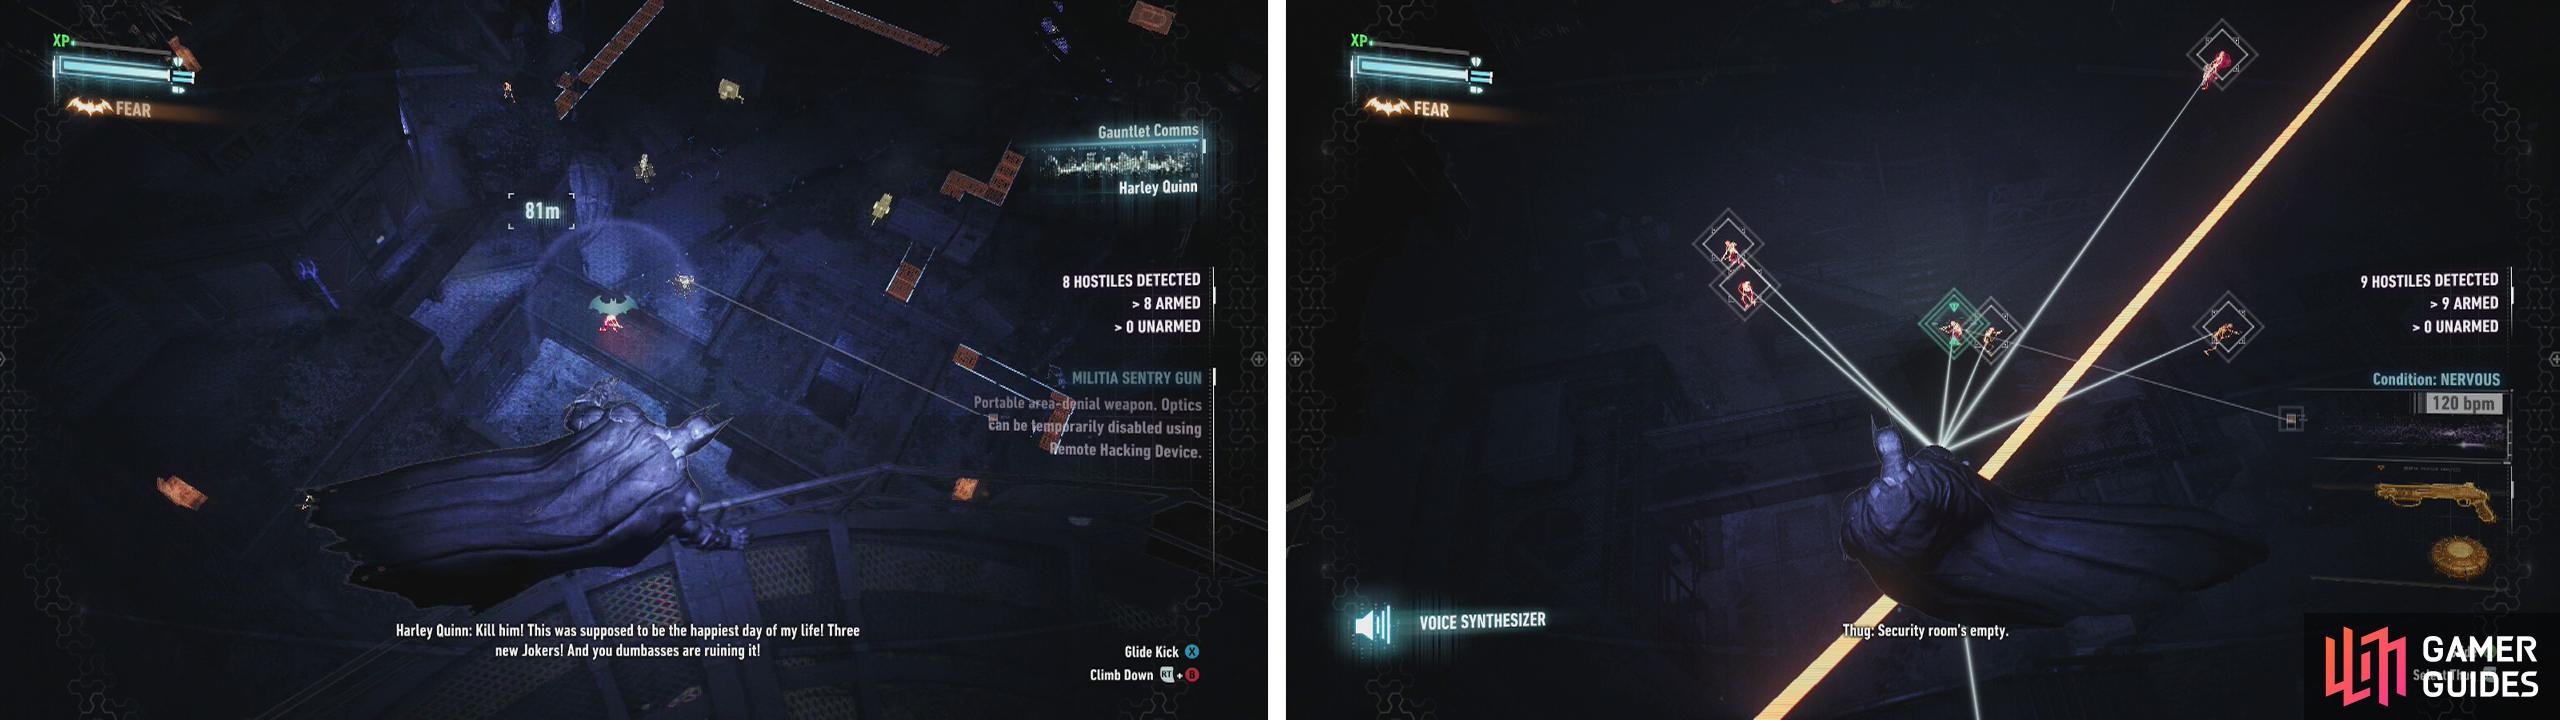
The enemies will spread out across the entire rooftop (left). You can now use the Voice Synthesizer to order enemies about (right).
A good tactic is to eliminate as many enemies as possible by luring enemies near your position with the Voice Synthesiser for a silent takedown and to knock a few out using the generator overload trick. You should also utilise the underground vent systems and save up and use Fear Multi-Takedowns to eliminate several enemies at a time when you see the opportunity. As per the norm with Minigun enemies – you’ll want to leave him for lucky last as attacking him will cause quite a bit of commotion and instantly bring attention to yourself.
Once all the enemies have been dealt with, make your way over to the elevator and use your Remote Hacking Device to blind one of the Sentry Turrets, wait for the other to look away and run in to disable it. Do the same to the other.
Head up to the elevator and ride it down into the lab.
As soon as you exit the lift, you’ll run into a Thug equipped with a shield. Similarly to the Brutes, you will not be able to hit or damage a shield bearer from the get go. You’ll need to perform a stun attack followed by a double pump of the jump button whilst facing the shield to perform an aerial attack knock down attack. This will make the Thug drop the shield after which you can take him out like any other. Finish off the fellow here.
Use the Voice Synthesizer on the console by the gate and walk into the fight beyond.
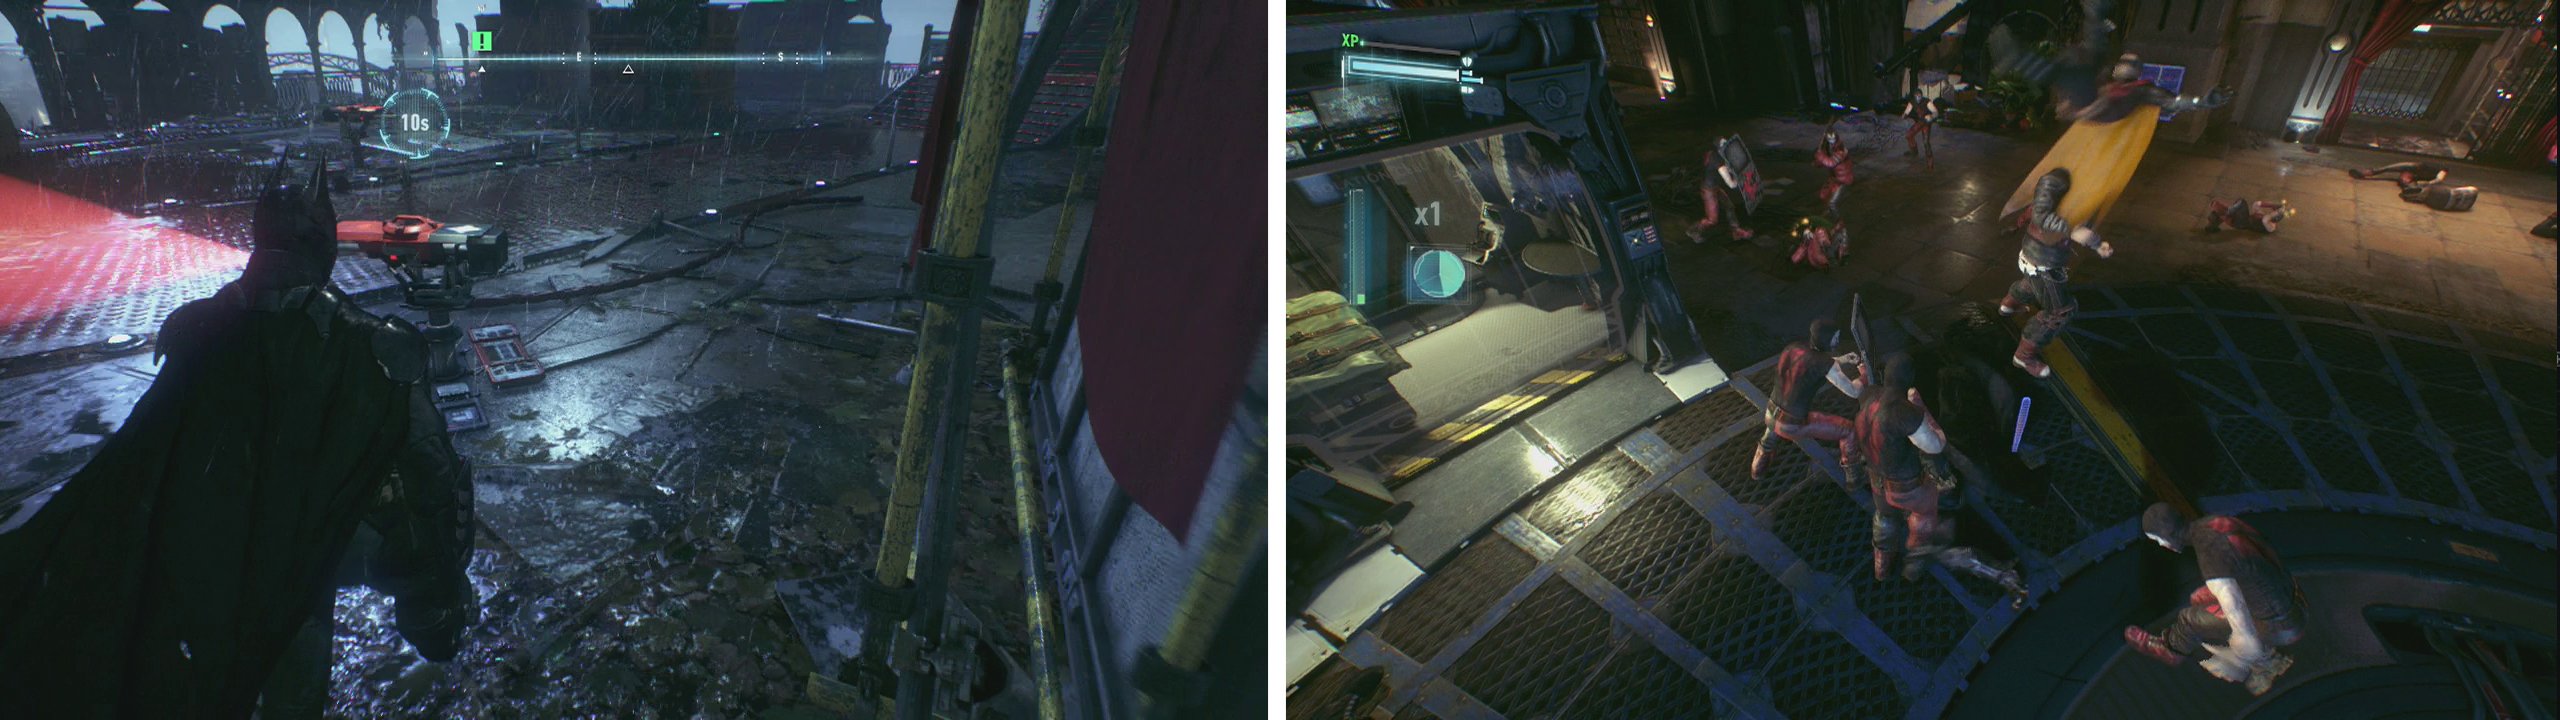
Disable the Sentry Turrets by the door (left) before heading inside. Fight off enemies with Robin in a dual-combat situation (right).
As we enter, you will have stepped right into the middle of another dual-combatant fight. This time we’ll be able to control both Batman and Robin. Robin’s attacks and control scheme are similar to both Catwoman’s and Nightwing’s which very much resemble Batman’s own move set albeit with a few differing animations, with some taking slightly longer to complete. In total there are 15 Thugs (including three with shields, two with knives and several melee objects) and a Brute to eliminate.
Once all of the enemies have been dealt with, follow Robin into the centre of the lab. Interrogate the Thug here for a scene.


Objective: Return the escaped infected to their cells
Following our chat with Harley’s Thug, we can now continue further into the Panessa Studios building. Go through the now unlocked area and interact with the door for a short scene before heading into the sound stages area.
There are three Joker infected that we need to retrieve and there are three sound stages in the studios. Yep, you guessed it, there is one located at each of the three stages and you’ll need to approach each in a slightly different manner. Oh and for the next little while you’ll have Robin along for the ride and you can switch between characters at any time using the LB/L1 button.
Proceed through the main area until you reach a large statue. Behind this you’ll see three gates leading to the three different sound stages. There is only one open at the moment, so let’s head through the door to Sound Stage B.
No Comments