Objective: Return the first escaped infected to her cell
As soon as you enter the door you’ll find yourself immediately in combat with a group of seven Thugs. This is a much easier fight than the large scale battle we just fought through, you’ll just need to watch out for the pair of knives in the mix and keep an eye on the weapons crate and be sure to interrupt anyone accessing it.
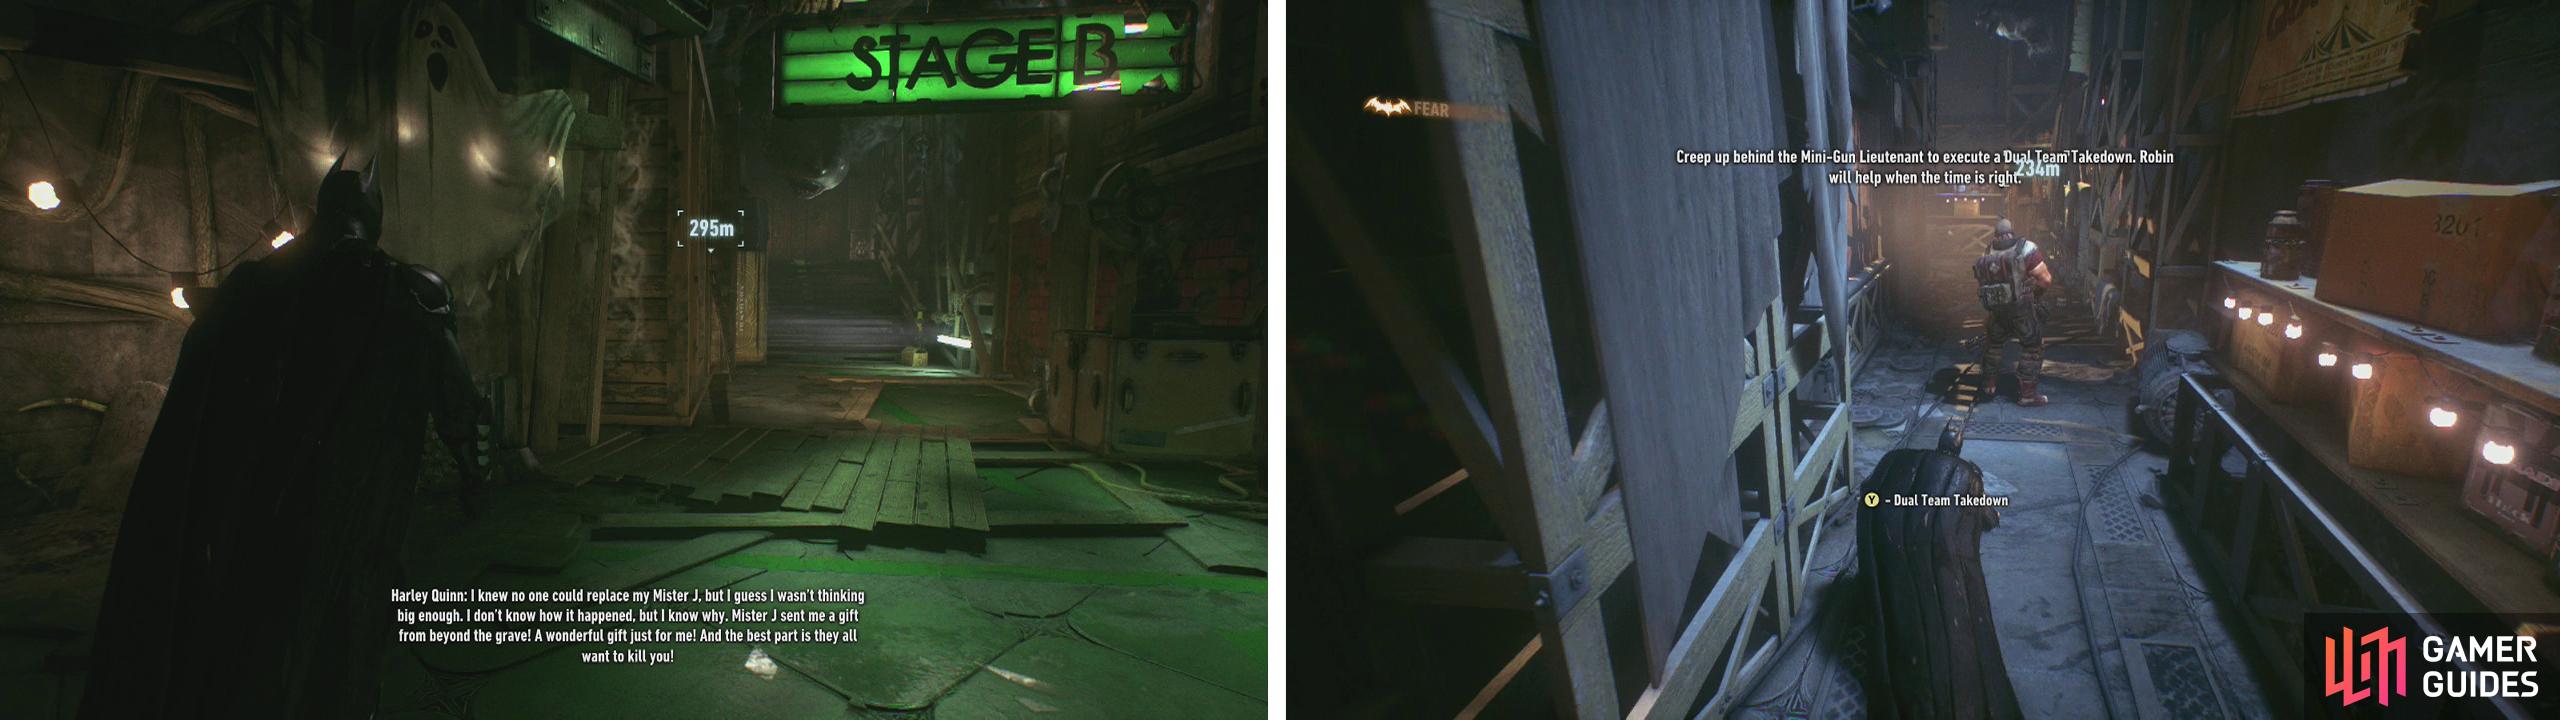
Enter Stage C first (left). Sneak up behind the Minigunner and perform a dual takedown (right).
Continue through the next green door and through the next room until you see a Minigunner. At this point, grapple up to the nearby gargoyle and then across to another gargoyle behind the Minigunner. Drop down behind him, sneak up and trigger a Dual-Takedown when the prompt appears on-screen.
Enter the next door to start another predator section.
Predator Section 11
This predator section is a little different than any of the others that you have undertaken so far. The biggest change is that you have Robin along for the ride and because of his presence, you have three co-op takedowns available which you can trigger to get Robin/Batman (depending on who you are controlling) to silently eliminate a targeted guard – we can’t use it on Minigunners, but we can use them to thin out the regular guards at pretty much any time, which is still handy.
There are a total of 10 Thugs and three Minigunners in this room and they’ll come in a couple of waves:
- The first wave of enemies will consist of five Thugs and a Minigunner.
- The second lot will consist of two Thugs and two Minigunners.
This predator area is quite large and as it is on a sound stage, there are quite a few large walls separating the room into sections. Unfortunately, except for one or two stationary guards, the bad guys seem to walk about wherever they wish in this scenario, so it’s hard to suggest a solid strategy that will work for everyone. You can however make use of several environmental factors to make things easier, including:
- There are several underground ventilation tunnels that can be used to get around quietly and perform silent takedowns.
- There are several vantage points around the room.
- The top of the dividing walls make a great place to observe and stalk enemies.
- Several raised catwalks and walkways have hatches allowing you to surprise enemies or transition quickly between floors.
- There are plenty of objects and walls that can be used for corner takedowns.
The first wave should be treated like any other predator scenario – be sneaky and knock things out quietly! As soon as you take down the first enemy, the others will be alerted via the big screen, so at that point it’s a patience game of picking off the isolated enemies one-by-one using the objects/techniques at your disposal. It’s a good idea to get a silent takedown on one of the first Thugs you attack so that you have a fear Multi-takedown up your sleeve, don’t forget you have Robin’s takedowns as well to utilise and be sure to leave the Minigunner for last!
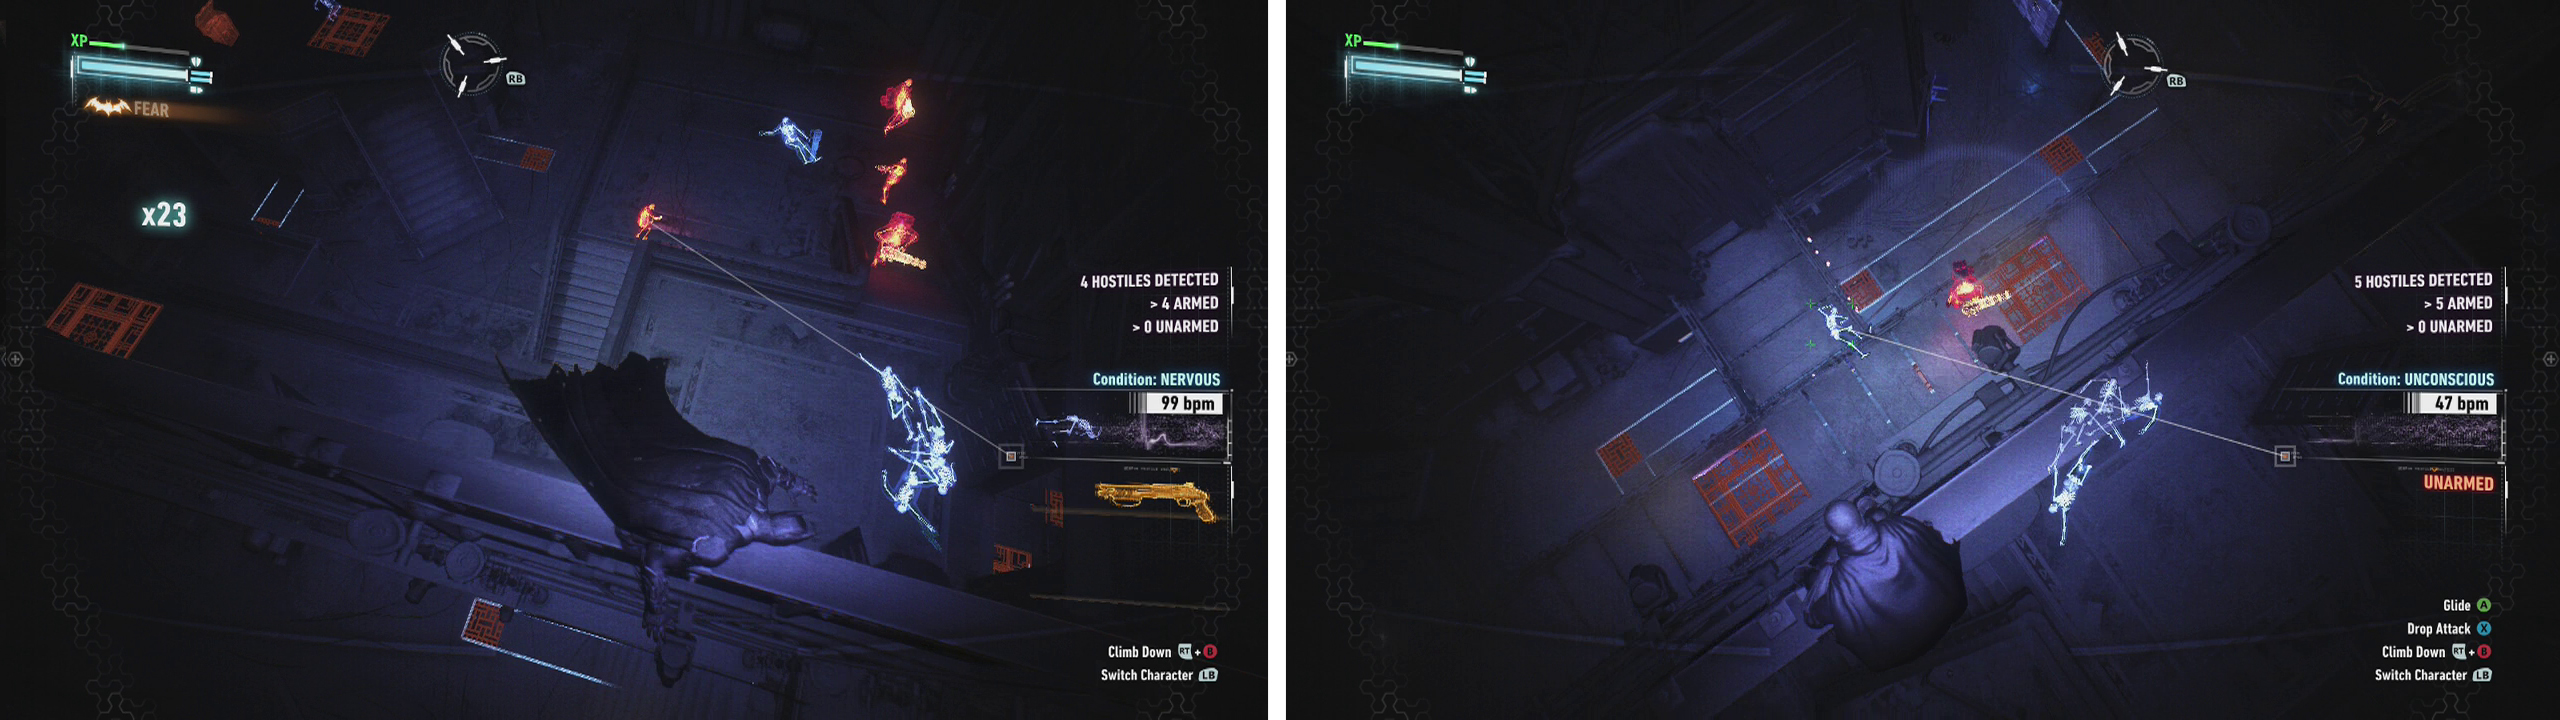
The top of the sets are a great vantage point (left). Remember to isolate or leave the Minigunners for last (right).
The second wave is a little trickier due to the pair of Minigunners. Again wait for the enemies to spread out across the room before eliminating the regular Thugs when they become isolated. Finally take down the Minigunners one at a time whilst they are far enough away from one another so that you won’t be set upon by one of the Minigunners whilst you are in the process of beating the other down.
Approach door for scene – make sure you use your counter button when you see the counter icon appear!
Now we can backtrack all the way to the main area with the giant statue. There’s another open gate here, so that’s our next section of interest – head on through to Sound Stage C.
No Comments