Objective: Find a way to defeat the Cloudburst Tank
As you will have no doubt noticed, the city streets are now covered in a thick layer of bubbling brown gas. I probably don’t have to tell you that venturing into the nasty looking gas is a bad idea, but I will anyway – dropping down into the gas is a bad idea! Note that it won’t kill you or anything but hopping into it will grapple you up to the nearest high point to your location.
For the next little while you are going to want to stay on the rooftops and other raised sections above the ground until we can clear it up.
Our first order of business is to return to the Stagg Enterprises Airships. Our goal is located on Airship Beta (the northern of the two ships).
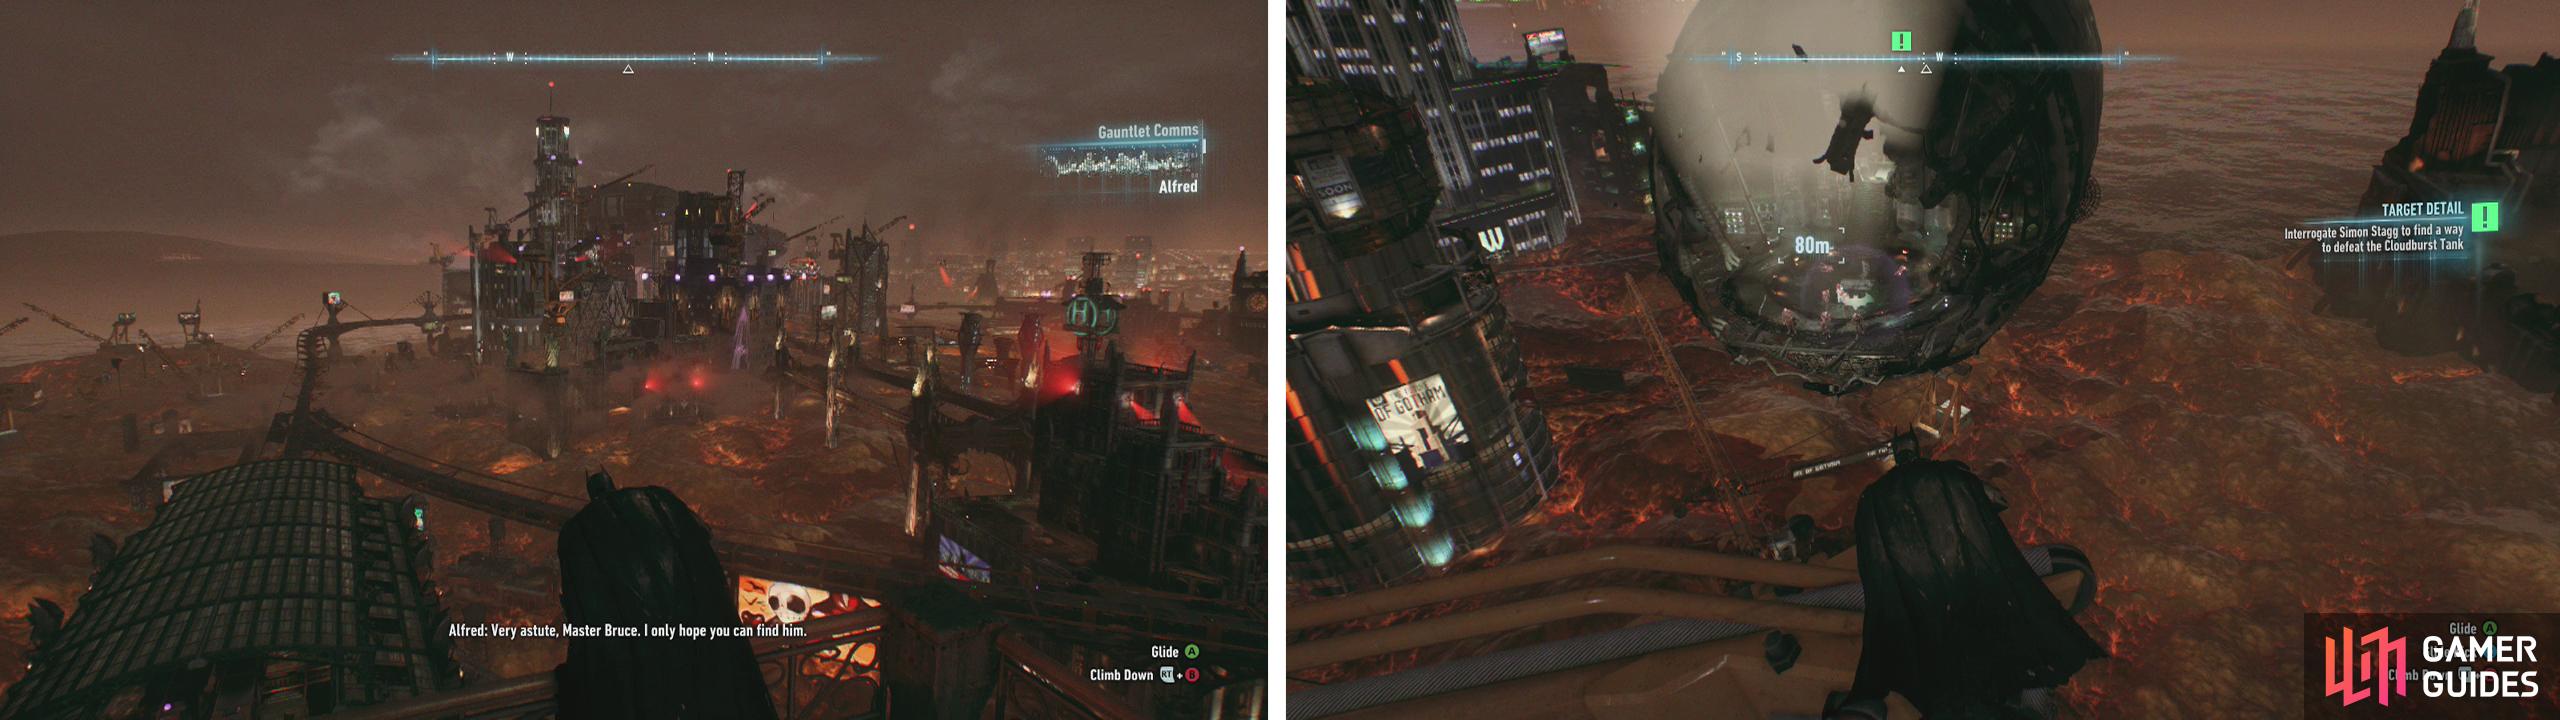
The city will now be shrouded in gas (left). Fly over to Founders’ Island and the air ships (right).
Fortunately, there is an easy way to get inside of it thanks to the hole in the front of it caused by Scarecrow’s explosive exit earlier! To get inside, simply climb on the crane opposite and look inside the front of the ship to see a group of enemies waiting for you. If possible, try to target the Medic and glide kick inside for a fight.
This fight has you facing off against the aforementioned Medic, a Brute with a shield and five Soldiers (two of whom have melee weapons). Try to get the Medic down as soon as possible before he uses any of his irritating abilities and then turn your attention to the Soldiers and finally the Brute.
Following the fight, approach the door at the back of the room and try to open it. We’ll now need to synthesize a sample of Stagg’s voice. As with the previous voice synthesizer mini-game, we can move the mixers on the left (to control pitch) and on the bottom of the screen (to control speed) so that the voice sample becomes nice and clear. For me the following settings seemed to work:
- Move the left hand mixer bar so that its lowest point is in line with the third green bar from the top on the left.
- Move the lower mixer bar around two thirds of the way to the right so that its left hand side in line with the right hand side of Batman’s thumb at the very bottom of the screen.
Once you have the correct settings, you’ll synthesize the voice. Use the Voice Synthesizer on the control panel by the door. Continue into the next main room for a scene.
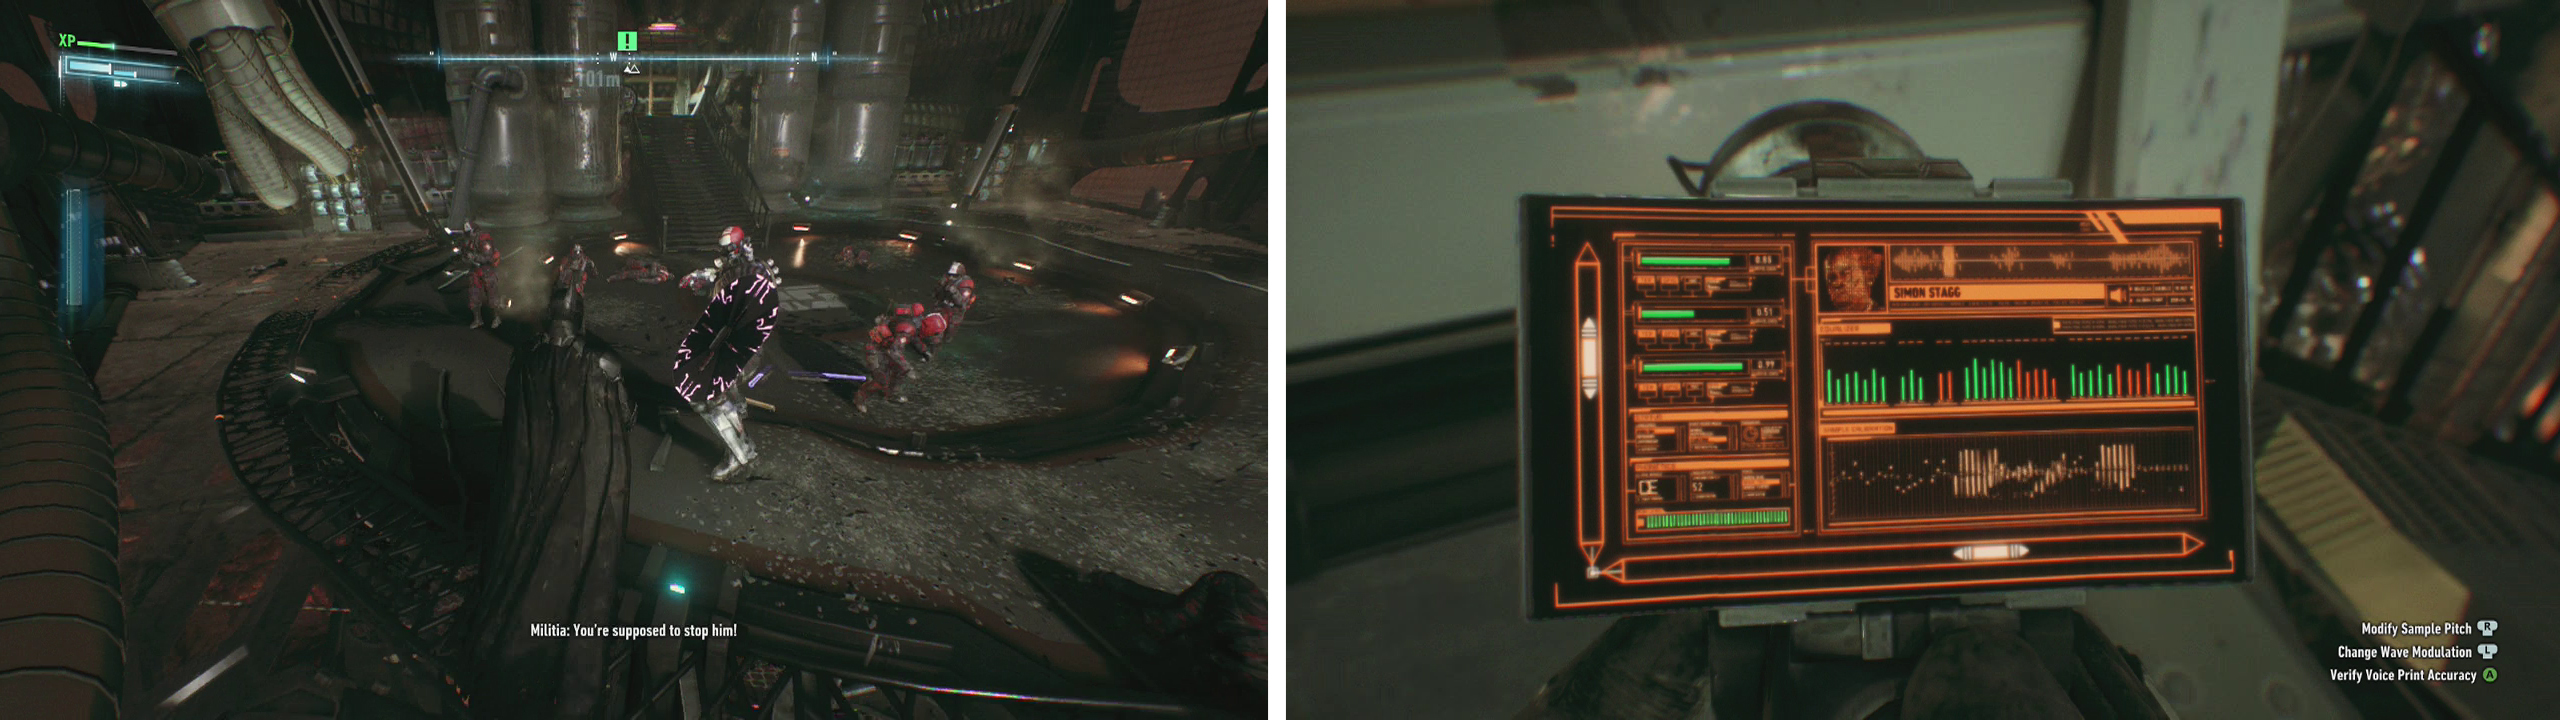
Fight off the enemies in the airship (left) and then move the mixers on the Voice Synthesizer with the above settings (right).
Predator Section 12
You may remember this room from the previous time we came through the airships. Yep, it’s a predator room yet again and this time, it’s going to be a little more difficult than the previous attempt. As a quick reminder, this room includes balcony areas around the outside of the room and a large, glass chamber in the centre.
There are two Boa Drones, six Soldiers (including two Drone Controllers) and a pair of Medics and as with last time, you can make use of several environmental factors to make things easier, including:
- There is an extensive tunnel network covering most of the ground floor and the adjoined rooms below balconies. There are hatches on walls adjacent to the main entrances that will get you down there quickly.
- You can use the Remote Hacking Device on the centrifuges, robotic arms and power cells around the room to create distractions.
- We can use the Voice Synthesizer to target Soldiers and direct them to areas of interest or into takedowns.
- There is a pair of pipes lining the entire length of the room from above, giving a great view of the area.
- There are floor hatches on the multi-levelled areas to the right and the far end of the room from our initial entry point allowing easy transition between floors.
- The multiple vantage points around the room give a great view of the area and can also be utilised for inverted takedowns.
I found the best strategy to be looking along the wall to the right of the entrance door and using the Batclaw on the hatch to slide down into the ventilation ducts beneath the floor. Use the underground tunnels to approach one of the Drone Controllers at ground level to steal his codes so that you can manipulate his Boa Drone later on – leave him alone for now. Whilst we are here, you can also use the lower area to clear out 4-5 patrolling enemies (including both Medics) using the tunnels to take down enemies in and around the large glass room in the centre of the area and the narrow rooms beneath the balcony areas on either side.
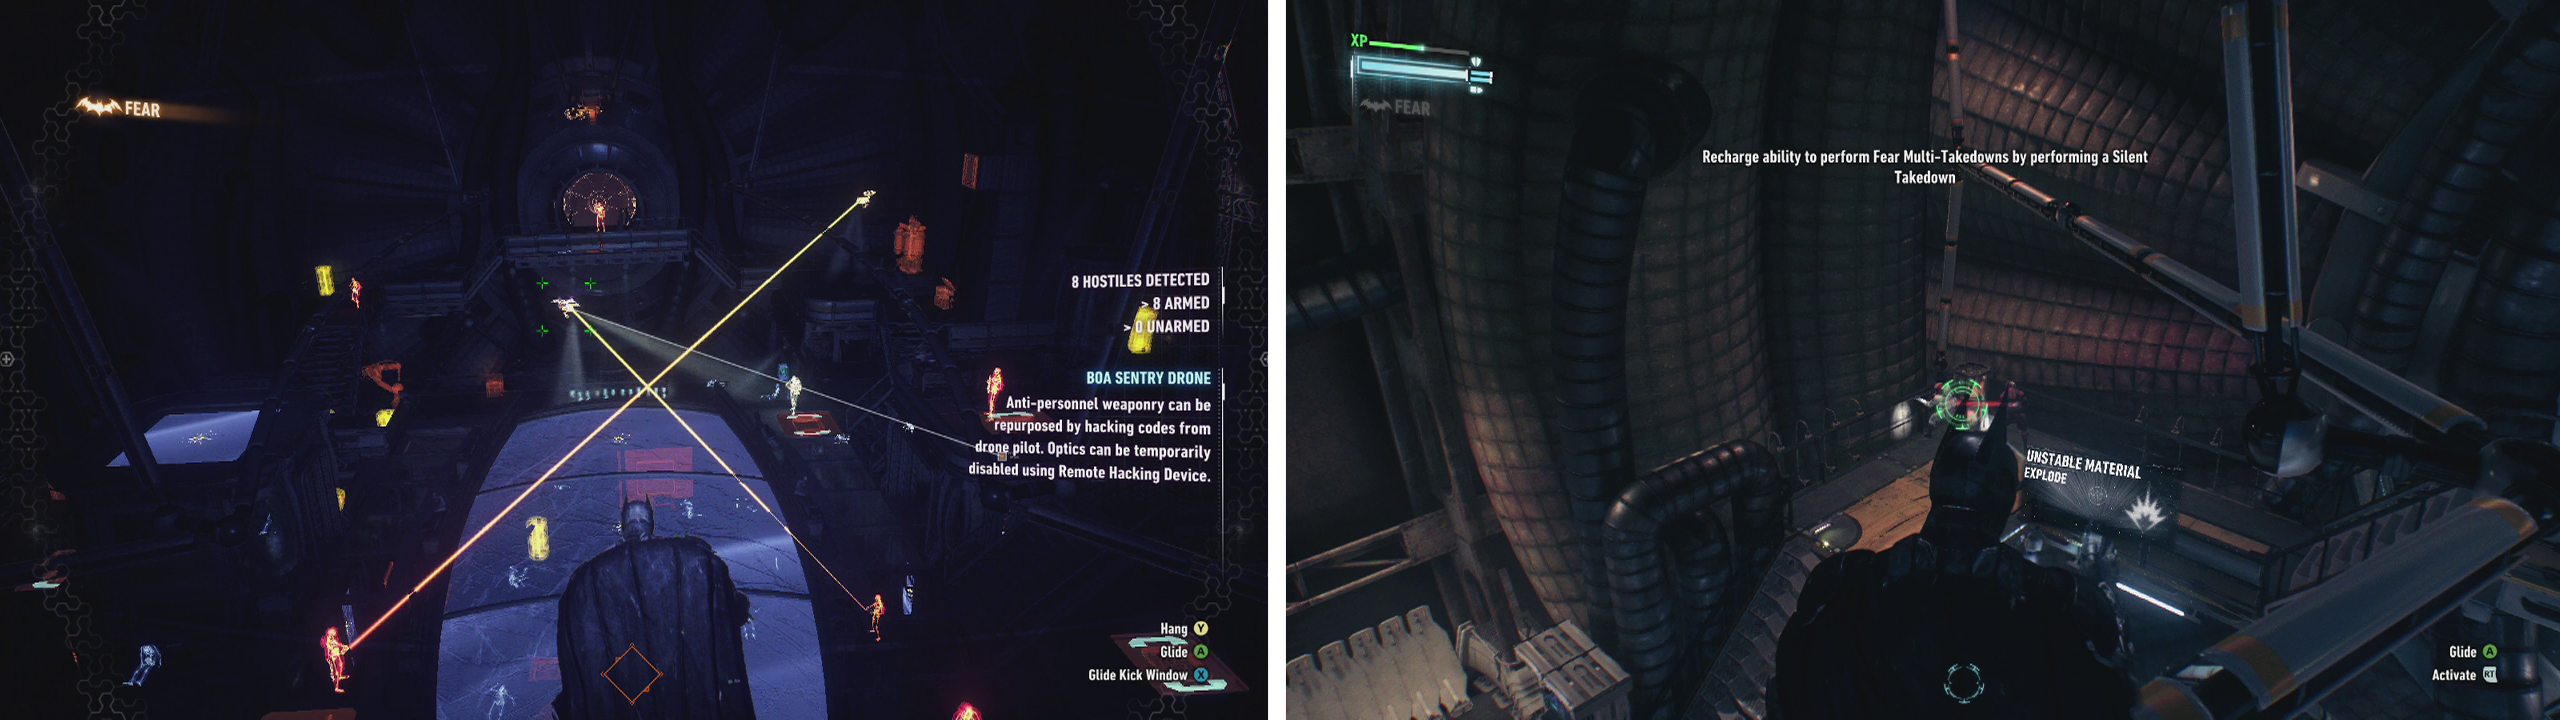
This room has two Boa Drones and a number of vantage points (left). Make use of the Voice Synthesizer/ Remote Hacking Device for some easy takedowns (right).
Once the enemies are on to your presence, use a combination of vantage points, use the Boa drone to target an enemy or two, use the Remote Hacking Device/Voice Synthesizer to create distractions, corner takedowns or a Fear Multi-Takedown (if you get a few numbers together) to thin out the numbers.
After the room is clear of bad guys, you’ll want to approach the small glass cage that we saw Stagg in previously and inspect it with your Detective Mode active.
On the cage here, you’ll be able to find Stagg’s handprints which appear a nice orange colour for us in Detective Mode. We’ll need to follow the handprints down to the ground level, into the side tunnel and find the vent hatch they lead to.
Interact with the hatch for a conversation.
Objective: Use the nimbus power cell to repair the Batmobile
Now that we have a way to fix the Batmobile, we’ll need to head back and exit blimp – just be sure to have your Remote Hacking Device at the ready as there will be a Dragon Drone we’ll need to blind before we can leave.
Once you are free of the airship, fly back to the objective marker on Miagani Island. Approach the spot and when you see the button prompt appear, hit the button for a scene.
During this section, we have to take the power core out of the Batmobile very slowly. Note the coloured lights on the core: Green means safe, but if you try to move it too quickly the colour will change to yellow and then red before zapping us, forcing batman to let go and having to re-start the process. As such, as soon as you see the lights turn yellow, it’s a good idea to stop and let the colour settle down before continuing.
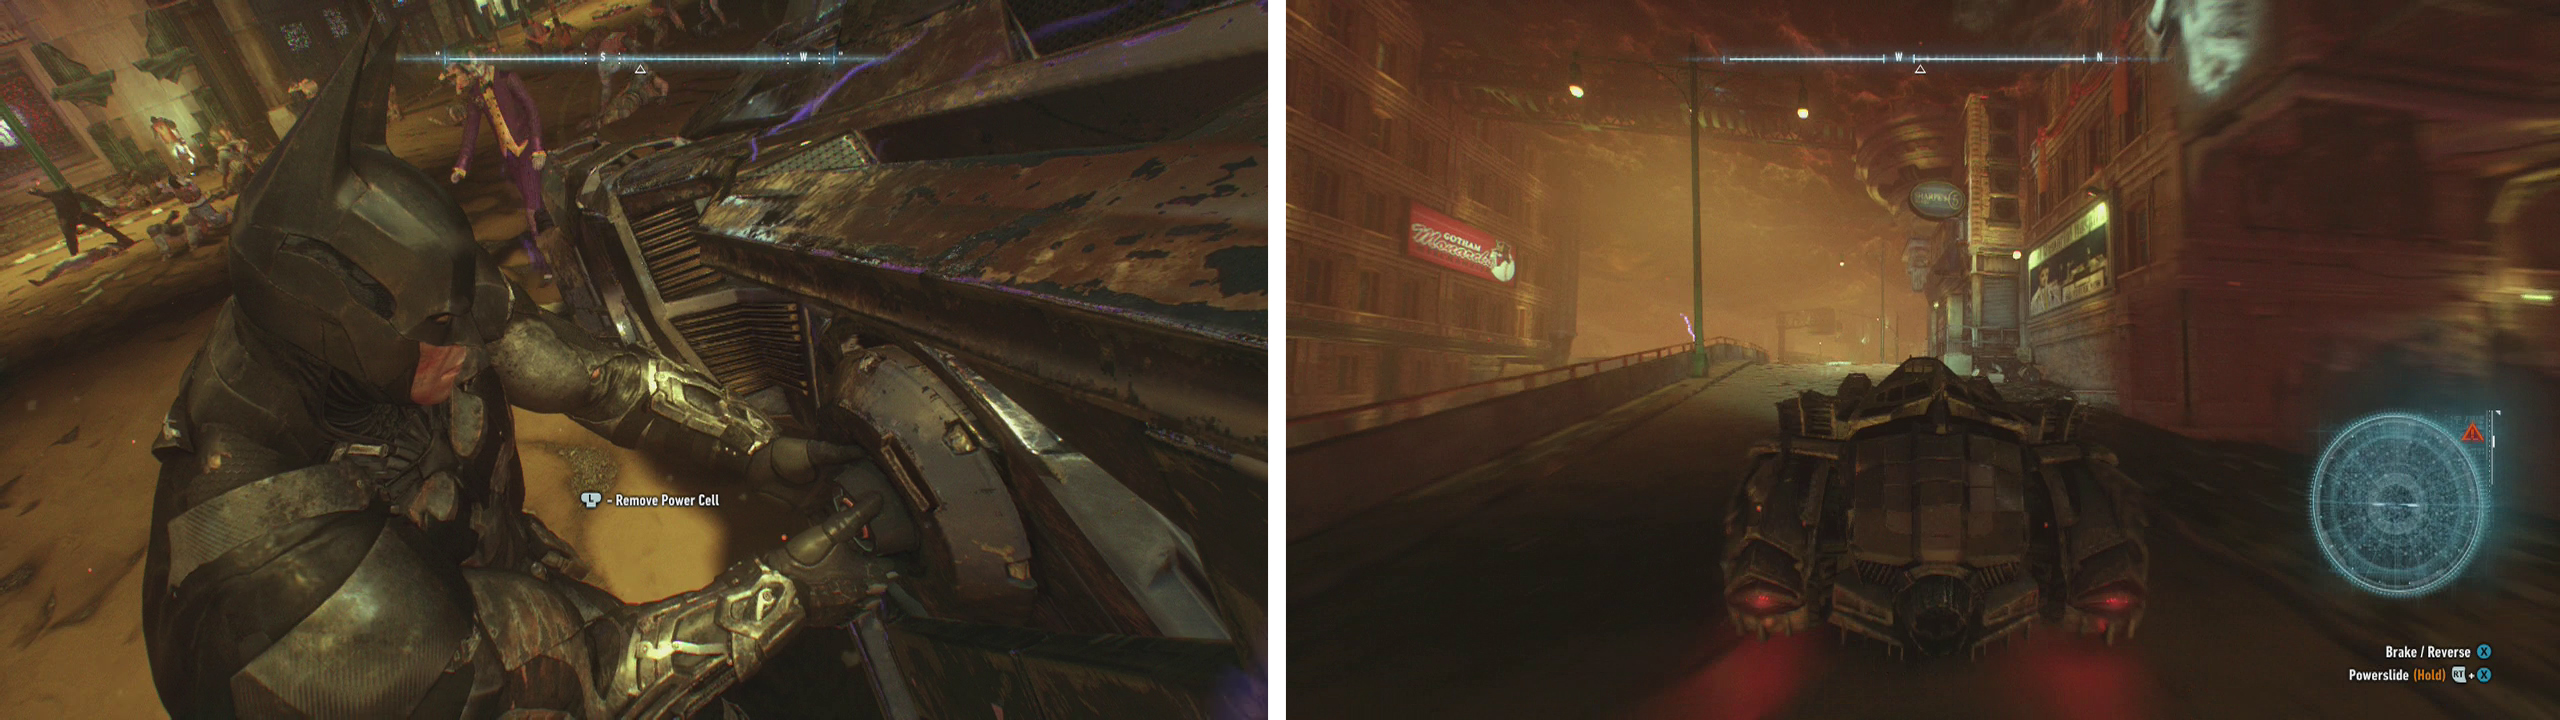
Exit the airship and fly over the objective marker (left). Remove the cylinder from the Batmobile and replace it (right).
After pulling the cell out you’ll then have to push it back in again. This requires the same slow-paced, colour coded gameplay. Watch out for enemies that approach during this time and be sure to counter them when you see the counter icon appear over their heads!
Once you have successfully replaced the core, you’ll hop into the Batmobile. After a short conversation, we can drive off. A short time later our objectives will be updated.
No Comments