Objective: Investigate Scarecrow’s Hideout
Now that we have a bit more information, it’s time to go and explore Scarecrow’s hideout. Make your way over to the next Bat Signal marker and climb to the top of the building. Find the skylight on the roof to look through and observe the enemies inside the room below.
From the skylight, you’ll want to perform a takedown on one of the enemies below before using your hand to hand combat techniques to clear the rest of the room. There are nine Thug enemies in total that you will need to subdue and one of them is armed with a firearm – try to knock him down first and keep an eye on the weapon as you fight and interrupt anyone who runs to pick it up so that you can prevent taking ranged damage as you fight.
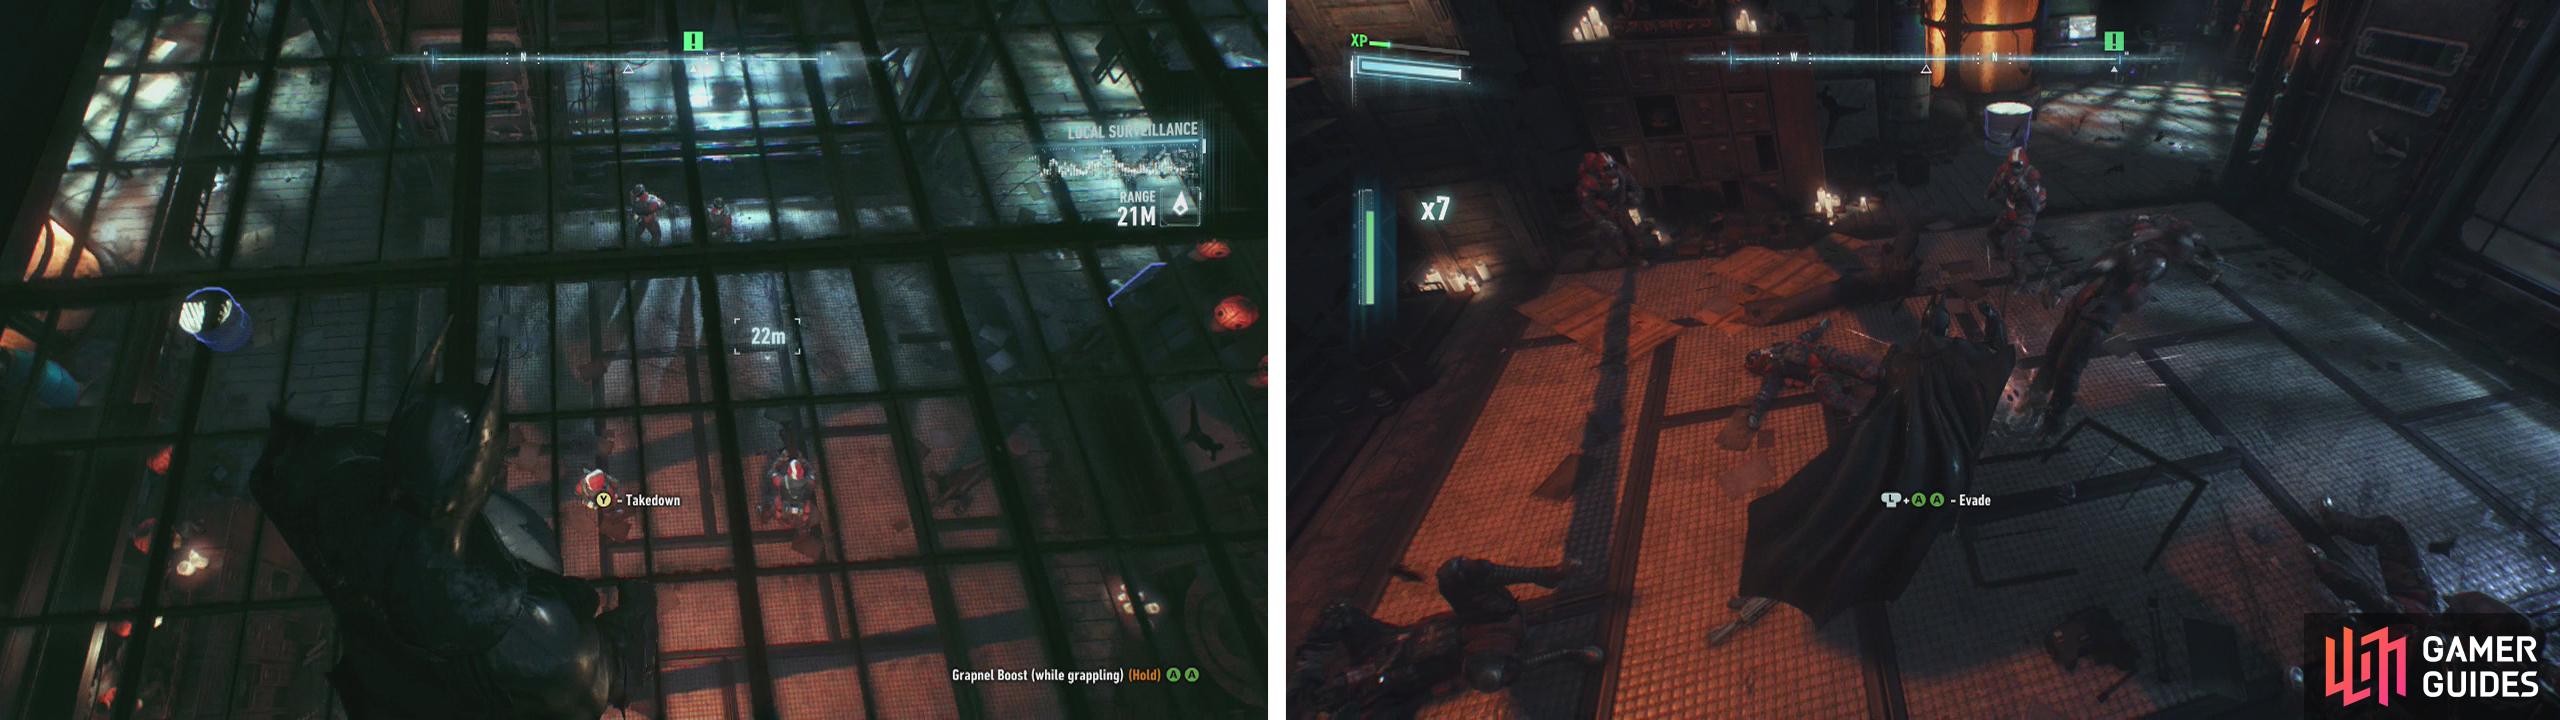
From the skylight use a Takedown on one of the enemies below (left) and then clear out the other Thugs in the room (right).
Approach the glass cage when it is safe to do so for a scene.
When we return outside, the game will prompt you to bring up your quick gadget menu. From here you’ll want to summon the Batmobile using Remote Batmobile Control .
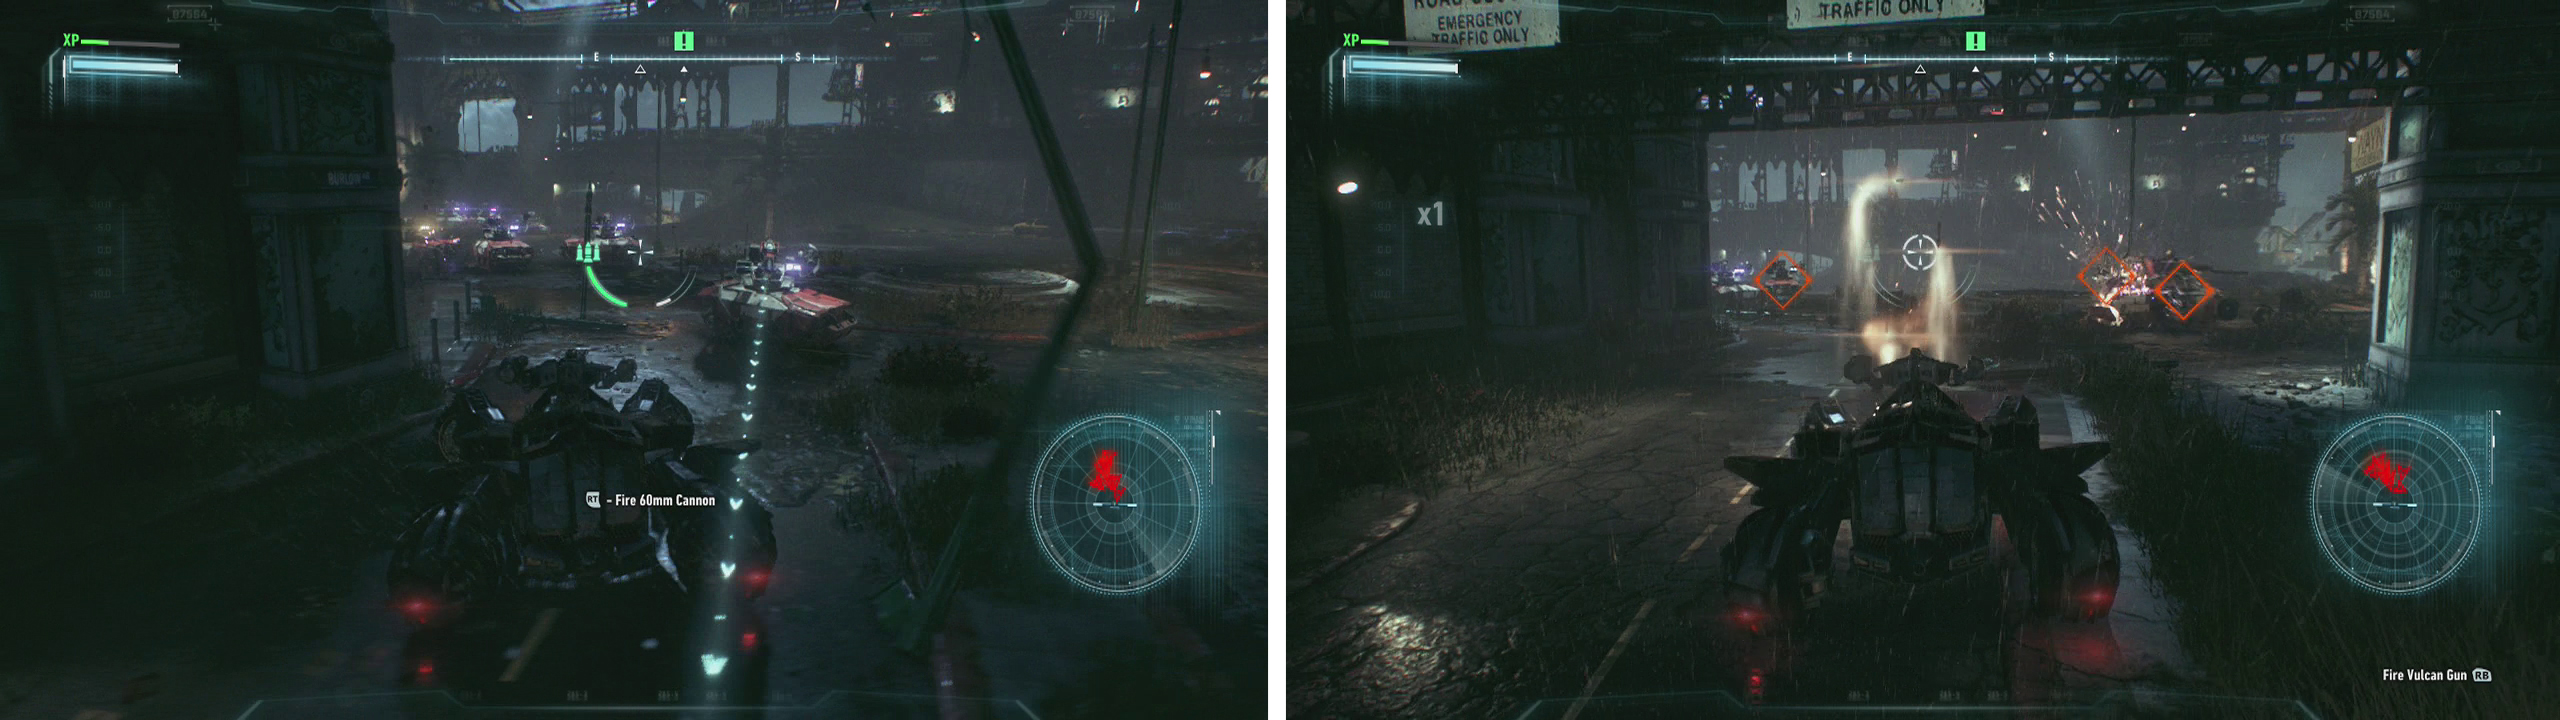
Activate the Batmobile’s Battle Mode and we’ll need to fight off a group of six Drone Tanks. The Battle Mode function allows the Batmobile to be much more manoeuvrable with the ability to hover on the spot as well as forwards/backwards and side-to-side movements. You can even thrust a short distance in any direction by hitting the action button to ram enemies or to avoid incoming projectiles.
Our goal here is to destroy the enemy Drone Tanks and whilst shooting them is fairly easy, the trickiest thing to do is to avoid incoming fire. As tanks prepare to shoot, a white holographic line will appear to show you where they are aiming and when this turns red it means that their shot will hit you when they shoot – so you’ll want to move out of the line of fire before that happens!
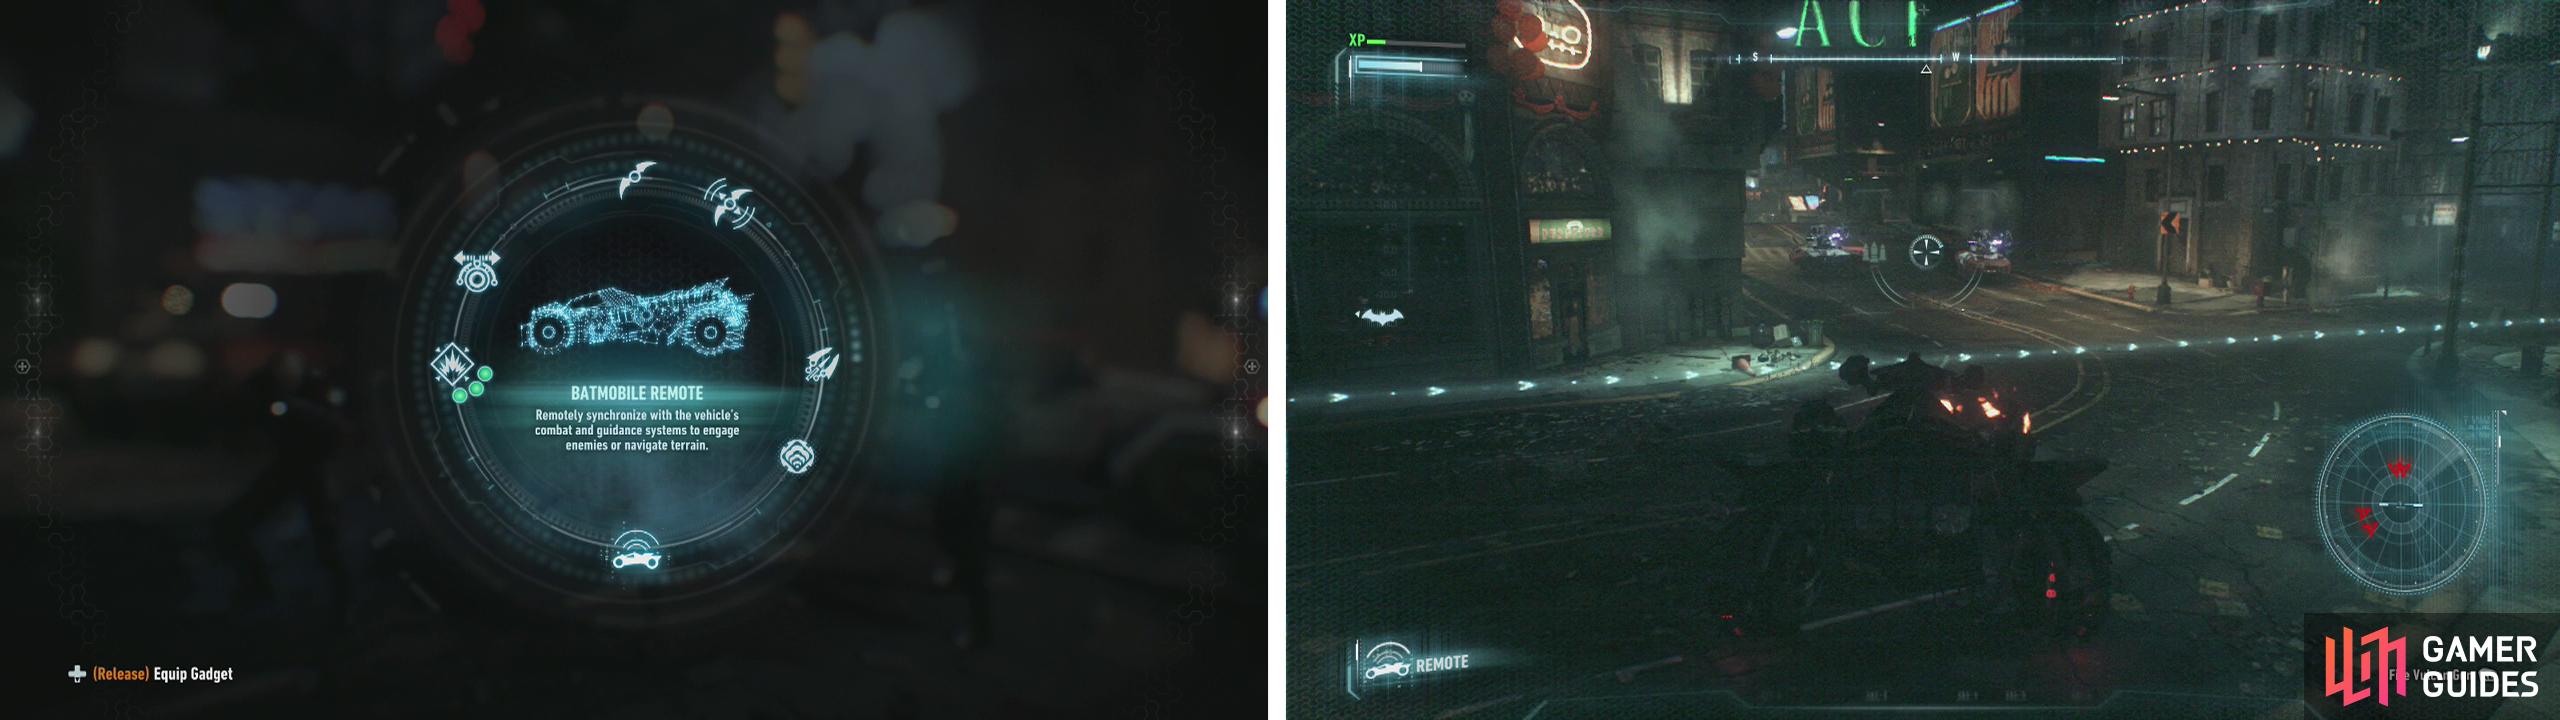
Use the gadget wheel for Remote Batmobile Control (left). When fighting Drone Tanks, avoid the holographic shot markers (right).
There are six Drone Tanks in total and they are all Rattlers – the most basic form of Drone Tank you’ll encounter. Rattlers are the weakest and most common type of Drone Tank in Arkham Knight. A single shot to its turret should be sufficient to destroy it.
After destroying all of six Drone Tanks, you’ll need to park the Batmobile on the space indicated.
Objective: Run Battle Mode weapon energy system diagnostics.
We’ll now need to make our way to the glowing Wheel icon nearby and have a go at a short training simulation that will run you through the basics of the Batmobile’s Battle Mode and how to charge up the Missile Barrage special attack. The game will essentially walk you through it and it’s a useful skill to remember as it will make life in the Batmobile a whole lot easier.
After completing training we can move on.
Objective: Destroy the squadron of drone tanks occupying Panessa Studios
Following our Batmobile primer, we’ll need to follow the GPS marker to the next location. Here you’ll find a large number of Drone Tanks milling about. There are twelve in total, all Rattlers - a perfect opportunity to test out the various levels of Missile Barrage ! If things get a little tricky, don’t be afraid to back off down a street a little ways to break line of site and force the tanks to funnel in after you one at a time to make shooting them easier.
Charge up the Missile Barrage by avoiding incoming fire whilst landing hits (left) and then unleash it to destroy multiple Drone Tanks at once (right).
Objective: Return to the GCPD lockup
Make your way over to the next objective marker to find the GCPD building. Drive down into its car park and at the end, park in the spot indicated. A scene will play.


In the GCPD precinct, our aim is to speak with Gordon, but before you do you are free to do a bit of exploring. We can speak to the various police around the area, explore the evidence area to find a Riddler Trophy and a museum of sorts featuring objects from various super-villains that we have fought previously in the series to date – interact with these for a bit of brief dialogue. The most important piece of evidence in this room though is the Remote Electrical Charge gadget behind the display opposite the entrance. Smash the glass and grab it if you wish.
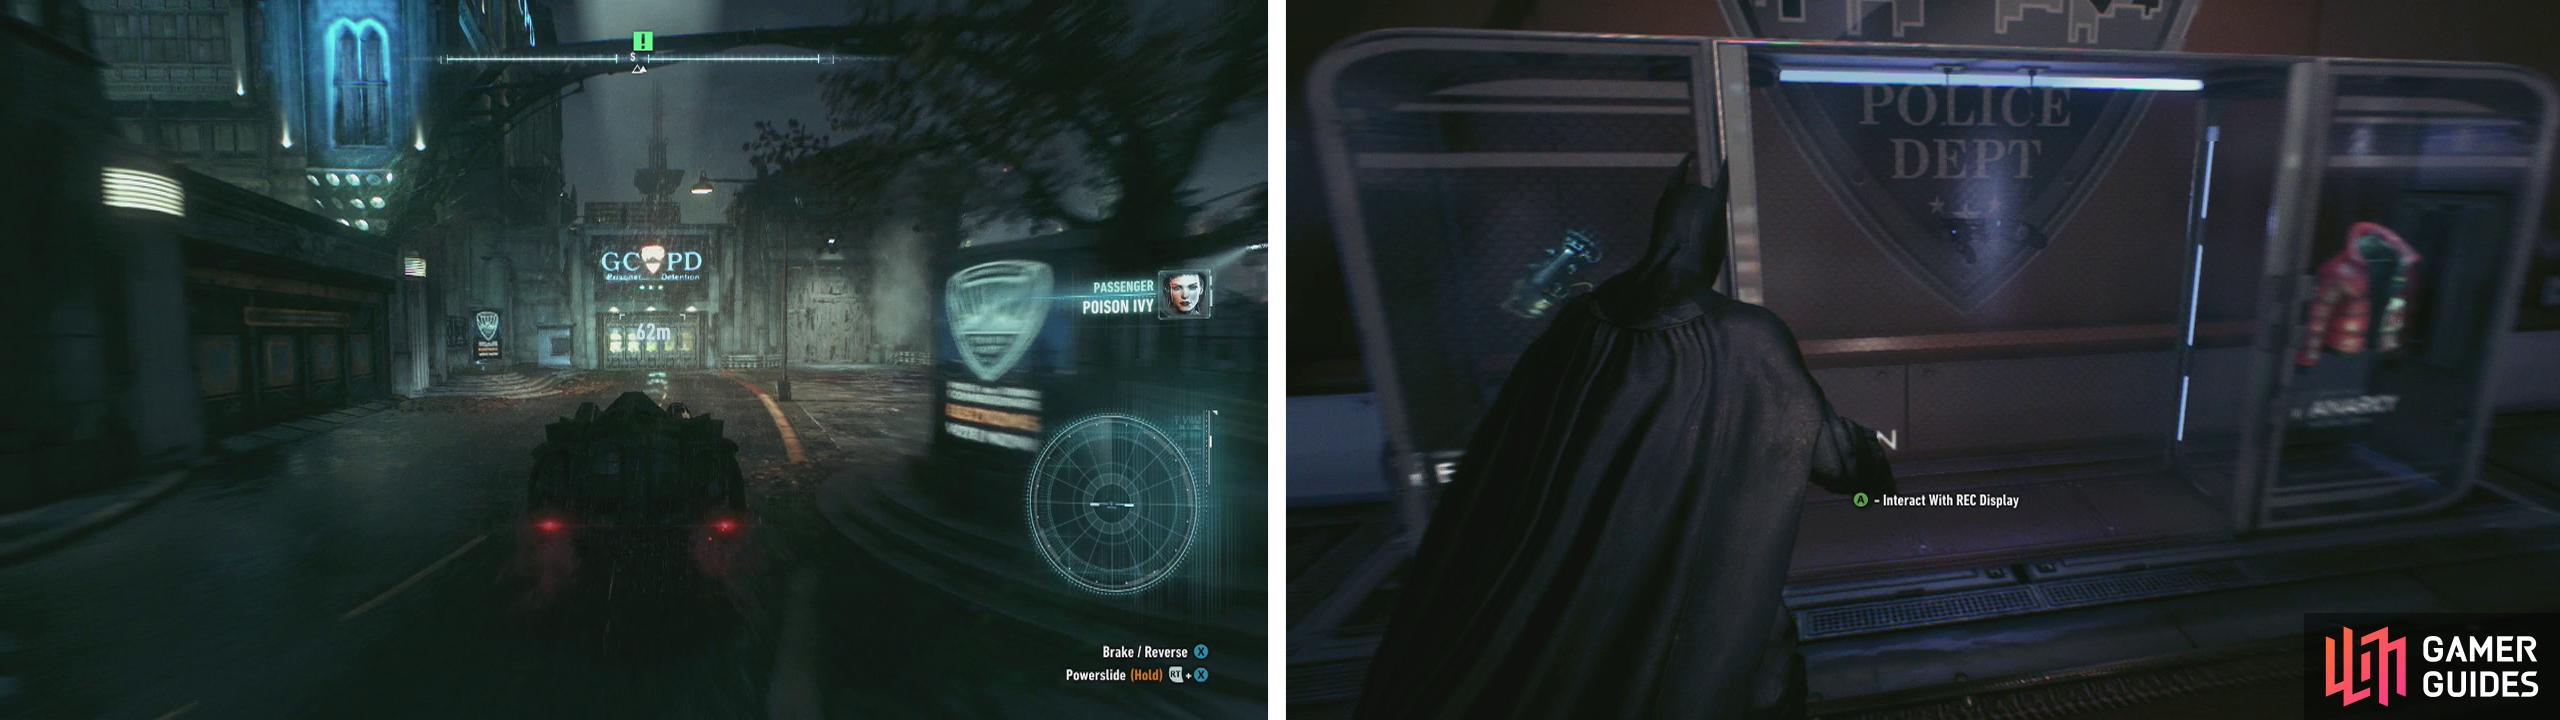
Retun to the GCPD HQ (left). Inside, check the ‘Evidence Room’ for the Remote Electrical Charge gadget (right).
Head over and speak with Gordon when you are ready to continue with the story. He’ll give you a rundown on what’s going on in Gotham, also introducing a couple of the ‘Most Wanted’ side-missions that are currently available.
Use the mission select screen when prompted to select your next objective. We’ll continue with the main story in this walkthrough, but walkthroughs to all of the ‘Most Wanted’ missions can be found in the ‘Most Wanted’ section after the main guide.
When you are ready to leave, exit through the door marked ‘Maximum Security’ and walk through the holding cells back to the Batmobile. Hop in and exit the building.
No Comments