Objective: Stop Scarecrow from blowing up ACE Chemicals
From Gordon’s location, we’re going to have to head back into ACE Chemicals once again. Once you land in the compound a short conversation will play out.
When you regain control of the Batmobile, you’ll see a big glowing target on the wall ahead. Shoot this to destroy it. Now head up to the platform where we used the hanging ramp earlier. We’ll need to adjust the hanging ramp so that it now faces the hole we just blew in the wall.
Once you have orientated the ramp correctly, drive over it slowly (I had to do it without the Afterburner ) to land in the service tunnel. Follow the service tunnel down the successive ramps until you reach the dead end, destroying the pair of Diamondback Drone Tanks you bump into along the way.
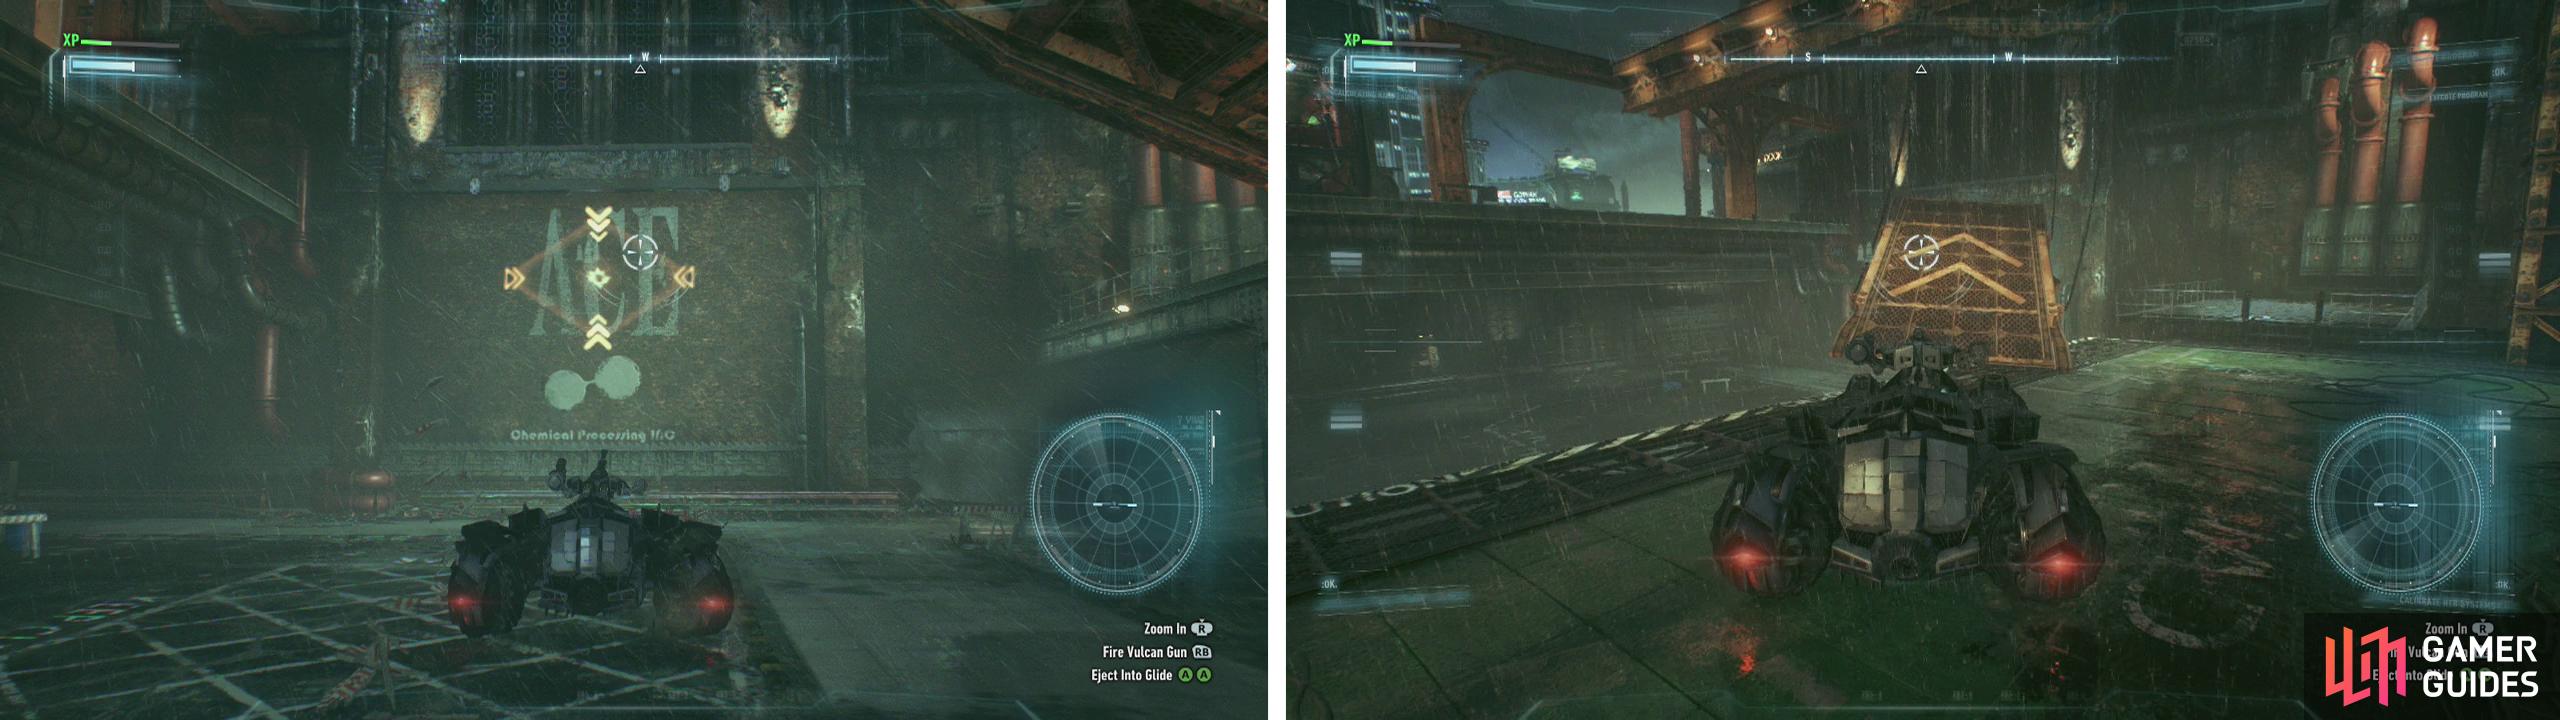
Shoot the weak wall (left). Then re-position the ramp (right) to jump into the hole.
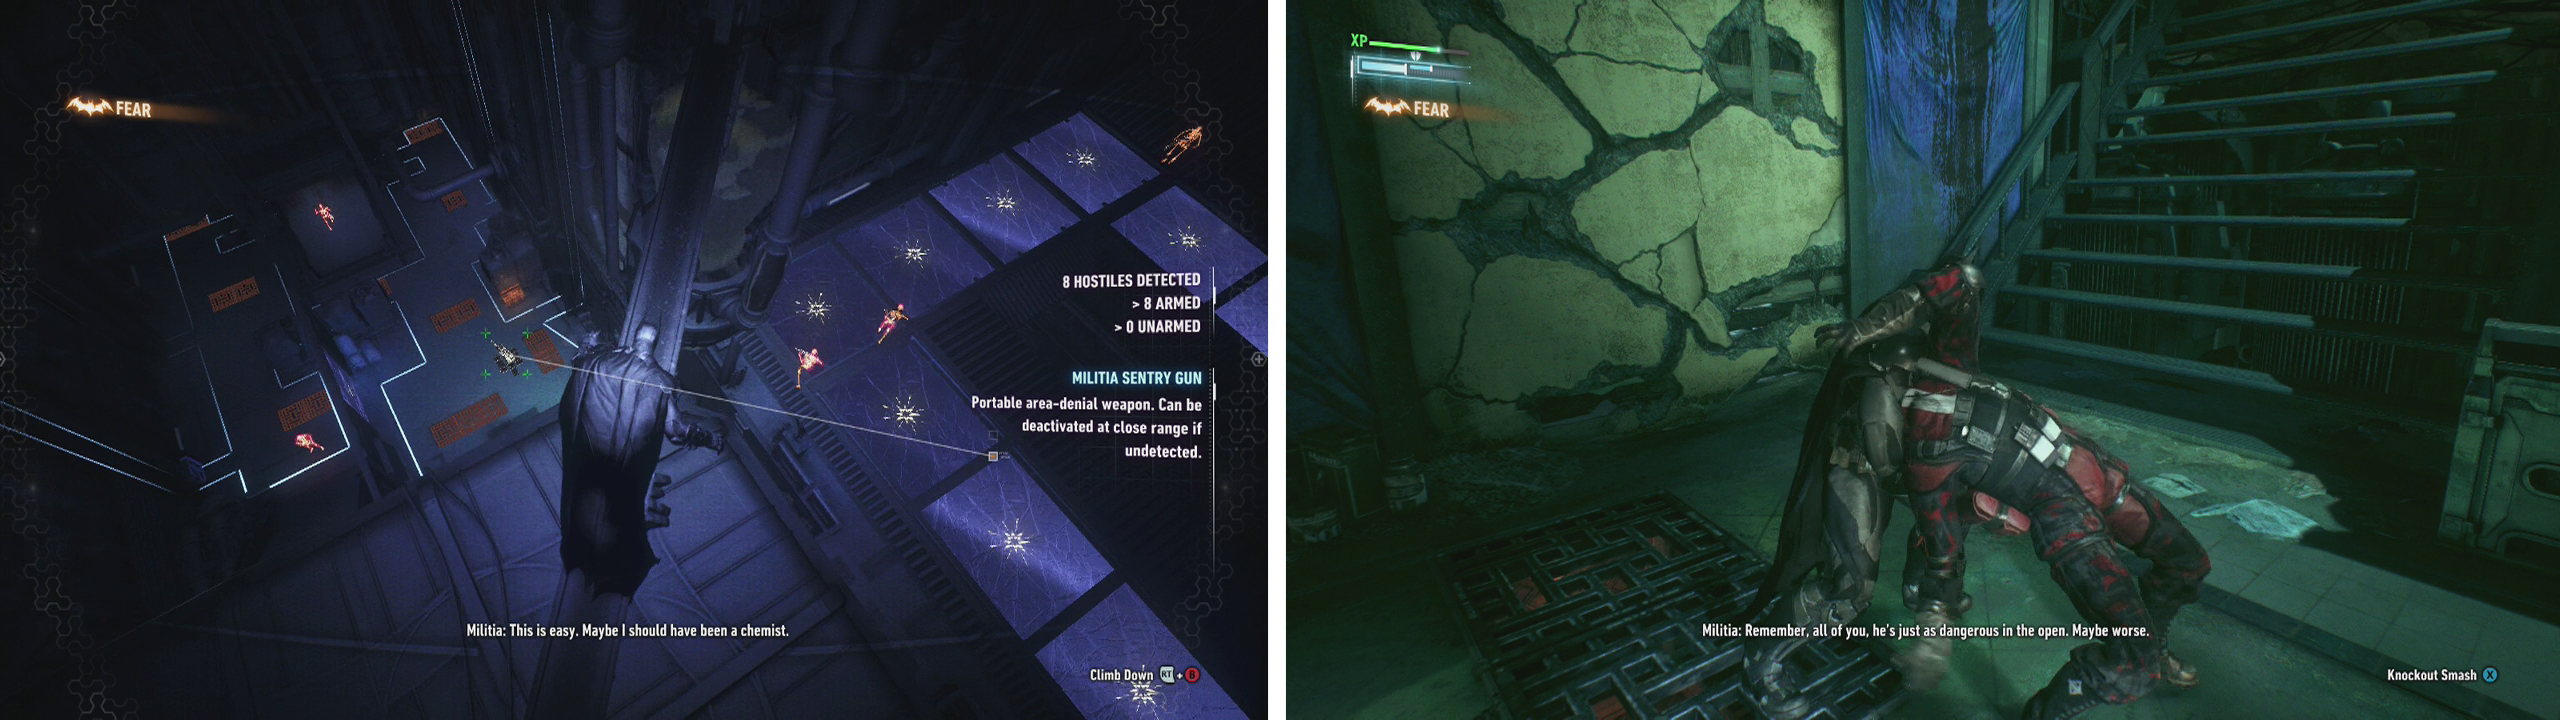
At the dead end, grapple up to a platform just before and above the gate. You’ll see a pair of guards and a sentry gun in the room below. Grapple to the far end of the room and use your Batclaw to enter one of the wall vents located on either side of the room that will allow you to access the space beneath the floor under the guards.
Sit beneath the guards and wait for the turret to look away before using a fear multi-takedown to dispatch the Soldiers. Quickly re-enter the floor space and move up to the turret. Exit and disable the sentry when it is not looking.
Interact with the panel on the wall to open the doors, allowing the Batmobile through. Jump back in and continue through the service tunnels until you reach the next closed gate.

Grapple to the top of the gate (left). Drop down and unlock the door to bring the Batmobile through to fight the enemies (right).
Grapple up to the top of the gate and you will see a small army of twenty enemies just ahead. Now if you are feeling really brave and supremely confident in your batman-combat abilities you can go and attack them. Alternatively, if you are looking for the easy way, you can drop down just inside the gate and activate the pane on the wall nearby to open it before hopping into the Batmobile and shooting the enemies – this will have them retreat into an adjacent room (you can chase them on foot and take them down if you are super keen).
At the next gate barring the service tunnel, you’ll have to use the Batmobile eject to launch yourself up on top of it. You’ll be able to get a nice view of the next room – the Mixing Chamber and we’ll need to enter predator mode to take down all of the bad guys in here before we can continue.
Predator Section 02
There are eight armed Soldiers in total and three Sentry Turrets. As with any predator scenario, the second you are detected, the guards will break off and behave erratically, leaving you to utilise the various takedown/stealth elements around the room to take them all out.
Before you have been detected however, the Soldiers act in the following ways:
- You’ll have three guards patrolling around a set of stairs on the right side of the main Mixing chamber with plenty of opportunities to break through weak ceilings.
- There is also a pair of stationary guards on a catwalk on the left side of the room with a handy girder overhead and a patroller that walks from the left of the room to the right and back again.
- At the far end of the room is a Sentry Turret and another pair of guards with ventilation shafts and floor panels we can use.
Use the girders at the top of the room to plan your attack (left). Pick off isolated targets silently to stay undetected (right).
I’d recommend clearing the back out first as you can eliminate them silently the easiest. Enter the ventilation shafts on the side of the room and take out the stationary guard and the turret before going after the patroller. Afterwards, what you do is up to you – if you go quietly, you can use the corners around the right hand side of the room for corner takedowns on the three enemies here and on the left side of the room you can use the equipment for a corner takedown on the patroller before Fear-Multi-Takedown on the pair of stationary guards.
Of course if you get detected at any time, you’ll need to retreat to the top of the room and scout the various locations for ways to take the enemies down that best suits you.
Once the room is clear of enemies, approach the door to the mixing chamber in the centre of the room and enter for a scene.
Following a chat with Alfred, you’ll need to interact with the control panel in the centre of the room (bang on your Detective Mode if you need help). Using this panel will cause four cylinders to emerge from the ground nearby.
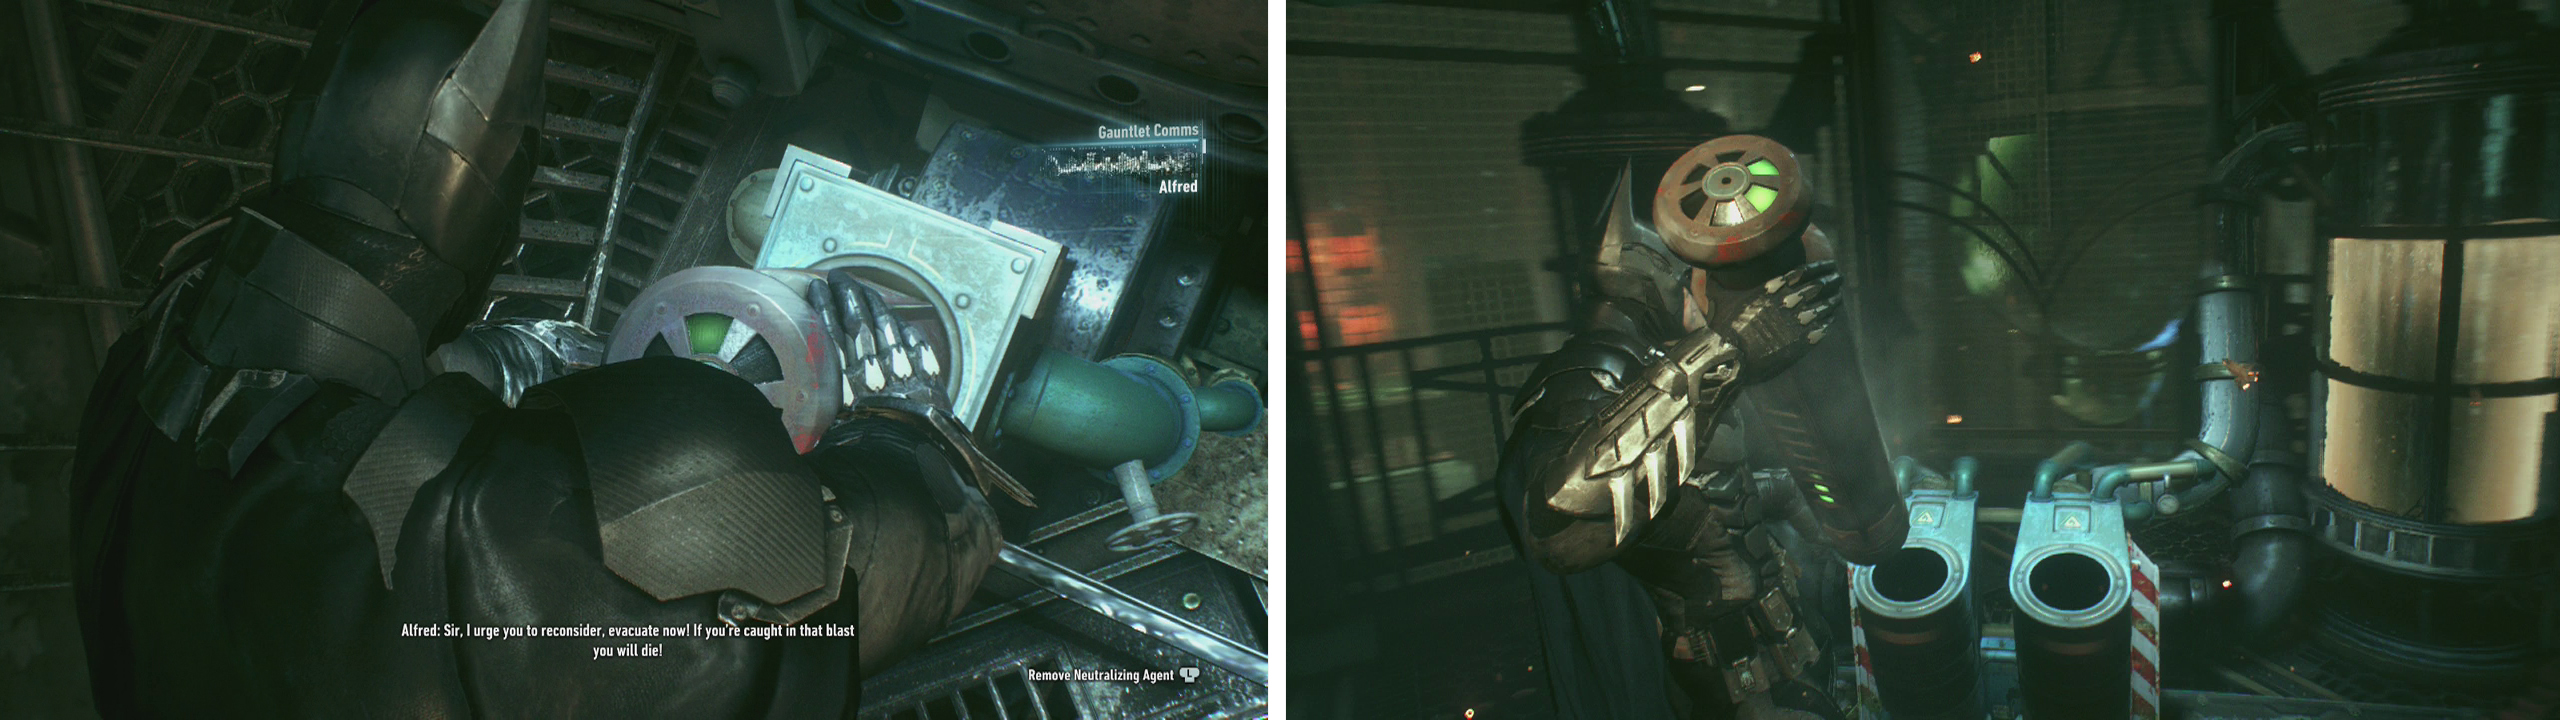
Pull the cylinders from the holders (left) and transport them to the other side of the room carefully (right).
We have to take each of these cylinders of Neutralising Agent CAREFULLY out of their sockets and place them in one of the other sockets on the walls opposite. We need to move them very slowly. Note the coloured lights on the top of the cylinders – at green they are safe enough, but will proceed to yellow and then red before exploding if we move them too quickly. As such, as soon as you see the lights turn yellow, it’s a good idea to stop and let them reset before continuing.
Once you have manoeuvred all four cylinders a scene will play.
We’ll now be in control of Commissioner Gordon on the rooftop of the Panessa Studios building. Move down the stairs and enter the door ahead. Take the elevator down.
After arriving on the main floor, enter the lab here to find a series of cells. Move up and interact with each of the cells for a brief conversation with the prisoners inside. After checking all of them out, it will trigger a story cut-scene.
This will end the flashback and send us back to present day Batman.
Objective: Escape ACE Chemicals
Once you are back in control of batman, the first thing you are going to want to do is switch to Remote Batmobile Control . Enter Battle Mode and look for an anchor point on the side of the mixing chamber we can snag with the Power Winch . Pull the wall down to escape.
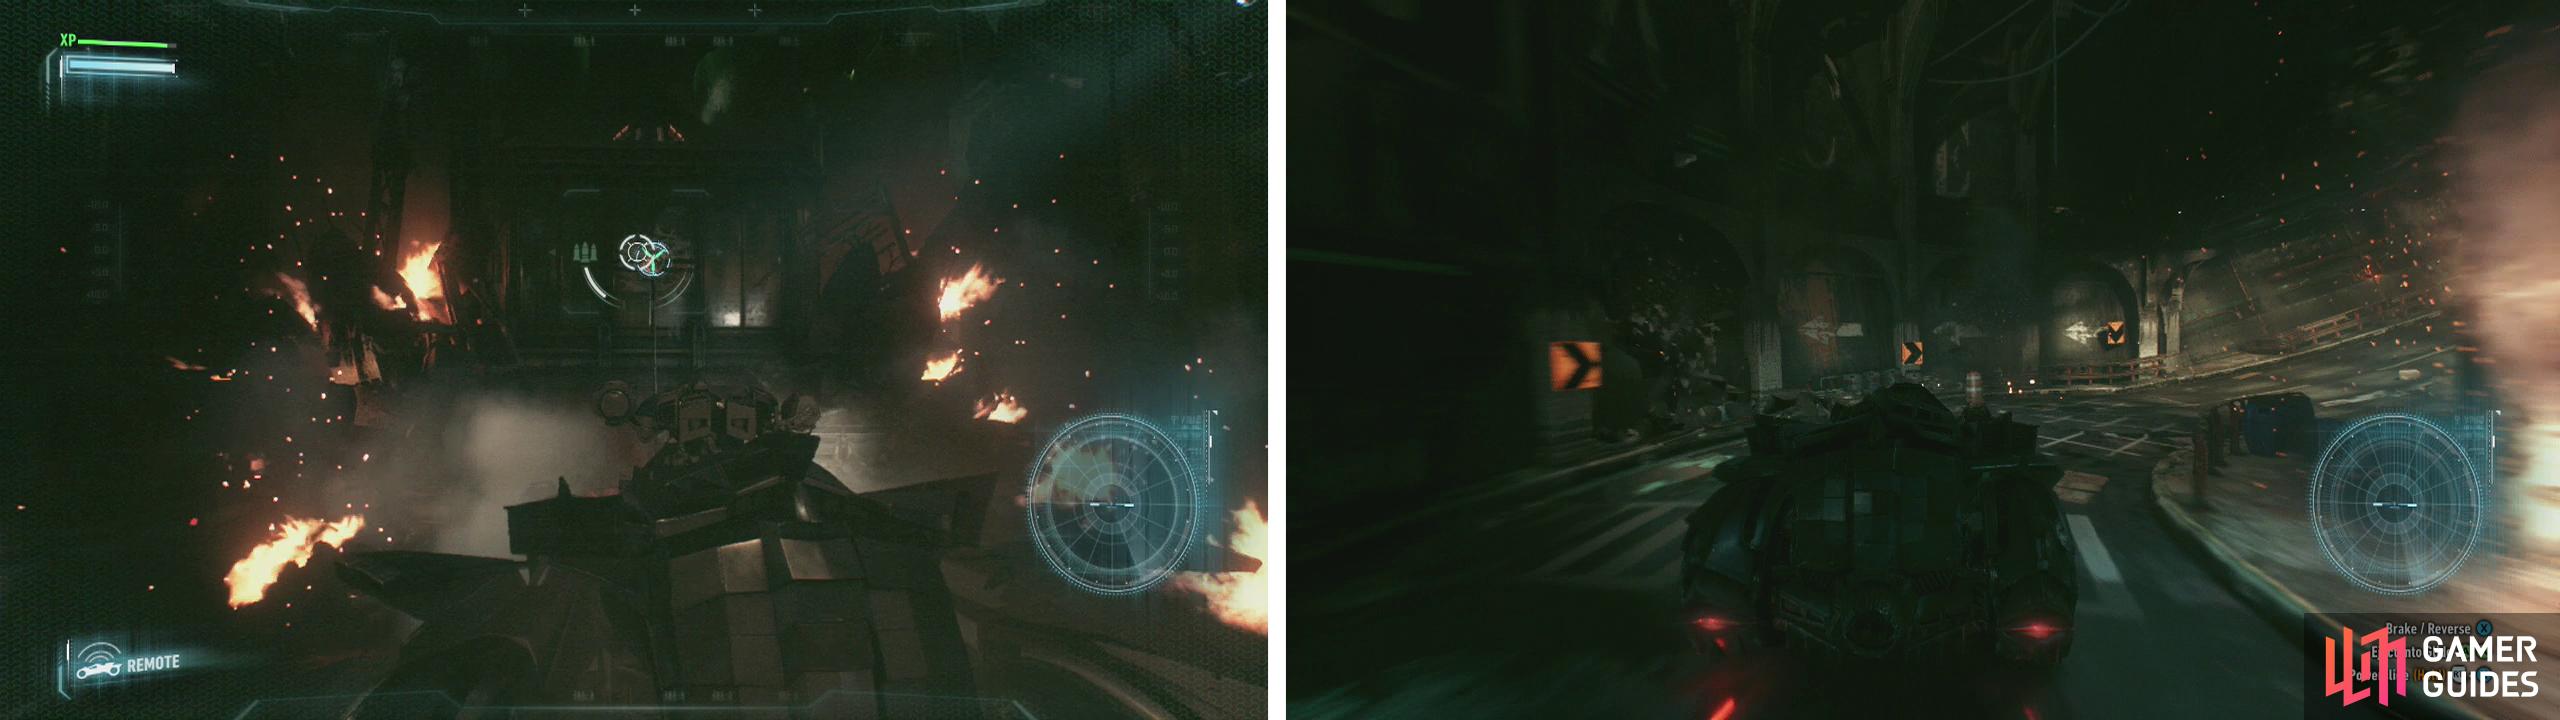
Pull down the wall with the Power Winch (left) and then race out of the facility ASAP (right).
Jump into the Batmobile and drive it back through the service tunnels the way you came and make your way all the way back to Commissioner Gordon on the bridge outside the facility for a scene.


No Comments