Objective: Meet Gordon outside GCPD prisoner detention
Following the scene, drive back to the GCPD headquarters on Bleake Island. As you arrive, you’ll need to take out a group of five Rattler Drone Tanks before being able to enter.
Once you are good to go, enter the GCPD HQ speak with Gordon here to update your objectives.
Objective: Escort Gordon to Oracle’s Clock Tower
After exiting the GCPD HQ, you’ll end up in the Batmobile behind Gordon who is also driving a police car. We’ll need to follow after him for a short distance and before long you’ll see him get attacked by a pair of militia vehicles. We now need to eliminate the hostile vehicles. Chase after them as they pursue Gordon and use your side-shunt ability and Immobilisers to lock on and take them out whilst avoiding their incoming fire.
Once the enemies have been stopped, Gordon will pull over. Drive the Batmobile onto the nearby objective marker to have him hop inside.
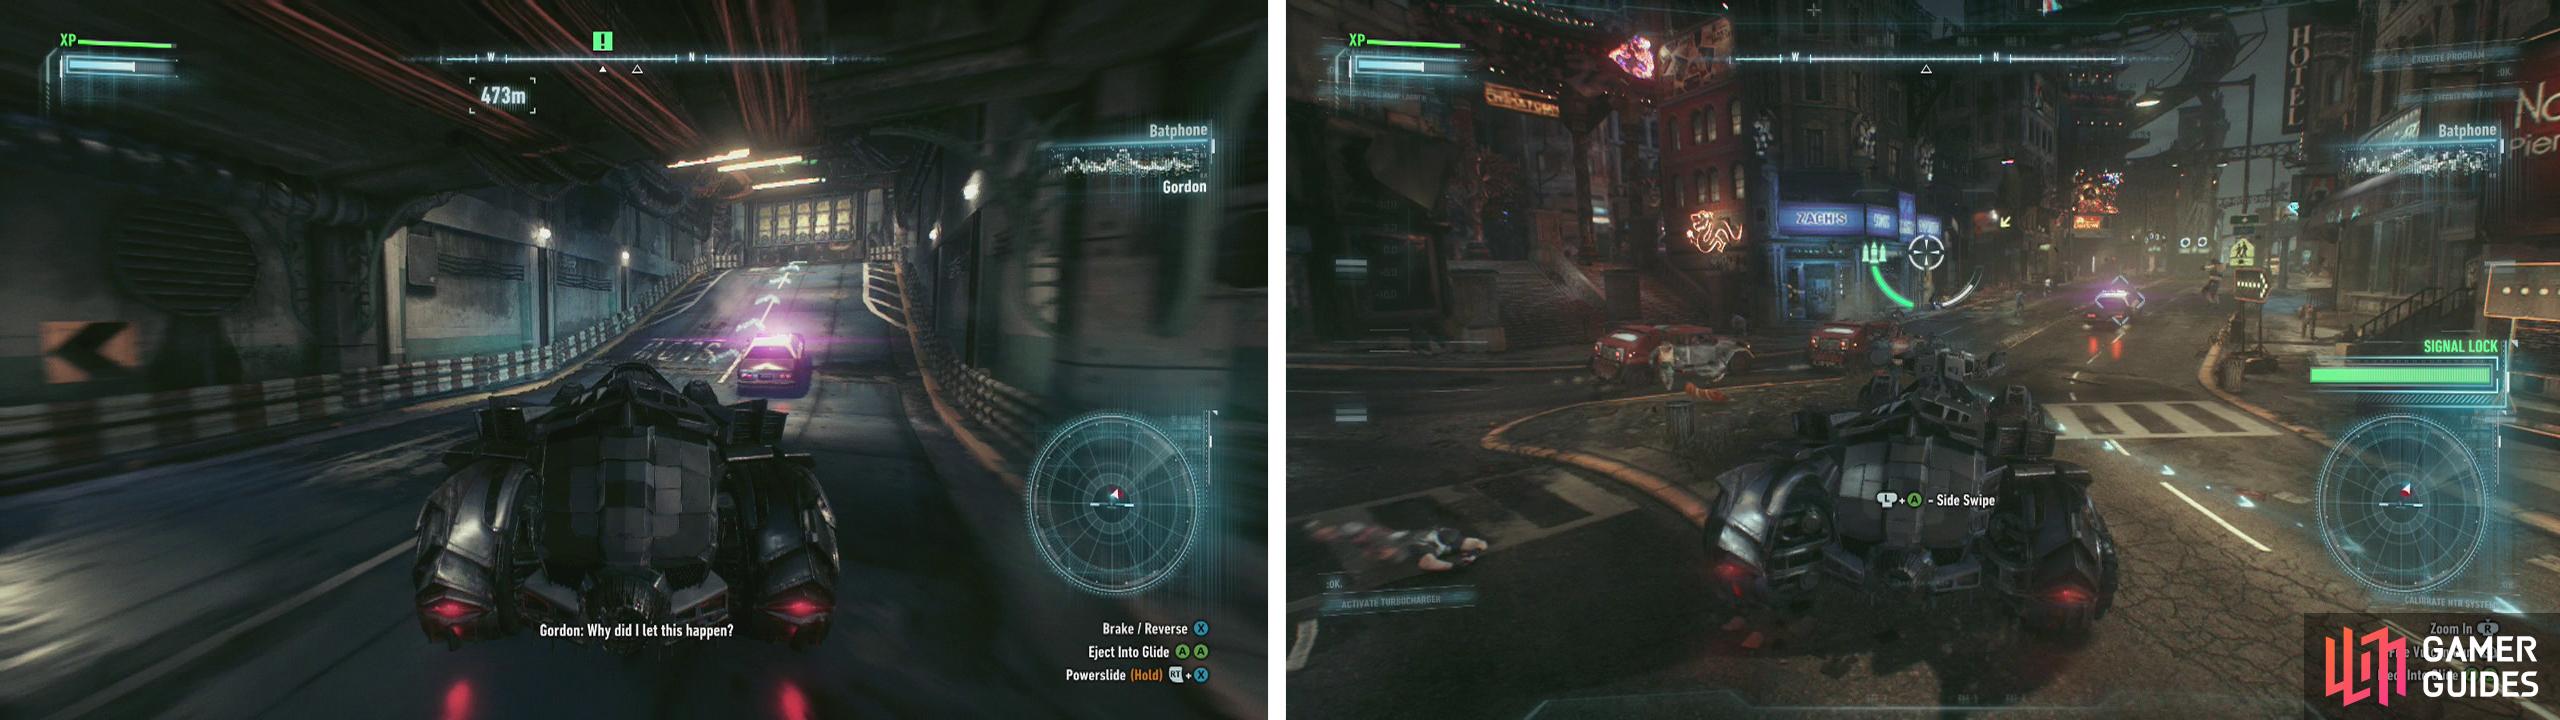
Exit the garage (left) and destroy the vehicles that attack Gordon (right).
Follow the set GPS route a short distance and you’ll bump into a large contingent of Drone Tanks. This group consists of 12 of the basic Rattler units and should pose no real threat, so long as you continue to practice avoiding incoming fire, getting critical hits on turrets and using your Missile Barrage when available.
When the area is clear of Drone Tanks, proceed to the Clock Tower via the GPS route. When you arrive you’ll see it has been overrun by Soldiers.
Predator Section 03
We need to clear out all of the enemies in the area to proceed and this entails taking down each of the five Soldiers and one Medic patrolling the balconies outside and on the scaffolding/construction area just north of the Clock Tower.
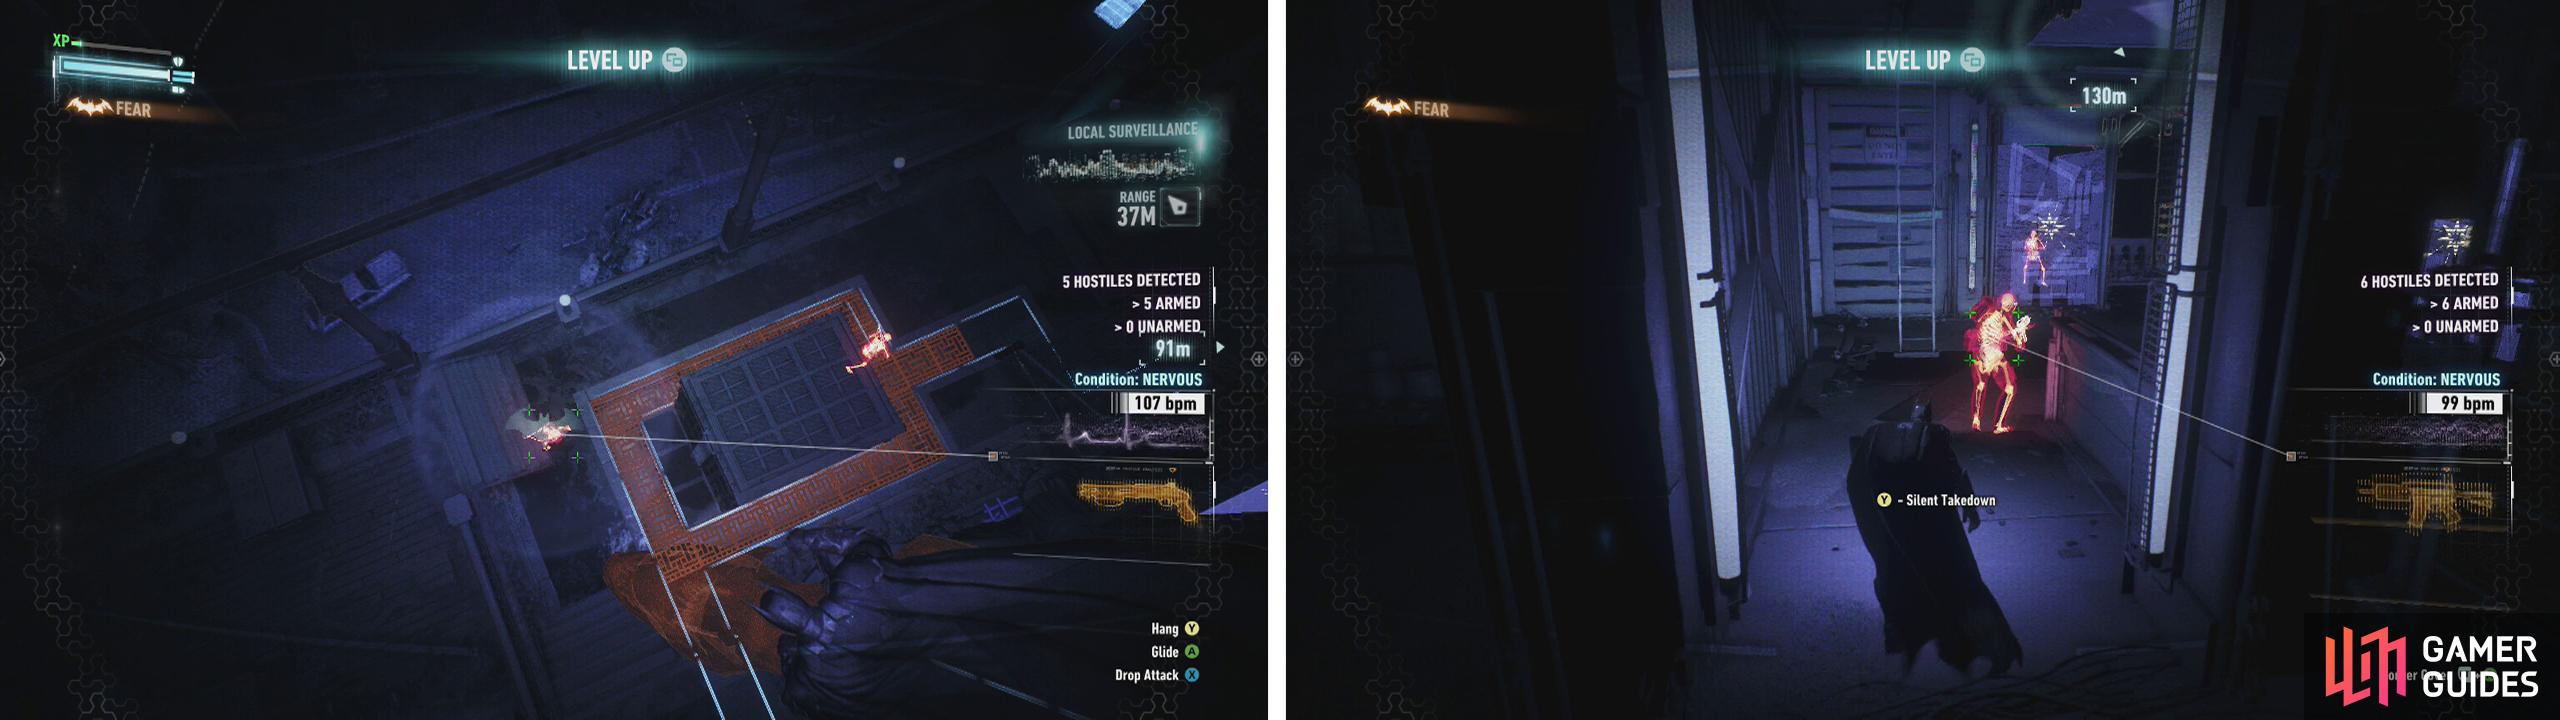
The floor gratings (left) are great for taking enemies down. Remember to use silent takedowns (right) to charge your Fear Multi-Takedowns.
The guards seem to walk about wherever they wish in this scenario, so it’s hard to suggest a solid strategy that will work in every instance. You can however make use of several environmental factors to make things easier, including:
- The large under-ground floor ventilation area by the northern side of the Clock Tower.
- The vantage points around the sides of the Clock Tower for inverted takedowns.
- The girders above the patrolling walkways on the northern side of the Clock Tower.
- The destructible walls in the scaffolding/construction zone.
- Corners in the Scaffolding/construction area are also especially useful for corner takedowns.
- A good tactic is to use a silent takedown by the underground vent systems to lure additional Soldiers to the position and then use a Fear Multi-Takedown to eliminate up to three at once when they come to investigate. If possible try to prioritise the medic so that he doesn’t go and revive downed enemies.
Once all the enemies have been dealt with the objectives will update.
Objective: Investigate the Clock Tower for clues
Grapple up to the top of the Clock Tower and interact with the hidden door to enter the tower proper. Approach the woman in the chair here for a scene.
This is the first of several trippy hallucinogenic sequences you’ll encounter throughout the game. Simply walk around the room a few times and change directions and eventually you’ll find yourself back in the familiar Clock Tower room we were in earlier.
After another brief chat, explore the room a little more until the Wheelchair materialises in the middle of the room. Interact with this for a scene.
Following the scene, head up and interact with the Batcomputer console. This will bring up some surveillance camera feeds.
This is the first of several mini-games involving scanning surveillance footage for clues. You can select any of the four windows and move forwards/backwards through the selected footage by spinning the stick clockwise or anti-clockwise. When you see evidence worth looking at, you can stop the footage, select the feed of interest and hit the interact button to scan it for evidence.
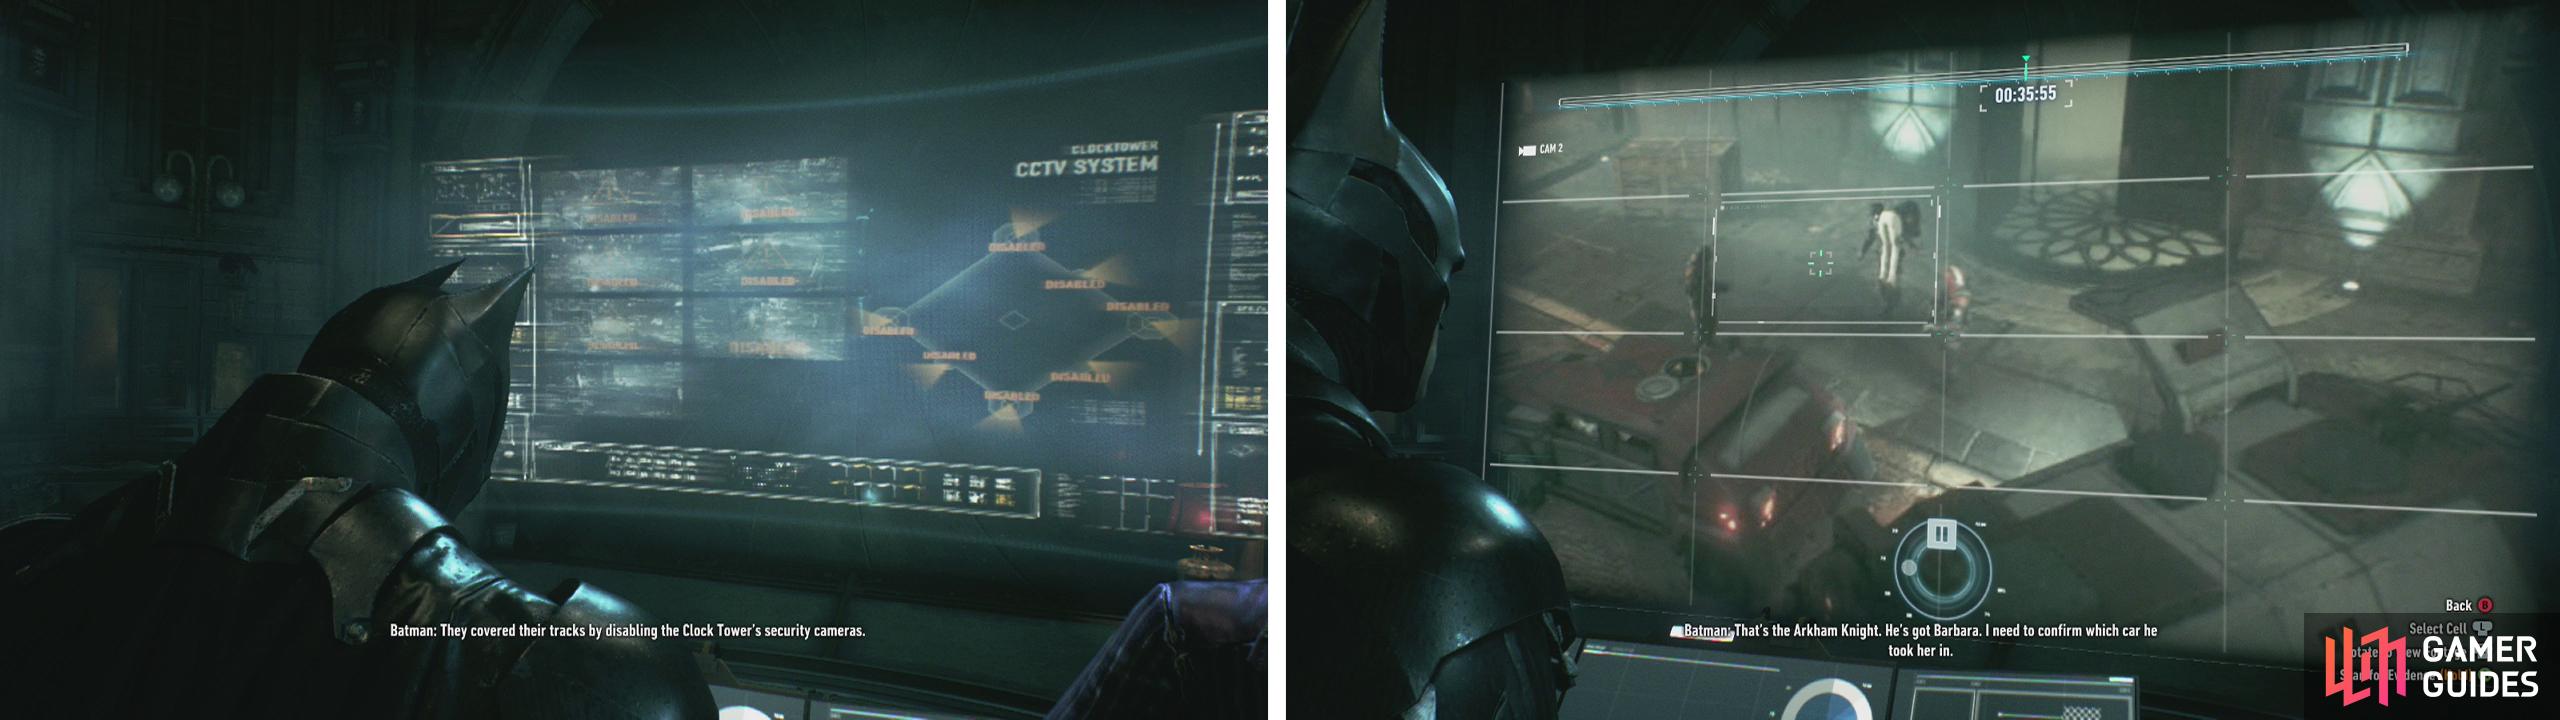
Enter the Clock Tower and use the Batcomputer (left). Scan the video (right) to update the objectives.
In this instance we need to see how our friend was taken from the Clock Tower. You can find said evidence by doing the following:
- At 00:35:80 scan the square with the man carrying the woman.
- At 00:42:00 scan the vehicle that the woman is placed in.
- This will allow us to proceed with the next objective.
No Comments