
| Important Items in this Area |
|---|
| eBook: Bob Page - Anatomy of a Prodigy |
| eBook: Jus in Bello |
| Palisade Elevator Keycard |
| Palisade Elevator Keycard |
| Drinking Water Analysis Results |
| Breach Software #15 |
| eBook: Palisade: Property & Data Protection |
| Flight 451 Dossier |
| Praxis Kit |
| Triangle Code #20 |
Alright, let’s go rob a bank. Enter via the front door like a boss and turn south to find some seats, on which you’ll find the eBook “Bob Page - Anatomy of a Prodigy”. Once done turn west and head up the southern stairs, then immediately turn north and search a table to find the eBook “Jus in Bello” . Continue west along the southern end of the building until you find a hallway to the south, which turns west and ends at some vending machines. Move a trash can out of the way to discover a vent, through which you’ll find some maintenance tunnels.
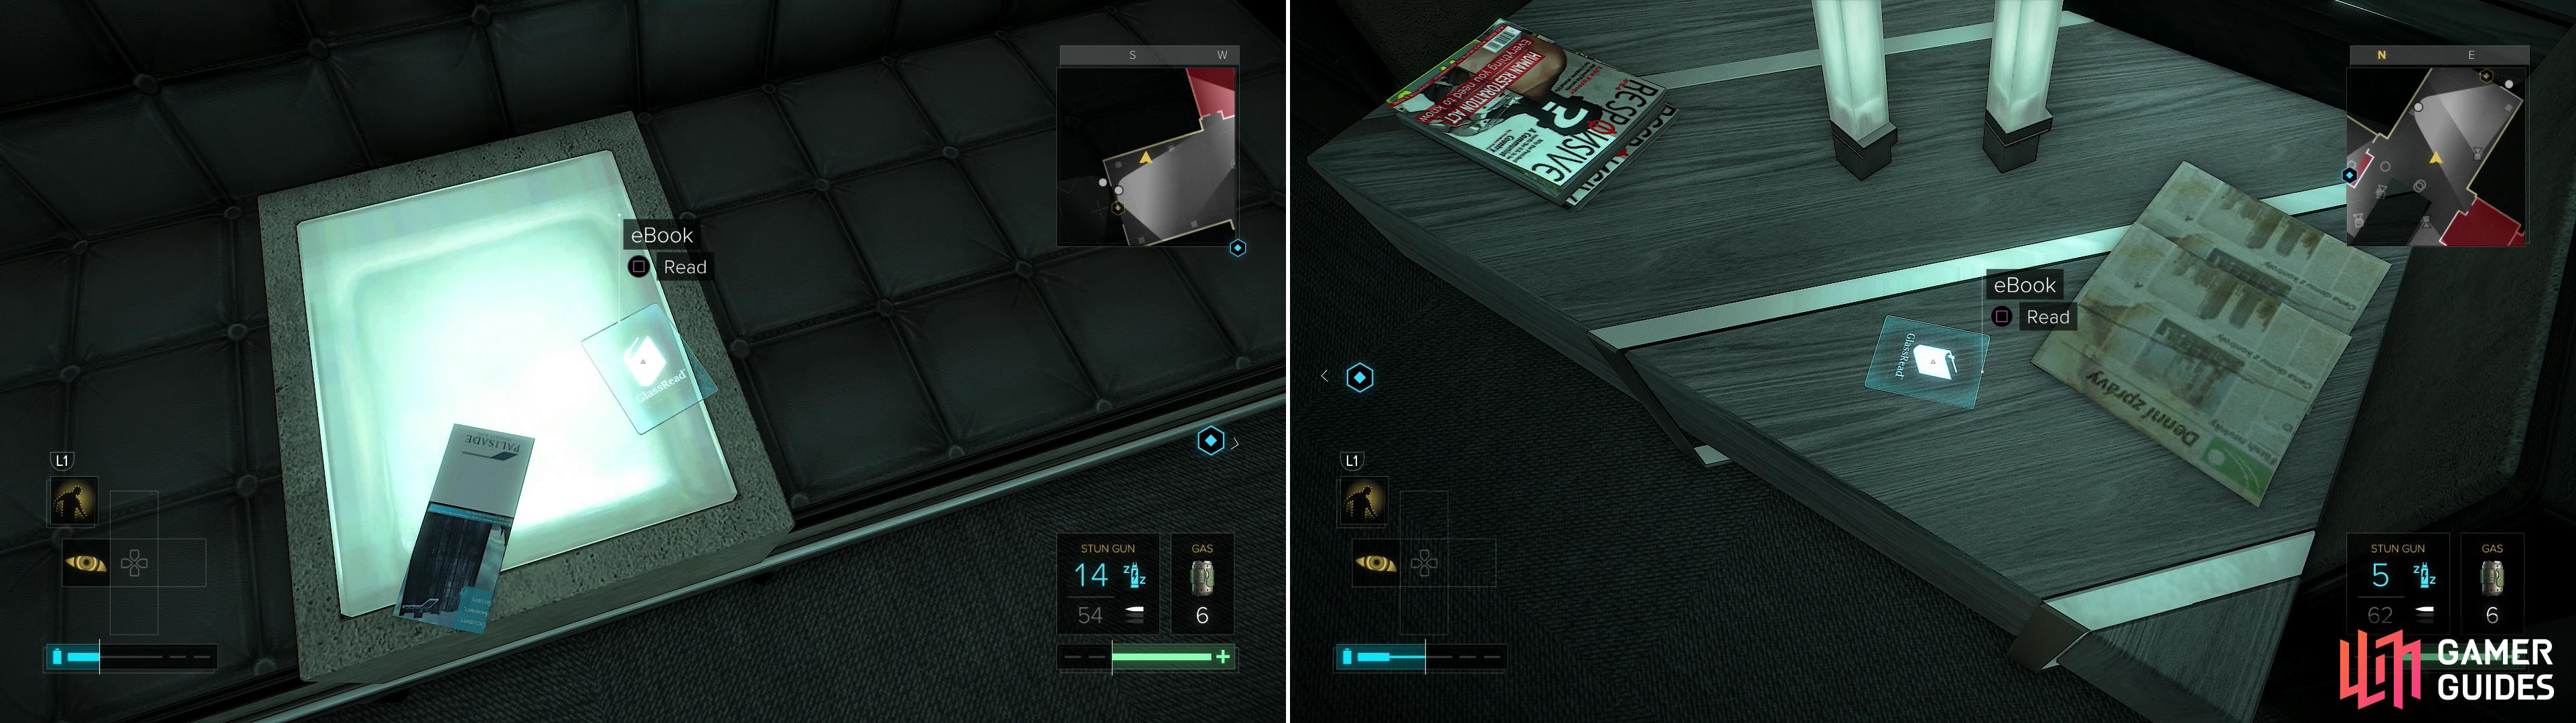
There are two eBooks near the bank’s entrance, one on some chairs (left) and another on a table (right).
LV2 Security
Across the tunnel to the west is another vent, which leads to a security room. Watch the guard inside carefully and wait for him to start walking west along the northern end of the room, which should give you plenty of time to pop out of your vent and knock him out. Stay low and make your way to the western wall and toggle an EG Switch to keep people outside from seeing in, then hack the security computer (password: “klmvp9951” ) (Security Rating: 2) and turn off any security you can. Loot the guard for various goodies (including a Pocket Secretary containing the password for the computer in here), then search the drawers in this room to find a unit of Reveal Software, some Stun Gun Ammo and a Box of Crafting Parts. Finally, grab the Pocket Secretary off the southern table to learn the new employee identification code for one Daniel Janecek.
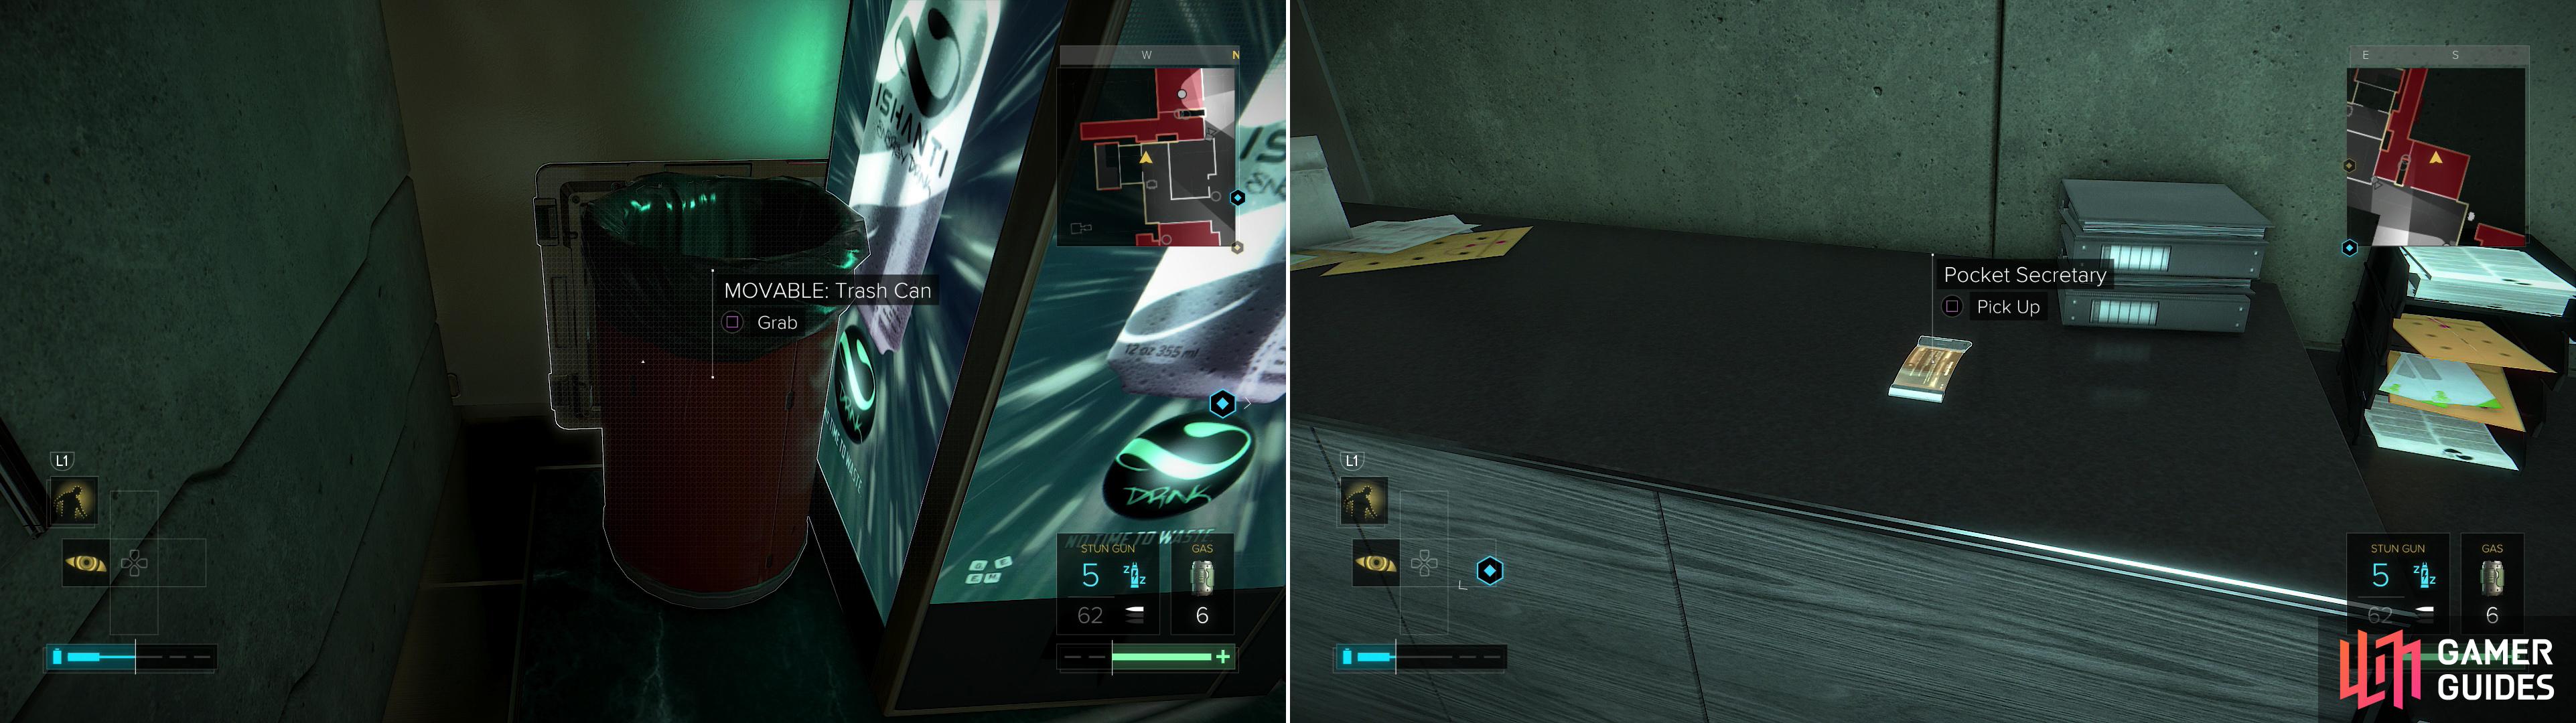
Move a Trash Can out of the way to reveal a vent (left) then sneak into a security office to find a Pocket Secretary you’ll need to disable more security (right).
Daniel Janeceks Office
Leave the vent and head north-east to find a structural weakness you can exploit to reach a boardroom. Grab a Pocket Secretary off the table in here, then retreat back through the wall. Continue south to the end of the passage and turn east to find a find a vent you can crawl through to reach the interior of the elevator shaft. Ignore the elevator and the ladder down for now and instead continue east into a vent, which will ultimately lead you to another maintenance area. Turn north to spot a vent, which leads to Daniel Janecek’s office. Use his computer and select the messenger service to get in contact with security. Select the options “new technician”, then either “yes” or “I did” before you finish up by giving them your code “ID 4489”. You have to get this off the Pocket Secretary in the security room - there’s no way to fake it.
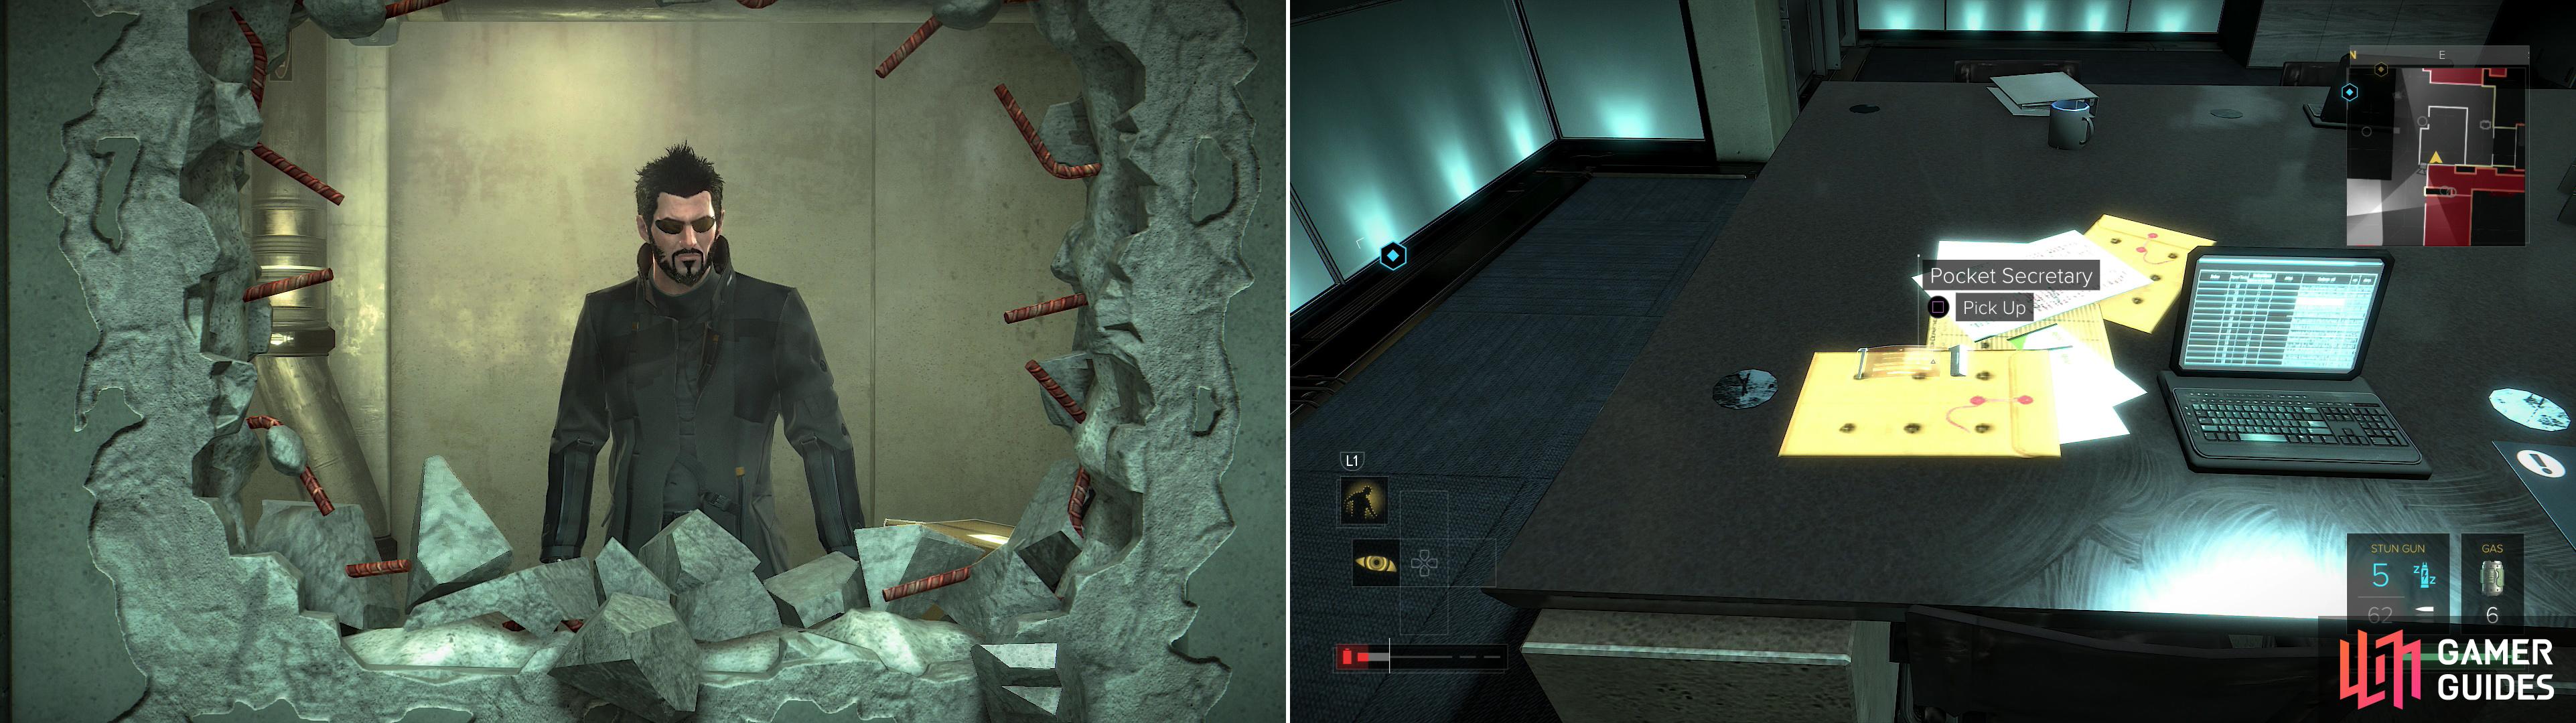
Sneak through the maintenance area and punch a hole through a wall (left) to reach a boardroom where you can find another Pocket Secretary (right).
Tomas Romaneks Office
Return to the lobby by crawling through the maintenance tunnels and head north-east to reach Tomas Romanek’s office. Use the Keypad (CODE: 0831) (Security Rating: 1) to gain access to the room - you want to use the code, as hacking will provoke the security guards in the area. Once the door is open, use Ghost-Shield Cloaking to turn invisible and enter the room, as the two Civilians nearby will cause trouble if they see you enter the office. Grab the “Palisade Elevator Keycard” from off the desk, pick up a Pocket Secretary on a table to the south. You can also loot the various drawers in here for two Credit Chips and a bottle of Painkillers.
Leveling Up
You now have two ways up to the third floor of the Palisade Property Bank, the first and most obvious being to head down the hallway to the south (the same hallway you used to initially reach the maintenance tunnels) and simply ride the elevator up. Failing that, sneak back into the maintenance tunnels and go to the elevator shaft, where you’ll find some devices you can remote hack to bring the elevator down. From the top of the lowered elevator you can jump south to reach a metal walkway above you, then turn east and climb through a vent to reach a maintenance tunnel. Elevator riders can reach the same tunnel by simply exiting the elevator (be sneaky, as guards can be found in the security room to the west) and crawling into a vent along the floor to the east - a vent that is blocked by some cardboard boxes).
IT Services
If you want to score some extra loot, turn your attention to the east, where you can find a tech nerd talking to somebody. Go through a vent and move a photocopier, then dispatch the Civilian when you get a chance. Keep sneaking and head to the northern end of the room to find an EG Switch, which will stop the guards outside from noticing you. Once done, loot the room to find another “Palisade Elevator Keycard” , several Credit Chips, a unit of Stealth Software, a Biocell, three Stem Processor Chips, two boxes of Crafting Parts, a Gyroscopic Regulator, a unit of Datascan Software, a Multi-Tool, a unit of Reveal Software and two Hydraulic Micropumps. You can of course also hack the computer in here (Security Rating: 3), if you wish.
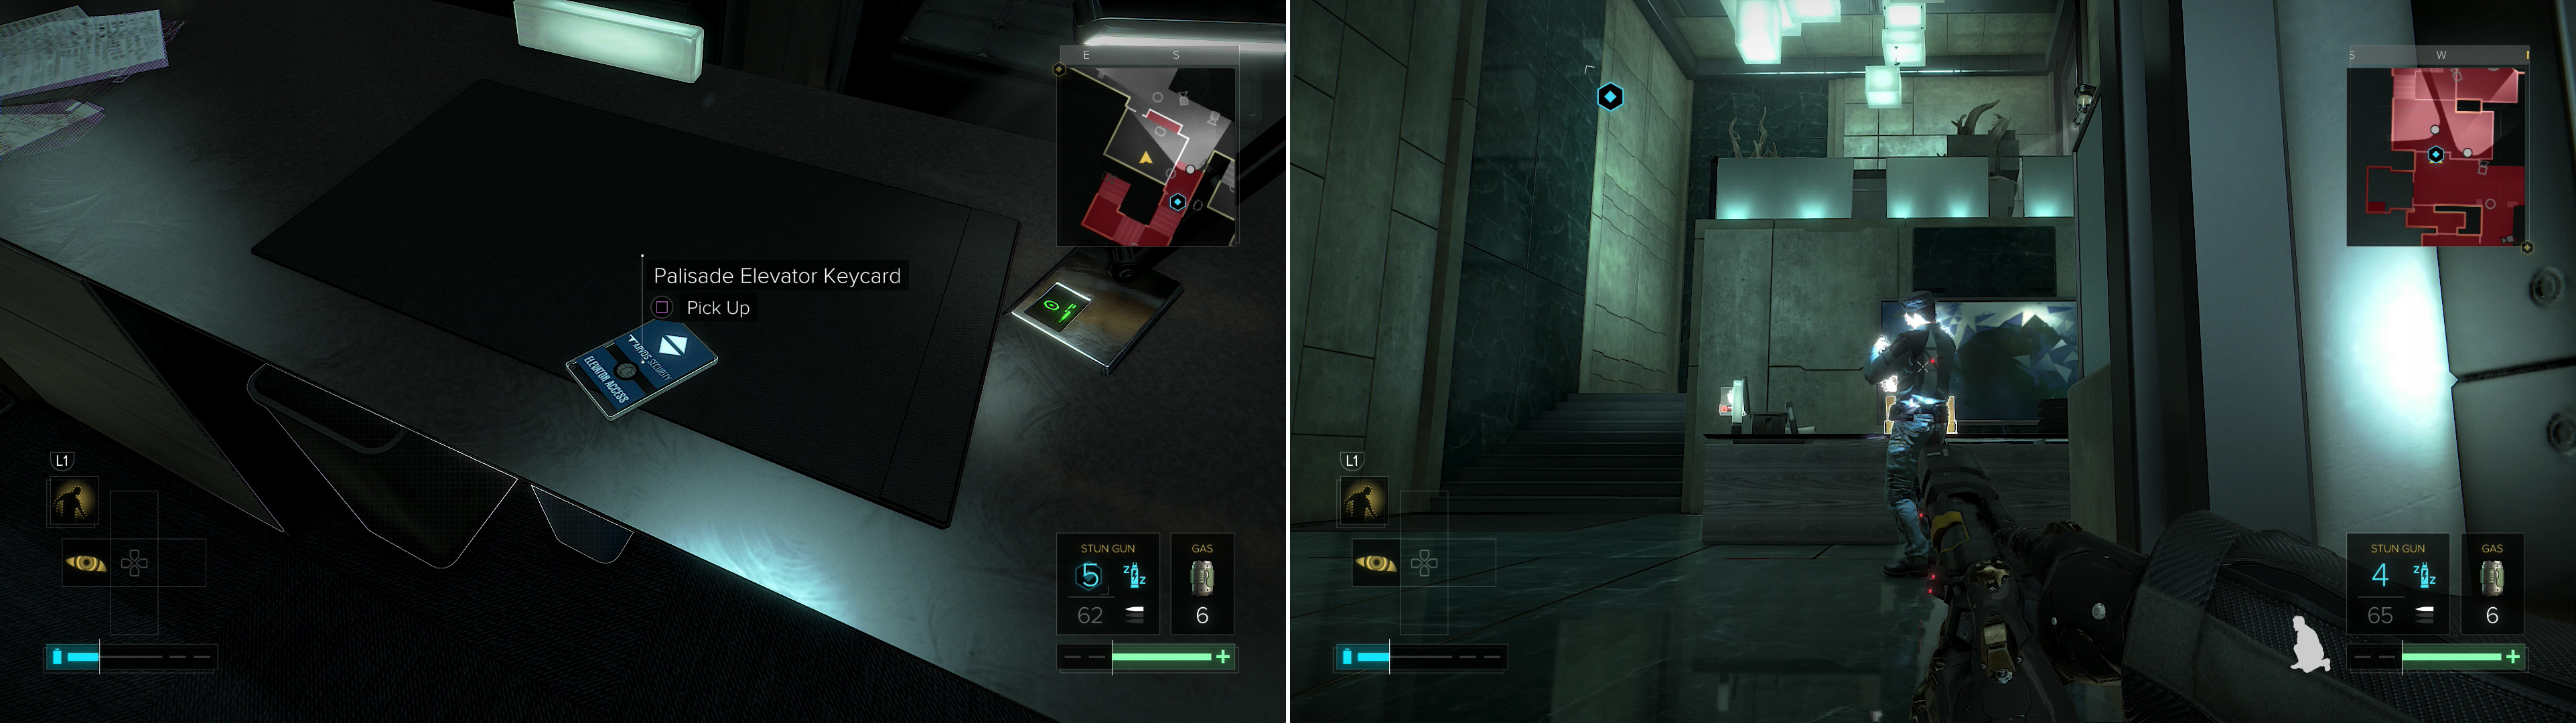
Grab the Palisade Executive Keycard out of Tomas Romanek’s Office (left) and dispatch the guards stationed near the CEO Offices (right).
CEO Offices
Make your way to the elevator and from there turn west to reach the door to the CEO Offices. Wait out of sight (the corner north of the door works fine) until the two guards get done talking, at which point one will sit down and face west, utterly failing at his job, while the other will stand by the door. Open the door but stay out of the doorway. The guard will become suspicious, so wait for him to get bored, stop being suspicious and turn west, then pop in the room and shoot him with your Stun Gun. If you’ve been following this guide, this may be the first time you’ve actually had to use said Stun Gun. Press the EG Switch near the door to obscure the room from outside intervention, then sneak around a corner to the north and shoot the sitting guard with your Stun Gun as well. Once the two guards are neutralized, hack the computer on the desk here (Security Rating: 1) if you wish, then grab a unit of Stop! Worm Software from the desk drawers and a Pocket Secretary from the lower shelf of the desk. You can also disable an Alarm Panel on the wall (Security Rating: 1), but failing a catastrophic mistake you should no longer be at risk of guard interference.
Head halfway up the flight of stairs to the west, then turn north and jump up over the railing - going fully up the stairs forces you to deal with a camera, which you can, of course, just remote hack. Make your way north to a doorway under the camera and hack the Keypad (Security Rating: 1), then quickly rush through the doorway to avoid the camera. Voila! The CEO Offices now lie before you.
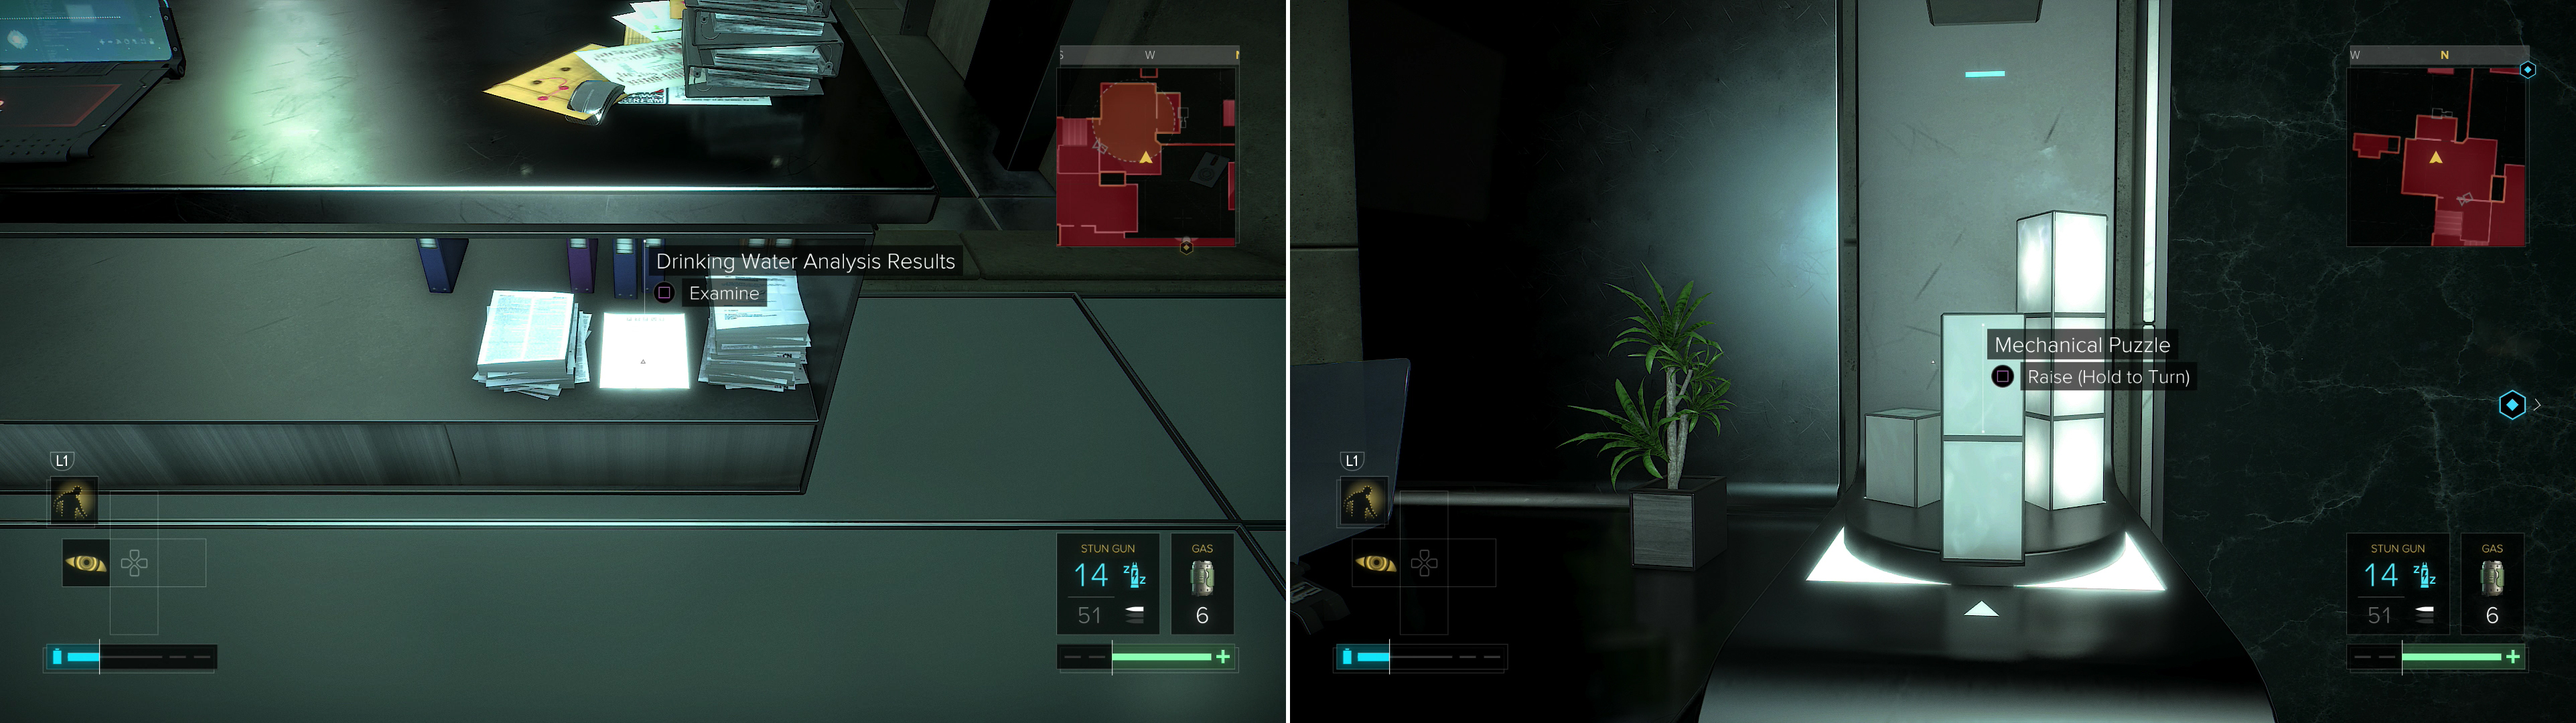
Search the north-eastern desk - Ashani Talwar’s desk - and grab the “Drinking Water Analysis Results” paper from the shelf under the desk. Seems like Samizdat was right to distrust Picus. You can now leave the bank whenever you wish - the way back shouldn’t require an extra effort on your part. If you choose to stay and finish looting the place, however, there’s plenty of goodies to get with minimal effort in the CEO Offices, and with a bit more effort, in the Executive Vaults.
| Objective | Reward |
|---|---|
| For finding incriminating Picus documents | XP 1500 |
Search the CEO Offices to find the Drinking Water Analysis Results (left). Solve a Mechanical Puzzle to open up a secret room (right).
Hack the security computer (Security Rating: 1) and disable all the security on this level, then hack the other computer (Security Rating: 3). On the other desk is another computer (Security Rating: 1) you can hack and a Credit Chip. Near this desk, against the northern wall, is a Mechanical Puzzle you can try to solve. Hold down the [SQUARE] / [X] button to rotate the pillars, and press [SQUARE] / [X] raise their height. From its base position it’s pretty easy to solve, simply take the following actions, in order; raise, turn, raise, turn, raise, turn, turn, raise.
When the puzzle is solved a door to the north will open, but if this puzzle is too much of a chore for you, head to the western end of the office and look up behind the larger of the two televisions to find a vent which you can climb into. Do so, destroy a destructible vent, turn north and drop into a maintenance area. Turn east and climb down a ladder, continue east and look up to spot a vent in the roof. Climb into it and slither west, following the duct’s linear path and jumping up into elevated ducts when necessary. Exit out another vent into the secure chamber the Mechanical Puzzle opens.
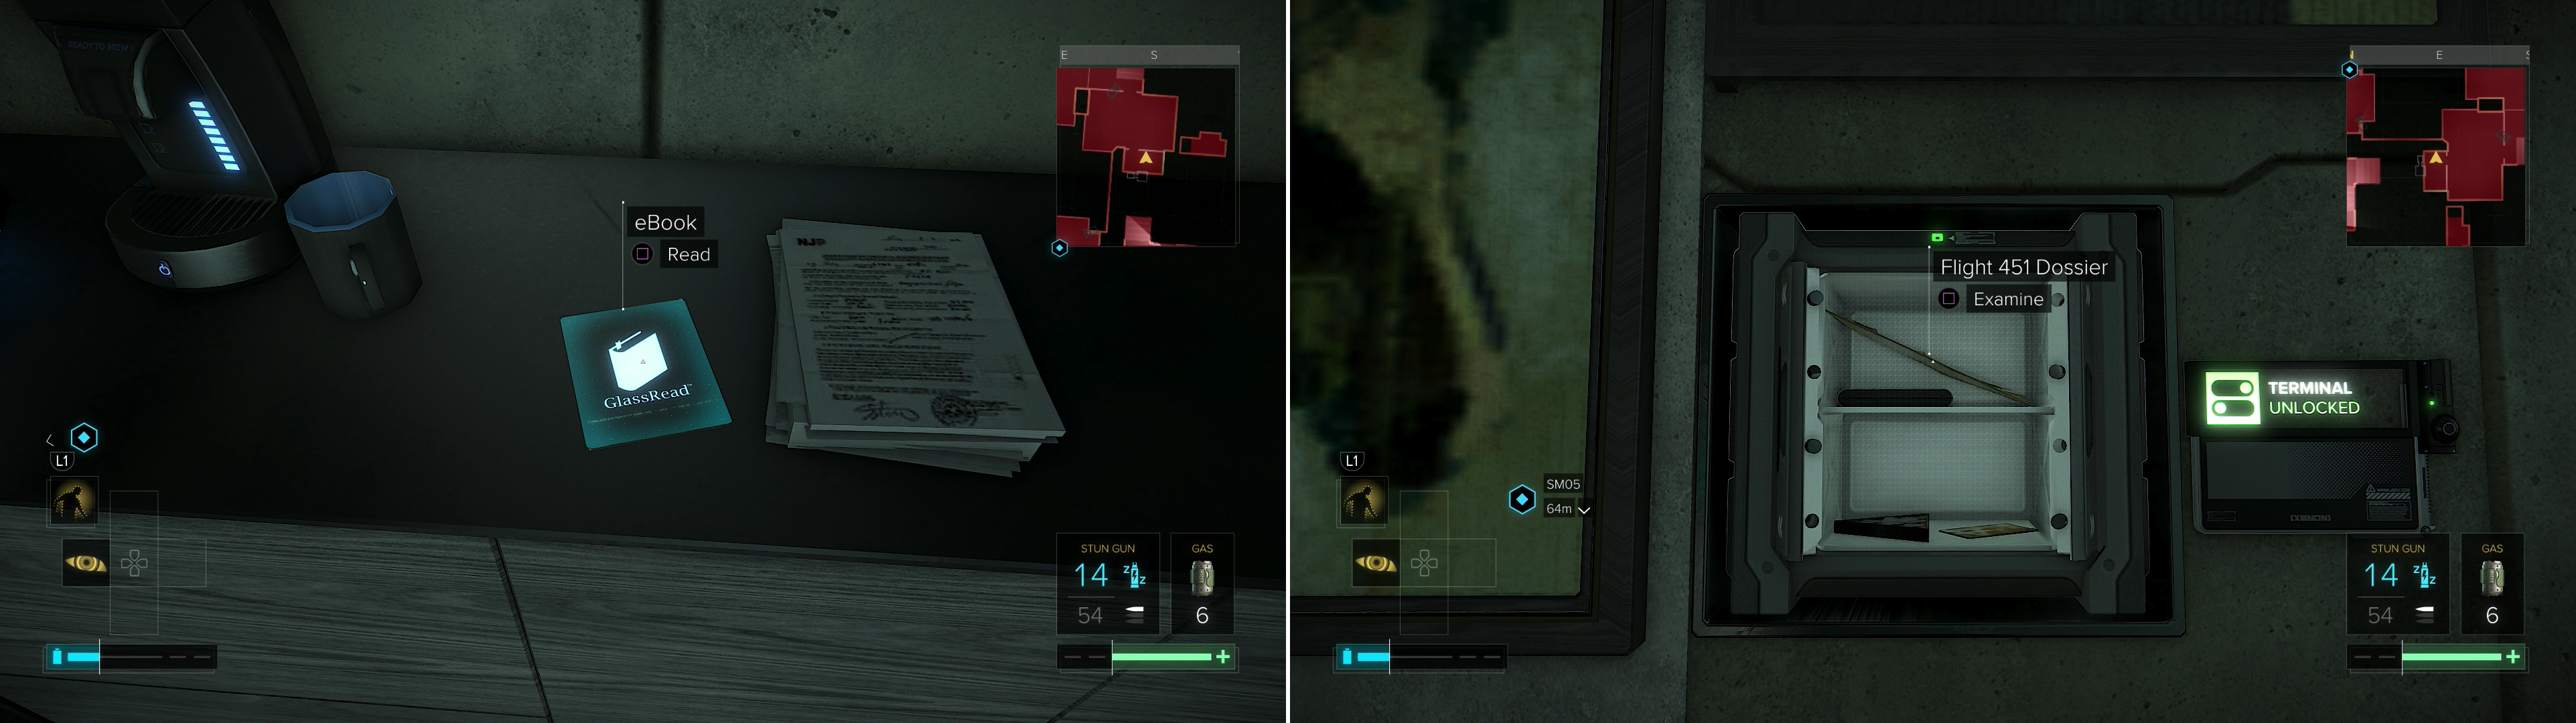
Search the secret room to find an eBook (left), then grab the Flight 451 Dossier out of a safe (right).
Grab “Breach Software #15” off the desk, along with a Pocket Secretary, then turn around and read the eBook “Palisade: Property & Data Protection” on a table to the south. Next turn east and examine a painting to reveal a safe and its attendant Keypad (Security Rating: 1). Hack it, then open the safe to find the “Flight 451 Dossier” which provides even more damning evidence against Picus. More importantly, there’s also a “Praxis Kit” , a Credit Chip and “Triangle Code #20” .
You’re now done with Palisade Property Bank… the relatively easily-accessible, upper reaches of it, at least. There is, however, the Corporate and Executive Vaults, not to mention the parking garage, and there’s still plenty of great loot to be had. If you want to just return to Samizdat and turn in the intel you’ve found, skip to the heading “Returning to Samizdat” at the end of the next section, otherwise continue with all the text in between.
No Comments