
| Important Items in this Area |
|---|
| eBook: Tarvos: Mission Statement & Company Bio |
| Neuropozyne |
| Triangle Code #31 |
| Devastator Shotgun |
| Security Keycard |
| eBook: Port in a Storm |
Rooftop Looting
After enduring a pep talk from Miller and suffering through the foolish bravado of a buffoonish billionaire you’ll be left to your own devices atop the Apex Center. What a pretentious name. Anywho, there’s a bit of loot up here worth going over, just in case you found yourself wanting some of the loot mentioned earlier. From the helipad head head through a doorway (Security Rating: 4) to find a small room with a case containing a unit of Datascan Software, some Crafting Parts and a Biocell. Biocells will be good for ghosting the last bit of this mission, and Crafting Parts are best used to make Mine Template, if you need them.
Leave this room and head north across the roof to find another building. Ignore the door (Security Rating: 4) and head to the western end of the building to find a weak section of wall you can punch - do so and enter the lightning-filled room beyond. To get rid of the lightning climb onto a generator, then jump onto another metal structure to the east and look up. Above you is a platform on which a breaker awaits a hero brave enough to conquer the lightning. Be that hero, then loot some lockers below to find more Crafting Parts, a Smoke Grenade, a bottle of Painkillers, a unit of Nuke Virus Software, a unit of Stealth Software, some Tranquilizer Ammo and some Sniper Rifle Regular Ammo.
Return back outside and climb through the hole you made in the wall, then turn your attention to a third building, this one to the south-west. Ignore the door on the northern end of the building (Security Rating: 5) and instead circle around to the western end of the building, where you’ll find a vent hiding behind a Heavy Plastic Crate. Crawl through the duct to reach a small room with another case in it, this one containing a HypoStim Injector. There’s also another Biocell on a metal object in the south-eastern corner of this room.
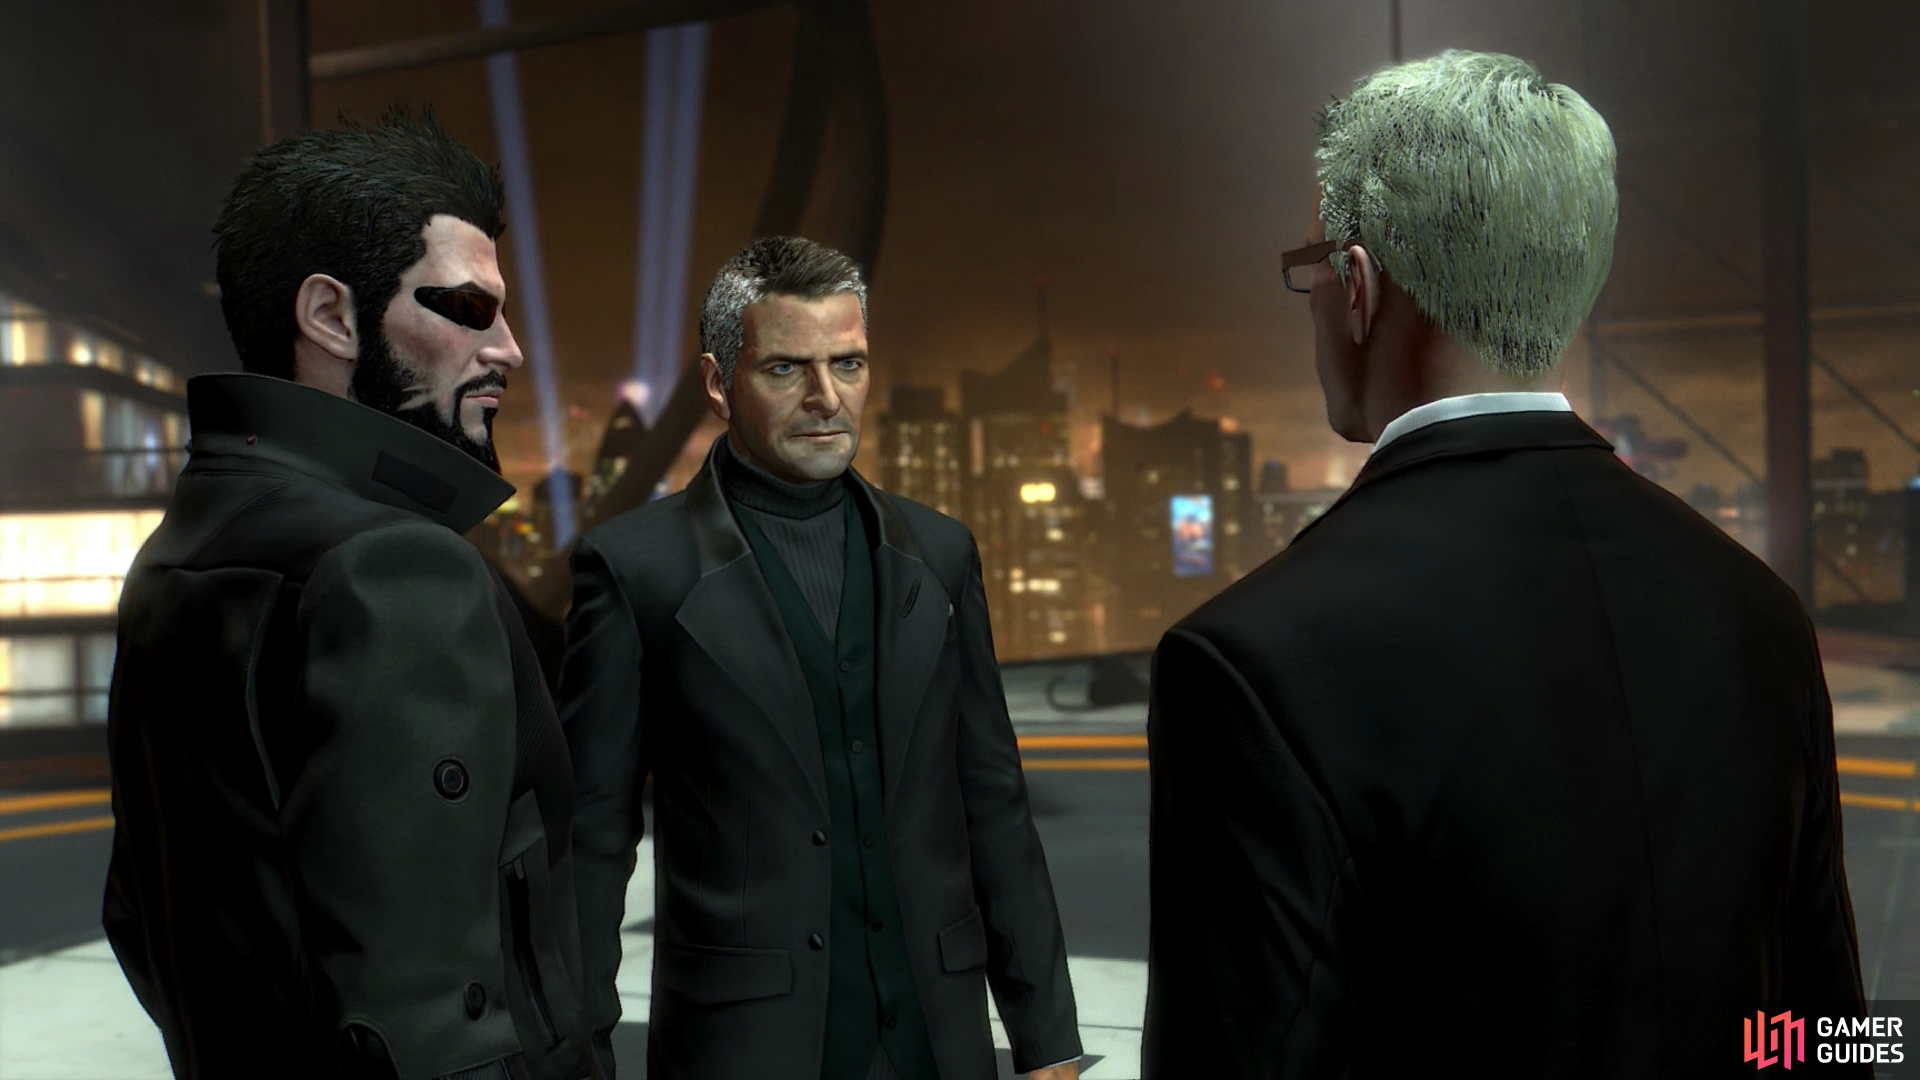
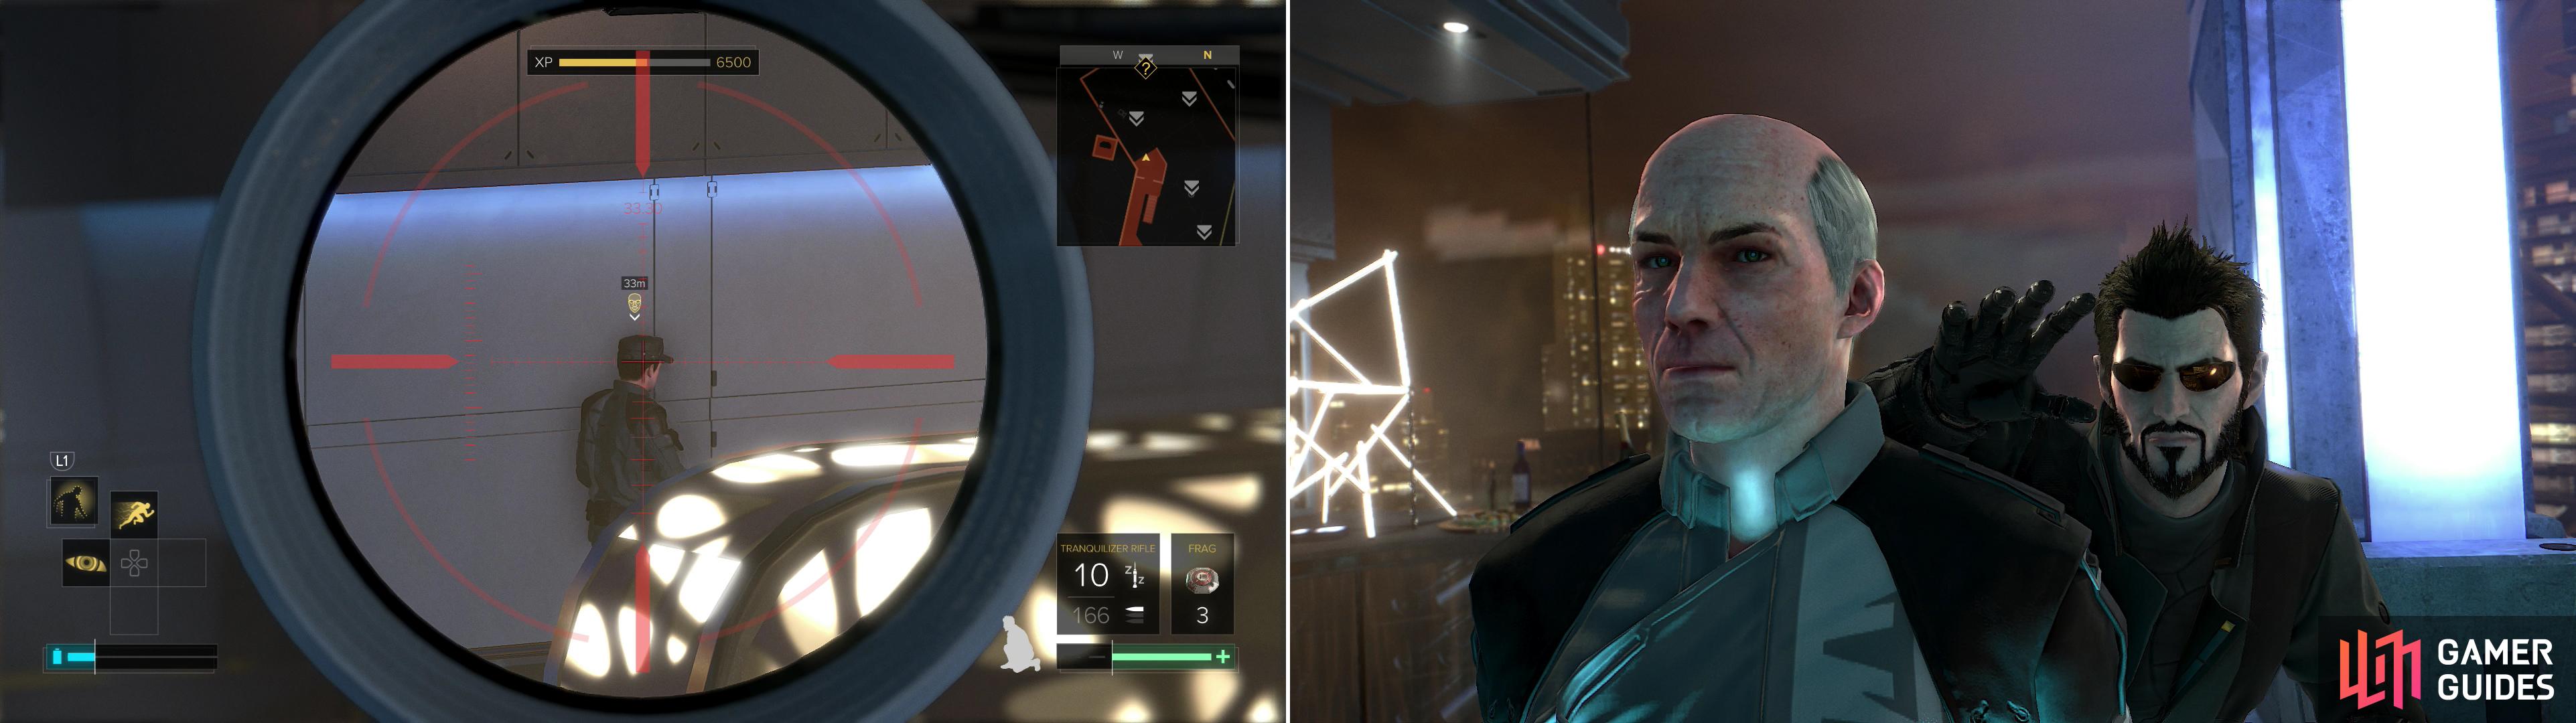
After being suspiciously denied access by the security guards (left) take it upon yourself to infiltrate the security of the infiltrators (right).
To Slaters Office
When you’re done playing around on the roof head south-east from the helipad to find an elevator and ride it down to the CSO level. Alex and Janus will give you some more good news as you ride down. Wonderful. Raise the stakes further. Exit the elevator and head west to find a security office, where you can talk to a rather shifty guard. After your request is denied, pick the dialogue option “Back off”… really, who would pick “Attack”? Anyways, something is fishy, and there’s no point in letting these security officers know that you suspect something. Besides… there’s an eBook on the desk in there, which was visible during the conversation. Even if these guards weren’t suspicious, there’s a good chance they’d end up eating a headbutt.
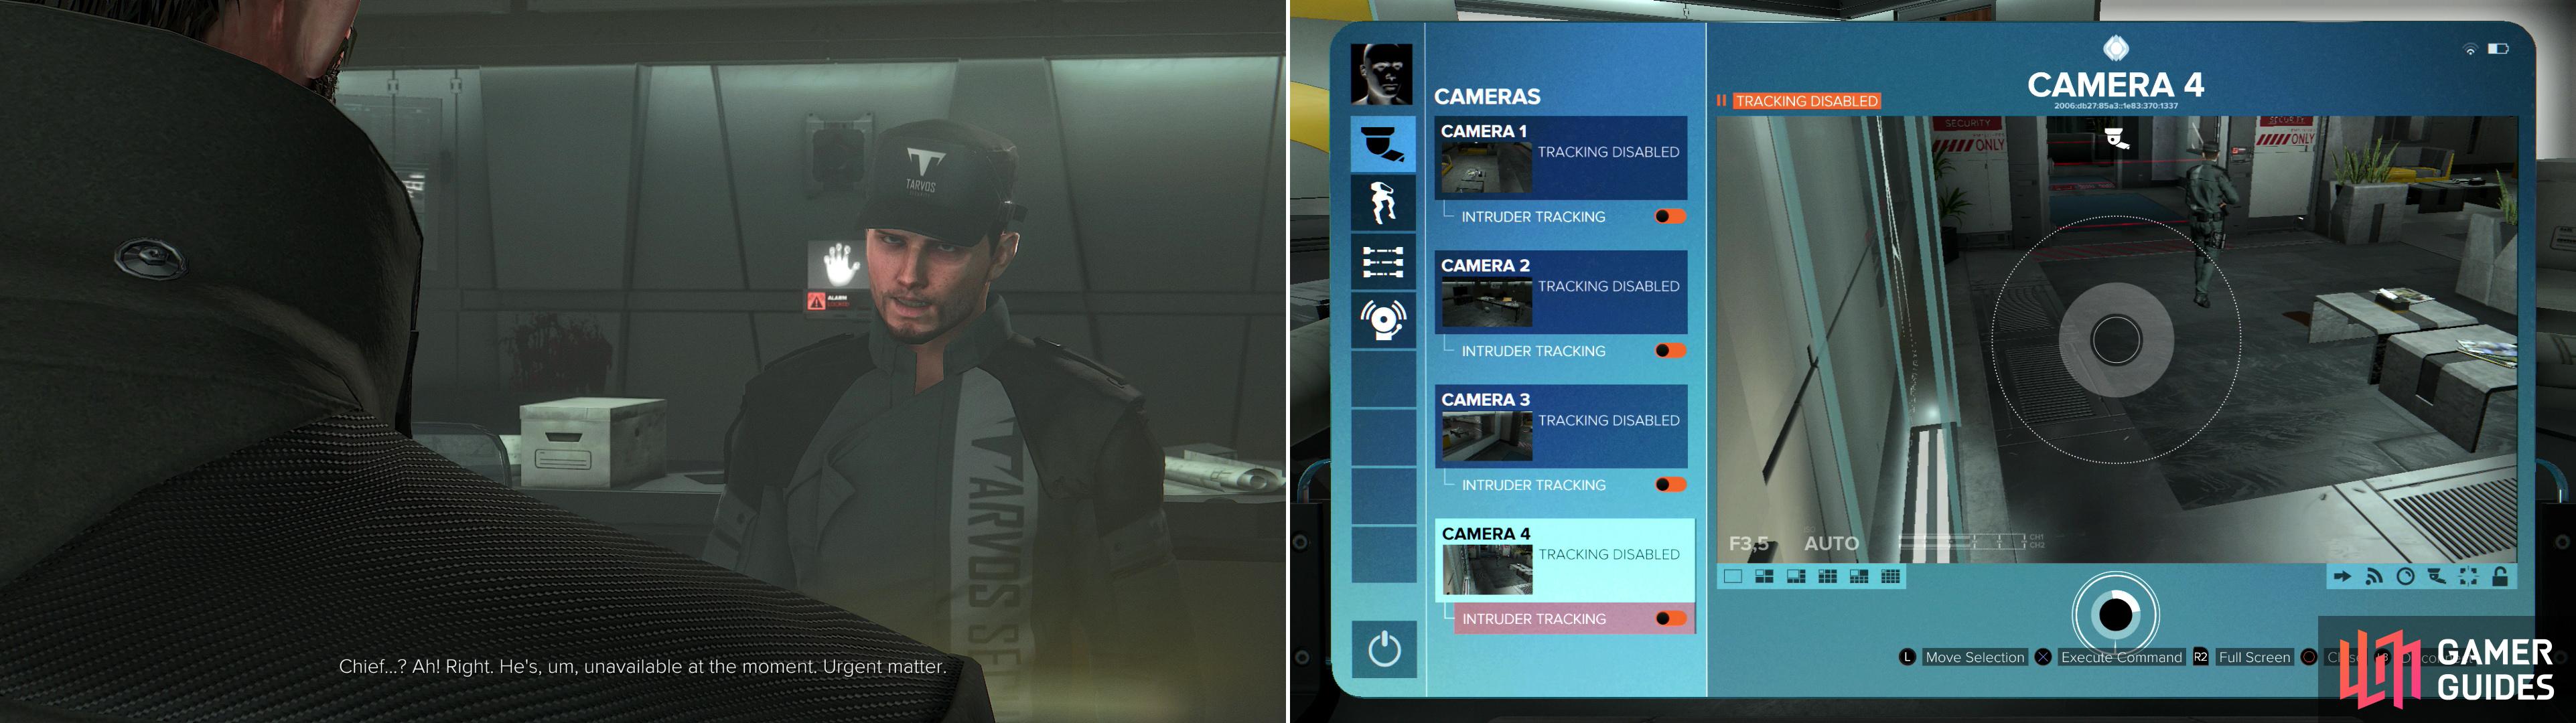
On that note, head south from the office and turn east to find two vending machines. Move the one to the left to reveal a vent, which will take you into a room east of the security office. Sneak on in here and crawl under a desk to shield you as you head west, as along the western wall there’s an EG Switch that’ll keep you out of trouble. Once the guards outside can’t see in, hack a security computer (Security Rating: 4) and turn off any security you can - the cameras are the only thing that really need to go, however. Grab a Multi-Tool out of a drawer to the south, then crawl back through the duct to return to the room near the vending machines.
Head west to find the door leading to the security office (Security Rating: 1). Don’t bother hacking it, instead take cover along the corner of this room near the door and wait for the guard out here to walk nearby on his patrol. He’ll stop, stare at you for a while, then continue past you to the north, at which point you’ll want to take him down. Now that he’s out of the way and neatly placed out of sight, hack the Keypad, sneak into the security office and knock this rude guard out, too. Grab the eBook “Tarvos: Mission Statement & Company Bio” off the desk, then turn north and crouch down to find a gold mask lying under the desk. You know, a Dubai gold mask? The blood pool and bullet holes in the south-western corner of the room should confirm that whomever you just knocked out - they weren’t the good guys. Loot the drawer of the eastern desk to find some Tranquilizer Rifle Ammo, while in the drawer of the southern desk you can find a unit of Overclock Software. You can also loot a Weapons Cabinet to claim a Combat Rifle, some Pistol EMP Ammo, some Machine Pistol Regular Ammo, a Concussion Grenade and a Smoke Grenade.
Take cover along the wall near the door to the north, then open the door and make sure no guards are looking through the window to the north. When all is clear, head through the doorway and turn west and go through a doorway. In the north-western corner of this room is a vent you can destroy - do so, crawl on through to reach a maintenance tunnel, then climb onto some elevated pipes to the north and turn east to find an air shaft. Remove the vent, then remote hack the Industrial Fan to shut it down and make the way safe for you. Continue east and smash a Destructible Vent, crawl east across a cage-roof (grab a HypoStim Injector and a bottle of “Neuropozyne” to the right as you go) smash another vent and crawl through a duct to reach a ledge overlooking the “Central Security Office” room.
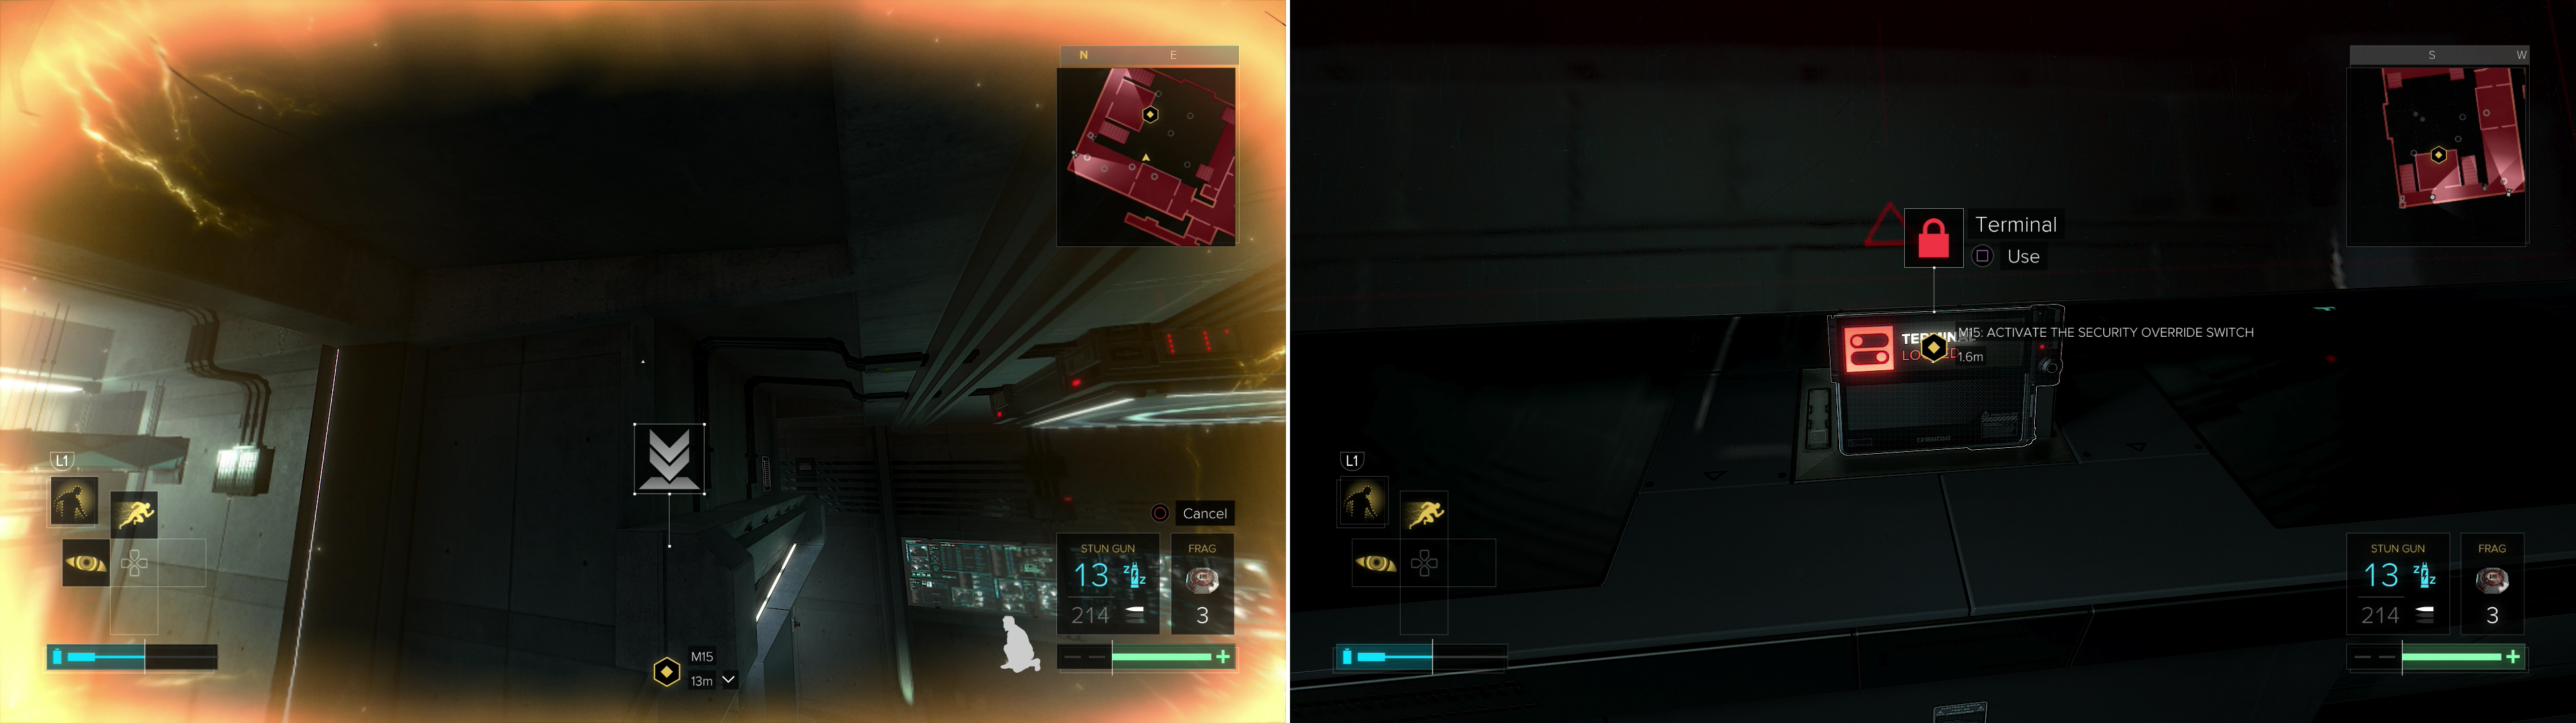
Time for Icarus Dash to earn its keep again; turn north-east to spot another ledge off in the distance, which you can reach via Icarus Dash. Do so, then continue east to find another vent, which leads onto another cage roof. Search the north-eastern corner of this cage-roof area to find “Triangle Code #31” sitting on a metal box, grab a Biocell off another metal object in the south-western corner, then find a hole in the roof you can drop down to reach Slater’s office. Sadly, he’s in no condition to help you, and Adam will now update Miller, who will make a simple request of you - simply hack the Terminal (CODE: 5359) (Security Rating: 1) to the south and activate the “Security Override Switch”. Loot the bodies in this room for minor goodies, then search a Weapons Briefcase to find some Battle Rifle Regular Ammo and Battle Rifle Armor Piercing Ammo. In a Weapon Cabinet you can find a “Devastator Shotgun” , some Machine Pistol EMP Ammo, some Combat Rifle Regular Ammo, a Frag Grenade, a Smoke Grenade, some Stun Gun Ammo, a box of Grenade Launcher Gas Grenades and some Crafting Parts.
| Objective | Reward |
|---|---|
| For reaching Slater’s office | XP 1950 |
| For activating the Security Override Switch | XP 1950 |
Icarus Dash will help you get past the terrorists without hassle (left). Activate the Security Override Switch to get Macready back on track (right).
Taking Them Down Quietly
Climb back through the hole in the roof, crawl back through the duct to the ledge outside, then Icarus Dash back to the other ledge to the south-west. Sneak to the southern end of this ledge (ignoring the vent you came out earlier) and instead look down to the south-west. Jump or Icarus Dash down onto the floor below (not the lowest floor), then go through some double doors to the south and either remote hack some lasers, or just use Ghost-Shield Cloaking to get through them. From here it should be no trouble to simply walk back to the elevator and take it down to the “Reception” floor.
Your goal on this level is to knock out all eleven bogus security guards without being caught by other guards or raising a panic. You also need to secure a Keycard to proceed. If you don’t complete the optional objective (knock out the guards) you’ll suffer an automatic alarm later on, voiding Foxiest. Plus, it’ll be easier to move through the place when time matters if everybody isn’t alerted. You can obviously find your own way of taking out all the guards sneakily - what will be presented below is but one way of going about it.
Exit the elevator and note the security room to the west. It should be a priority to get in there and take out some of those nasty cameras lurking about. Turn west and go down three flights of stairs to reach a swanky reception floor. One of the more obvious features down here is a “SAFE HARBOUR” display, opposite (south-west) of which is a black banner with the “Santeau Group” and “Apex Center” logos on it. Behind this banner is a door (Security Rating: 1) you can hack. Do so and go up two flights of stairs, be wary of any guards patrolling around here and turn south-east at the top of the stairs then head into a small room to the south-west. Head south-east and take cover near a large, destructible vent and activate your “Smart Vision” augmentation. A guard patrols in the room beyond the vent, and if you wait until he’s near the vent and activate “Smart Vision” you can perform a takedown on him THROUGH THE WALL. Never too late in the game to make use of new tricks, eh?
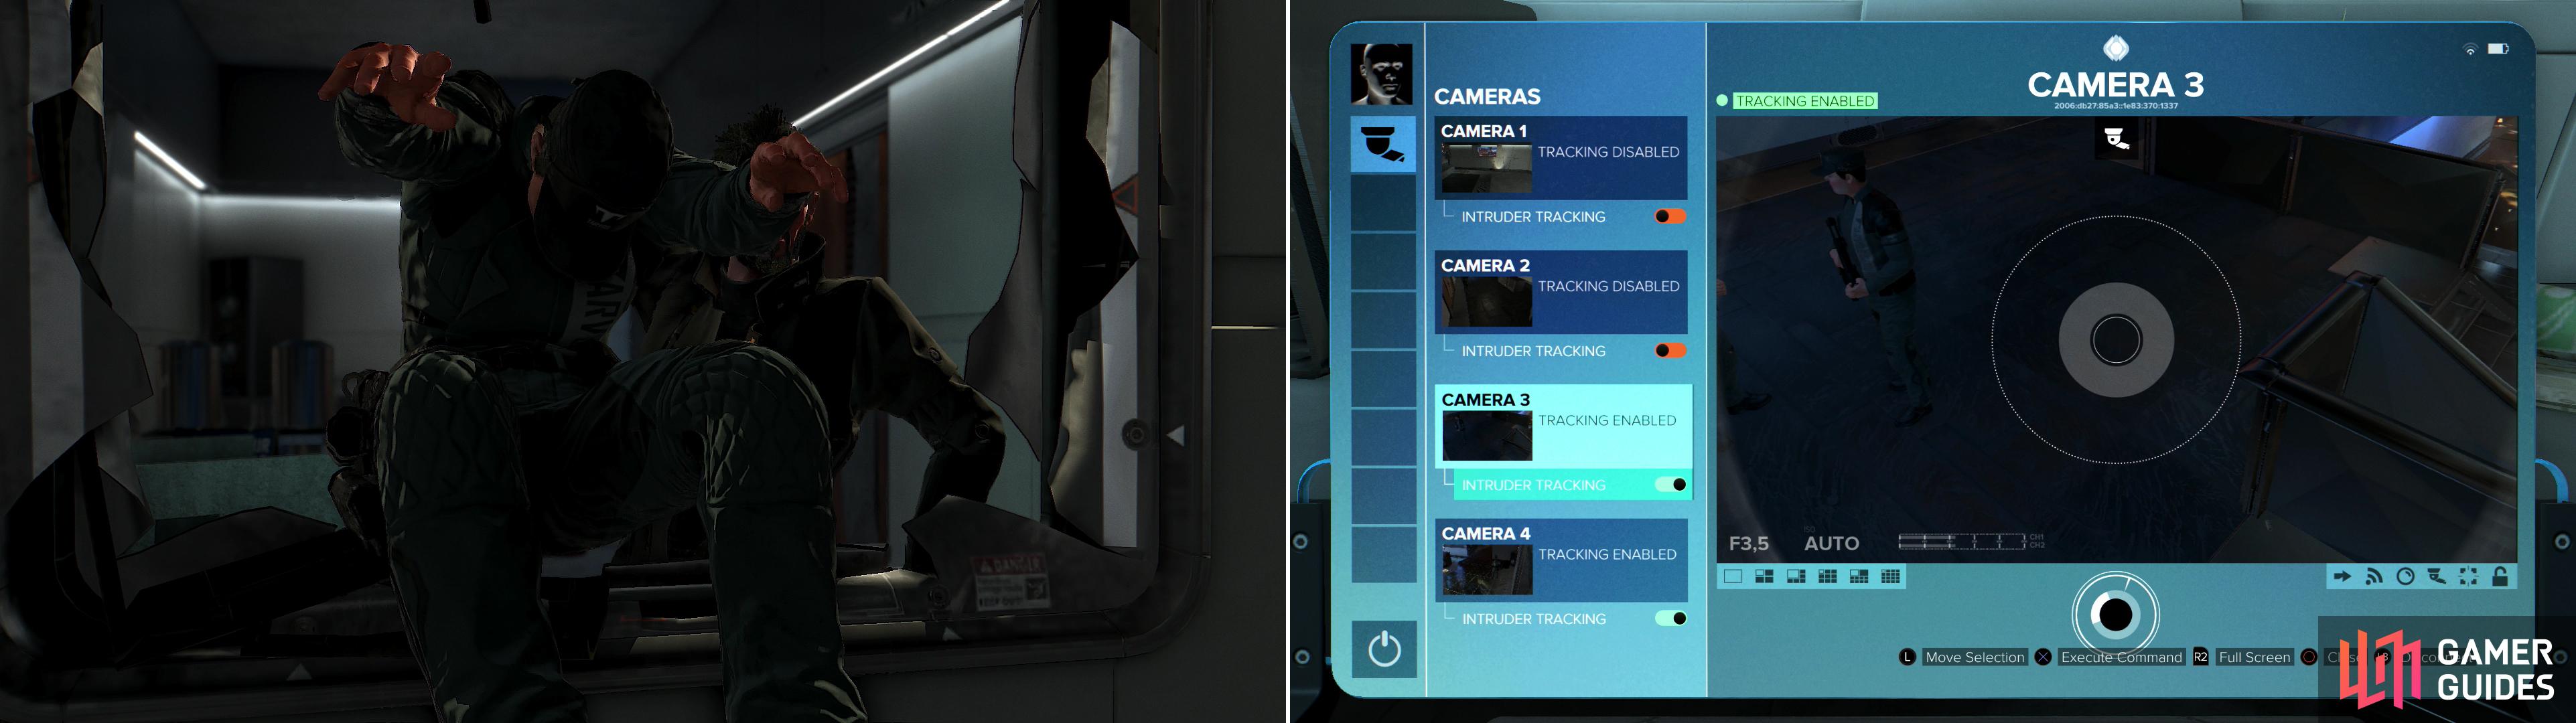
Jump through the hole in the wall and head up two flights of stairs before turning south-east at some double doors to spot a vent near the floor. Crawl through it and you’ll reach the security room you saw opposite the elevator. Make your way to the eastern end of the room and flip an “EG Switch”, then hack a security computer (password “arcturus” ) (Security Rating: 3) and disable all the nasty cameras snooping about. Congrats, you’ve made your job much easier. To celebrate, how about you punch a guard in the cave? Take cover near the door and open it from cover, immediately performing a takedown on the guard as he reacts to the door opening. Alas, for him, too late.
Smash a hole in the wall and take out a terrorist at the same time! (left) If you disable the security cameras it’ll make your task of dispatching the terrorists much easier (right).
Head back through the duct and return to the stairwell and take cover near the double doors. Time to perform the same open door/takedown combo you did a moment ago, save you need to be wary of another guard who patrols around here. Fortunately, he’s marked on your map, just be patient and wait for him to leave the stationary guard near the doors to his fate. After he’s been handled drag his body downstairs and return to the double doors. This leaves the guard beyond the double doors isolated, and easy pickings; one way to easily dispose of him (besides just leaving the door open, staying in cover beside it and sneaking up behind him or popping him with your Stun Gun as he walks past) is to wait for him to go through the double doors to the north-west, taking cover along them, then performing a takedown on him when he comes back through.
Another easy guard patrols up ahead, just head through the double doors to the north-west and continue north-west until you find some stairs down. Down the stairs a guard patrols, stopping occasionally at the railing to look down at the crowd below. Just wait for him to abandon that spot and turn around, then sneak downstairs and put him to sleep. Go back upstairs and hack a Keypad locking some double doors to the north-west (CODE: 1515) (Security Rating: 1) then continue west and take cover along a balcony.
Over to the west, on the level below you, are two guards having a bit of a chat. Wait for them to get done, then they’ll go their separate ways. Switch to your Tranquilizer Rifle and keep an eye on the further one as he explores to the north and wait for the nearer one to stop looking at you and head back west, at which point take the further guard out with a headshot from your Tranquilizer rifle - his stupid head should just be visible over a gaudy, glowing Santeau Group logo. As long as you shoot down this guard when he’s behind the logo to the north there should be no chance of his buddies ever finding him. You can then take out his nearer buddy any time he’s not facing you. You don’t even have to shoot any moving targets this way. If headshots aren’t really your thing, no problem; just wait for the nearer guard to turn away from you and drop down to the level he’s on. Take cover behind a decorative stone planter until he goes downstairs then sneak west past the stairs, turn north, and take out his buddy. Head back south and take cover along the railing just north of the stairs and wait for him to come back up to this level and start walking east, then just sneak up behind him and knock him out, too.
However you manage it, eliminate these two guards and head downstairs, turn west, and be wary of another guard who patrols up and down another flight of stairs below the previous ones. Head west along the railing and take cover at the railing’s western-most point, wait for the guard to come upstairs, then perform another takedown from cover. That should make eight out of the eleven guards you need to incapacitate, and all of the ones in the restricted area. The next ones are mingling with the crowd, however, making takedowns from cover the ideal solution.
Head downstairs and leave the restricted area, then head north-west and take cover behind some containers where various beverages are being kept on ice. Wait for a balding guard to take up position in front of the ice-filled containers and perform a takedown from cover. Adam will reach over the cover, pull the guard over, make him take a nap, and leave him hidden behind the iced beverages… where nobody will bother looking. Best of all, loot him to find the “Security Keycard” you’re looking for. From behind the ice beverages head east to find a nook along the stairs, where you can search a couch to find the eBook “Port in a Storm” . Only one more of those to go…
| Objective | Reward |
|---|---|
| For obtaining the Security Keycard | XP 1950 |
Reach a balcony and take out two isolated enemies with your Tranquilizer Rifle, if you’ve got the aim (left) then head down to the reception floor and finish off the few remaining foes (right).
Make your way up the nearby stairs, then ascend another flight to the south-east and hide behind the “S” in the “SAFE HARBOUR” display. Wait until a guard comes and puts his back tantalizingly close to you, then drag him behind the display. “S” is for “Sandman”, buddy. Head north-east from the “S” in “SAFE HARBOUR” and jump over a railing before turning south-east to find the last guard, chilling in front of a couch near the bathrooms. Oh, you know how this ends. Sneak behind the couch and from cover perform a takedown. That’s eleven-for-eleven.
| Objective | Reward |
|---|---|
| For eliminating all eleven guards sneakily | XP 1000 |
Return to the west and go up the western-most stairs in the reception area, after which turn south and use your ill-gotten keycard to open the door. Go down some stairs and turn south-east down a hallway. Don’t be fooled by the guard walking away - he’ll turn around soon enough, so let him get that out of his system, then continue south-east behind him and go into the first room you find to the south-west. Make your way through the locker room (don’t worry, you’ll be back to loot, shortly) and head into a bathroom, at which point turn south-east to find a vent on the wall. Climb through it to reach another room further to the south-east, from which you can easily dispatch the two guards menacing the hallway. Sneak up to the doorway and take cover nearby, then wait for the patrolling guard to walk down the hallway to the south-east. Once he’s looking down another hallway to the north-east, dispatch the stationary guard in the doorway from cover and drag him behind Metal Crates. Once done, sight tight until the mobile guard to returns and heads past the doorway you’re occupying. Wait for him to turn around and look behind him after he goes past, then sneak out and knock him out, too.
Now that that business is done, return to the locker room to the north-west and search in and near the lockers to find some Crafting Parts, a 10mm Pistol, two Mine Templates, a Tactical Shotgun, some Painkillers, two Smoke Grenades, an EMP Grenade, a Combat Rifle, some Combat Rifle Regular Ammo, some Stun Gun Ammo, “Triangle Code #32” , a HypoStim Injector, some Pistol EMP Ammo and some Shotgun Regular Ammo. In the other room (where you dispatched the guards) you can find a Biocell on top of some electrical boxes along the south-western wall. Even if you came into this last mission without the recommended equipment, you should now have a few Biocells and all the tools you need to make an EMP Mine. Do so now, you’re going to need it imminently.
Enter the hallway again and head south-east, then turn north-east. Your goal is through a door to the south-east, but first, continue north-east then north-west to find a room at the end of the hall. Inside is one guard; just wait along the wall outside the door, and when he comes out of the room, nail him. There’s plenty of interesting loot in this room, including a “Security Stash Keycard” near a Weapons Briefcase, both of which are on a table along the north-western end of the room. Honestly, however, it doesn’t really fit into the suggested approach for the upcoming mission. If you have two or three Biocells (you’ve found more than that this mission!) you shouldn’t need it. Loot the Weapons Briefcase to find a Machine Pistol and a Frag Grenade, grab a HypoStim Injector off a nearby desk, then search some lockers to find some Stun Gun Ammo and some Tranquilizer Rifle Ammo. Most importantly, however, is the hidden loot under the desk to the south-west. Crouch down and move some Studio Bags out of the way to reveal a container holding “Marchenko’s Kill Switch” … at least, it’ll be here if you didn’t get the device from the G.A.R.M. Facility. Might as well grab it, as it’ll open up some options later on.
No Comments