
| Important Items in this Area |
|---|
| Triangle Code #13 |
| Viznik’s Keycard |
| Neuropozyne |
| Crumpled Paper |
| eBook: New Regulations for Augmented Citizens |
| eBook: The Next Three Decades |
| Scambling Devices |
| Voltar’s Card |
| eBook: Top 10 Tech… Abandoned Technologies |
| Breach Software #28 |
| Neuropozyne |
Well, you did the best you could, and saving one person is better than saving none. There’s still more you can do, though, and this time it’s awfully close to home. Speaking of home, there’s plenty of reasons to return to Zelen; you have to contact Sarif, for one, and there were a few networks you couldn’t hack earlier than are now vulnerable to you.
Unfinished Business in the Zelen Apartment Complex
Starting from the courtyard, let’s blaze through this quickly. Turn west and head past the cultists to find two storage lockers. Hack the northern one (Security Rating: 2) first, to find a Biocell, a Stem Processor Chip and a Weapons Briefcase with a Machine Pistol inside on some metal shelves. In the other corner you’ll find a case containing a Multi-Tool, a unit of Datascan Software and a unit of Stop! Worm Software. On a box nearby is a unit of Overclock Software, while near the door you can find a unit of Stealth Software and Reveal Software in a box. Not damn bad for a such a simple hack…
Next hack your way into the storage shed to the south (Security Rating: 2), inside of which you’ll find a Pocket Secretary on a desk. Grab a box of Crafting Parts, then move a heavy plastic crate to find another such box. Once done, look up and climb into a vent in the ceiling, head north and loot a case on top of a metal object to score a Hydraulic Micropump and another box of Crafting parts, then turn east and punch through a wall.
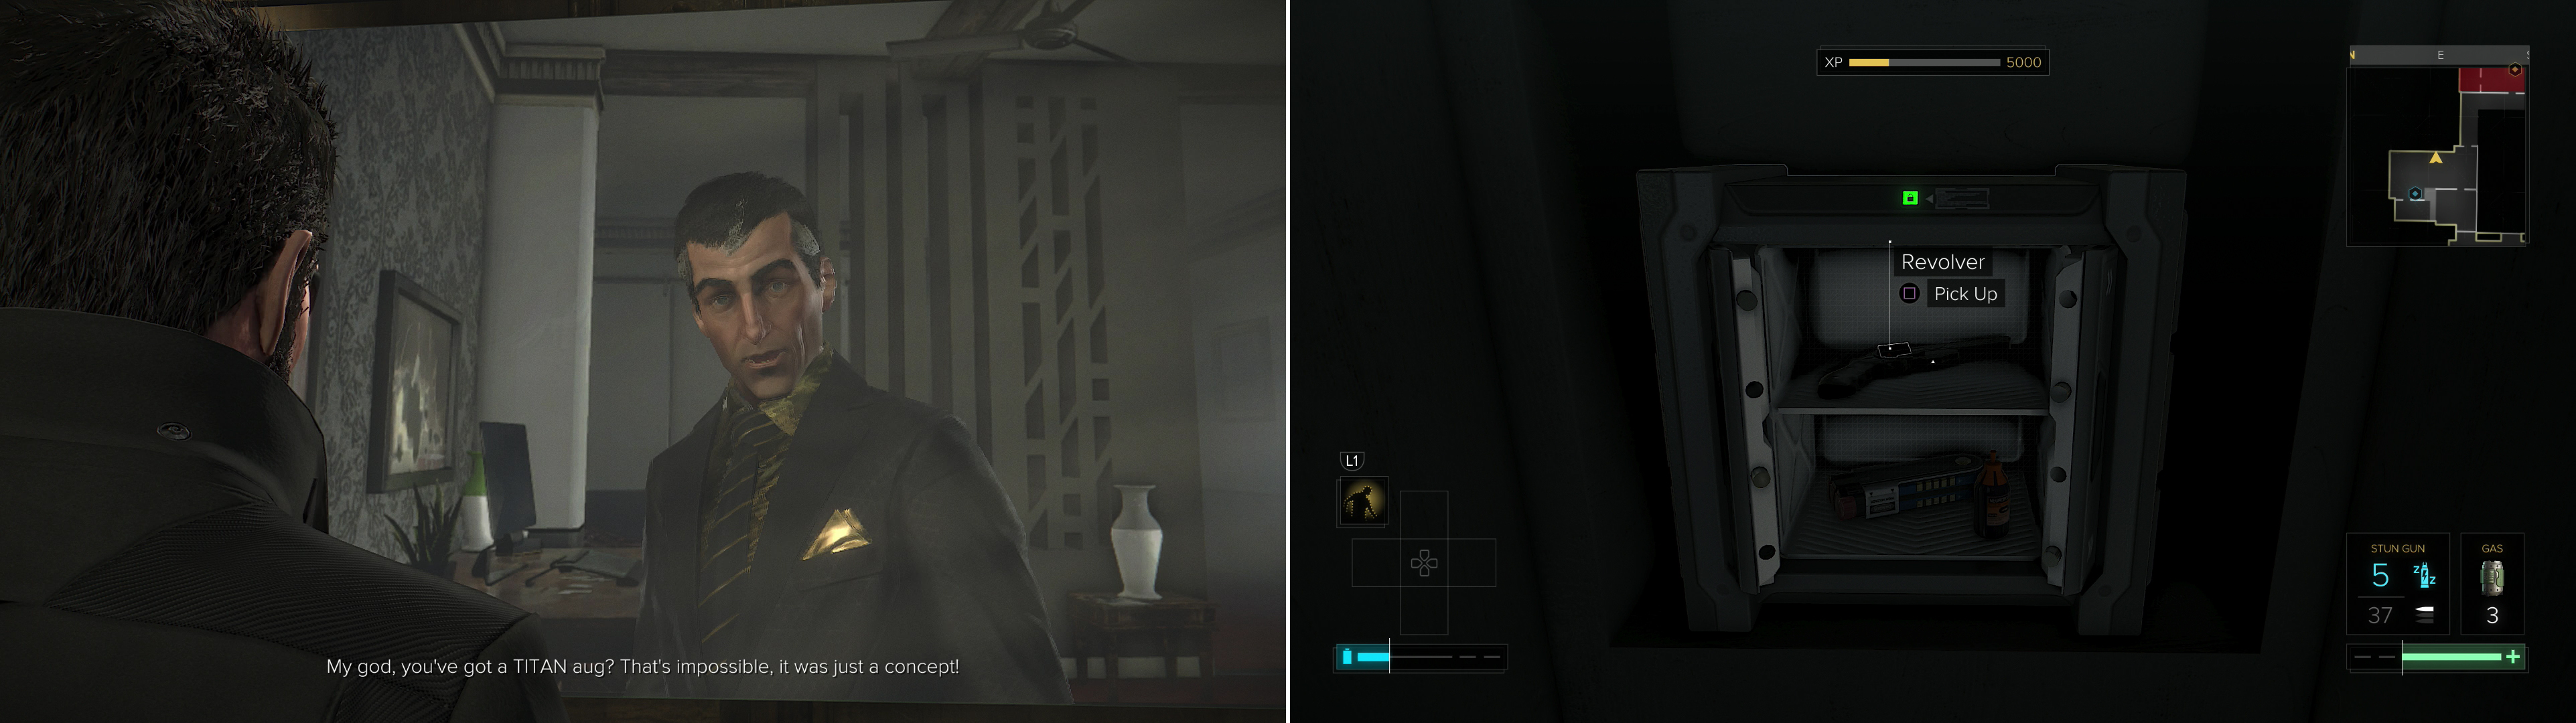
You’re now back in Teresa Petrauskas apartment. Head east into the kitchen and move the refrigerator to reveal a Keypad and a Safe. Hack the former (Security Rating: 3) to open the latter, in which you’ll find a Revolver, a Biocell and a dose of Neuropozyne. Leave the apartment (go out the window if you want to hack the front door’s keypad (Security Rating: 3)) and head up to the next level, where you can enter apartment #32 and hack the computer on the bed (Security Rating: 4).
Confronting Sarif
Return to your lofty apartment in the Zelen Apartment complex and use your remote to talk to Sarif. It doesn’t matter what you say, really, he’ll drop a name, identify your mysterious augmentations, and promise to get back to you later. Seems you’re going to have to advance the main story to get this one to continue. While you’re here, though, you might as well take advantage of your newly-repaired “Optimized Musculature” augmentation. Move your refrigerator to find “Triangle Code #13” lying on the ground. How’d that get there, one must wonder…
| Objective | Reward |
|---|---|
| For talking to Sarif about your mystery augmentations | XP 350 |
Confront Sarif and ask him about your mysterious augmentations (left) then go grab a bit of loot you couldn’t grab the first time around (right).
Points of Interest and Neuropozyne (Part 2)
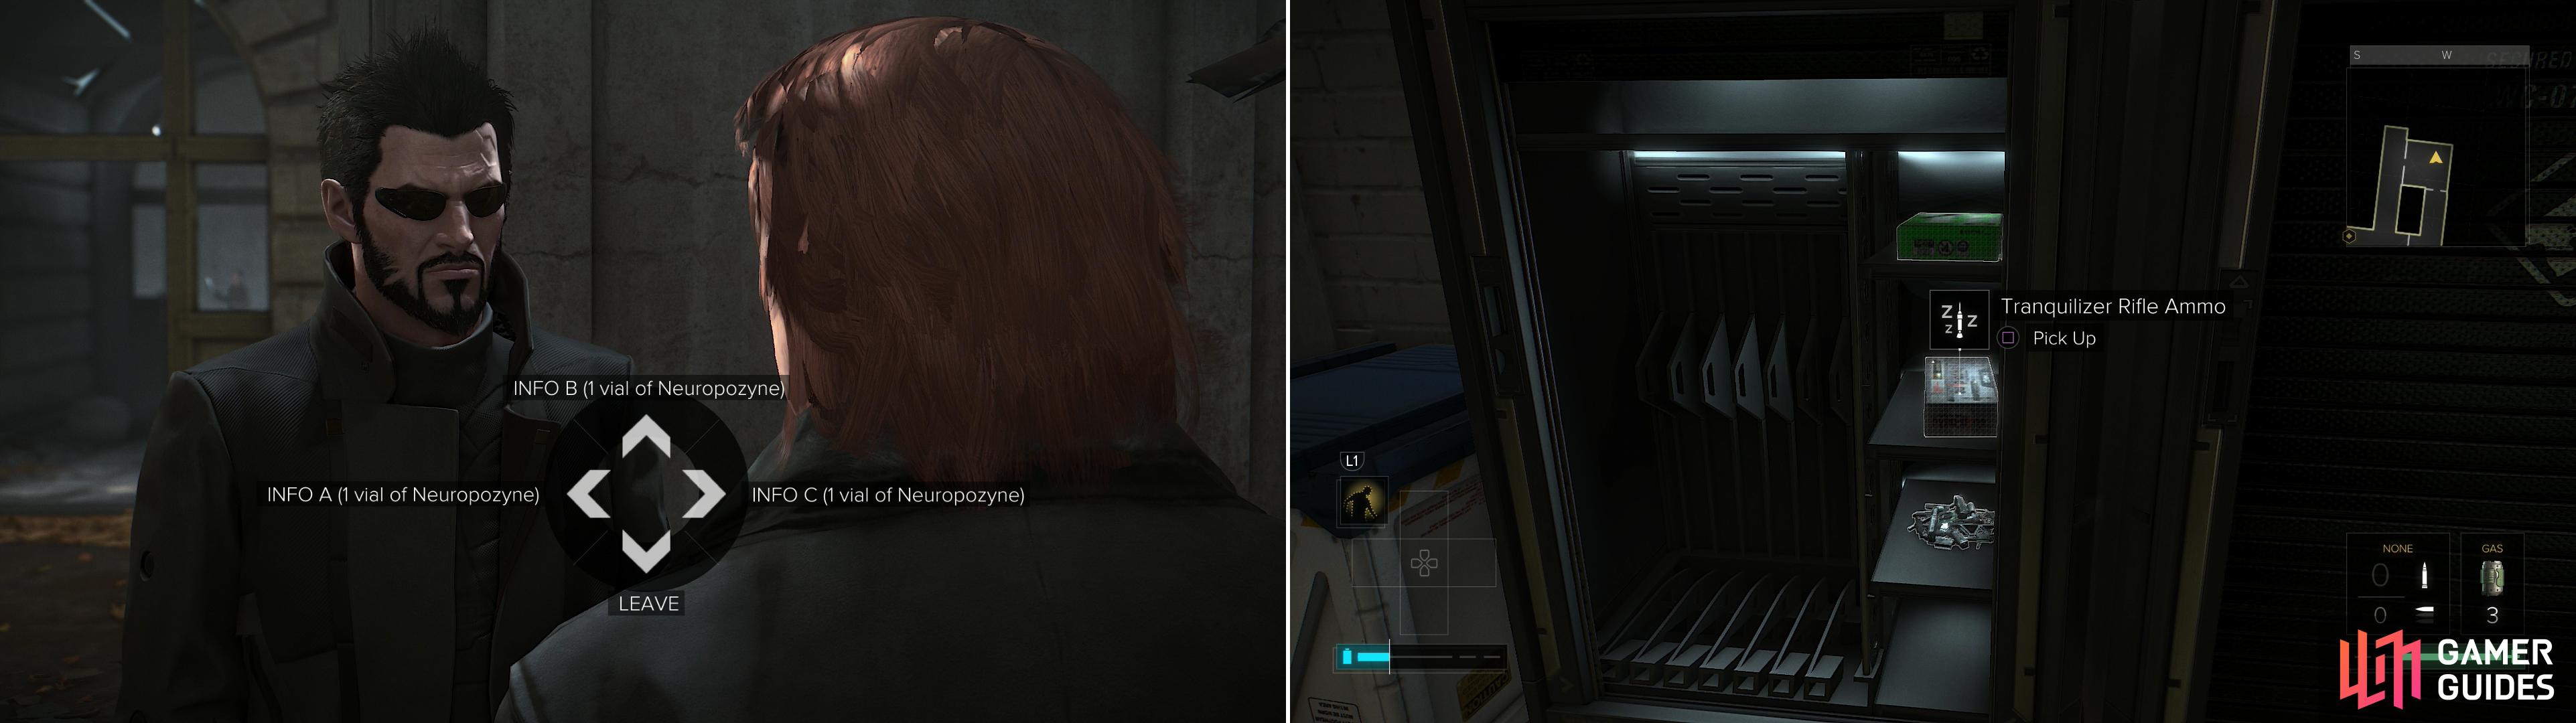
You’re finally done in the Zelen Apartment complex for now, so jump back down into the courtyard (let that Icarus Landing augment earn its keep!) and head out the eastern tunnel, then continue east under an arch to find an aug named Kazatel and his bodyguards. Chat him up and he’ll offer to sell you what he’s peddling - info - for a dose of Neuropozyne. One dose, one bit of info.
Now that you have the Neuropozyne to burn (figuratively, of course), you can trade some to him. Info A and Info B will both direct you to some location via a “Point of Interest” objective, generally granting you XP when you explore it. On the other hand, you can also sell Neuropozyne for 1,000 Credits a dose. Money comes fairly easily in this game (if you pick up and sell weapons, anyways), an XP is always welcome, so it’s recommended that you trade Neuropozyne to get Info A and Info B. Below are the two Points of Interest objectives you can get by trading Neuropozyne for info:
POI: Shots Fired
If you trade Neuropozyne for Info A you’ll be directed to explore Helena Volin’s apartment (the apartment you went through enroute to the Time Machine during “M3: Getting in Top Shape Again”. This Point of Interest objective will end when you enter the apartment.
| Objective | Reward |
|---|---|
| For exploring the Point of Interest | XP 350 |
POI: Every Little Helps
Pick Info B and hand off some Neuropozyne to get the POI: Every Little Helps. Head back to the Zelen Apartment complex and exit via the northern hallway. Continue across the street to the north from this hallway and go through a doorway and head into a building, venturing north until the path splits. If you continue north a bit (moving a heavy plastic create out of the way in the process) you’ll find a structural weakness you can exploit, while on the other hand if you turn west you’ll find electricity merrily cackling away. You can run through the lightning (jumping periodically helps) and turn off the breaker to stop the pain, then go through a door (CODE: 9002) (Security Rating: 4) nearby. Both the structural weakness and the door take you to the same place, the only benefit of turning off the electricity is the XP you’ll gain by hacking the Keypad.
Either go through the door past the lightning, or crawl through the hole in the wall made by your fist of fury and turn south, going through a door. Either way you’ll reach a small room with three weapon storage lockers in it. Inside you’ll find plenty of ammo, some Crafting Parts and a Machine Pistol. Loot the lockers and head east through a doorway, go up some stairs and search the northern wall to find a series of lockers which contain more ammo and Crafting Parts. Once done, you’ll notice a vent on the wall to the south. Ignore it, as you’ll find an excuse to explore there later, and there’s not much you can do right now.
| Objective | Reward |
|---|---|
| For exploring the Point of Interest | XP 350 |
Give Kazatel some Neuropozyne (left) and the intel you’ll get in return can prove quite valuable (right).
Augicide Down Under
Well, that was a fine diversion, but it’s time to actually get started on the quest this section of the guide is named after… well, after a bit of exploration enroute to said quest. Return to the Zelen Apartment complex and head down the previously neglected southern tunnel. Once outside the complex turn south-west to find a manhole near a dumpster. Descend into the sewers and head north into a tunnel, then turn west. You’ll find your way blocked by a wall you’d have to crawl under, but the gas in there might give you pause. If you can weather to gas long enough to turn a valve you’ll be able to loot the body of a civilian and score a Credit Chip, two Biocells, two EMP Grenades and a Pocket Secretary. The latter device is a message for some lady named Paulina, and it comes with a passcode.
Interesting… You don’t need to get that loot just yet if you don’t want to invest the Praxis (which isn’t recommended anyways), although a HypoStim Injector will give you the health to survive turning off the valve. To bypass that section of tunnel, head north into a drainage passage, which bypasses the gas-filled area. Once back in the main sewer head north until you find a gate to the east. Head over to the door and hack the Keypad (CODE: 6122) , (Security Rating: 2), beyond which you’ll find a large, multi-level chamber where three security drones are busy murdering three augs.
The drones aren’t hostile to you, but they will kill the augs - including Paulina - if you don’t attack them. This, of course, isn’t recommended if you’re going for “Foxiest of the Hounds”, which means for the purposes of this walkthrough you either SHOULD NOT intervene and attack the drones, or you should avoid this room entirely. This encounter is just pointed out for the sake of completionism, or for those who don’t necessarily care to avoid detecting. Speaking of which, if you do save the augs (those EMP Grenades will help greatly with this) talk to Paulina afterwards and she’ll tell you her backstory and give you a passcode.
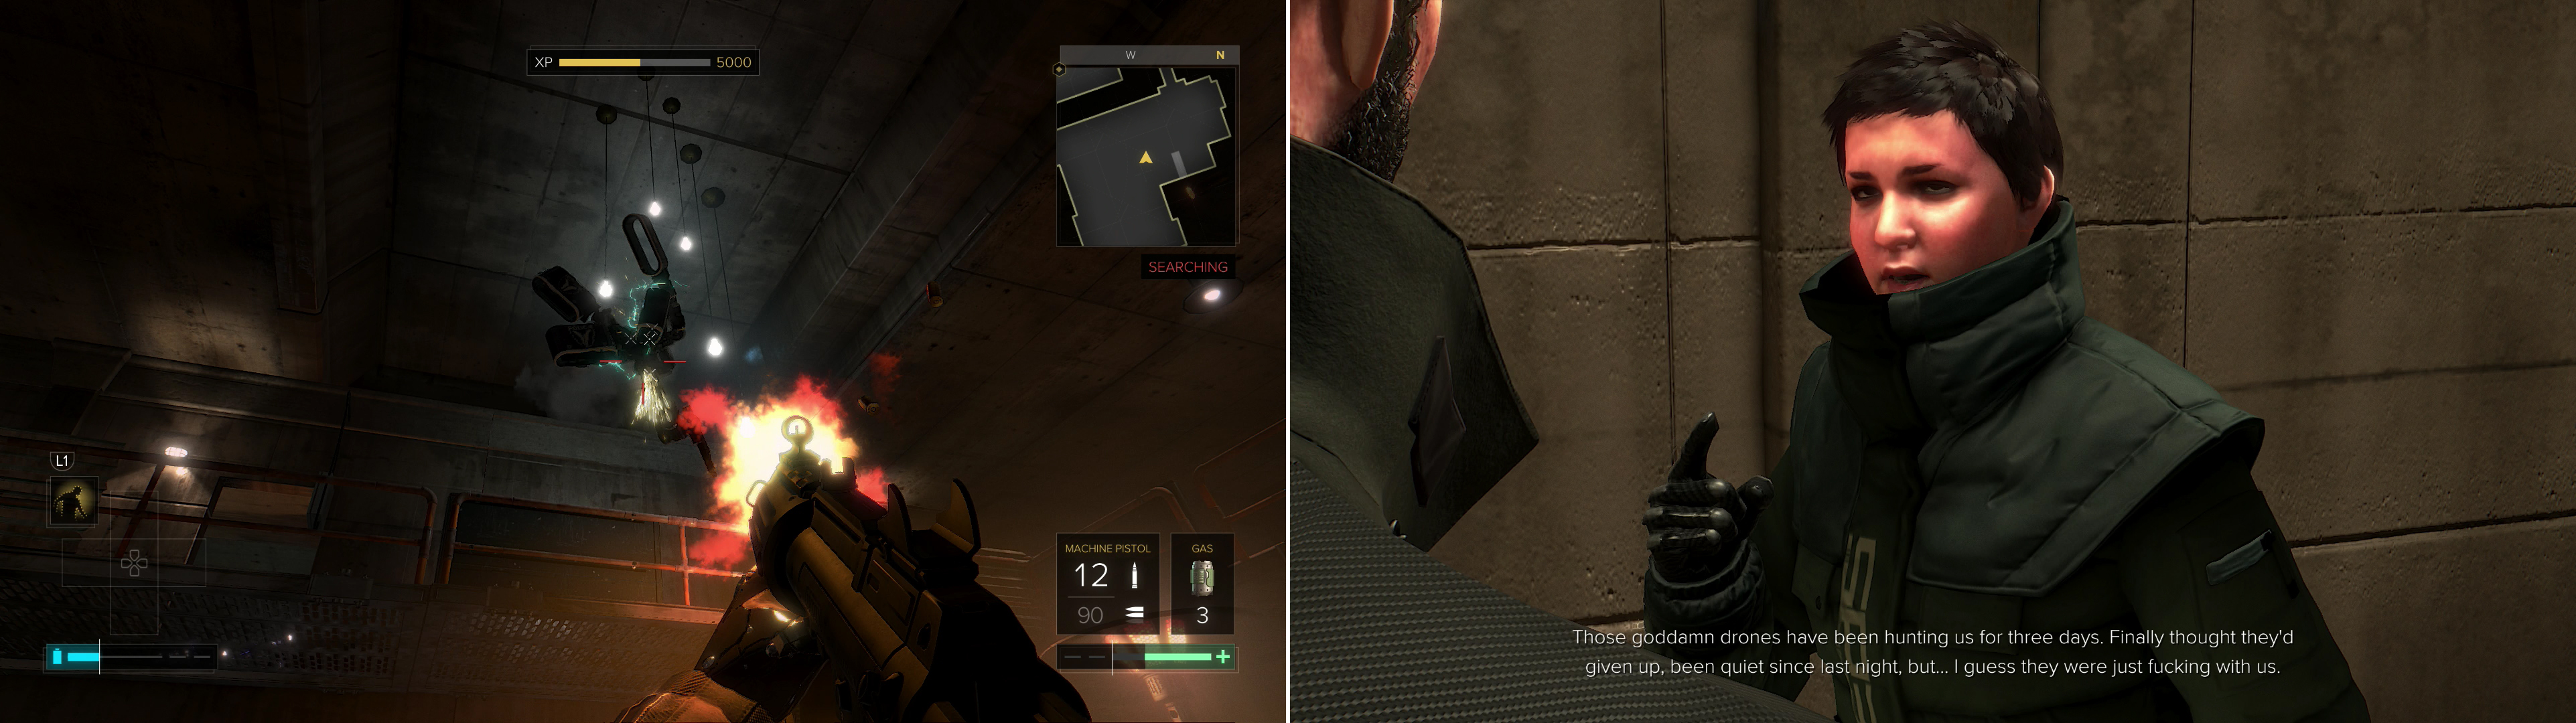
Destroy the drones in the sewers (left) and you’ll save Paulina and her fellow augs (right).
The Cult Compound
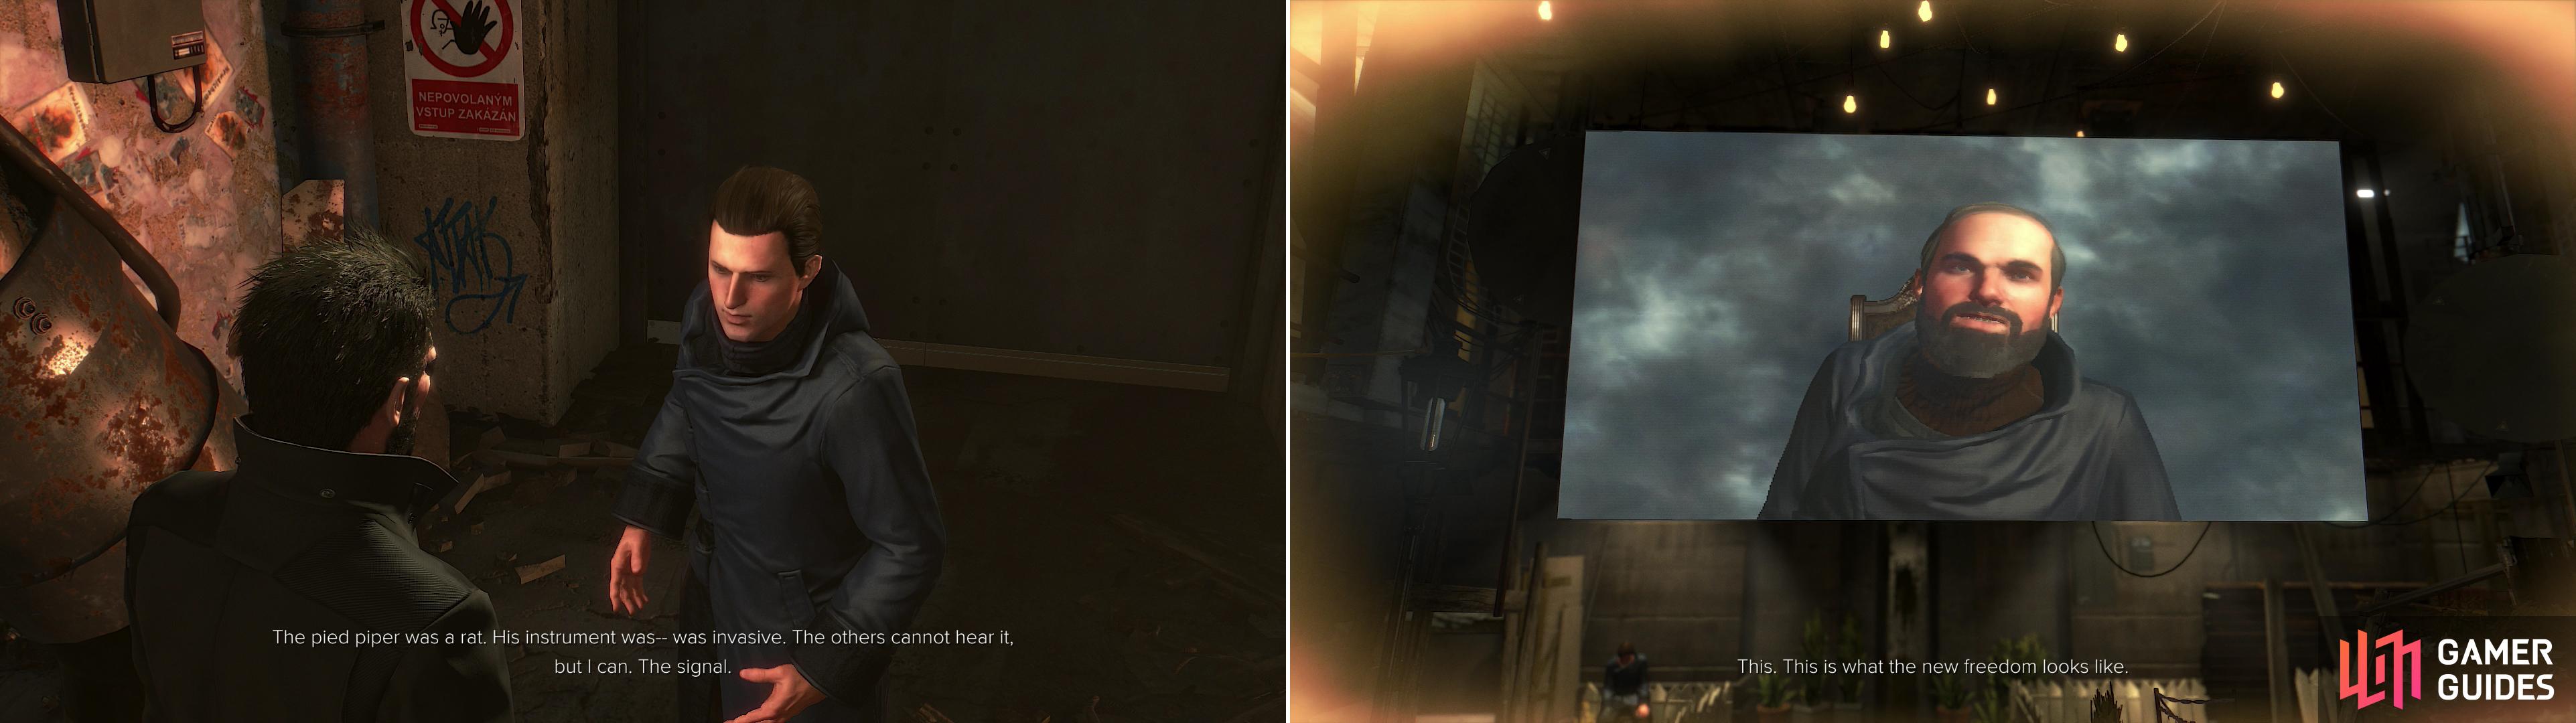
Continue north down the sewer channel from the gate to find a strange man named Viznik standing on a ledge. Talk to him (another nutter talking in third person… yay) and he’ll tell you he was part of some cult that committed the one unforgivable sin - questioning the leader. Get what information you can from him (which is surprisingly much, actually) and he’ll give you “Viznik’s Keycard” after you agree to help. Use the keycard on the keycard reader near a door to open it, then head north-west through another door to find the cult Viznik was part of.
Their leader will talk to you, albeit indirectly, and whatever affected Viznik will also affect you. Listen to Richard’s impossible promise of a bland utopia, and when you get a chance to choose your response pick the dialogue option “Indulge”, then “Acquiesce” to get through the conversation (you’ll be forced to pick them anyways).
| Objective | Reward |
|---|---|
| For talking to Richard | XP 350 |
Talk to Viznik to learn about some mind-control cult (left) then visit the cult compound to experience the compulsion first hand (right).
After the conversation you’ll find yourself unable to use any of your augmentations. Part of Richard’s enforced pacifism, it seems. Turn north from the speaker’s podium to find a ladder leading up a ledge. Climb it, but be wary, as a turret scans the room above. Just stick to the eastern wall, stay out of the turret’s cone of sight and take cover behind the ample cover provided. With all that in mind, sneak your way to the north-west until you find your progress terminated at a door. While you might be able to hack the Keypad (Security Rating: 5), it’s more beneficial to refrain for now. Instead, examine a “Crumpled Paper” on the ground to learn about Richard’s past profession - and a former partner in the trade.
Svobody Beer
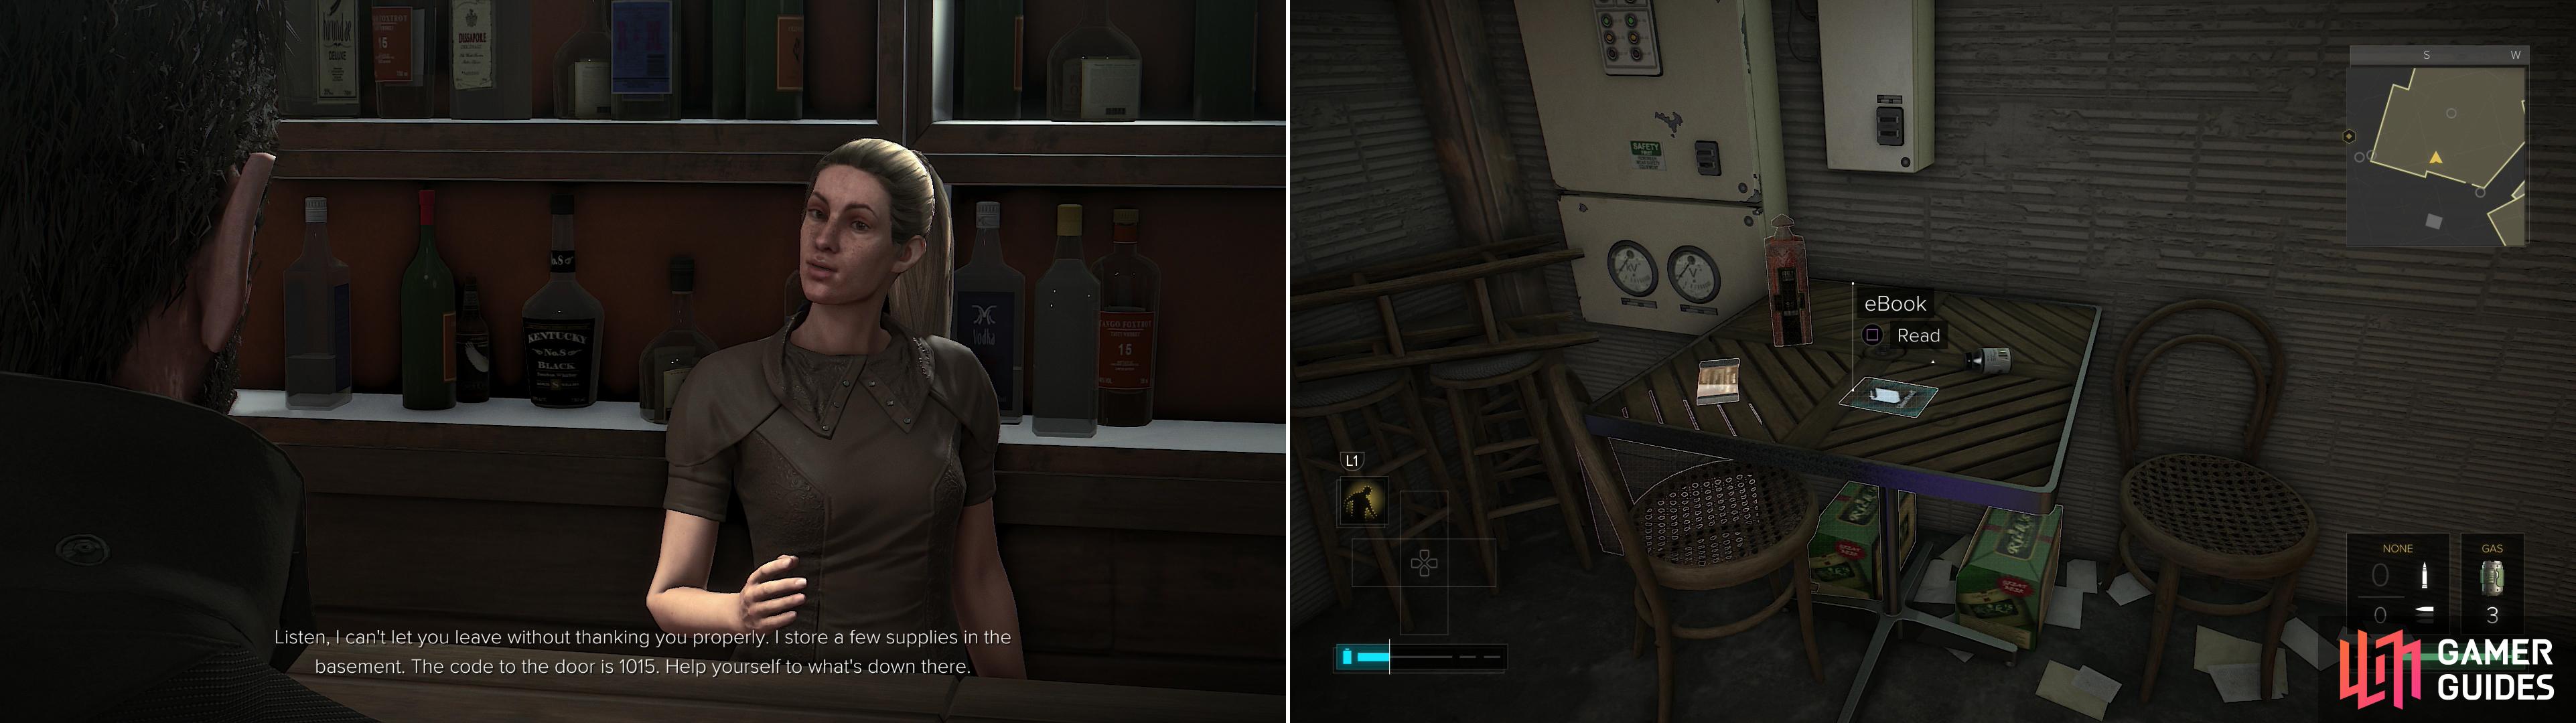
Leave the elevated, restricted part of the cult compound and return to the lower, inhabited part, then exit the compound entirely via the door to the east. Exit the sewers and head east then north-east up the street until you reach Svobody Beer on the edge of the Capek Fountain Roundabout. Head inside and talk to the bartender - Teresa - and pick the dialogue option “Ask What Else” to get her to ask you for a dose of Neuropozyne. If you give her some she’ll surprisingly grateful before going all idealistic, and as thanks for your generosity she’ll allow you to let you loot the place. Afterwards she’ll offer to sell you a “First Aid Pack” for 350 Credits, which just so happens to be three HypoStim Injectors.
Grab the eBook “New Regulations For Augmented Citizens” off the bar, then go over to the door leading to the basement. Either use the code Teresa gave you (CODE: 1015) or hack the network (Security Rating: 4) for the bonus XP, then head downstairs. Down here you’ll find… another door! Use the same code as you used above (CODE: 1015) to get through this network or hack it (Security Rating: 4) - the network is identical to the one above. In the room beyond you’ll find a Pocket Secretary that’ll bestow another passcode upon you as well as the eBook “The Next Three Decades” . Once those are yours, note the secret door on the south-eastern wall, then move some boxes in the eastern corner of the room to uncover a button near the floor. Press it and head into the passage beyond… after moving another, larger box out of the way, of course.
Head south-west and grab two Credit Chips and a unit of Stealth Software off a box, then leap onto the box and throw a smaller cardboard box out of the way to find a Gyroscopic Regulator, a unit of Reveal Software, two Biocells, a Hydraulic Micropump and, fittingly, some Svobody Beer in a crate. Return north-west and continue past the door, drop down a hole in the floor and proceed down a drainage chute and into a chamber where you’ll find a Keypad (Security Rating: 2). Hack it if you want, but don’t bother going through the door it unlocks, as it just takes you to the chamber where the security drones are trying to murder Paulina.
Give Teresa some Neuropozyne (left) and she’ll let you raid her basement (right).
Seek Out Liborio
Go back to - and through - Svobody Beer and from there return to Capek Station and ride the train to the Palisade Station. If you remember, there was a magic shop near the metro that was ignored earlier. Time to go visit the place. Leave the Palisade Metro and head south-east, round a corner and enter the red building - the magic shop. Inside you’ll find Voltar 3000, and his fleshy servant, Liborio Barbadoro.
| Objective | Reward |
|---|---|
| For meeting Richard’s former partner | XP 350 |
Examine a crumpled poster to learn about Richard’s past (left), then go visit his former partner to find a way to break his control (right).
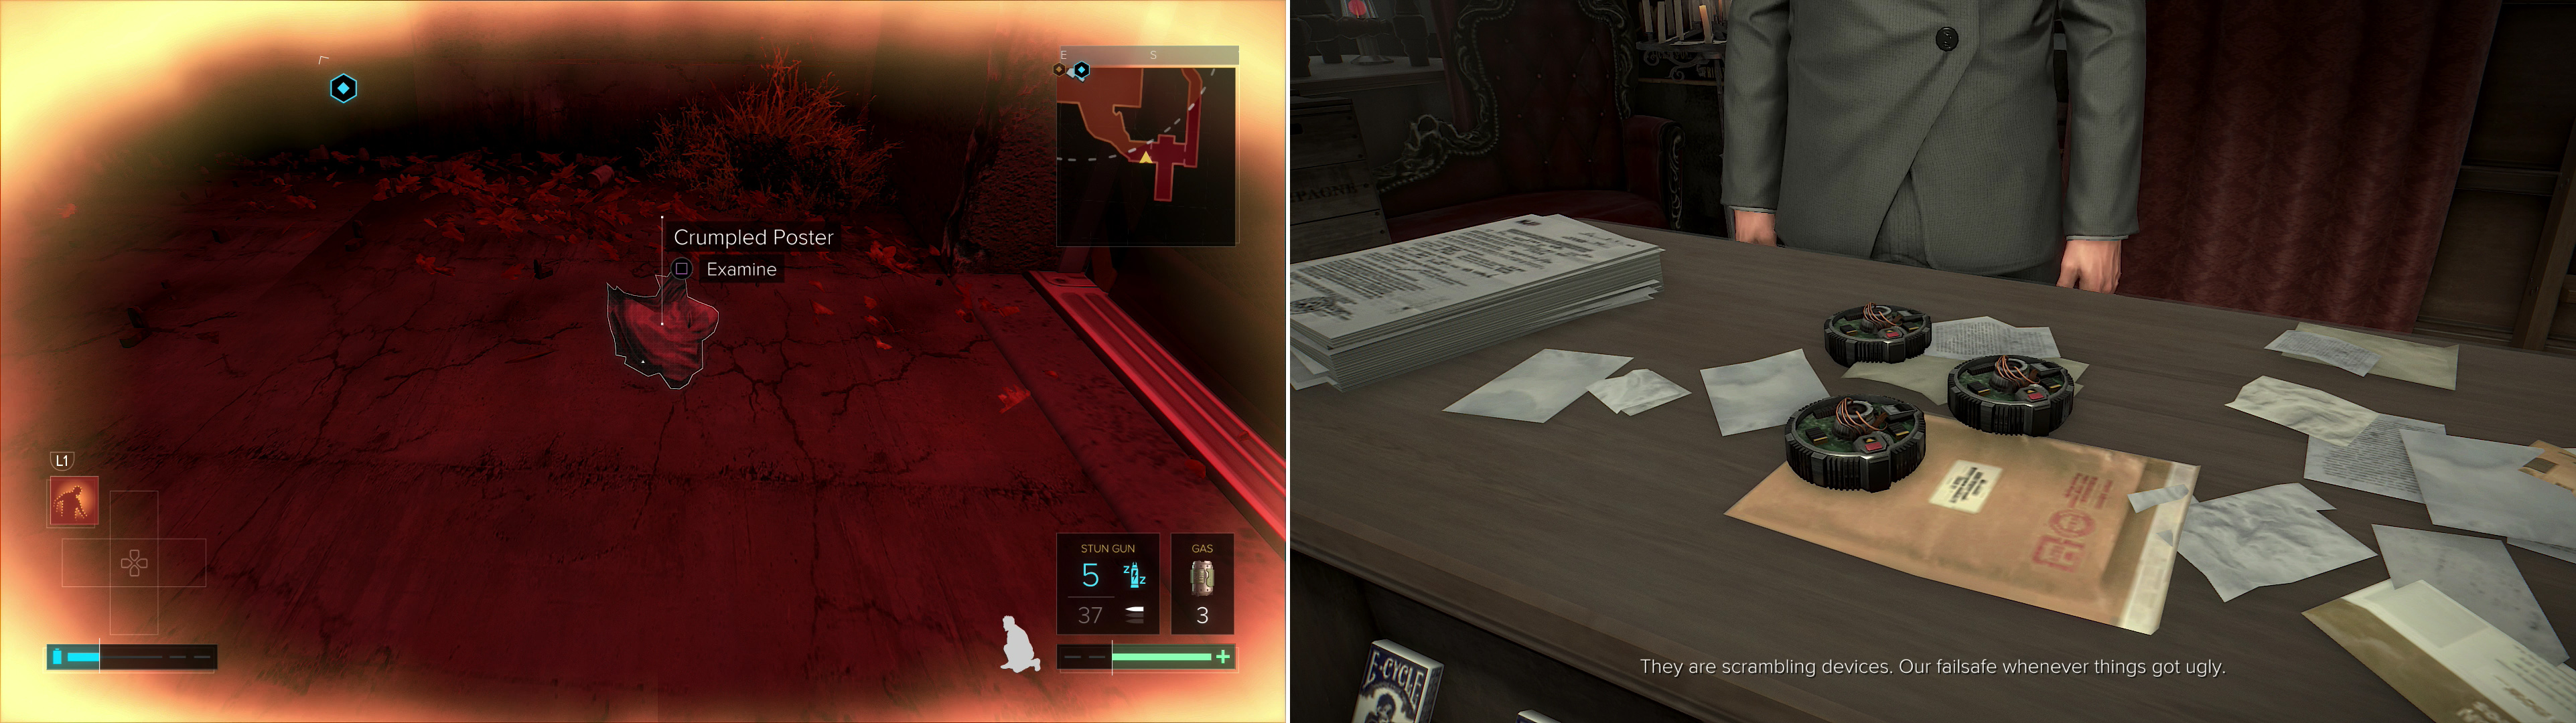
Indulge the petty human and talk to him about Richard and he’ll explain their act, and presumably the secret behind Richard’s “powers”. More importantly, he’ll vouch for Richard’s character and given you some “Scrambling Devices” , which he hopes can be used to break Richard’s control. Search downstairs when you’re done talking to find some Wine and a Credit Chip, then pay homage to almighty Voltar 3000. His words of wisdom don’t come cheap, but if you are wise enough to listen he’ll bestow upon you “Voltar’s Card” . Seriously, though, there’s no telling what this card does - it may well be an easter egg. Save your money.
The Great Dick
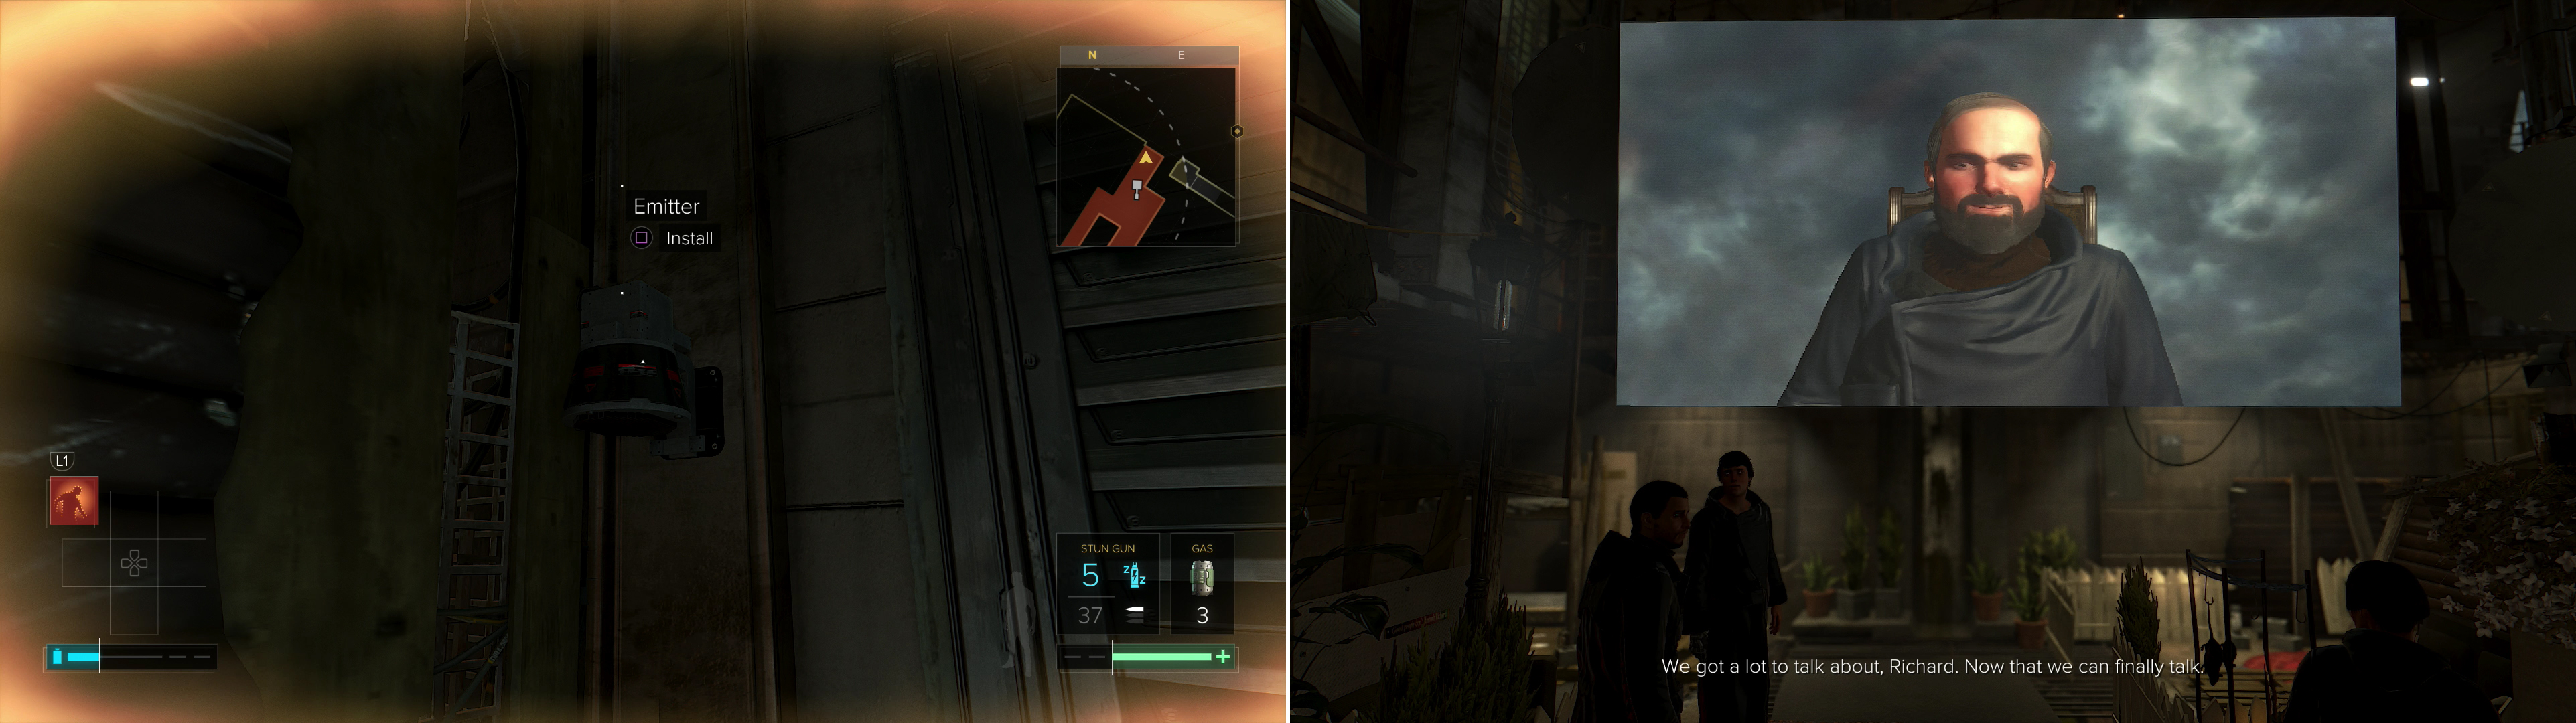
Return to Richard’s cult compound in the sewers under the Capek District. There are a few ways you can resolve this quest; by sneak over to Richard’s room (either way you try it you’ll have to evade at least one turret and hack a Keypad), then incapacitate Richard when you reach him. Since that doesn’t give you the trophy/achievement, though, and it isn’t any easier than doing things the proper way, let’s try to plant these Scrambling Devices. Head to the podium in the middle of the compound and turn south to find a metal ledge, the eastern end of which you can leap up to.
To the south is a room with a turret keeping watch, so either disable it with your “Remote Hacking” ability, use “Glass-Shield Cloaking” to evade it, or simply time your movement so you can get out of its sight before it turns hostile. Your goal is to head south into the room and immediately turn east to reach a dead-end, where you’ll find the first Emitter. Plant the first Scrambling Device and return back north, then look west down a hallway. The second Emitter is on the northern wall of this hallway. Return east and drop back down into the lower part of the cult compound, then head back up the ladder north of the podium. wait until the turret up here isn’t facing you, then run west and seek shelter behind some boxes near the hallway to the south. When the coast is clear, round the corner to find the third Emitter on the northern wall of the hallway, just around the corner. Plant the Scrambling Device, then return to the relative safety of your boxes, wait for an opening, then return to the lower part of the compound again.
You’ll notice that you’re now in full control of your faculties, so mount the podium and use the microphone to issue a challenge to Richard. During your argument pick the options “Pity”, then “Mitigate”. You’ll still complete the quest if you don’t but those options give you the best ending, more XP and the trophy/achievement “Cult of Personality”.
| Objective | Reward |
|---|---|
| For breaking Richard’s control | XP 1600 |

Cult of Personality
By uncovering the key to Richard's persuasive powers, you broke his control and freed his followers.

15
Plant the Scrambling Devices to neutralize Richard’s Emitters (left) then, with your faculties restored, confront Richard in a war of words (right).
Now that Richard’s control has been broken, return south to the elevated part of the compound, head south past the now-neutral turret, then turn west and enter Richard’s room. If you picked the options suggested above, he’ll be busy sobbing, if not, he may well have killed himself. Either way, search the room for a variety of software units, a few Credit Chips, Battle Rifle Ammo, and other goodies. More noteworthy loot includes the eBook “Top 10 Tech… Abandoned Technologies” on a divan in the north-western corner of the room (where Richard will be sitting, if he’s still alive), a Battle Rifle on the floor near a bed to the south-east, and “Breach Software #28” on some electronics near Richard’s security terminal. Also in the bed/security computer area is a Medical Cooler with a dose of “Neuropozyne” in it. After you plunder Richard’s room, consider hacking the Keypad (Security Rating: 5) along the northern end of the elevated part of the compound… you know, for the XP. Other than that, now that the annoying “mind control” effect is gone, you can loot the lower part of the compound more easily, although the best you’ll find are two Pocket Secretaries and a box of Crafting Parts.
Leave the cult compound and talk to Viznik to wrap this whole episode up. There’s one more quest to do before reporting in to TF29; find and end the Neon scourge that’s plaguing Prague, and particularly its augmented population. Too bad real life doesn’t work like that; “Hey boss, I’m gonna be late today, I have a side quest to do!” Ah… anyways, normally exploration is interspersed with questing, but the next section will be different - the quest “SM00: Neon N **ights”** just takes you too many places, so that quest will be more focused, after which there will be a clean-up exploration section to cover all the collectibles passed along the way.
No Comments