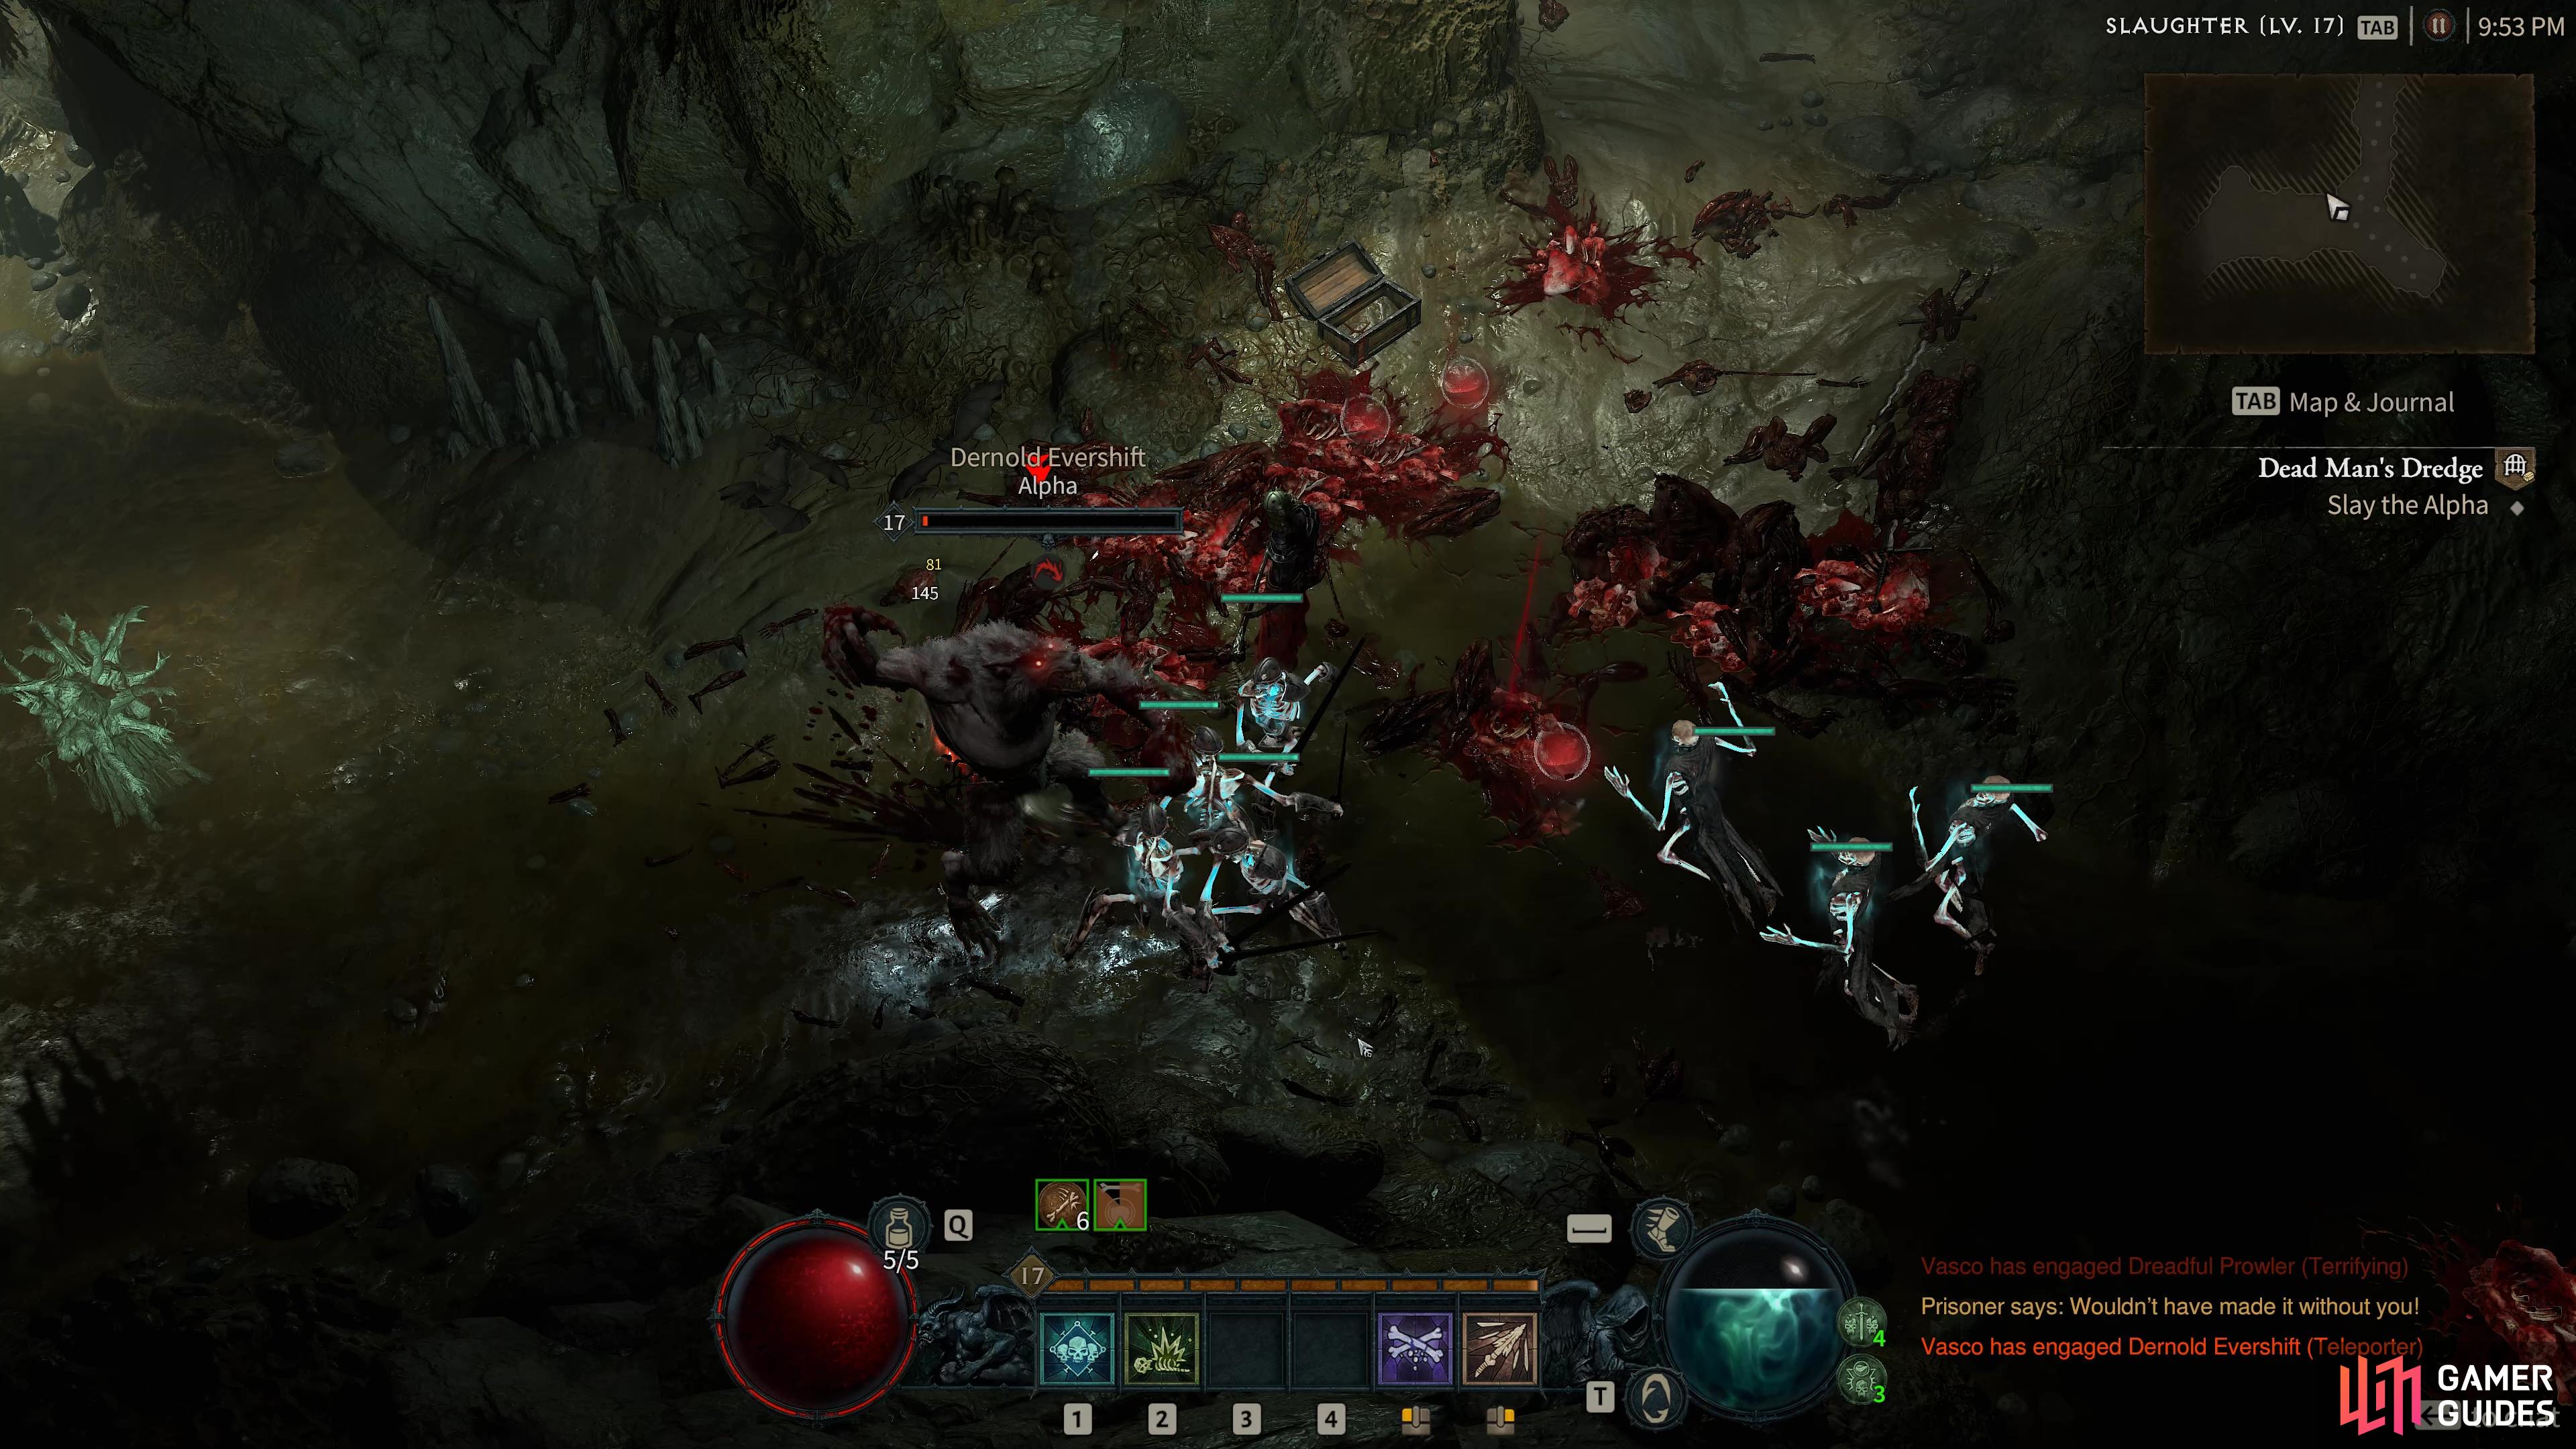
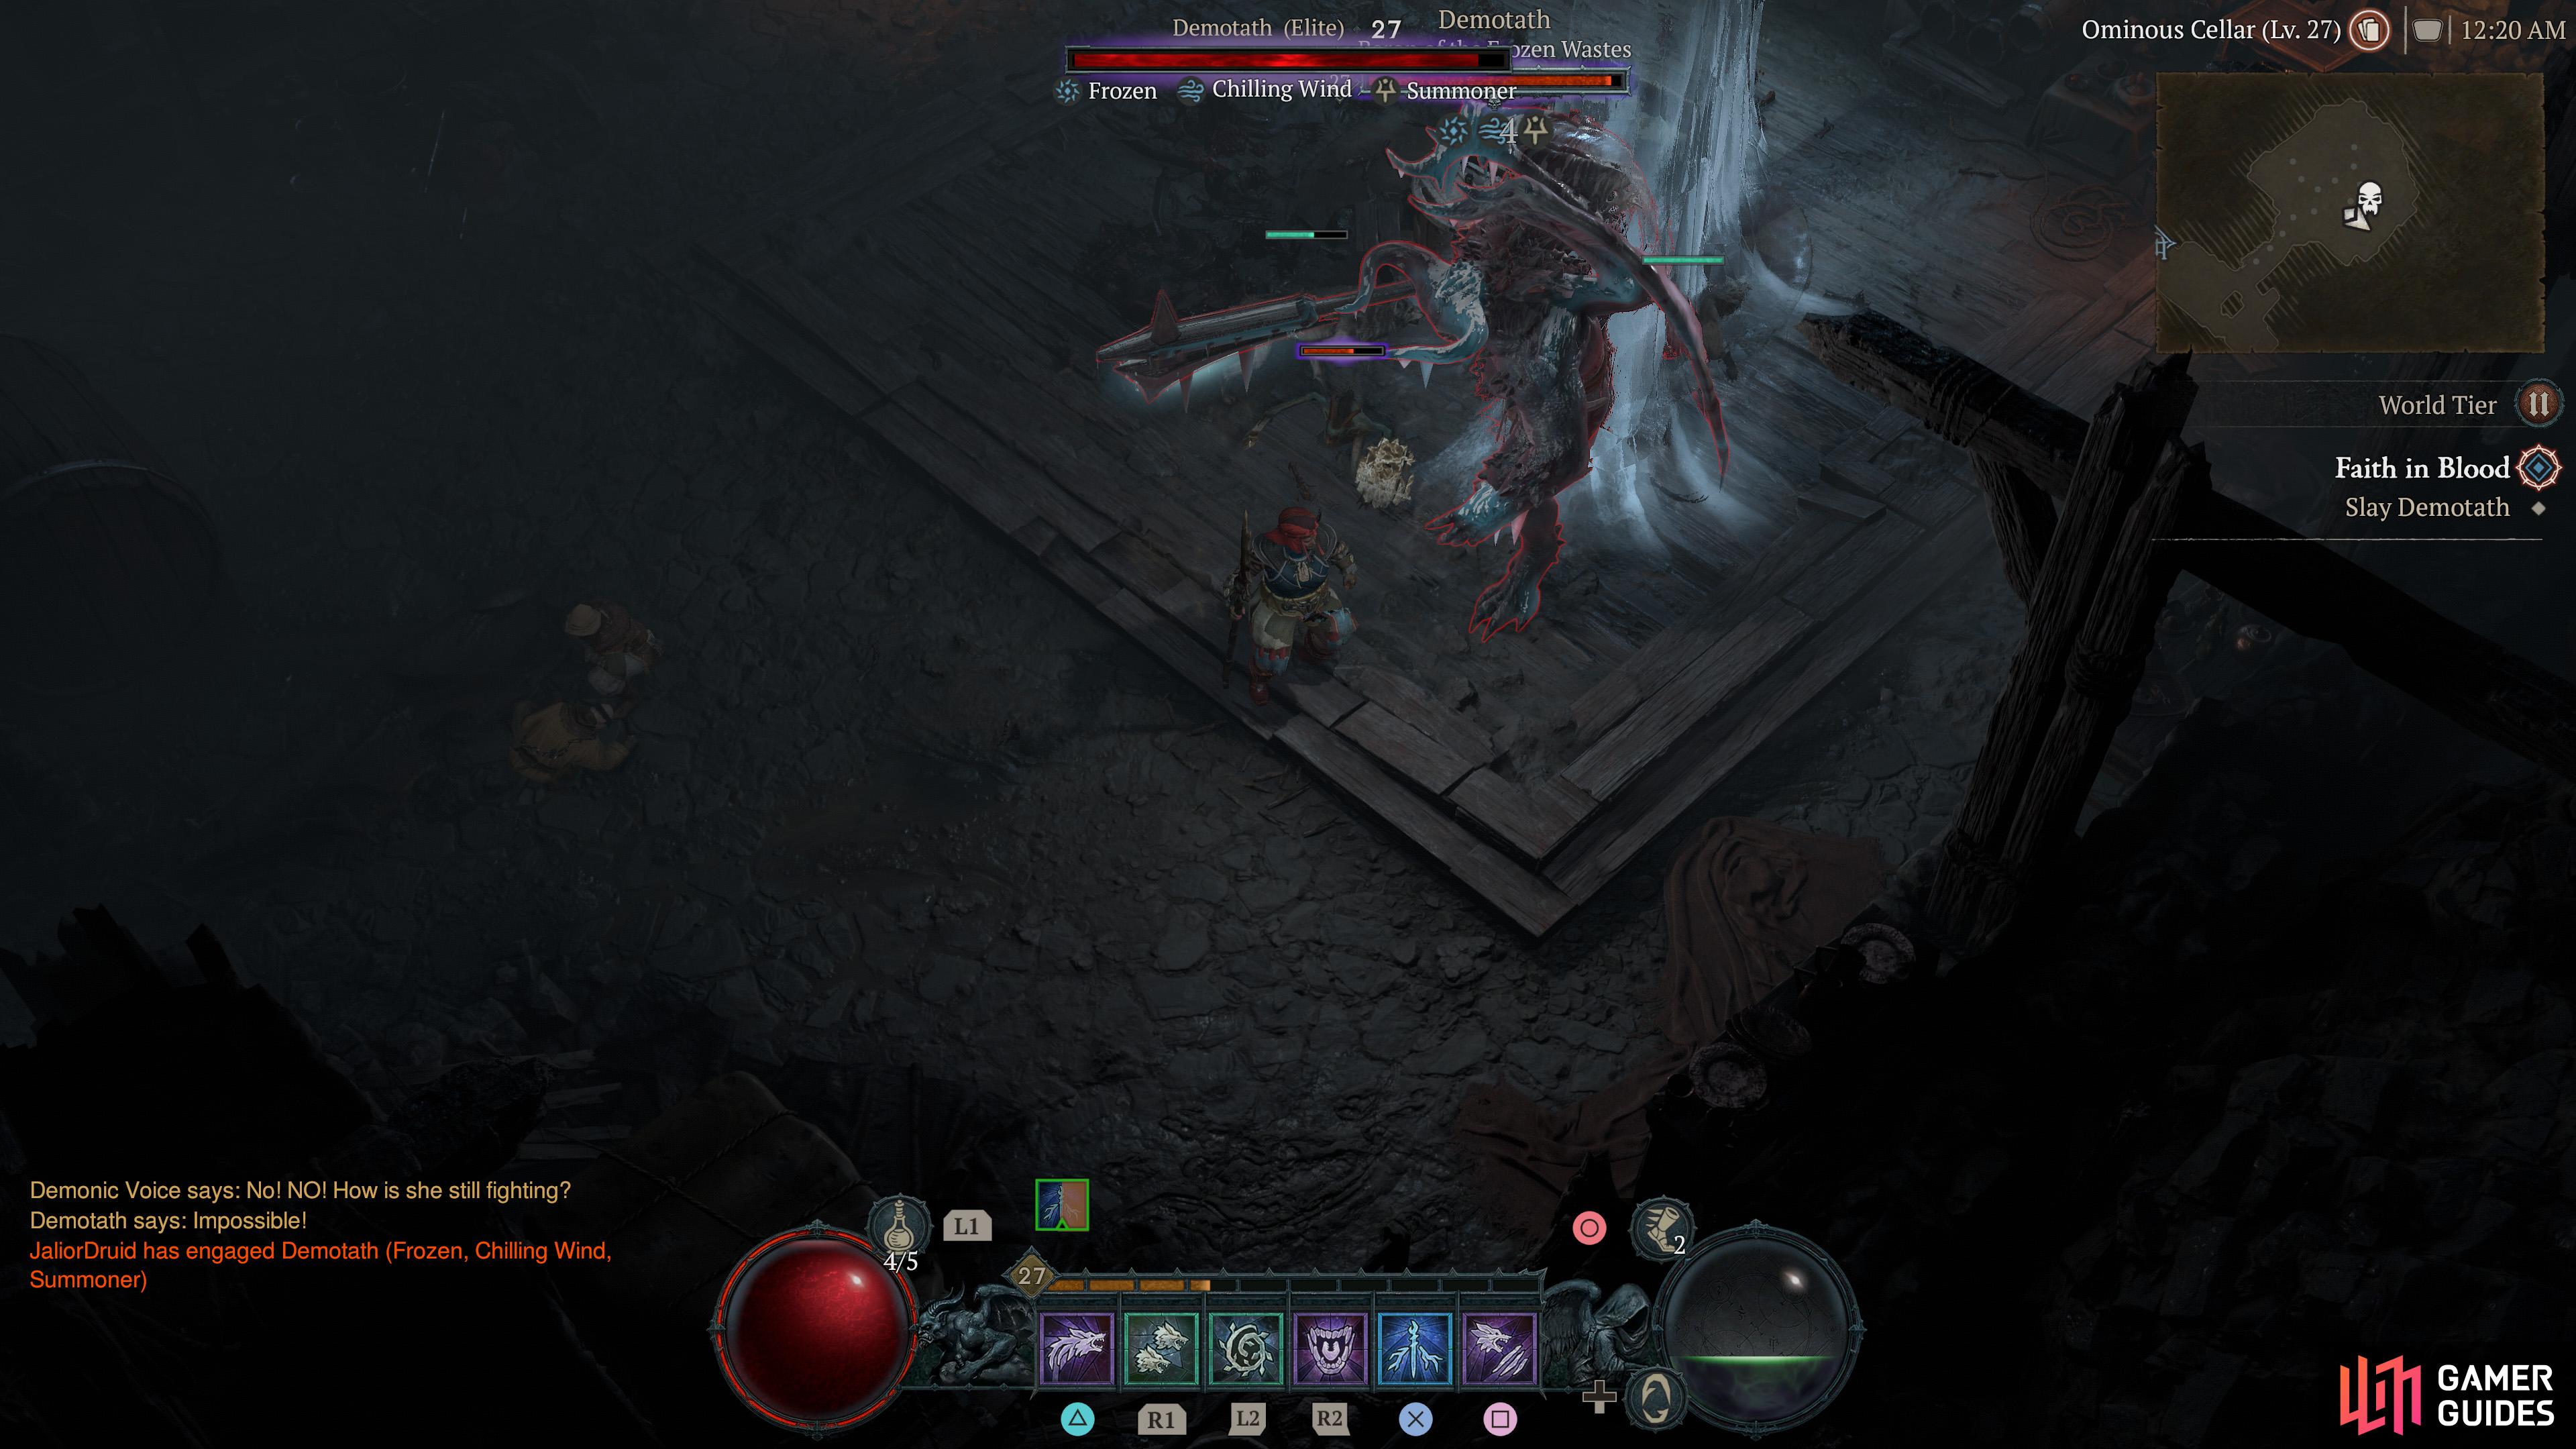
A large, teleporting alpha werewolf and the final boss of the Dungeon Dead Man’s Dredge in Fractured Peaks. Comes with a pack of other Elite werewolves and can teleport around while dealing large damage to players.
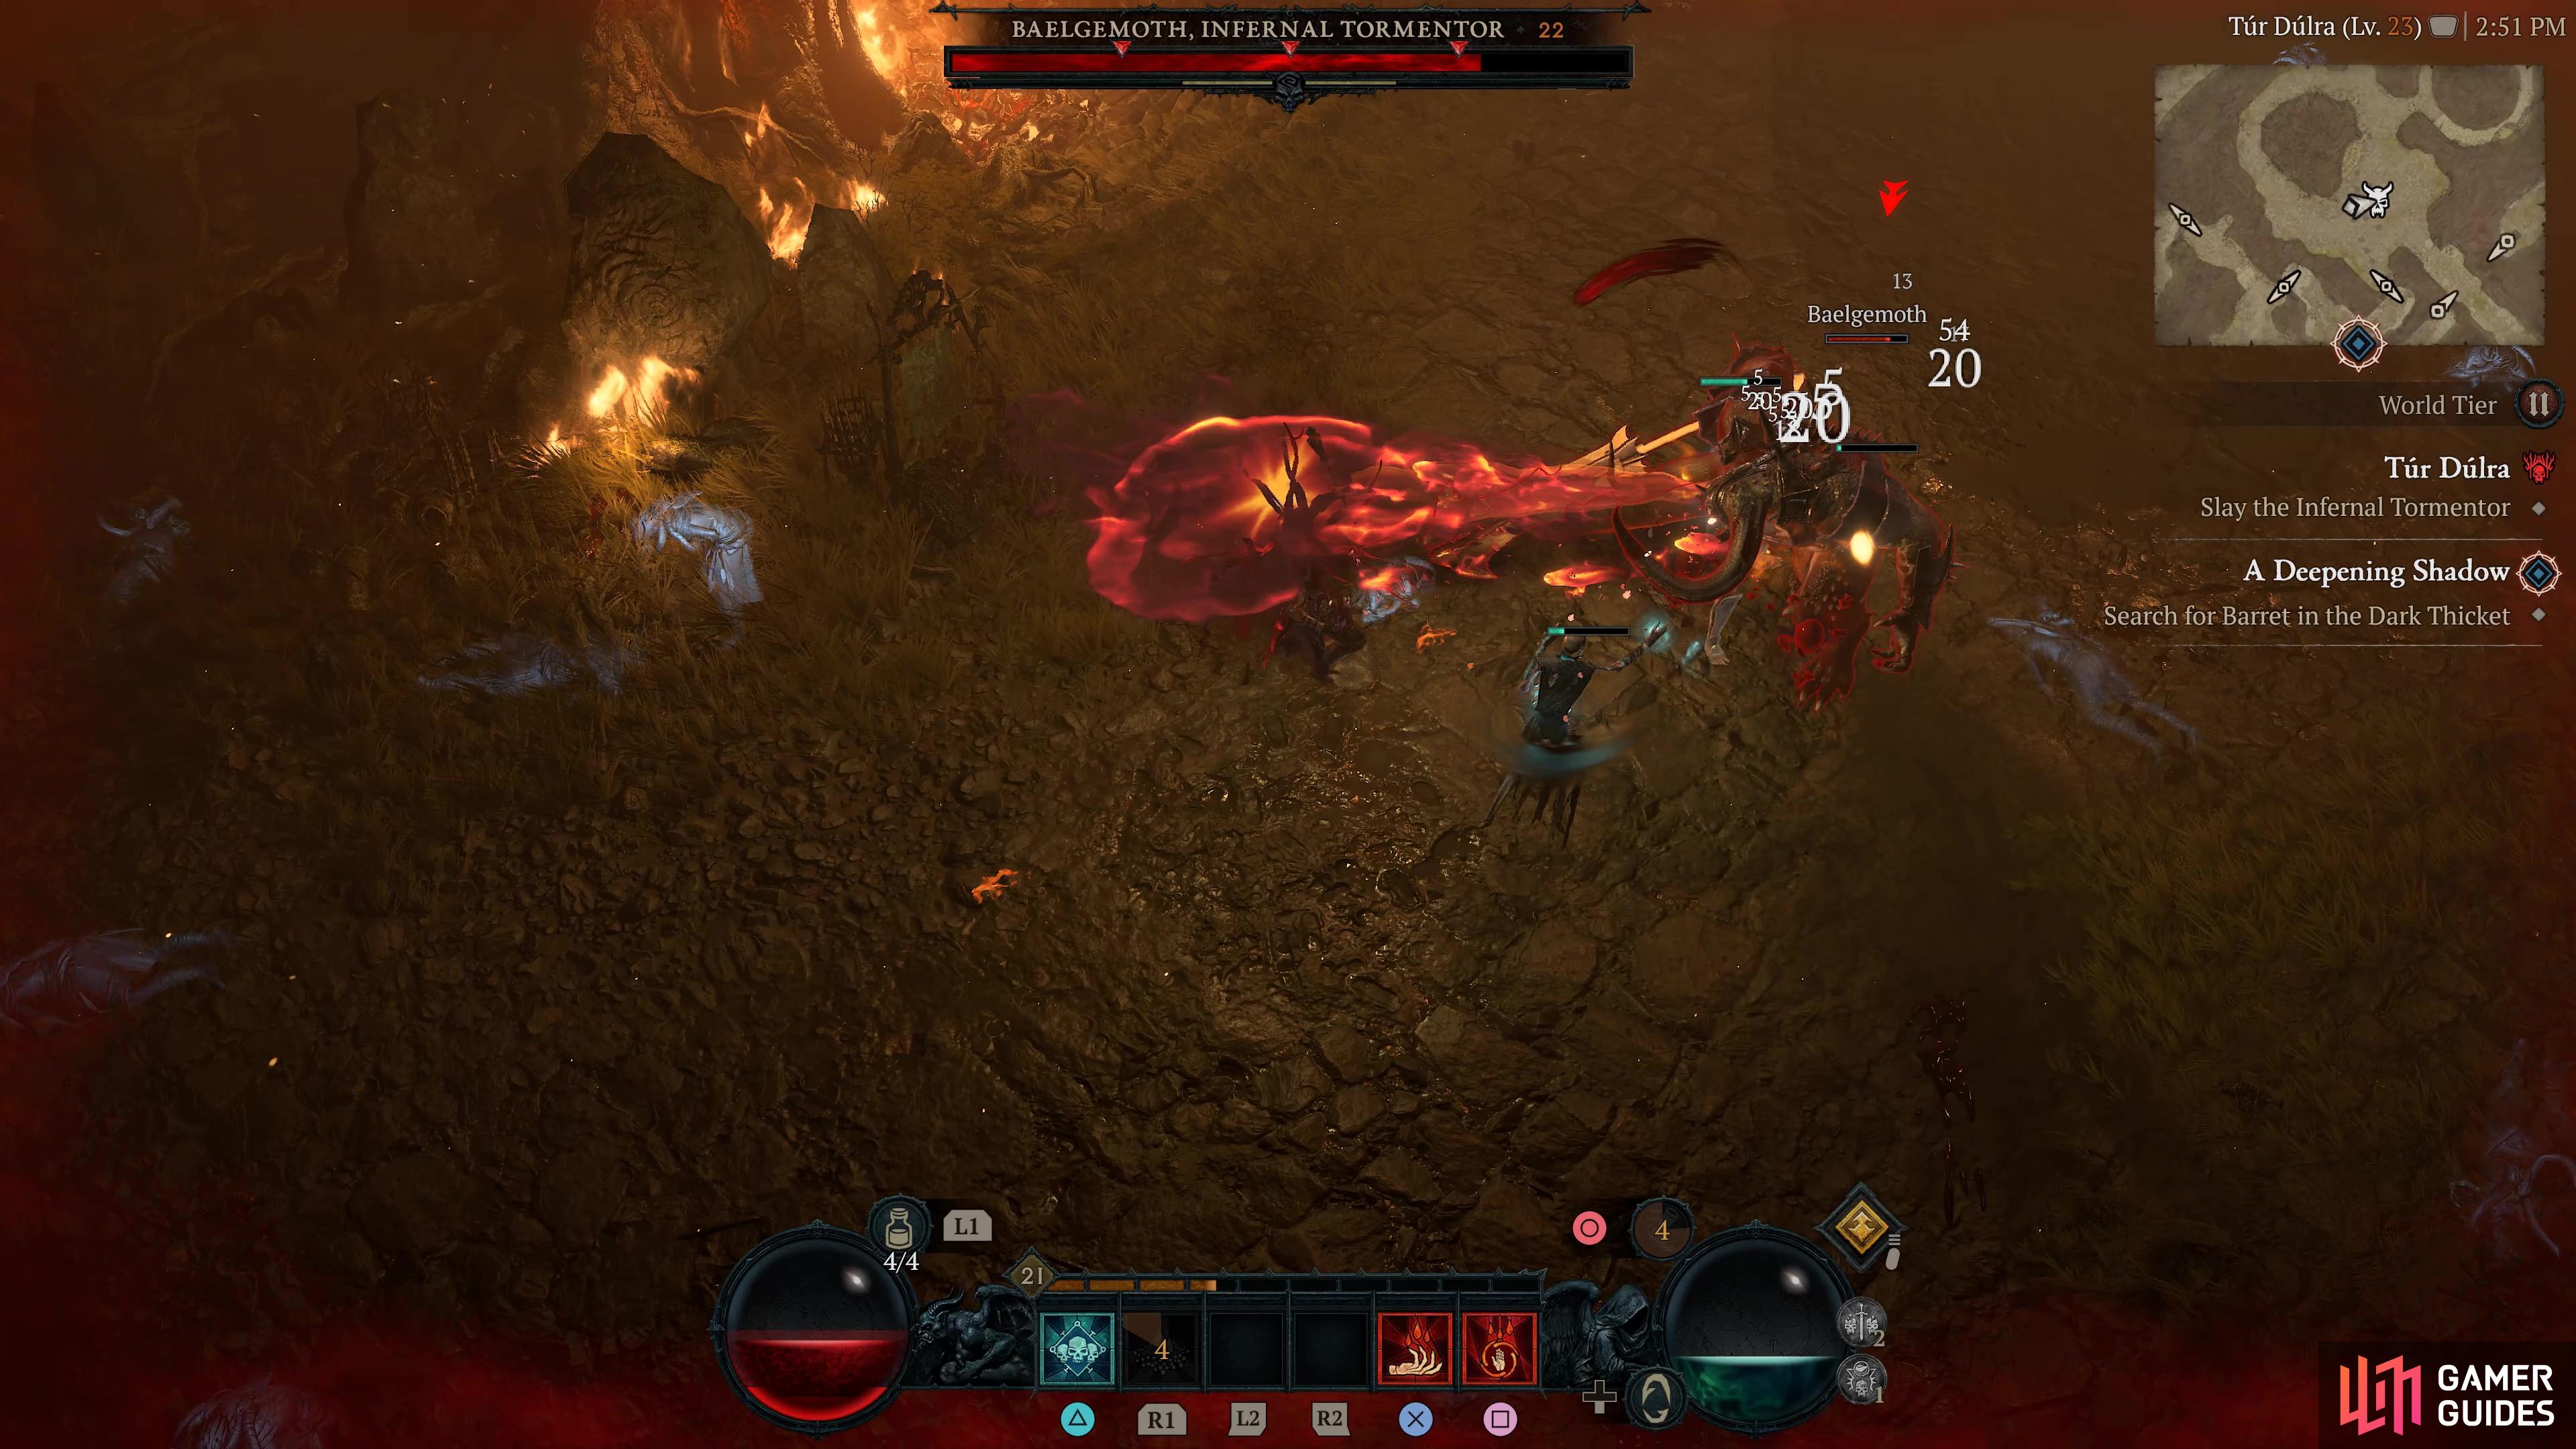
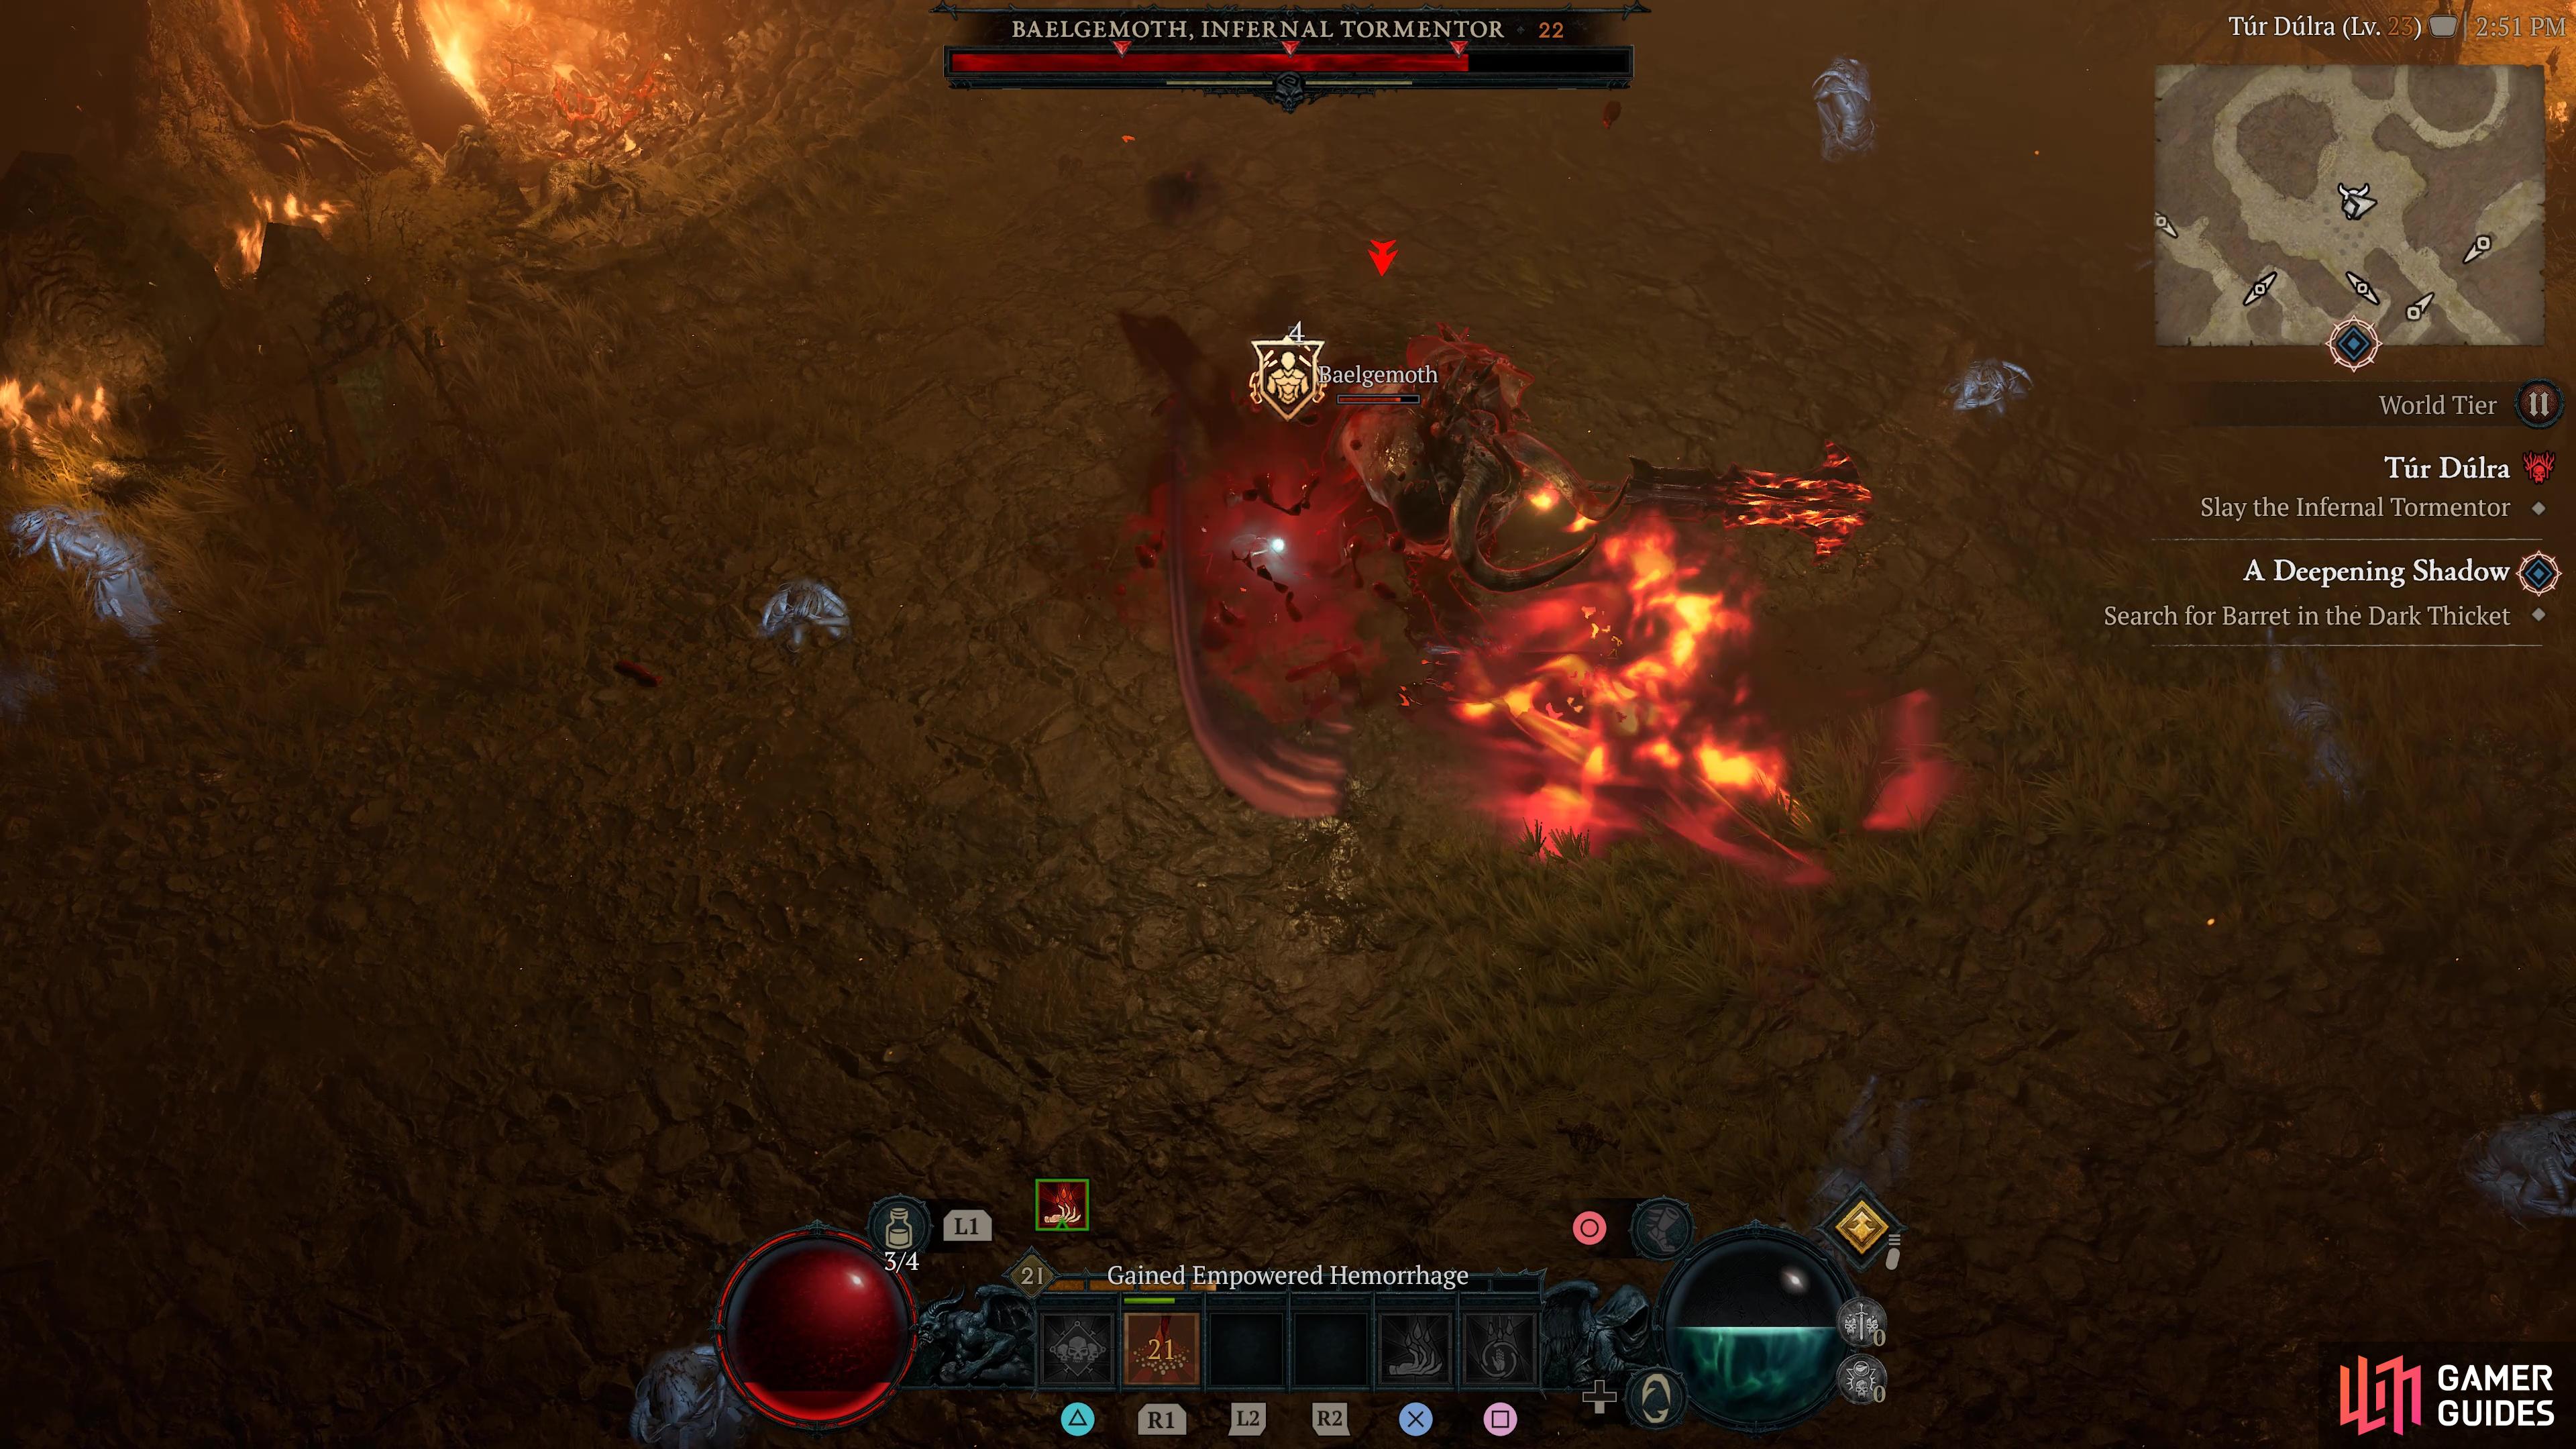
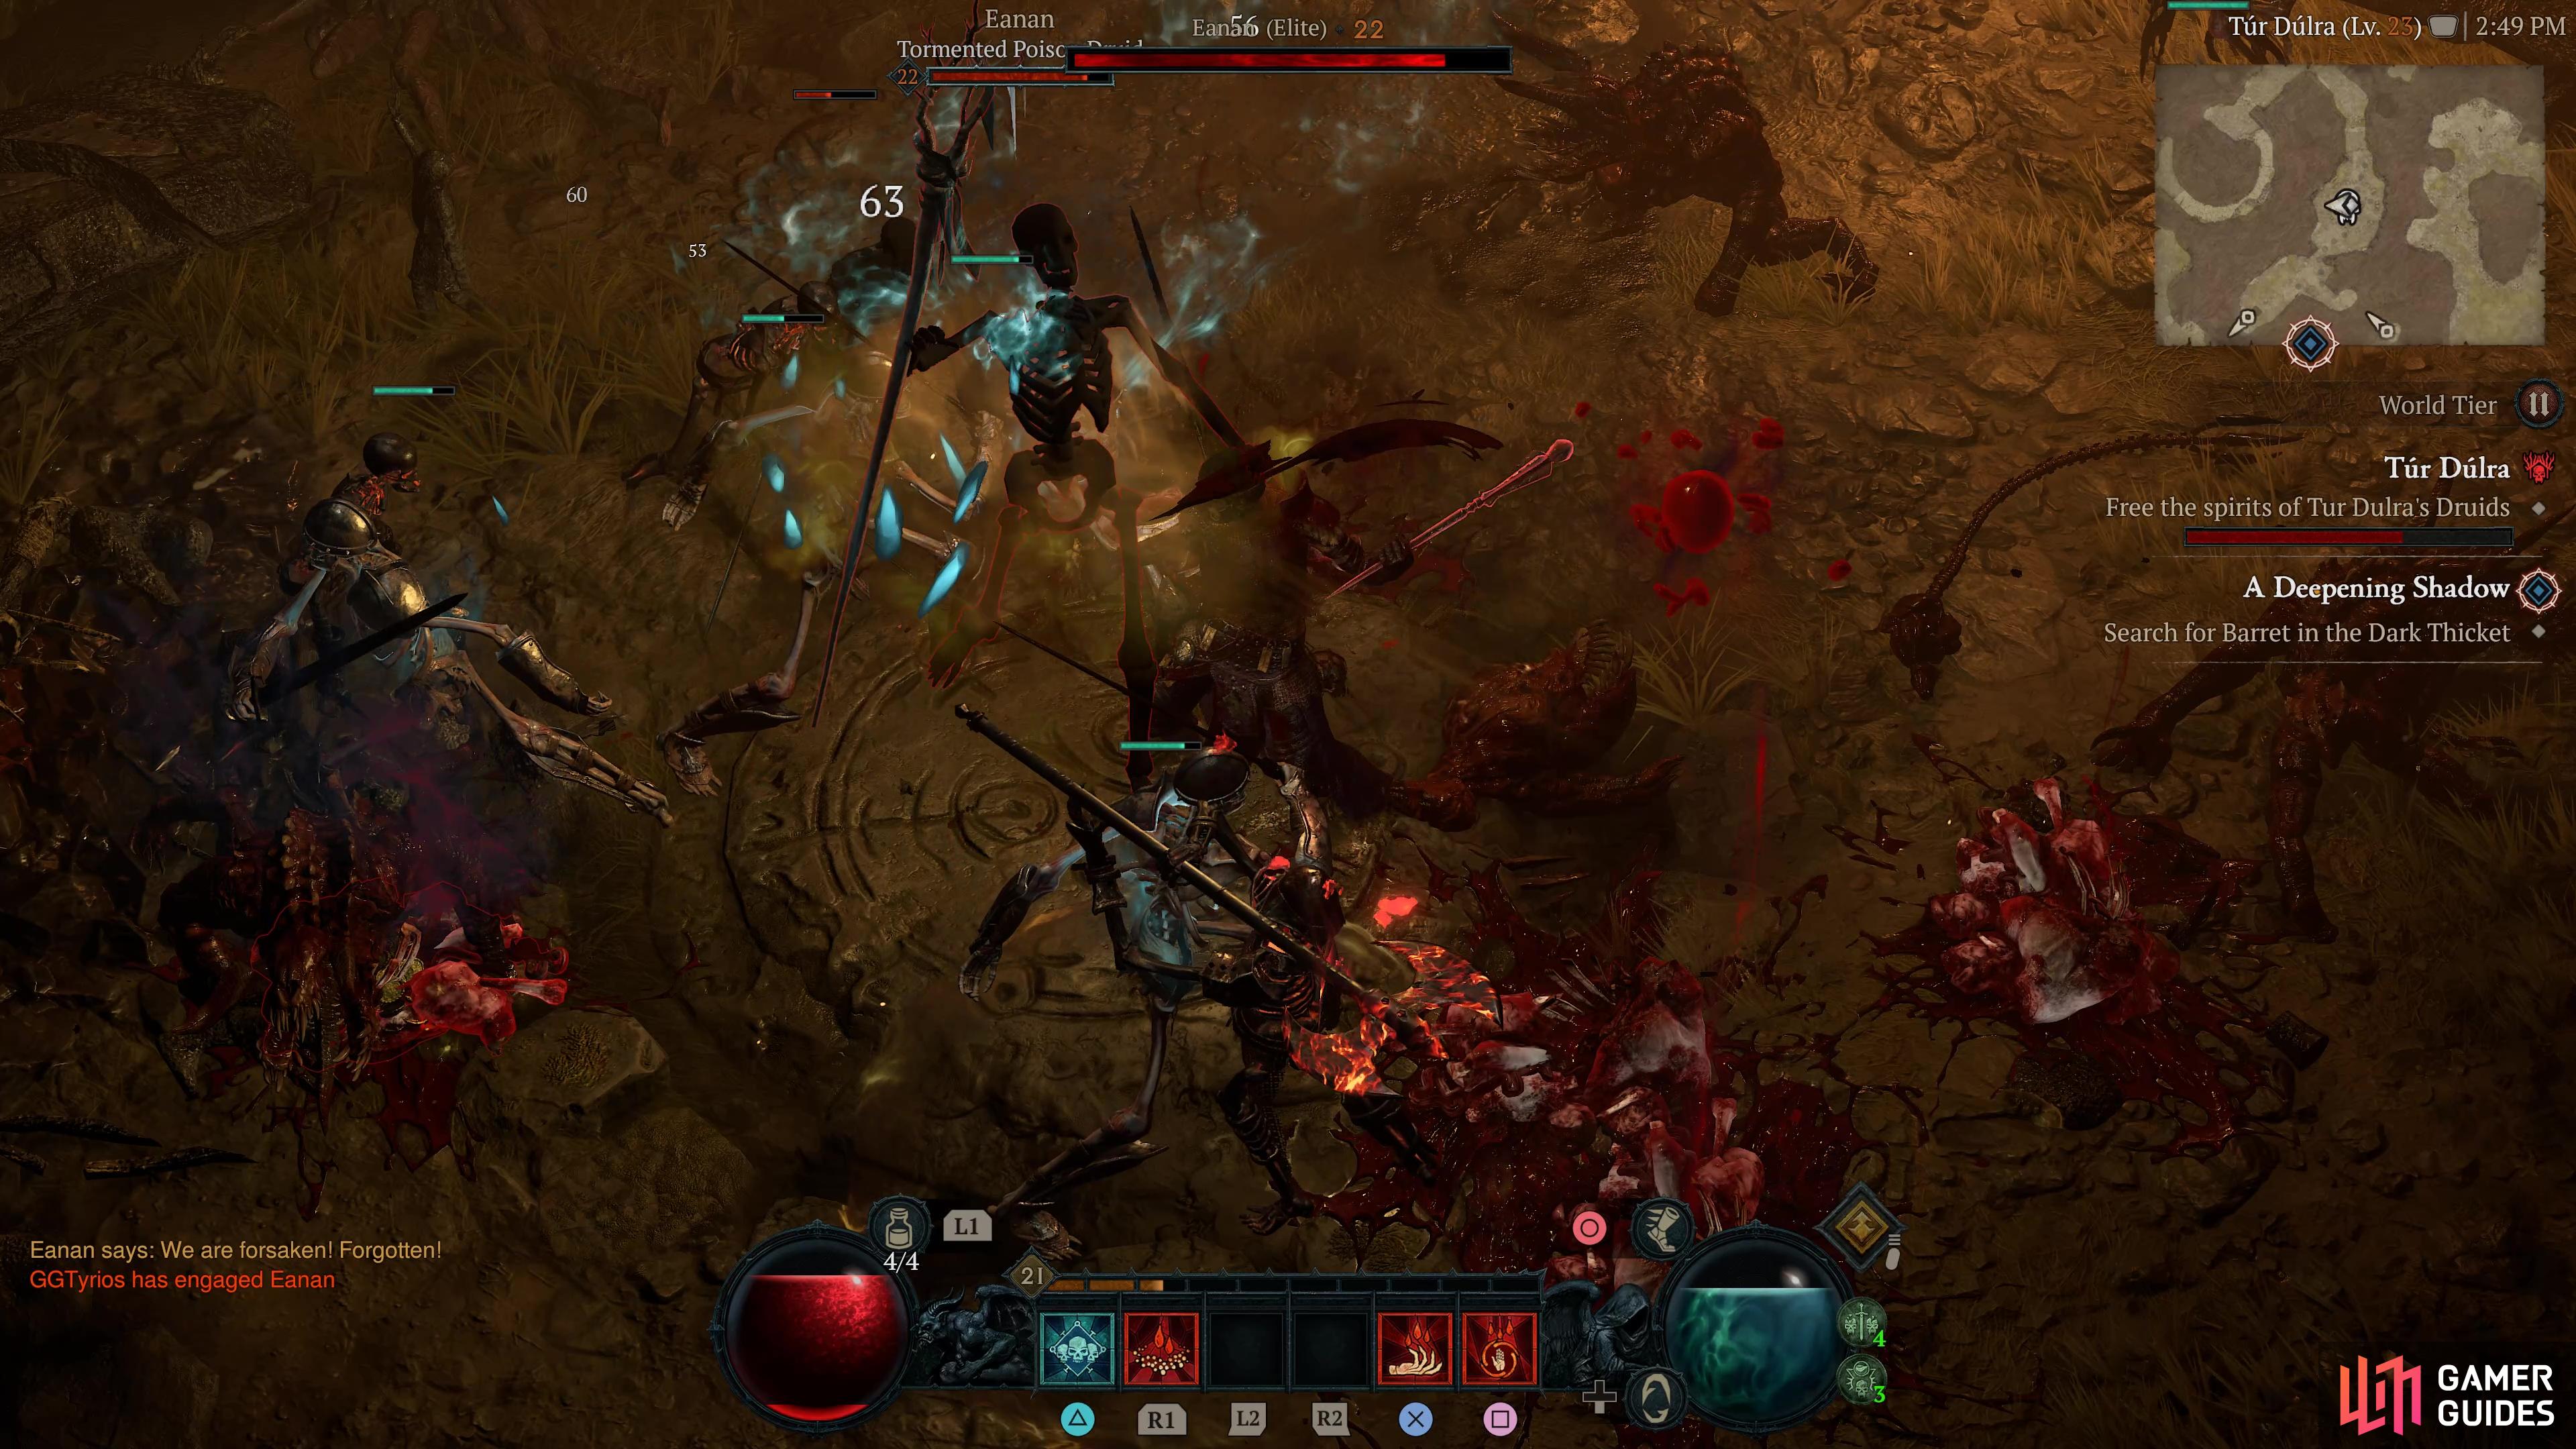
Final boss of the Túr Dúlra Stronghold quest, !Baelgemoth is a massive Balrog-type demon, who wields a flaming cleaver and spits infernal fire from his mouth. He will spray this in a tracking line at the player, in one large flame, with three fireballs shooting off either side. He can also disappear and reappear to slam his weapon on the floor, causing fire to erupt forward in a line from where the weapon hits the floor. He can also summon skeleton spirits to attack you periodically.
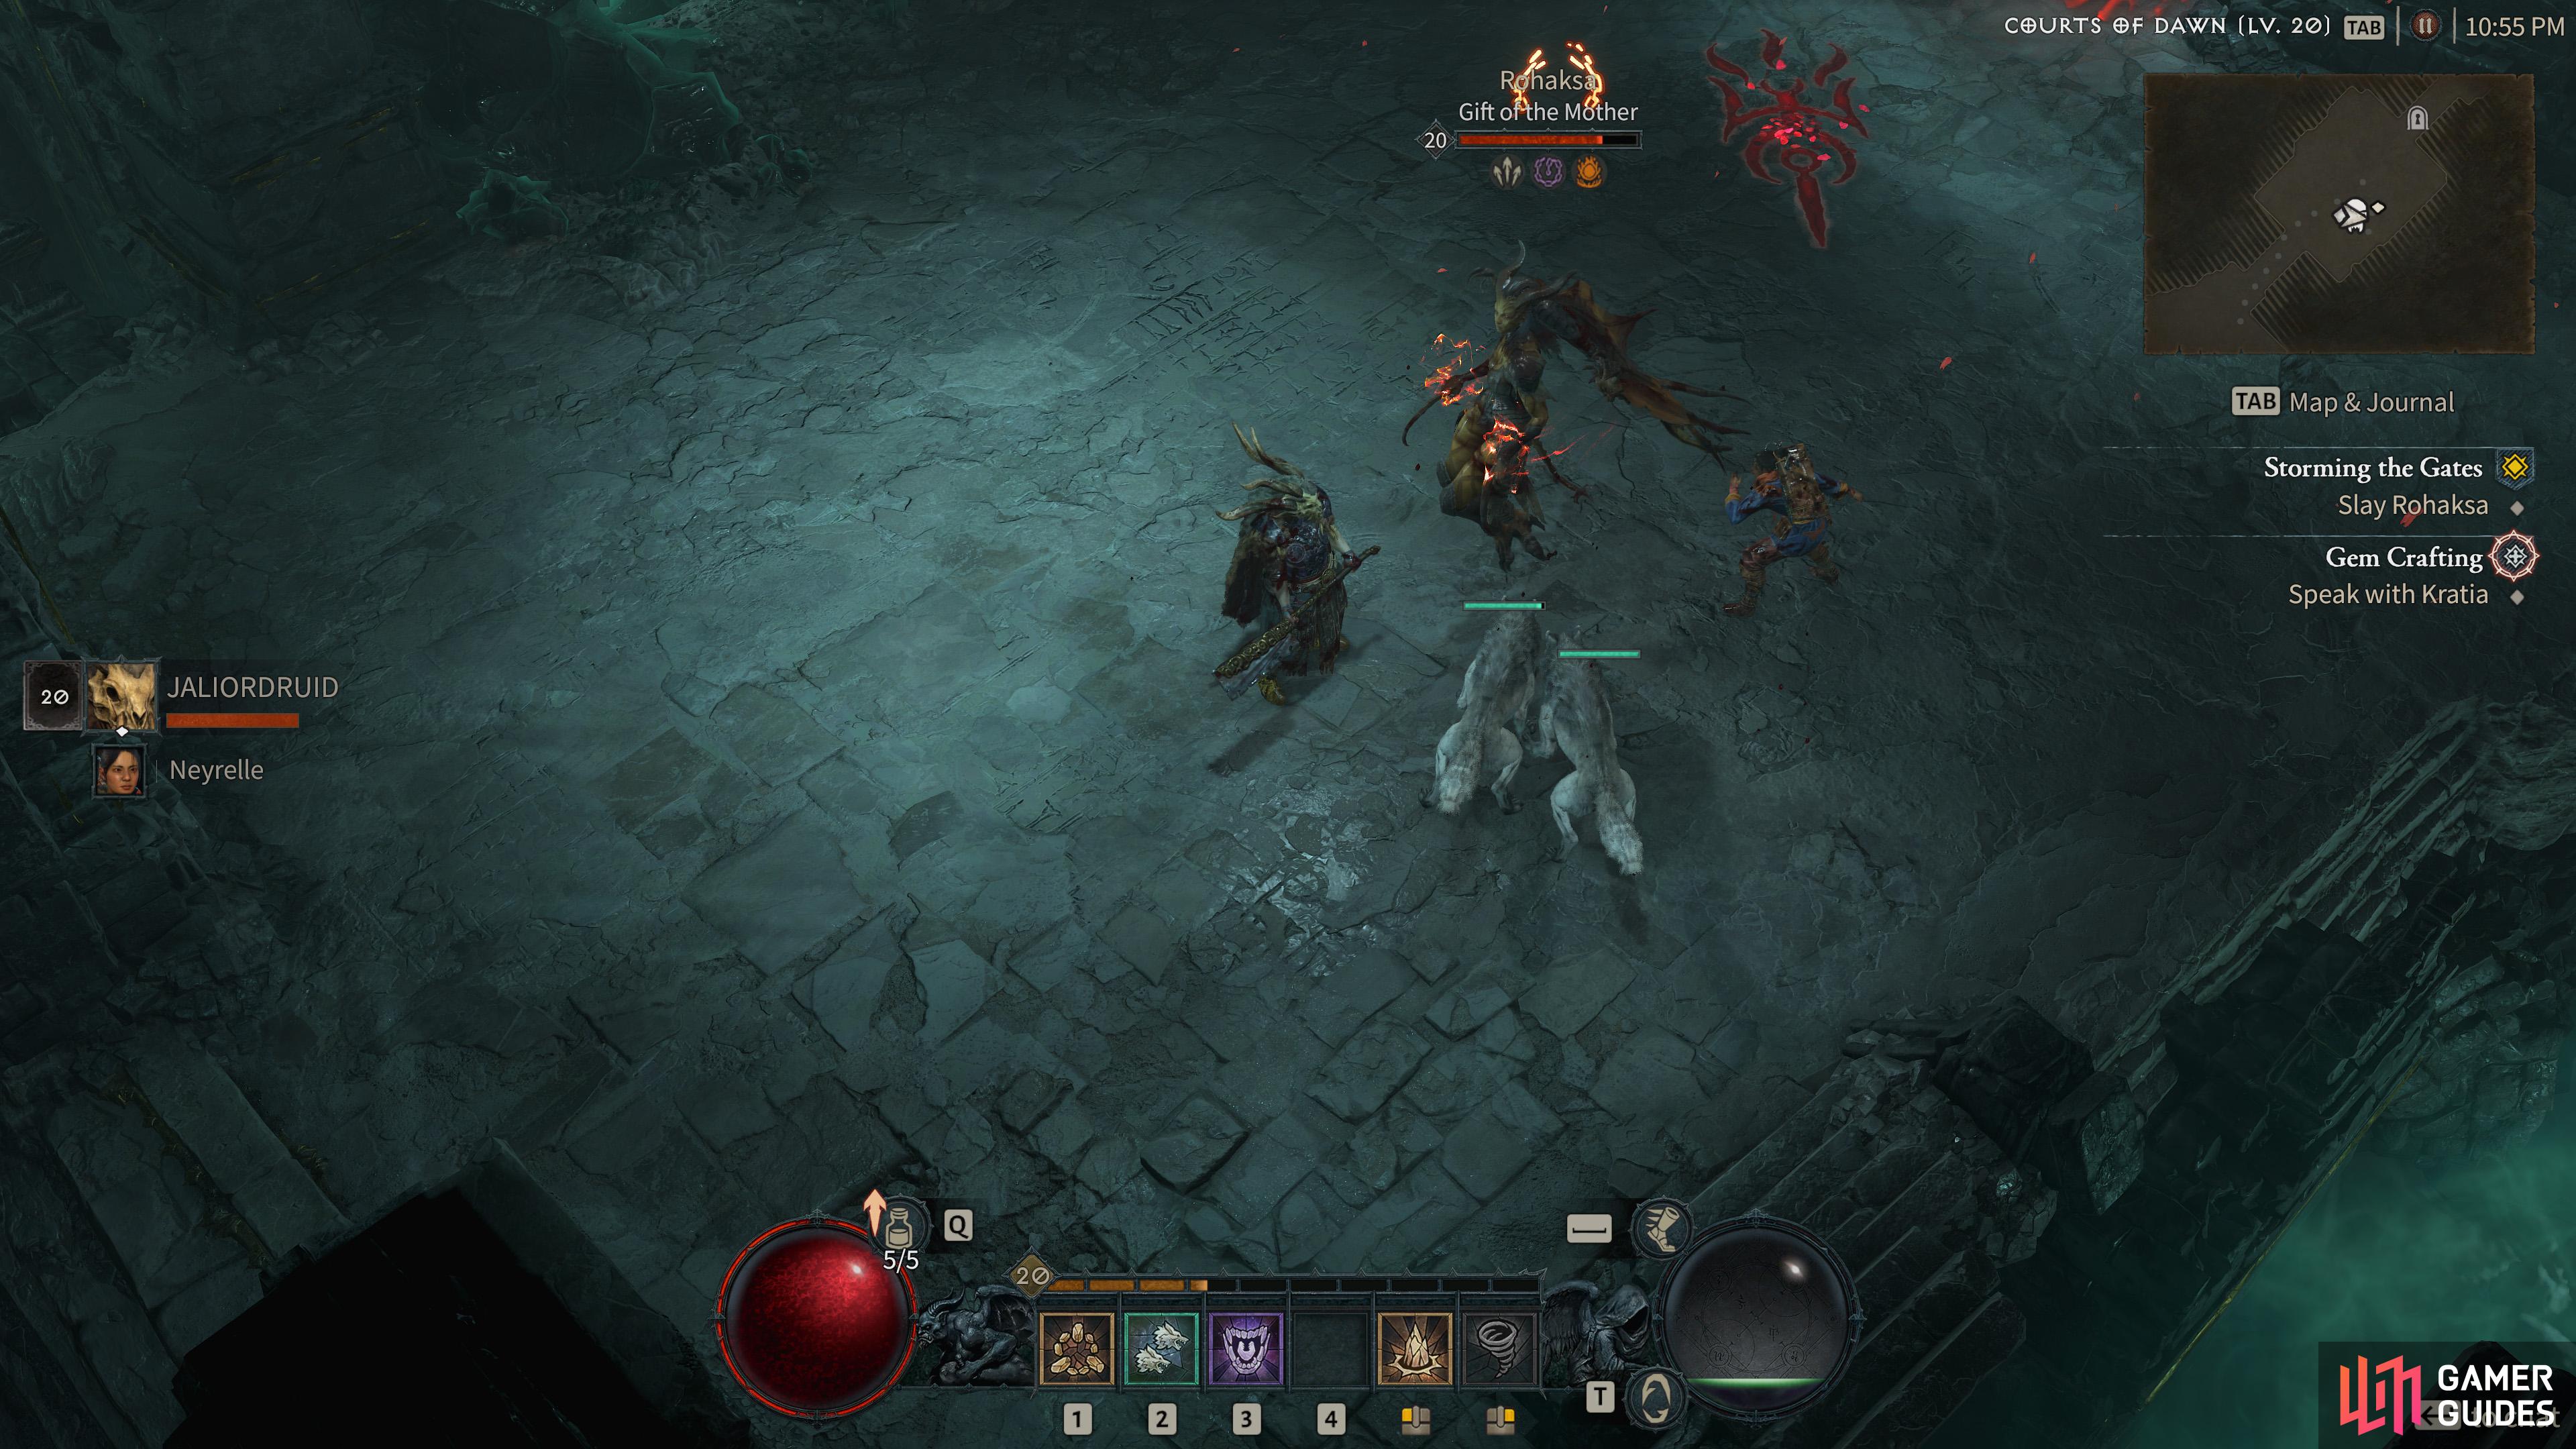
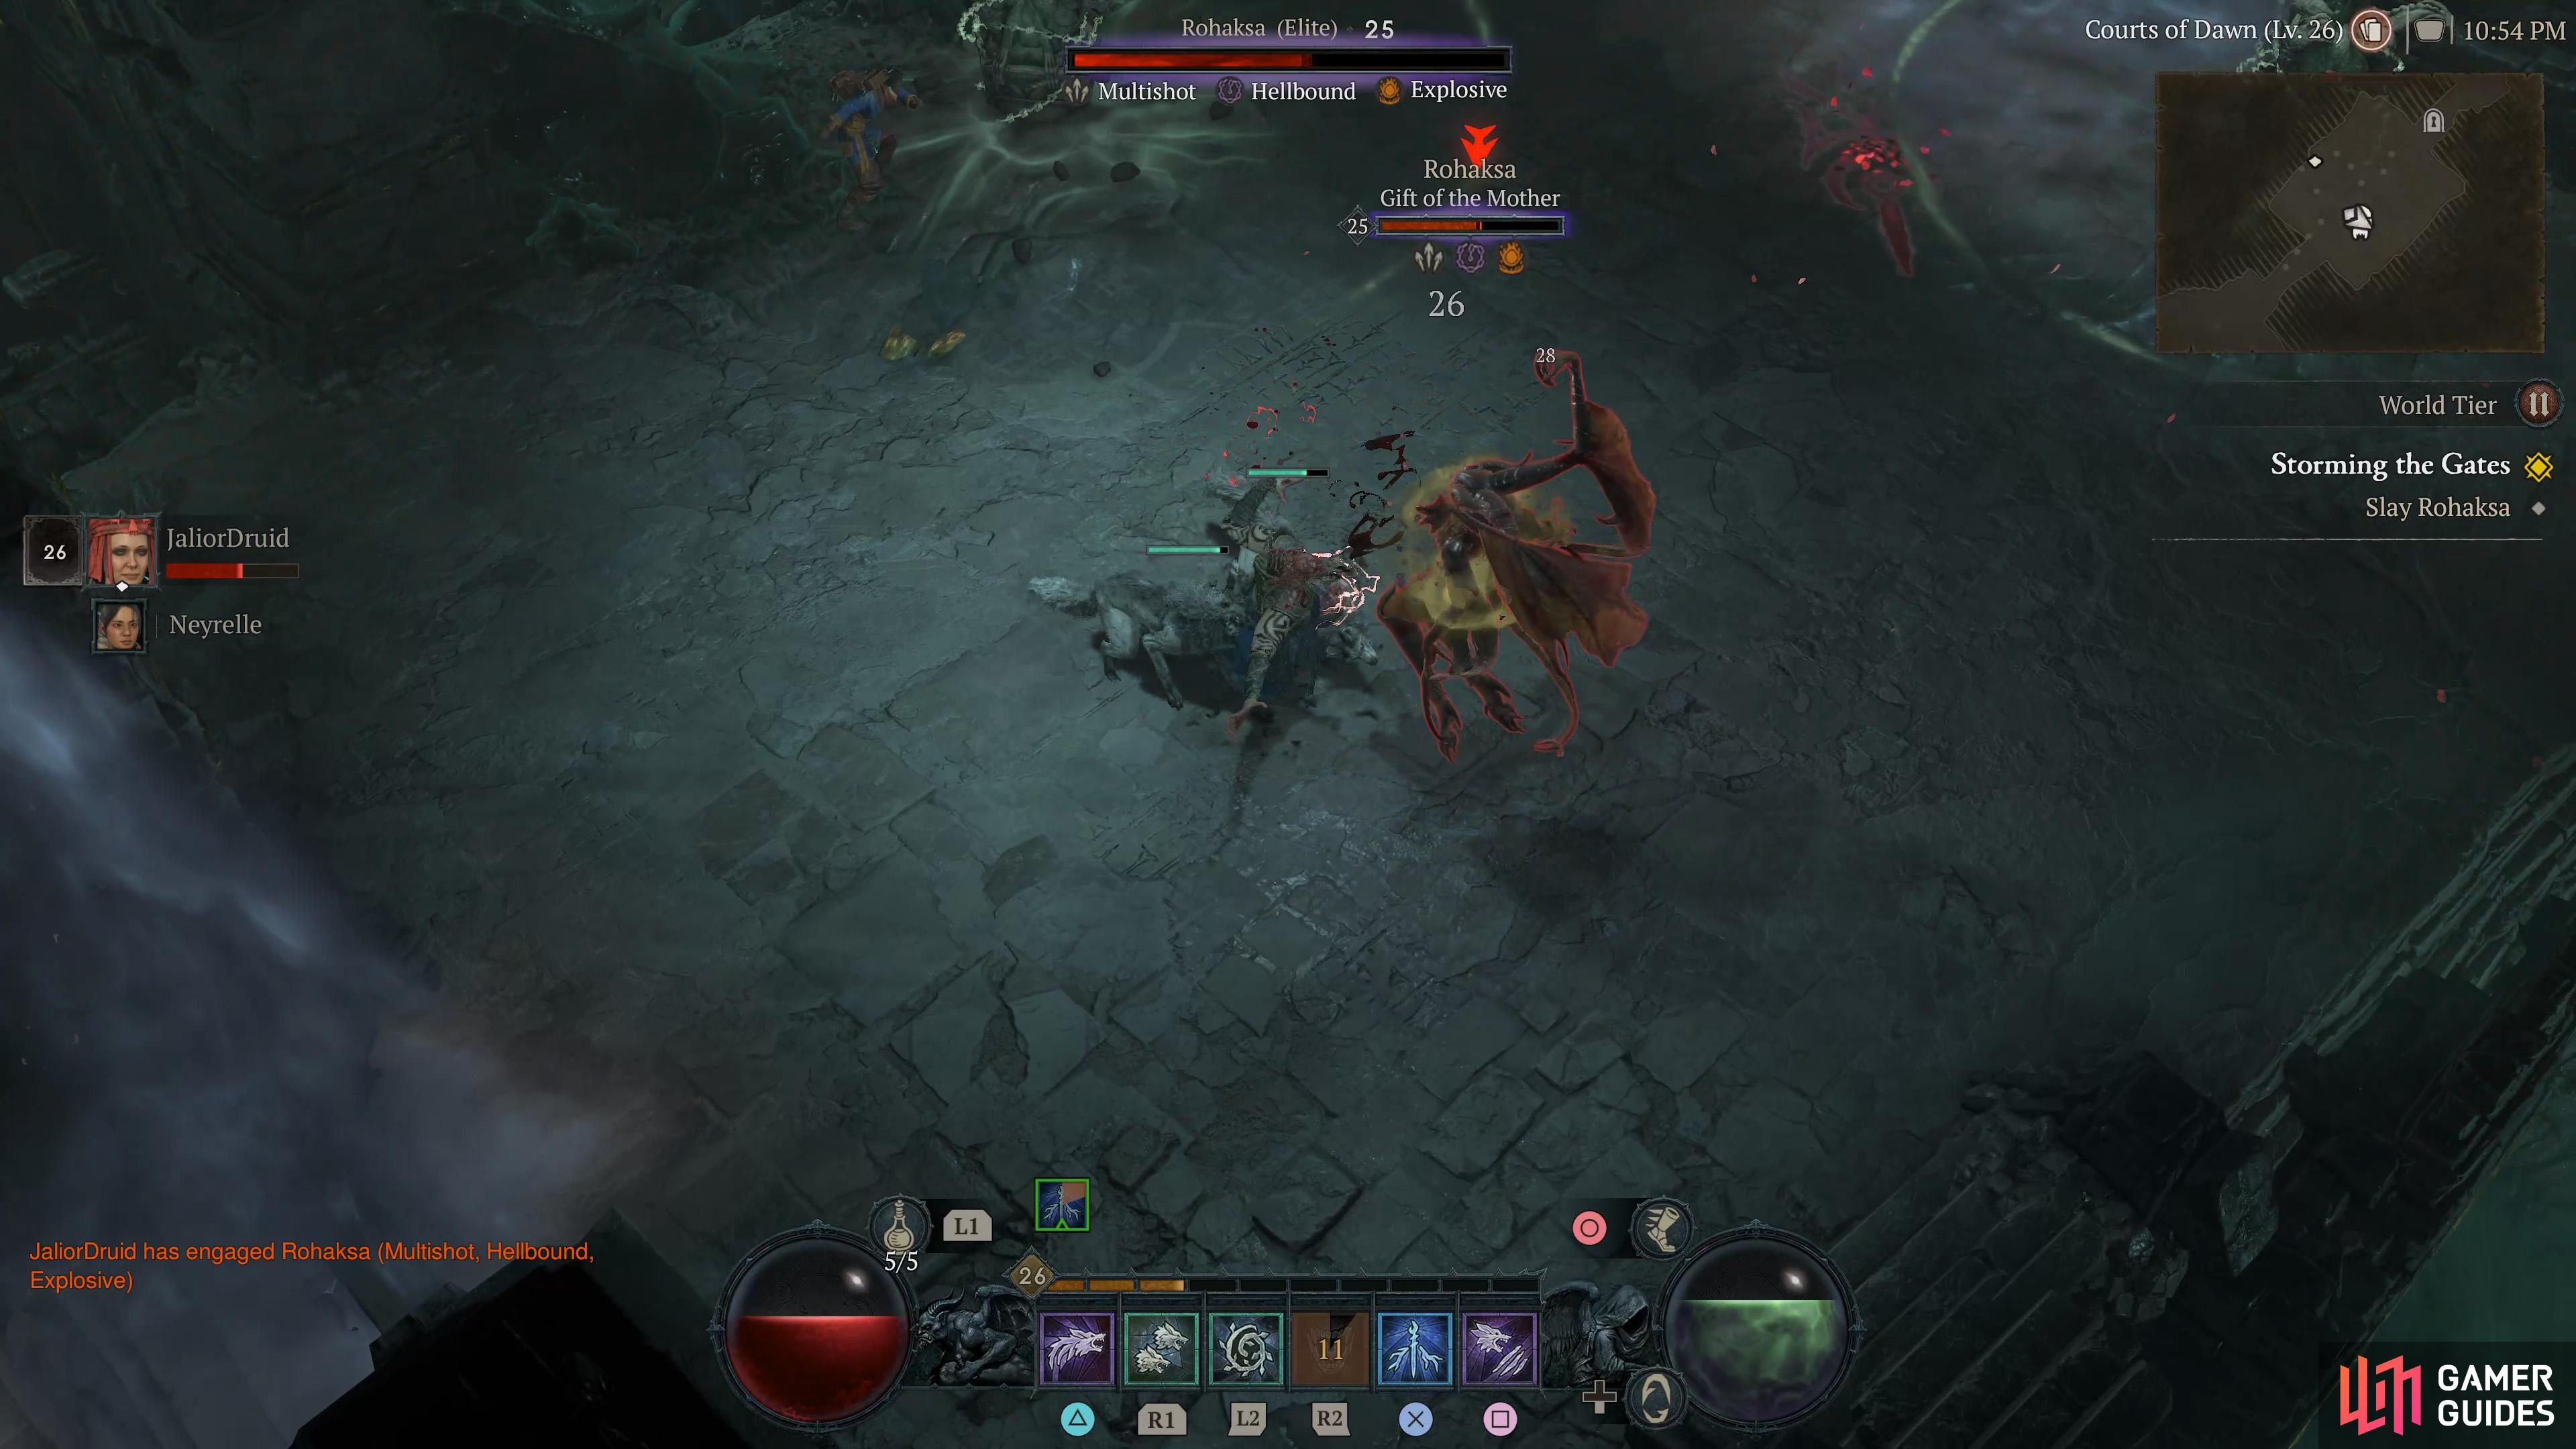
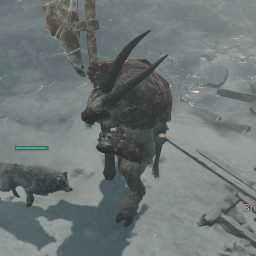
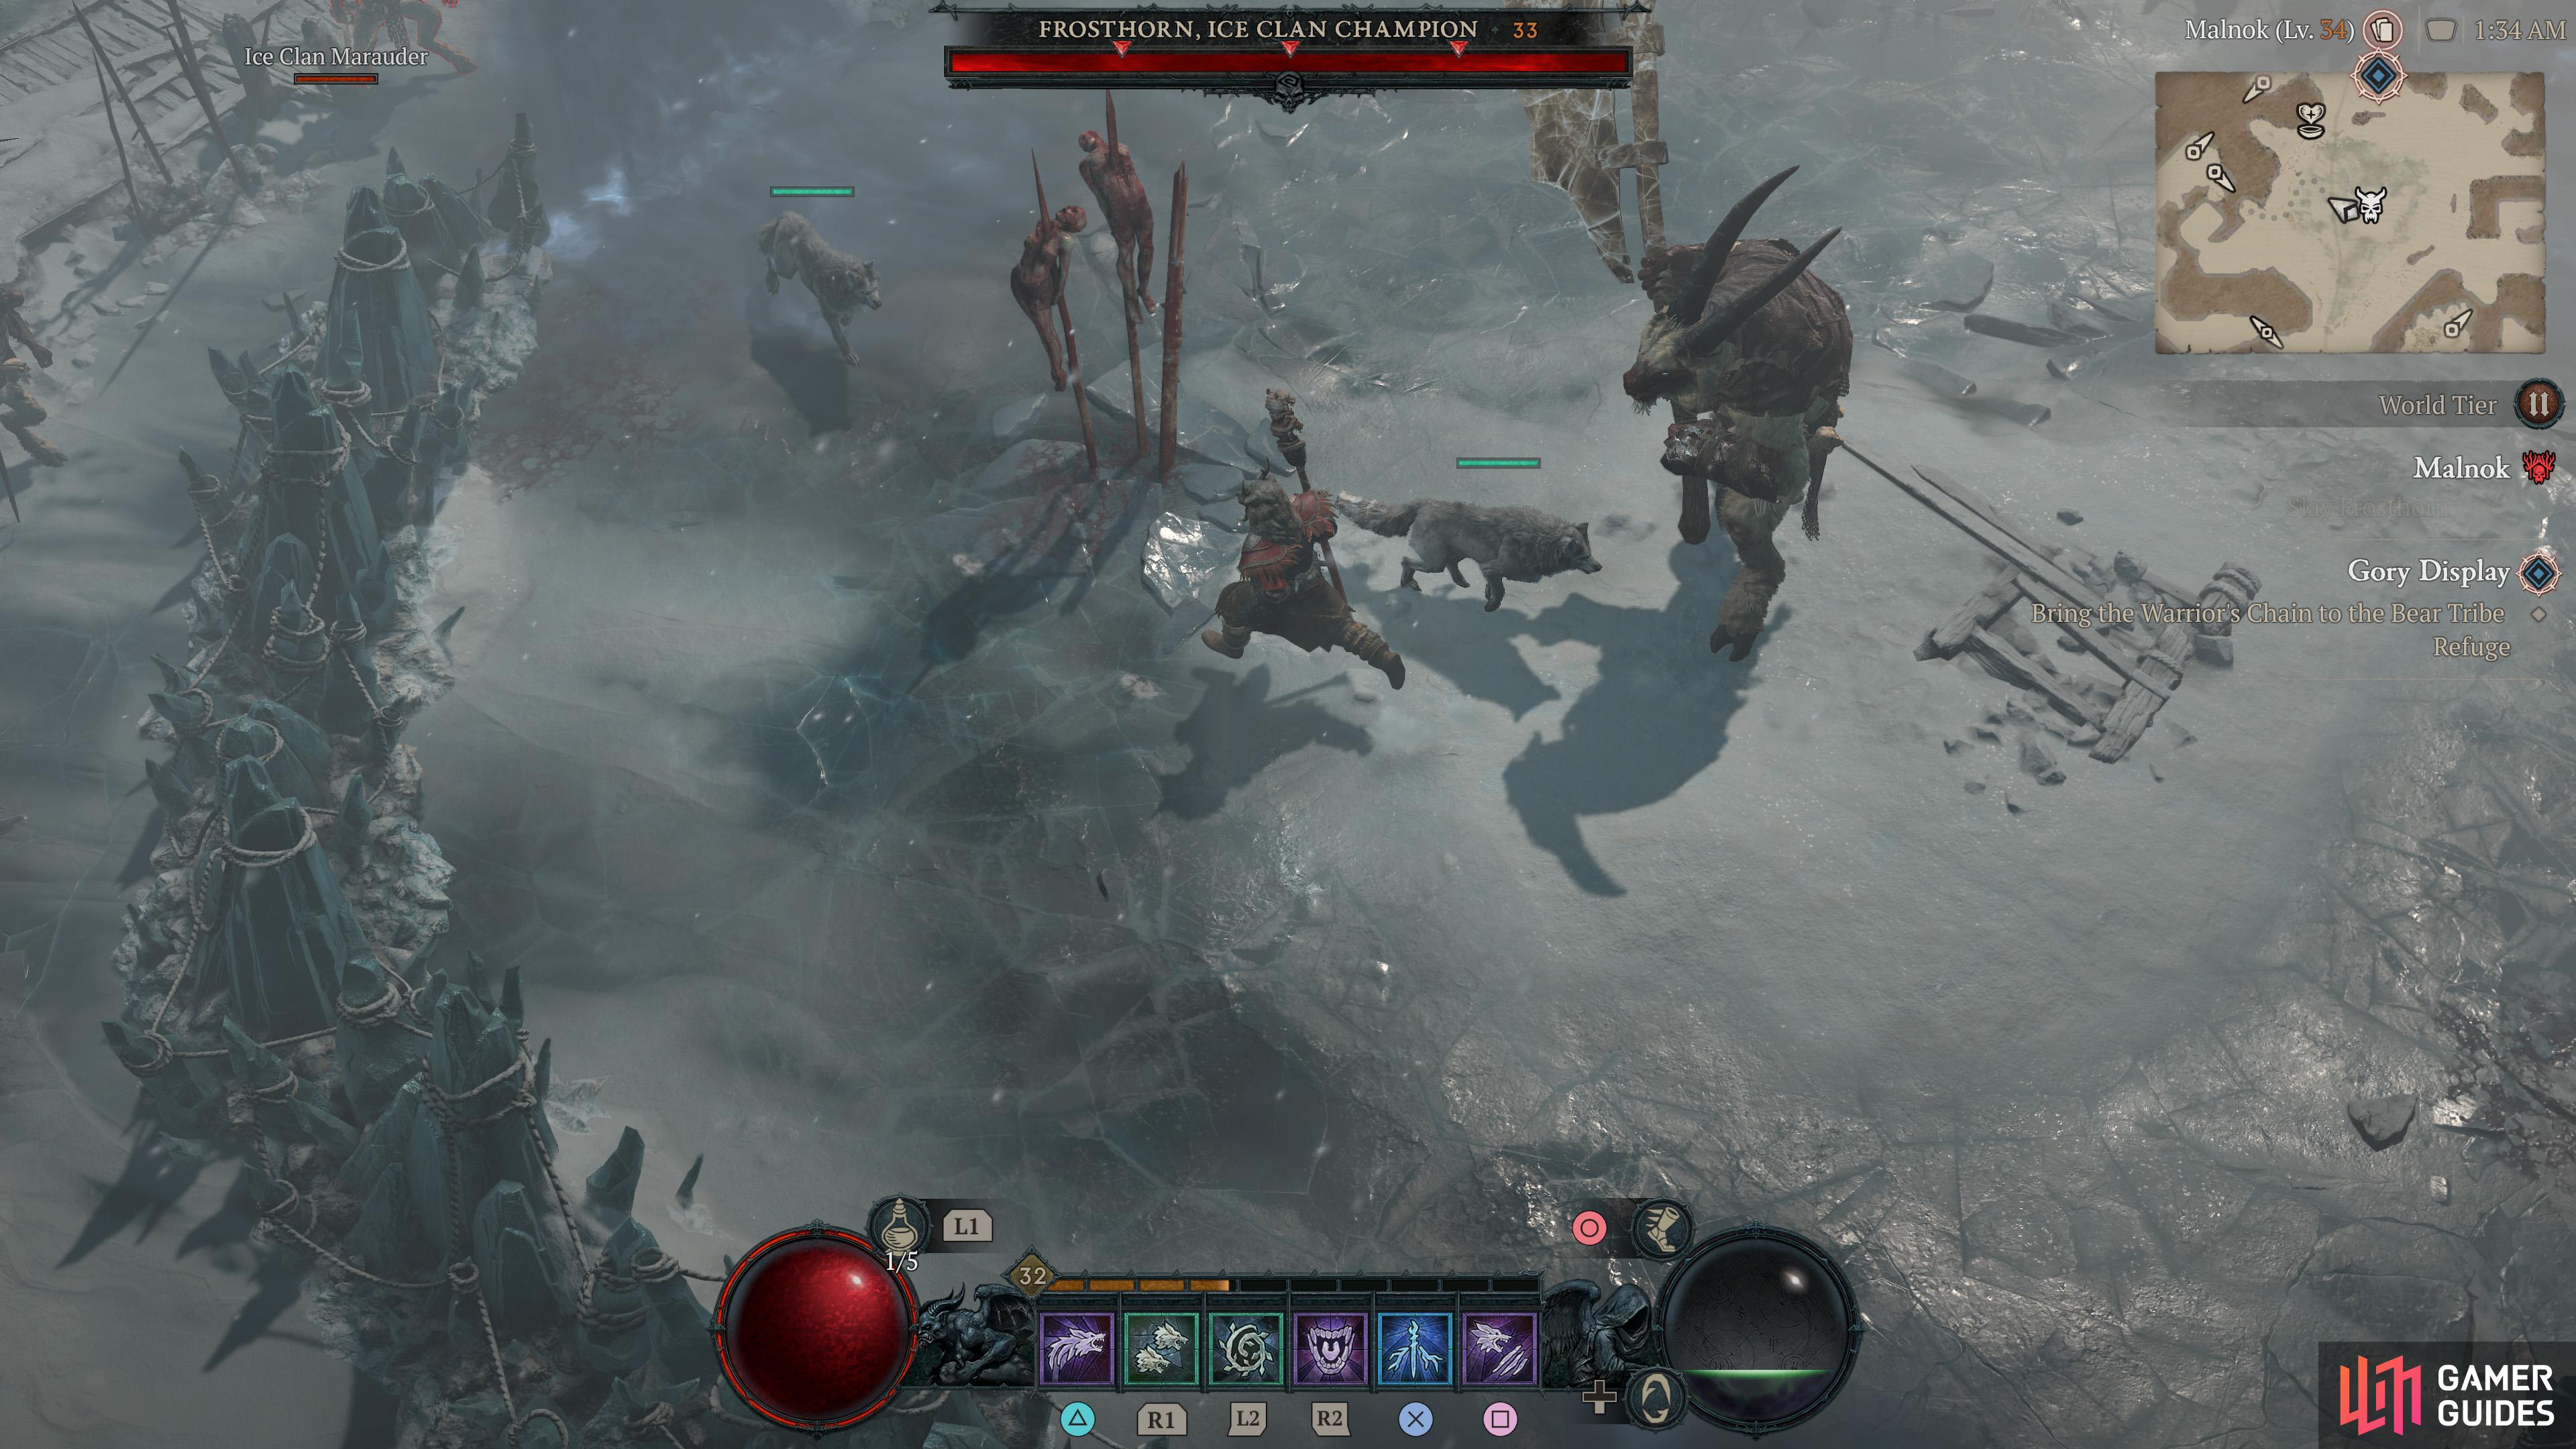
Blackhorn is the Chieftain of the Blood Clan and is Fire Enchanted. He can leap and slam his massive axe on the floor, creating a flaming attack on the ground around him. Standing directly underneath him will also cause fire damage. He will also shoot fireballs at cardinal points from beneath him. His melee attacks can also deal a large amount of damage.
Detailed Location
The Unhallowed Pit, Scosglen as part of the Fields of Ruin side quest.
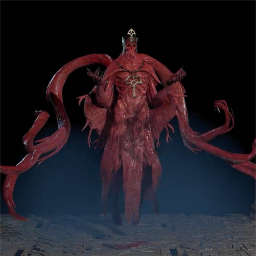
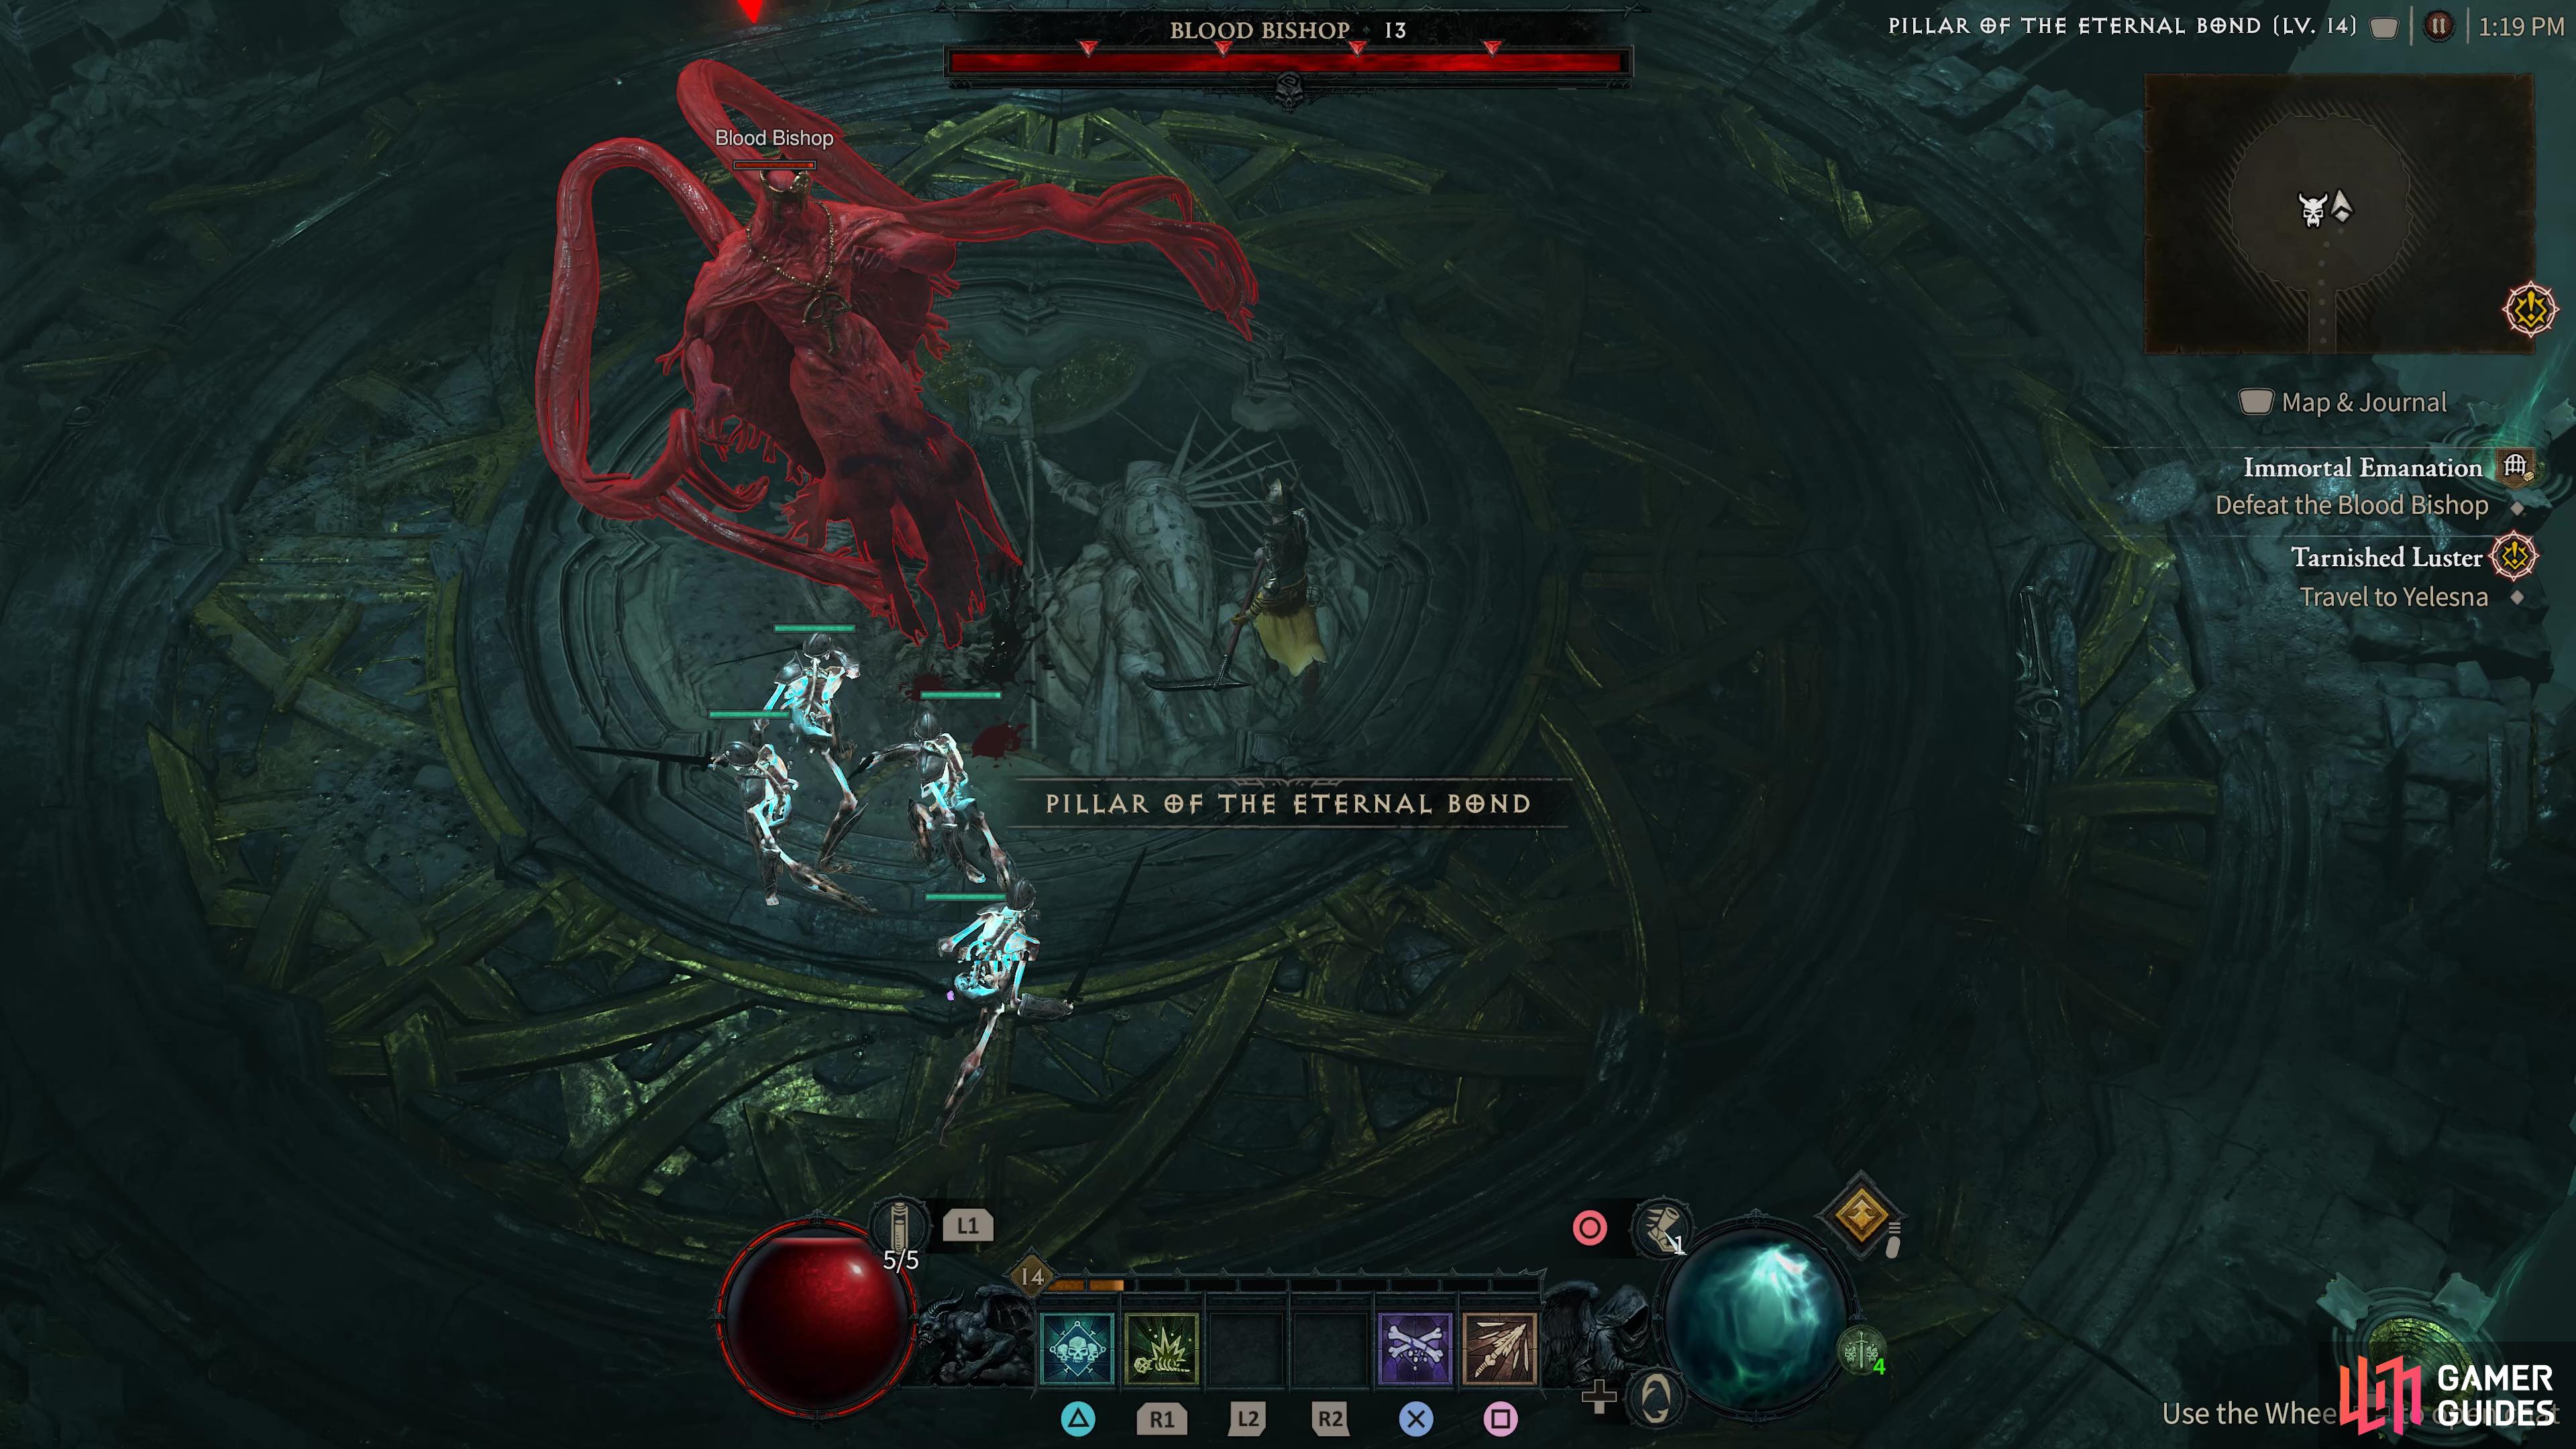
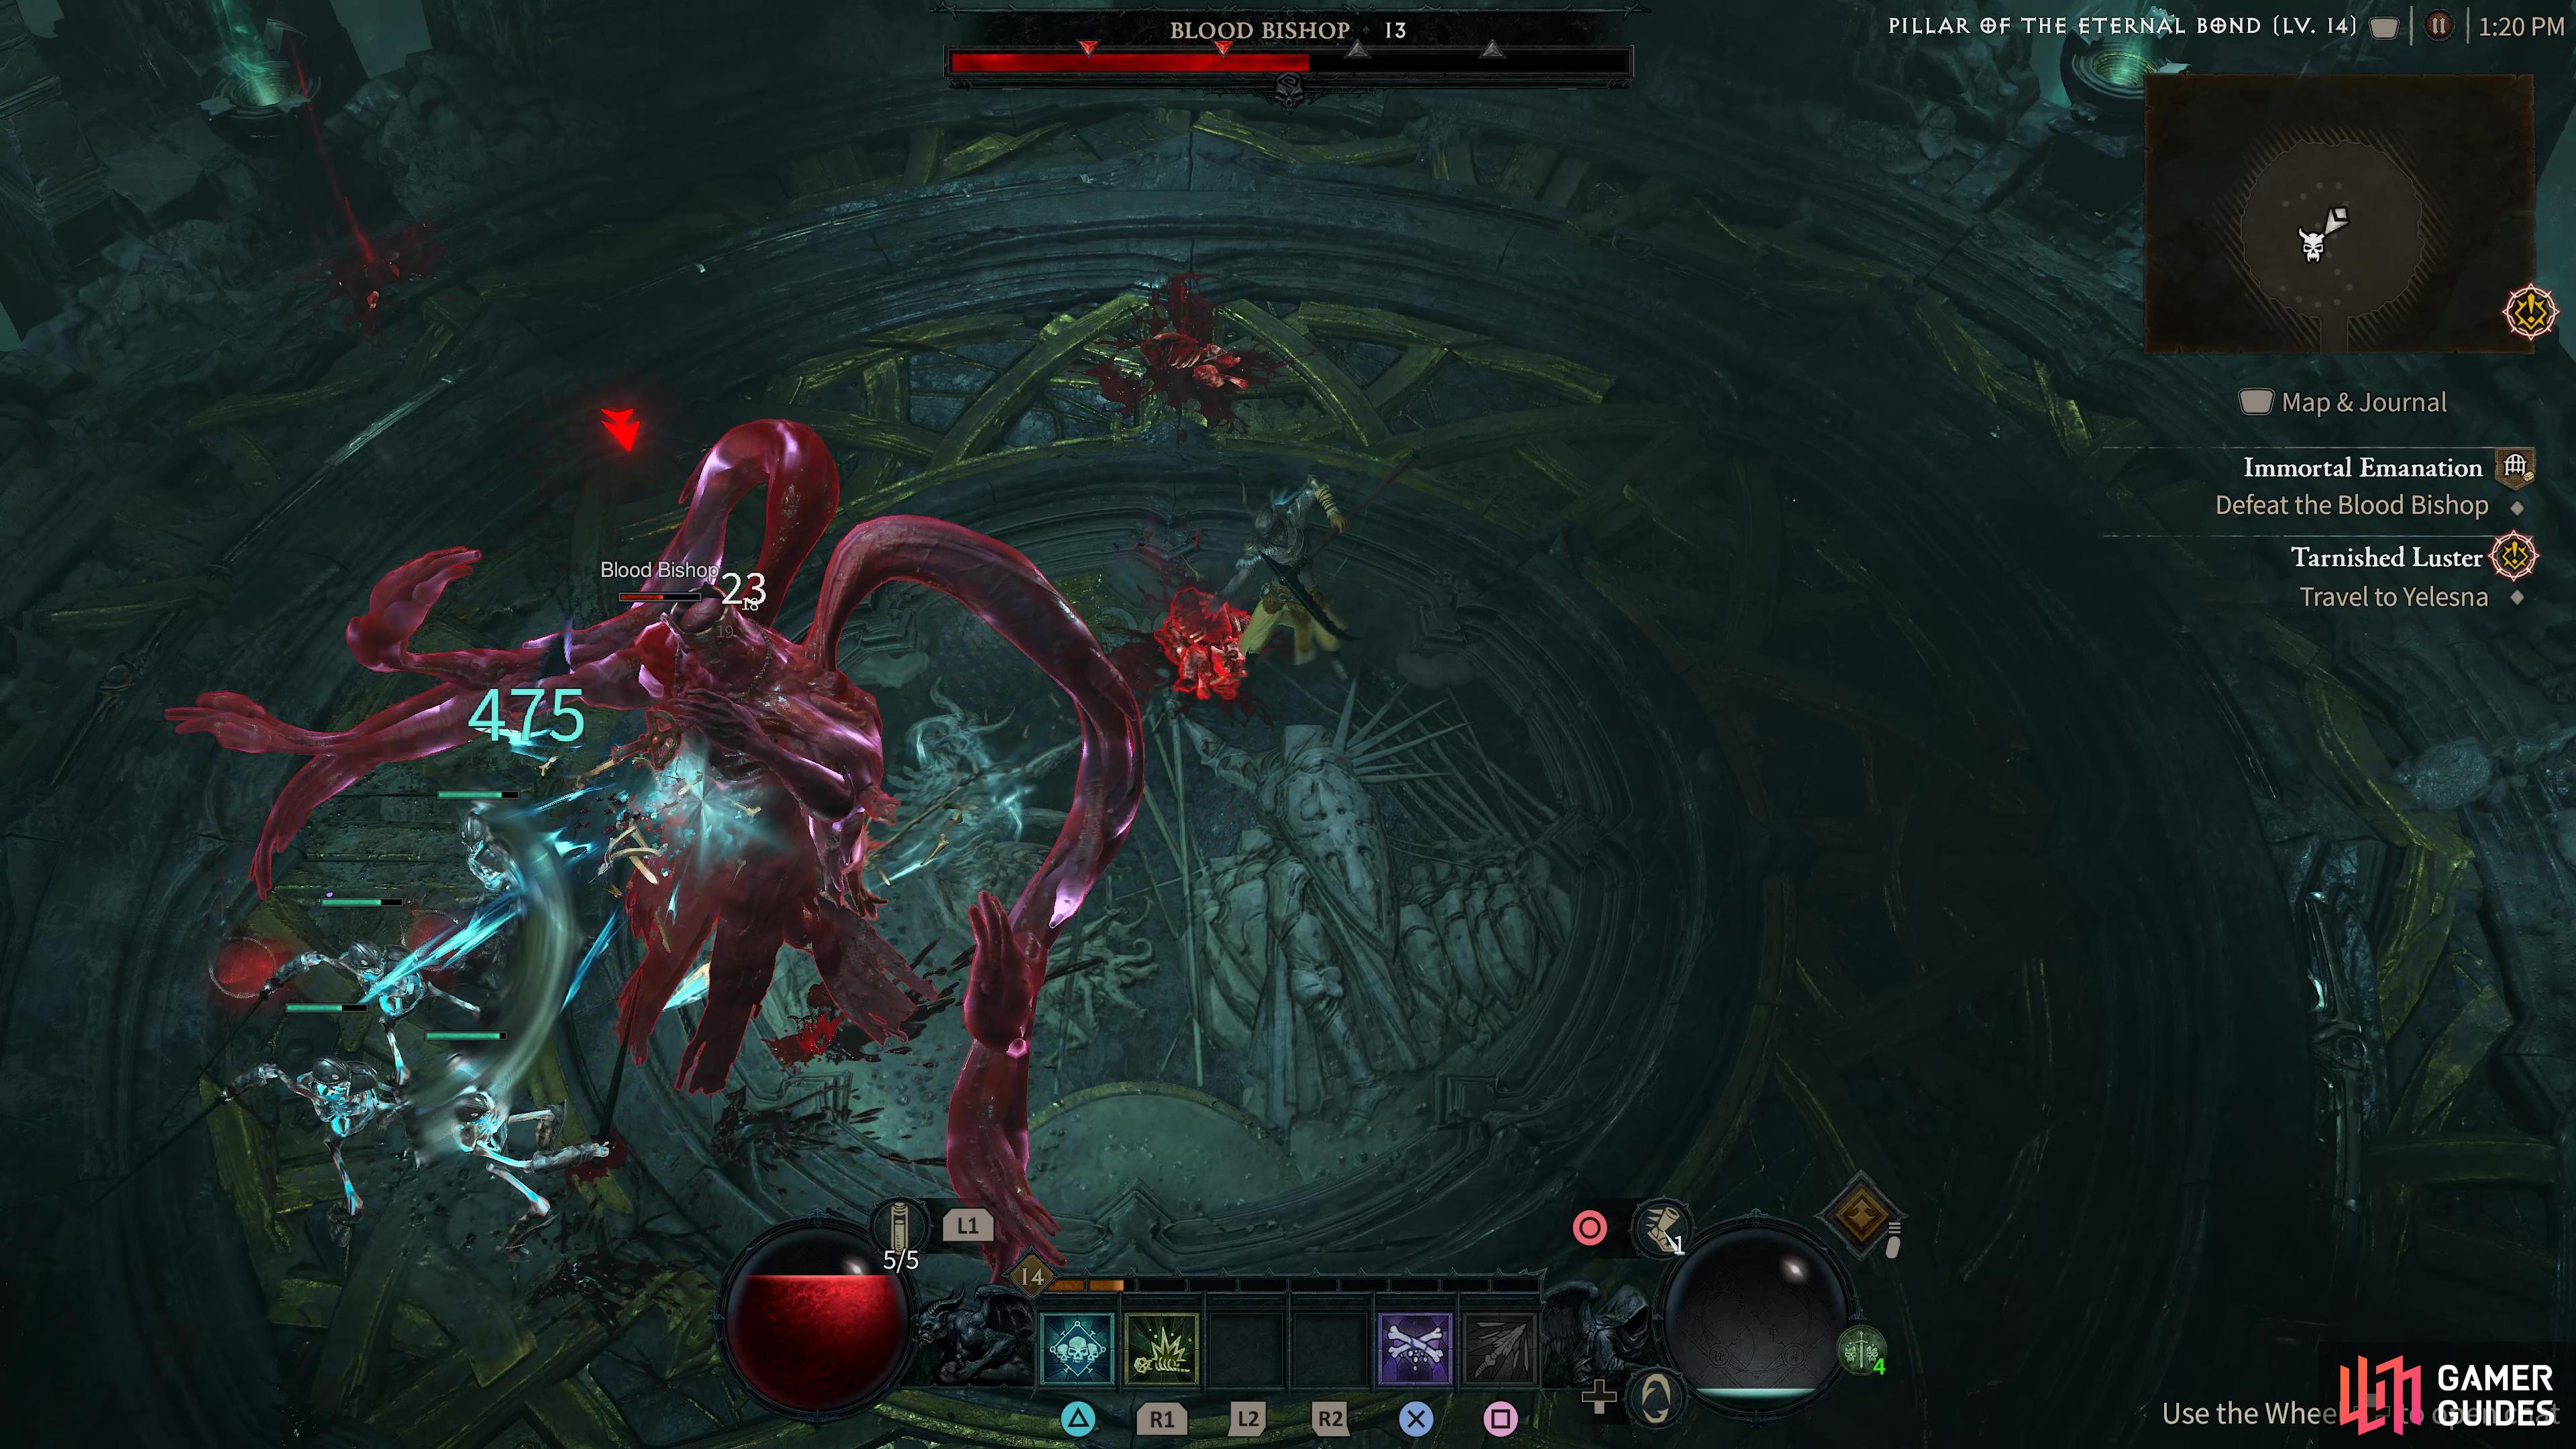
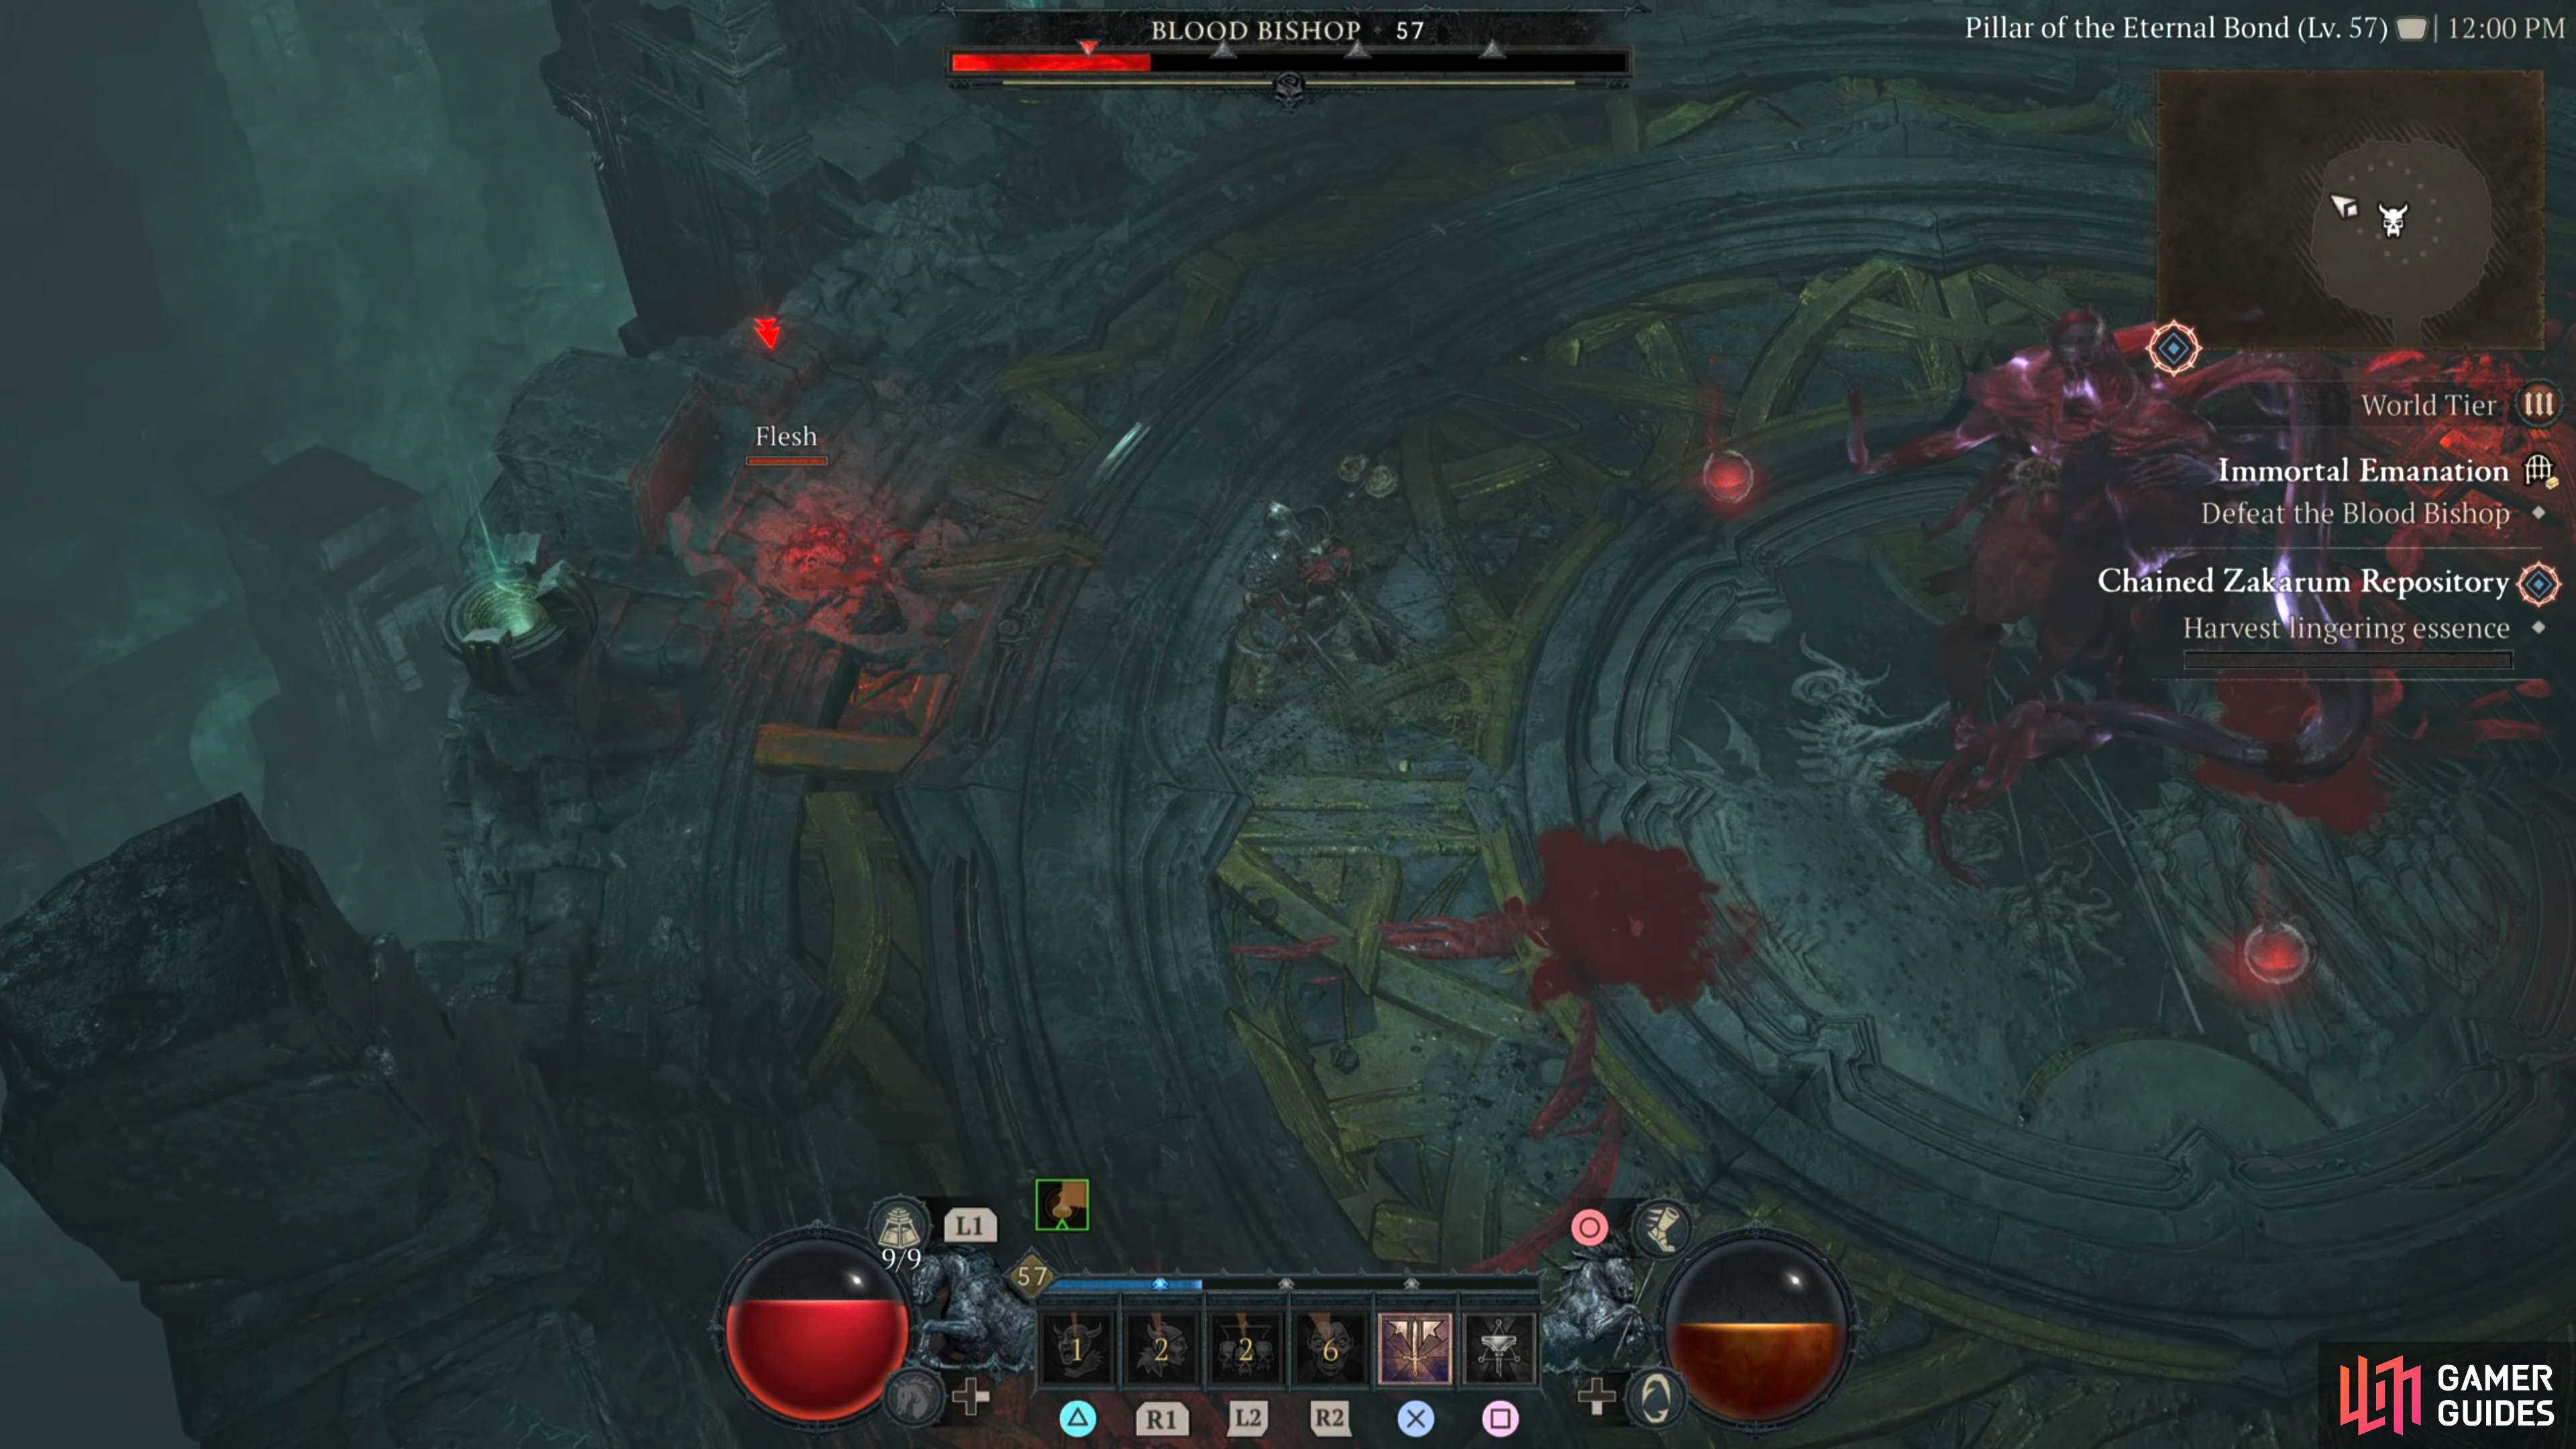
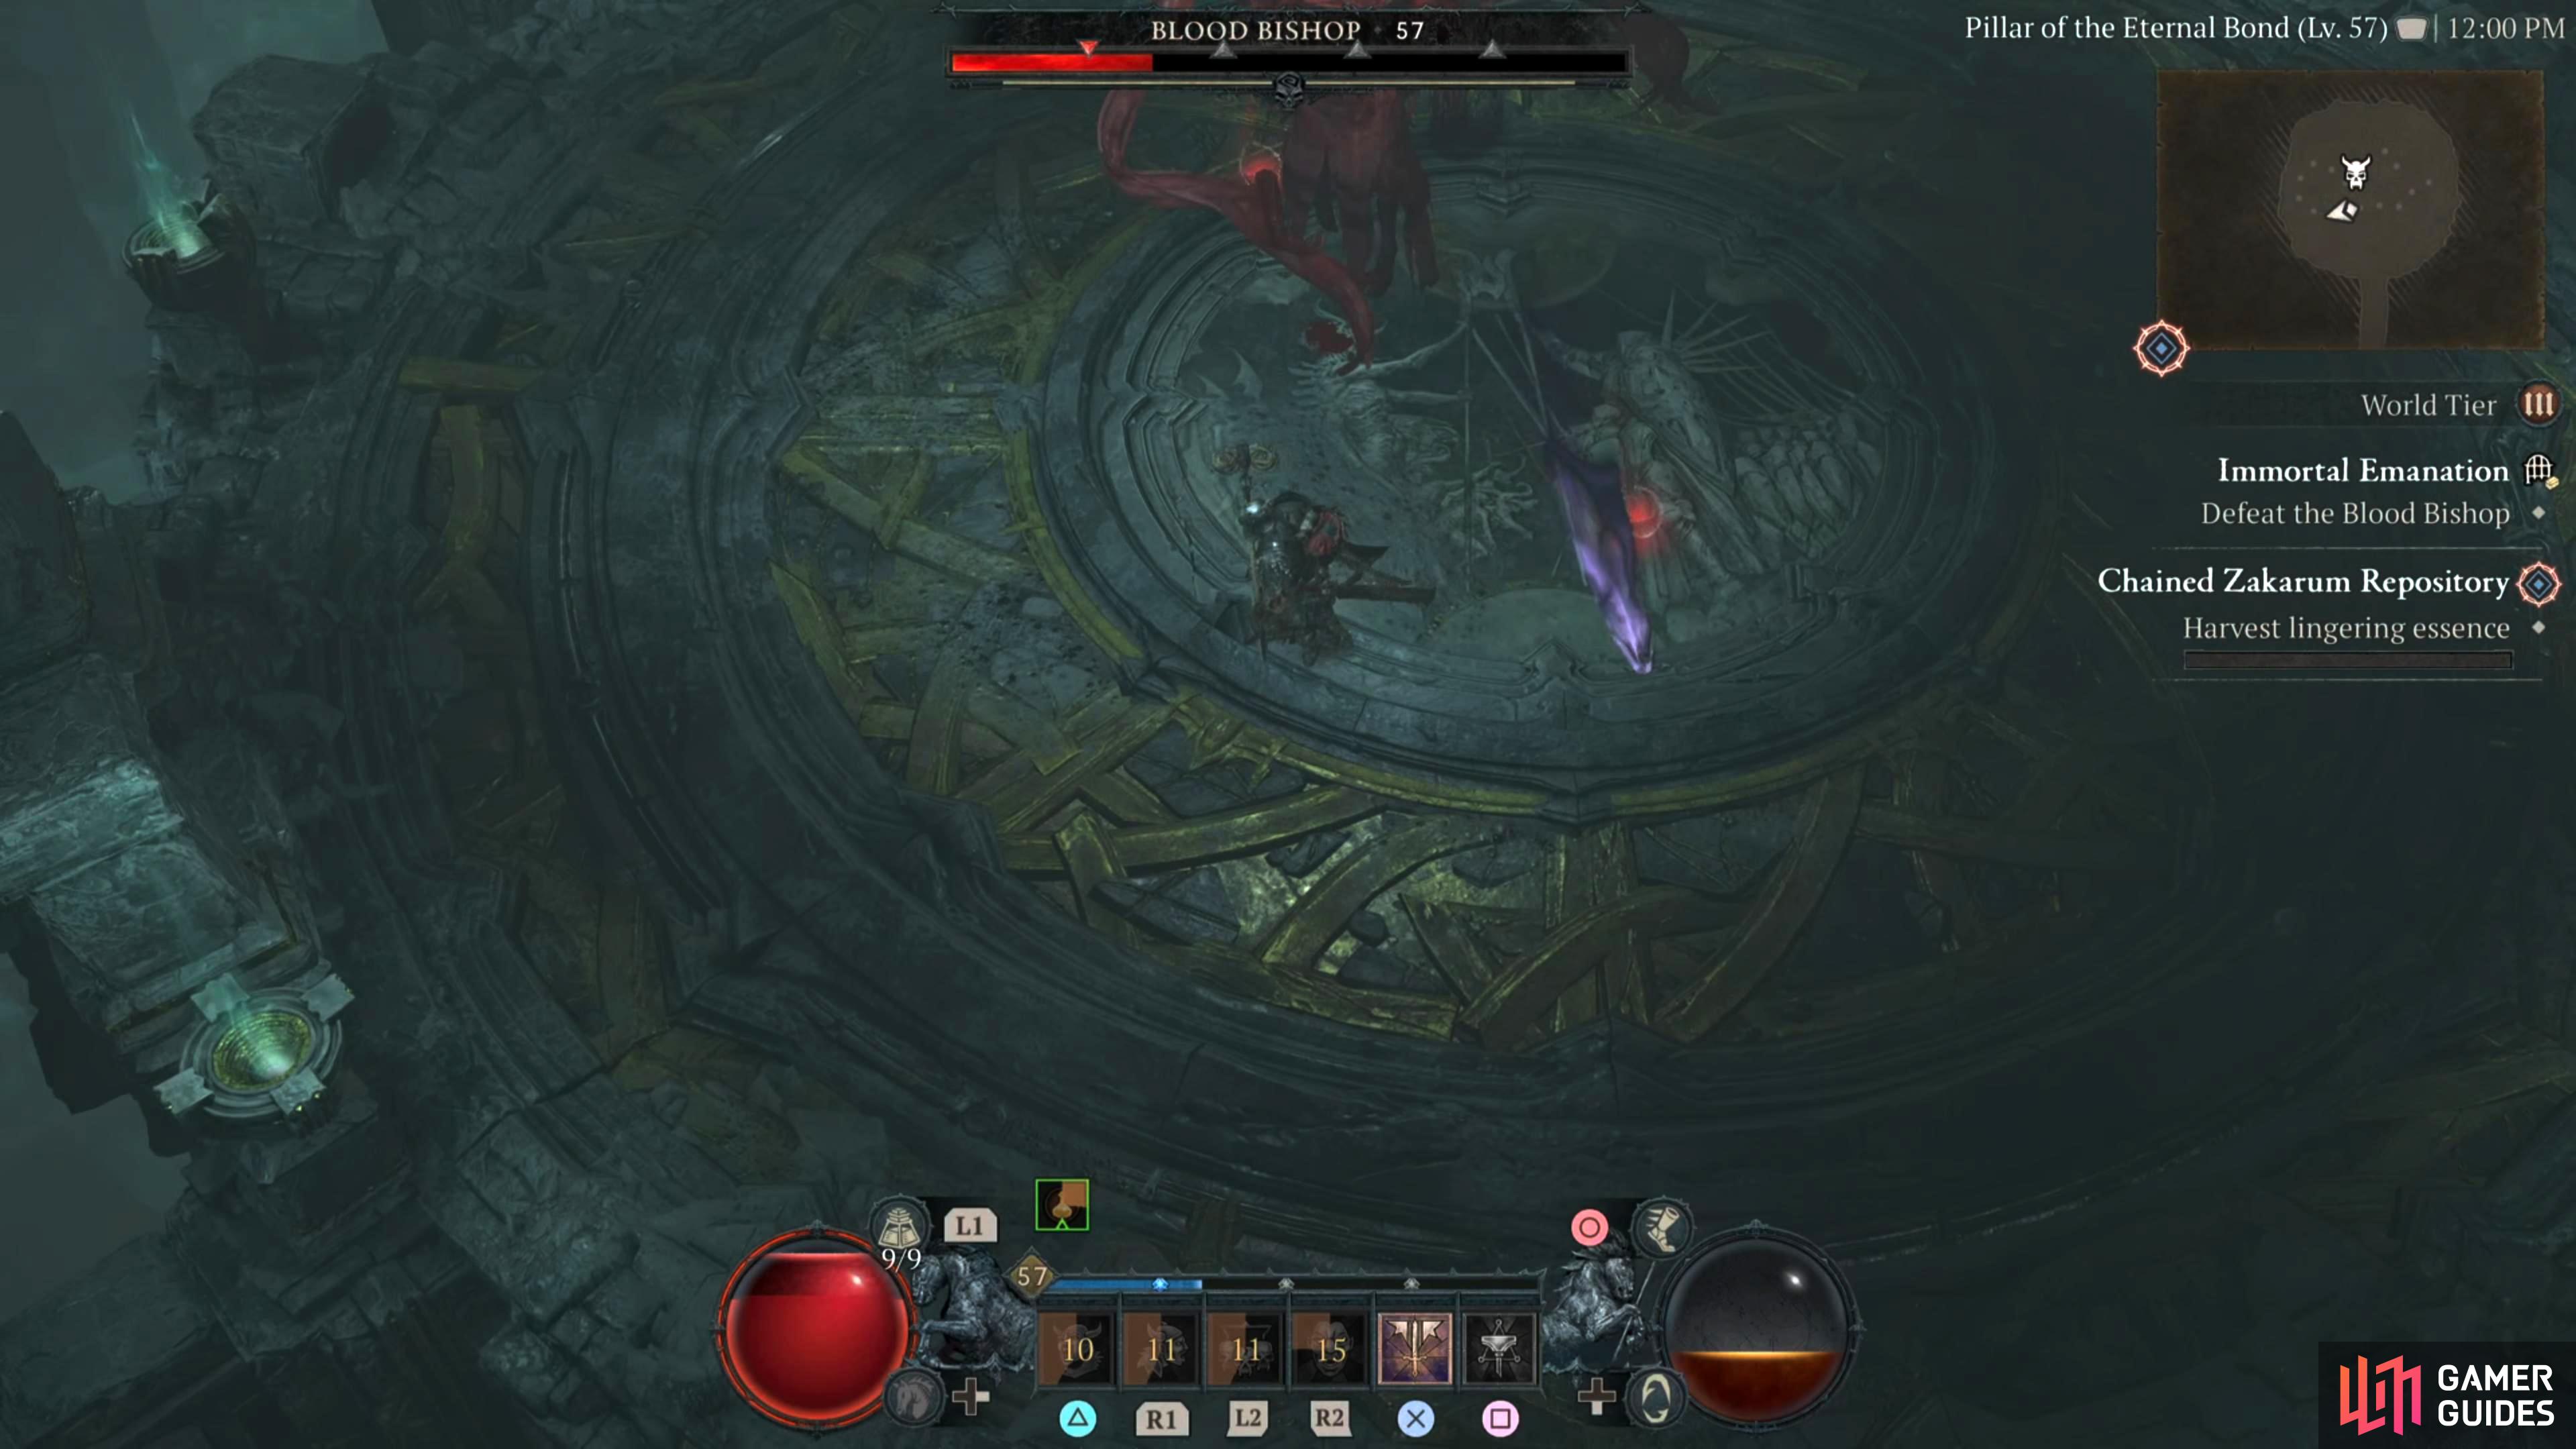
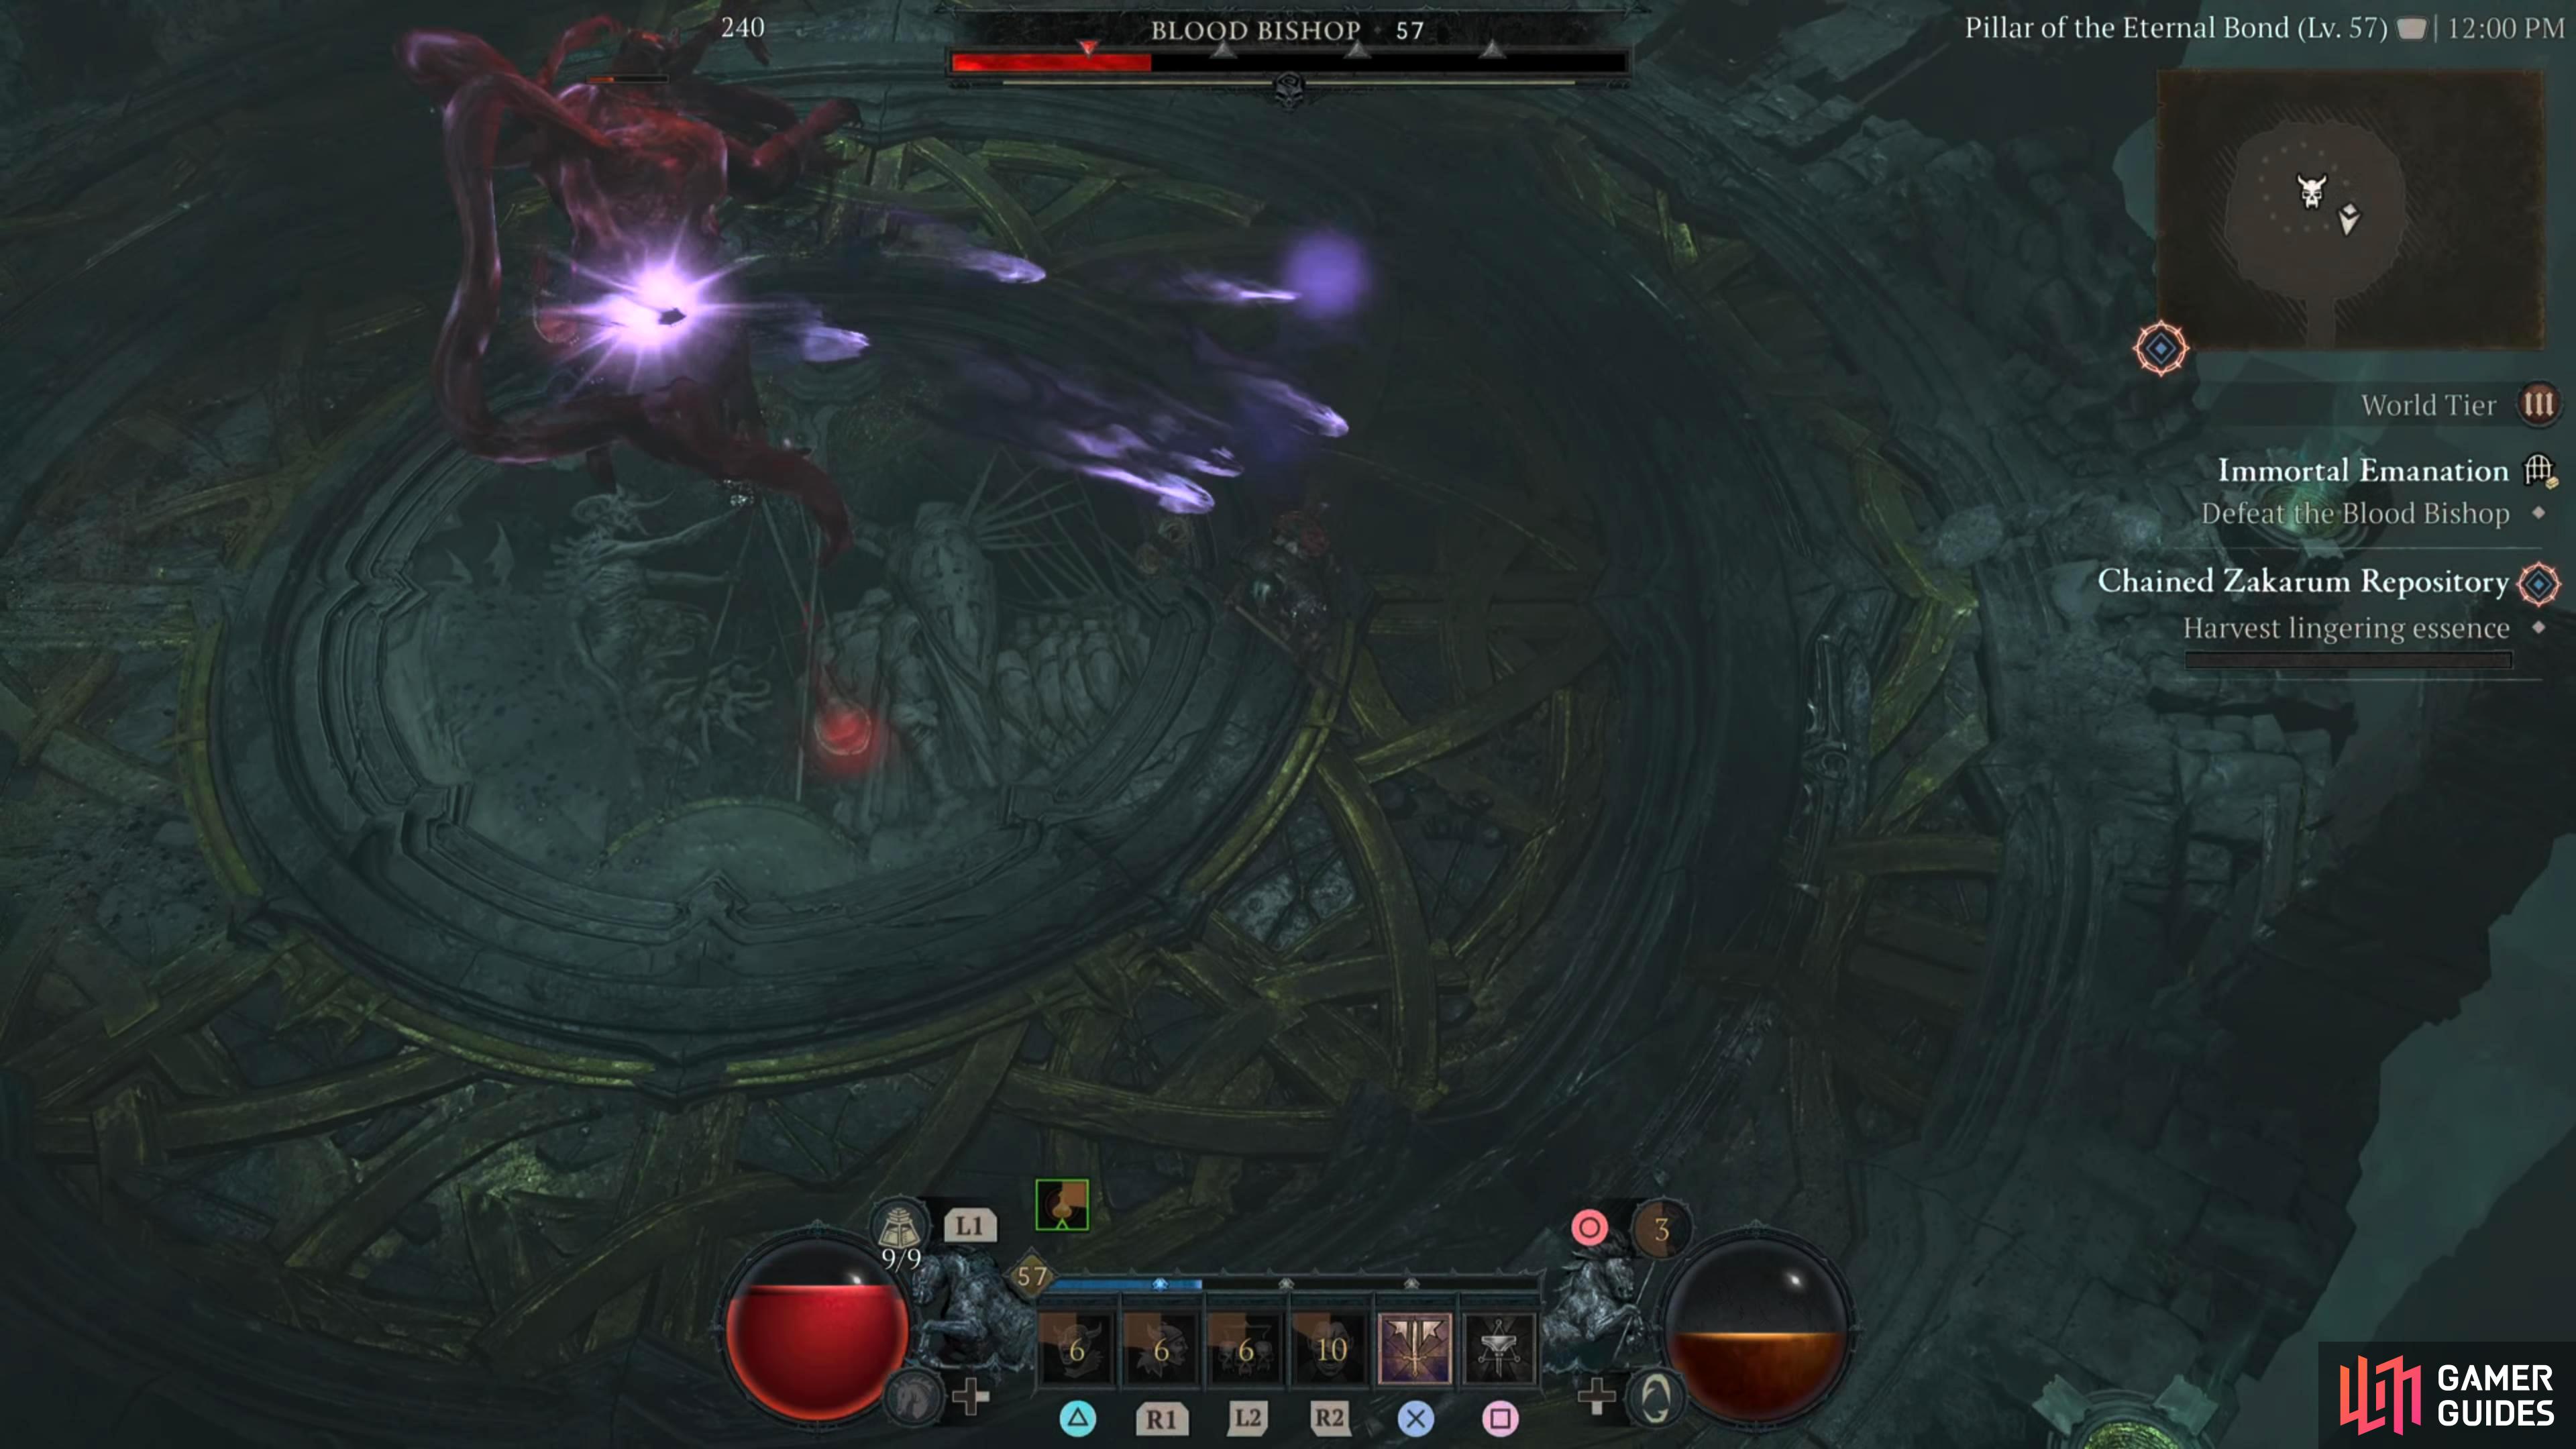
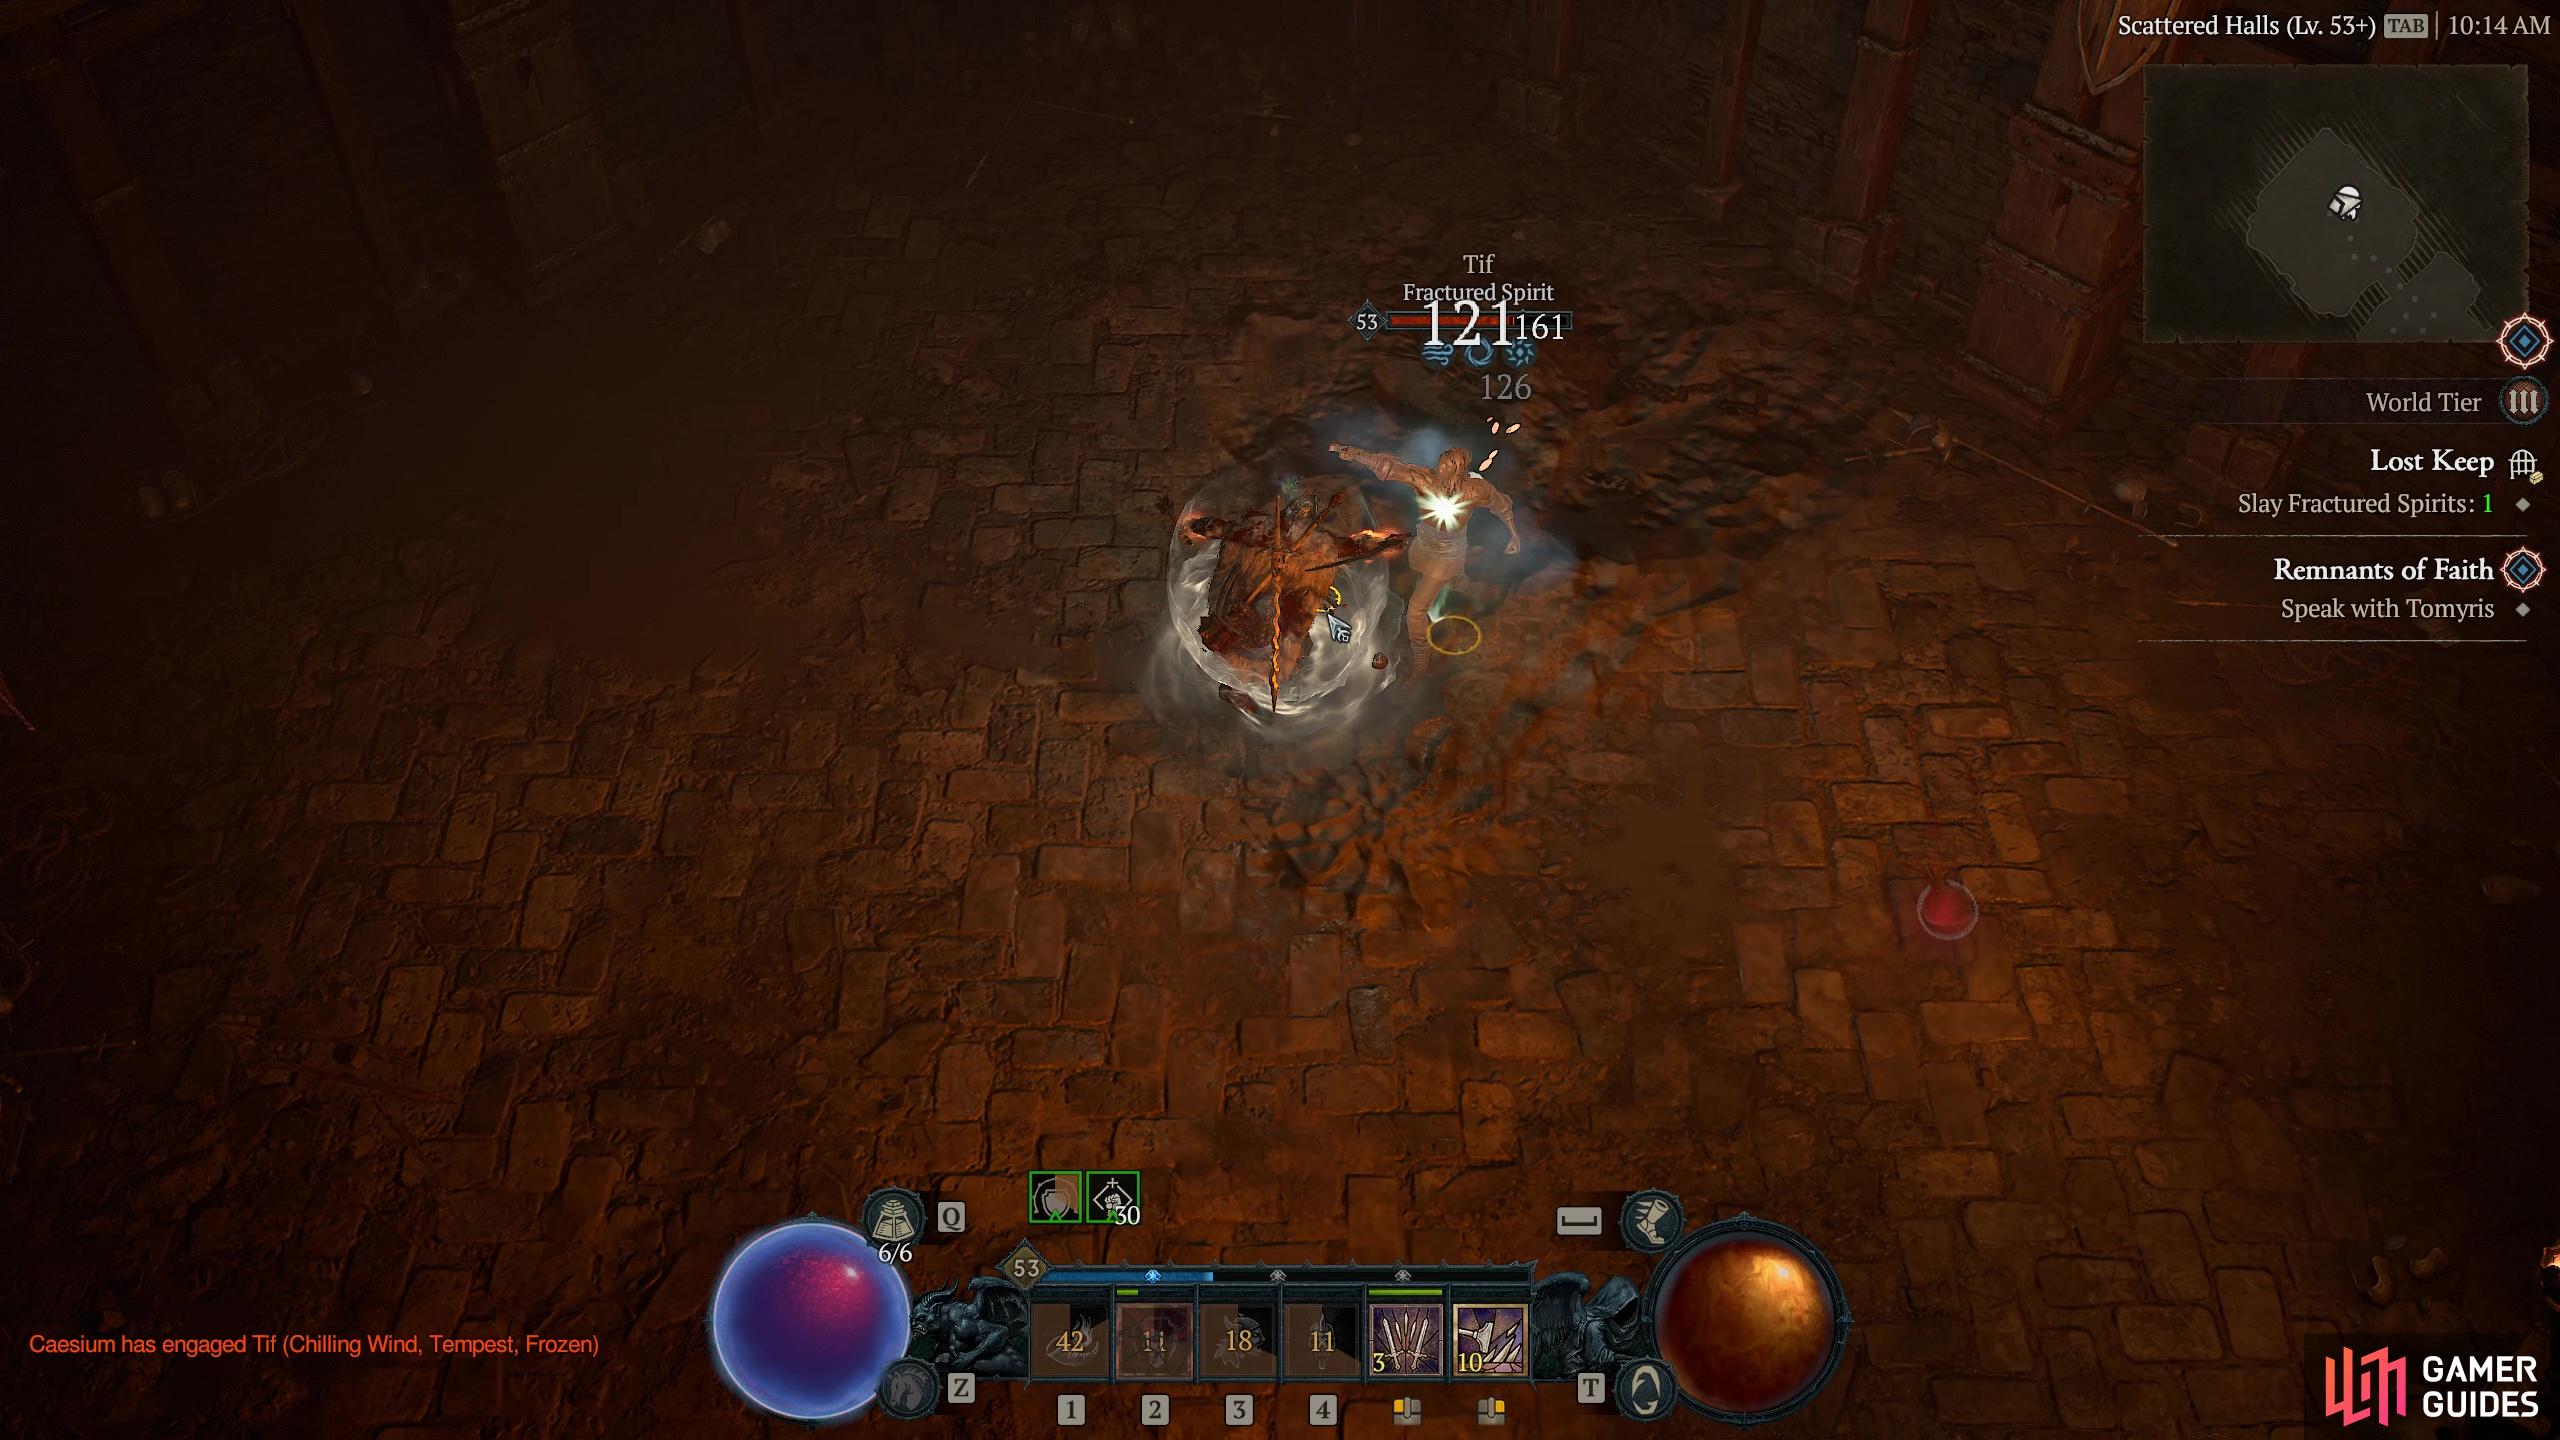
A massive Skeletal Necromancer, Blood Bishop uses Shadow and Blood magic to cast flesh pustules on the floor and can ensnare players in its tentacles.
Description
Blood Bishop is one of the easier bosses in the game due to its lack of attacks. It predominantly uses Shadow magic with some blood magic thrown in. Here’s a look at what attacks it has in its arsenal:
Elongated Arms - This is its basic melee attack. Blood Bishop will throw out both arms in front of itself, and perform a singular attack. Although it’s slow, it does have some range as the arms elongate from its body. Fortunately, it’s easily avoidable by moving away or dodging it.
Shadow Missile - If the boss isn’t using its melee attack, it’ll be using this instead. This is a simple projectile made of Shadow energy that will get flung your way. These are singular projectiles and can be effortlessly avoided.
Shadow Barrage - Shadow Barrage is the most difficult to avoid and can deal substantial damage to you if you get hit by every projectile. Blood Bishop will conjure up a cloud of purple smoke in front of itself before it unleashes numerous Shadow Missiles at your location. This attack somewhat has a homing function to it and will track your movement. The easiest way to avoid this attack is by running in a circle around the boss. If the missiles get close, use up a dodge to avoid getting hit.
Flesh Explosion - The Boss will plunge its appendages into the ground to form four pustules of flesh around the arena. After some time, these will explode, and deal damage. This attack should never hit you as you have plenty of time to destroy the pustules of flesh, or if you’re feeling lazy, move away from it. You can forget about this attack entirely.
From the attacks listed above, there is only one real attack to worry about, and that is Shadow Barrage. If you die, it will be most likely because of this. To make life easier, use a Shadow Resistance Elixir to negate some of its damage should you get hit by it. Other than that, pummel the boss, and move away/destroy the flesh pustules whenever they appear. The other attacks can be negated by your damage mitigation tools, or healed via potions or passives.
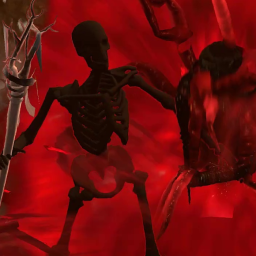
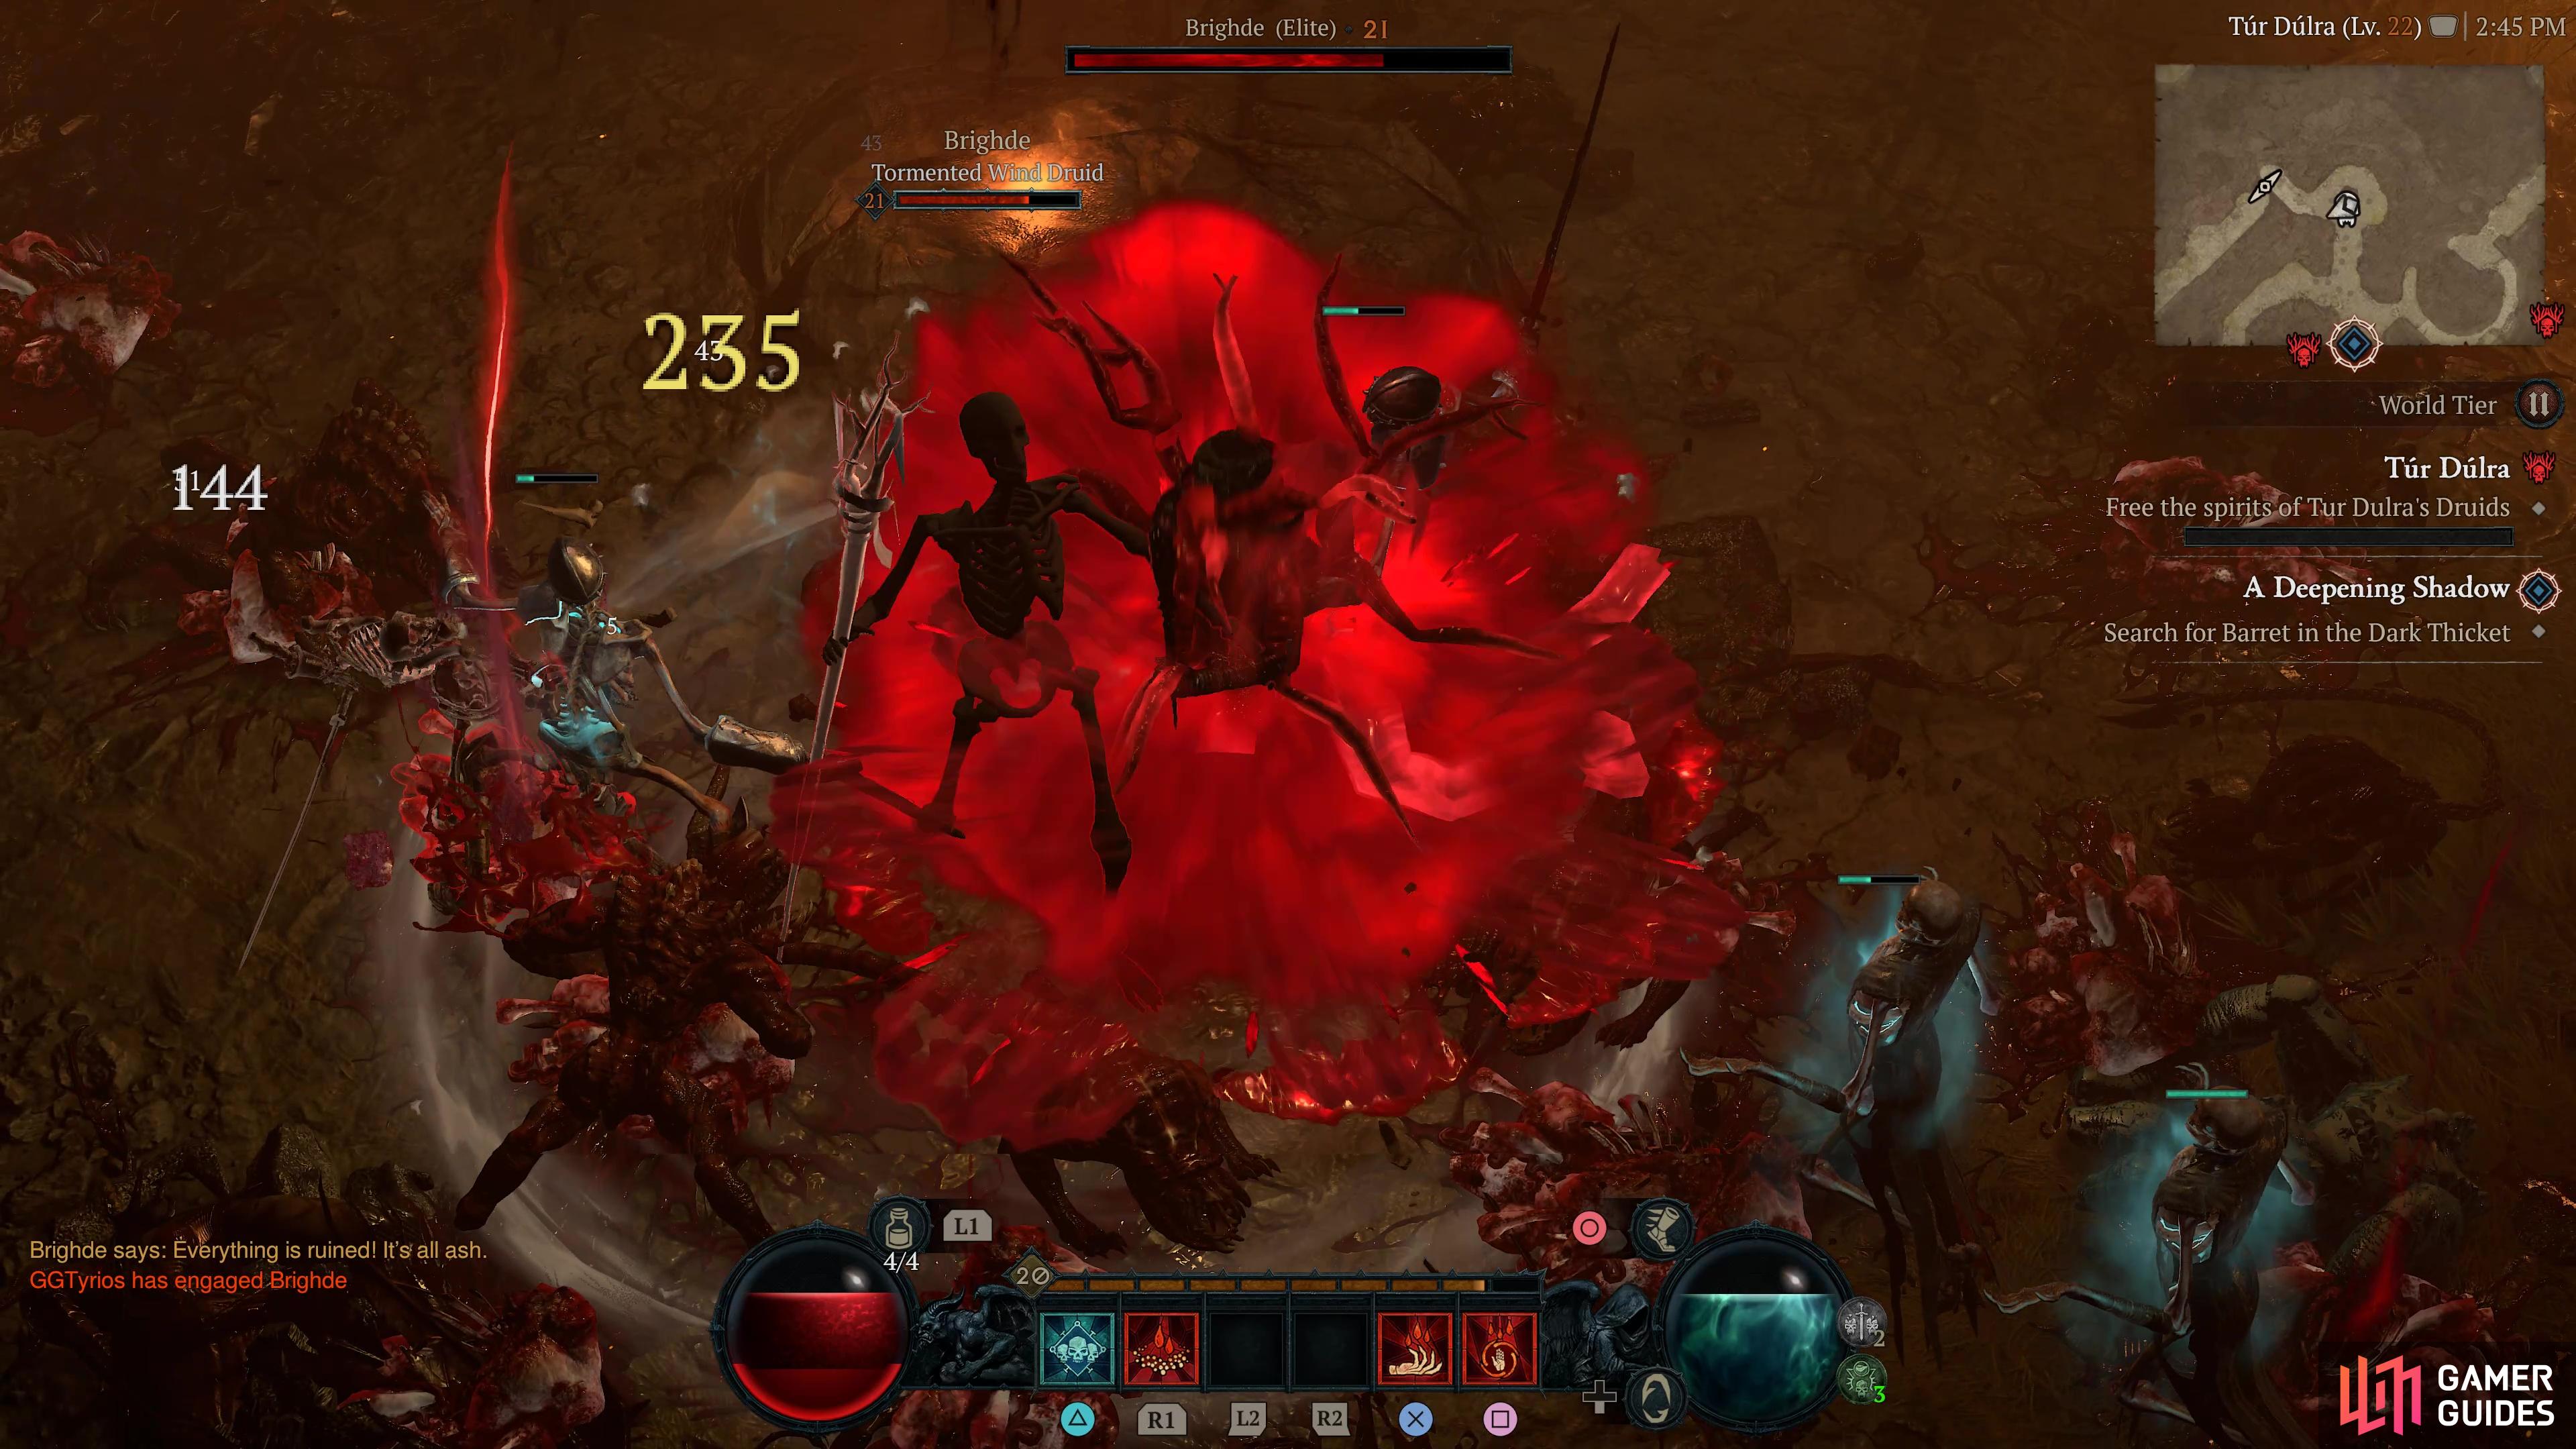
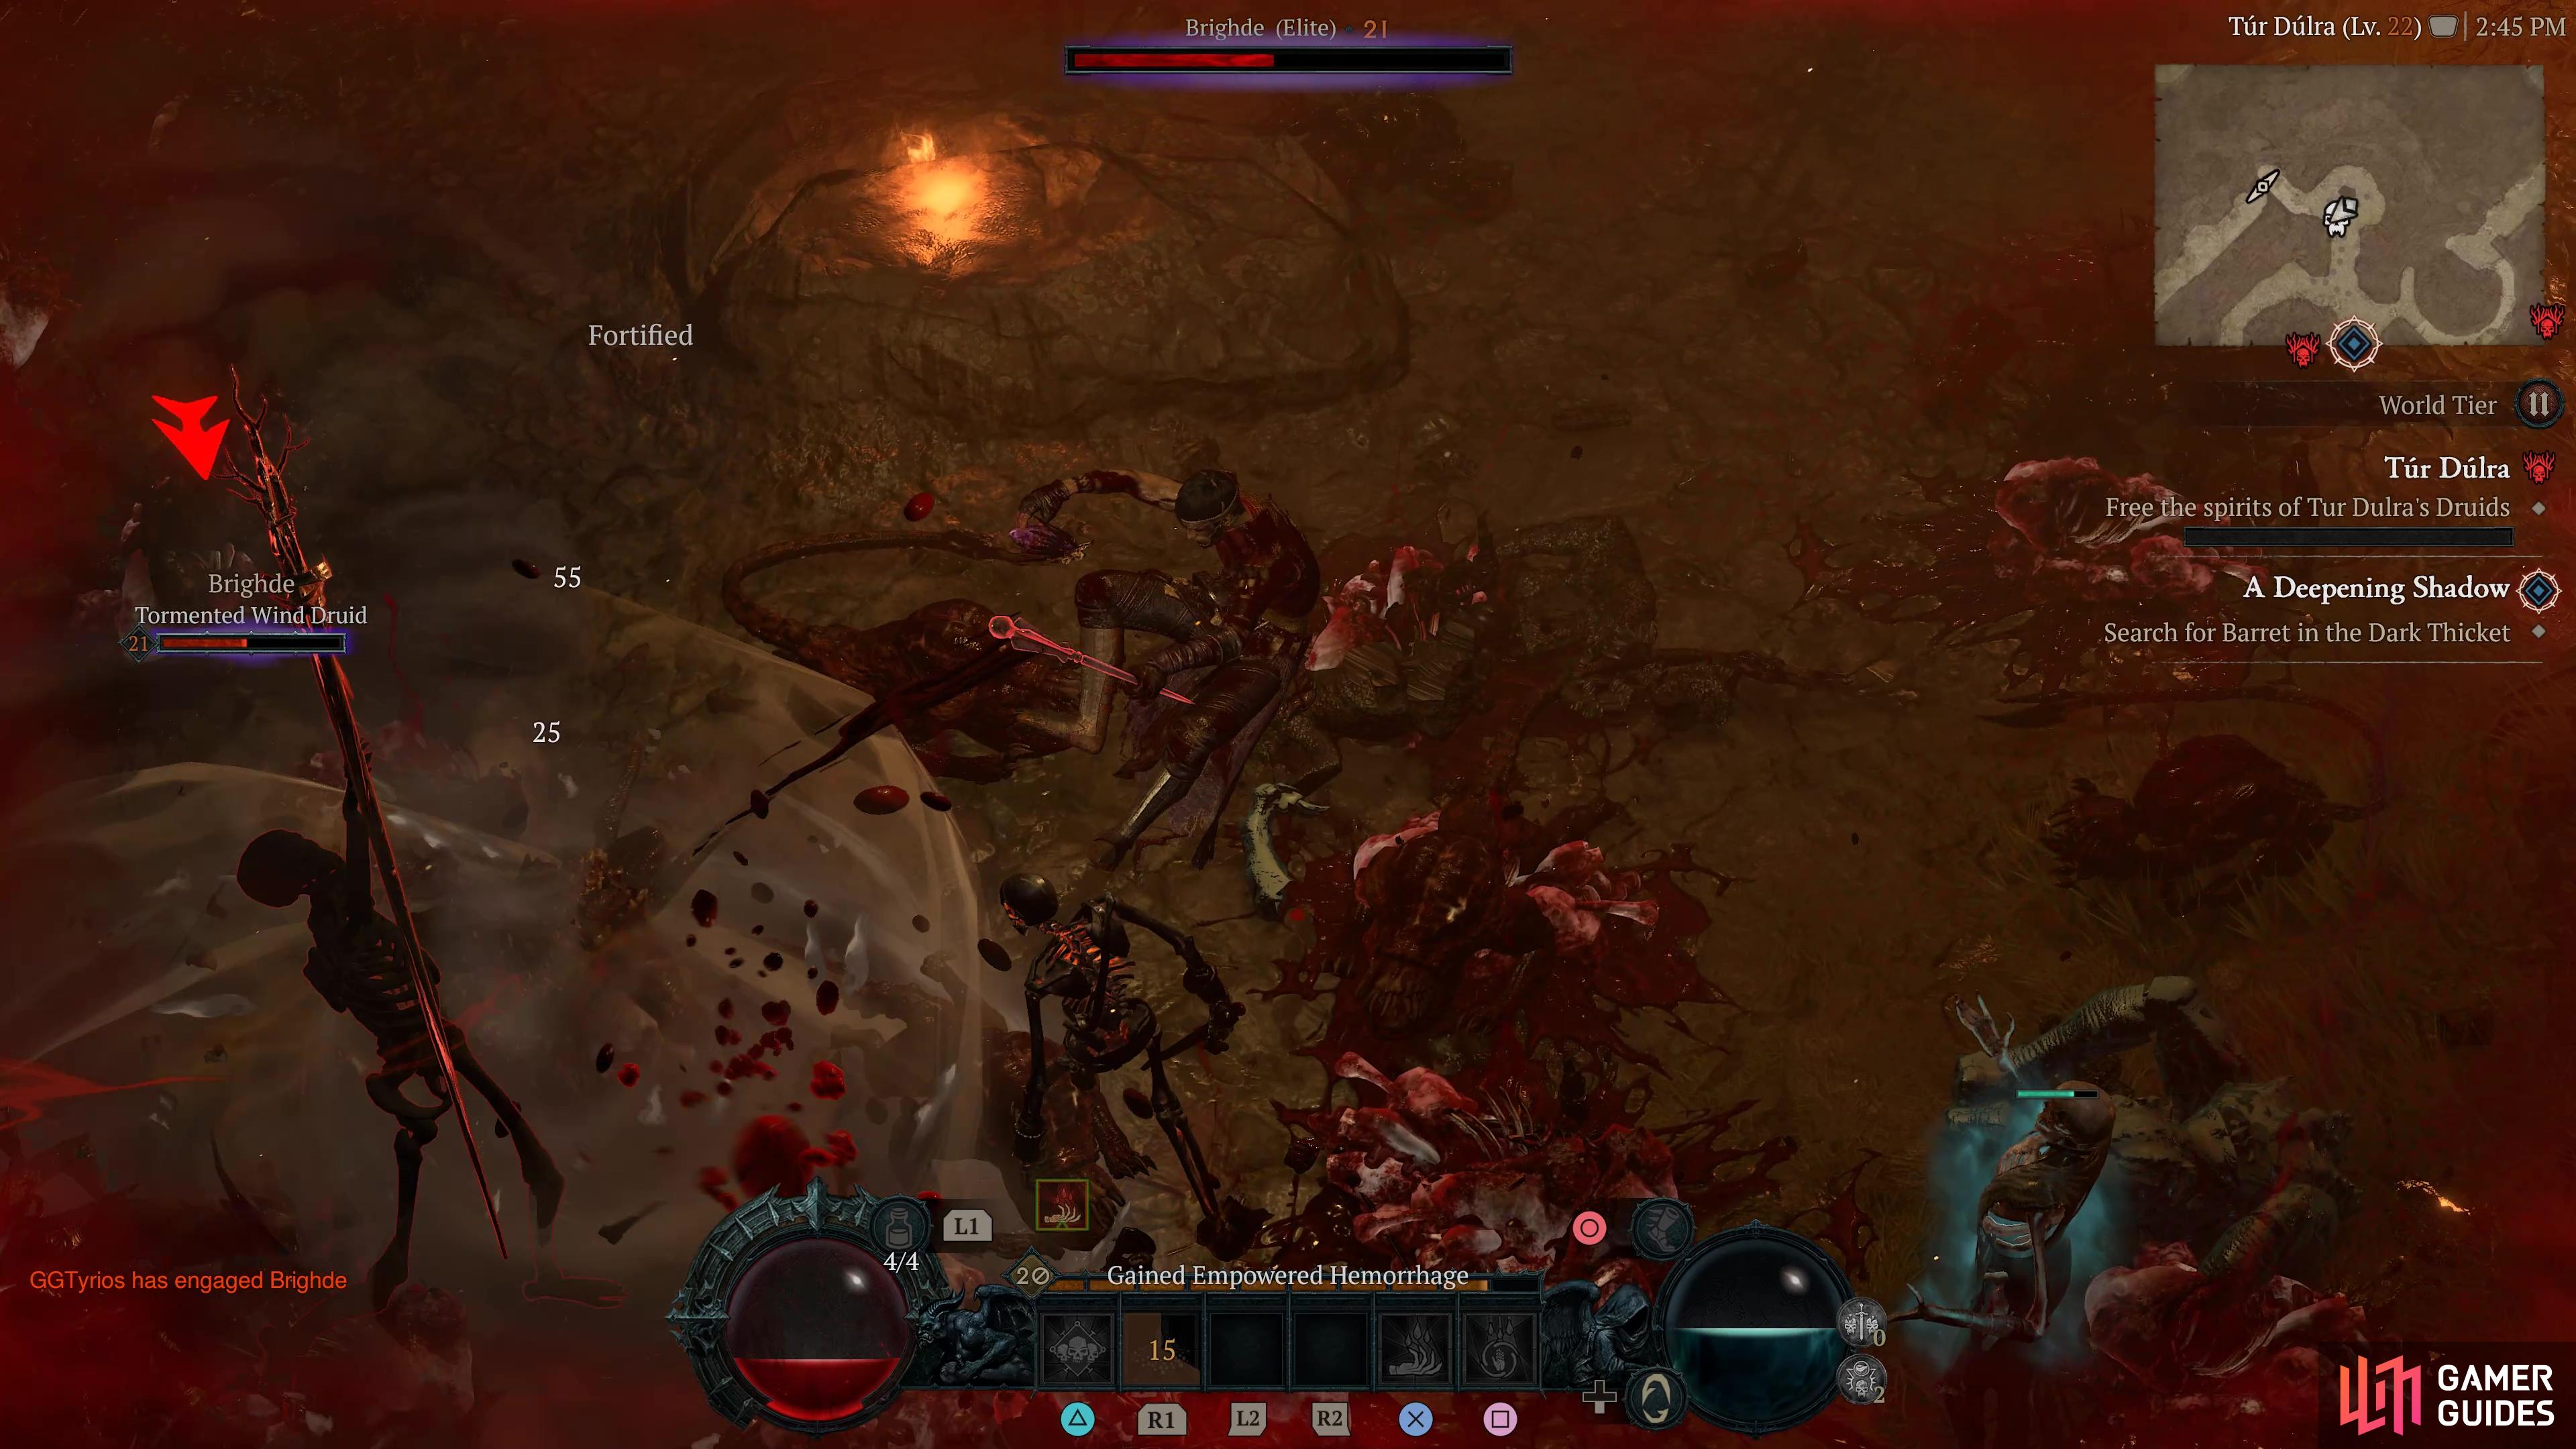
A skeletal Tormented Wind Druid Elite who is one of the three Druid spirits you must free during the Túr Dúlra Stronghold quest. She wields a staff and uses knockback to great effect and damage.
Detailed Location
Is one of three Druid Spirits during the Túr Dúlra Stronghold quest.
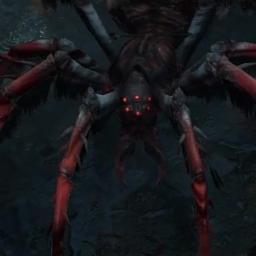
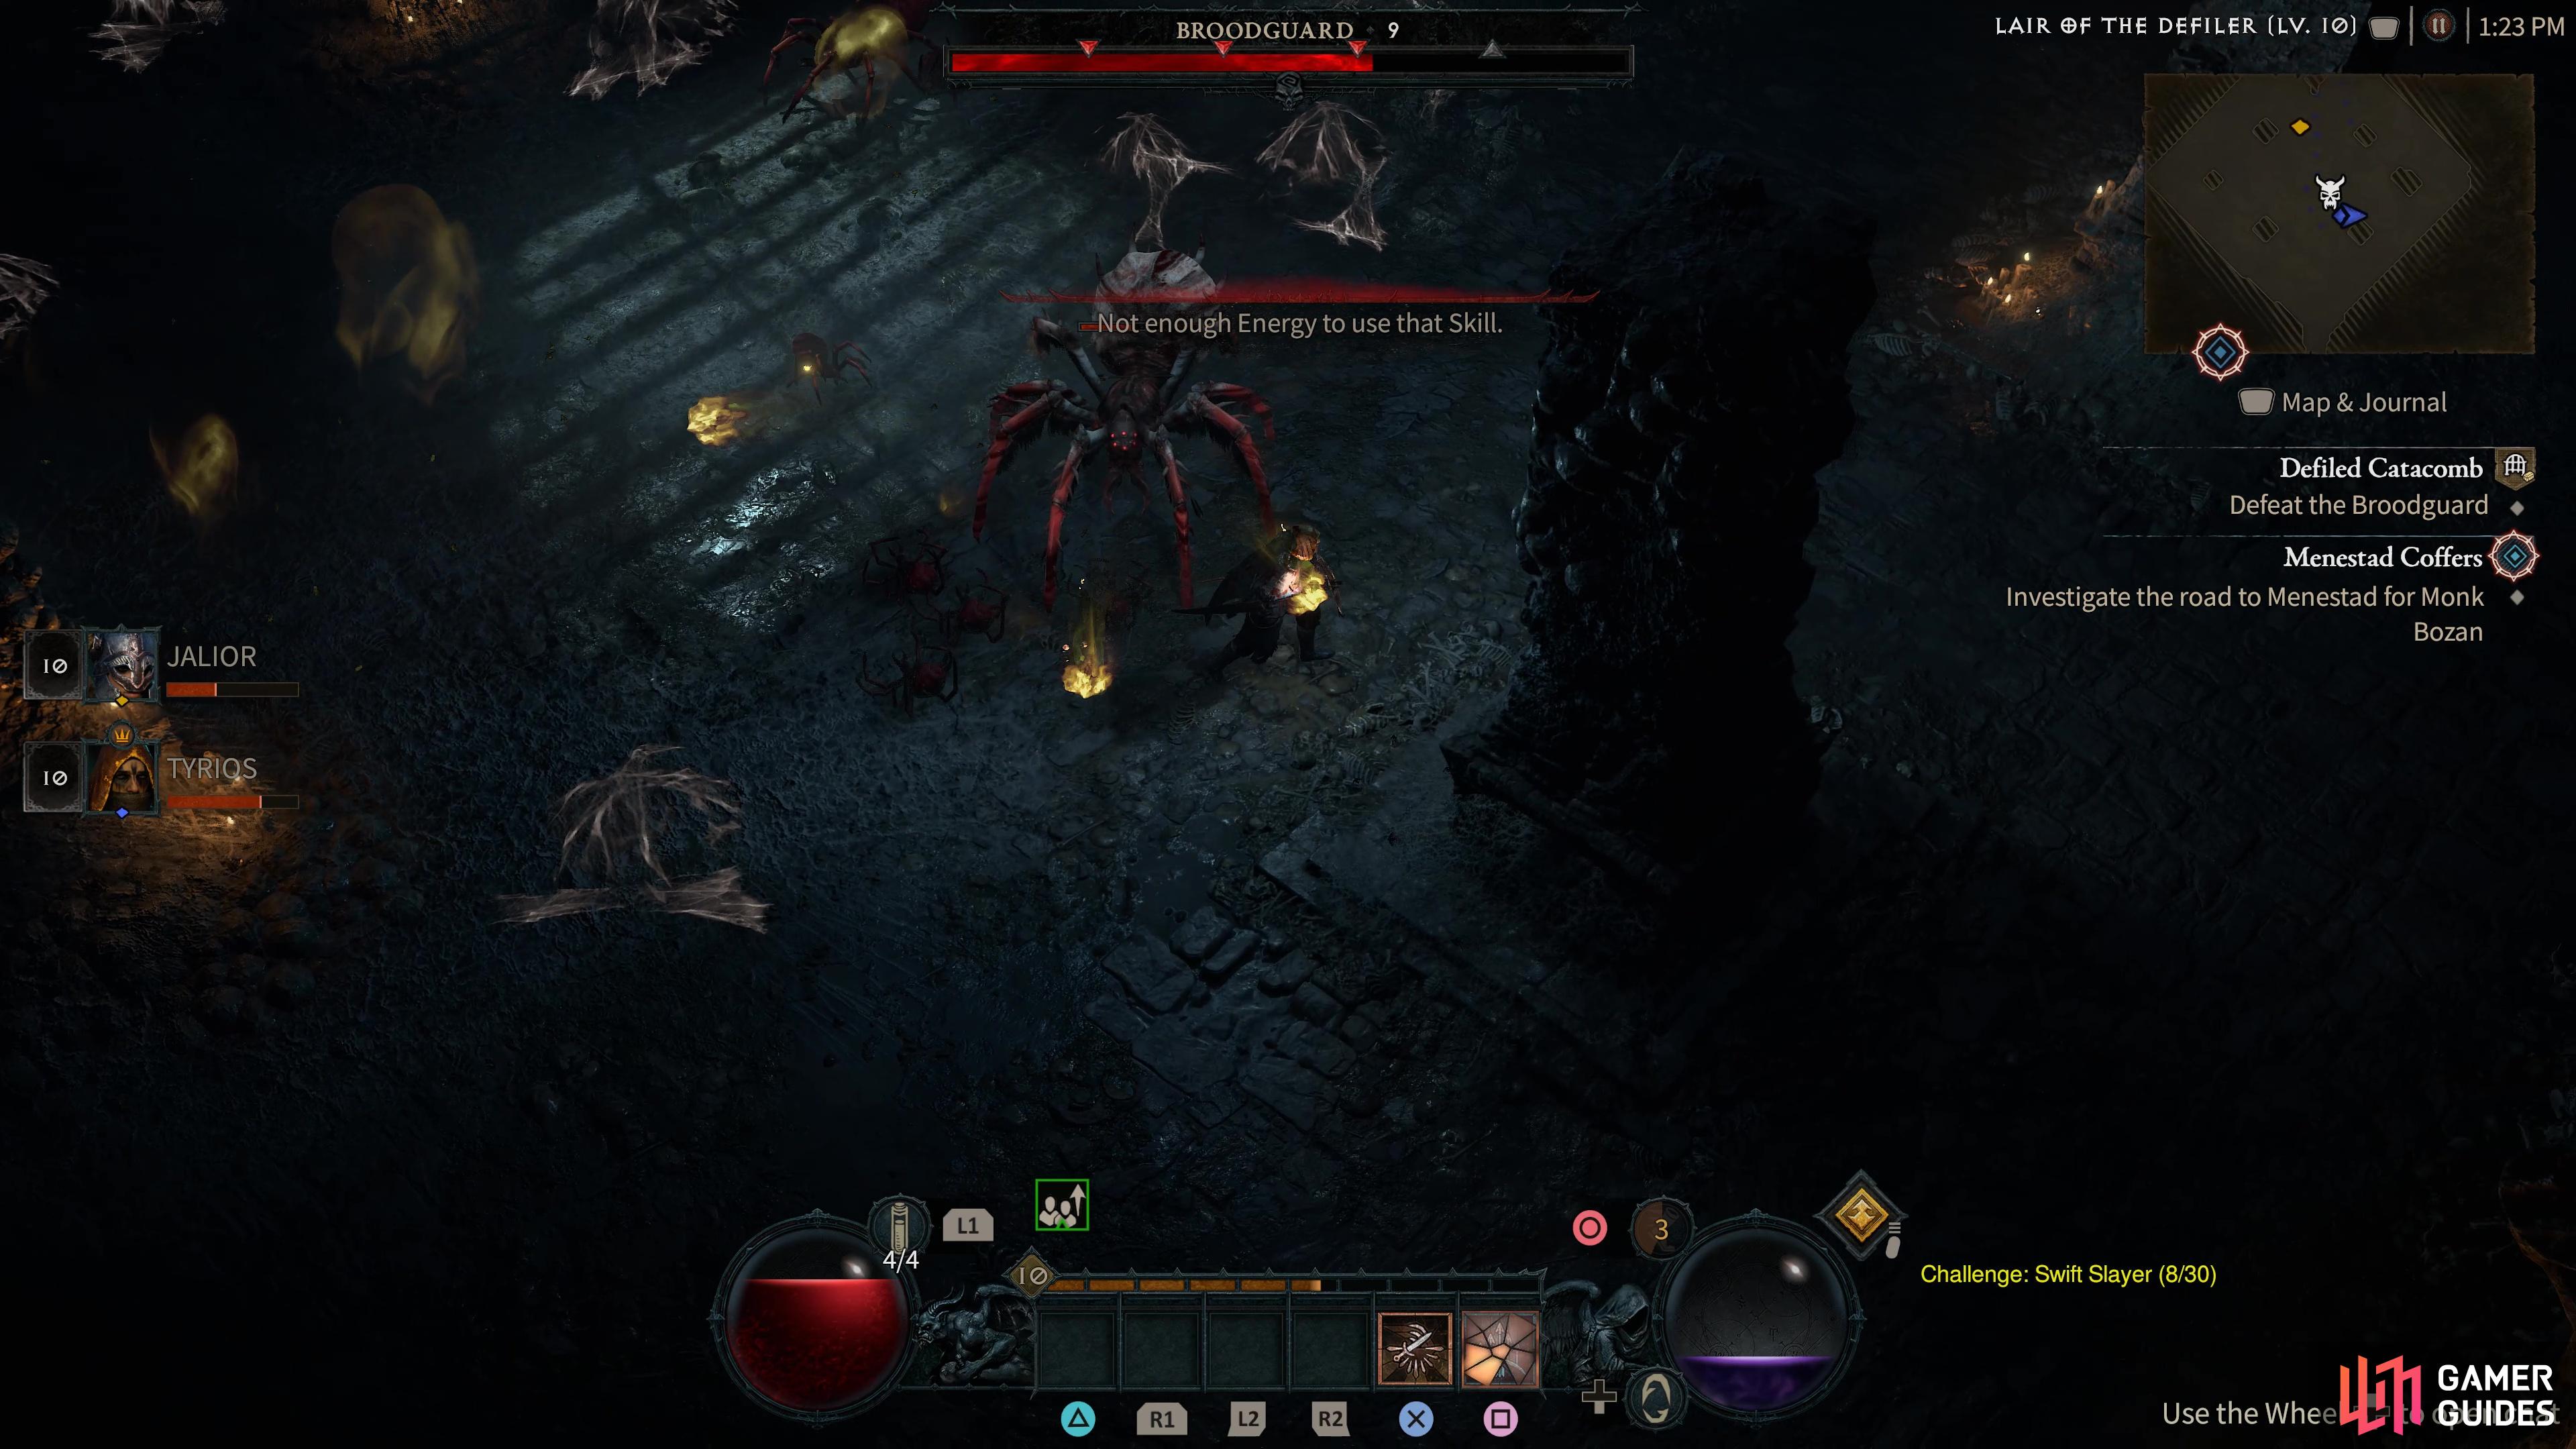
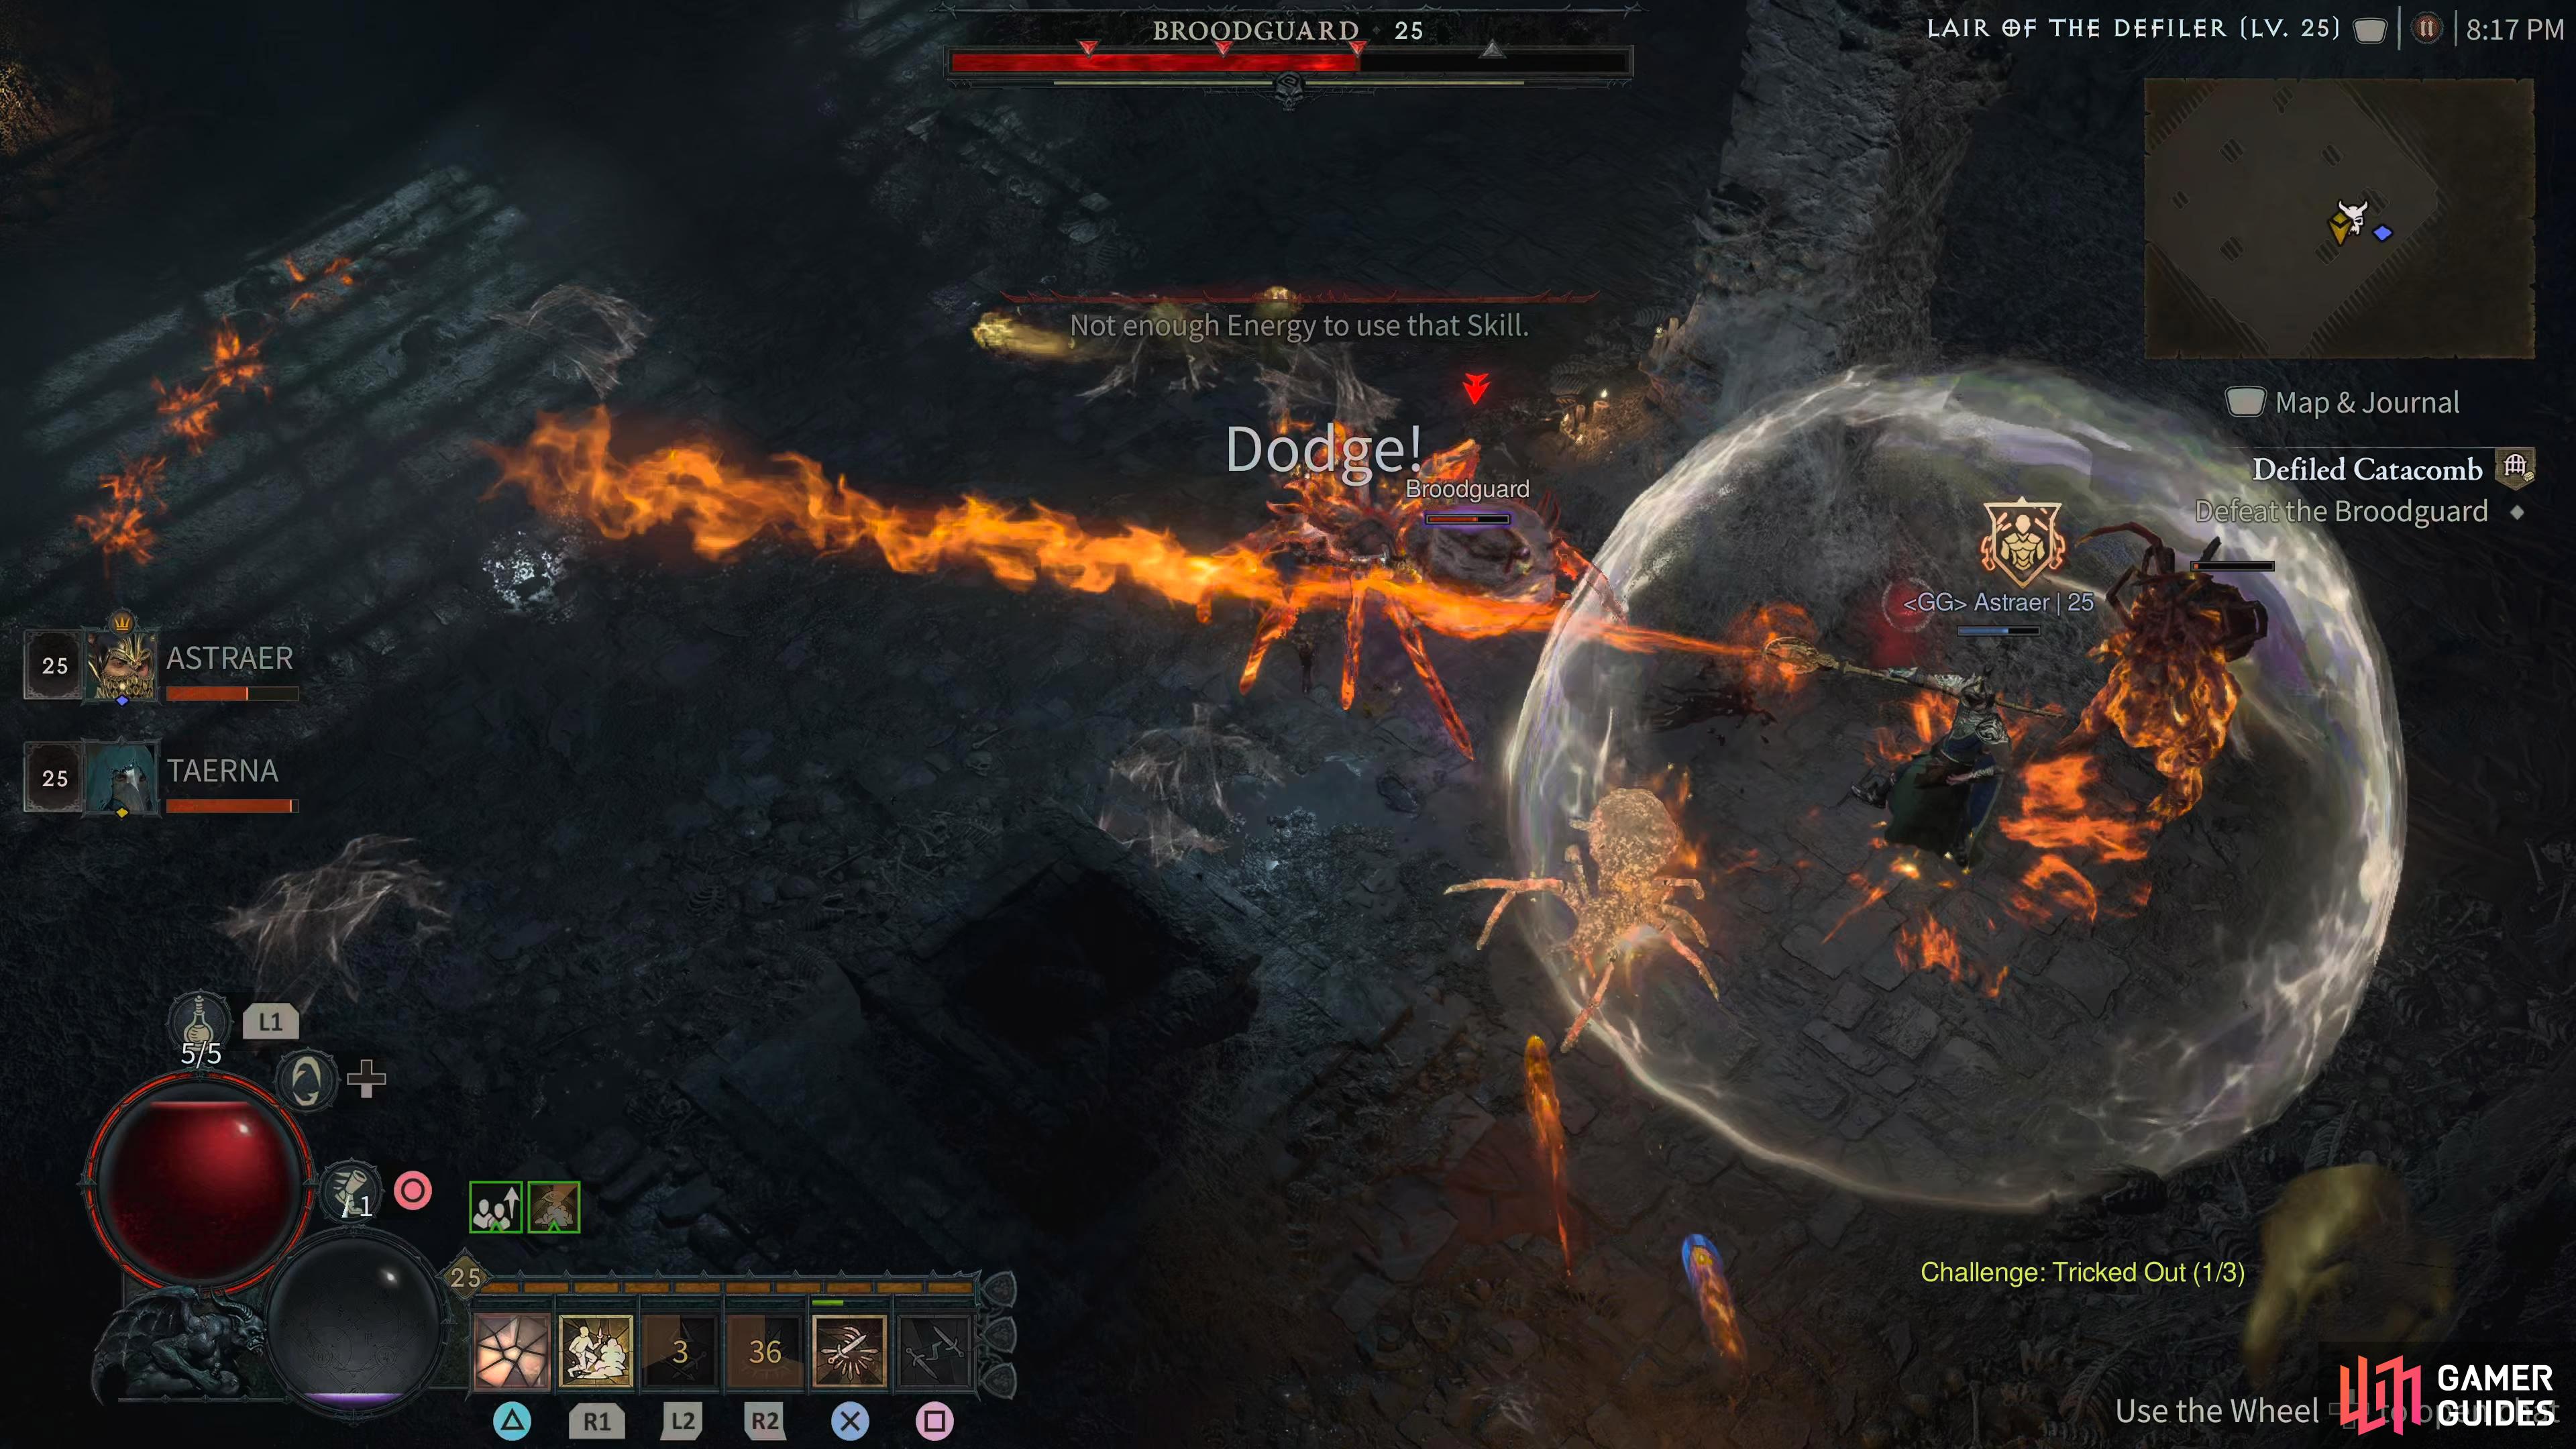
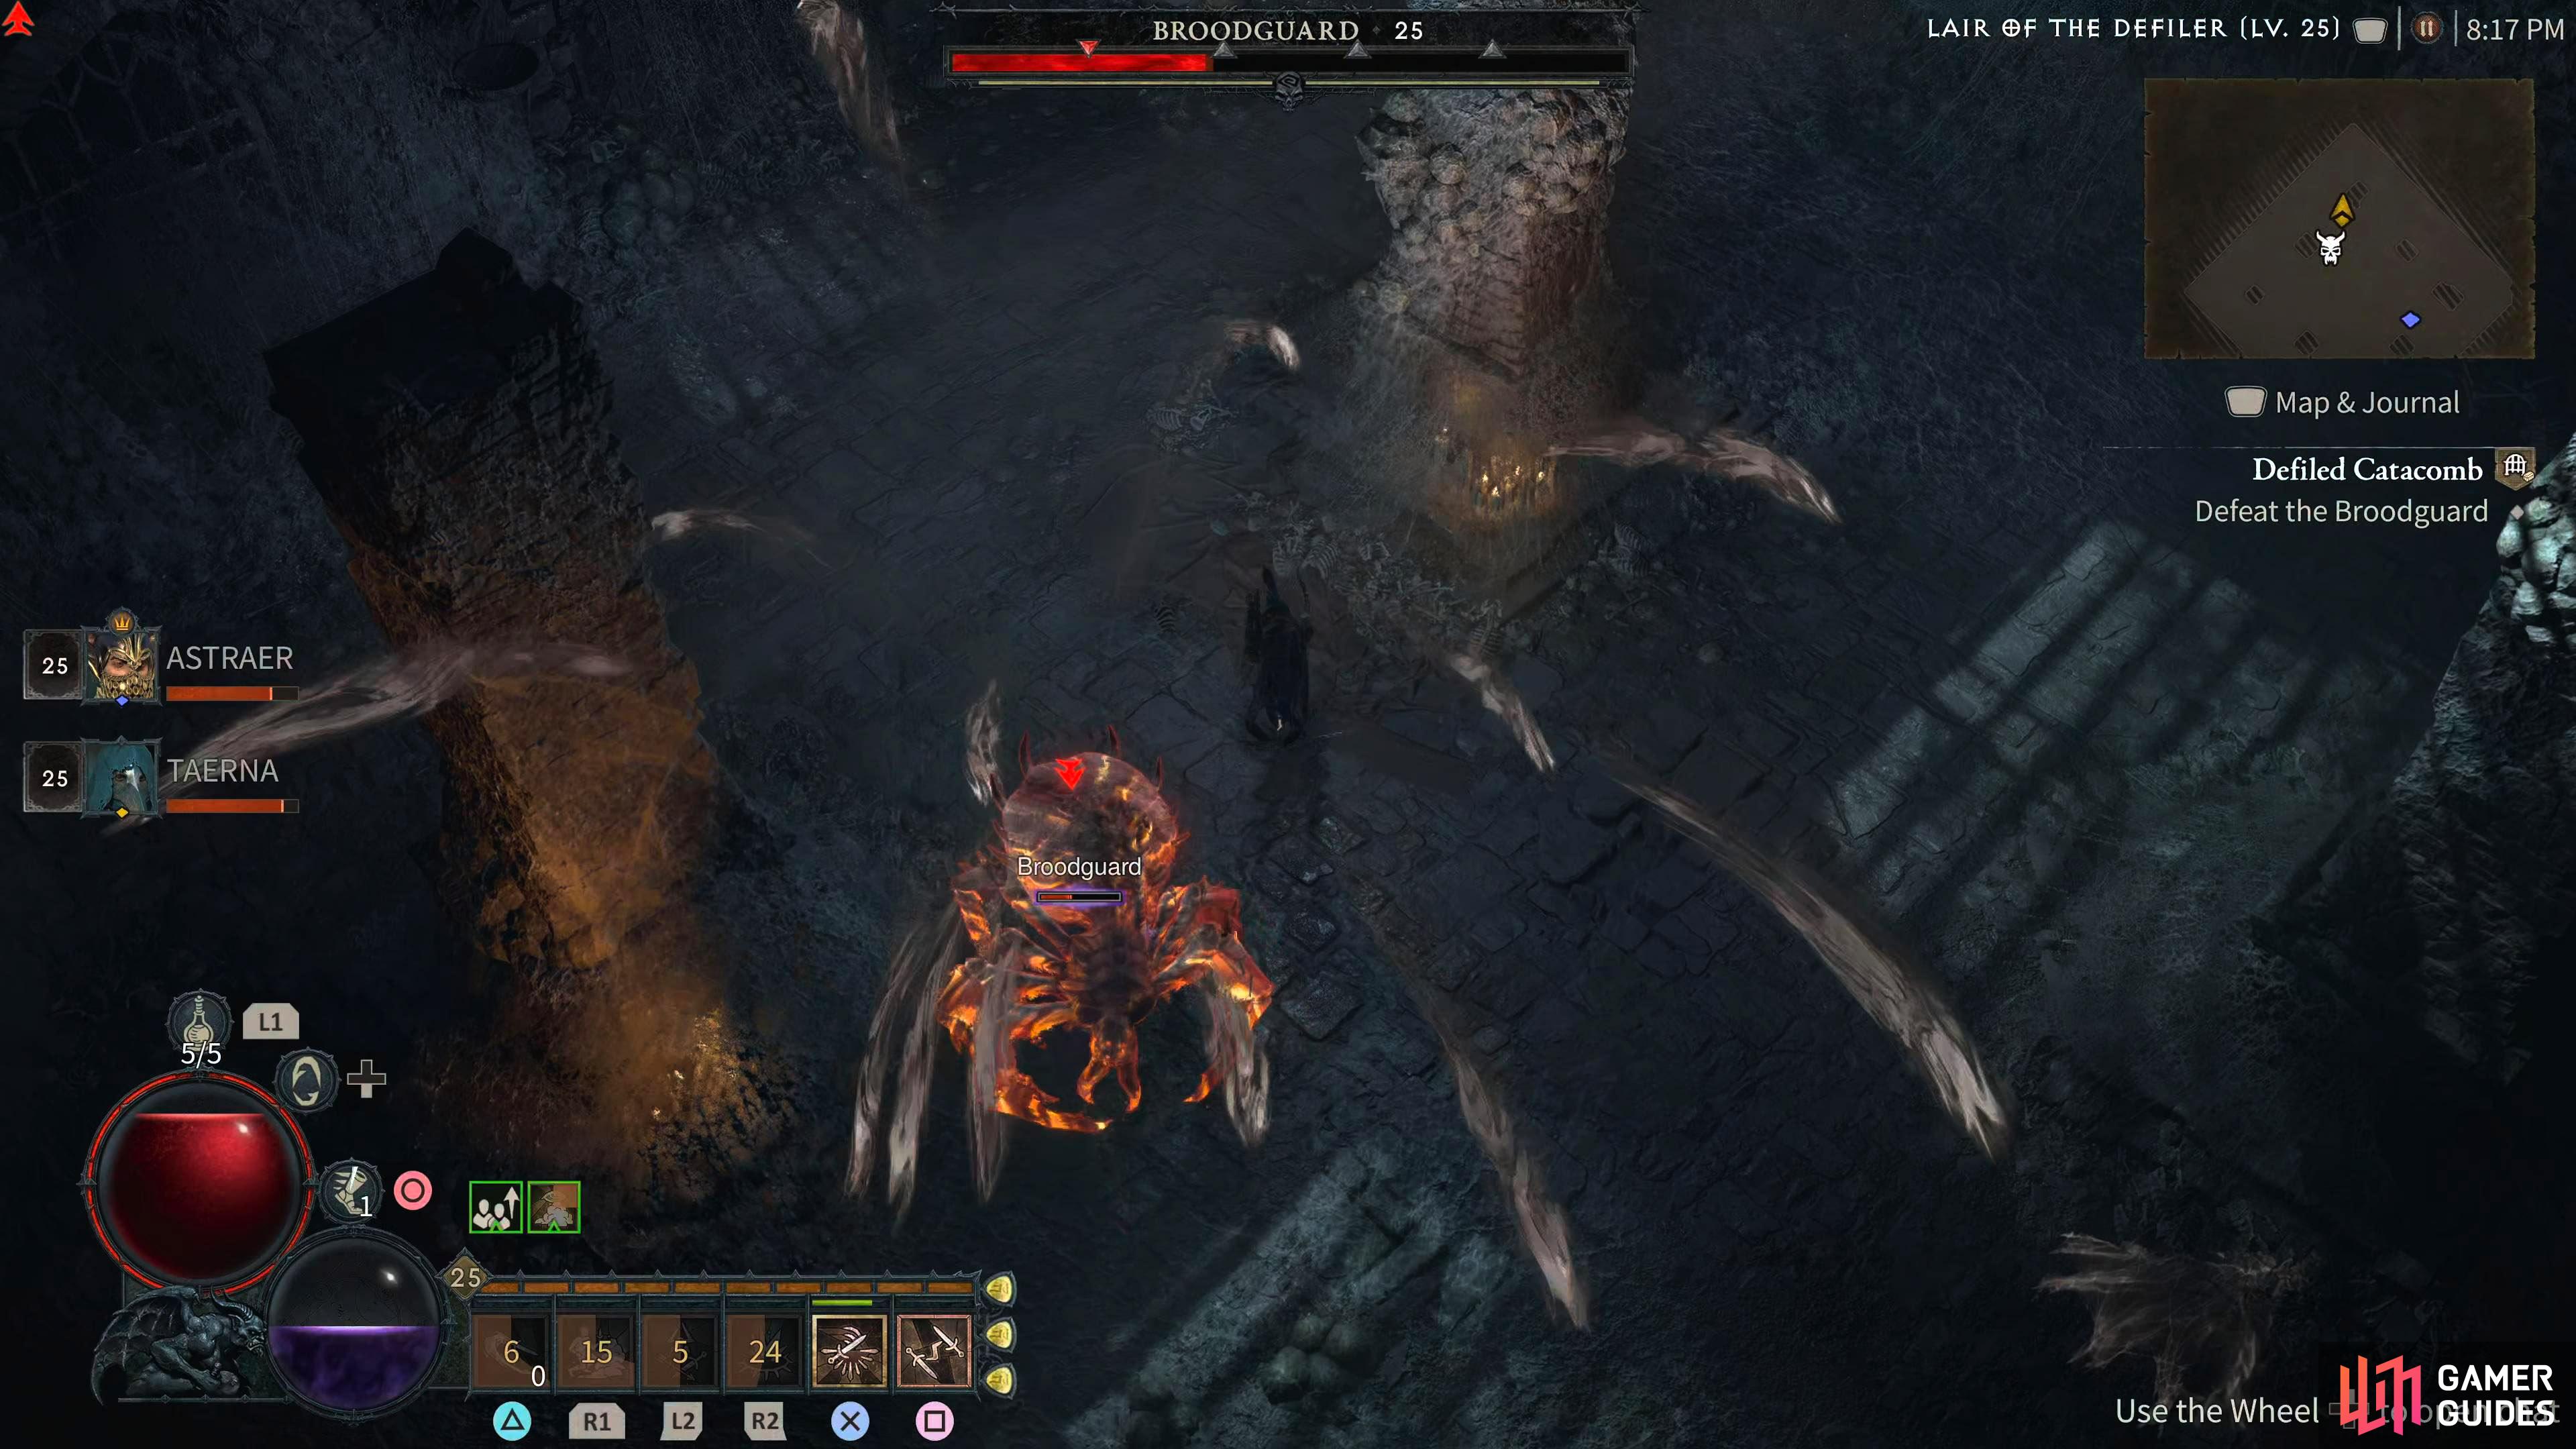
The Broodguard is a massive spider that deposits sticky webs around the room, slowing your movement down dramatically. It also spits poison globs that scatter and form Poison pools so be wary and try to find the safer spaces. She can summon other spider minions to aid her when her HP is lowered enough. Generally, this is a game of cat and mouse and ranged builds will have a much easier time.
This is an incredibly tough boss for melee characters so ideally, bring a friend or two.
Description
The Broodguard doesn’t have a lot of attacks, but the attacks it does have can be problematic. Throughout the battle, you’ll encounter the following attacks:
Leg Stab/Bite - This is a generic attack where the Broodguard will attack you with one of its many legs (or bite you). Fortunately, it doesn’t deal a lot of damage, so you can continue to attack the boss and take the hit. You could dodge this, but your dodges will be better served on its other attacks.
Web Throw - The Broodguard will throw out numerous webs around the arena, and if you get caught in one, you’ll either be slowed, or rooted. The attack itself doesn’t deal any damage, but it will leave you vulnerable to a follow-up attack. For the most part, you can avoid this by staying close to the boss.
Poison Spit - Similar to the Web Throw attack, the Broodguard will spit out several puddles of poison that persist on the floor for a brief moment. There doesn’t appear to be any specific places it will spit these puddles, but staying close to the boss once again will avoid this attack unless it runs near to them.
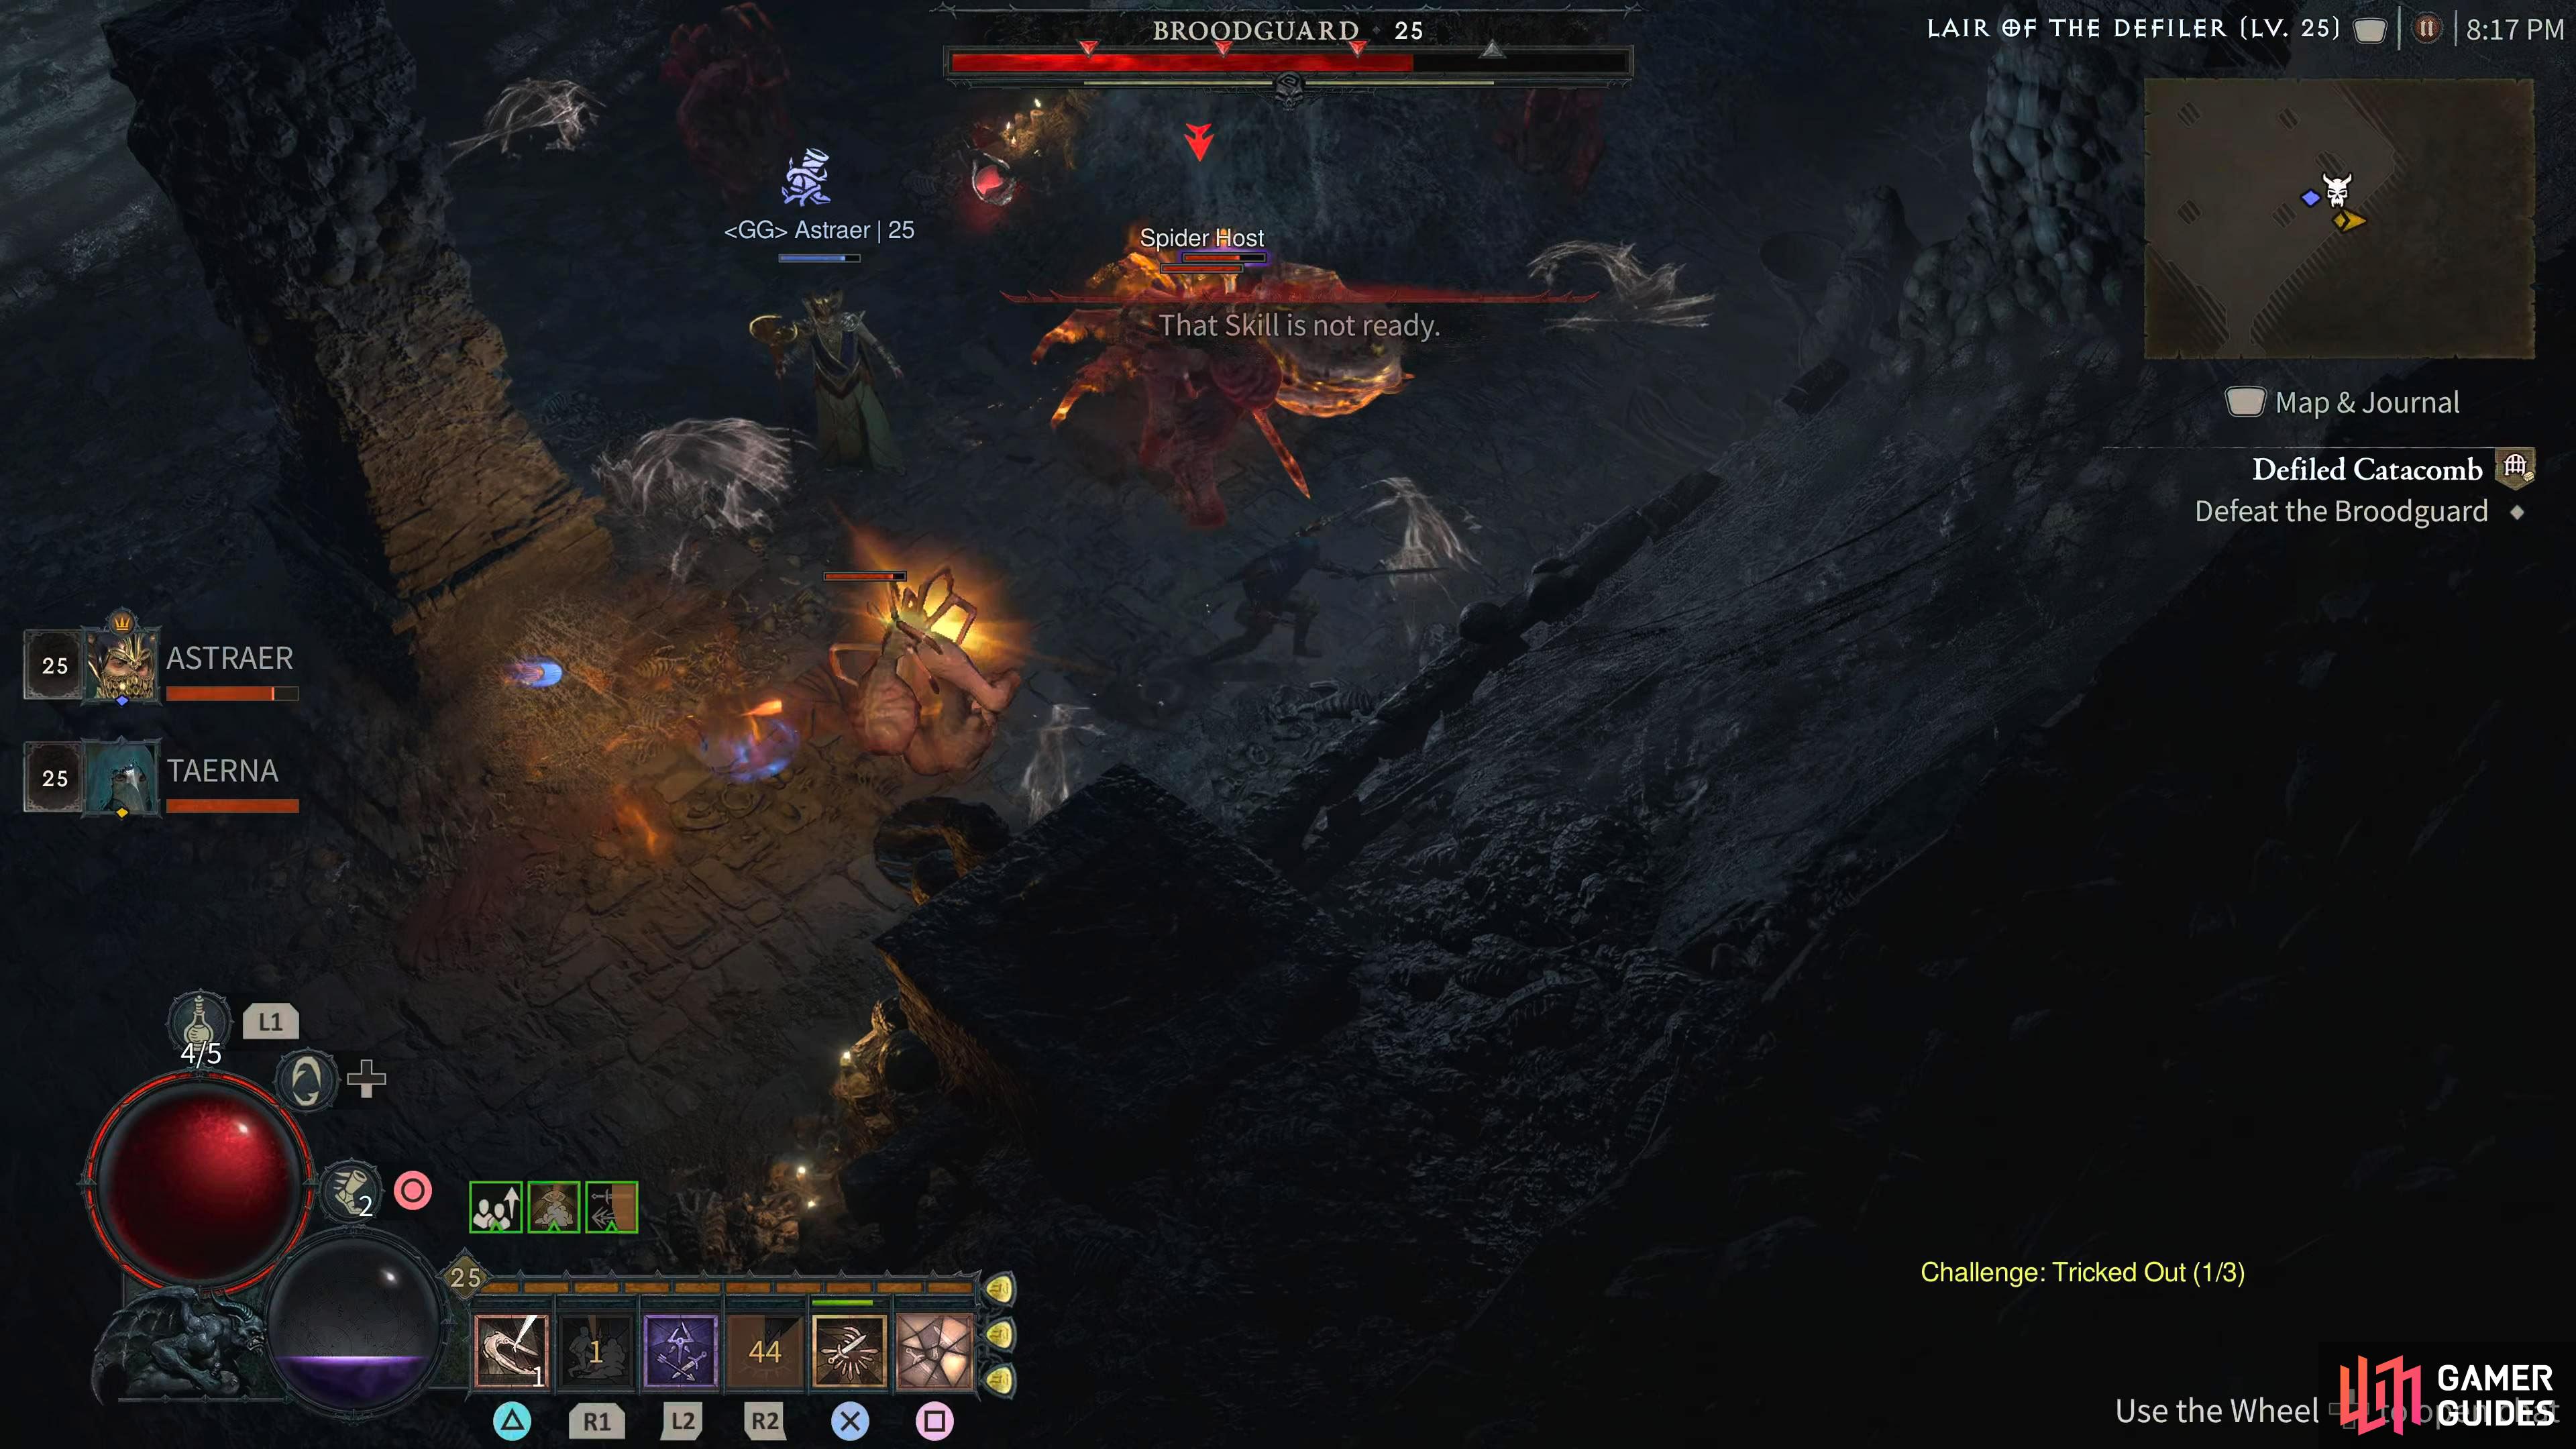
Summon Spider Hosts - Not an attack per se, but throughout the battle, the boss will summon enemies known as Spider Host to the fight. They normally spawn in threes or fours, and when you defeat them, they’ll explode, and release other Spider enemies. When they spawn, these should be your focus otherwise you’ll end up with four enemies attacking you at once which will overwhelm your small healing supply.
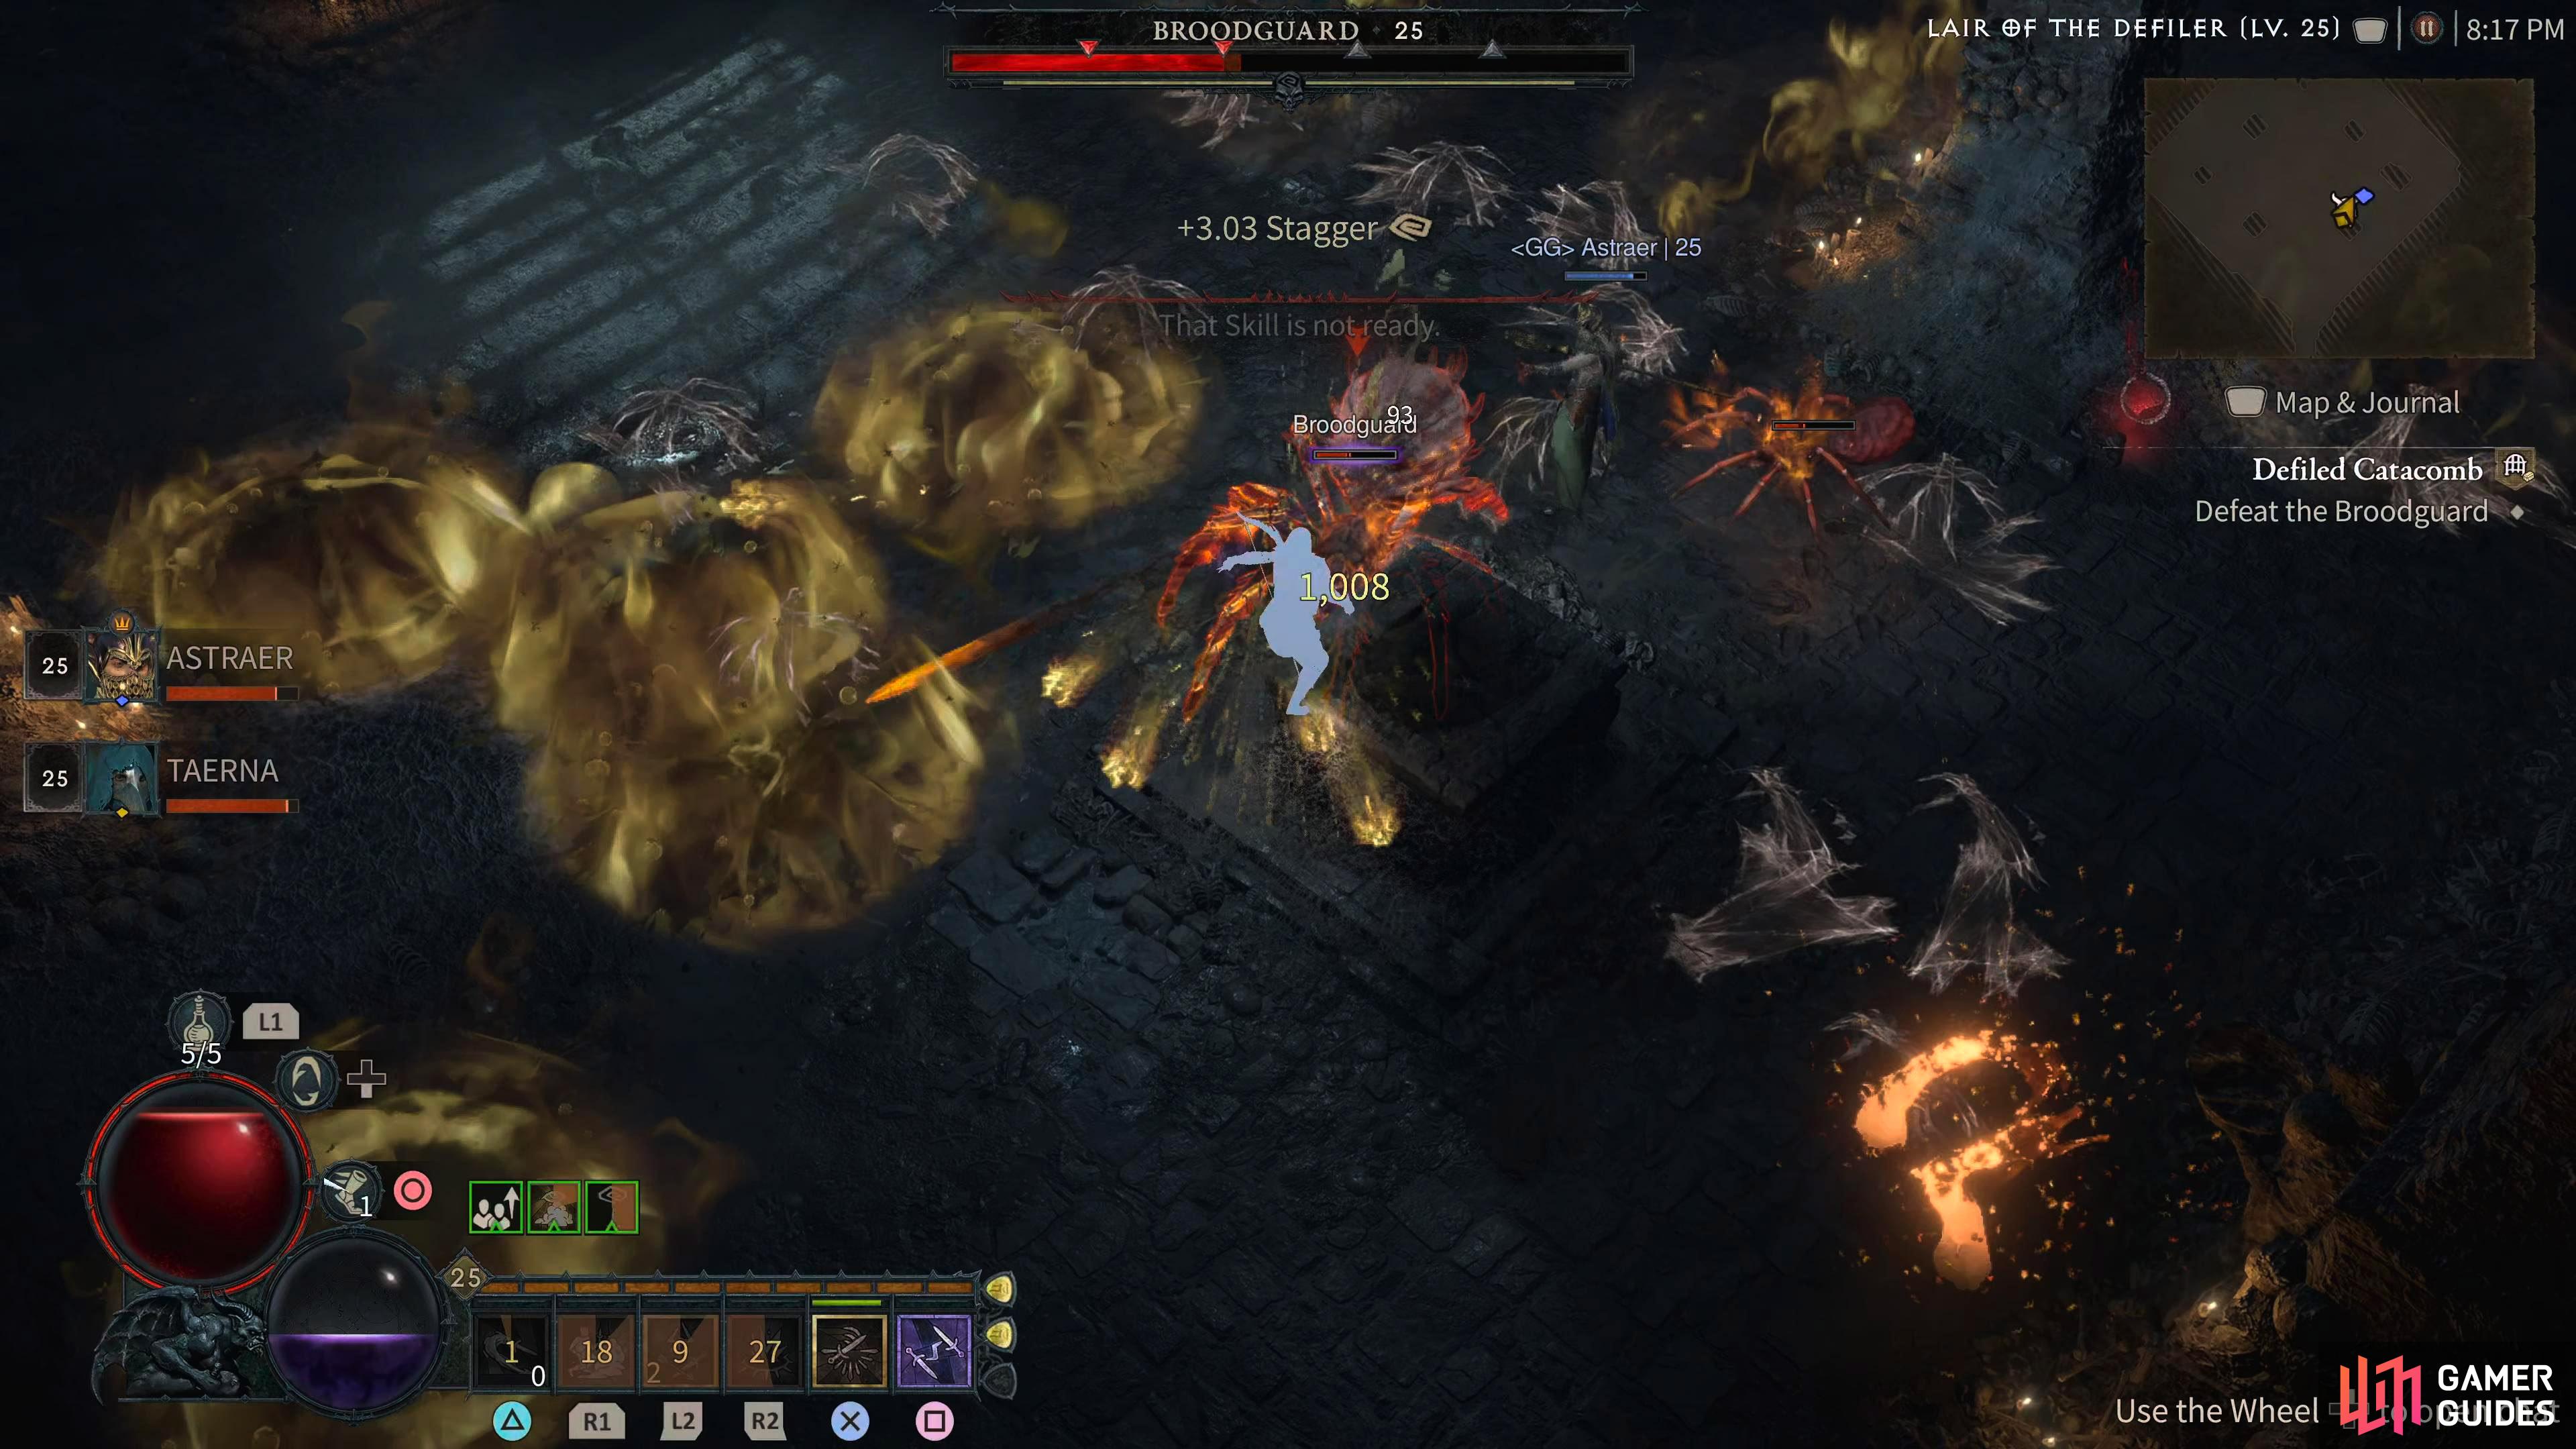
The strategy of this battle is to be aggressive and stay close to the boss. If you sit back, you’ll get hit by almost all the attacks. The general gist of the fight will be: you close in on the boss and attack it, and it runs away and does either the Web Throw or Poison Spit attacks. You close in again to attack it, it’ll do a couple of Leg stab attacks, then one of the other attacks, and runs away again.
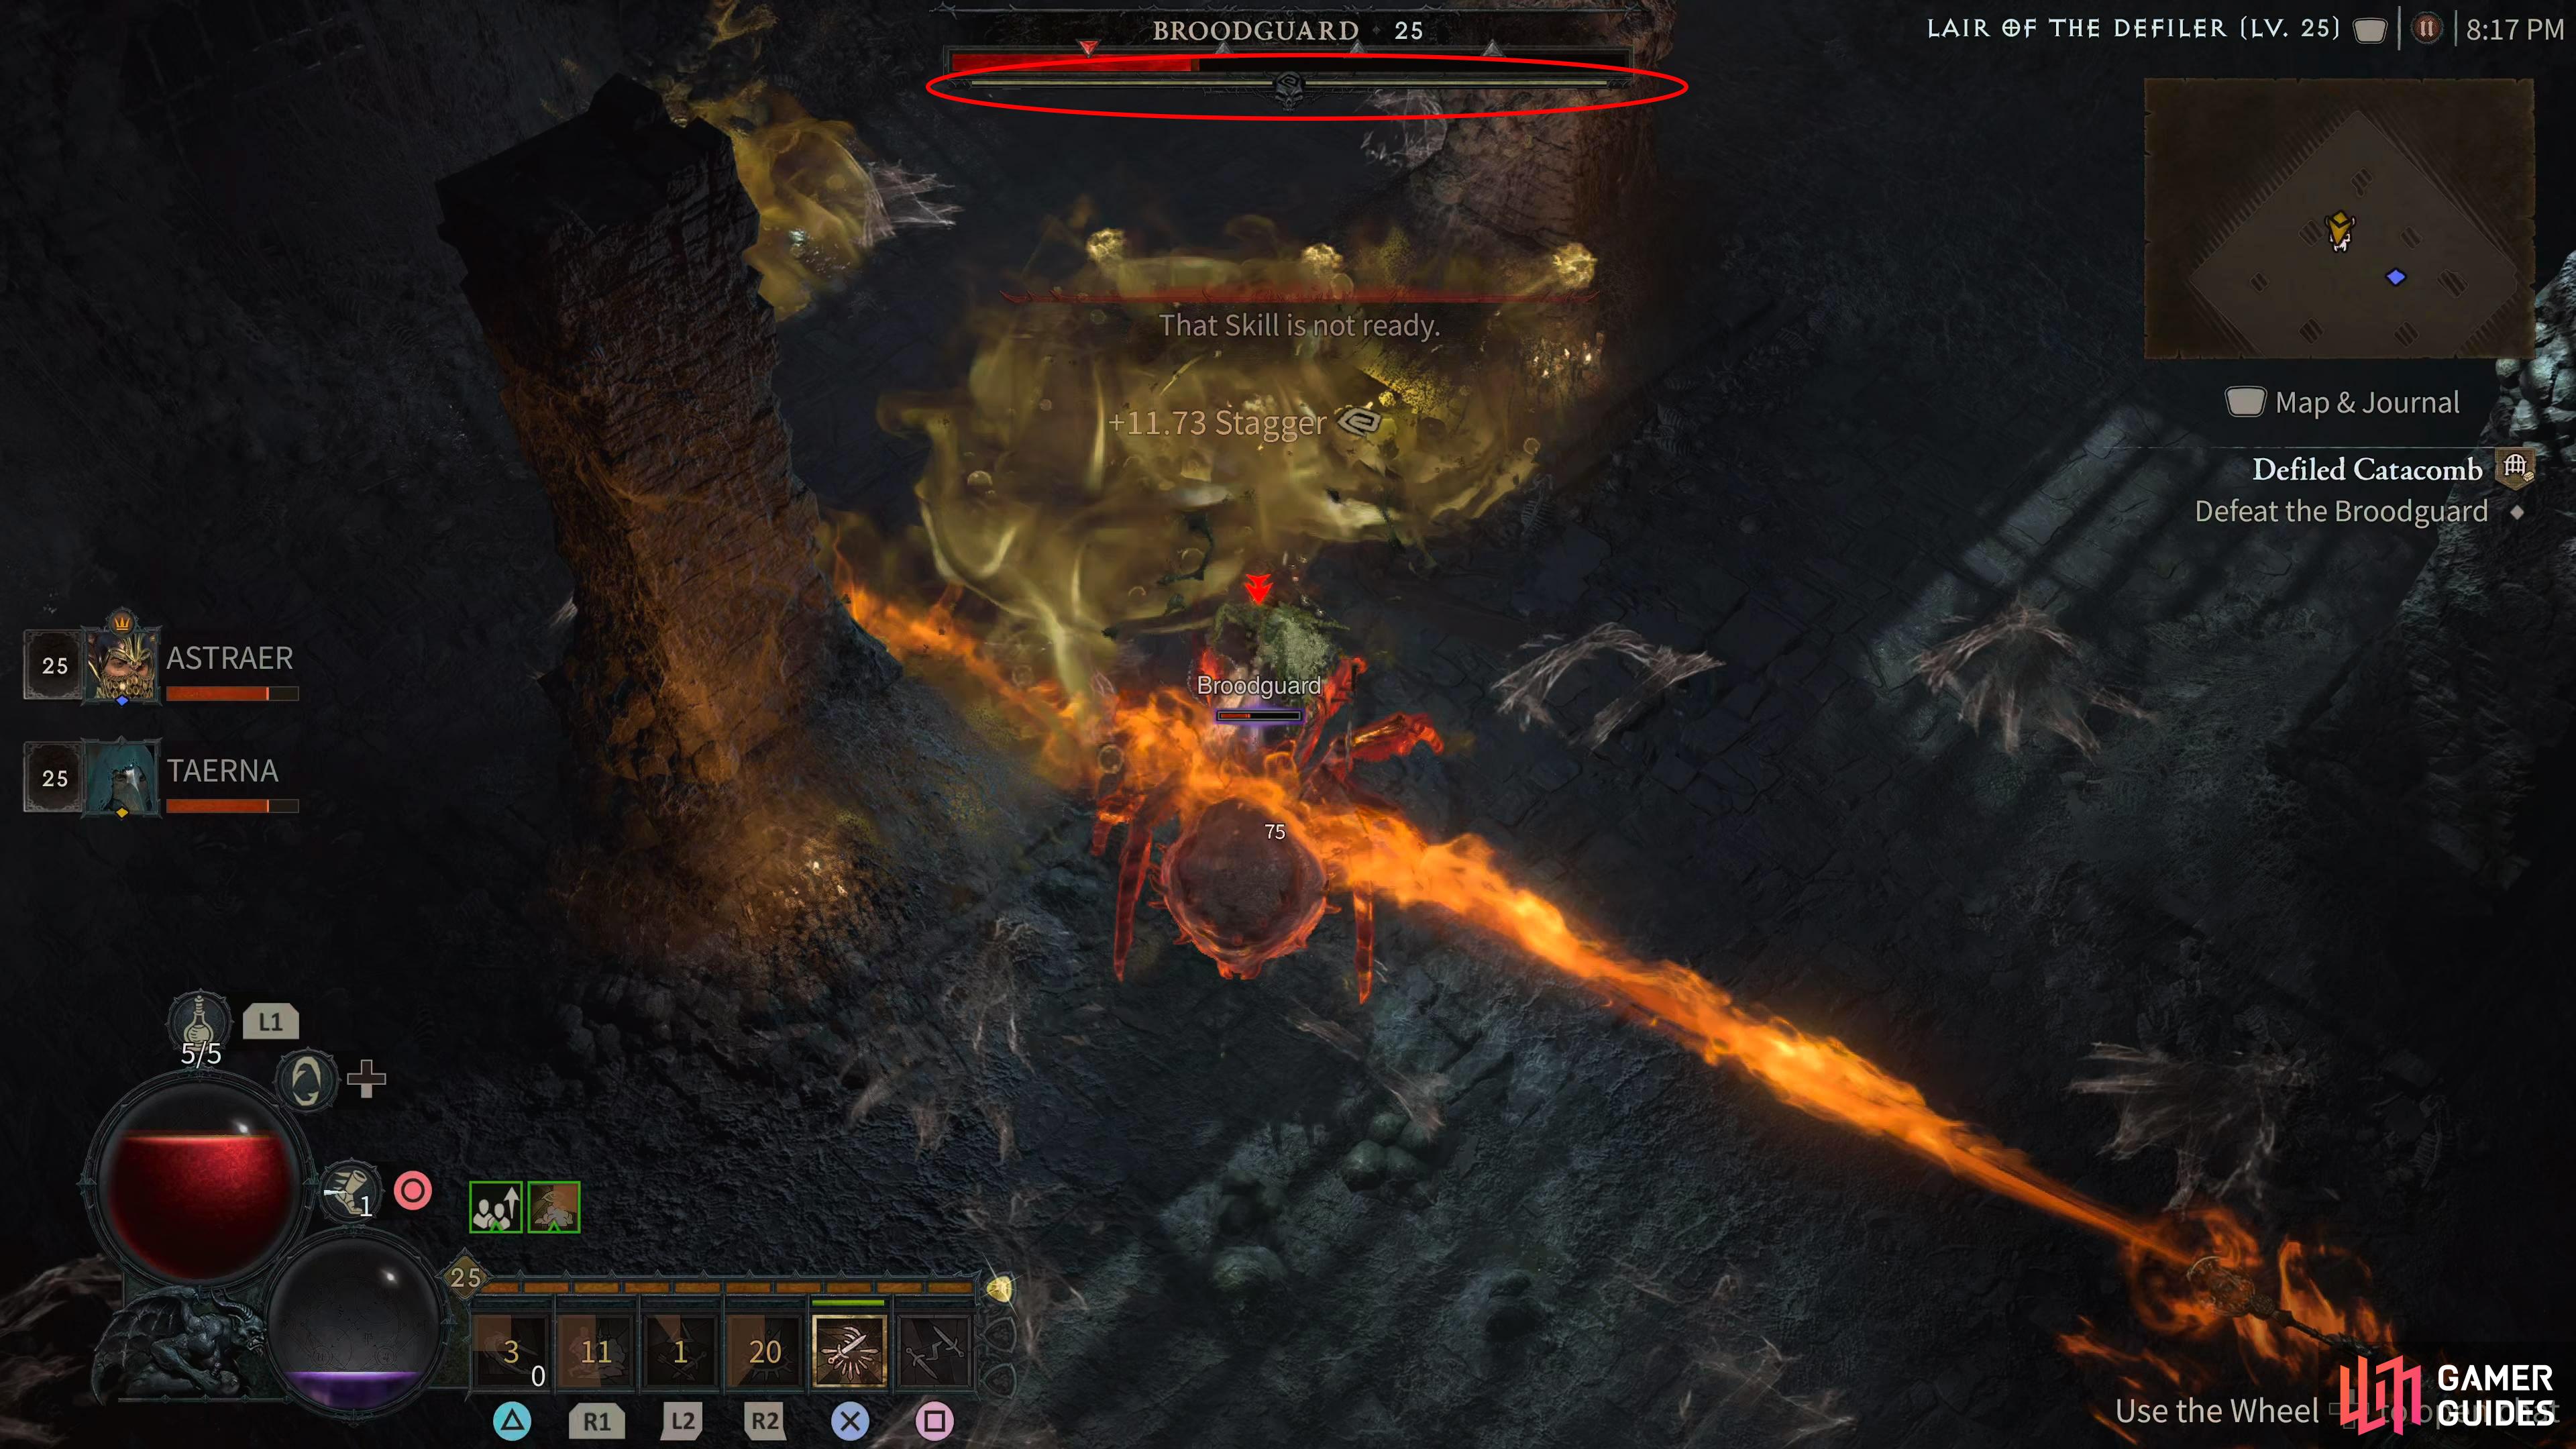
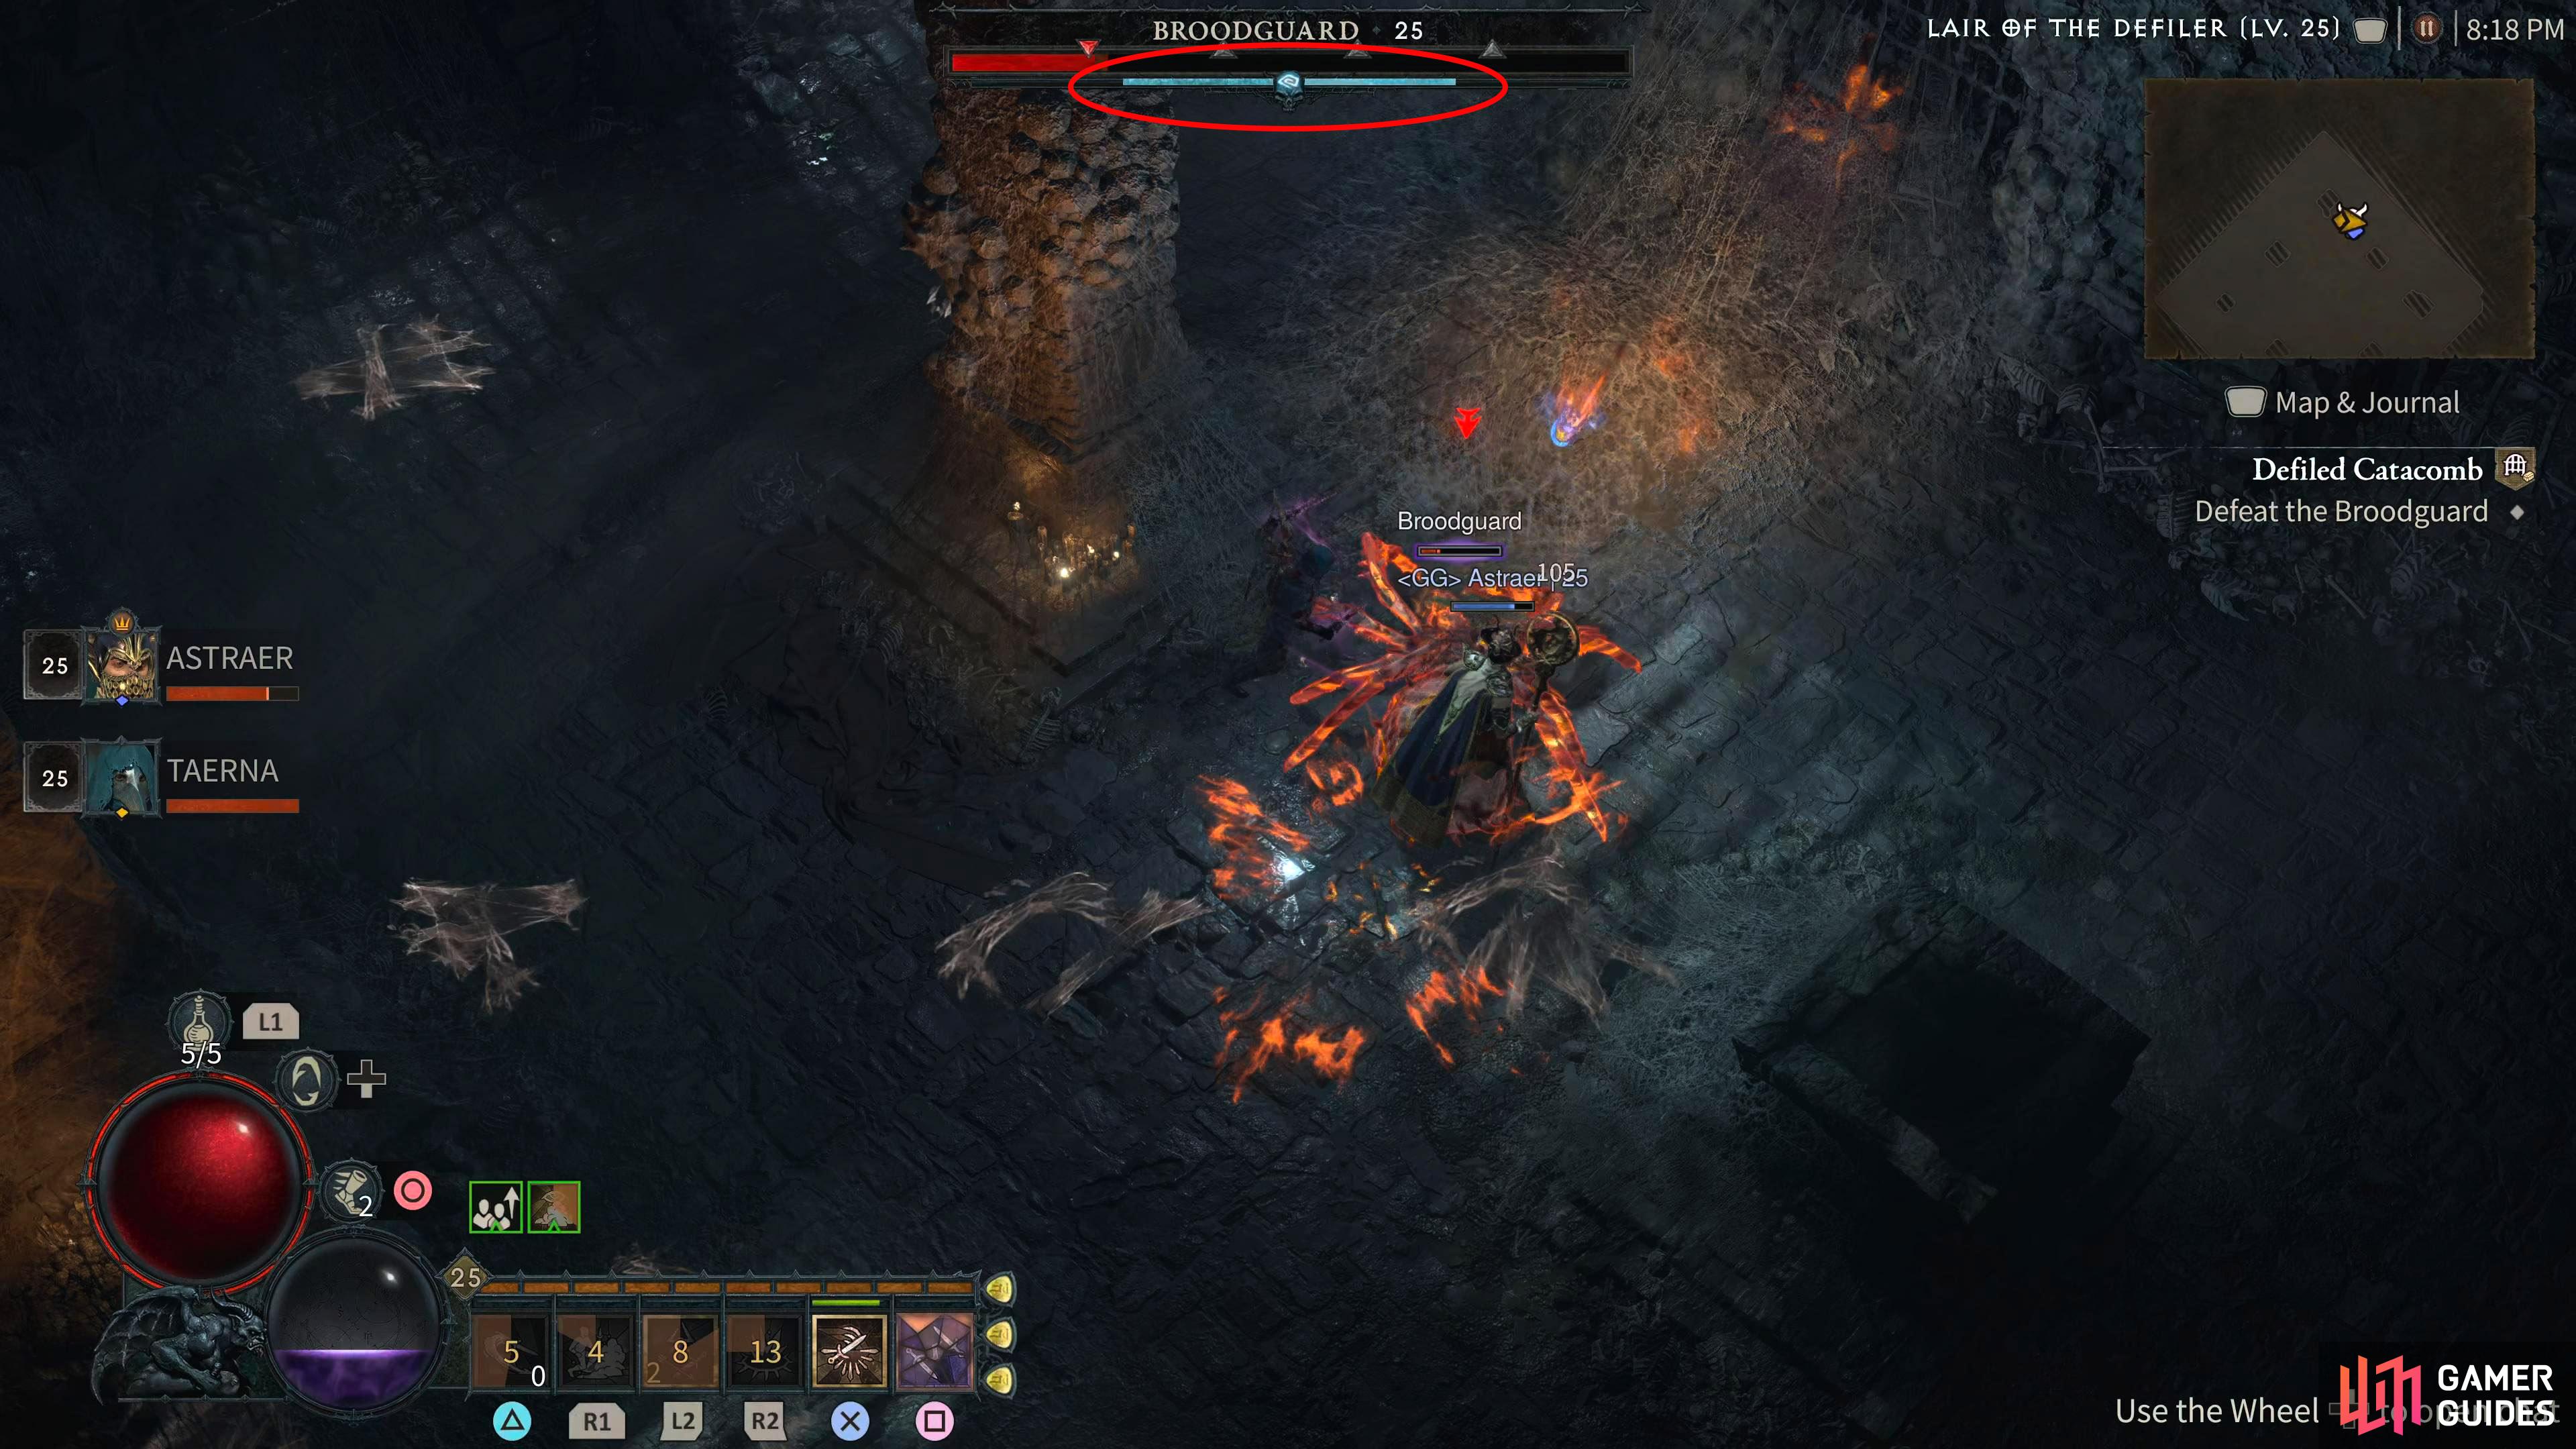
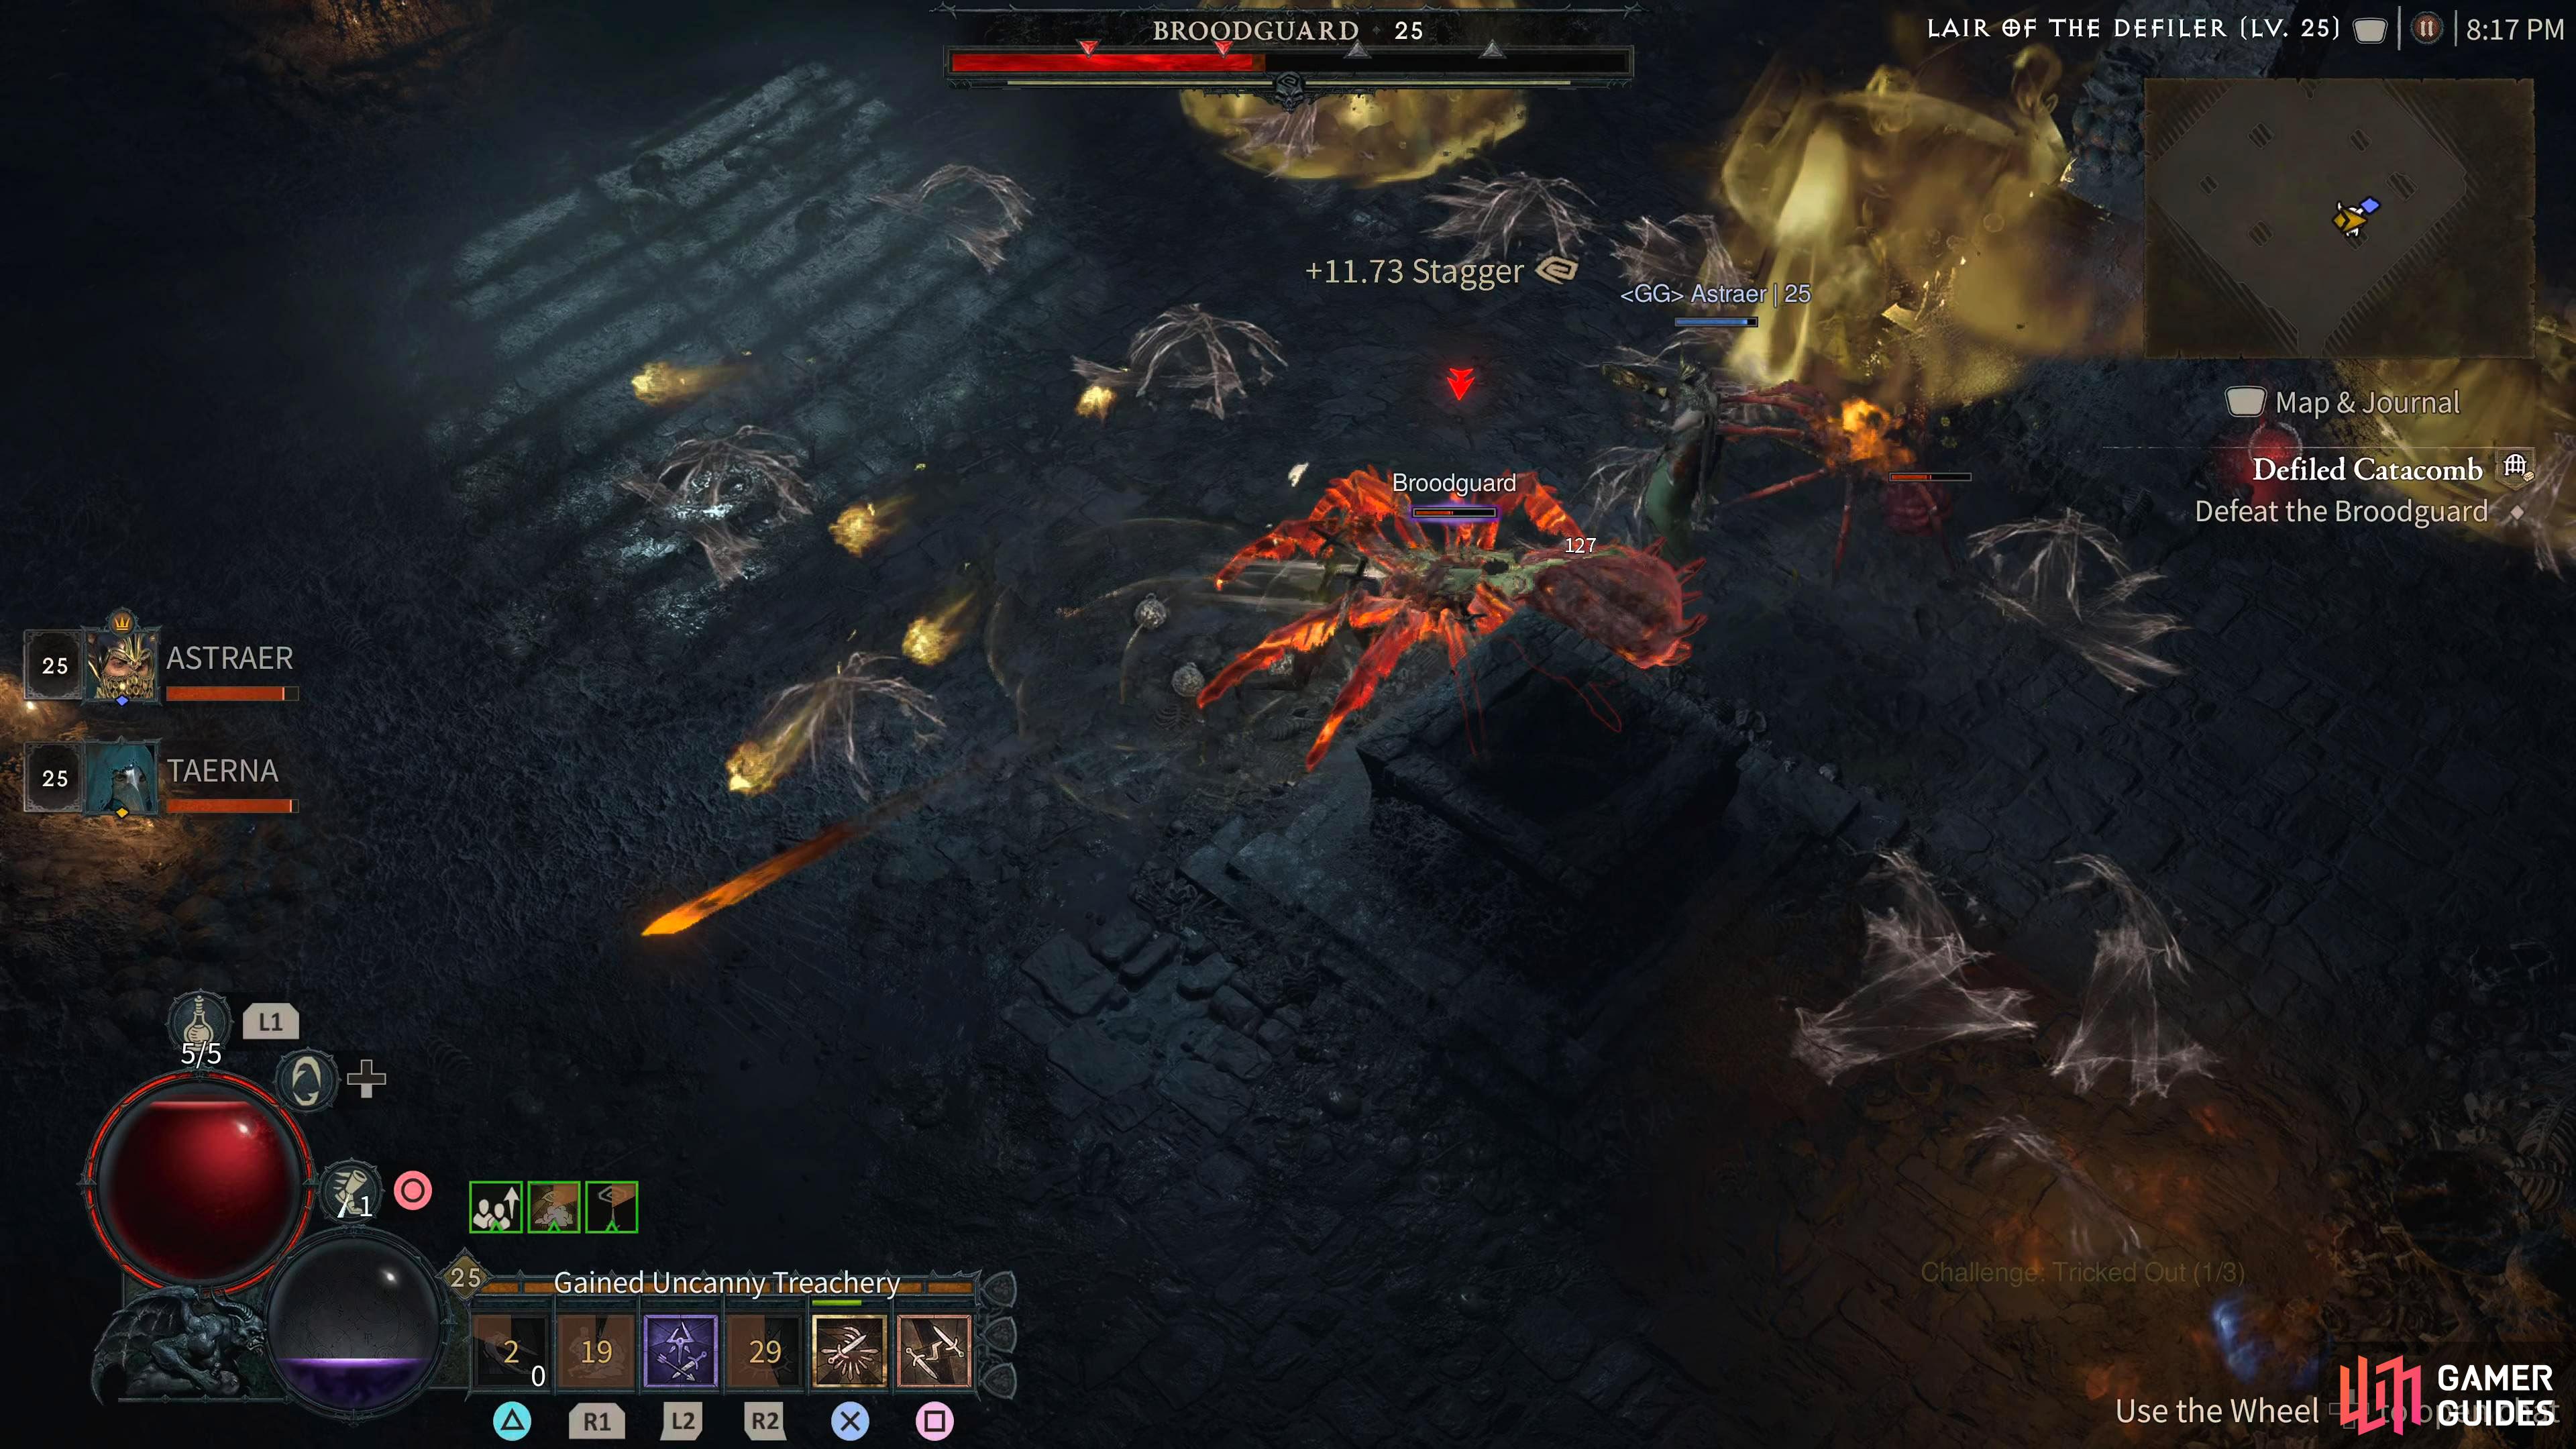
When the Broodguard health drops below the first arrow on the health bar, the Spider Host adds will spawn. Defeat them quickly, preferably with an Ultimate like Death Trap, or Inferno. If you don’t have any Ultimate available, use your area-of-effect attacks to take them down quickly. When you defeat a Spider Host, it’ll explode and a Spider enemy will appear, so make sure you defeat the adds, adds too. During the fight, you will stagger the boss.
This means it’ll take more damage from your attacks, and you’ll want to take full advantage of this by using your strongest attacks such as the Ultimates, and any damage-increasing utility you have like War Cry. You will know it’s staggered as it won’t move, and it’ll have a blue bar underneath its health bar slowly depleting. Head here for more details.
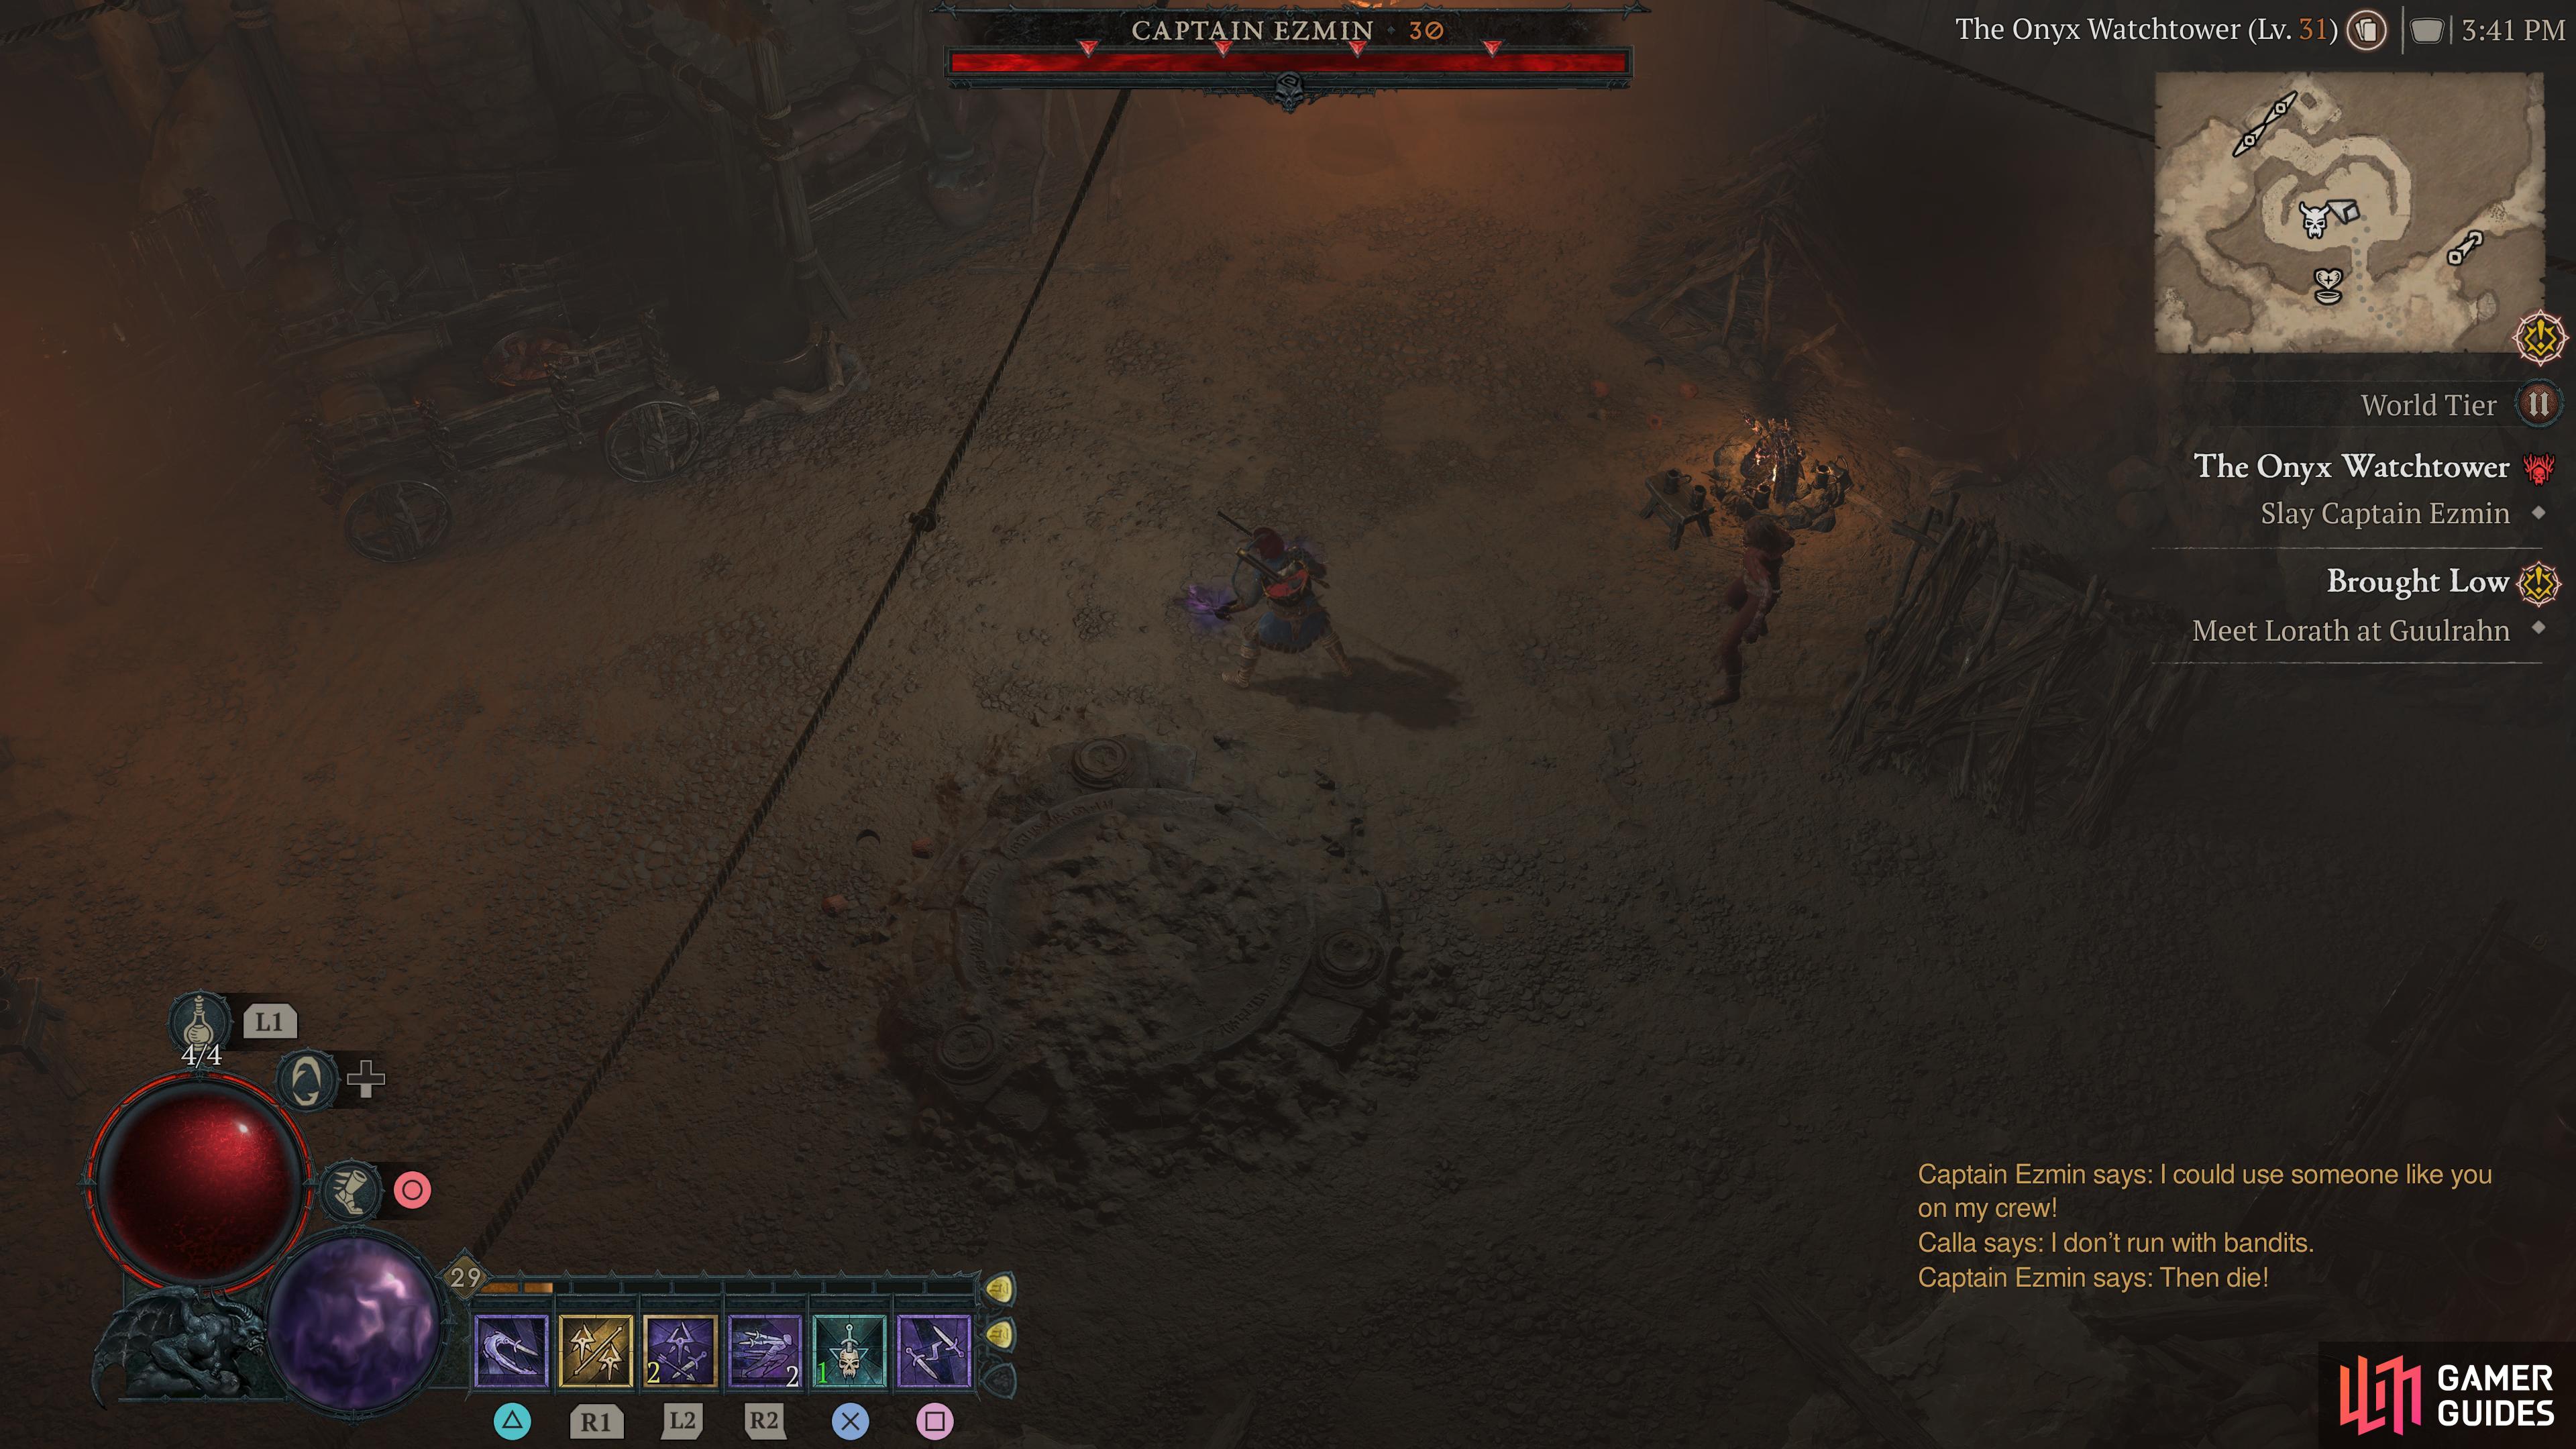
She behaves like a tougher version of the assassin style bandits. The largest threat, however, are the large number of reinforcements that Ezmin will call out, especially the Firebrands. Once she’s below half health, she will conjure flaming circles around the arena, keep on the move to avoid getting damaged by them.
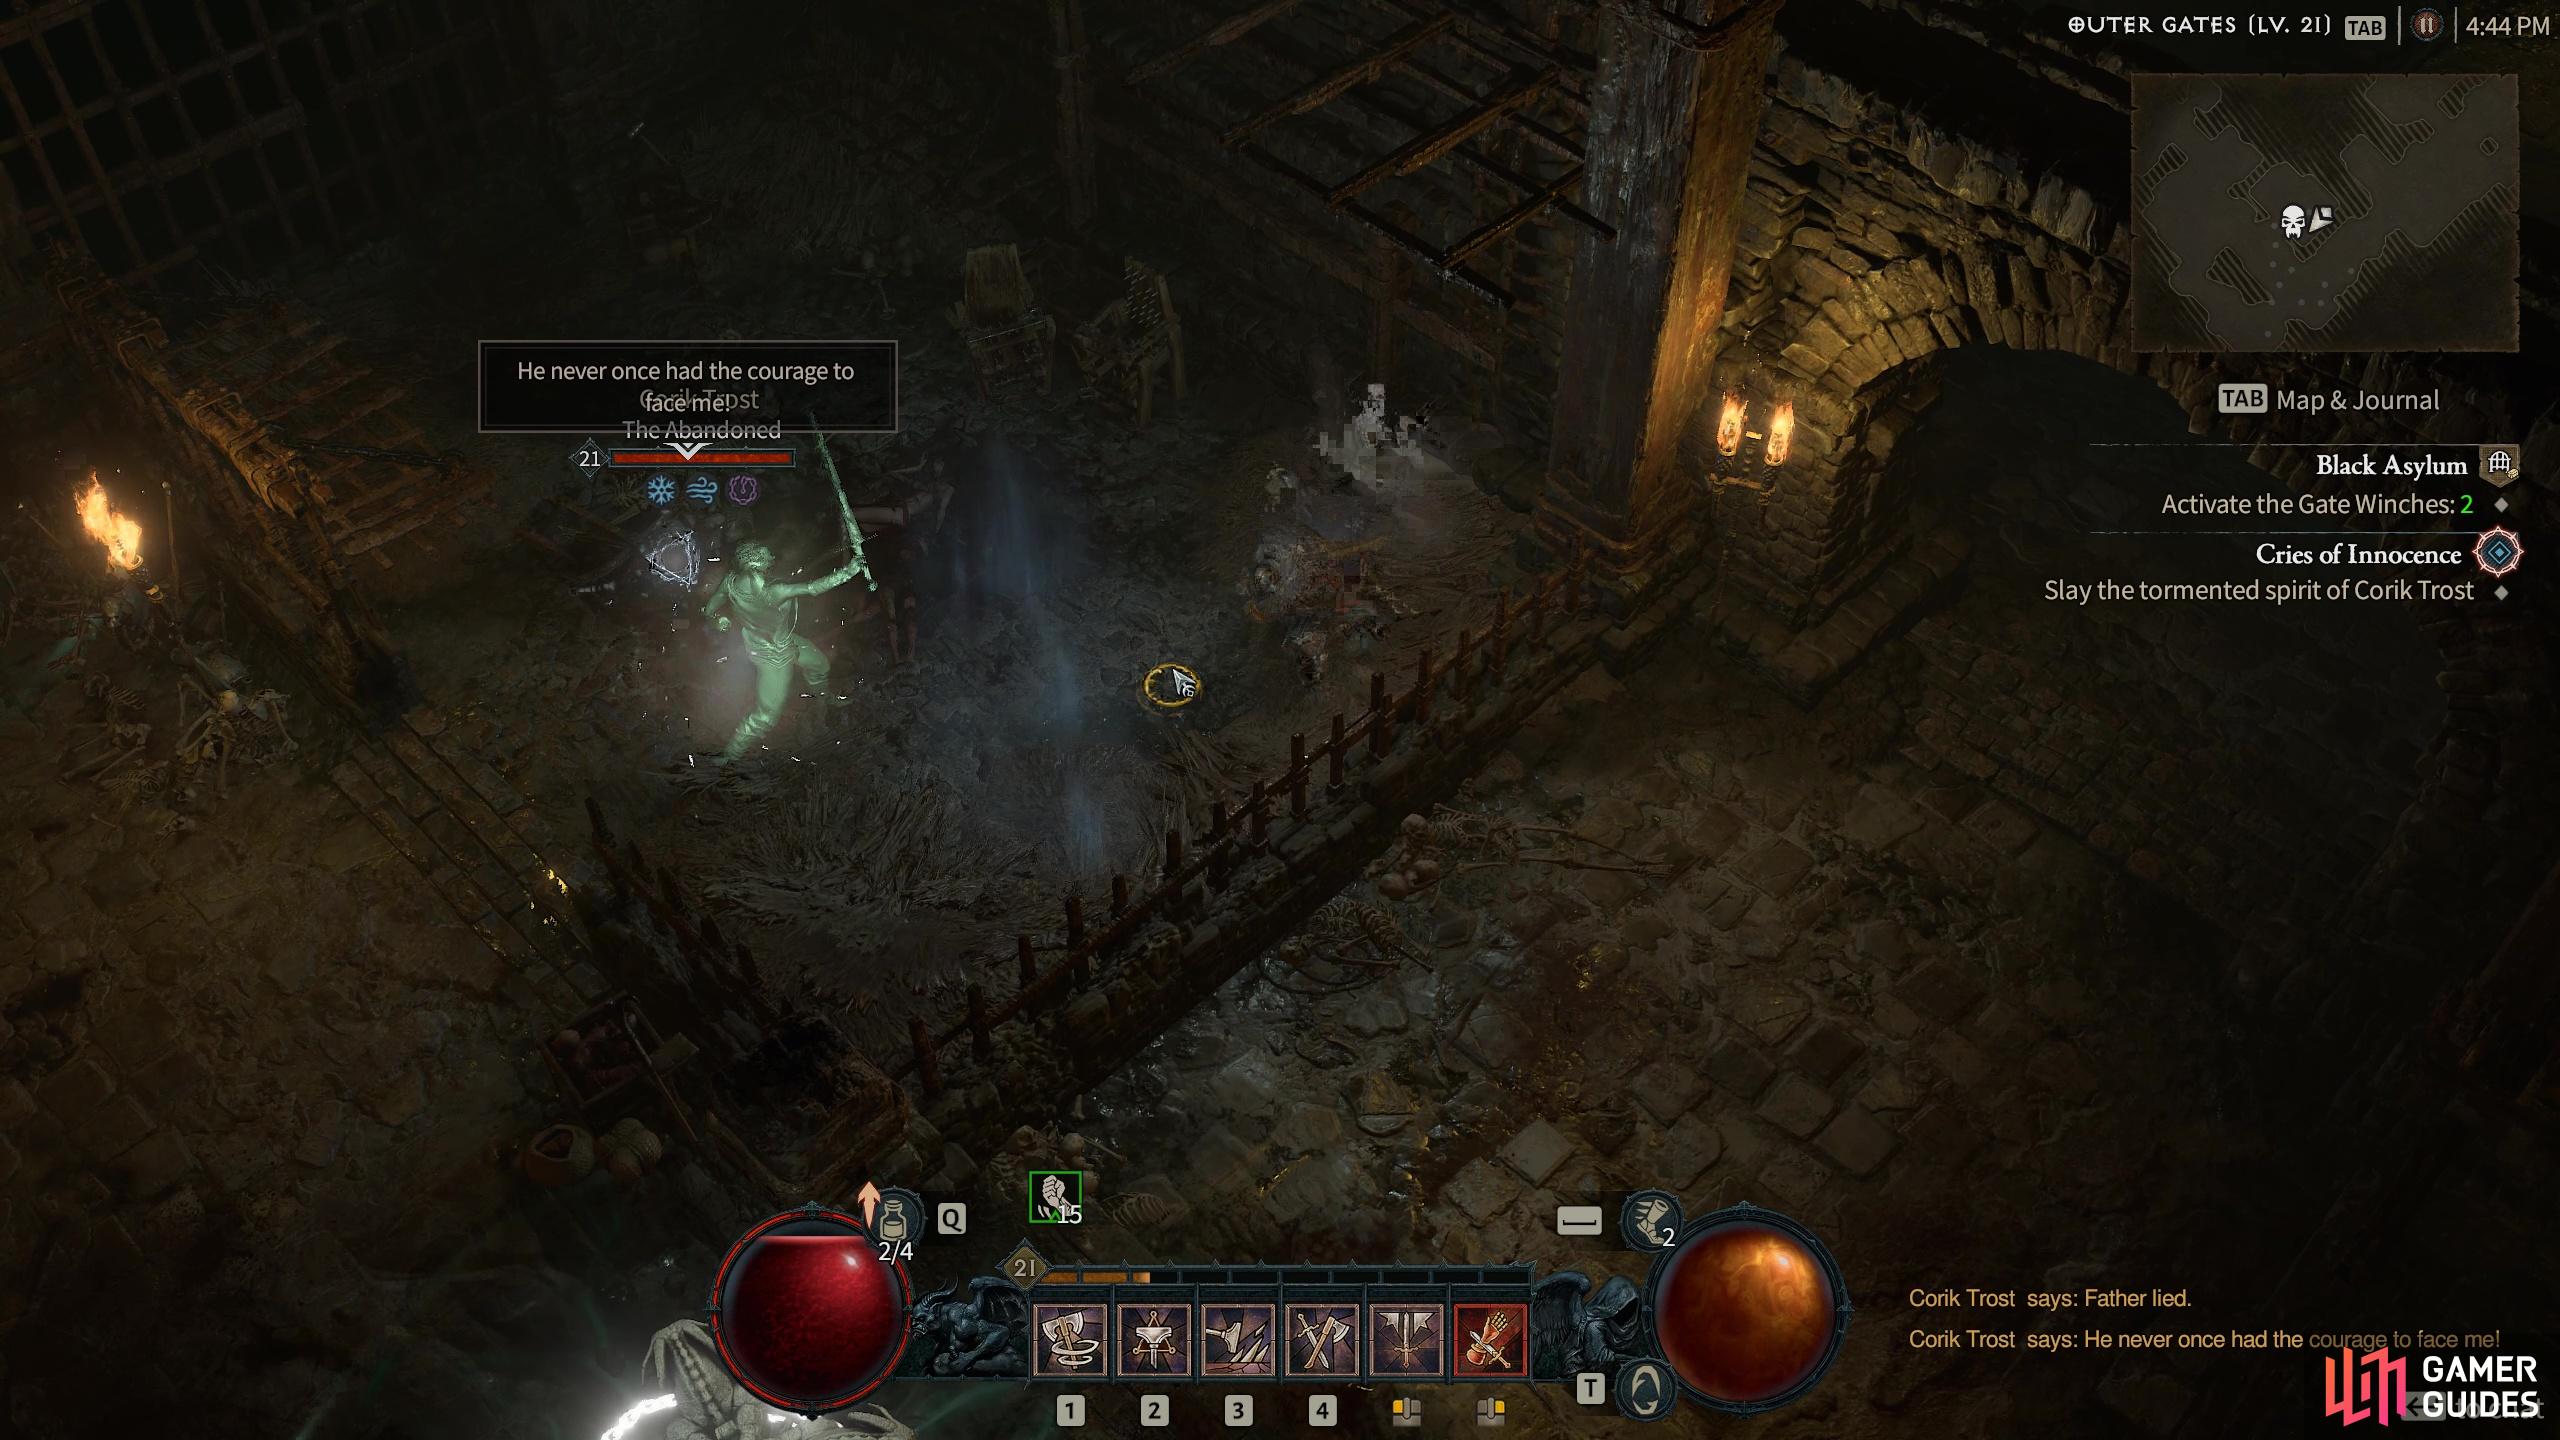
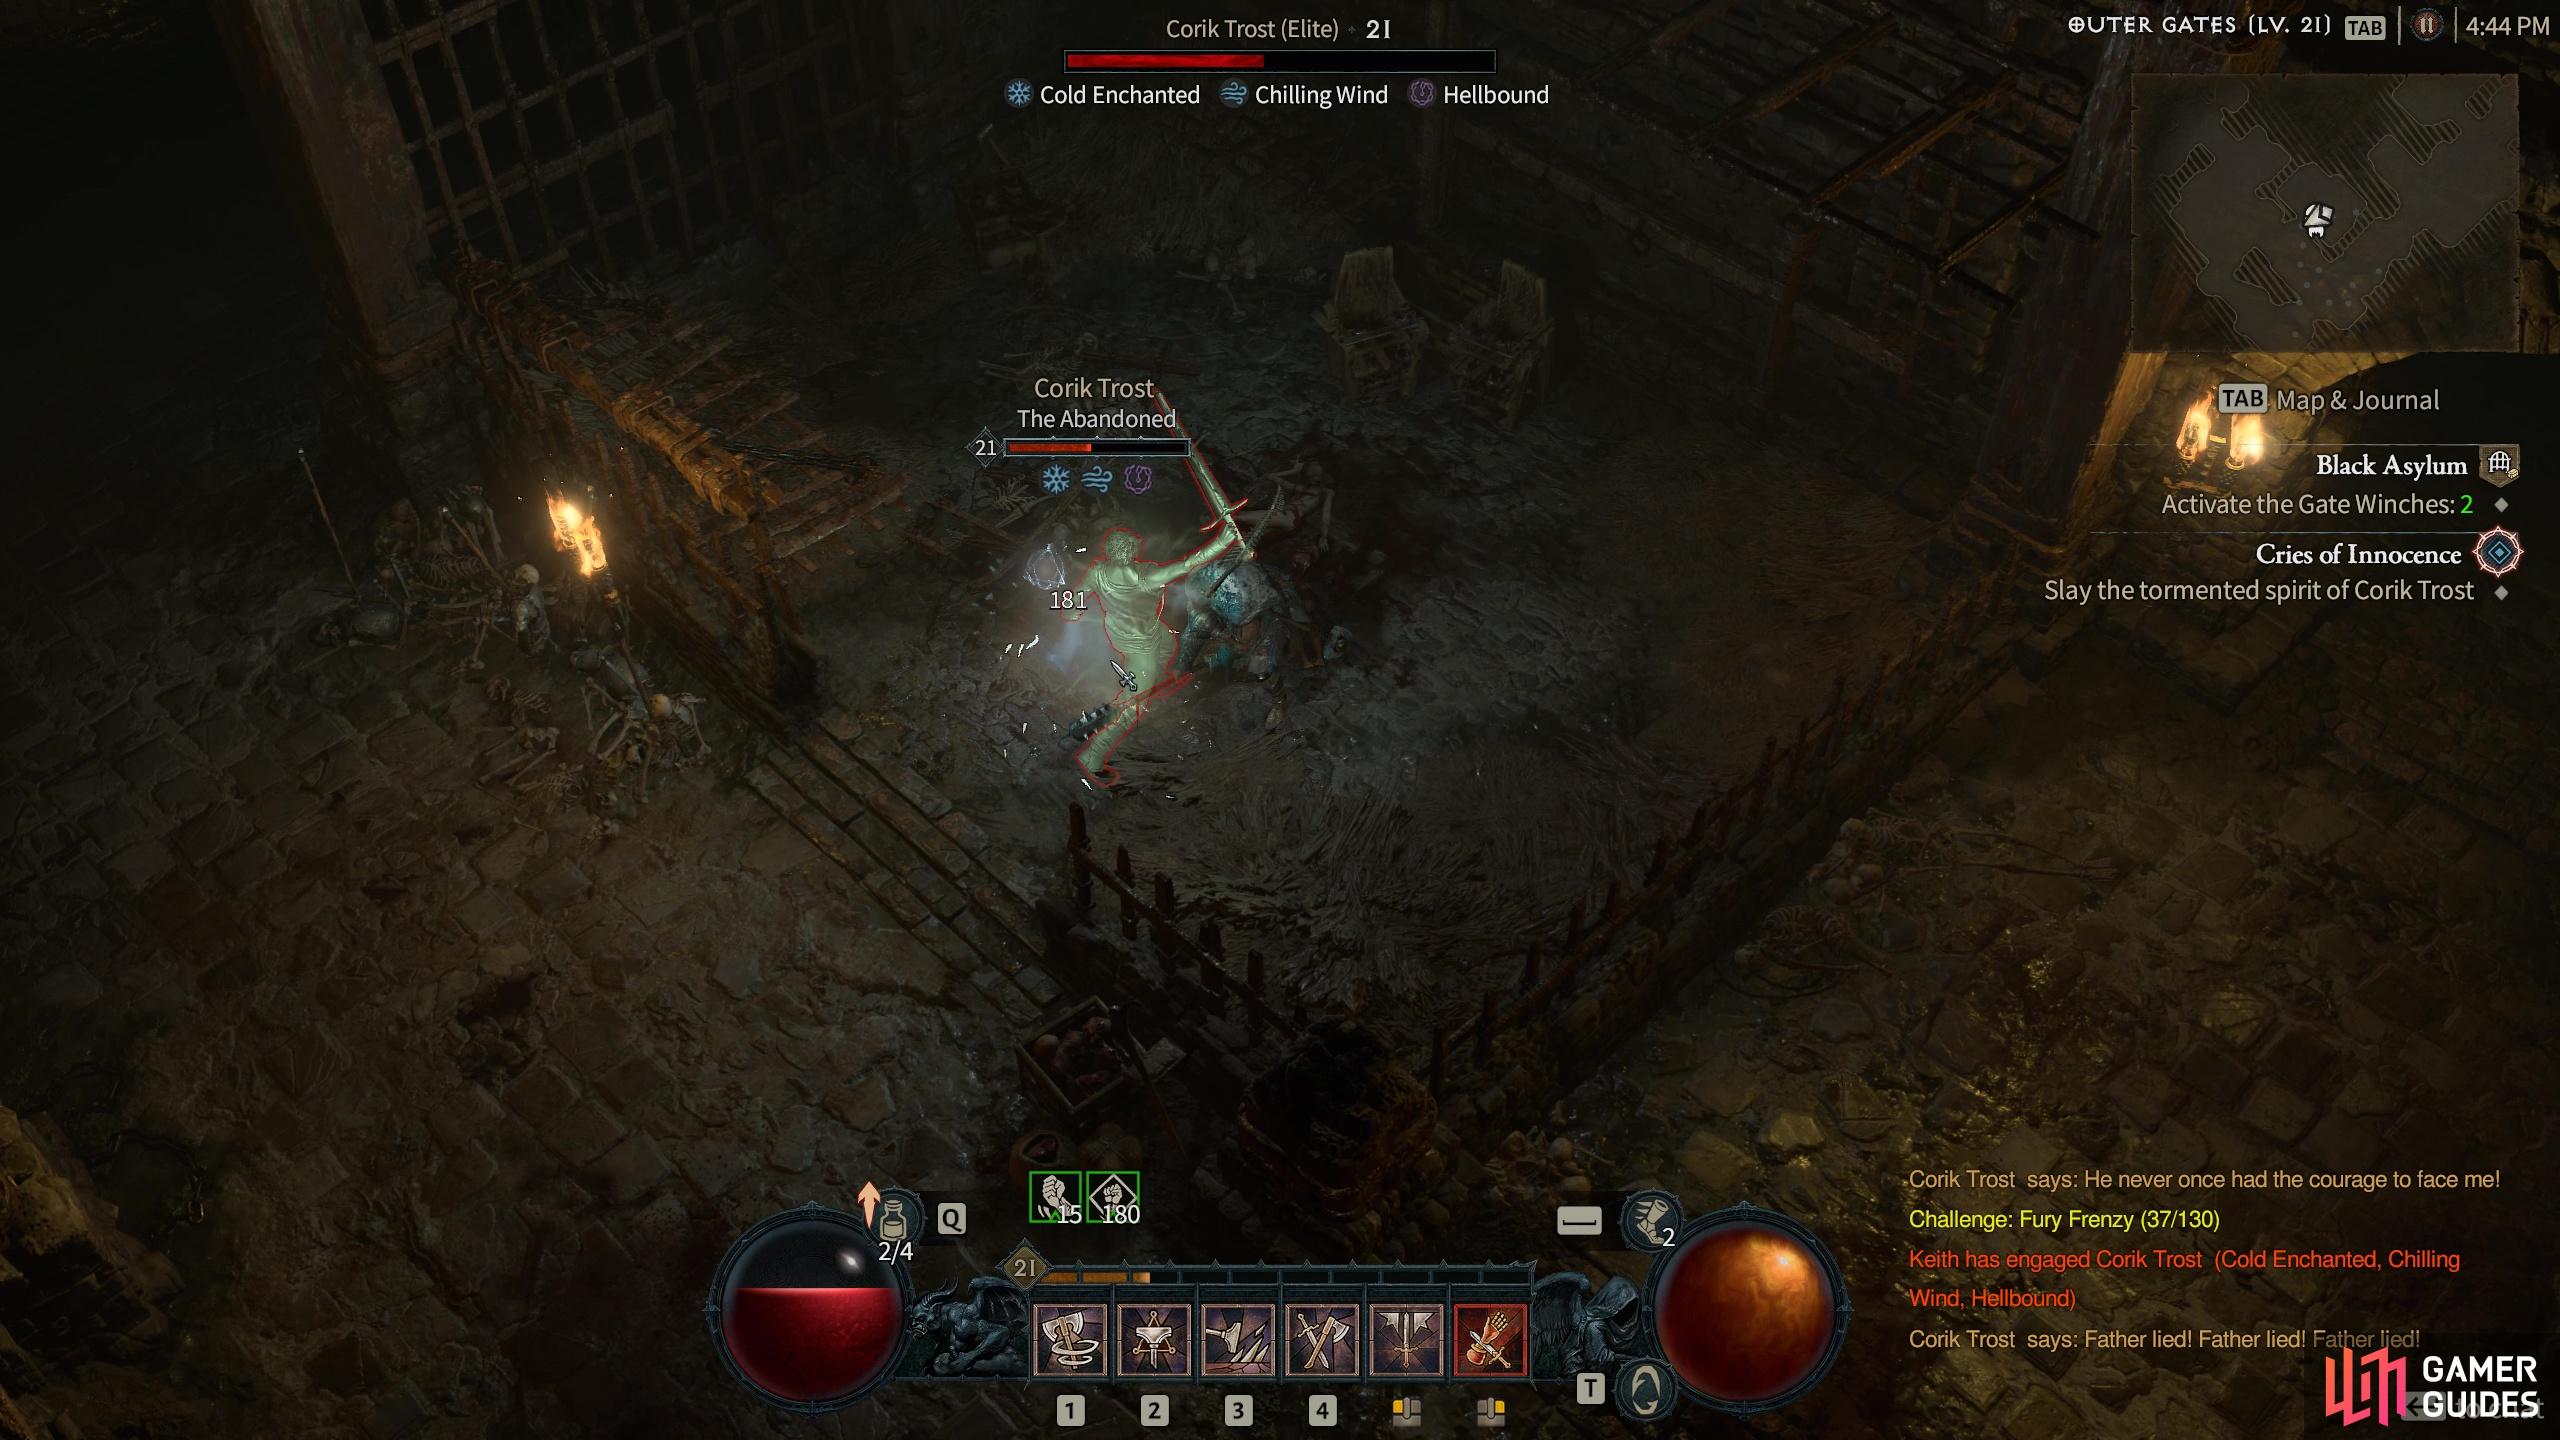
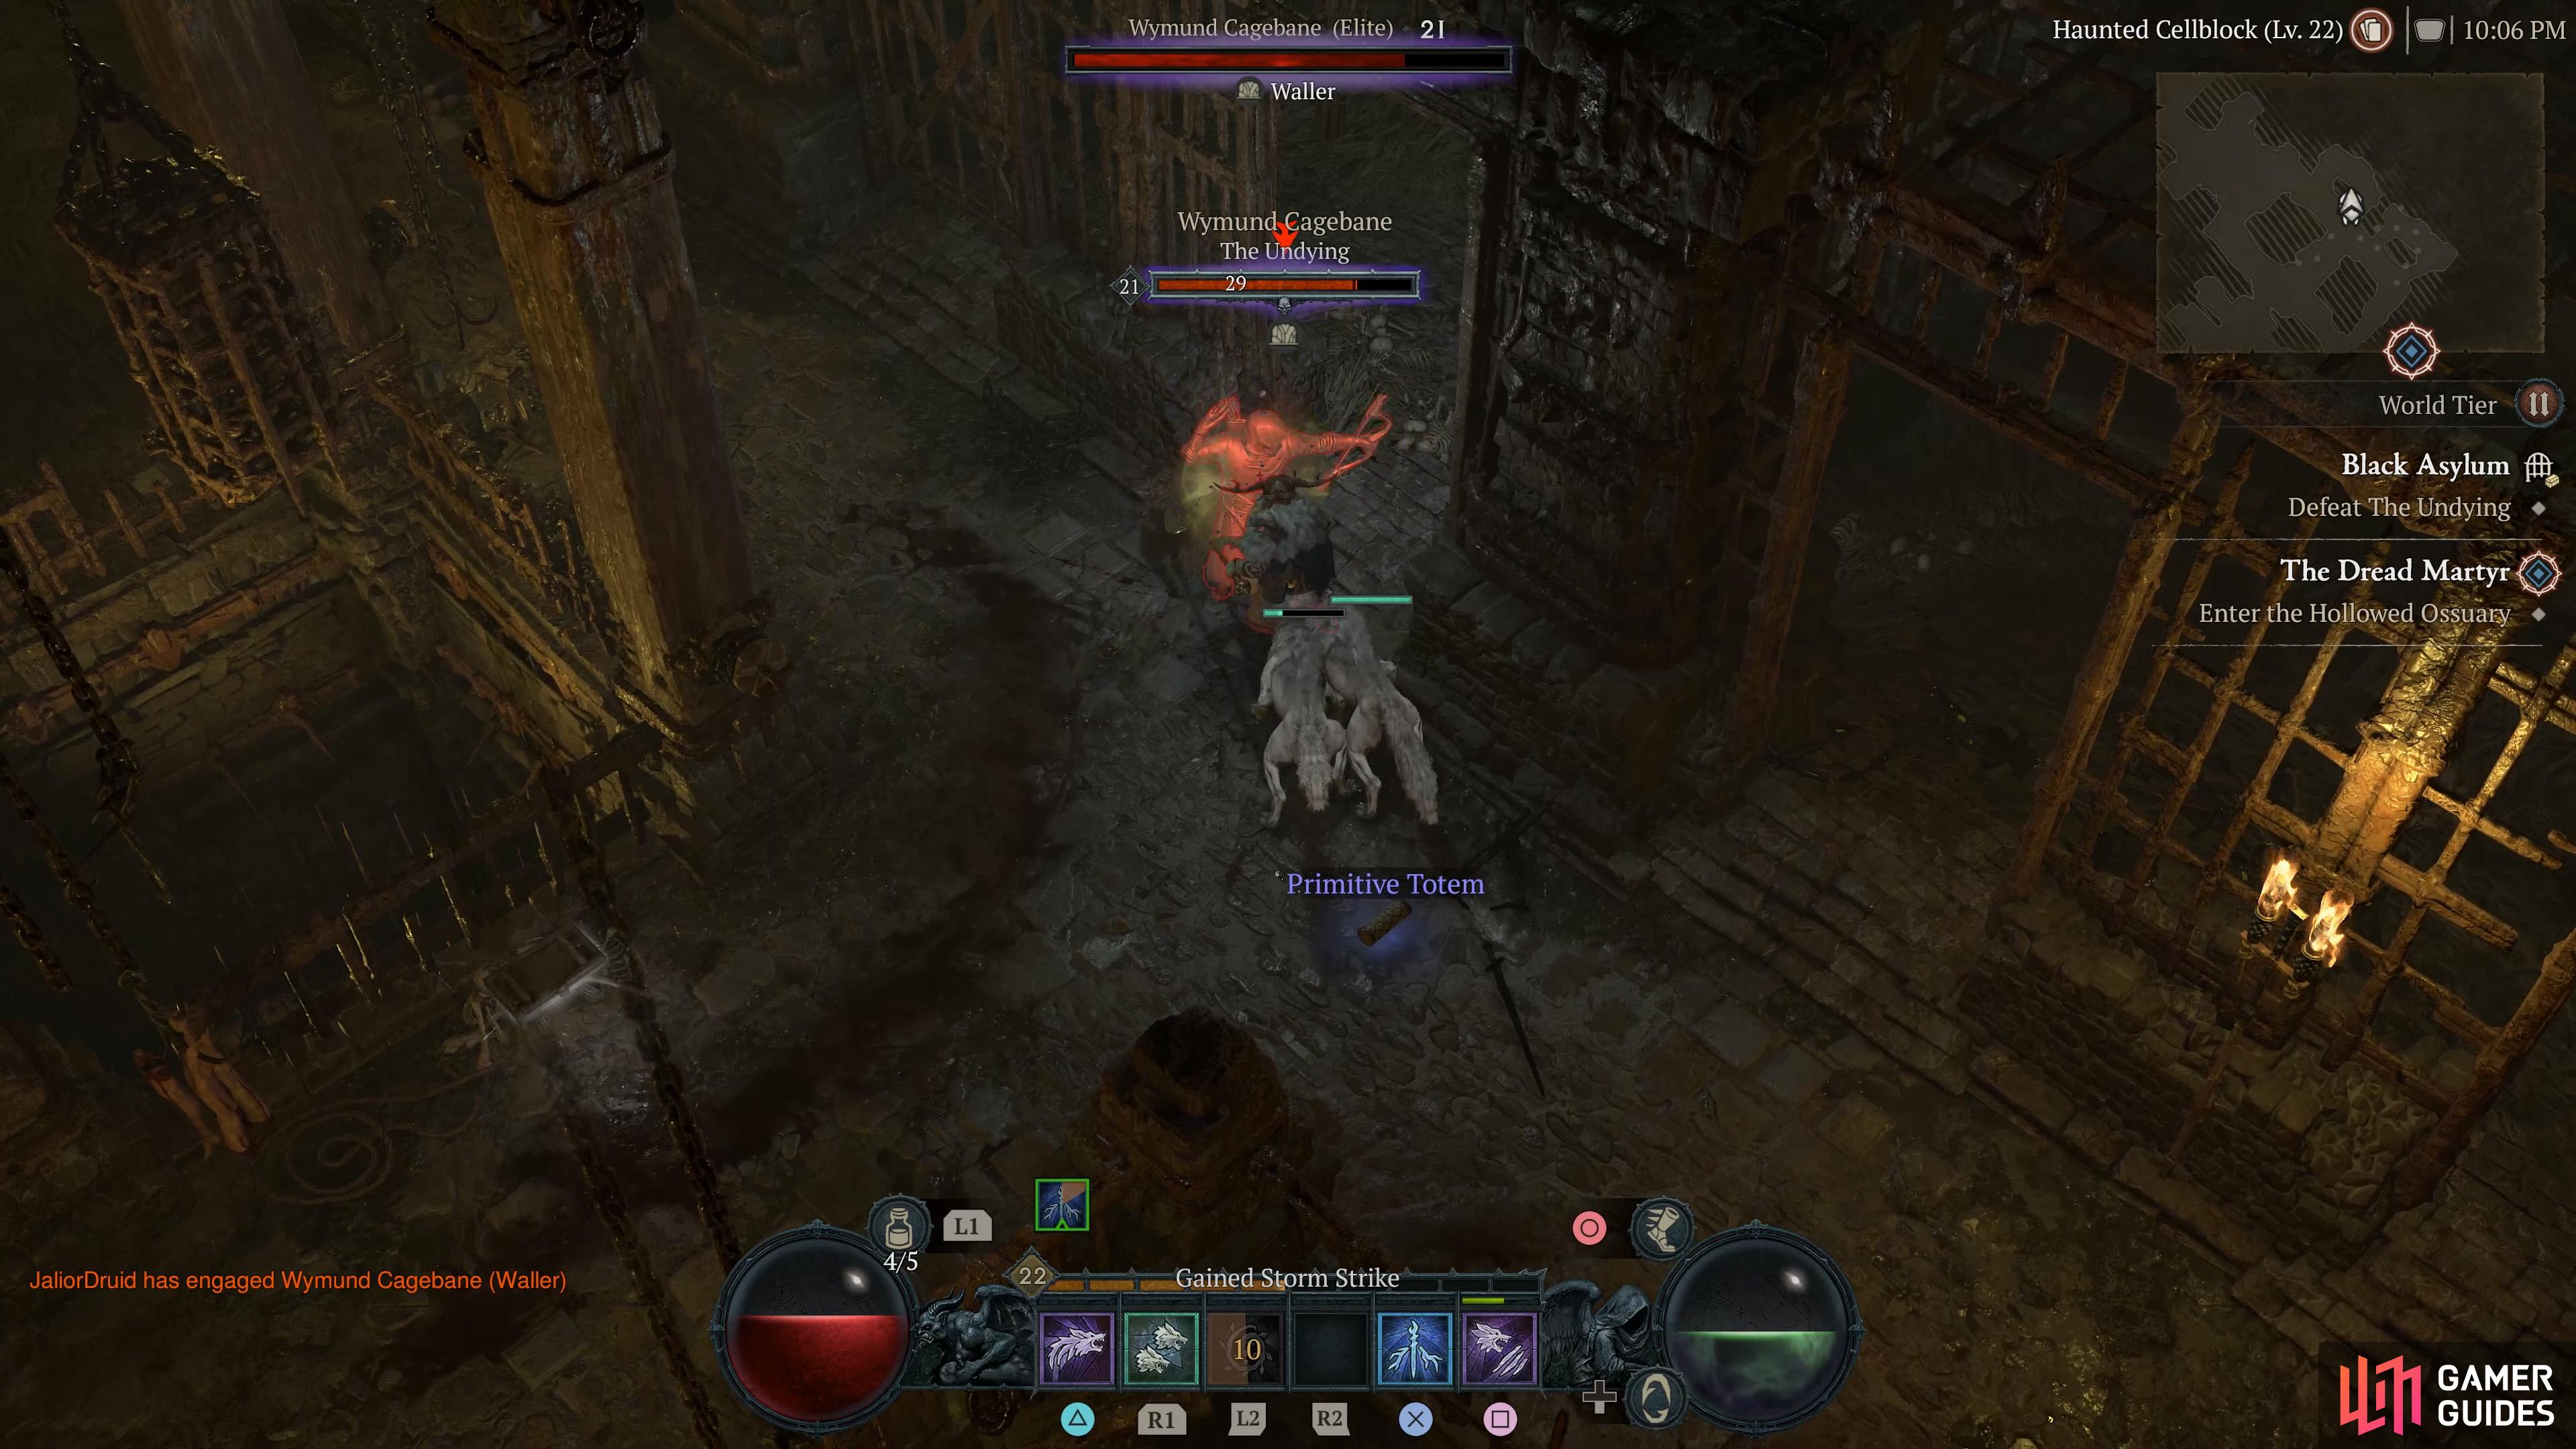
Corik Trost is a dungeon boss of the Black Asylum dungeon and rounds off the side quest, Cries of Innocence, when the young Corik has died in the asylum after being imprisoned there as a child for murder.
To get to Corik you will have to battle your way through a whole host of different ghost enemies.
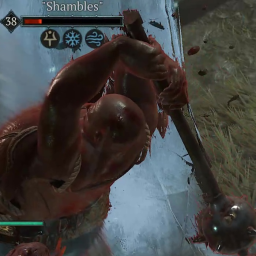
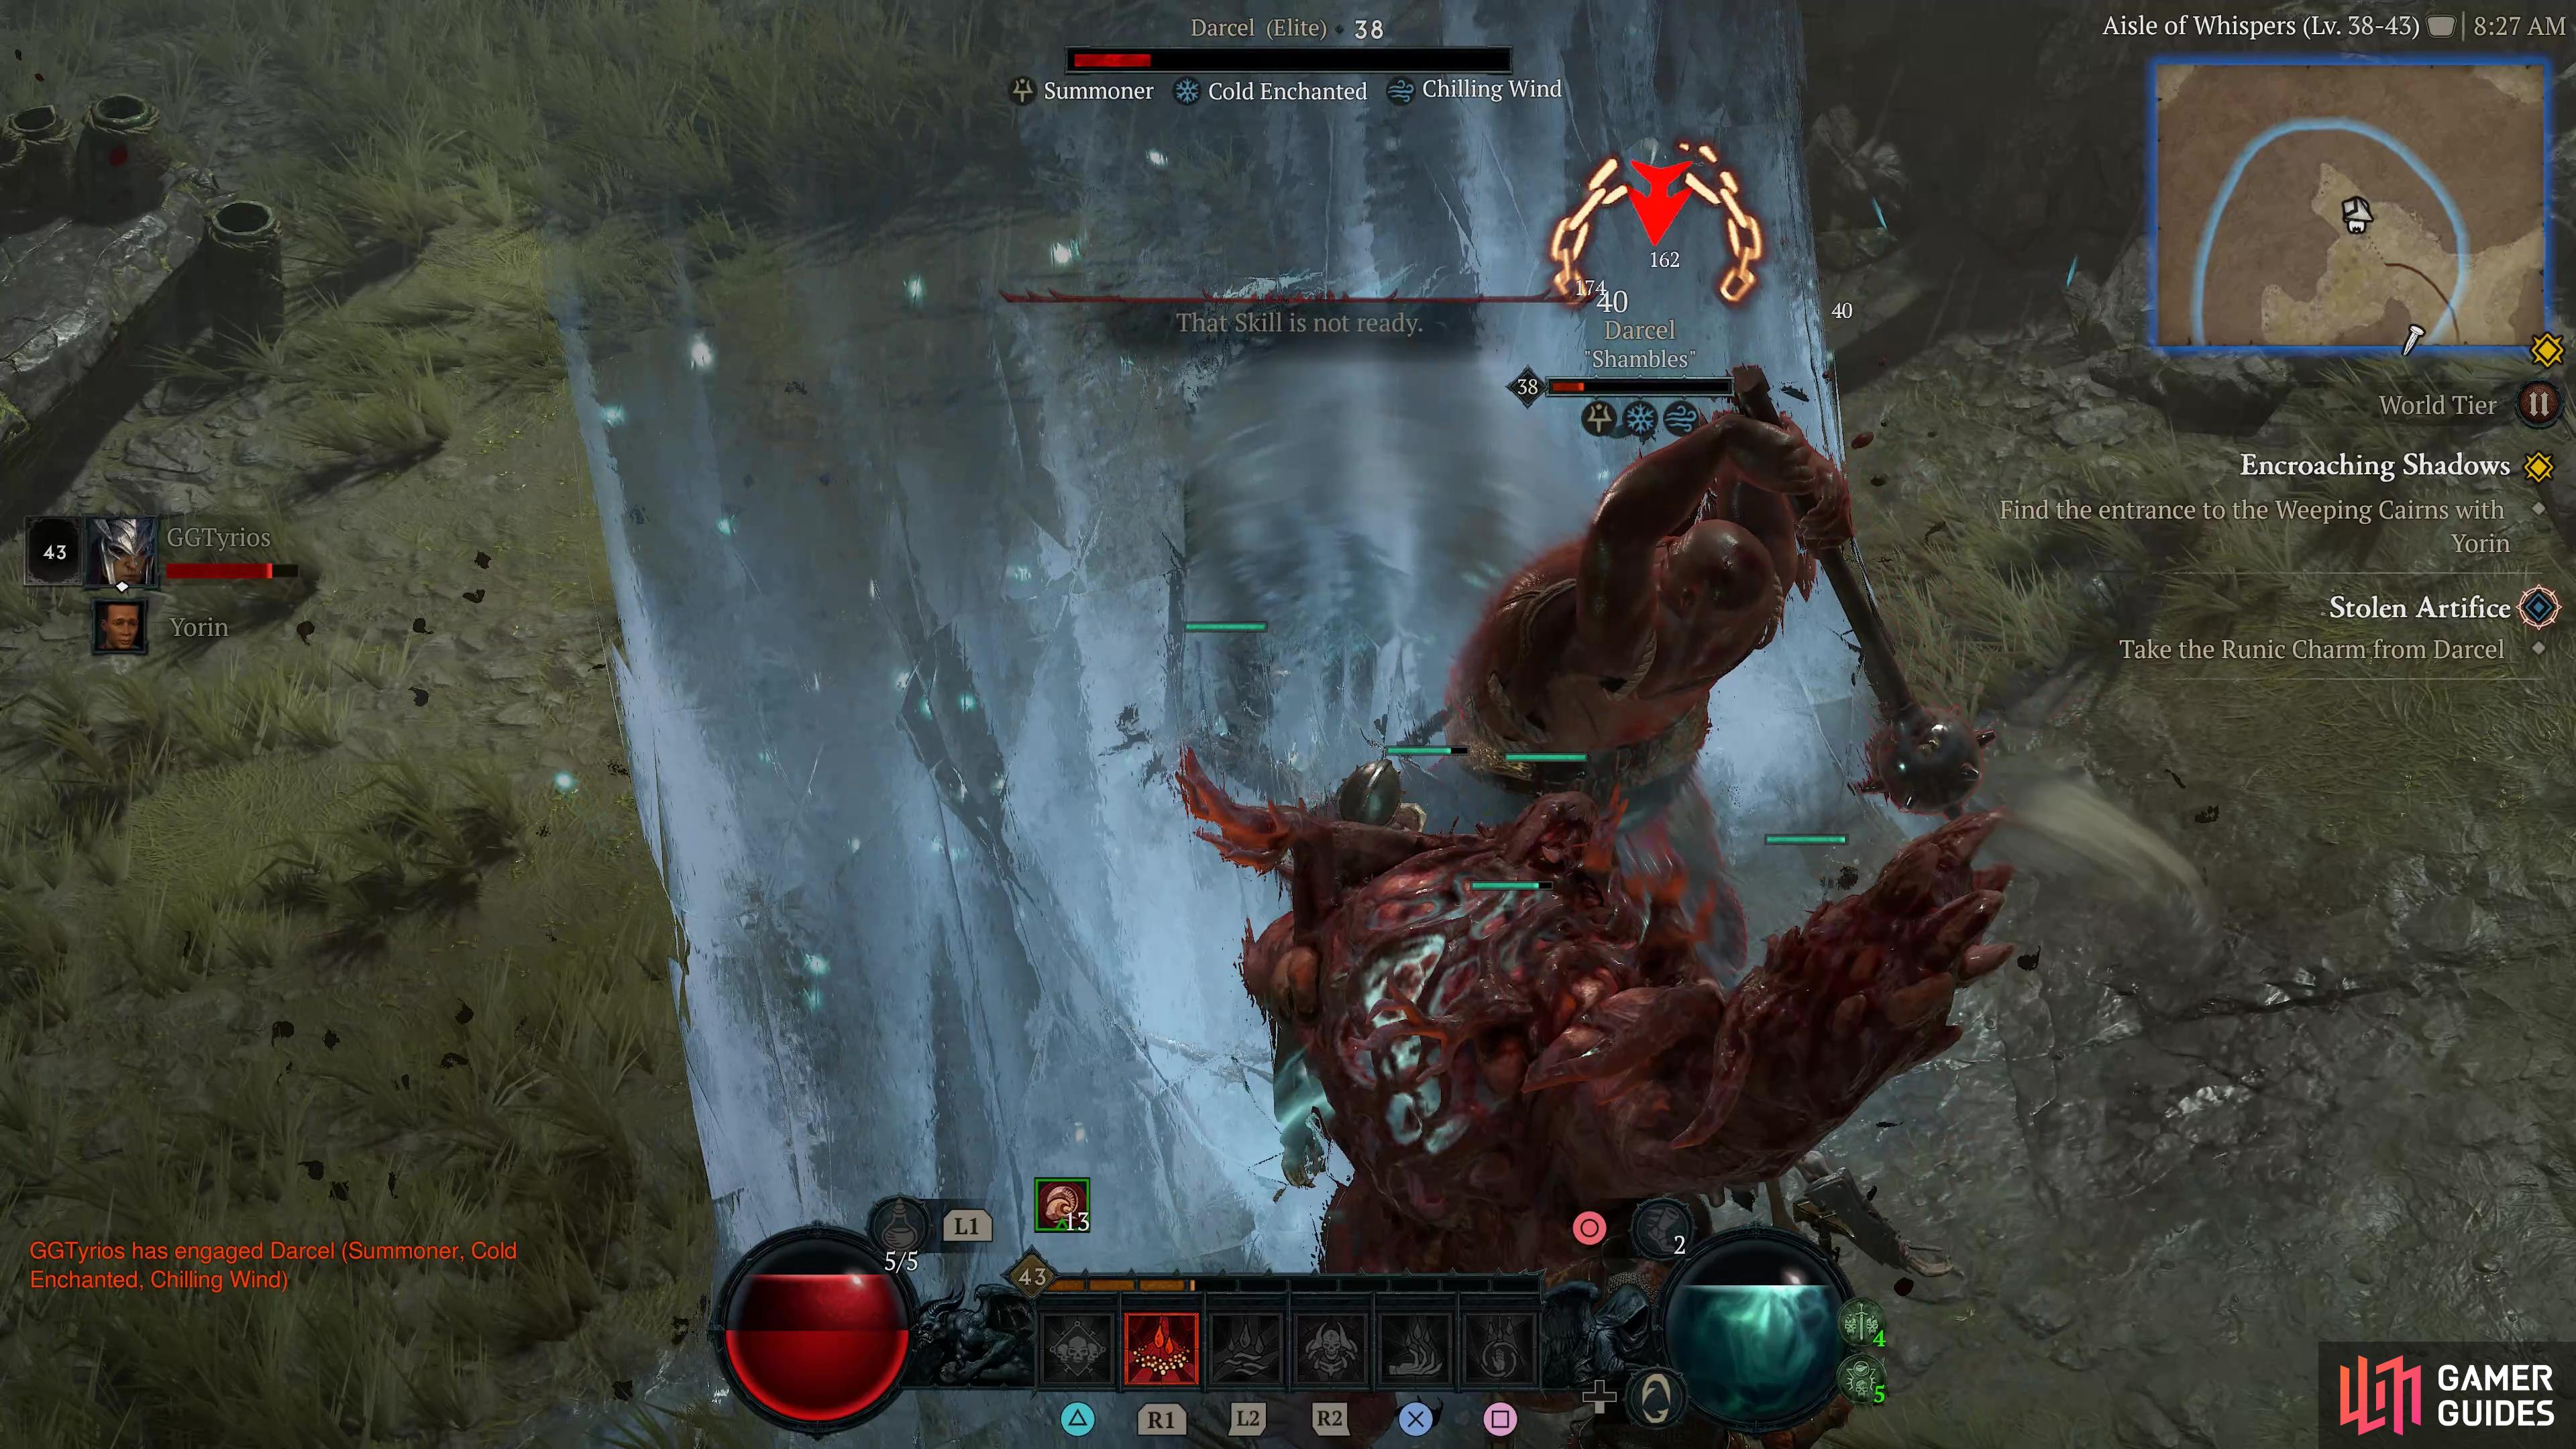
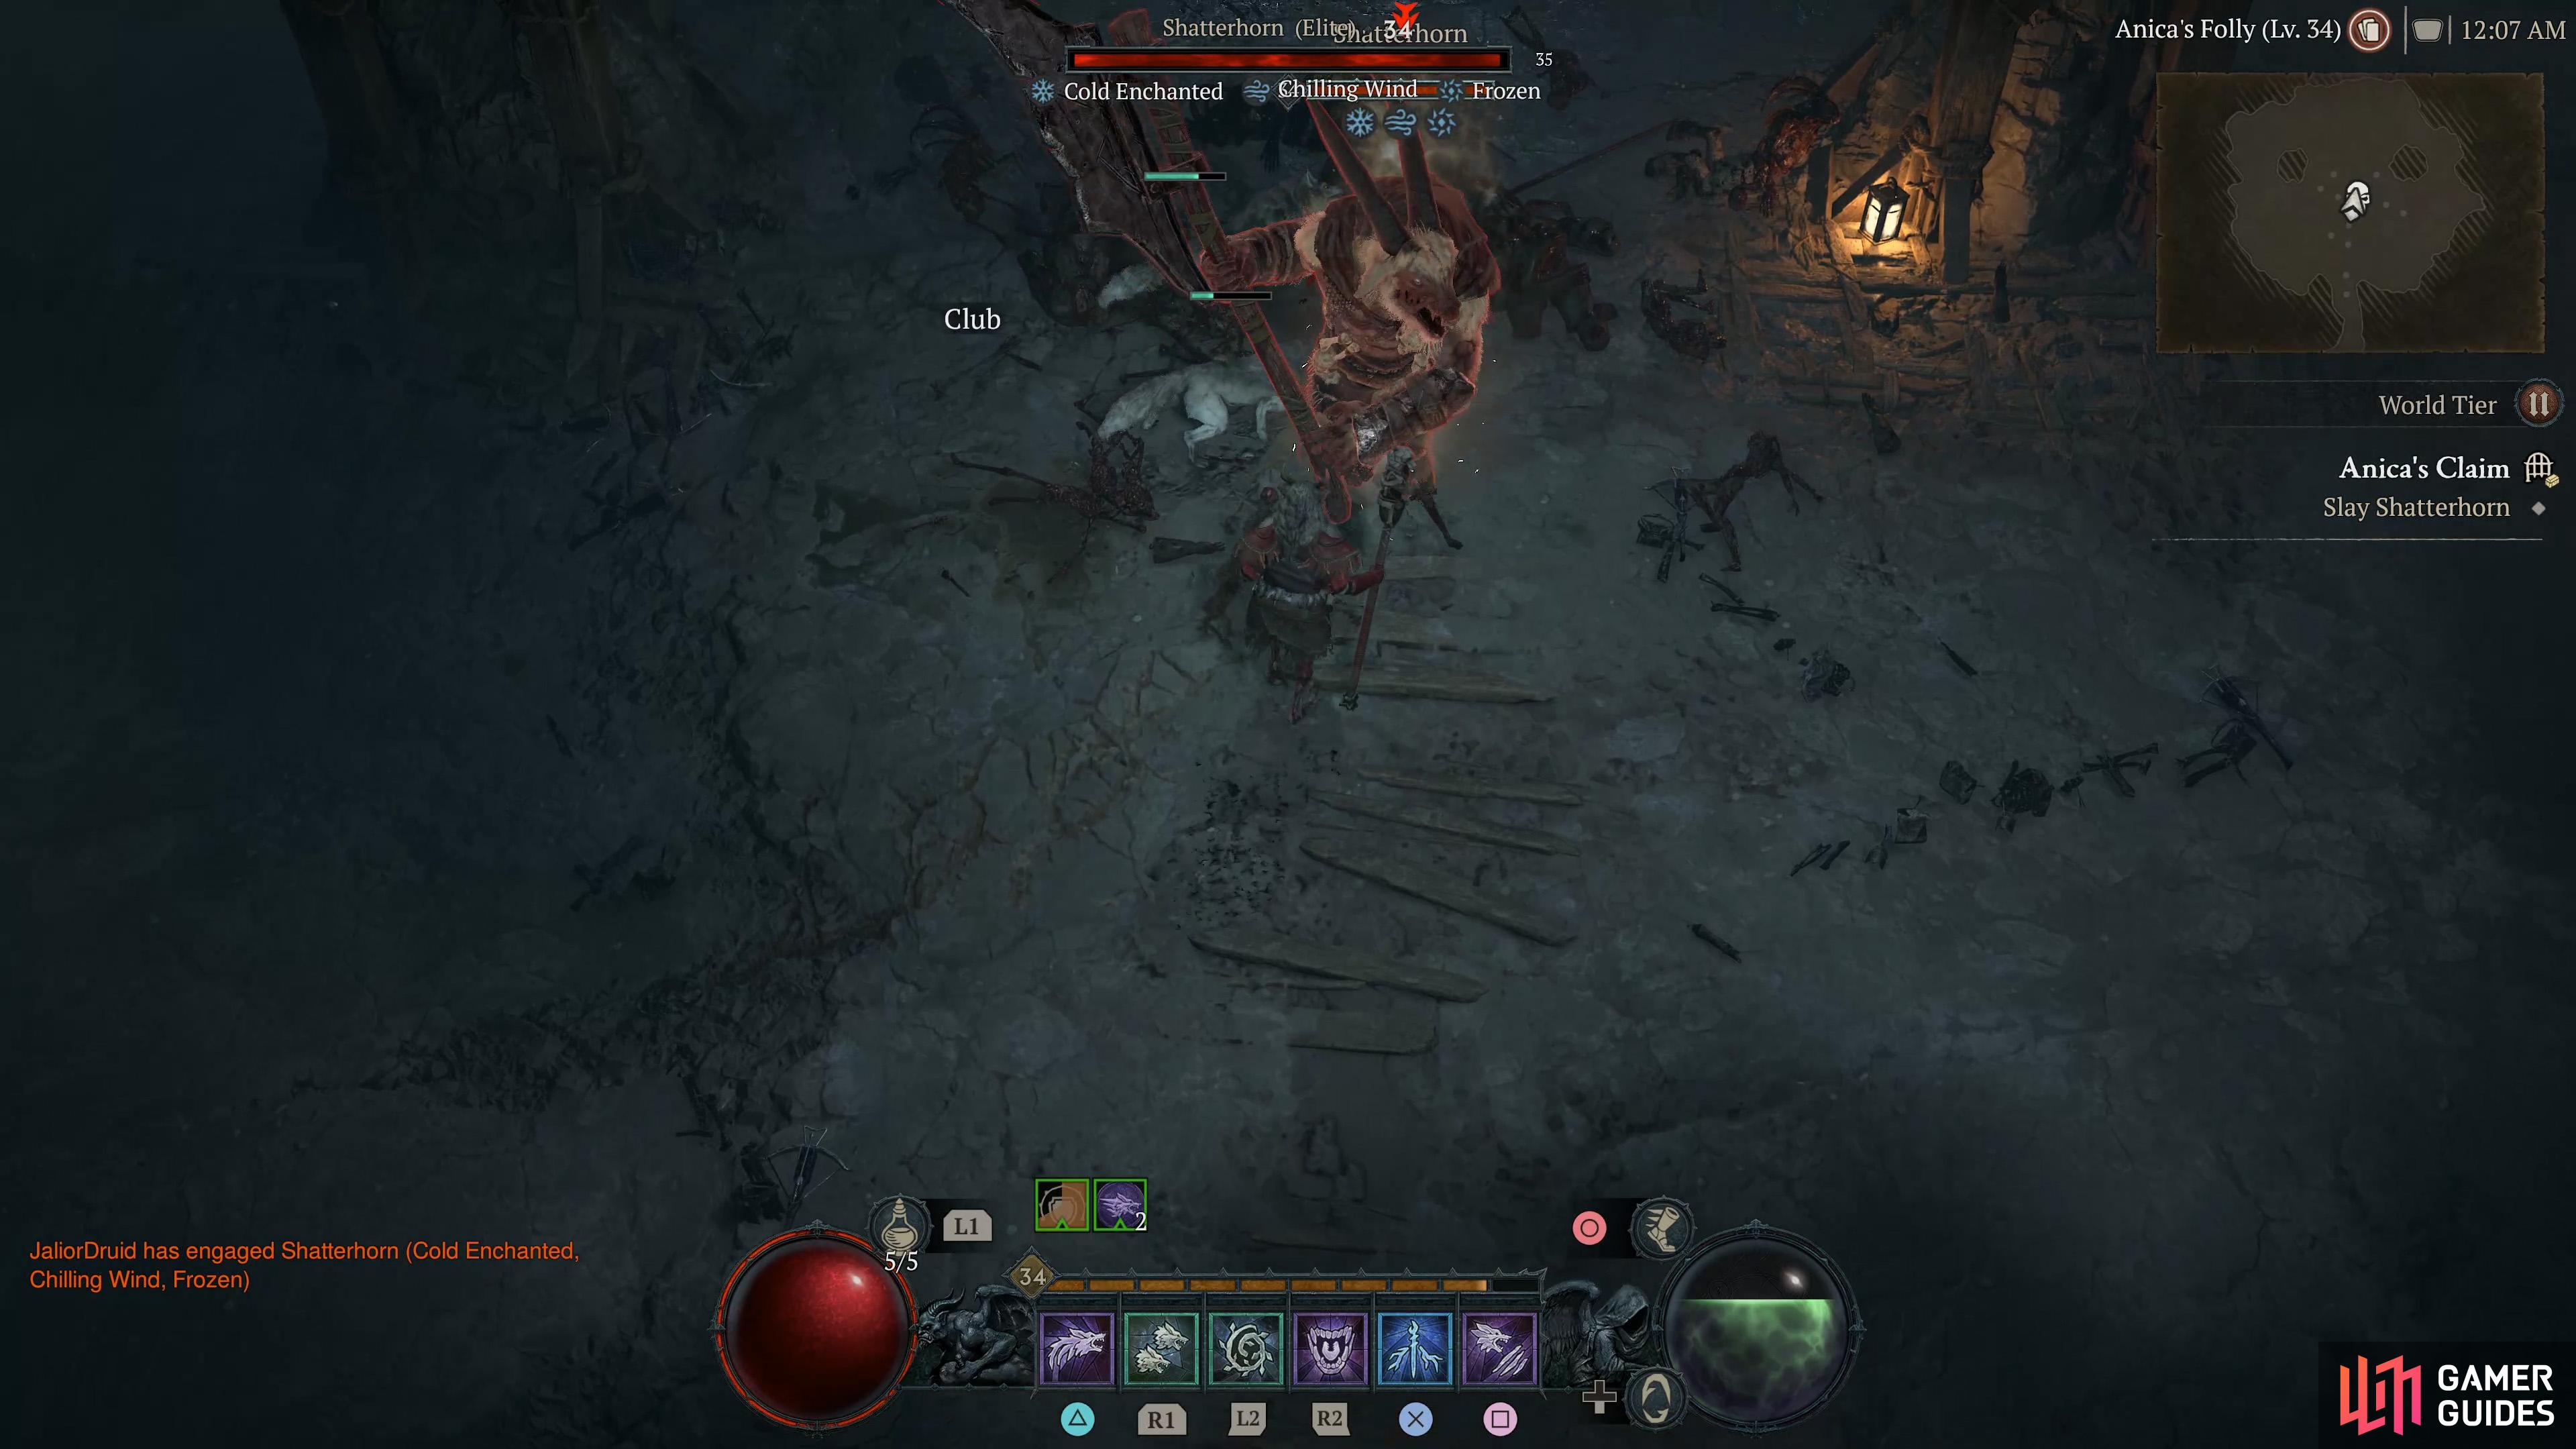
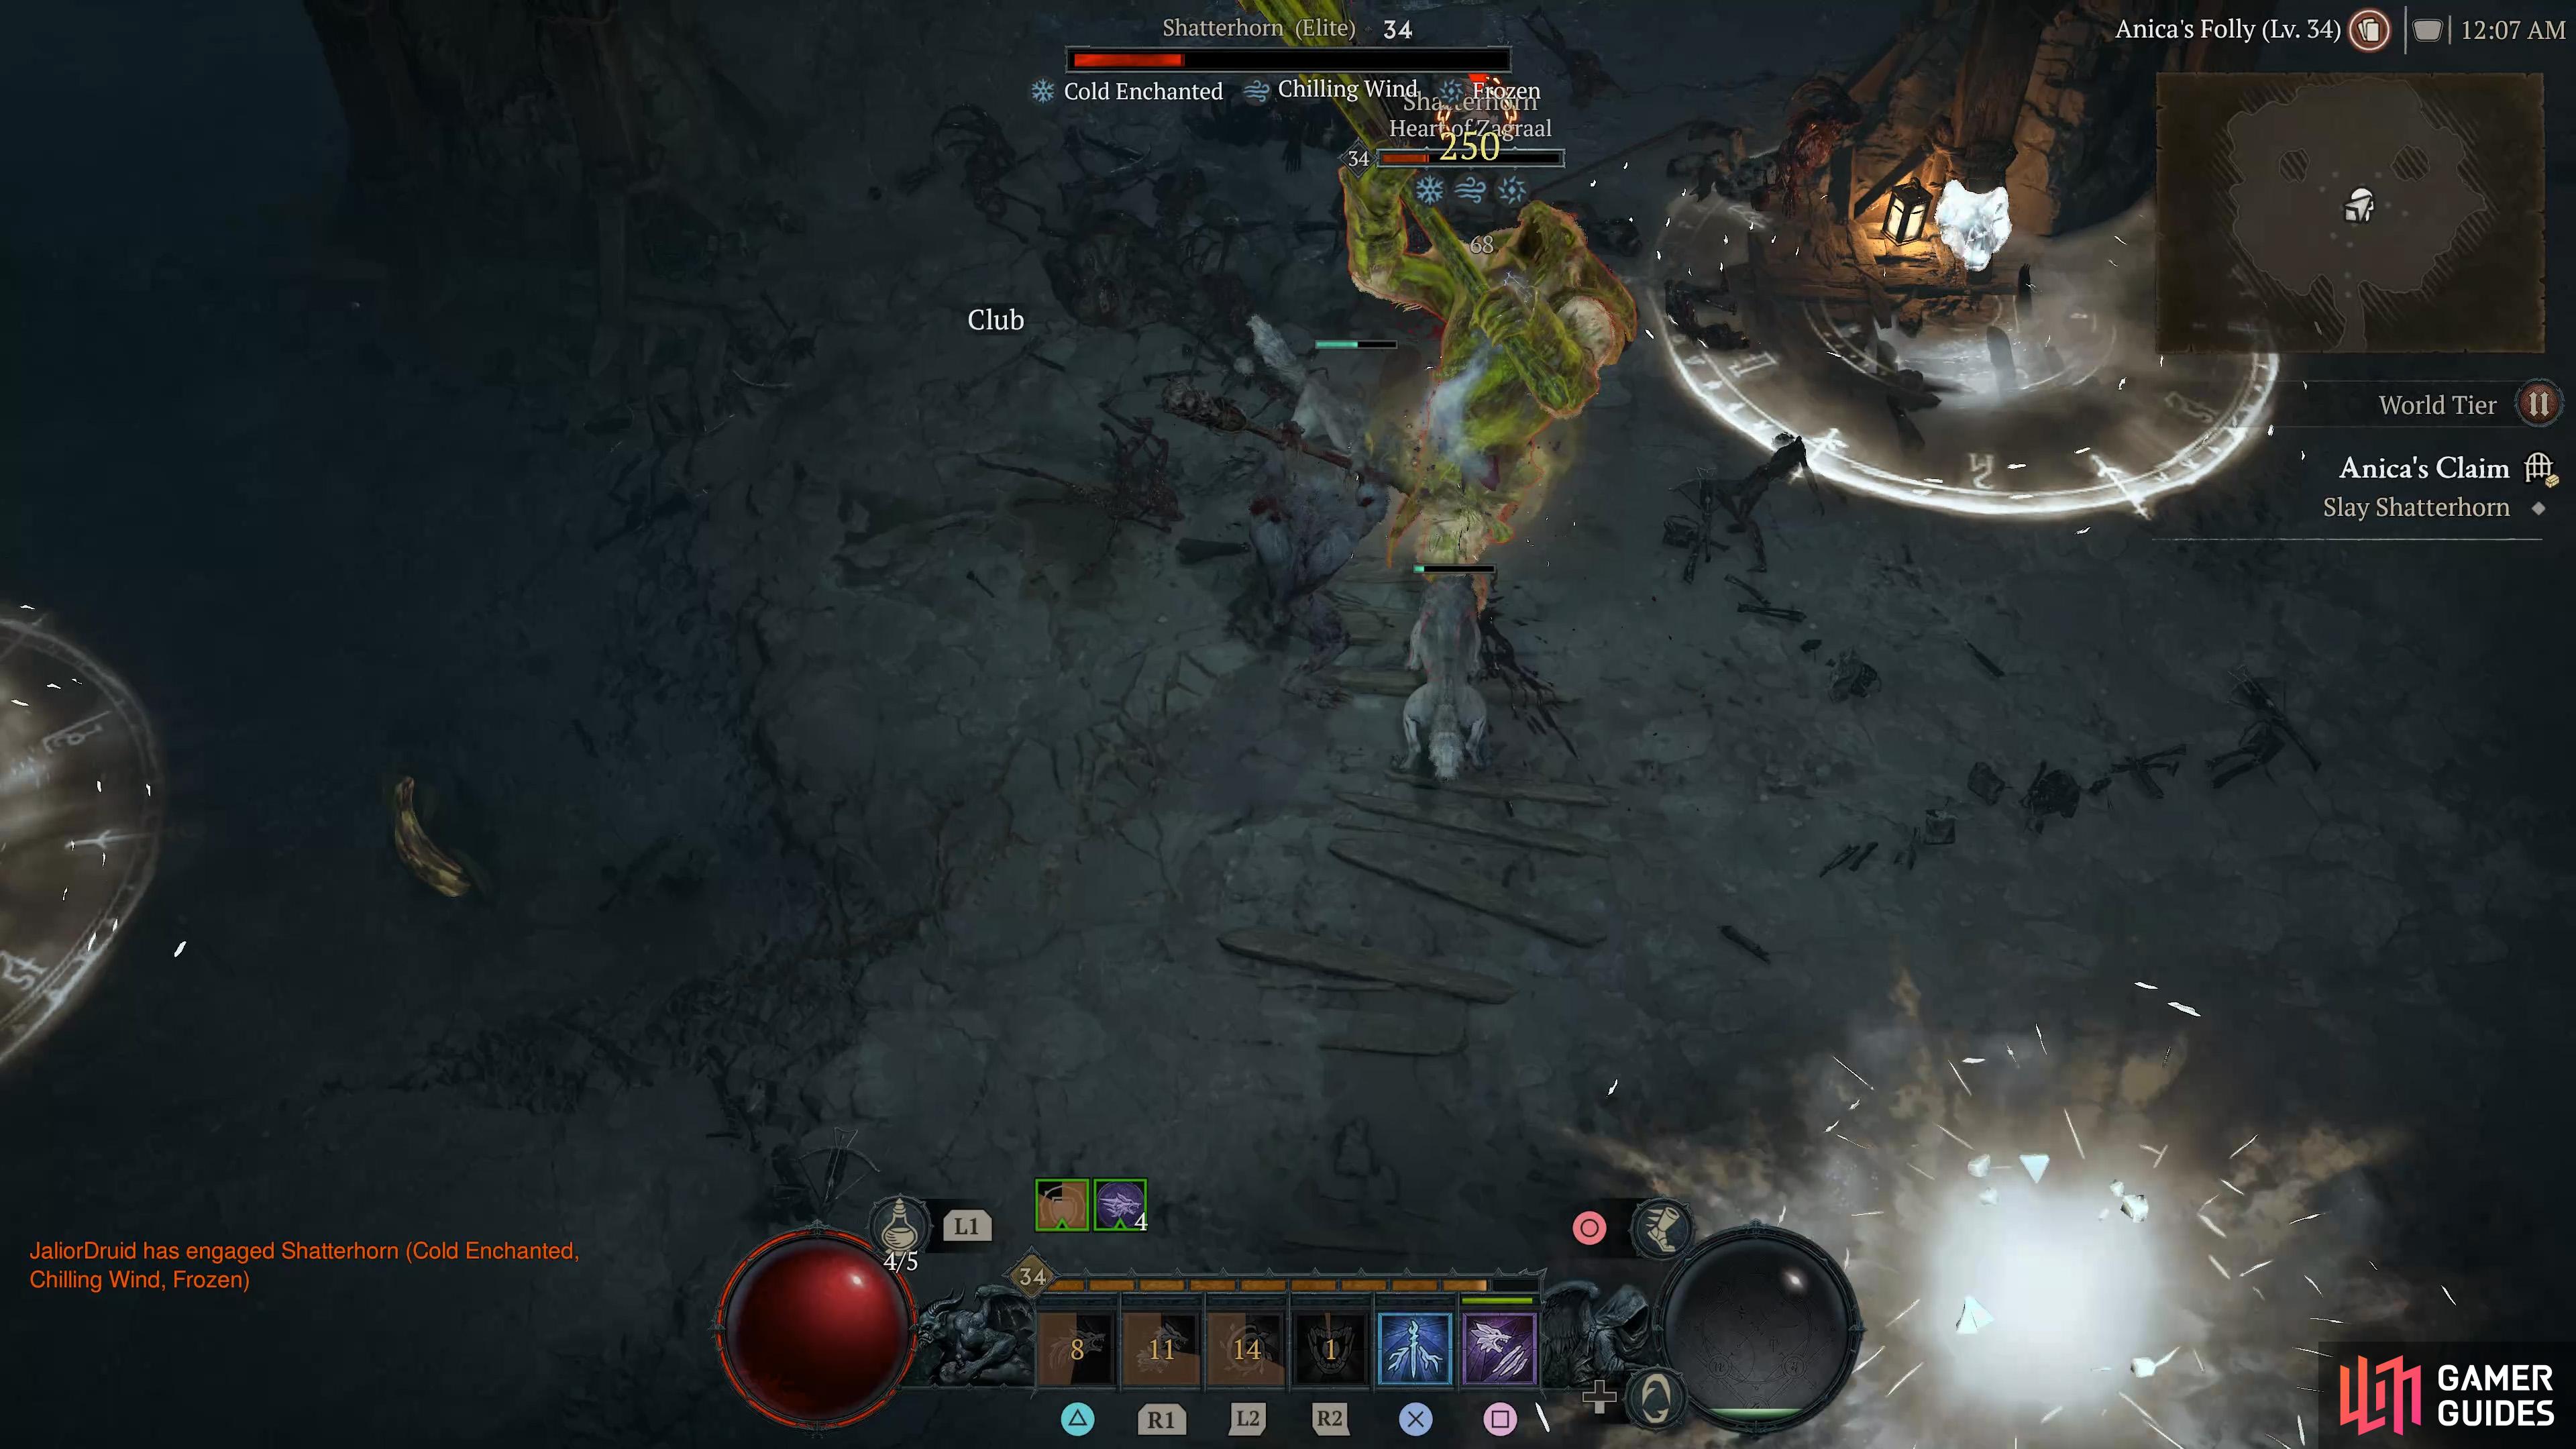
Darcel can be found in the north part of the Aisle of Whispers. He is a massive Giant-like enemy who is Cold-Enchanted and can summon others to his aid. He wields a large mace that he swings with both hands for massive damage.
The charm thief from the Stolen Artiface side quest.
Detailed Location
Aisle of Whispers, Scosglen during the Stolen Artifice side quest.
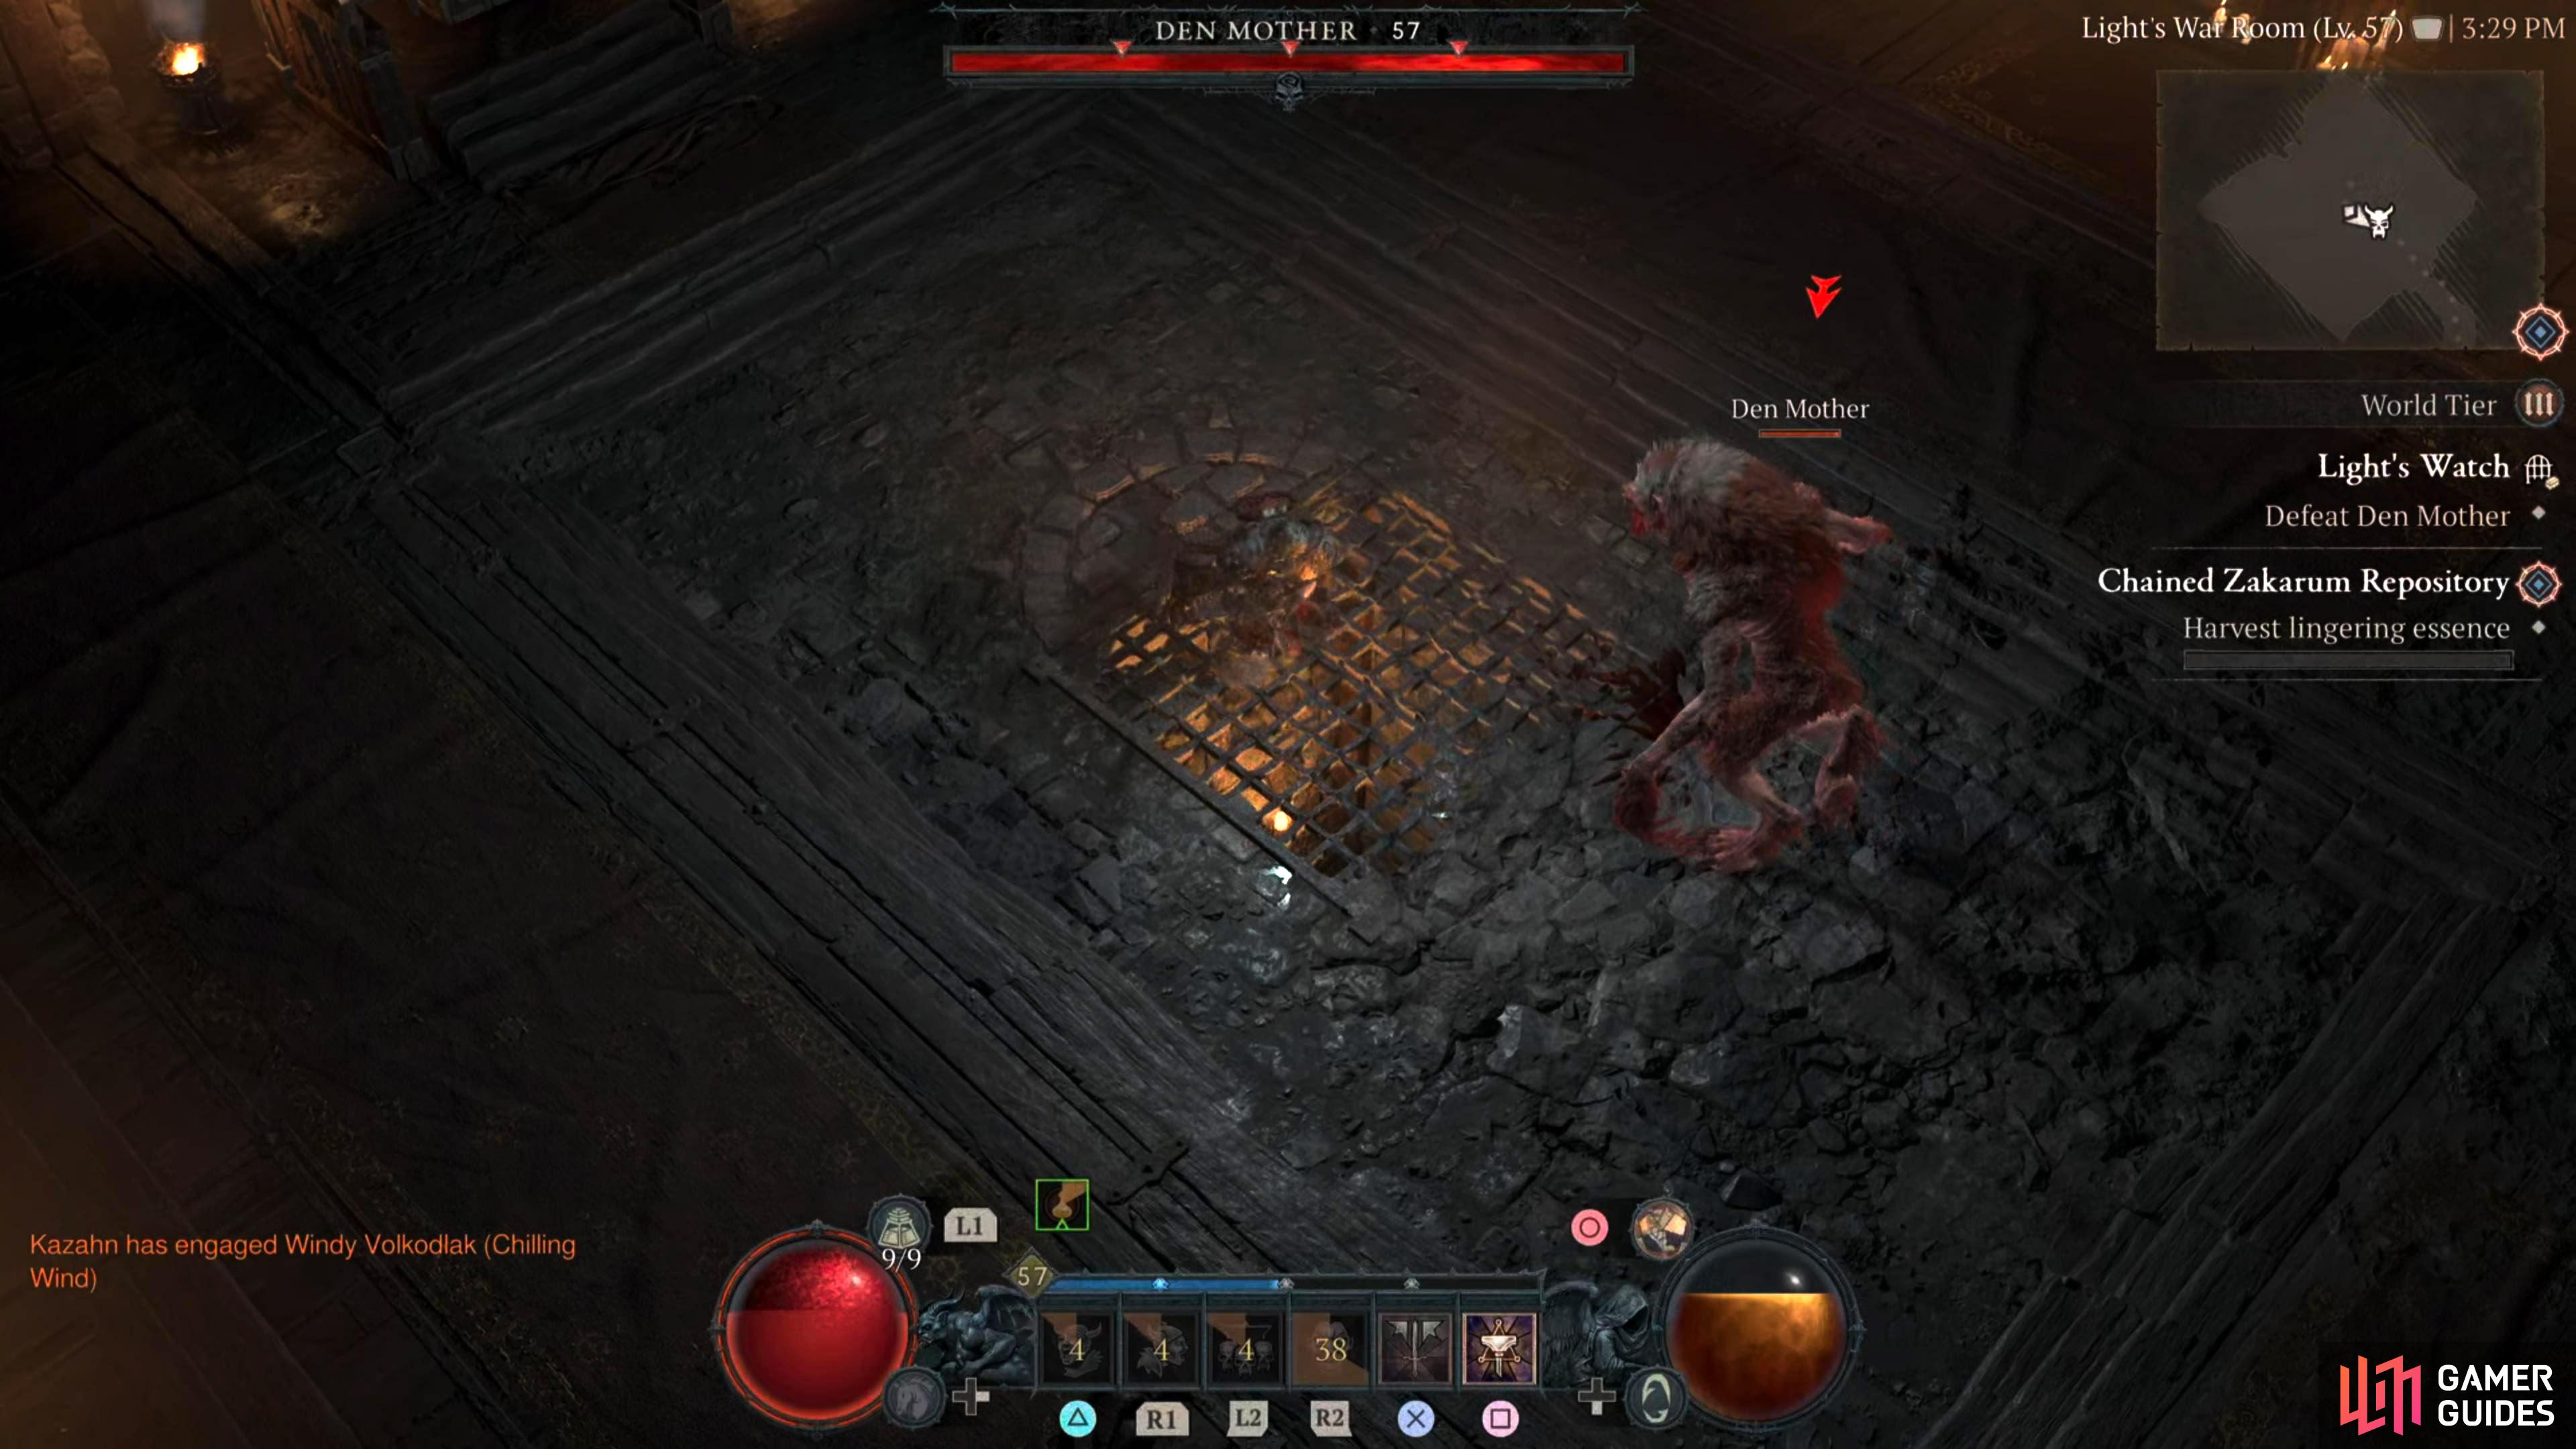
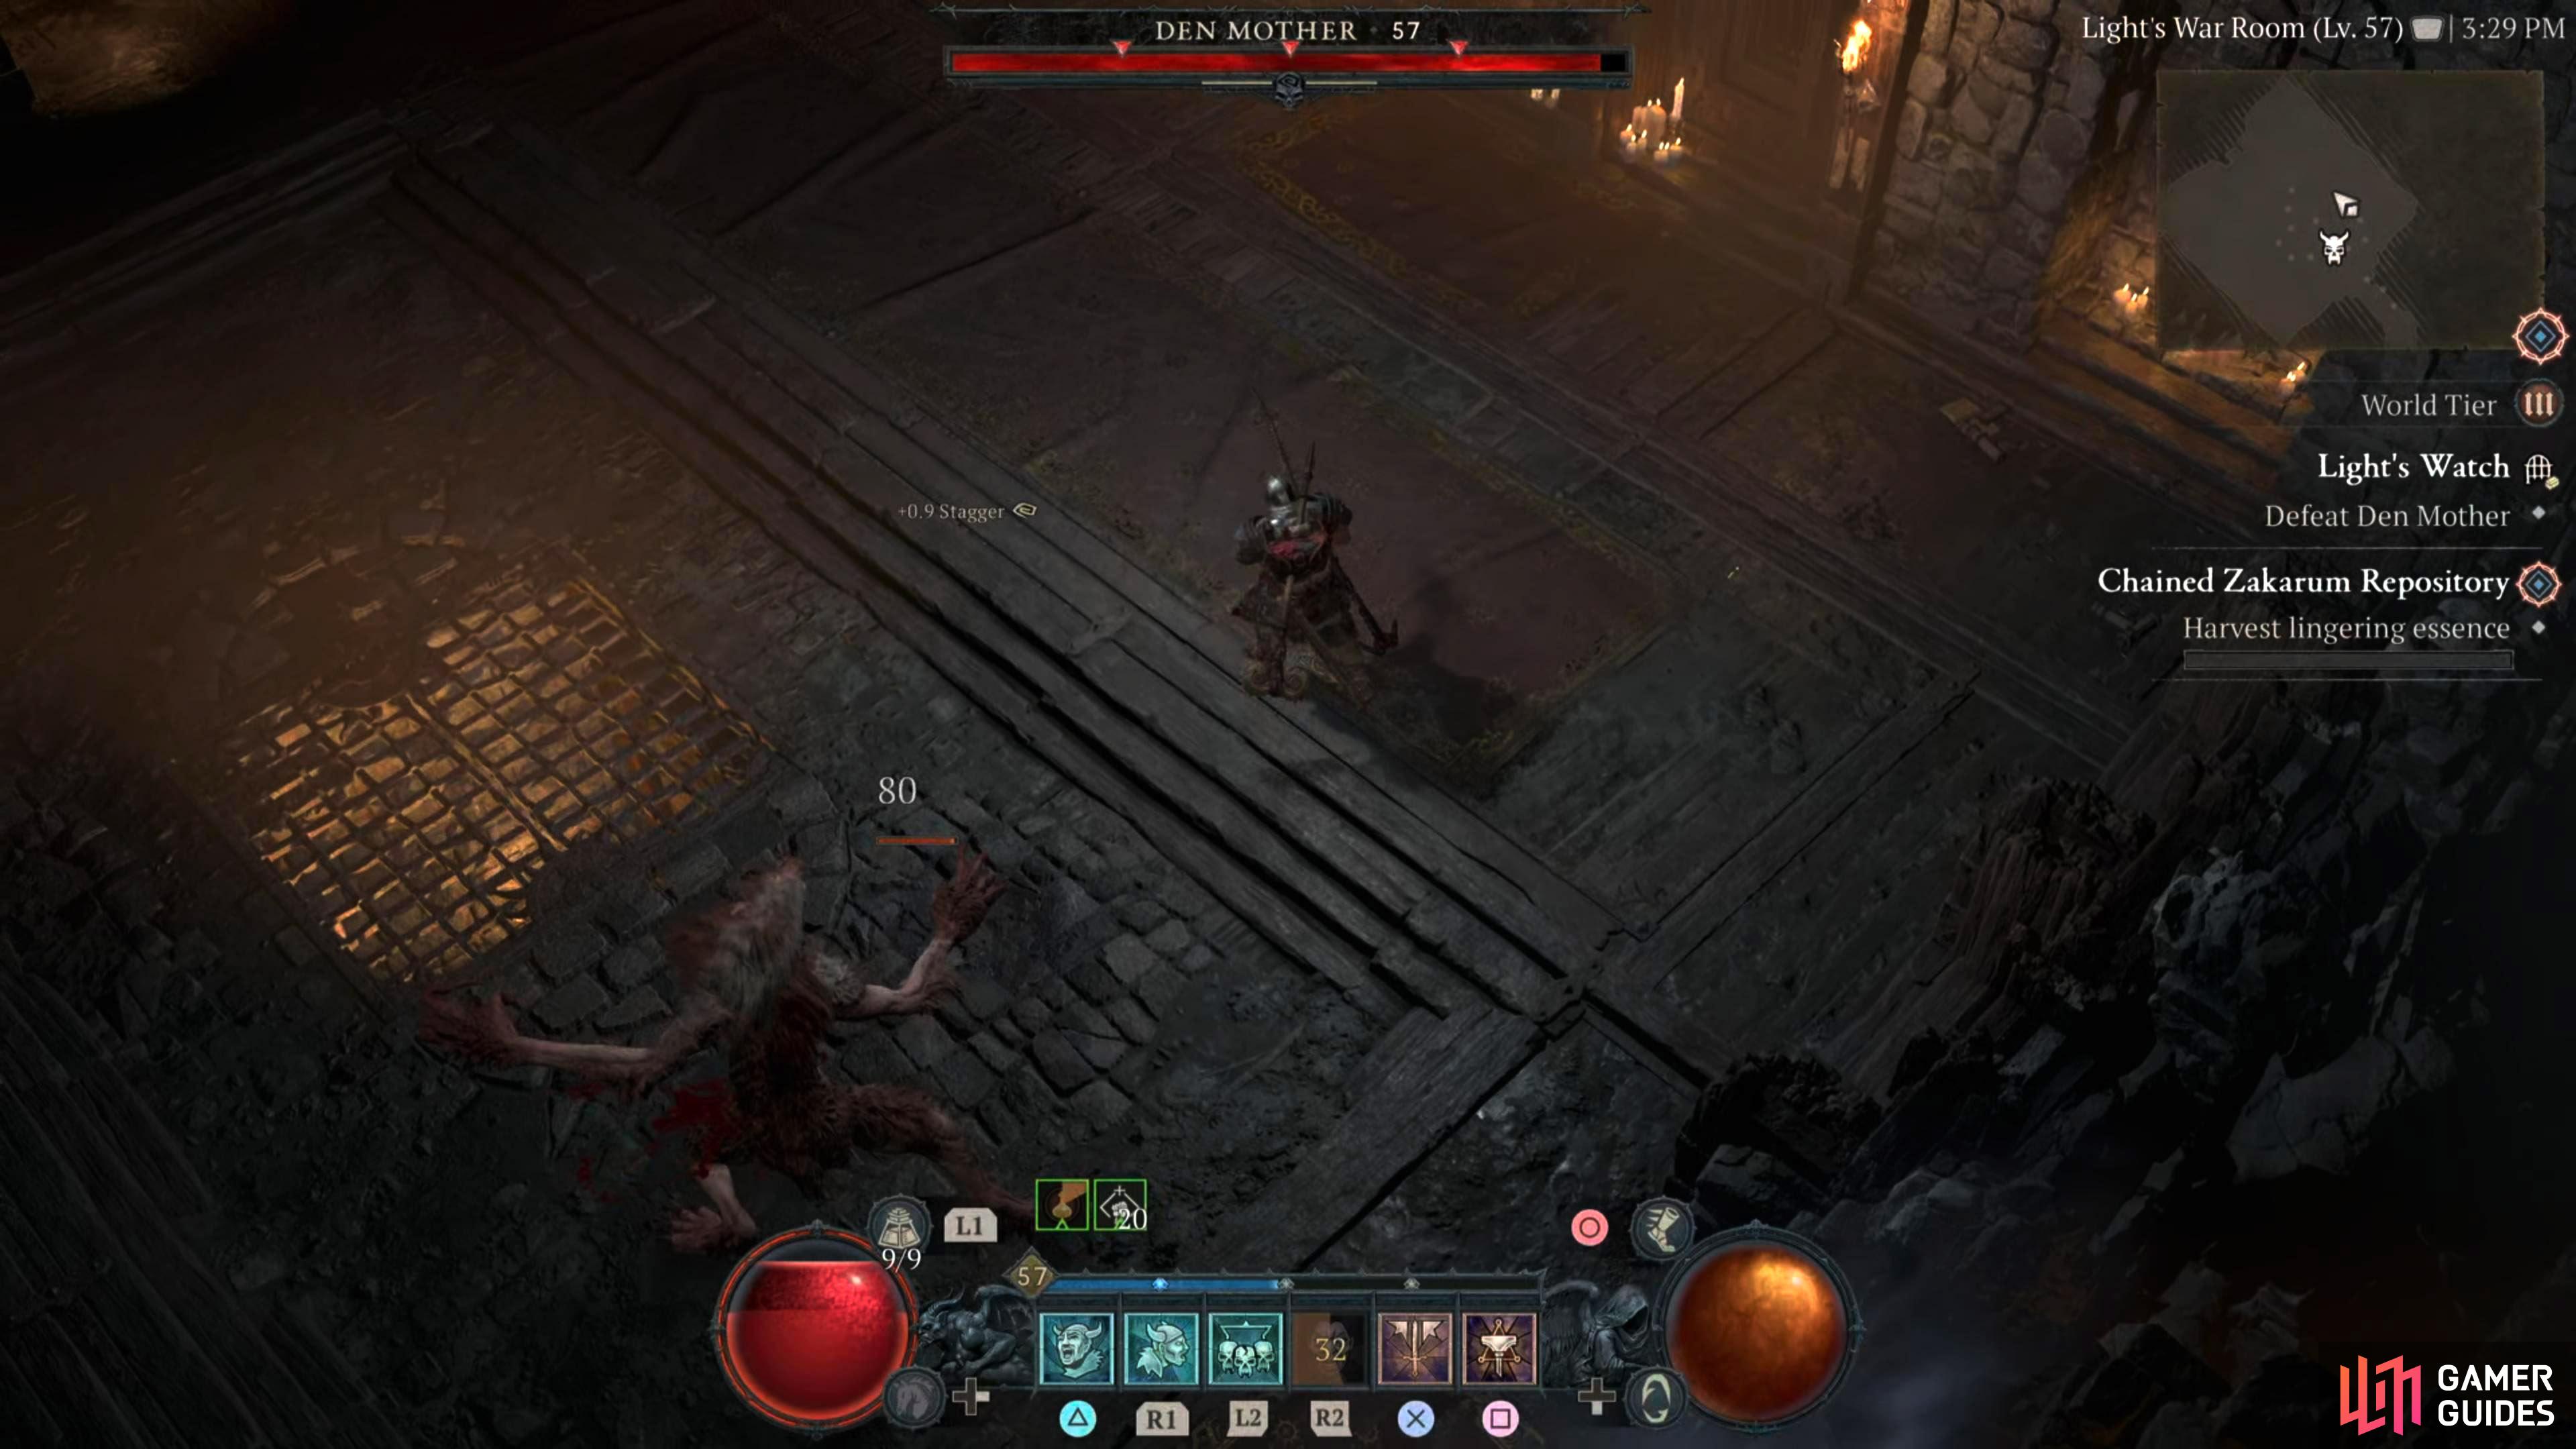
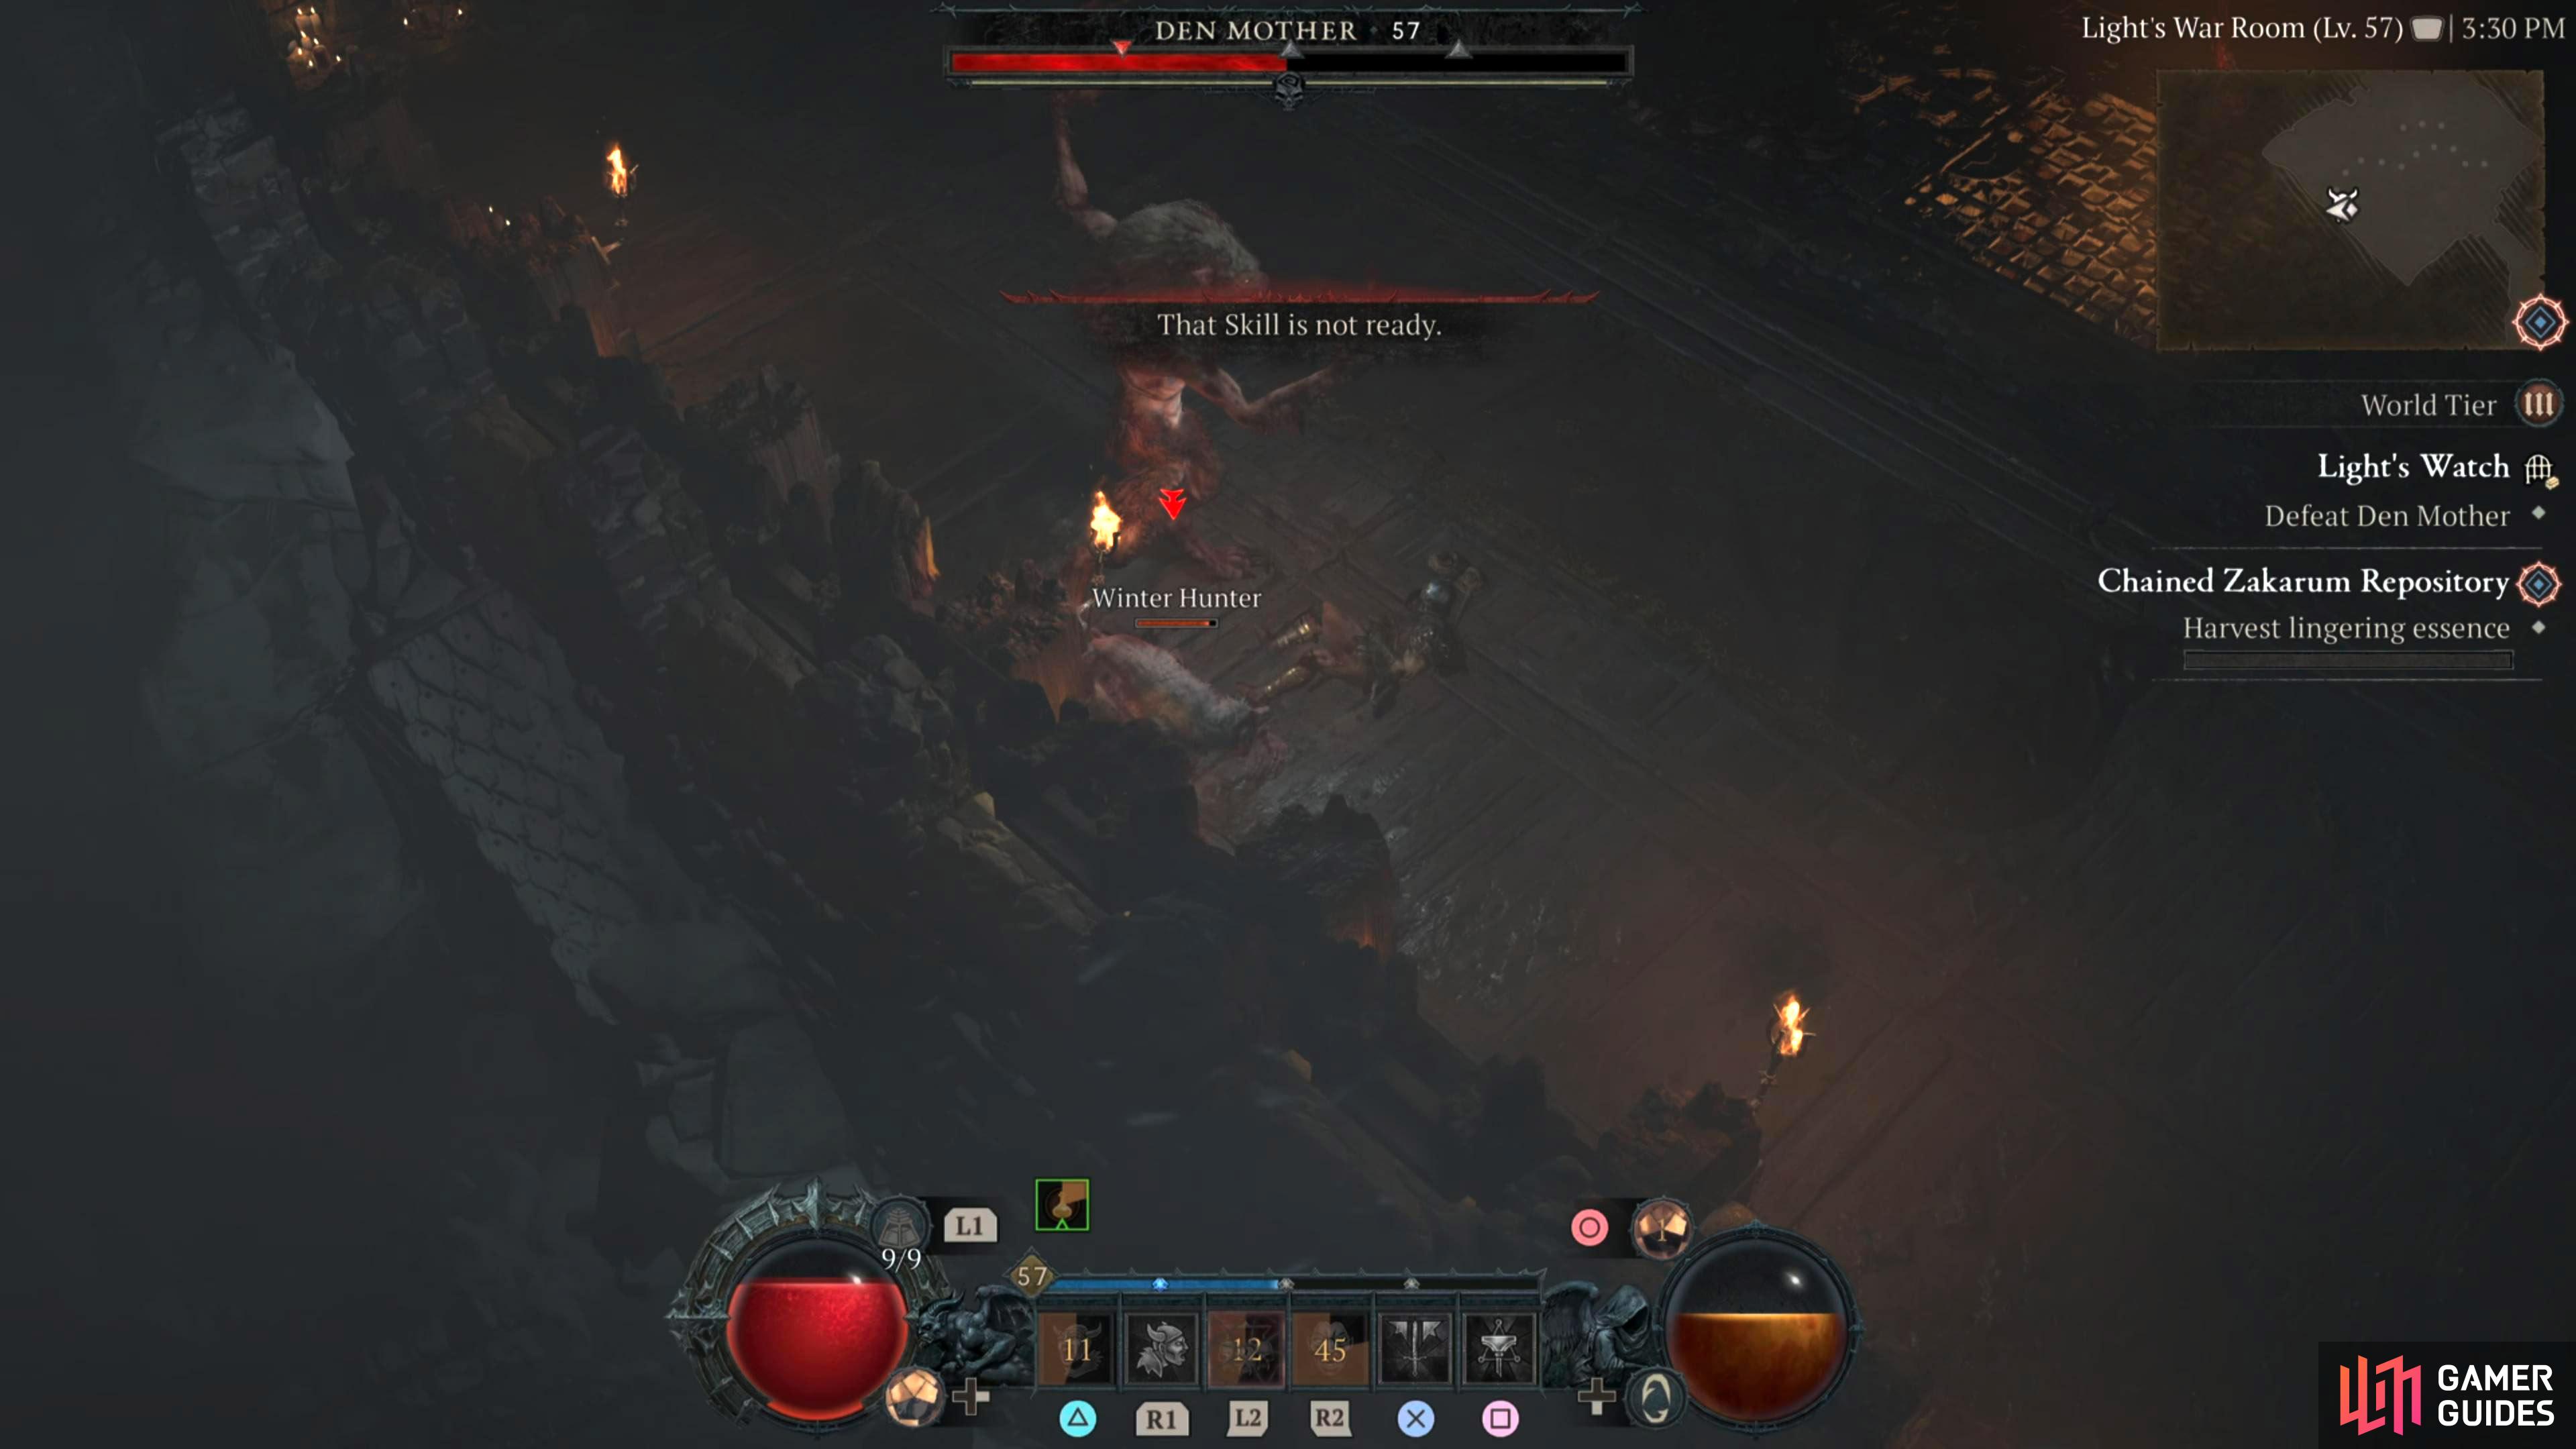
A massive werewolf, the Den Mother can disappear and reappear at will, deal massive damage with combo swipe attacks, is incredibly fast and will start to summon packs of wolves later on through the fight.
Description
The Den Mother is a relatively easy fight if you know what’s coming. Most of its attacks are melee-based, although it does have an area-of-effect attack, and it can summon Prowlers to support its carnage. Here’s a look at the Den Mother’s arsenal:
Swipe - This is a regular bog-standard melee attack that will barely cause any damage.
Charged Lunge - Although this is similar to Swipe, the boss will charge it up, and lunge towards you. If it hits you, it can perform a small combo of slashes and swipes. Fortunately, it takes them about 5 years to execute it, so you can just run to the opposite side of the arena to avoid it.
Stealth Swipe - The boss will disappear, and reappear a few seconds later at your last location to perform swipes and slashes.
Blood Slam - Arguably the more difficult attack to avoid, but not by much. The Den Mother will slam on the ground, summoning blood pools under its paws where it slammed, as well as around the arena which will slowly drain your health if stood upon. This attack does cover a fair bit of the arena, but you don’t need to move too much anyway, so it shouldn’t cause you too many problems.
Summon Wolves - Throughout the battle, the Den Mother can summon up to five Prowlers/Winter Hunters (wolves) which will pounce at you. If you get hit by them, they’ll knock you down temporarily which can make dodging the other attacks more problematic. It’s best to defeat these as soon as they’re summoned to avoid complications later on. Thankfully, they have a low health pool, and a few attacks will dispatch them.
The Den Mother looks a lot more difficult than it is. A lot of its stronger attacks are on the slower side and are telegraphed. For the most part, you can go toe-to-toe with the boss, and take it down fairly quickly. Keep an eye on the boss’s arm and if it holds it back for a brief moment, get ready to dodge. Likewise, if it slams its paws on the ground, dodge away and avoid the blood puddles. Finally, when it goes into stealth mode, keep on the move to avoid the incoming attacks. The only other thing to note is that the Prowlers can knock you down, so defeat them as soon as possible.
A Tormented Poison Druid Elite and one of the three Druid Spirits you must free during the Túr Dúlra Stronghold quest. They can cast a powerful knockback attack as well as summon poison pools around them.
Detailed Location
The east of Túr Dúlra, during the Stronghold quest.
Can be found in the Heroes Triumph region of Scosglen as part of the Wagered Honor side quest. You can kill him for his Giant Demon Horn needed for the quest itself. Golmothos is an Elite Balrog who wields a massive sword that can cleave in front of him in a conal attack. He can summon other Demons to his aid and can Fortify himself as he gets below half health.
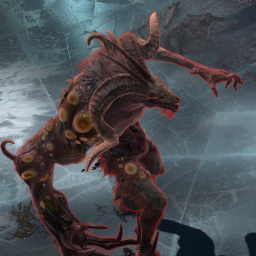
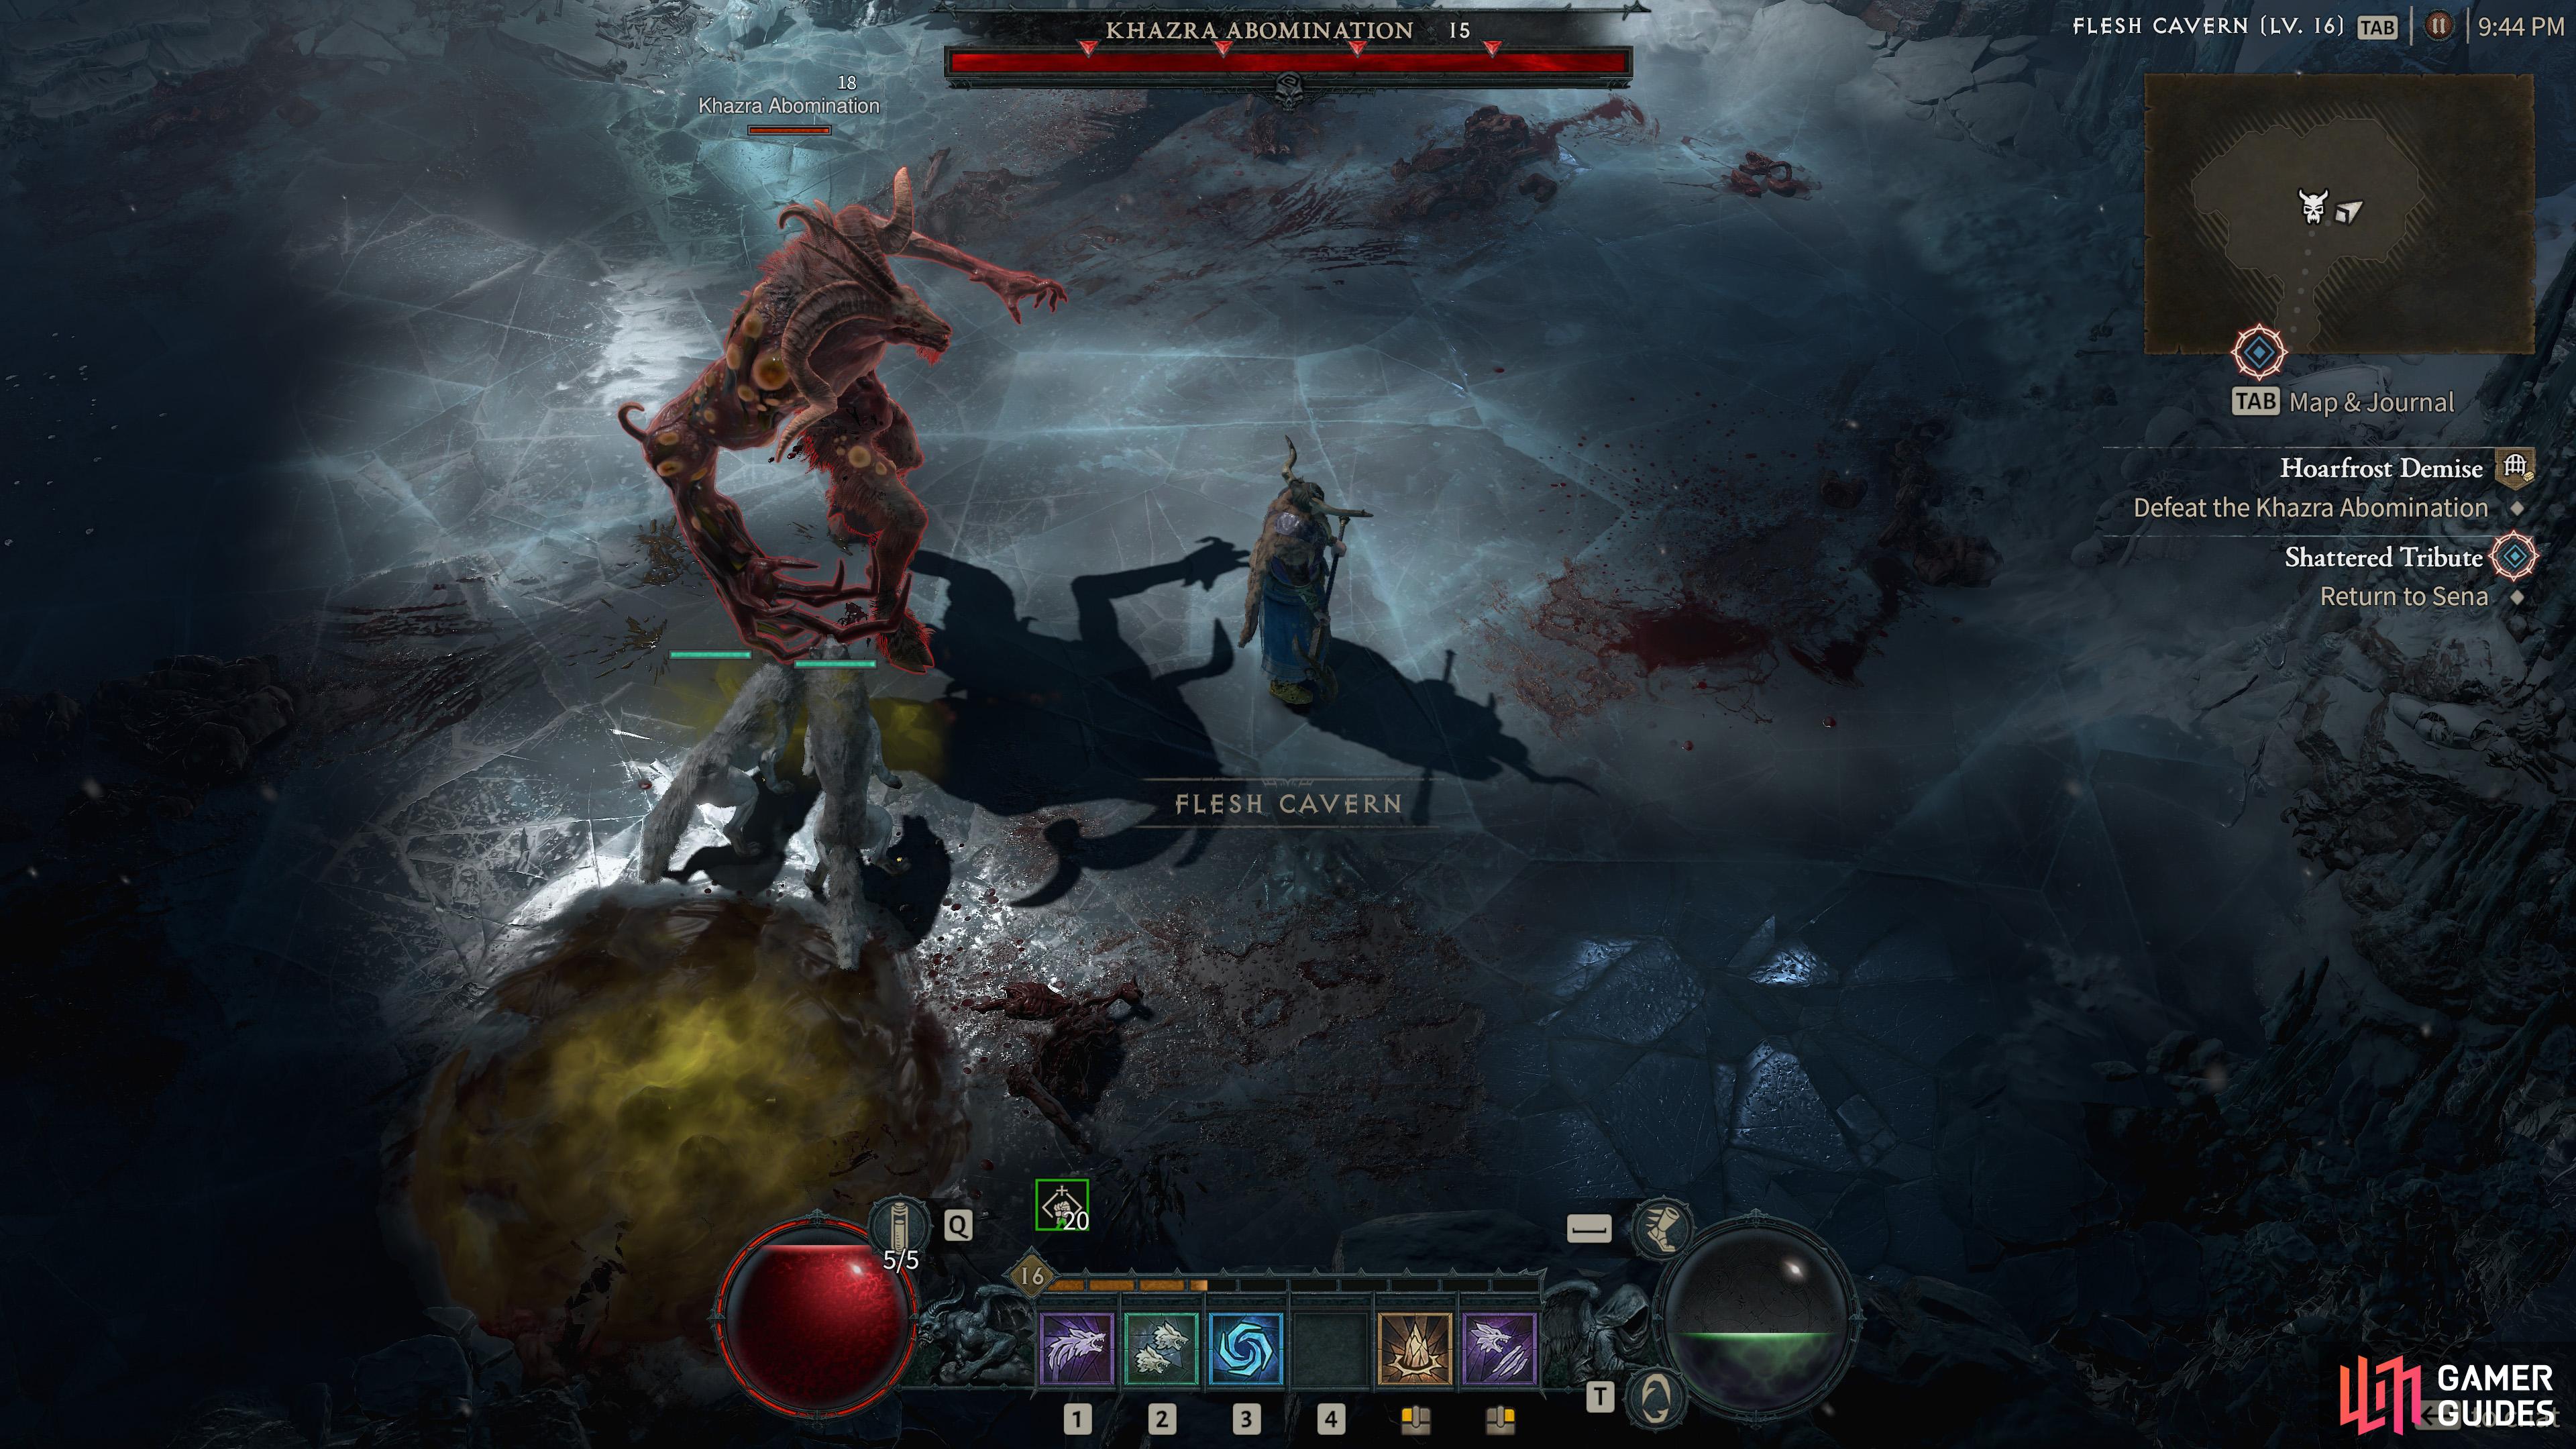
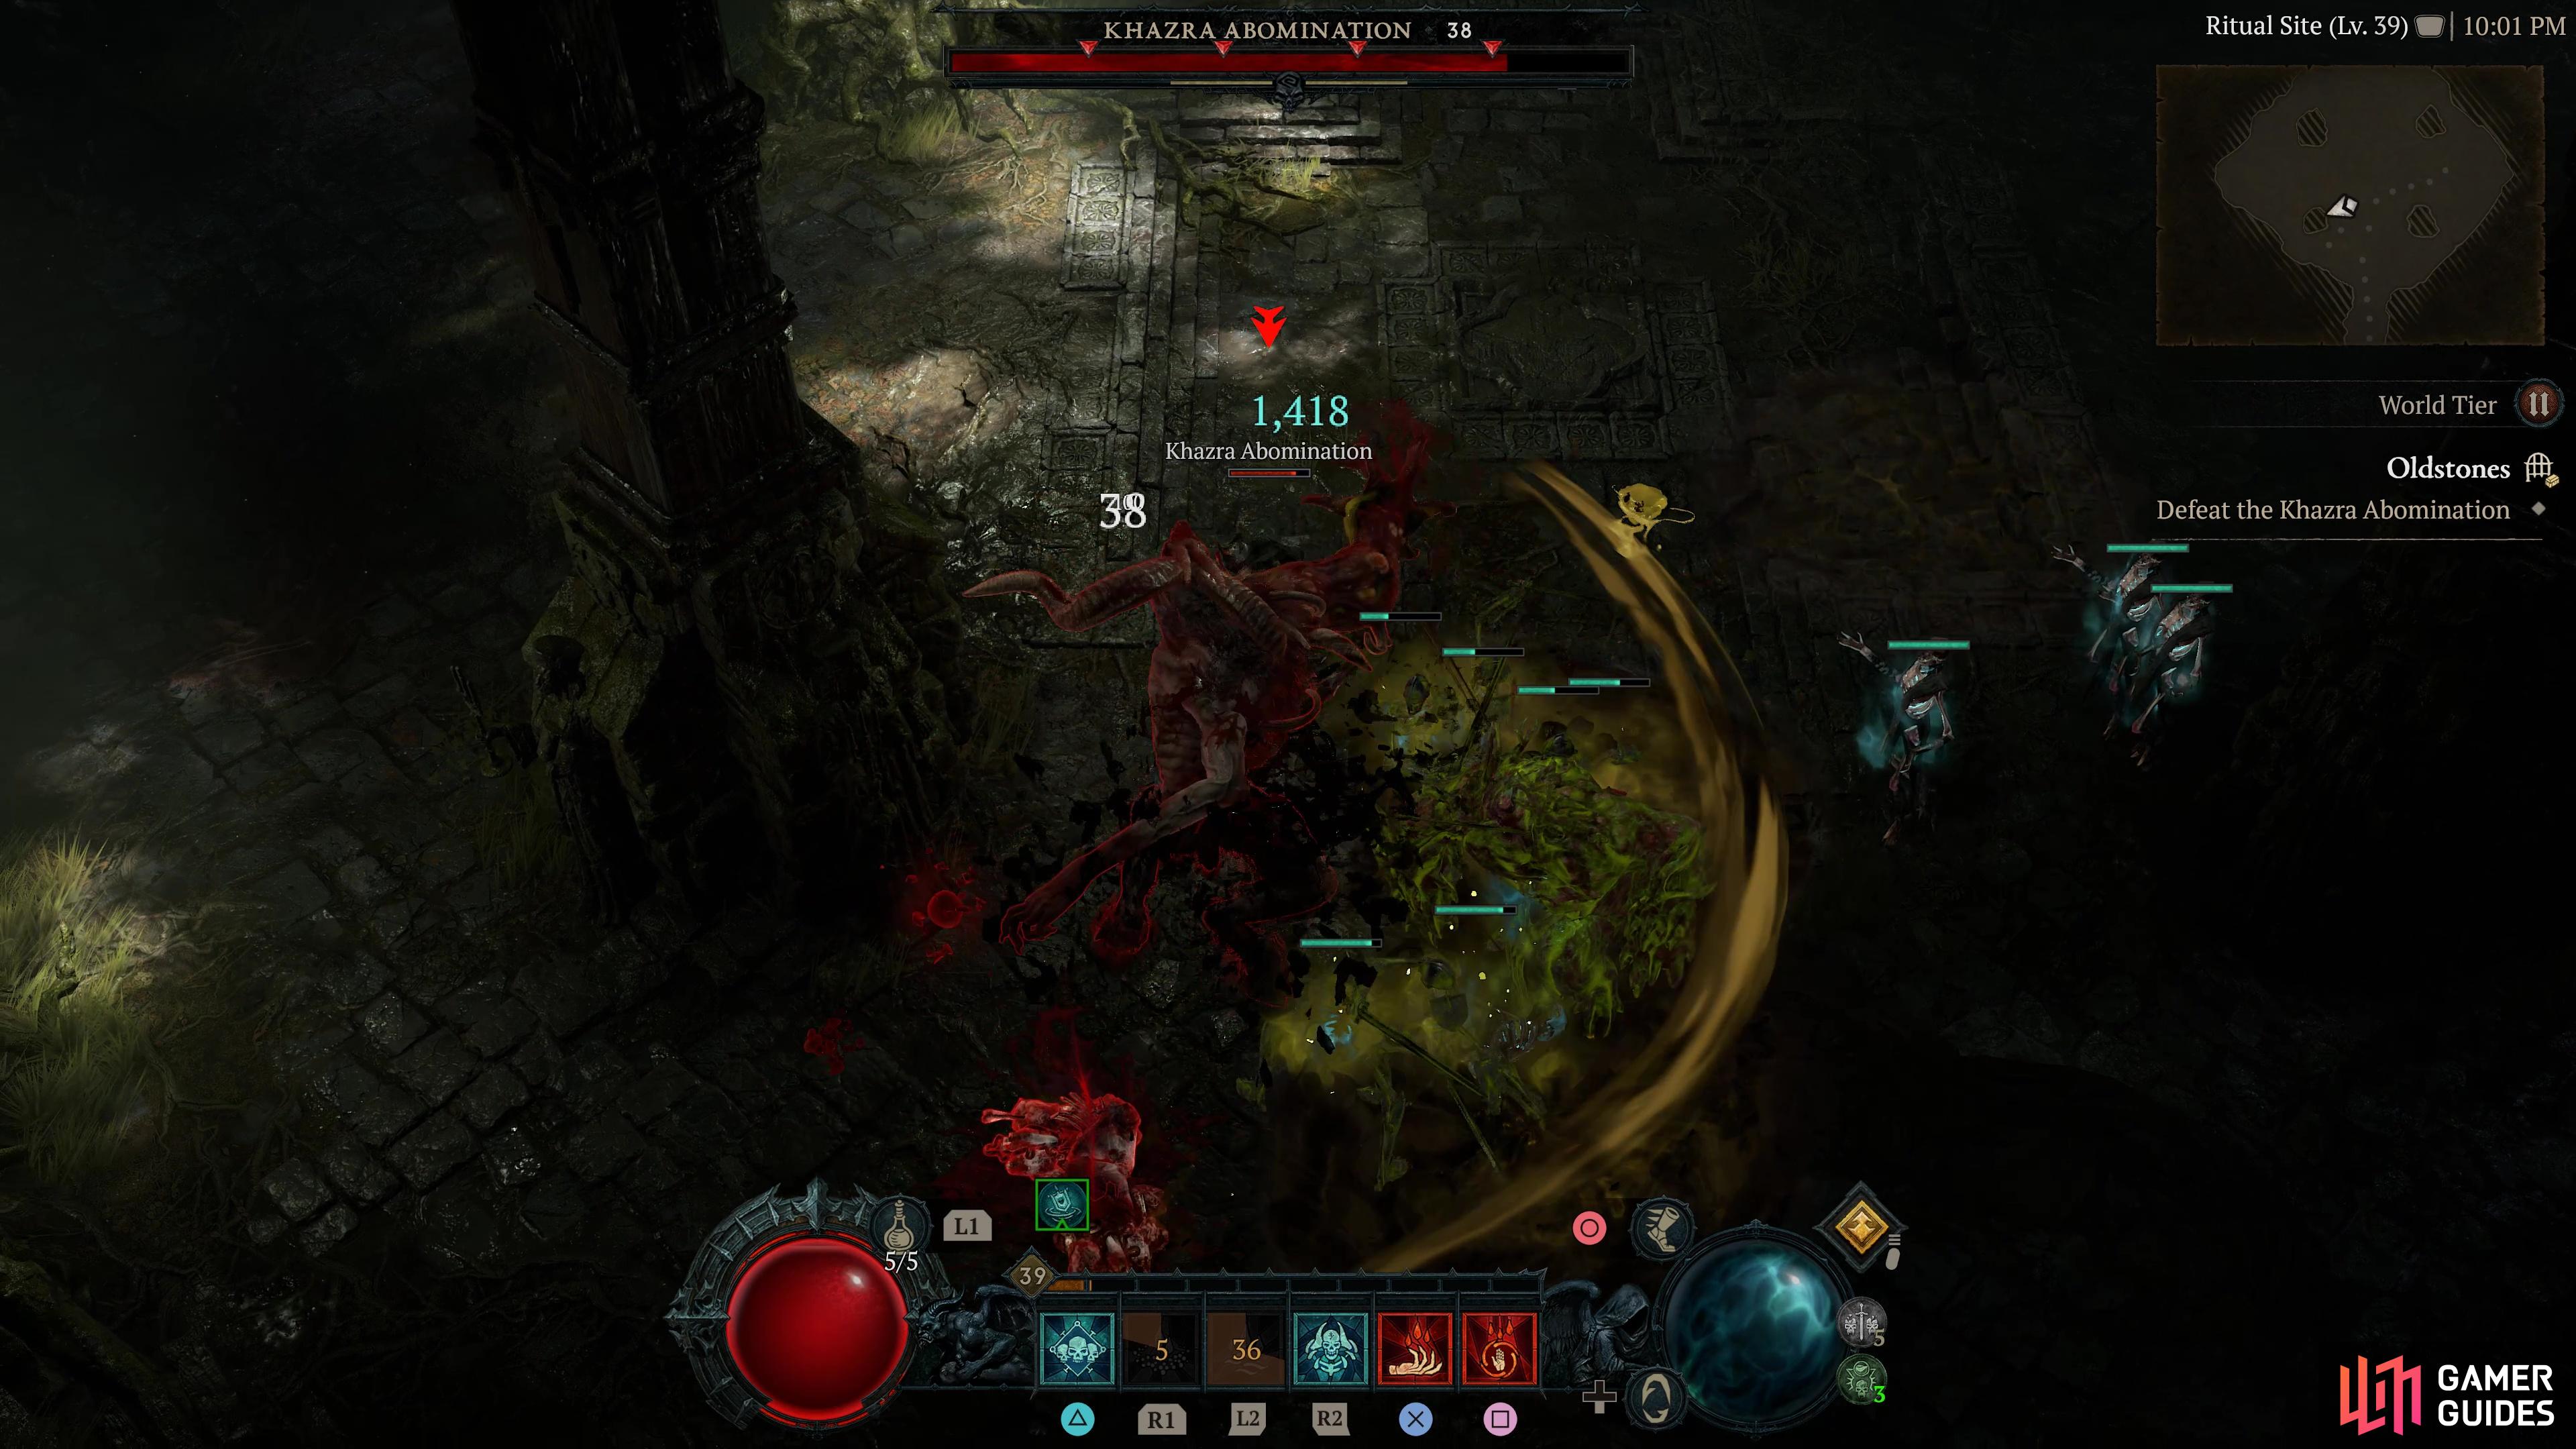
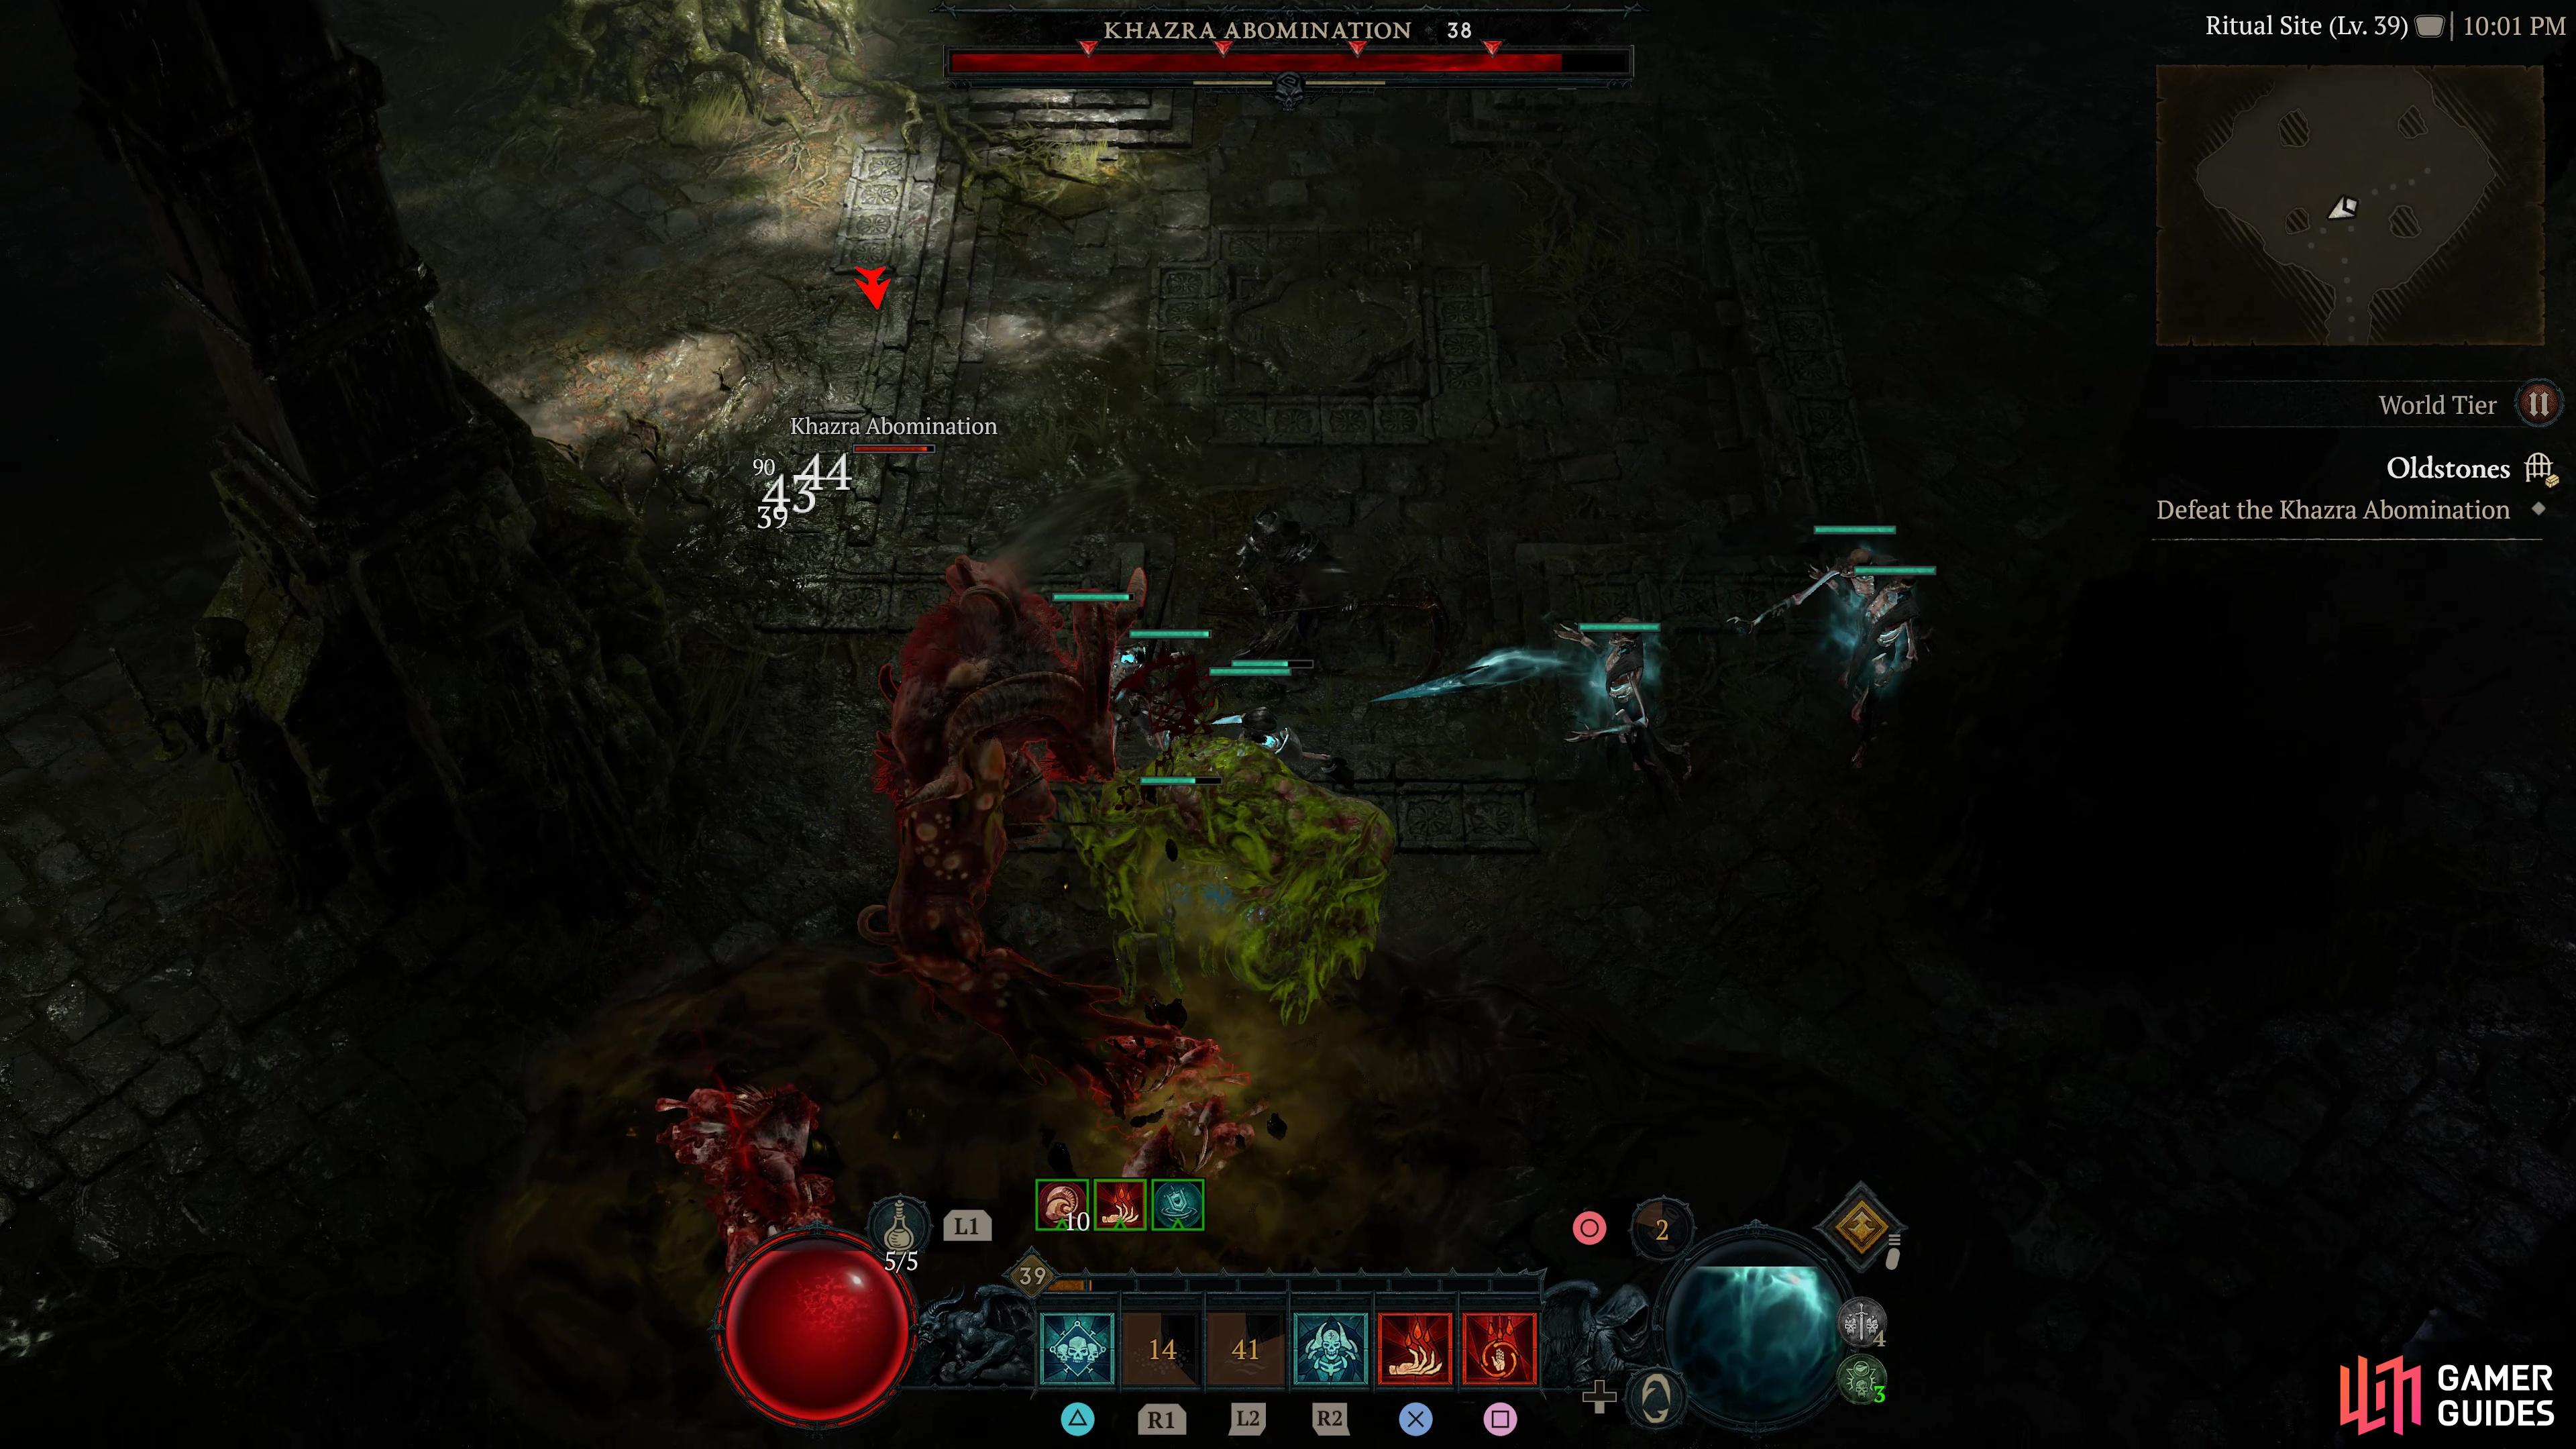
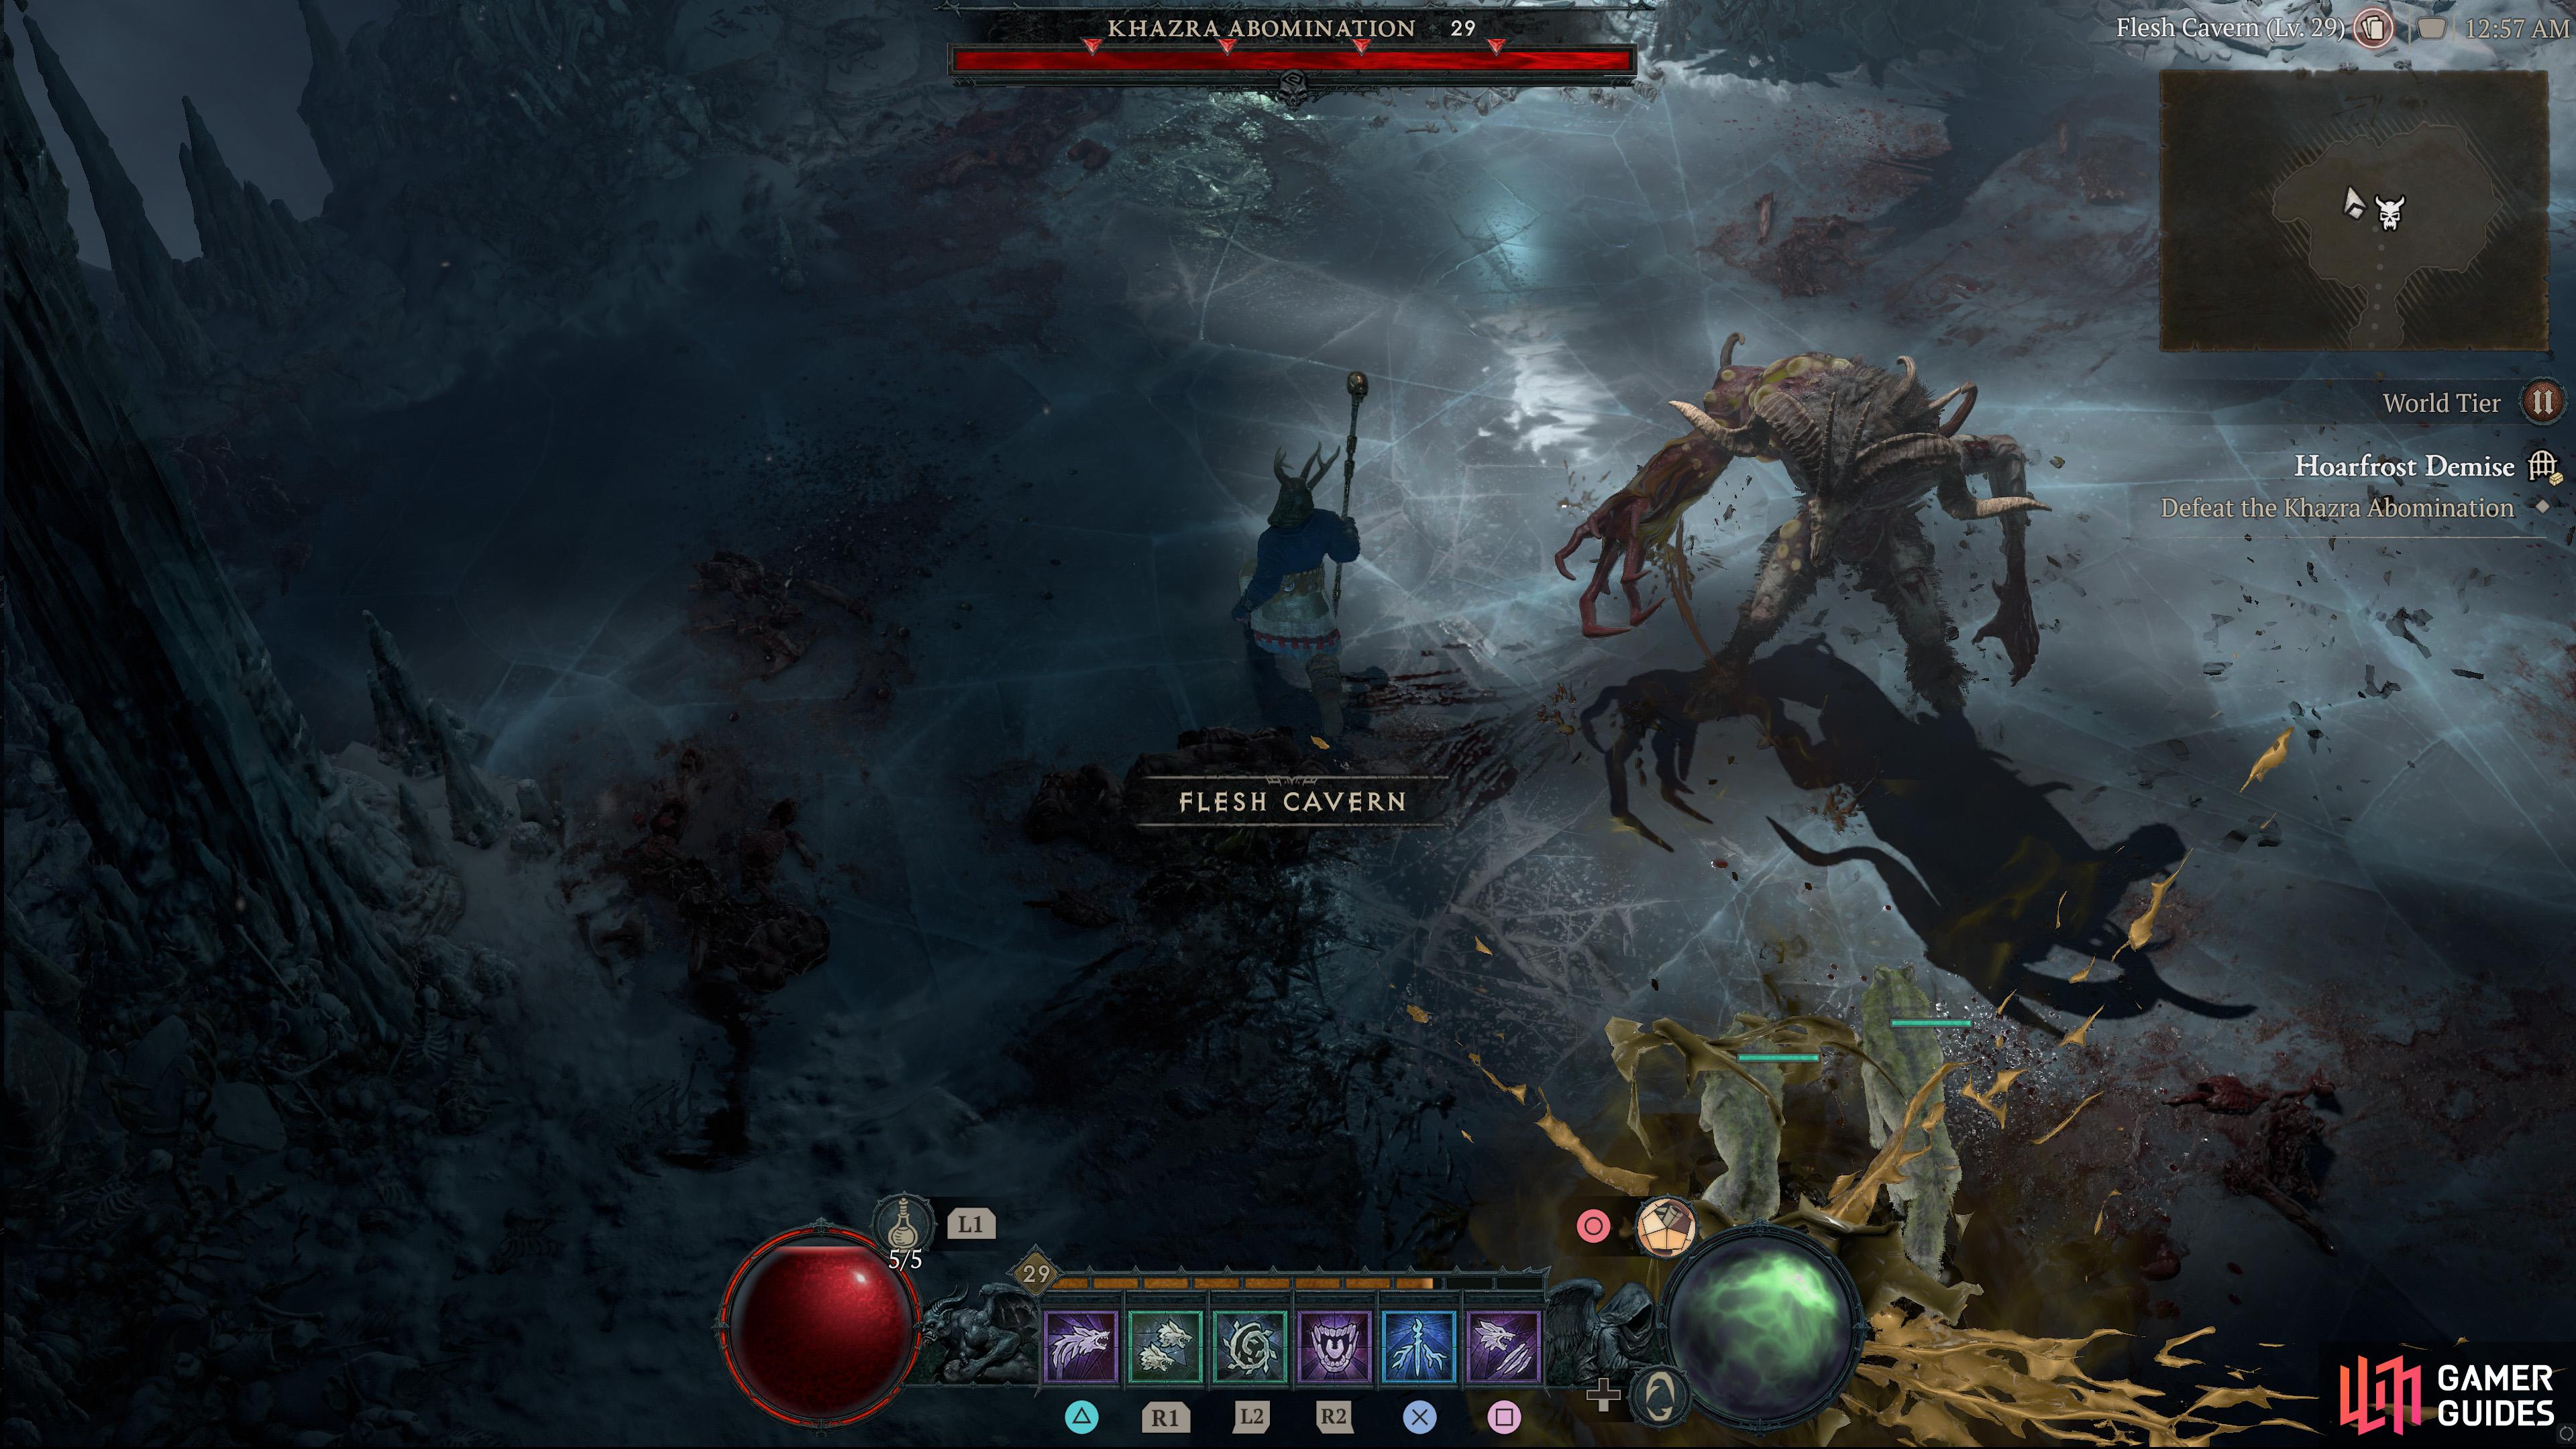
Khazra Abomination is a hulking, corrupted Goatman who uses its sharp poisonous claws to attack its prey.
Description
The Khazra Abomination is one of the first bosses you’ll experience, and it’ll appear more evident when you see its lack of attacks. Saying that it can still cause trouble for new players as its poison pools can slowly drain away your health.
As it leaves poison pools in its wake, ideally you’ll want to bring some Poison Resistance Elixirs but mostly, just don’t stand in them. It has a decent health pool but is largely not too complex of a boss on lower World Tiers. Either way, here is what attacks it has in its arsenal:
Poison Stab - When the boss is in melee range, it’ll stab its claw into the ground leaving behind a pool of poison. This happens after a couple of regular swipes first when it lifts its arm upwards, evade to the opposite side. After a while, the area will get surrounded by poison pools, when this happens, move the boss to another part of the arena.
Poison Throw - The Khazra Abomination will fling its arm towards you, launching two-three poison pools which have surprising accuracy. This attack appears more often if you’re fighting at range, but it will still be used in melee. Try to dodge just as the pools of poison are about to land.
Charge - This is the boss’s gap closer. If you’re attacking from range, it’ll charge across the arena, knocking you over briefly if you’re caught by it. Either stay in melee range or dodge at the last second to avoid the attack.
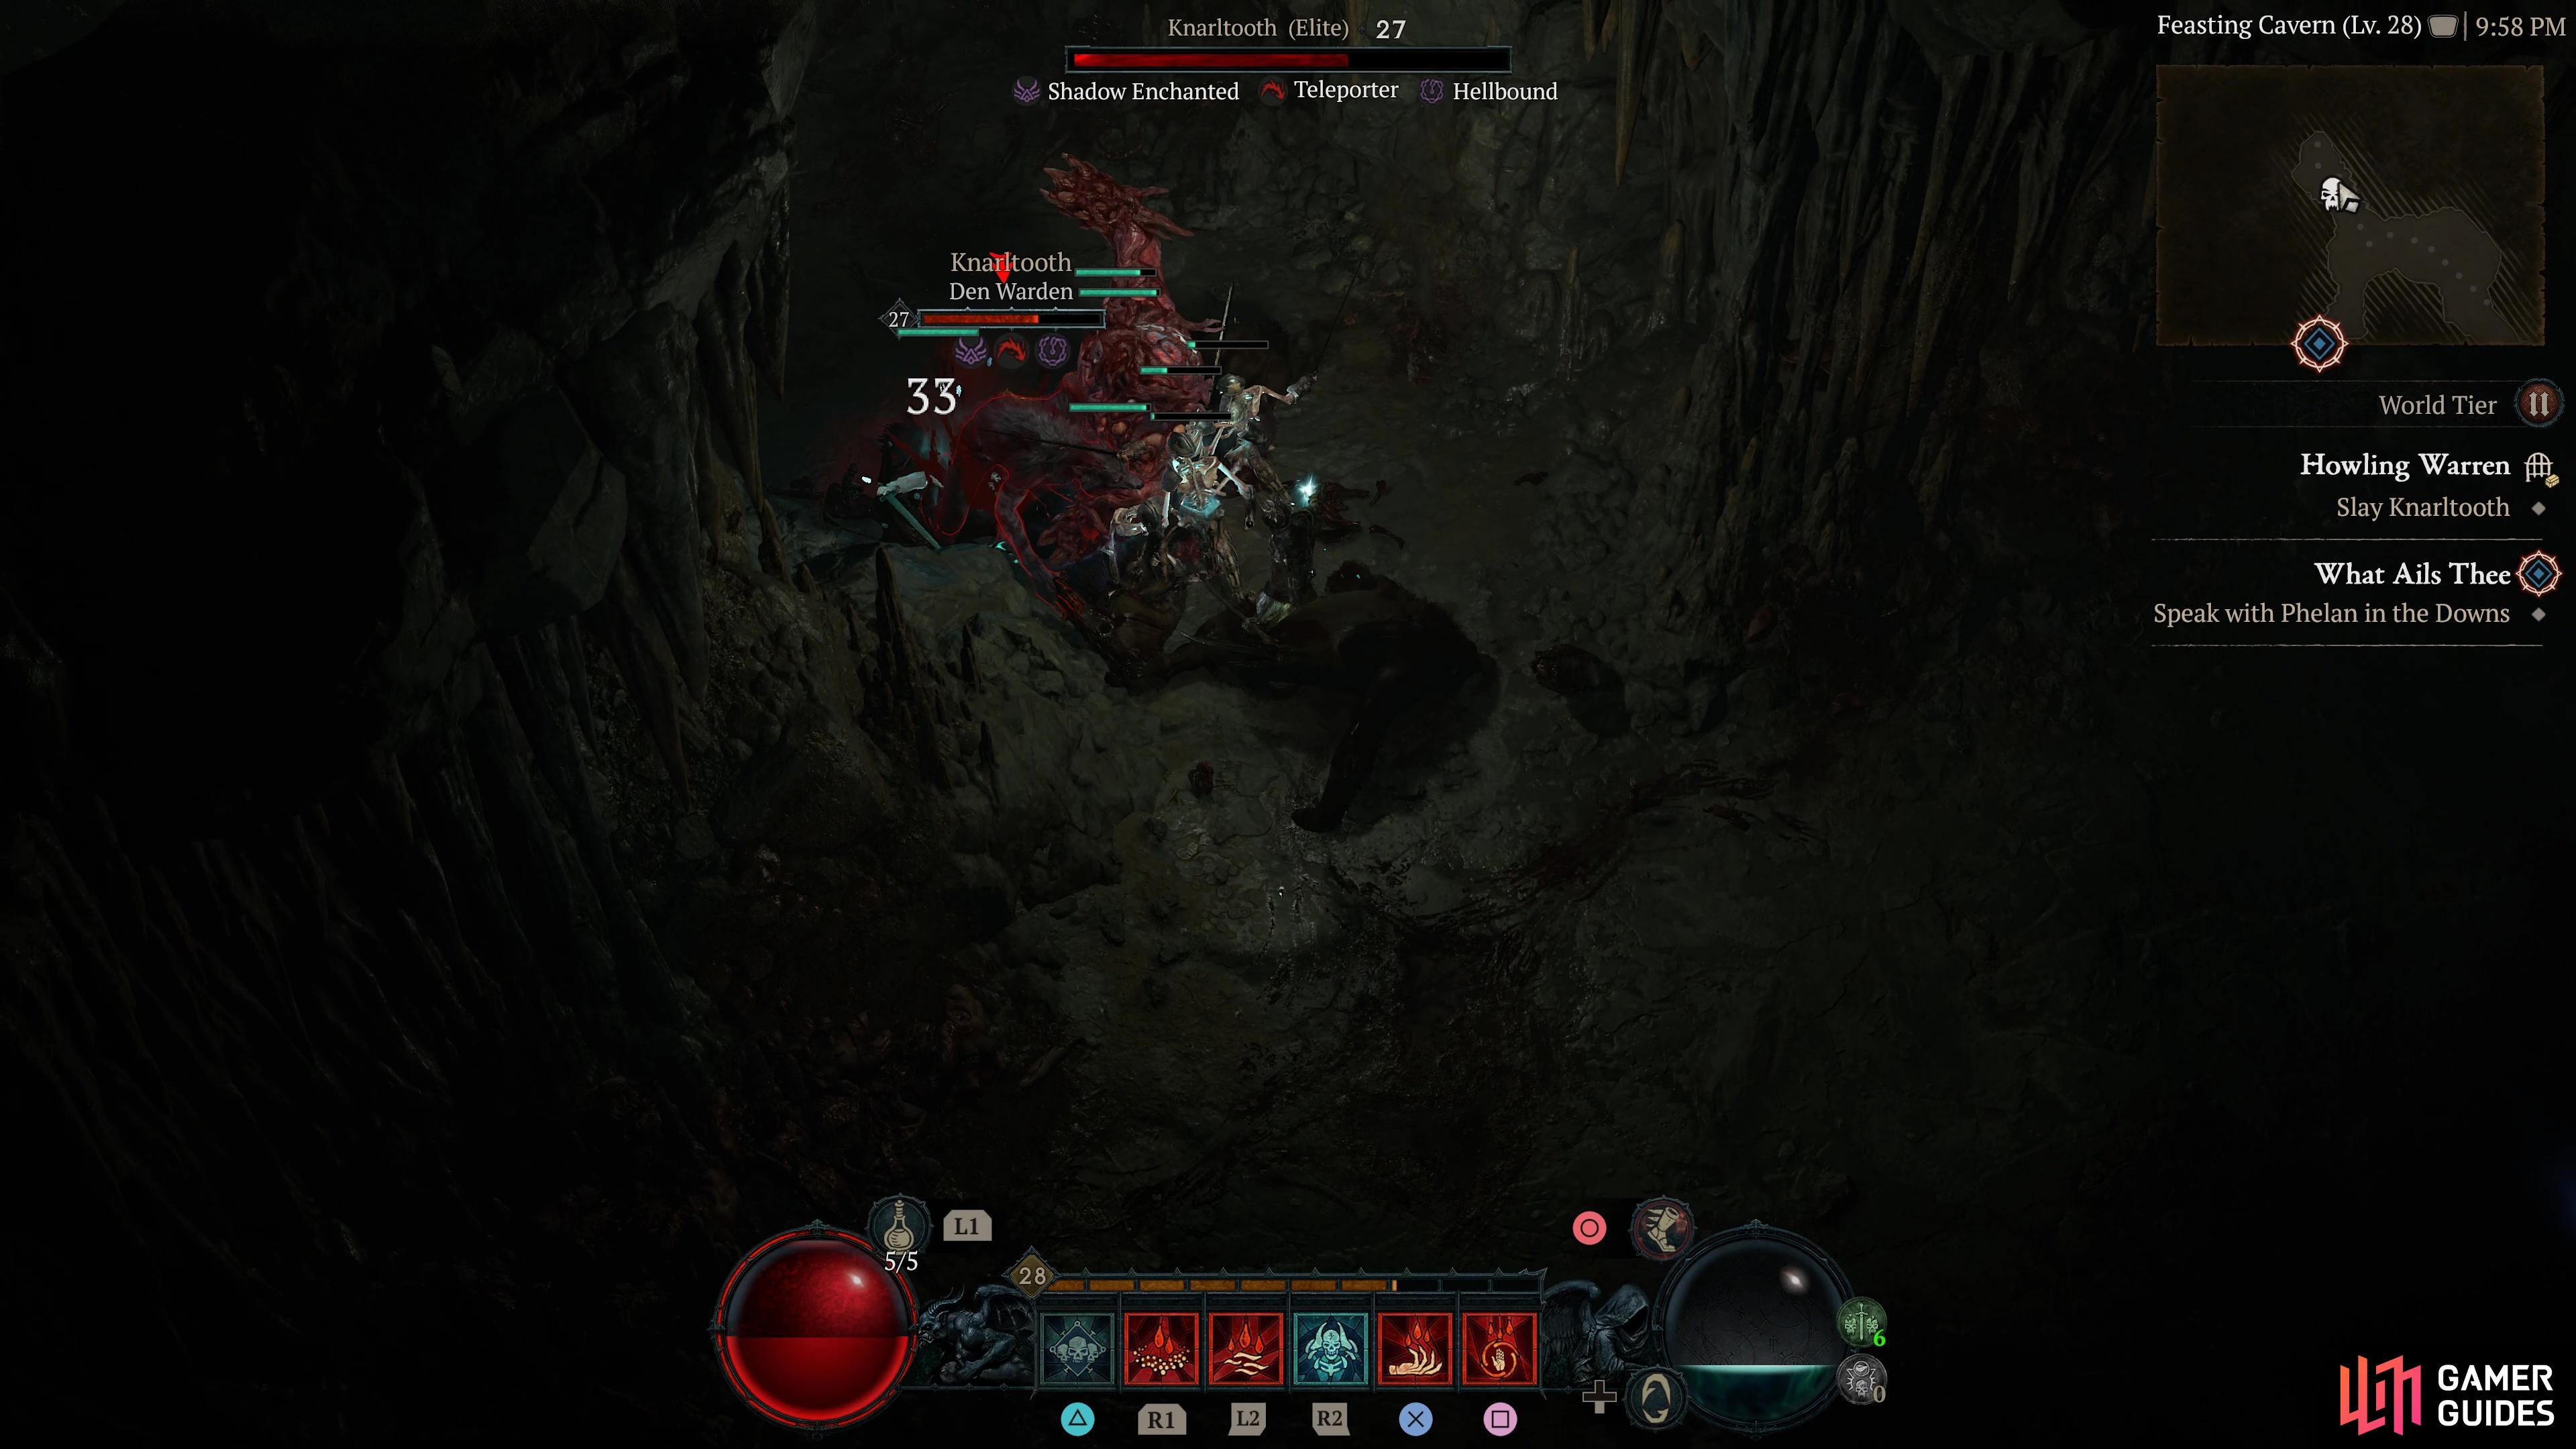
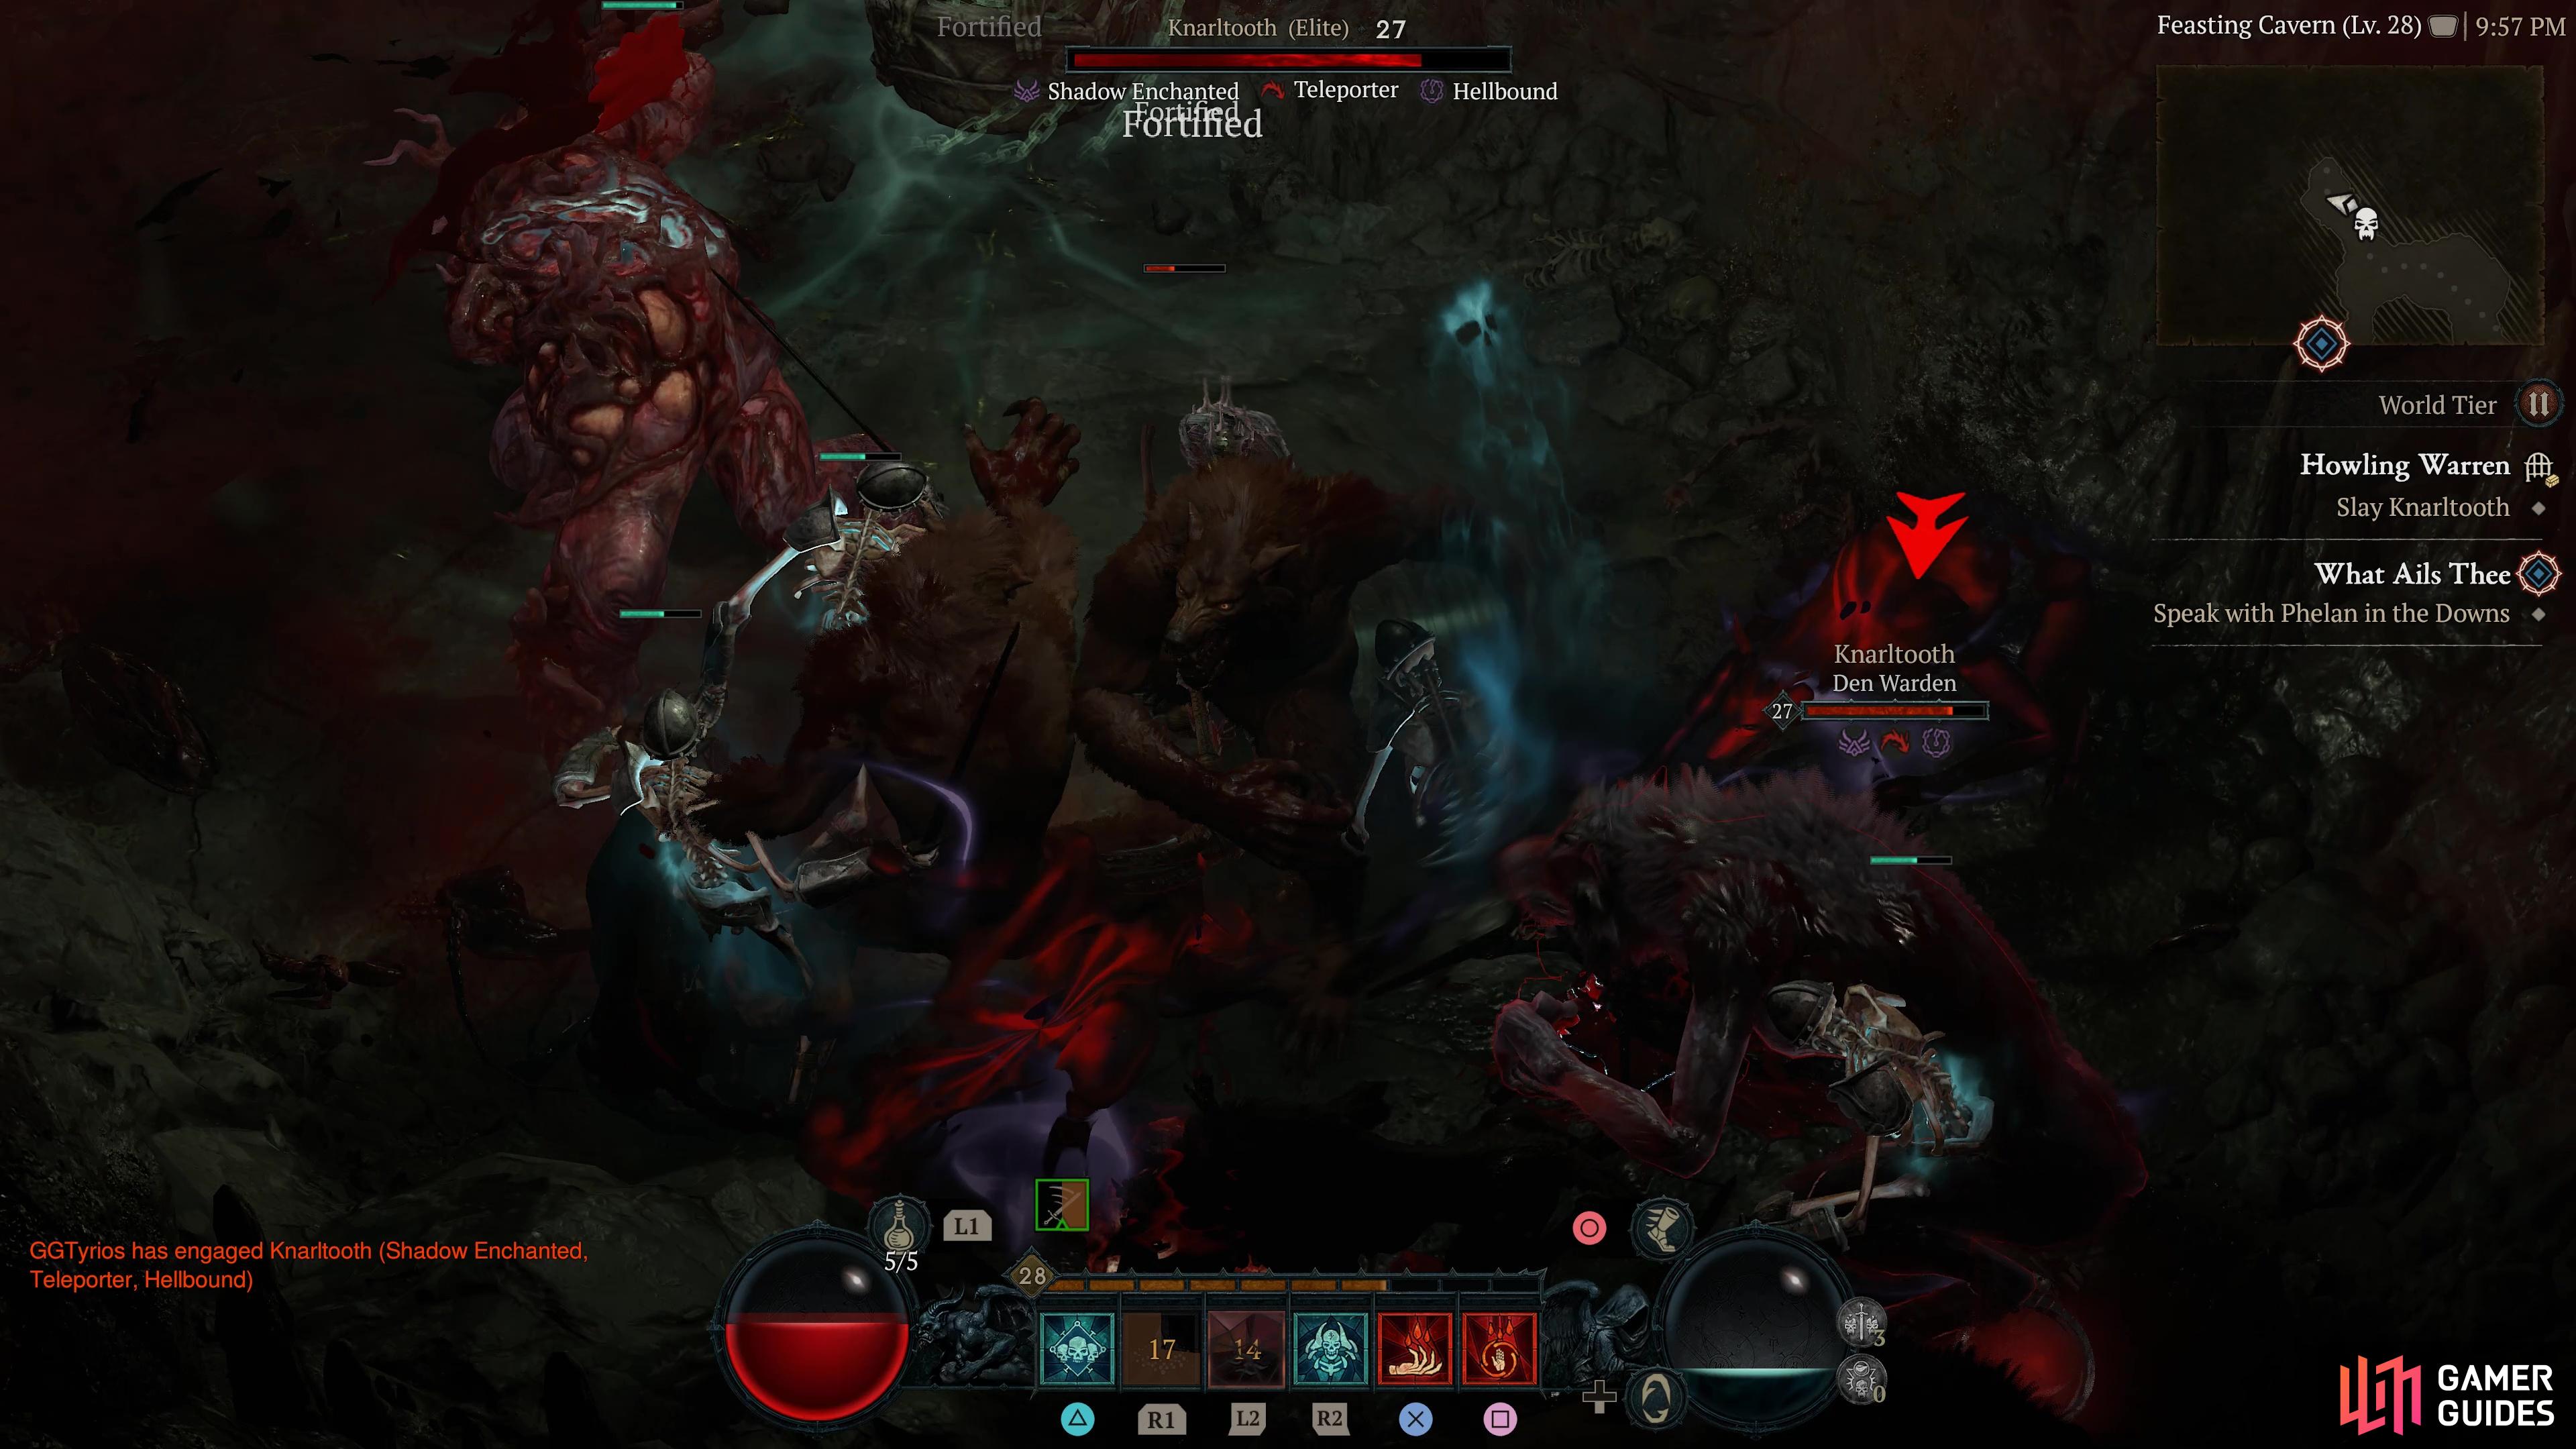
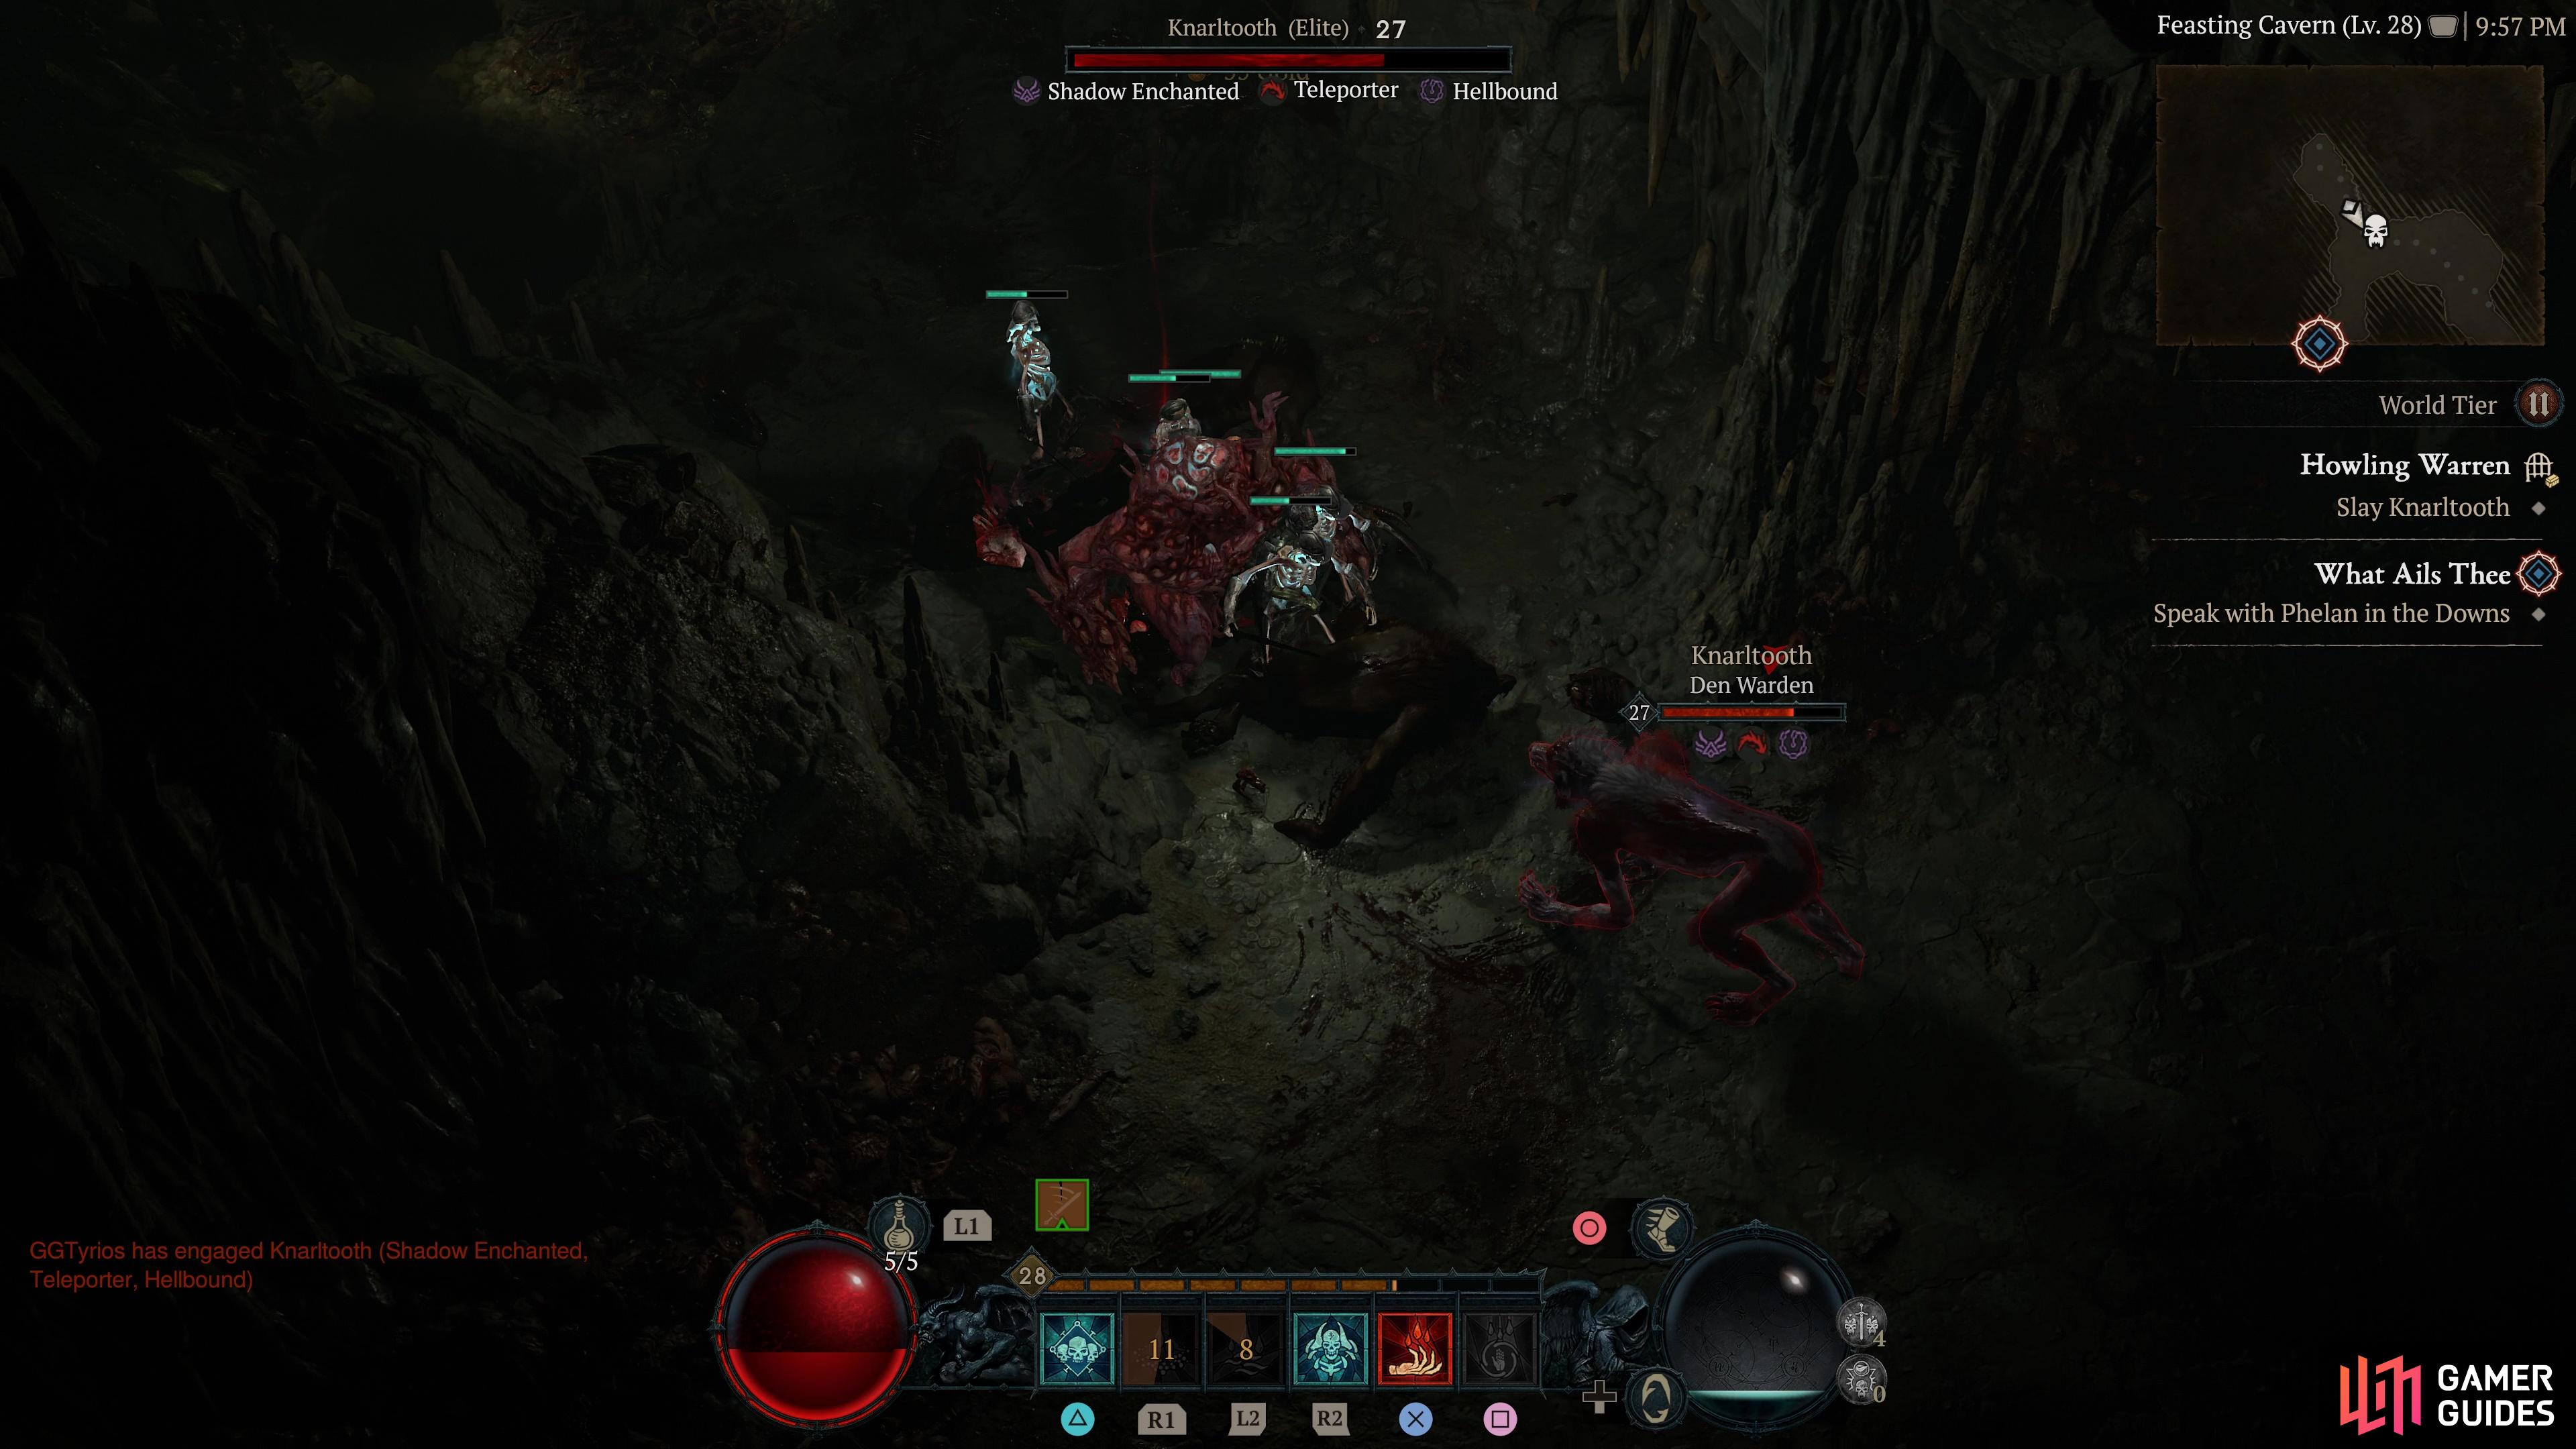
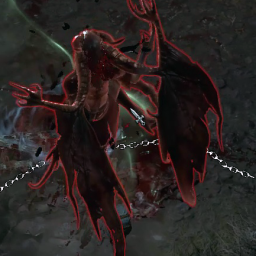
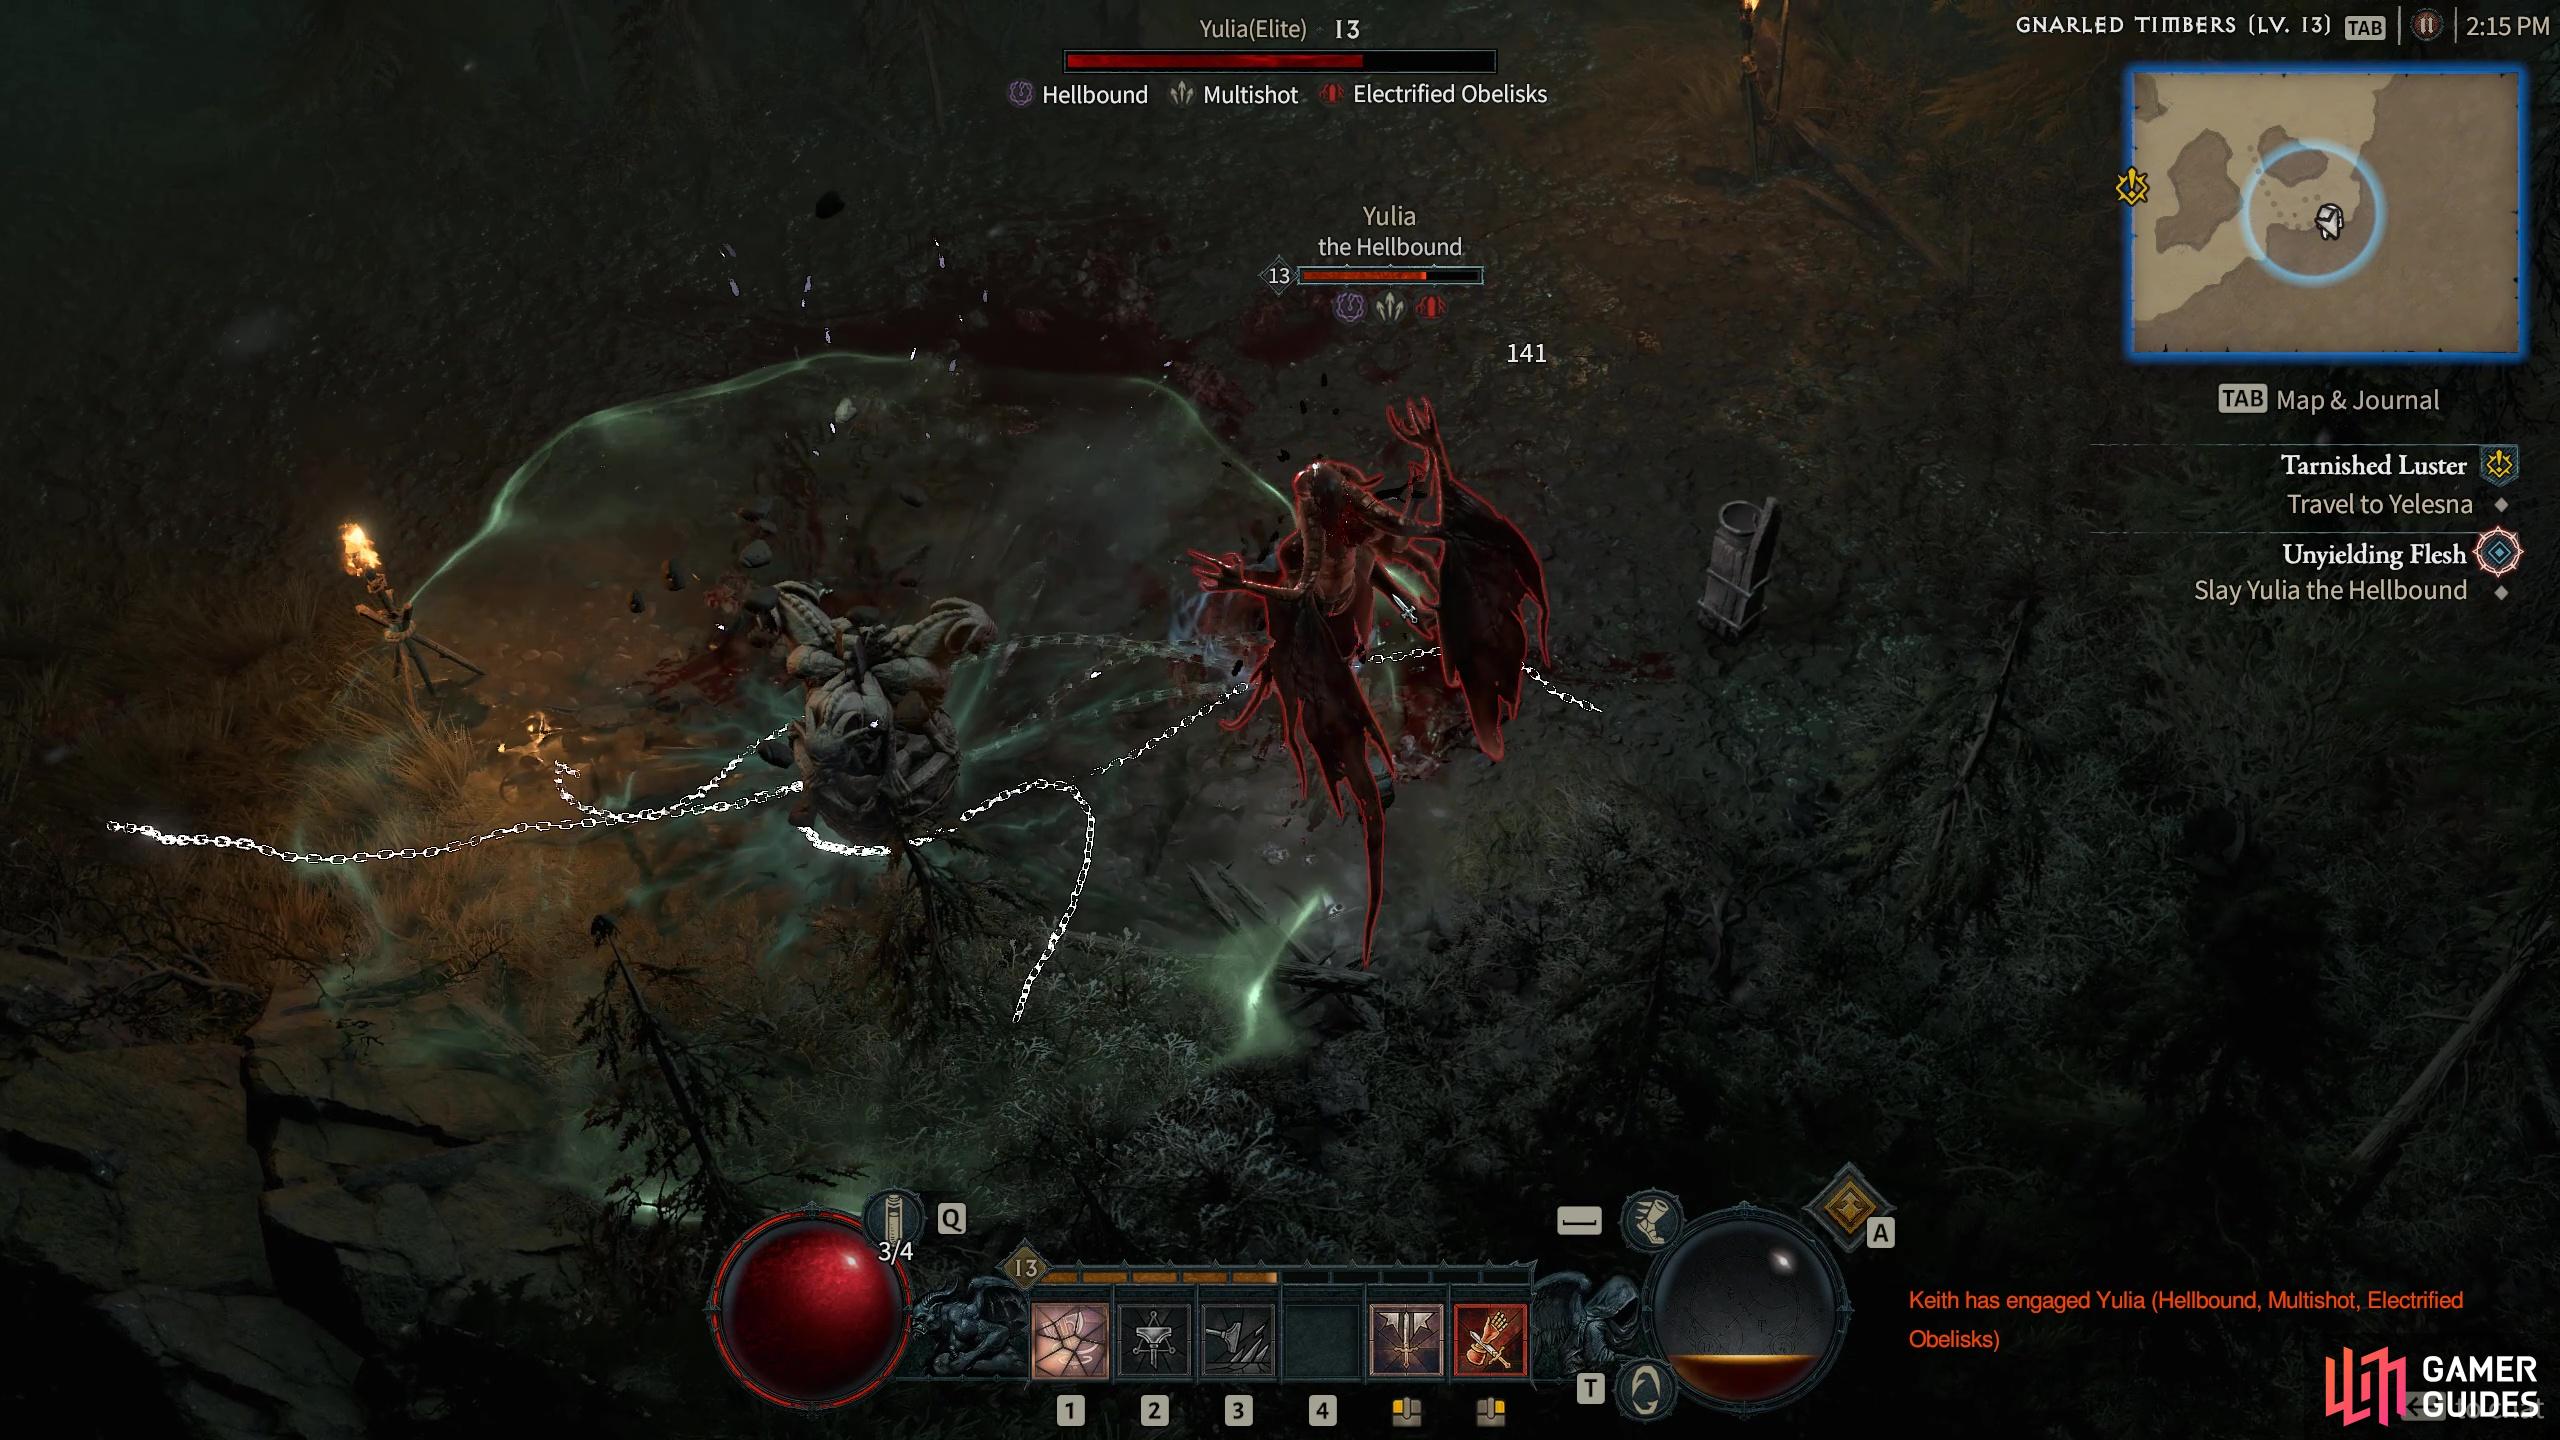
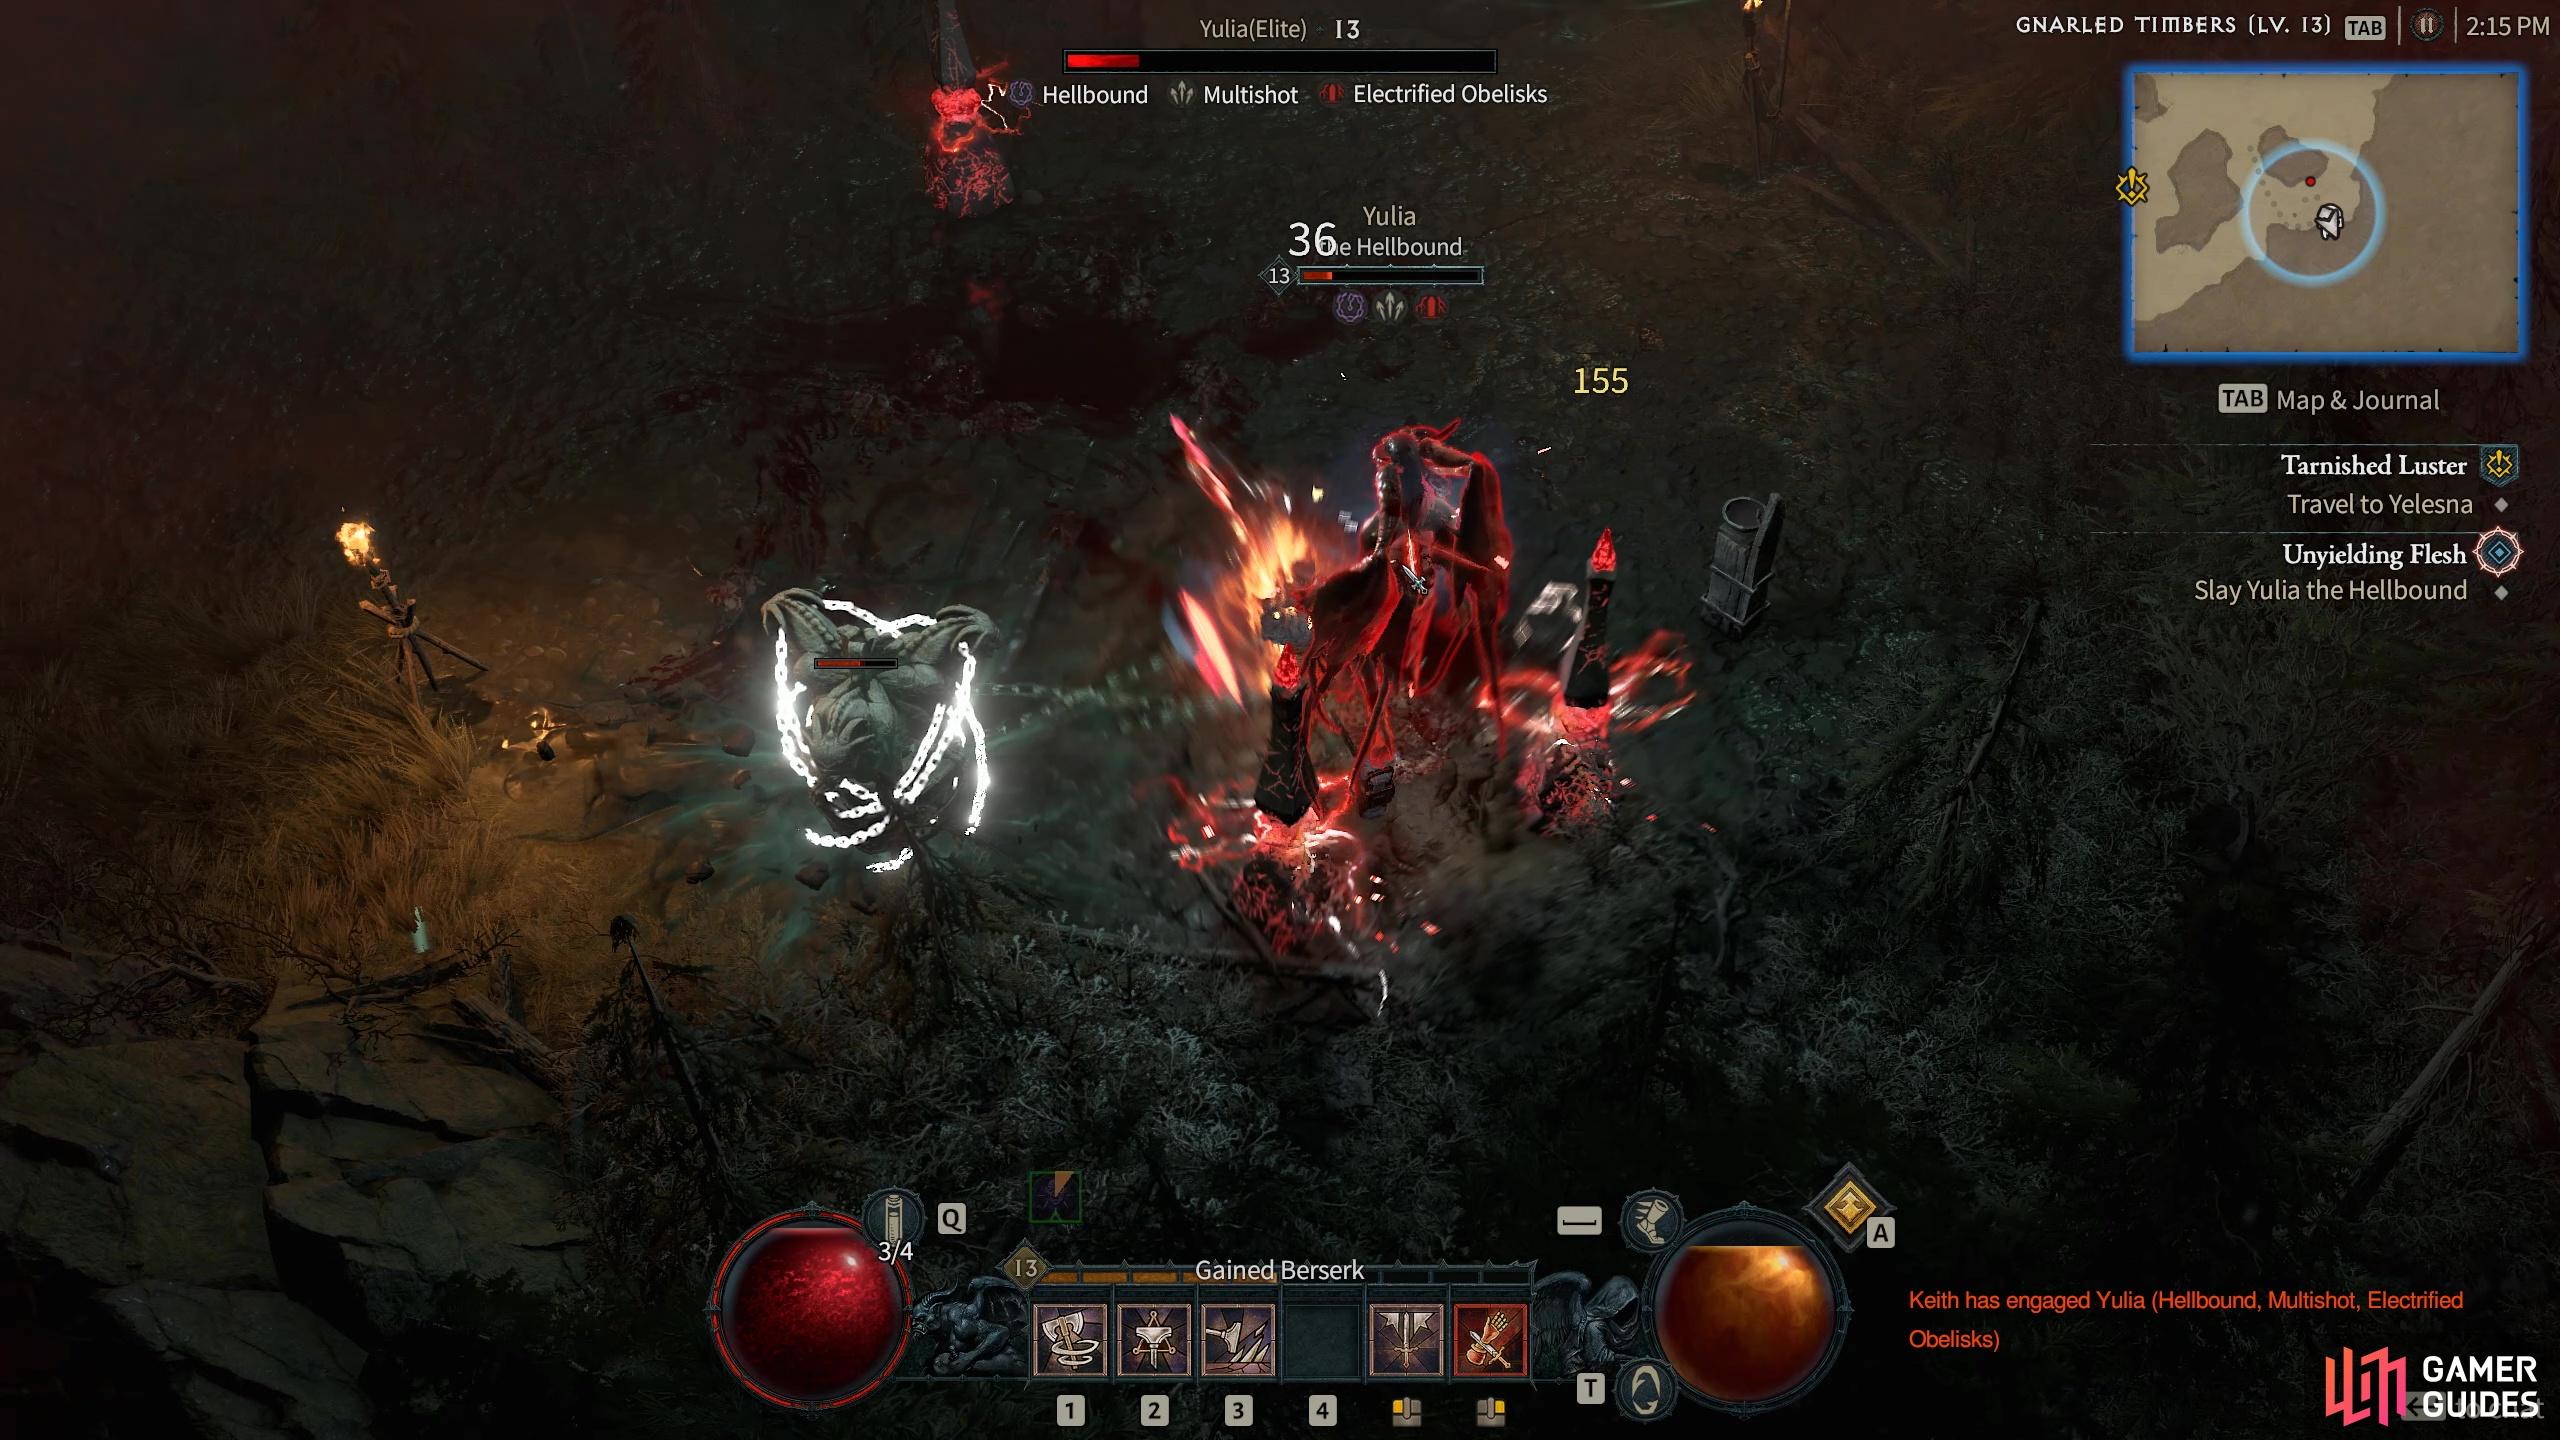
A massive Shadow-Enchanted Werewolf who is the final boss of the Howling Warren dungeon. He sometimes comes with the Hellbound modifier which can tie you in place with shackles. He will leap and swipe at you with Shadow-infused attacks so Shadow resistance is a good idea.
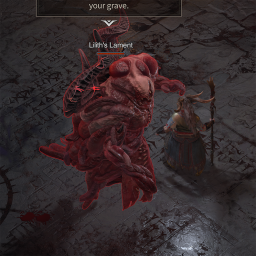
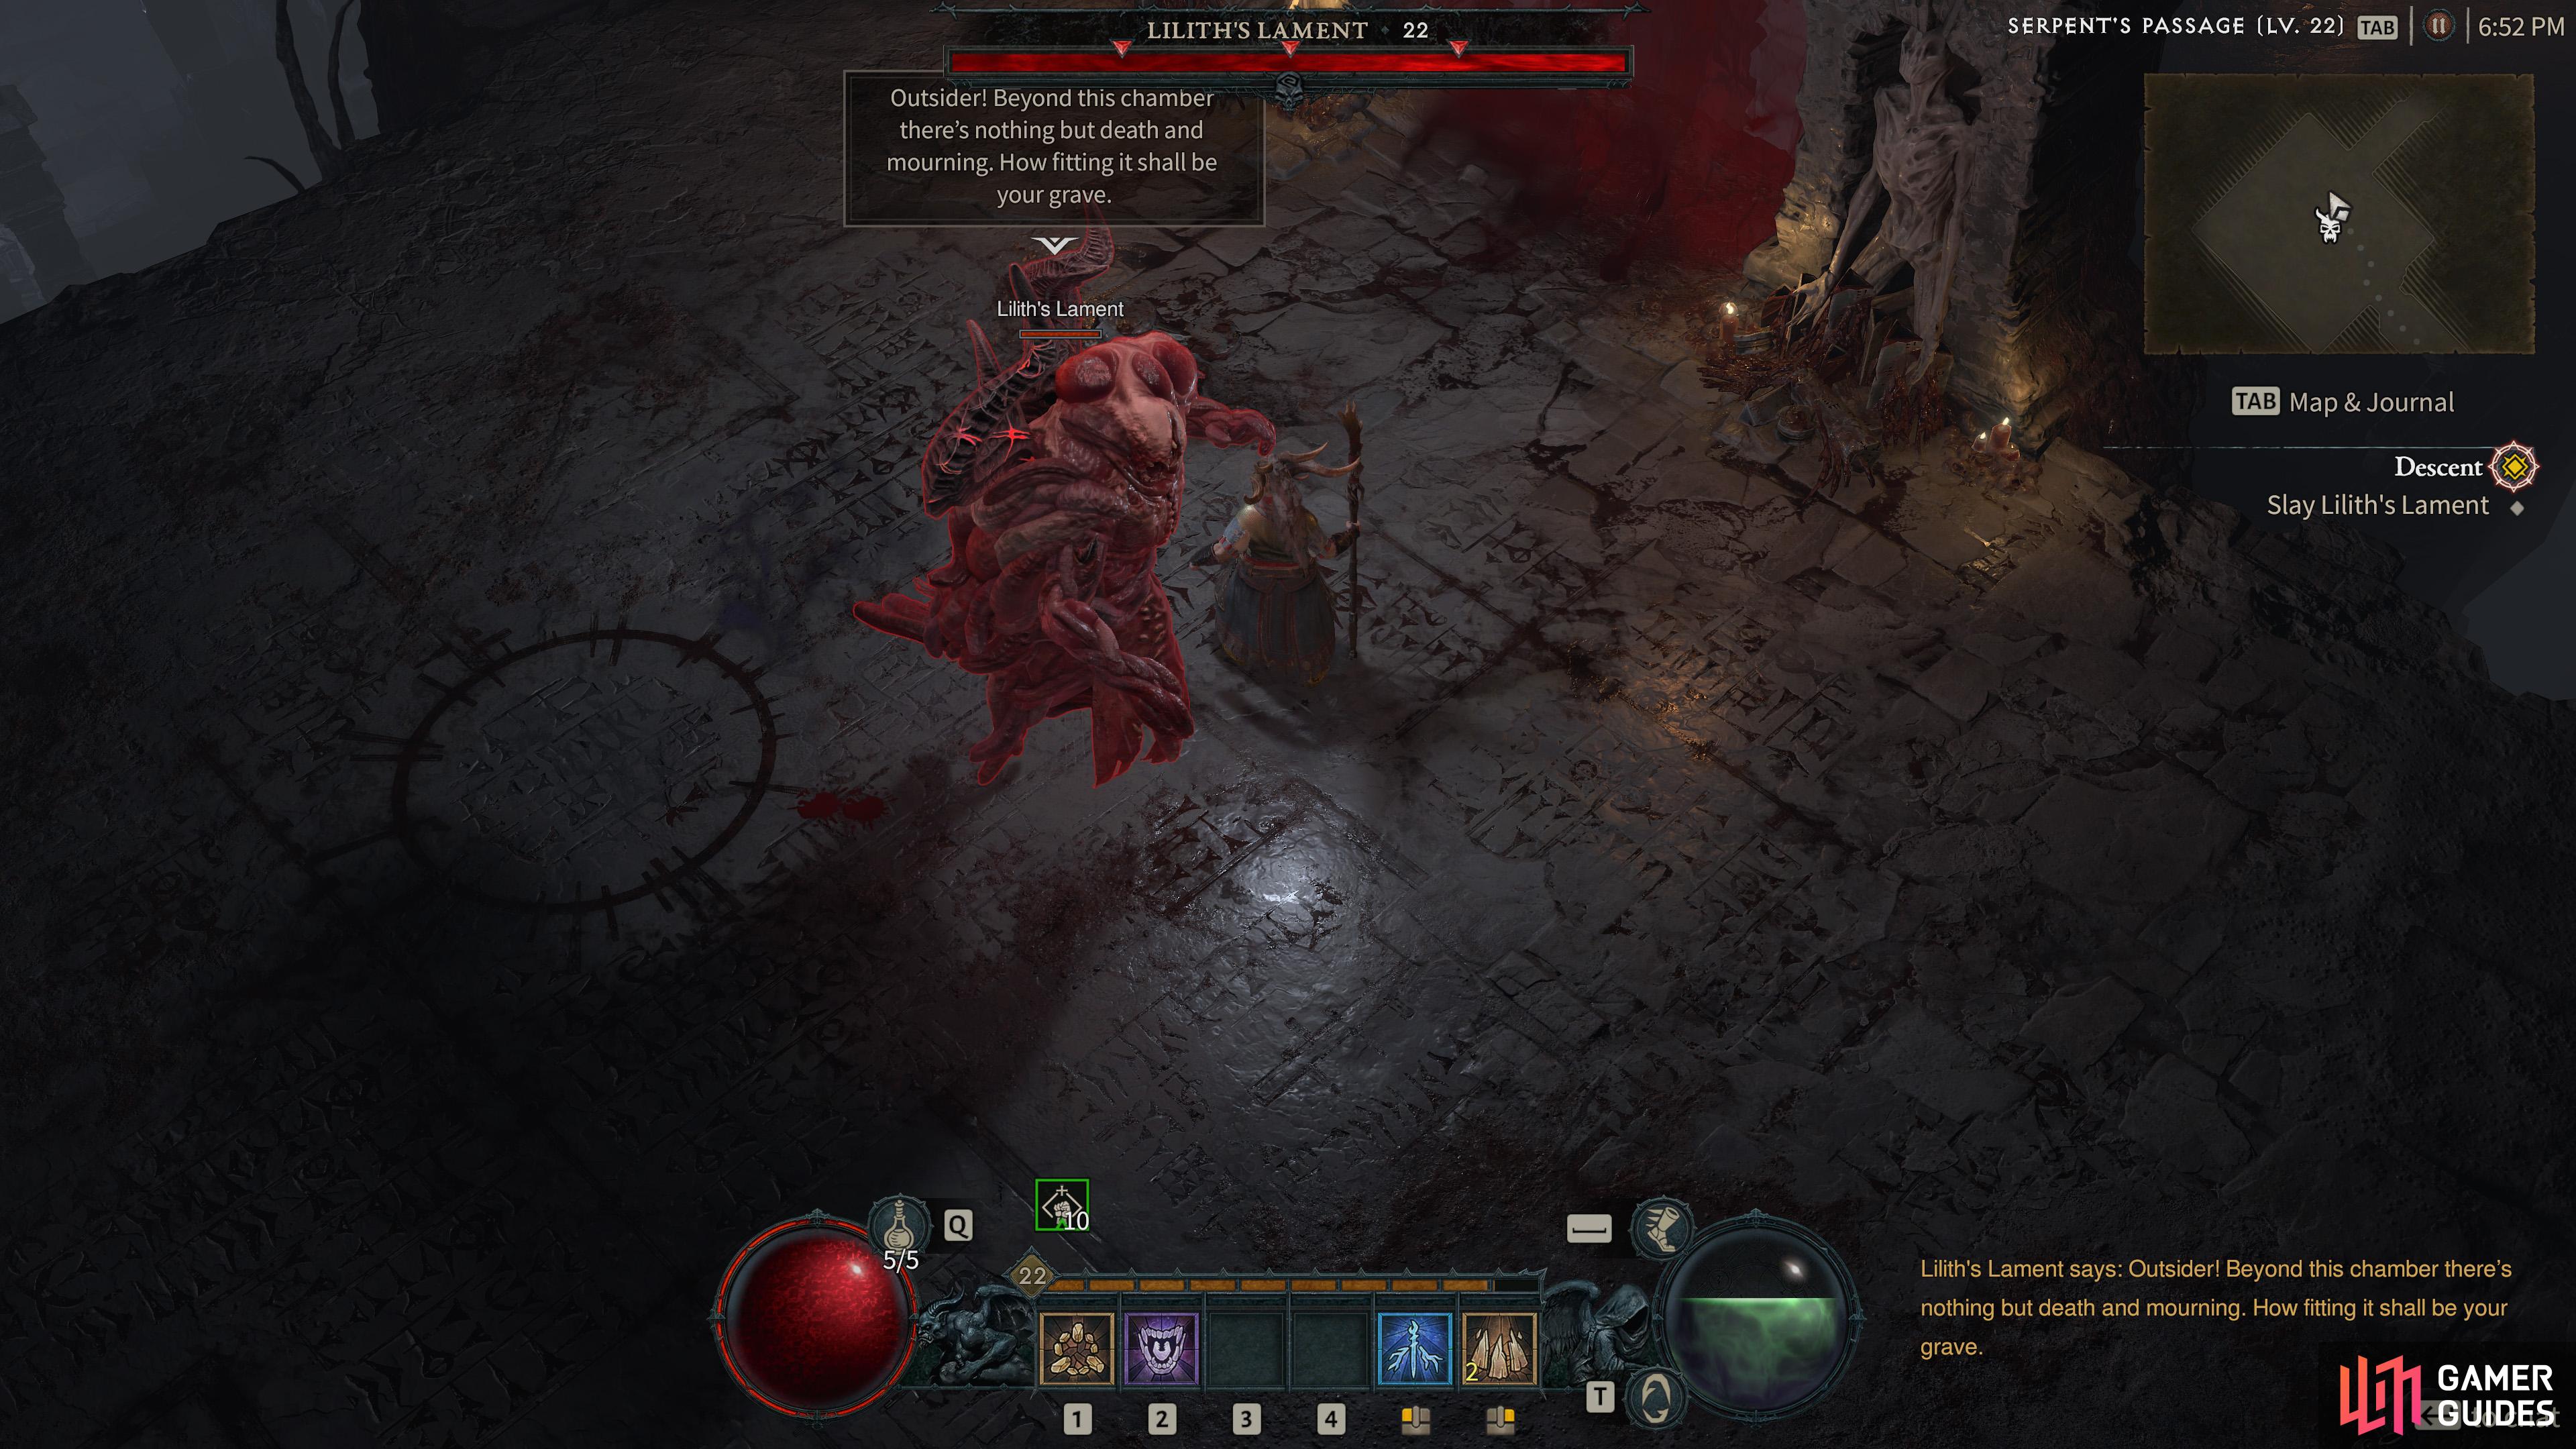
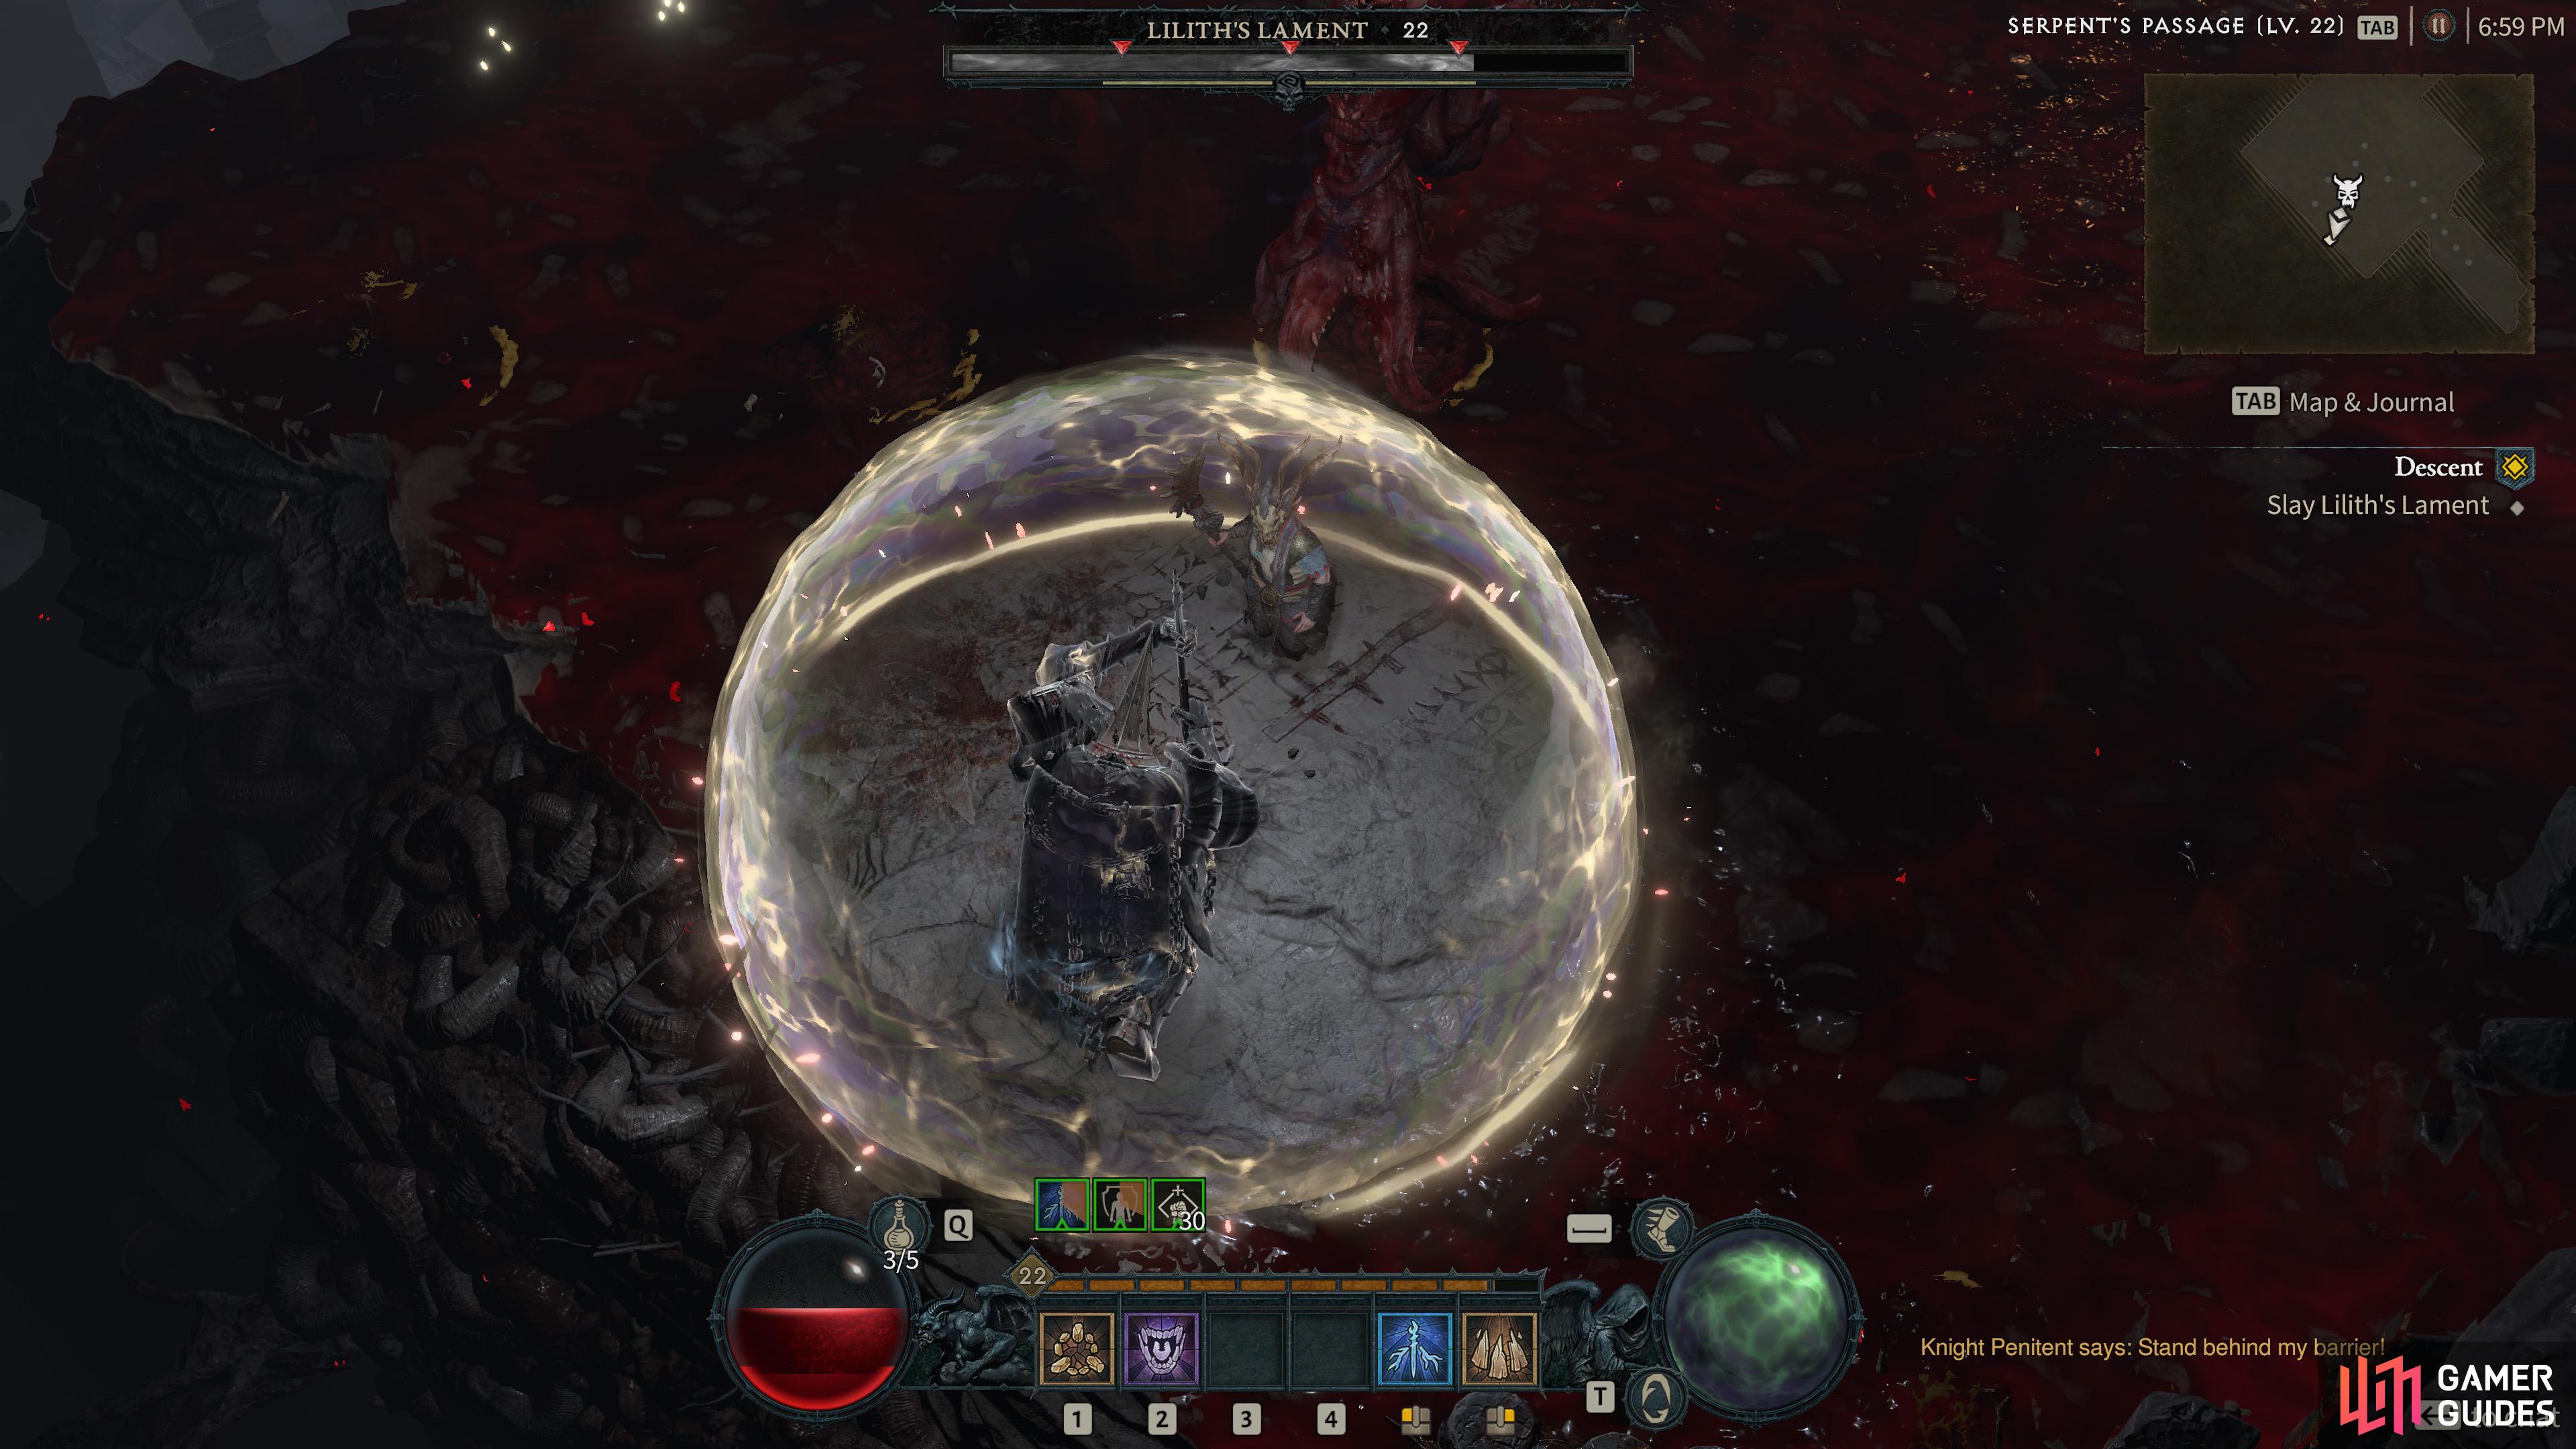
A great beast of oozing, pulsing flesh in the epicenter of the vile corruption inside the Necropolis of the Firstborn in the Serpent’s Passage. It must be defeated to continue the player’s pursuit of Lilith during the quest Descent.
Strategy
The boss will continually cast rolling waves of ooze that will damage/poison the player. Dodge them by finding the gap in-between the waves.
The boss will occasionally cast a room-wide AoE. This is your queue to stand inside the shield of the Knight Penitent donning the heavy Father’s Grace armor. This will protect you. Immediately after this the boss will target you with a frontal cone attack which you can dodge by quick stepping behind.
Detailed Location
Found inside the Necropolis of the Firstborn in the Serpent’s Passage.
A Tormented Earth Druid Elite and one of the three Druid Spirits you must free during the Túr Dúlra Stronghold quest. They wield a massive staff and can cast a powerful knockback spell as well as summon Apprentices in large numbers to help them.
Detailed Location
During the Túr Dúlra Stronghold quest, in the south.
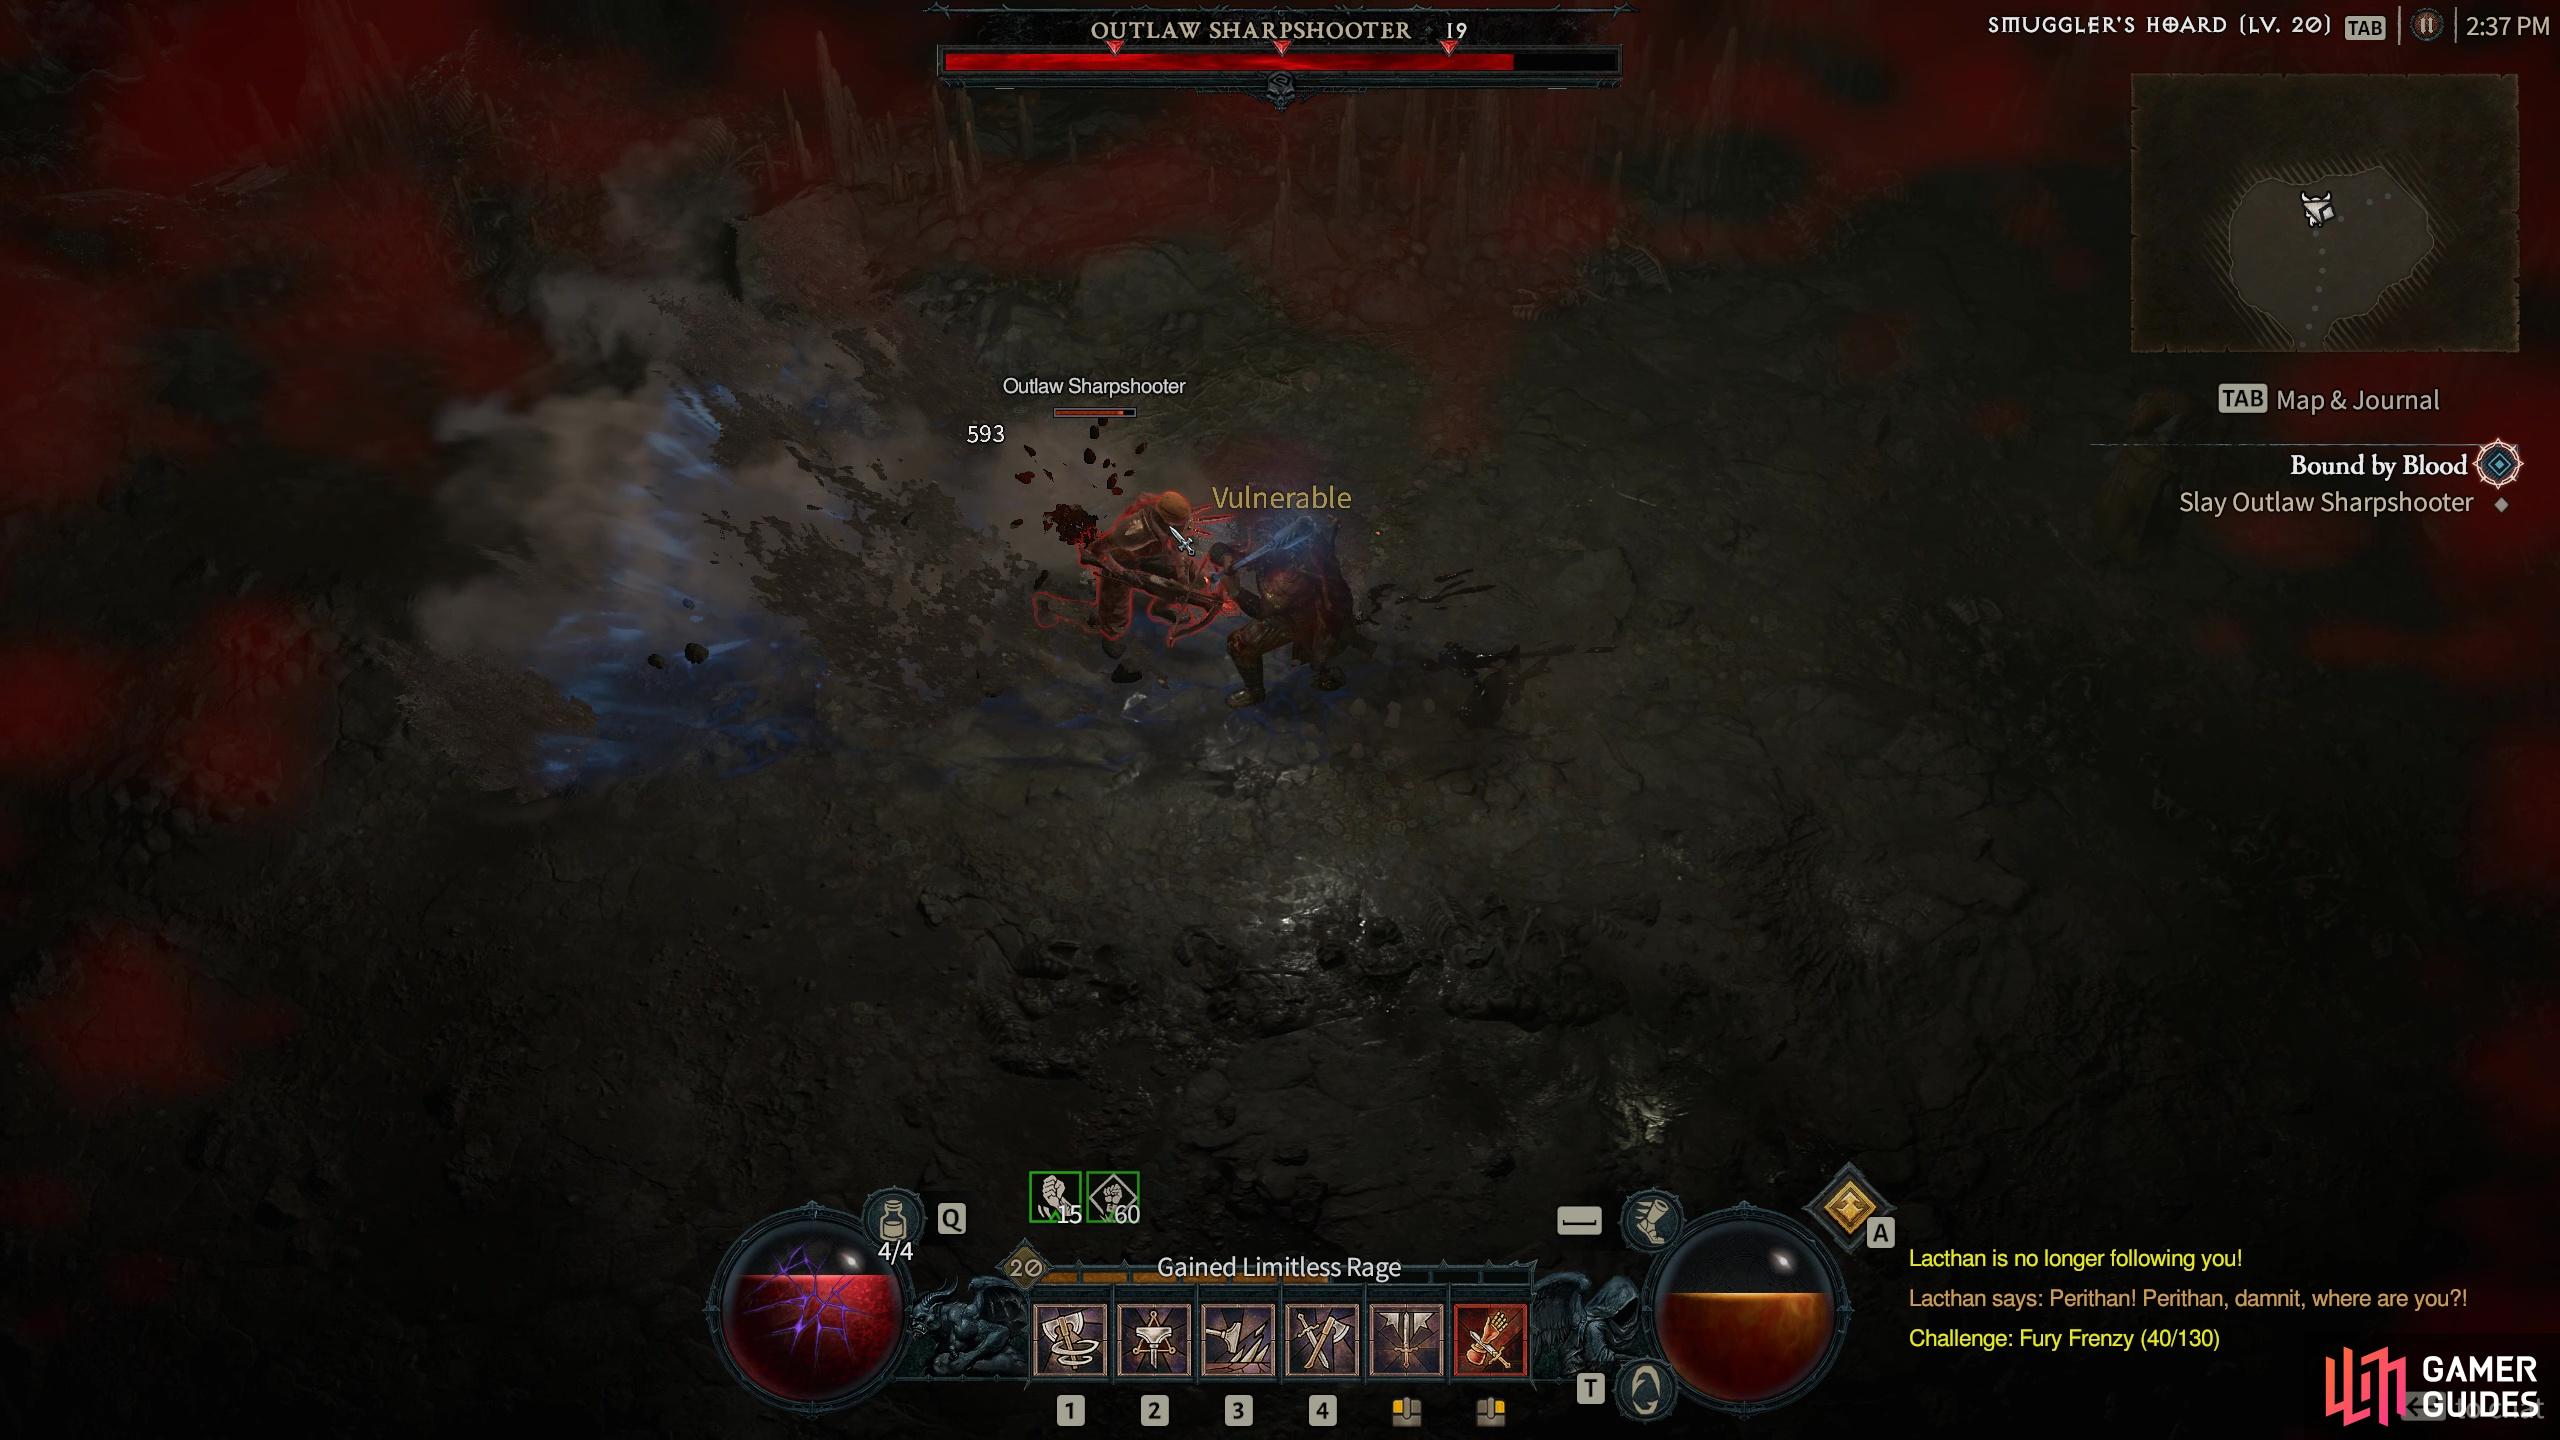
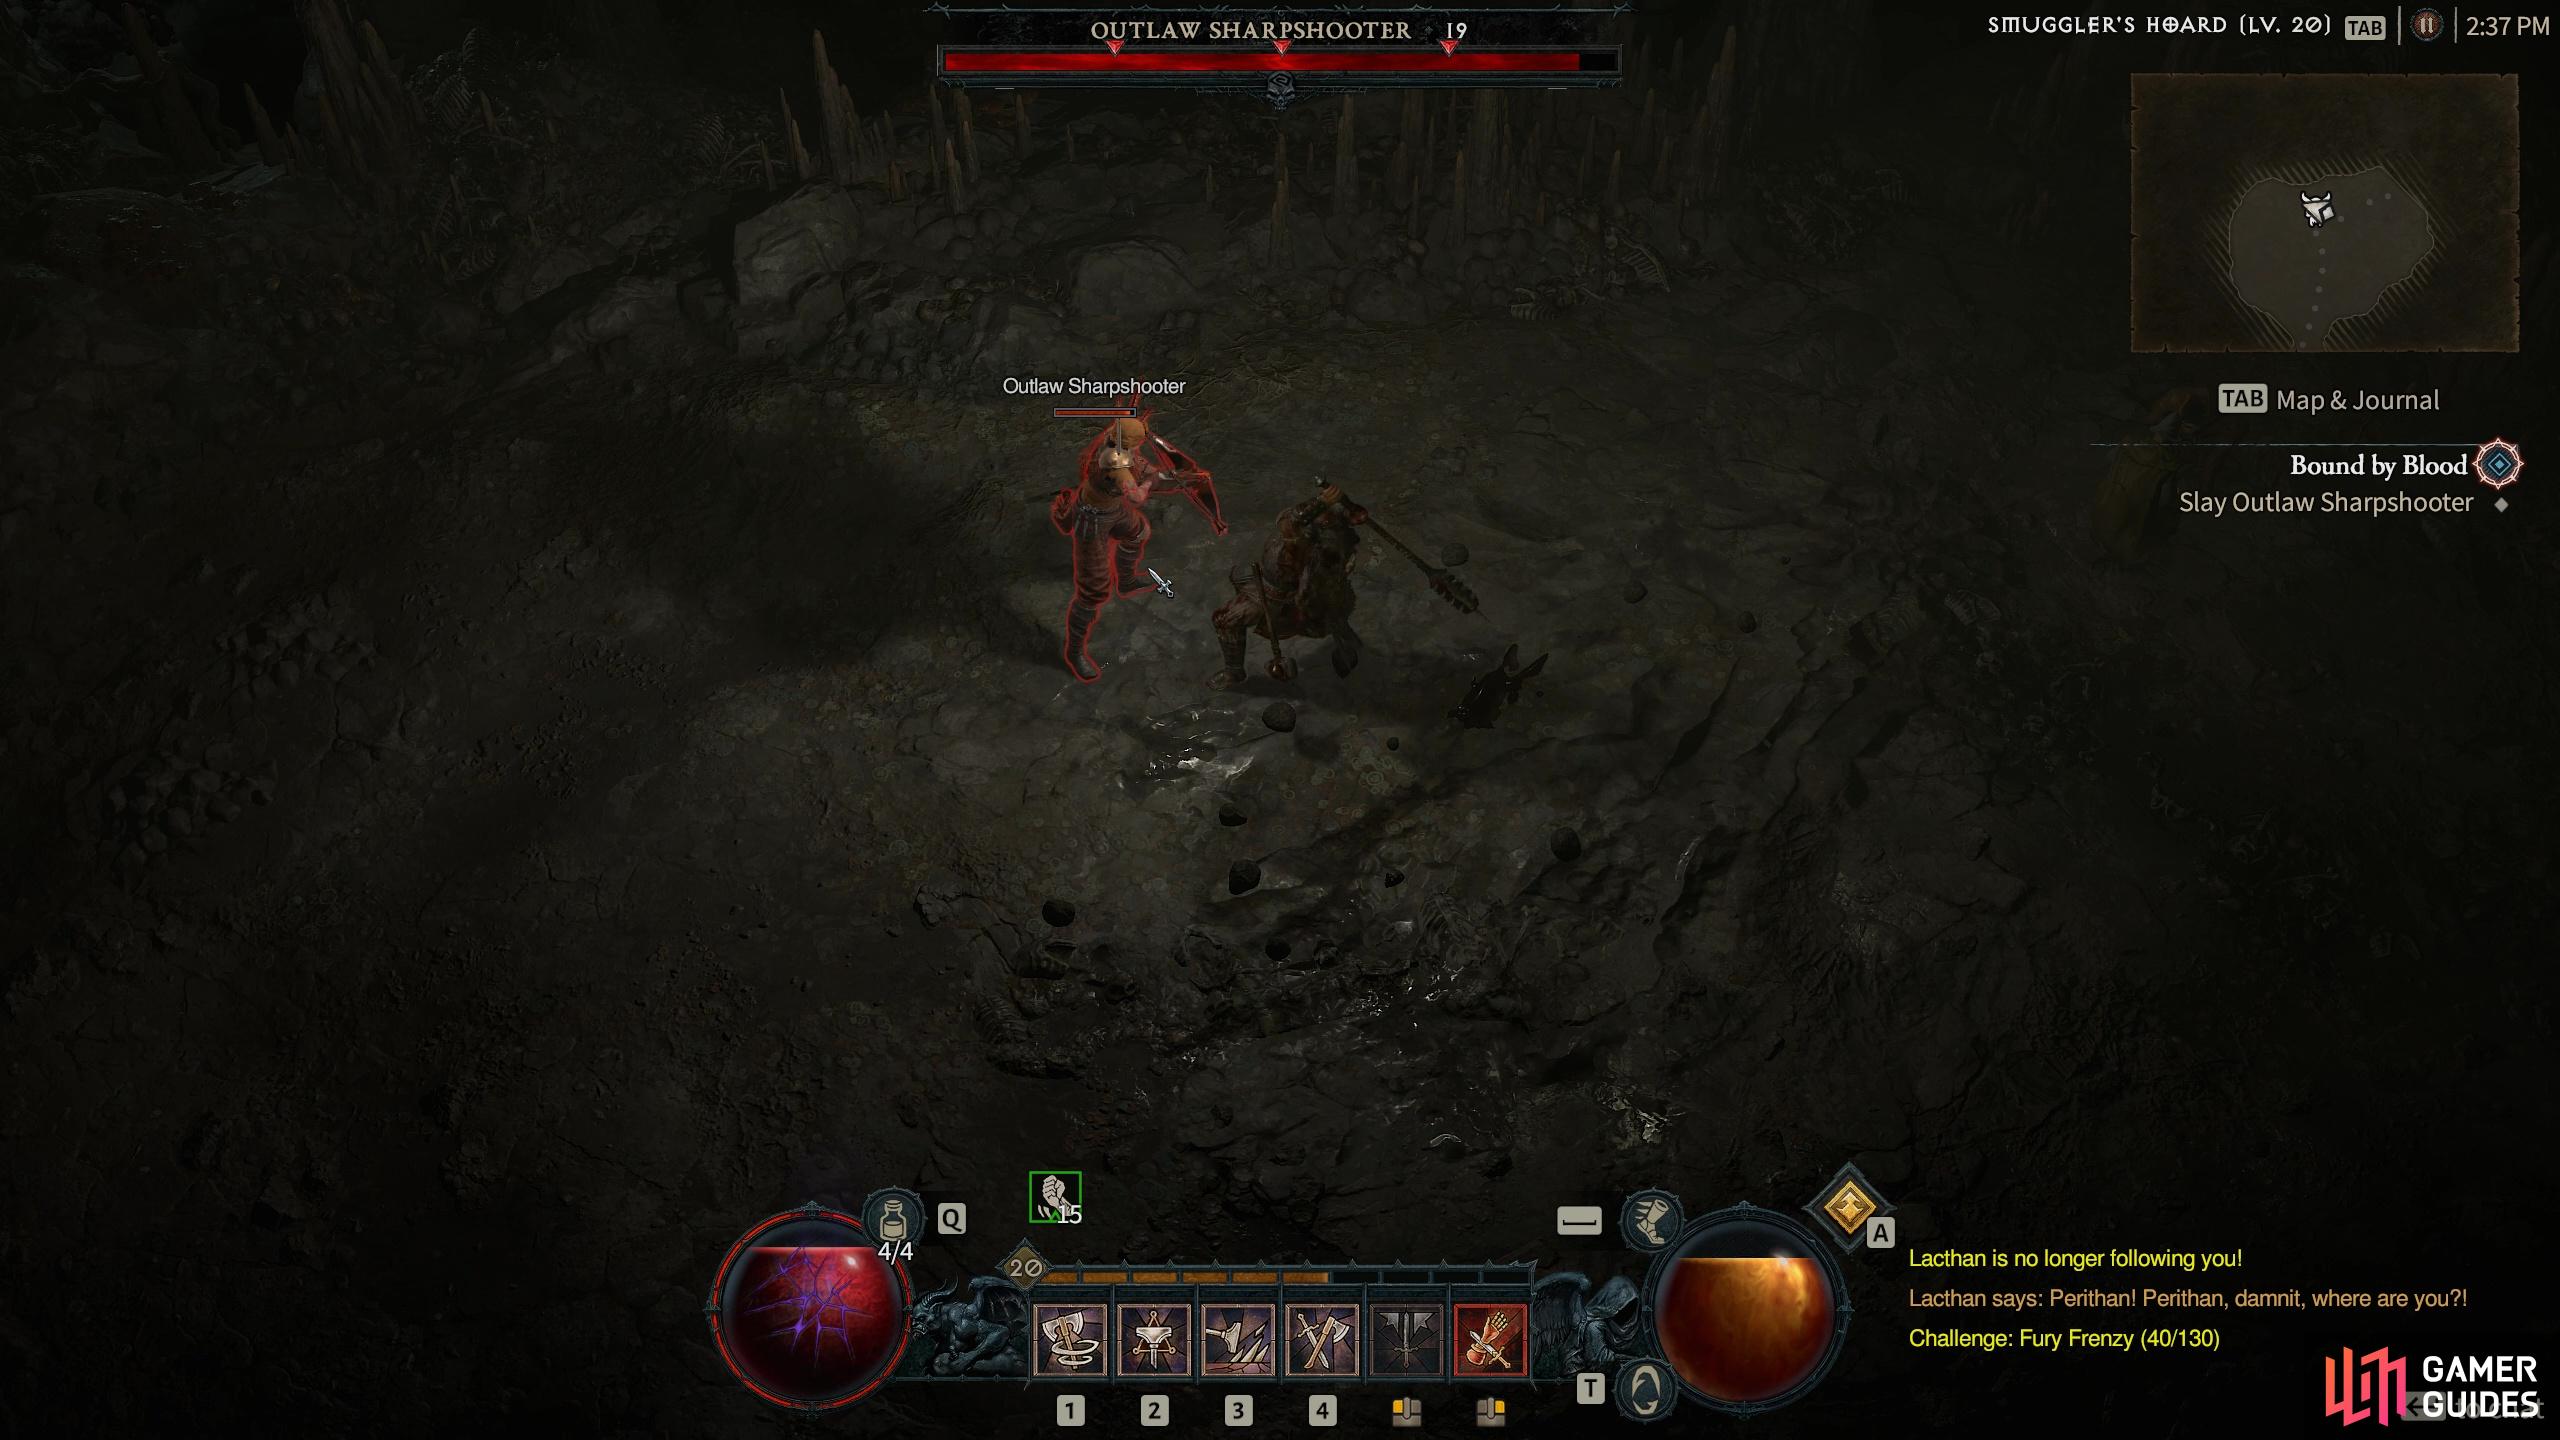
The Outlaw Sharpshooter is another crossbow-laden enemy that will first flaming bolts at you from afar. Doubled with a decent health bar they can cause a problem if there are multiple enemies in the vicinity.
They also have the ability to teleport around the vicinity leaving fireball shooting spots around that really can cause issues.
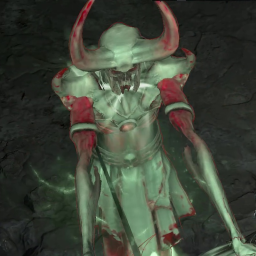
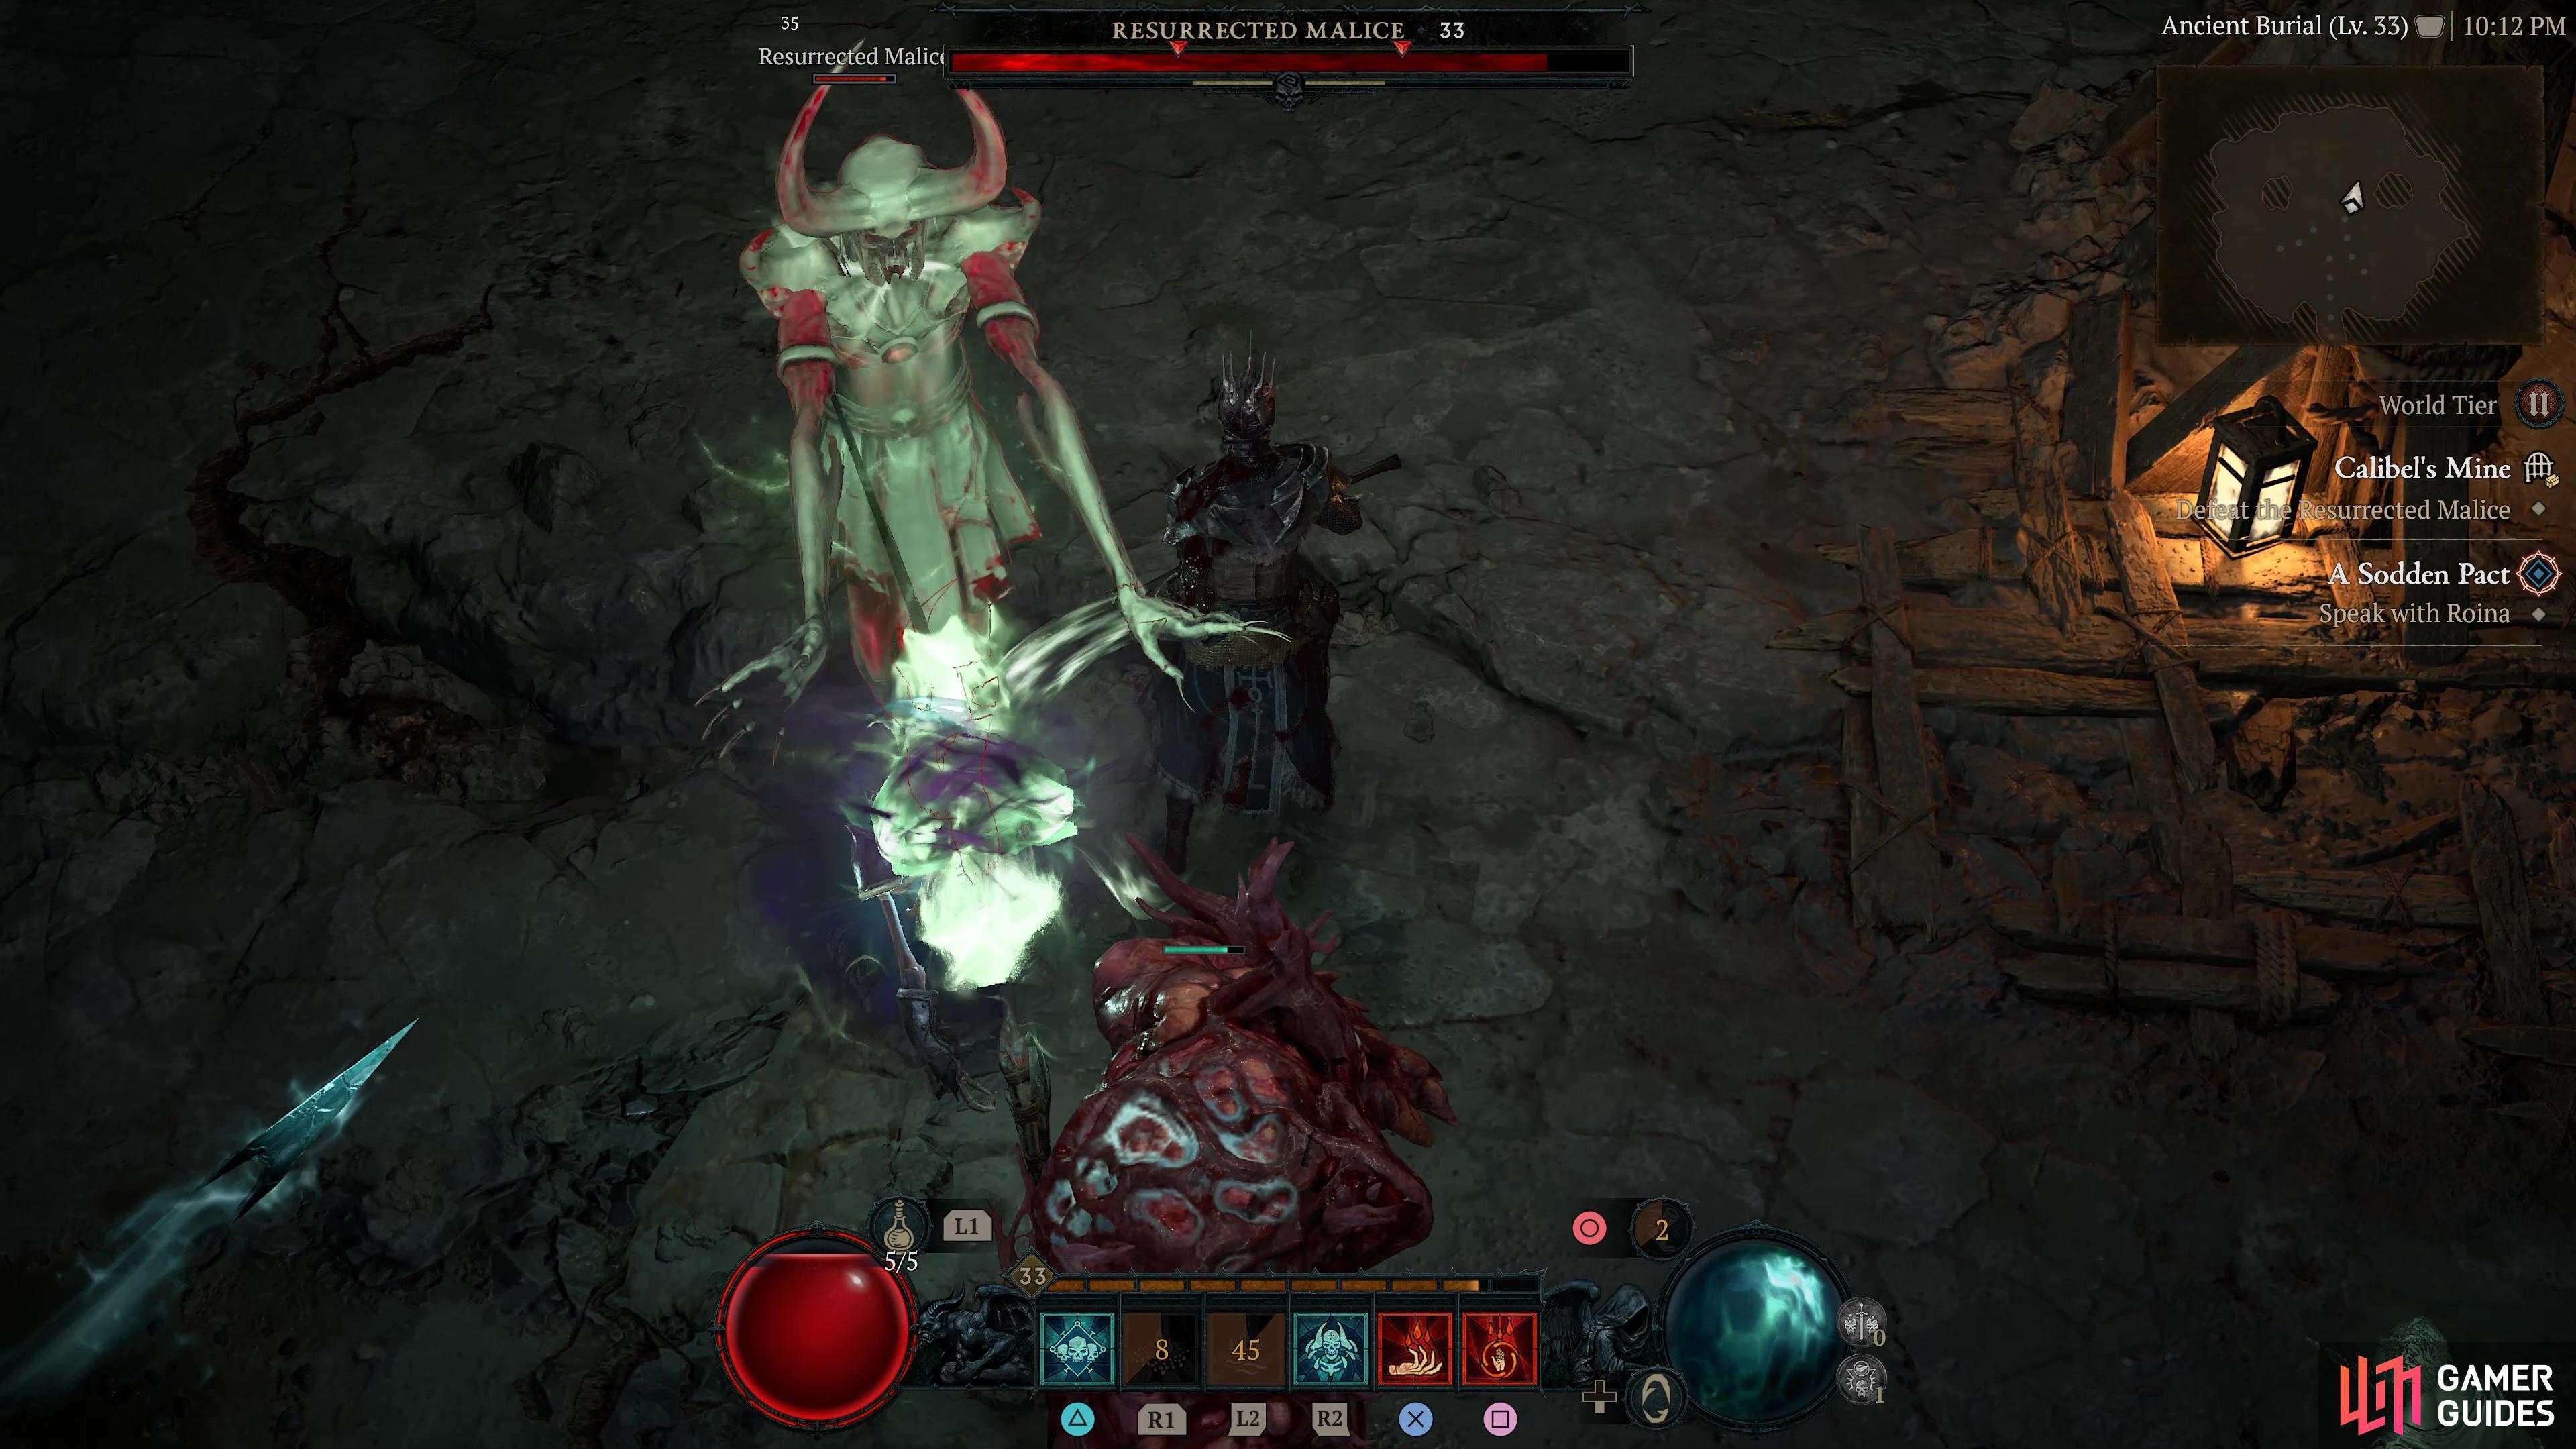
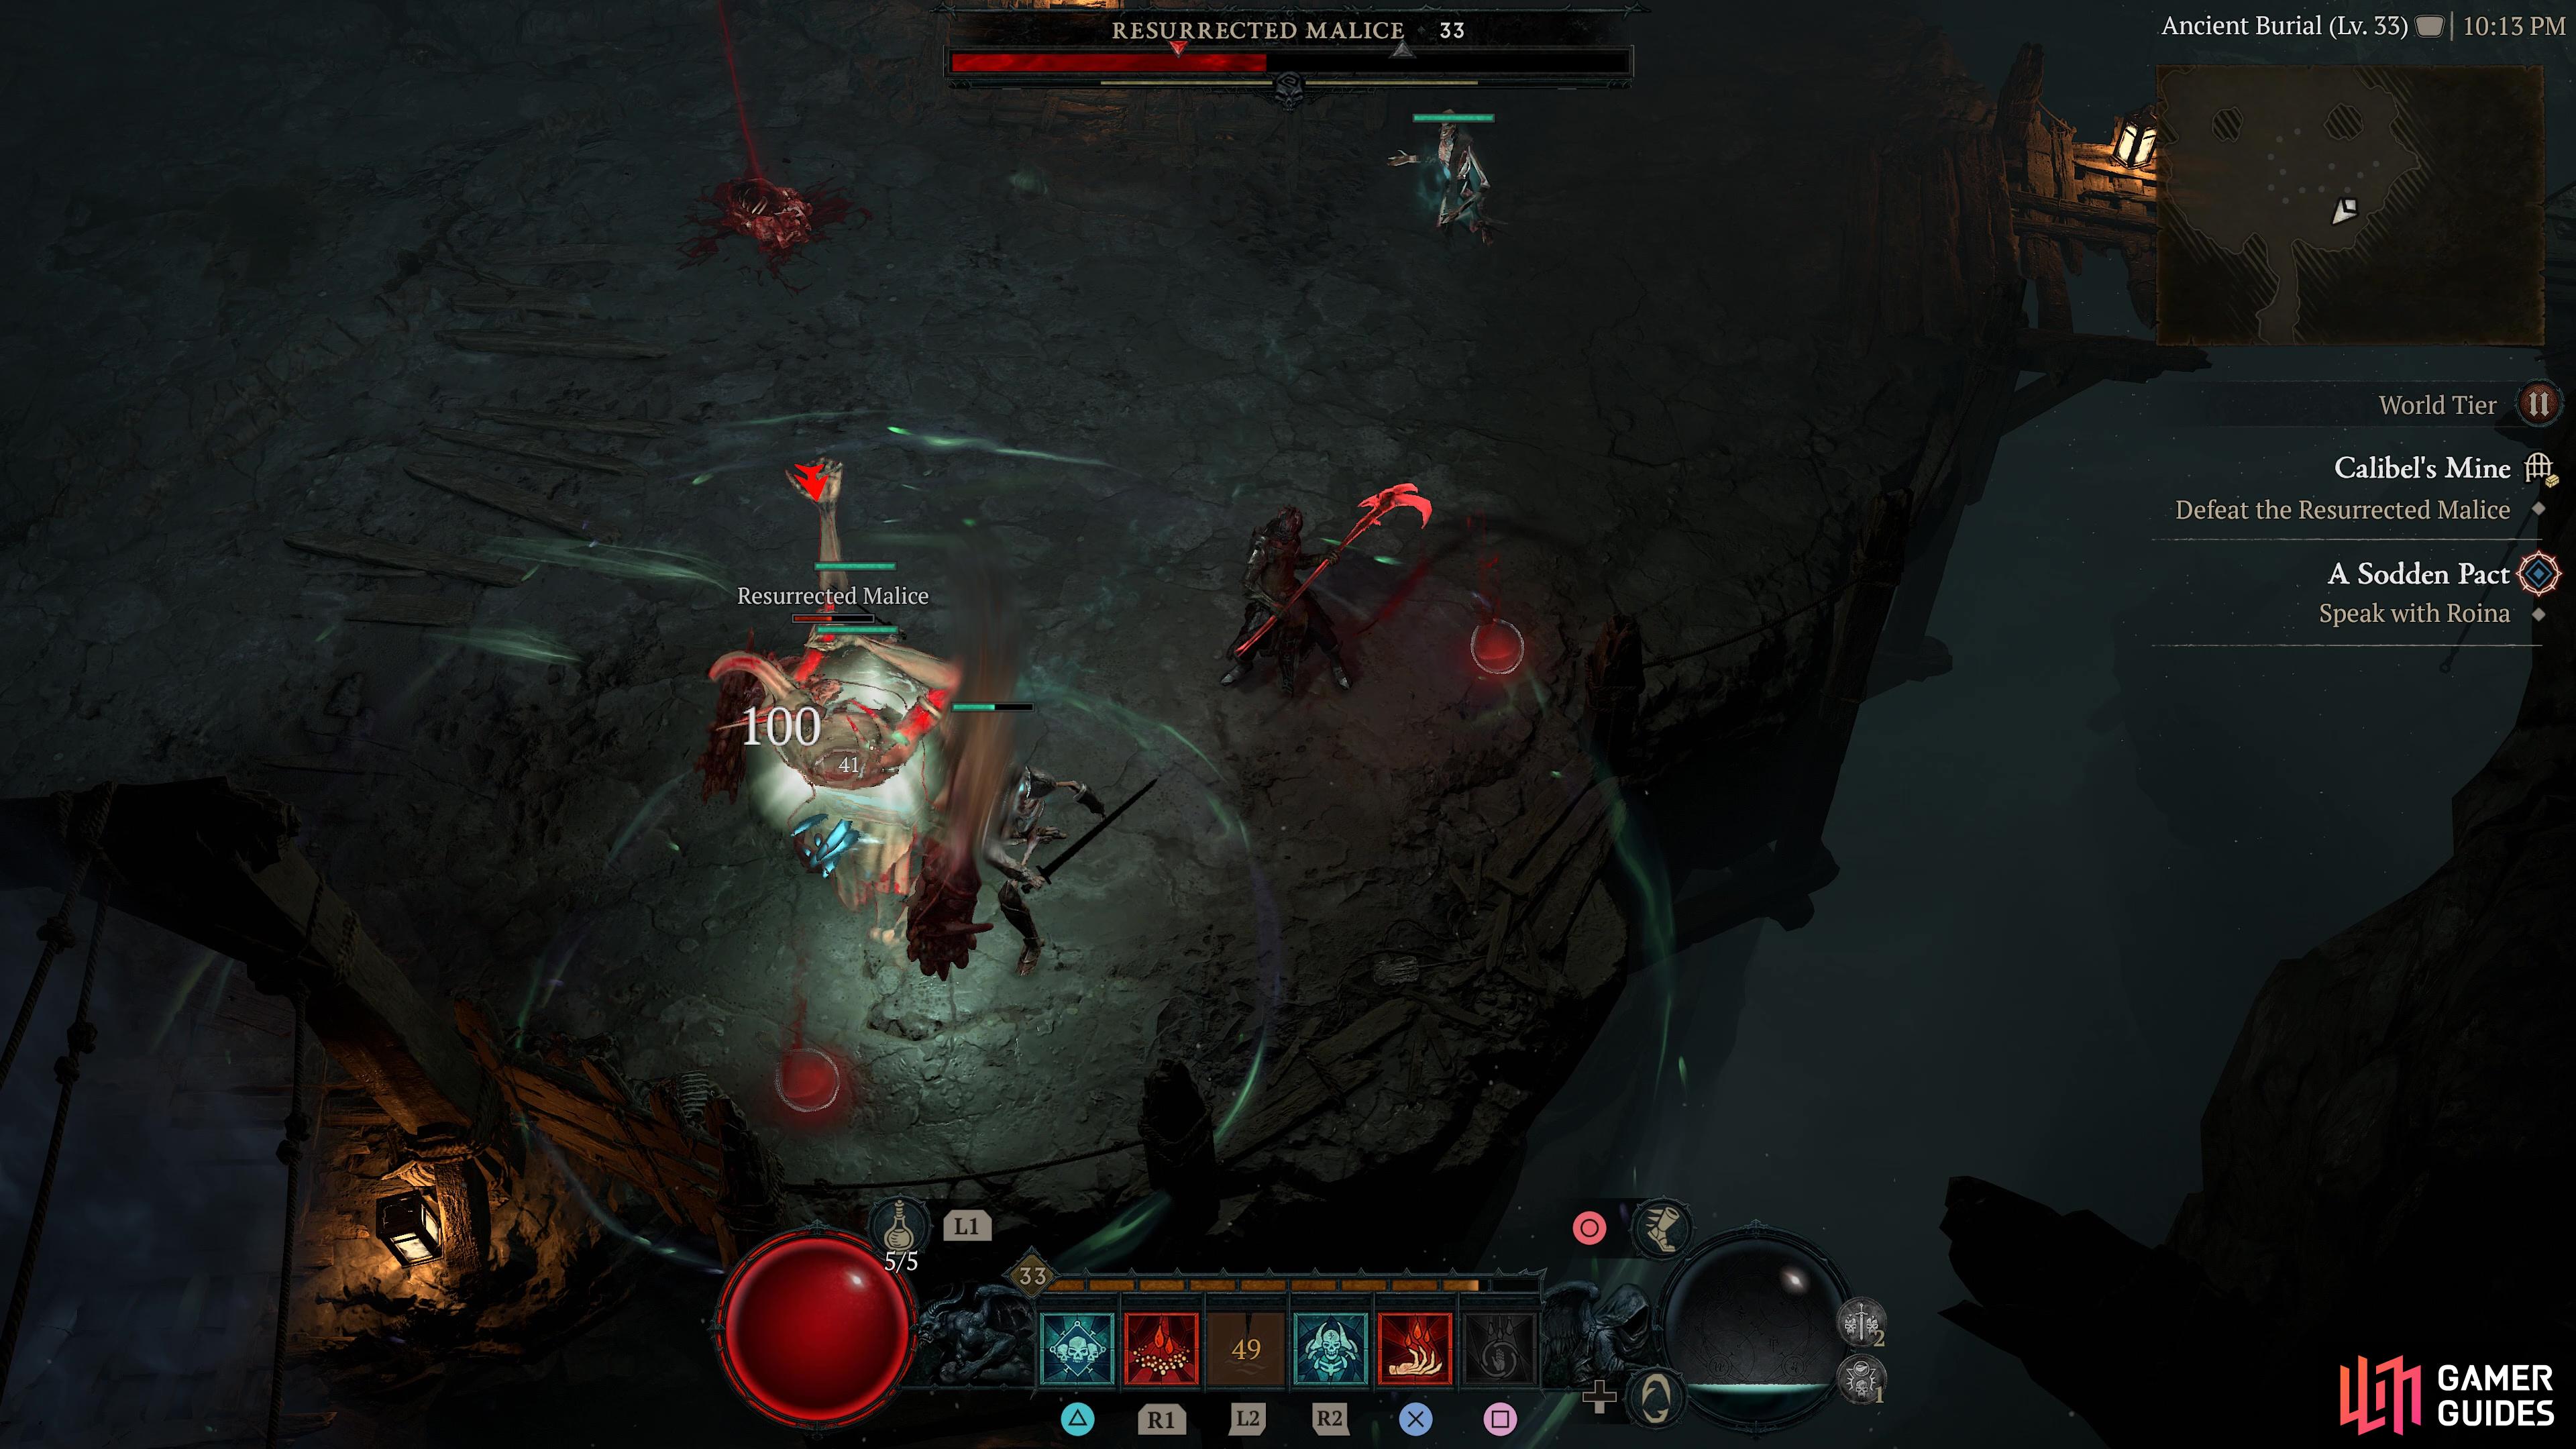
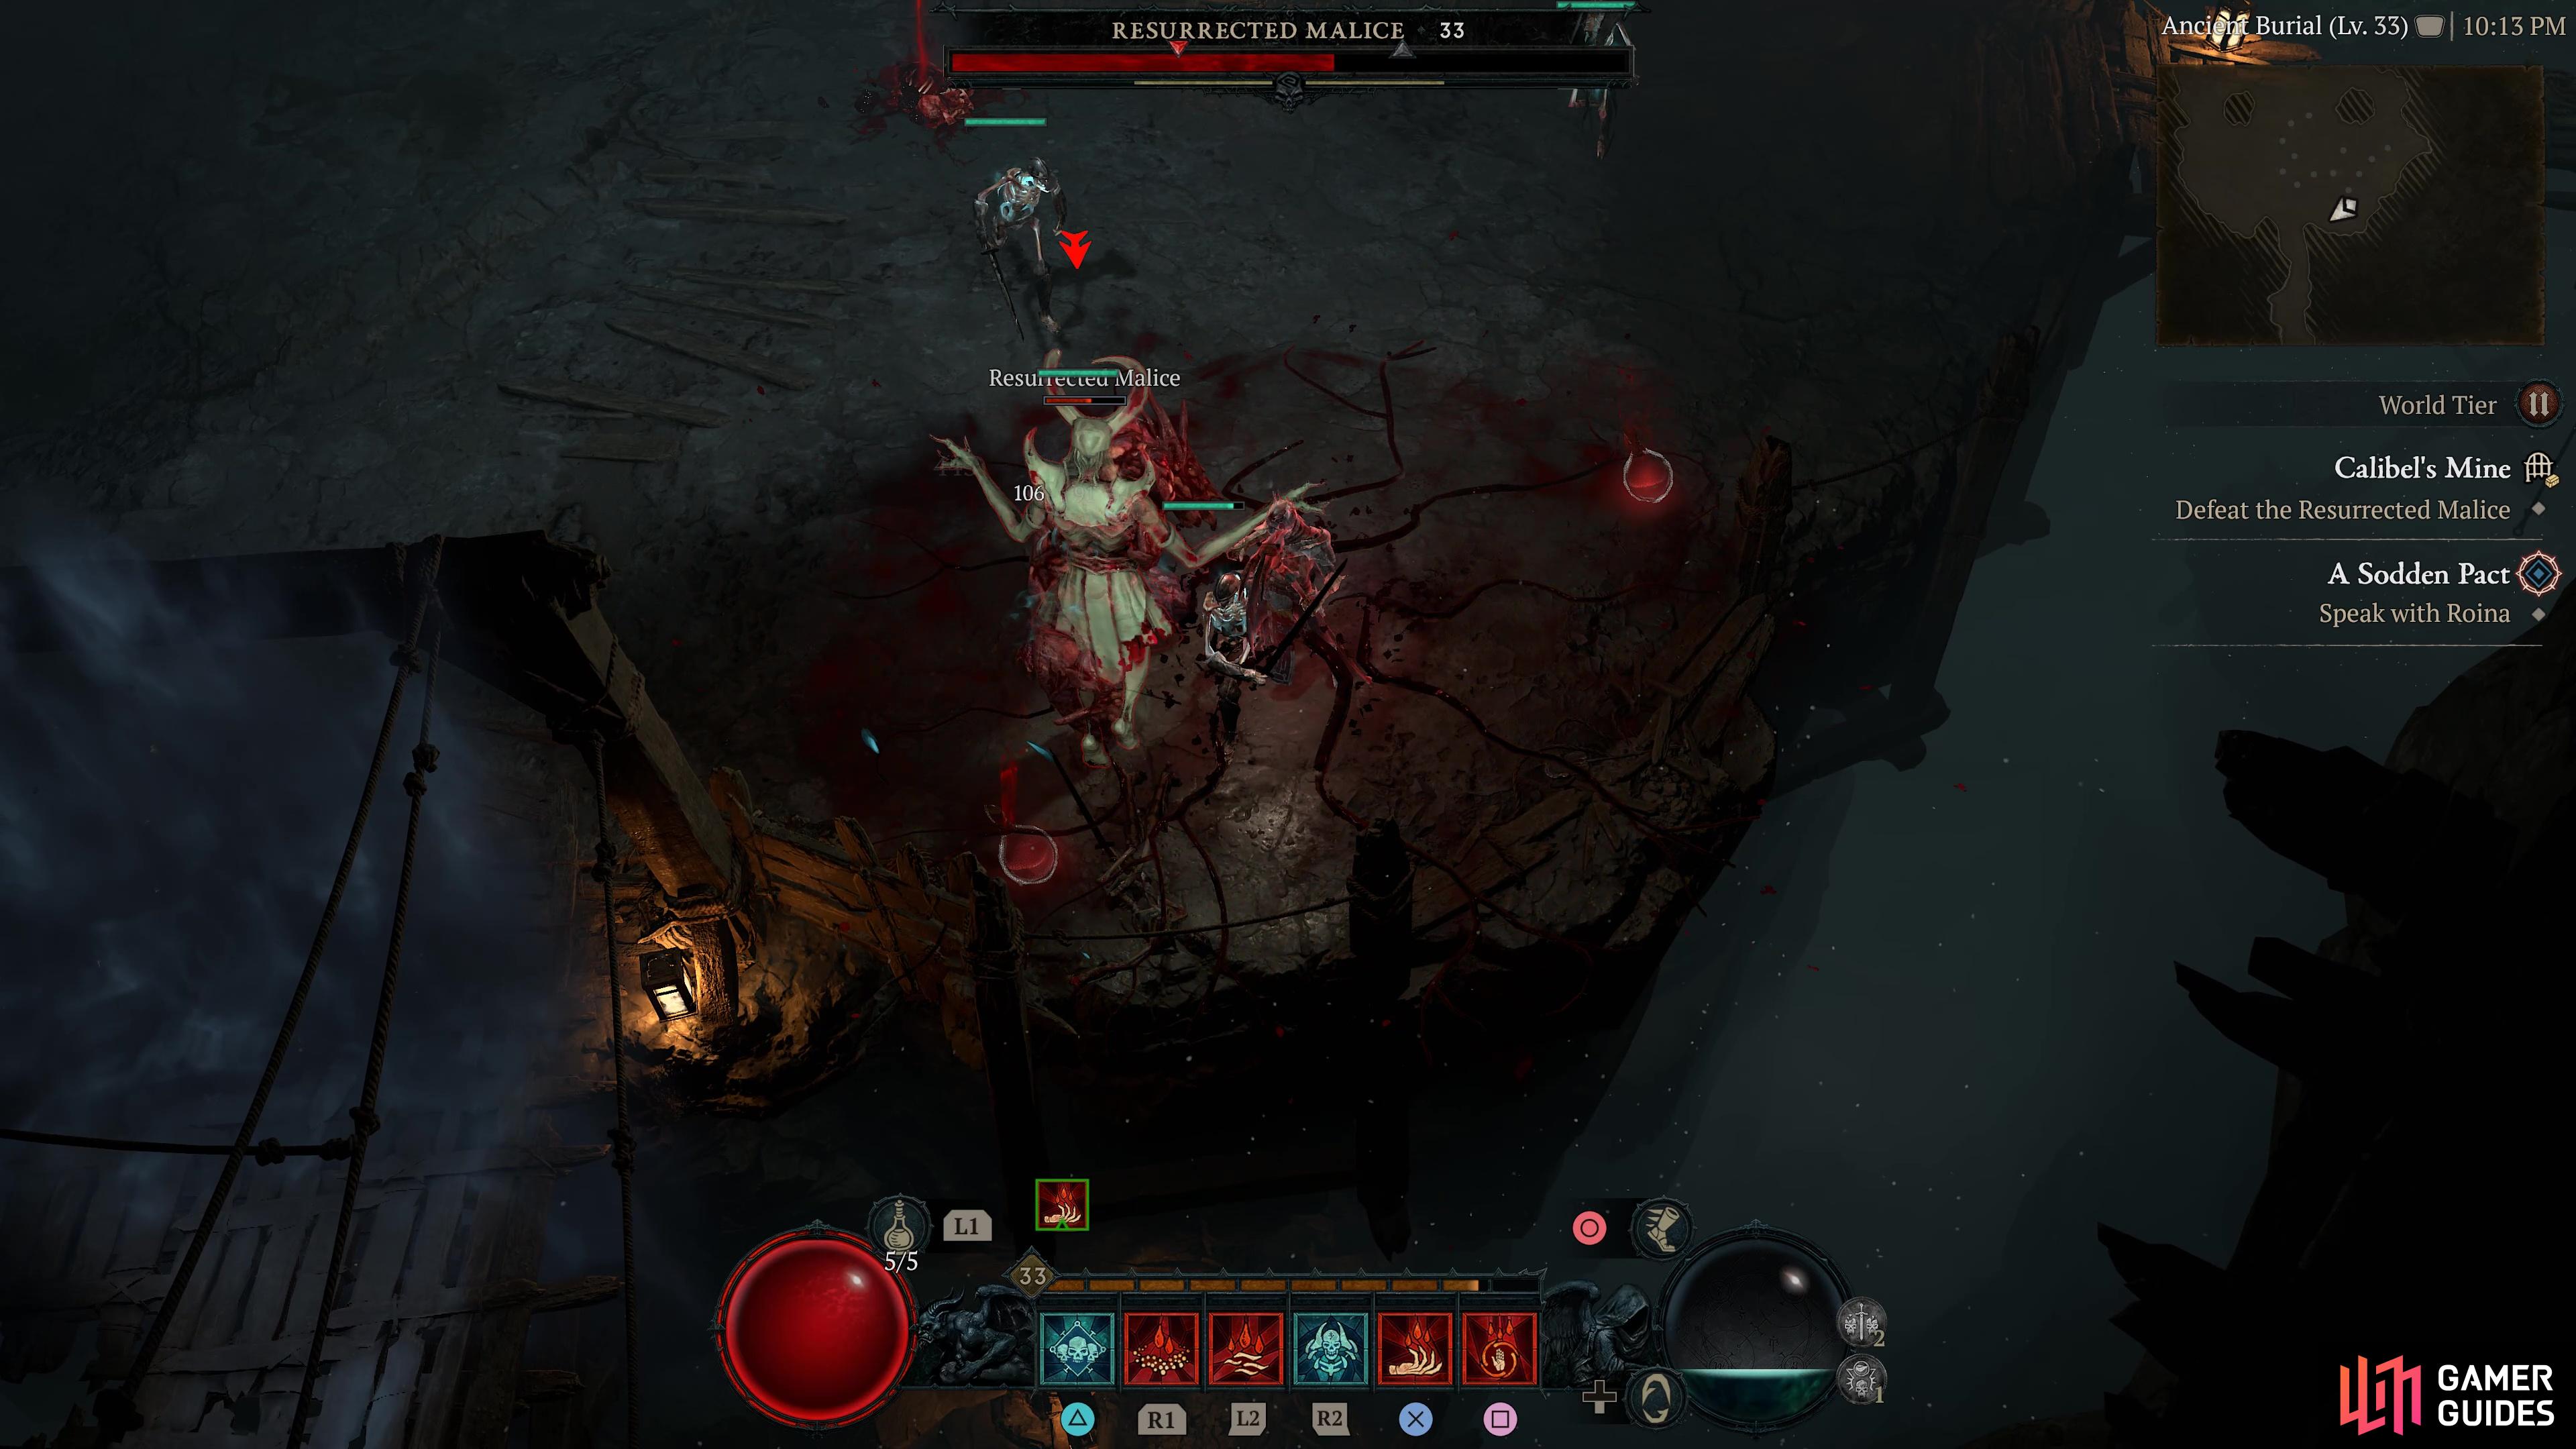
The final boss of Calibel’s Mine and a ghost-type enemy who summons whirlwinds around it to knock players back. It will repeatedly form glowing spirits and shoot them at players.
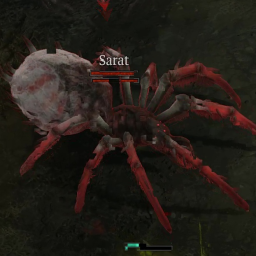
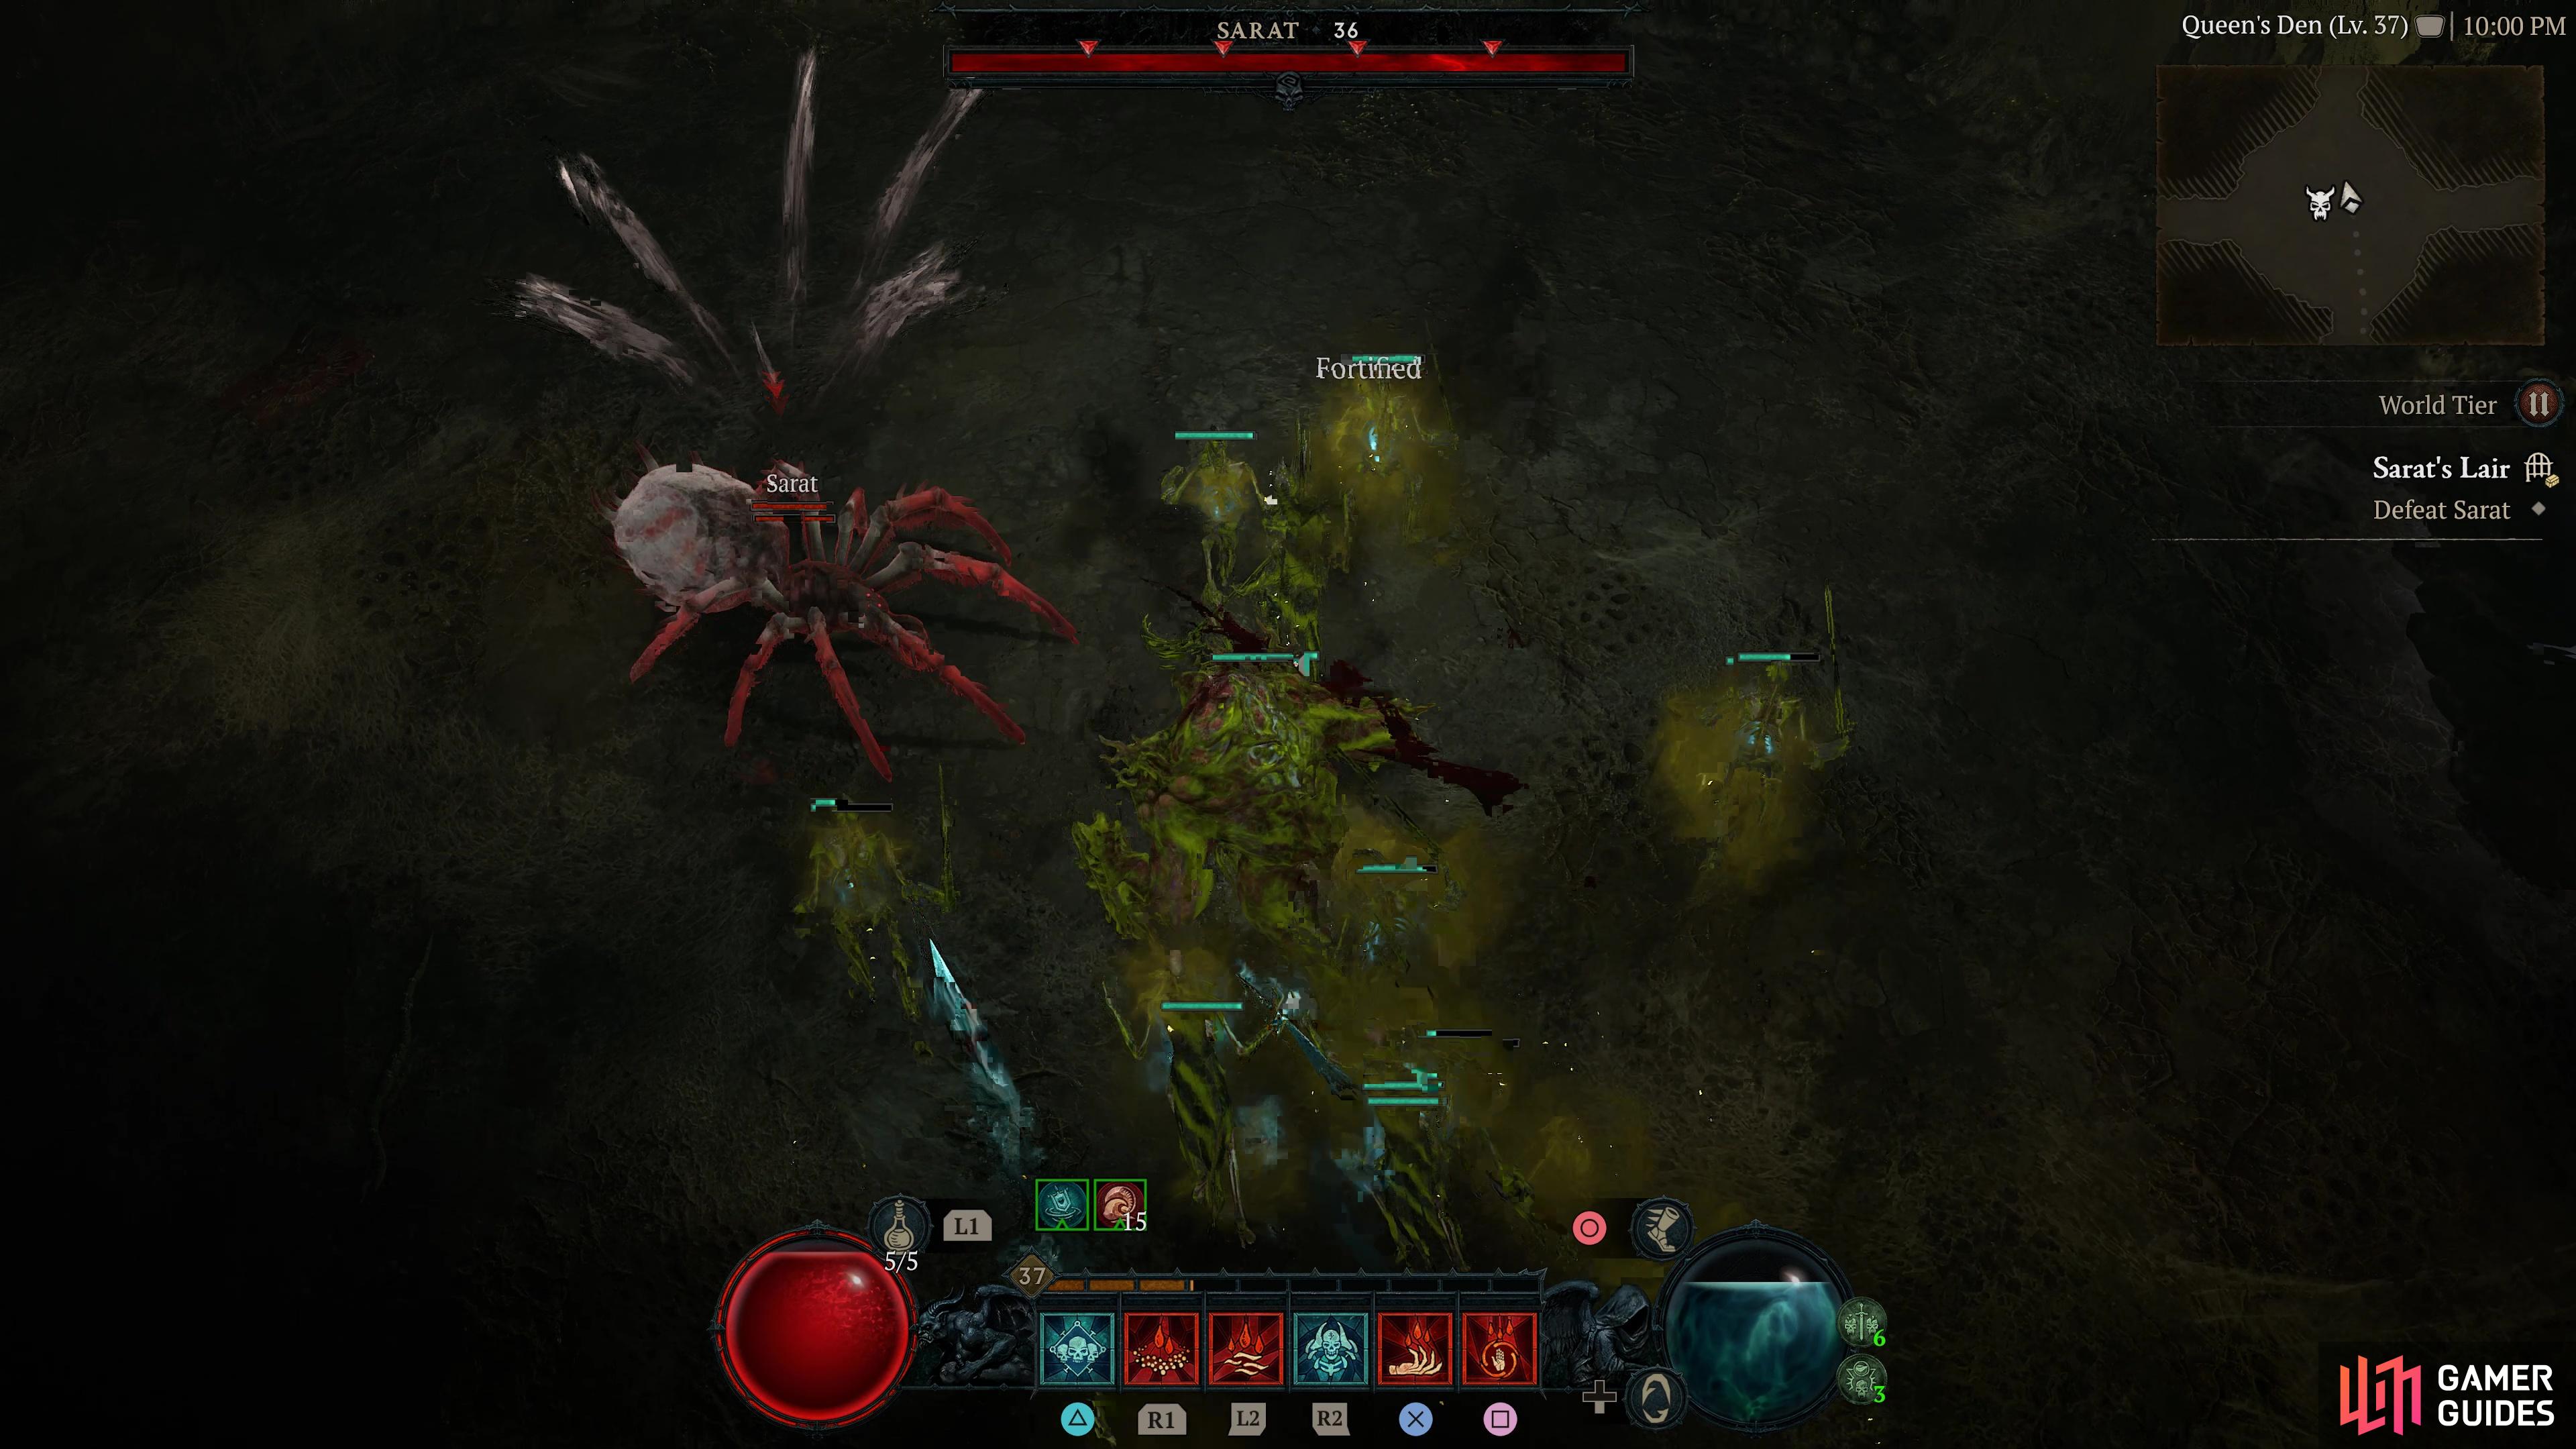
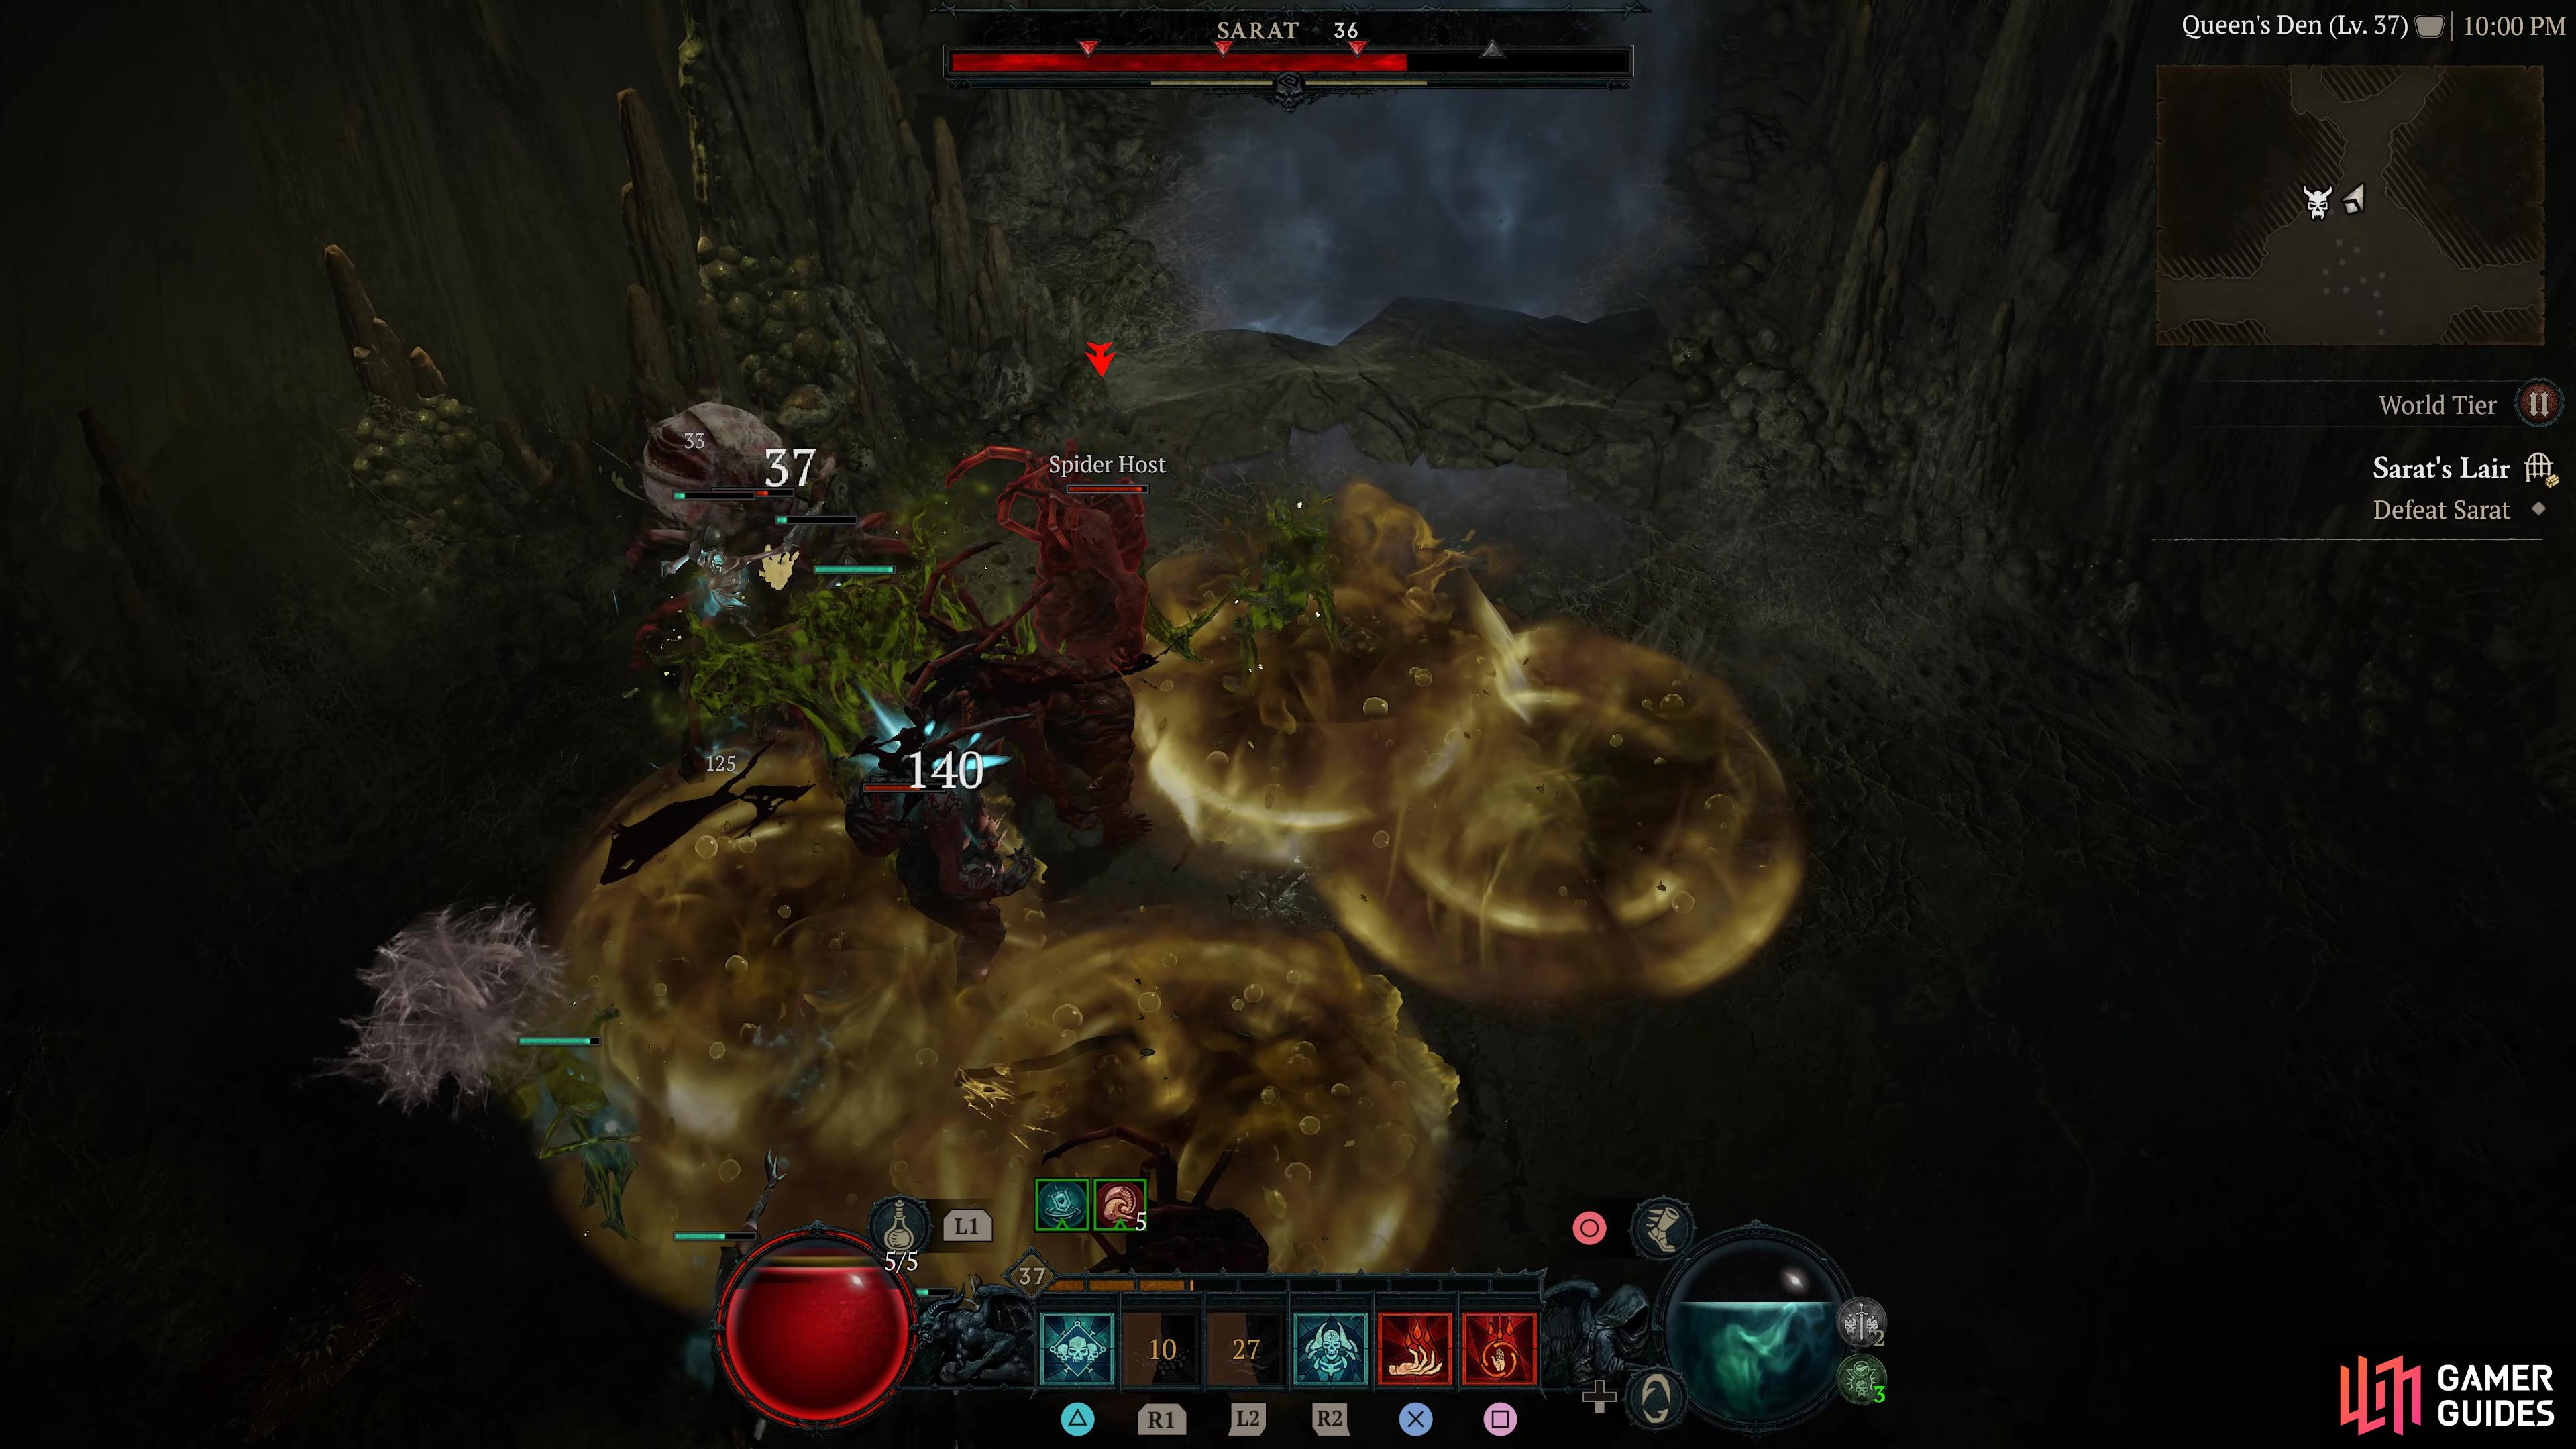
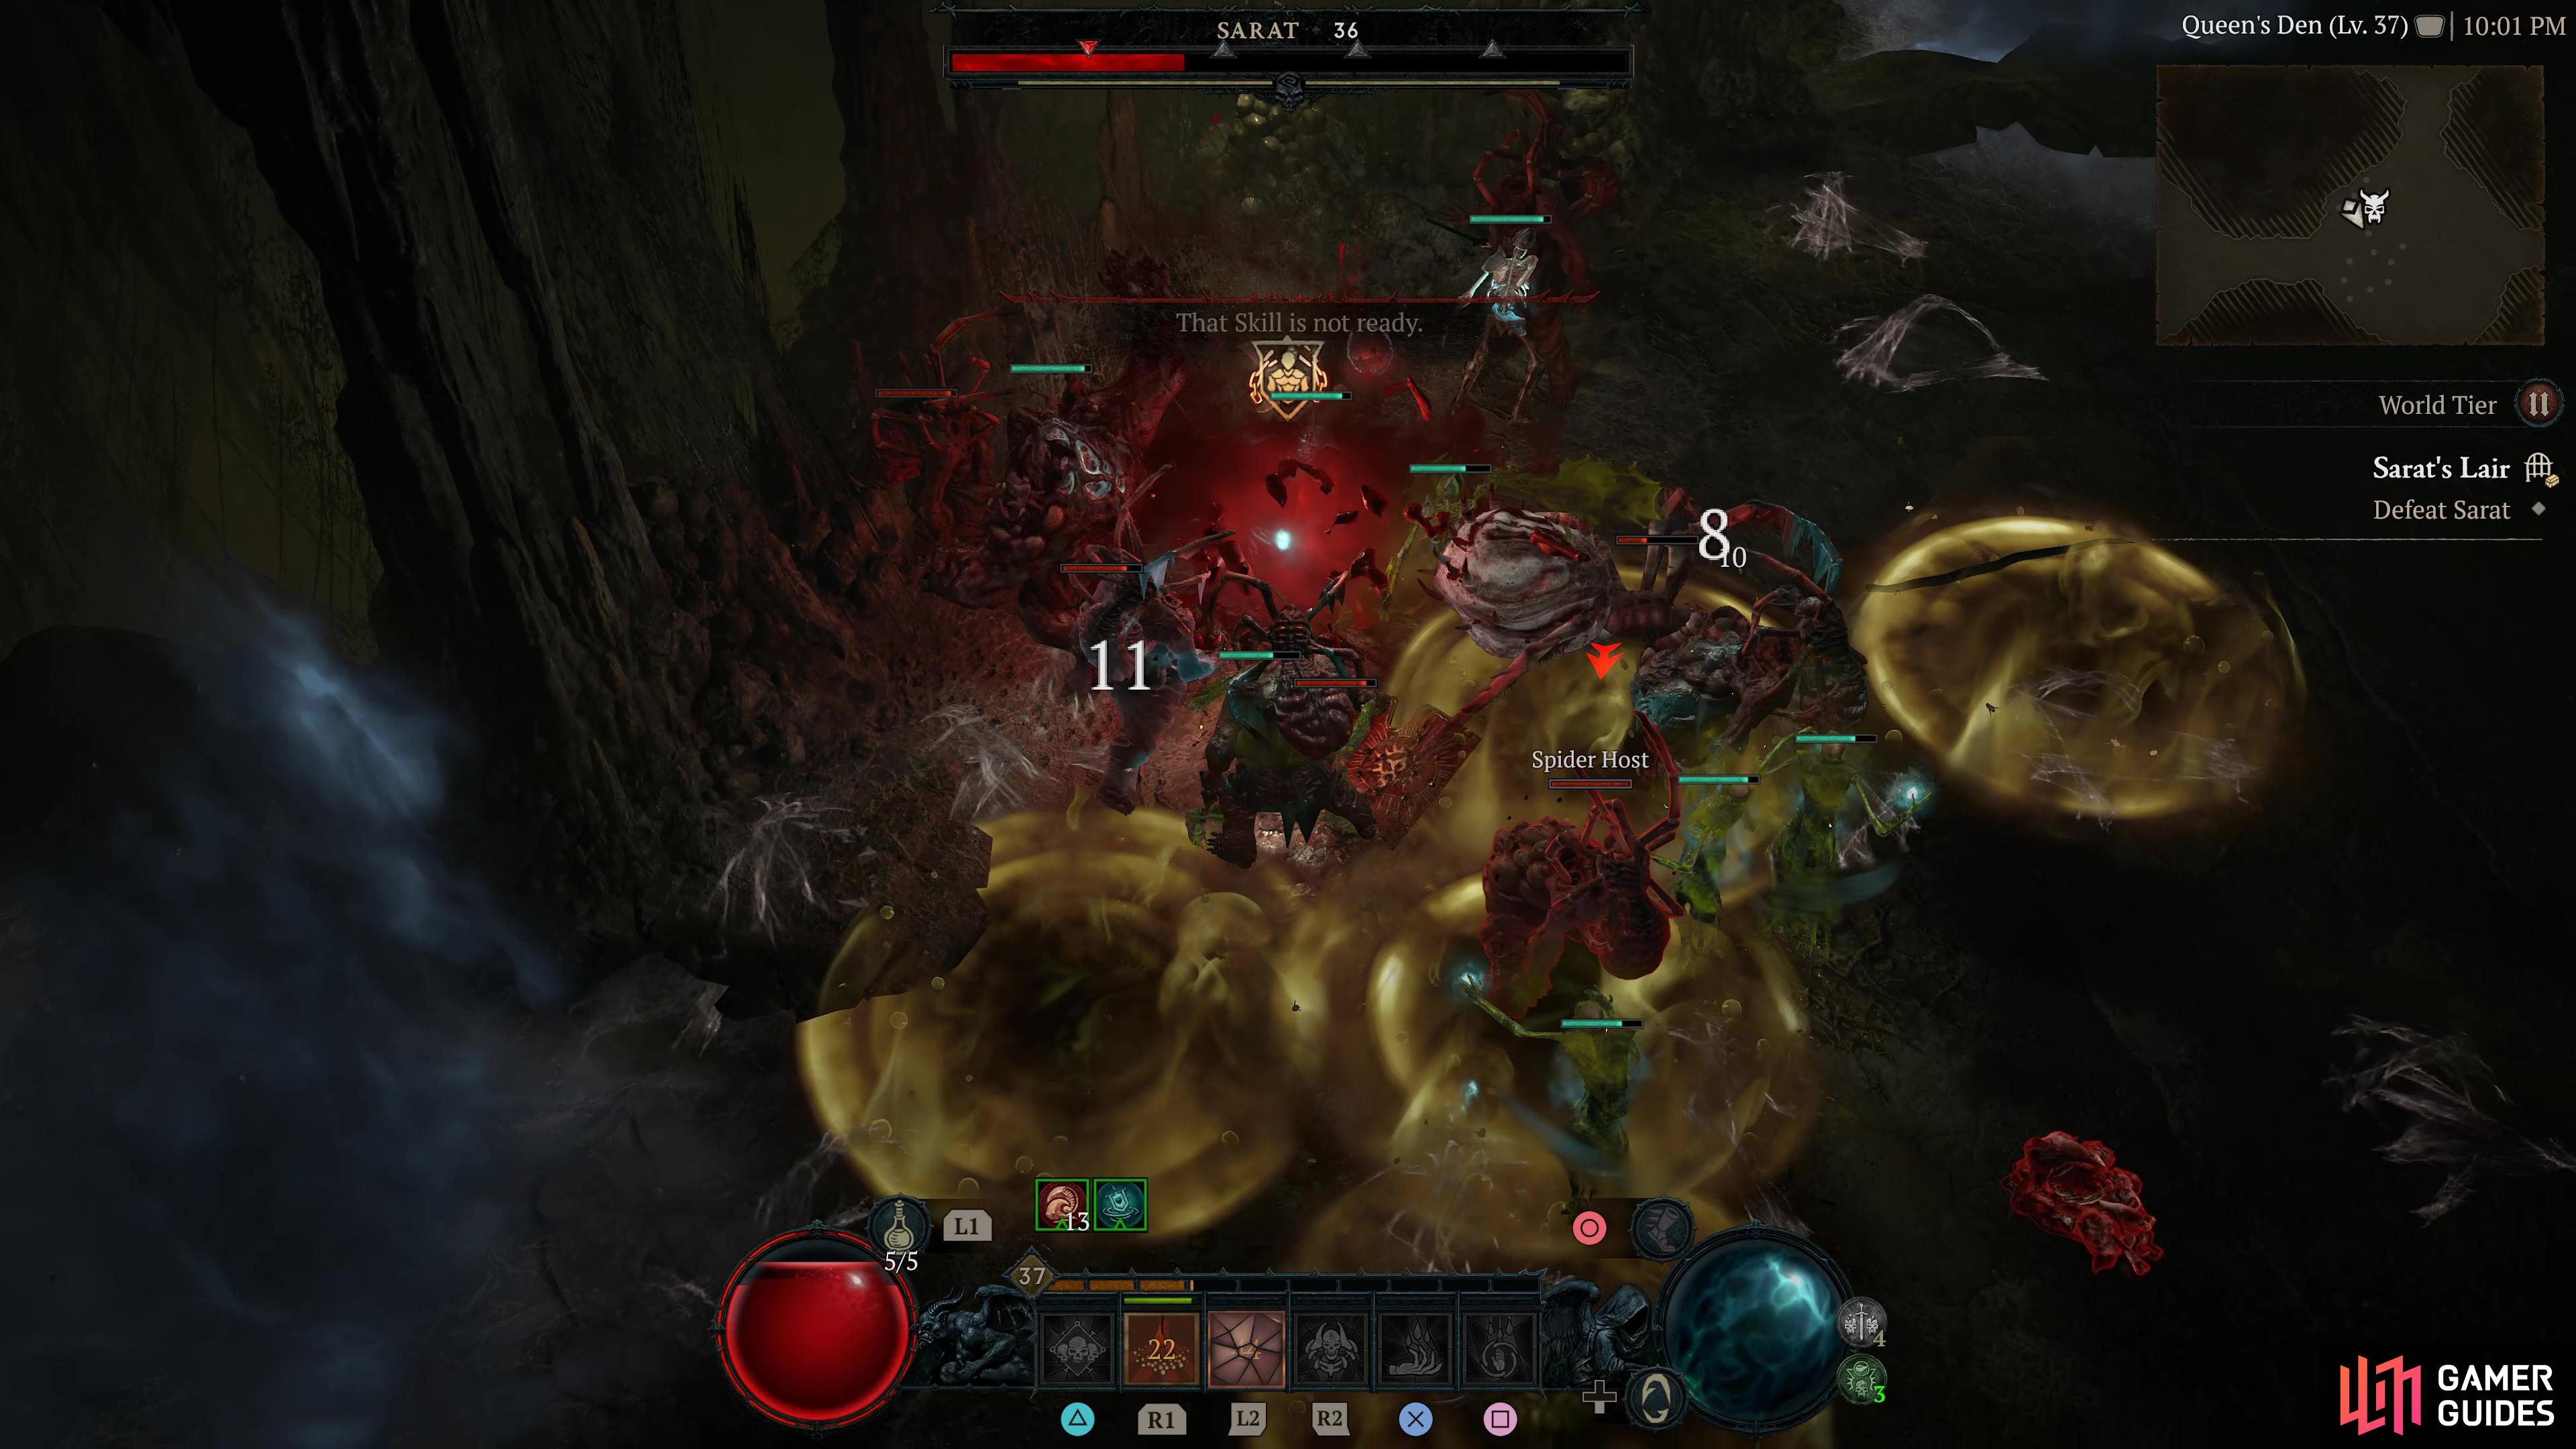
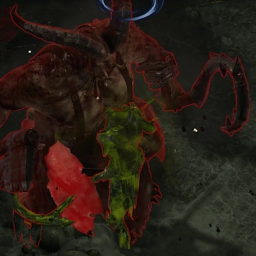
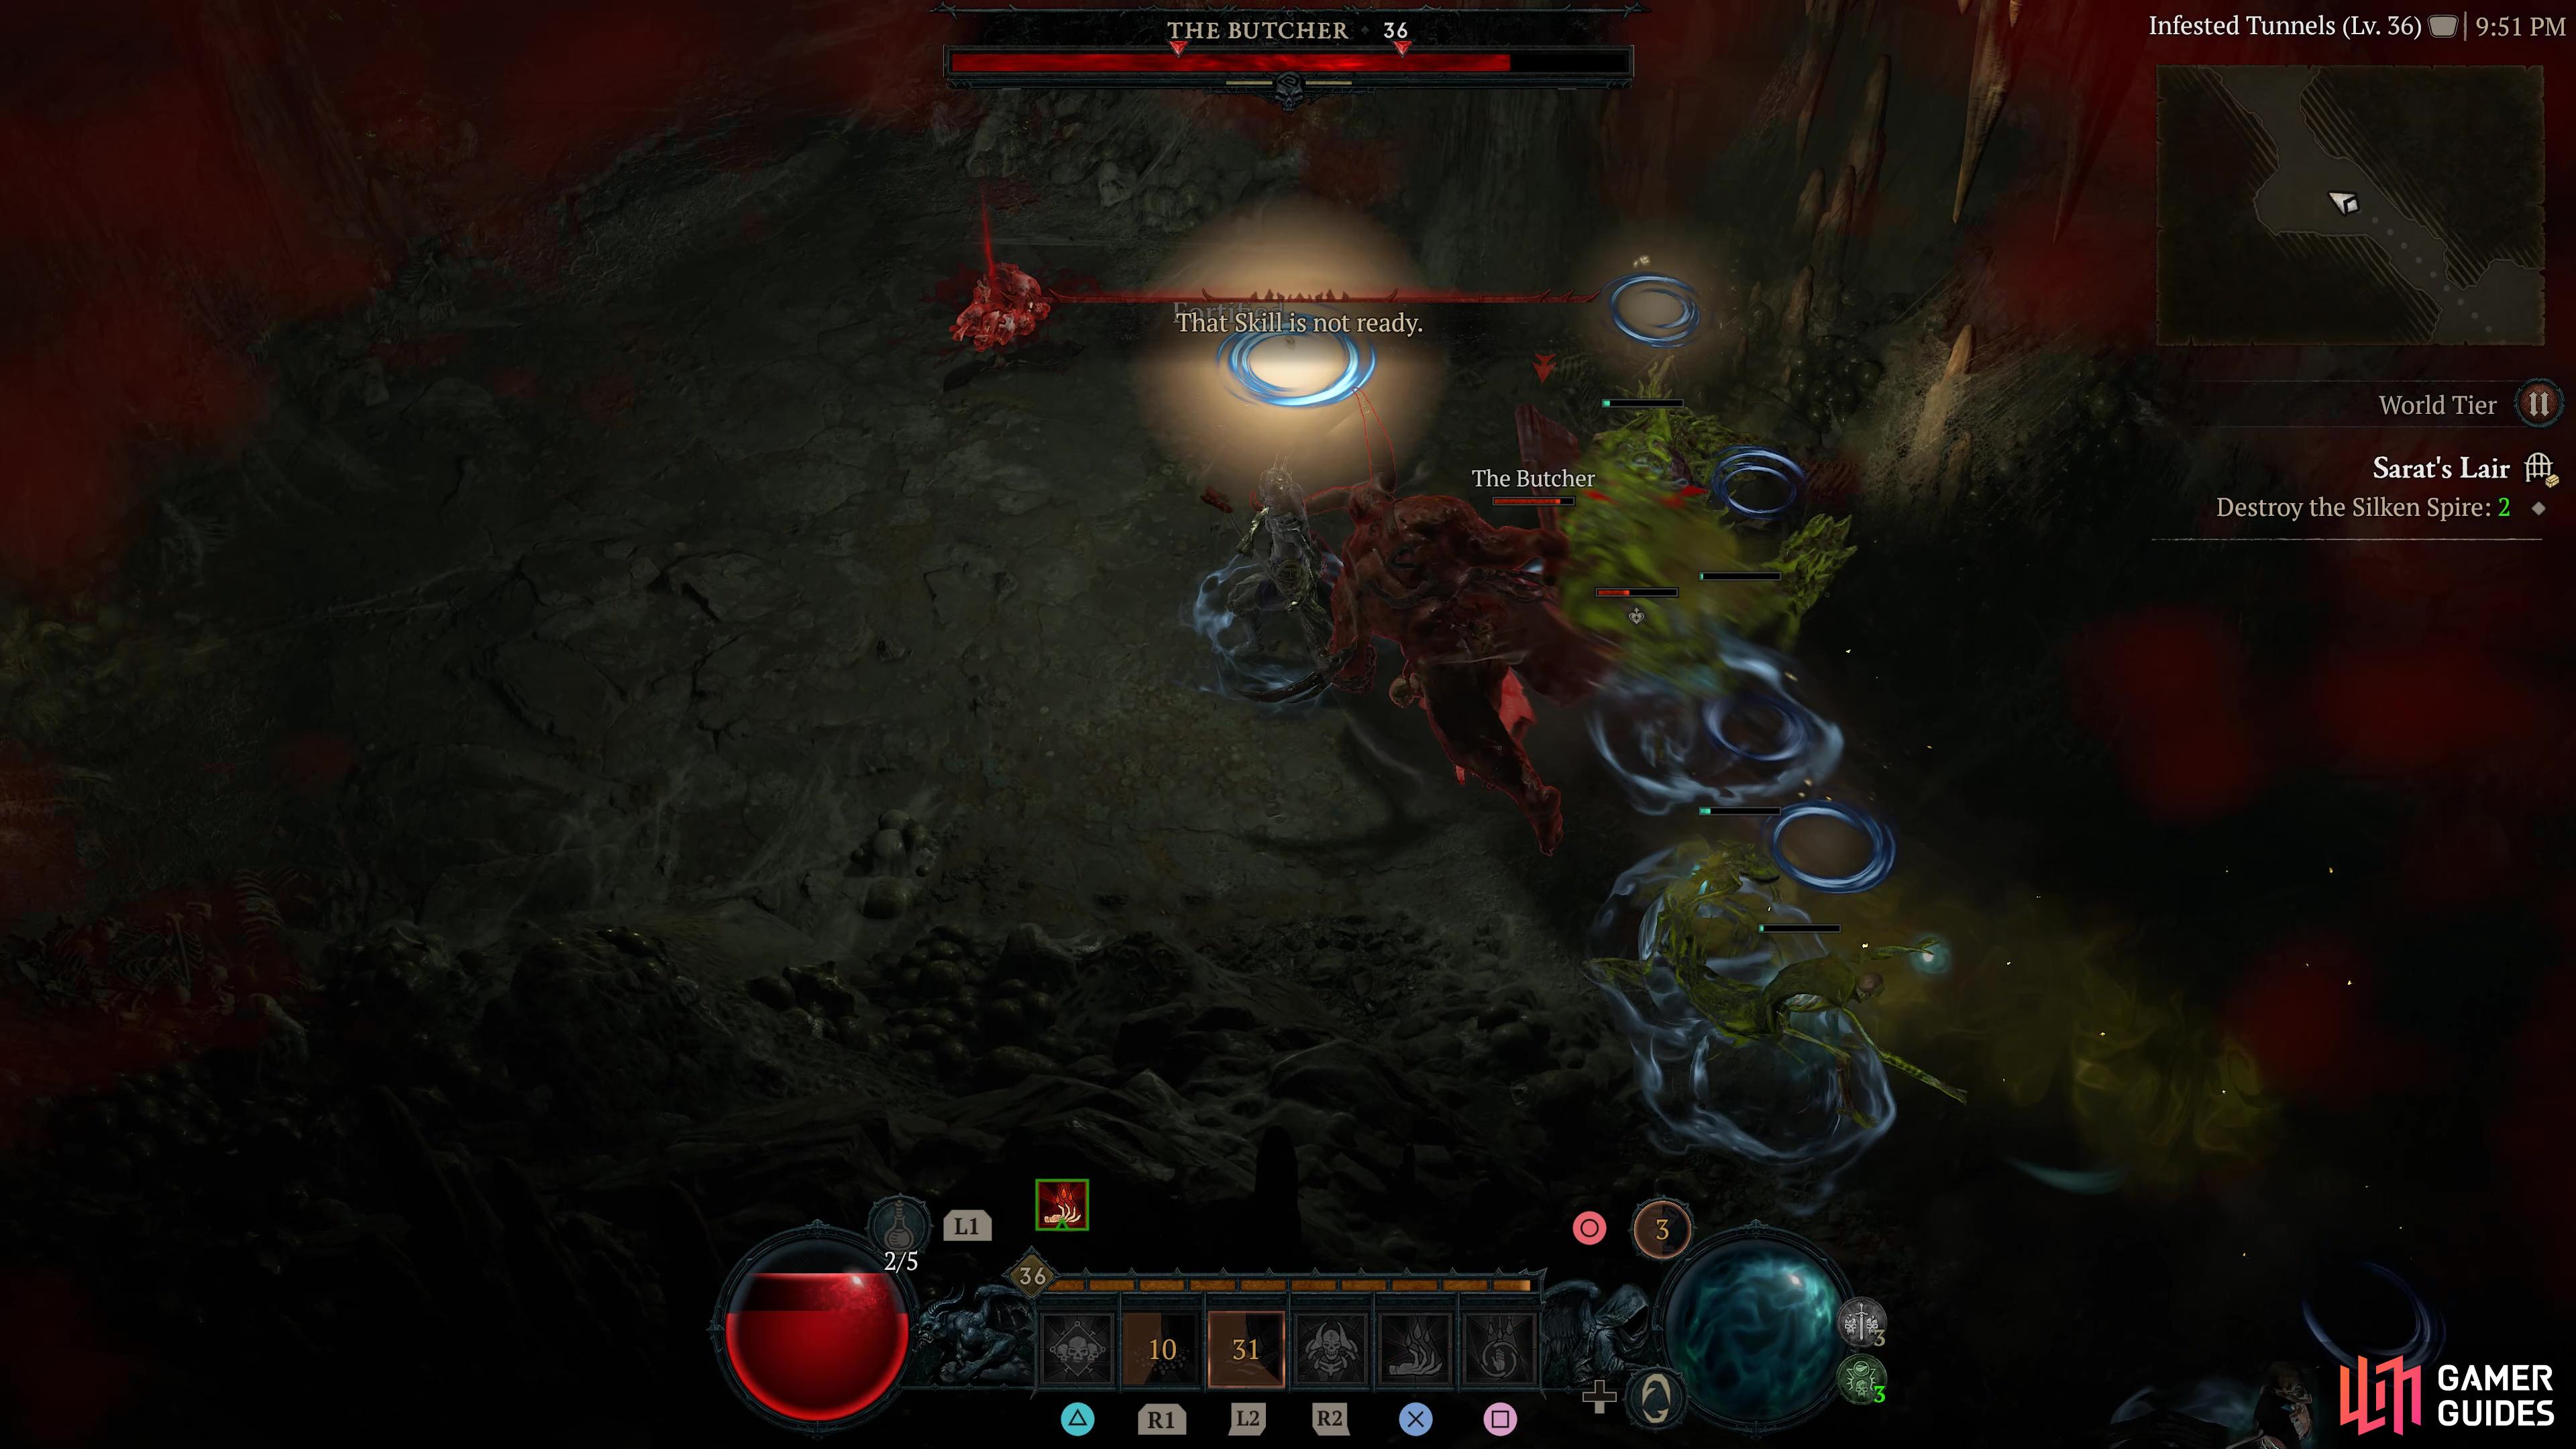
Sarat is a massive spider and the final boss of Sarat’s Lair dungeon in Scosglen. She can summon other spiders during the fight. She will snare you in her web, slowing you down and will shoot large pools of poison on the floor for the duration of the fight. Your challenge is to dodge both poison and webs, as well as her minions and try to stay alive. Poison resistance is incredibly helpful, especially on higher difficulties.
This boss predominantly roams the central/north parts of Fields of Hatred, although can appear in the south too. It has a devastating charge attack which it will use if you are at range, otherwise it will hit you with quick melee swipes that leaves a poison puddle on the floor.
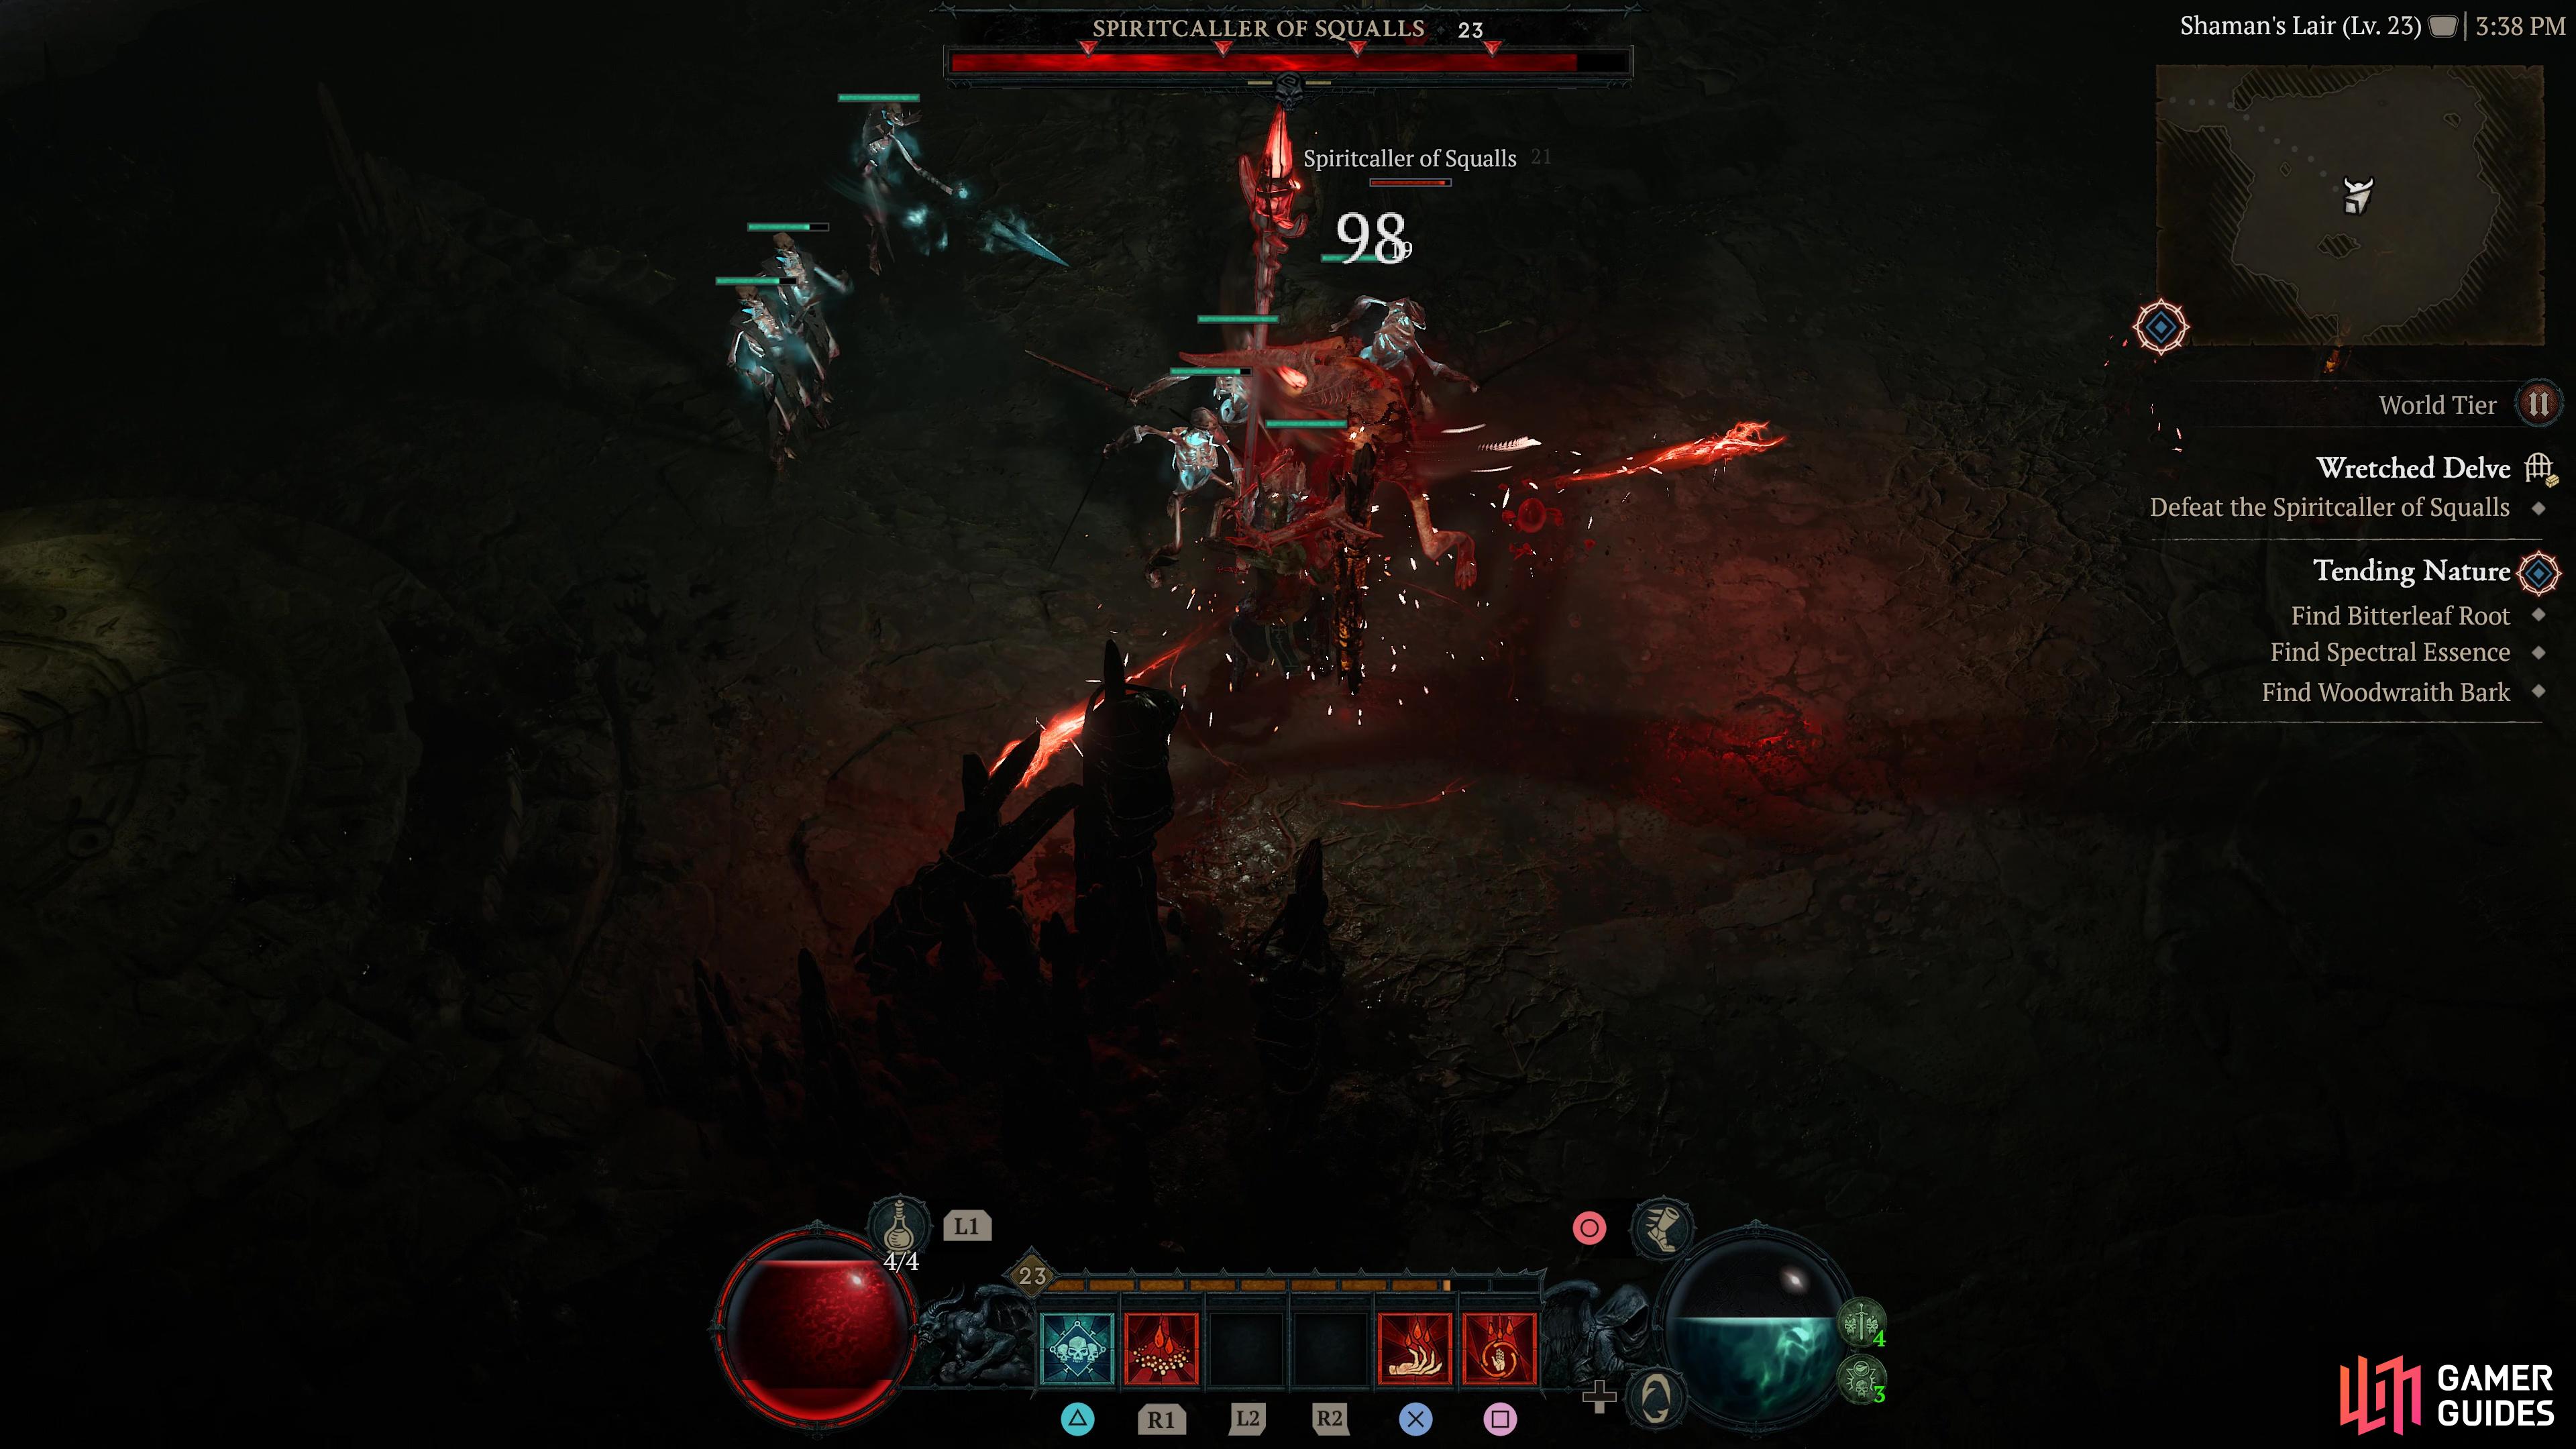
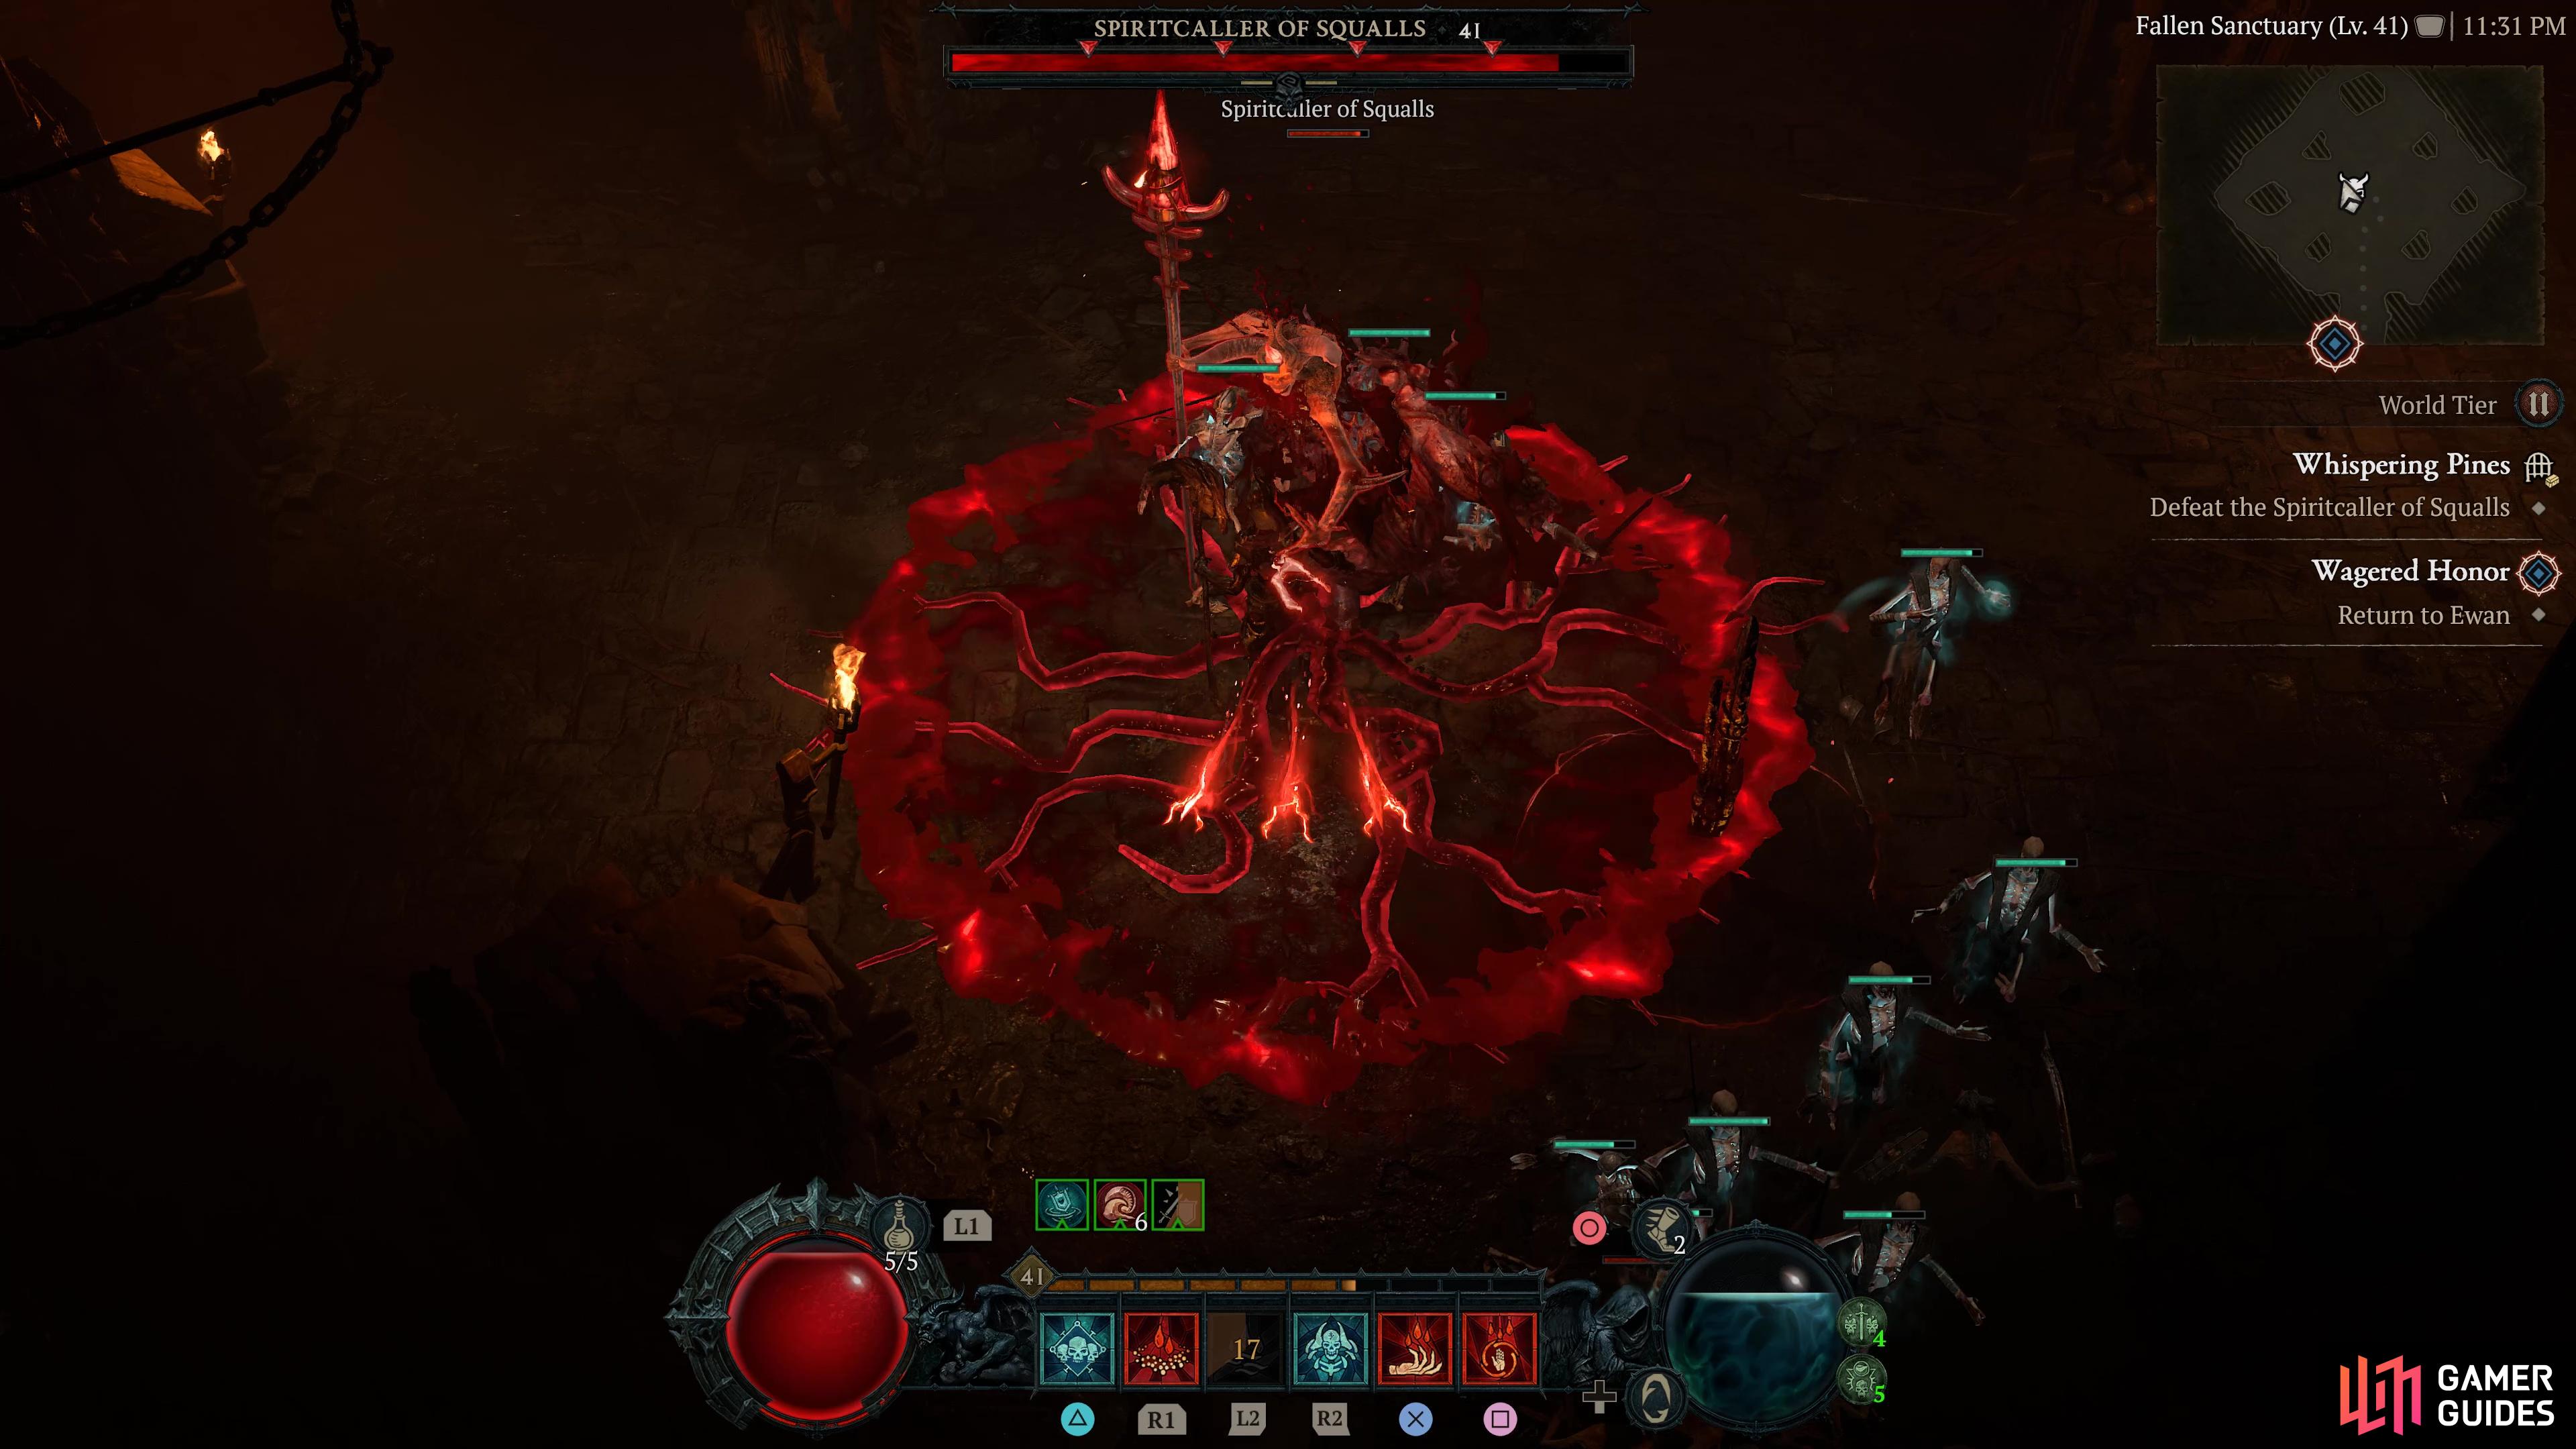
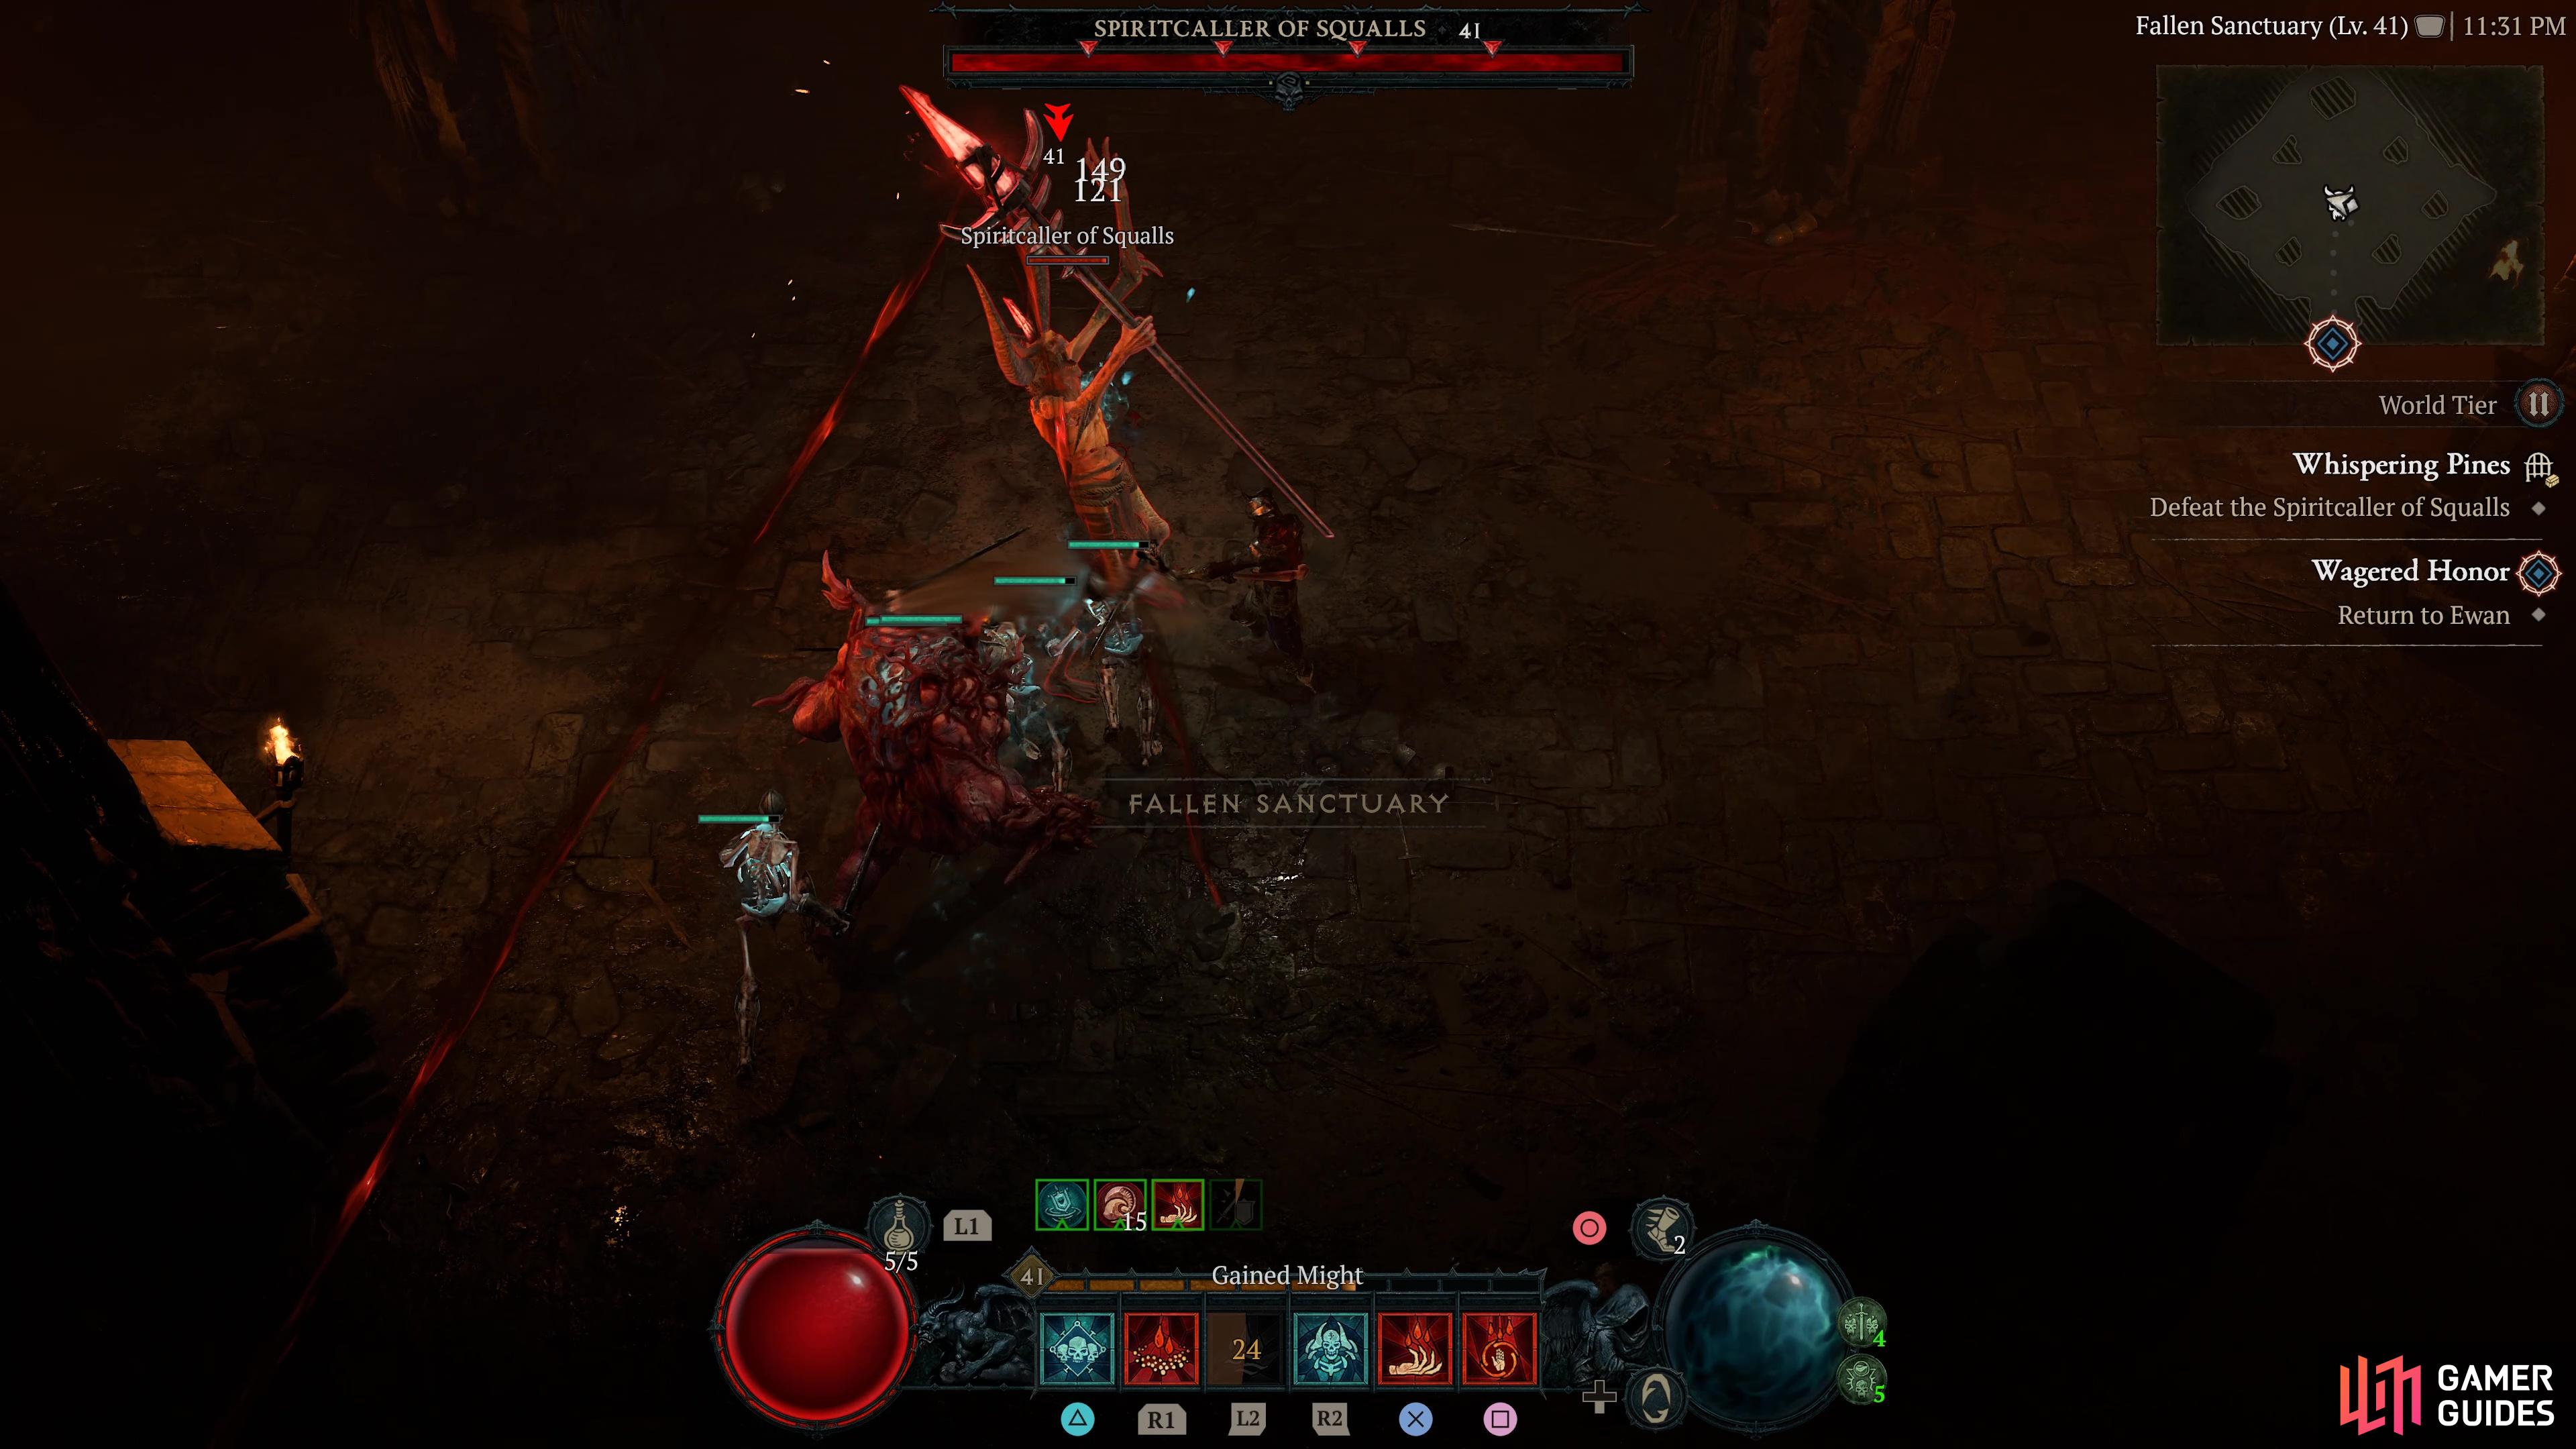
Final boss of the Wretched Delve and Whispering Pines dungeons in Scosglen. It is an Elite Vile One variant that summons and boosts his kin, as well as casts lightning elemental magic. Boost Lightning resistance before tackling it. It can emit a large ground AoE attack that surrounds its body in a circular pattern, shoot out triple fireballs in a cone pattern, summon and buff his kin as well as leave tethers on the floor of the arena.
Stana is a crossbow-wielding rogue type and the final boss of The Bear of Blackweald side quest and storyline. She leaves explosive mines around the room, can dash and shift quickly, dodging attacks, and inflict the Vulnerable status on players. Her health pool isn’t massive but her ability to dodge attacks and evade melee is an annoyance.
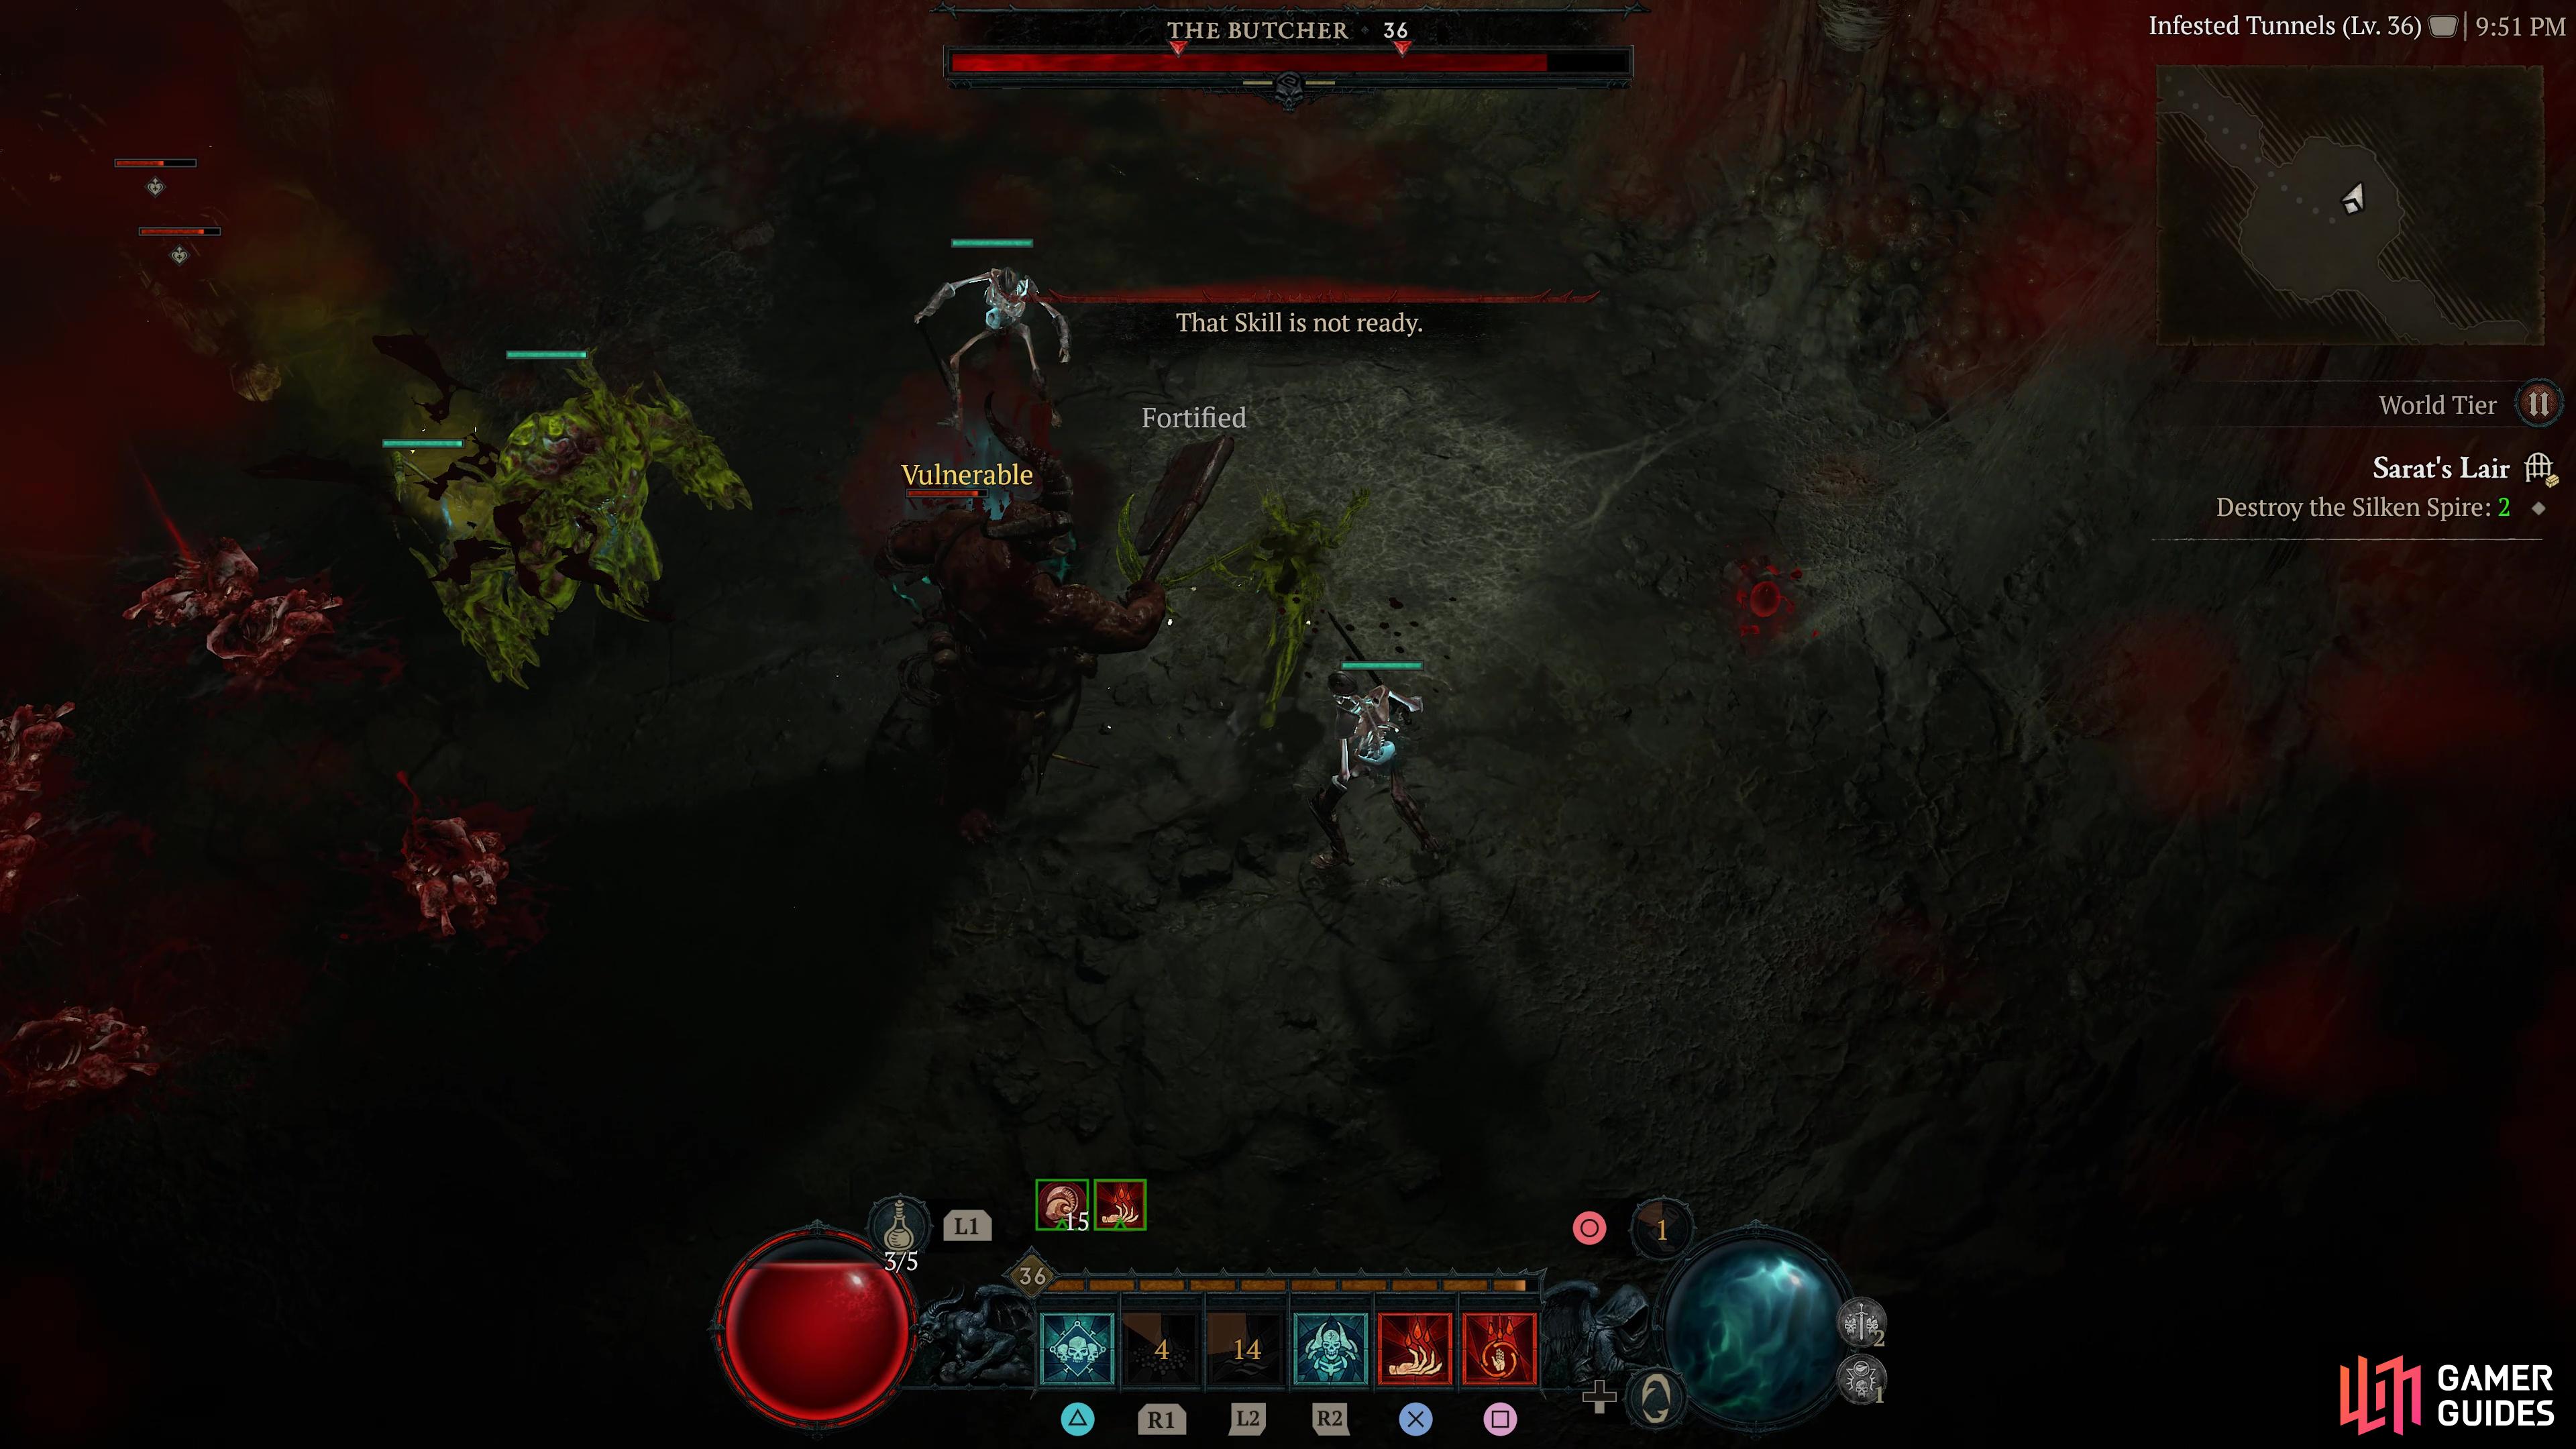
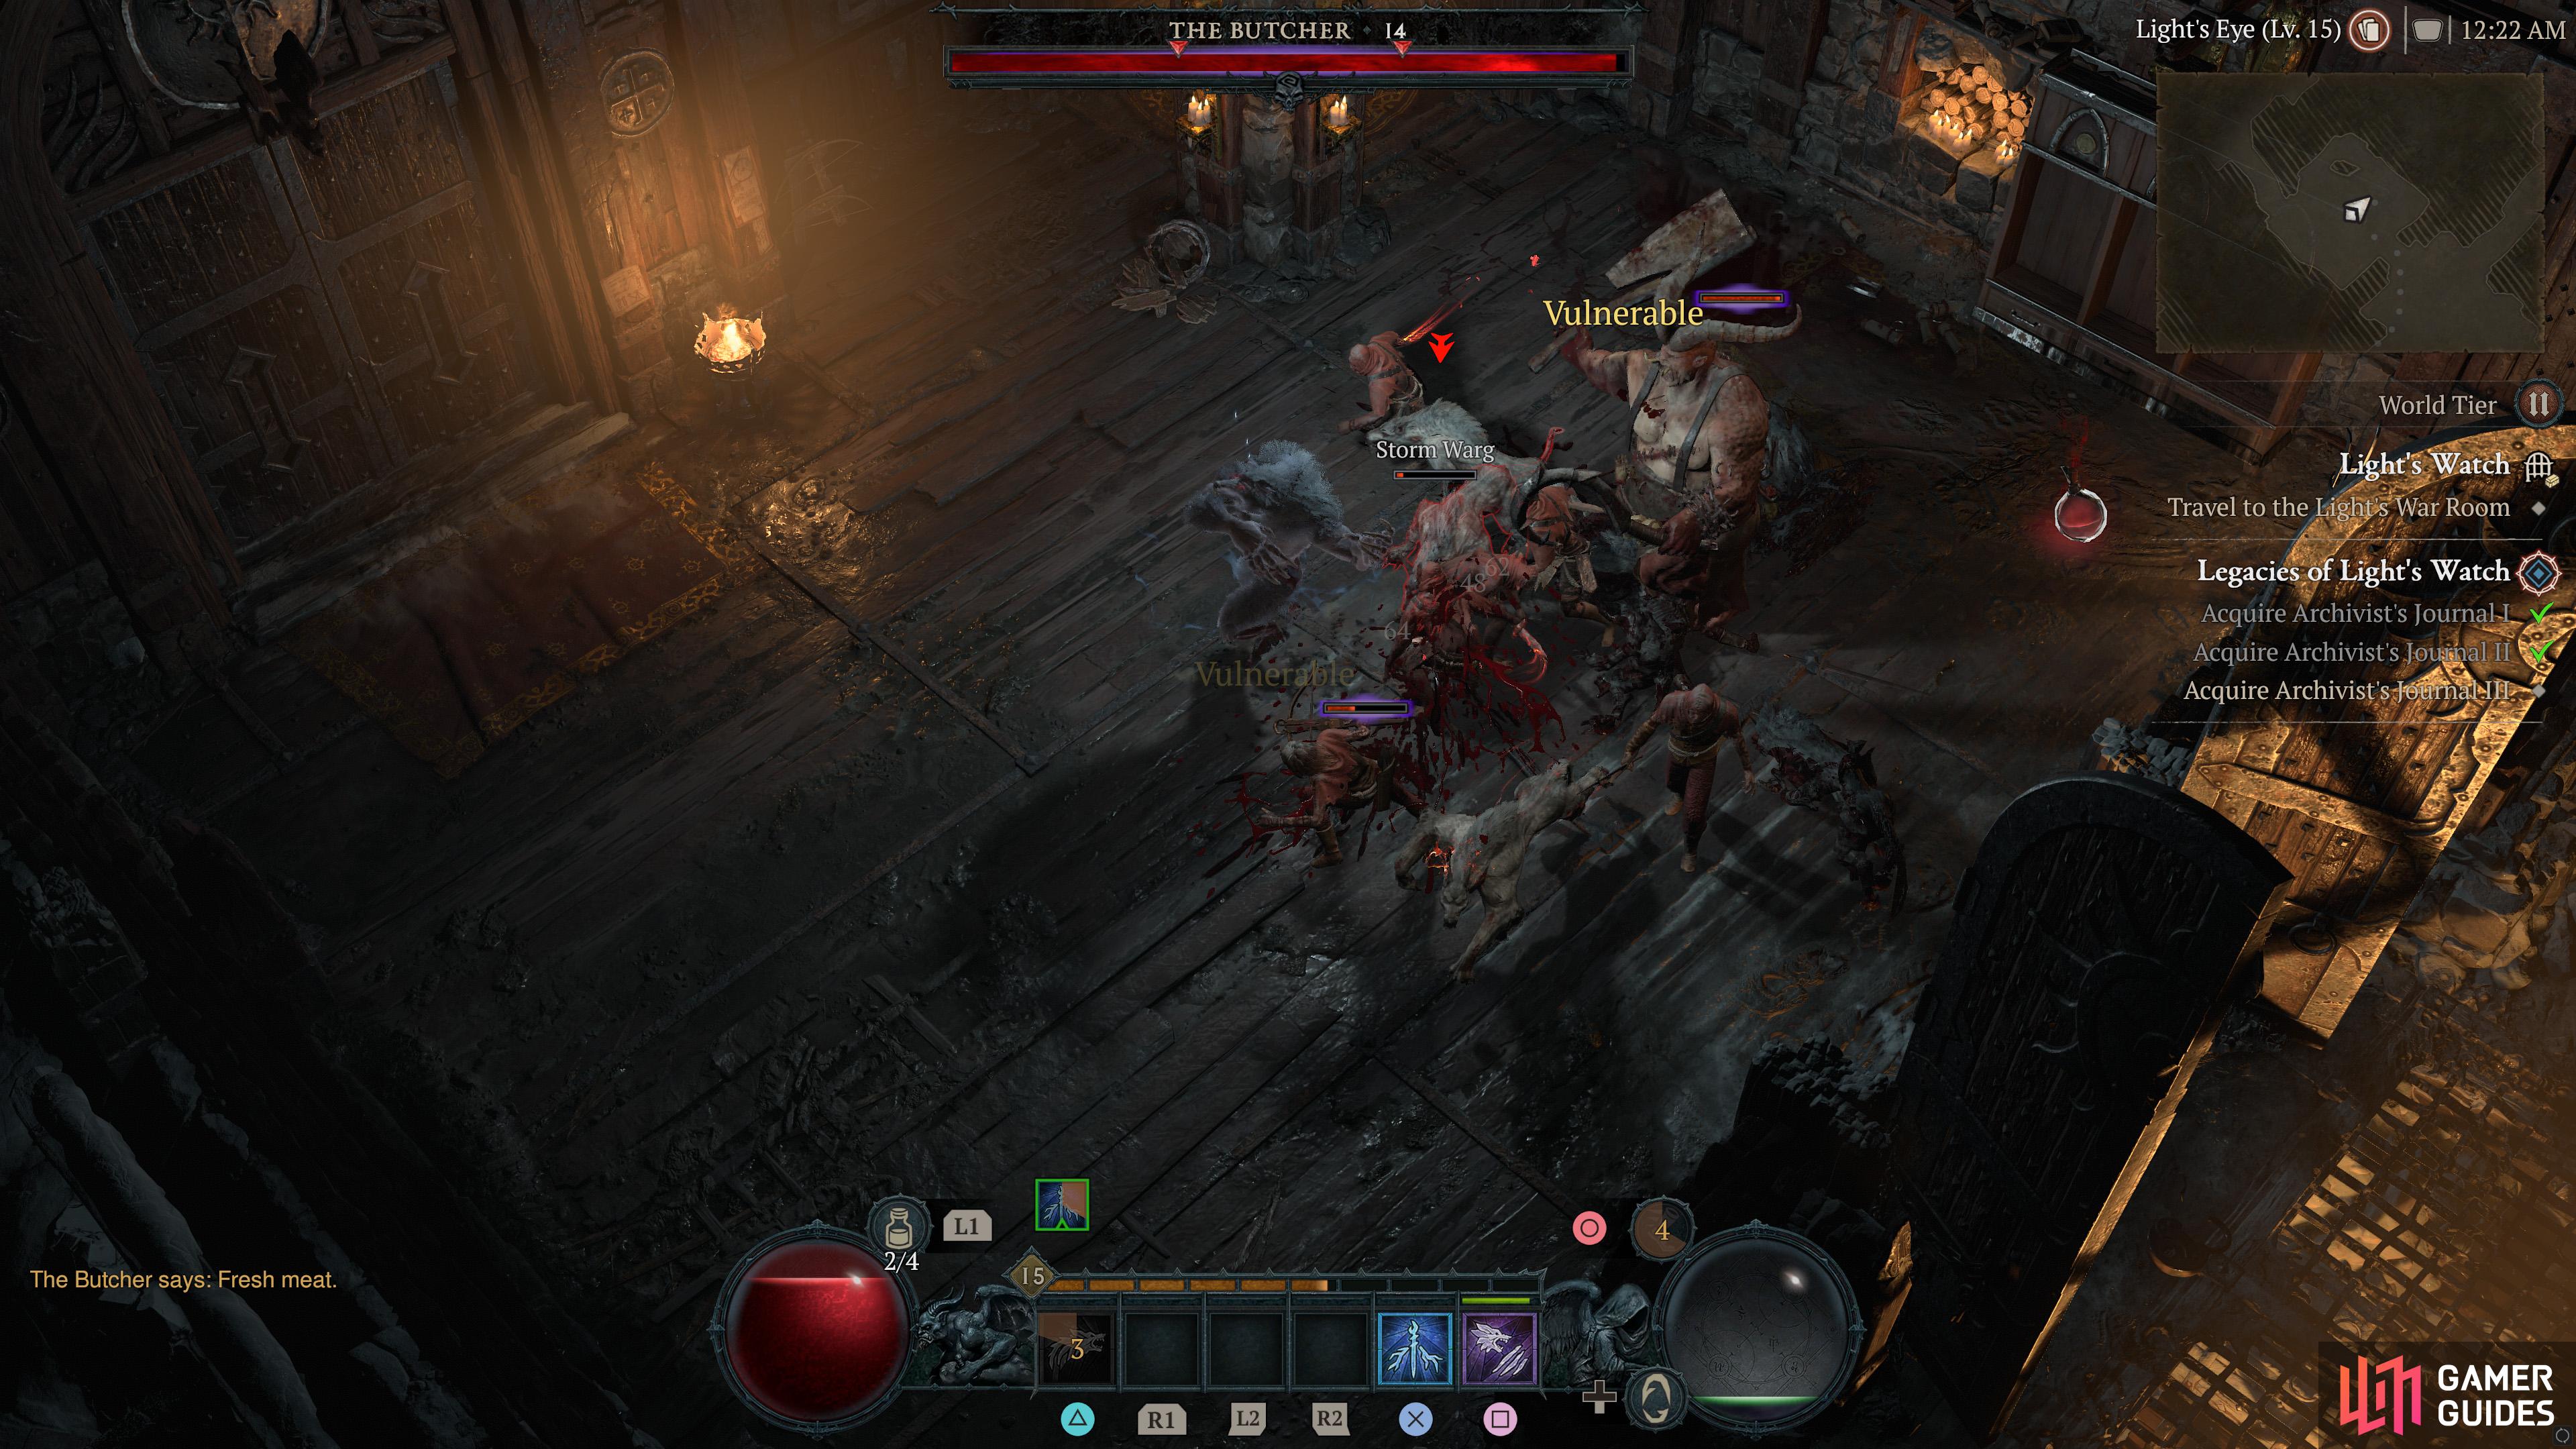
A legendary enemy from the world of Diablo, The Butcher returns in Diablo IV much stronger, faster and more dangerous. He is incredibly tough to tackle alone and can spawn at any time in dungeons or instanced content.
He is immune or resistant to a lot of status ailments making him extremely tough to stop and will relentlessly target you, even over any minions you may have. He can stun and slow you and your minions with a rush attack from a massive distance as well as deal large amounts of damage with his cleaver.
Final boss of Hope’s Light Stronghold. She is a massive sea monster who puts whirlpools on the ground that shoot jets of water and can roll a massive ball of water at you. She can also cast a conal oily spray that creates a knockback and deals moderate damage. Periodically throughout the fight, she will summon other Drowned enemies to rush you.
Tomas normally comes with a variety of modifiers including multishot, a powerful archery skill, Waller, Summoner and Shock Lance. He has the ability to summon several other spirits throughout the fight as well as inflict lightning attacks and use walls.
The Tomb Lord is a massive undead Necromancer who wields a large staff, summons whirlwinds and walls and can teleport around the room. He regularly summons other Skeleton enemies and can slam his staff down to deal AoE damage. Your vision in the fight will be regularly impeded and chasing him down is a challenge as you try to dodge the spinning whirlwind static AoEs on the floor and his minions.
Part of the Darkness Within (Level 2) Campaign Quest, he is a powerful demon that wields a massive sword. He has a leap attack, several sword swings in a row and can emit magical, damaging pentagons on the floor.
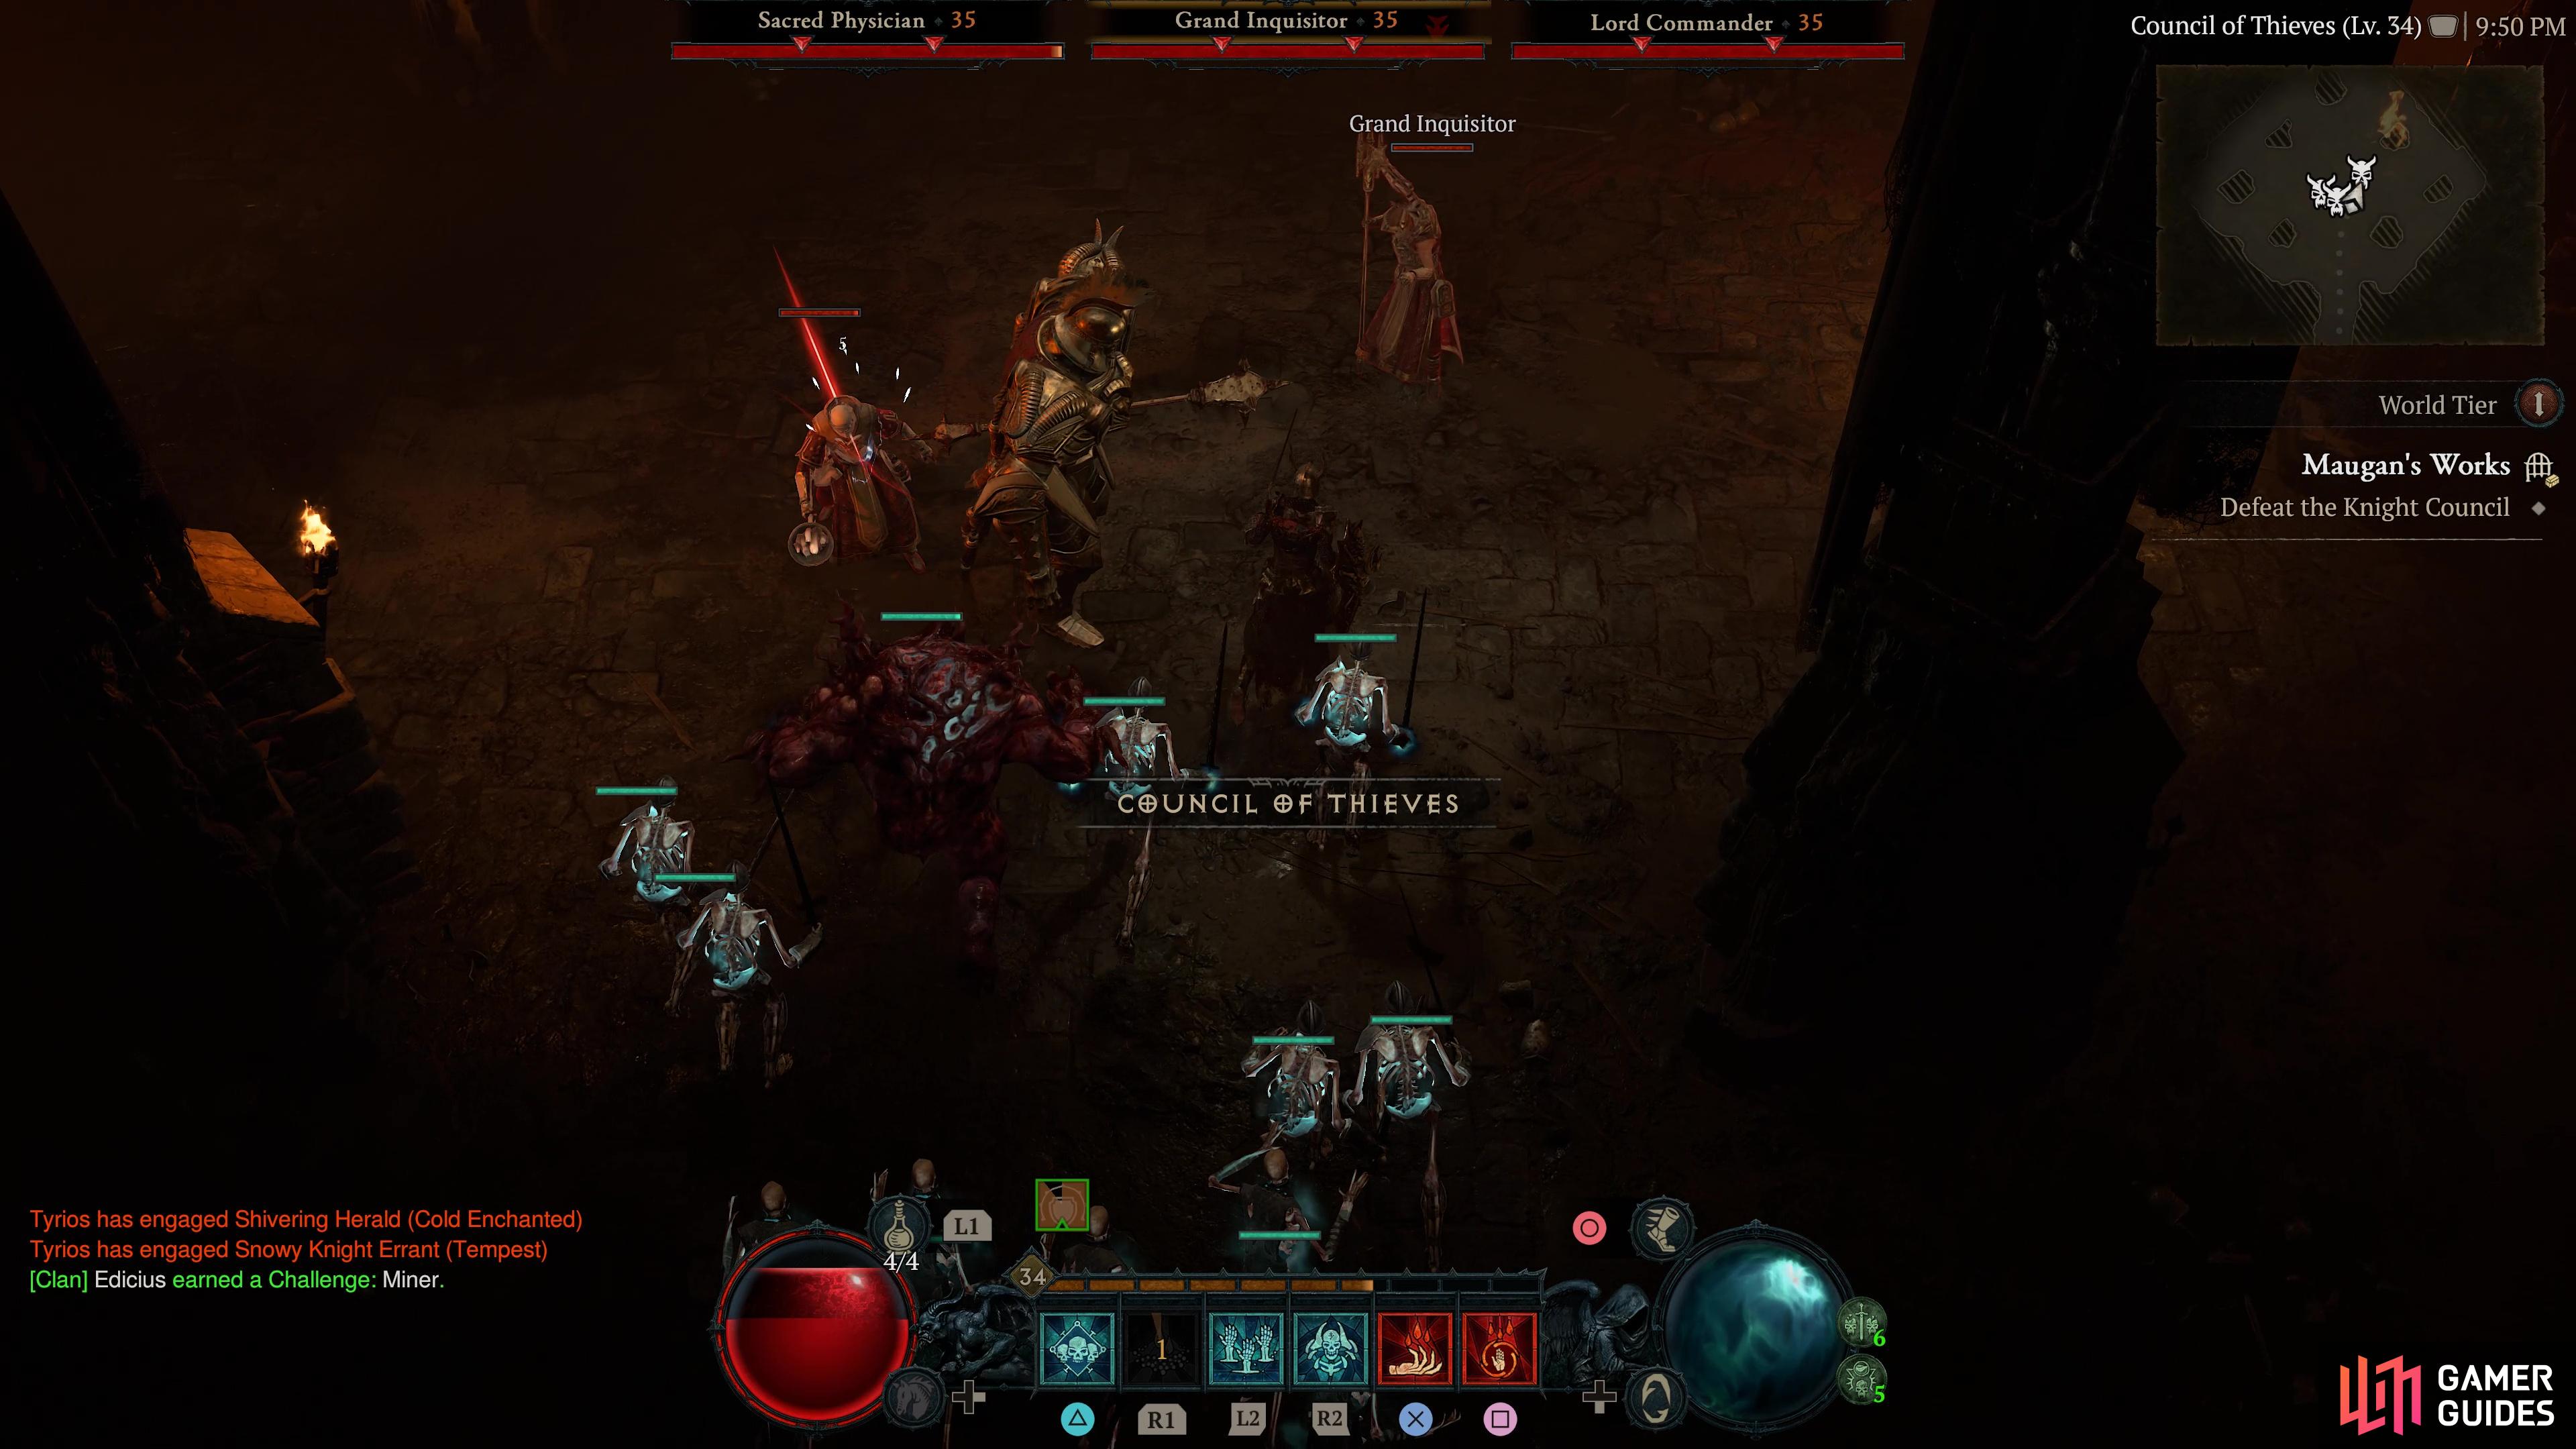
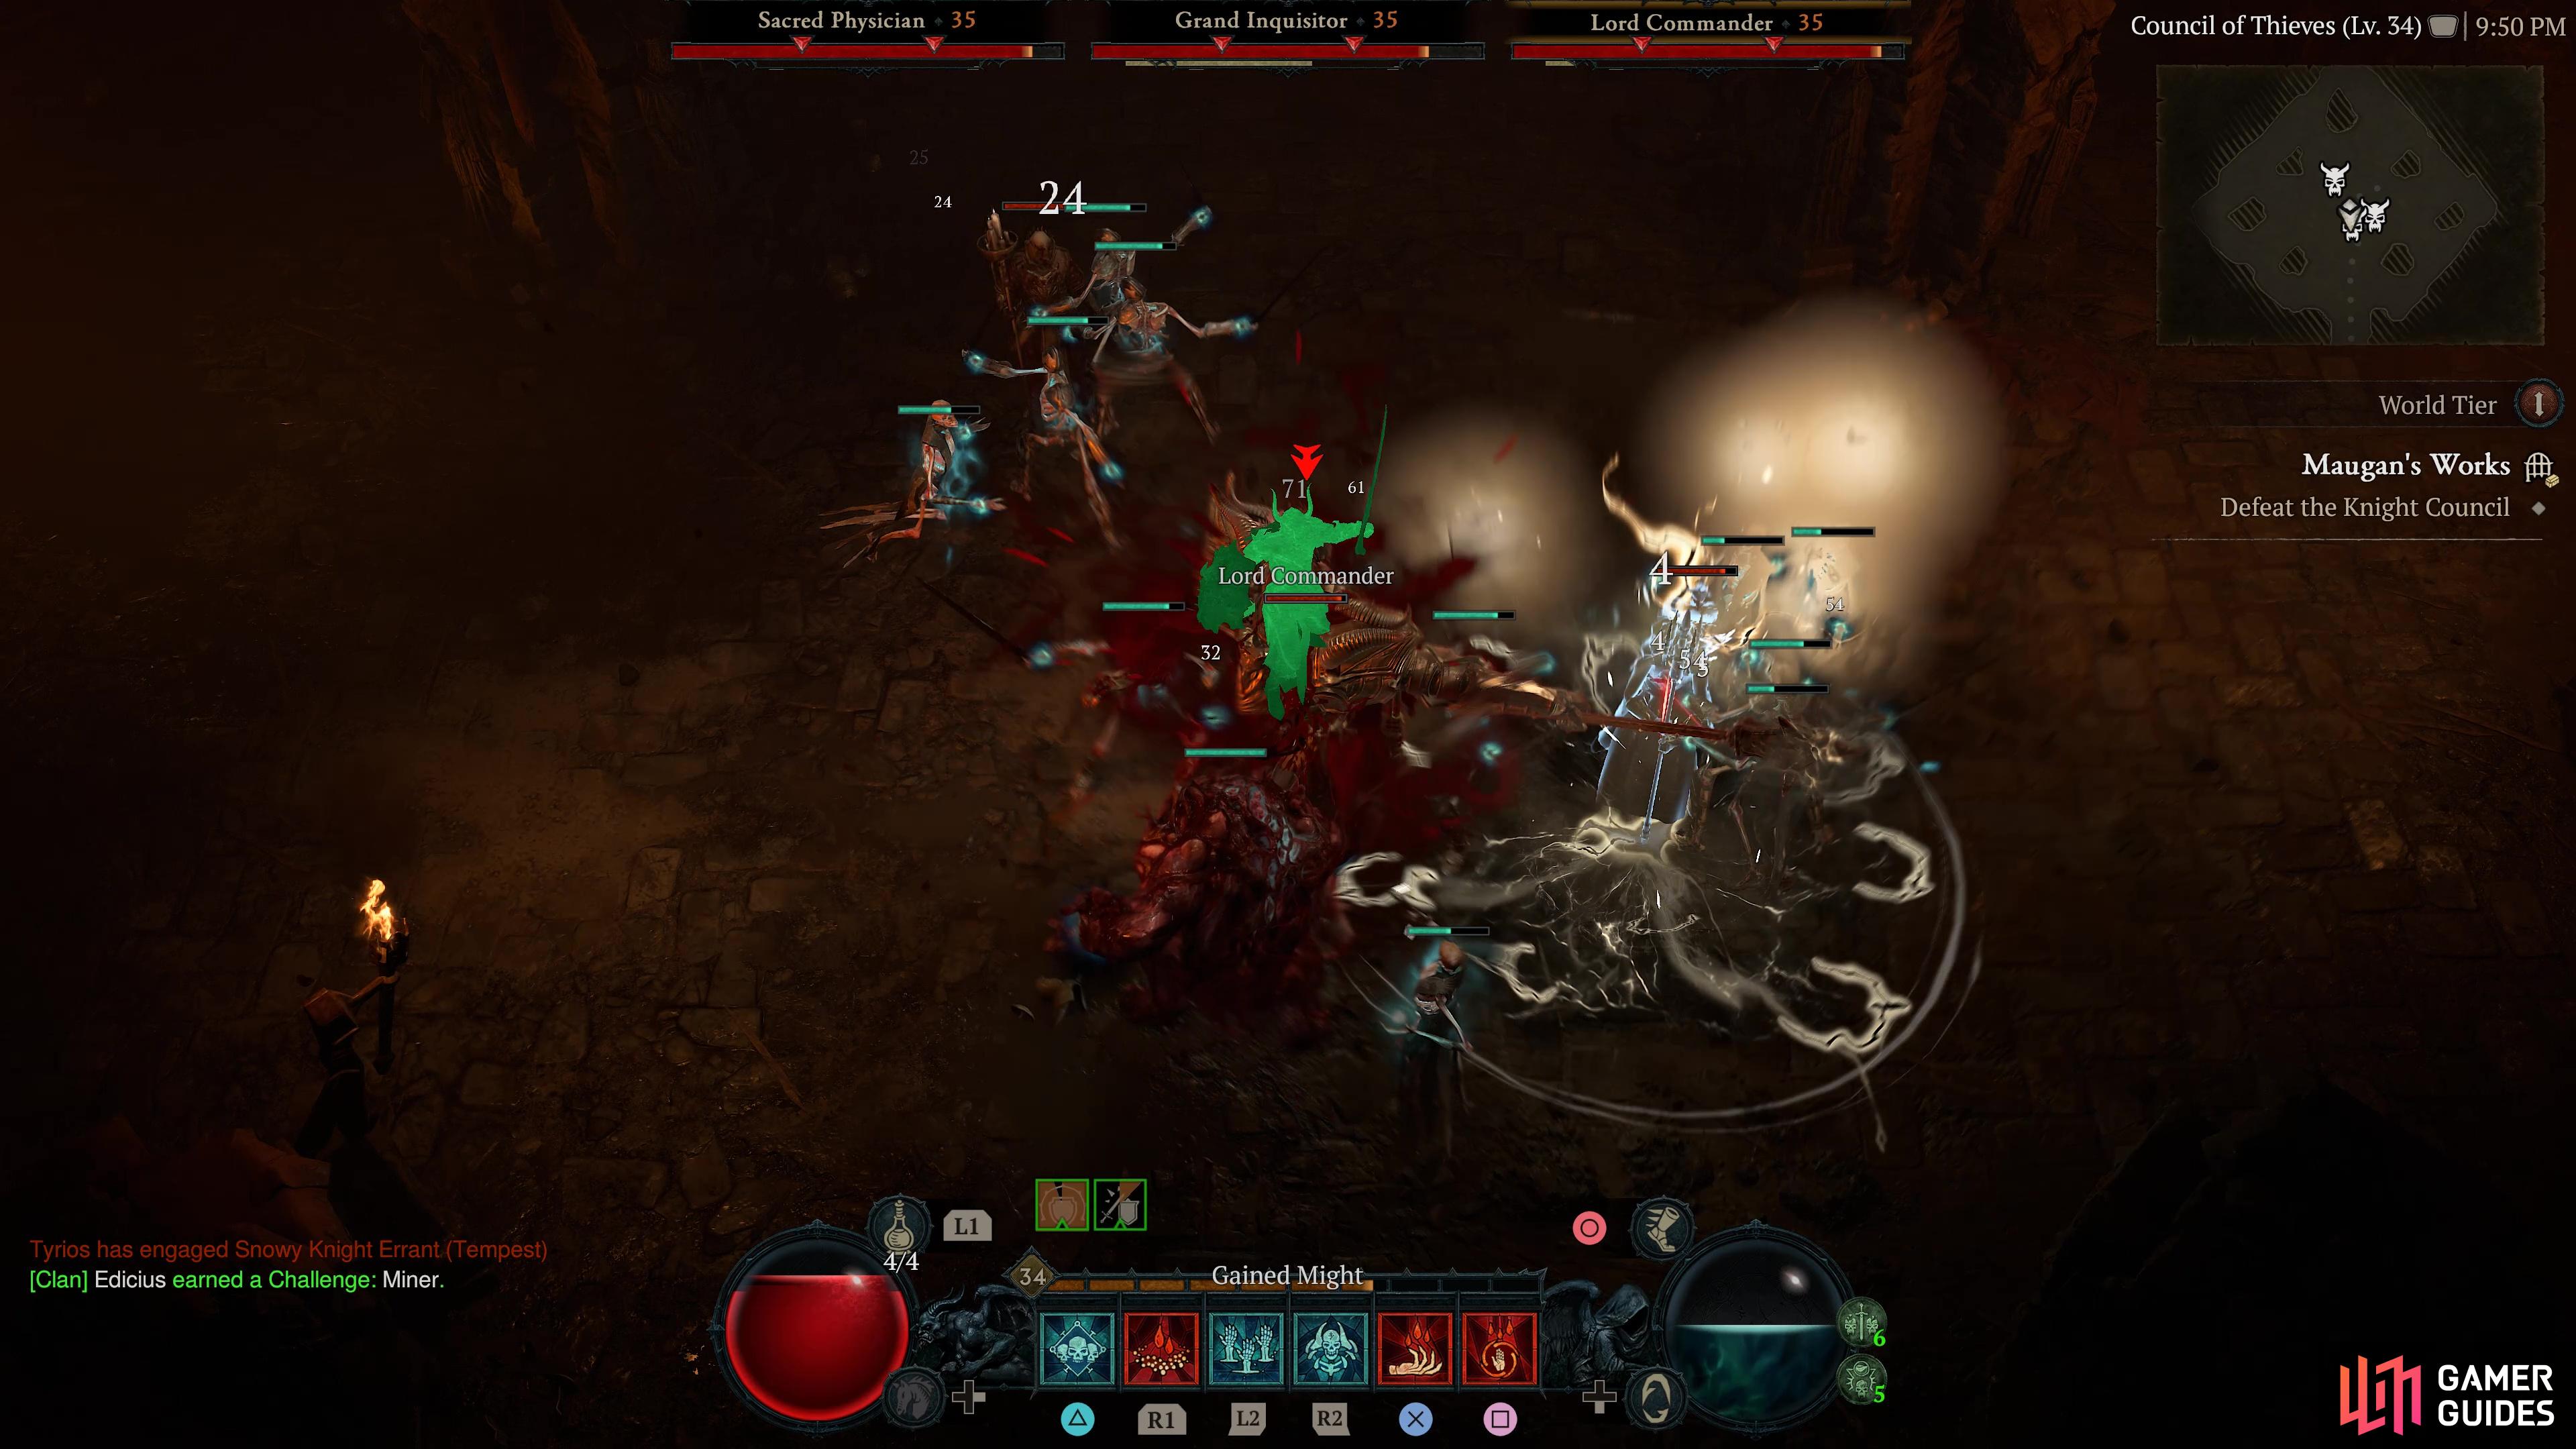
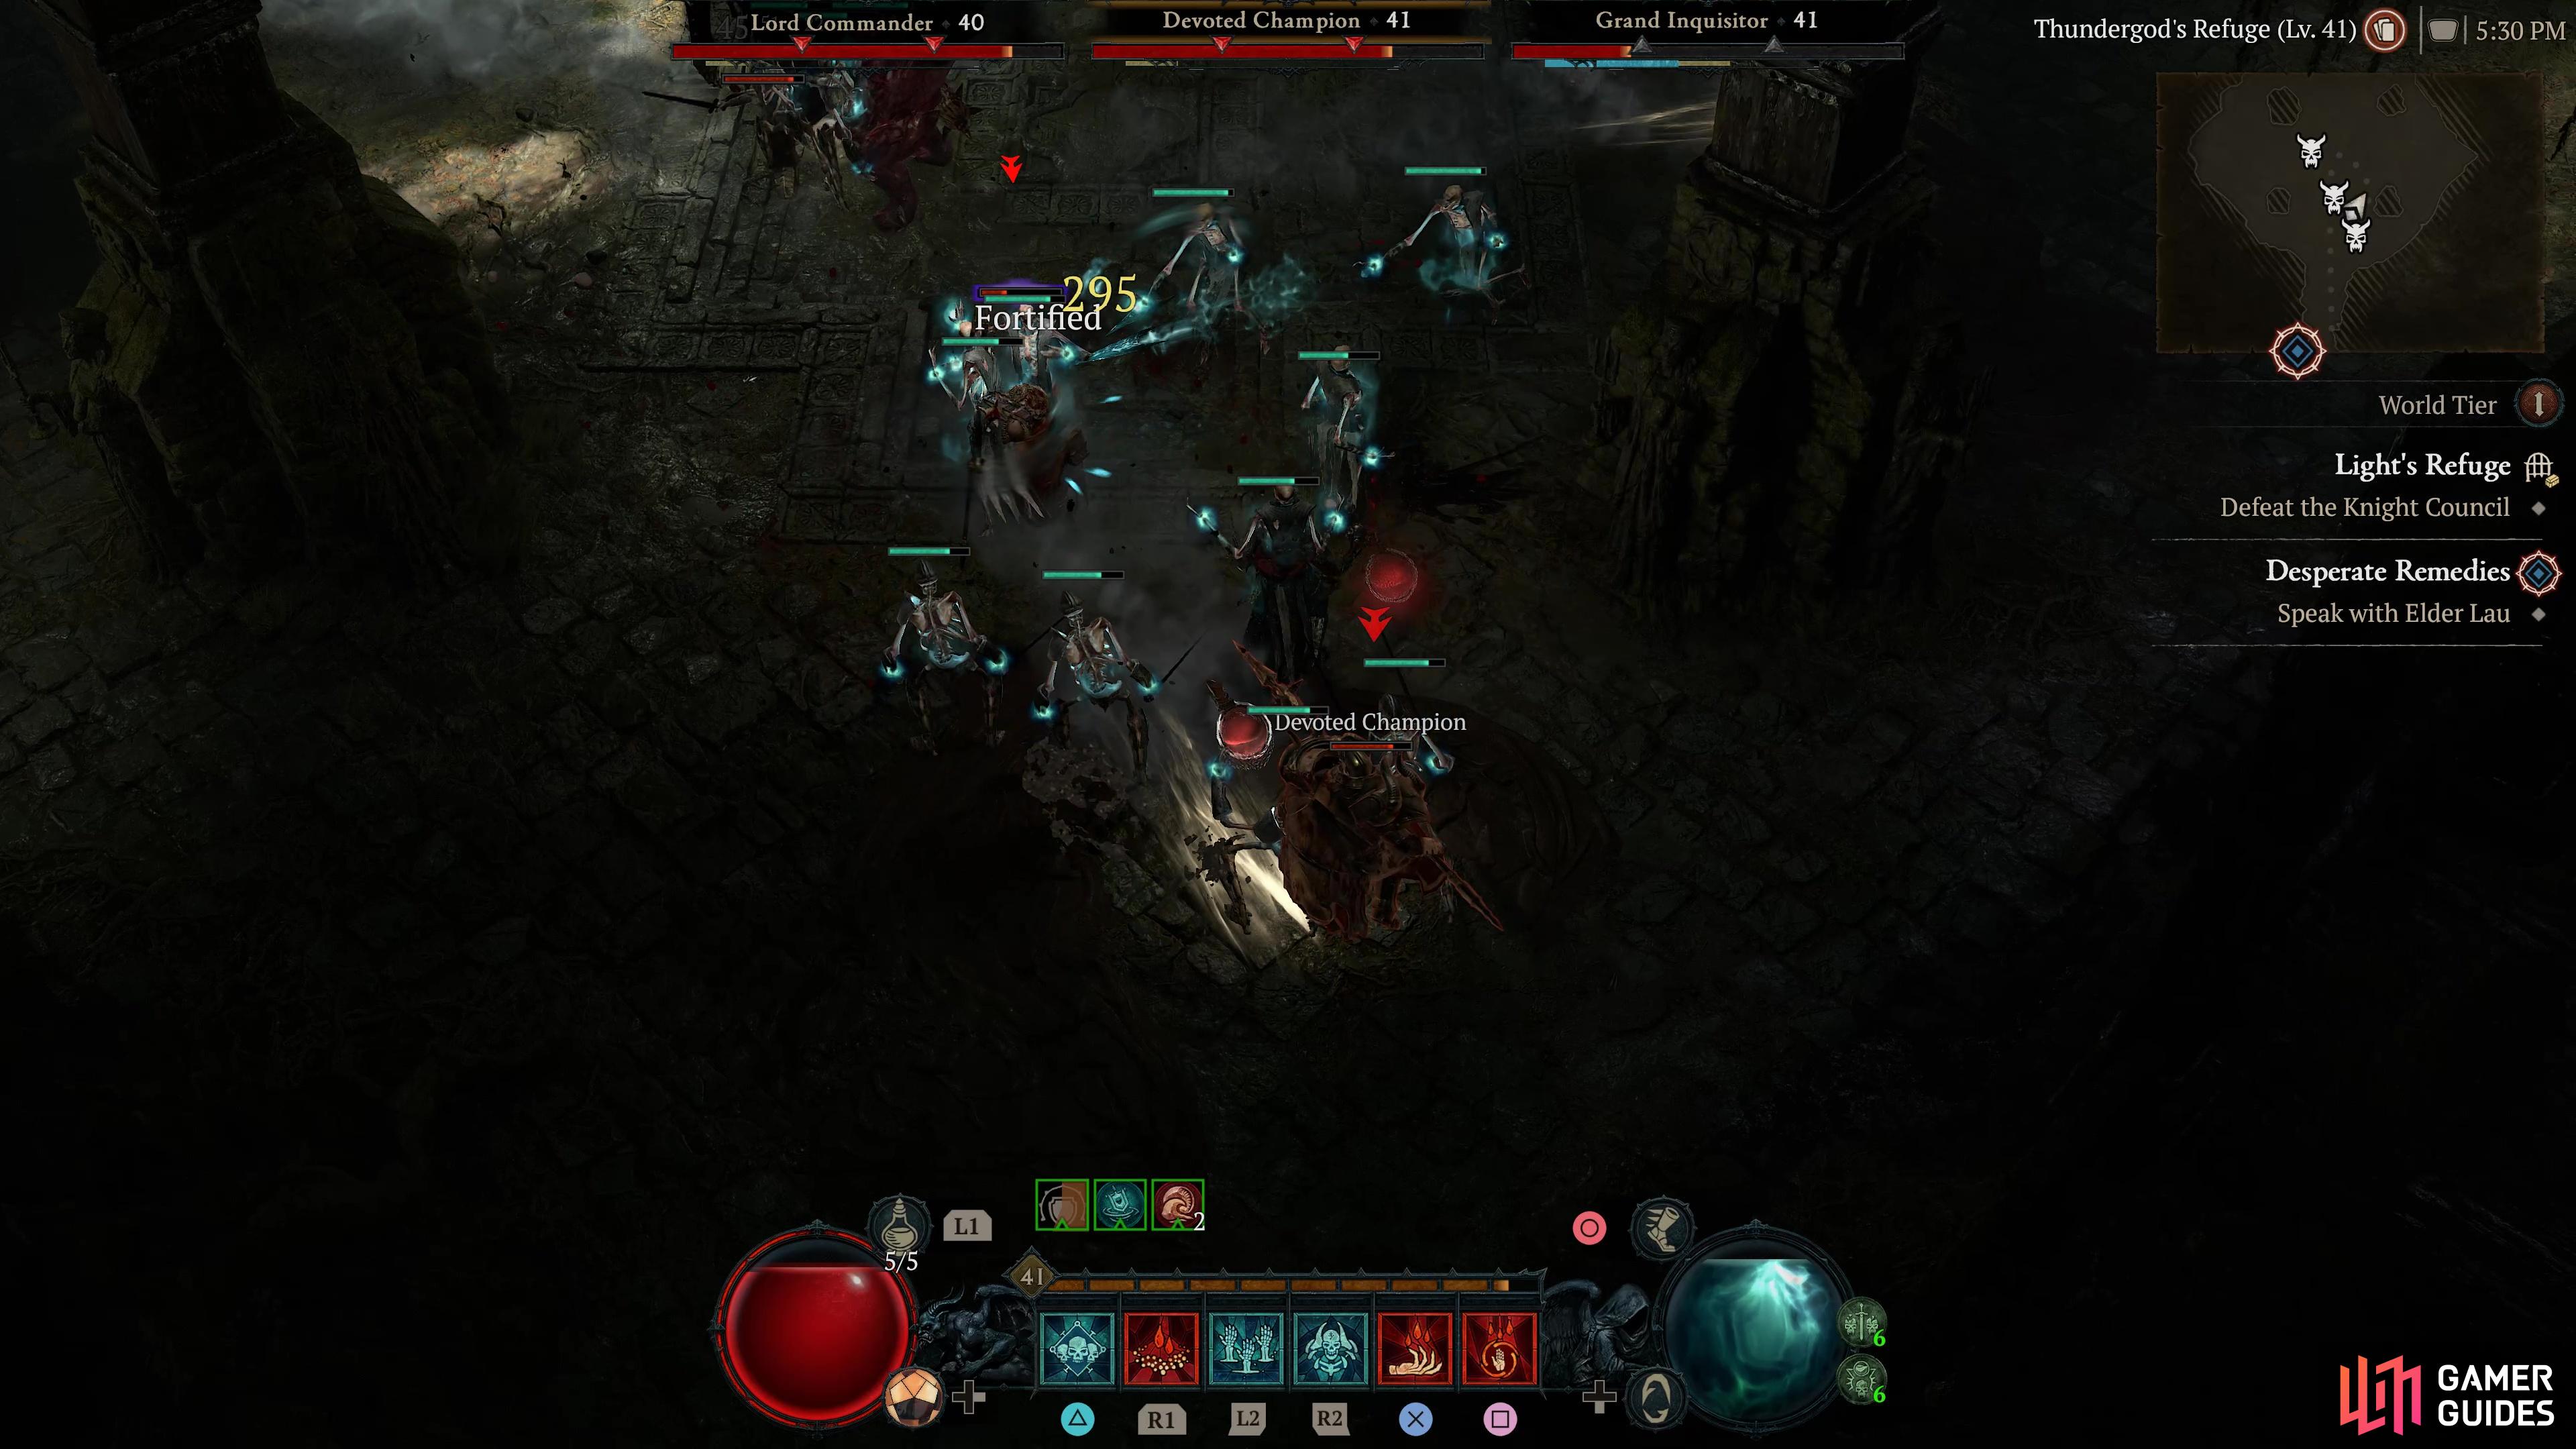
Final boss of Maugan’s Work and Light’s Refuge in Hawezar, the Knight Council is comprised of the Sacred Physician/Devoted Champion, Grand Inquisitor and the Lord Commander. The Sacred Physician is a powerful holy cleric and healer, the Grand Inquisitor casts Lightning magic and the Lord Commander is a unique Dreadknight type. Bring down the Physician first, then the Inquisitor and finally the Lord Commander.
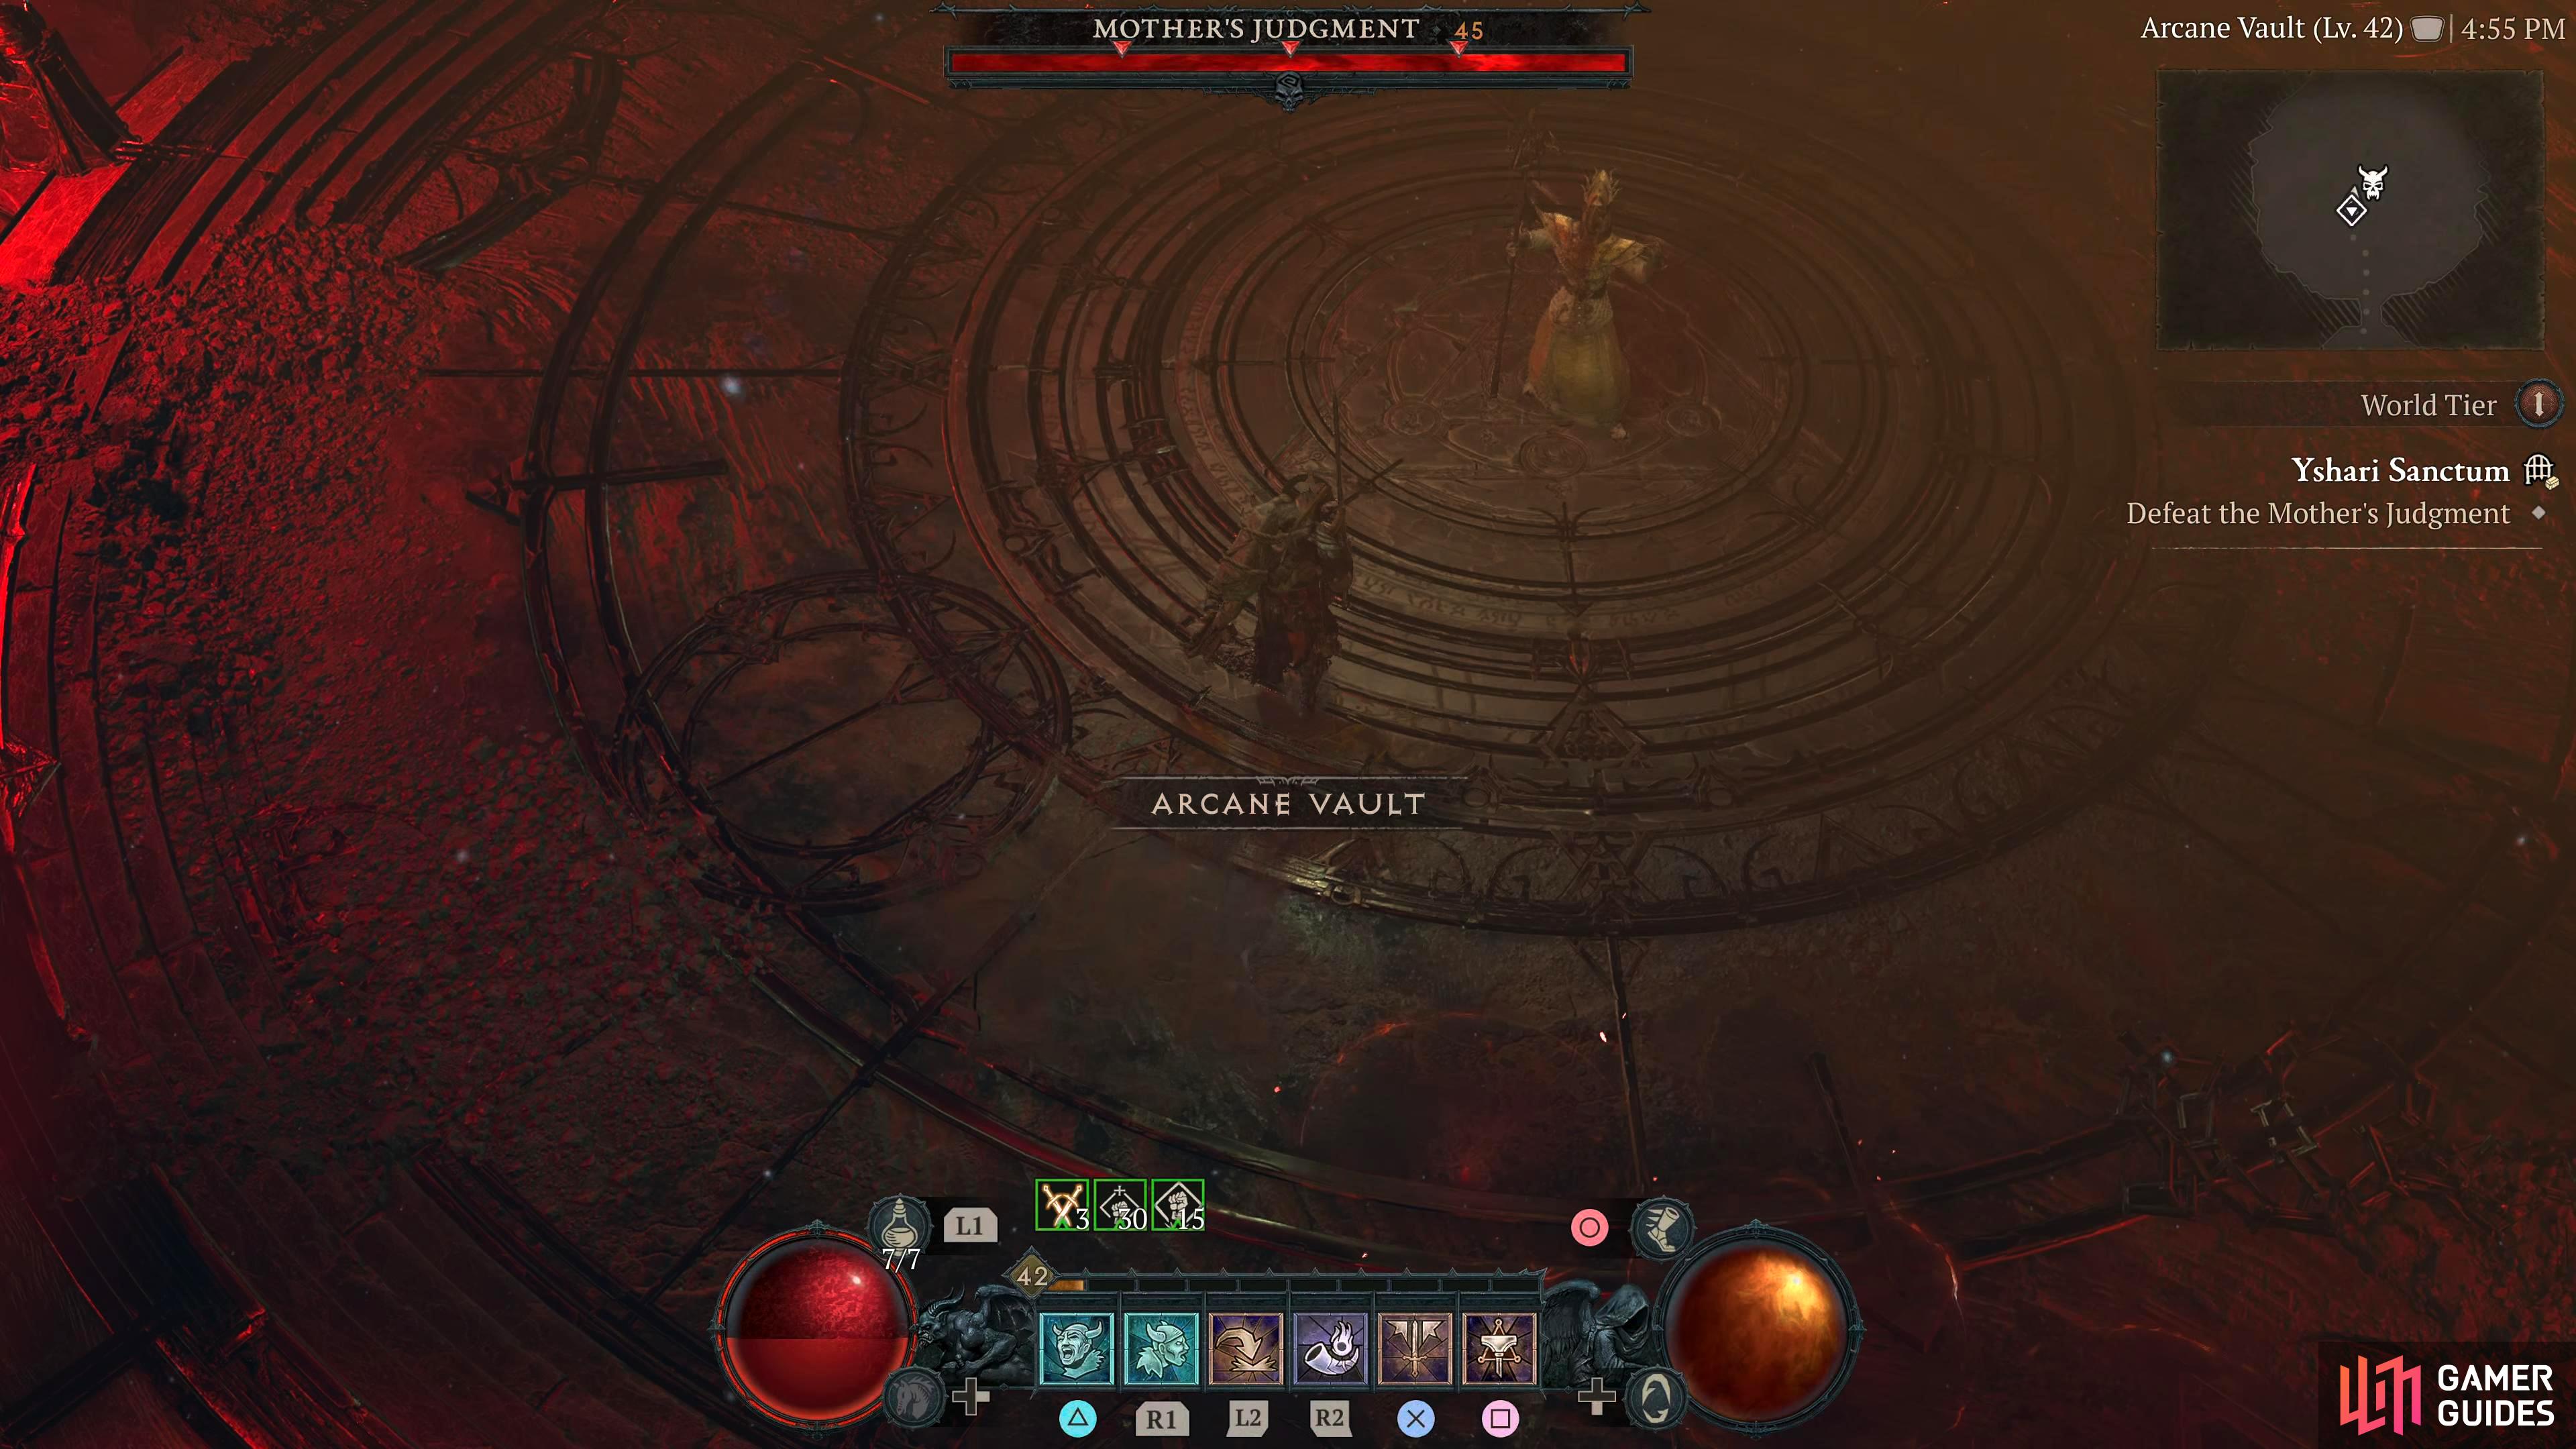
Mother’s Judgment is the highest tier of the Cultists, and can be found inside Yshari Sanctum where they practice their villainous deeds.
Description
The Mother’s Judgment boss is relatively easy regardless of what class you are playing as. For the most part, you can spend the entire fight in melee range, but be careful of the small and large red circles she places on the ground. The small red circles will appear in a line and explode consecutively.
The larger red circles will be placed around the room where you’ll need to move out of them, but after they explode, they will send out multiple red projectiles. Finally, Mother’s Judgment occasionally uses a short teleport before firing a few projectiles your way.
Final boss of the Vyeresz Stronghold in Hawezar, Dianthus is a larger, stronger version of a Nangari Longfang. It spits poison and casts a large poison AoE circle on the floor, as well as has a knockback attack.
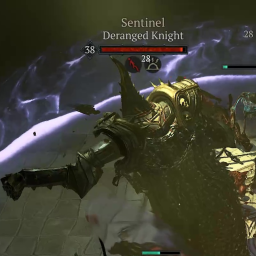
An Elite Dreadknight, part of the final boss in Bastion of Faith dungeon in Hawezar. It has the Suppressor and Shock Lance affixes so magic users will need to take care. Lightning protection will benefit players greatly. With their high HP and ability to attack from longe-range, the Sentinels are difficult to deal with.
An Elite Knight Errant and final boss of the Bastion of Faith dungeon in Hawezar, !Mera has the Hellbound, Teleporter, Lightning Enchanted and Vampiric affixes, making them particularly challenging. He can heal, avoid attacks with teleport, will emit constant lightning and can bind players in place.
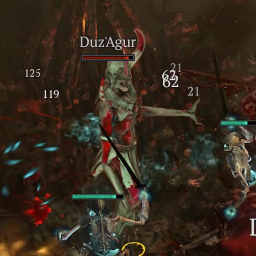
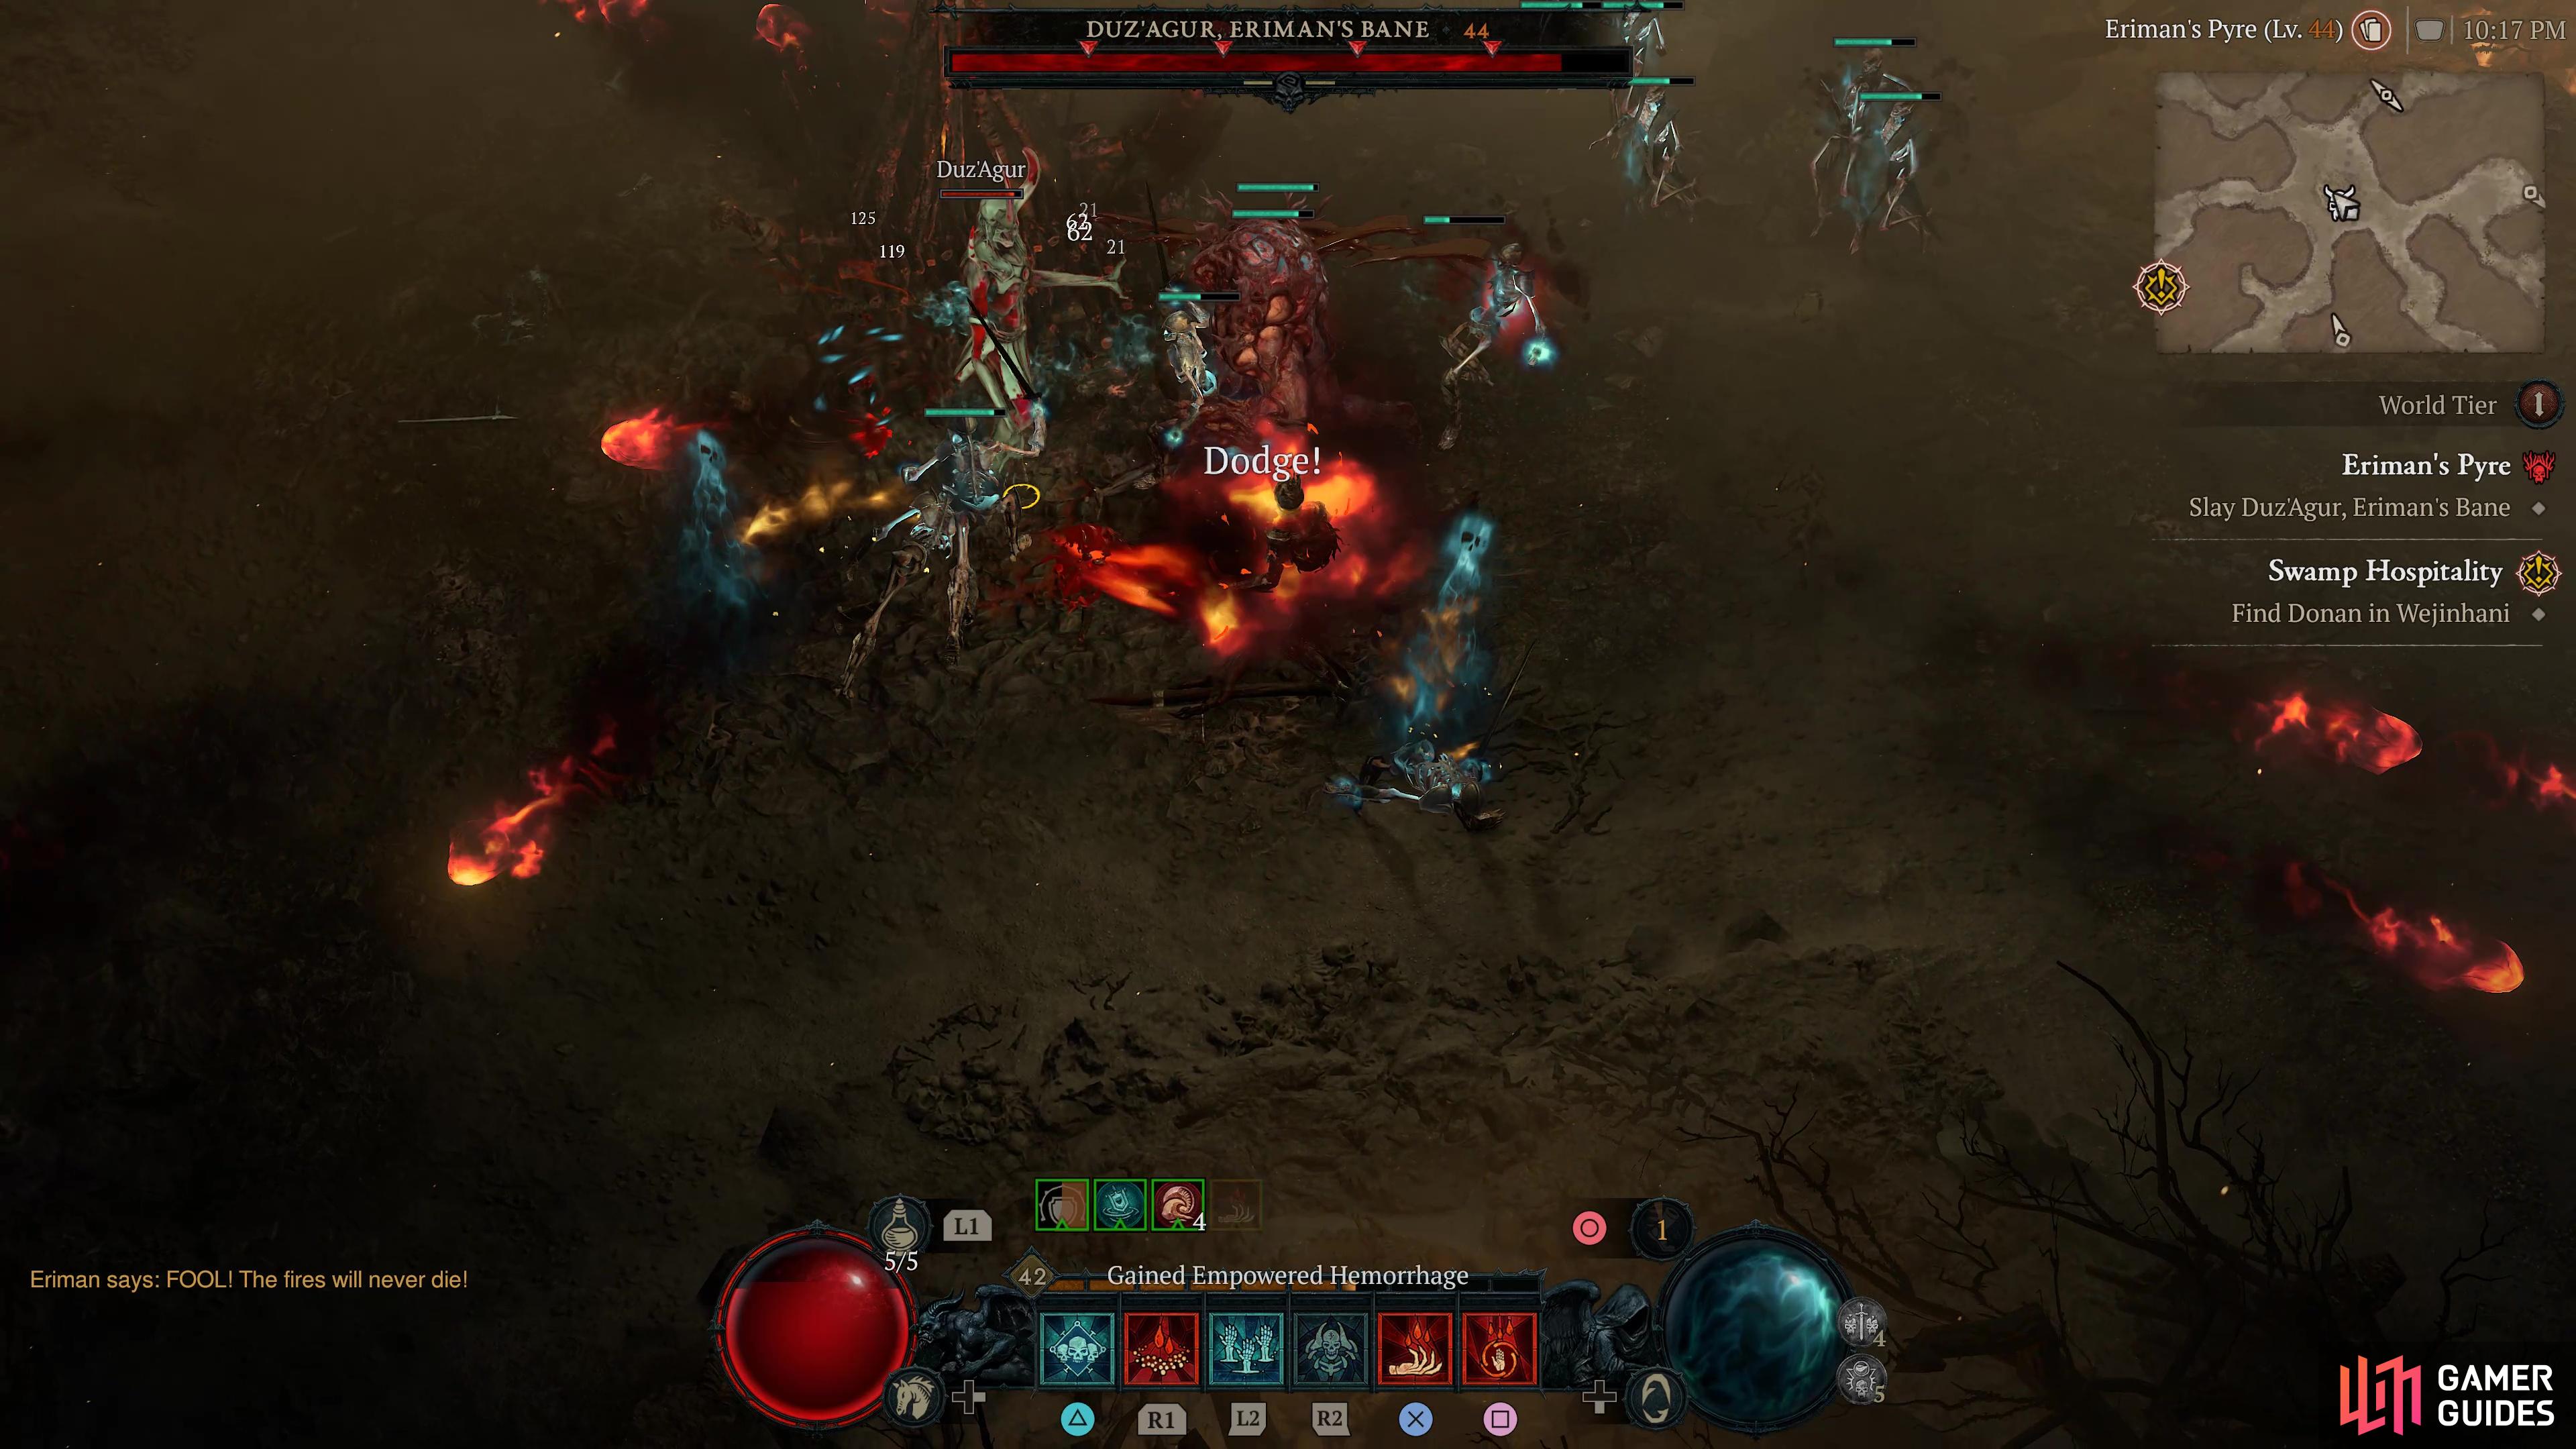
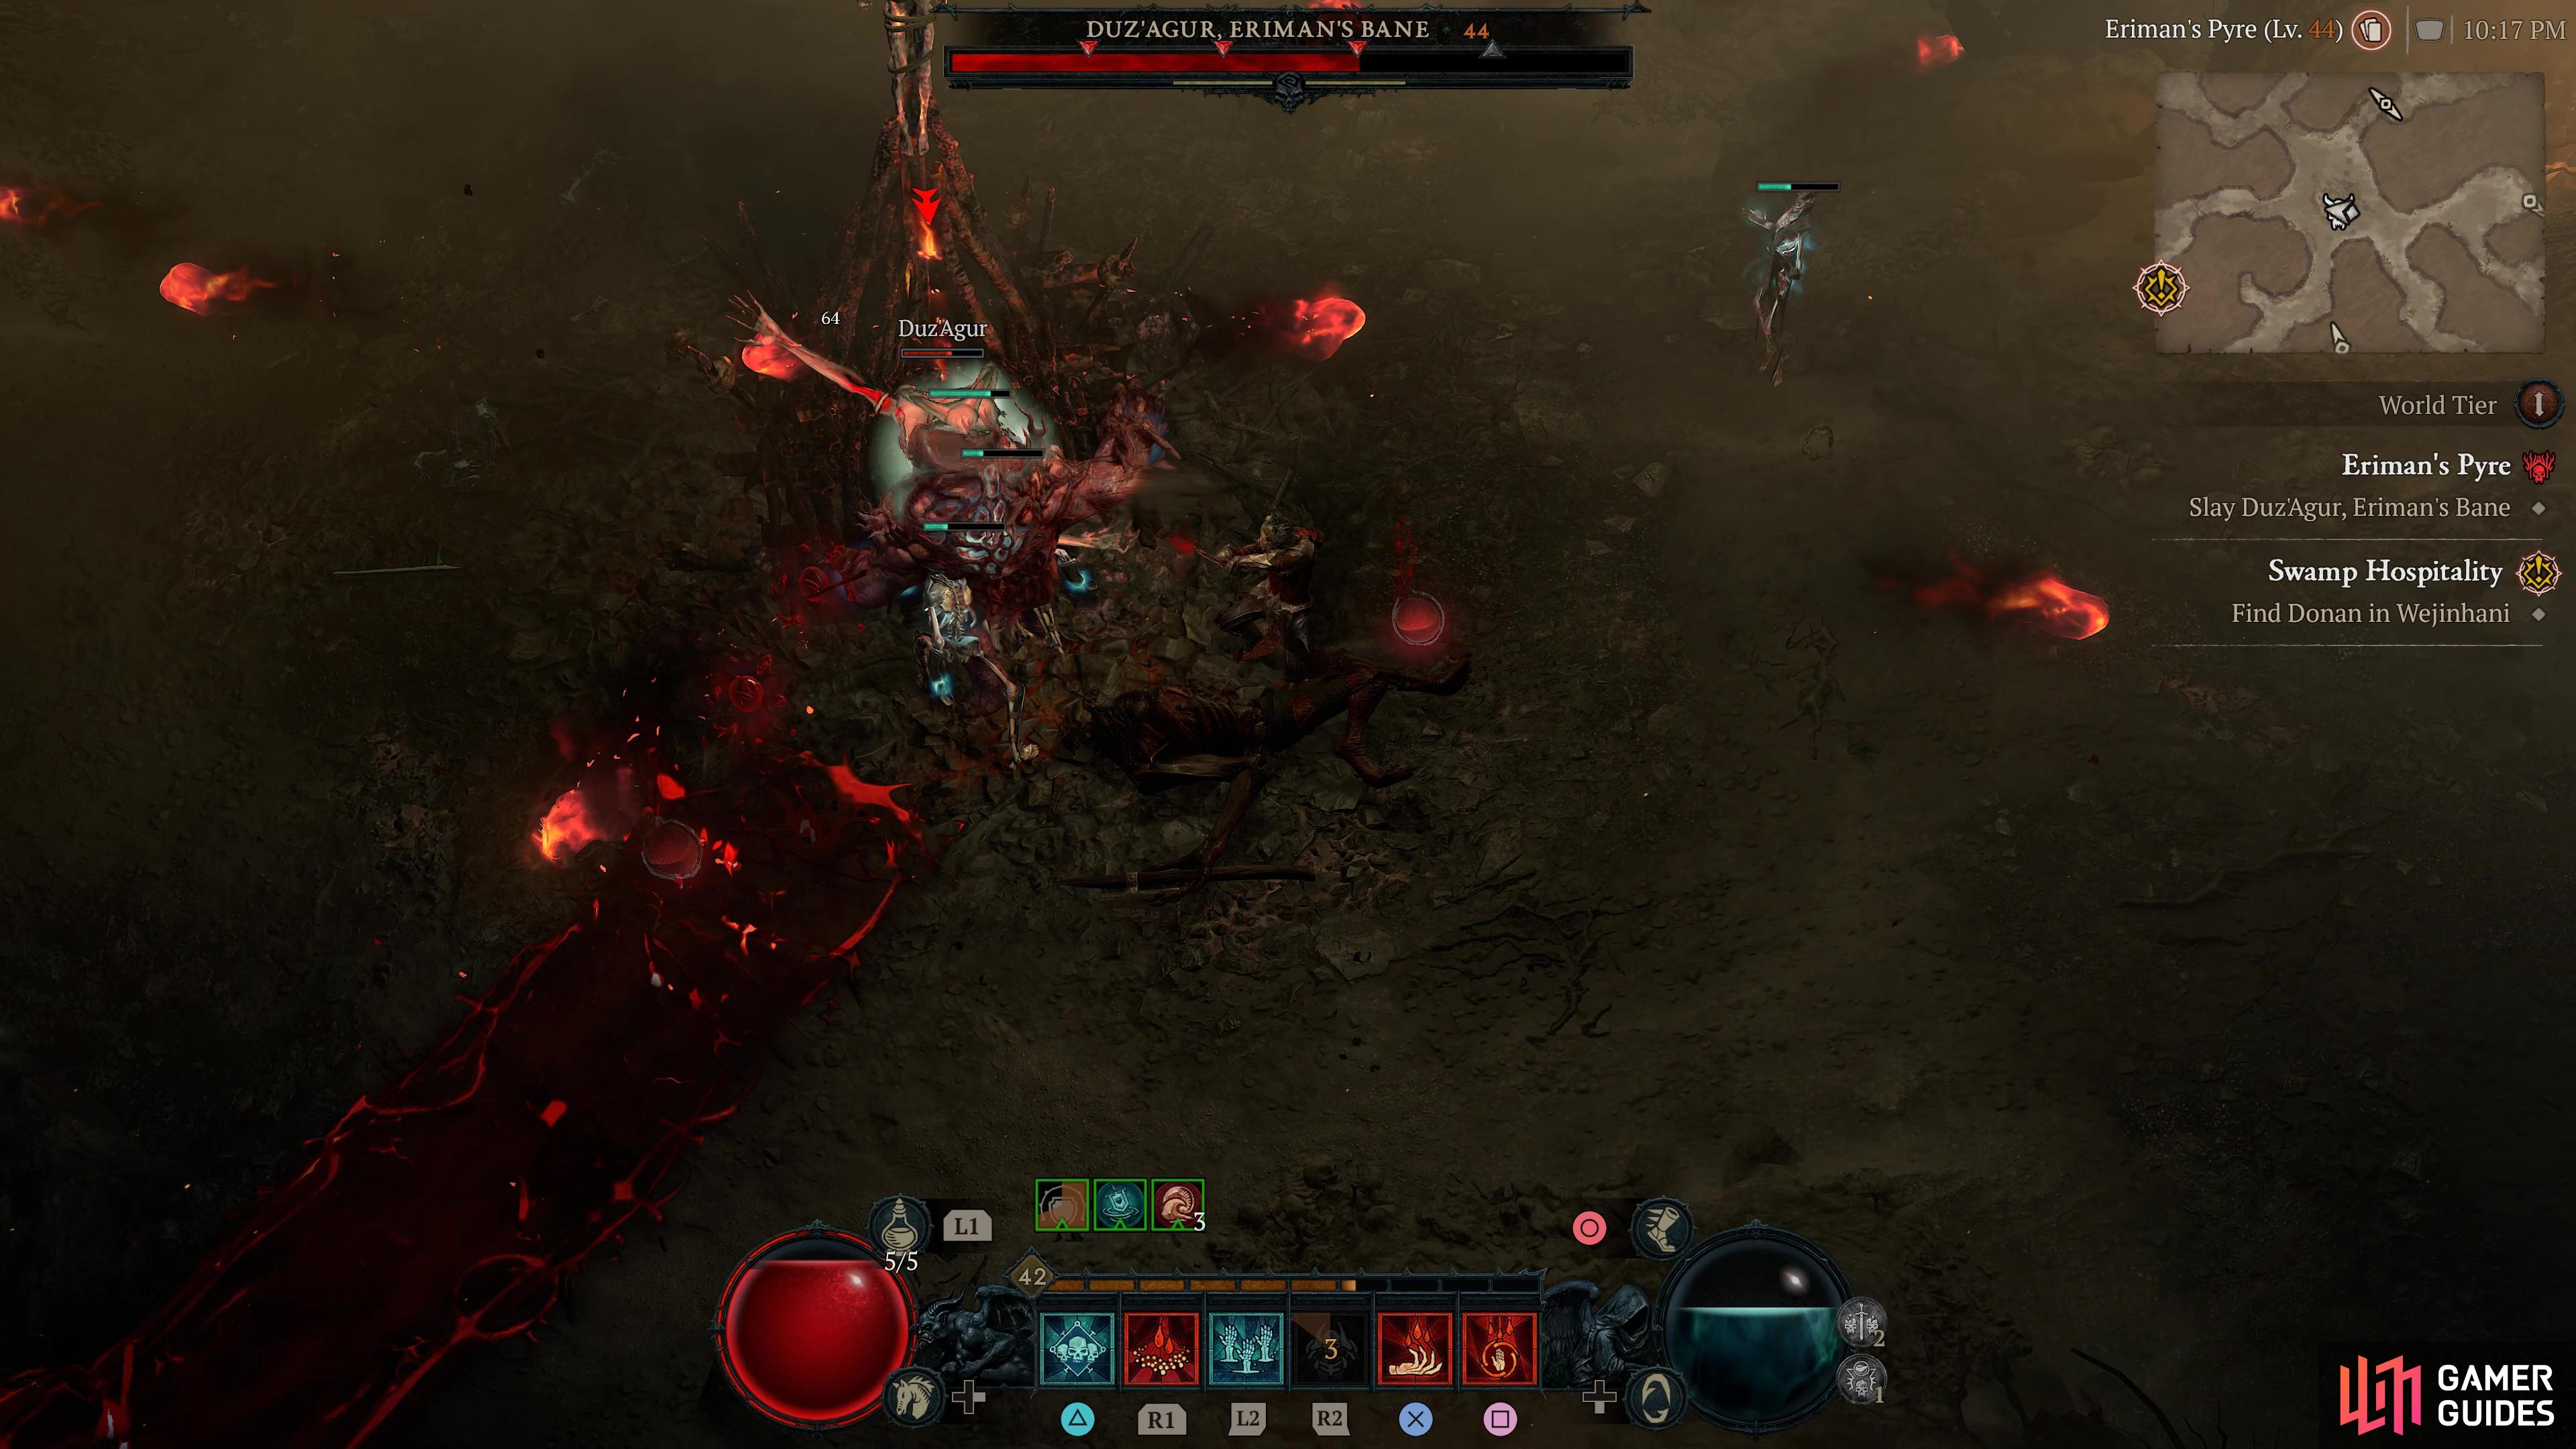
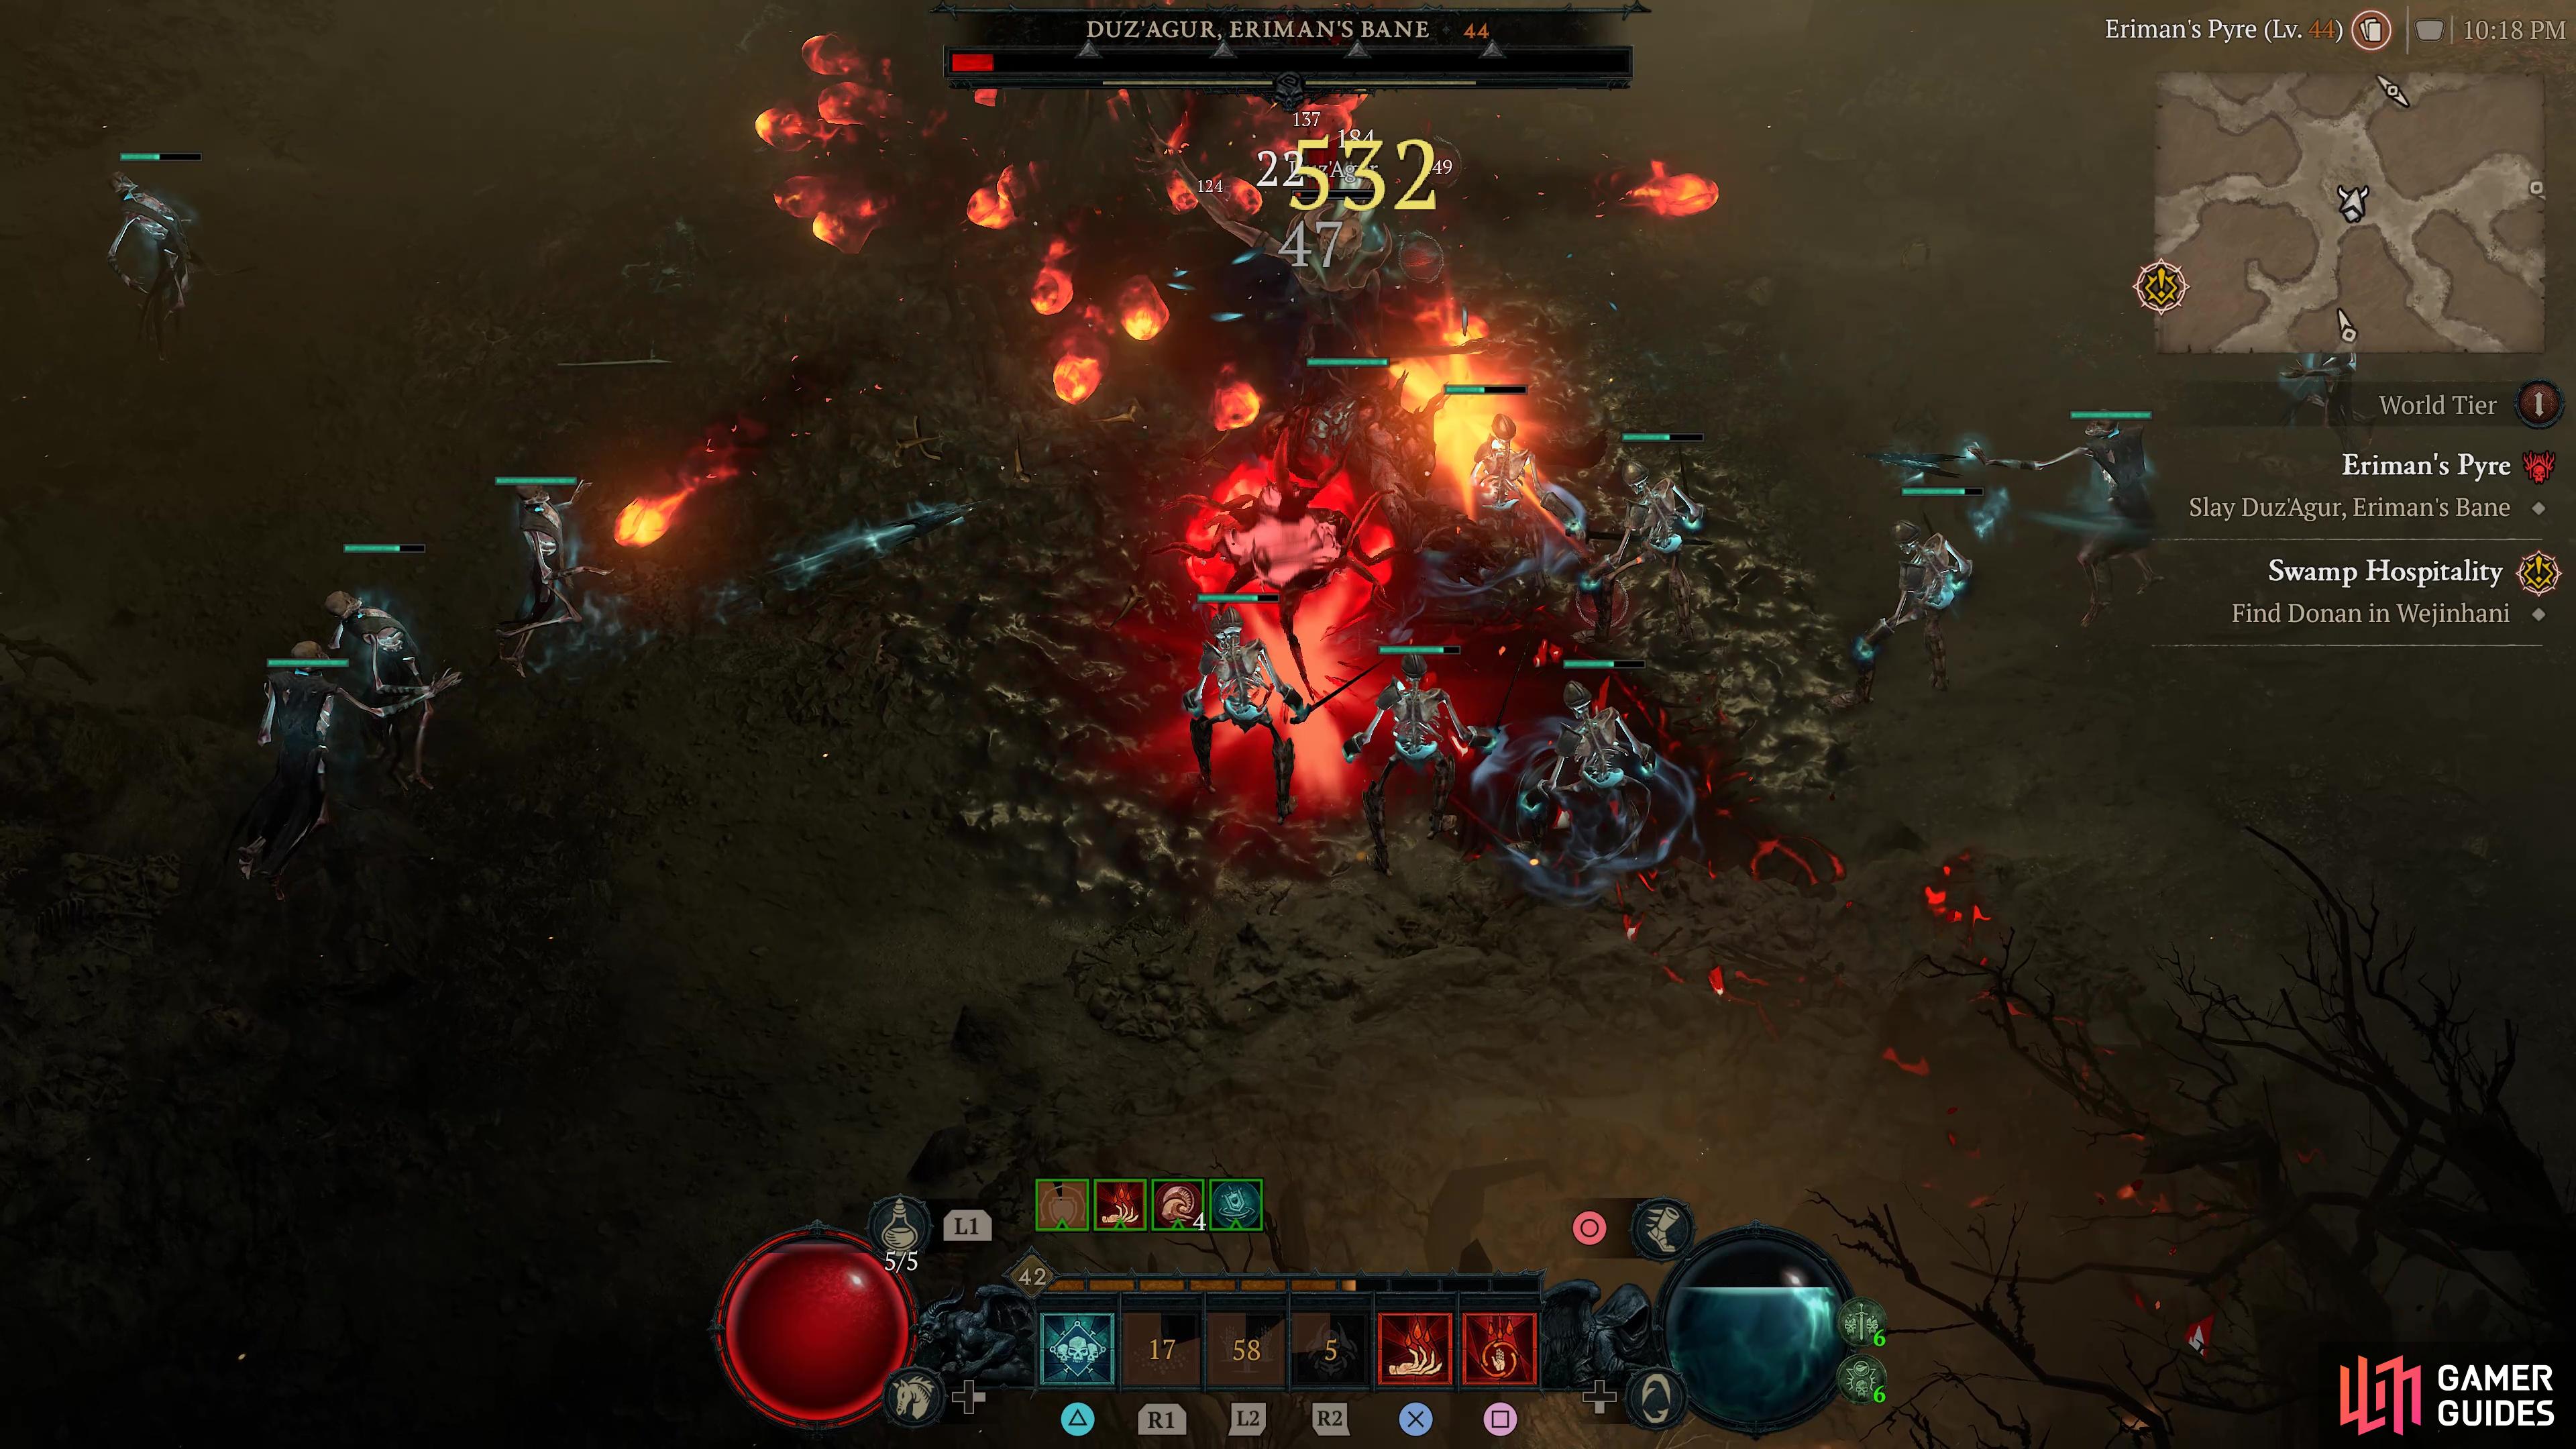
The final boss of the Eriman’s Pyre stronghold and an enemy similar to the Resurrected Malice boss found in other dungeons. Duz’agur can shoot fireballs in multiple directions and will often leave a strip of damaging magic on the floor. It can also deal an AoE knockback attack that then emits the fireballs after the fact.
A human witch whom you must fight during the Witch of the Wastes Campaign Quest in Hawezar. She wields a flame staff and can cast Mortar magic as well as leave burning circles on the ground. She can use a knockback attack as well as leave a ridge of flaming ground in her wake as she teleports.
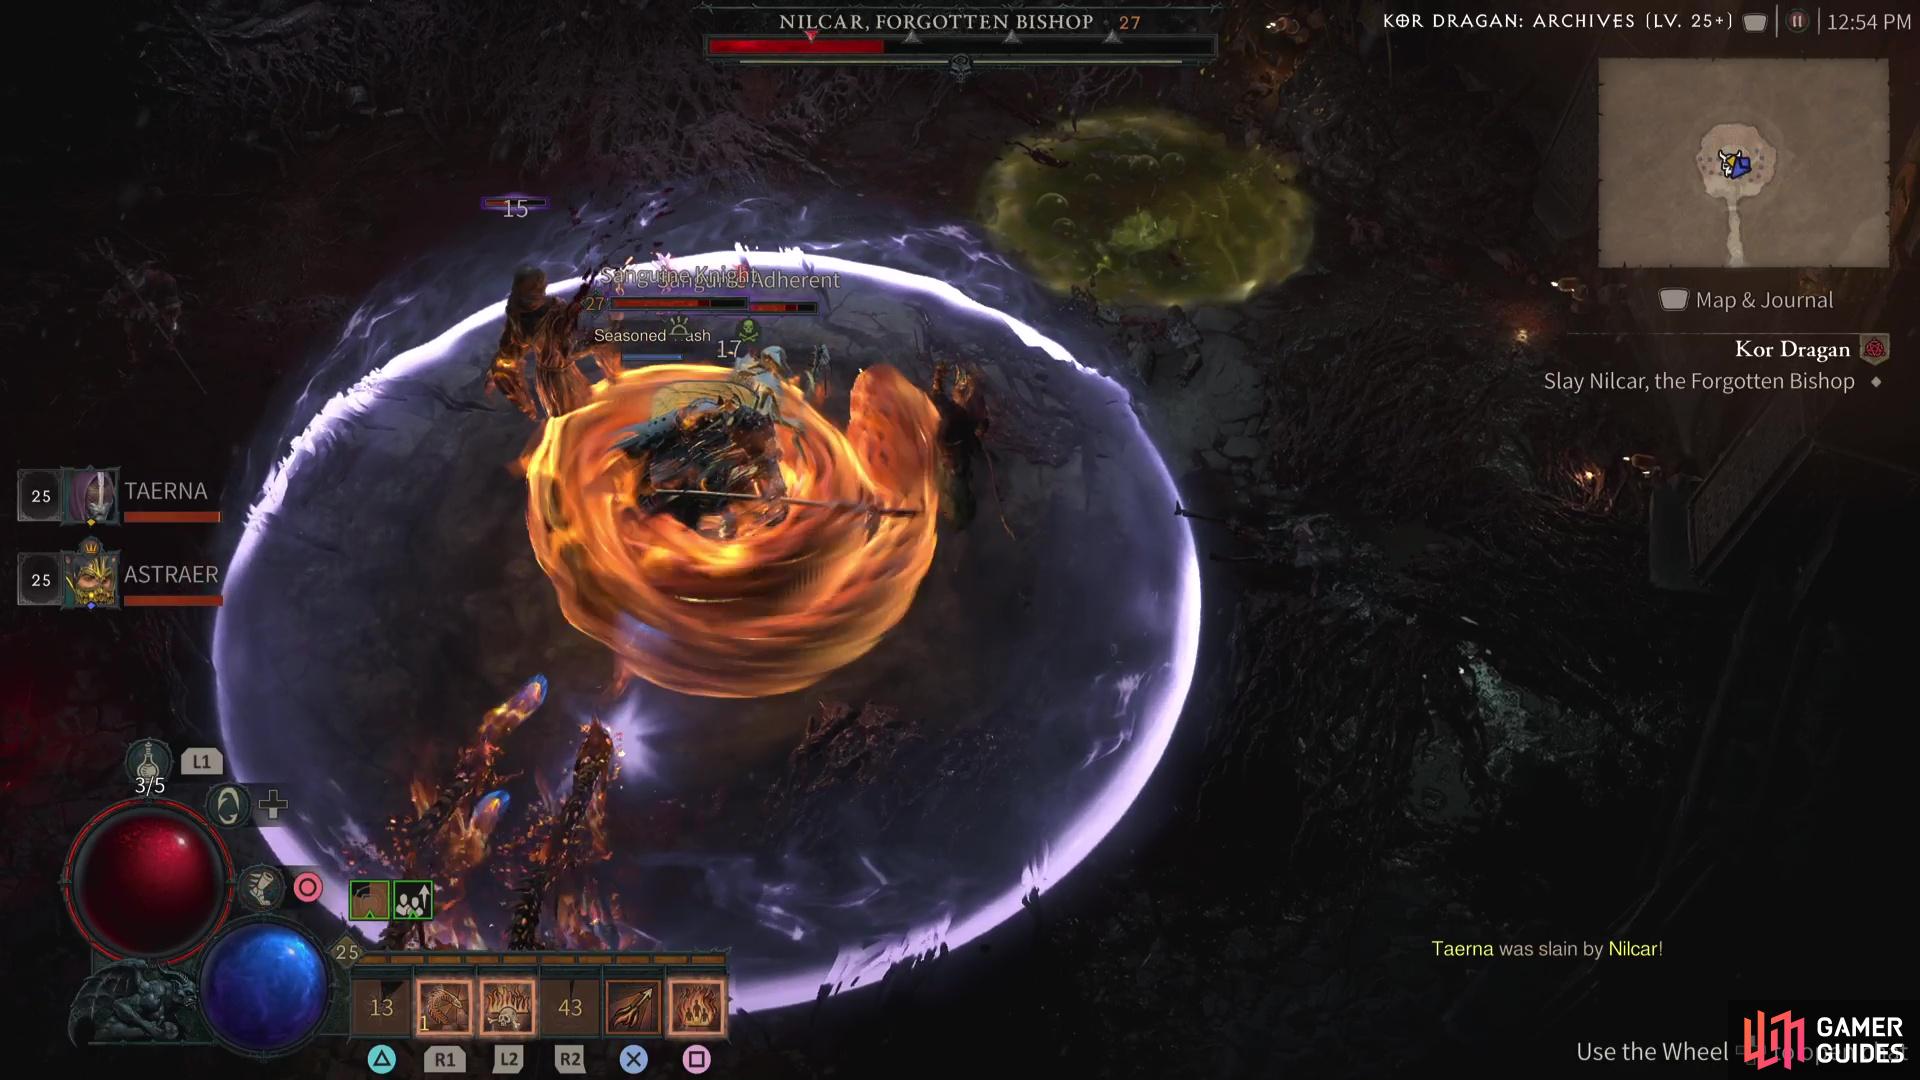
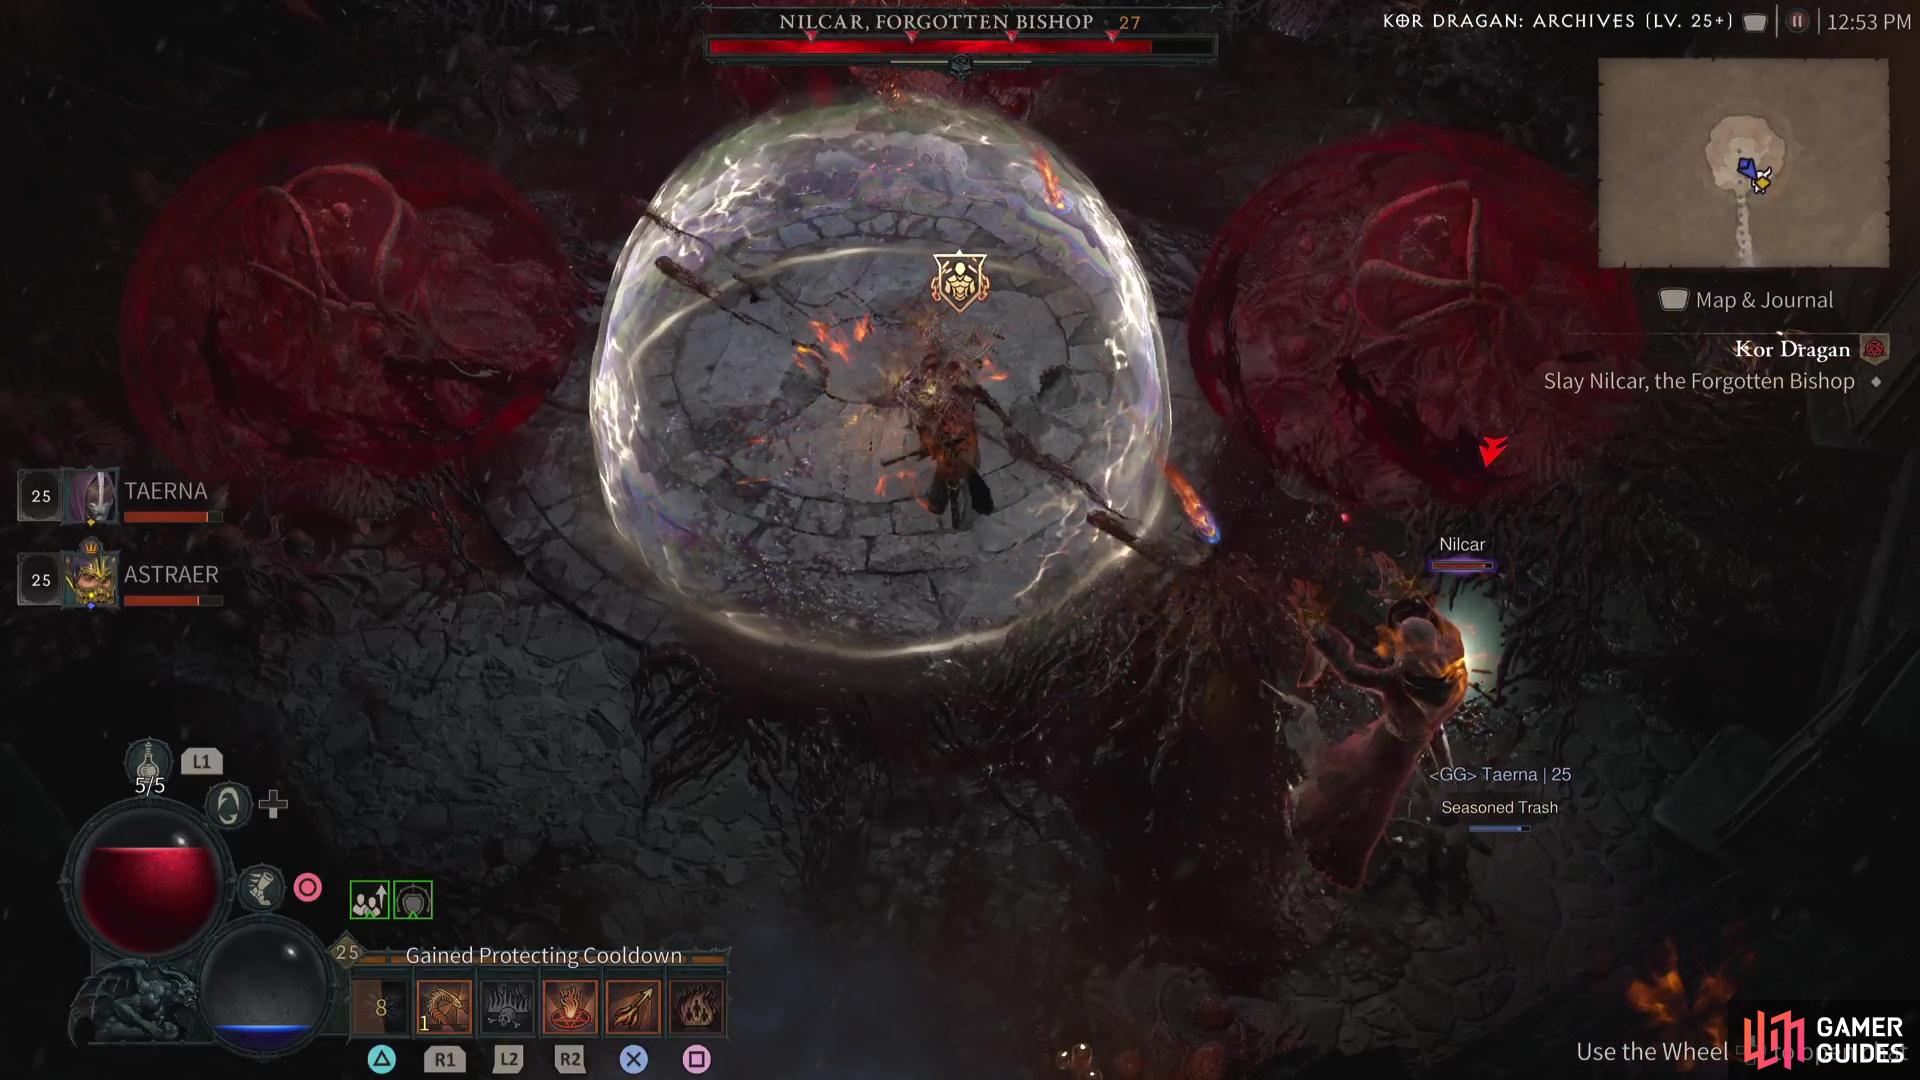
Nilcar, Forgotten Bishop is a vampire that summons other vampires to do its bidding. Capable of unleashing a barrage of blood at its victims, it is a foe to be wary of.
Description
The first thing you should notice about this boss battle is that there’s not much room to move about in this relatively small boss arena. Nilcar, Forgotten Bishop is also surrounded by three more Incubators, which start off shielded, but these will also impact where you can and can’t move throughout the battle.
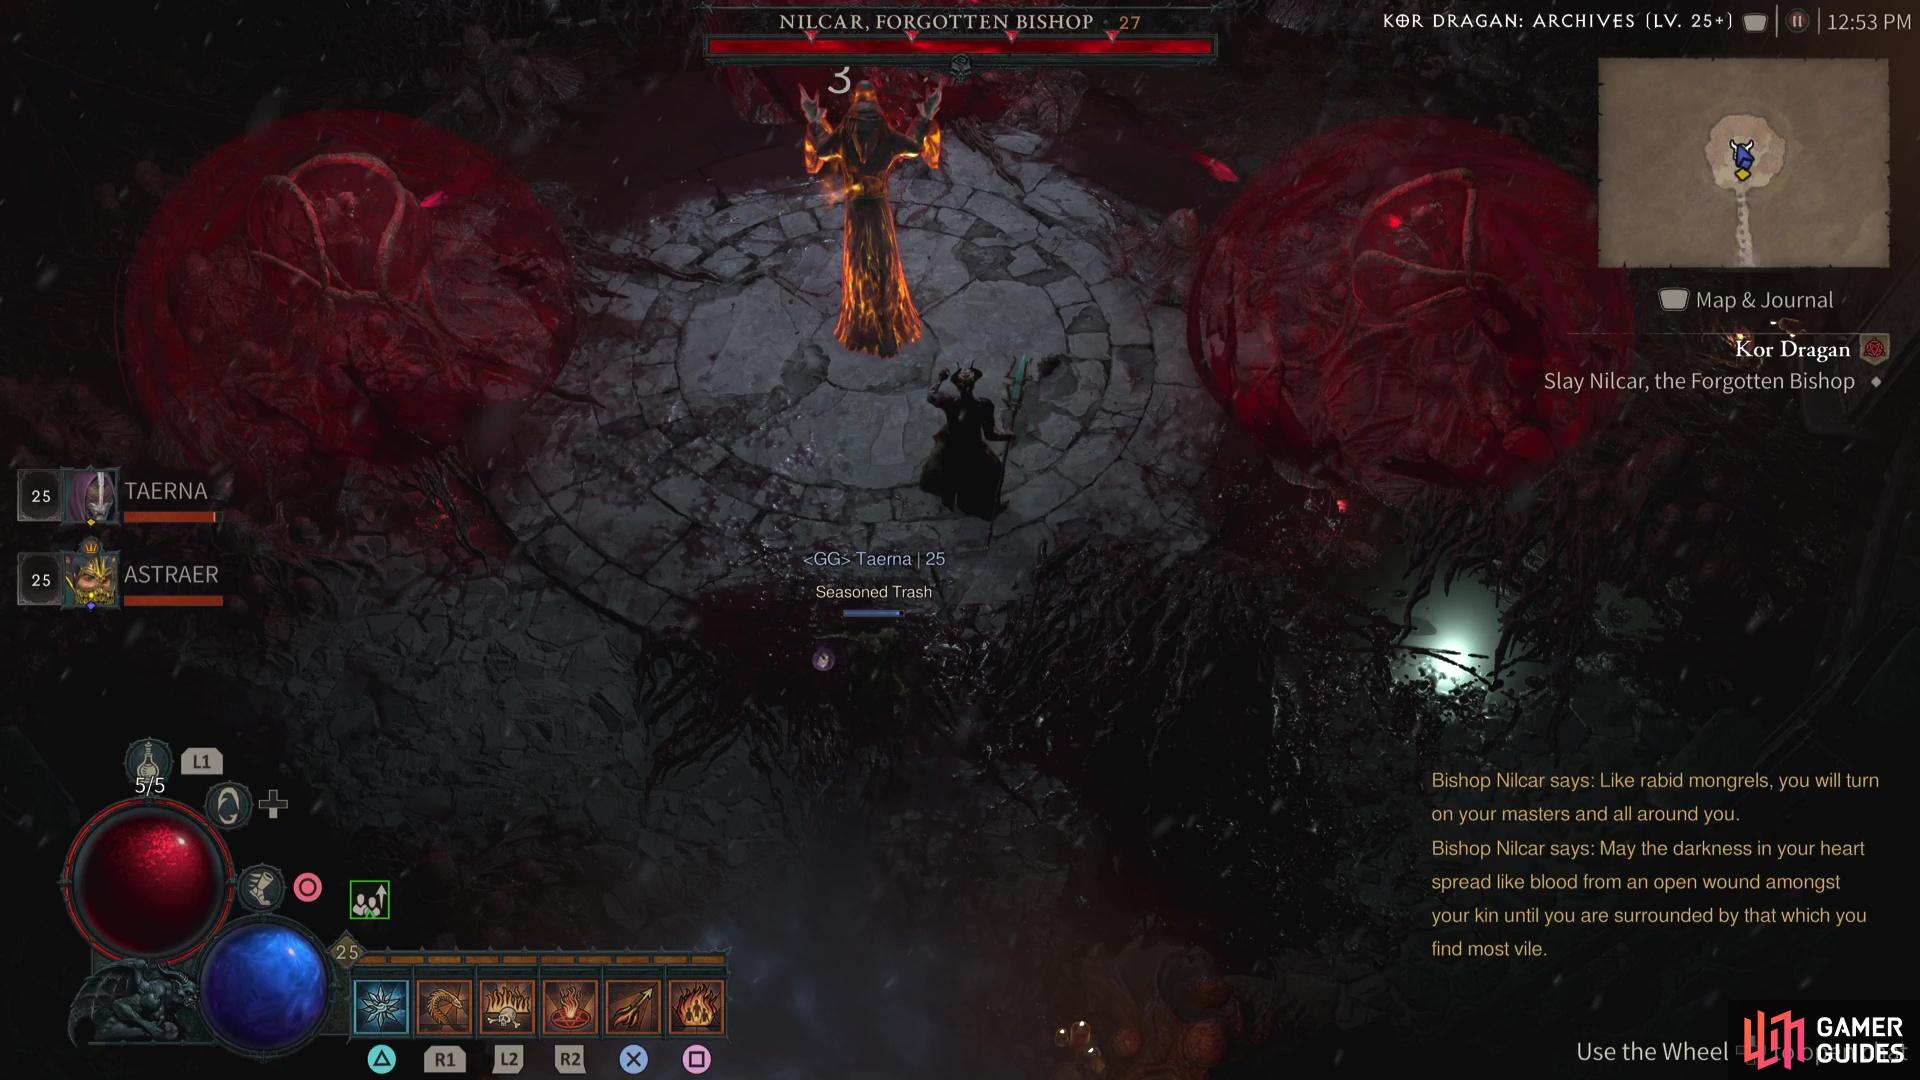
Nilcar has a variety of attacks available to him, and you can learn about them all below:
Blood Shot: This is Nilcar’s basic attack where he’ll shoot out a single blast of Blood, this will deal minimal damage but can add up over time.
Blood Barrage: When you see Nilcar fly away, get ready for his Blood Barrage attack. This sees him shoot out a stream of Blood Shots at a lightning pace, if you get caught in this, you could be seeing an early death so keep on the move during this attack.
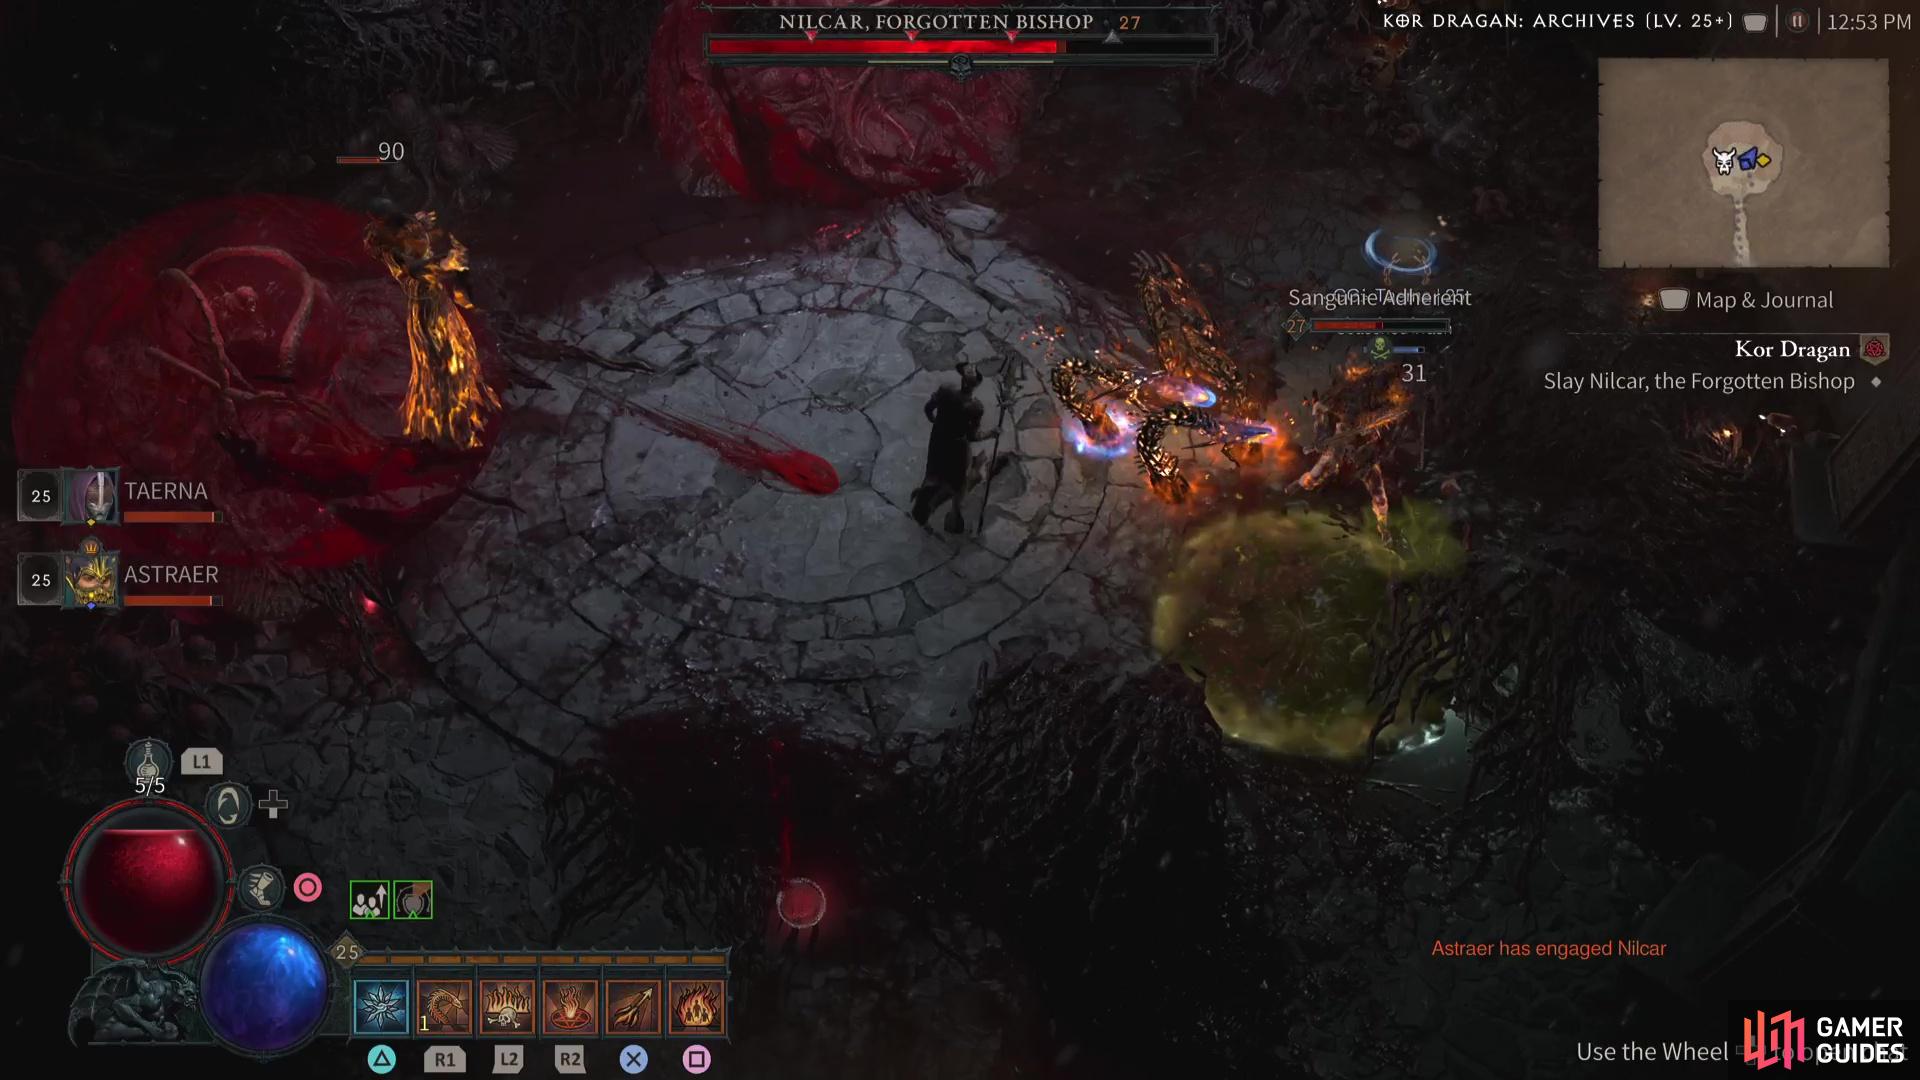
Sanguine Adds: Every time you reduce Nilcar’s HP by a quarter, not only will he drop some potions, but he will break open one of the Incubators to spawn a difficult Sanguine add. Turn your attention to these enemies before returning to focusing on Nilcar.
Sanguine Knight: As mentioned above, Nilcar will call out adds but the Sanguine Knight that spawns from the third Incubator is the biggest issue. It has a massive aura so you’ll want to group it with Nilcar if possible and burn it down as quickly as possible.
The battle against Nilcar is a tough one that gets more challenging as he brings out more adds. You can never fully defeat them, as they’ll only be Dazed for a while, so you’ll need to pick your moments in dealing the adds and inflicting damage on Nilcar.
Try to line up Ultimate skills with any abilities you have that can inflict Vulnerable (such as the Sorcerer’s Frost Nova) to deal maximum damage to Nilcar at any one point. AoE’s will help out once the battle gets a bit crazy at the end with all of the adds out, don’t let the Knight be active for too long!
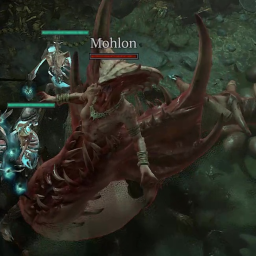
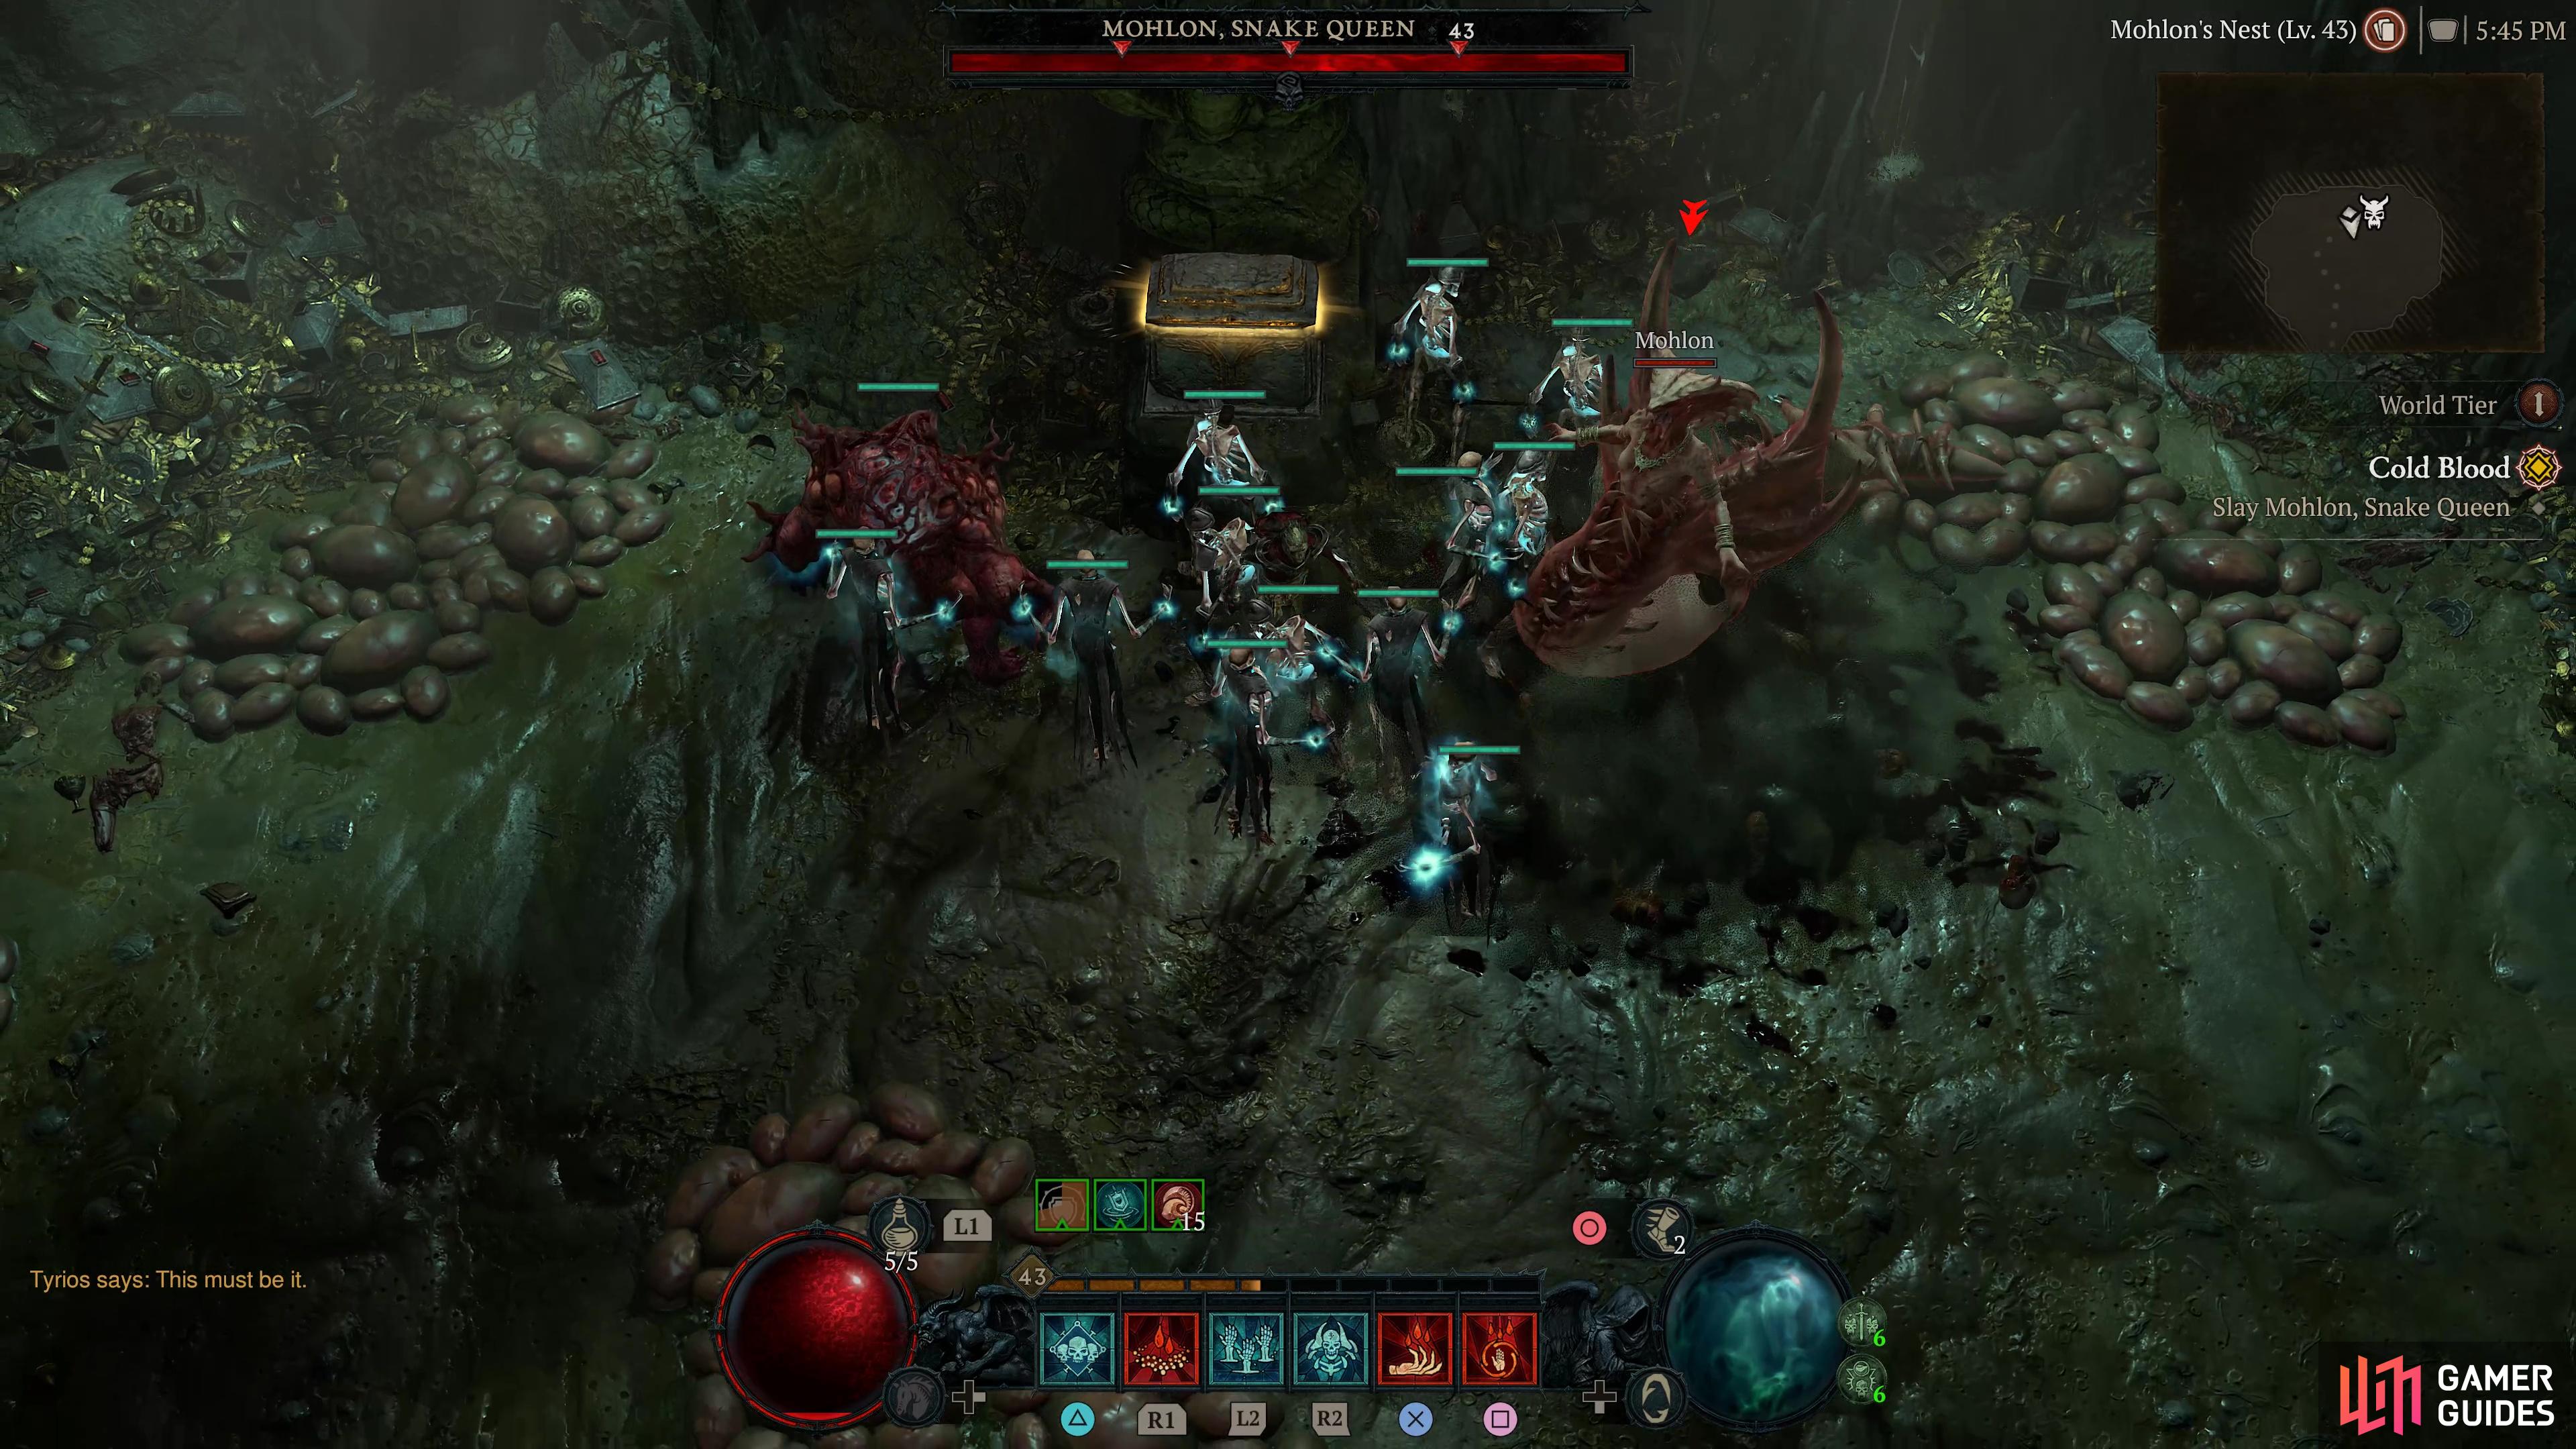
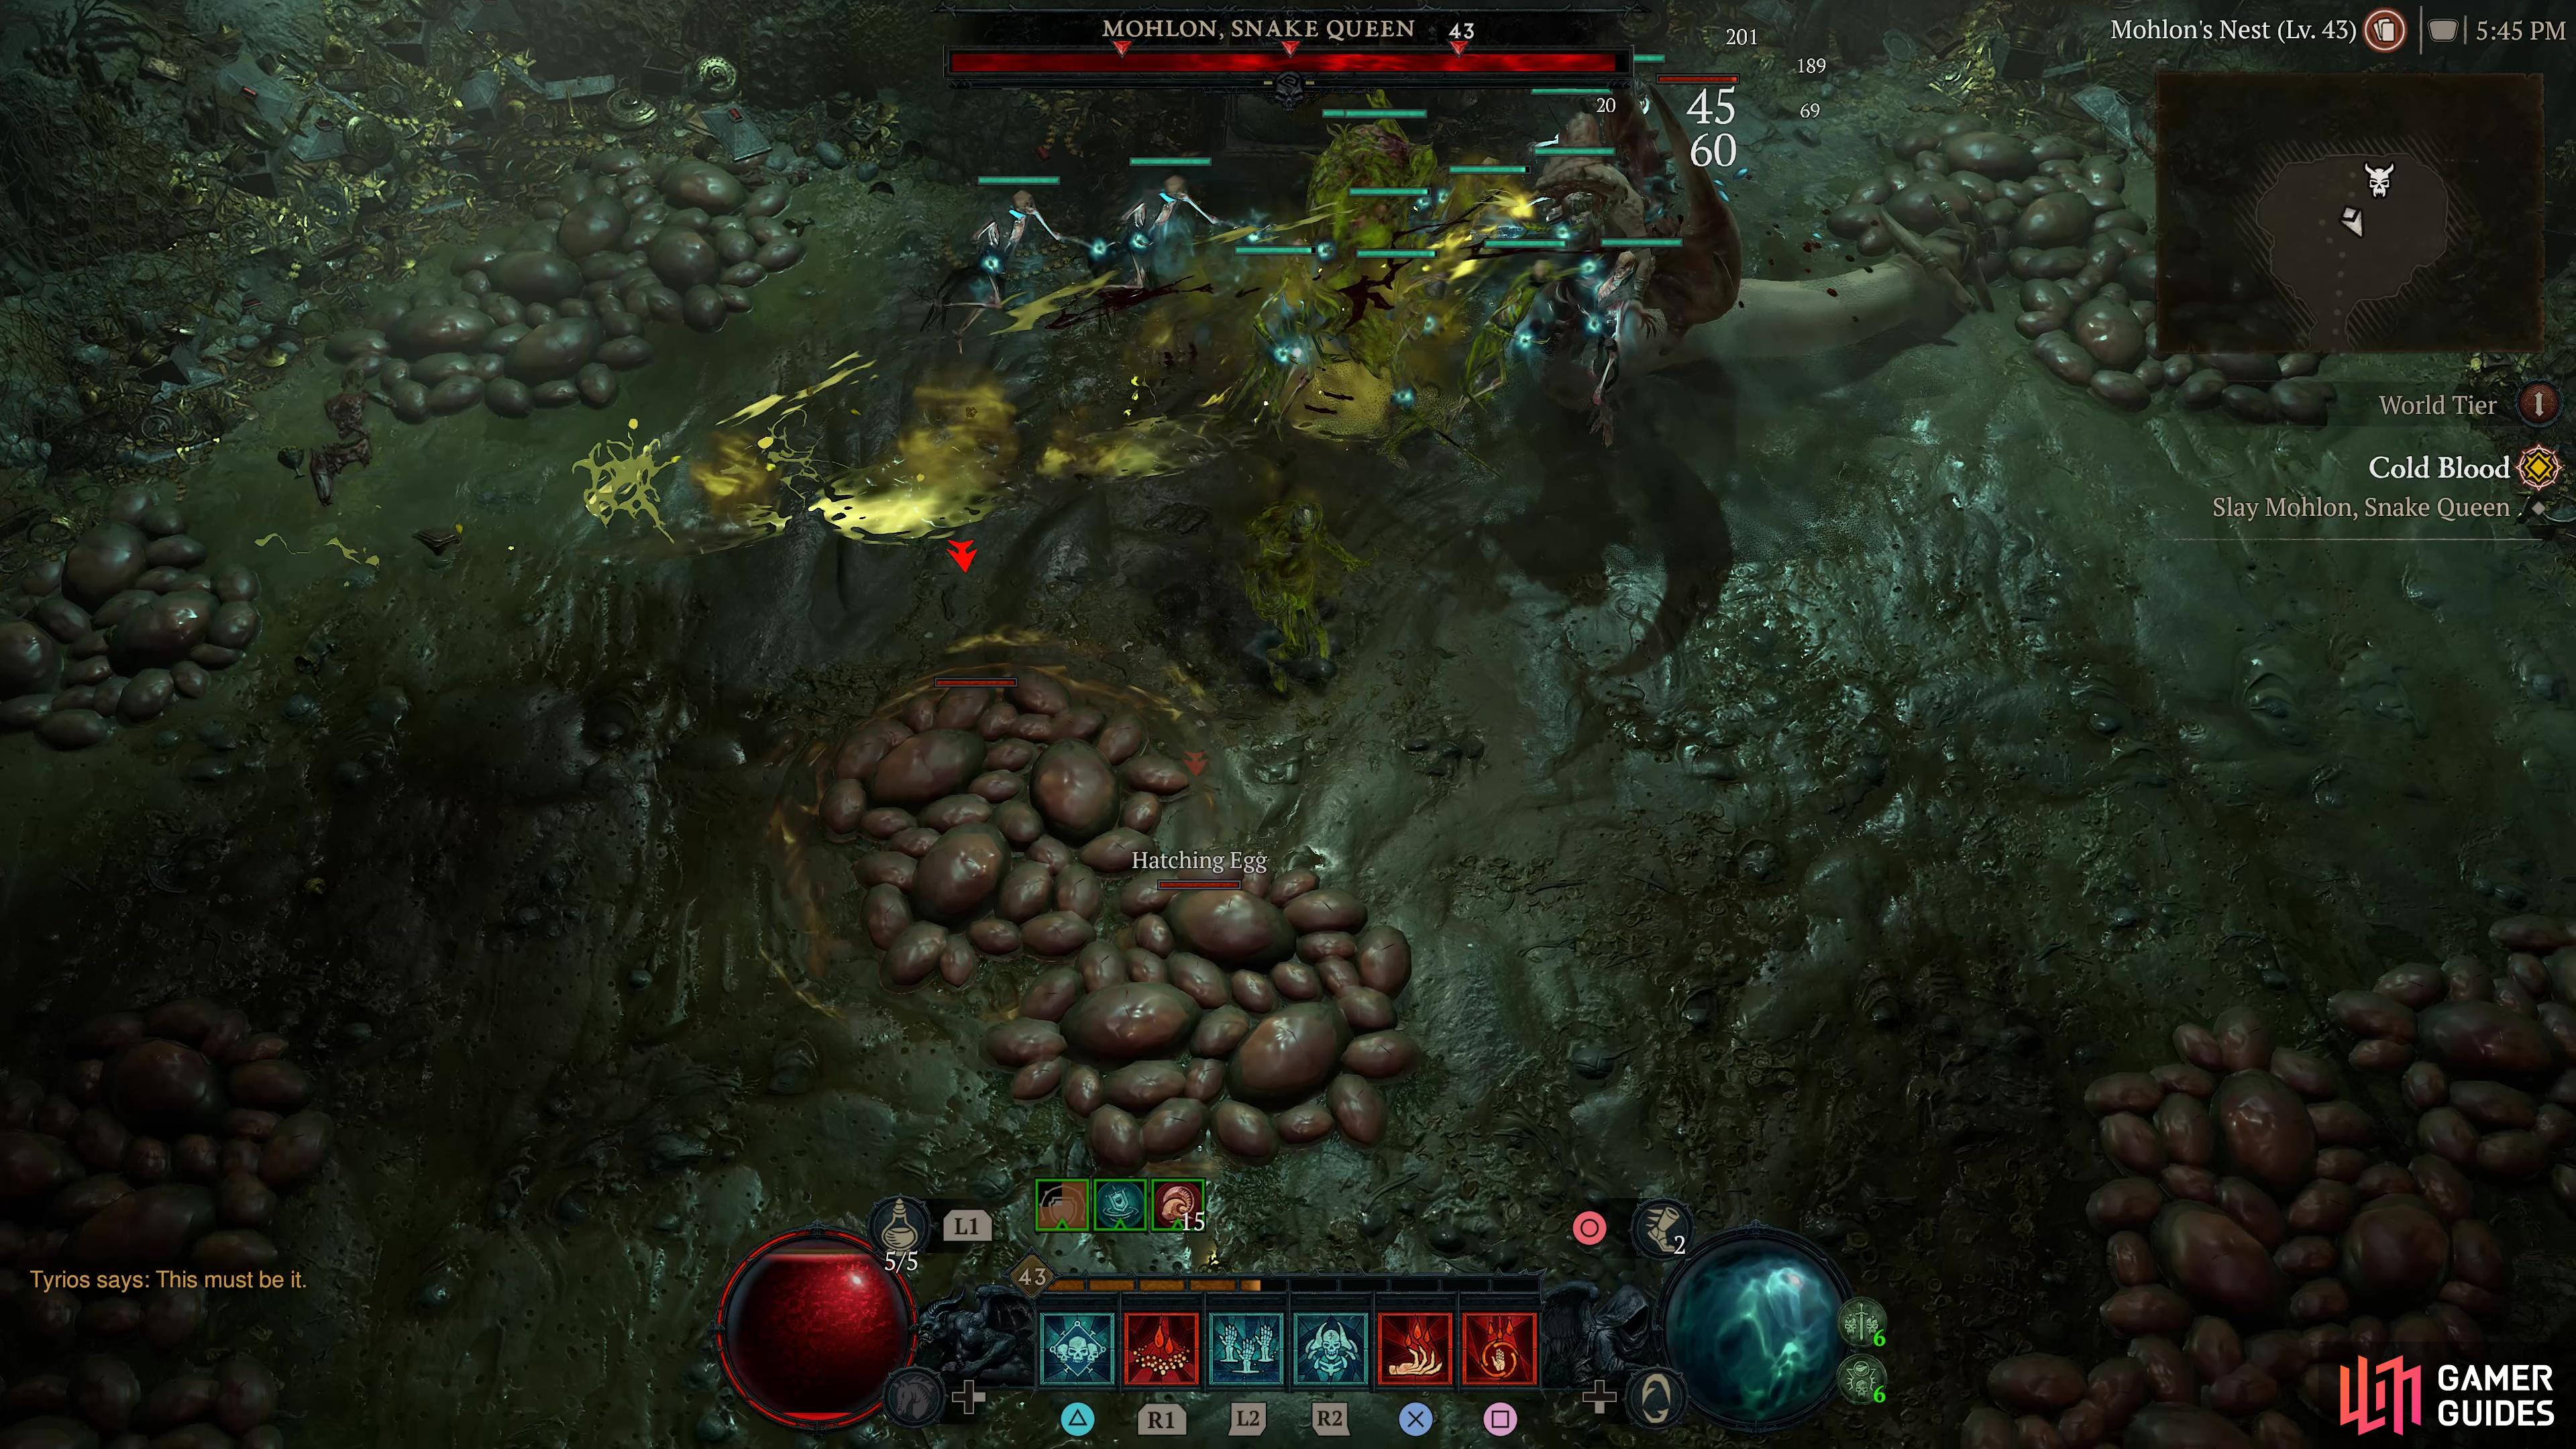
!Mohlon is a giant snake boss found in the Slithering Dark story dungeon. She shoots a stream of poison in a line attack, swipes with her barbed tail in a frontal cone knockback. She also has a ton of eggs around the room that start to hatch throughout the fight. If they hatch, they will turn into other snake enemies, namely Nangari Spitters but they get progressively stronger as the fight goes on. She can also drop snake eyes around her that turn and point towards you. If you get hit, you will be stunned temporarily.
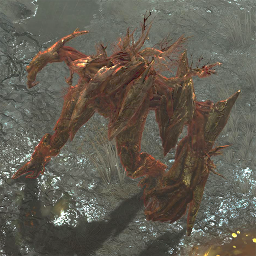
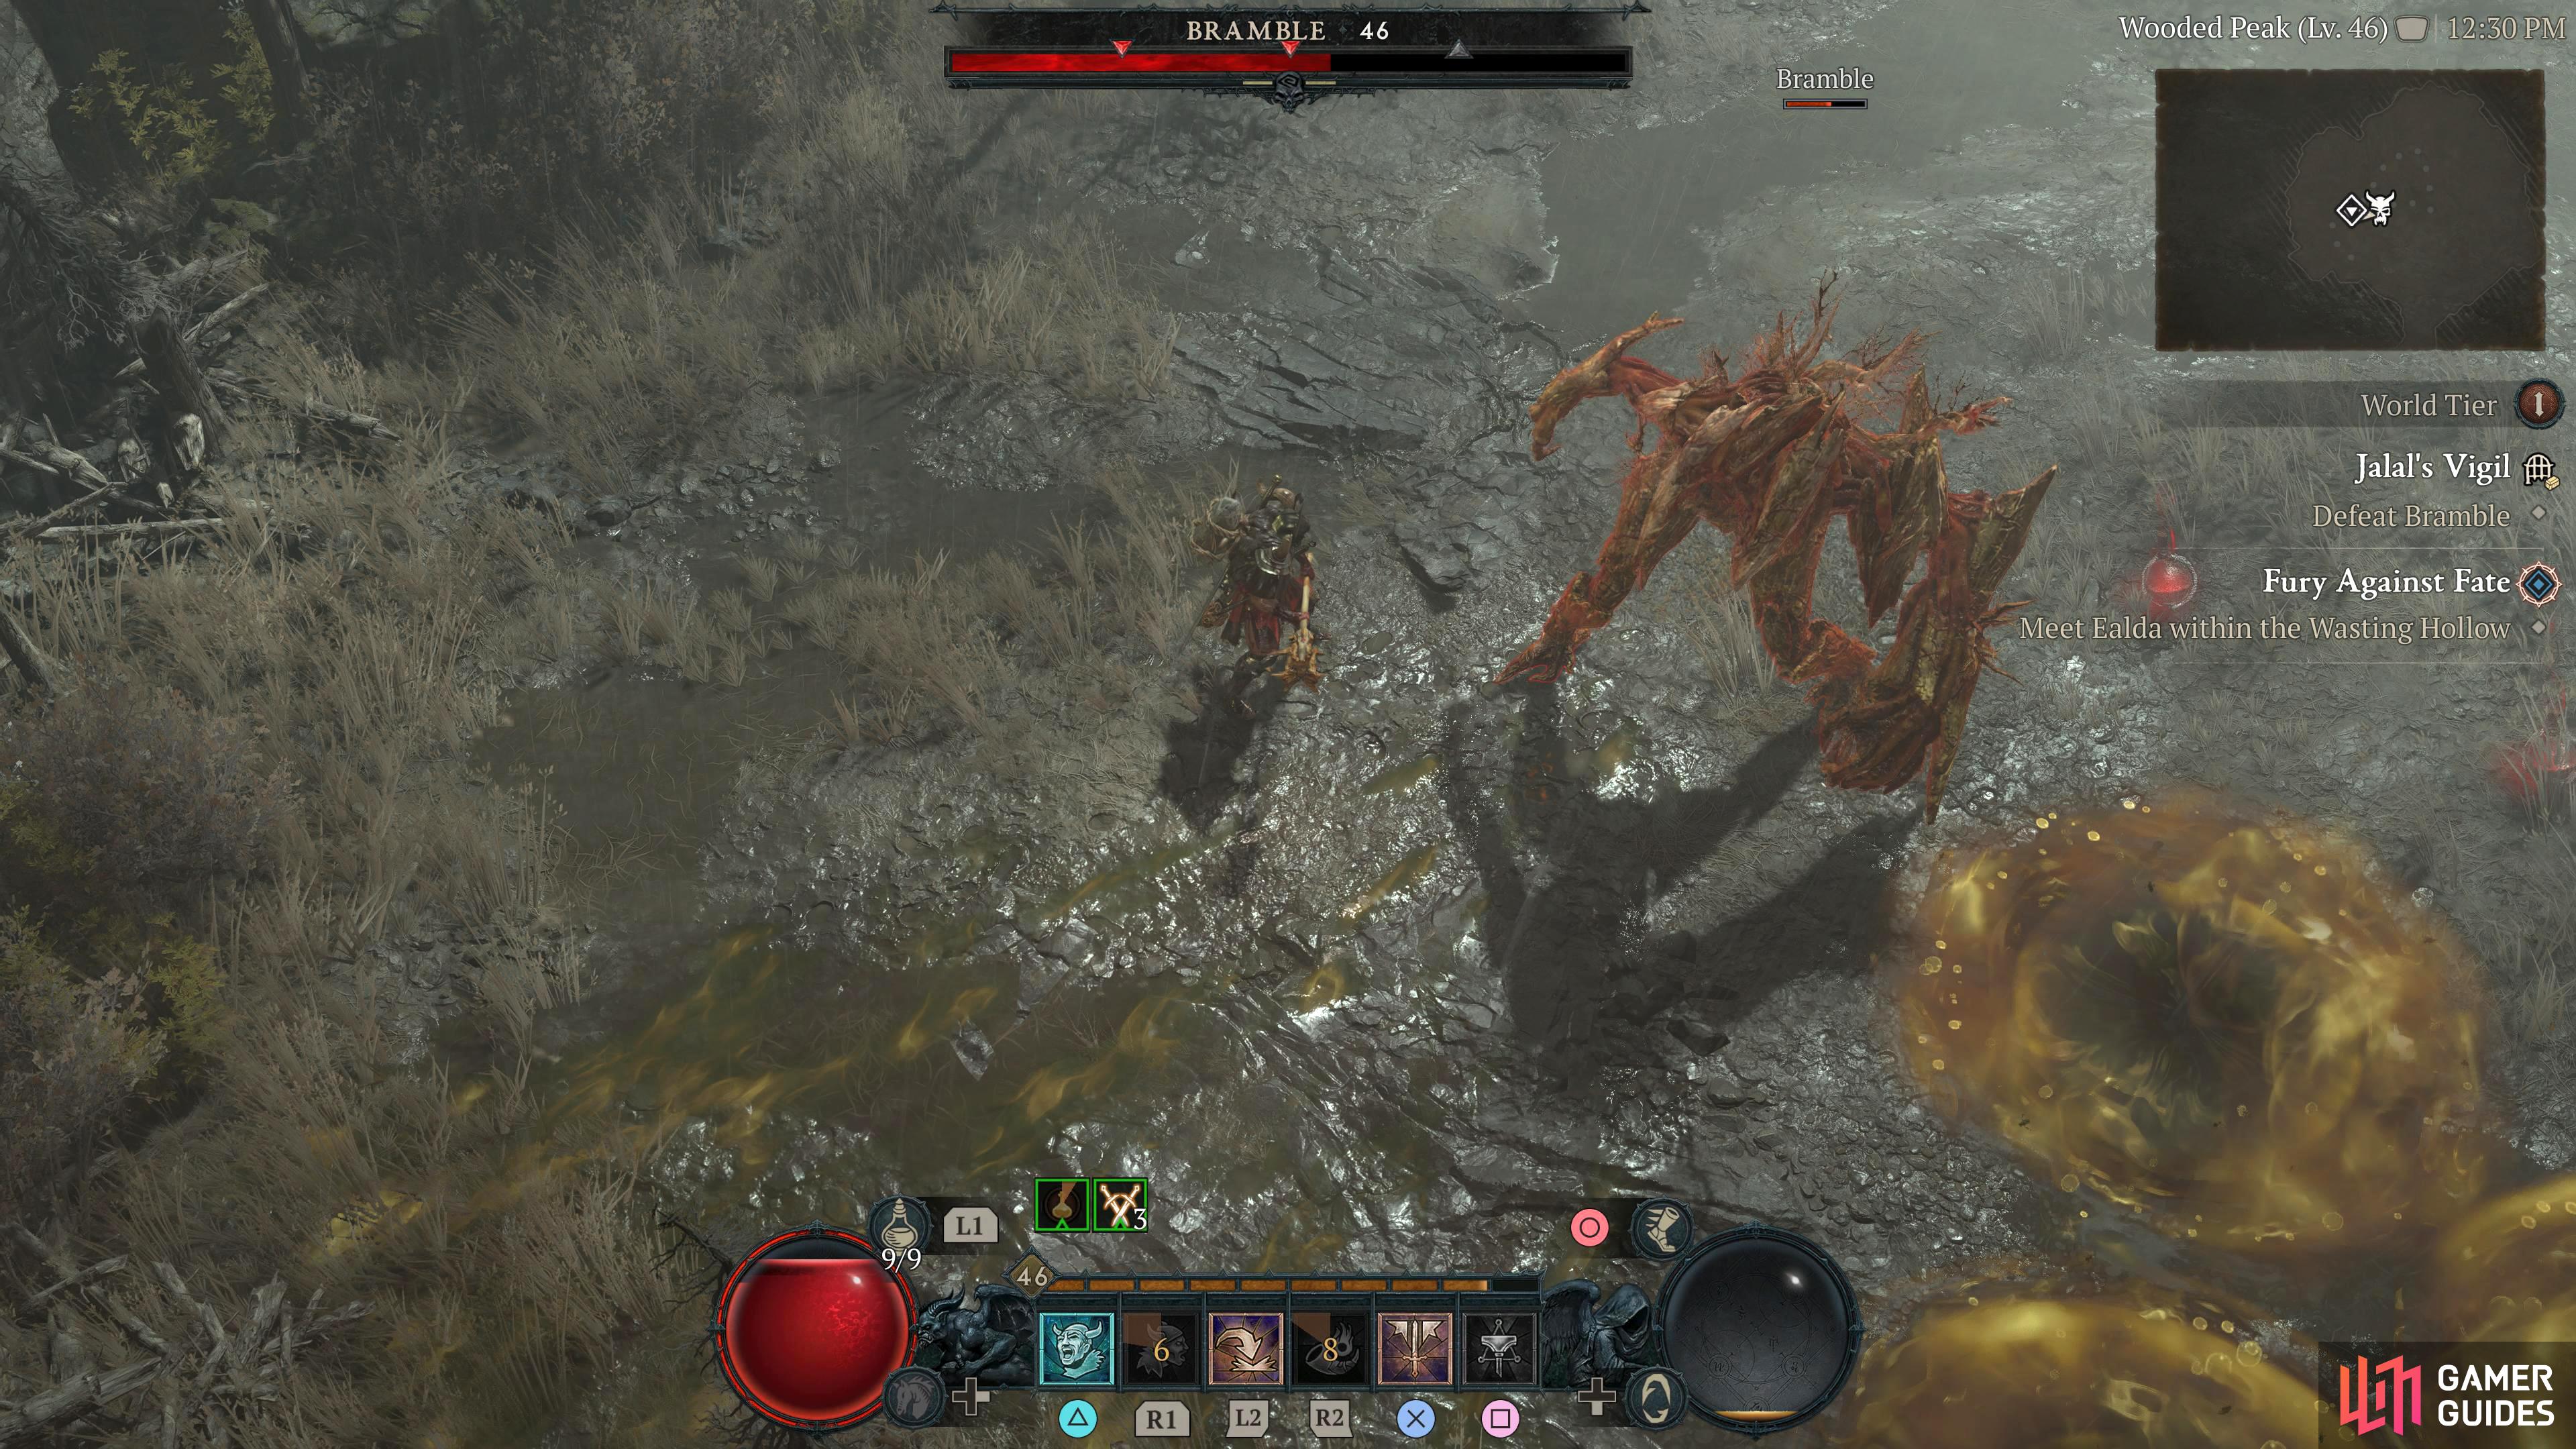
Bramble is a hulking corrupted tree that uses various poison-based attacks.
Description
Bramble doesn’t move too much and prefers to use sweeping attacks instead. Its main attack to watch out for is its Poison Breath attack where it’ll unleash the attacks in a cone in front of itself for a few seconds. Its second attack is its Poison Puddle ability where Bramble will place its hand into the ground, and make poison puddles appear on the floor in front of it. Other than that, it’ll just swipe at you in a sweeping motion.
The good thing about its attacks is it keeps it rooted (pun intended) to the spot, so you can get behind it to not only avoid the attacks but get a window of opportunity to thrash it with your most powerful abilities. One thing to note is that the poison puddles will persist for the majority of the fight. If you start running out of space to maneuver, pull it to an empty space in the arena.
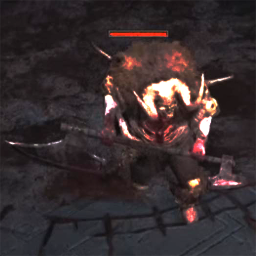
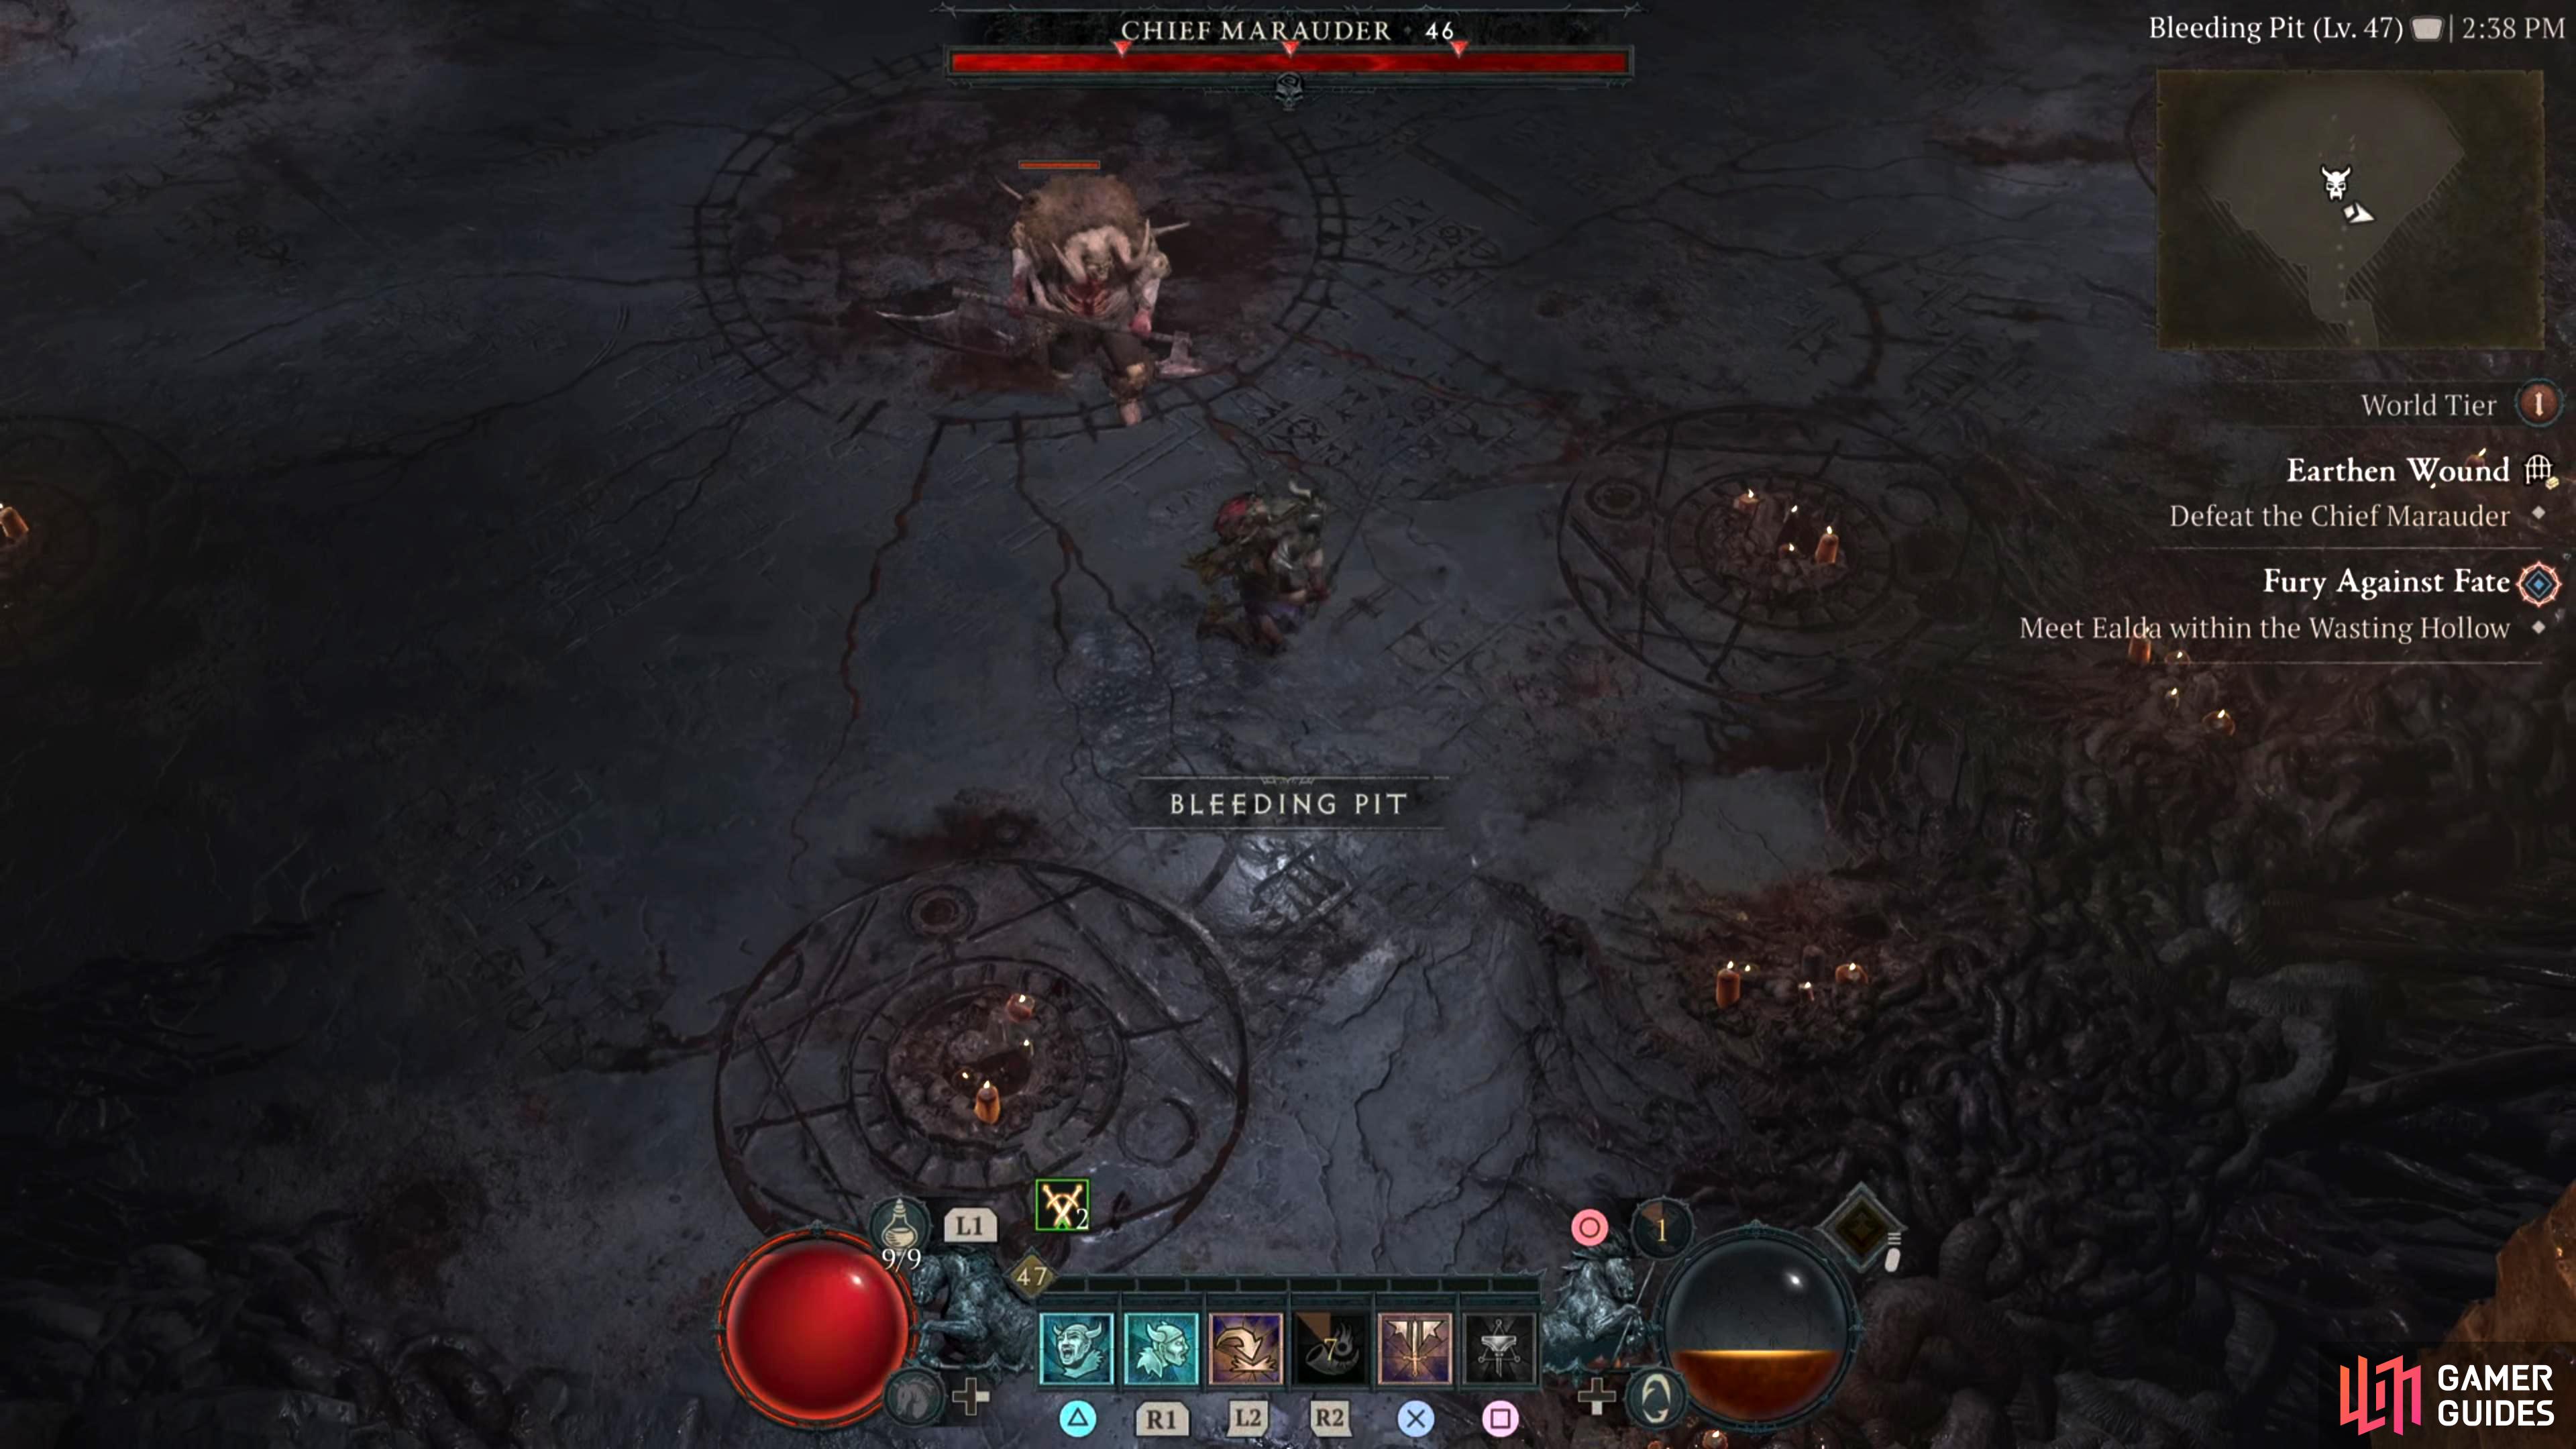
Chief Marauder is an oversized human cannibal who wields a giant axe who likes to swing it wildly at its victims.
Description
The Chief Marauder acts similarly to its kin where it will swing its axe wildly with large sweeping attacks. These can deal substantial damage especially if you face-tank it without some form of barrier or fortify. Along with its melee attacks, it has a few abilities up its sleeve.
Slash - Chief Marauder will step forward while slashing. Not much to say about this attack, you can just take the hit if you want as it’s not worth
Spinning Slash - Chief Marauder will perform a spin before attacking. This isn’t like the Barbarian’s Whirlwind, but more of a singular spinning attack. Either dodge away from it, or eat the attack as it won’t deal too much damage.
Overhead Slam - Chief Marauder will lift the axe above its head for a second before crashing it down onto the ground unleashing numerous projectiles on either side of the axe. This is arguably the most damaging attack it has, but it’s relatively easy to avoid. Dodge through the boss just as the axe is about to slam down. If you do it too early, it can change directions even though the axe is raised.
The boss can be easy or difficult depending on various factors such as your class, and/or level. Barbs and Druids can eat most of the hits while only dodging the Overhead Slam. Rogues can use their speed to move in and out of attacks while having Dark Shroud up, and Sorcs can either make use of their barriers or kite it around while launching nukes at its face. If you choose the tank and spank strategy, you’ll only have to deal with its melee attacks and Overhead Slam.
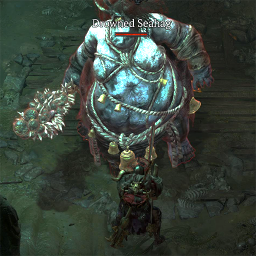
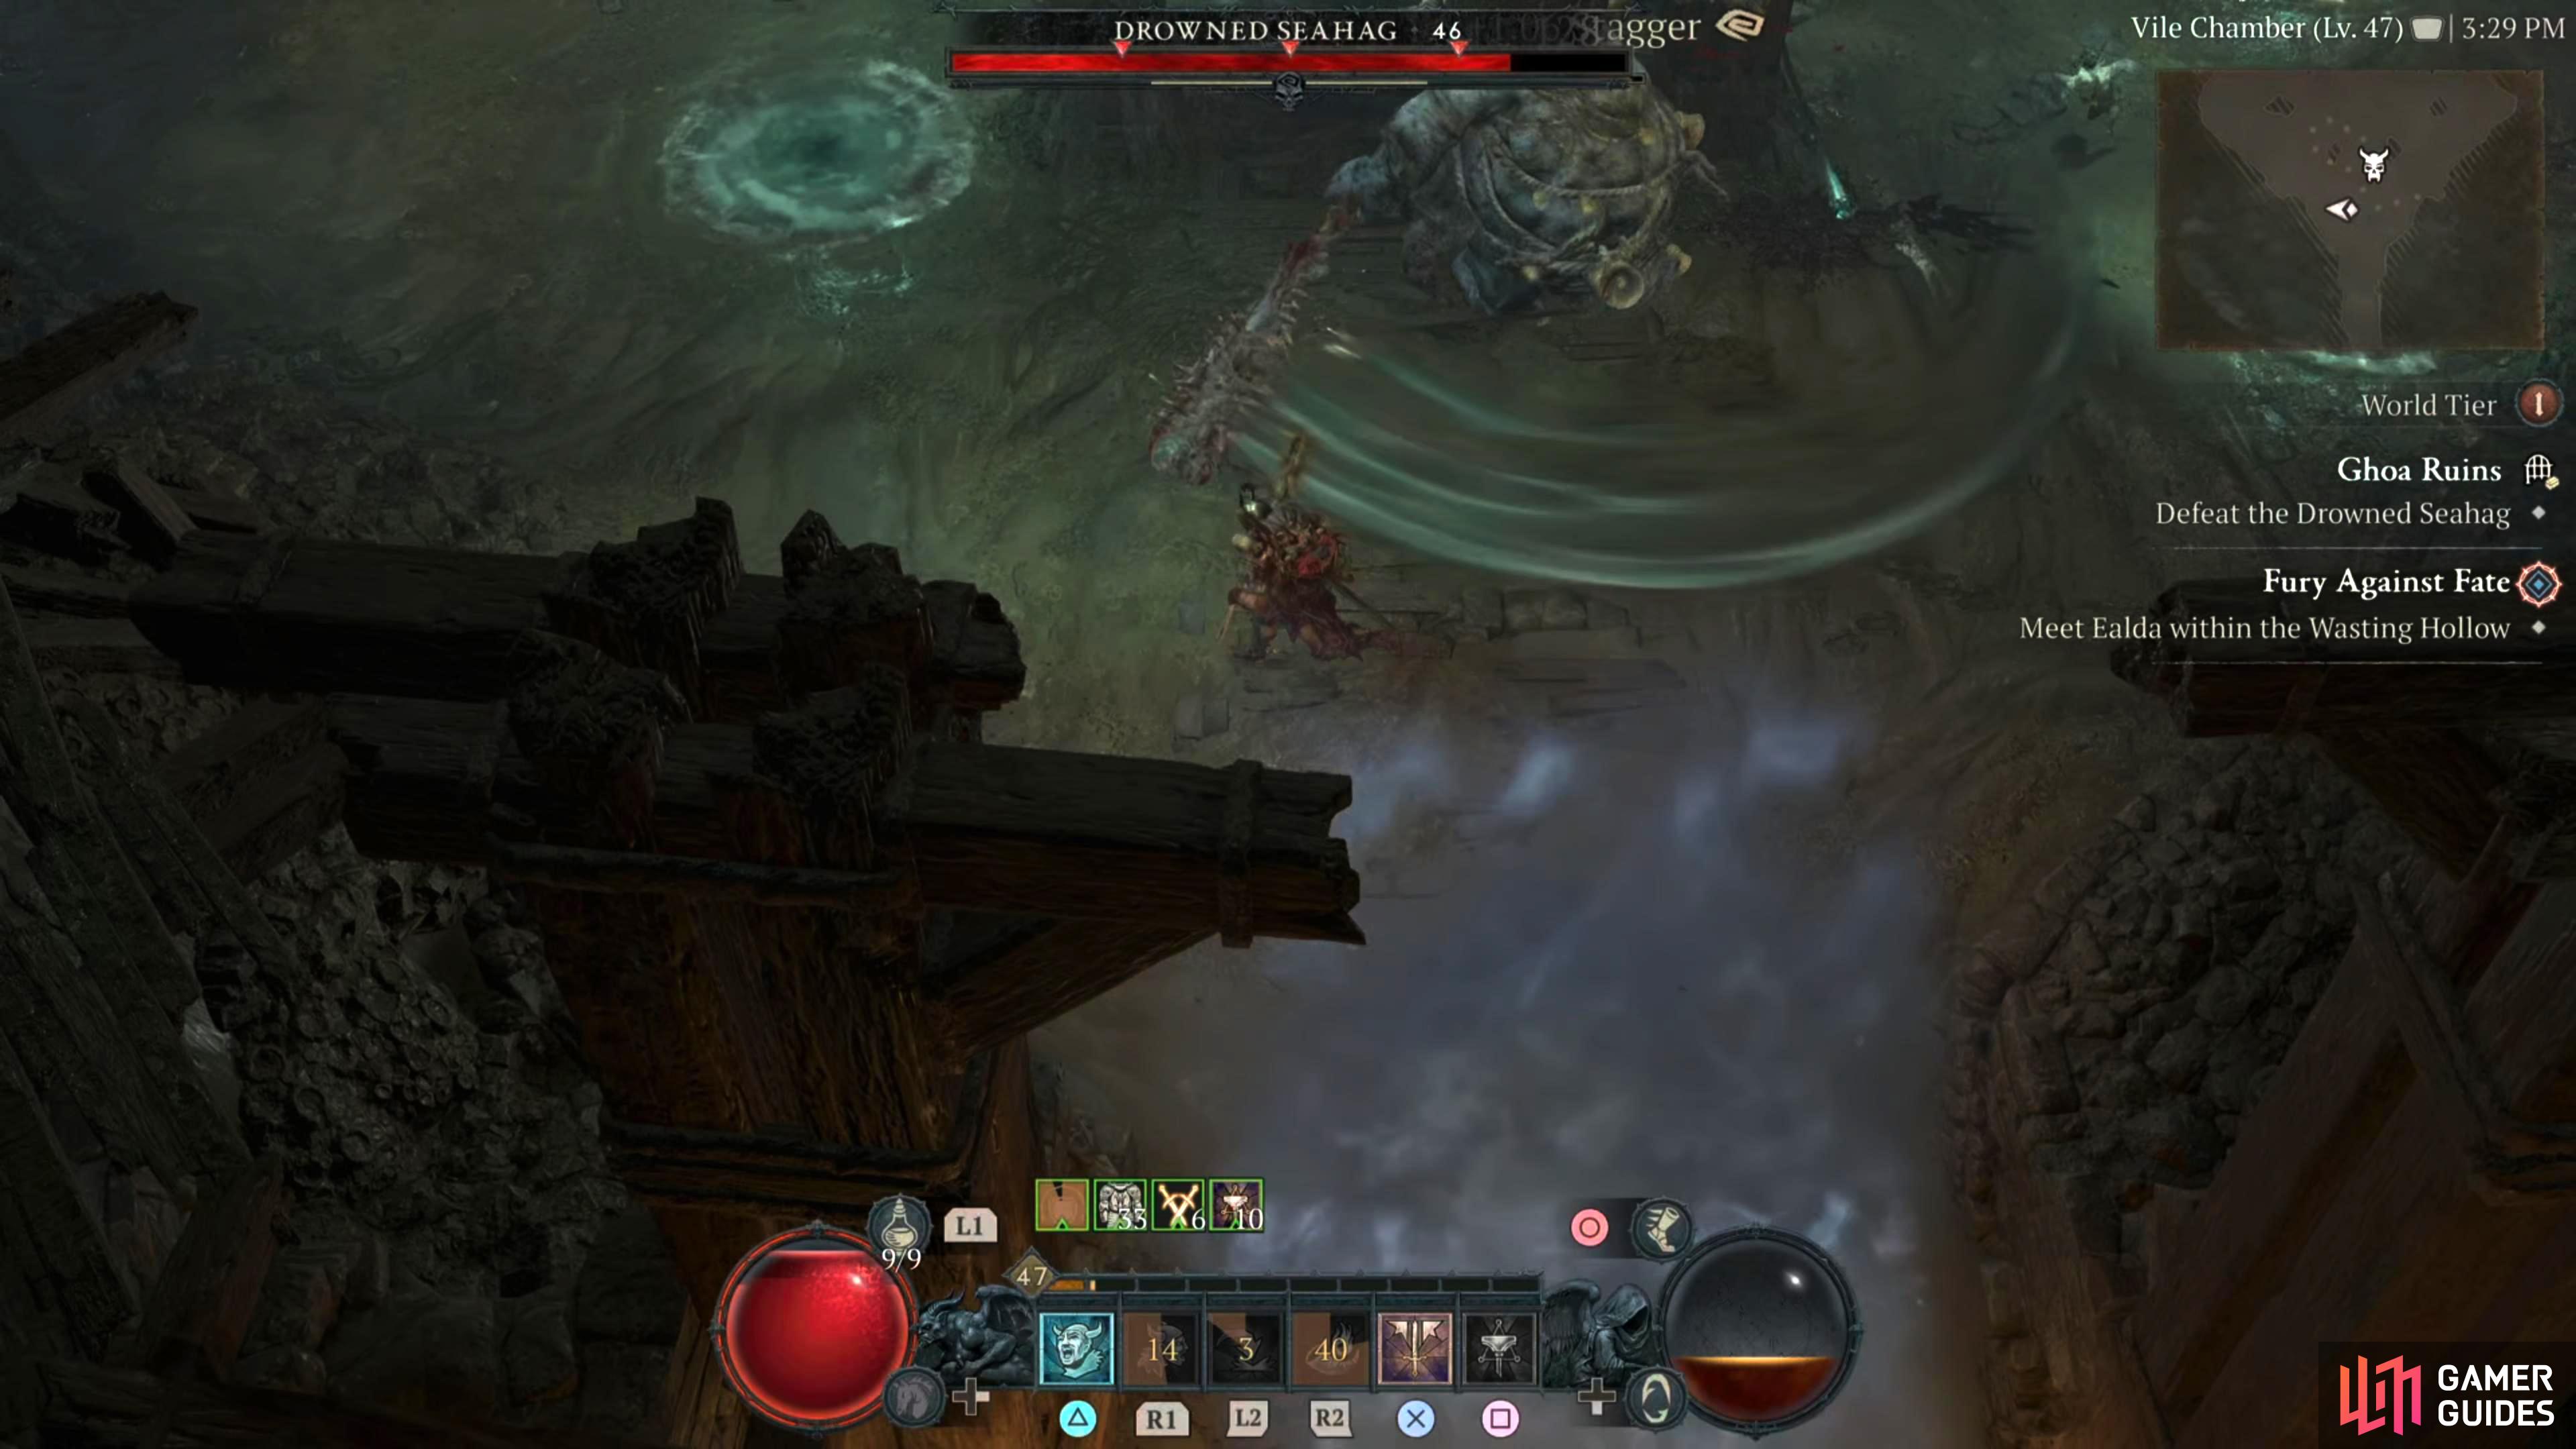
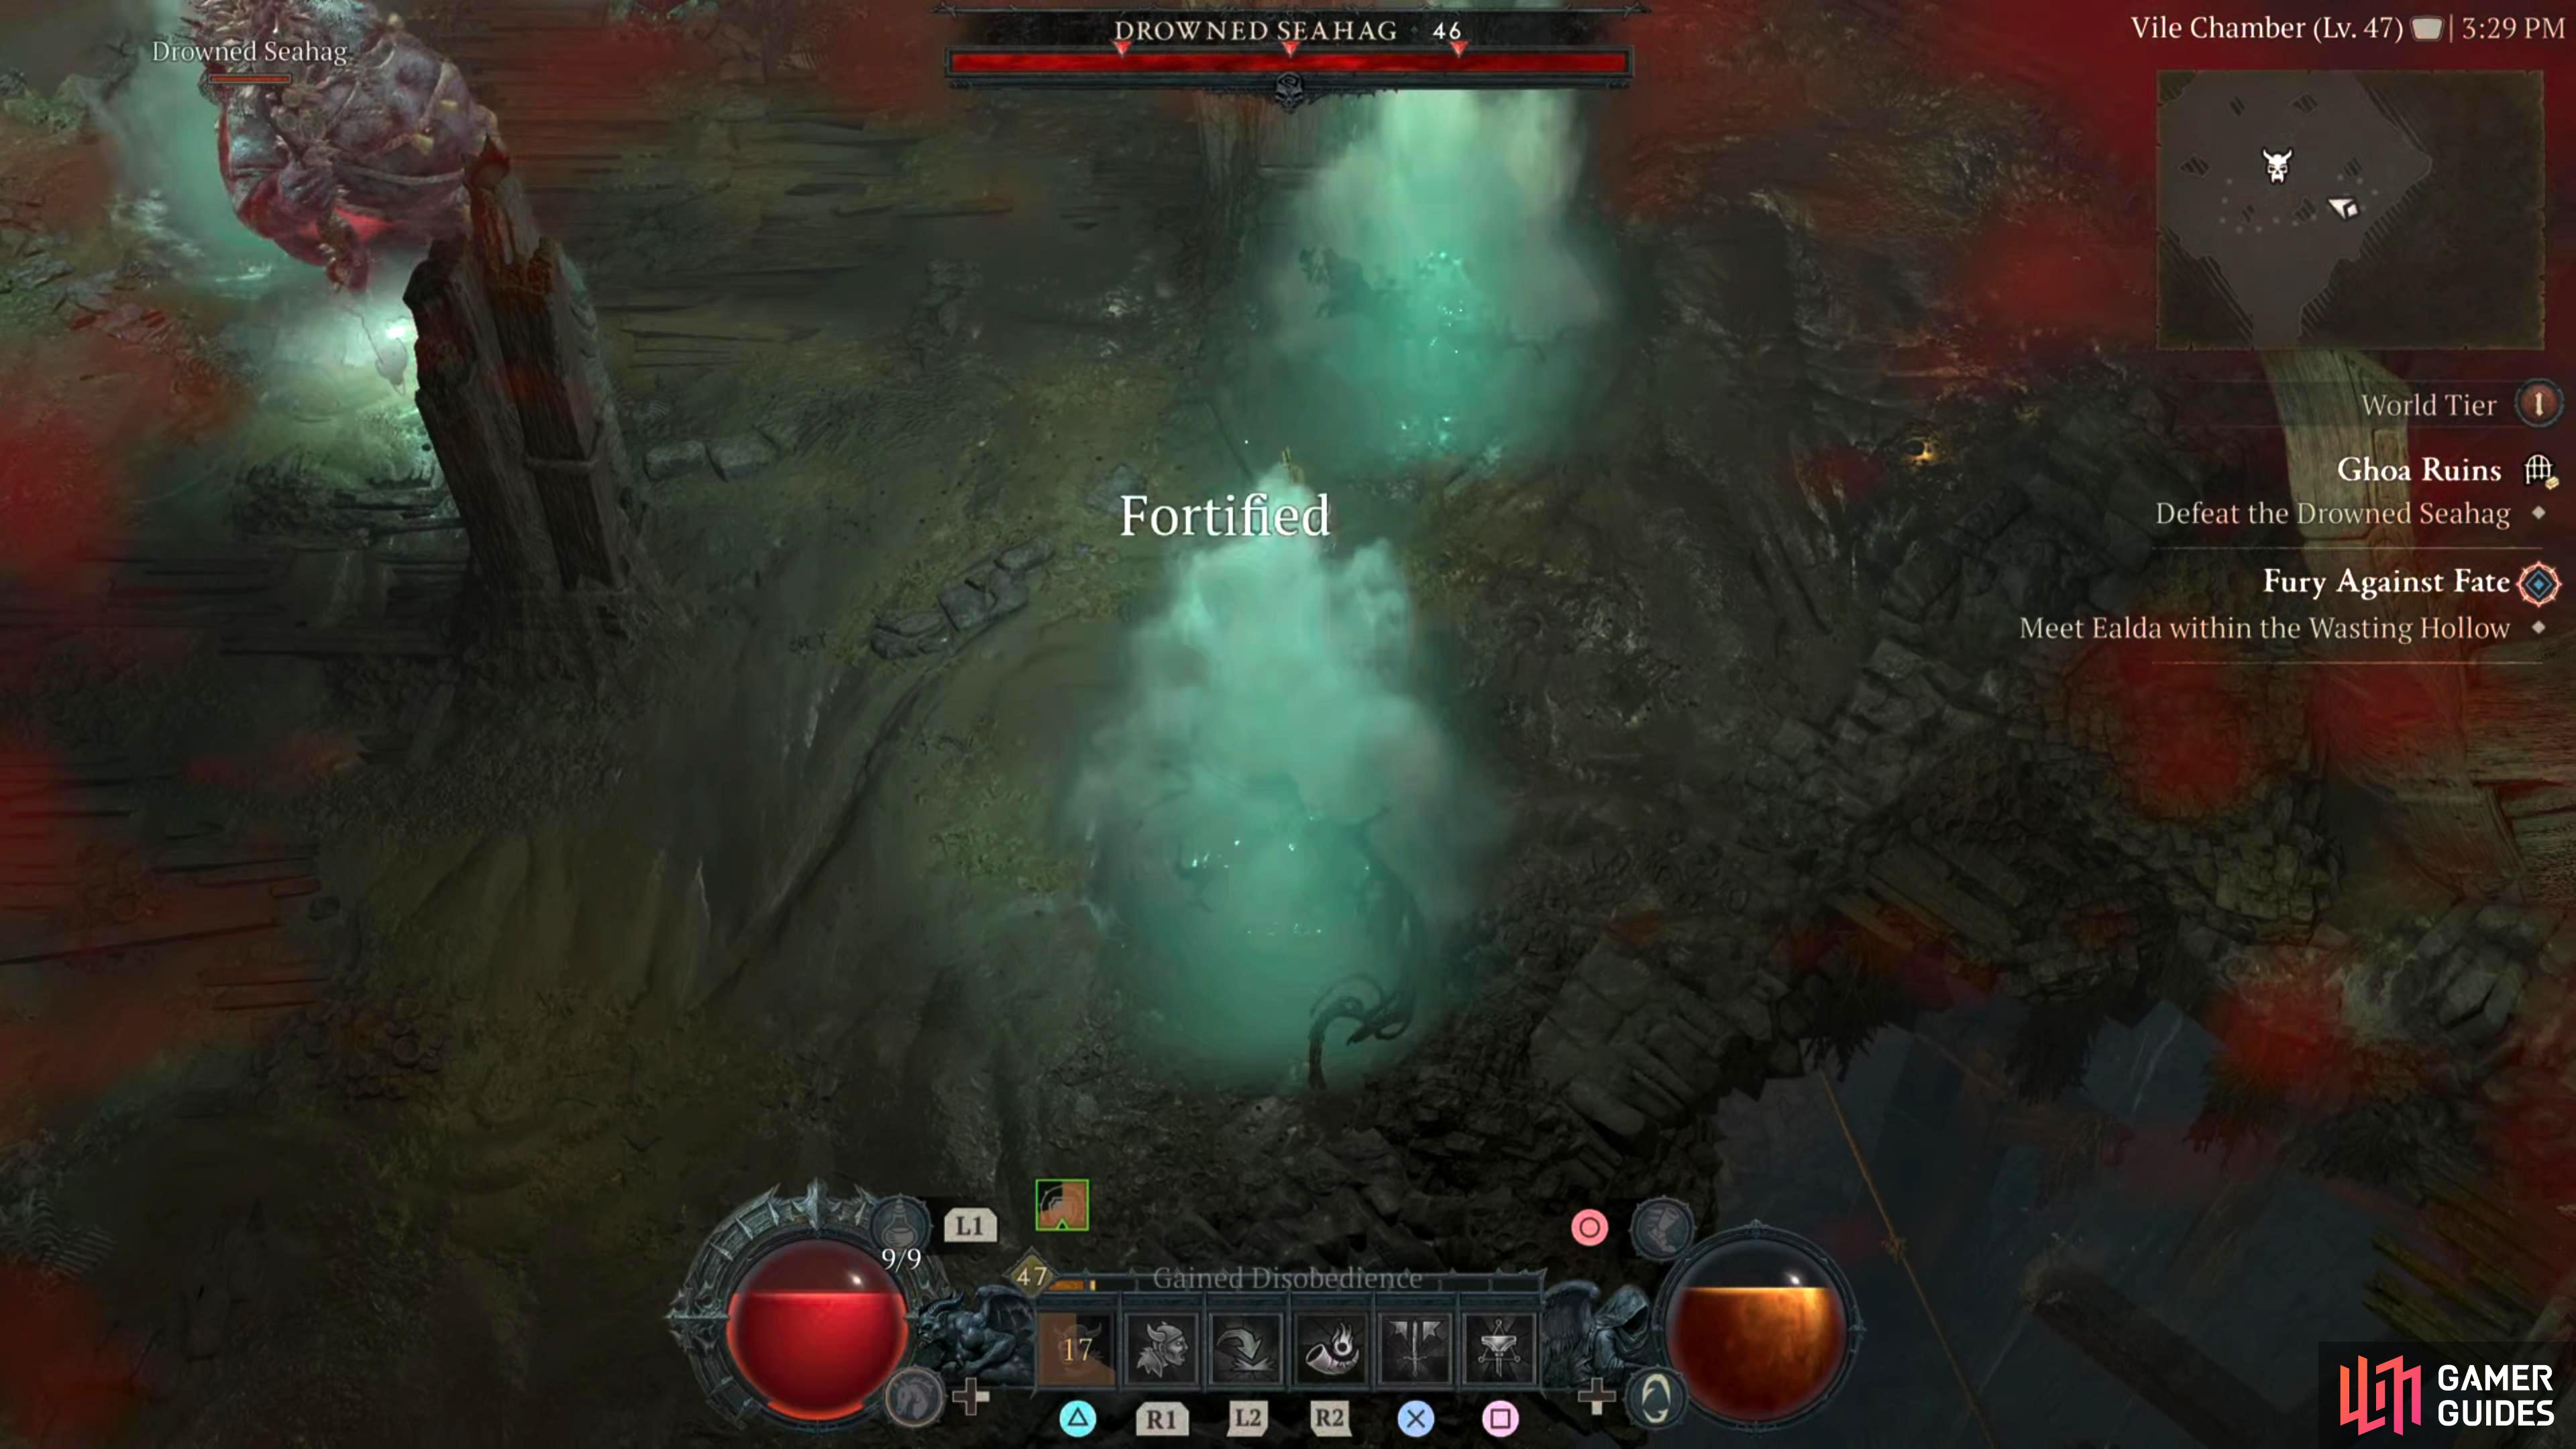
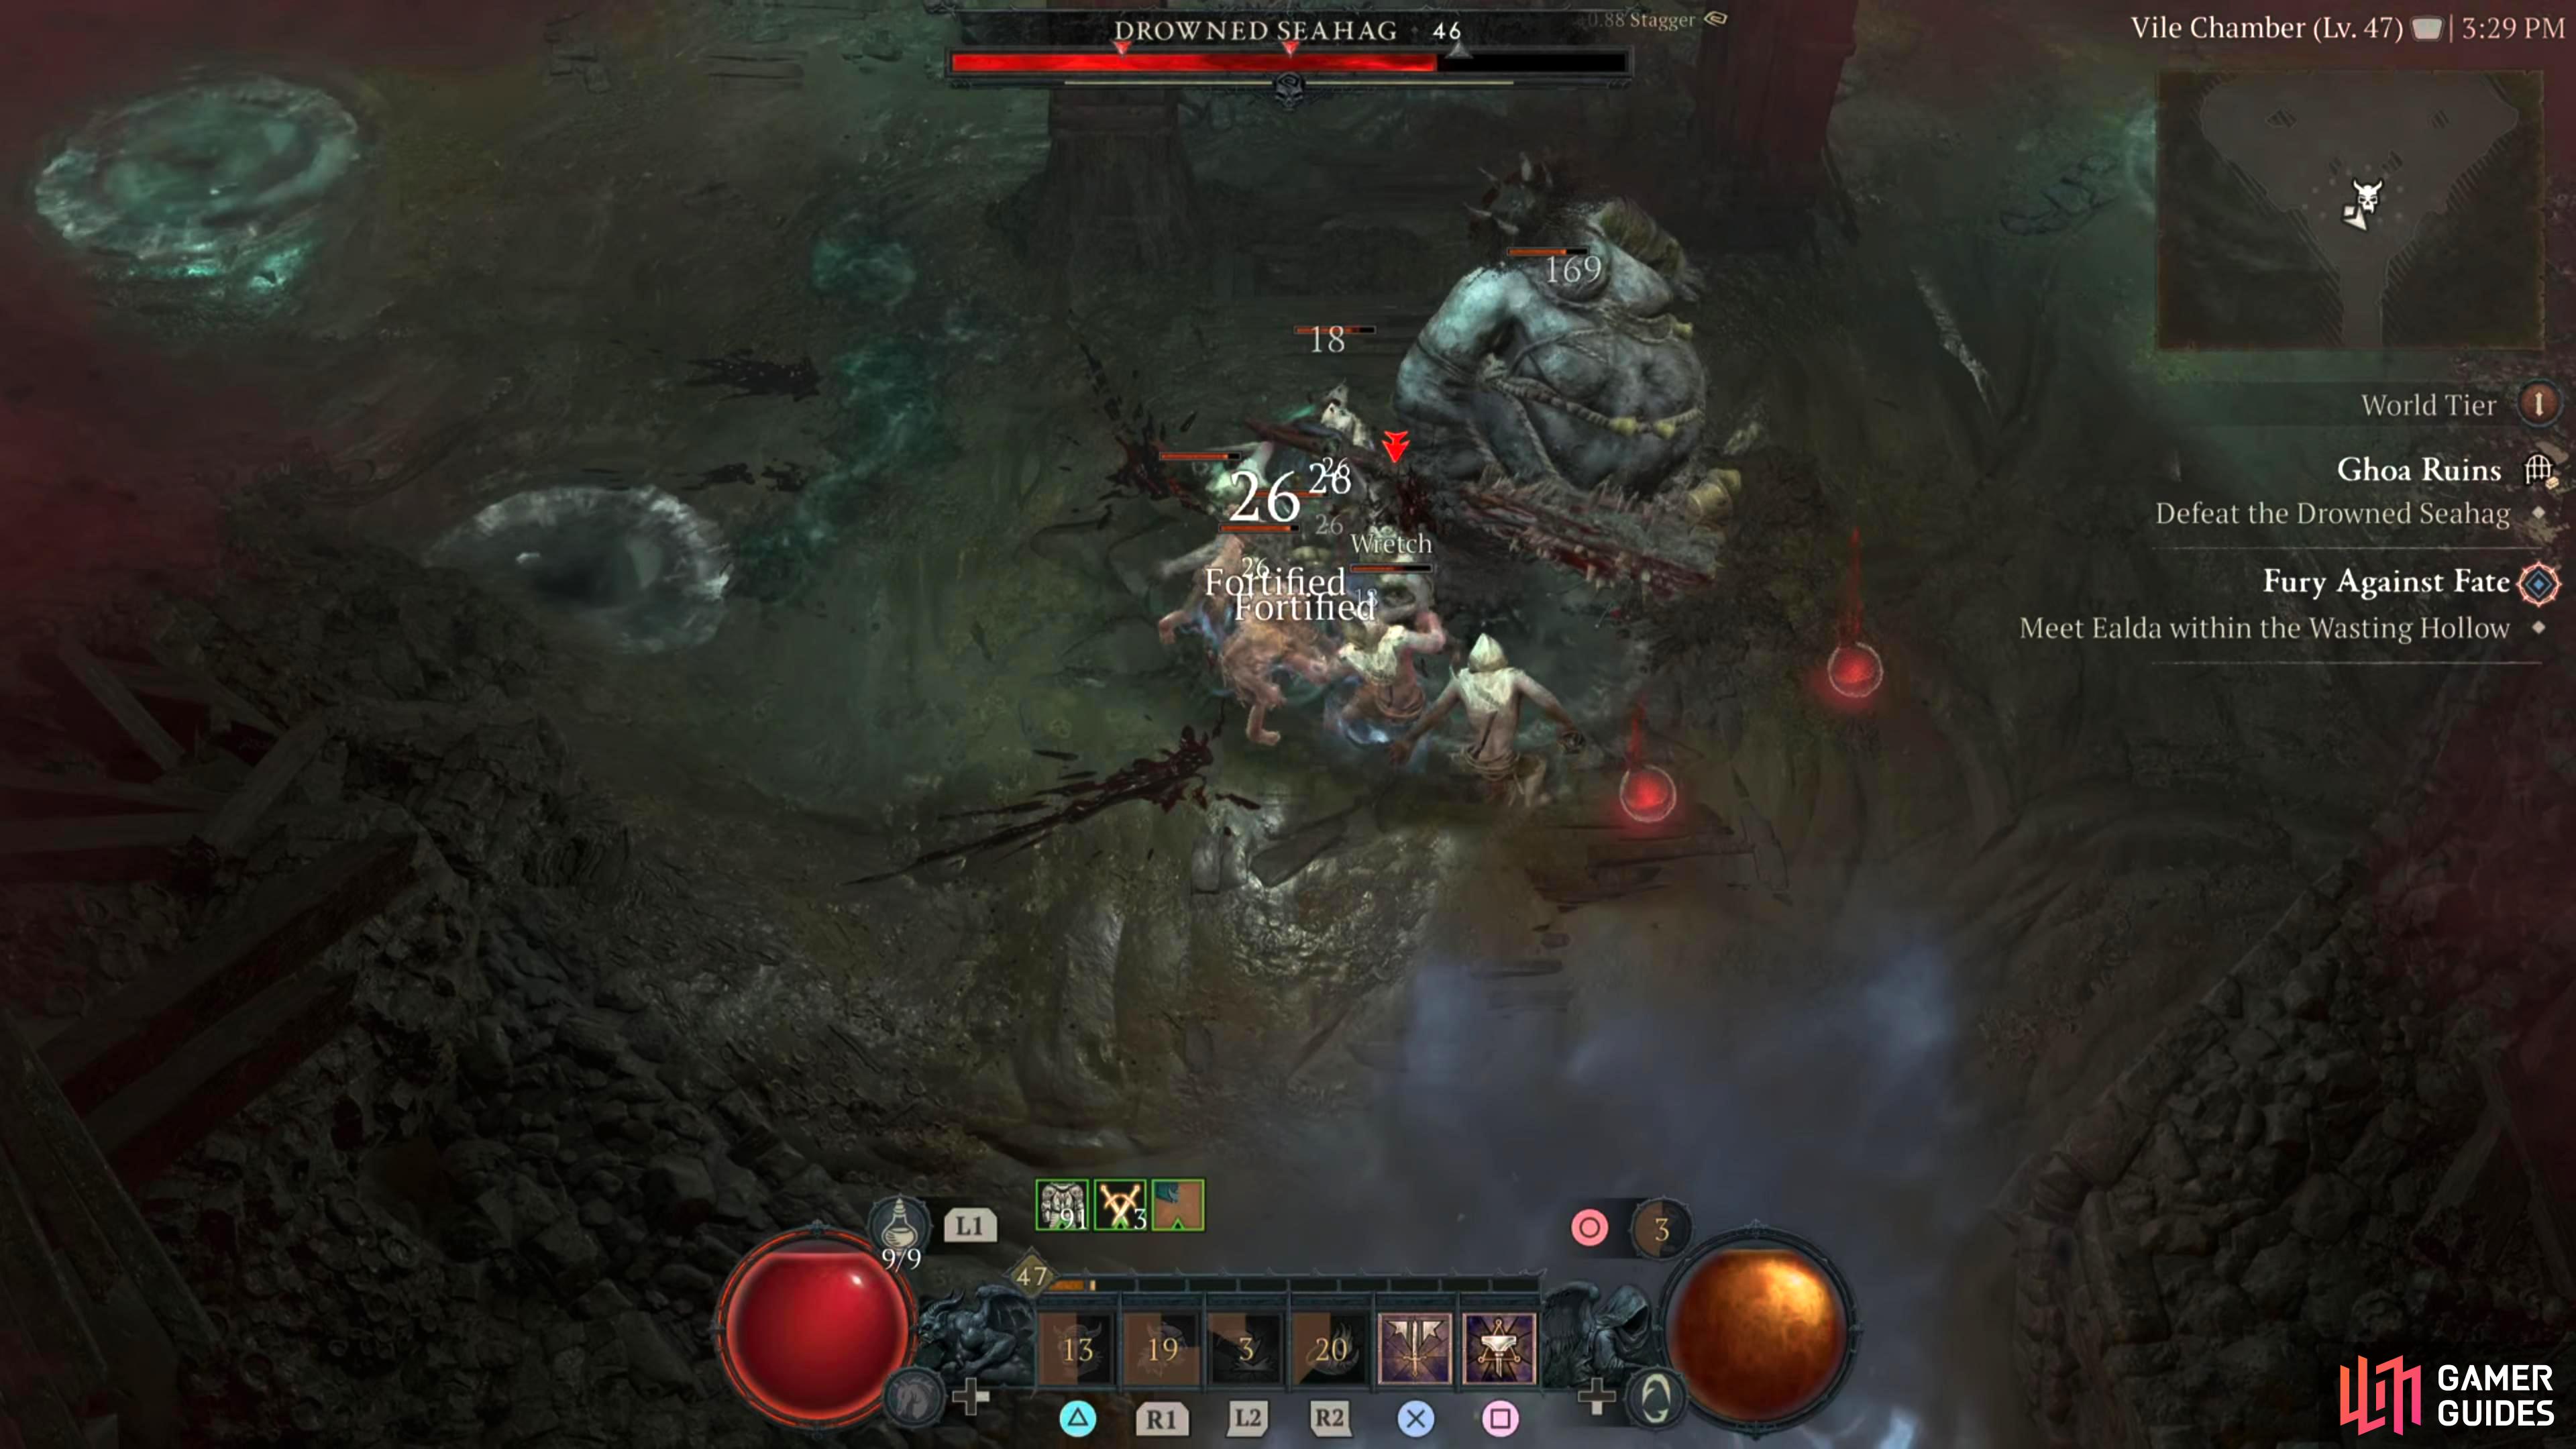
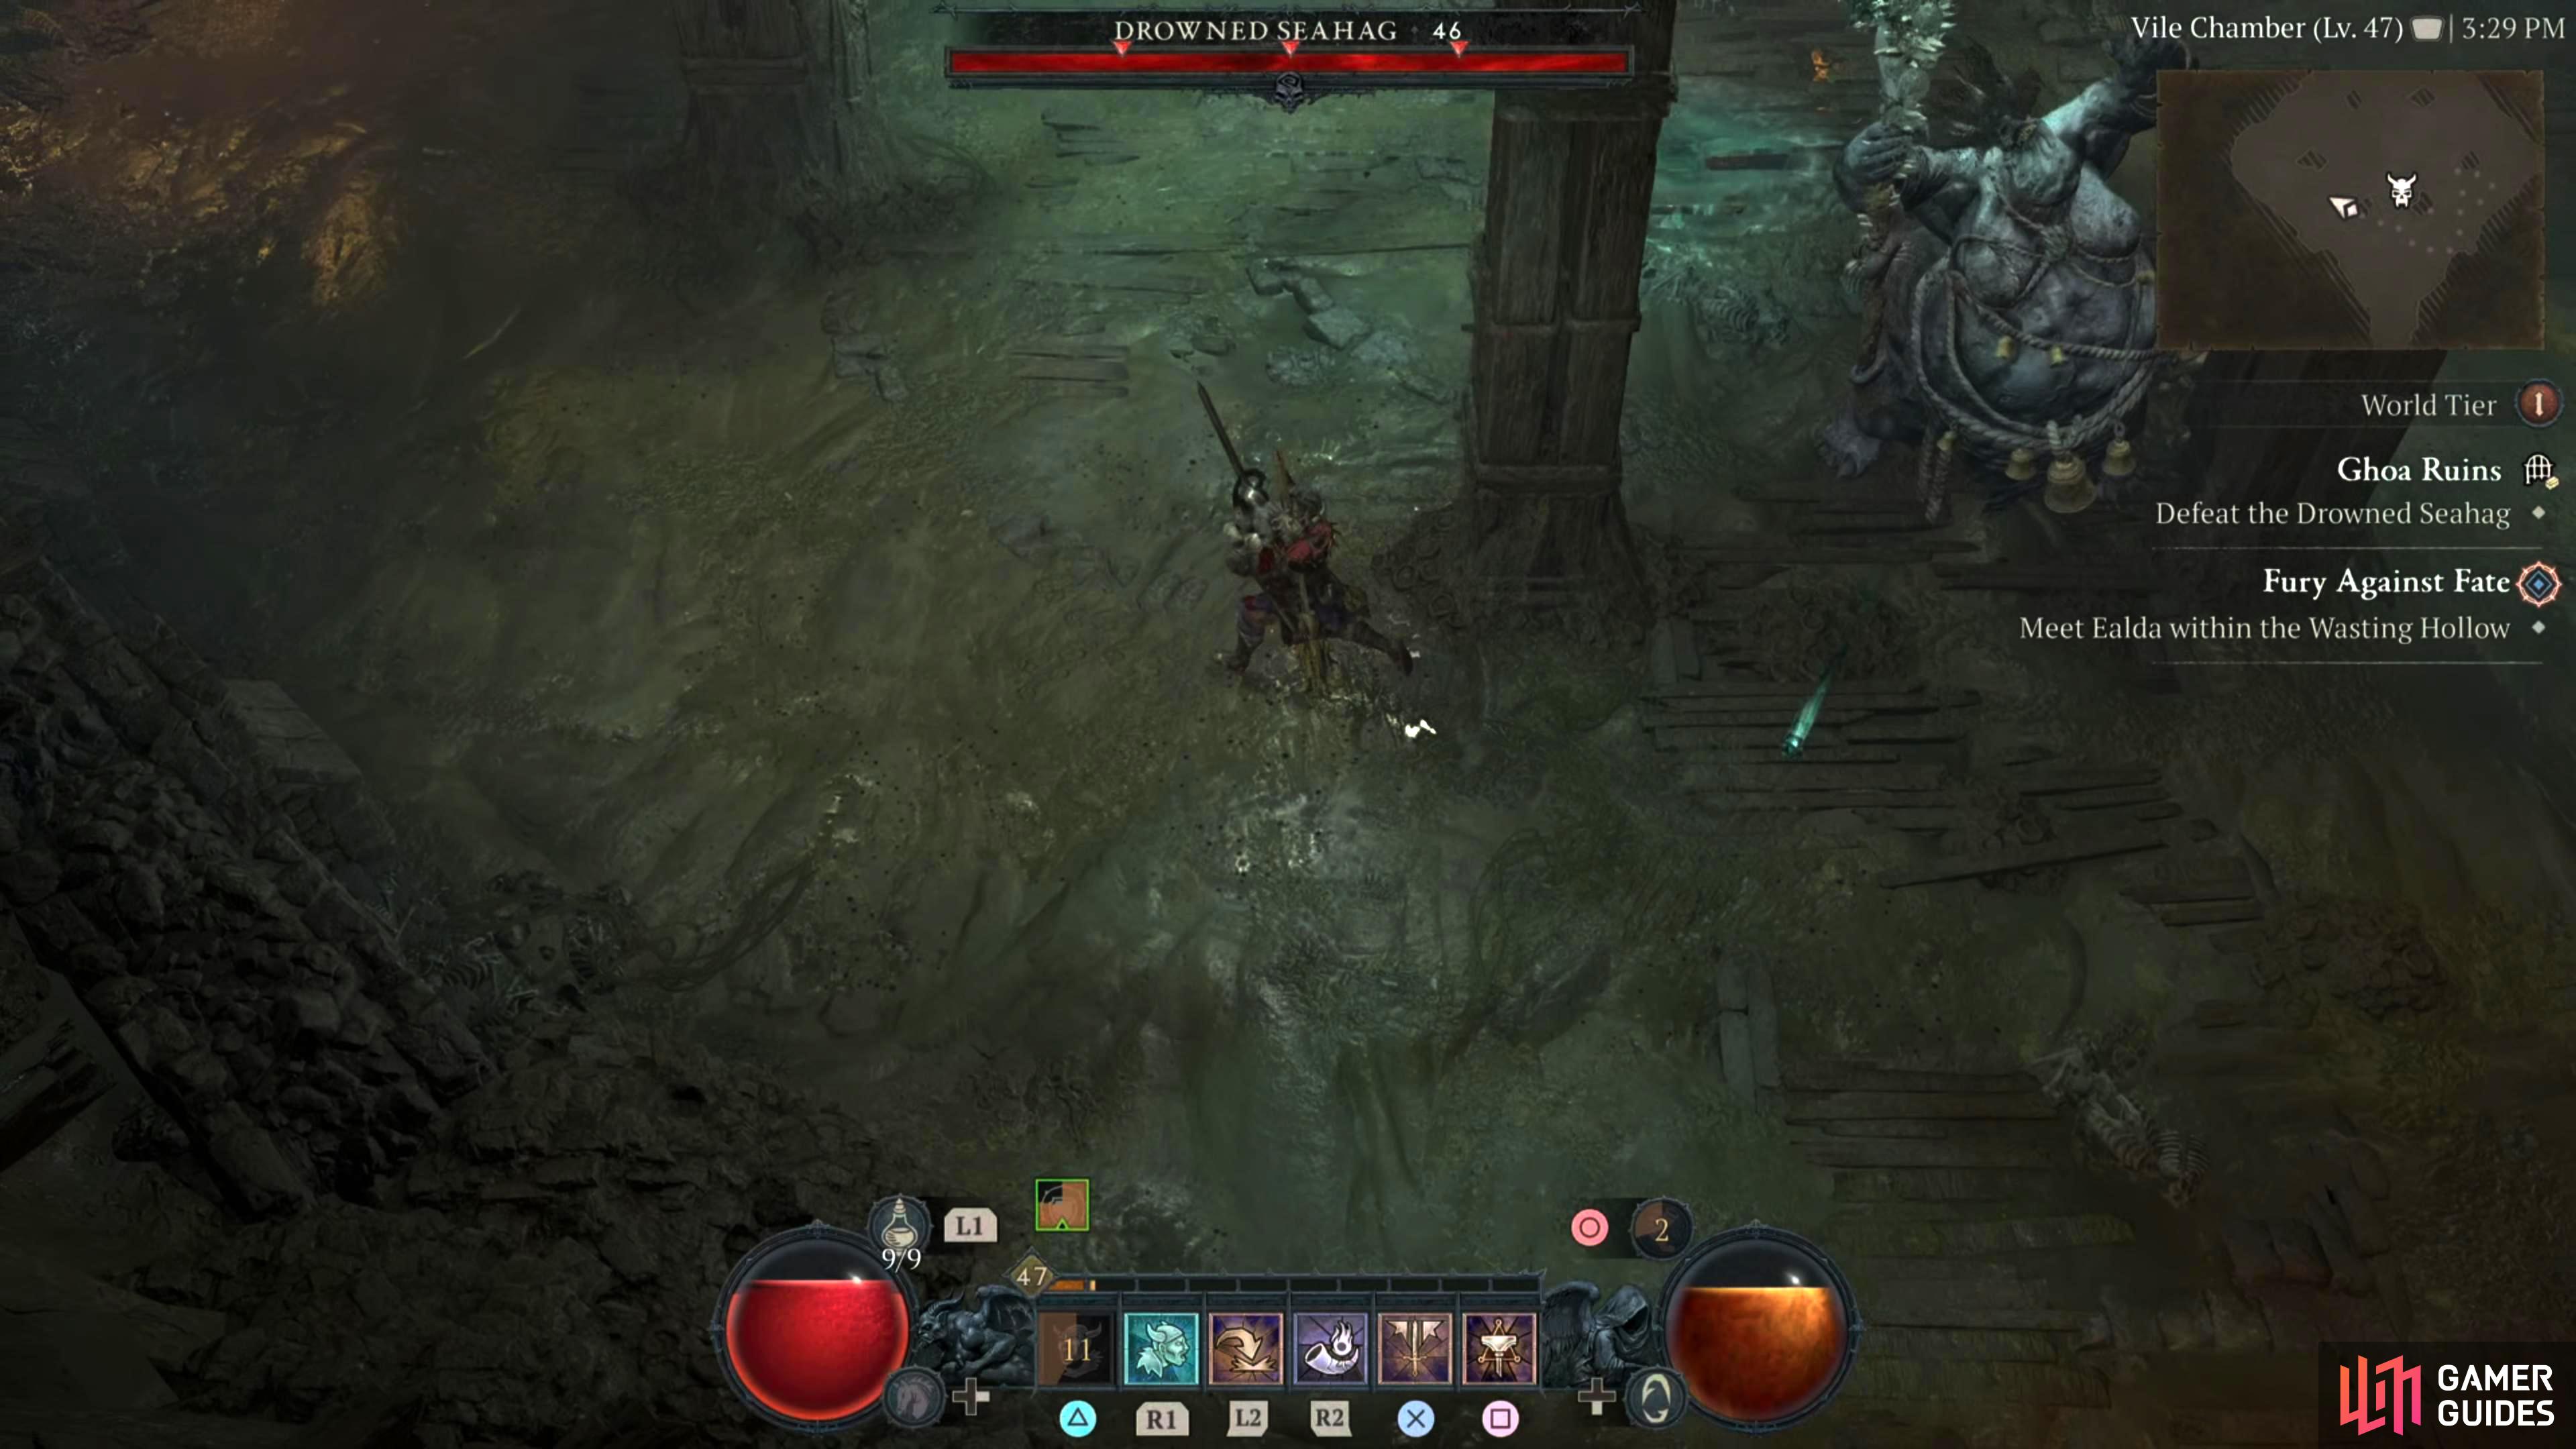
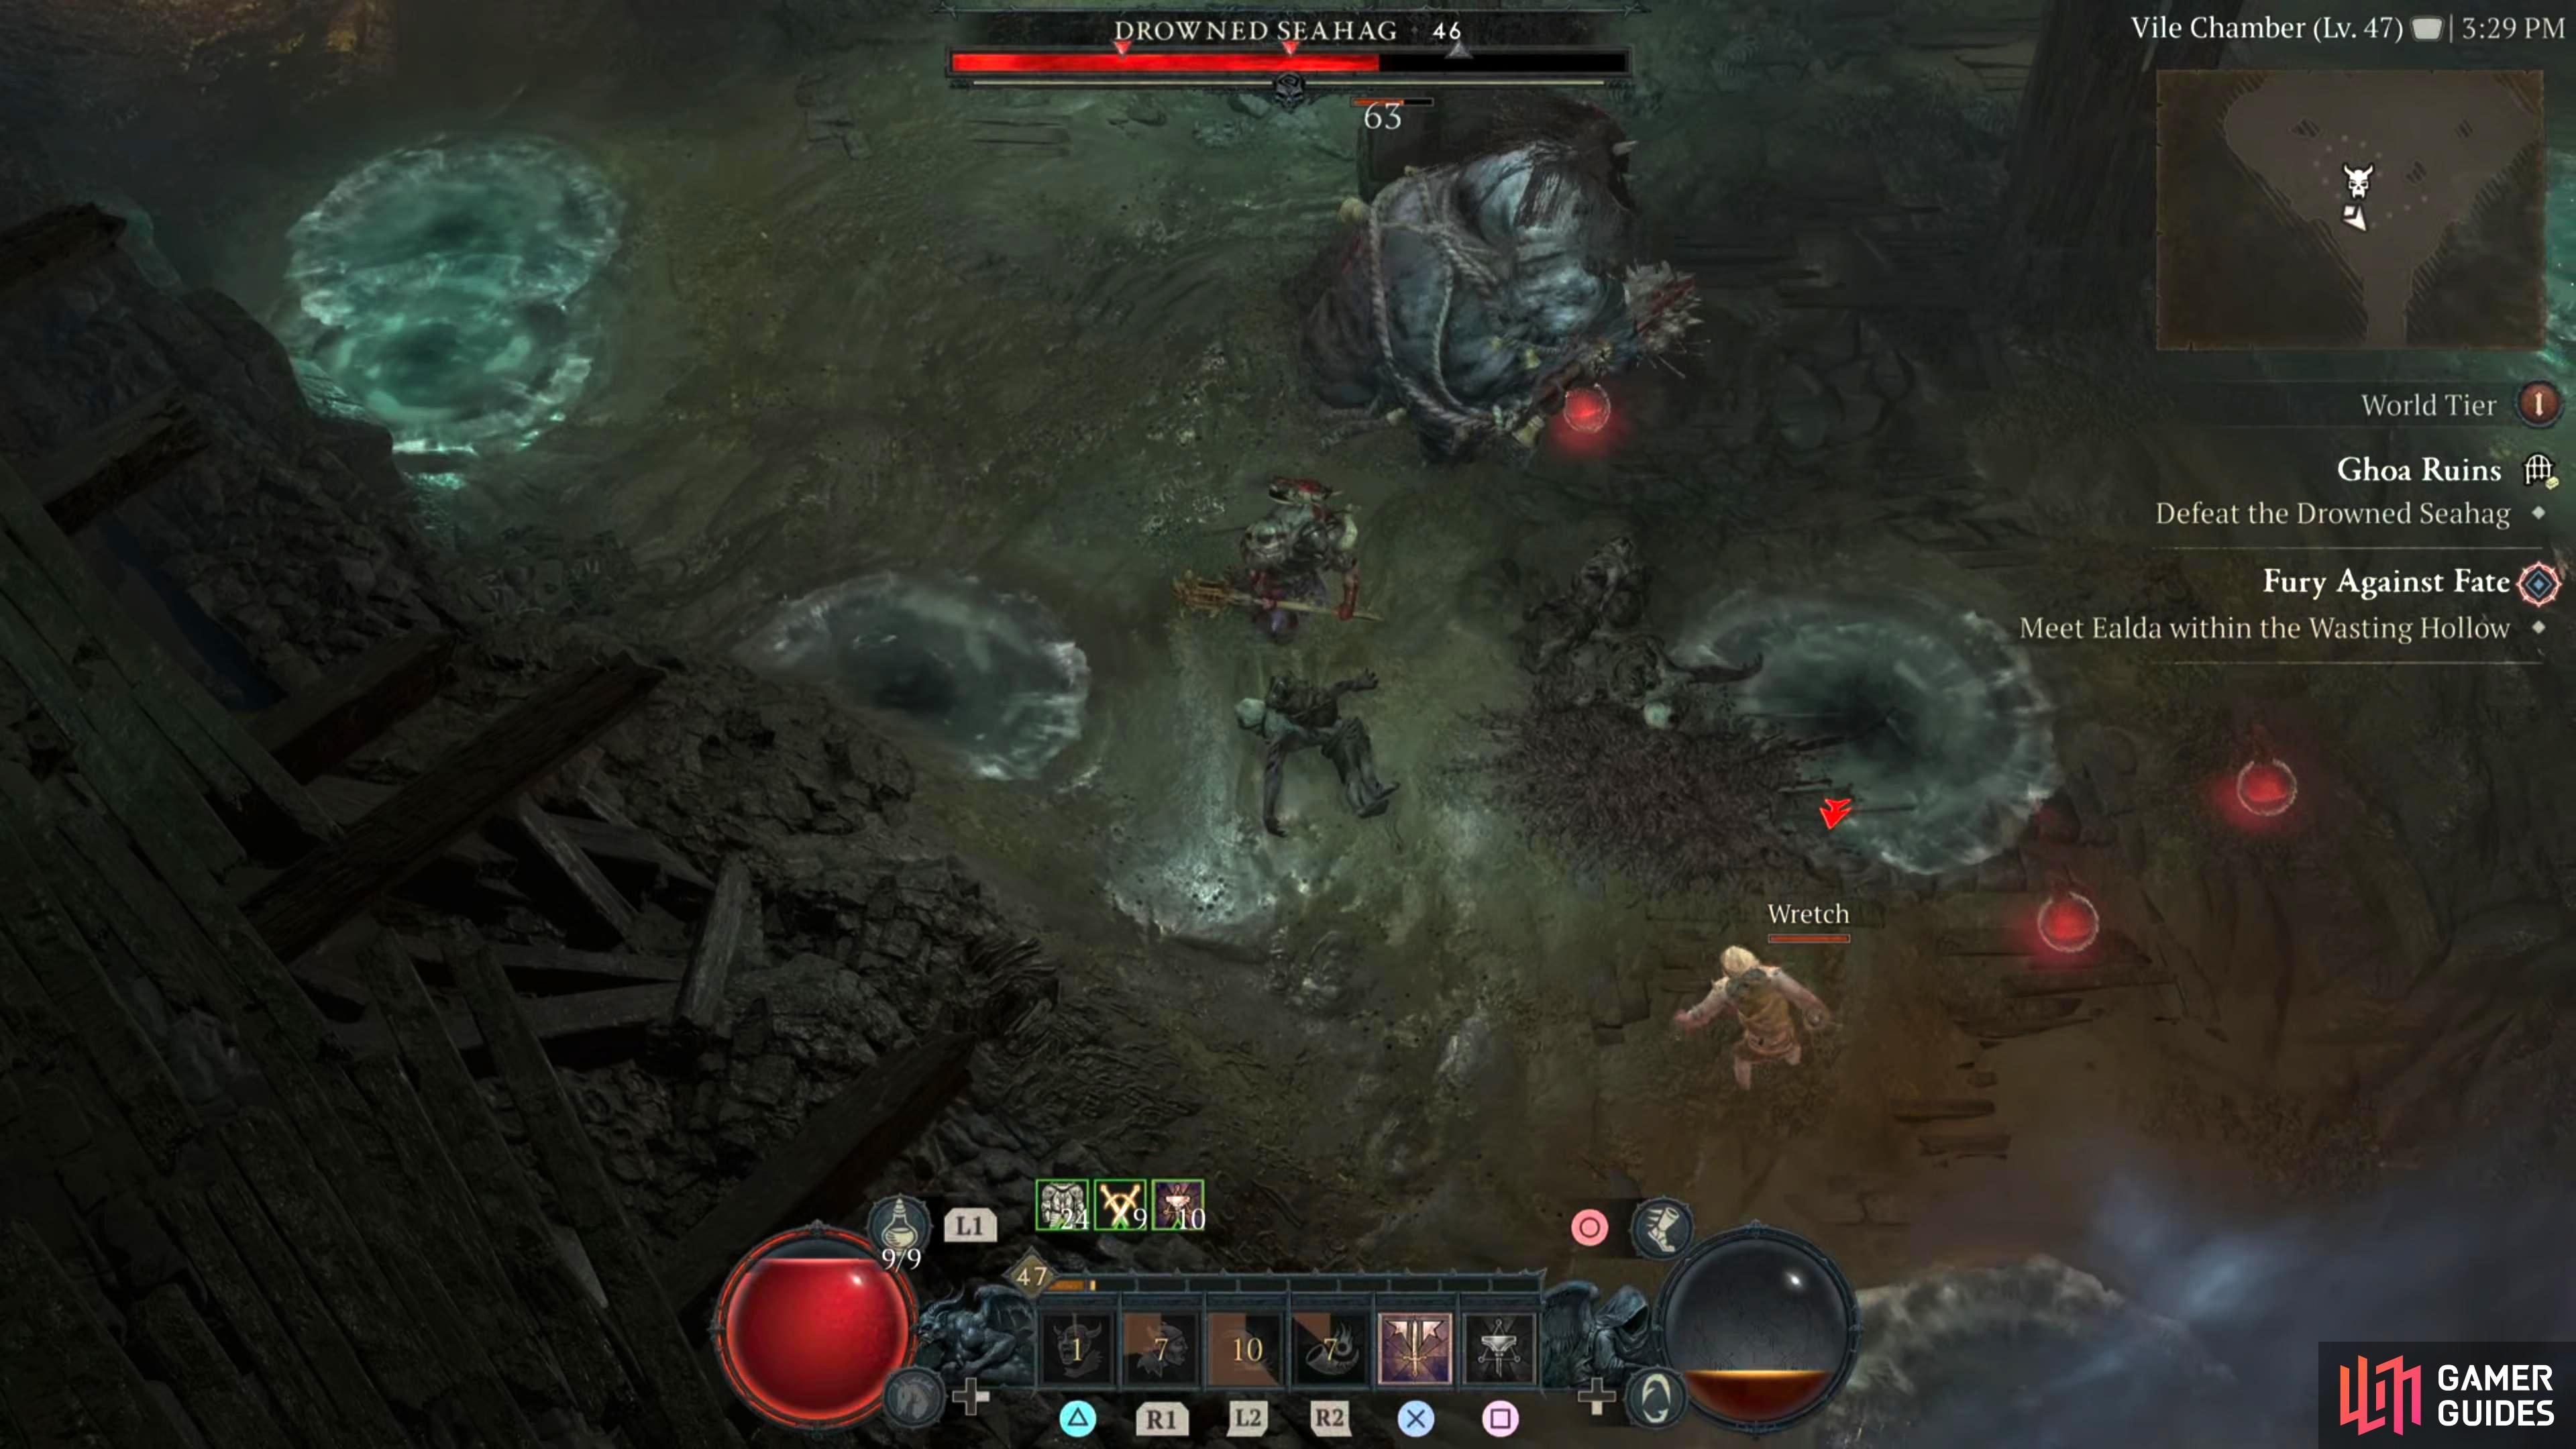
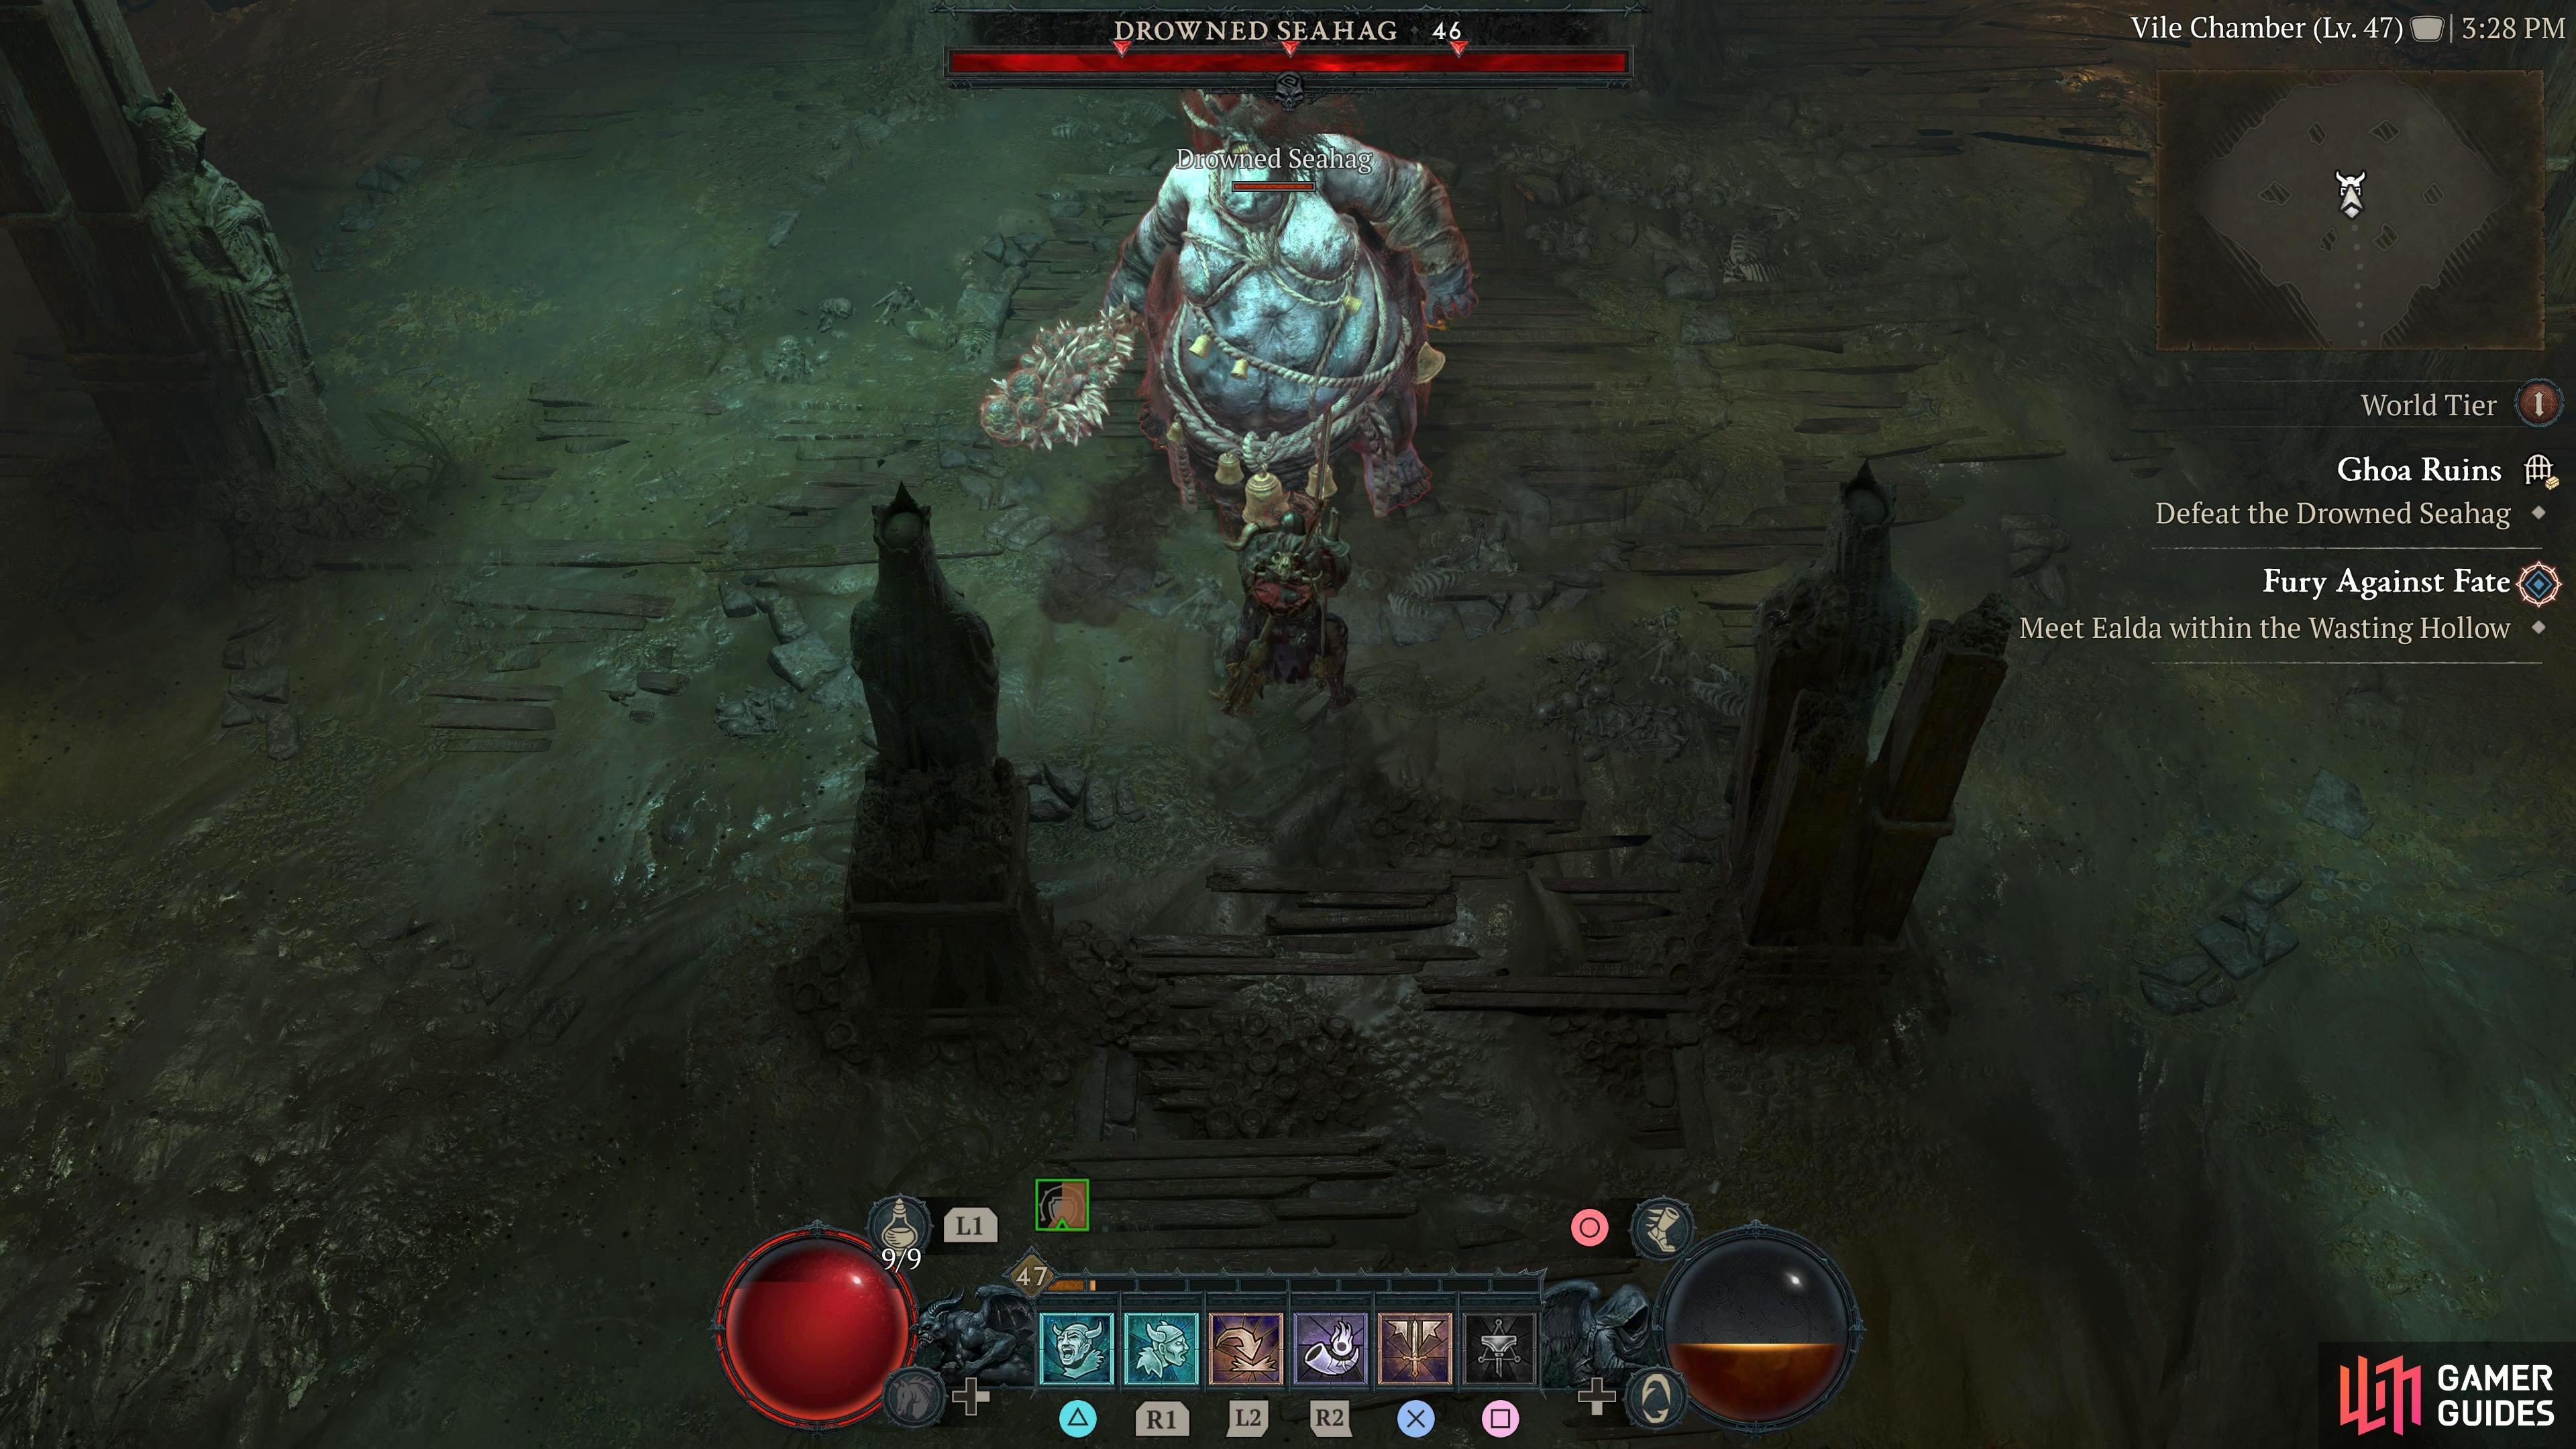
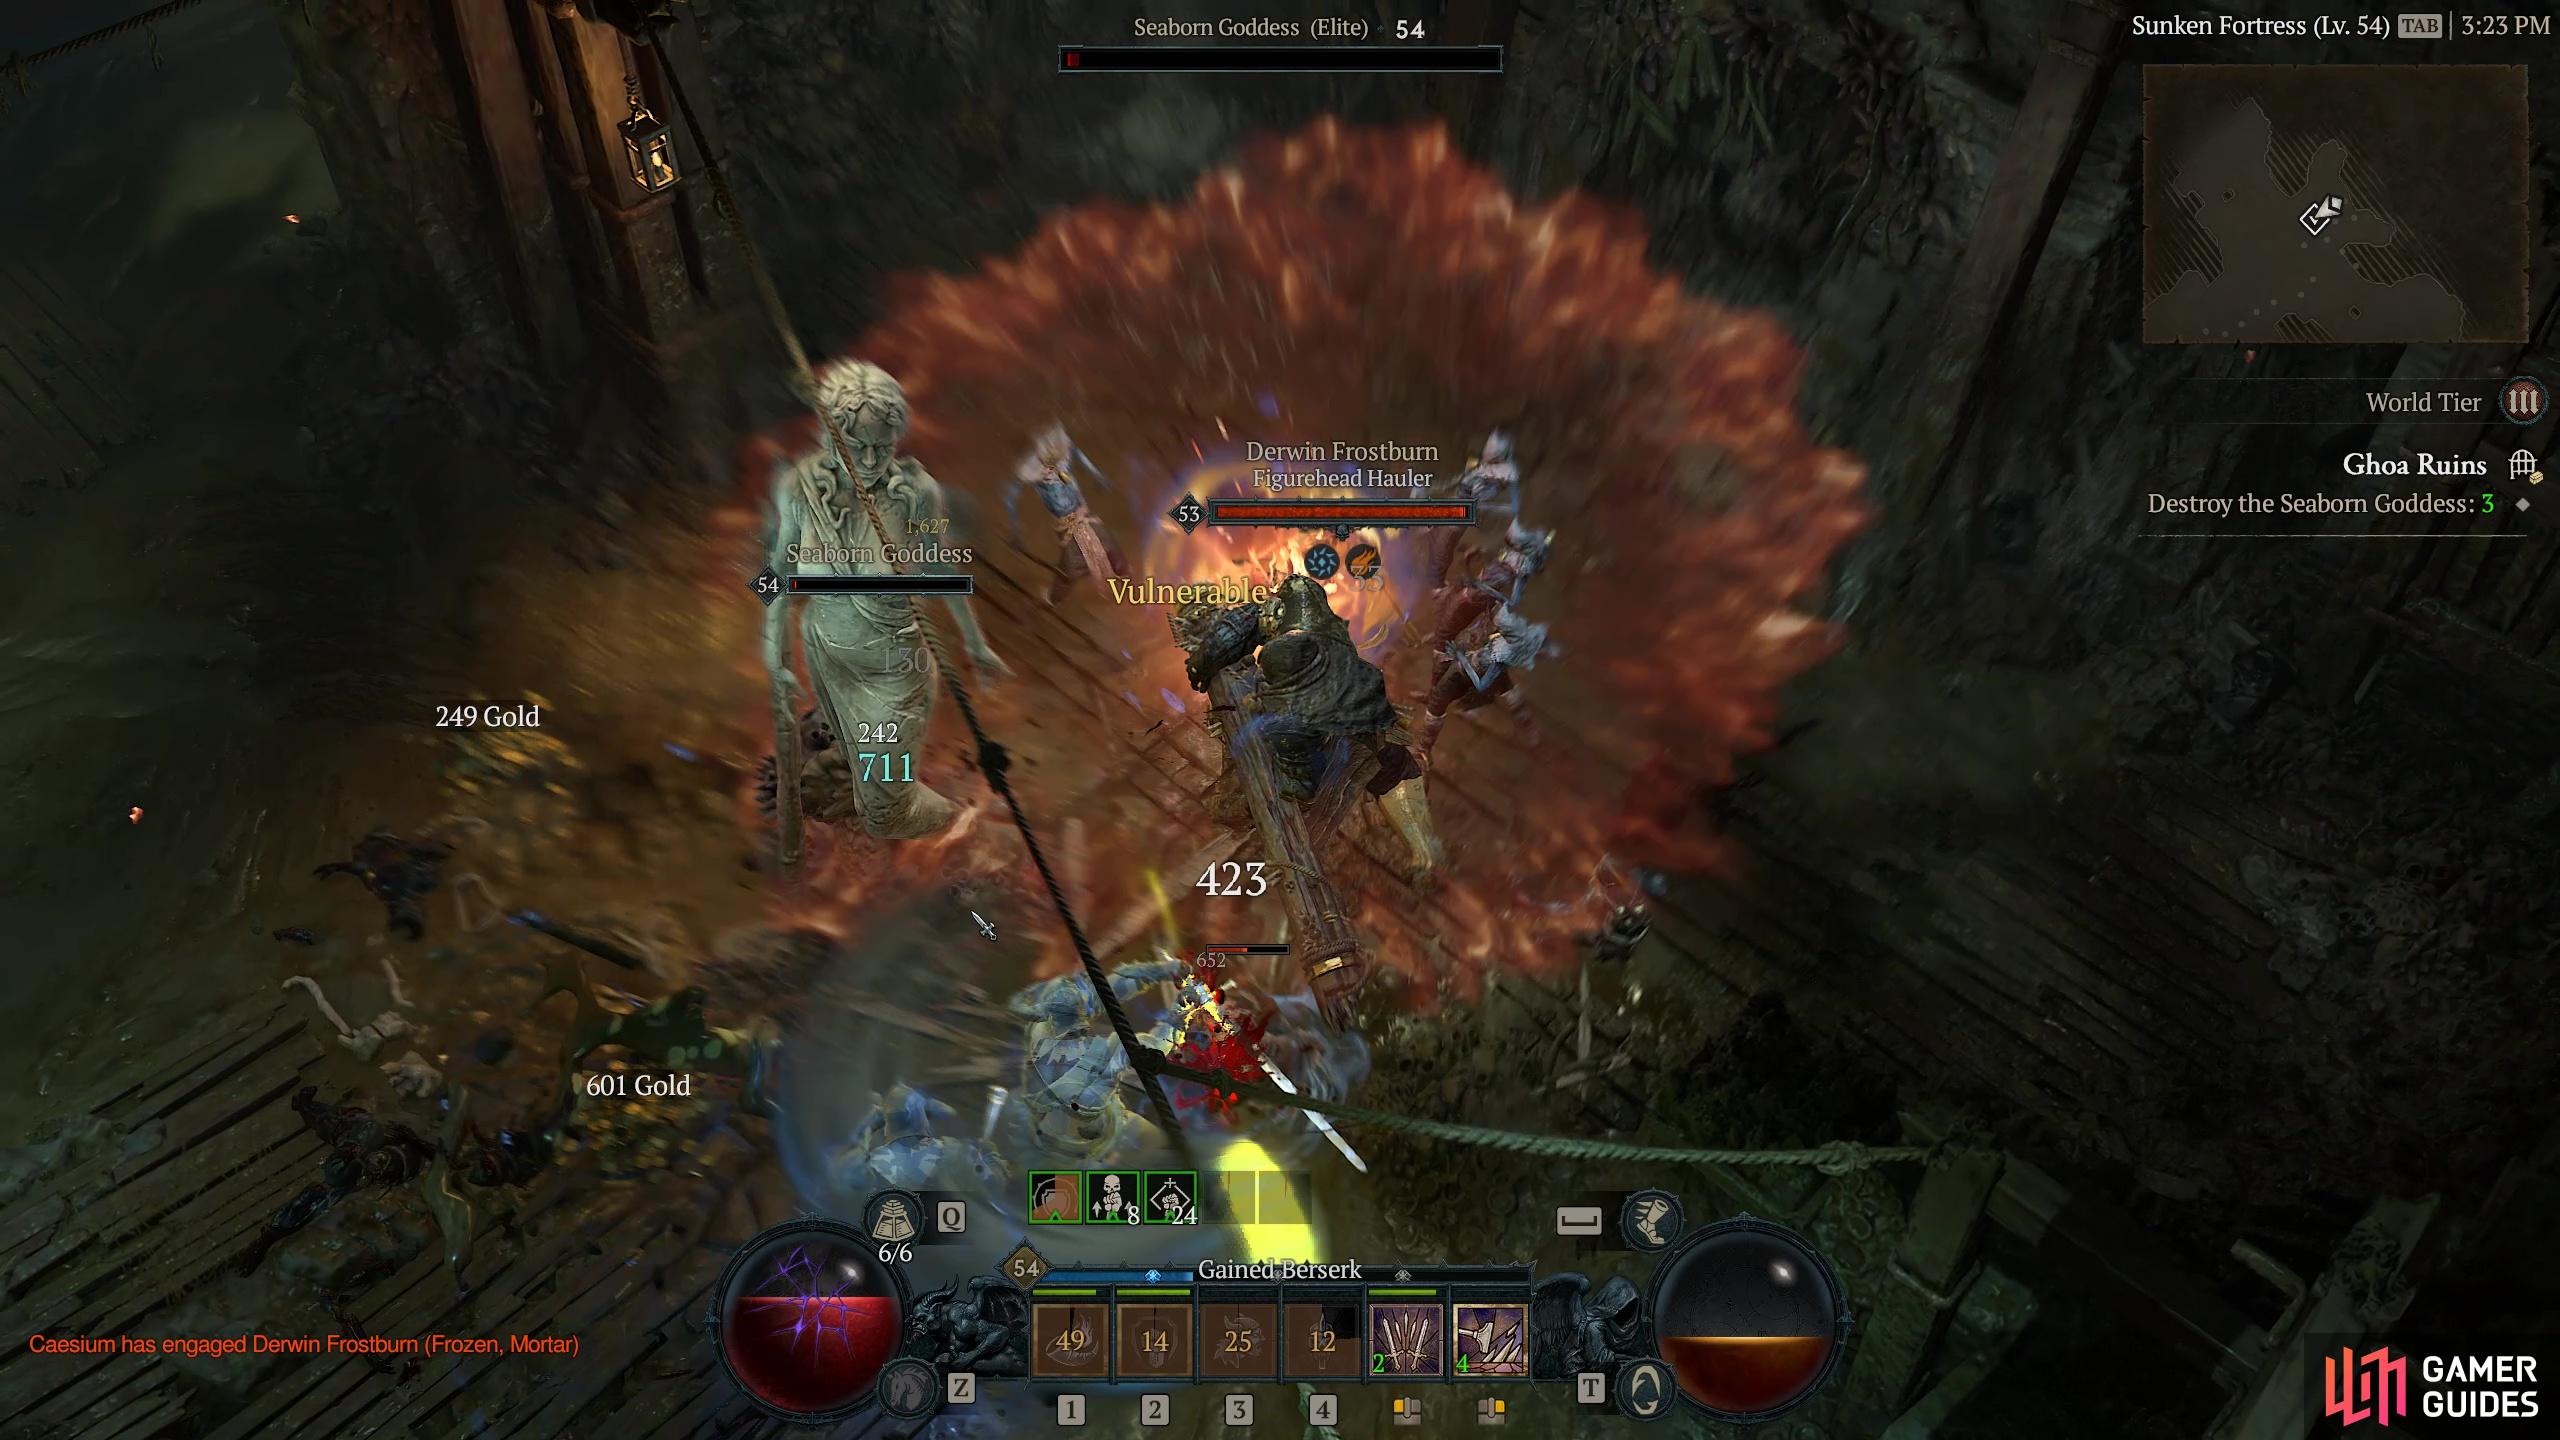
The Drowned Seahag resides at their home in the Ghoa Ruins. This large humanoid monster is part of the Drowned family type. They wield a large club that has bones and spikes spread throughout to cause further damage to their foes. With the power to control water and other members of the Drowned family, this enemy is truly a ferocious foe.
Description
The Drowned Seahag can be a difficult battle if you’re not prepared. With the ability to summon pools of water that can slow you down. On top of that, they will regularly spawn Wretchs from the pools which will attack you while you’re trying to deal with the main threat. If you try to burn the Seahag down, you’ll be met with painful swipes from their spiked club. At times throughout the battle, they will let out a hearty bellow that rouses the Wretchs into a frenzy and causes all of them to rush you at once. Here is what you can expect from the boss:
Melee Club Attack - This is their general melee attack that can deal a respectable amount of damage. Not much you can do about this other than having Barriers/Fortify.
Geyser - Unleashes three water geysers at you/around the arena. The Seahag will start off with just the one geyser which will be flung away from you then throw another two at you. When all three hit the ground, they will unleash a small pillar of water out of them, damaging if you’re standing on them. After that, they will persist and slow you down whenever you walk over them.
!Wretch Call - As the name implies, the Seahag will call up numerous Wretchs from the depths who will throw projectiles. These don’t have a lot of health, so deal with them quickly in-between pummeling the boss.
Call to Action - After the boss has called out the Wretchs, they’ll perform a hearty bellow which will cause the Wretchs to go into a frenzied state, and attack you at once. This sounds worse than it is, as you can use a singular area of effect skill to take them out at the same time.
Charged Geyser - Similar to the regular Geyser attack, but the boss will raise its hands in the air and perform a short charge before placing five geysers around the arena. Make sure you’re next to the boss, or on one of the Geysers when this attack is happening.
This fight isn’t as tough as it sounds as for the most part you can stand in front of it and pummel away while replenishing your health via potions or health-leeching passives/skills. Just make sure you move if a Geyser lands underneath you.
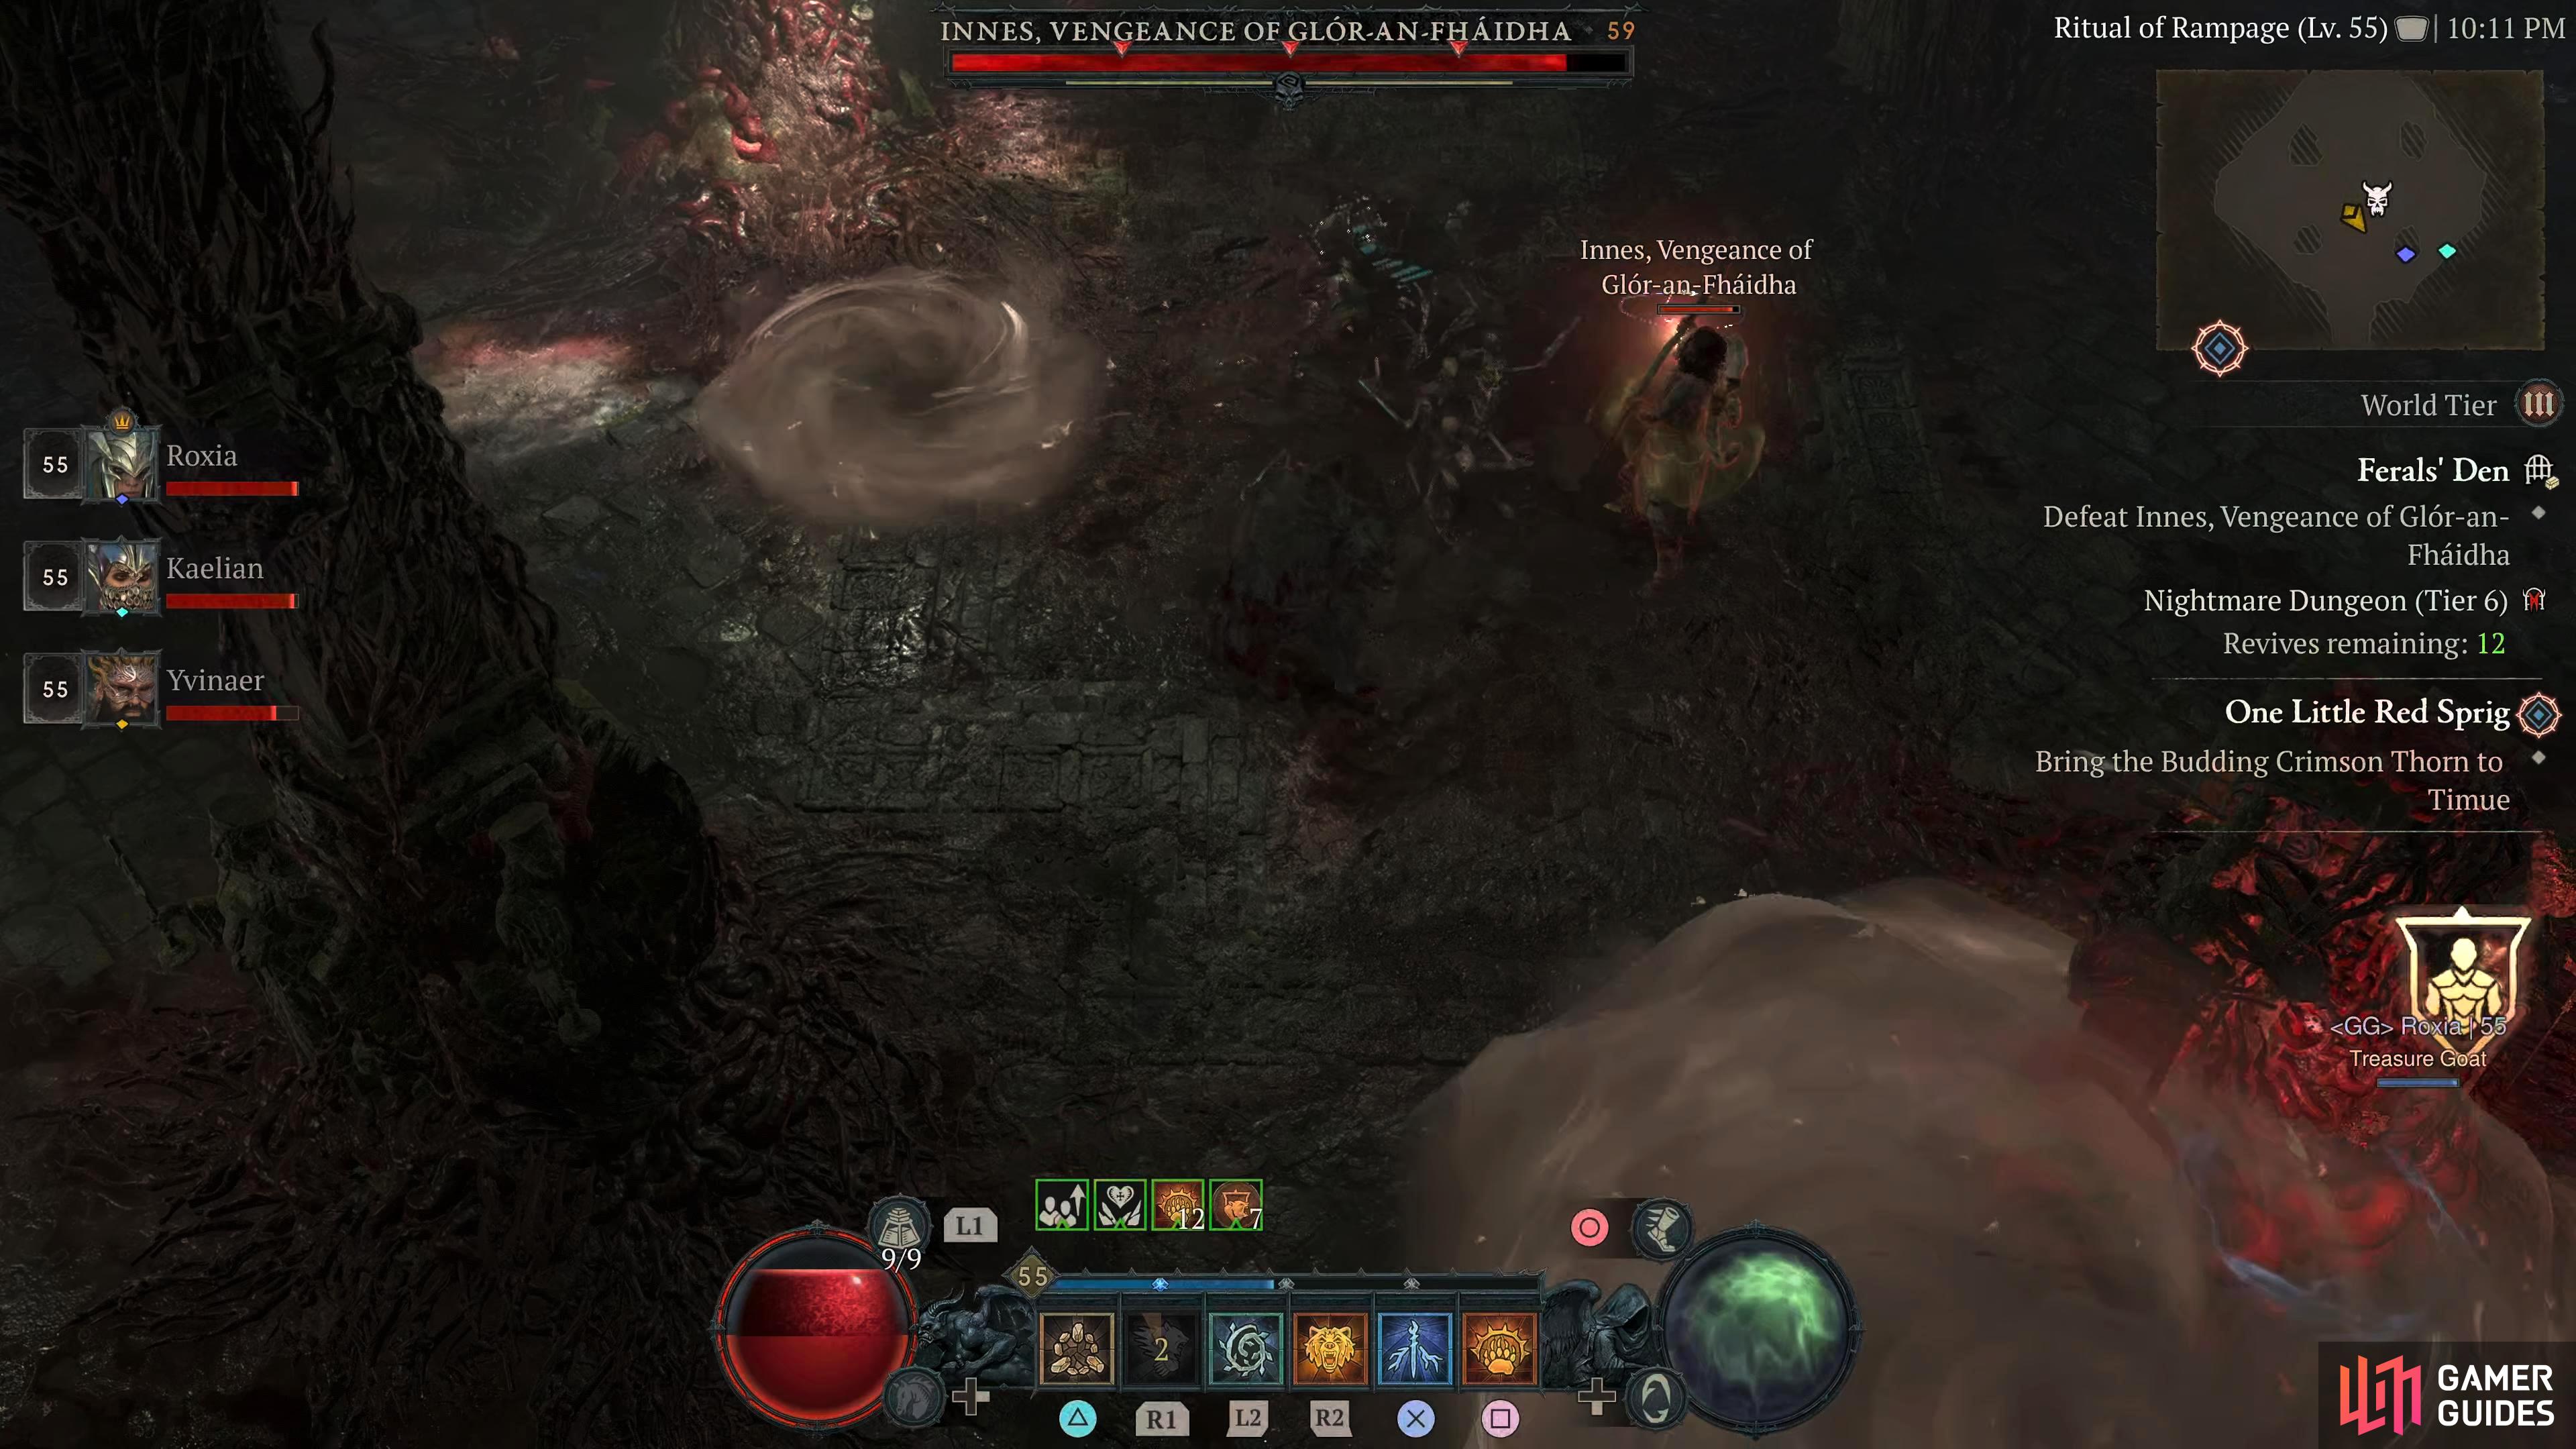
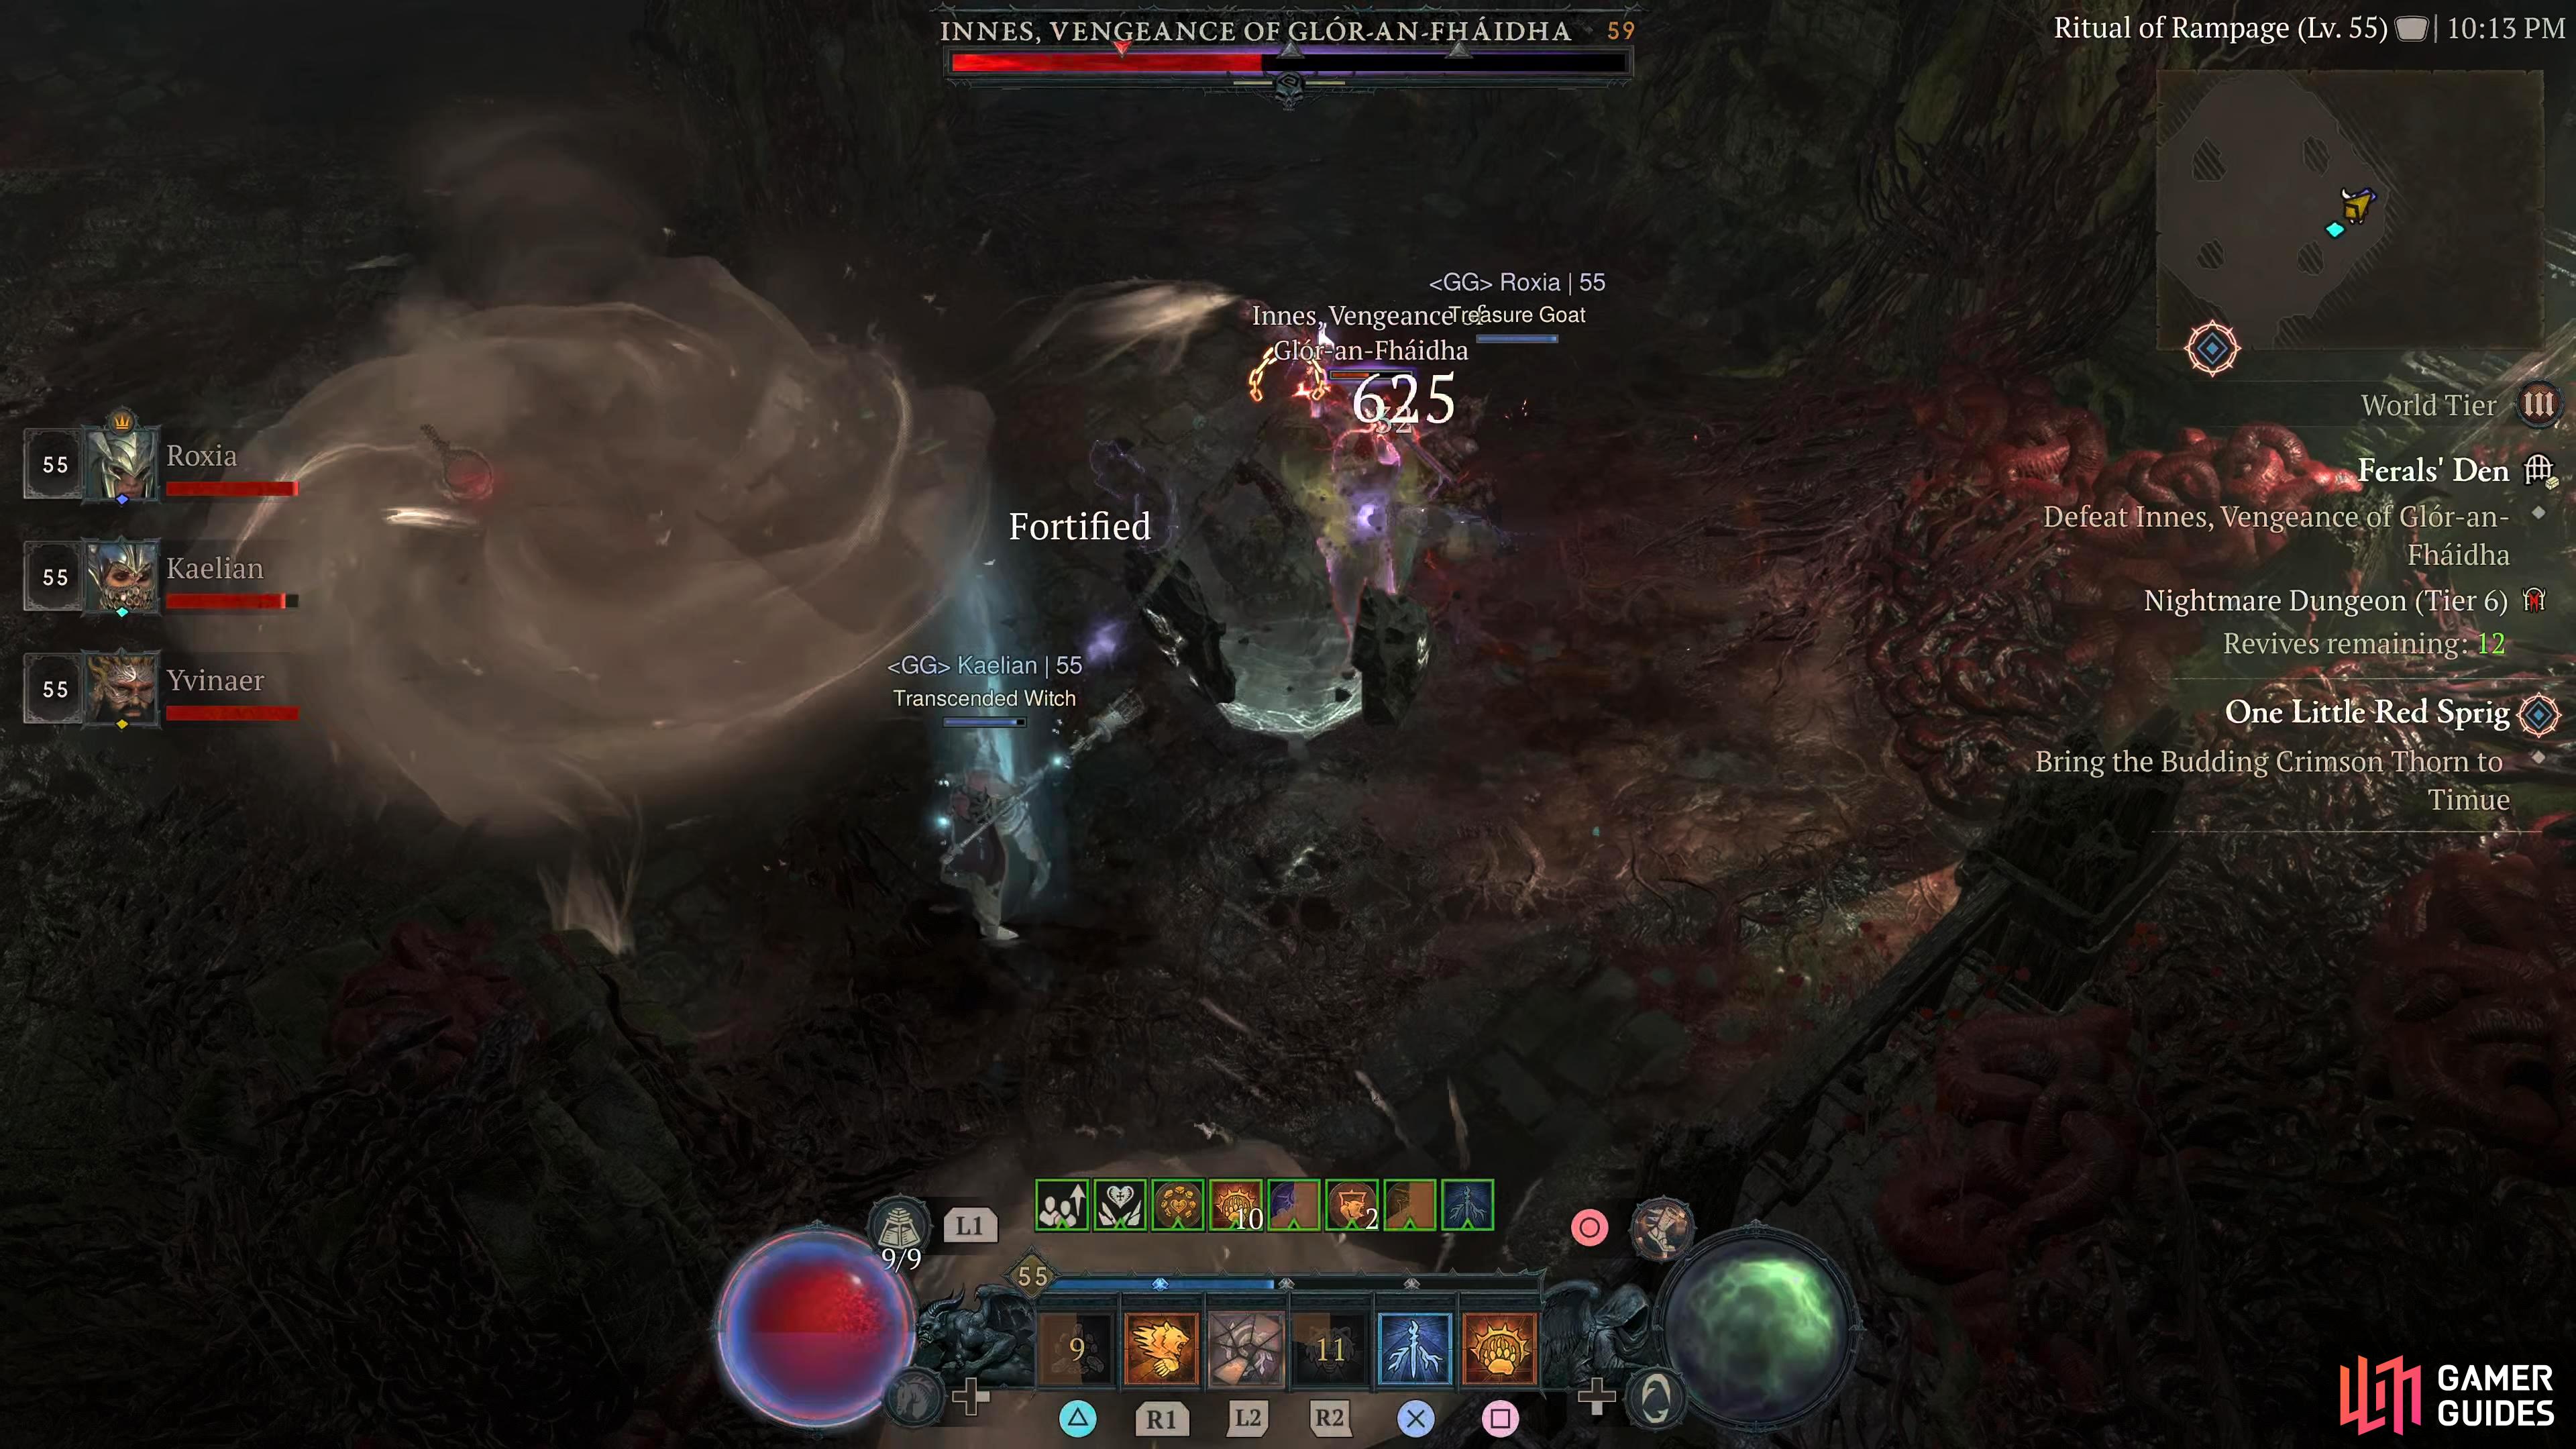
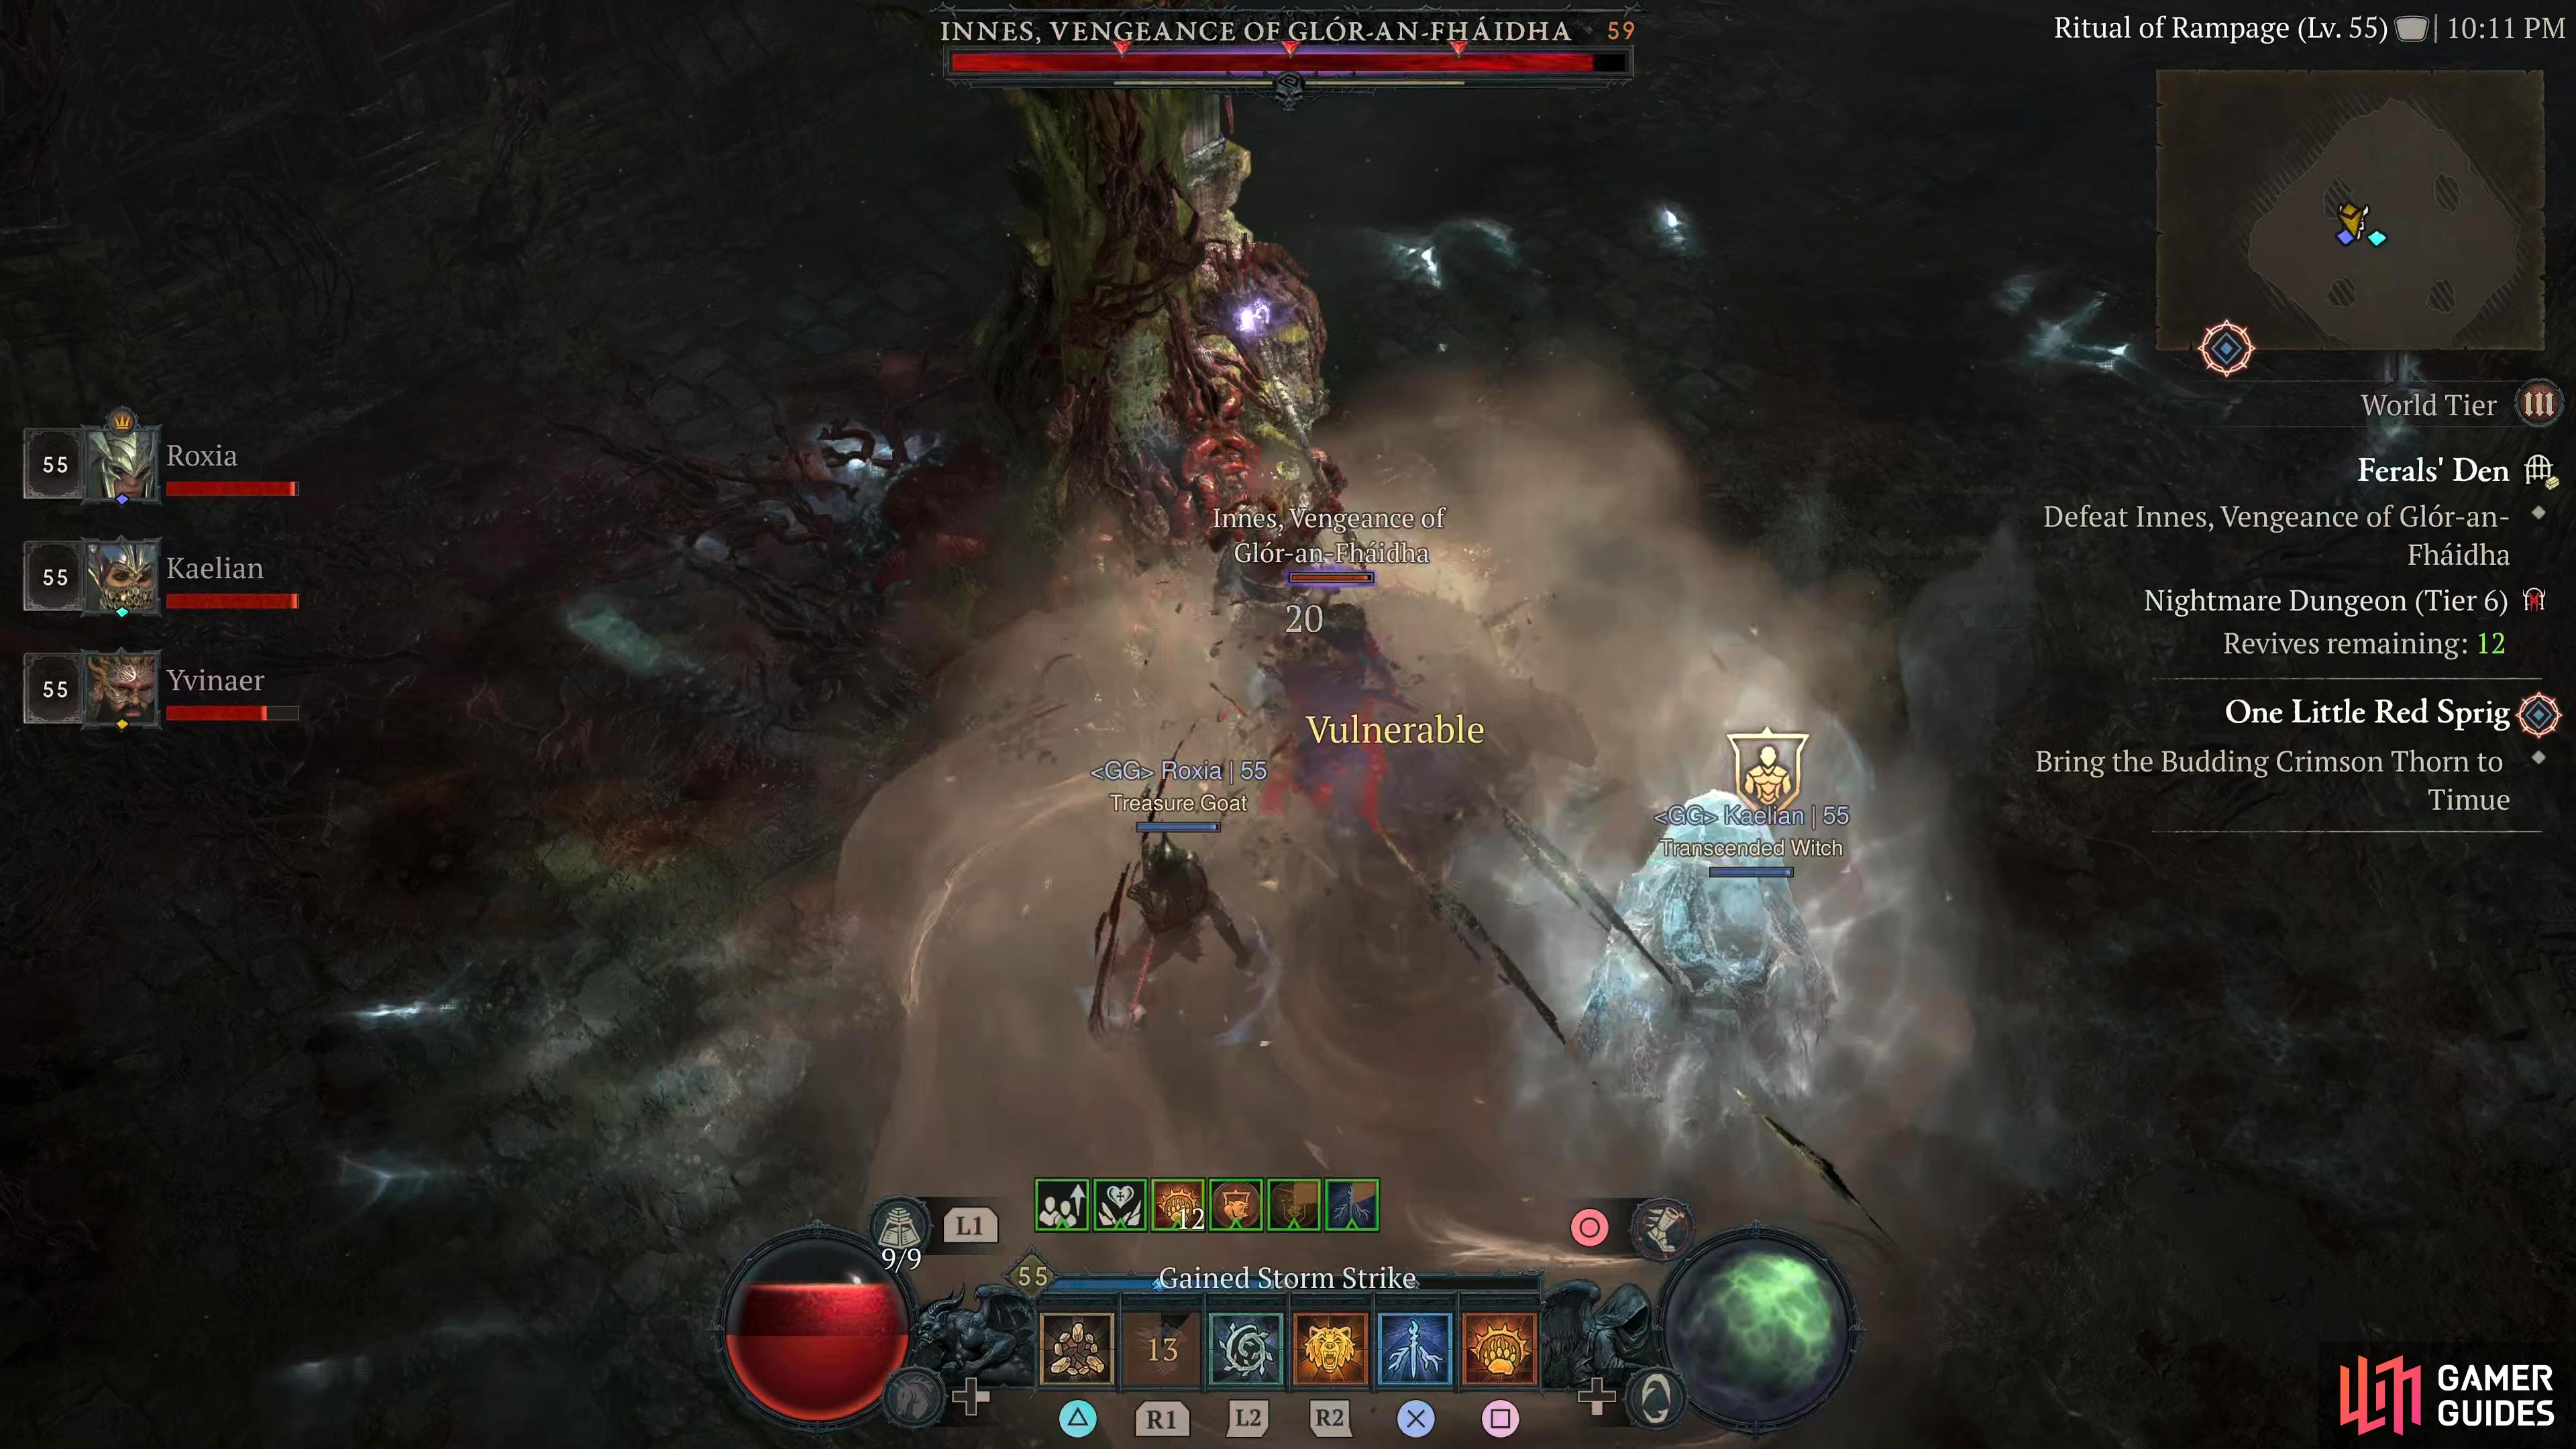
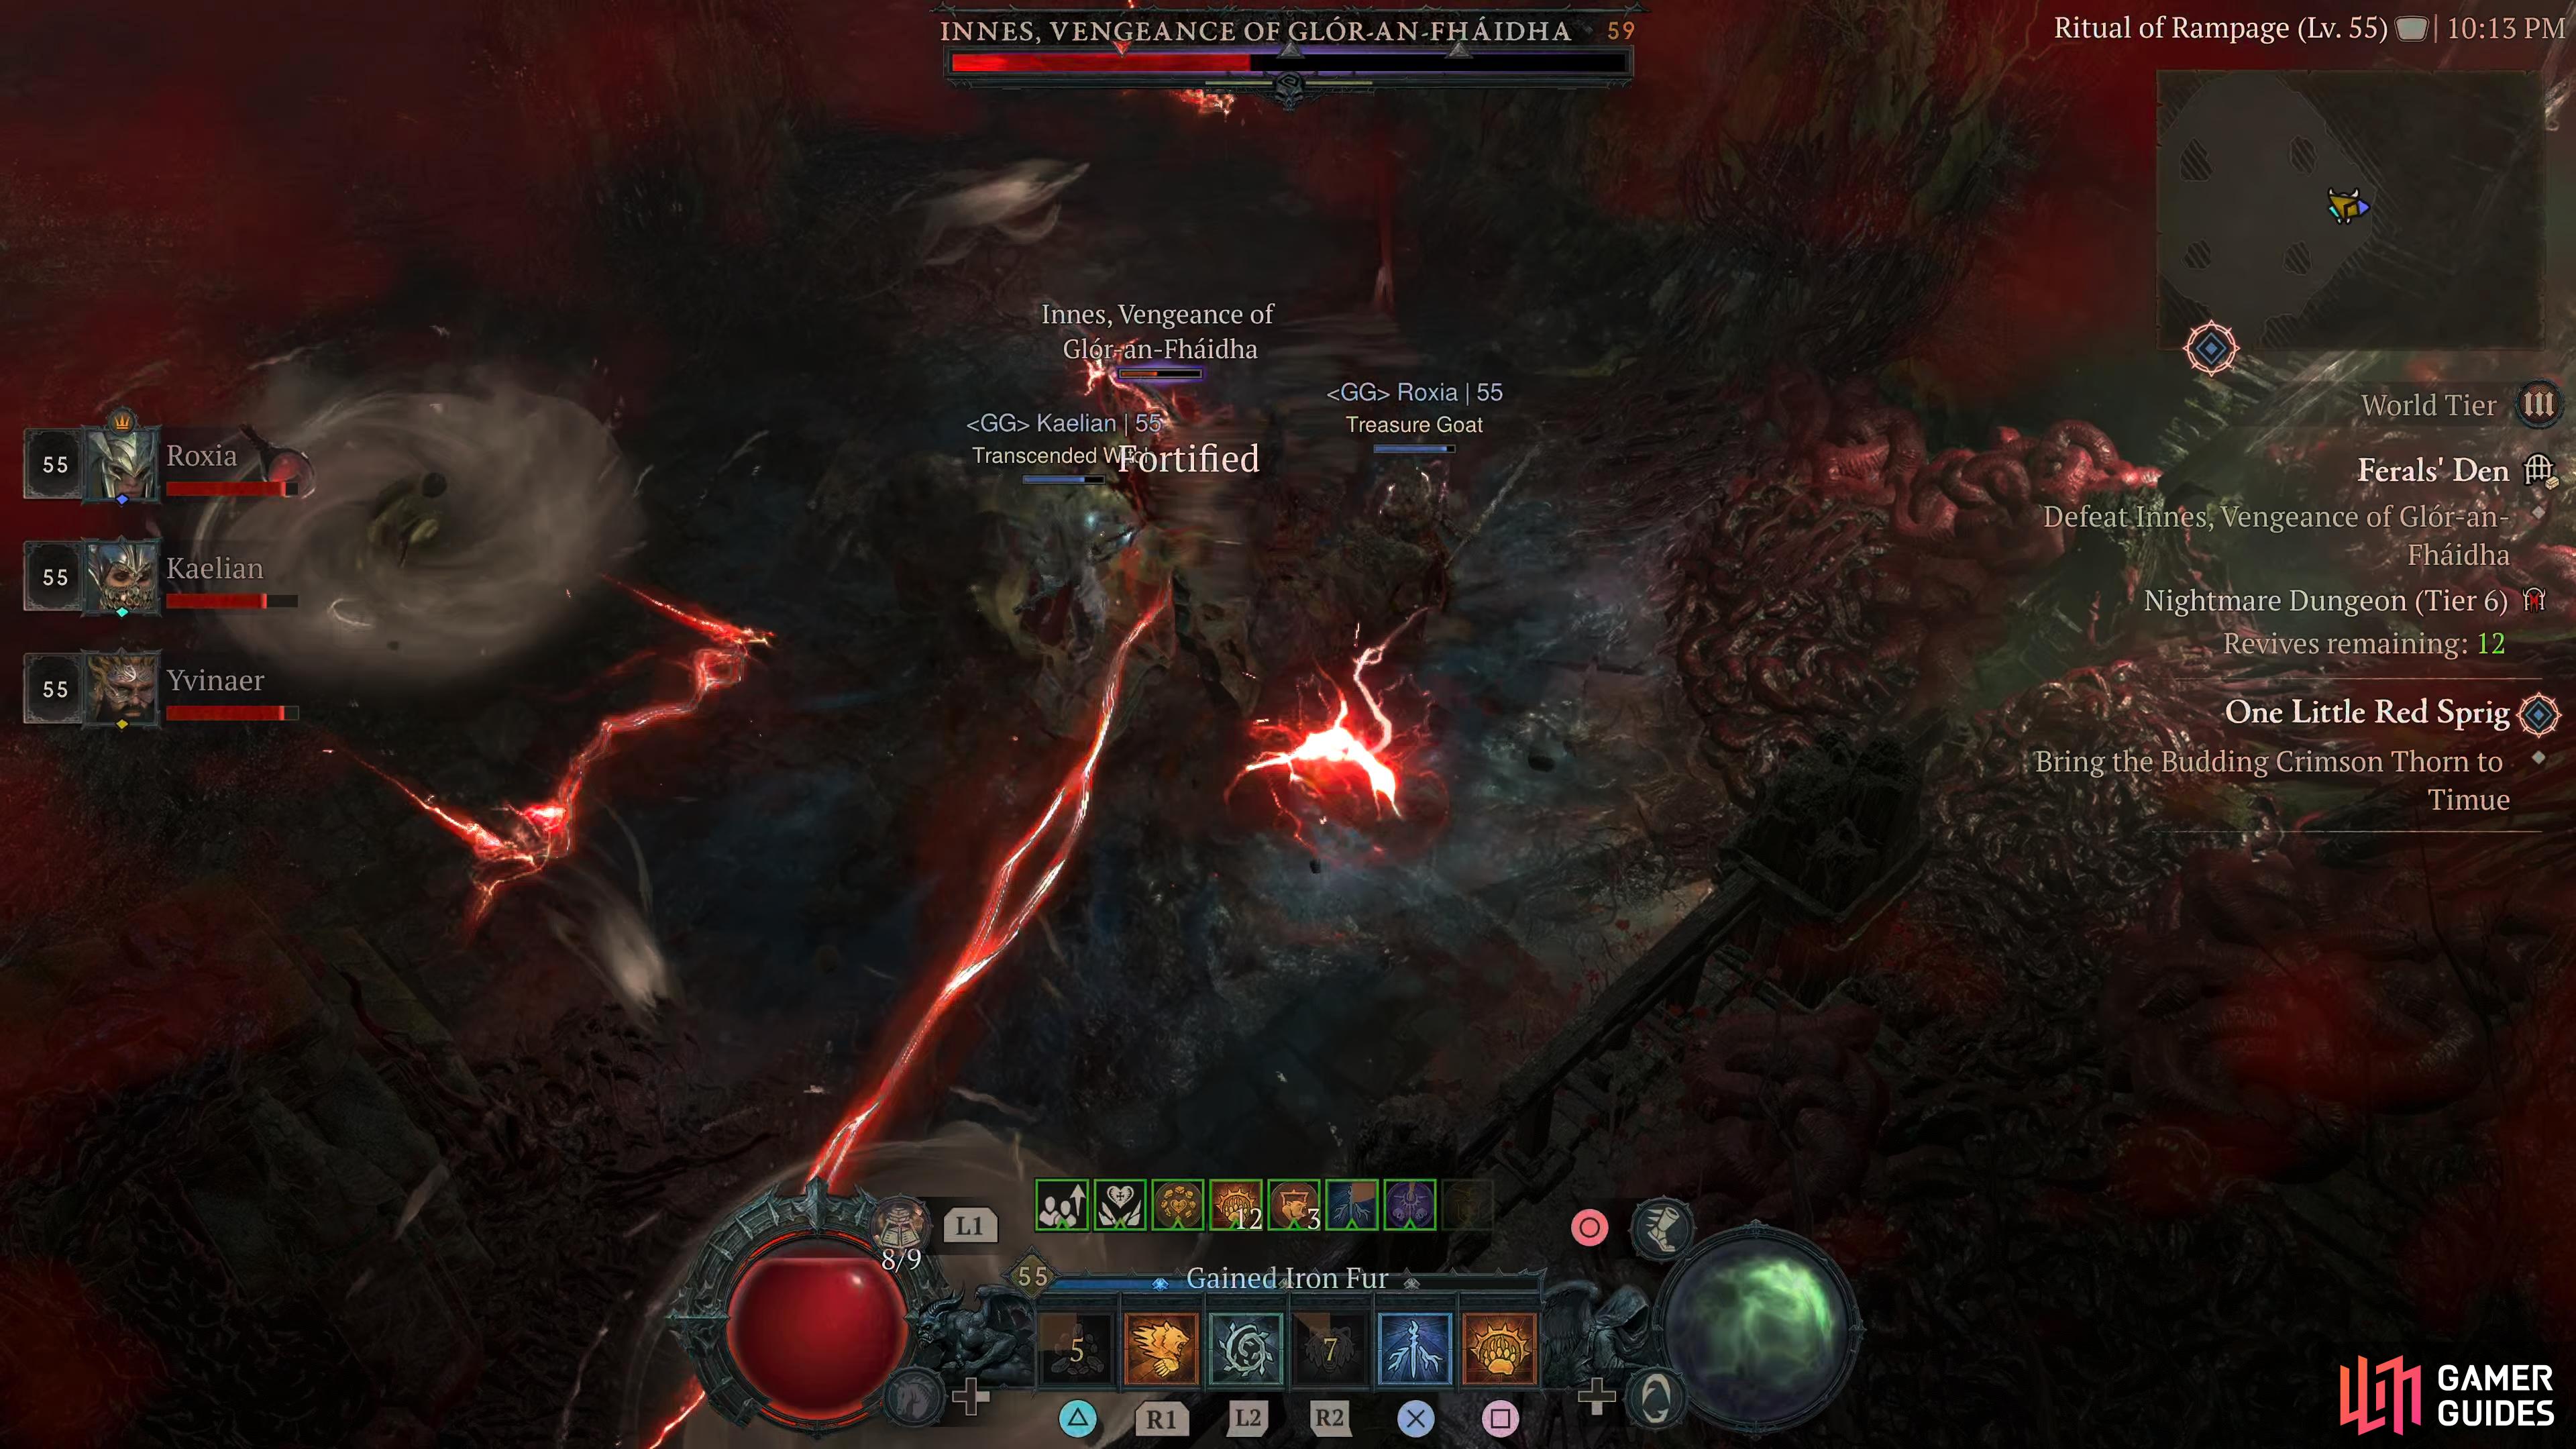
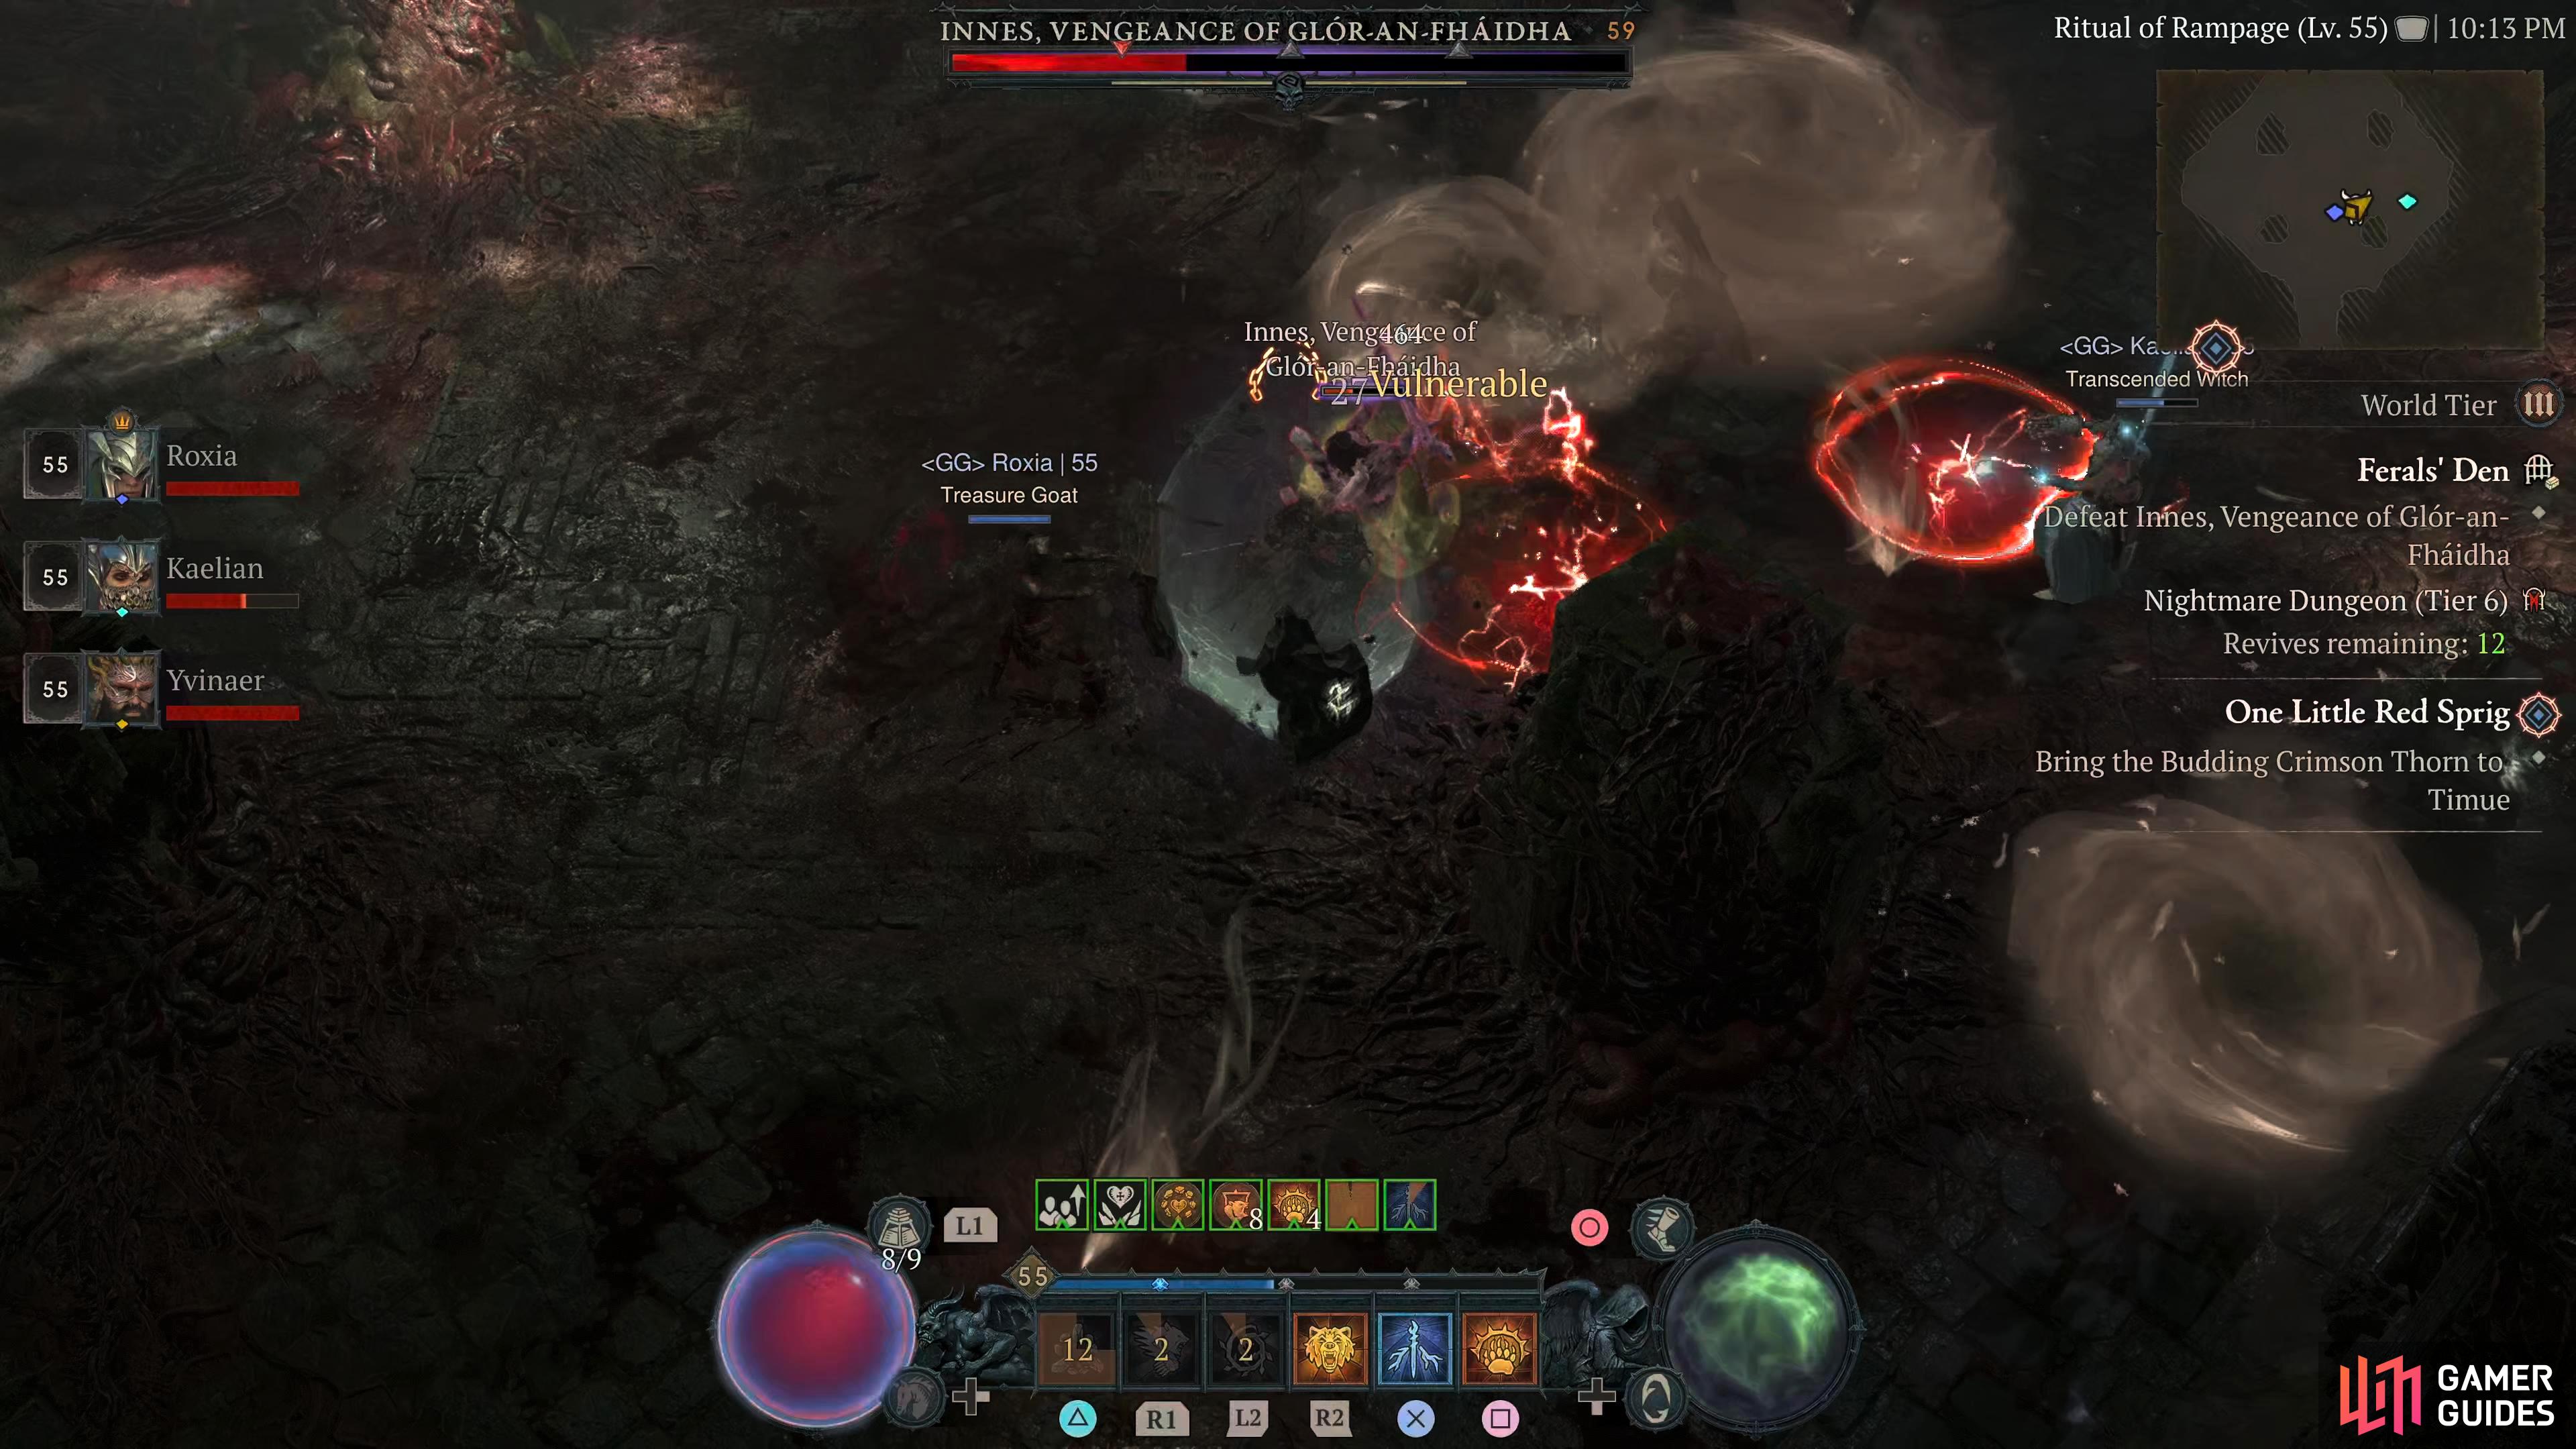
Innes is a large powerful shaman who wields a staff to control the power of wind and lightning. They reside in Ferals’ Den, which is situated in the northeast of Scosglen.
Description
Innes is unlike most of the other dungeon bosses in the game as they have a fair few more attacks to deal with. On average, most bosses have 2–3 attacks while Innes has at least five. Most of their attacks are predominantly Lightning-based with some Wind Blast attacks thrown in for good measure, so you may want to use a Lightning Resistance Elixir if you’re having trouble with the boss. For their attacks, a lot of them are movement-based which will require you to reposition throughout the battle. Here’s a list of attacks that Innes can use:
Wind Blast - Innes will place a large white circular area of effect around themselves while charging up a blast attack which will knock you back, and deal a small portion of damage. After the attack has been cast, it will persist in the area for a short period of time. This attack takes a while to charge up which allows you to get a few attacks on them before you need to dodge out of it.
Tornado - Innes can cast multiple tornadoes on the battlefield that persist for a short period of time. While these are on the field, they will continuously fire out small wind projectiles. There’s not much you can do to avoid this other than use damage mitigation tools such as Barrier, or Fortify. Other than that, try to reposition the boss to an area where they won’t cause you as much of a problem.
Lightning Bolt - Arguably the most difficult attack to avoid especially with all the other mechanics happening at the same time. Innes will fire off three sets of lightning bolts, each firing off in a line three consecutive times. Once the three sets have been cast, two of them will join together in a line and head back to the start. The original sets of bolts are easy enough to avoid as long as you stay mobile, but when they join together they become more problematic. Navigate around them to avoid taking any damage, and if you get trapped in a corner then dash through it.
Lightning Circle - Innes will place multiple circles of lightning around the arena which will deal substantial damage, and Vulnerable to you when you pass through them. The trick to this attack is to avoid them! Joking aside, reposition the boss away from them, so you don’t dodge into the circles when avoiding the other mechanics.
Lightning Zap - This is a simple zap from the staff which will hit you with lightning damage. It has little range, and you can avoid it by not standing in front of the boss.
As stated above, much of this fight is about positioning, and good dodge management as you’re limited on how often you can dodge. Some attacks you’ll just have to take while saving your dodges for the Lightning Bolt, and Wind Blast attack. Using an Elixir of Lightning Resistance can make your life significantly easier as will any equipment that has it too. Like all bosses, you can power through the fight by keeping up damage mitigation tools and using potions, especially if your build can output high damage as you’ll get more potions to drop before you run out of them.
Detailed Location
Found at the end of the Ferals’ Den dungeon in Scosglen.
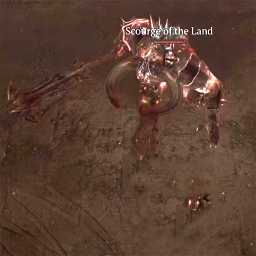
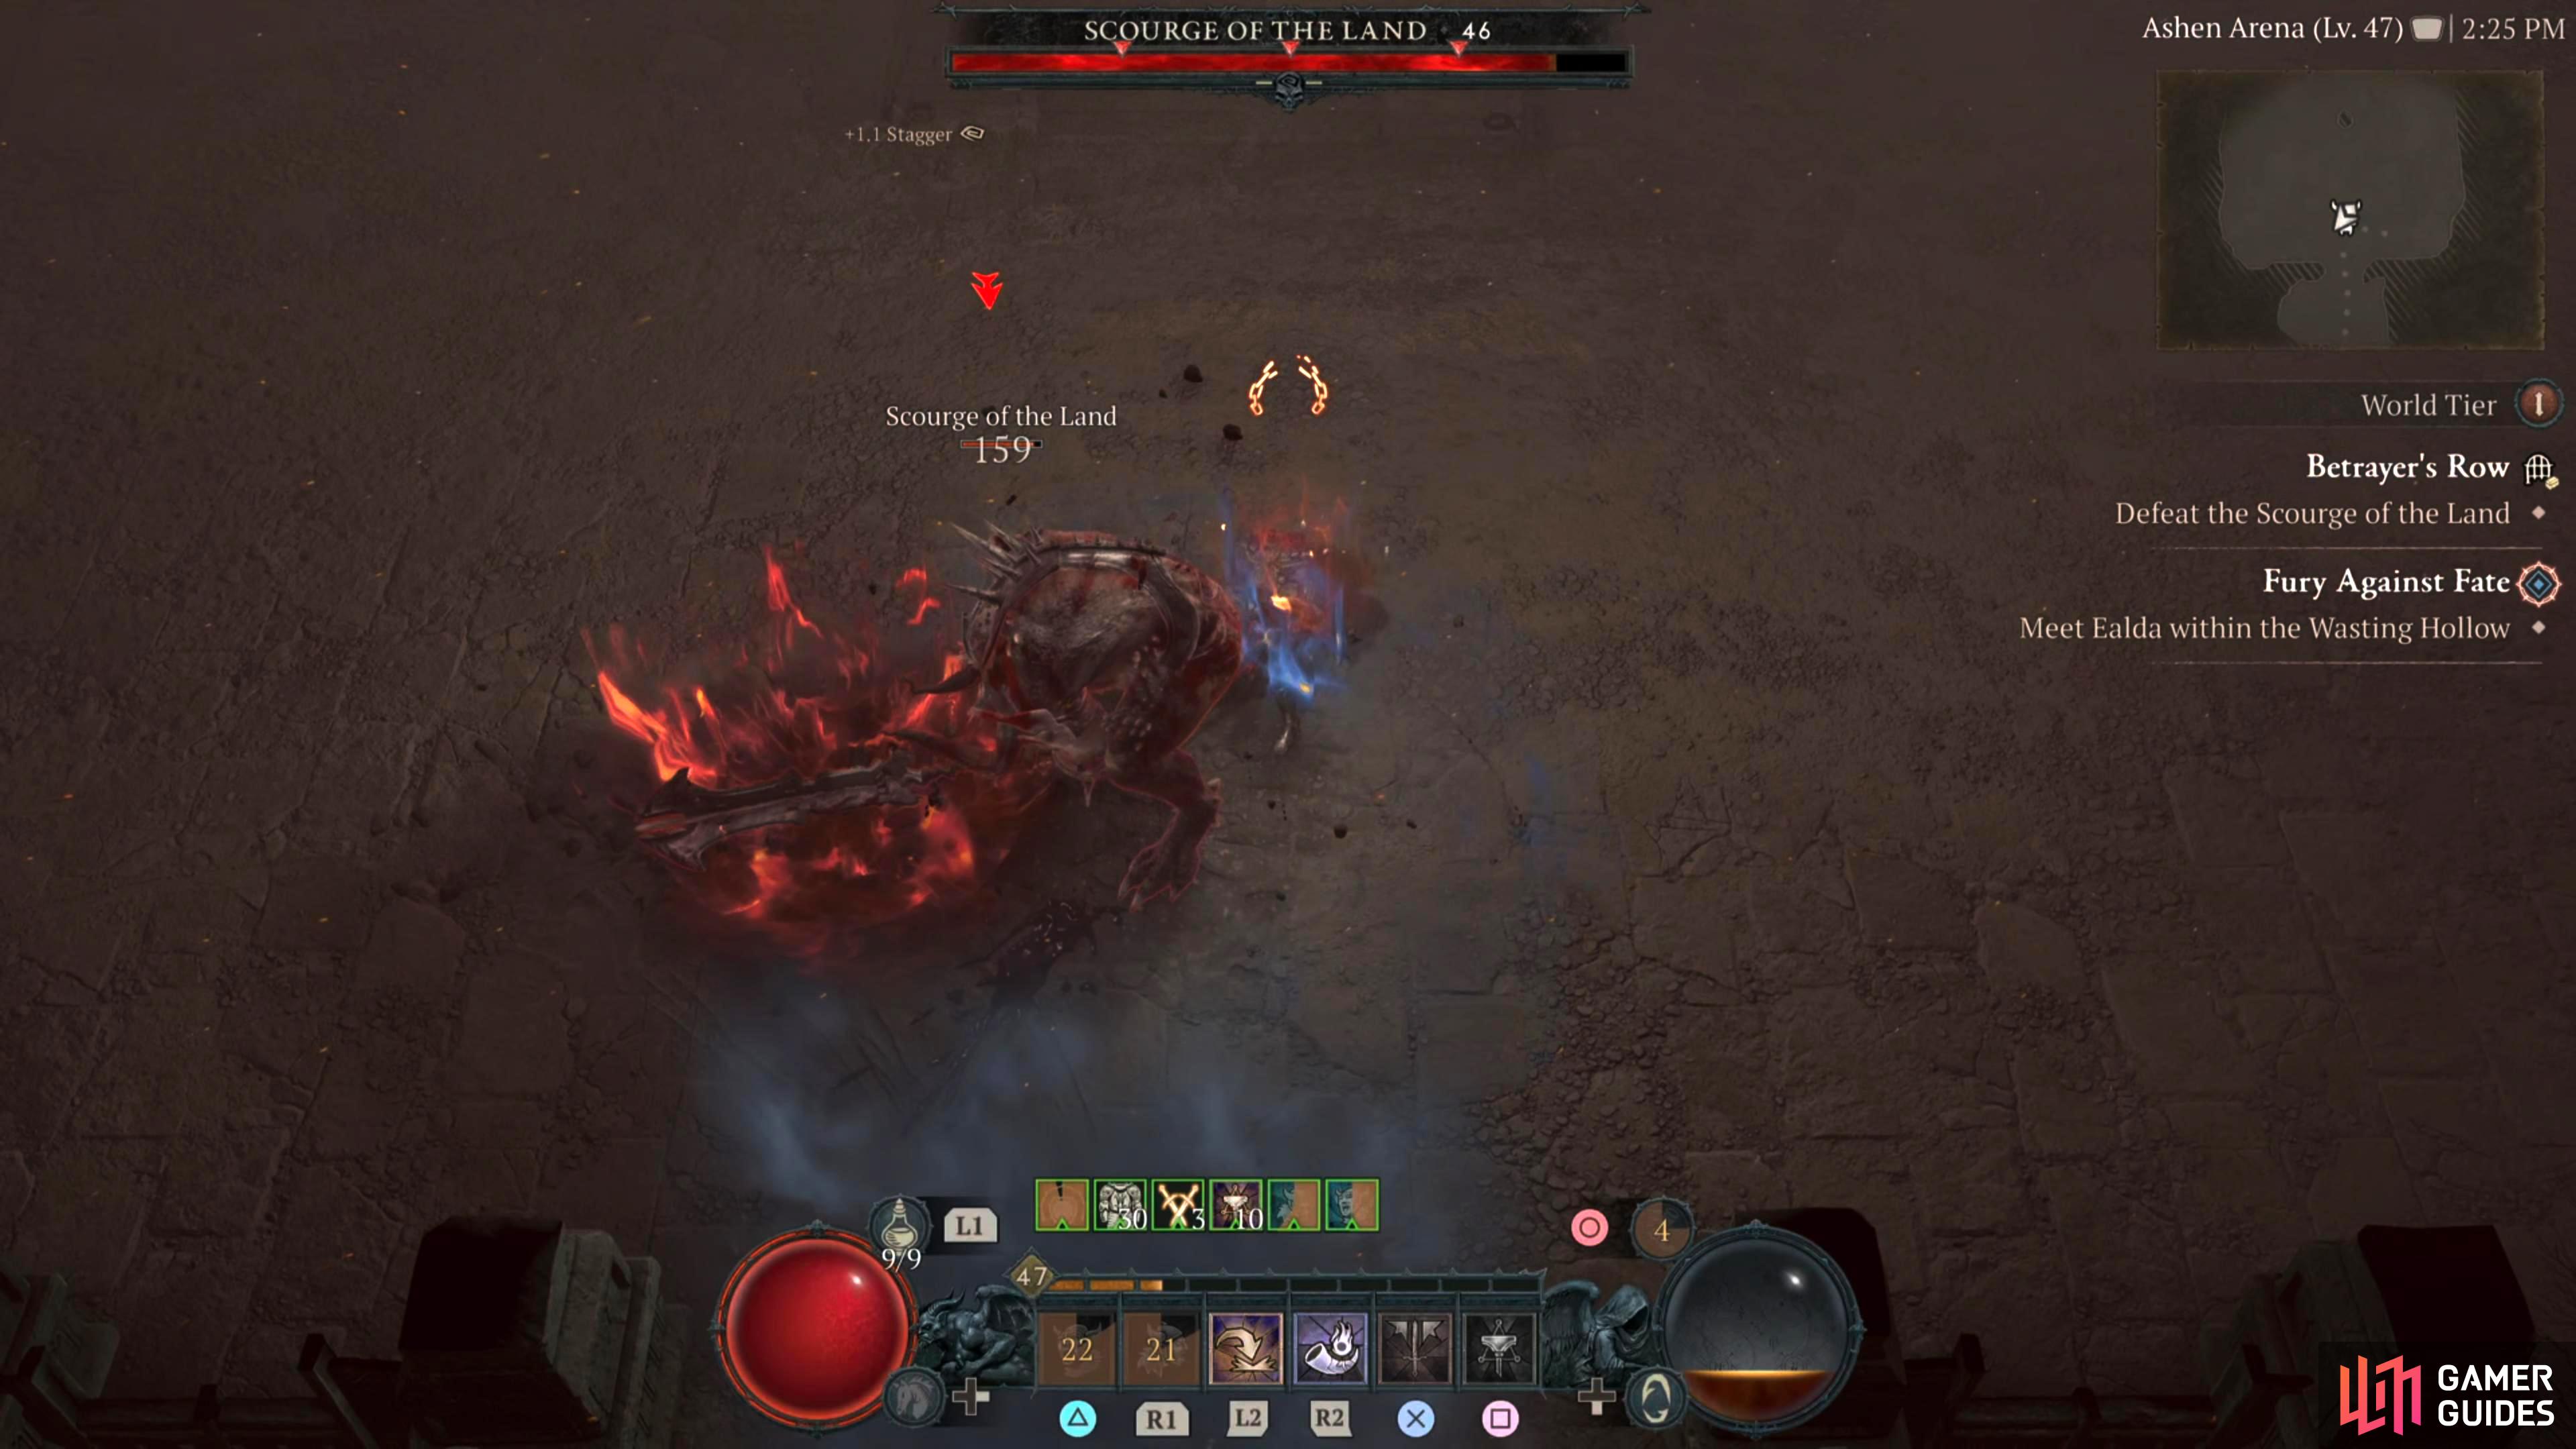
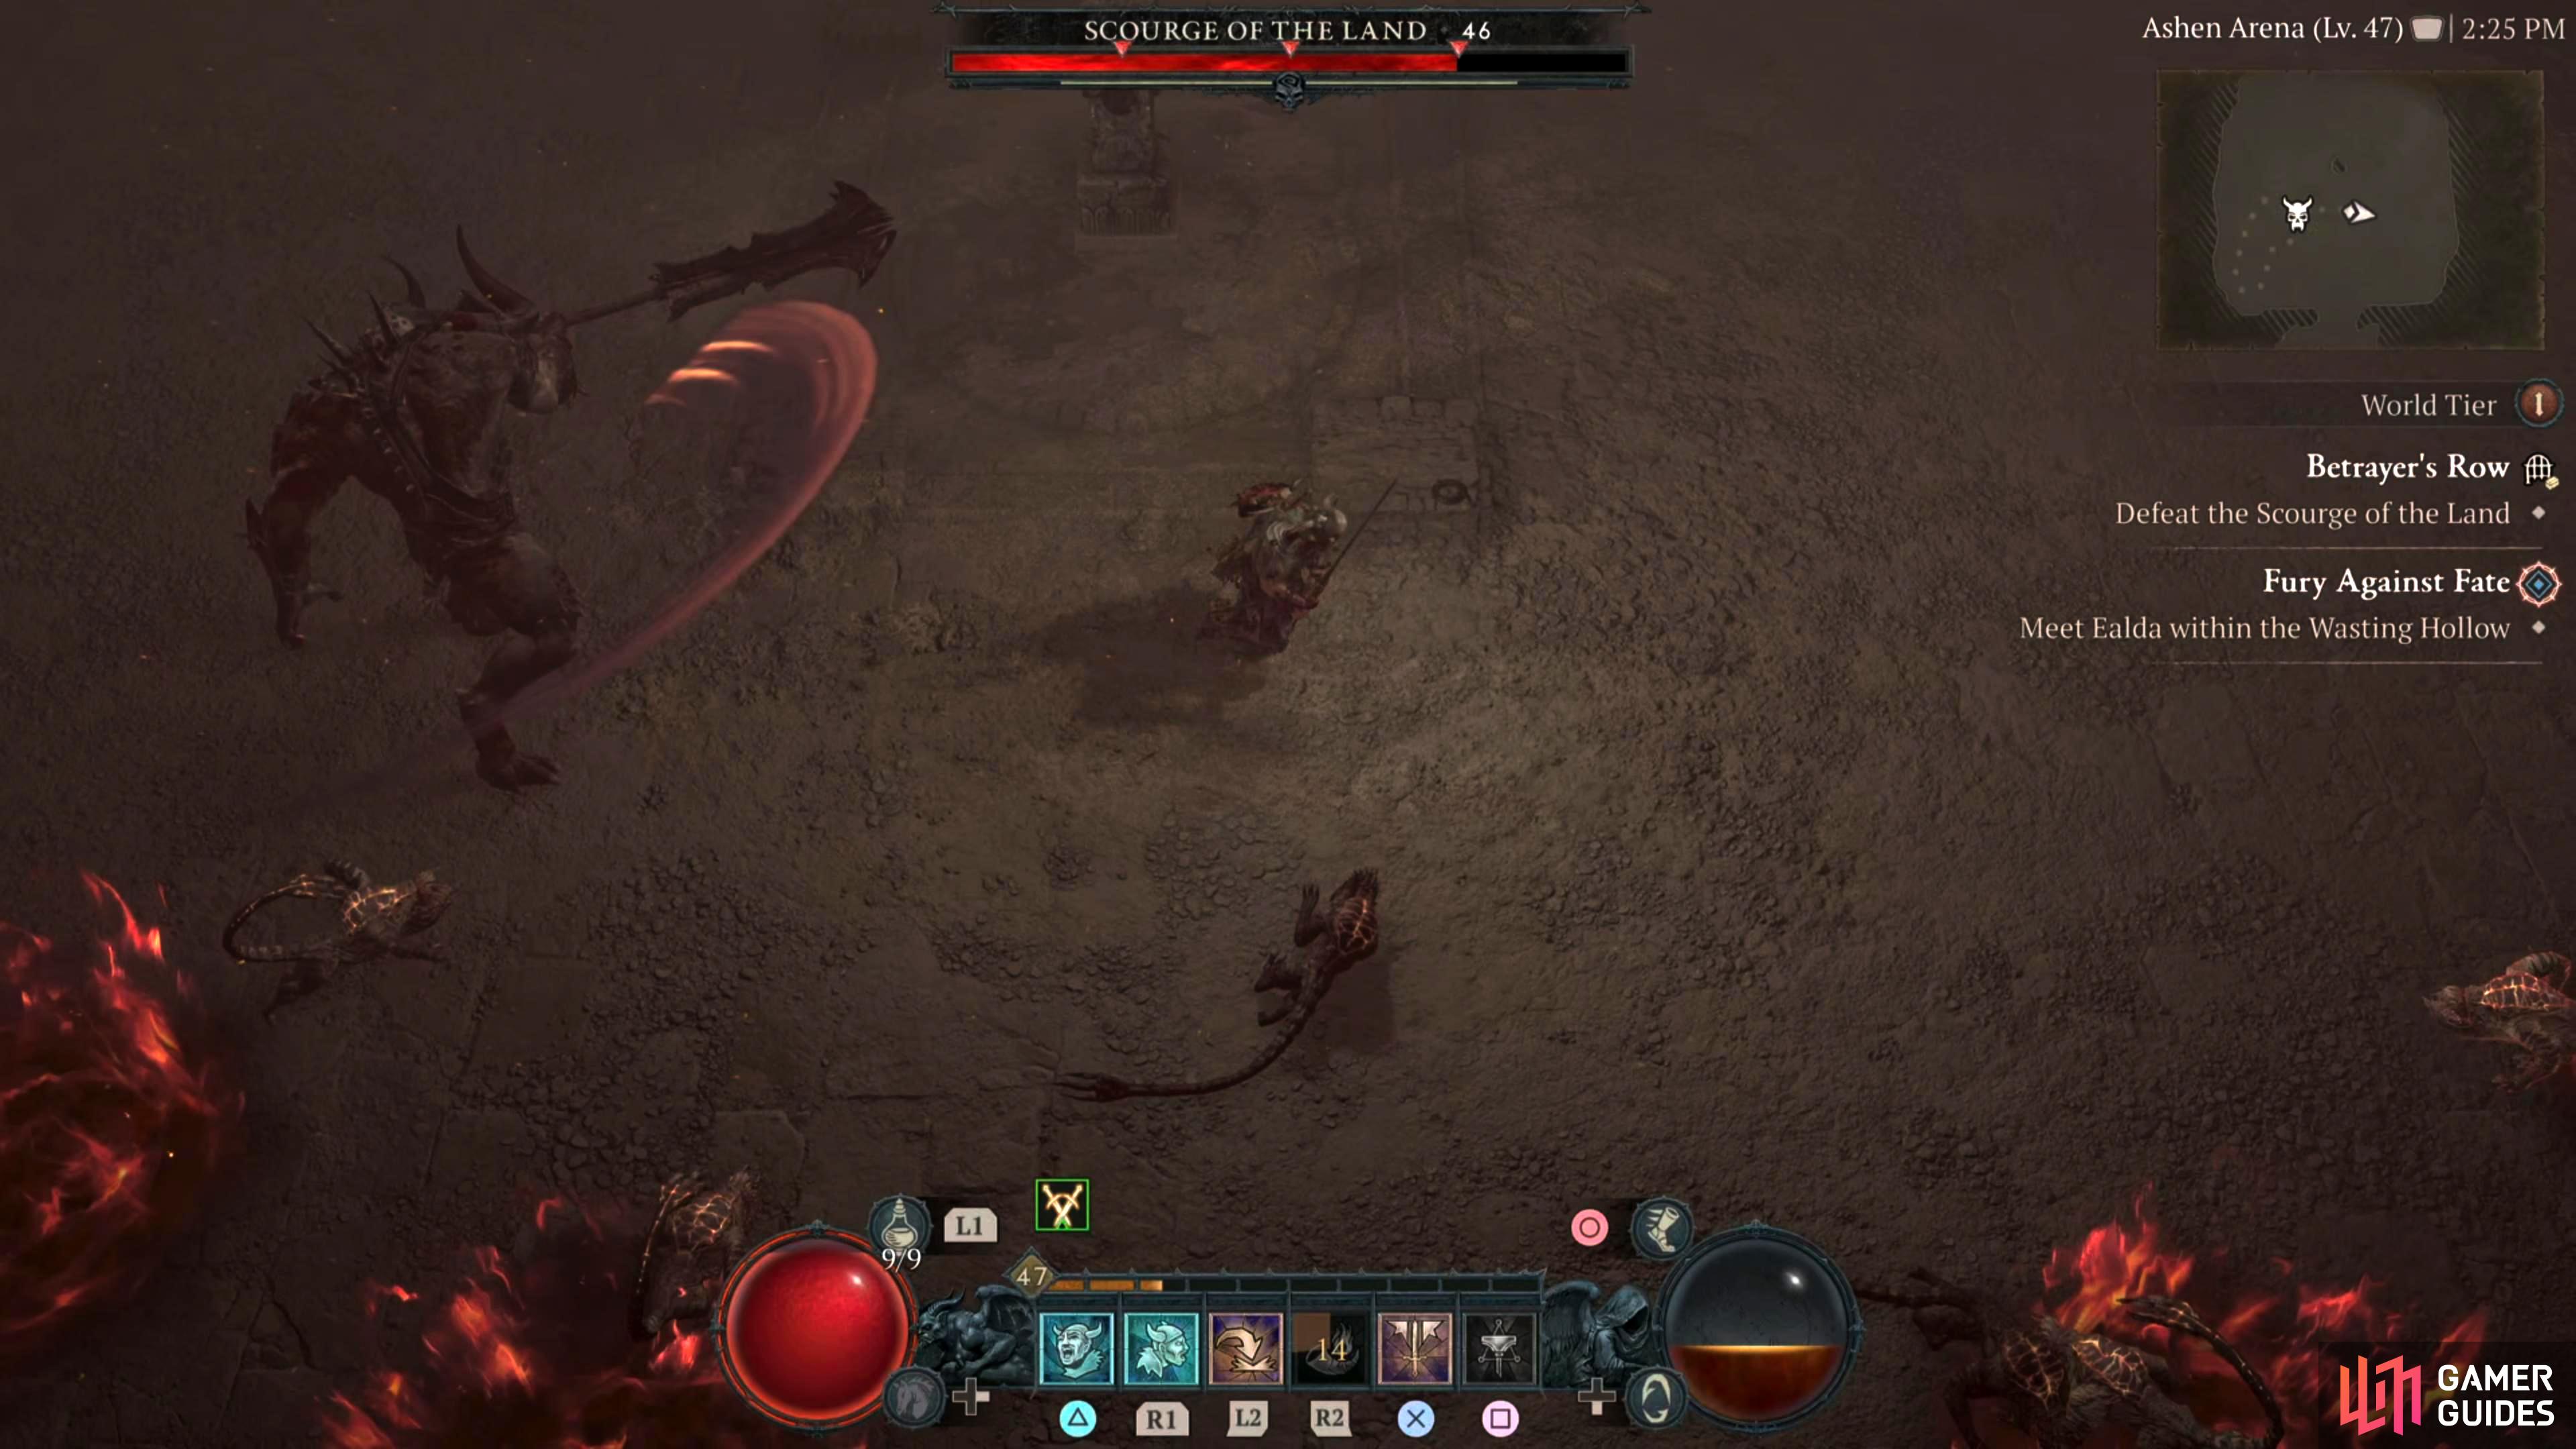
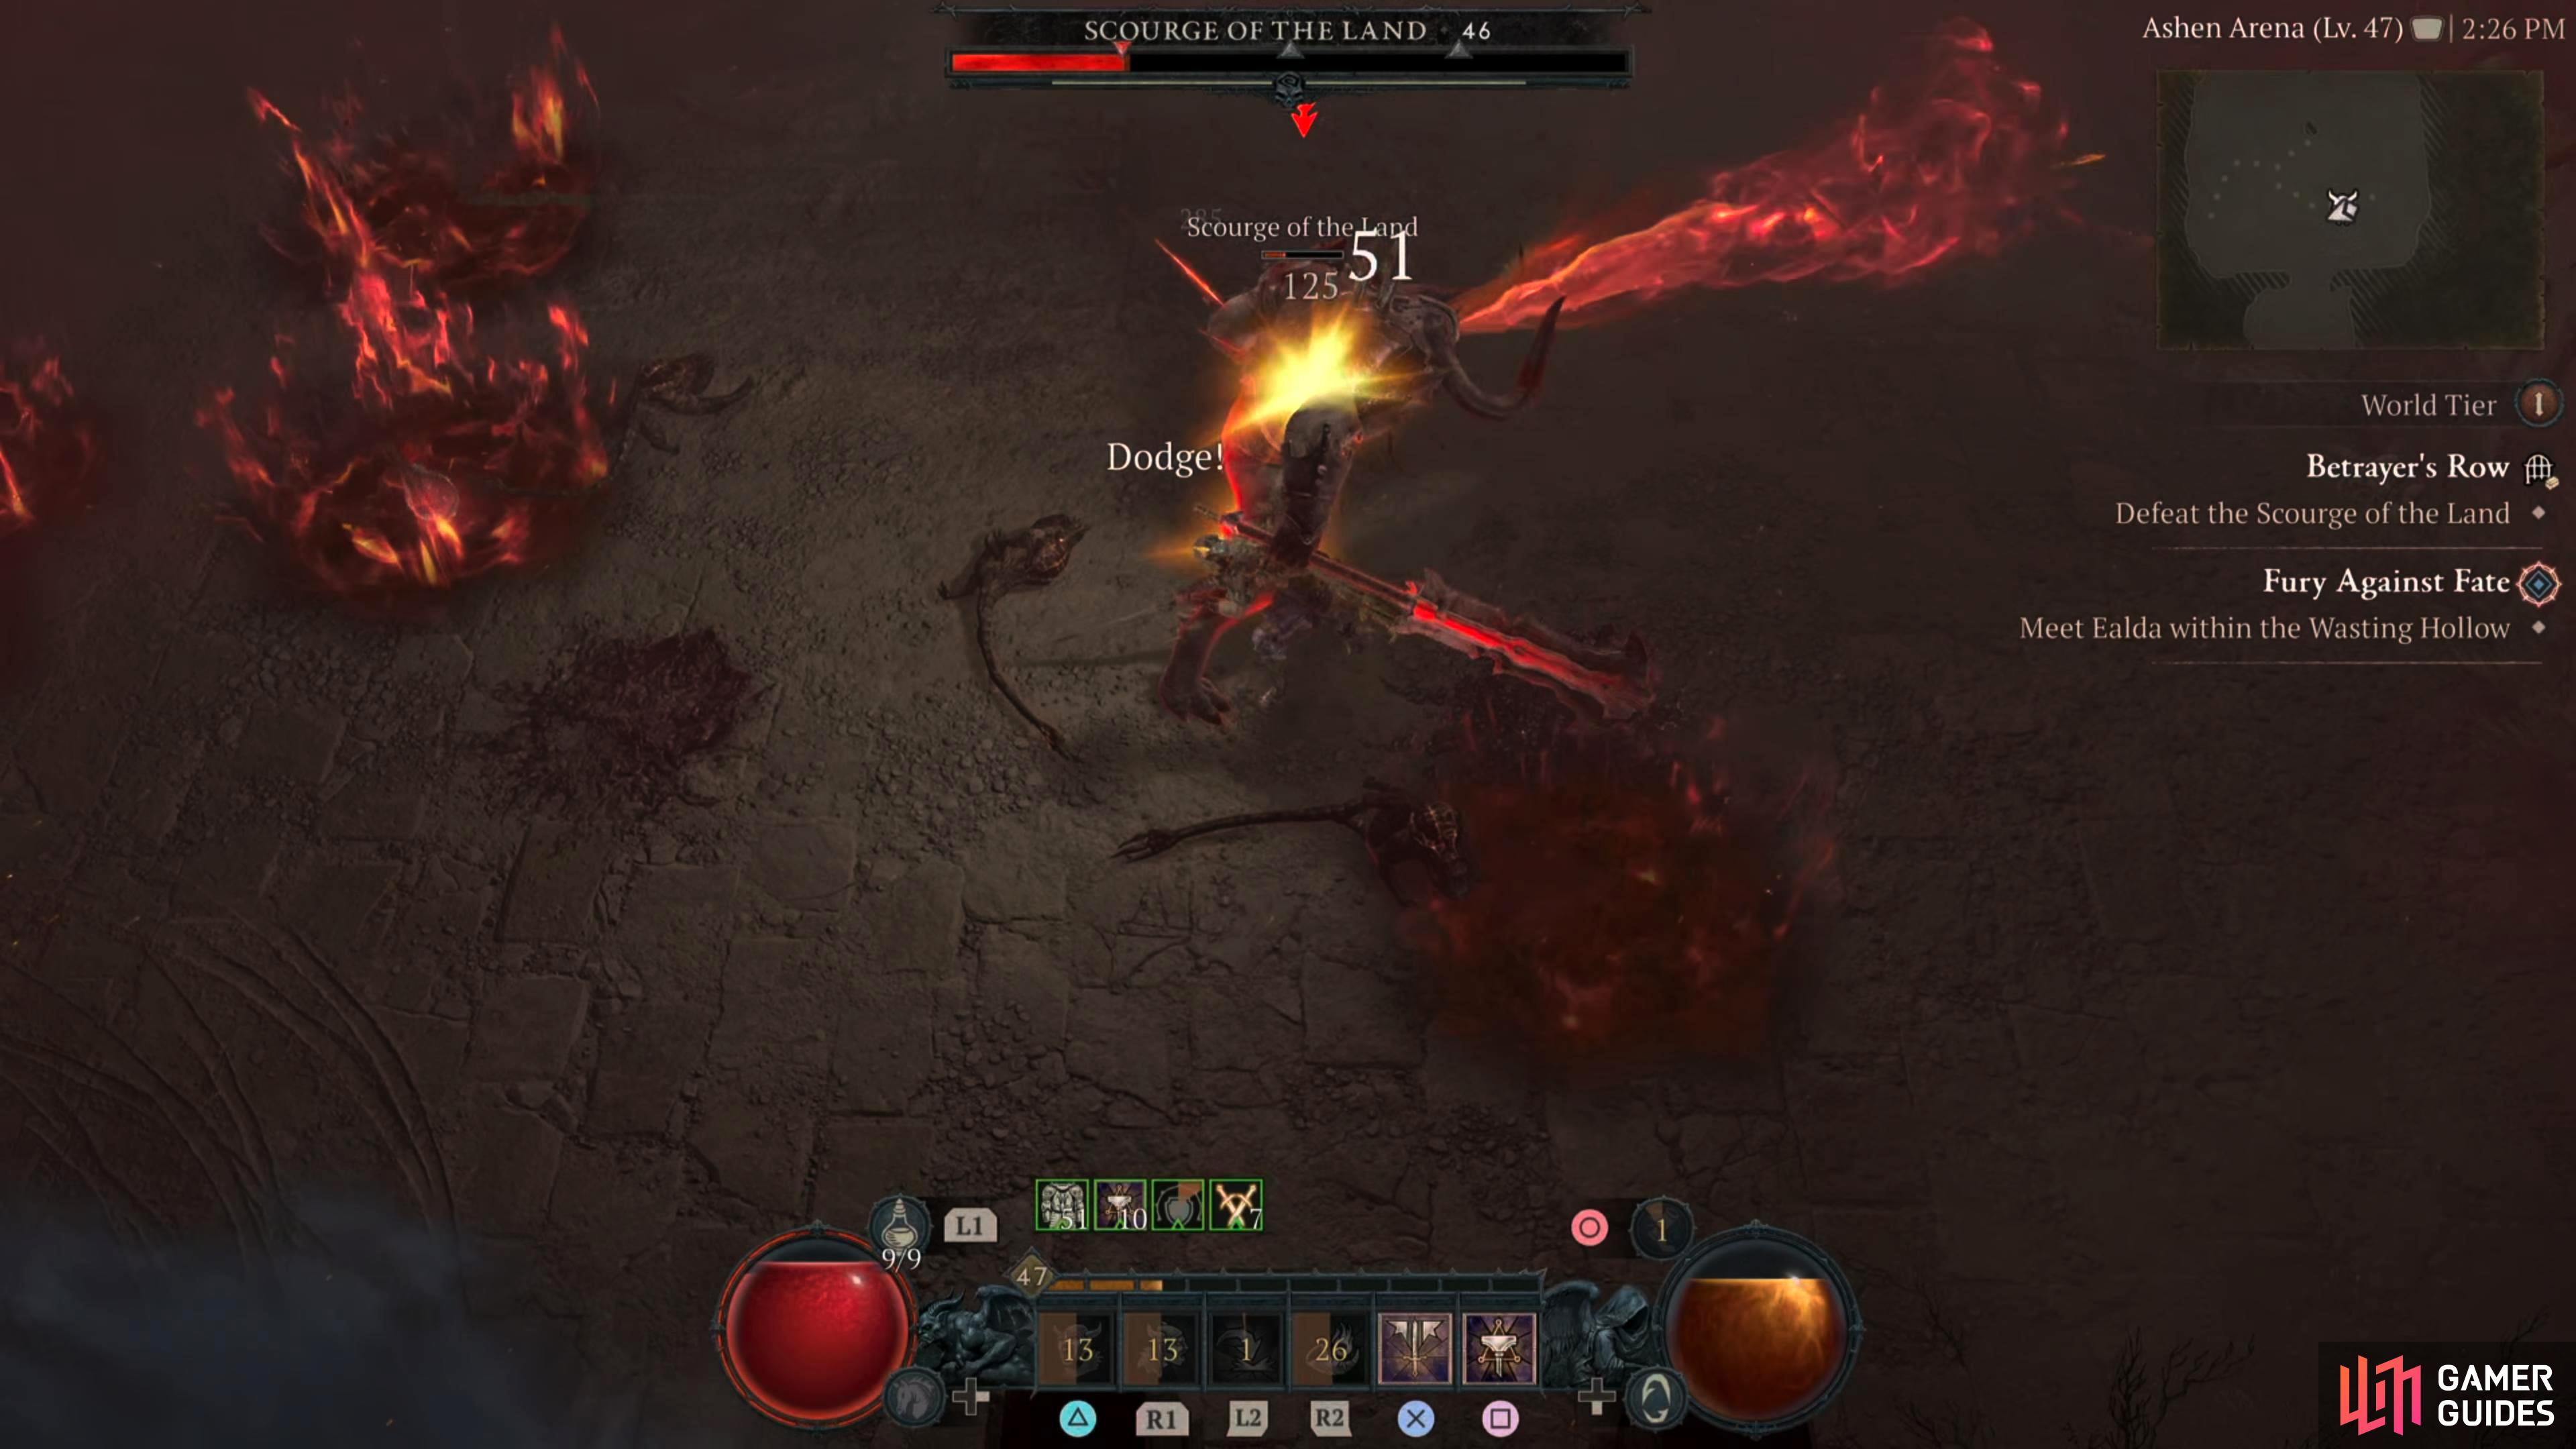
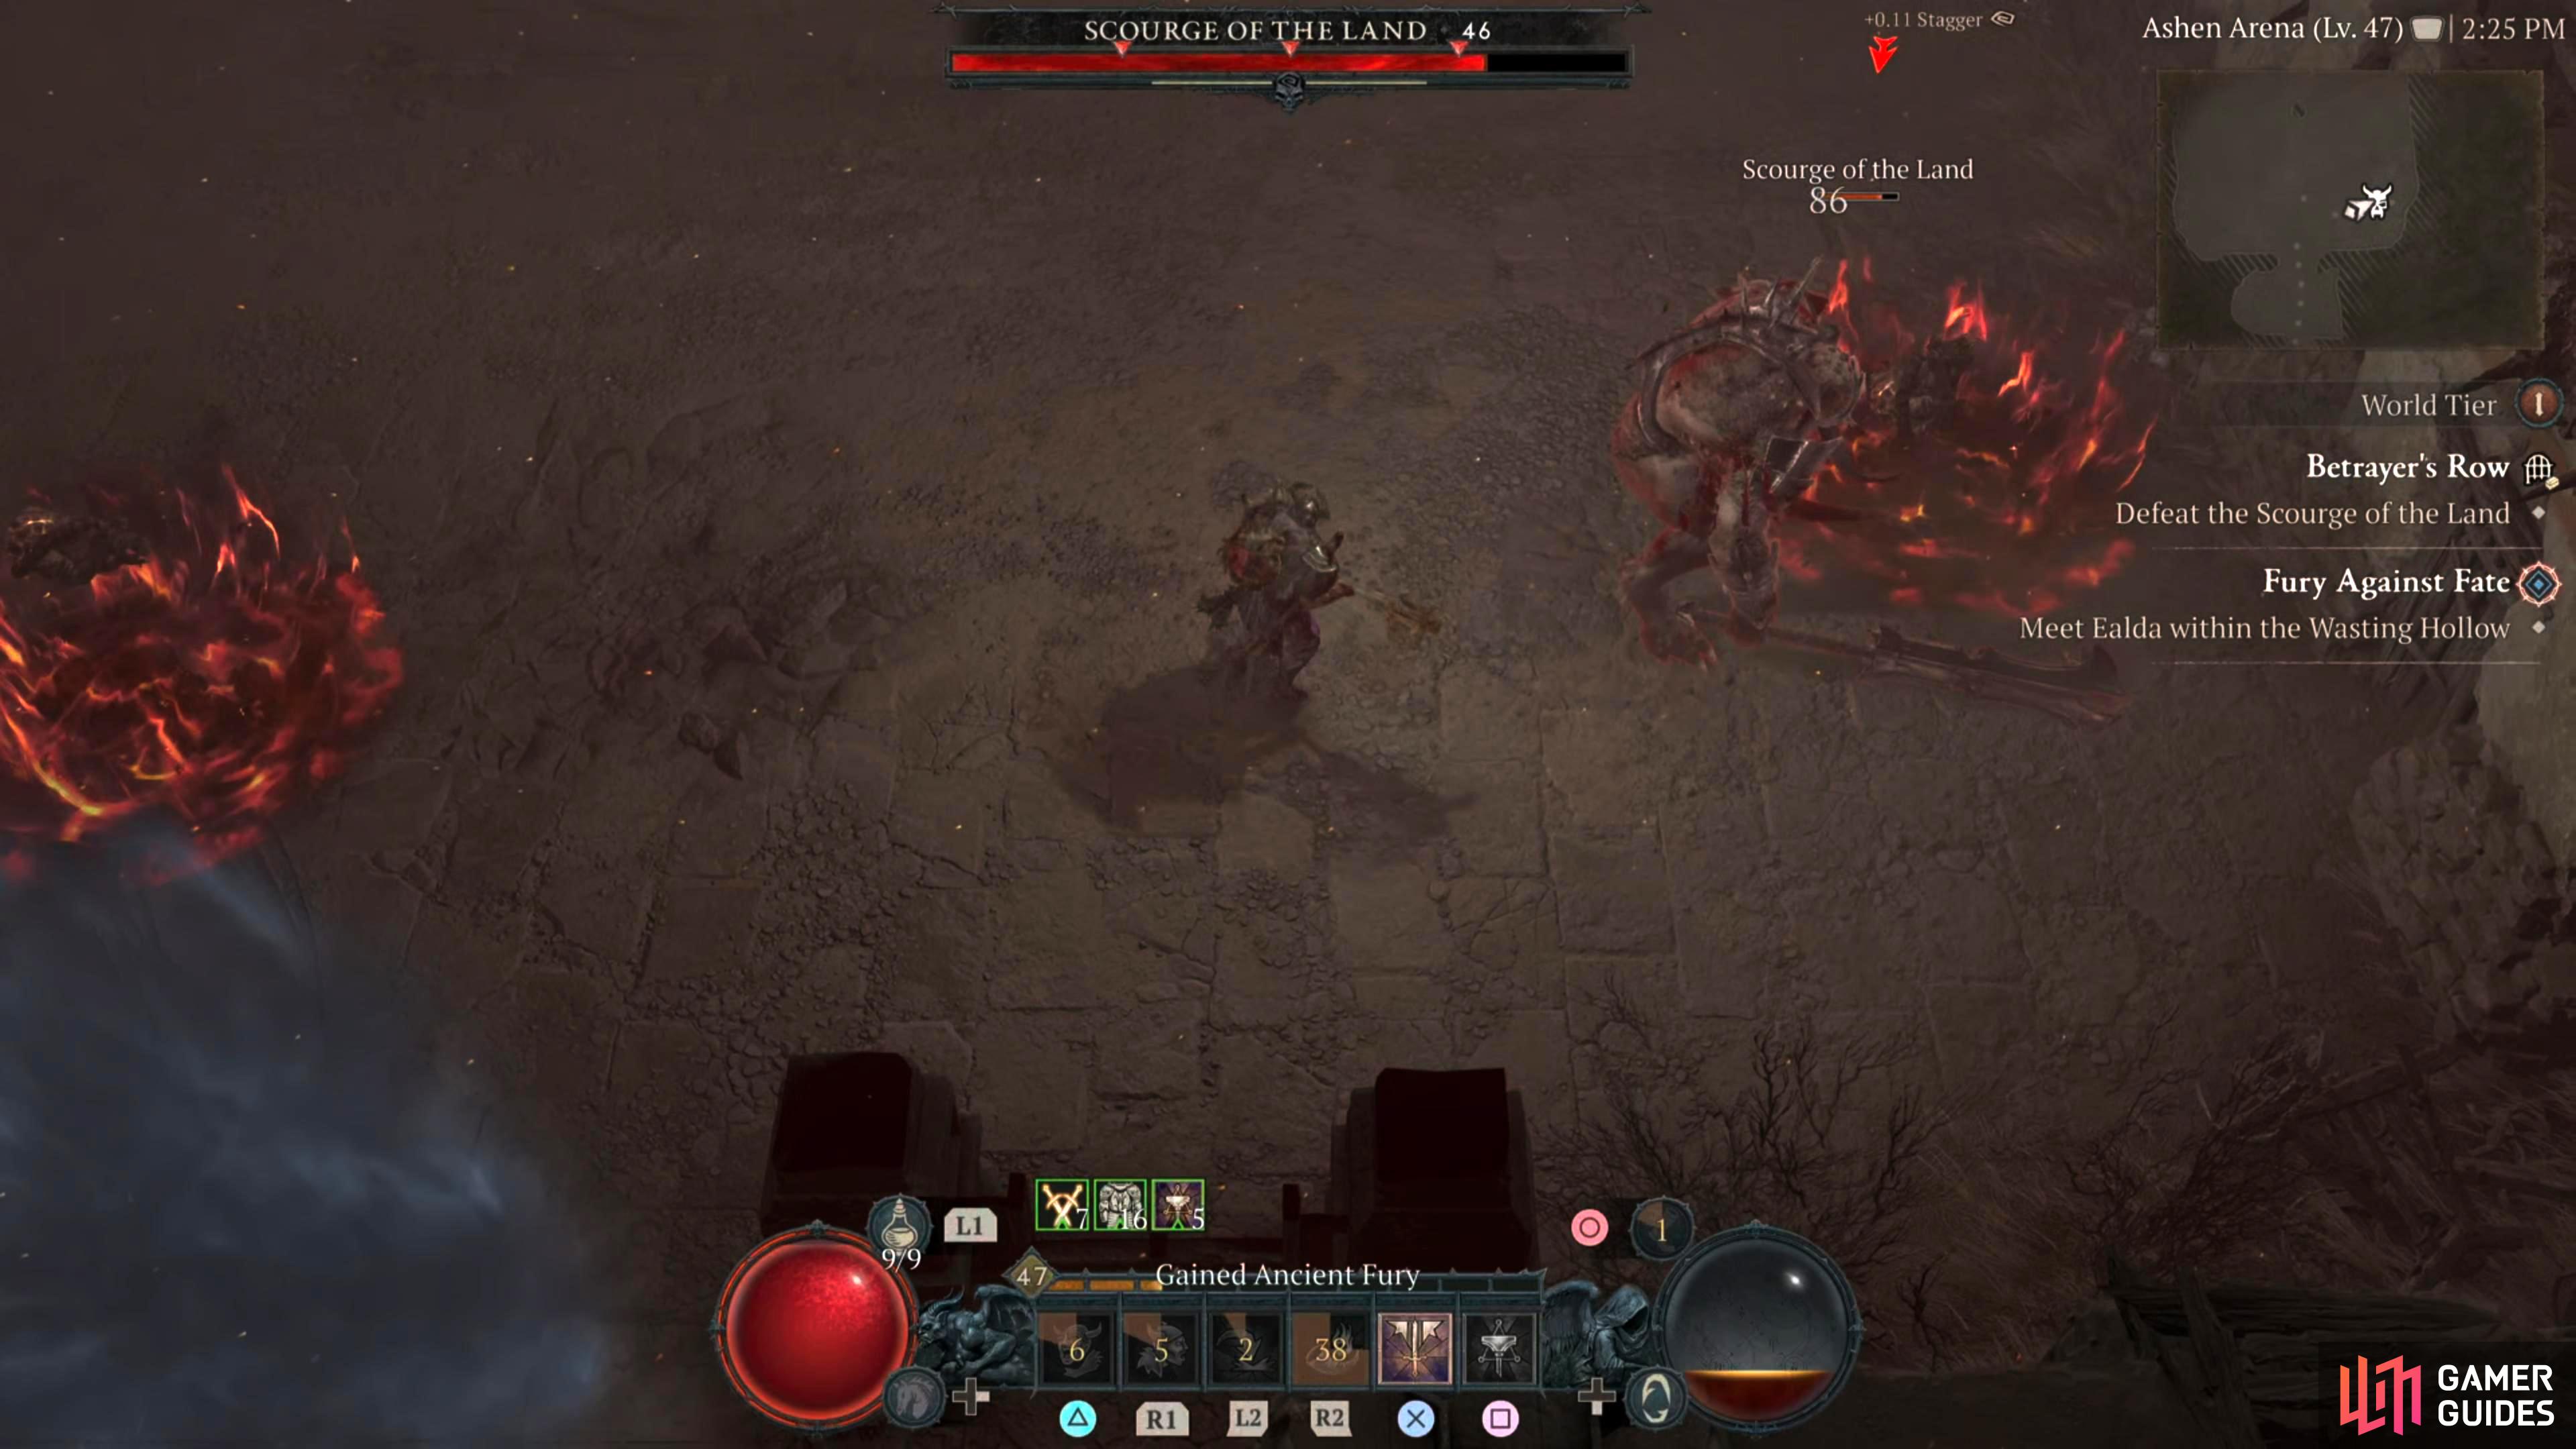
Scourge of the Land is a humanoid-looking demon with two large curved horns protruding from its head. Its hulking stature and gigantic mace are enough to instill fear on any foe.
Description
The Scourge of the Land is a simple boss with only a few attacks. Its attacks are predominantly fire-based, so an Elixir of Fire Resistance can go a long way. For the most part, this fight is a straight-up slugfest with the odd bit of repositioning to avoid the fire puddles it leaves behind. Here is what you can expect from the Scourge of the Land:
Fire Slam - The boss will head over to you and raise its large mace above its head before slamming it down twice in succession. This leaves behind a fire puddle that persists throughout the battle.
Fire Breath - Similar to the Amalgam of Rage story boss attack. The Scourge will stream out fire from its mouth which will last a few seconds. This hurts if you stay in it, but it’s easy to dodge by not standing in front of the boss, the damage doesn’t matter. This is a good time to get some free hits on it.
Demon Summon - Most bosses have something similar, and the scourge is no different. Throughout the battle, it’ll summon various demons to aid it. You can ignore these for the most part unless there are ranged enemies like Succubus where you may want to take them out sooner rather than later.
Sweeping Swipe - This is a generic sweeping swipe attack with its mace that can hit twice in a wide arc. This attack comes at you with speed, and unless you’re adept at dodging, you’ll probably get hit by this. Fortunately, you can just heal through it, or use your damage mitigation tools.
That’s it, a relatively easy boss battle, where as long as you don’t stand in front of it when it’s performing the fire-based attacks, you shouldn’t have any problems. If the fire puddles start covering the arena, move the boss to the other side by simply moving over there as the boss doesn’t have any ranged attacks.
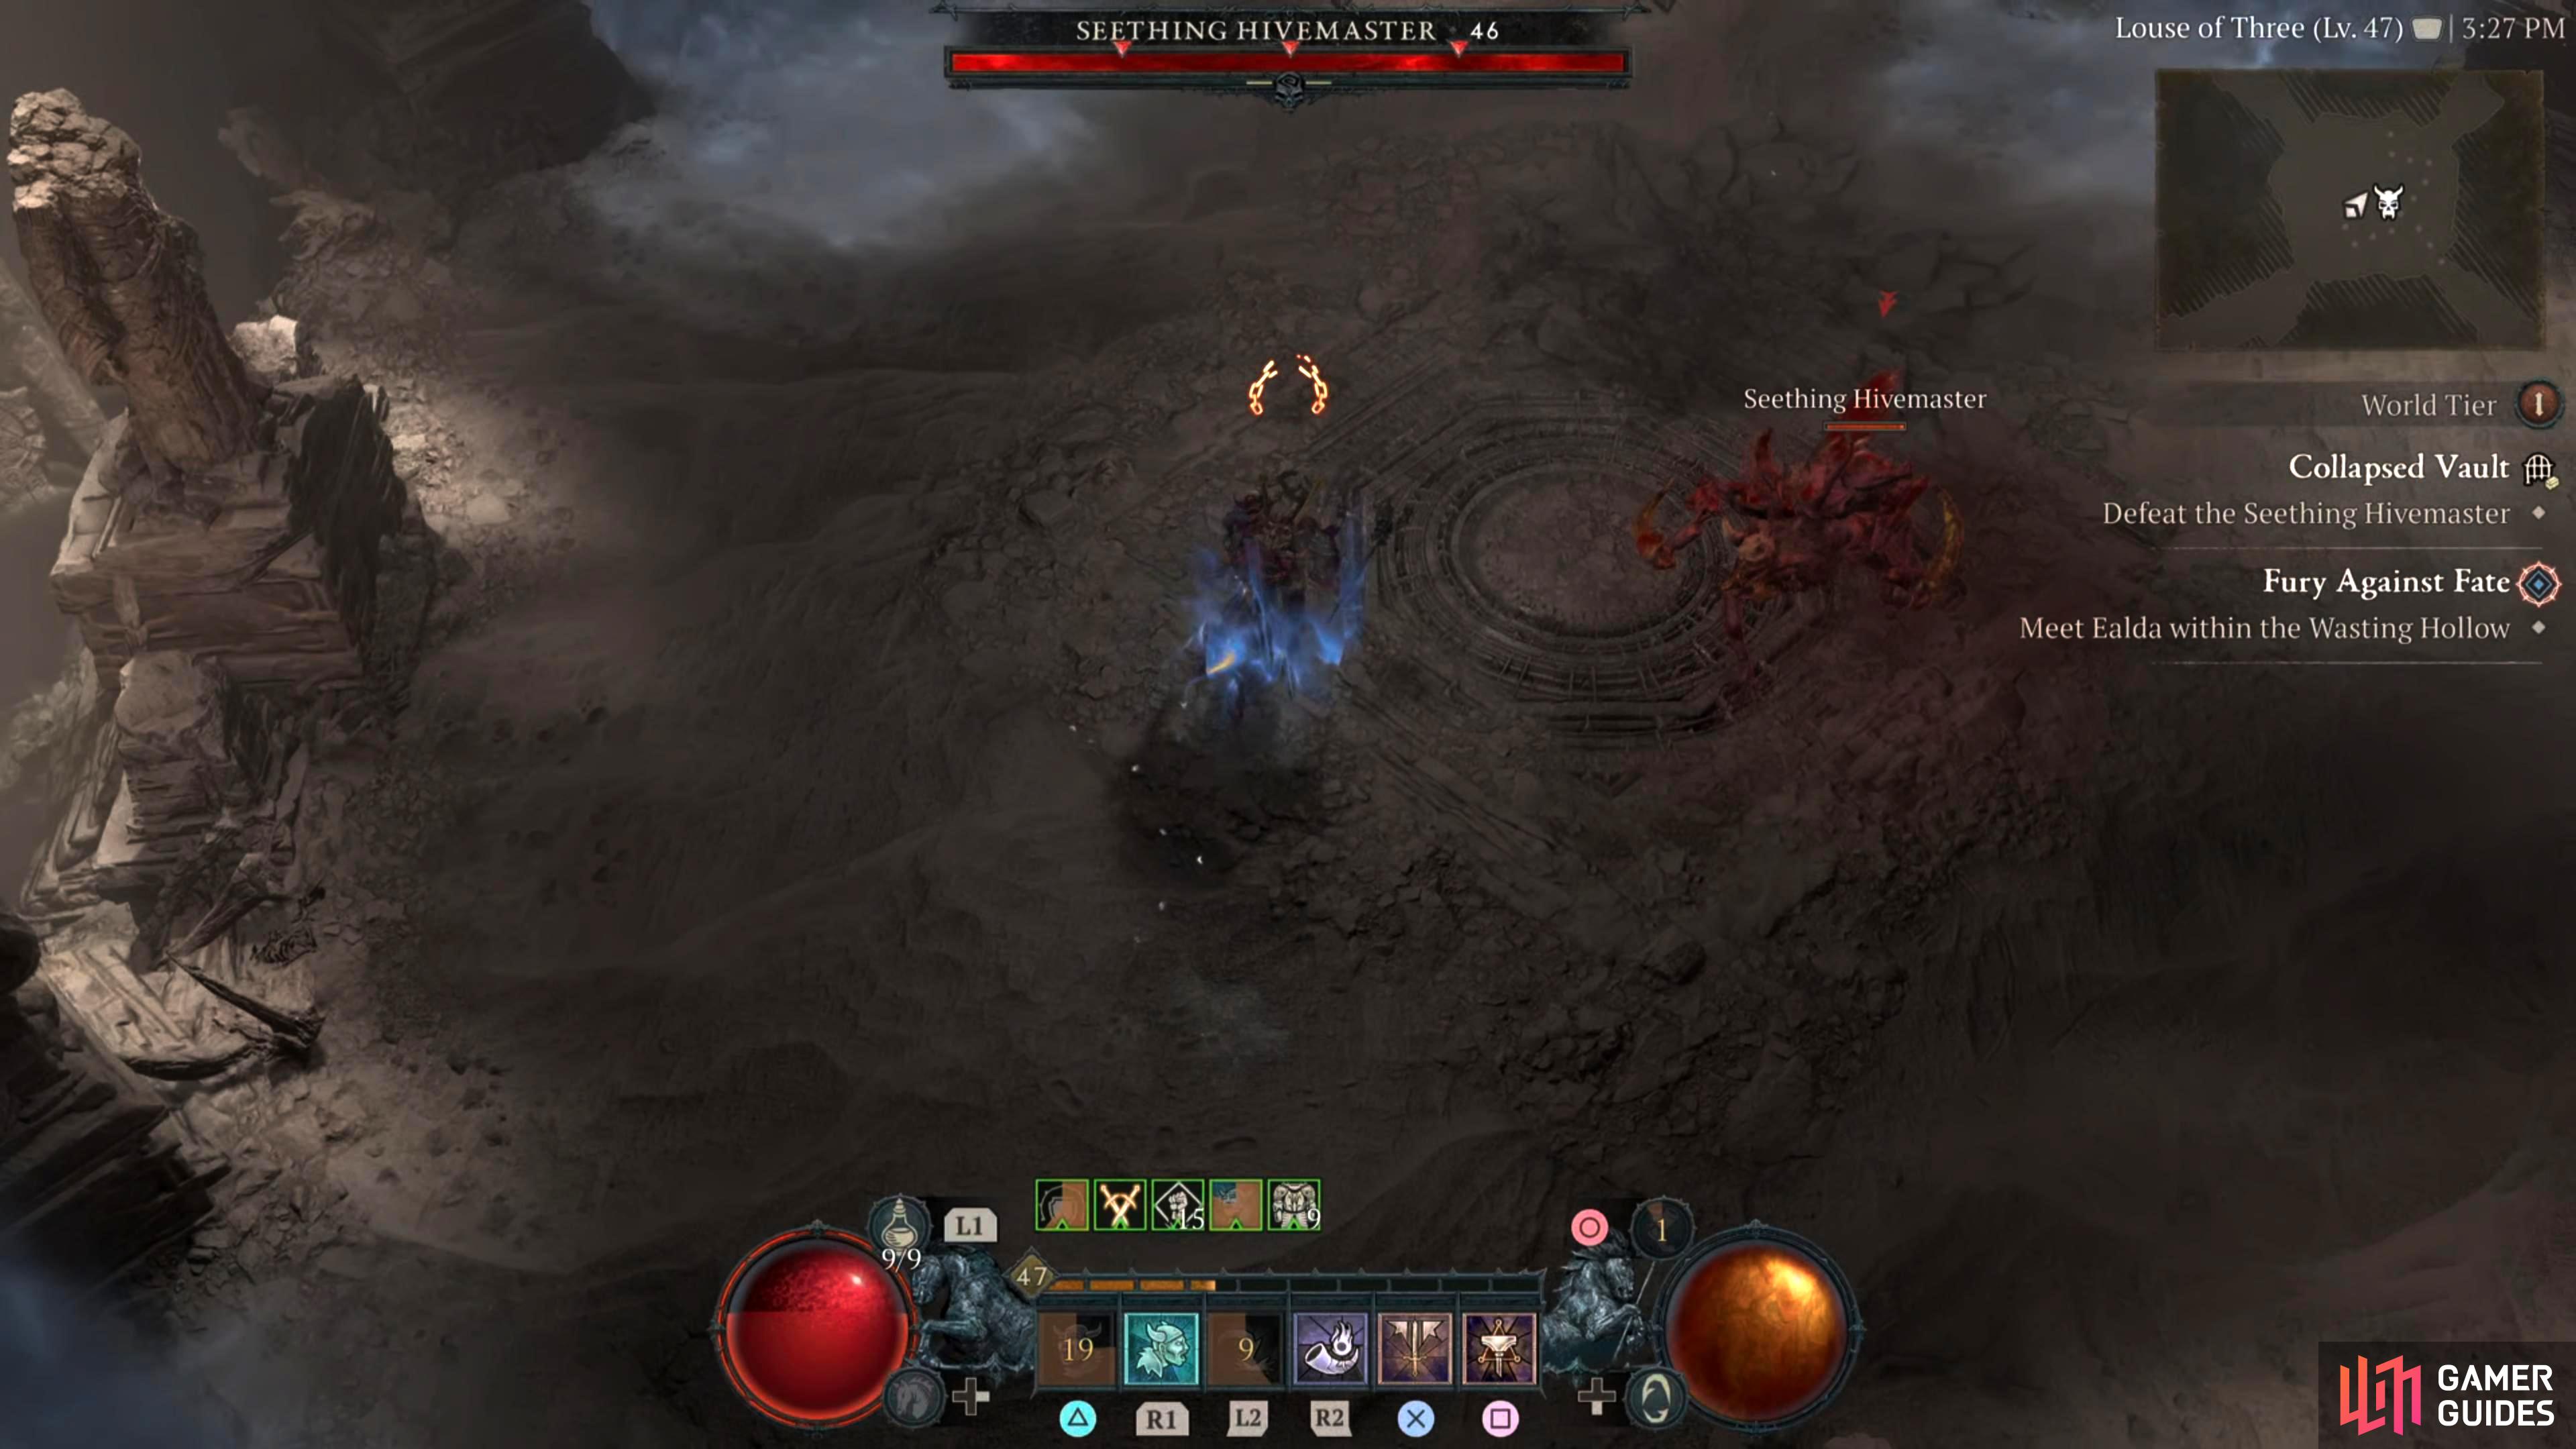
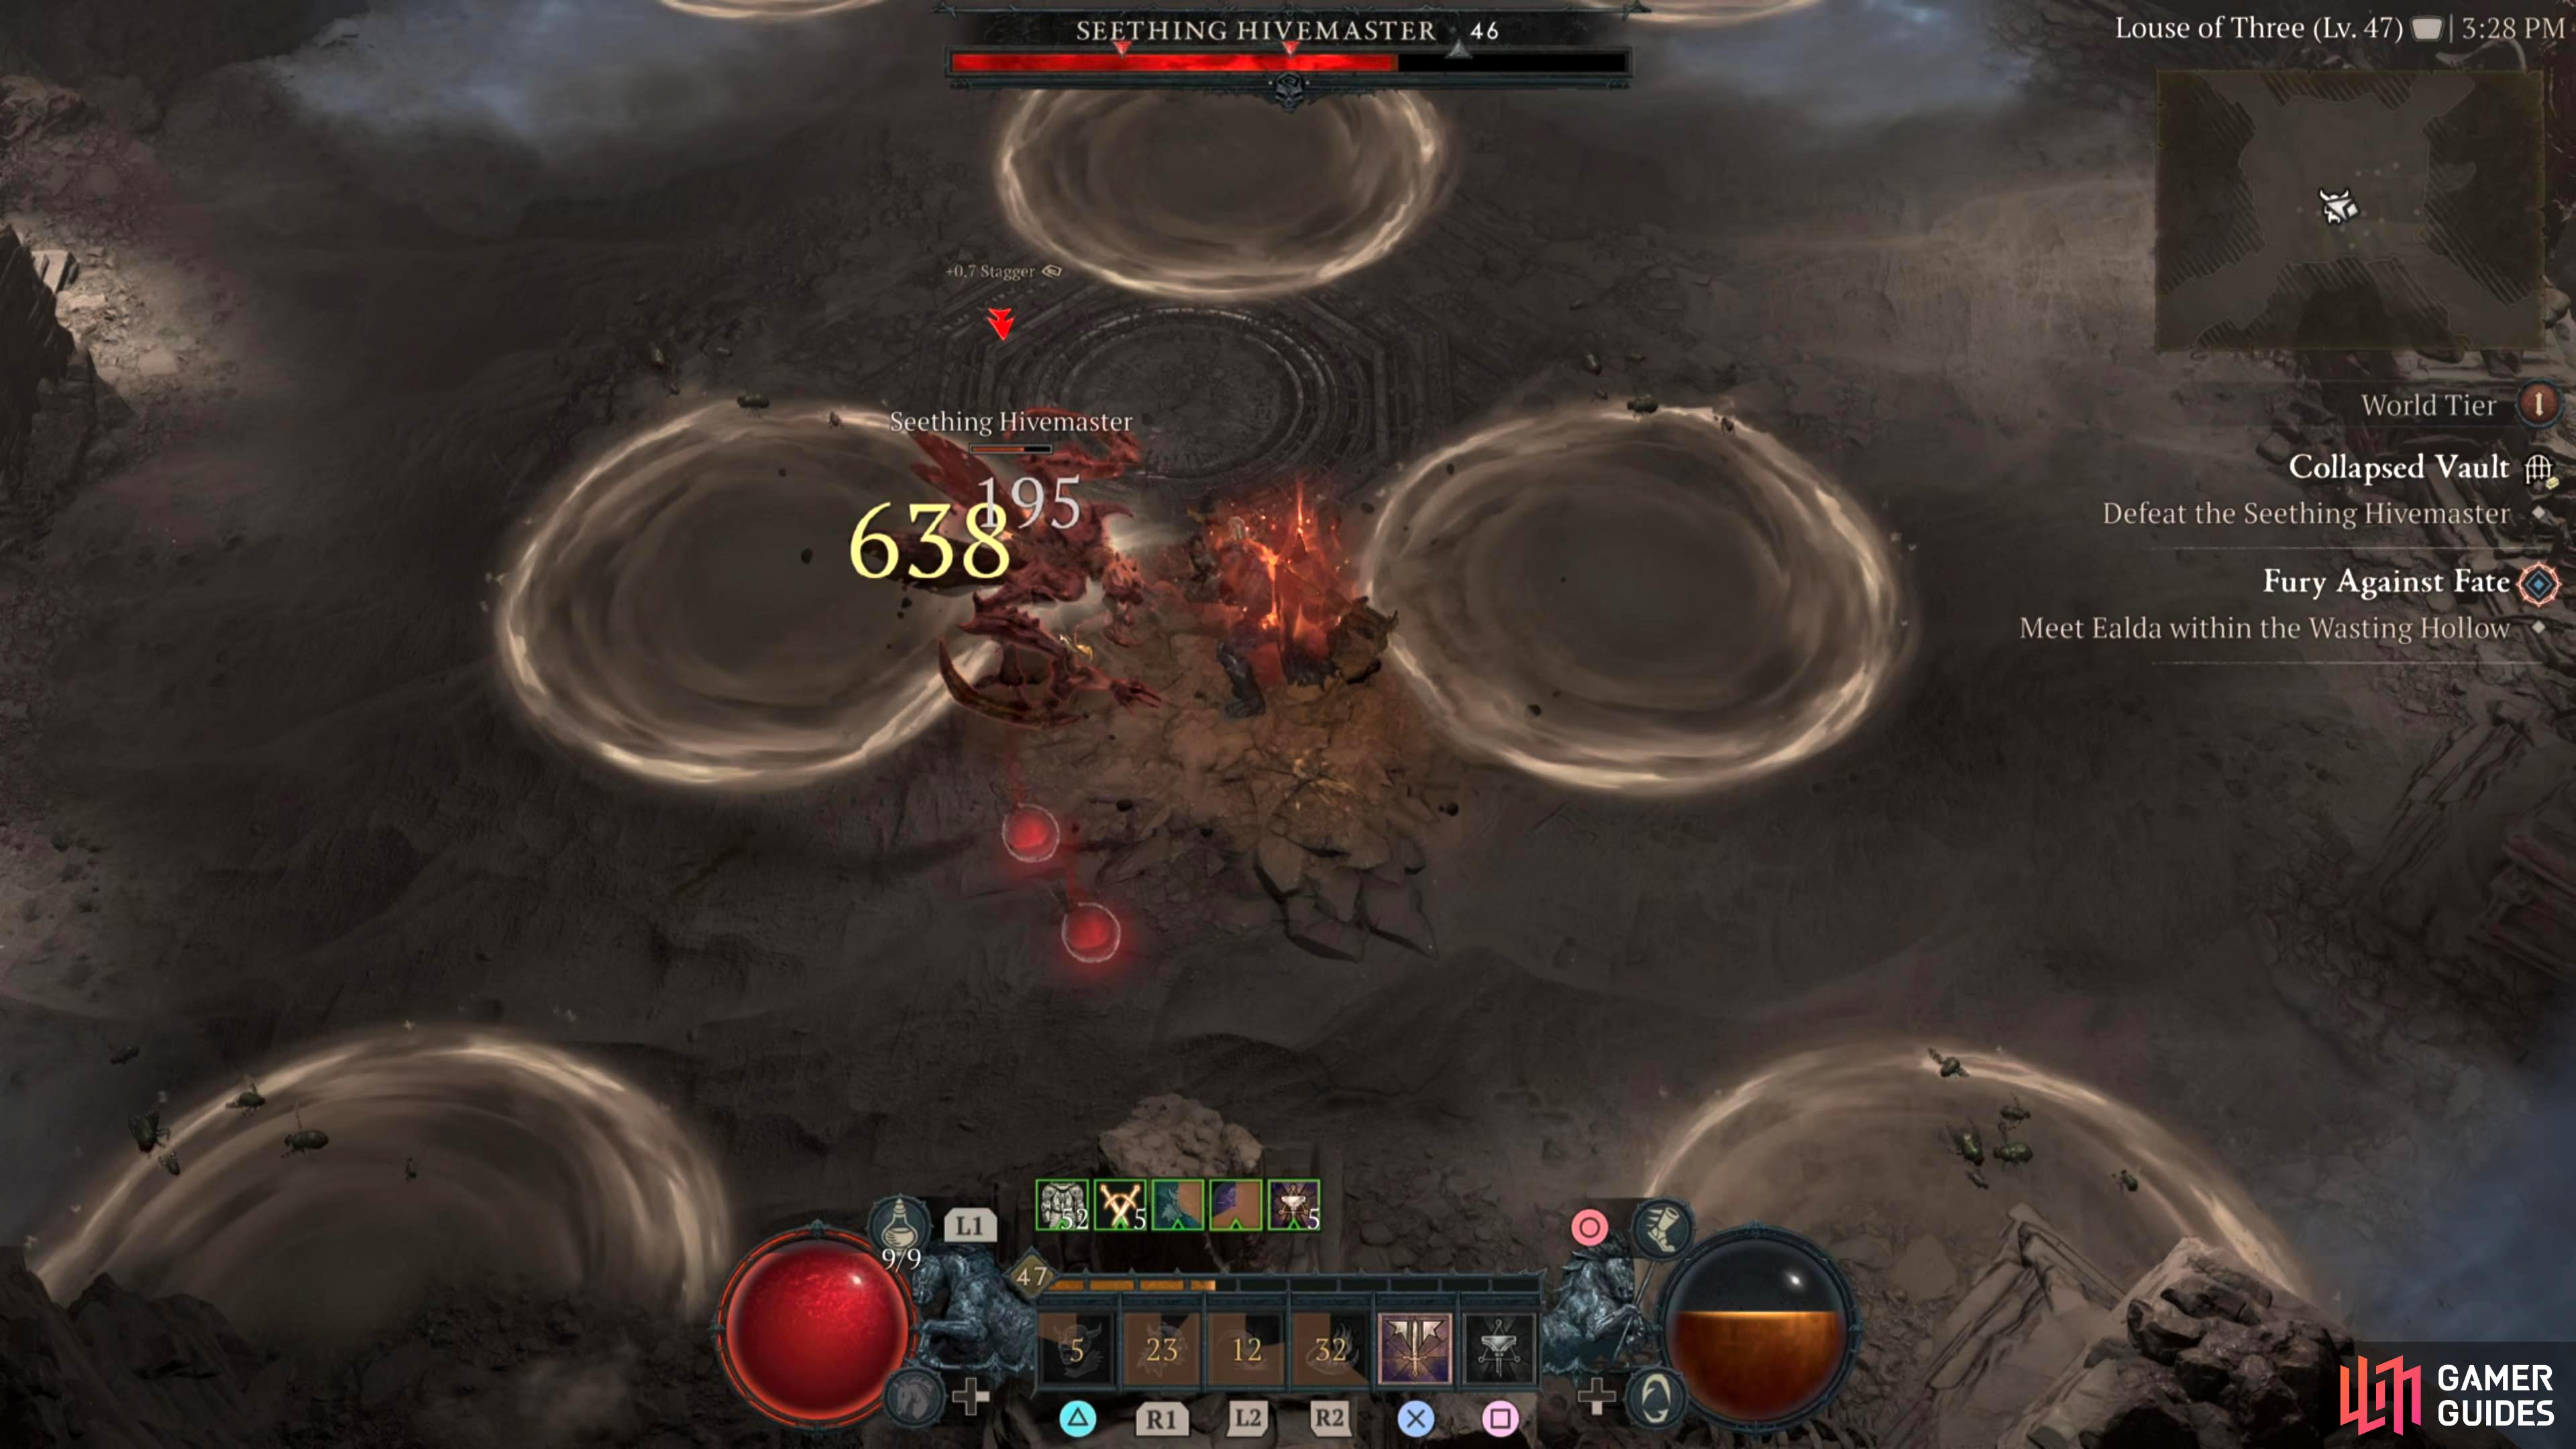
Seething Hivemaster is an insect-type monster that uses its claws, and poison to harm its victims.
Description
There’s quite a bit going on in this battle. Seething Hivemaster has a few frustrating attacks to deal with, and when it’s at 70-80% health it’ll start combining the mechanics which makes it difficult to avoid a lot of its attacks due to the restrictions on your dodge. Poison, and Slow are its predominant statues it likes to inflict, so bringing a Poison Resistance Elixir may help. Here are the attacks that the Seething Hivemaster will use:
Double Slash - This is the boss’ regular attack where it will fling out its claws and perform a double attack with the same claw. You can ignore this attack for the most part.
Poison Barrage - The boss will spew out multiple poisonous projectiles which will aim at your last locations. Run around in a circle around the boss to avoid the attack, dodging if needed too. When the boss has its !Fly Swarms out on the arena, this is a lot more difficult to avoid as you’ll need to navigate around the swarms while avoiding the barrage.
!Fly Swarms - At around 70-80% the boss will place several gray/white circles that contain !Fly Swarms in them that will drain your health and slow you down whenever you pass over/through them. After a brief period they will begin to move back and forth in a small circle from their position. This persists throughout the battle. There isn’t any trick to this attack other than avoiding them, and they’re more of a nuisance than a damaging attack.
Tri-Abomination - Seething Hivemaster will summon three Skittering Abominations in a triangle-like shape before they all unleash a stream of poison/blood at your current location. This attack can be a pain to deal with while you’re fighting the boss, but you want to dodge any cardinal direction just as they’re about to fire off the projectiles.
The flow of the battle will be, evade the Poison Barrage attack at all costs then striking the boss in a central area while moving whenever the !Fly Swarms are about to hit you. While dealing damage to the boss, keep an eye out for the Skittering Abominations, and have a dodge ready to avoid the attack. Classes that have good burst, and/or good movement speed will shine in this battle.
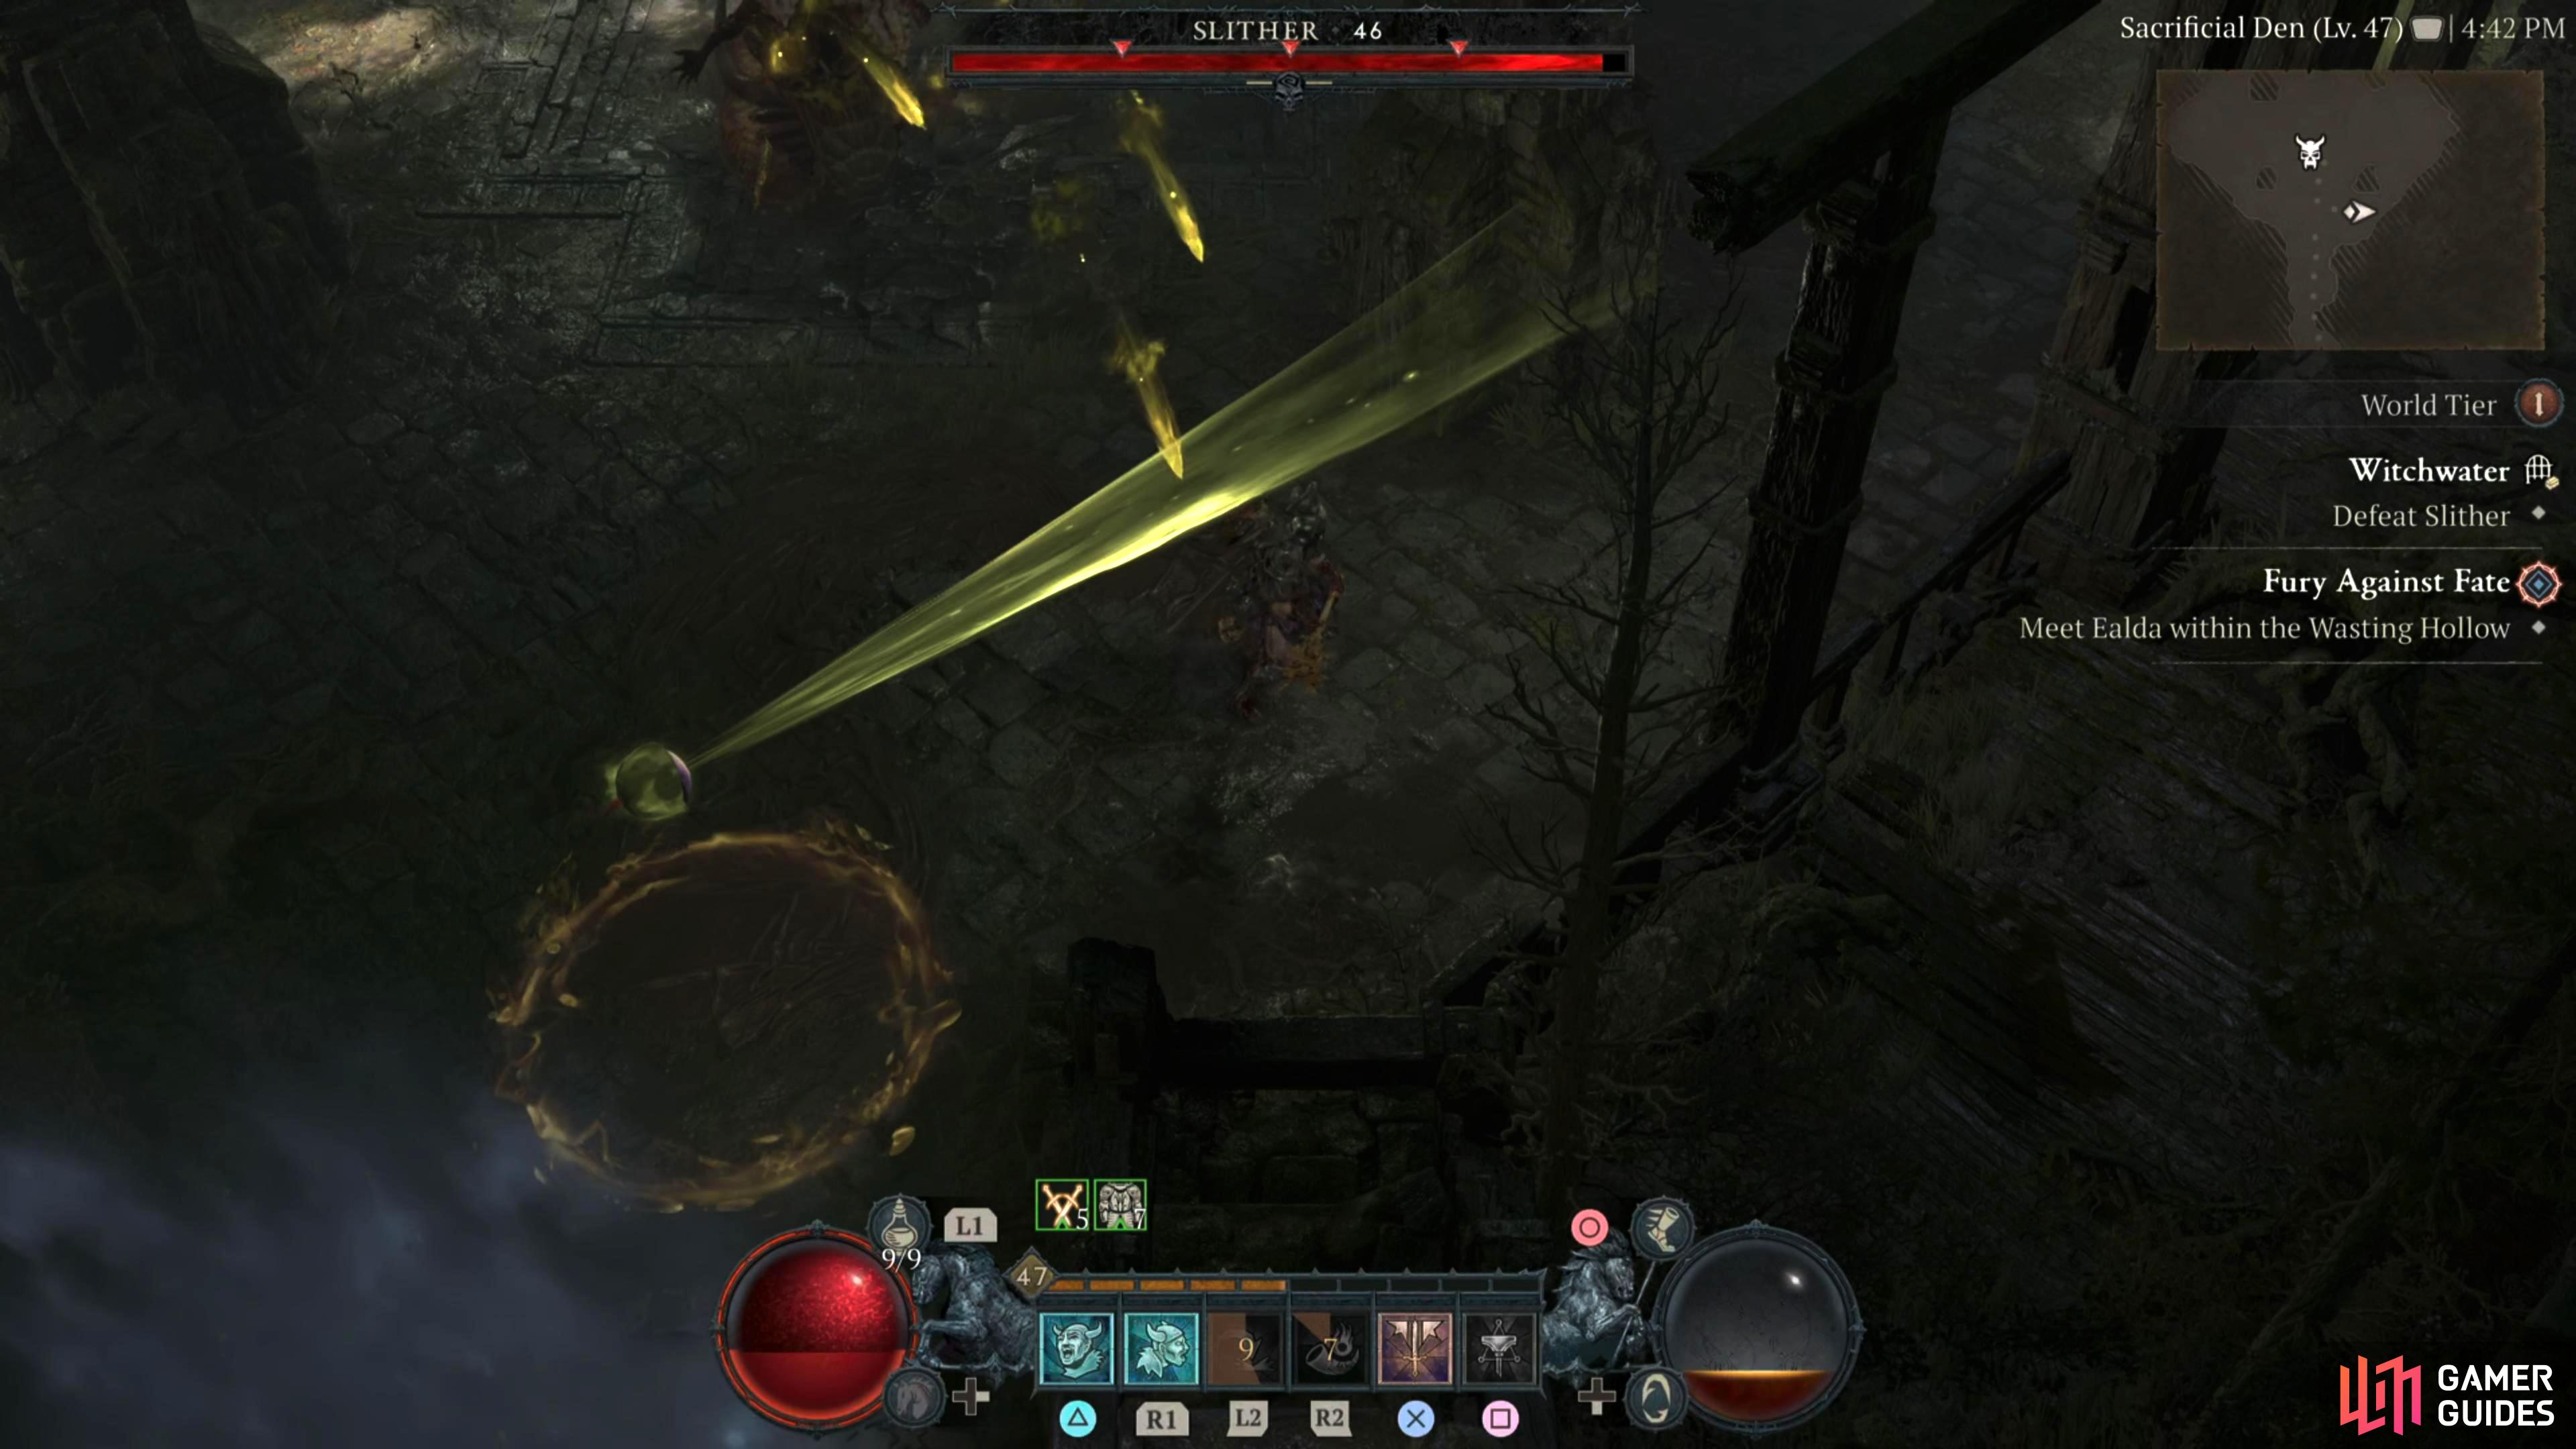
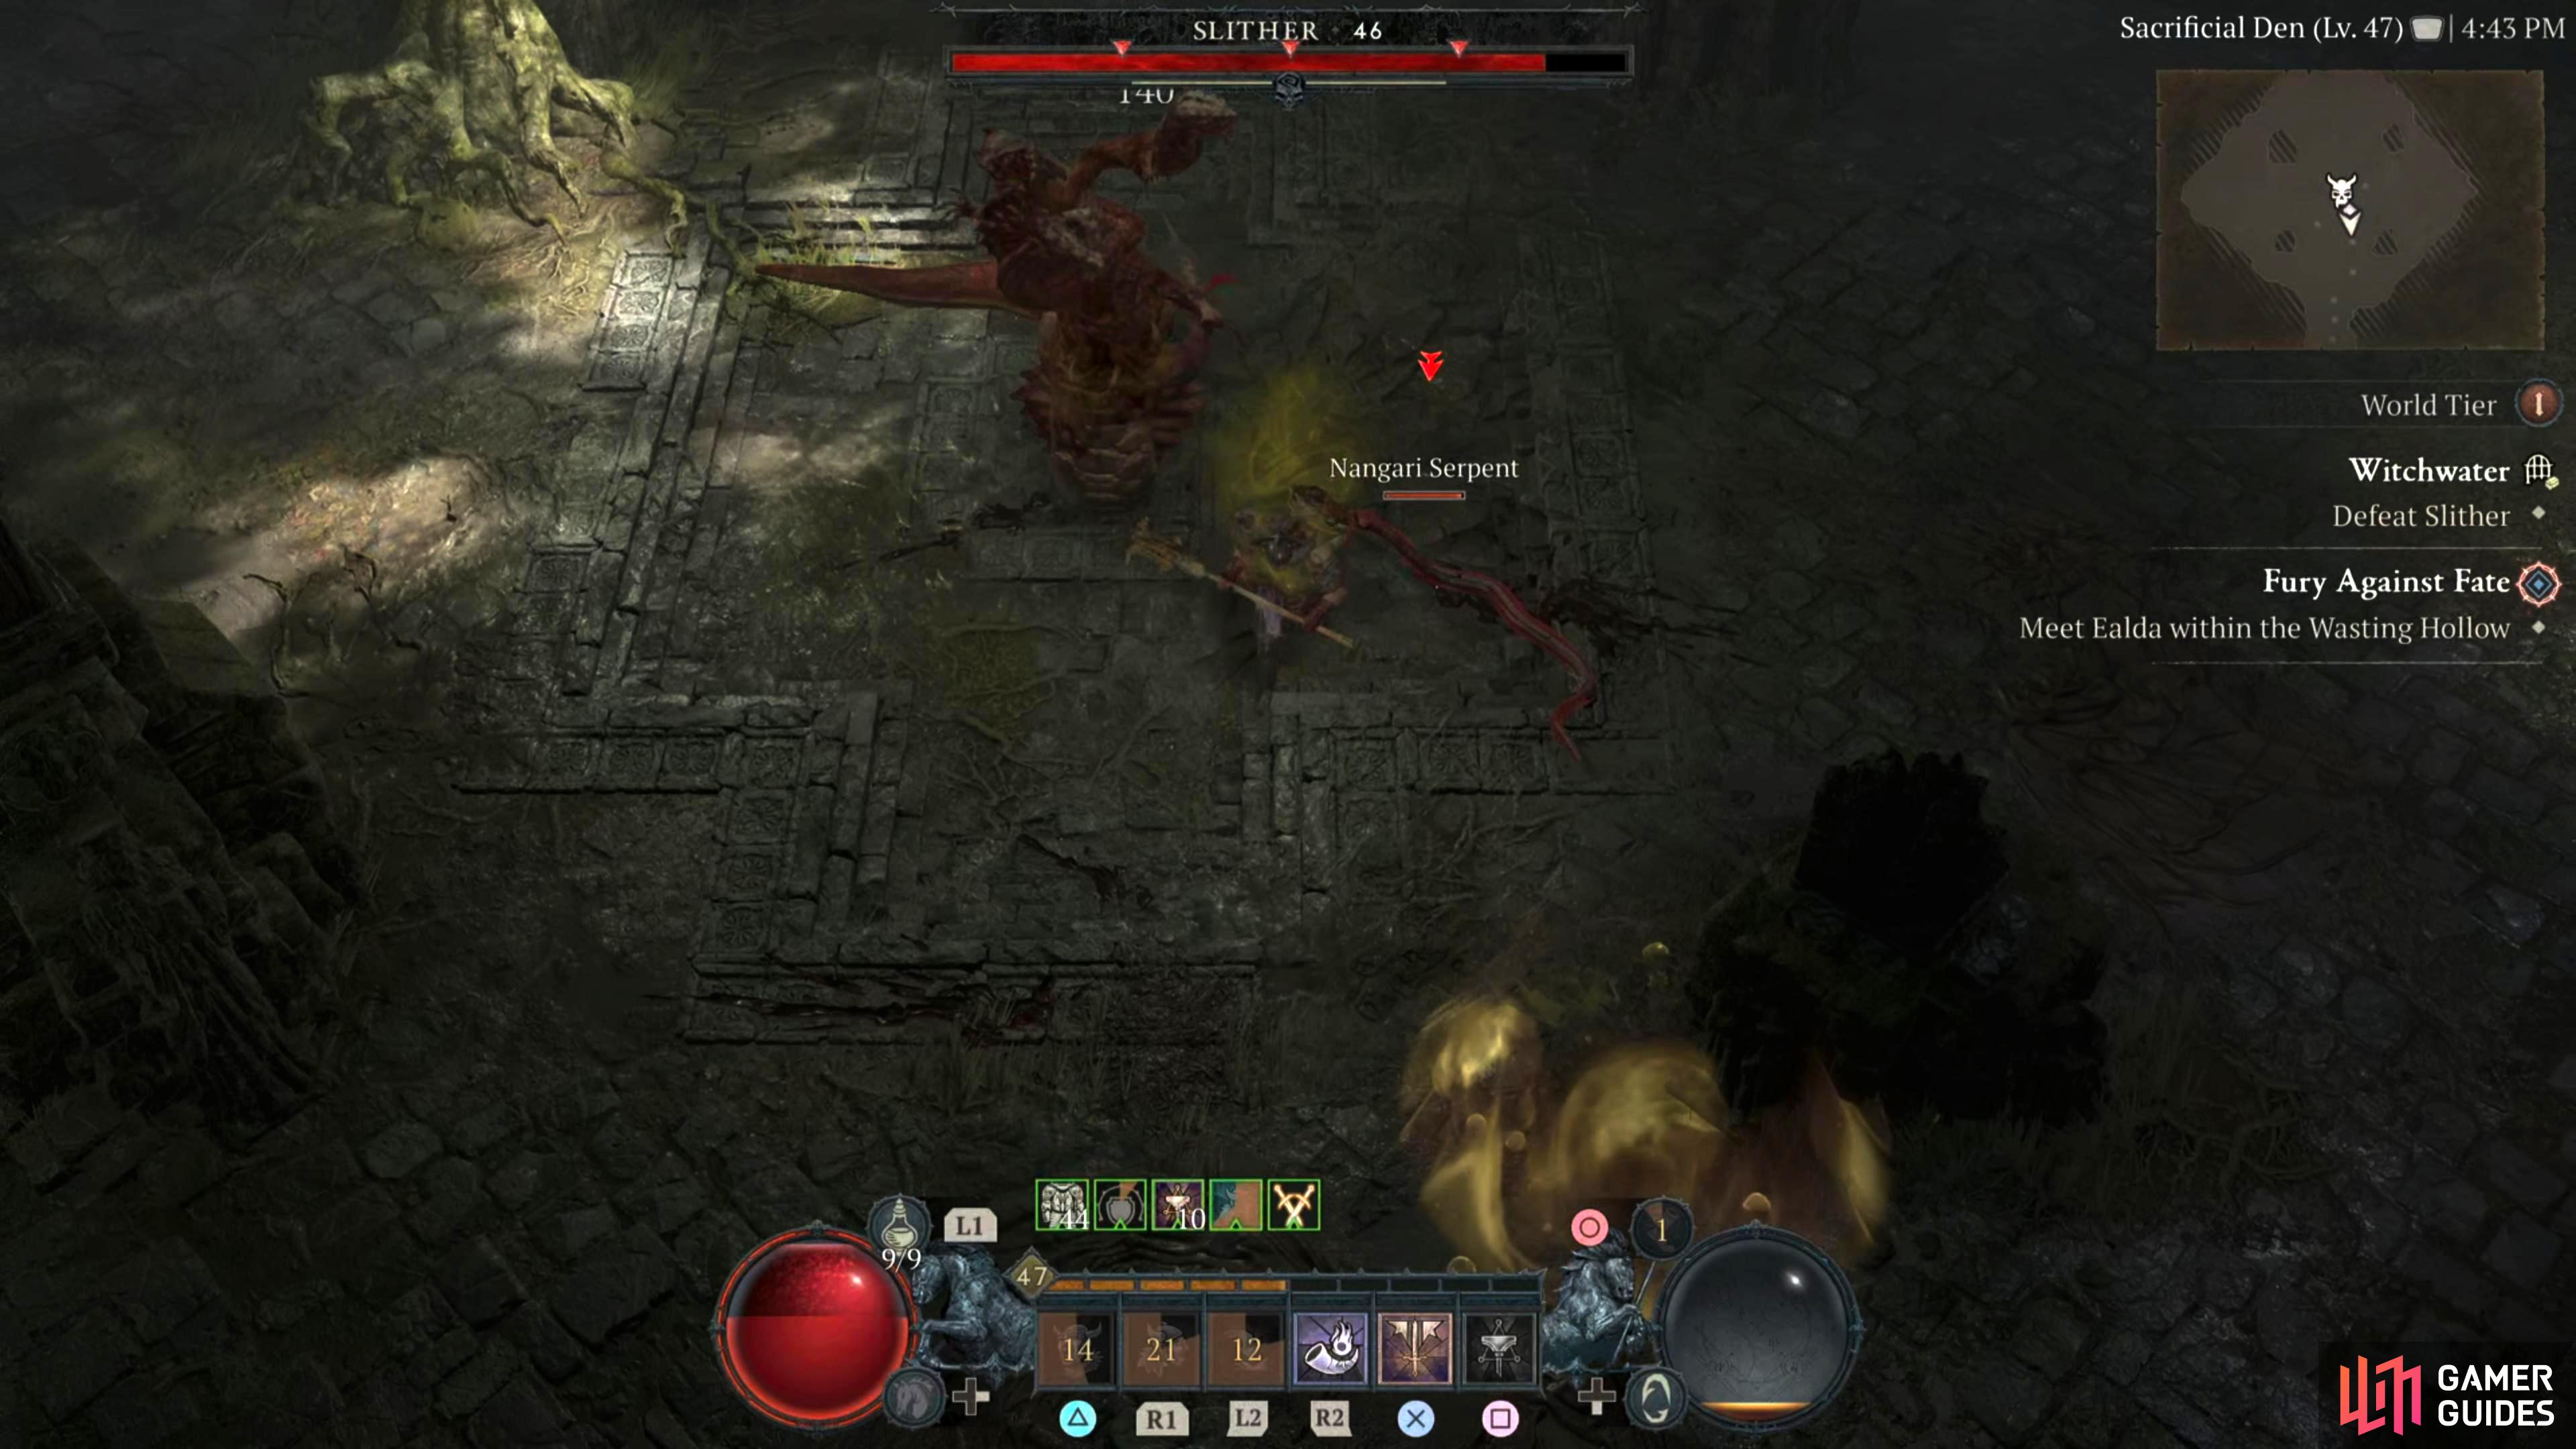
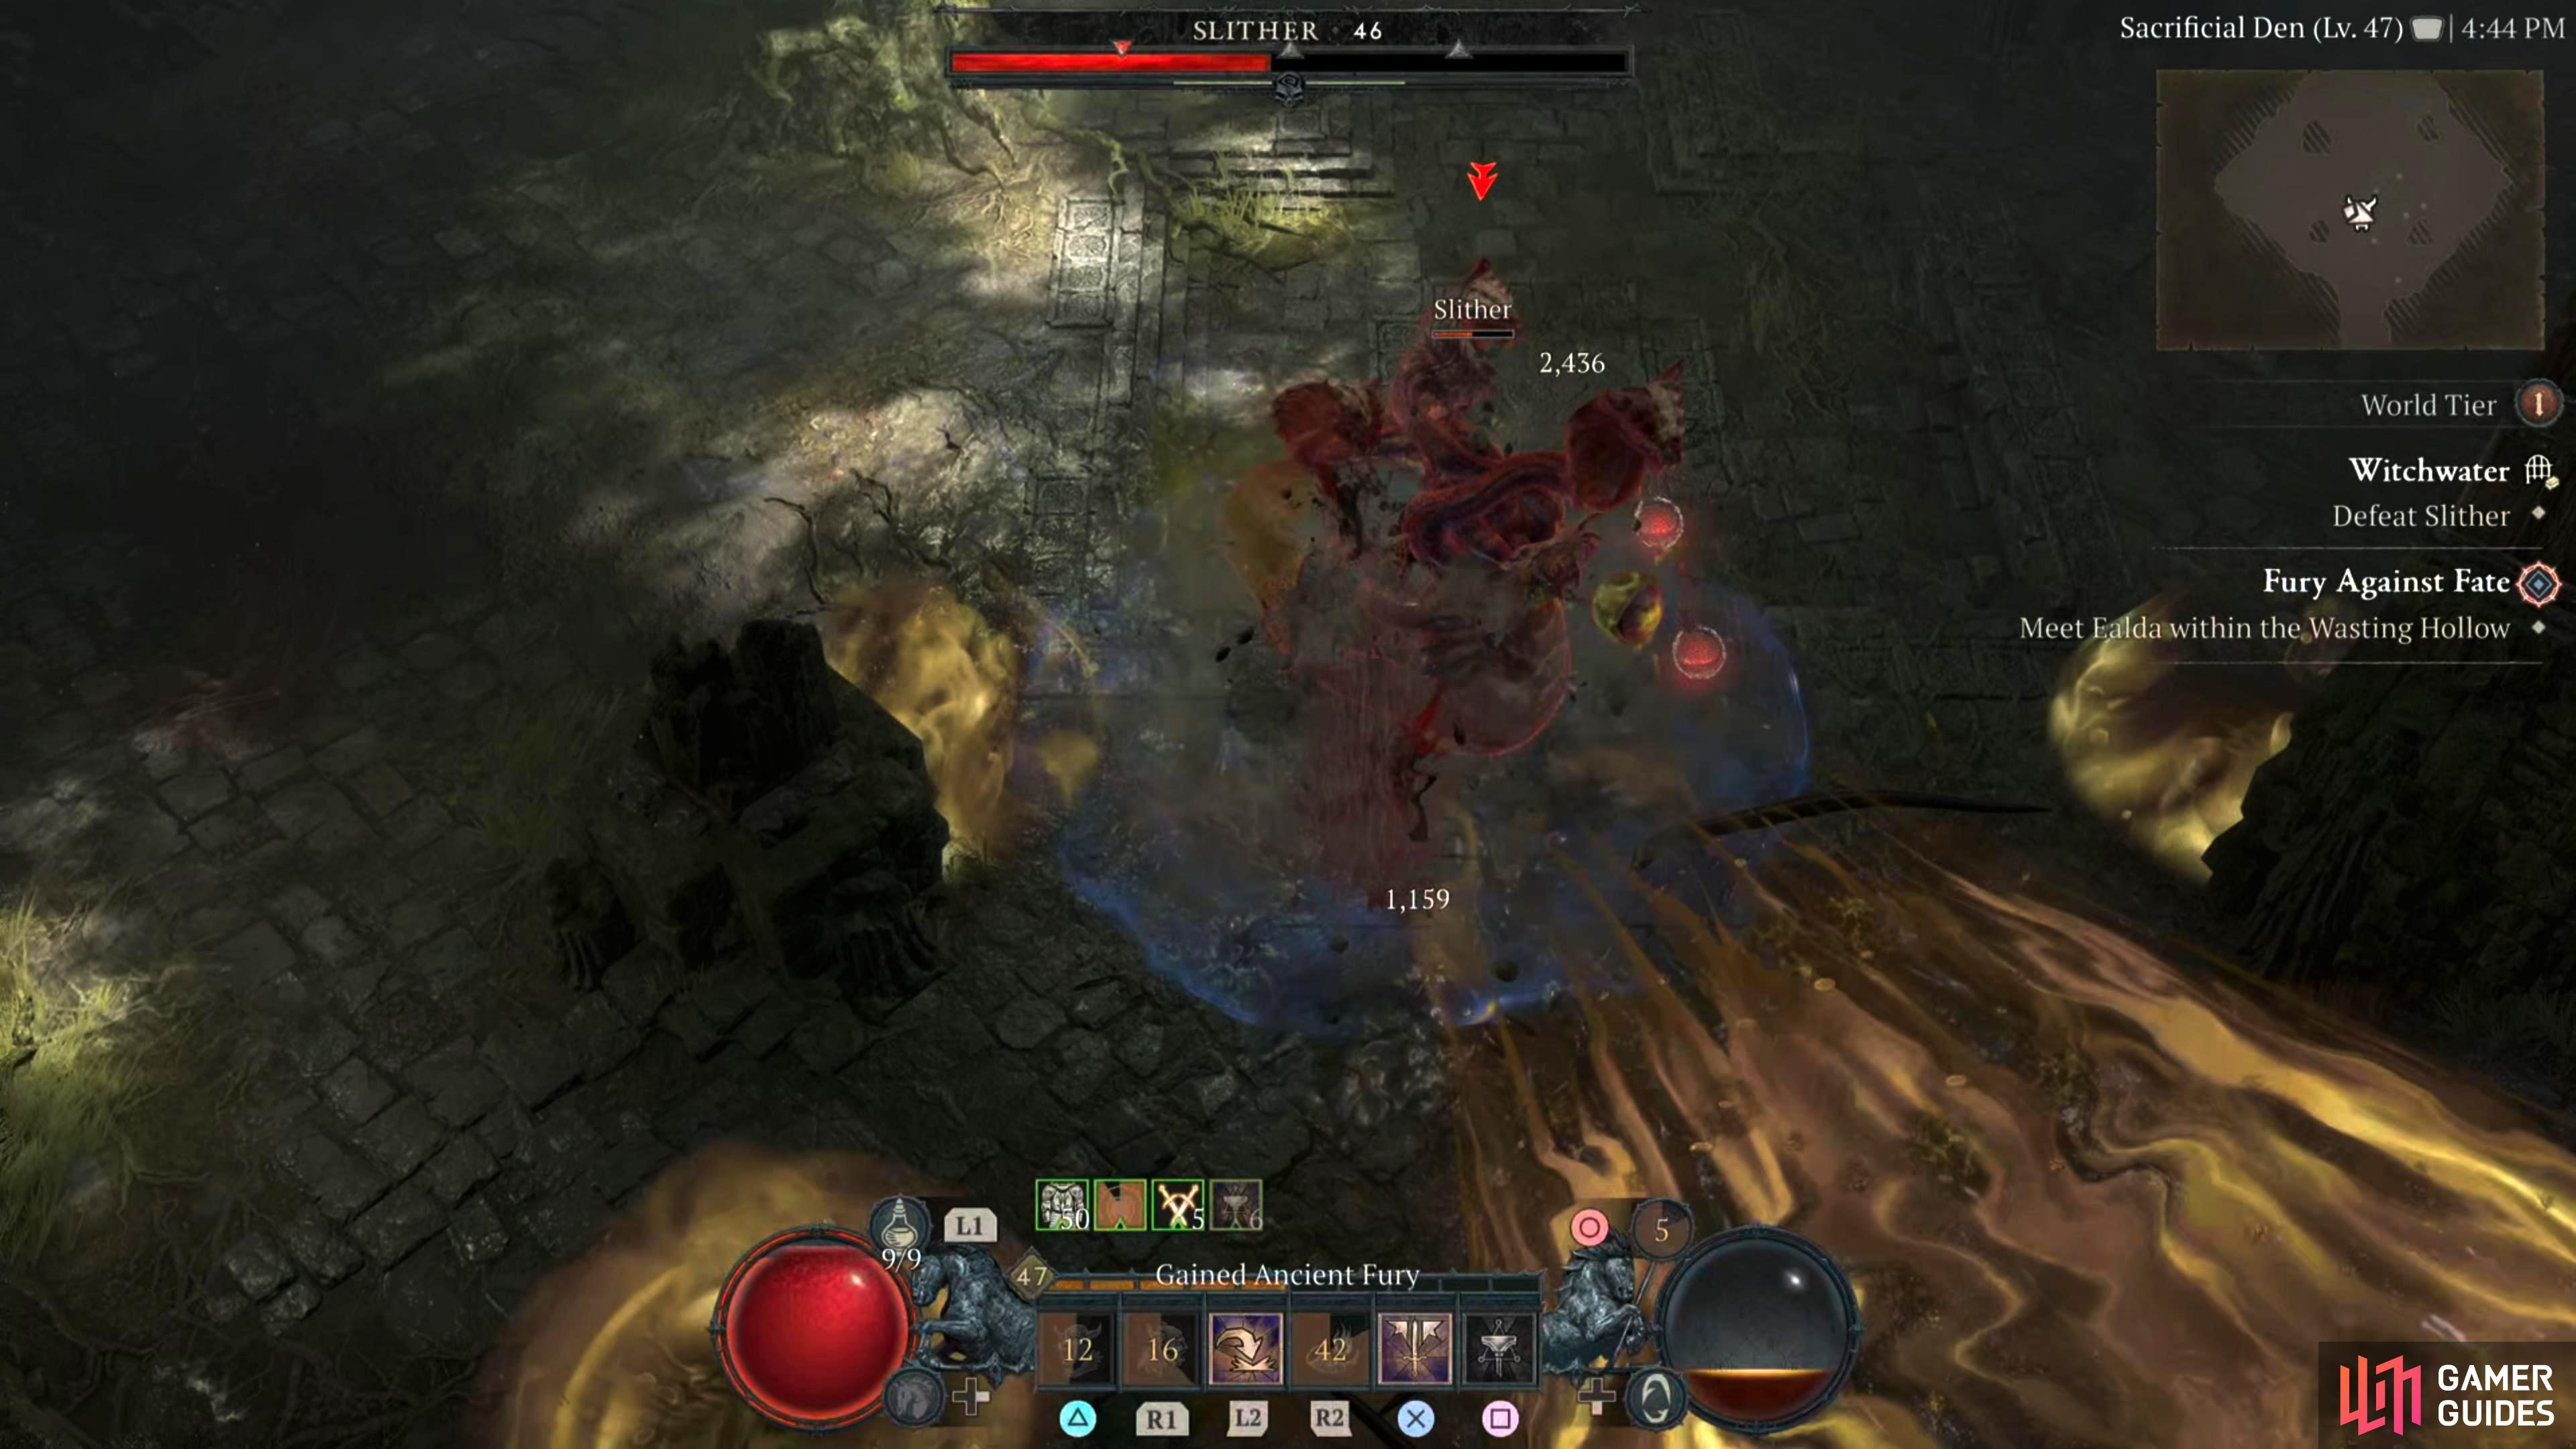
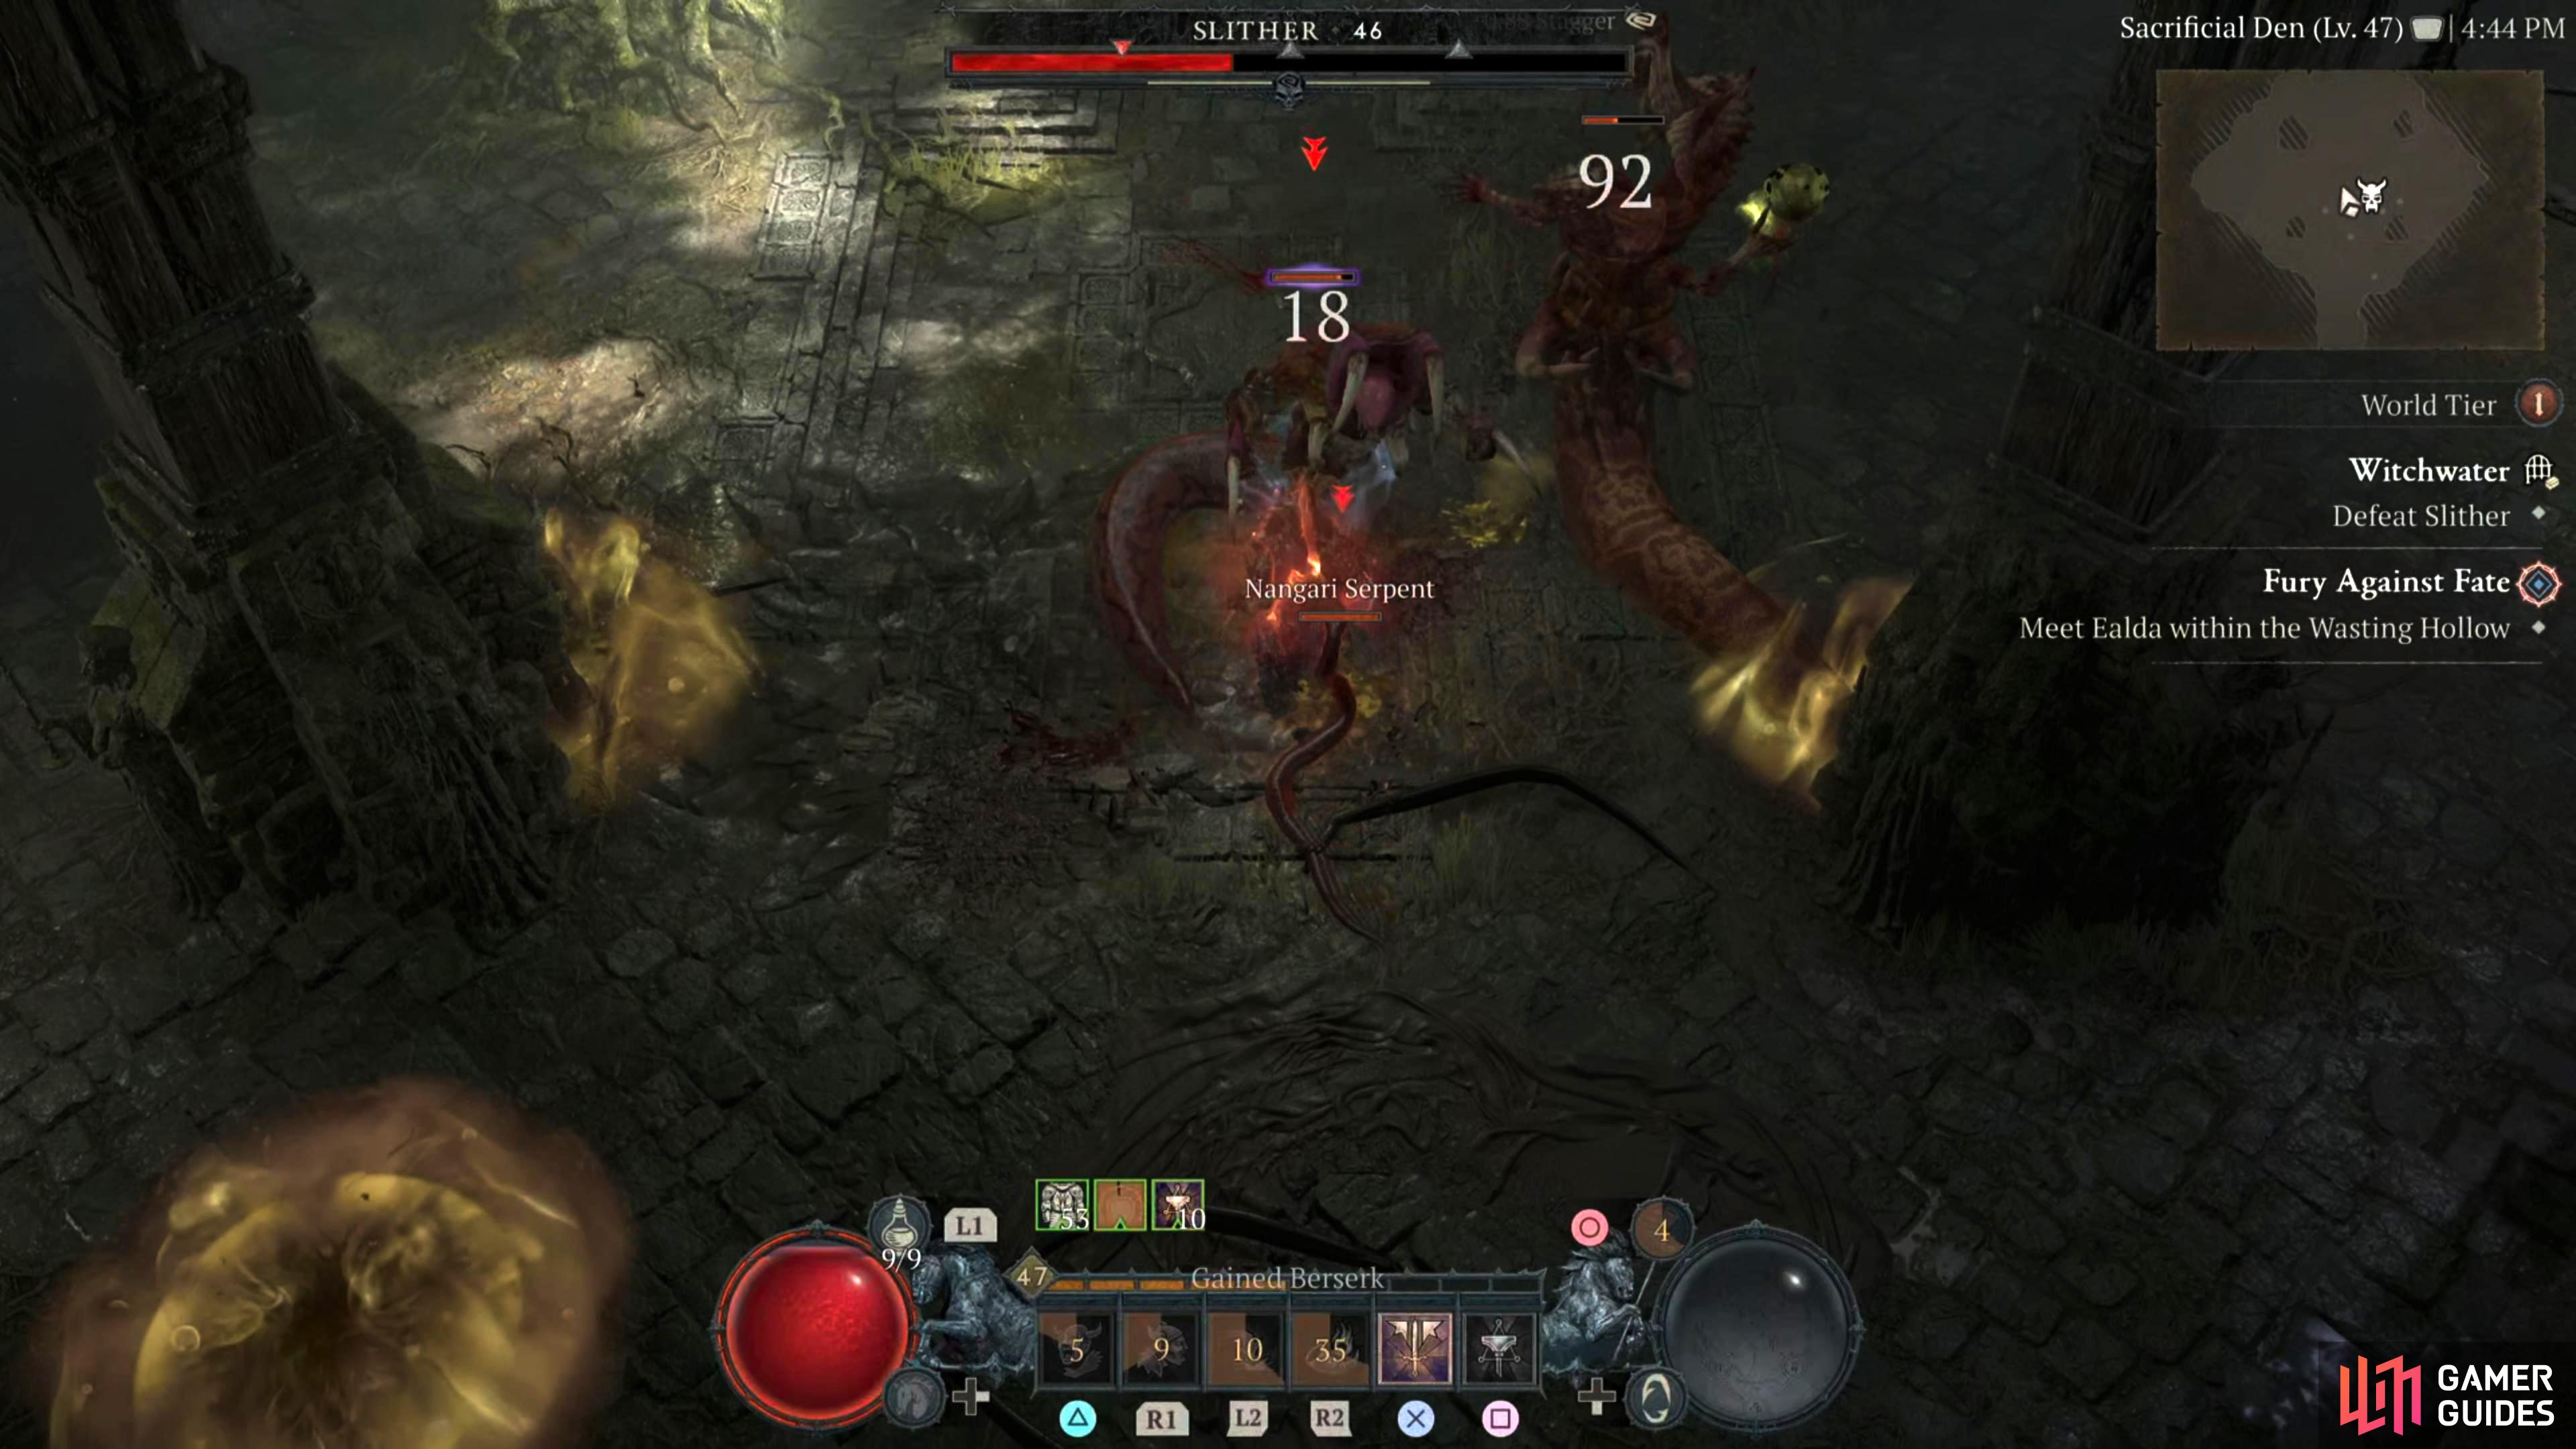
*Slither is a serpent-type creature that boasts three heads. Large in stature, this monster has the ability to conjure poison from its heads on a whim. *
Description
Slither is one of the more difficult dungeon bosses you will come across mainly due to its incessant barrage of attacks. Although it doesn’t have the largest attack pool, the ones it does have, require you to be on the move which can hamper your damage output. As its attacks are mainly poison, an Elixir of Poison Resistance would go down a treat. Here’s a look at what Slither has in its arsenal:
Poison Breath Slither will lean back and absorb poisonous fumes into its lungs before unleashing it in a cone towards you. You’ll see the outline of the cone on the floor a second or two before the actual attack comes towards you. Simply move out of the cone to avoid the attack.
Stunning Eyebeam - The boss will release eyes that float to a poison puddle and shoot a green beam at you. If this hits you, you’ll be stunned briefly. Dodge when the beam gets near to you to avoid the attack.
Summon Nangari - Throughout the battle the boss will summon various Nangari which will aid them in battle. Defeat the adds as soon as you can to limit the overall amount of damage you’ll be taking.
Poison Volley - Slither will spit out a volley of three poison projectiles at your location. Simply move or dodge away from your last position to avoid the attack.
The two main attacks you need to worry about the most in this battle are the Stunning Eyebeam, and the Poison Breath abilities with the latter being the easier to dodge out of the two. Stunning Eyebeam can really hamper the battle as they can hit you multiple times in quick succession, and they go off relatively quickly, so ideally you’ll keep on the move.
The problem is, while this is happening, the Poison Breath is cutting off part of the arena you can dodge into, and when there are poison puddles on the floor too, it gets quite hectic. As stated above, keep on the move while you’re still damaging the boss, pop a Poison Resistance Elixir, and try to avoid the stun as much as possible.
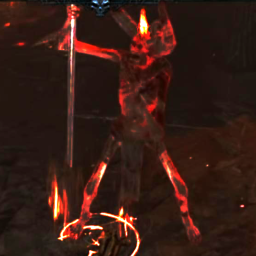
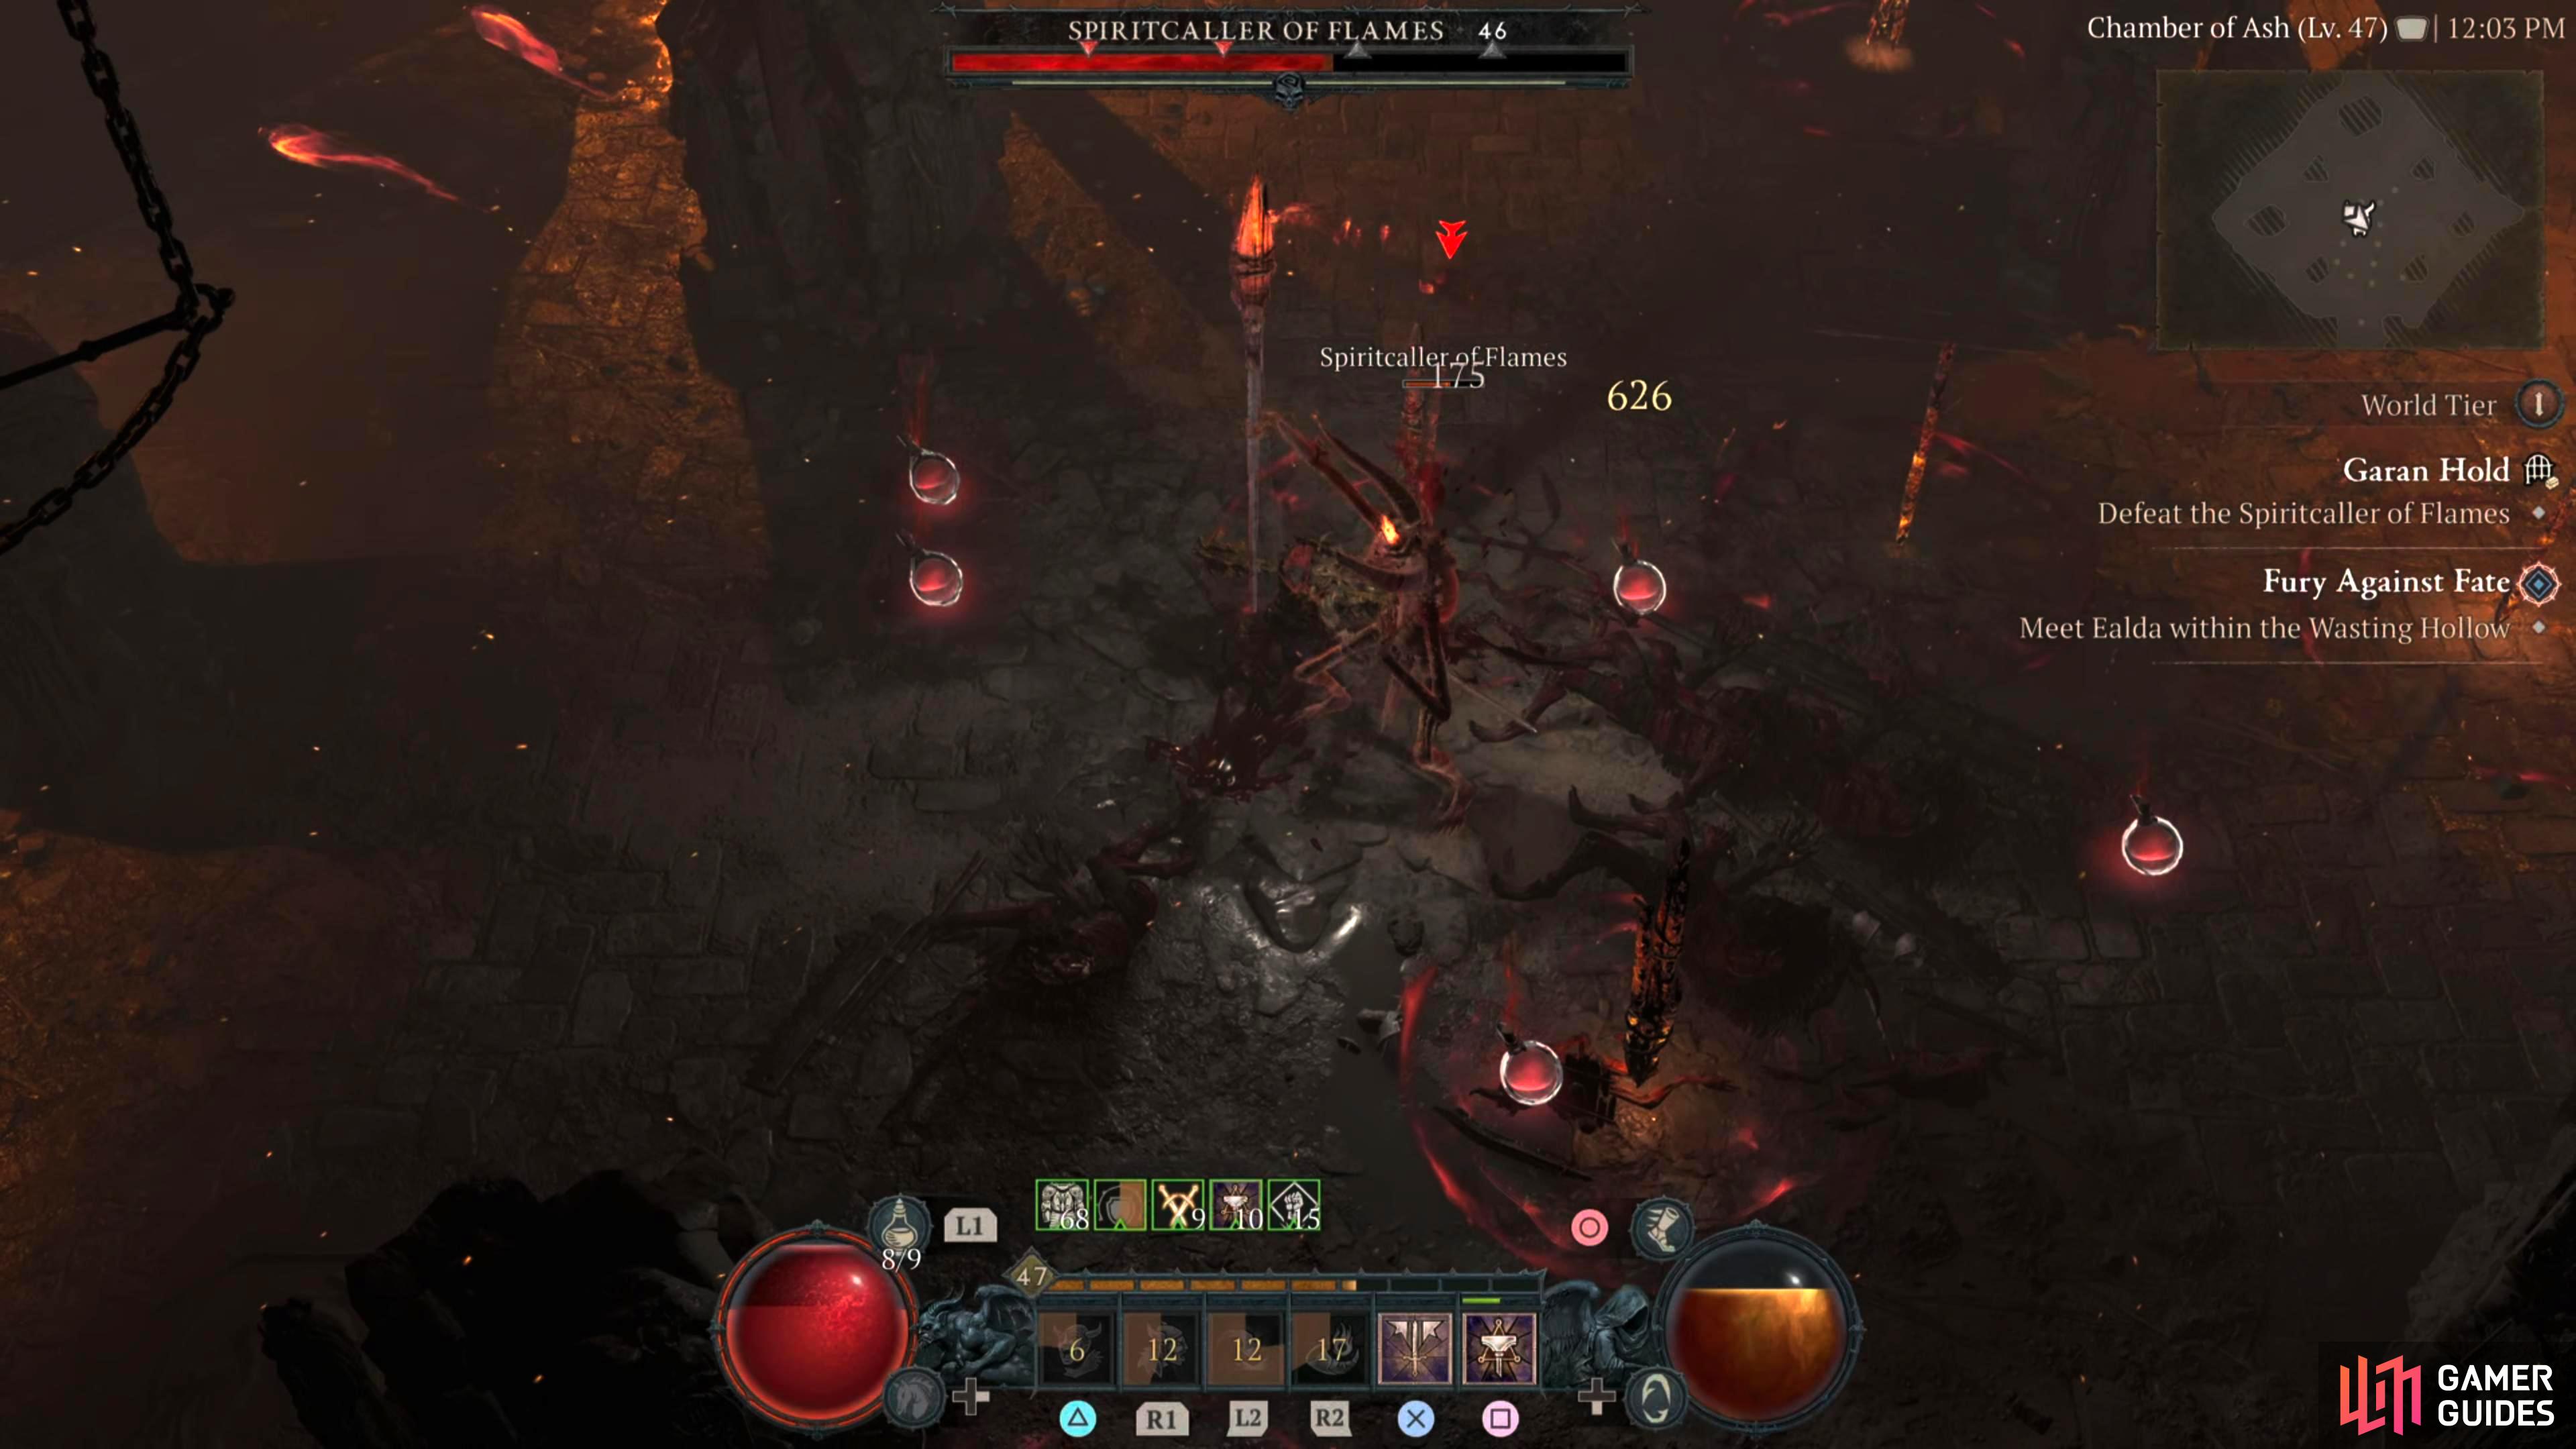
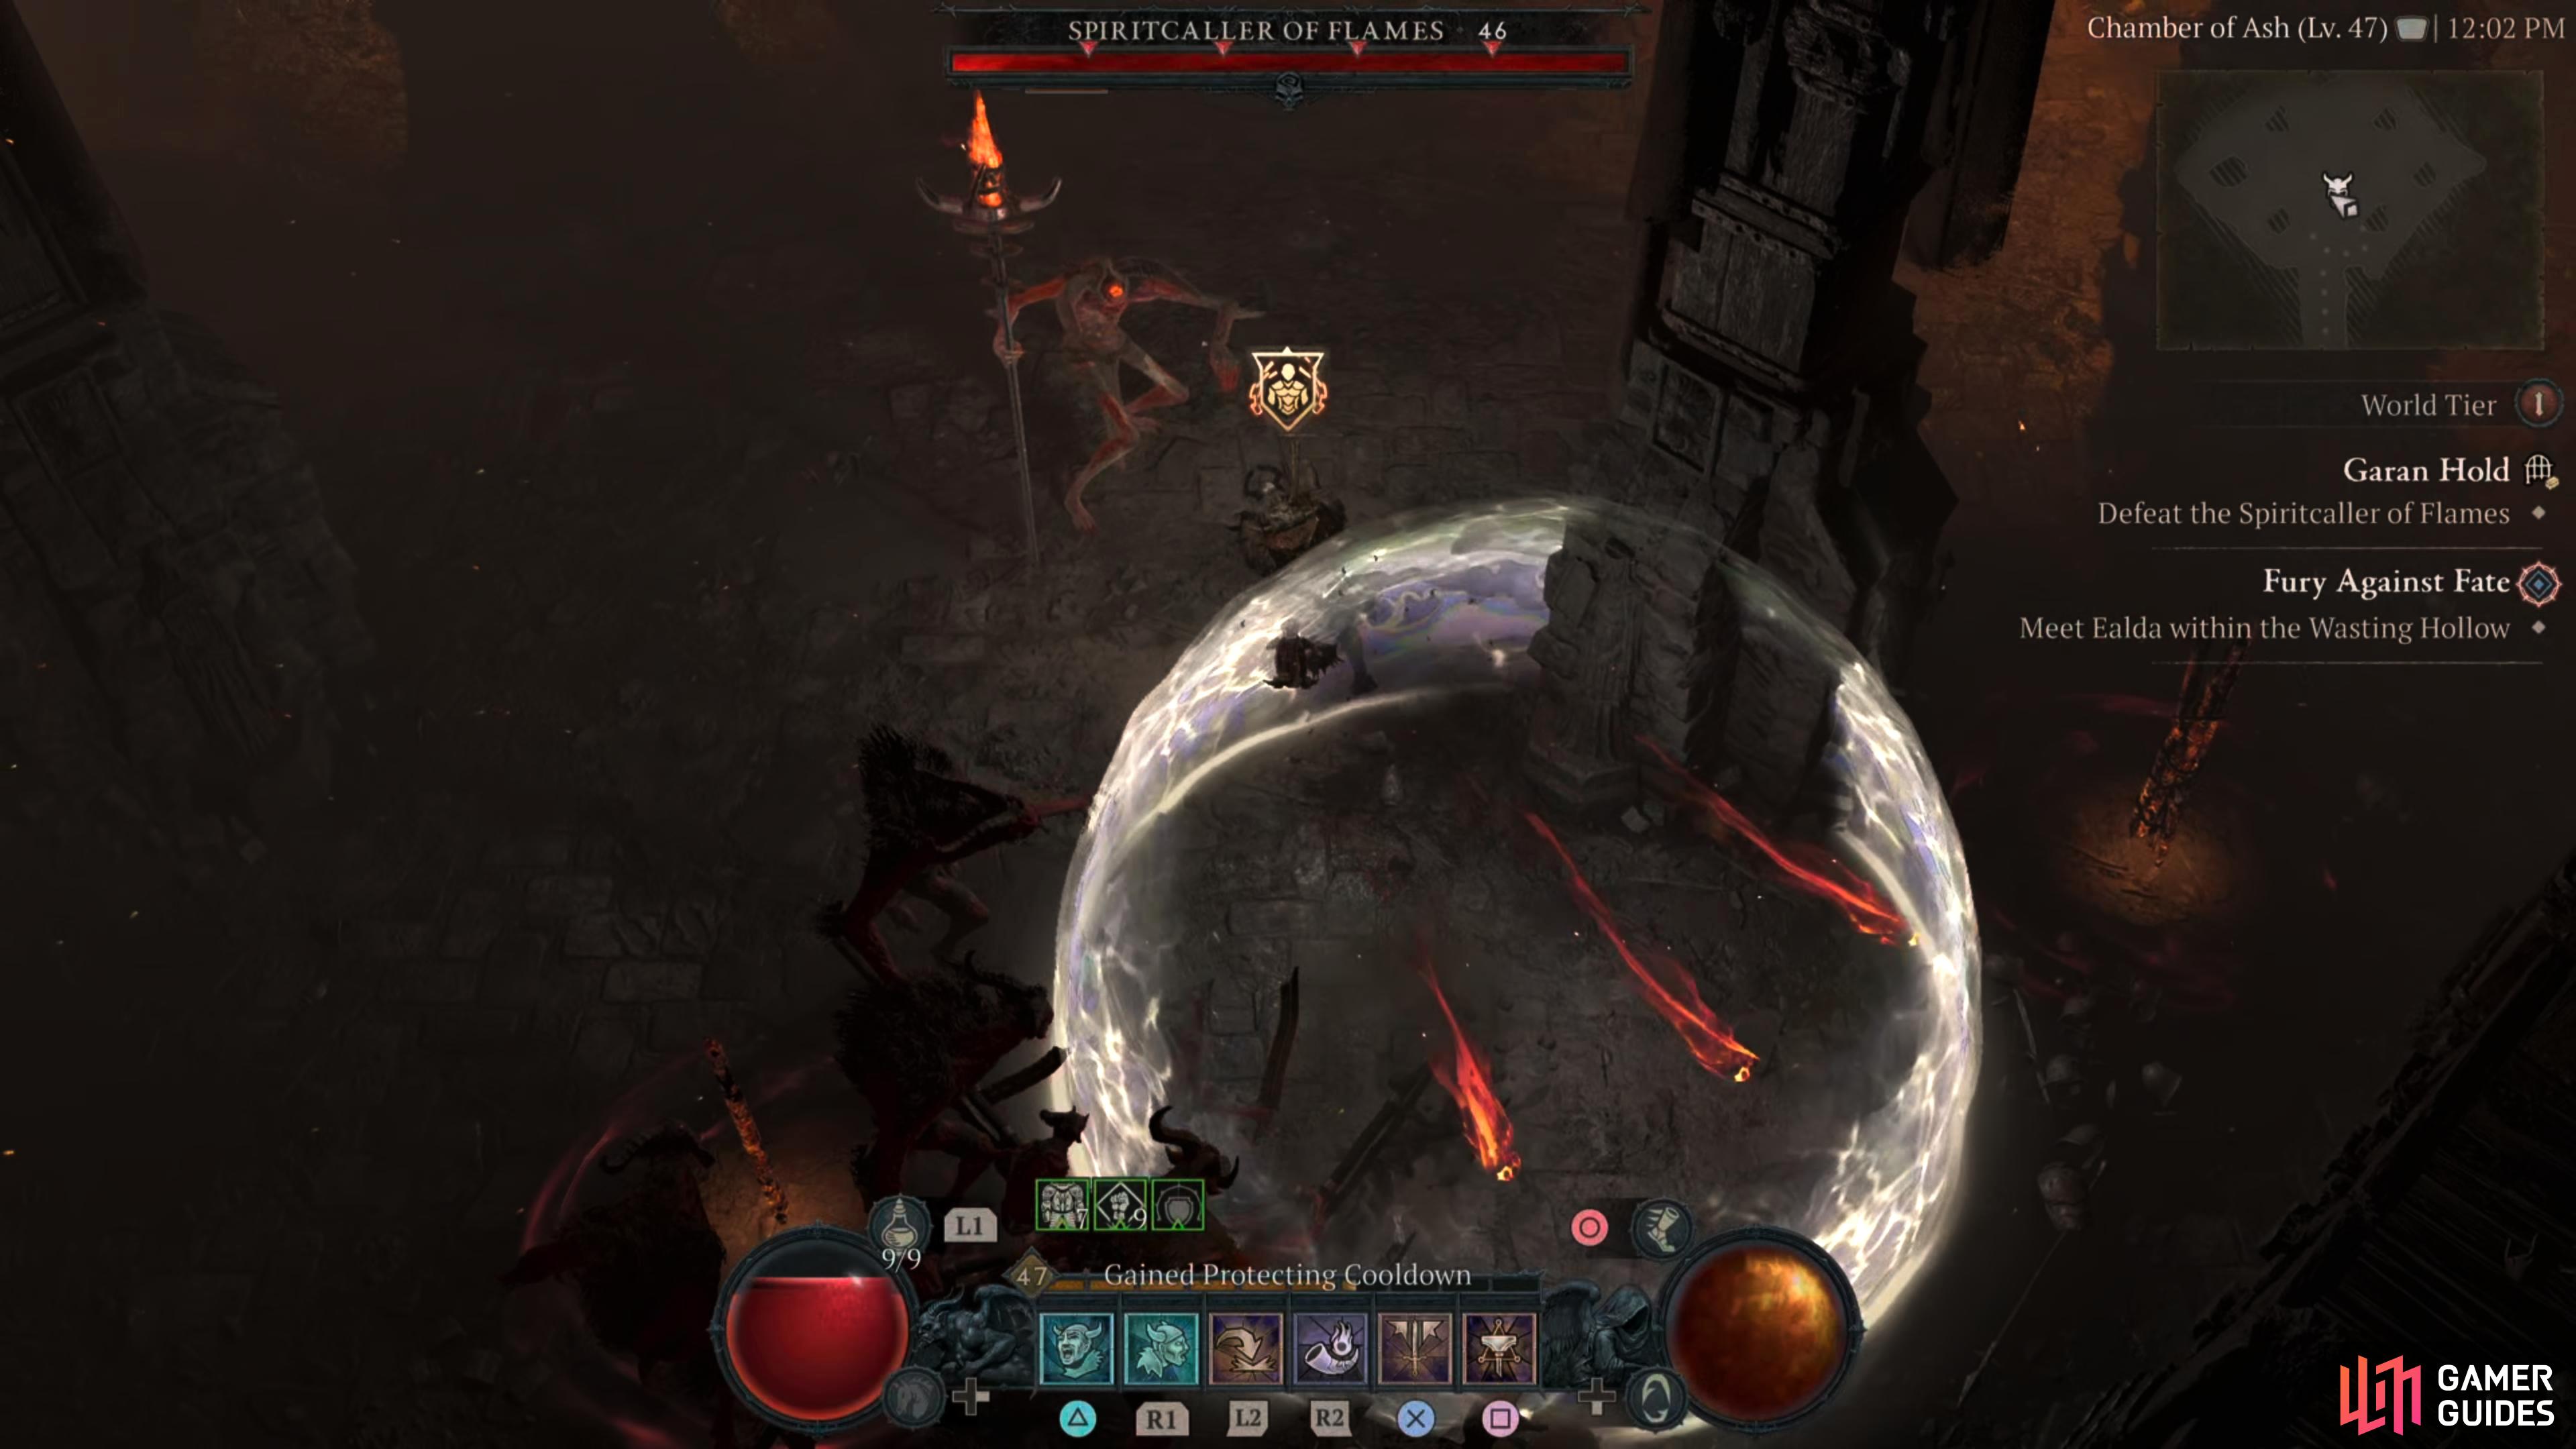
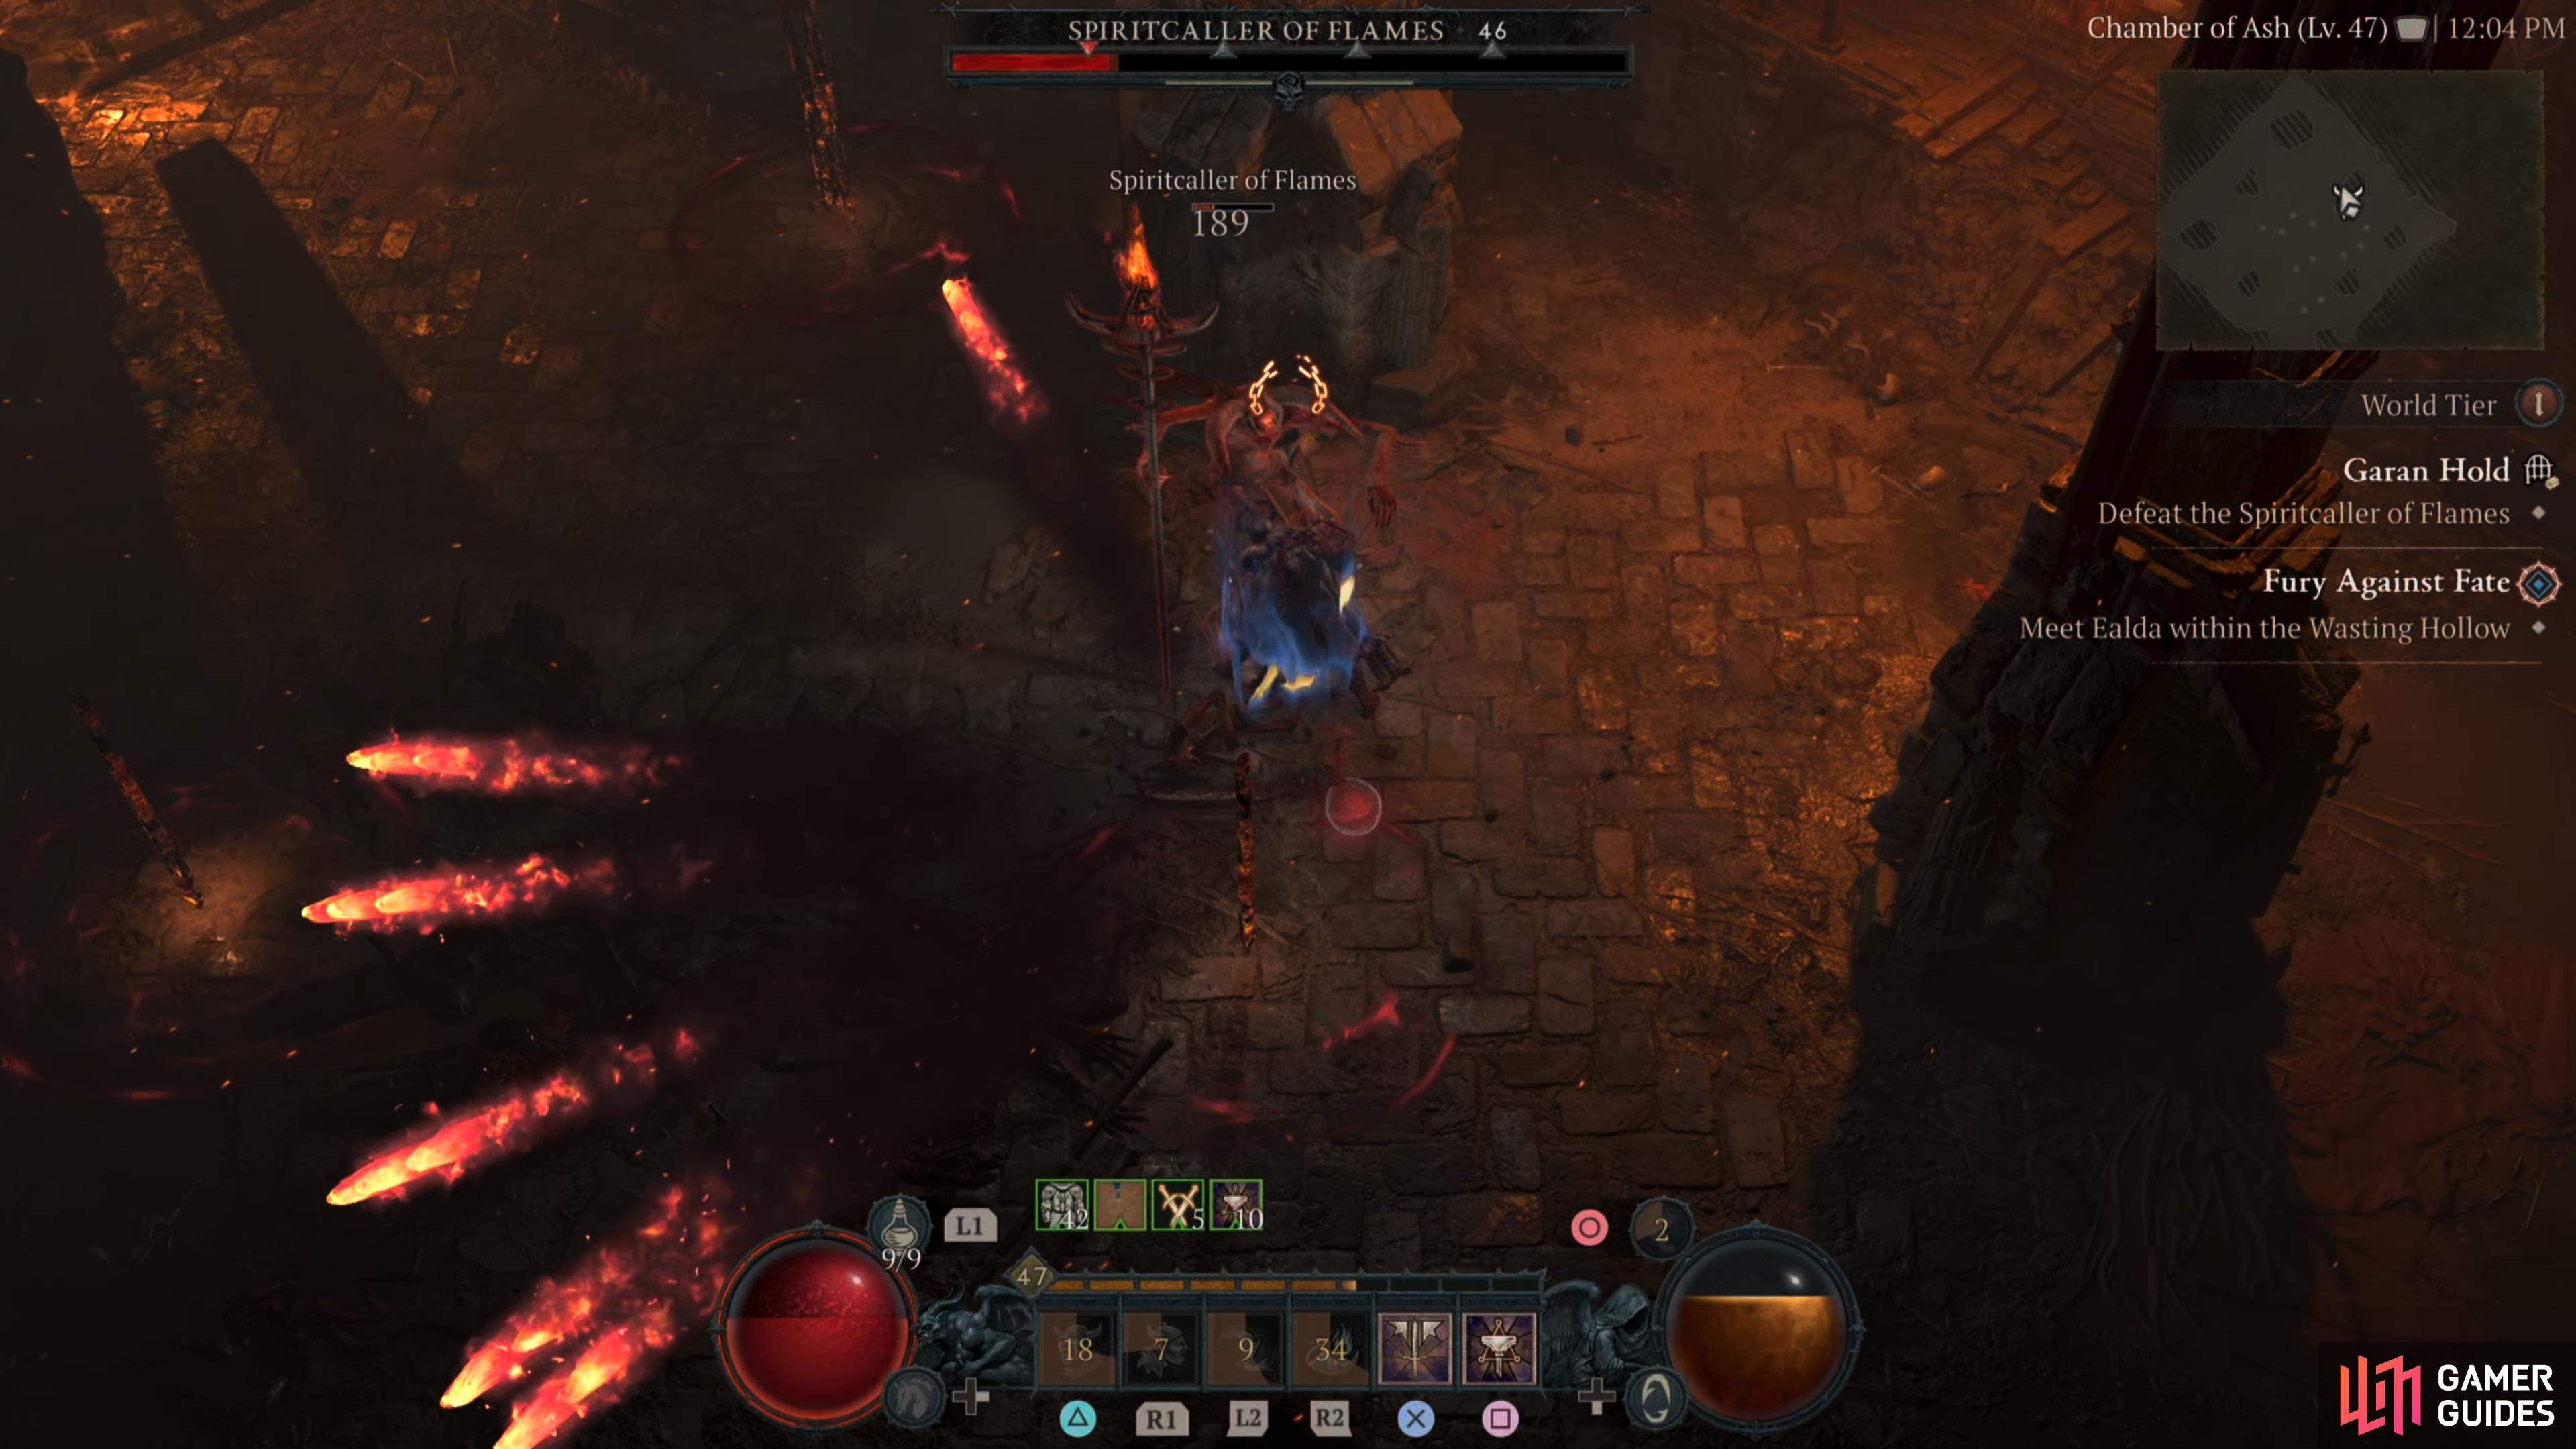
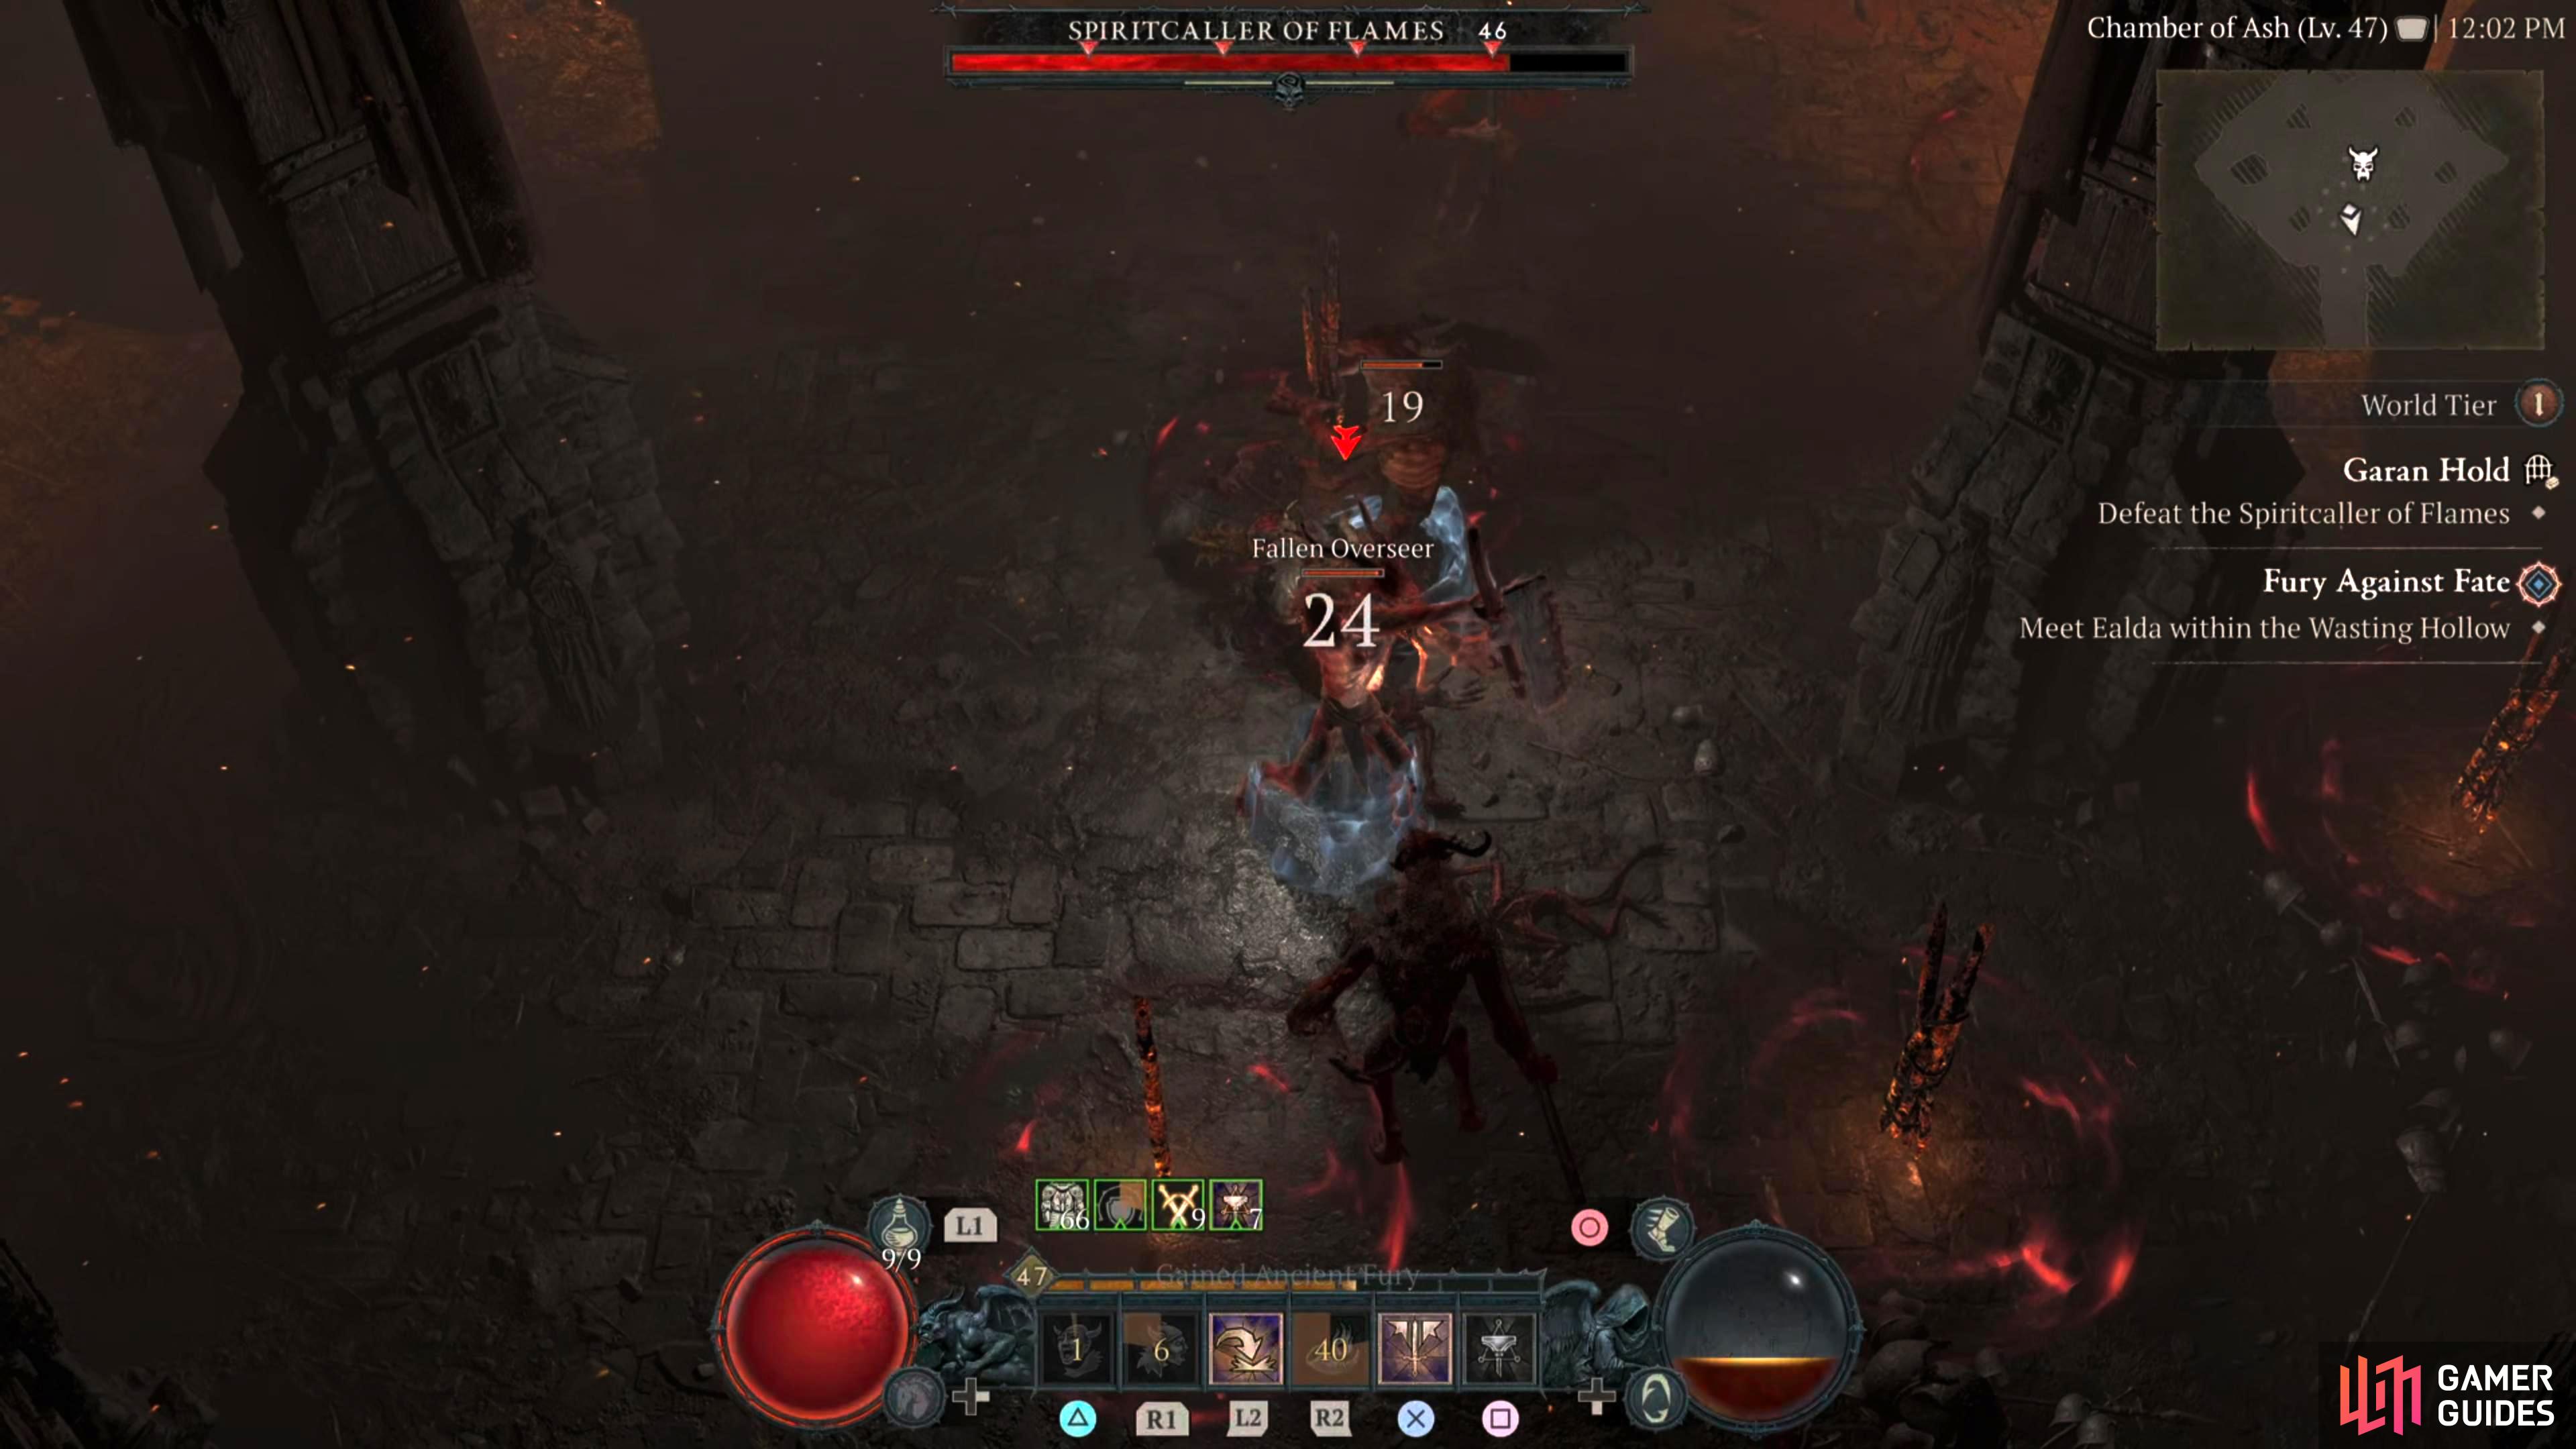
The Spiritcaller of Flames is a powerful Fallen Shaman who controls the power of fire through it’s flame-tipped staff. When under attack, it favors calling its brethren to help keep them at bay while it casts its fire spells to incinerate them.
Description
The Spiritcaller of Flames boss battle is more of a Fallen summon simulator. Most of the bosses attacks will be some form of summoning. This includes resurrecting the Fallen Overseers you defeat. Apart from that, expect a few fire-based spells considering it’s aptly named the Spiritcaller of Flames. Here’s what attacks you can expect from this shaman:
Summon Spike - This will always be the first attack the shaman does in the battle. It will place multiple spikes around the arena that will summon numerous Fallen enemies with the Fallen Overseers being the toughest. Unfortunately, you can’t destroy these, and throughout the battle, they will fire off projectiles of fire. Ideally, you want to keep moving the boss around the arena where they will become less of a threat.
Tri-Fire - This is a simple fire spell that splits off into three projectiles. Simply dodge, or move away from the incoming projectiles.
Fire Barrage - Almost exactly the same as Tri-Fire, but it has a couple of differences. First is, there are four projectiles. Secondly, these come from the spikes. The boss will move its hand towards a spike, and that spike will fire off the barrage. Finally, these projectiles have a bit more velocity, meaning they will get to you sooner than the other attack.
Fallen Resurrection - As stated earlier, the boss can resurrect the Fallen Overseers you’ve defeated. Once again, there isn’t much you can do about this other than defeat them again.
This battle is definitely more of a focus on the boss and not the summons type of fight as the boss will continuously summon more and more enemies throughout the battle which could overwhelm you. Sipping on a Fire Resistance Potion wouldn’t be a bad idea, or having it on some armor pieces, but the fire isn’t too problematic.
What you want to do is keep on the boss at all times while continuously attacking it, and then using a skill spender on an area of effect attack. You may also want to save your Ultimate after the summons become plenty. That way you can take them all out in one fell swoop. Also, good timing on your defensive tools can change the tide of battle, especially when you have numerous enemies attacking you at once. As stated above, this fight is more of dealing with the summons while still consistently hitting the boss. If you take it slow, you could get overwhelmed.
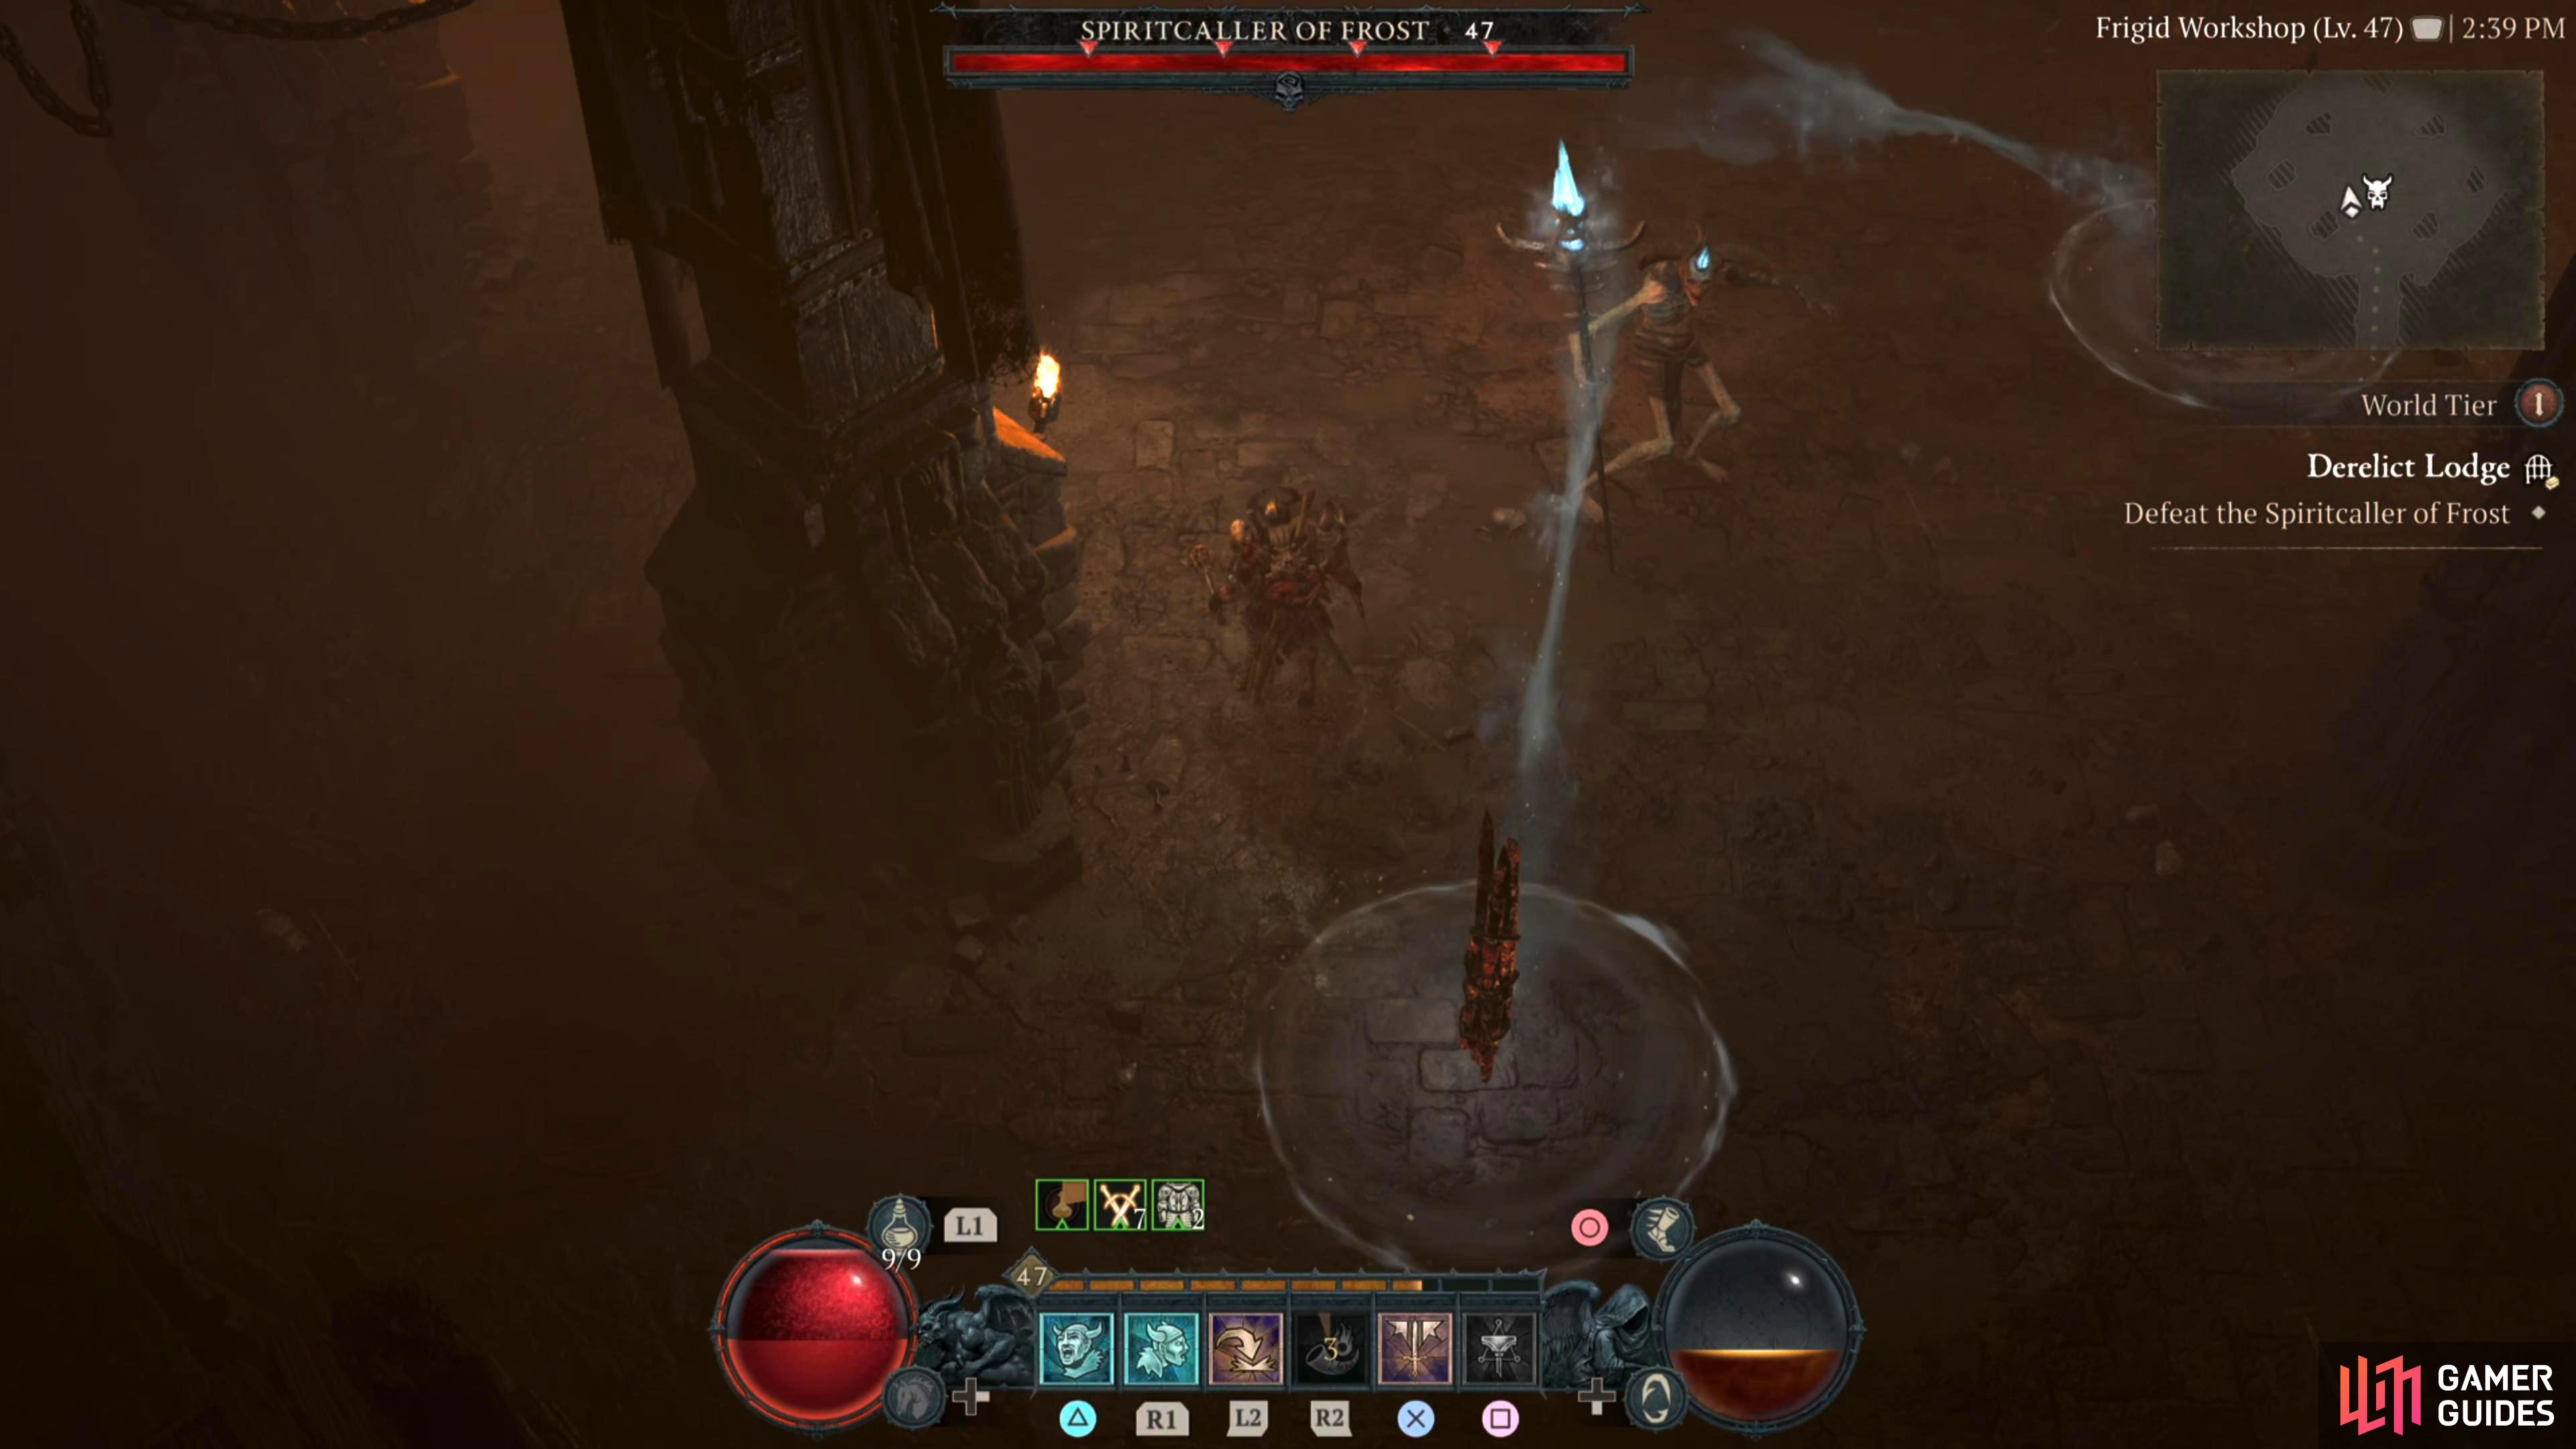
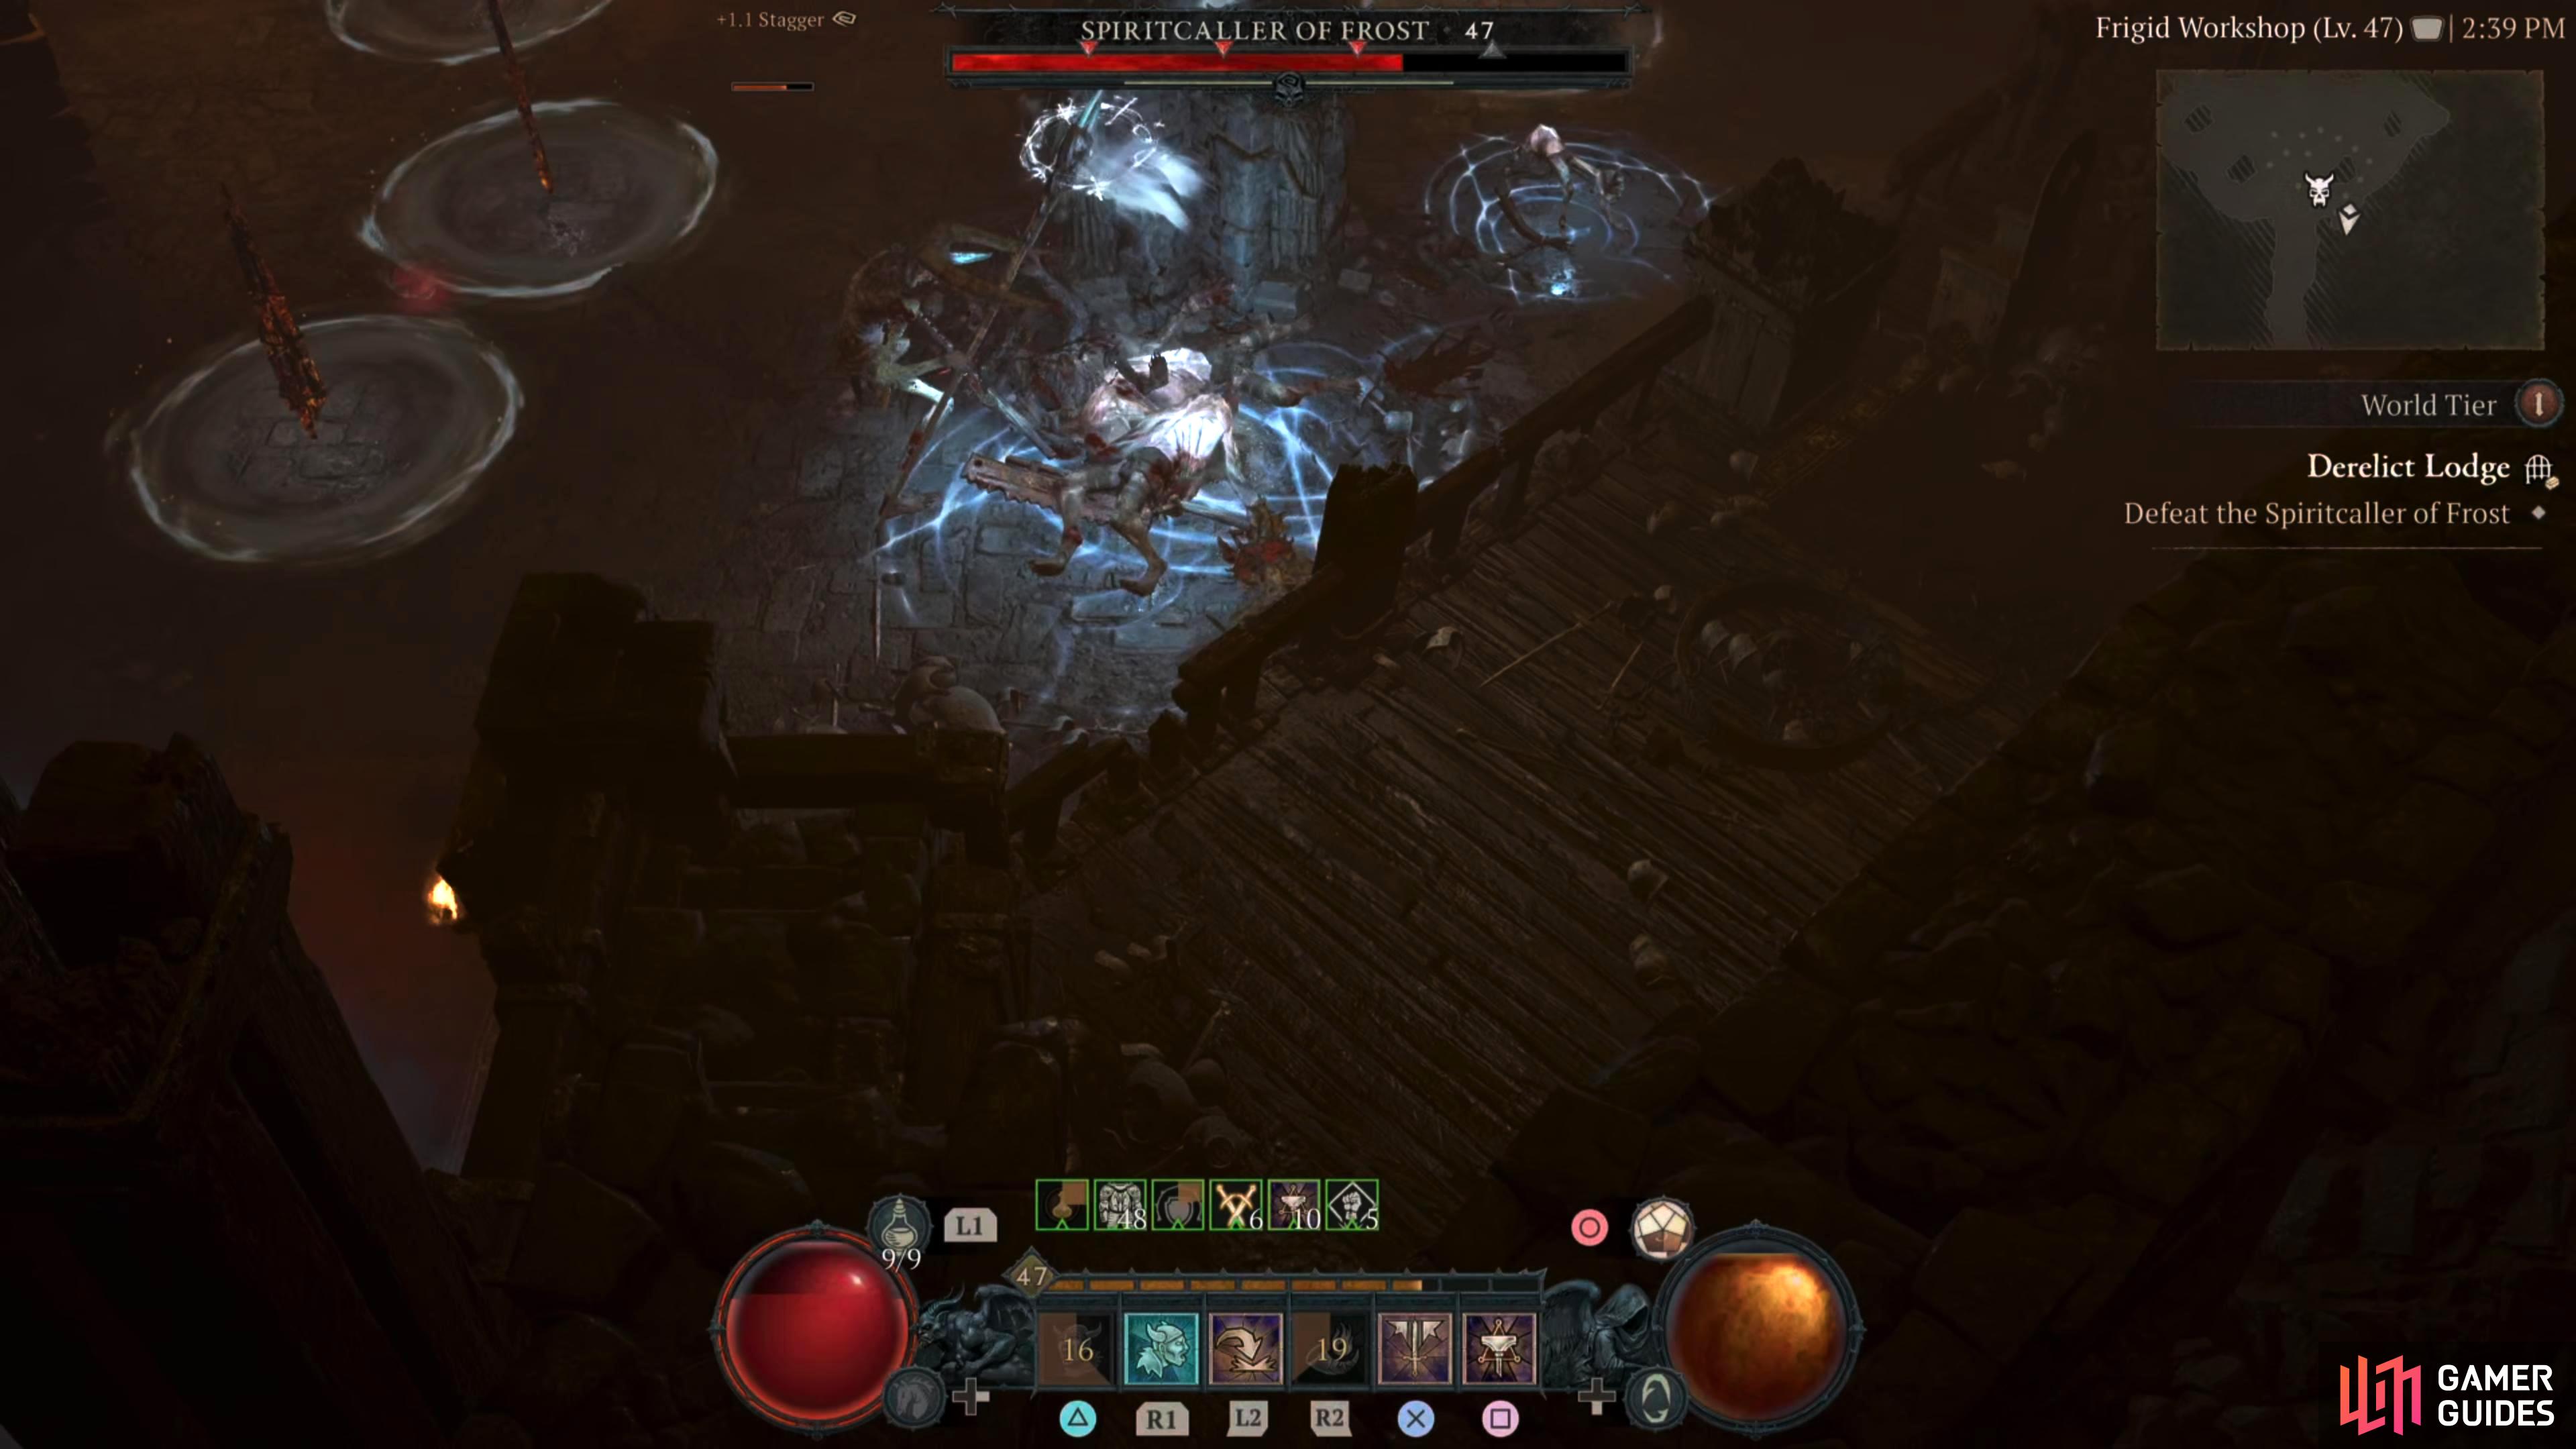
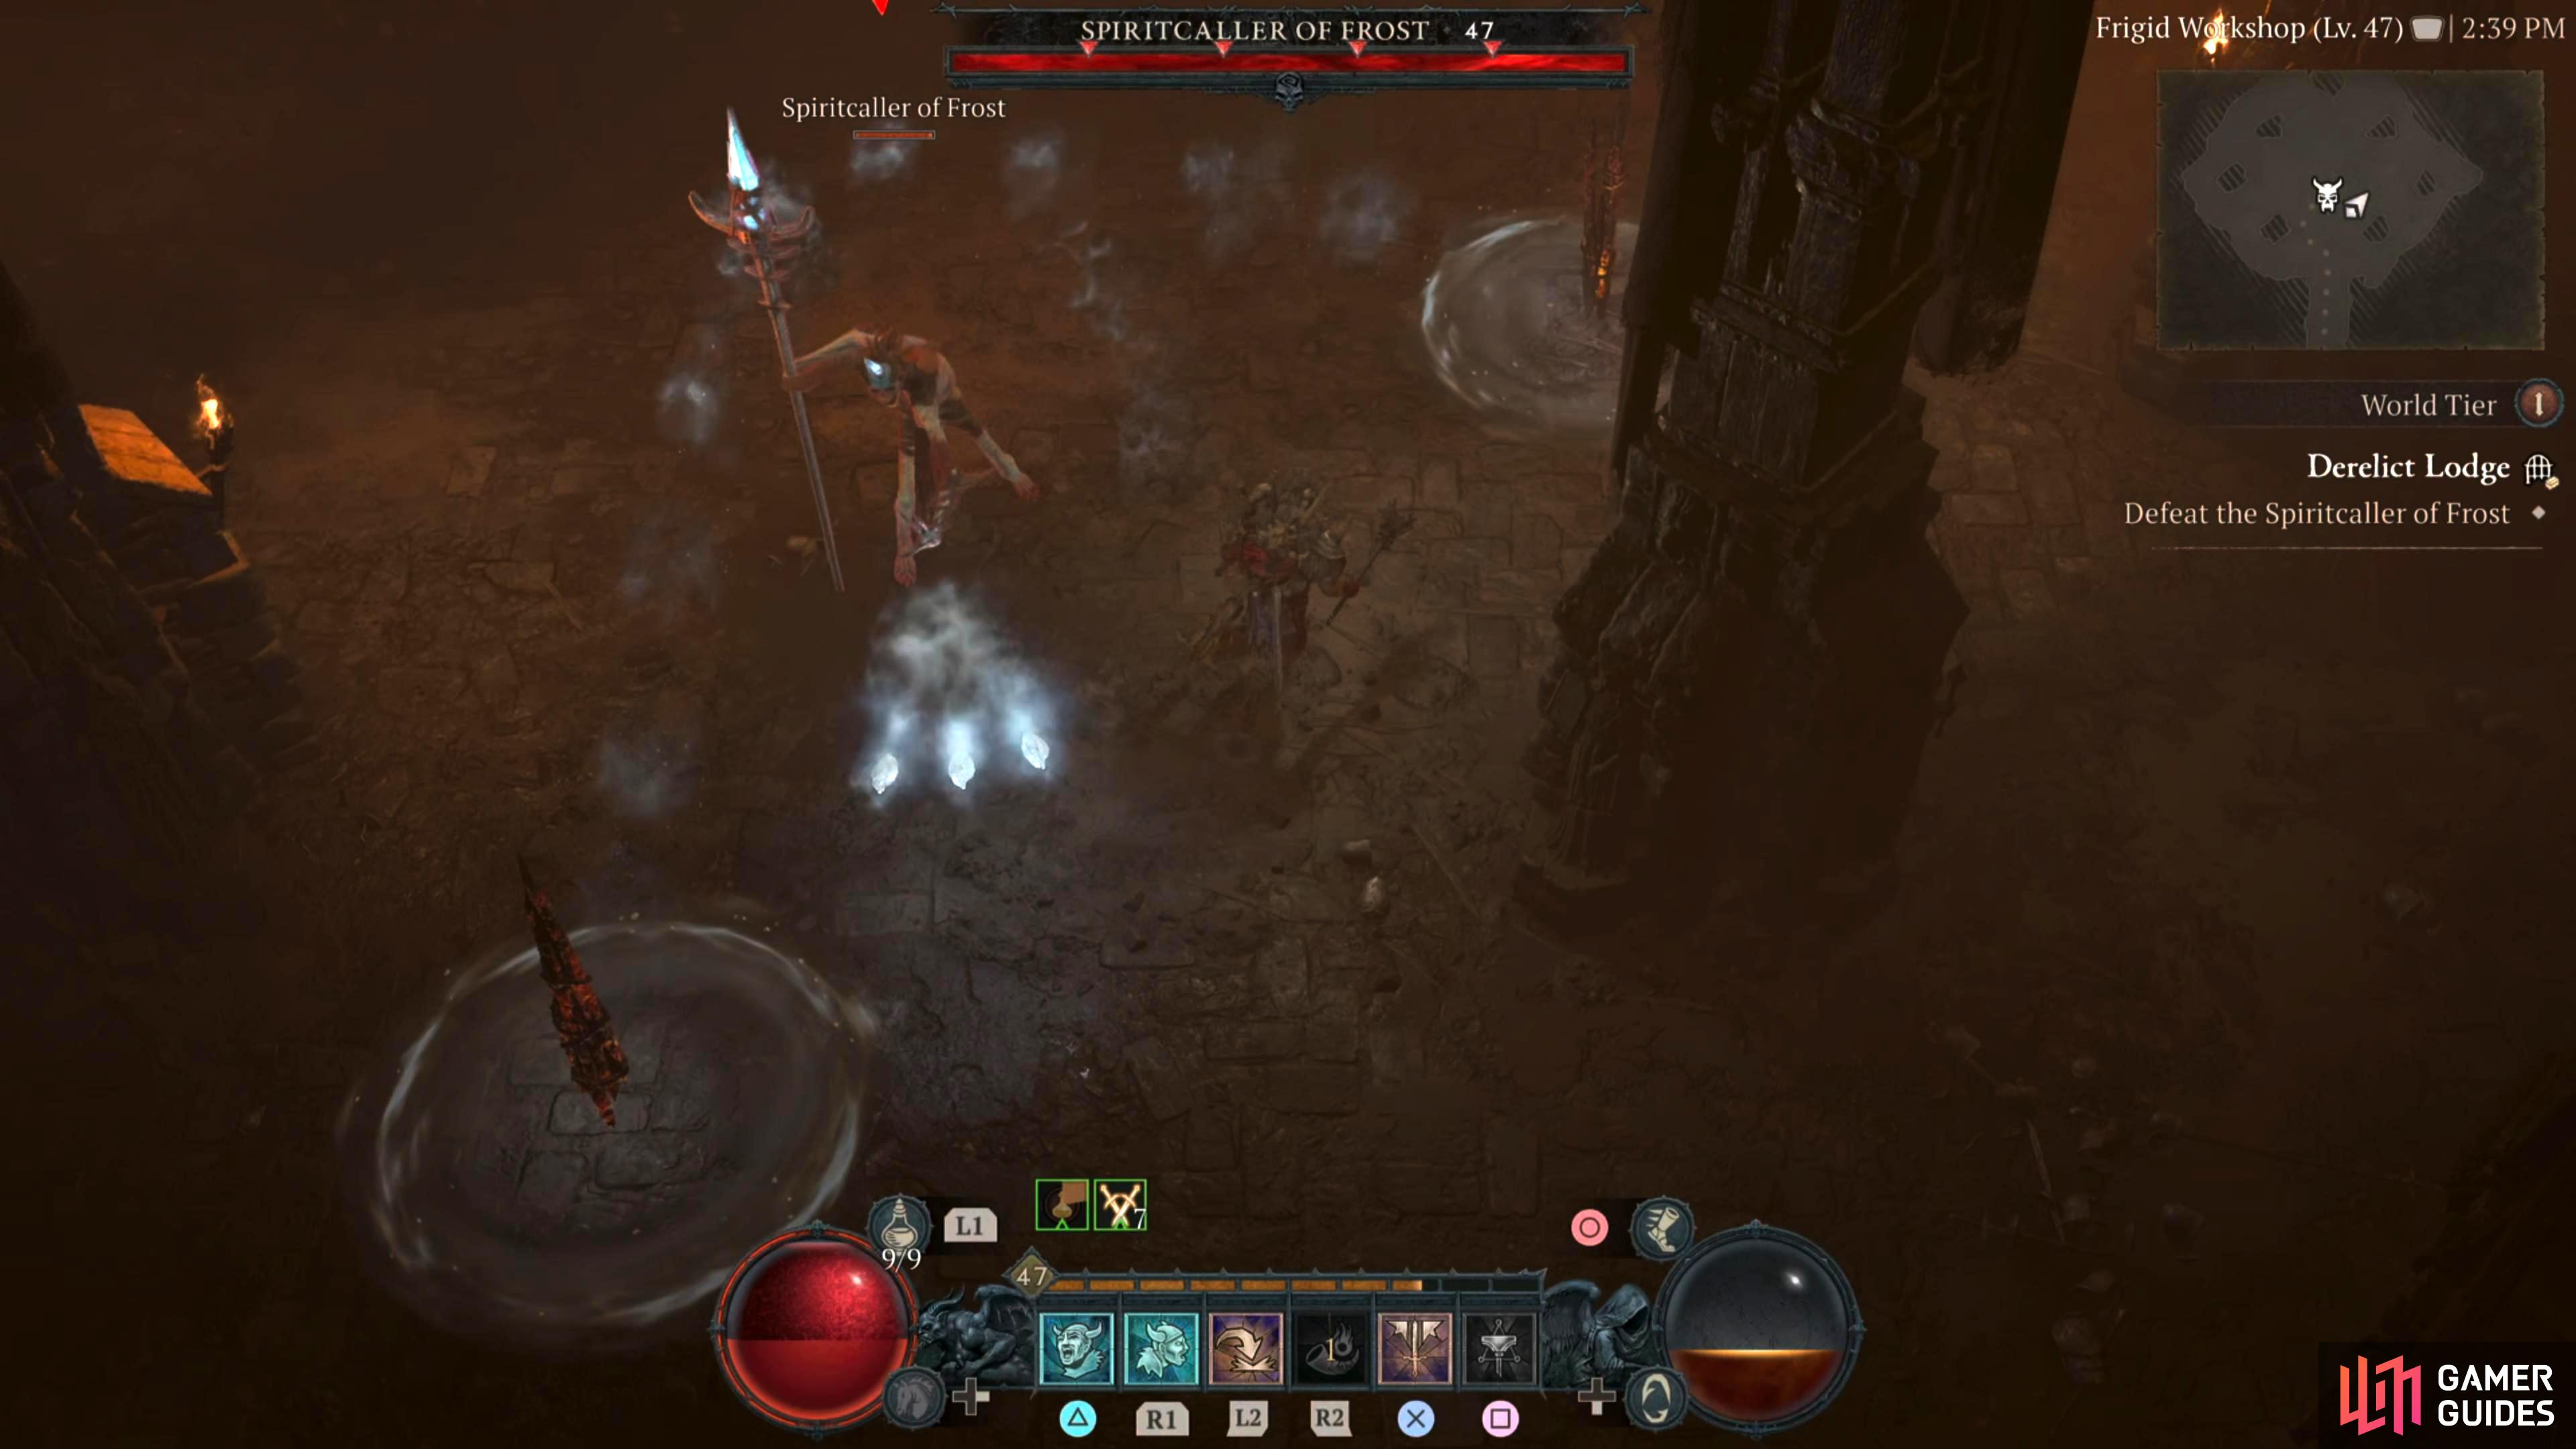
The Spiritcaller of Frost is a powerful Carver Shaman who controls the power of ice through it’s ice-tipped staff. When under attack, it favors calling its brethren to help keep its foes at bay to give it time to use its ice spells to freeze them, leaving them helpless.
Description
The Spiritcaller of Frost boss battle is more of a Carver summon simulator. Most of the bosses attacks will be some form of summoning. This includes resurrecting the Carver Overseers you defeat. Apart from that, expect a few ice-based spells considering it’s aptly named the Spiritcaller of Frost. Here’s what attacks you can expect from this shaman:
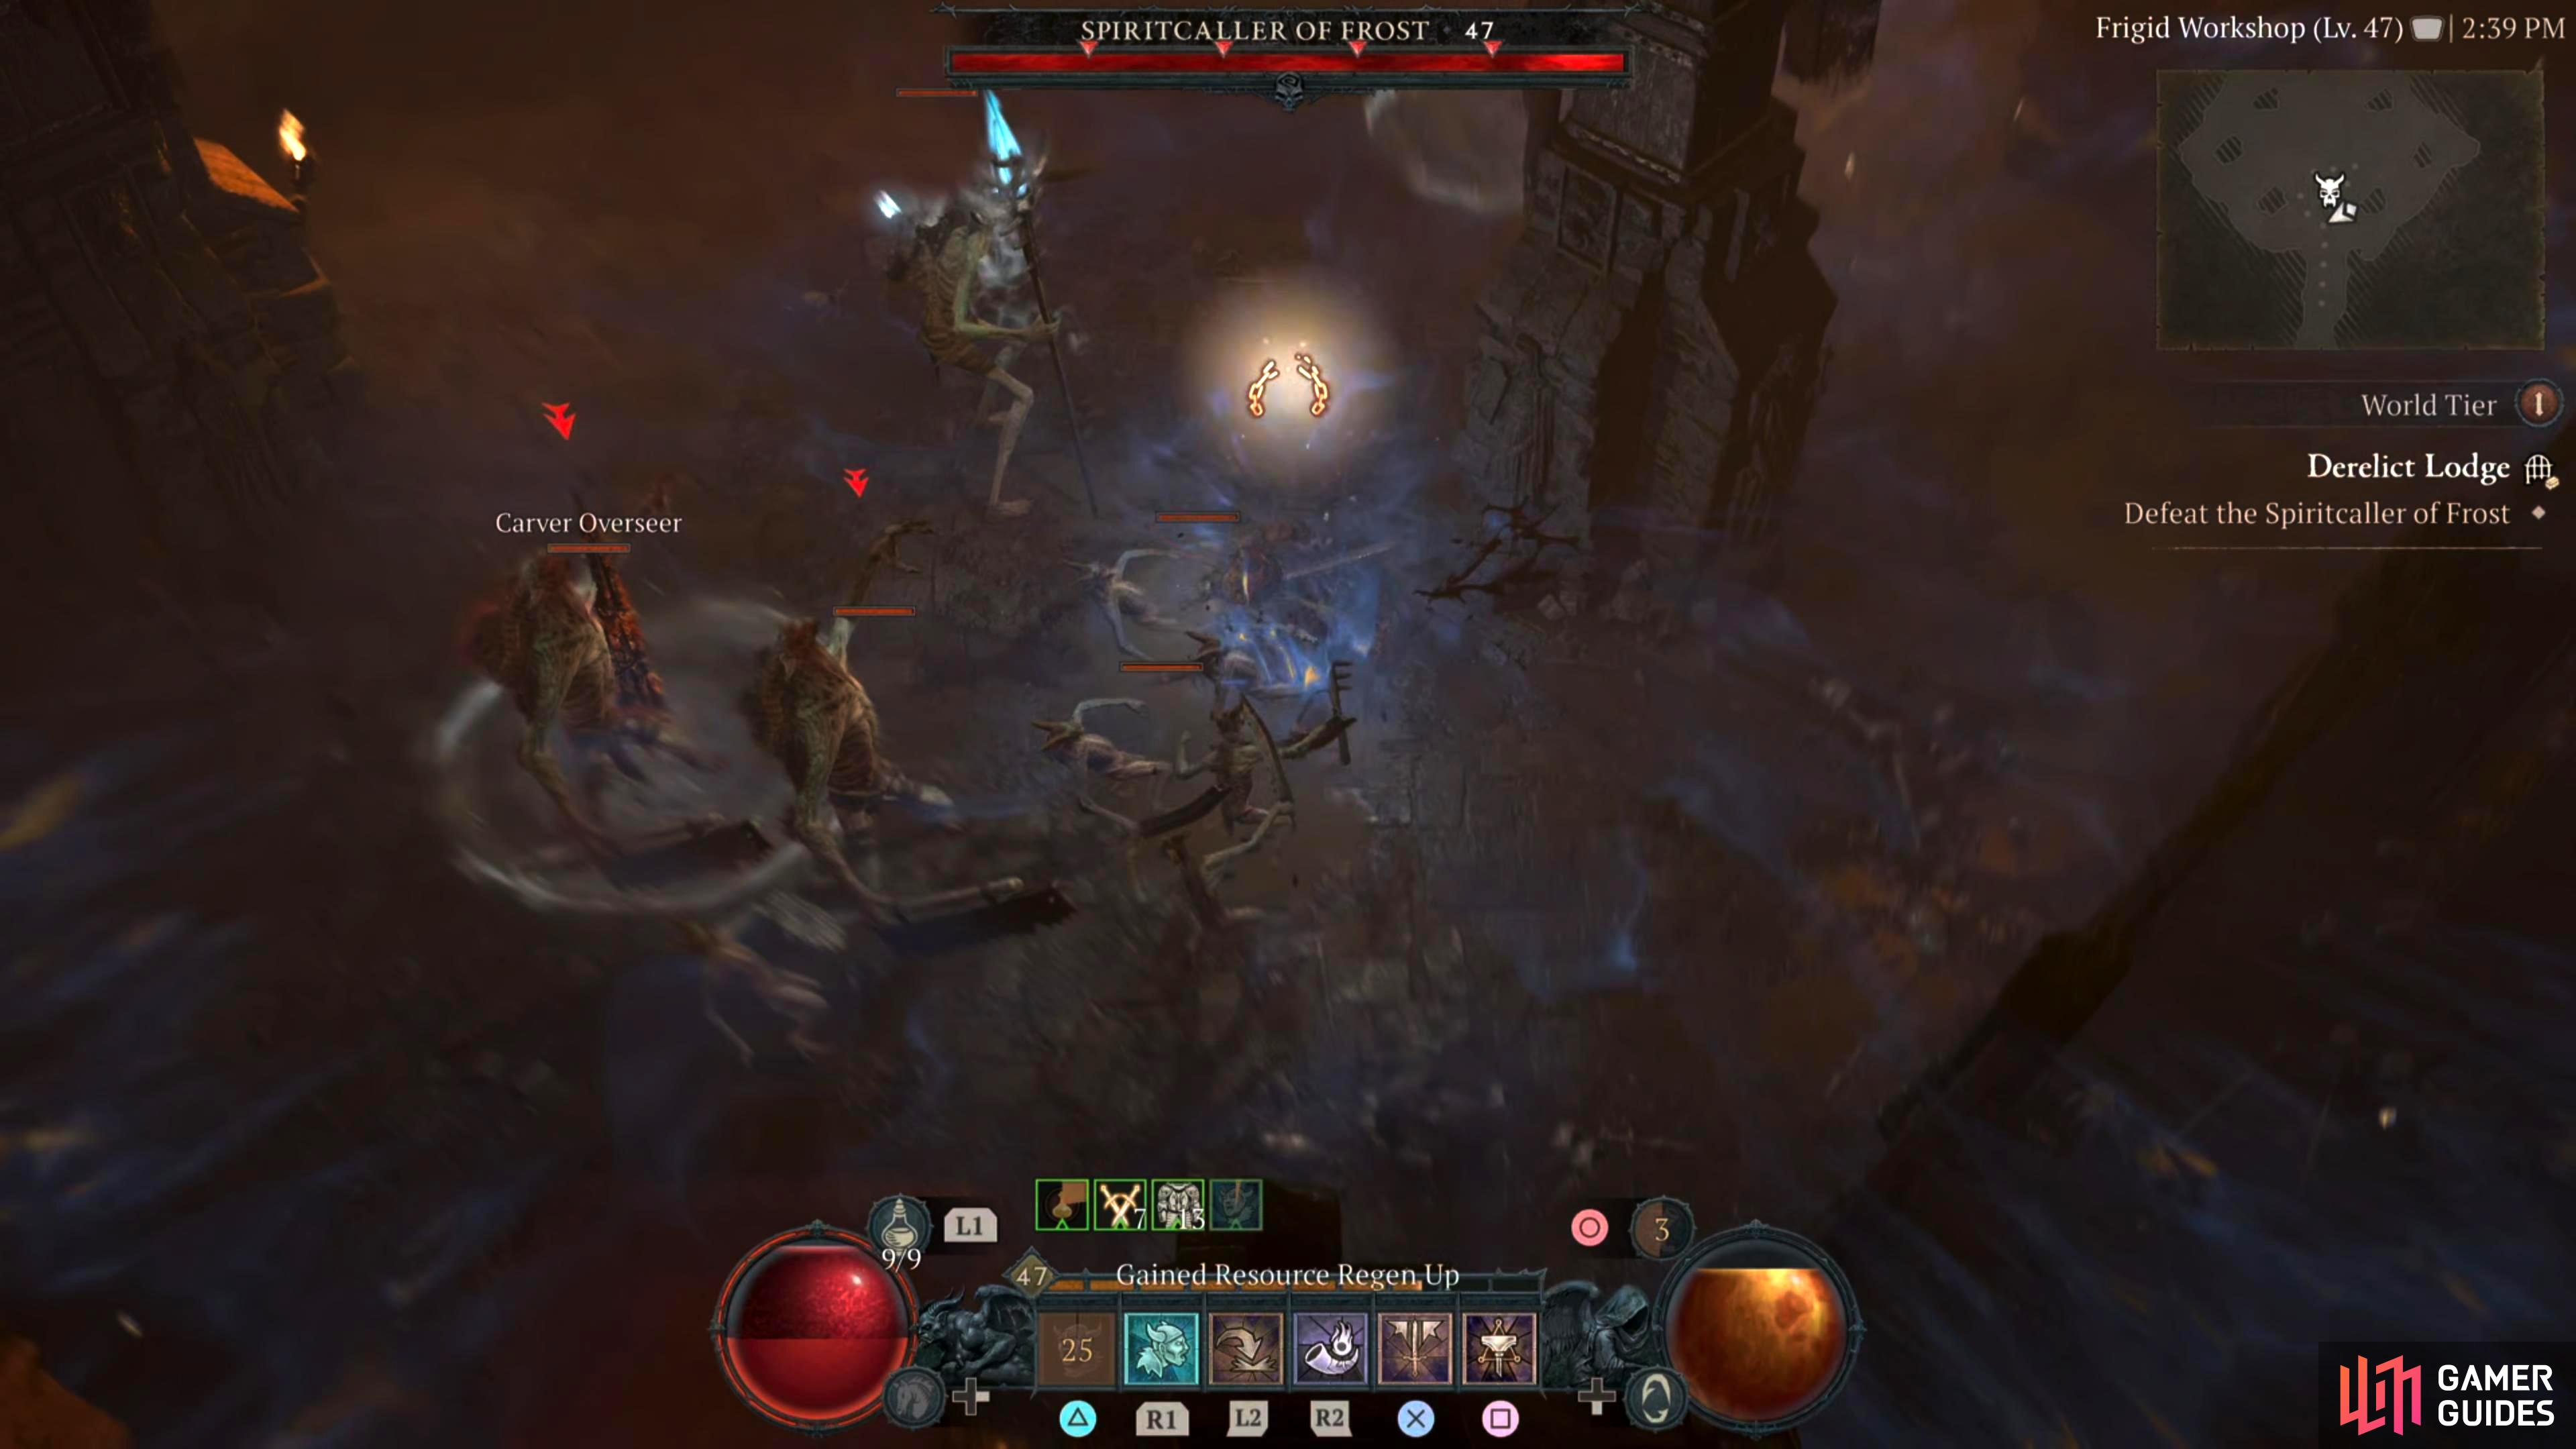
Summon Spike - This will always be the first attack the shaman does in the battle. It will place multiple spikes around the arena that will summon numerous Carver enemies with the Carver Overseers being the toughest. Unfortunately, you can’t destroy these, and throughout the battle, they will fire off projectiles of ice. Ideally, you want to keep moving the boss around the arena where they will become less of a threat.
Tri-Ice - This is a simple ice spell that splits off into three projectiles. Simply dodge, or move away from the incoming projectiles.
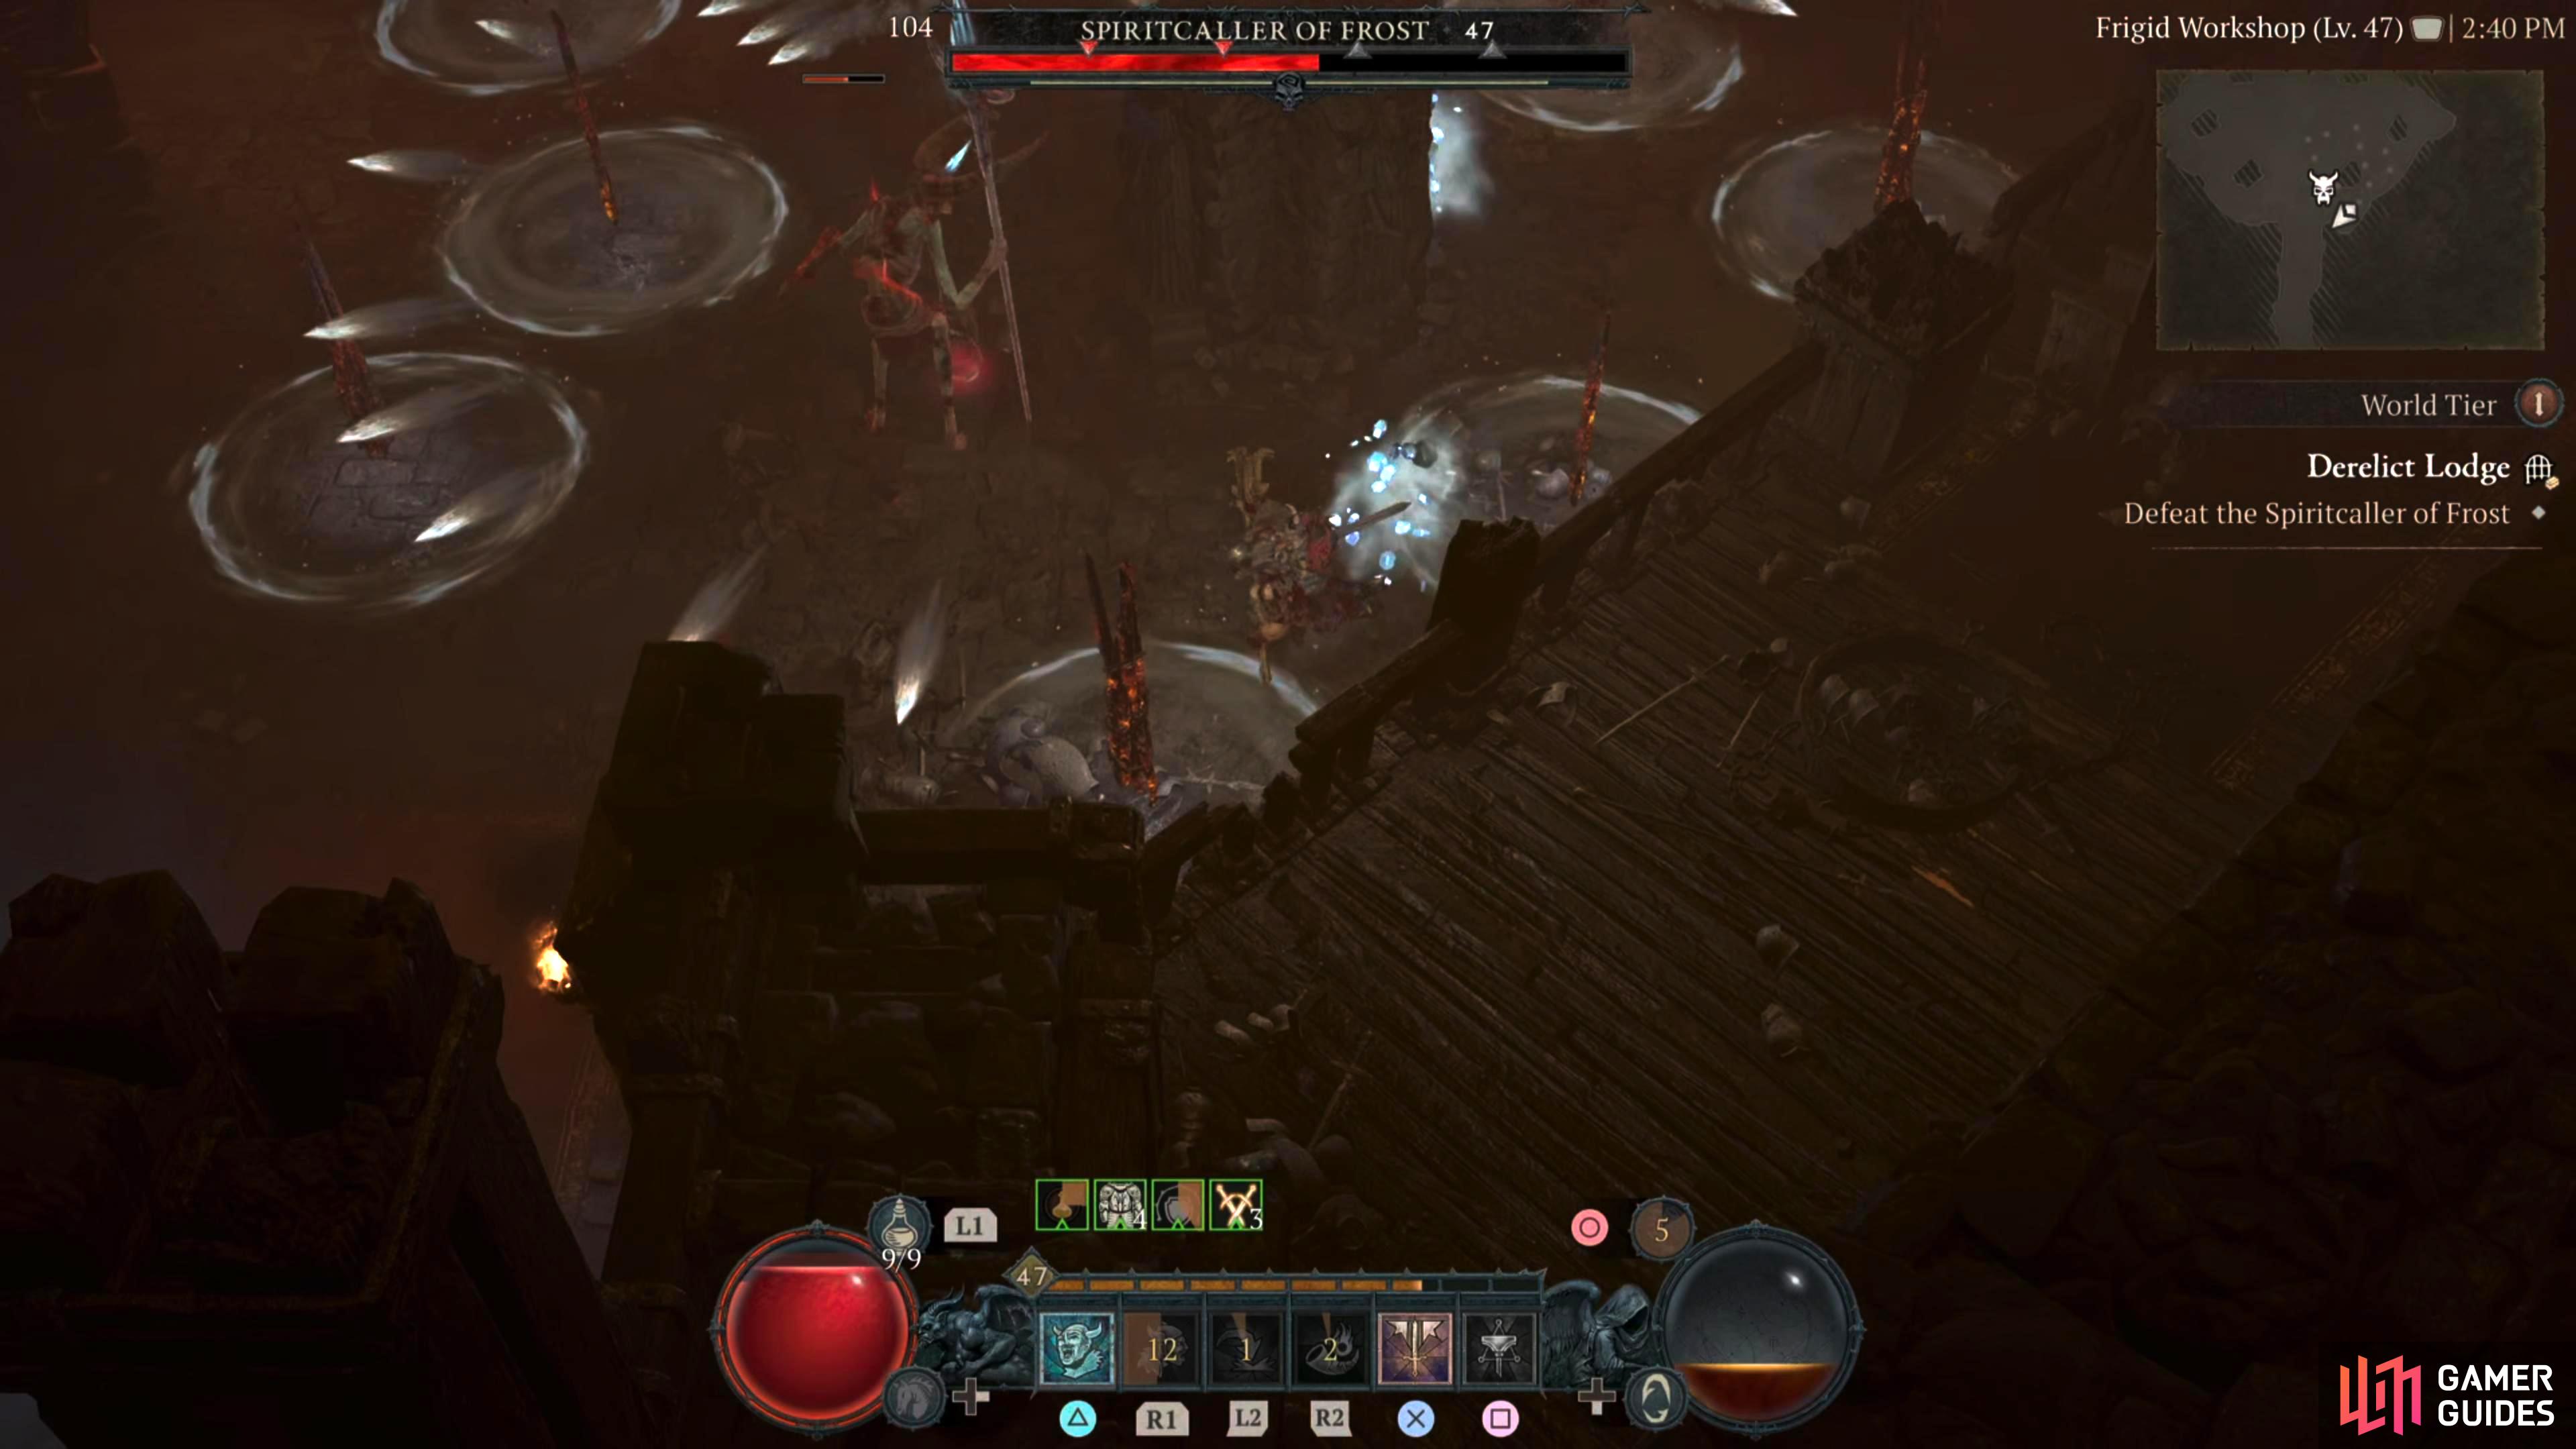
Ice Barrage - Almost exactly the same as Tri-Ice, but it has a couple of differences. First is, there are approximately four to five projectiles. Secondly, these come from the spikes. The boss will move its hand towards a spike, and that spike will fire off the barrage. Finally, these projectiles have a bit more velocity, meaning they will get to you sooner than the other attack.
Carver Resurrection - As stated earlier, the boss can resurrect the Carver Overseers you’ve defeated. Once again, there isn’t much you can do about this other than defeat them again.
Frost Glyphs - The boss will place 3-4 blue glyphs on the floor before exploding them into a mist of frost. If you’re hit by this, you’ll get chilled, and be slowed down. These go off pretty quick, so make sure you move out of them as soon as you see them.
This battle is definitely more of a focus on the boss and not the summons type of fight as the boss will continuously summon more and more enemies throughout the battle which could overwhelm you. Sipping on a Ice Resistance Potion wouldn’t be a bad idea, or having it on some armor pieces, but the Ice isn’t too problematic.
What you want to do is keep on the boss at all times while continuously attacking it, and then using a skill spender on an area of effect attack. You may also want to save your Ultimate after the summons become plenty. That way you can take them all out in one fell swoop. Also, good timing on your defensive tools can change the tide of battle, especially when you have numerous enemies attacking you at once. As stated above, this fight is more of dealing with the summons while still consistently hitting the boss. If you take it slow, you could get overwhelmed.
!Carthas is the final boss of the Defiled Halls side quest dungeon that you must defeat as part of the Lost Legacy side quest. He is a sword and shield spectral entity and can summon other ghostly paladins to his aid. He casts ground AoE attacks that erupt and has a reasonable health pool.
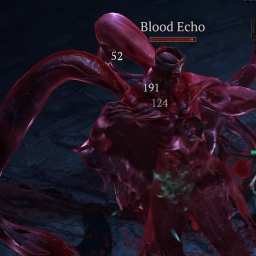
The Blood Echo is the final boss of the side quest dungeon Halls of Dark Portent, found during the Side Quest By Three They Come in Hawezar. It is essentially a Blood Bishop boss in all but name, having the same attack patterns and abilities.
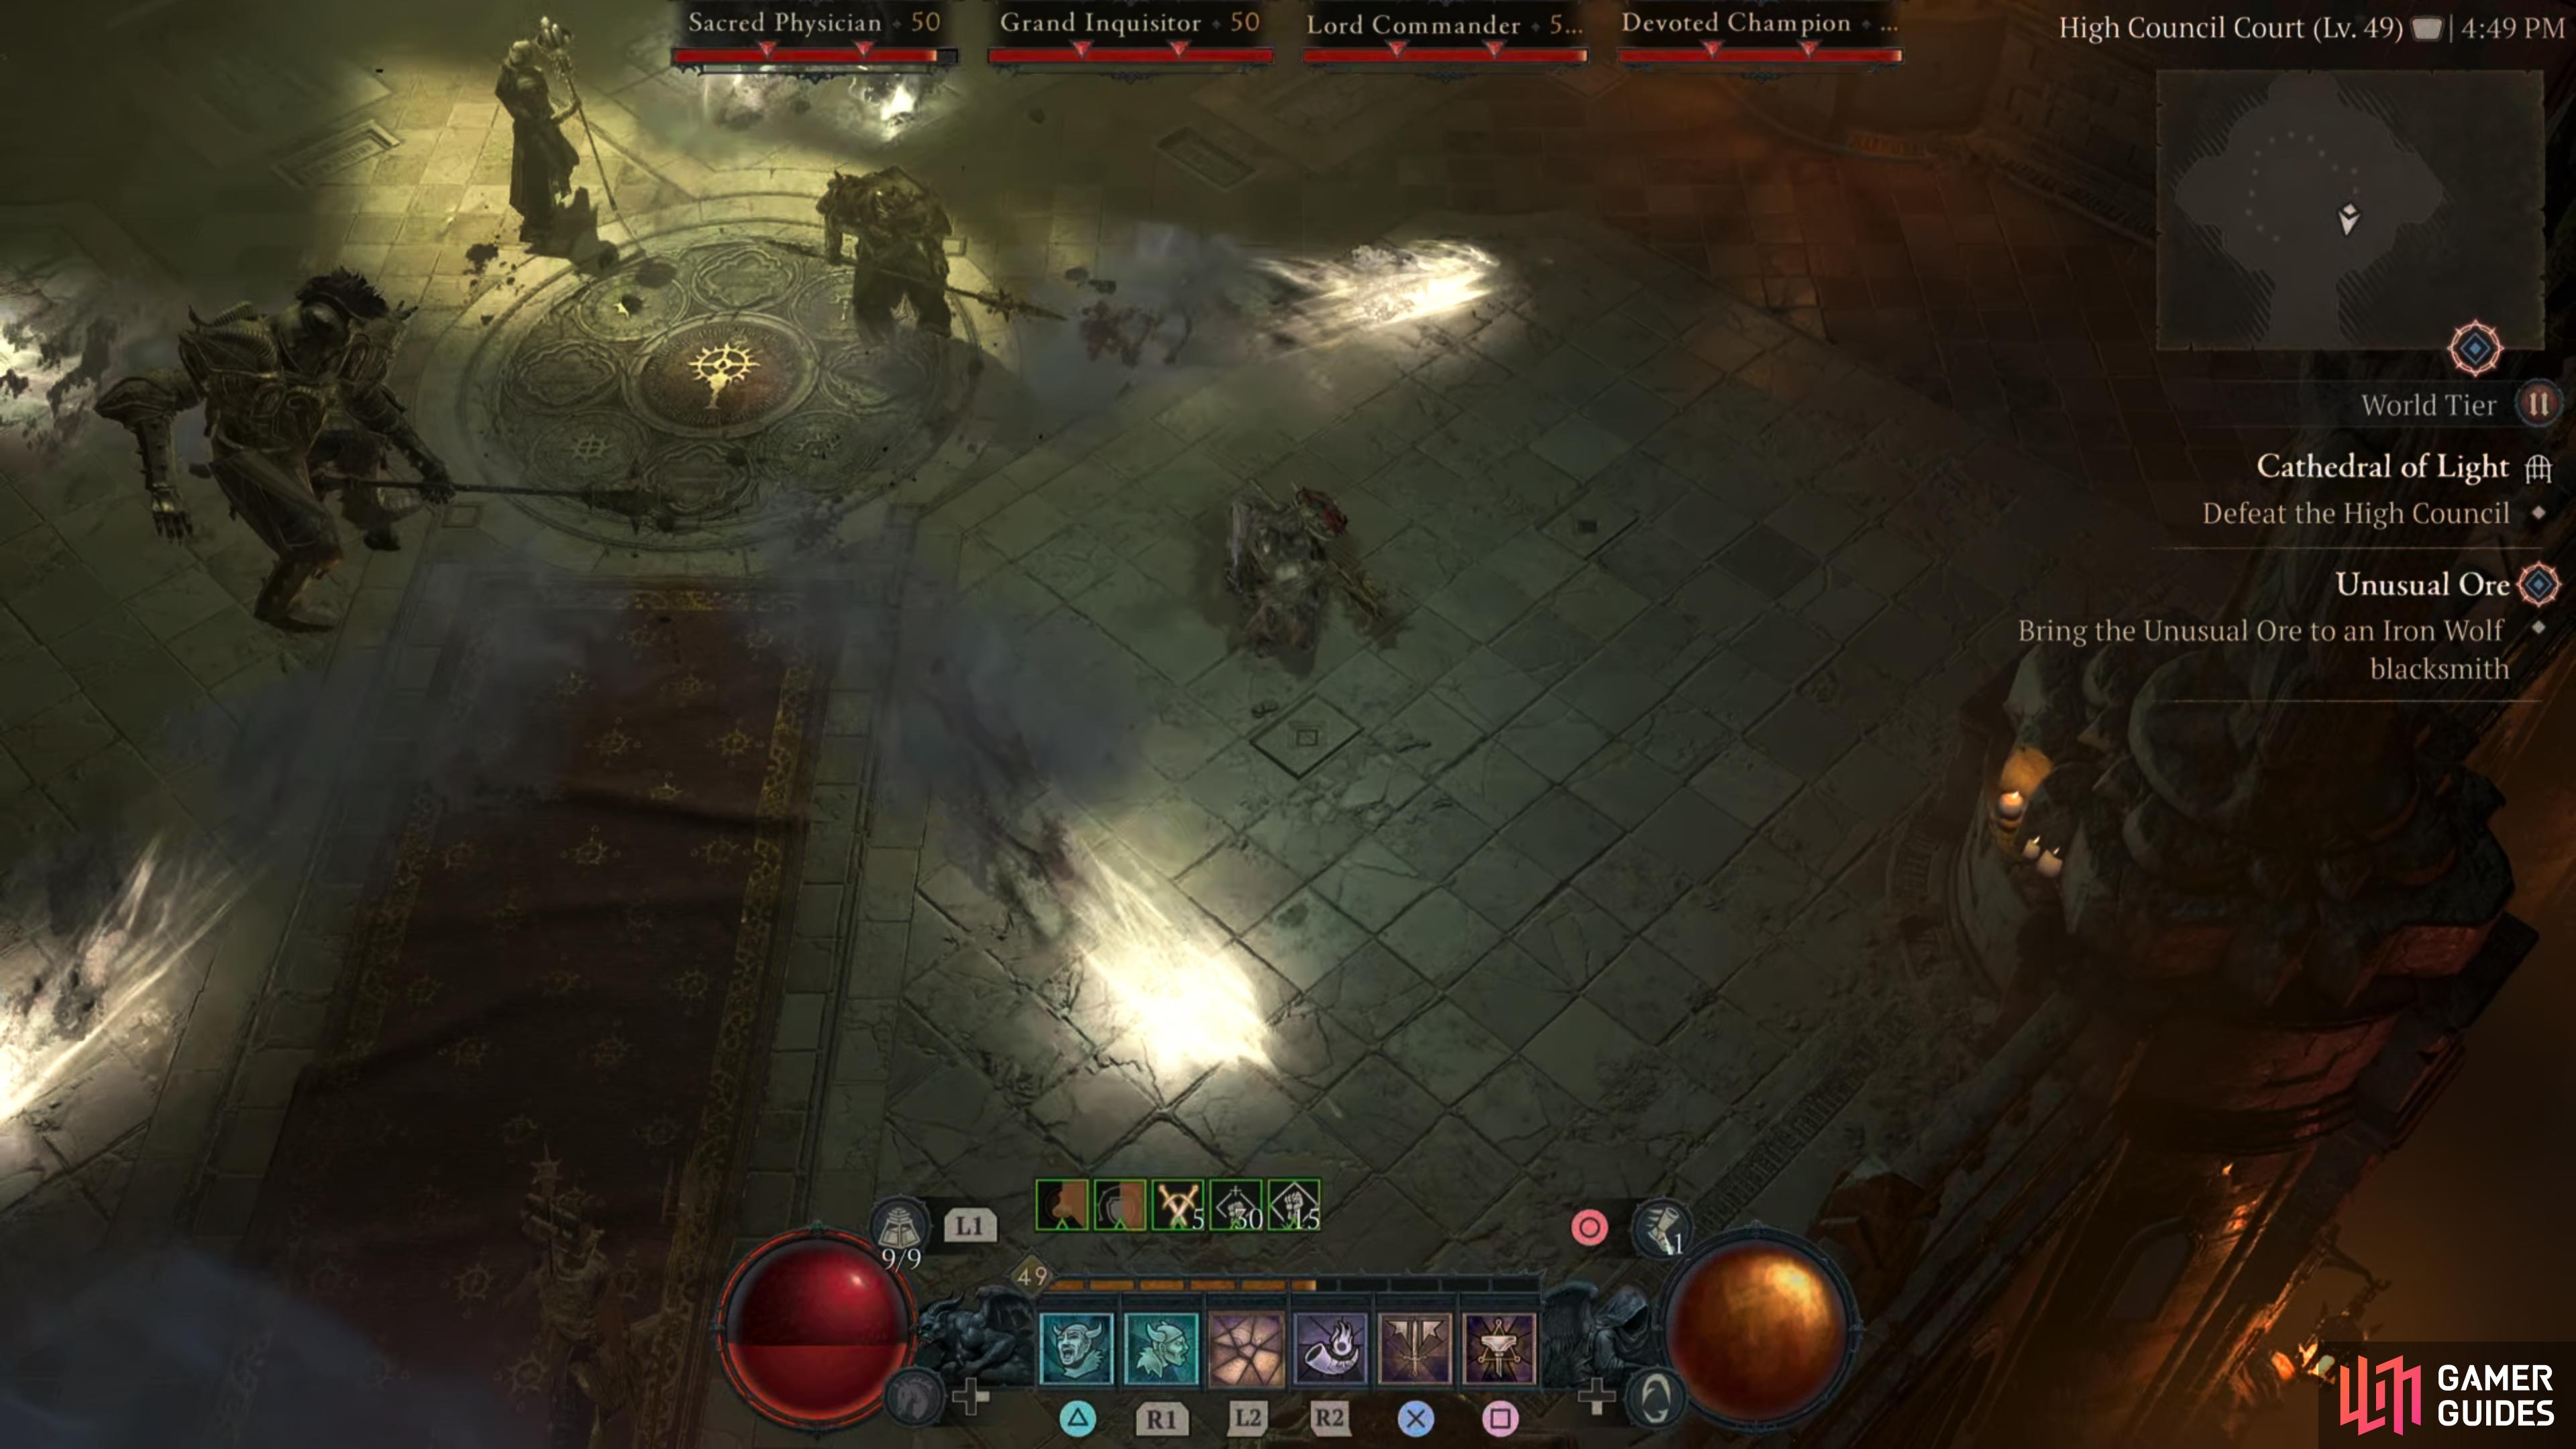
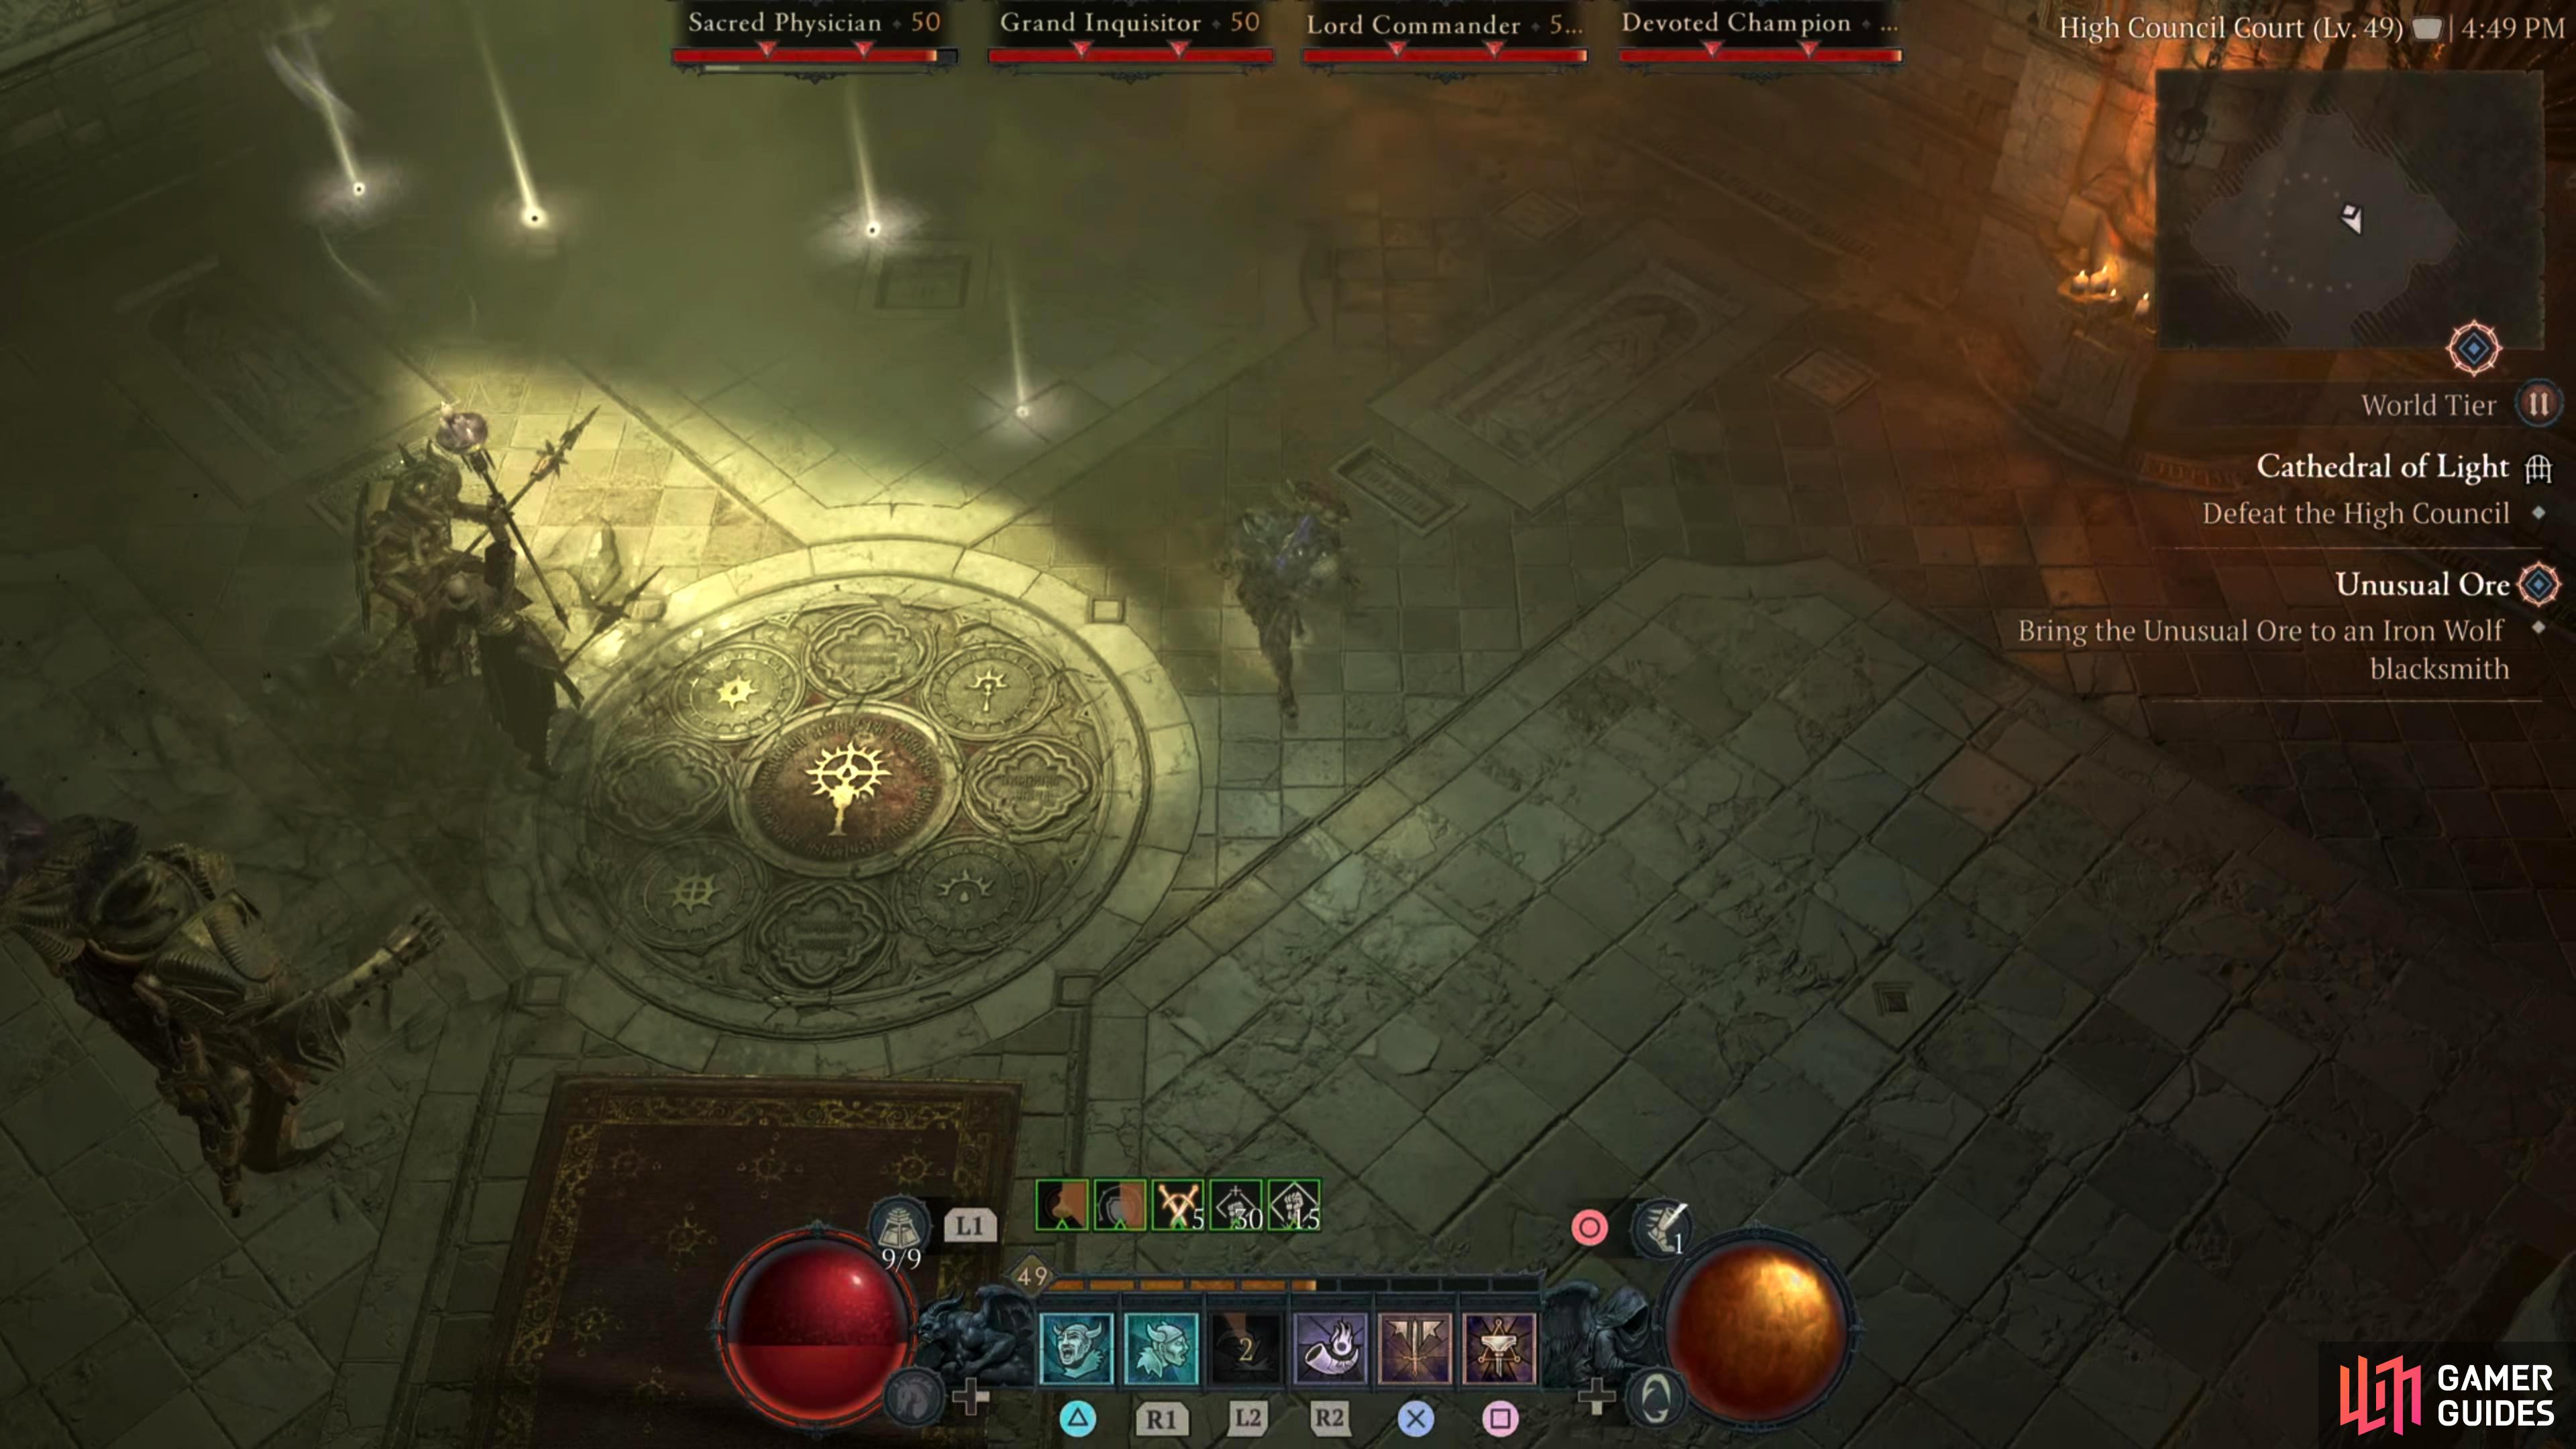
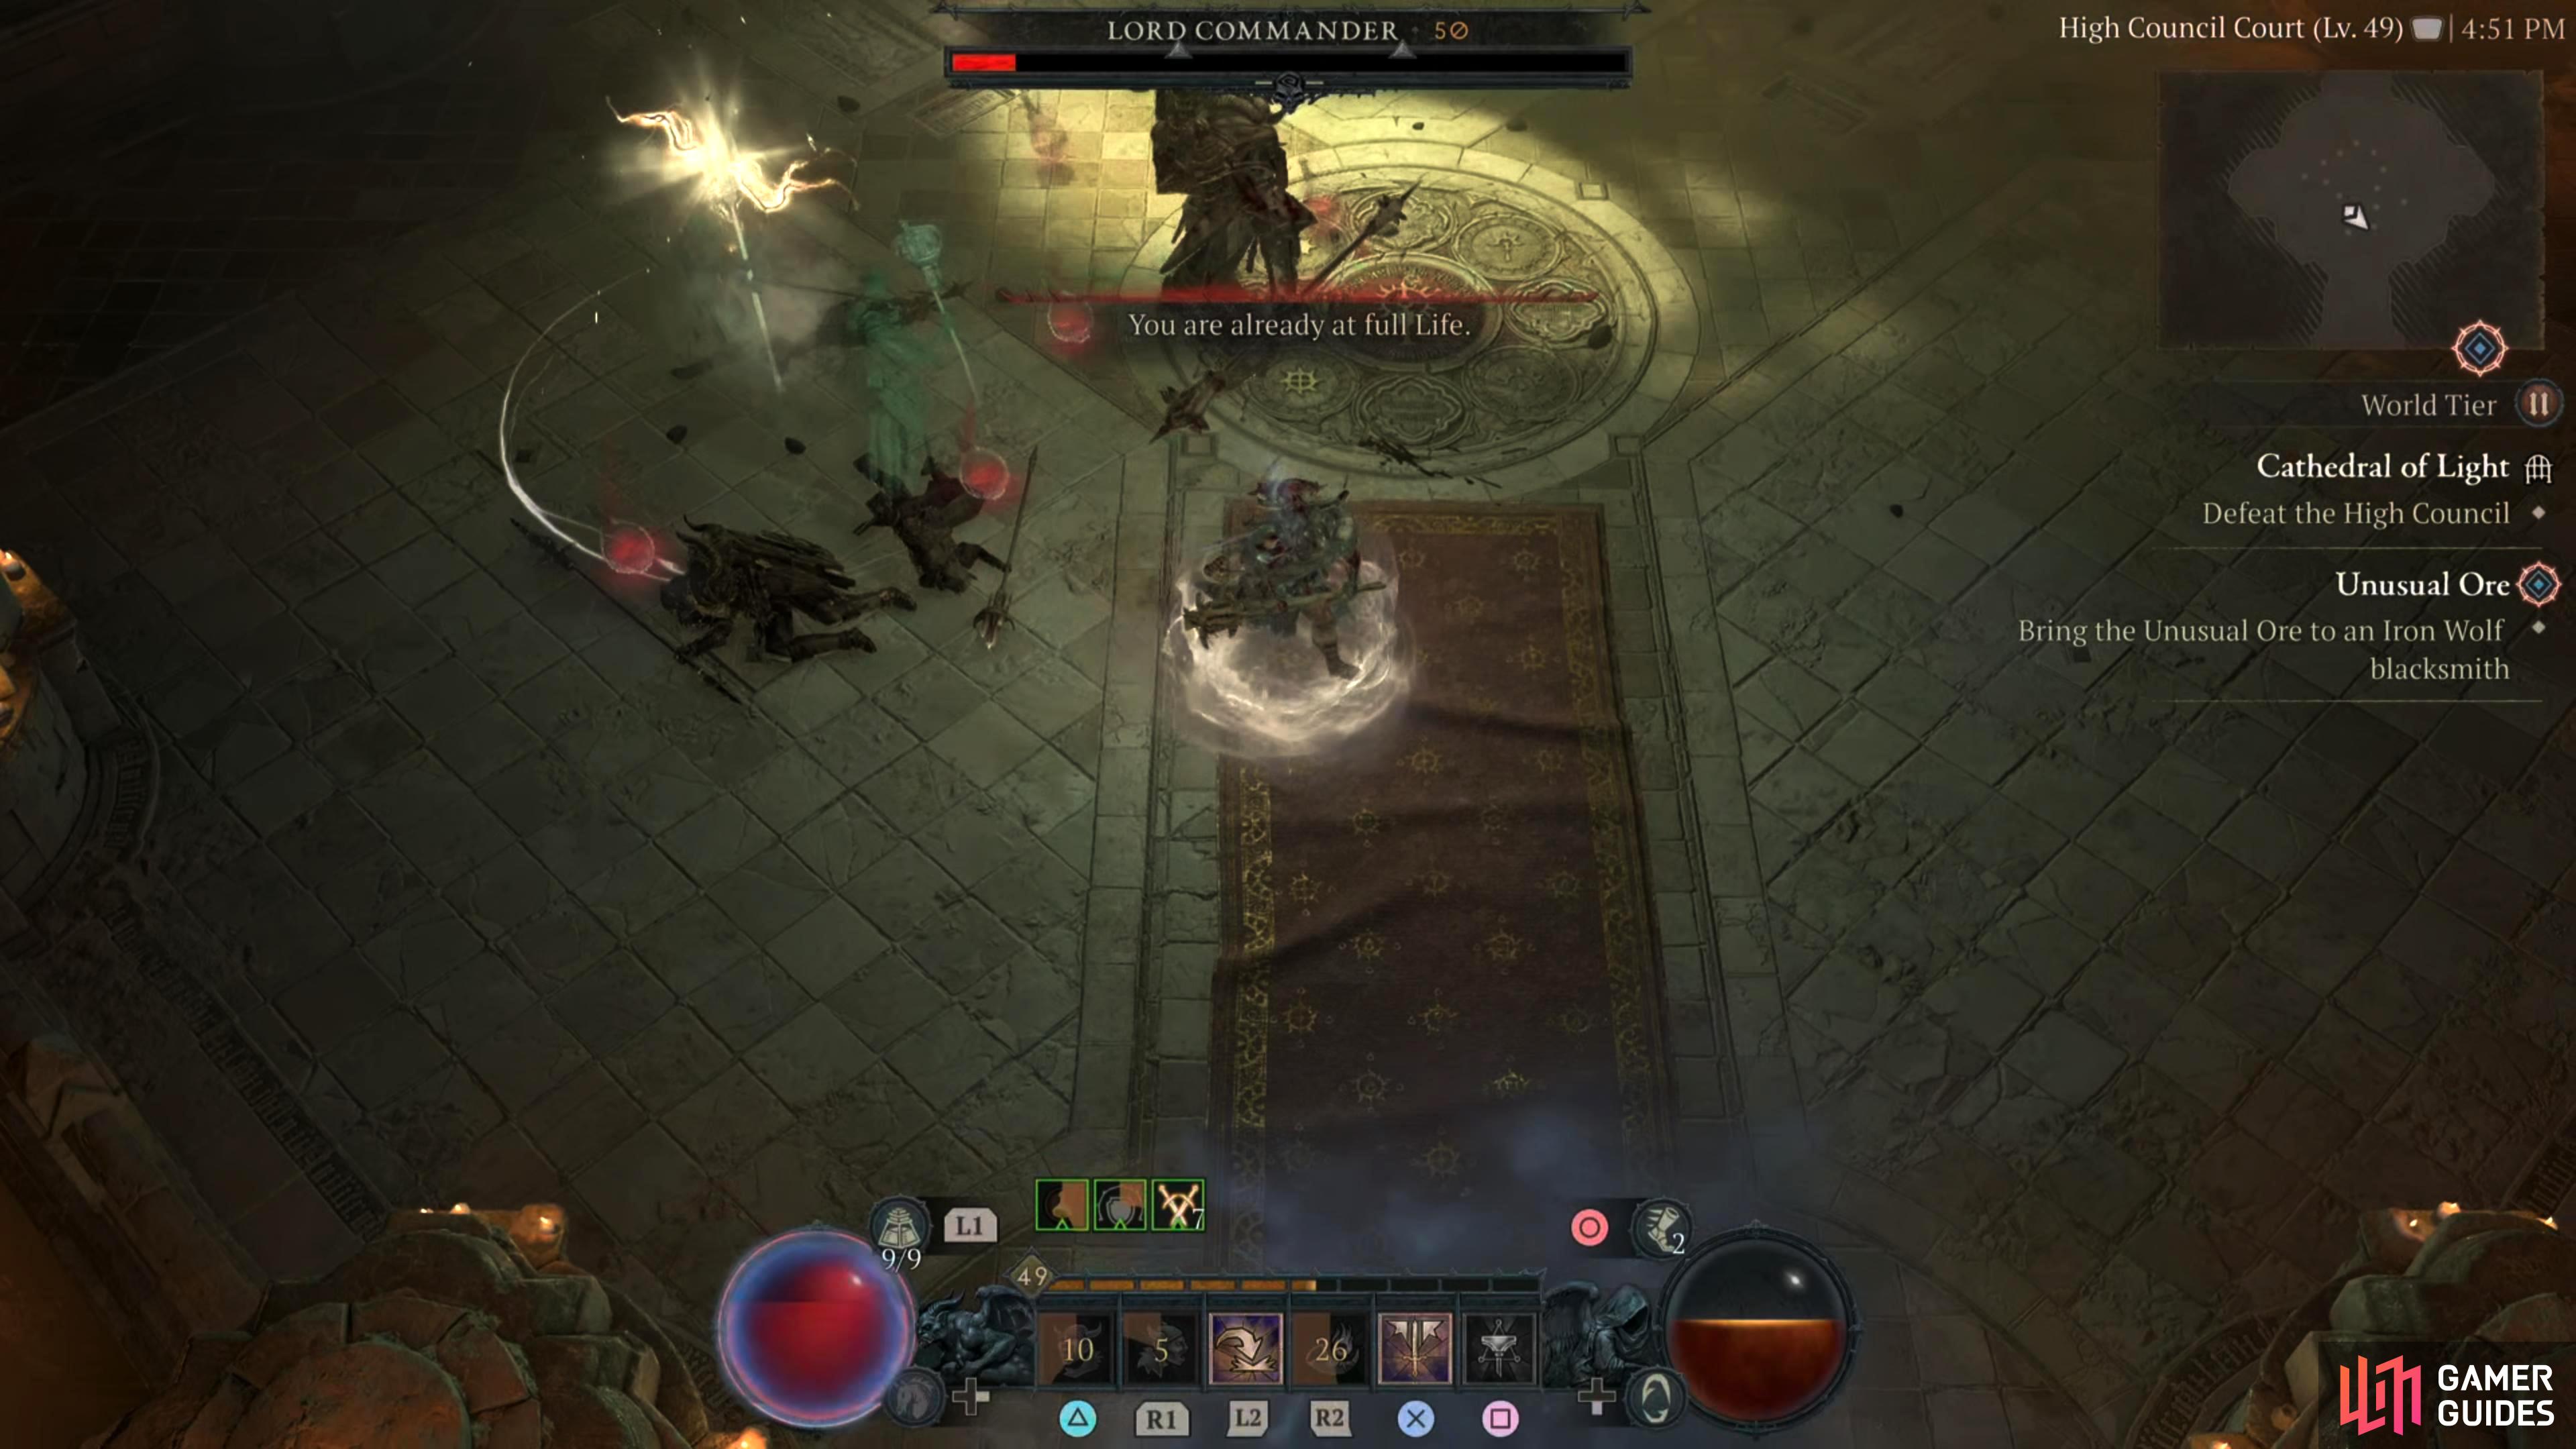
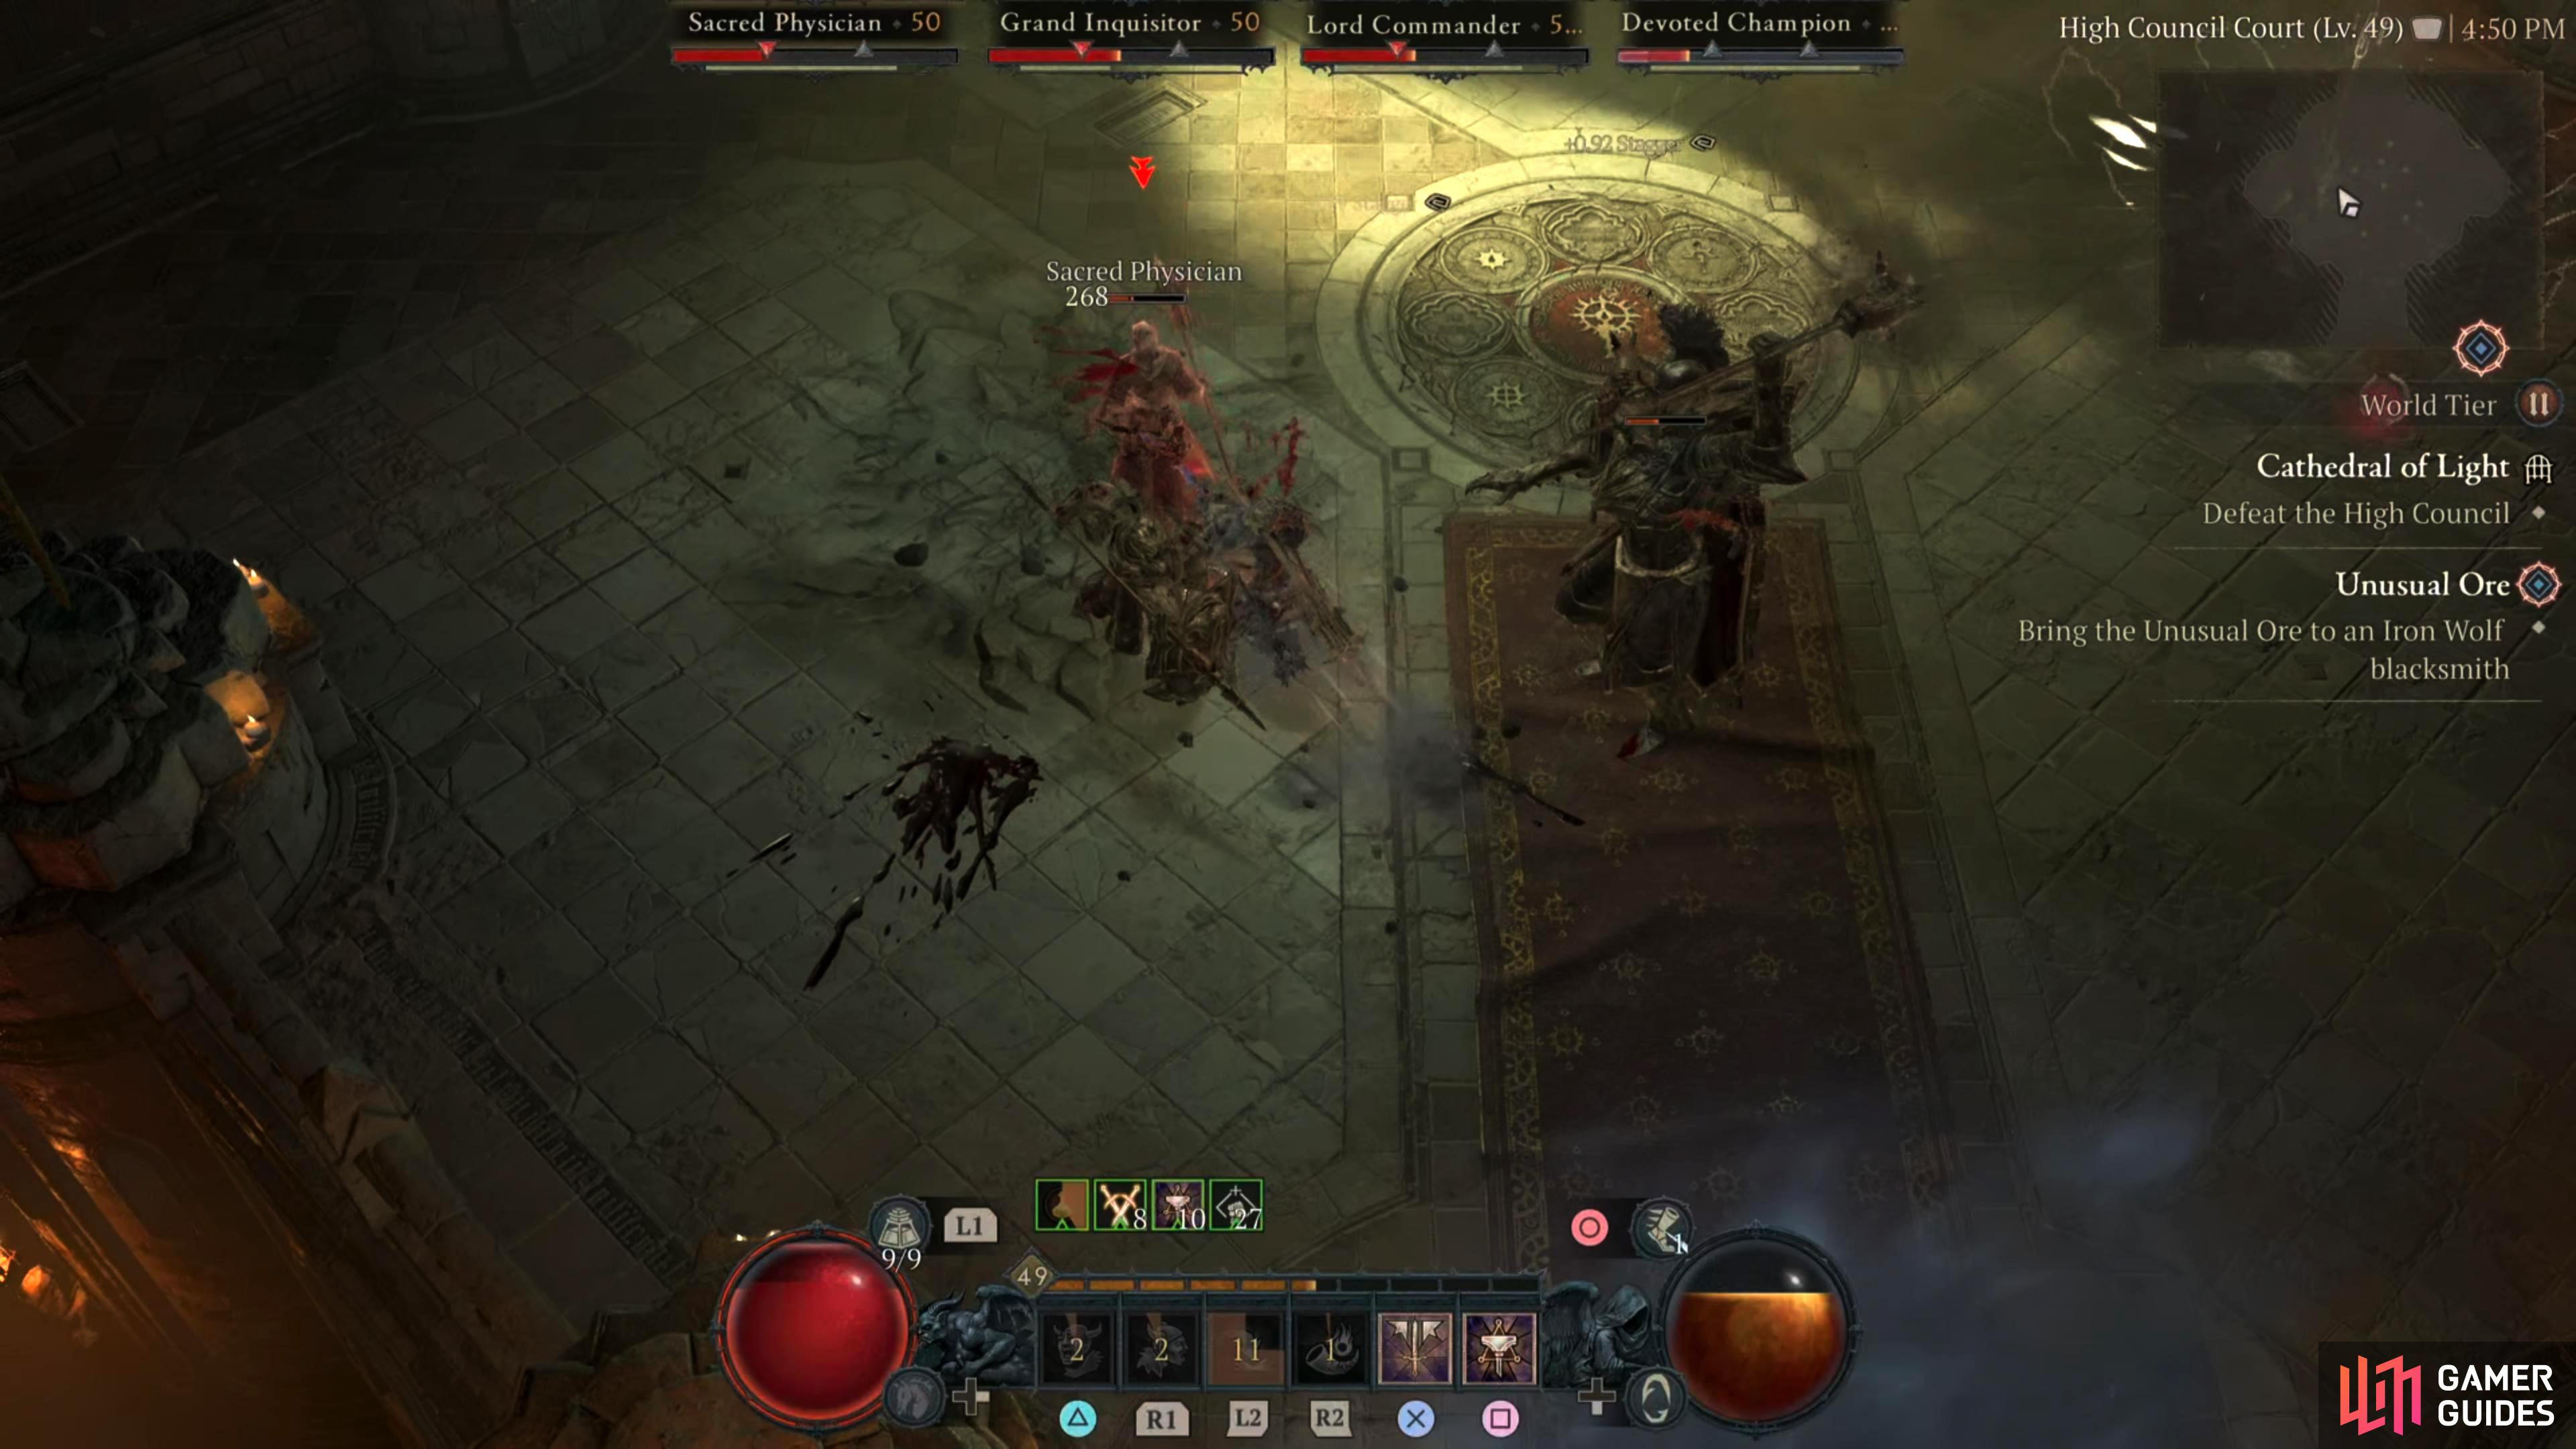
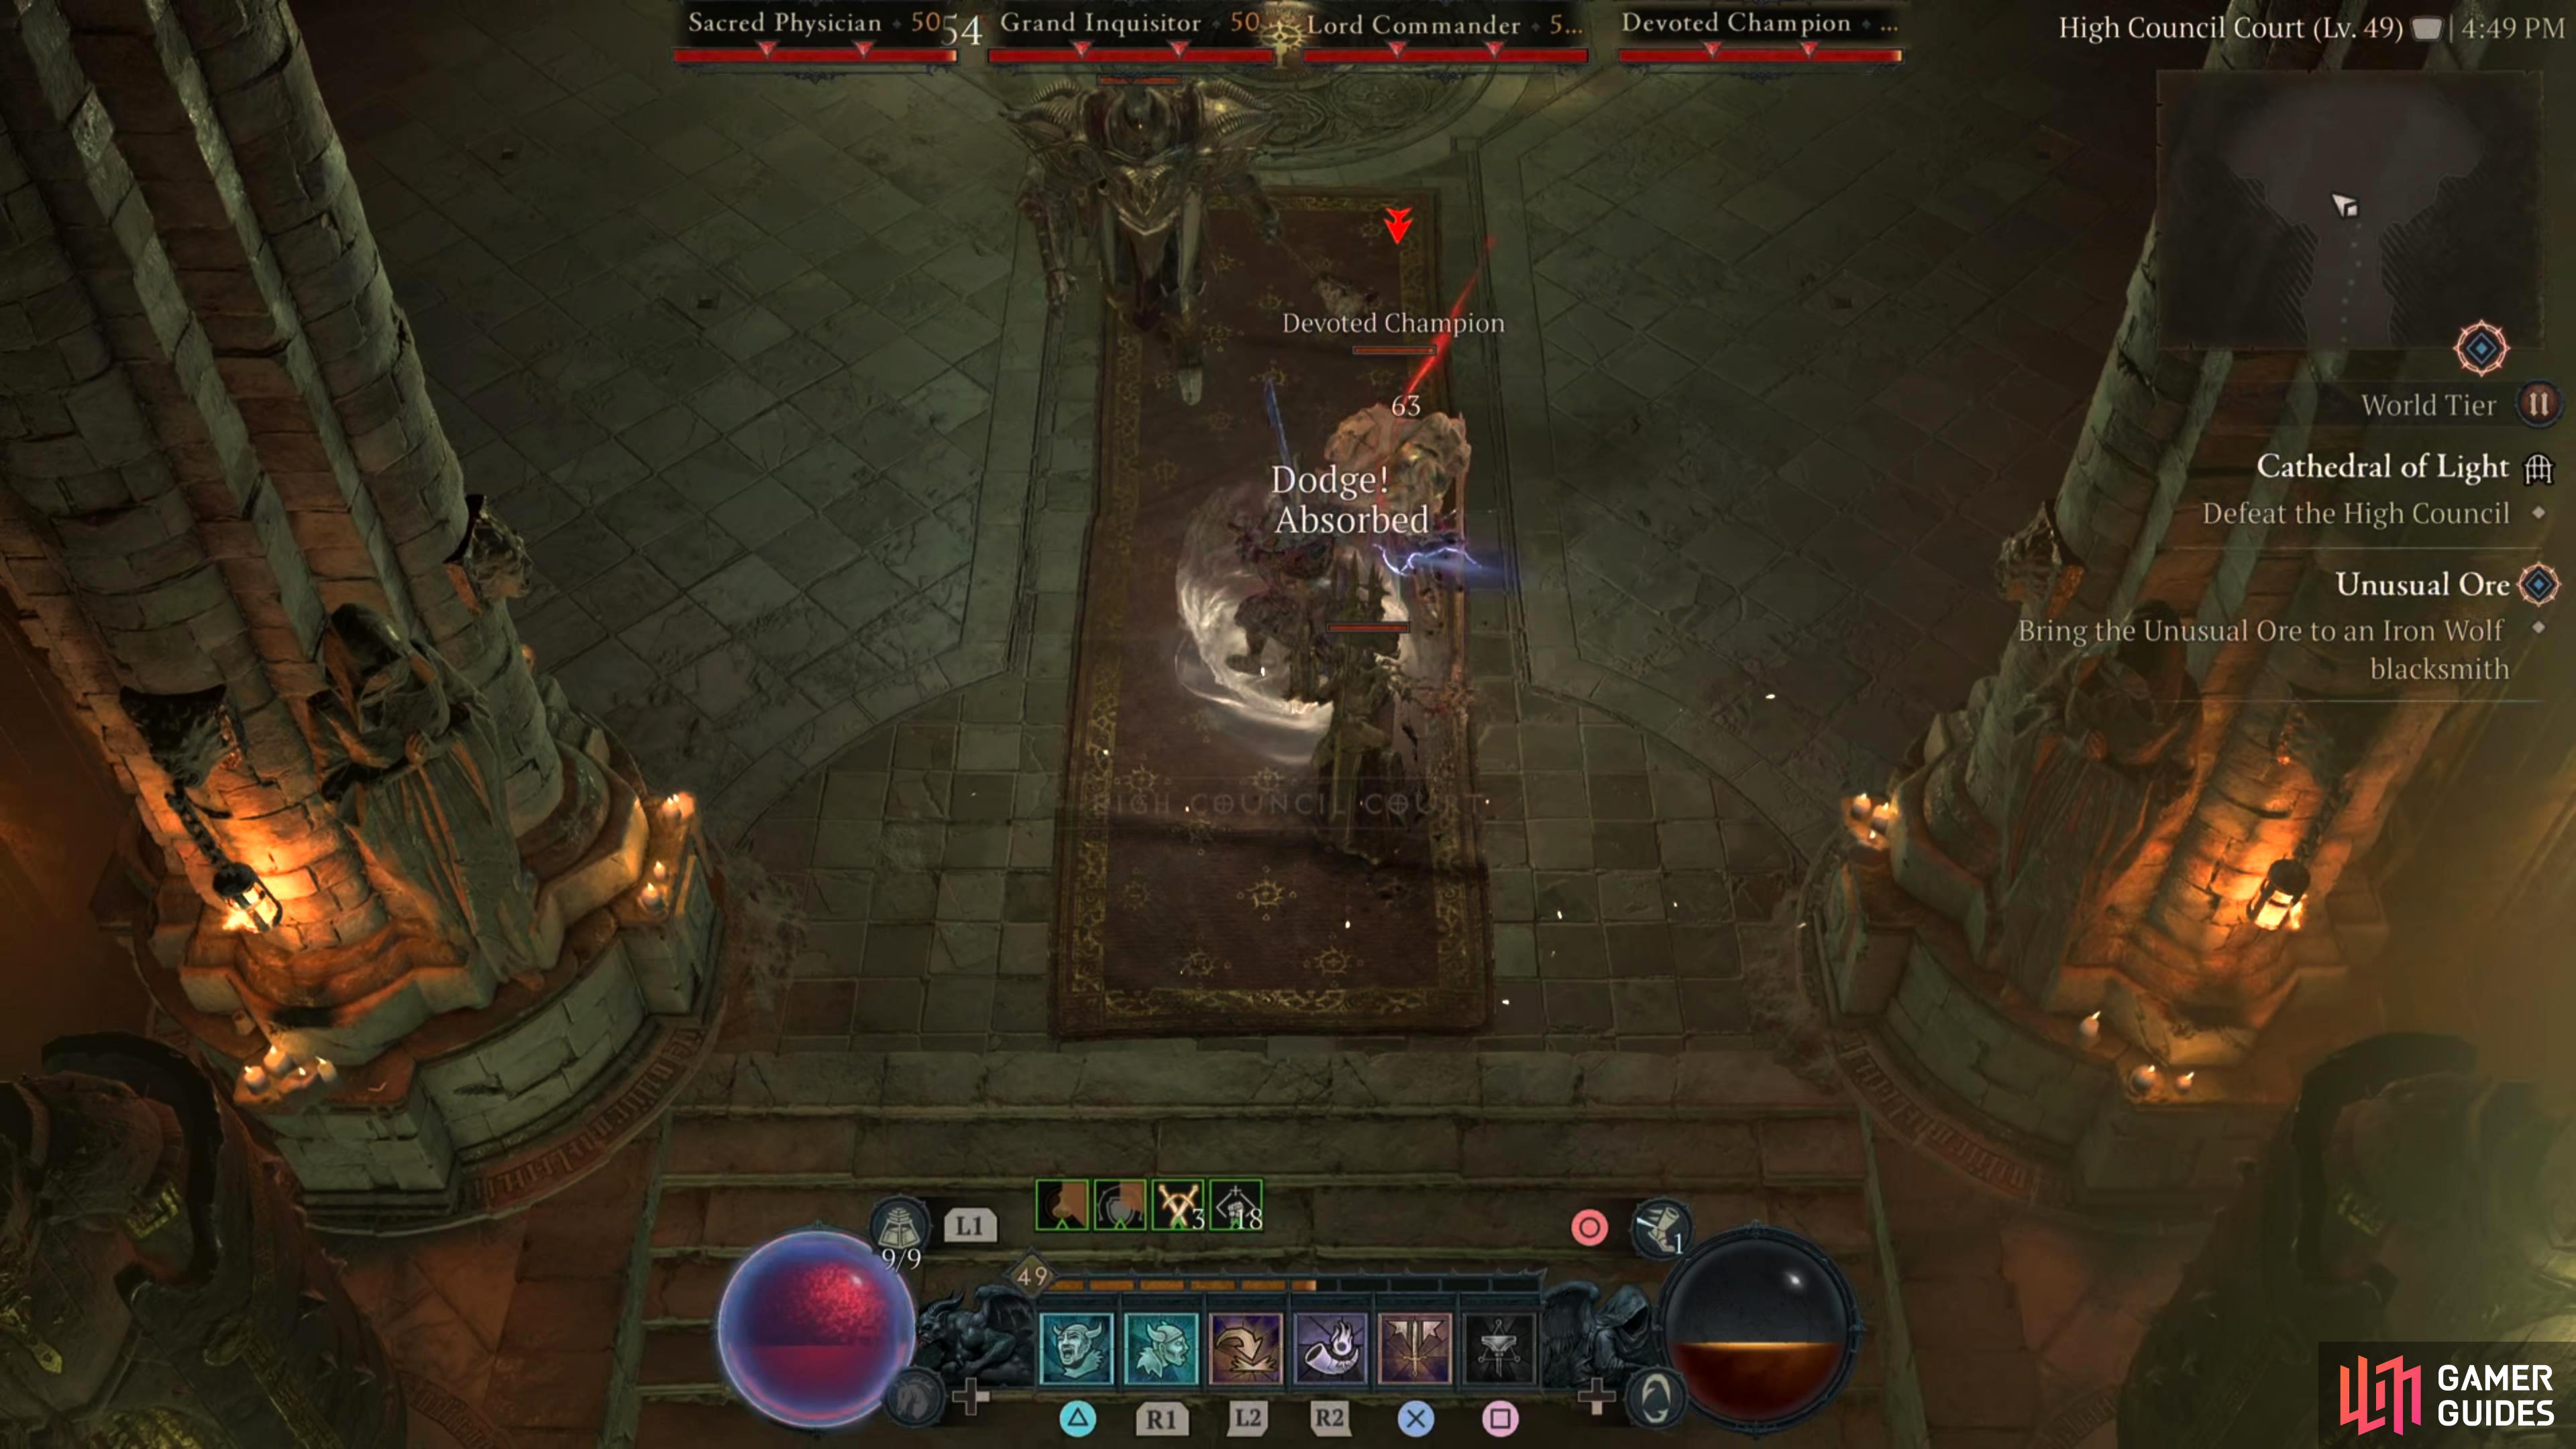
The High Council resides in the Cathedral of Light. The council consists of four members which include the Sacred Physician, Grand Inquisitor, Devoted Champion, and the Lord Commander.
Description
The High Council is a slightly uncommon fight as it’s one of the few boss battles which feature multiple bosses with there being four in this case. They all have their own skill set which means you’ll want to defeat them in a specific order. Here is a quick look at what each council member can do:
Sacred Physician - The clue of what they can do is in their name. They are a healer who has access to powerful healing magic which they will use to heal the other council members. This target should be your first priority.
Grand Inquisitor - This council member mainly stays at range while using Lightning/Holy magic. They are more of a hindrance if anything, but they should be the second priority just to stop them repeatedly casting magic at you.
Devoted Champion Third on your priority list is the Devoted Champion. They’re a melee-range fighter who will spend most of the battle in your face. They can close the distance with a leap attack similar to the Barbarian’s leap, and they have a shield similar to a Horror Captain which will give them a barrier and absorb some damage. The only reason you choose this third over the Lord Commander is that the commander gets a reduced amount of health back every time you defeat them while its minions are still alive.
Lord Commander - Based on the Dreadknight, this hulking menace hits hard, but fortunately, it is on the slower side of the spectrum. Once it’s just you, and this guy, the battle is pretty much won, just make sure you respect its attacks, and dodge them. One last thing about the commander is its Shockwave Slam attack. It will crash down its mace onto the ground which unleashes a shockwave in every non-cardinal direction (NE, SE, NW, SW).
The hardest part of this battle is feeling overwhelmed by the number of bosses. Don’t be, as you should be able to burn them down pretty quickly, especially the physician (healer). When you have all four bosses still alive, you’ll want to stay mobile to avoid a lot of the attacks coming your way. As the bosses start to dwindle, you can start moving less.
Also, you’ll want to take the bosses out in the following order: Physician, Inquisitor, Champion, then Lord Commander, although it doesn’t matter too much as long as the Lord Commander is the last standing as they will get revived with reduced health if any of the other three are still up. Note that the Physician, and the Inquisitor will still stay up in a corporeal form, and still cast attacks at you. They can’t be damaged in this state, so focus on taking down the remaining bosses.
Just when you think the battle is finished, a large group of Clerics will rush you from the southern door and attack you. These are just regular enemies, but if your health is low from the boss fight, they may just finish you off, so be careful, and top up your health immediately after the Lord Commander falls.
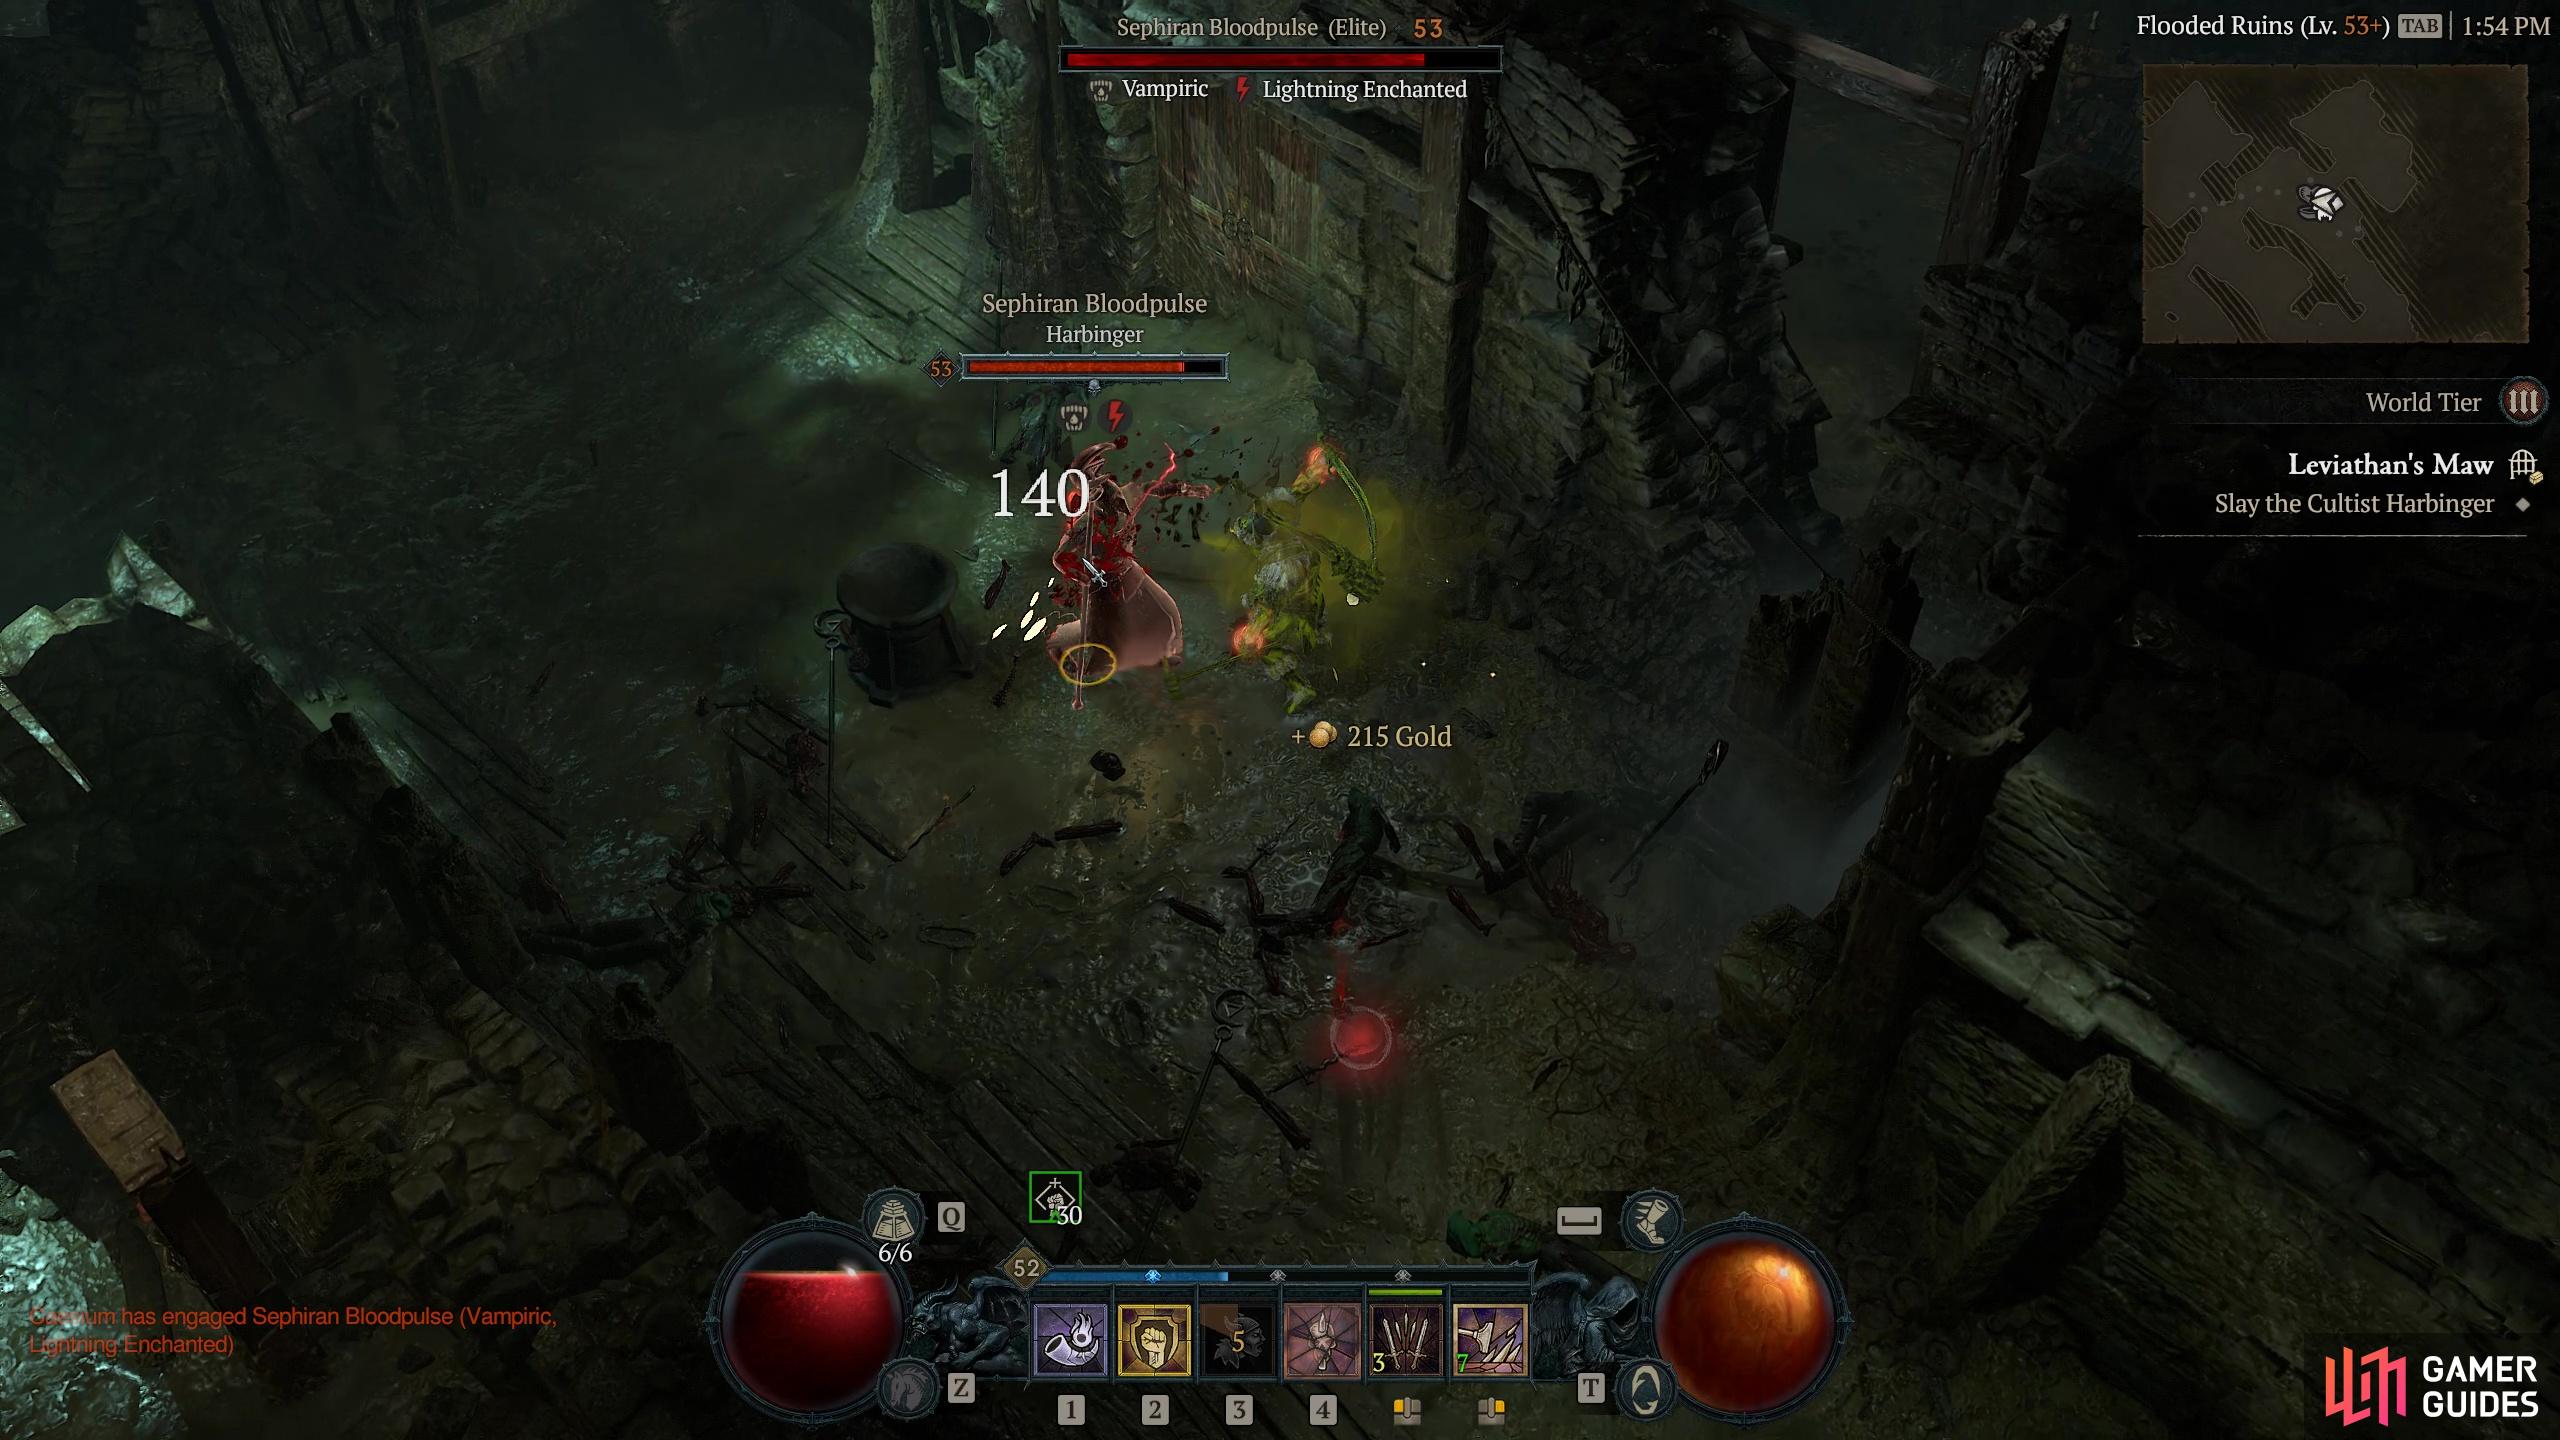
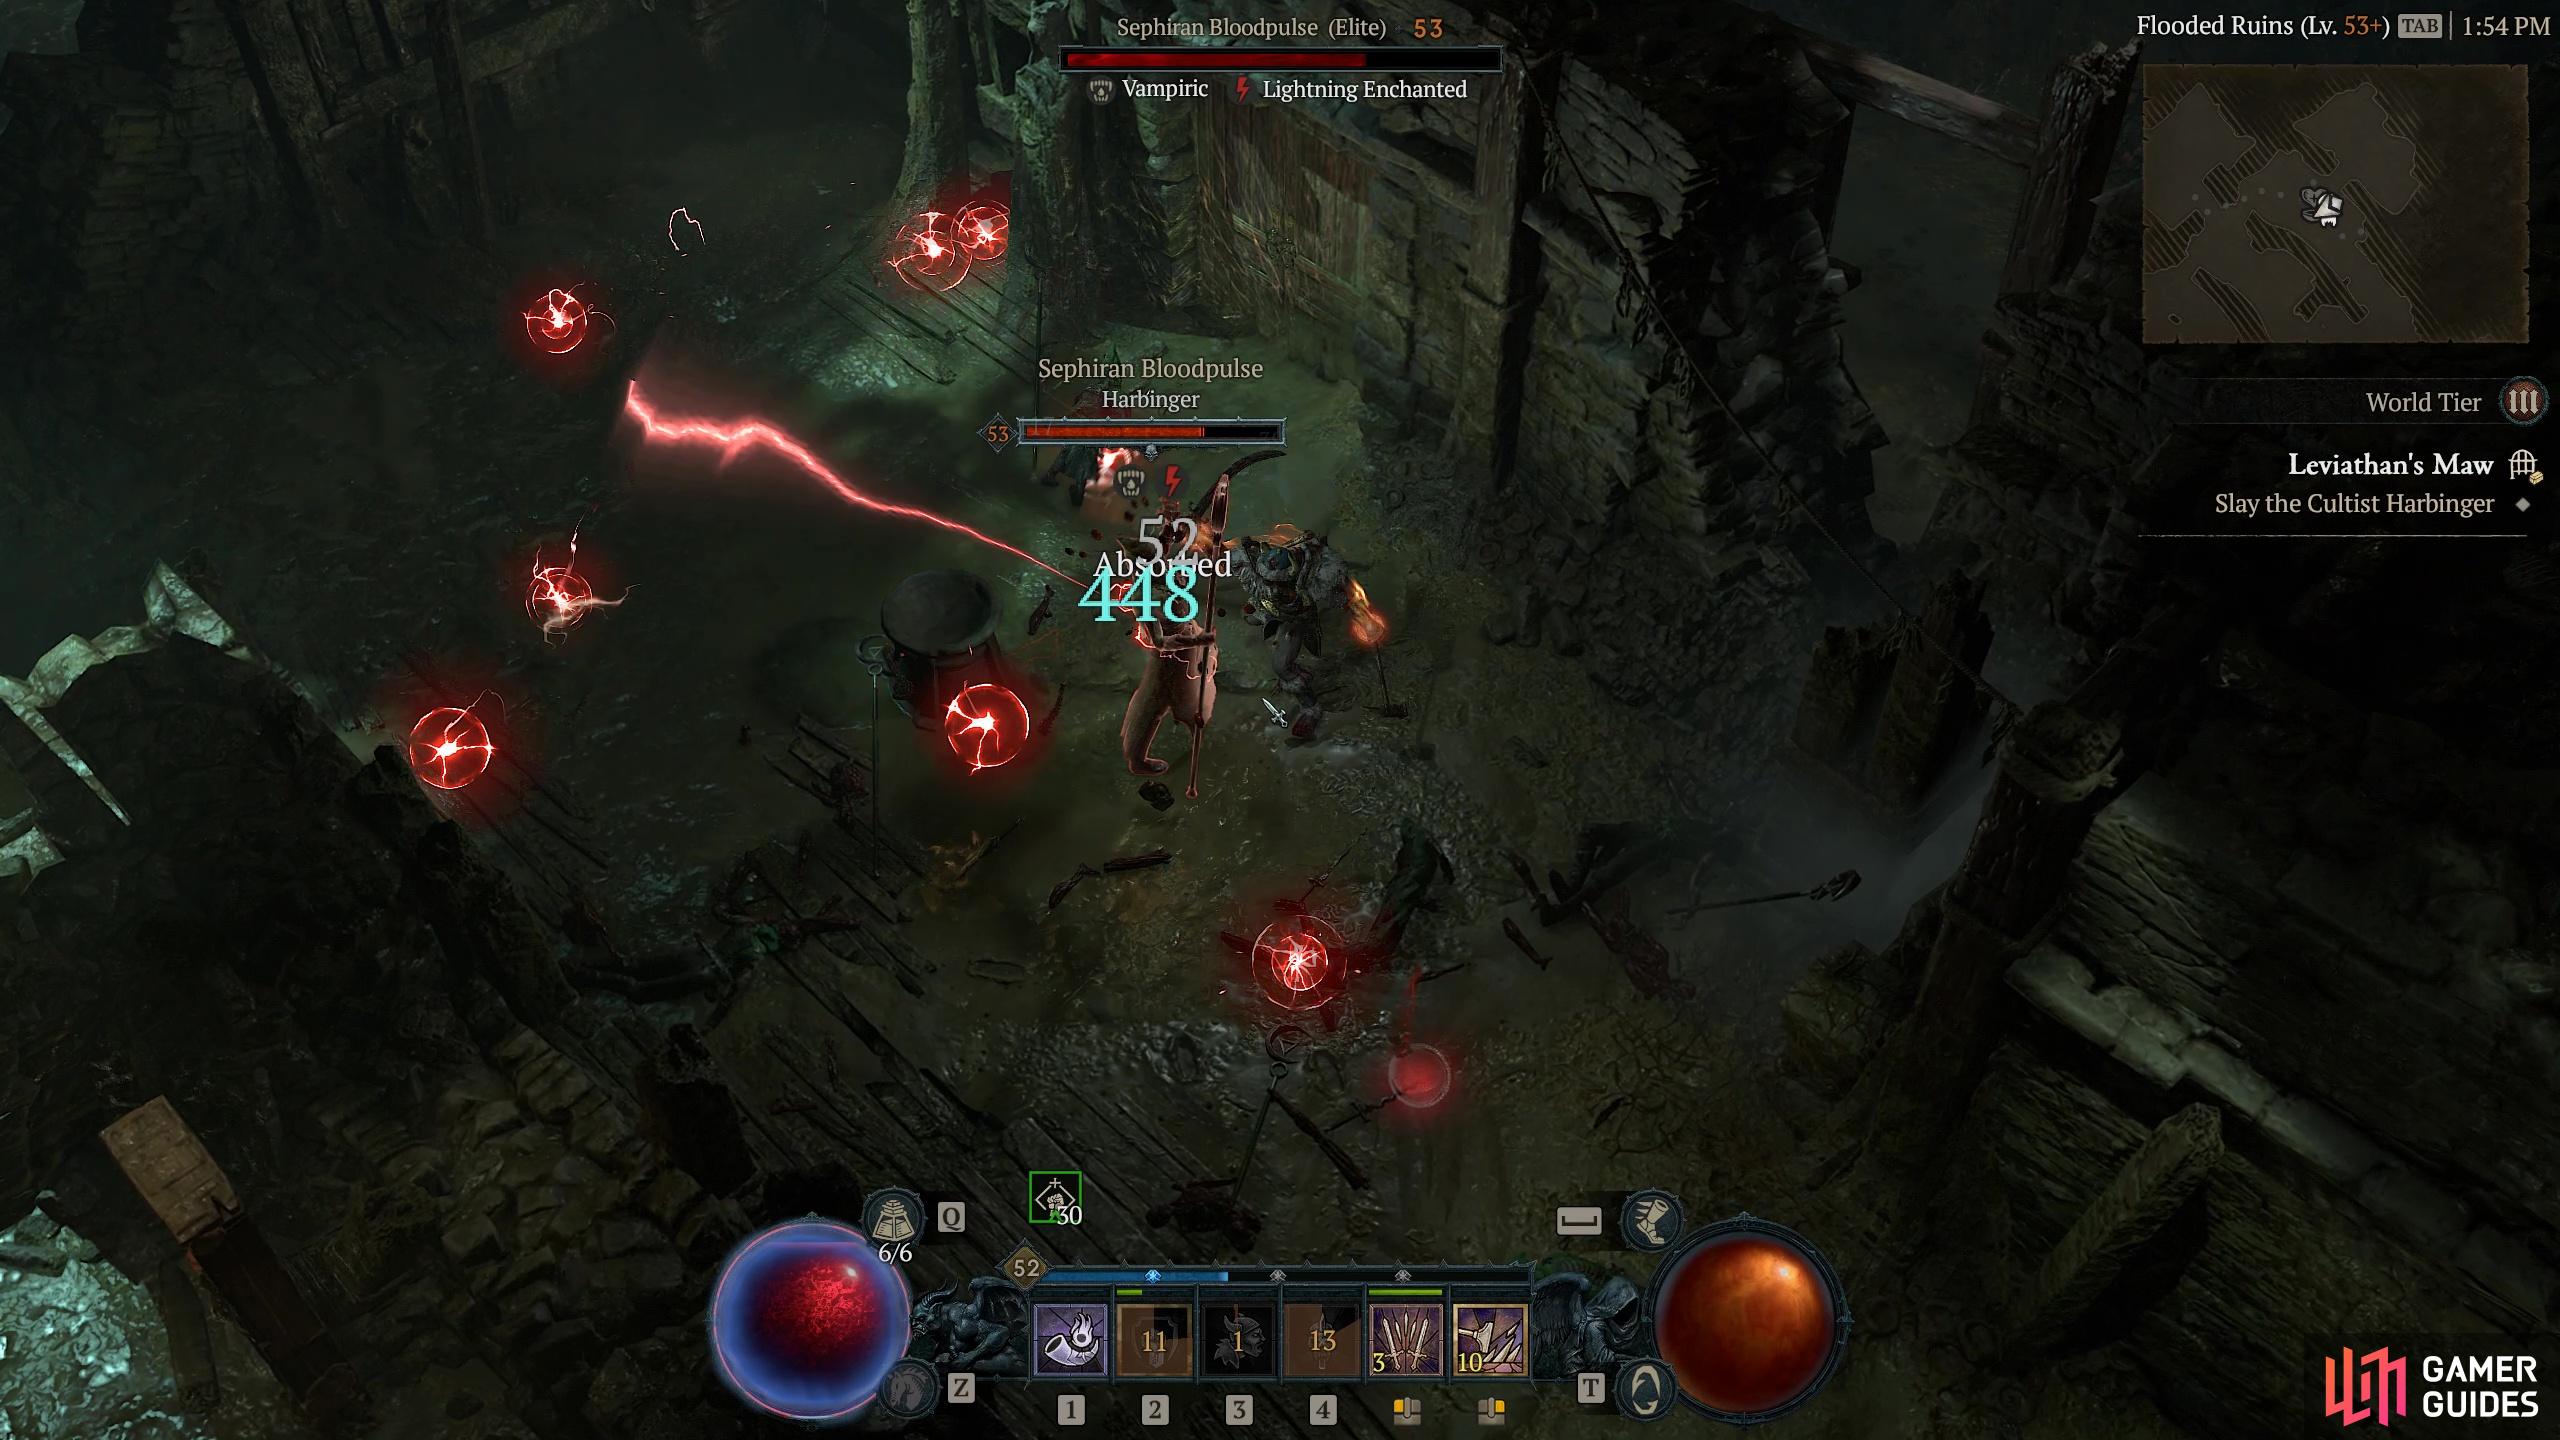
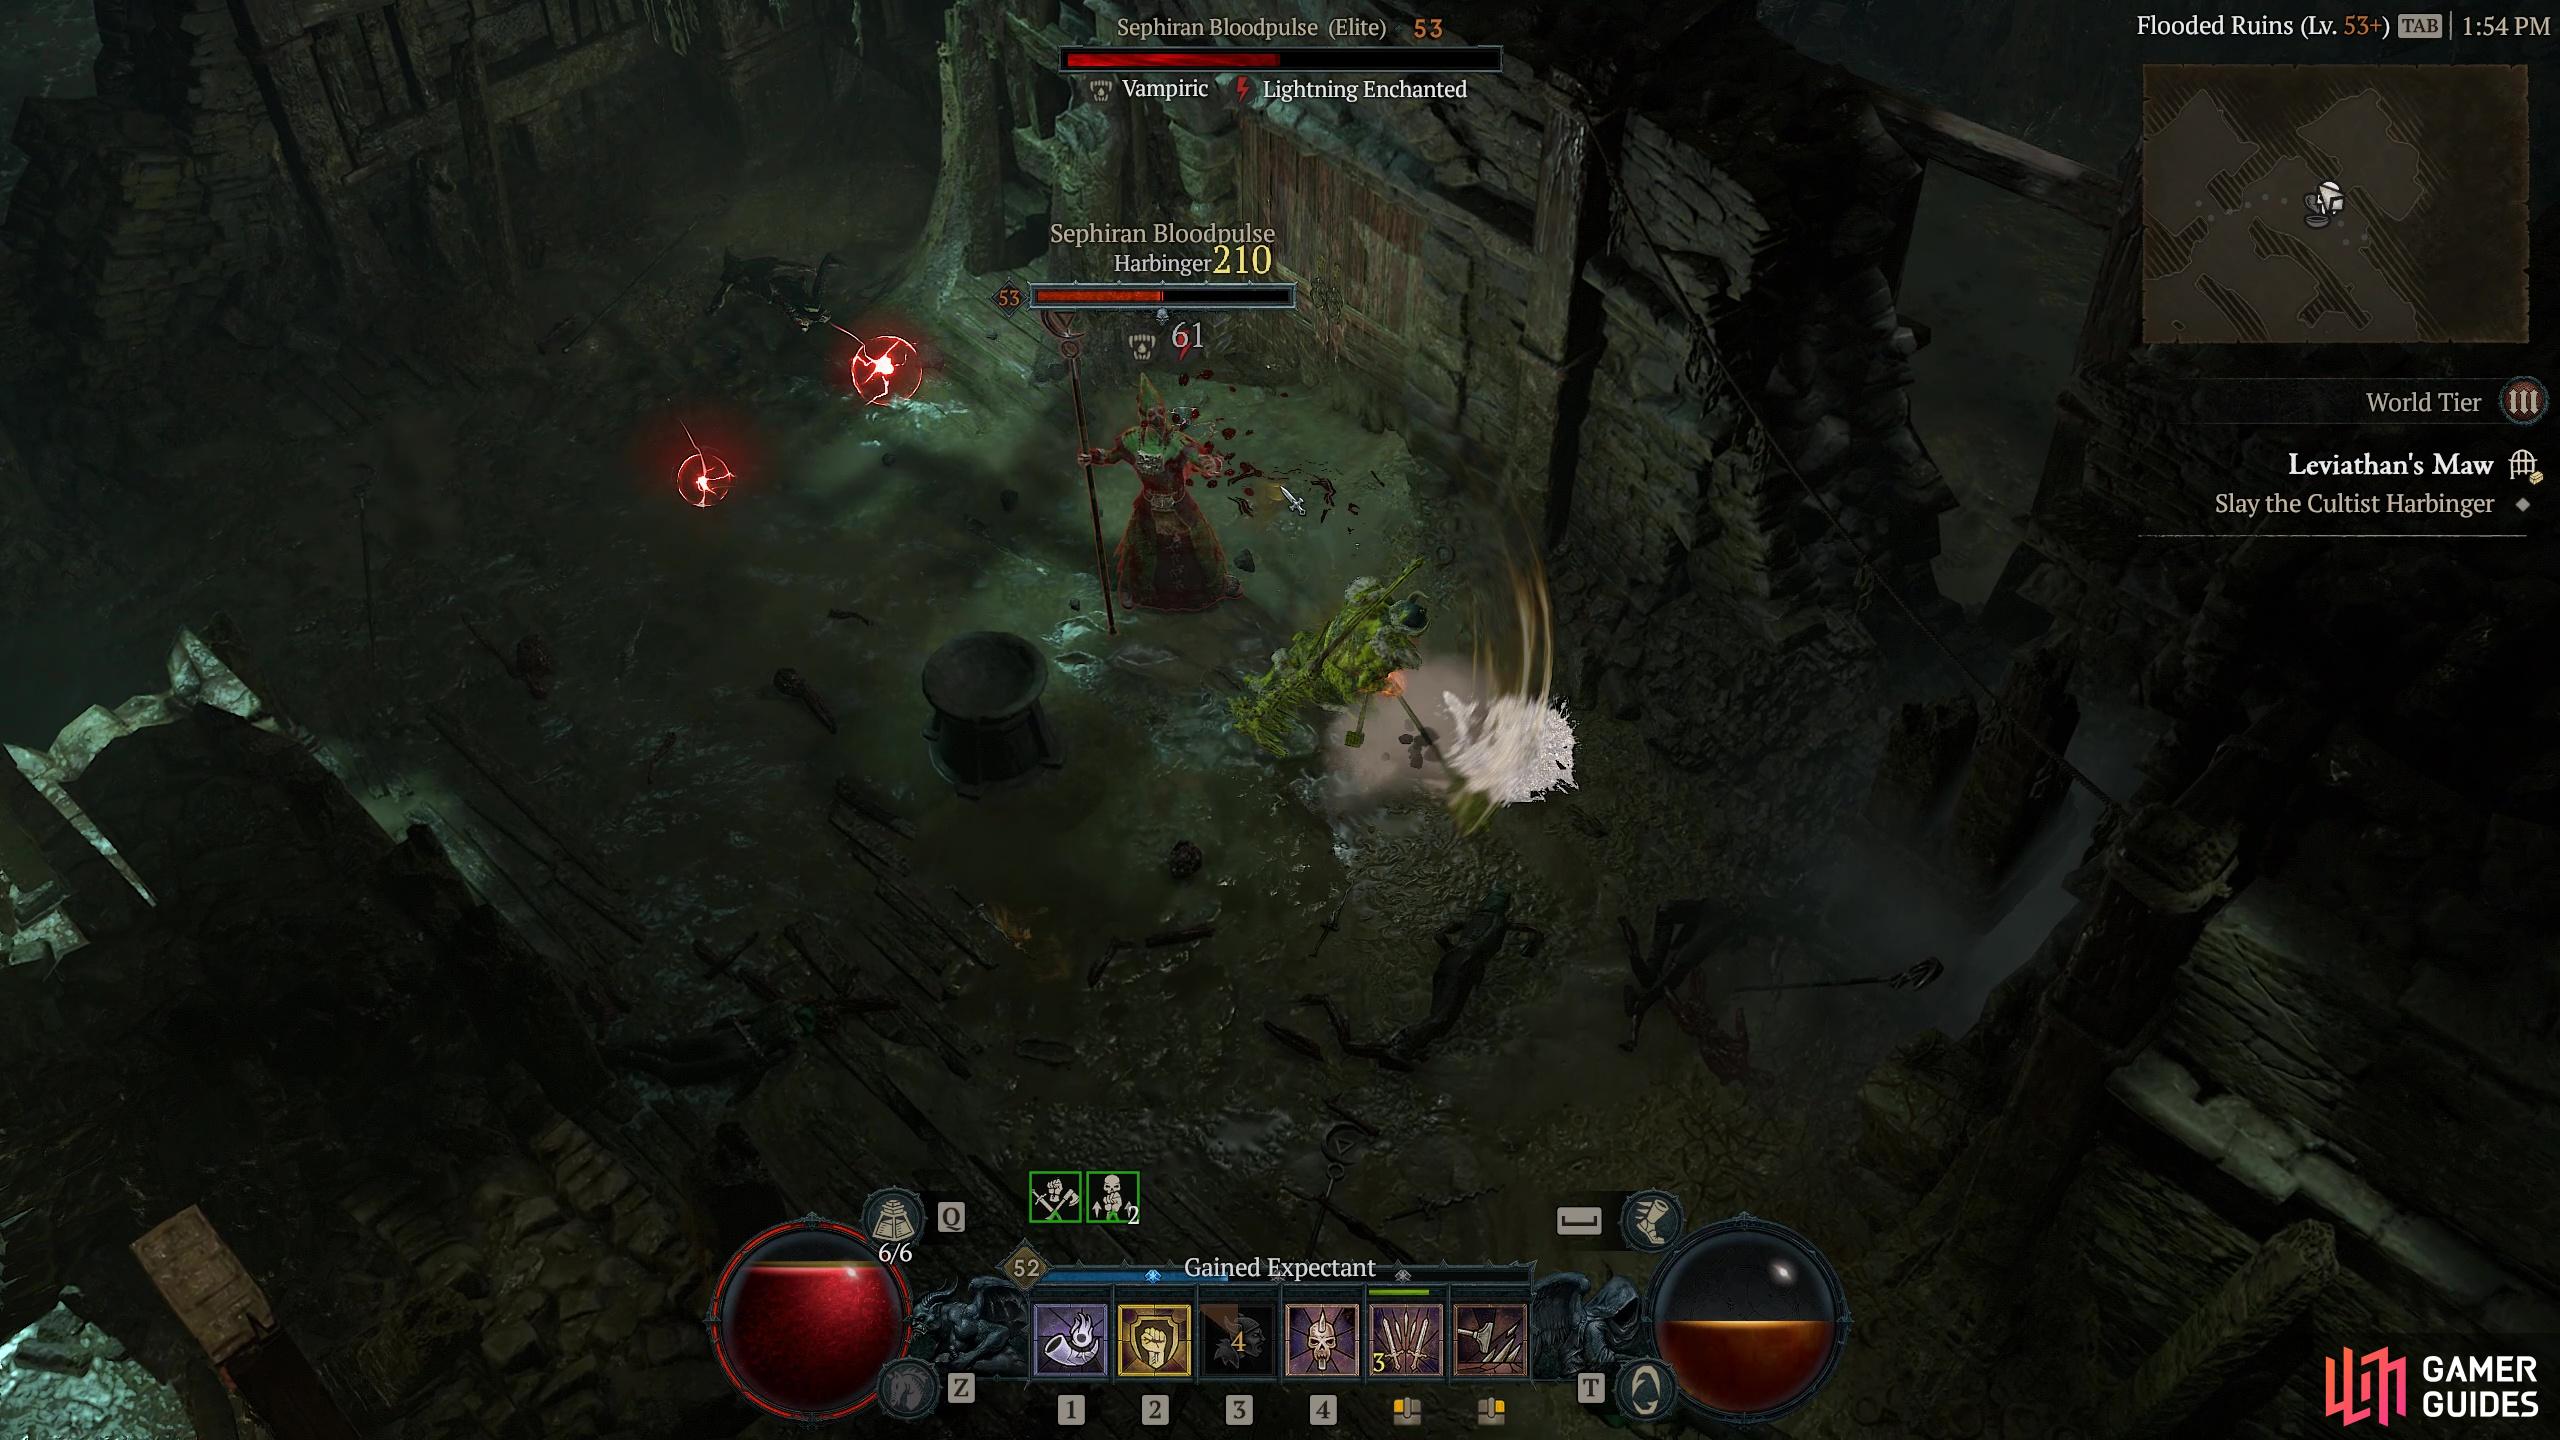
An Elite Serpent Cult Magus enemy found inside the Leviathan’s Maw dungeon in Hawezar. He is both Vampiric and Lightning Enchanted, making him a bit of a handful.
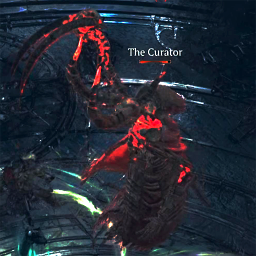
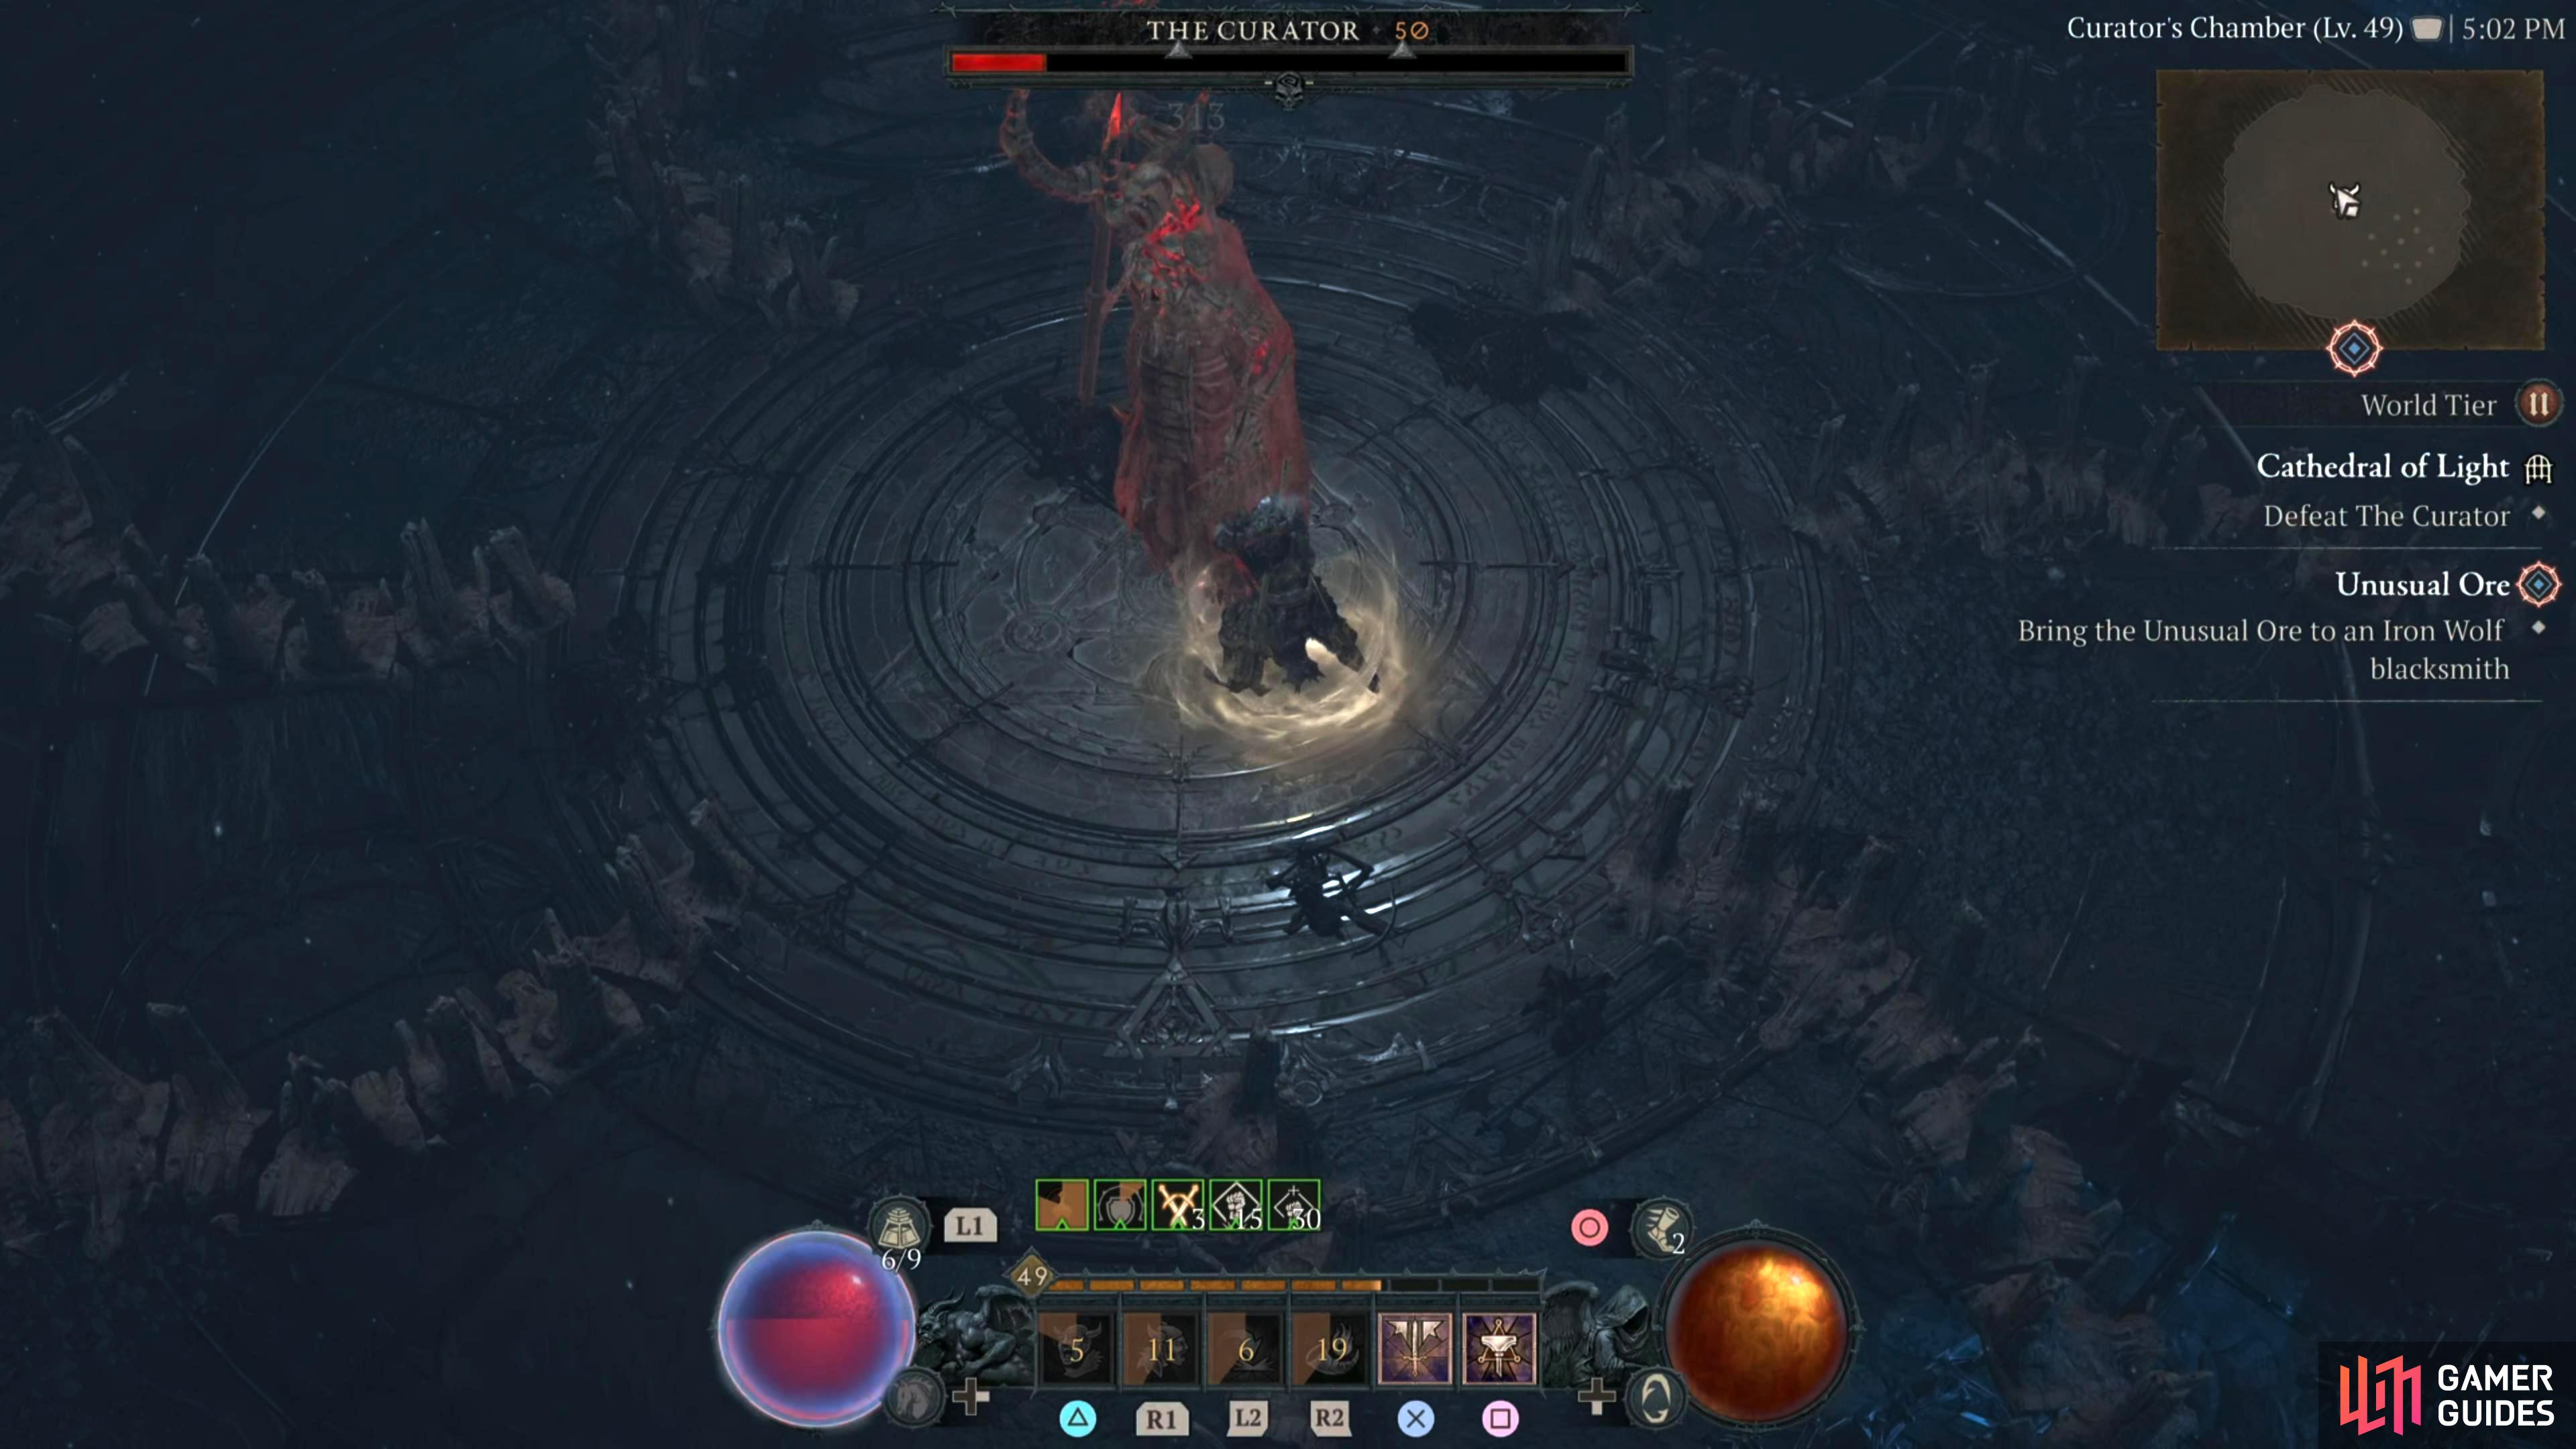
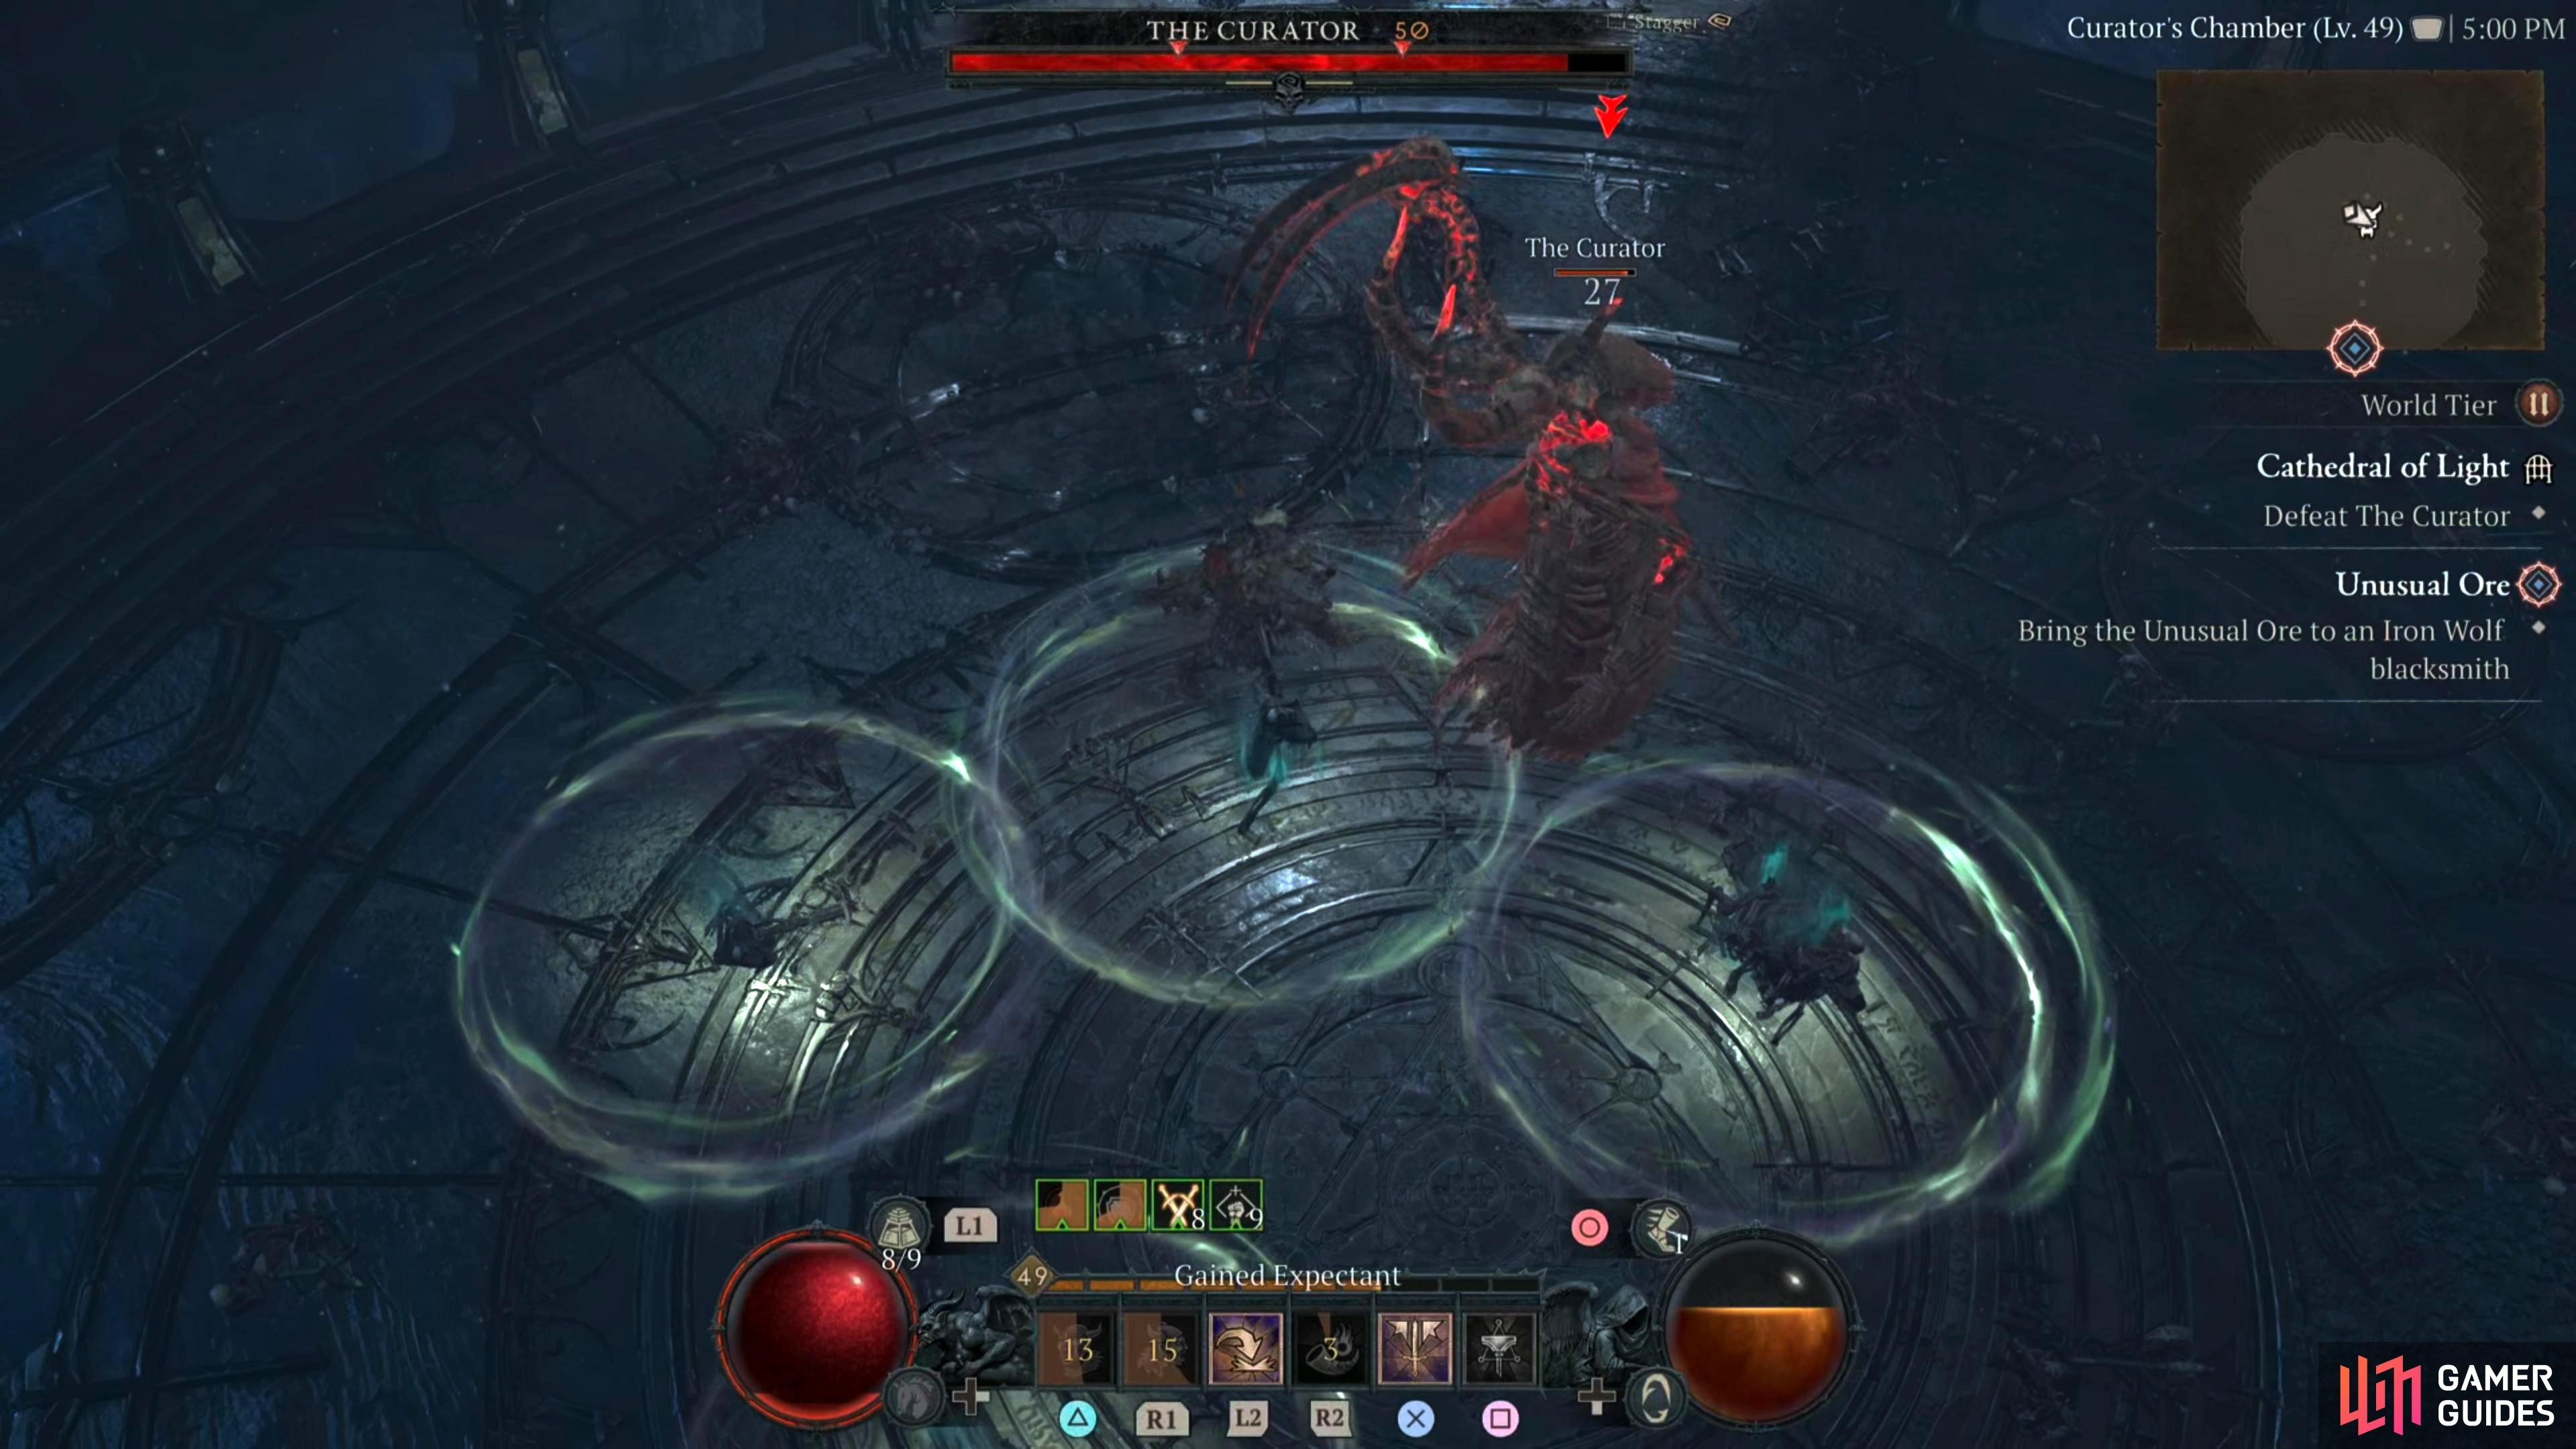
The Curator is a hulking undead monster who wields a large scythe. Often mistaken as death itself, this menacing creature can be found controlling the undead hordes in the Cathedral of Light.
Description
One of the better bosses in the game, mainly due to the numerous attacks it has in its arsenal. The Curator will rotate through its attacks at a rapid pace which means you need to be quick on your feet. Equipping a pair of boots with an extra Evade Charge is nice for this battle, especially if it has some movement speed on them too. Here’s what to expect from The Curator:
Sweeping Scythe - This is the boss’ regular attack. It will perform two large sweeping scythe attacks which let out ghostly skull projectiles after the attack. This attack can deal approximately a quarter of your health per attack (depending on defense and other various factors). Try to keep up your damage mitigation tools (Barrier, Fortify) to absorb some if not all the damage. Save your dodges for its other attacks.
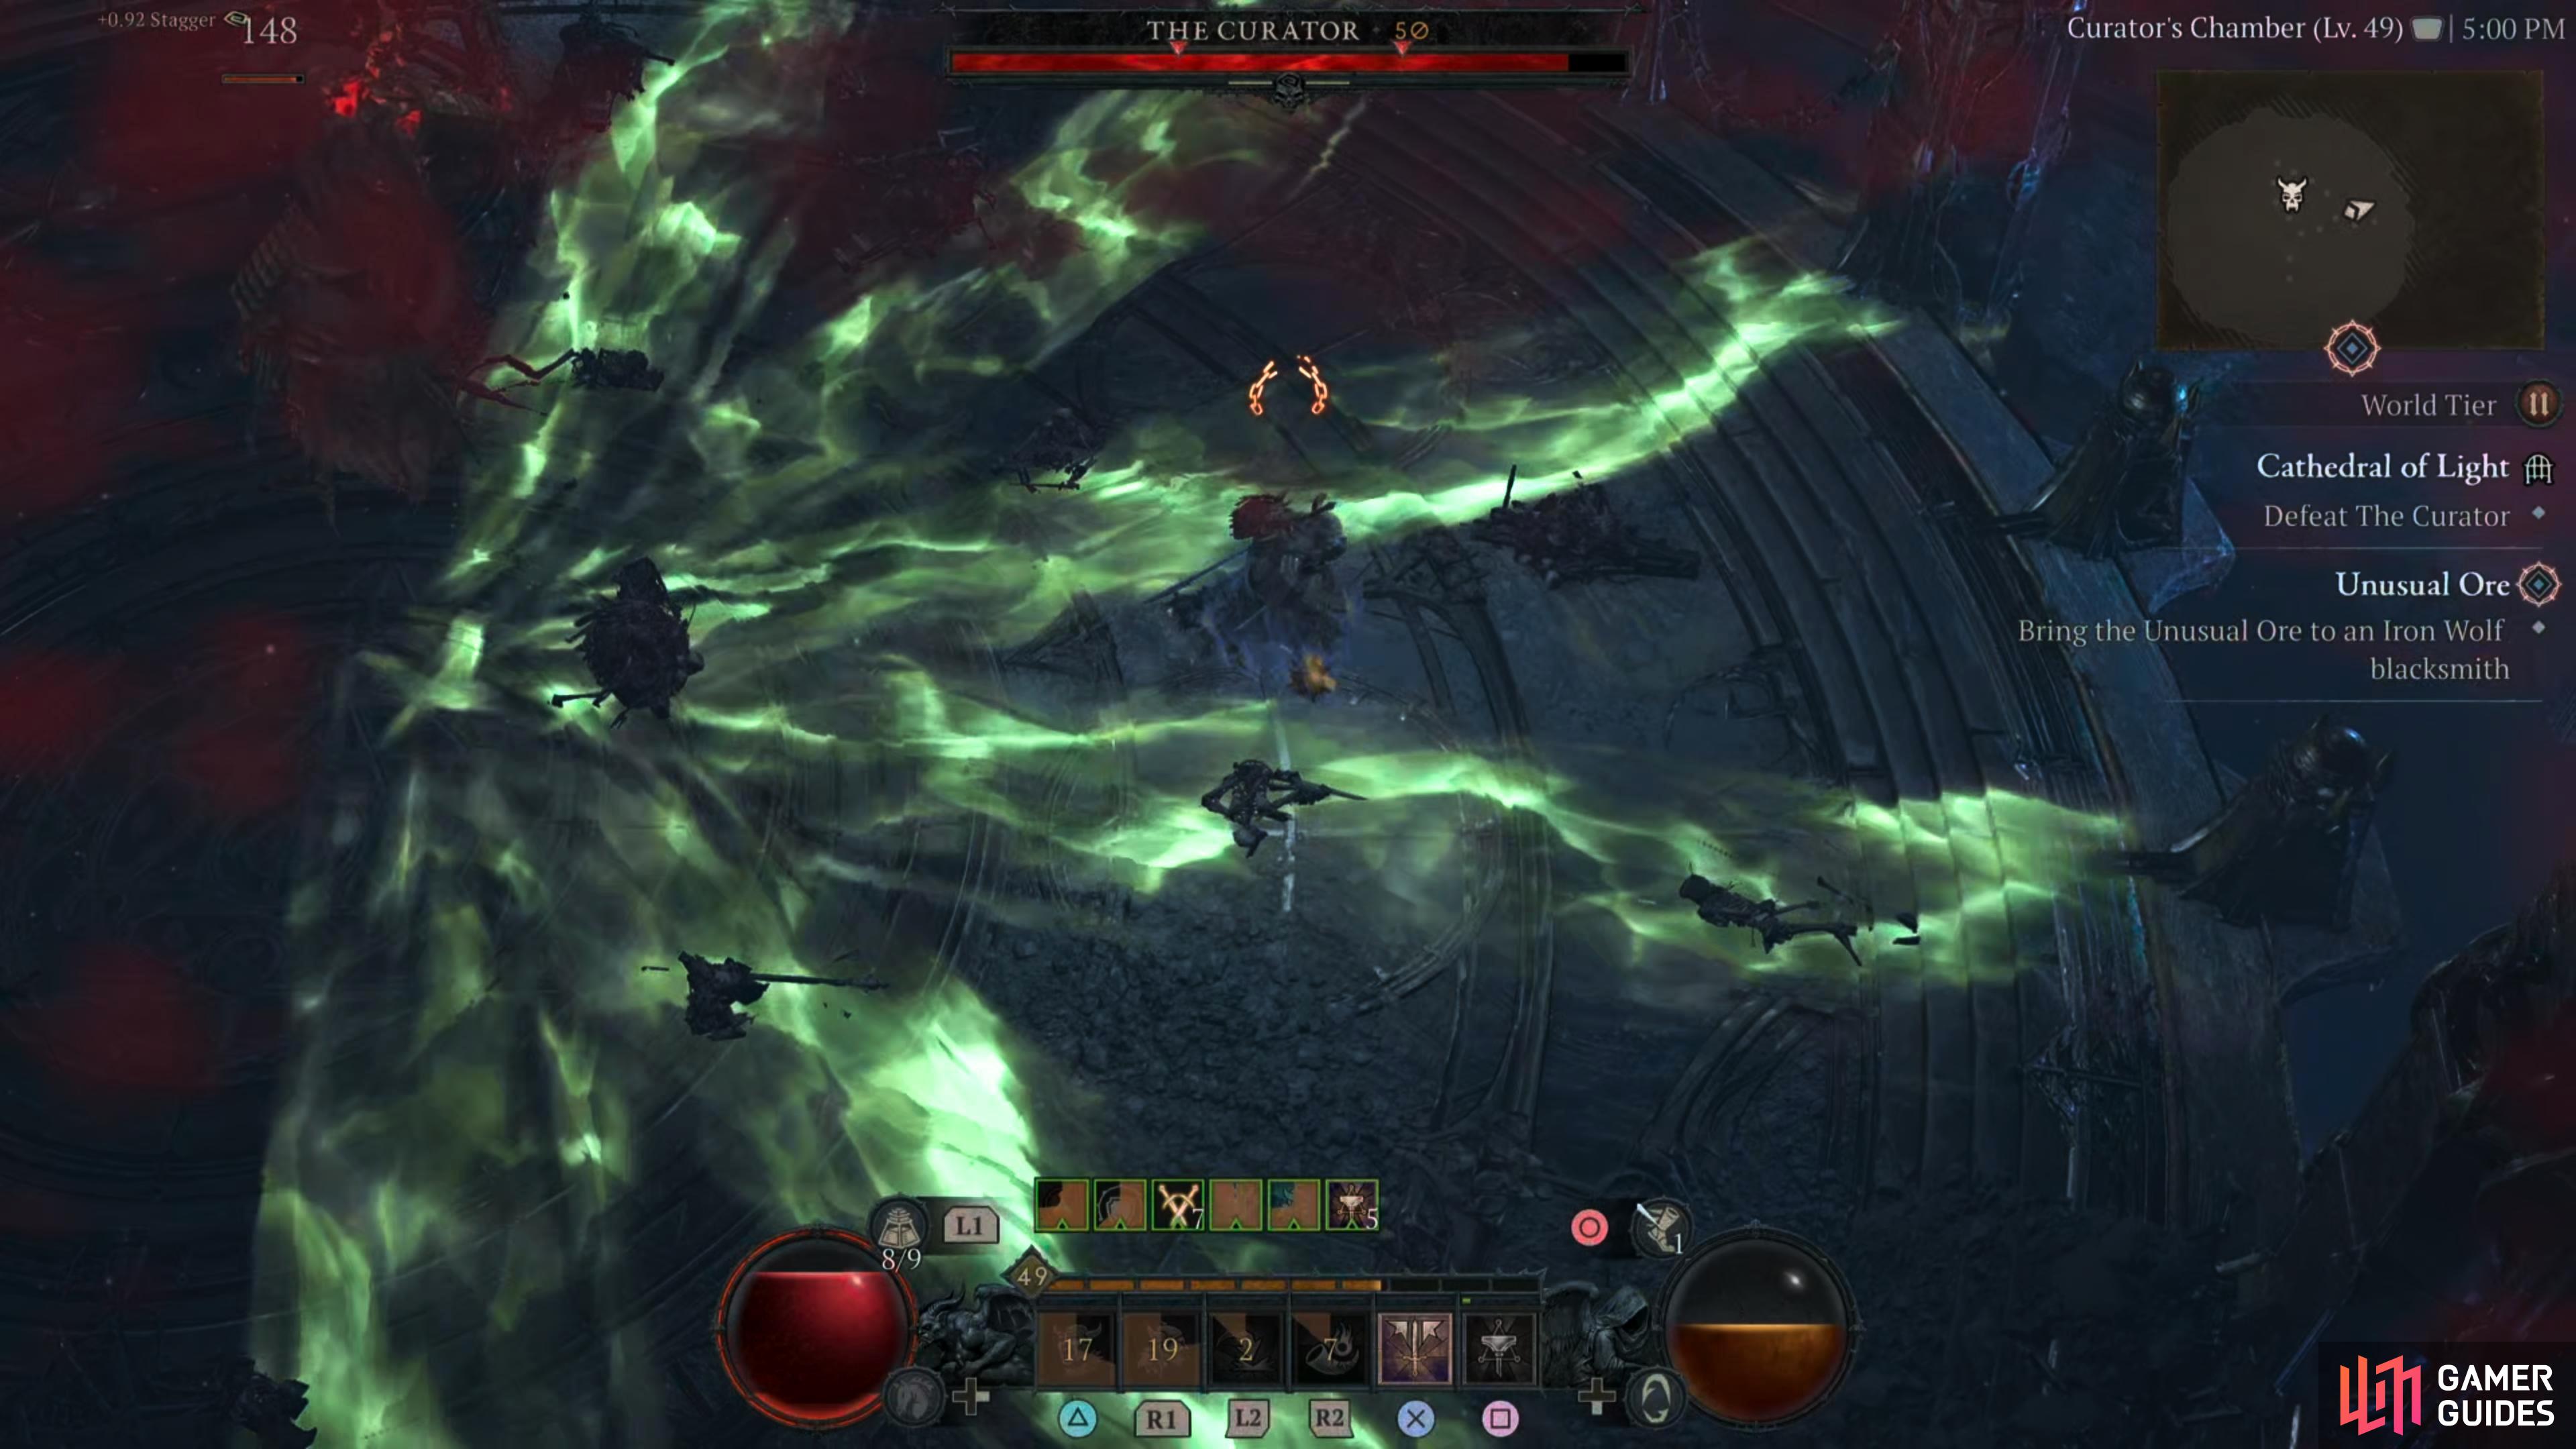
Explosive Bone Walls - The Curator will place Bone Walls all around the arena which may trap you in place before it explodes after a brief period of time. This ability gives its summons somewhere safe to attack from, but it can also deal a lot of damage if it explodes next to you. Either stand in a spot away from the walls or destroy the ones next to you.
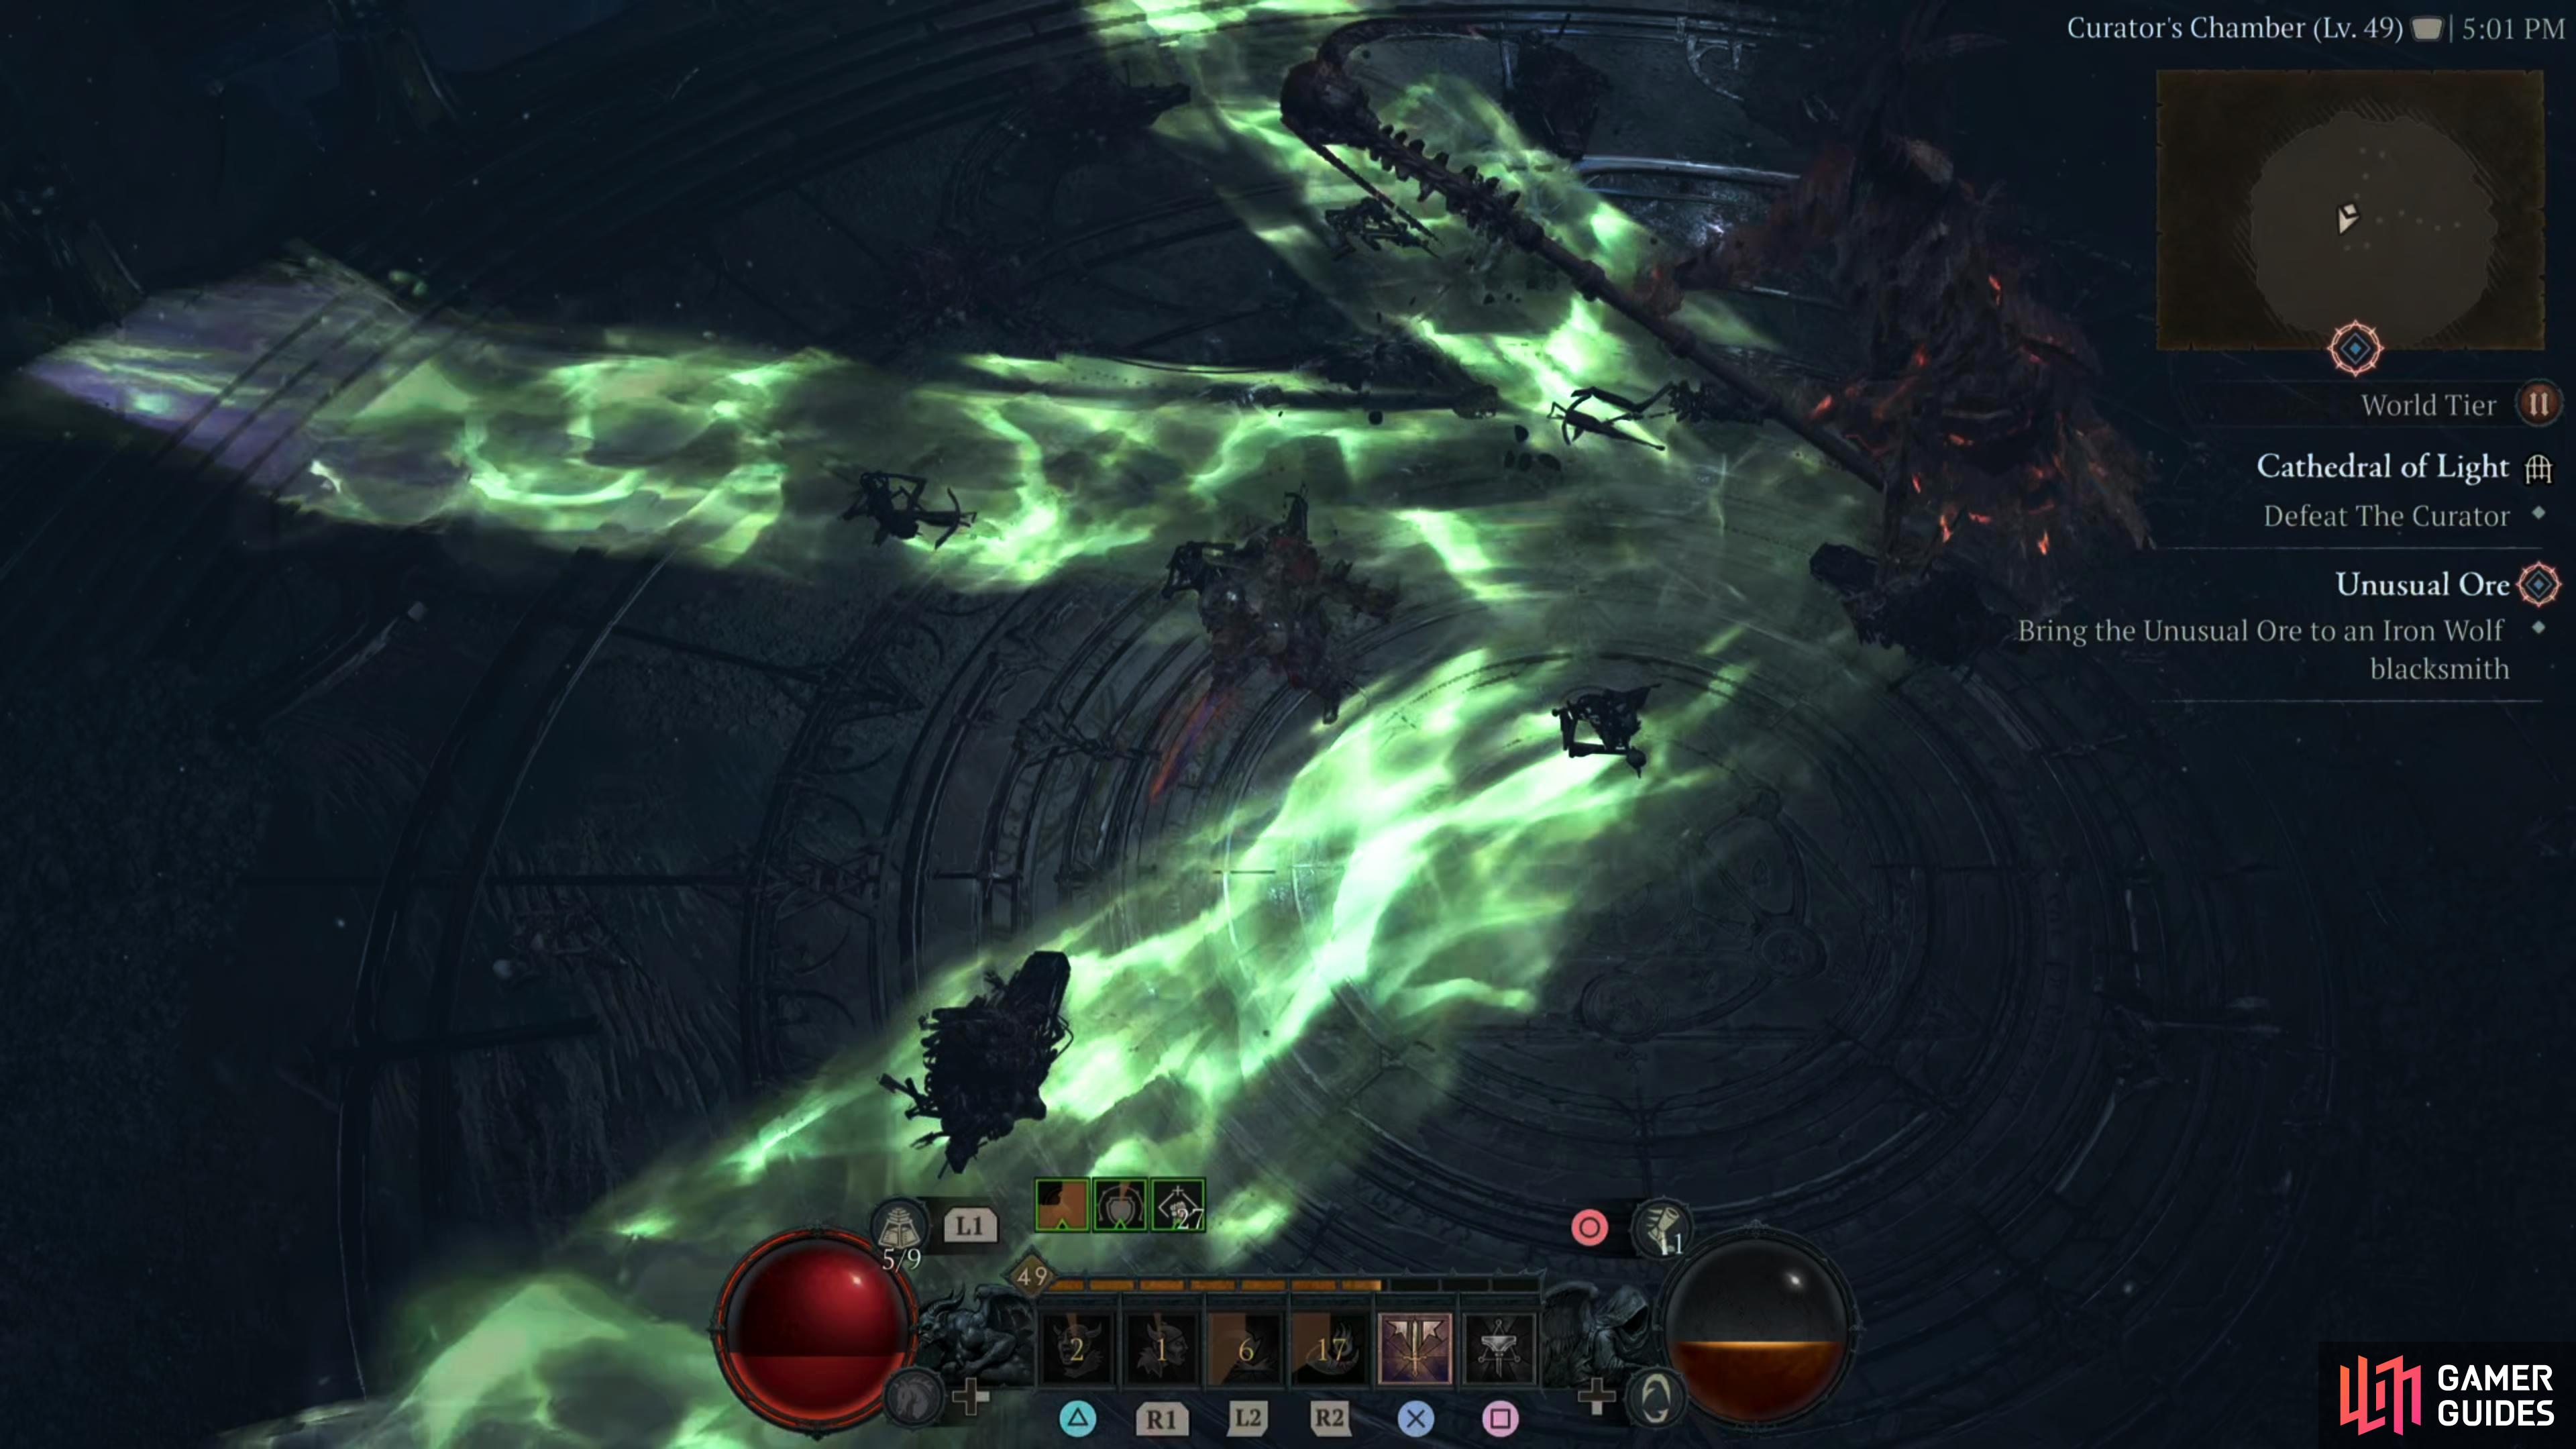
Blindnadoes - Throughout the battle, several tornadoes will be spread throughout the arena, if you touch them, they will cause the screen to go black causing a brief blind effect. This will stop you from using any actions while you’re in this state. Simply move out of them, and avoid them to counter this.
Summon Undead - The Curator will summon numerous whitish circles on the floor which will summon numerous undead skeletons. Once they have spawned, the circle will explode into many ghostly skulls around the arena which will deal minimal damage to you. You can ignore the skeletons for the most part, but if a Skeletal Ballista appears, take them out as soon as possible because they can deal some hefty damage.
Ghostly Lines - For lack of a better name, The Curator will display three green lines on the floor before unleashing an attack along them. This can go any direction, and you’ll want to stand in between the lines to avoid it.
Teleporting Ghostly Lines Combo - This is a more difficult version of the above attack. The Curator will teleport around the arena three times while unleashing several Ghostly Lines in various directions. Each consecutive attack will come at you quicker and quicker, so you’ll need to be deft to avoid them. Similarly to the above attack, you’ll want to stand in the gaps created by the lines to not take damage. At later stages of the battle, you’ll have to deal with this while other attacks are being used.
One thing you can say about The Curator is its speed. Considering it is large, it moves fairly quickly and uses its attacks even quicker which leaves you not much time to react. The main threat of the boss is its Teleporting Ghostly Lines Combo attack, as you’ll most likely get hit by this multiple times due to its speed. The other problem is the amount of chip (slight) damage you’ll consistently take. From its ghostly projectiles, its sweeping scythe attacks, or the random shots taken from the undead skeletons.
This is why some form of mitigation tools are imperative in beating the boss with little trouble. Using Fortify to reduce the damage, or Barrier to absorb it, the majority of the bosses attacks won’t bother you too much which leaves you to focus on avoiding the bigger area of effect attacks it has. Another good thing to have for this battle is area-of-effect attacks of your own such as Hammer of the Ancients for example as this will deal with much of the Bone Wall, and summons that’ll keep spawning. Finally, using your strongest Iron (armor) elixir can help a ton too.
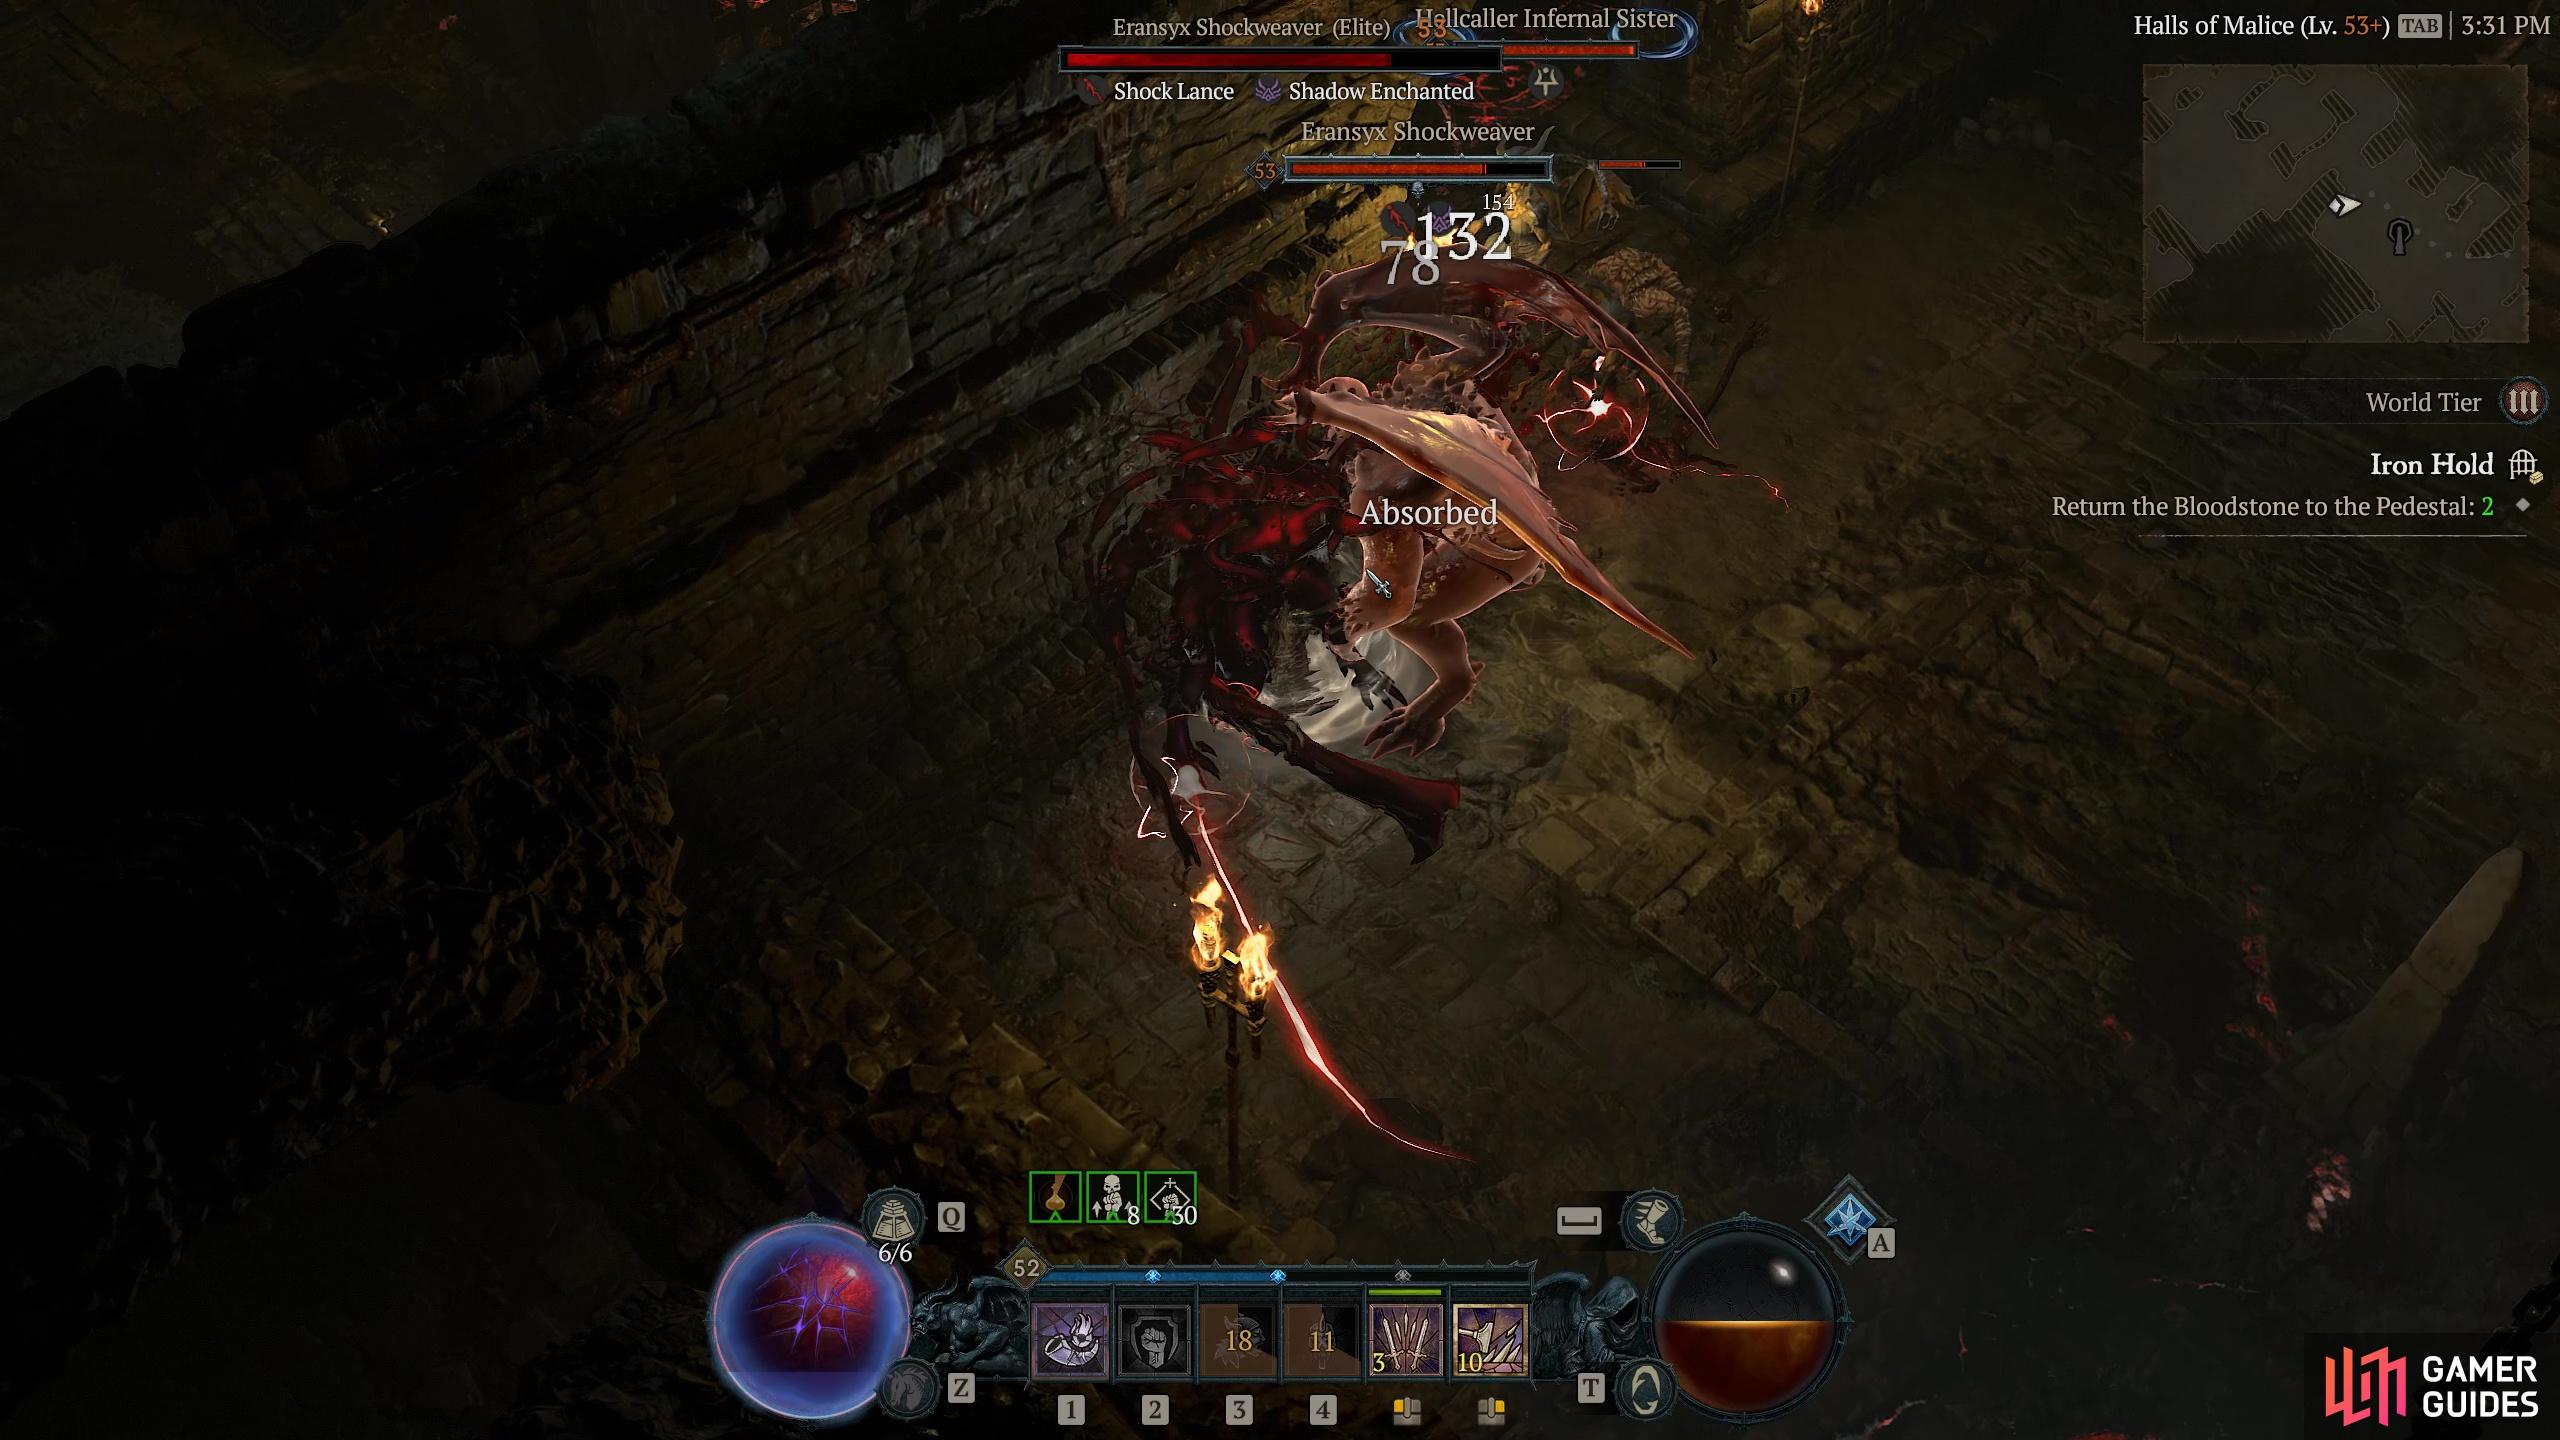
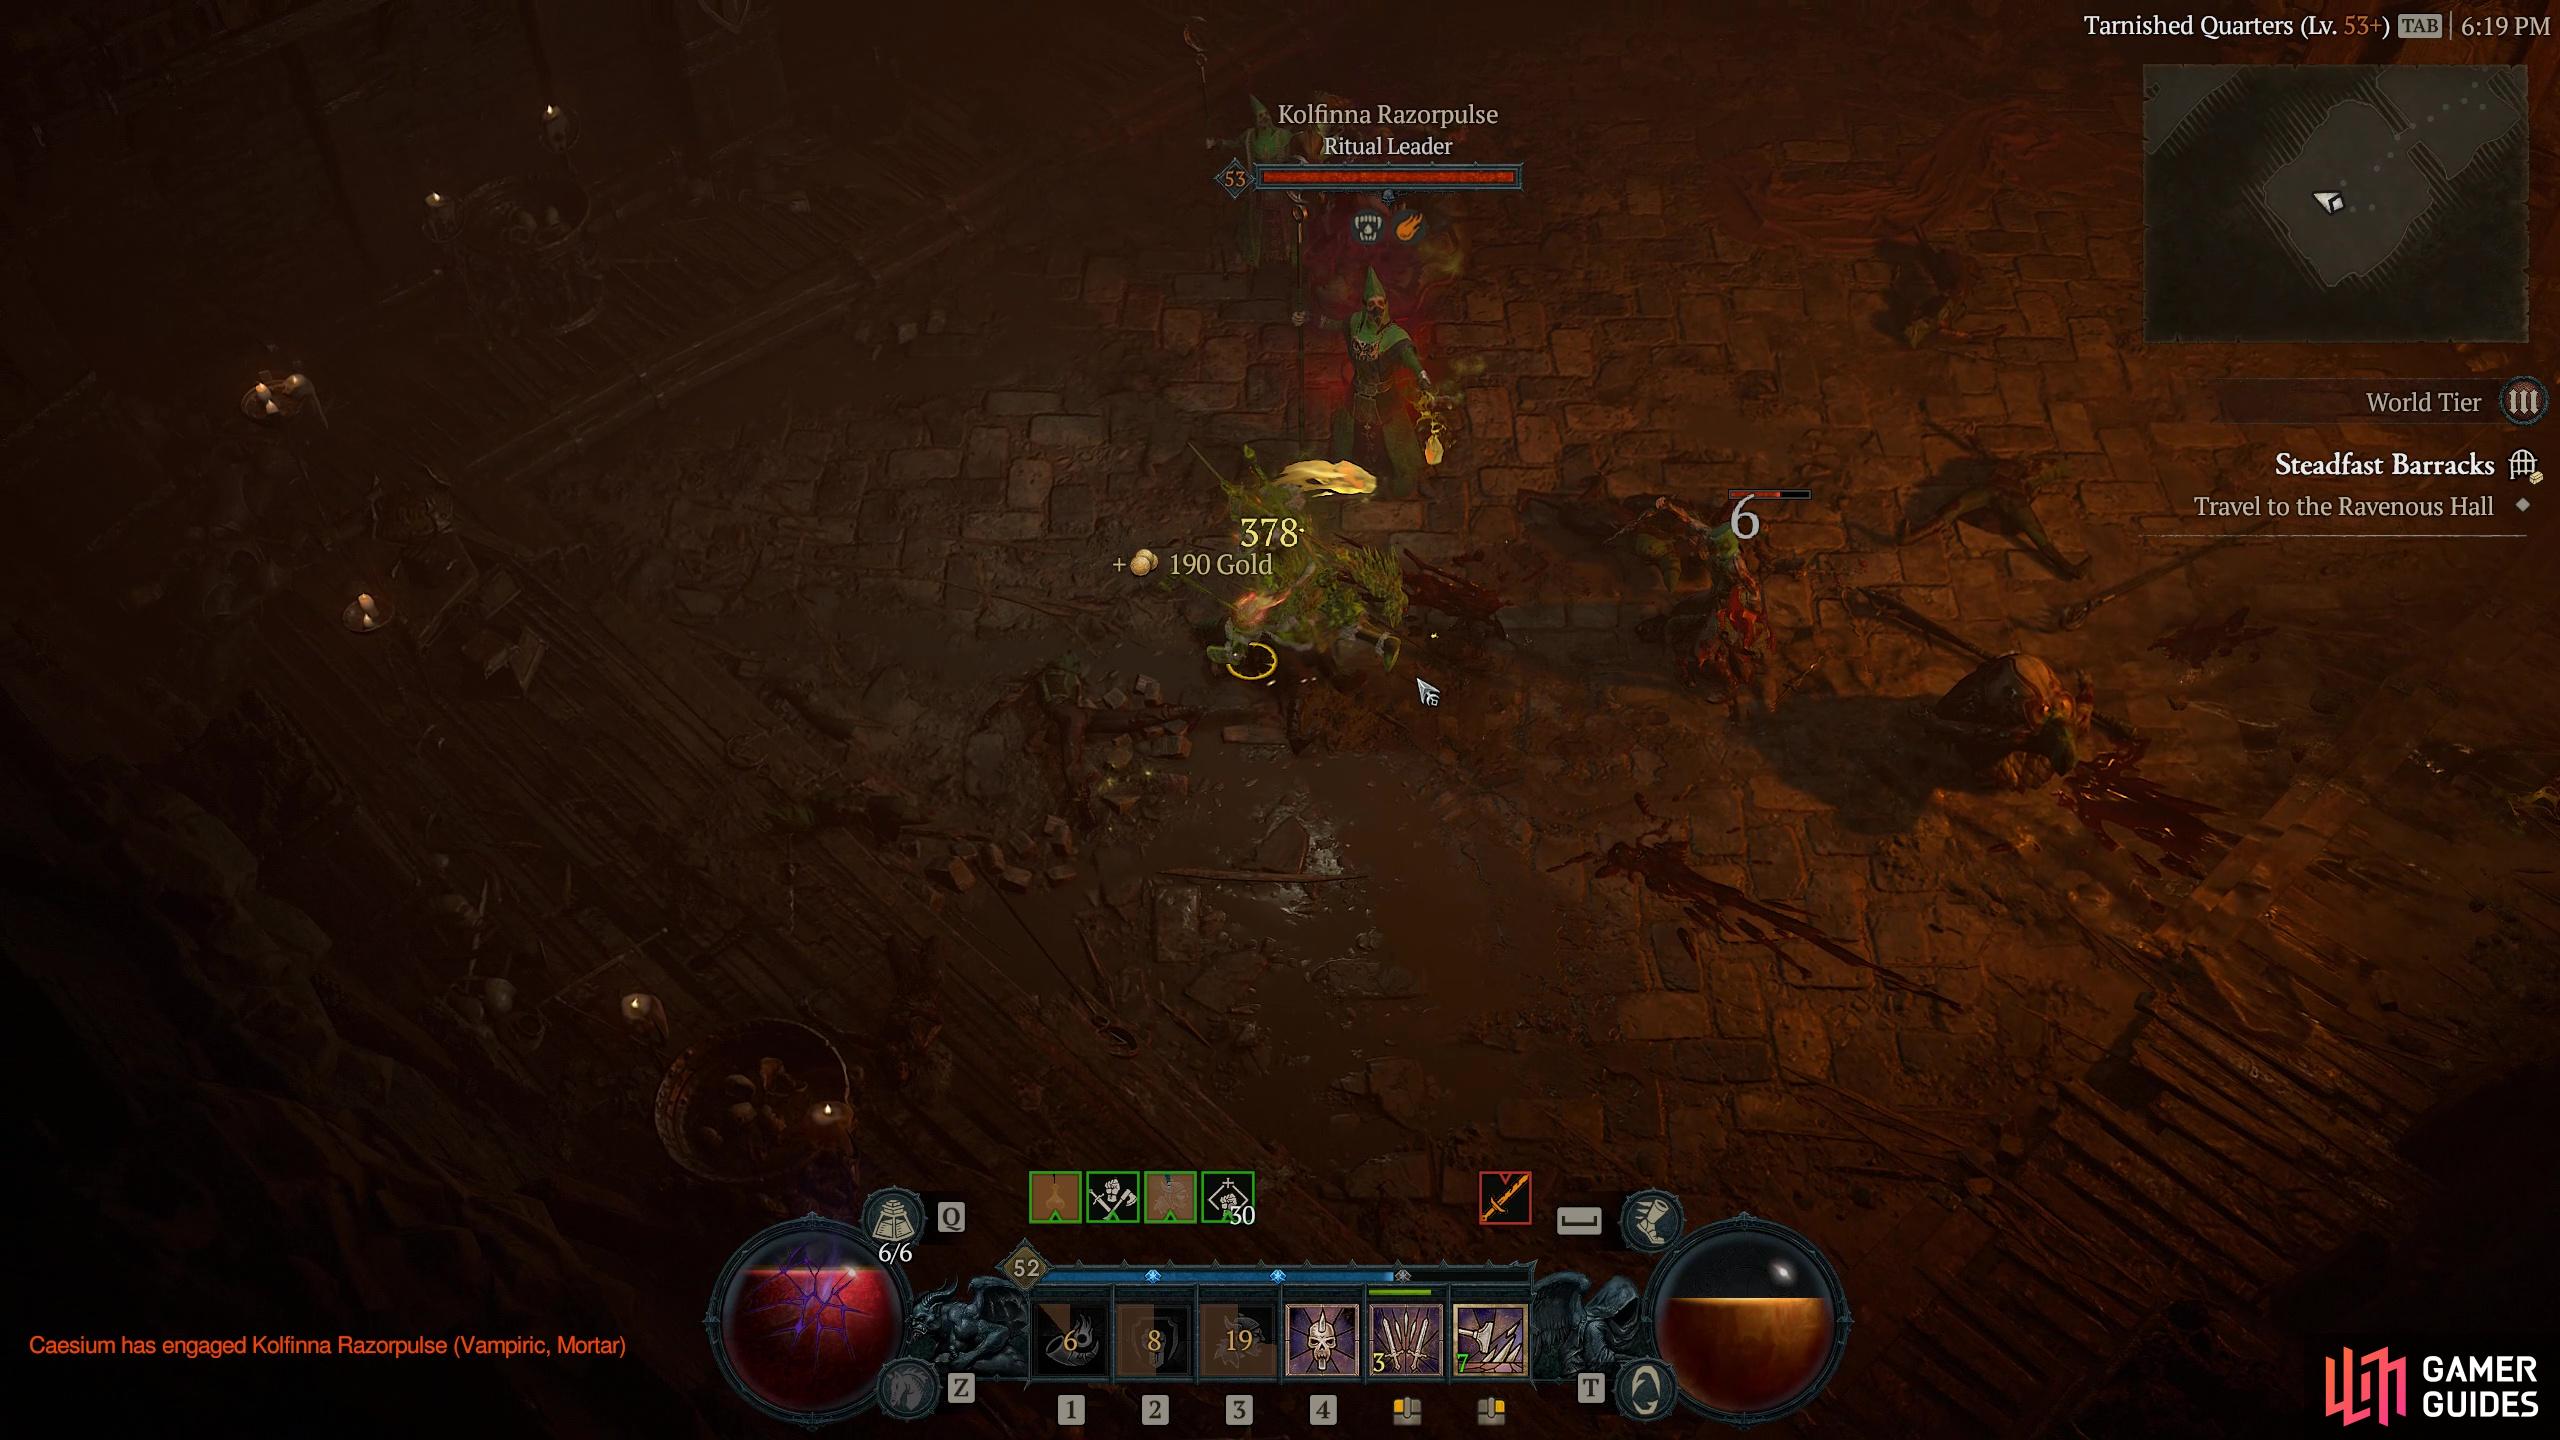
An elite level Serpent Cult Magus enemy found in the Steadfast Barracks Dungeon in Hawezar. He will appear as you cause one of the Blood Obelisks around 80% damage.
An elite level Serpent Cult Magus enemy found in the Steadfast Barracks Dungeon in Hawezar. He will appear as you cause one of the Blood Obelisks around 80% damage.
This Elite Sentinel Guardian must be overcome in the Faceless Shrine dungeon in Hawezar. With Damage resistance and a Vampiric Affix, he can be a bit of a slog.