
This quest is obtained from Rissa when you meet her in Berg. If you haven’t already, you will have to wait three days before you can proceed with the quest. There is no timer for the quest, so you can leave it longer than three days before you begin the quest if you wish.
When you are ready, speak with Rissa to begin the quest. You will find her standing by a water fountain near the merchants of the city. Once you’ve been informed of the council meeting, head up the stairs to the north and enter the Blue Chamber. Once inside, head to the centre platform where everyone is gathered.
Take some time to speak with all attendees and determine what their intentions might be. When ready, speak with Rissa and choose the second dialogue option. Rissa will then ask you to check the Inn in Berg for any sign of those who are missing. Head back south and leave the chamber.
After some time you will hear an explosion coming from the Blue Chamber, prompting an inner monologue. Once you’ve cycled through the text, head back into the Blue Chamber to investigate. As you approach the platform where people were speaking earlier, you will see Sagard Battleborn and Gabriella Sullivan fighting some marsh bandits.
You can choose to help them in the fight or wait a moment for them to finish it. After a brief black screen you will be able to speak to both of them. Speak with Gabriella and then enter the inner chamber from the stairs behind you. When you enter you will encounter two mobs down the stairs. They are easy enough to deal with and you have plenty of space to kite if necessary.
Once they’re dead, go back to the first room down the stairs and climb the ladder facing north east, as shown below. This brings you to the Ancestor’s Resting Place, where you will find two more marsh bandits. They will be waiting in the room to your left, providing an opportunity for a stealth attack on both.
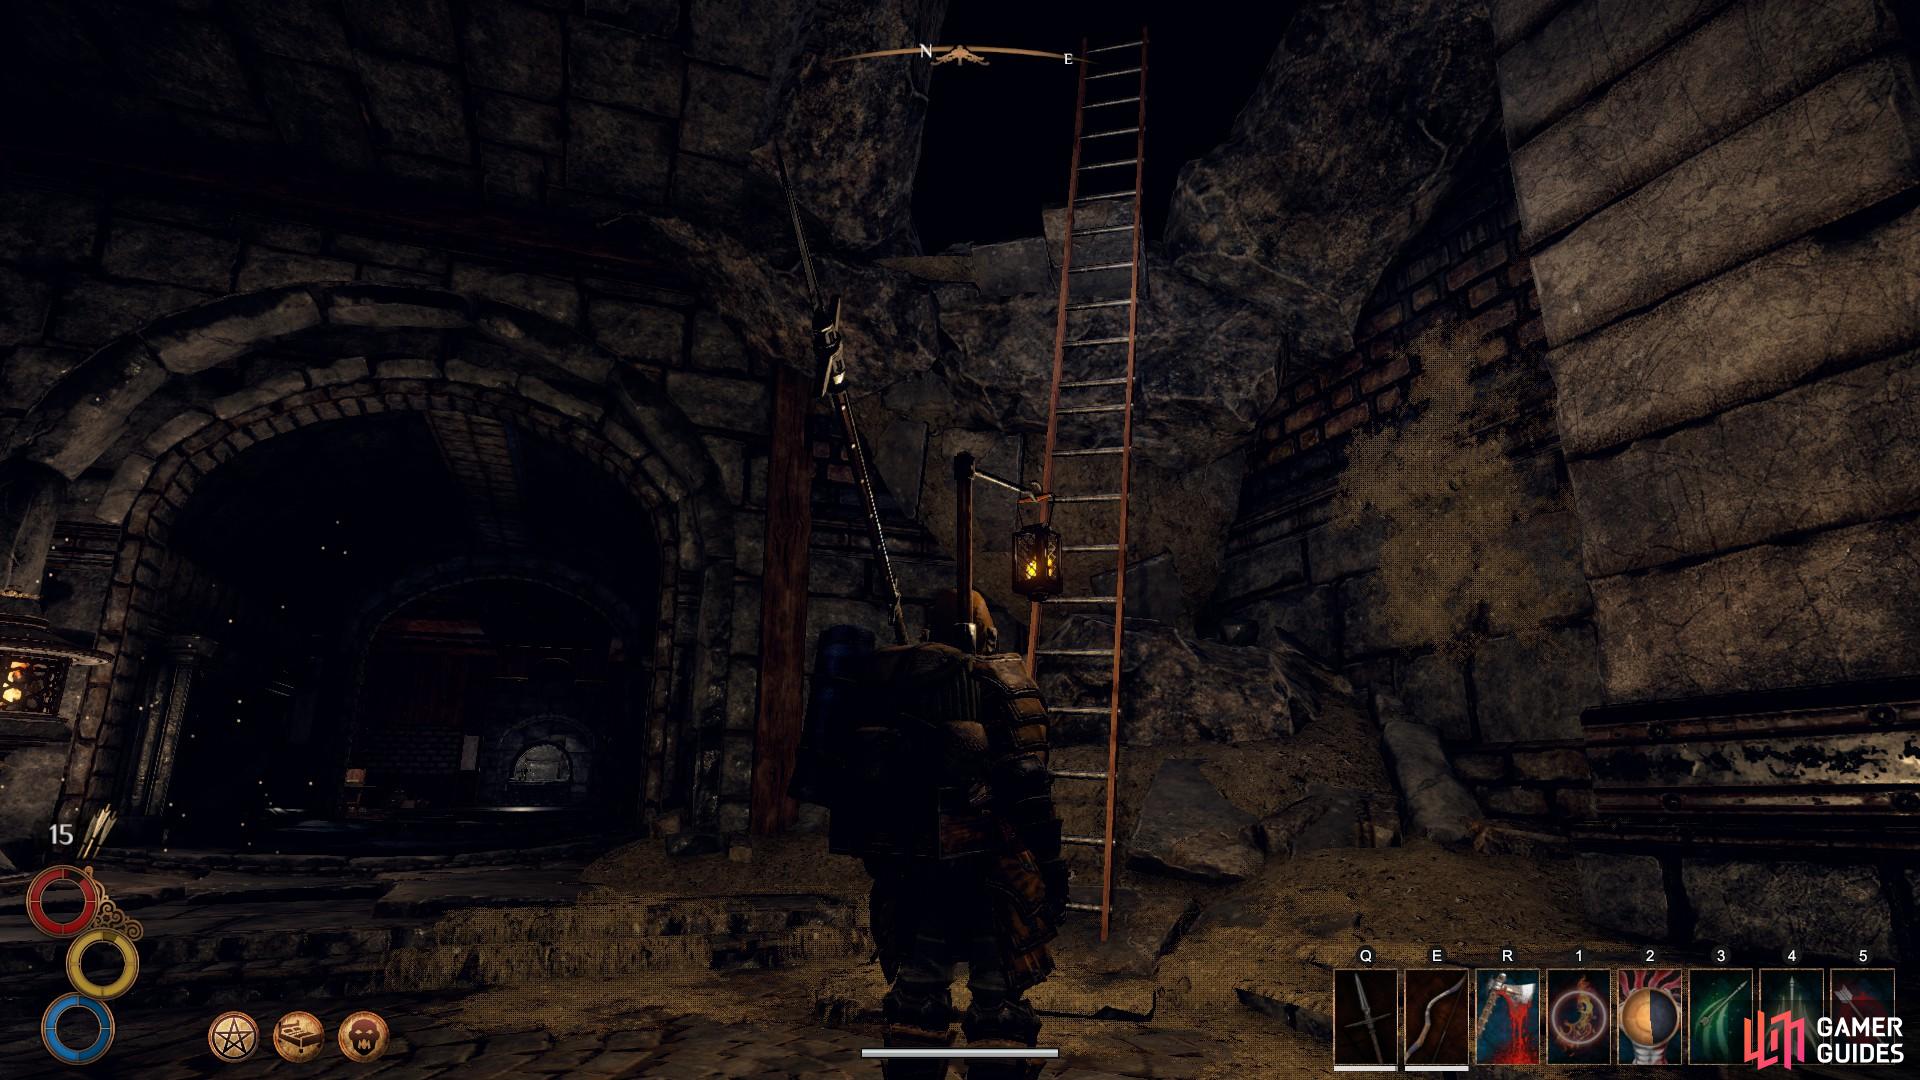
Climb the ladder to enter the Ancestor’s Resting Place.
When the bandits are dead, loot the chest near the entrance to the room and then use the lever at the end of the hall. When you pass through the gate the only viable option for the moment will be to turn left and go up the slope. At the top of the slope you will find an Assassin Bug. If you can’t surprise it with an attack first, take it back down into the hallway to give yourself more space as you fight it.
When you head back up the slope you should encounter another bug, use the same tactic to kill it and then go back up the slope. You will come into another chamber with a clean water source, take the opportunity to drink. When you’re ready, use the platforms to the right of the main rock structure to jump down into the pool area and be ready to fight another bug. If your build allows for ranged damage capability, stay on the final ledge and use it to whittle the health of the bug down. Otherwise, be sure to fight the bug in the same pool you found it; if you kite it to the pit in the north you will have two humanoid opponents fighting you, too.

As you look at the pool from above, note the purple bug to the bottom left.
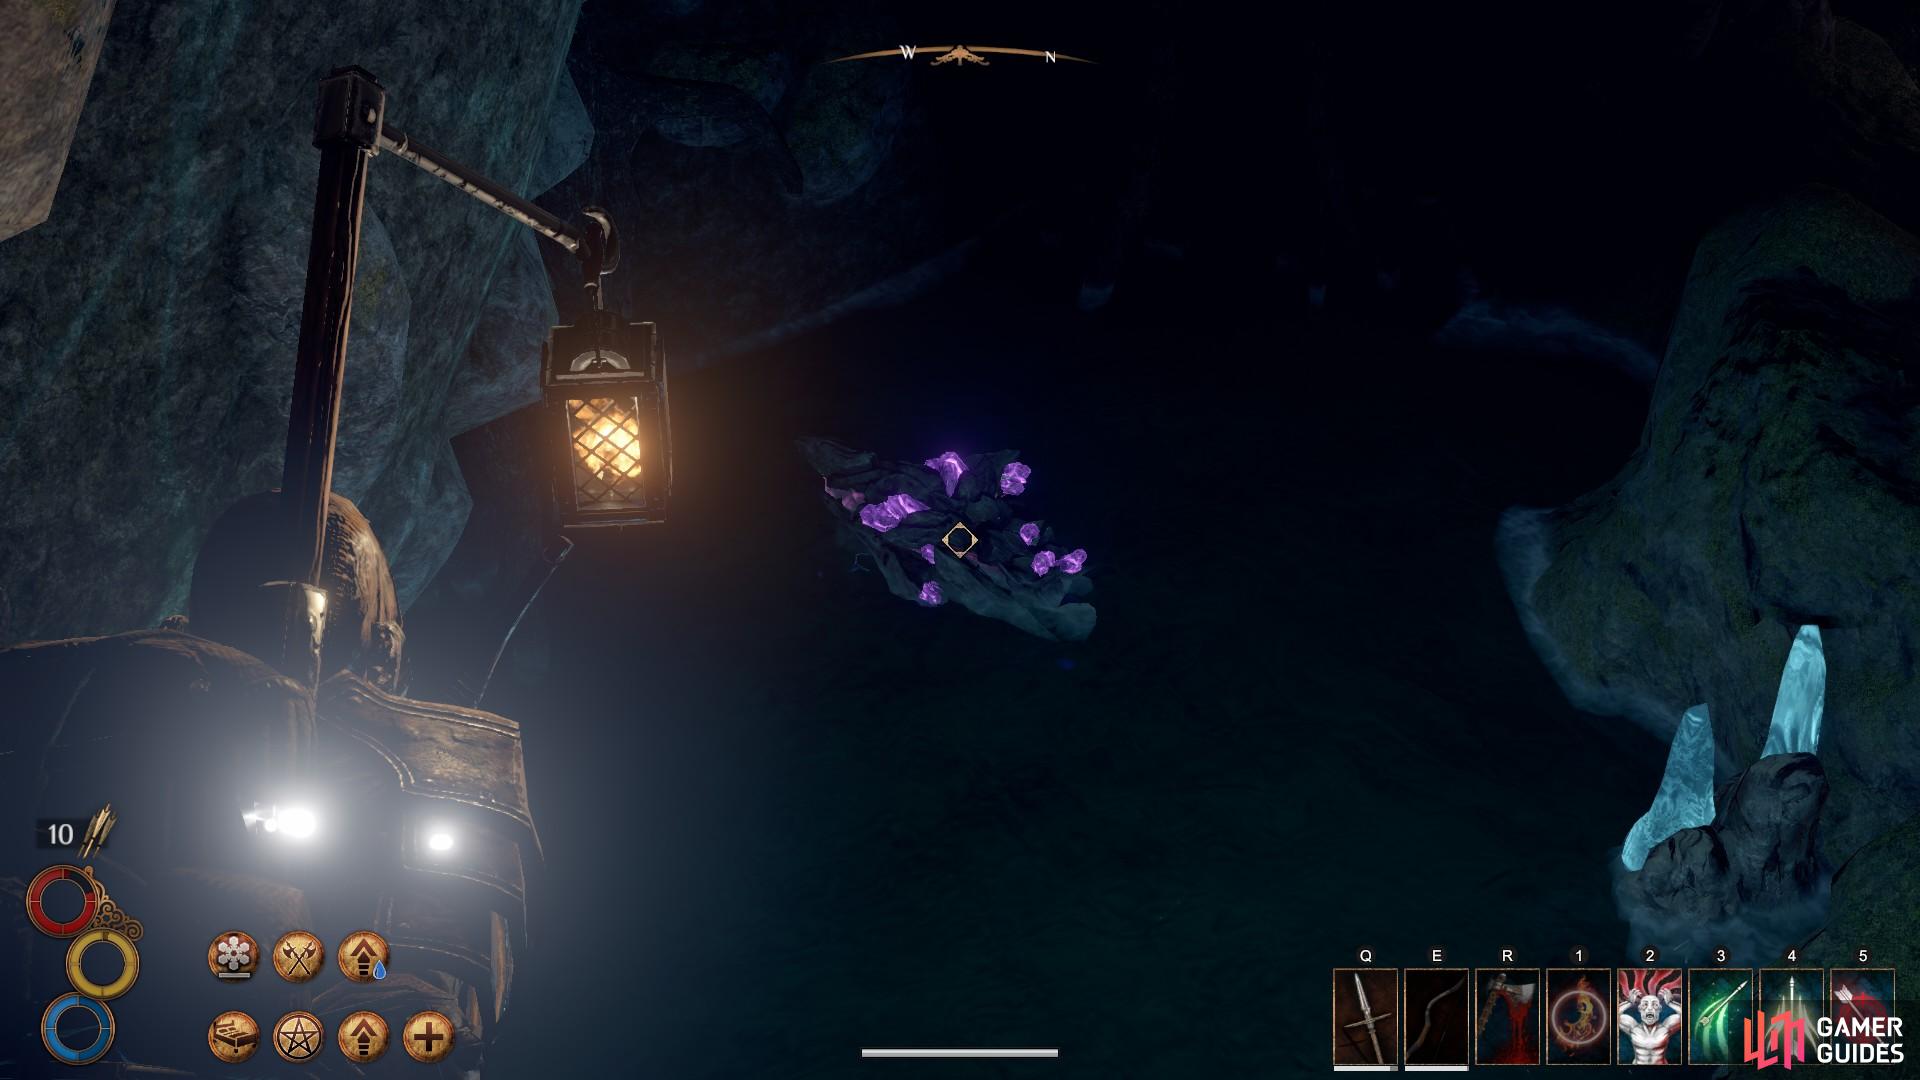
When you reach the last rock face before hitting the pool area, initiate the fight with a powerful ranged attack on the bug.
When you’ve killed the bug, approach the body of Balthazar and read the notes beside him. These will provide clues as to where to go next. When ready, jump down into the pit and be ready to fight a mage and an archer. They are light armoured and so shouldn’t be much trouble, but if you are having difficulty you can use the surrounding area, such as the boulders, to take cover while you regain composure.
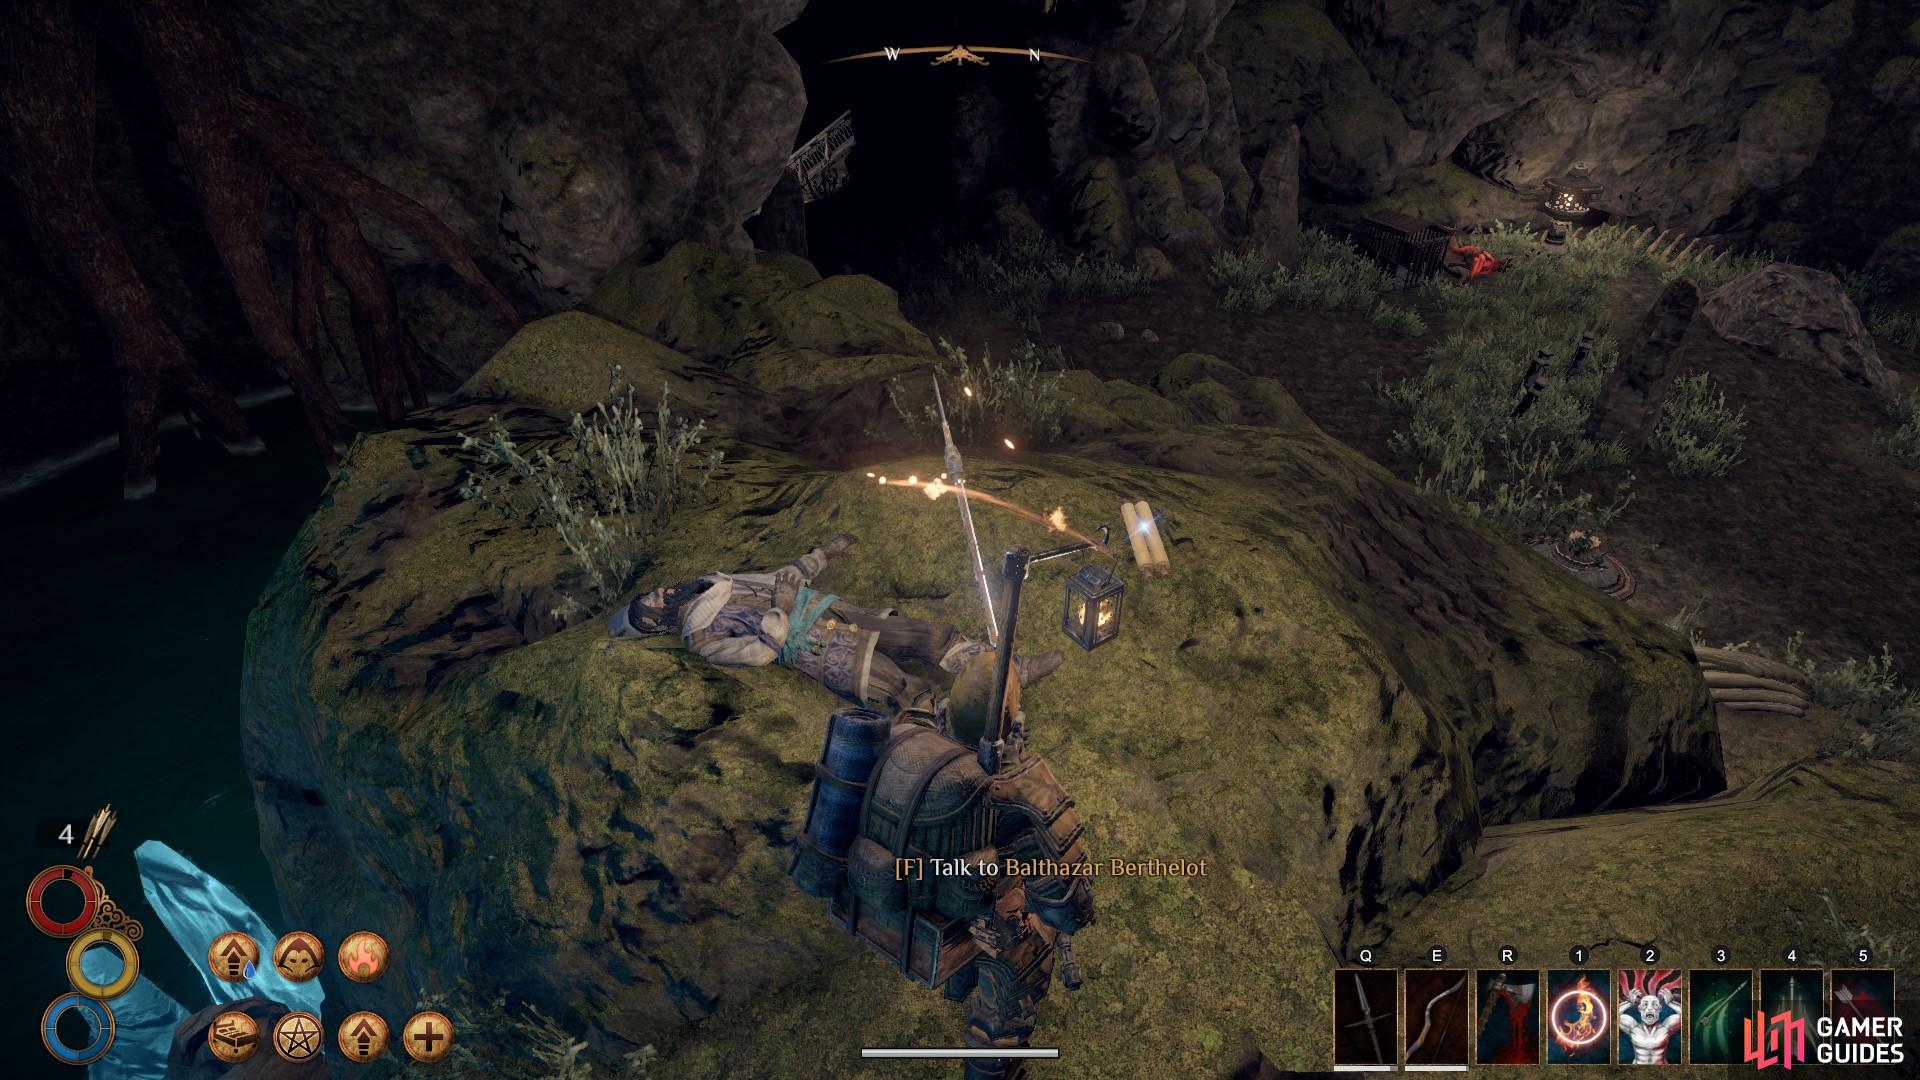
Interact with the body of Balthezar to learn of his fate.
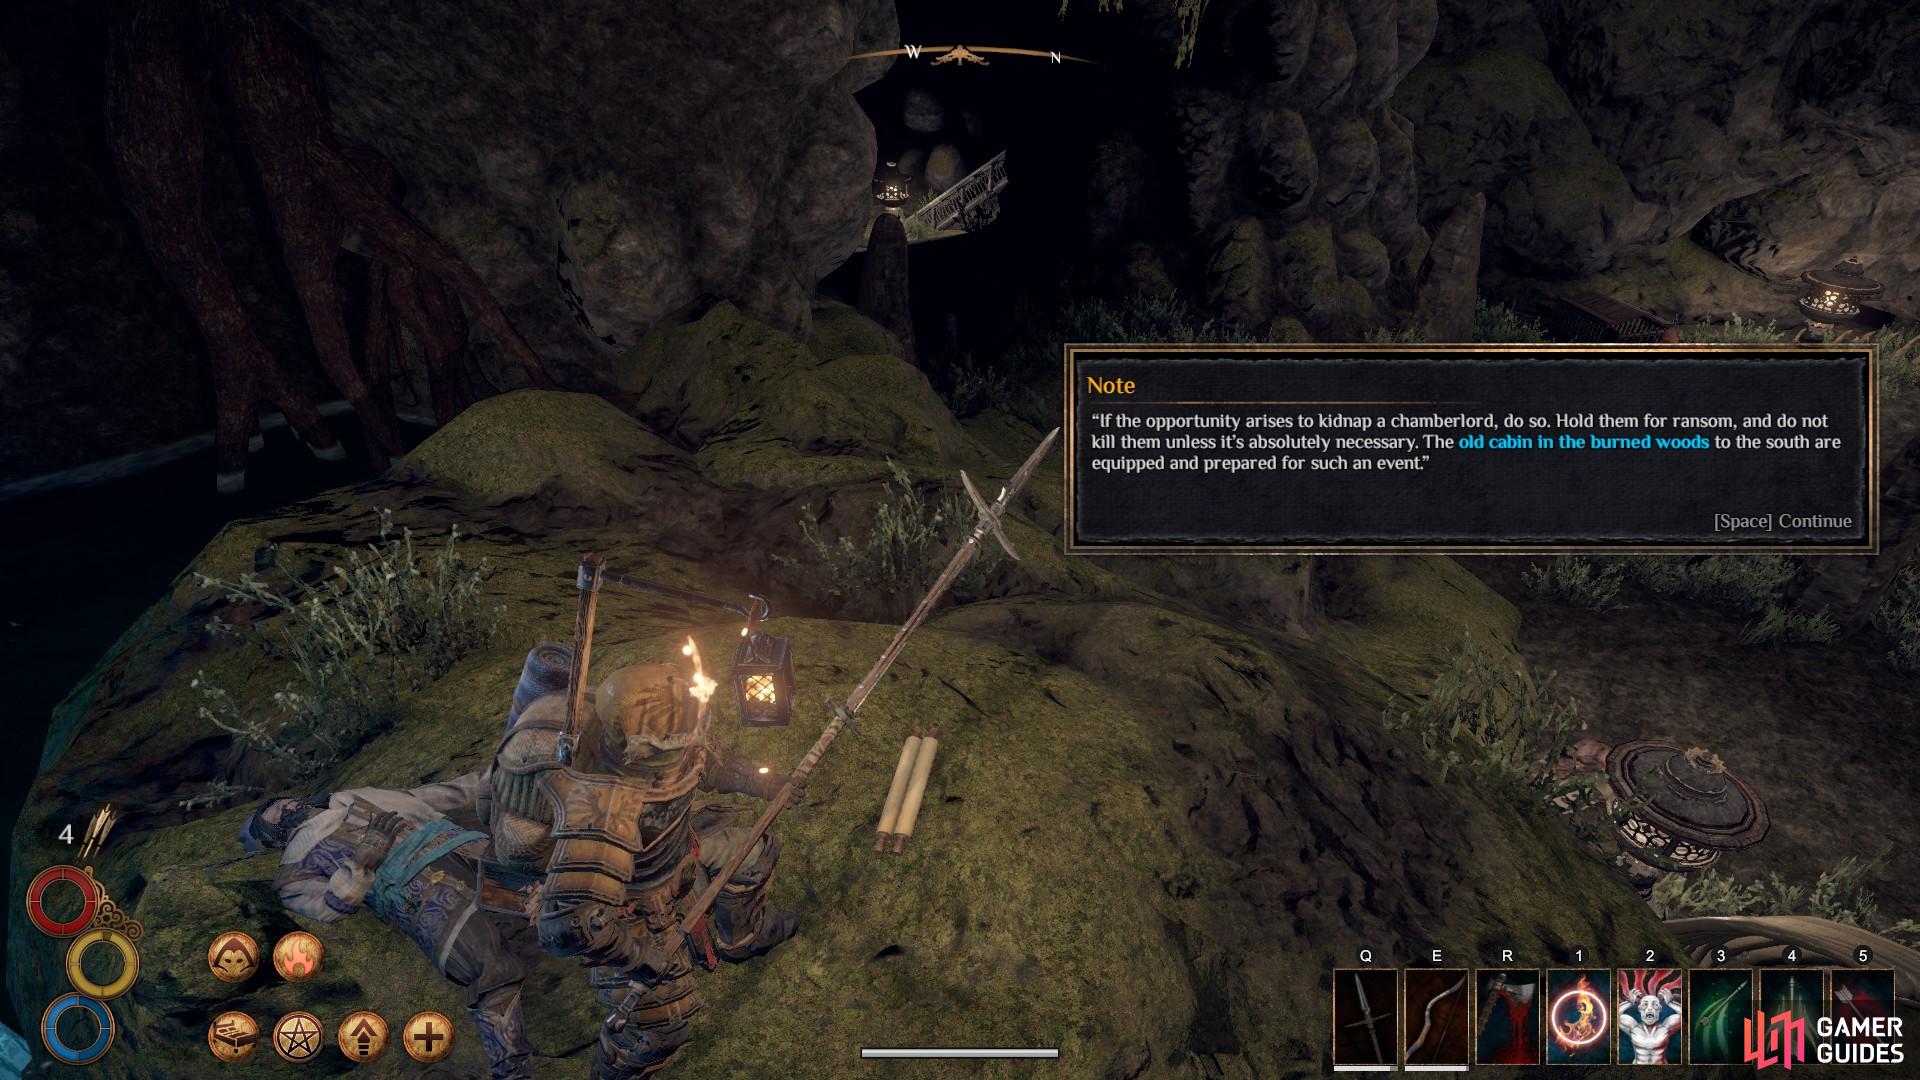
Read the notes beside the body for clues as to where Rissa might be.
When both are dead, head east into a crypt room. Here you will find a desert captain who is quicker and better equipped than the mage or archer. However, since the captain has no ranged attacks you will find it relatively easy to kite and whittle him down. If you do have some trouble, go back to the pool area and use the rocky outcrop to create a barrier between you and the captain, allowing for recovery and the use of ranged attacks.
When the captain is dead, head up the stairs to the west and then down another set of stairs. You will find a stone with a memoriam message, but not much else. When ready, head up the stairs to the north and out through the wooden door into Enmerkar Forest.
When you exit the tombs, you will find yourself outside of the city of Berg. See the map below for your precise location.
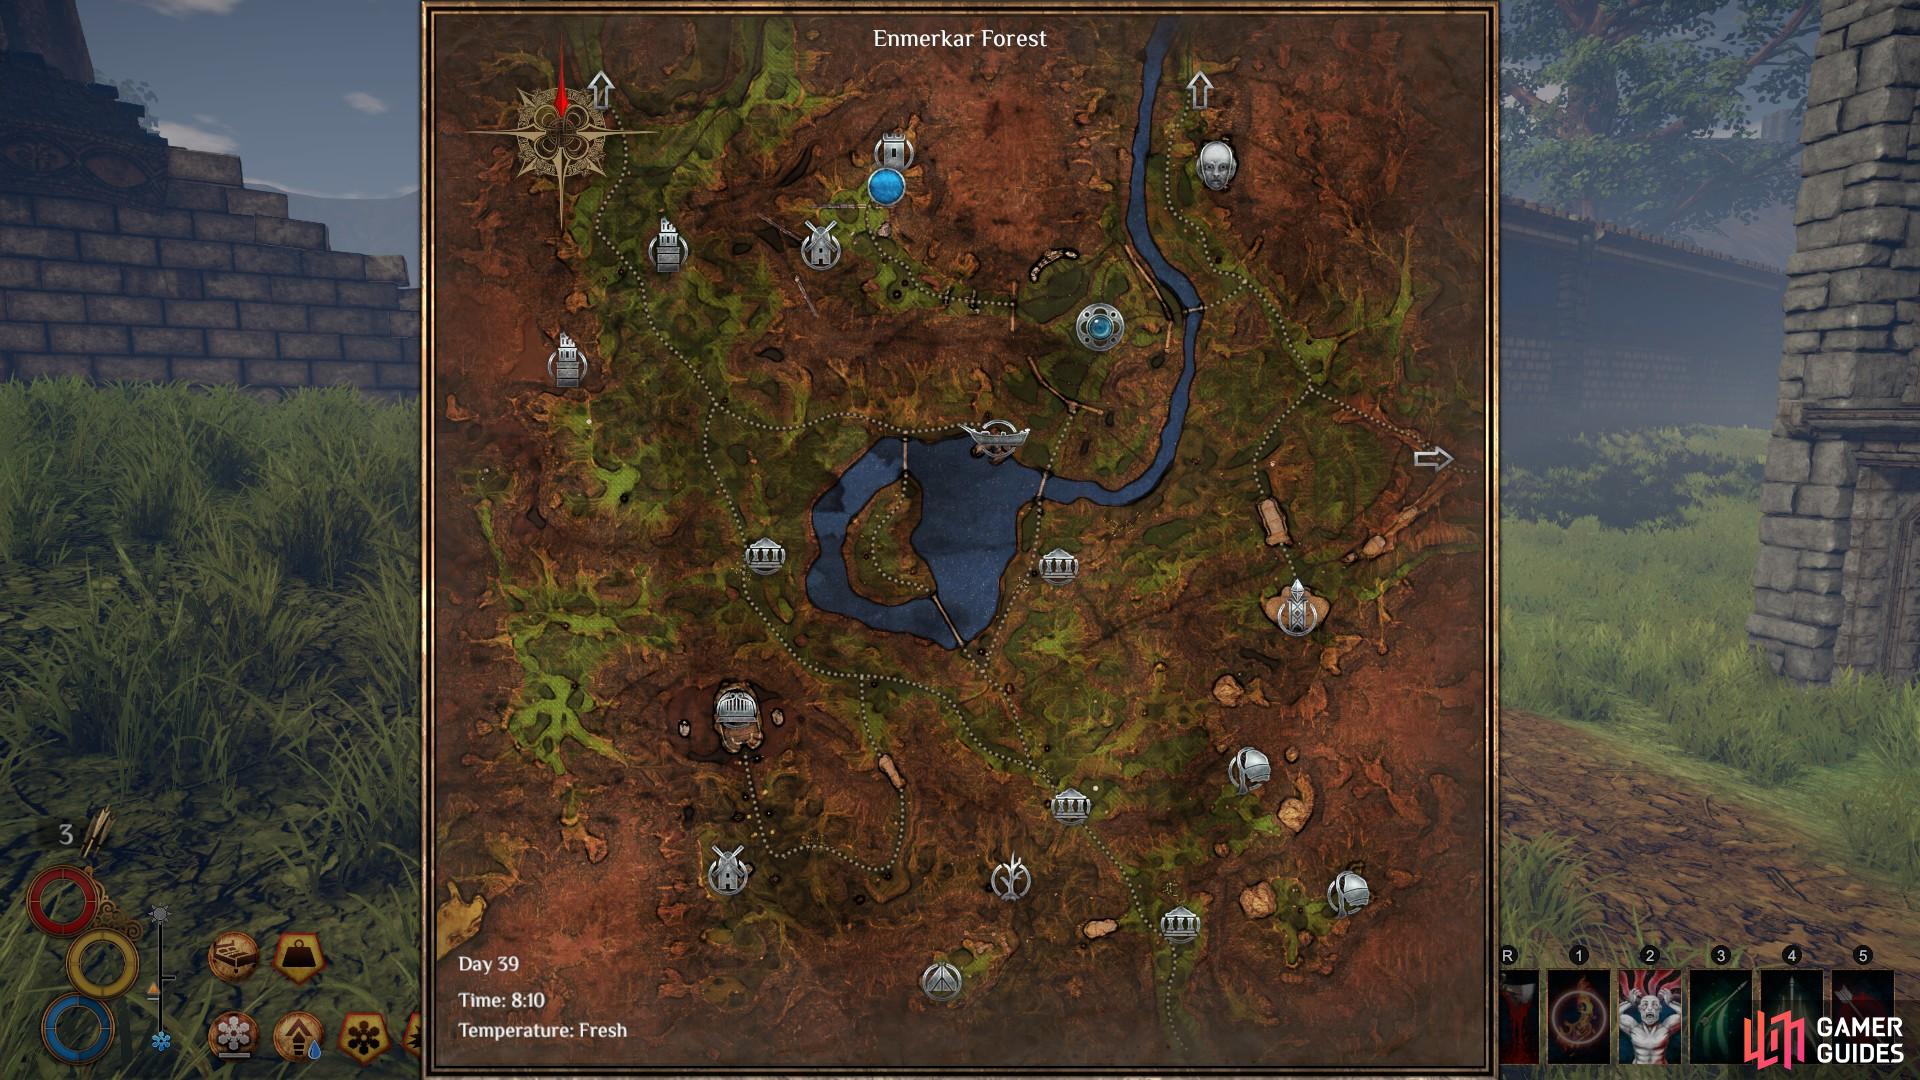
The blue icon to the north indicates where you are on the map as you leave the crypts.
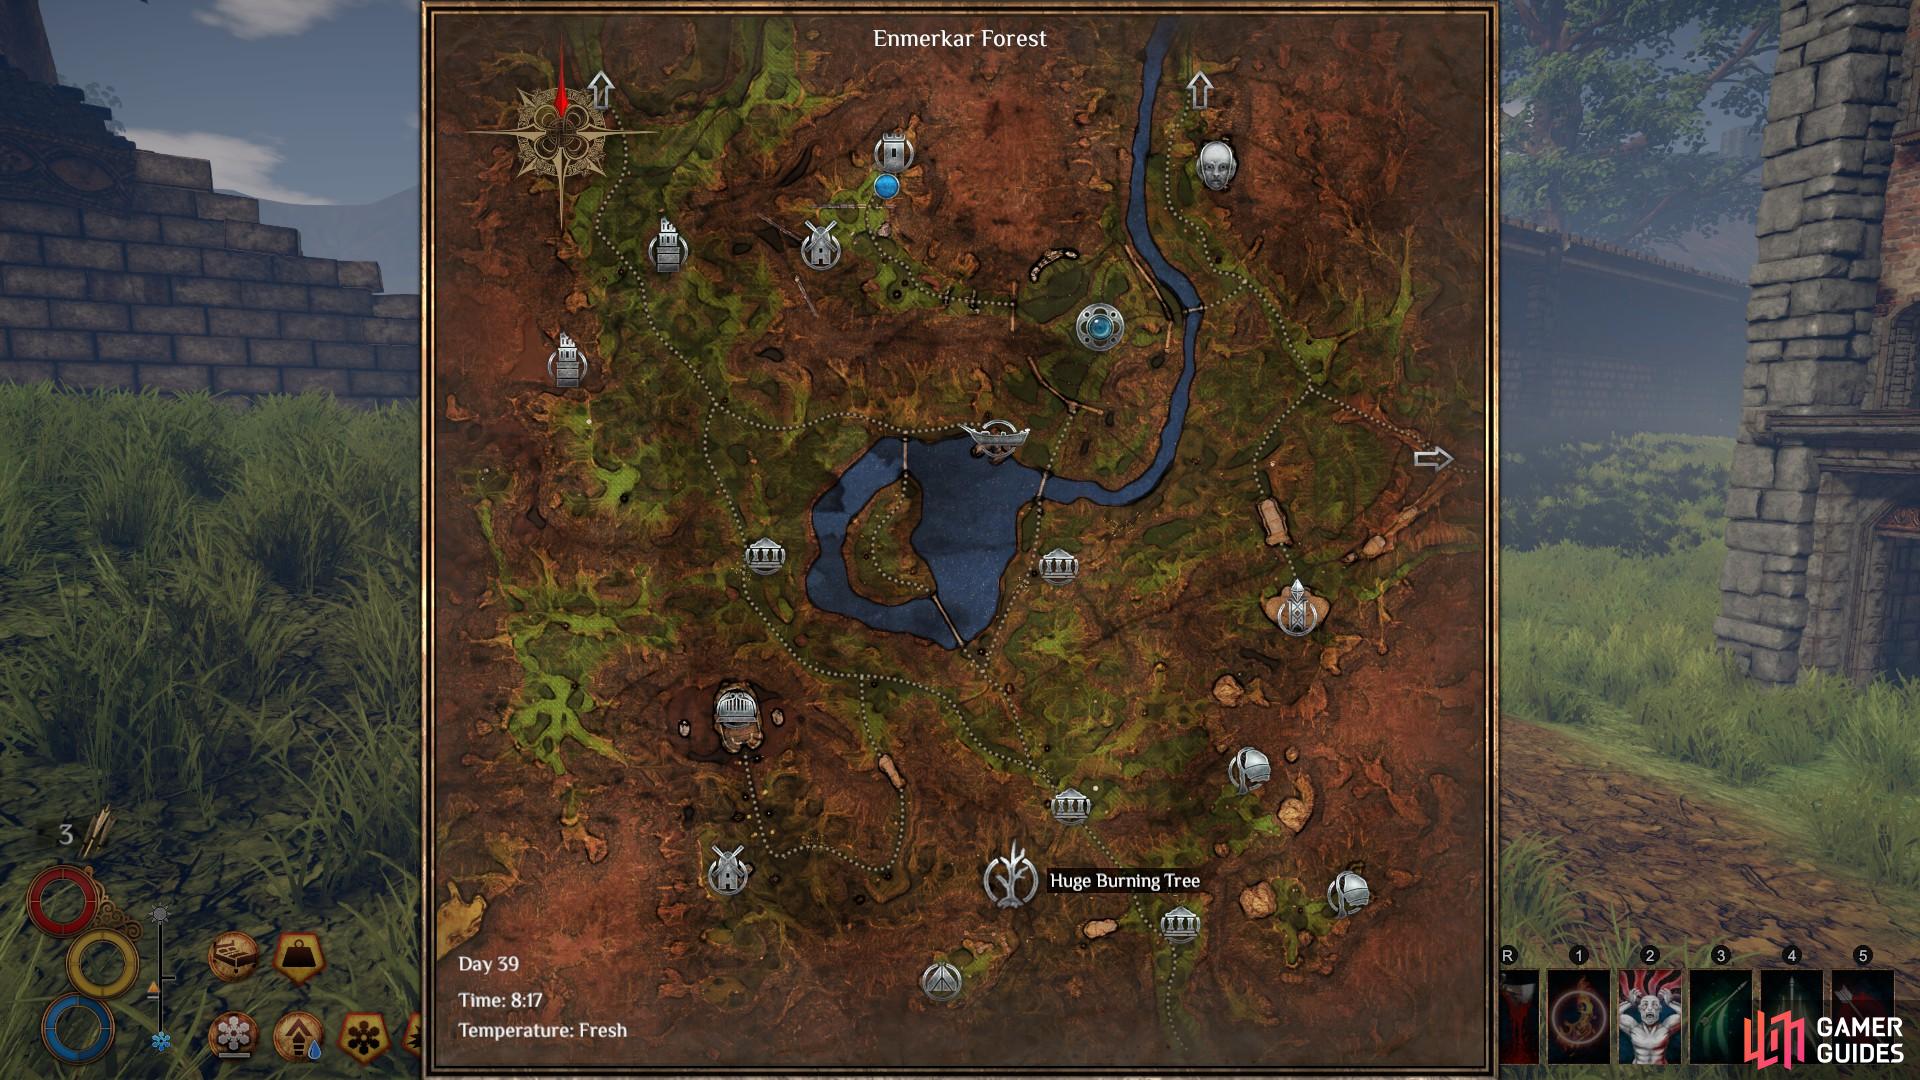
See the south of the map for the location of the burning tree.
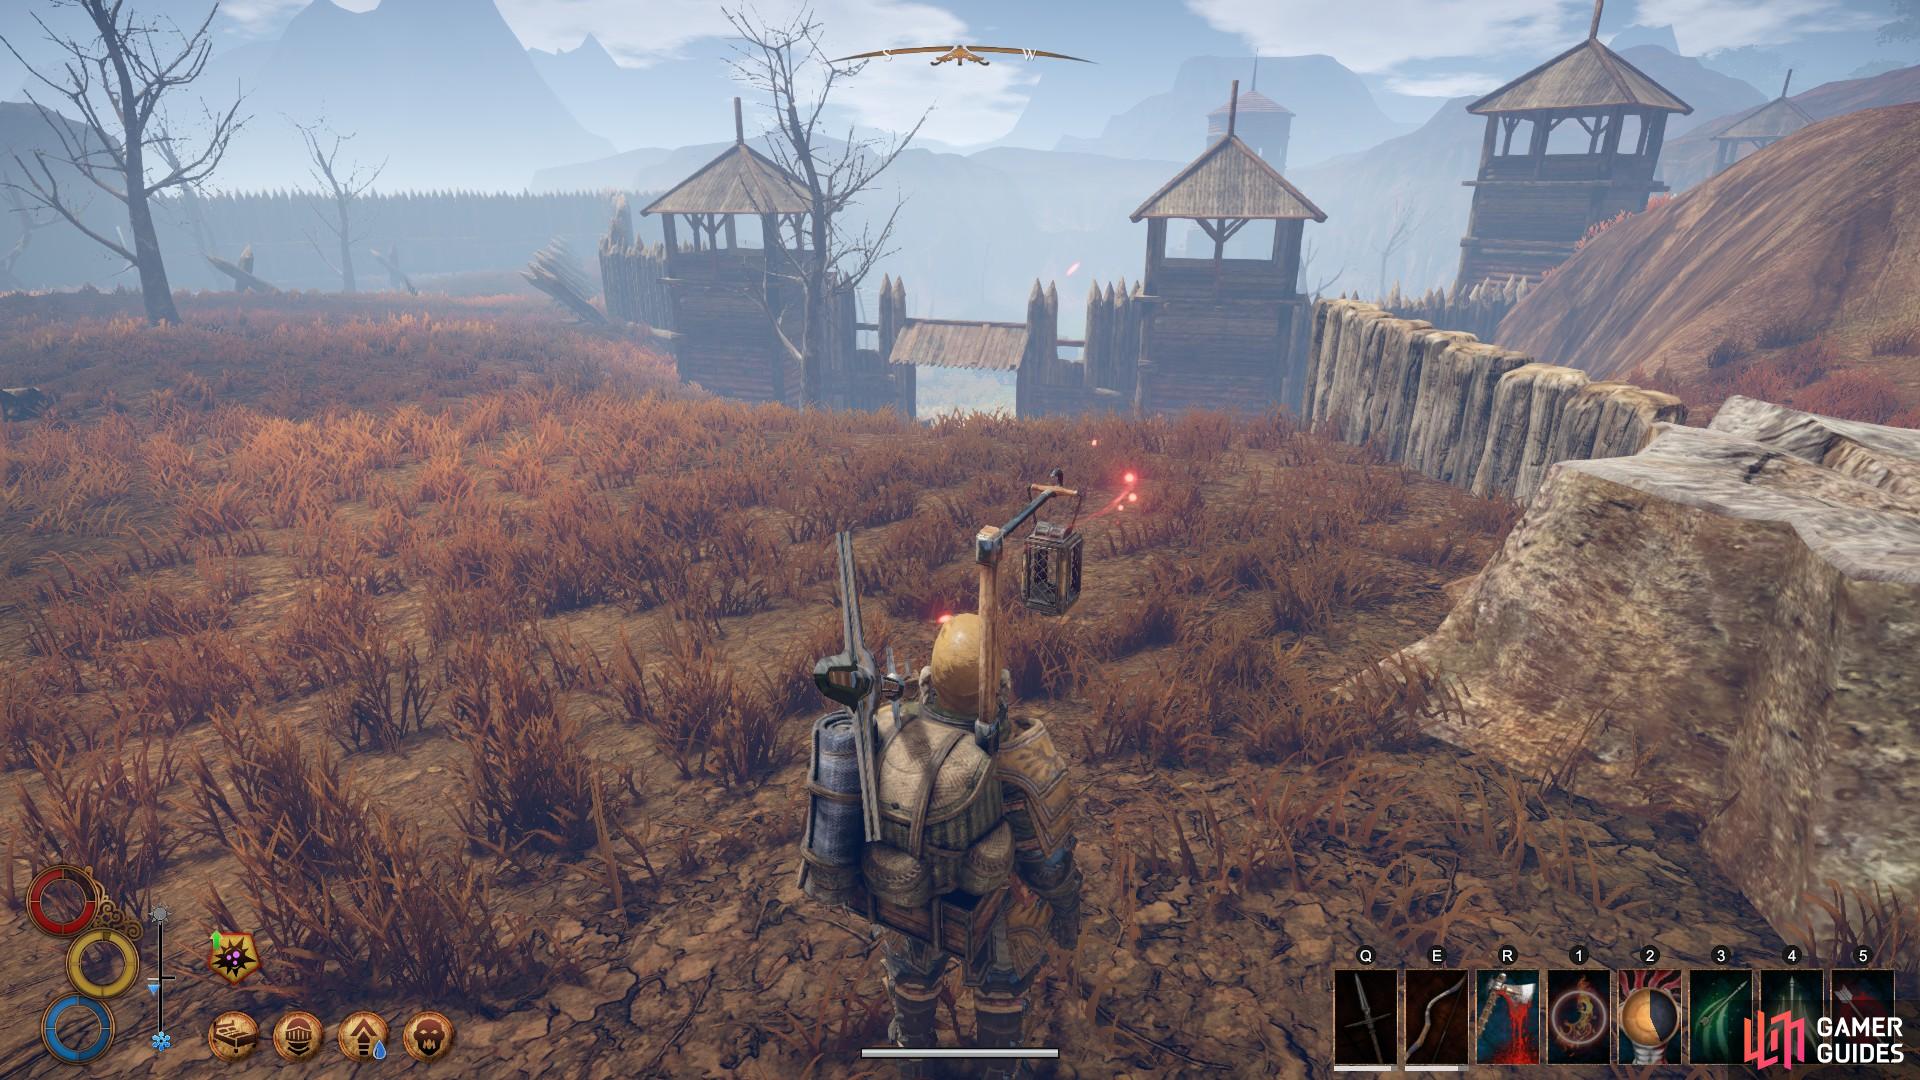
From here, you need to travel to the Huge Burning Tree, as shown on the map above. The location that you’re currently in is actually a fort occupied by bandits. You can choose to kill the bandits while you’re there, or head directly back to Berg by running East. You can easily avoid the enemies if you wish, and can enter Berg unscathed. Use the time you have in Berg to restock any essential supplies before heading south. You can also take the time to rest and recover strength if necessary.
When you’re ready, leave Berg by the main gate and take the main road south. As you cross the bridge you will encounter three bandits, use the length of the bridge to bait them and finish them off with ranged attacks if possible. You will want to preserve any strength for the fight ahead. When the bandits are dead, continue south over the grassy fields until you reach the main road again. When you hit the road, continue south until you reach a split in the road marked by a pillar. From here, take the left path further south.
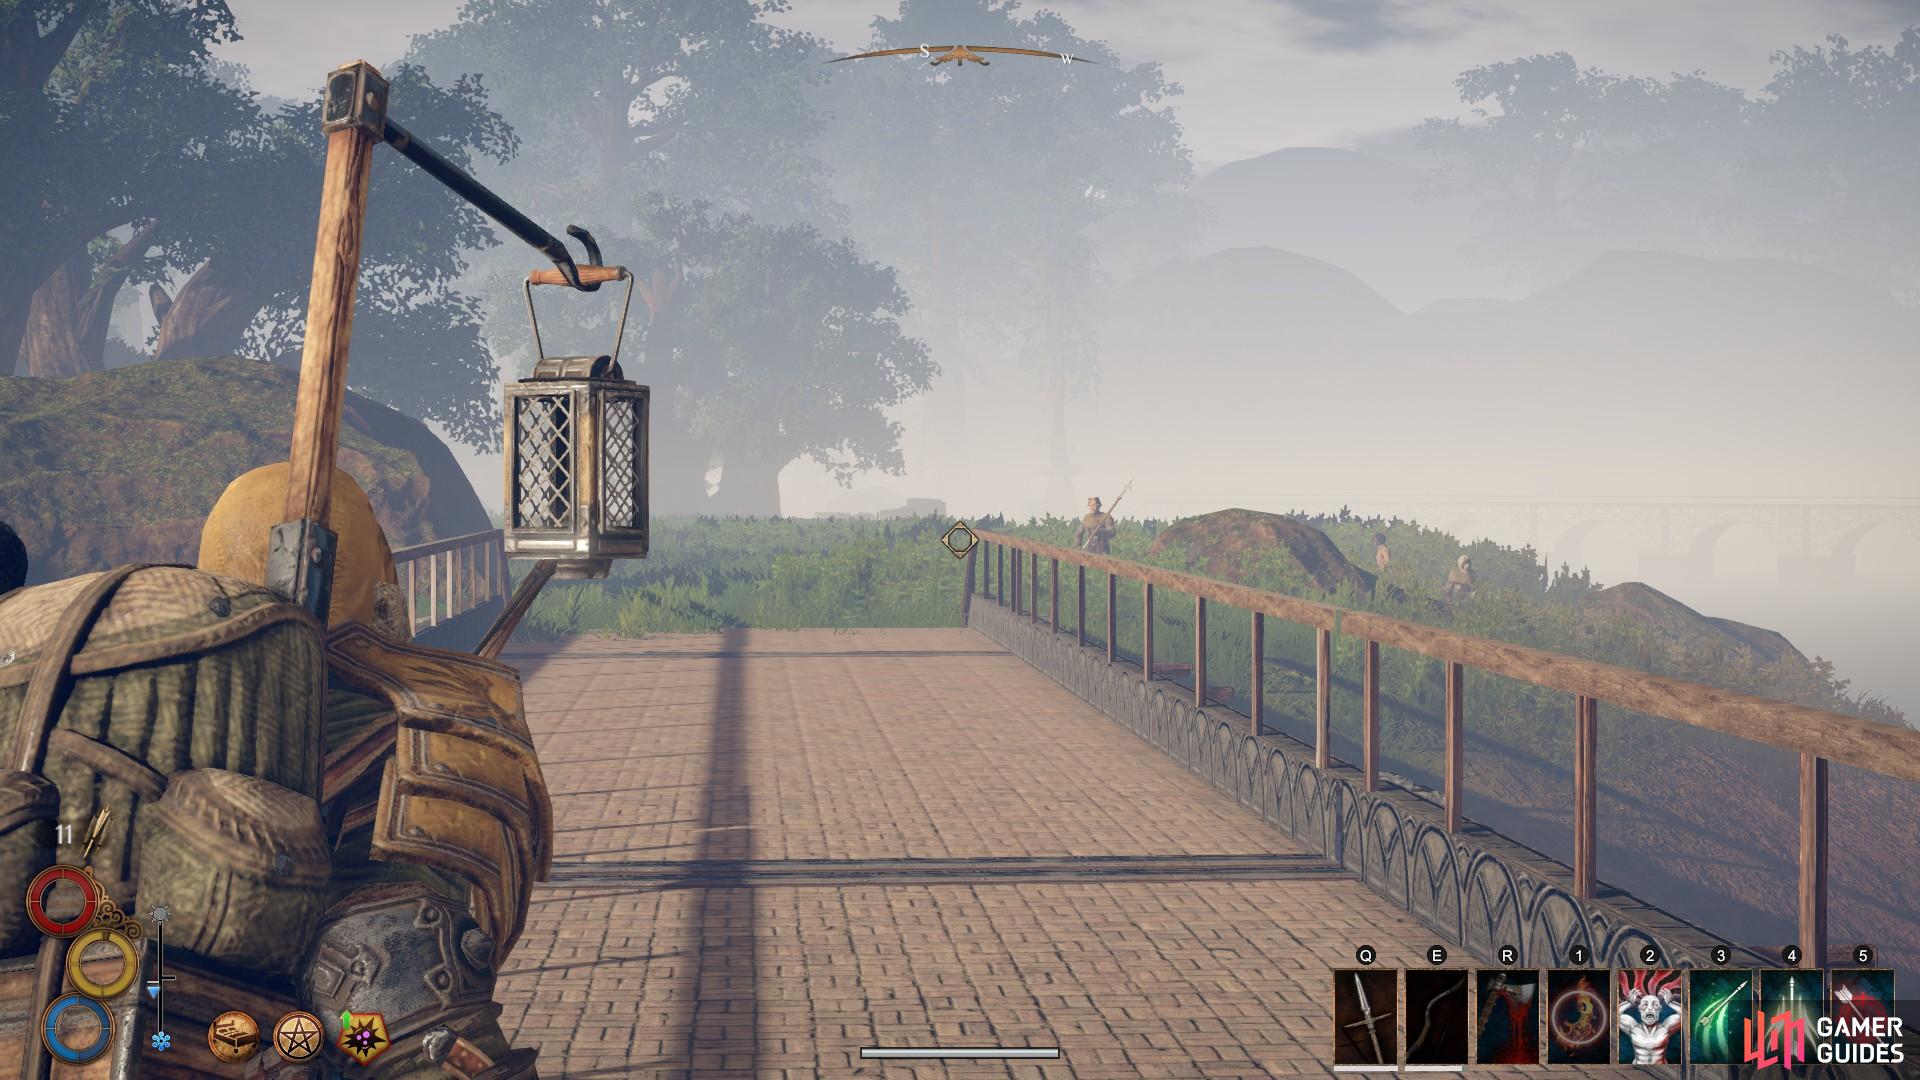
(1 of 3) The bandits may be hiding either side of the bridge. Wait a while for them to reveal themselves.
As you continue along this road you will see the burning tree in the distance. Head toward it and keep a look out for any mobs in the surrounding area; it is easy to get ambushed here. When you reach the tree, be careful not to pull any fire elementals which are patrolling the area. Loot the smoke roots and head south west to the camp where Rissa is being held.
The bandit camp can be seen as you walk south west from the burning tree.
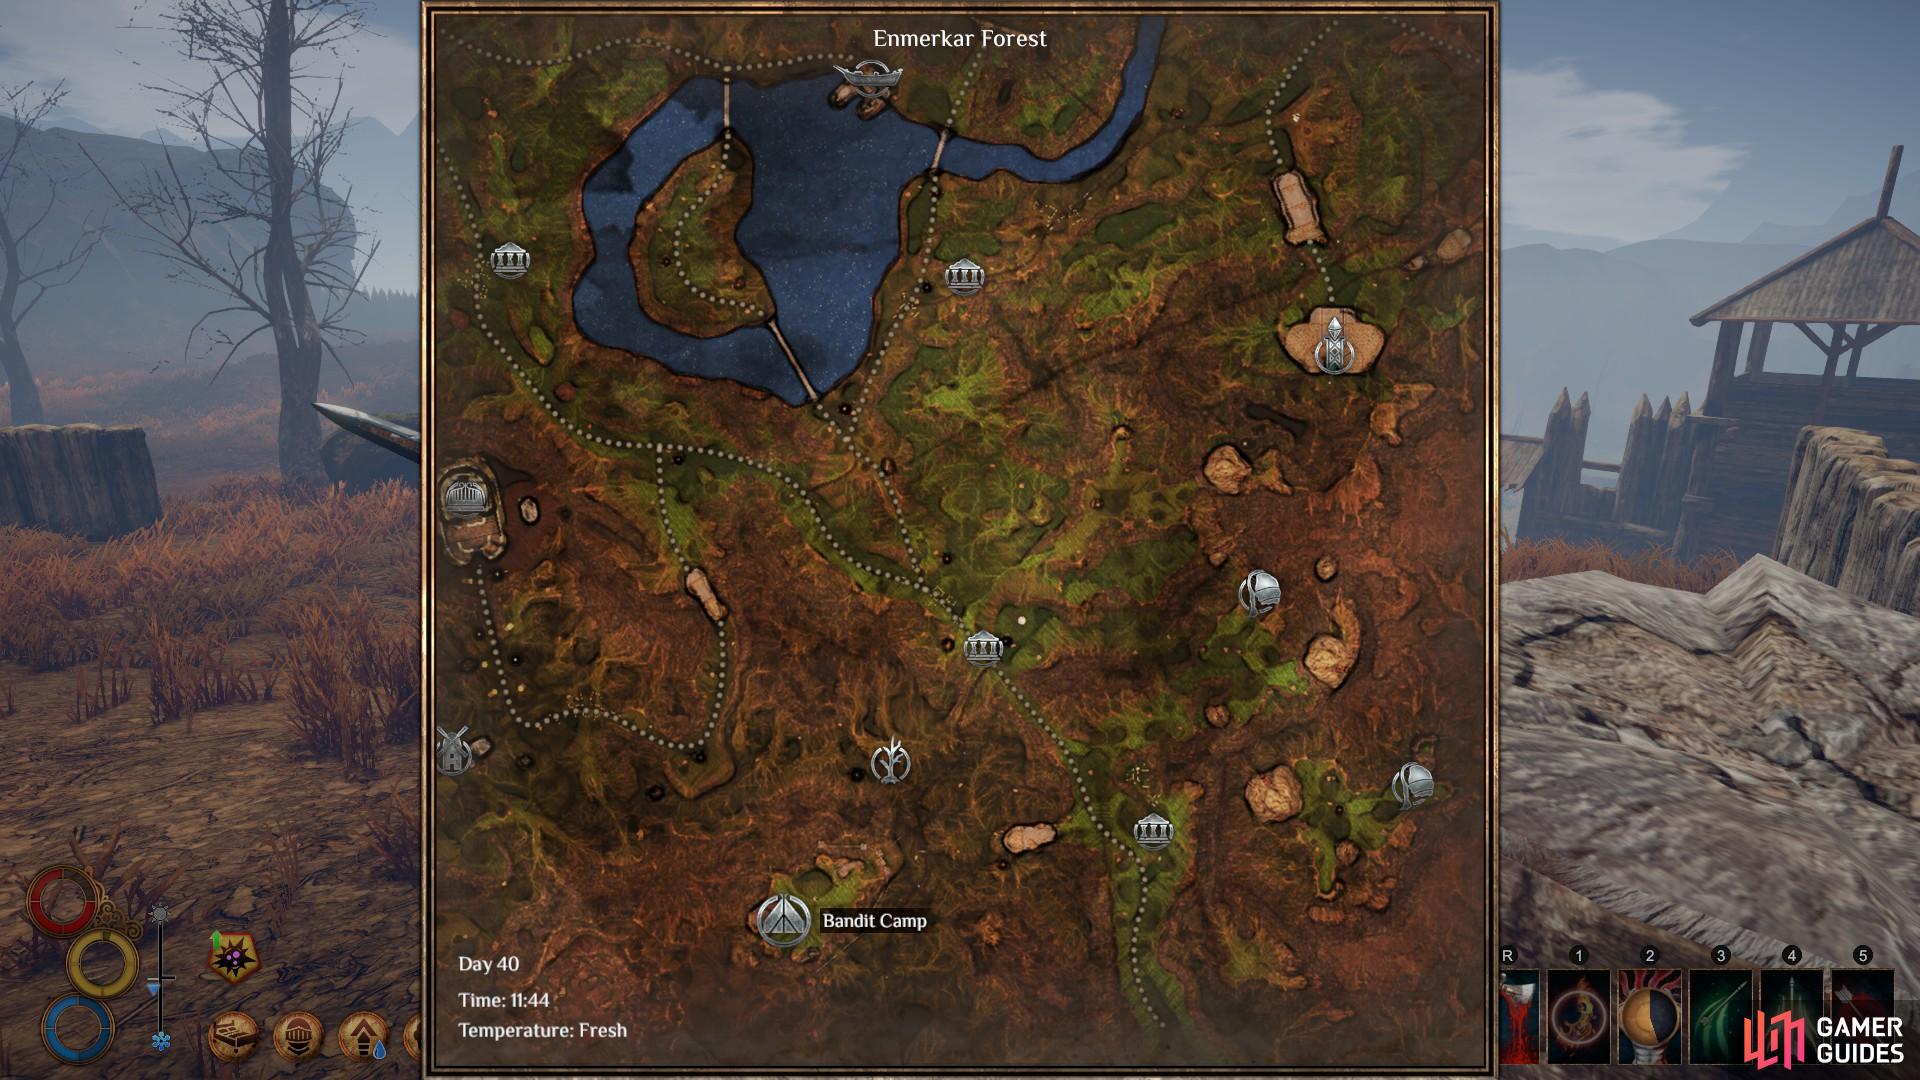
The location of the bandit camp on the map.
Enter the camp through the main gate and try to avoid any fire elementals. The goal is to get behind the camp fire and into the Burnt Outpost at the centre of the camp. When you’re inside the outpost, don’t run straight into the next room. Remain in the first room until you see two armoured warriors appear. You can take the advantage and surprise them with an attack of your choosing. Be sure to use any element rags to enhance your damage and potions or spells to boost your physical resistance.
When both warriors are dead, speak with Rissa. She will inform you that she is returning to Berg. Be sure also to speak with Kirouac, who will reward you with 100 silver.
Optional objective: Kill the mercenary leader
If you want to complete the optional objective for the quest by killing the mercenary leader, you will find him at the location marked below. Head north west from the camp, or directly west from the burning tree.
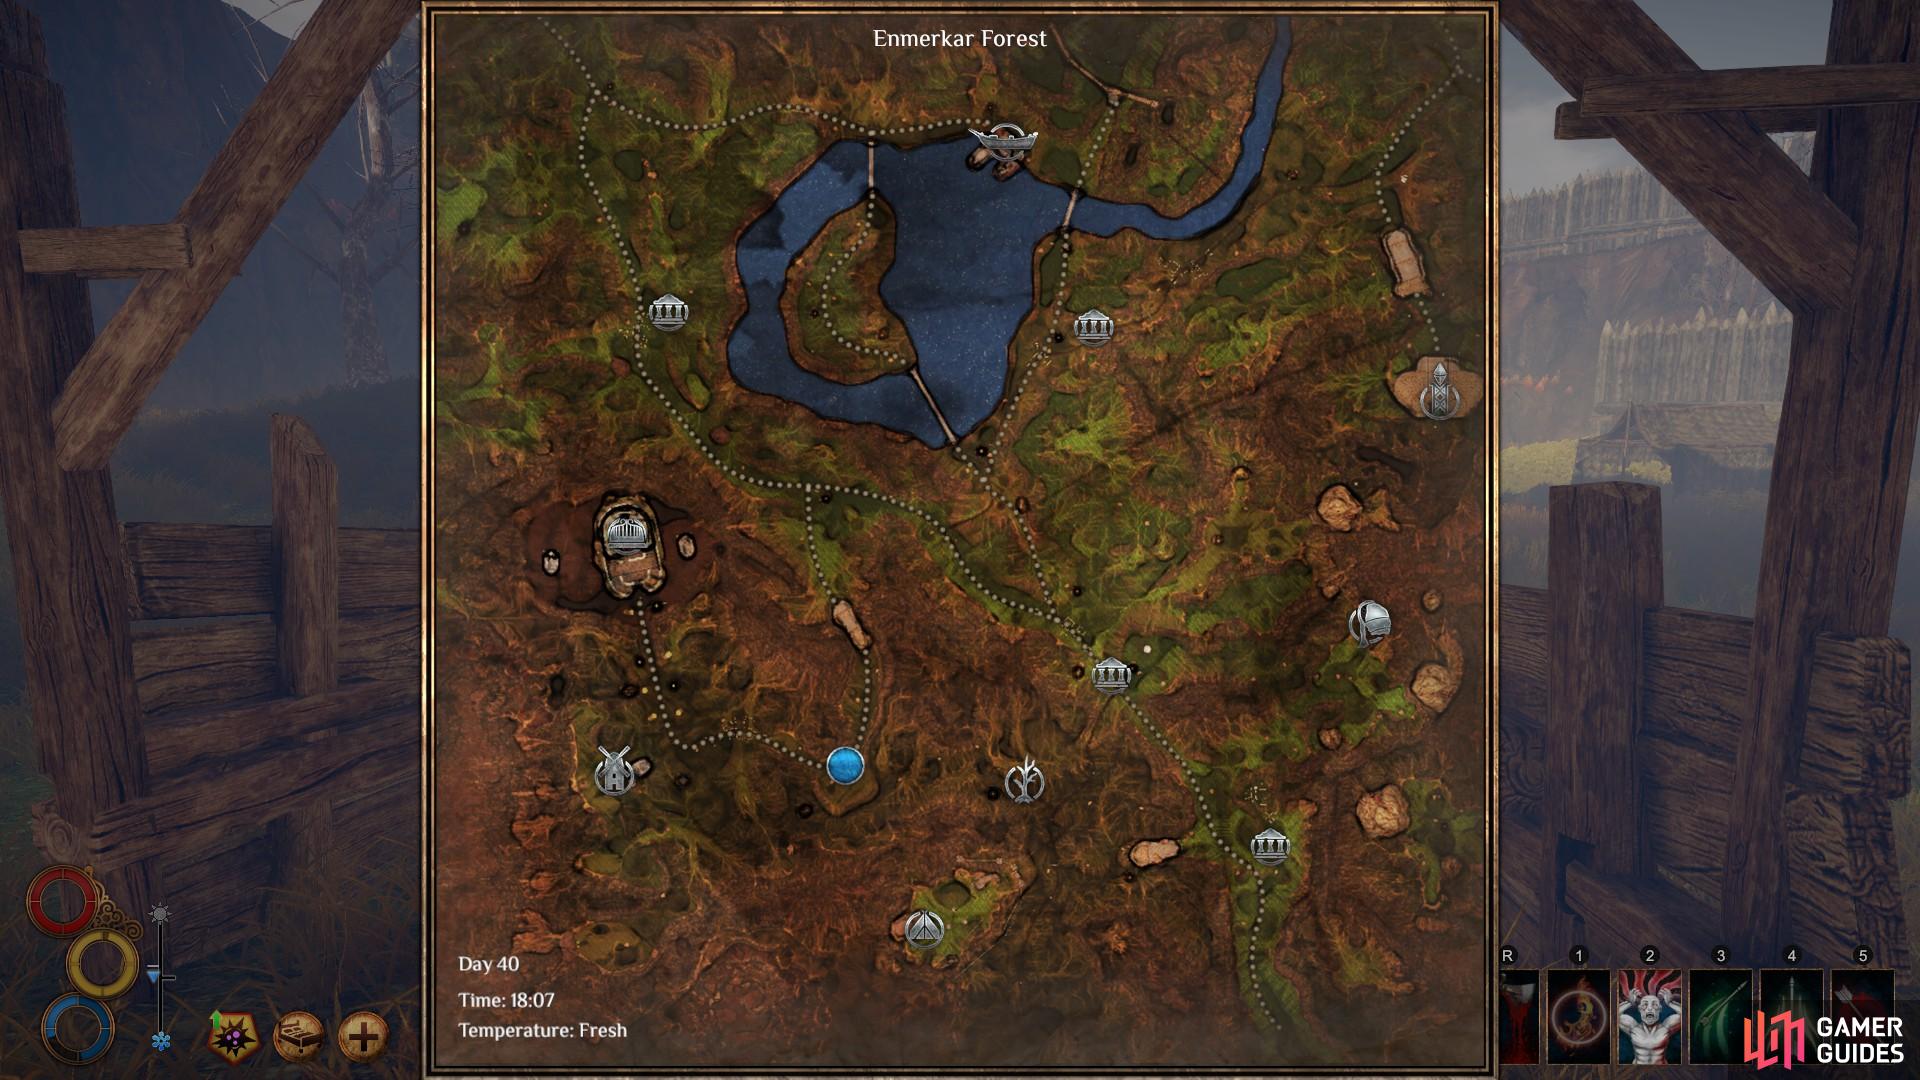
(1 of 3) The location of the mercenary leader on the map, marked here by the blue circle.
When you approach the location of the mercenary leader you should be able to spot him in the grasslands. Try to initiate the attack with a powerful ranged offensive, preferably one which impacts movement speed. You should also be careful not to pull the two poison creatures which patrol nearby. If you do, draw the leader away from them, but only so far that you are out of range of their attacks. They will then focus their fire on the leader and help you to kill him.
When the mercenary leader is dead, take the main road north. Upon reaching a split in the road, head north east until you come to a bridge. At the bridge turn north again and follow the road directly to Berg. Speak with Rissa, who can be found by the water fountain where you began the quest, to receive your reward and complete the quest.
No Comments