
This quest is first obtained from Helmi the Alchemist, found in the town of Cierzo. Speak with her and ask about where to obtain Mana. She will direct you to Conflux Mountain, the most prominent location in Chersonese, visible at the centre of the map for the region.
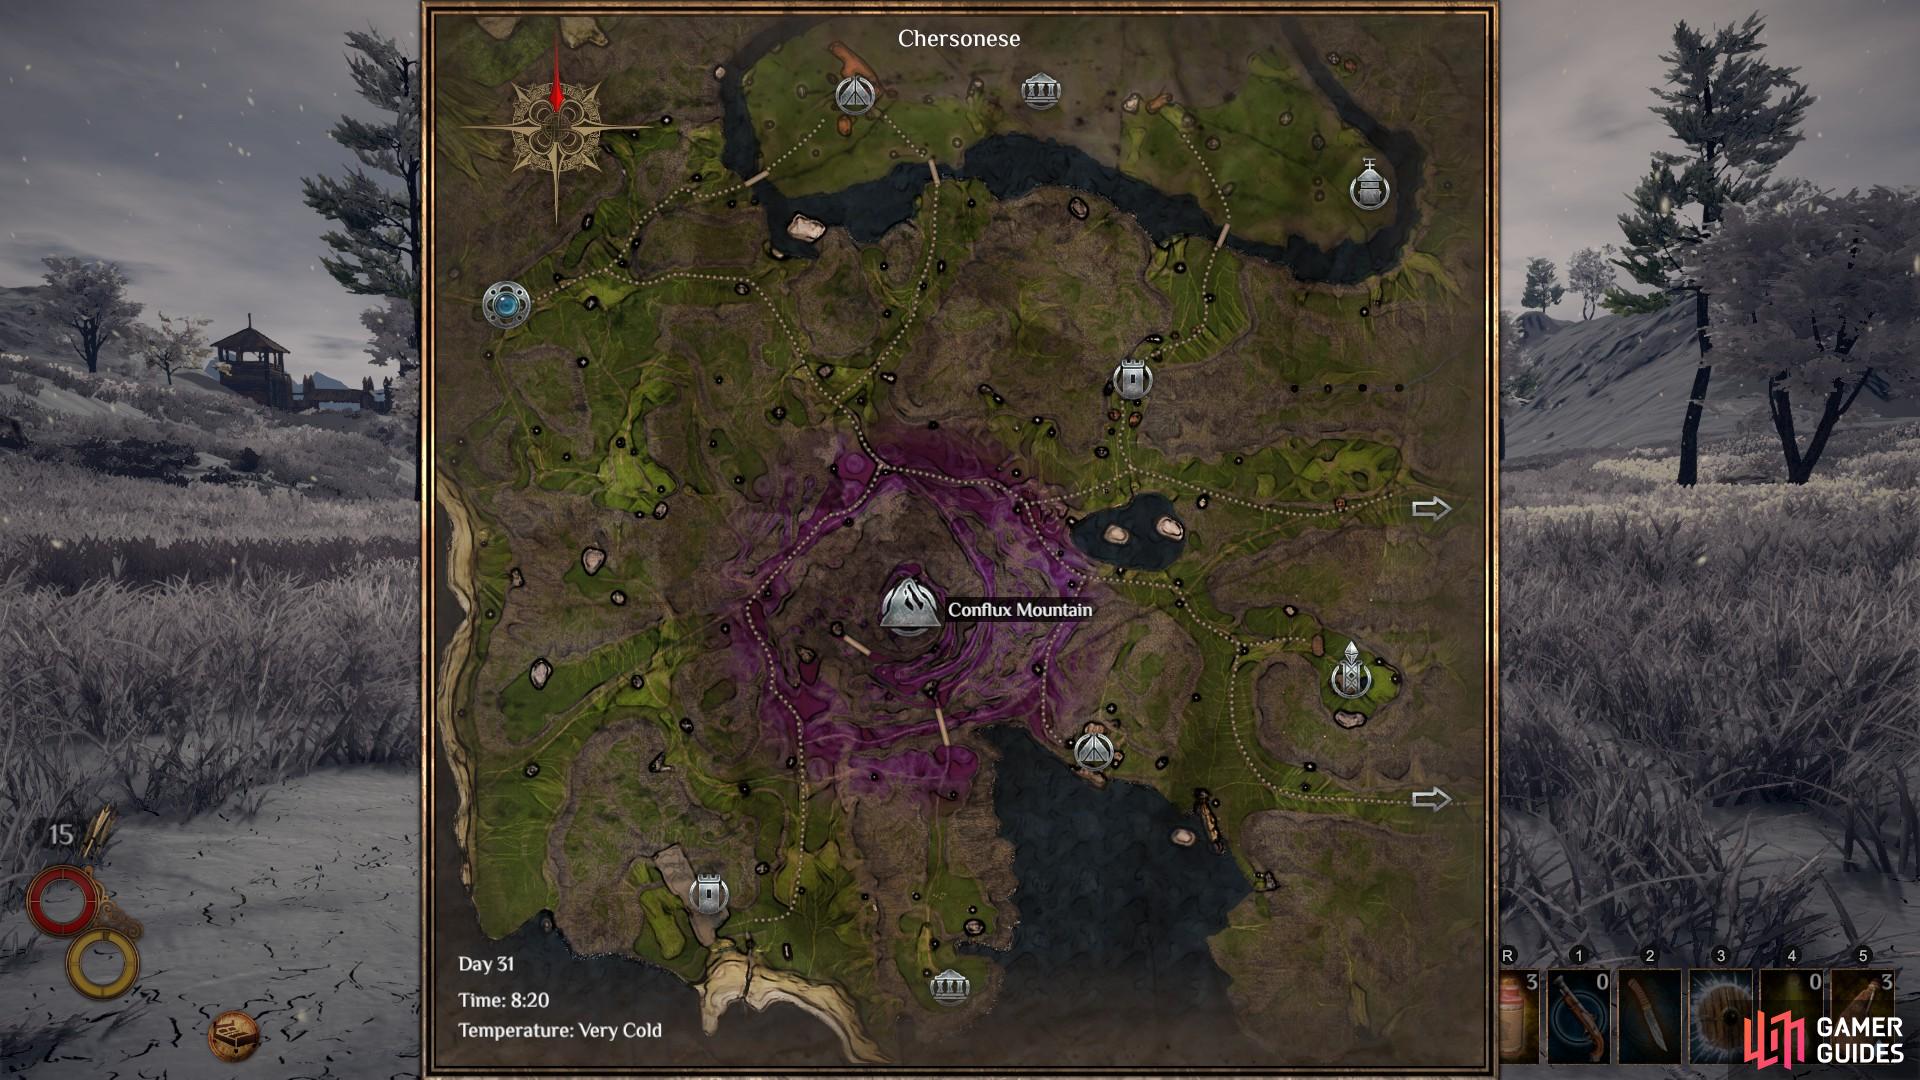
The location of Conflux Mountain on the regional map of Chersonese.
As you leave from the main gate of Cierzo, head north east along the main road. When you come to the first split in the road, continue north east as you gradually turn directly east. You will know that you’re on the correct path as you see the summit of Conflux Mountain in the distance to the south. It is important that you keep to the roads if you want to avoid any unwelcome encounters with mobs.
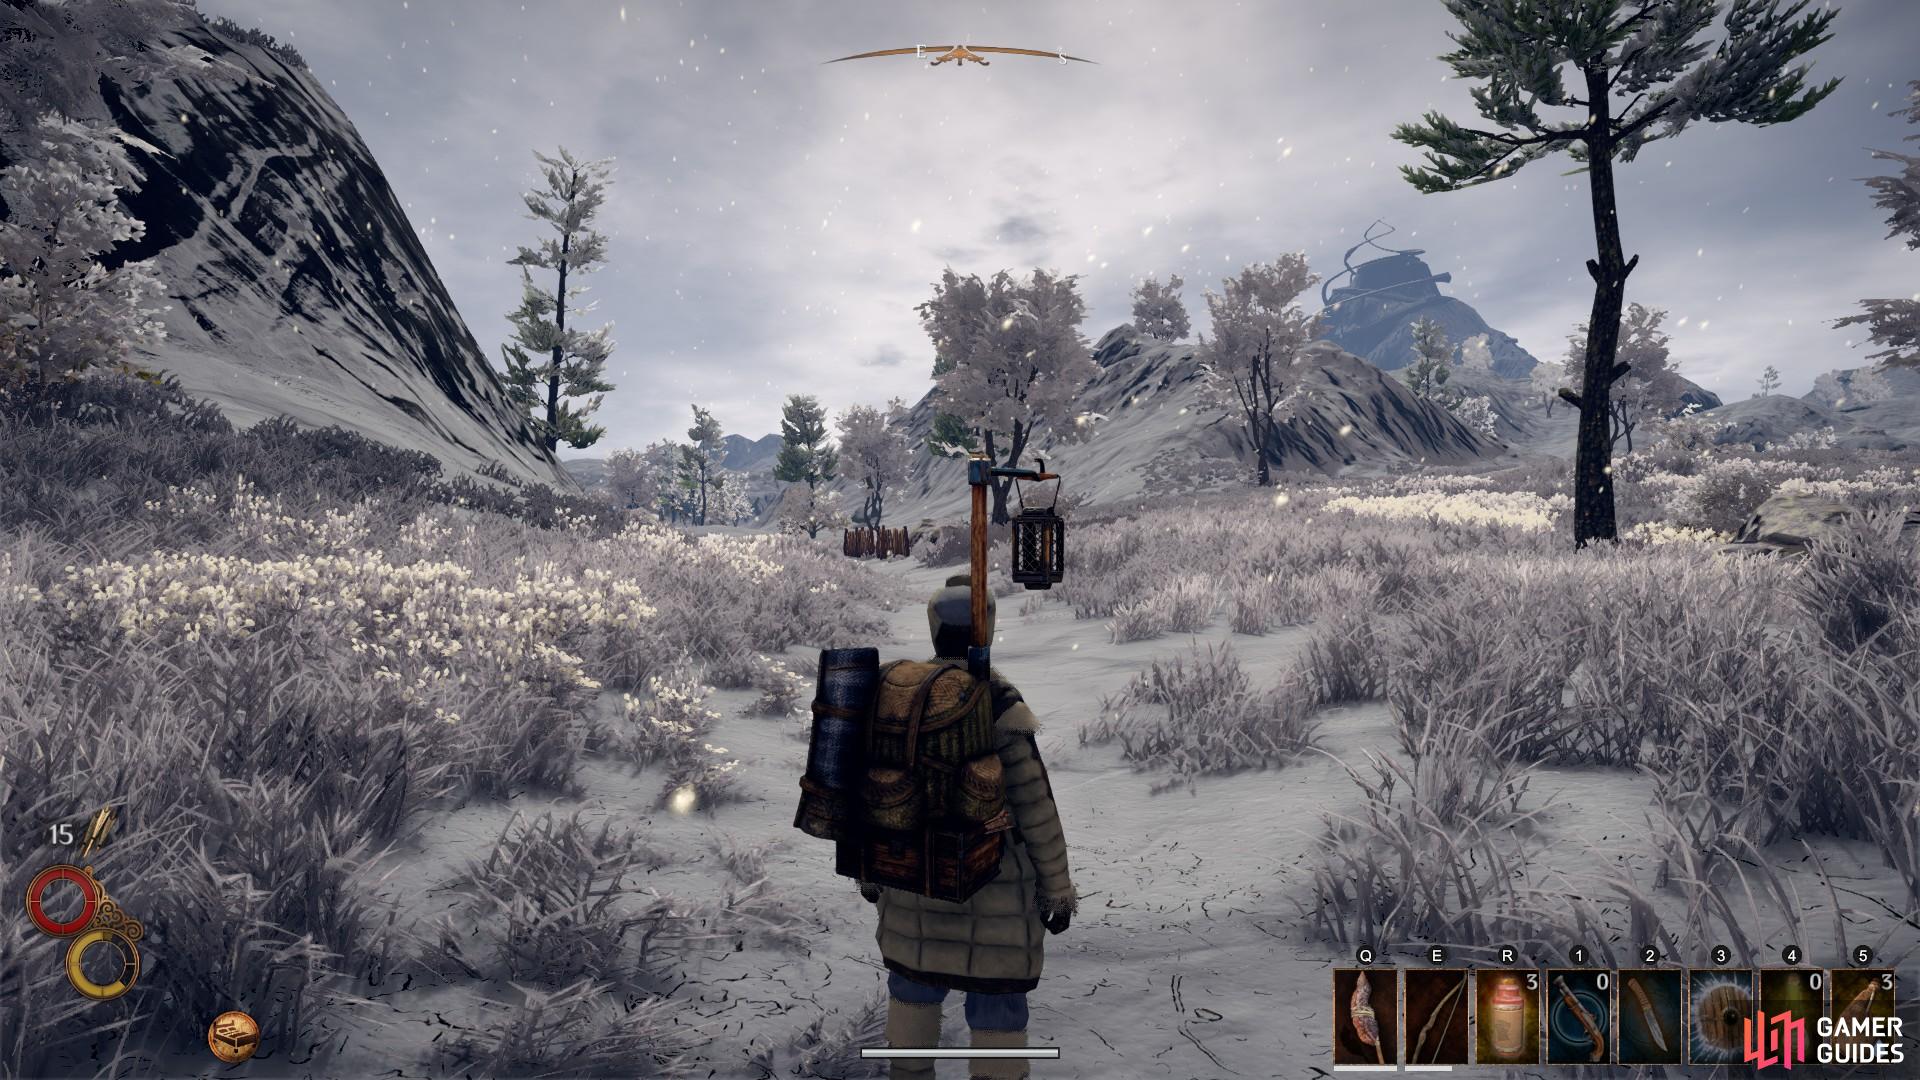
Conflux Mountain as seen in the distance from the road heading east.
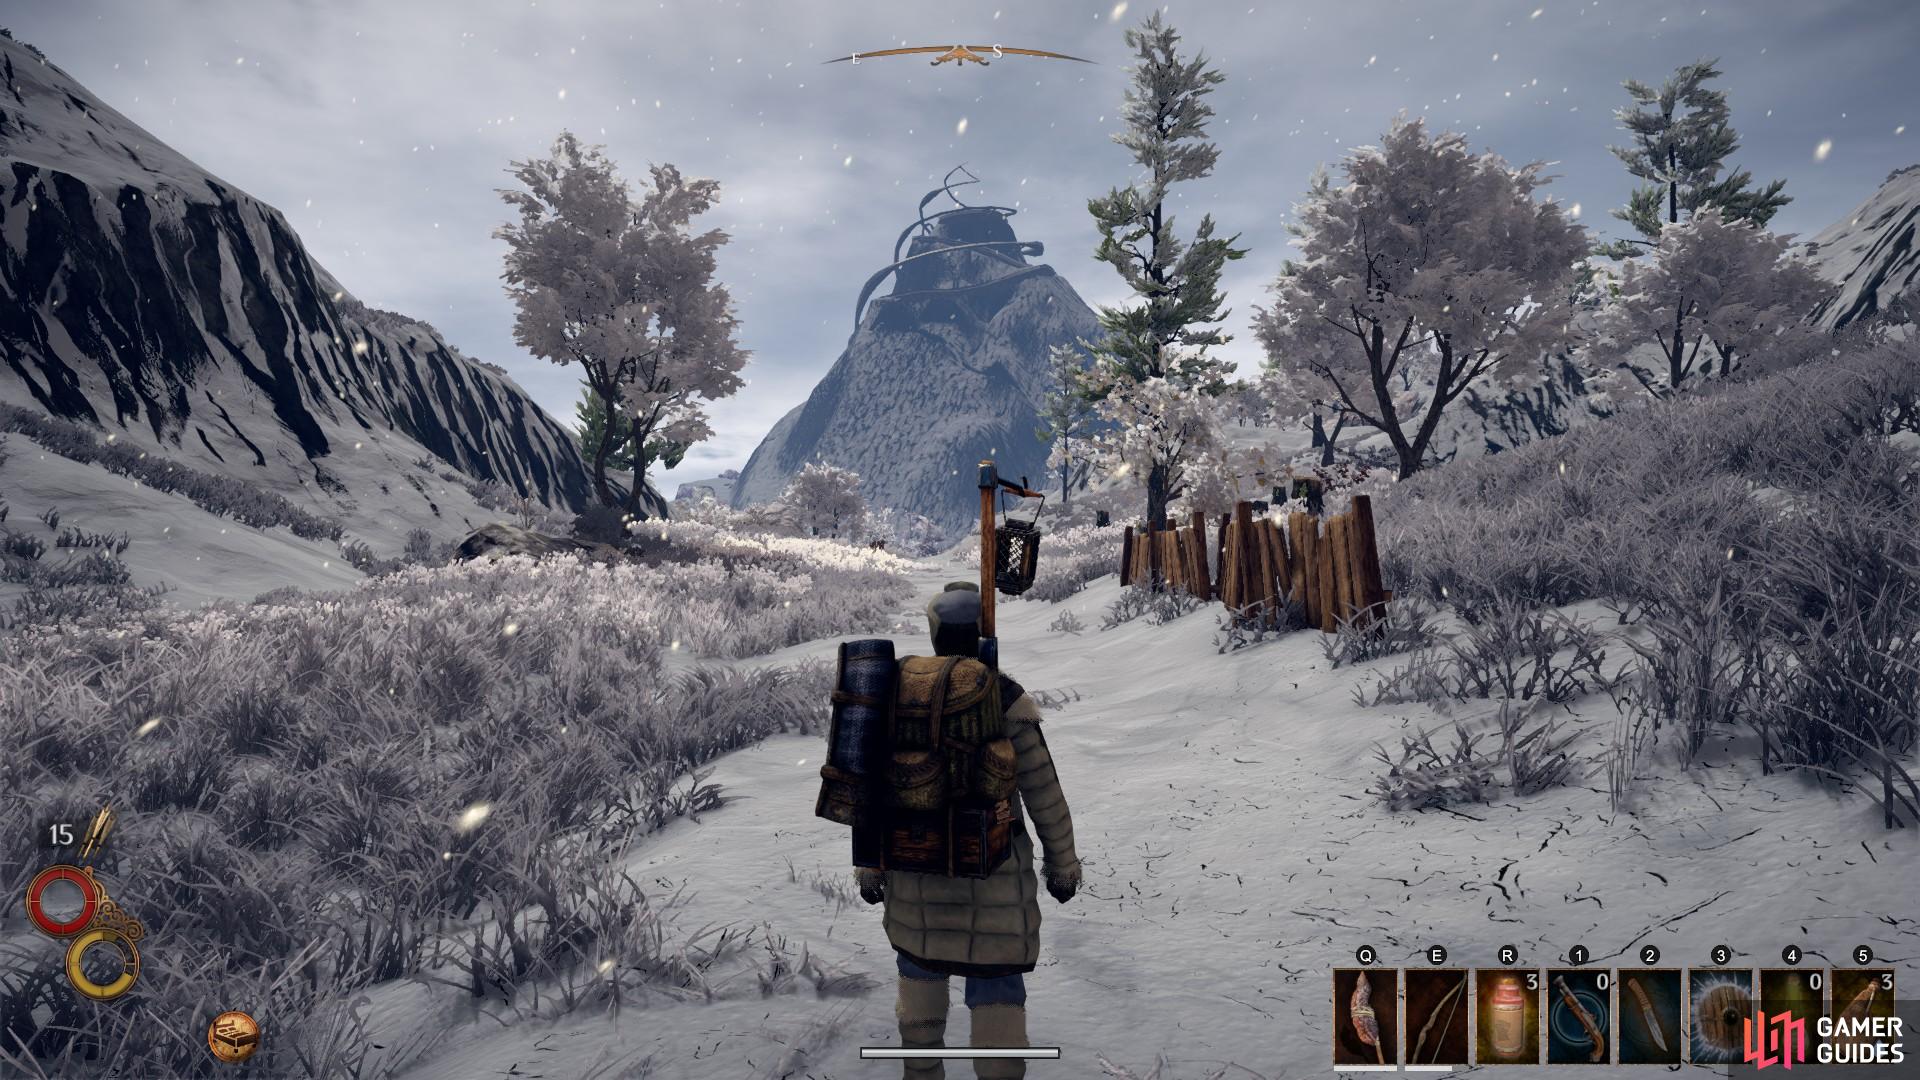
Conflux Mountain as seen approaching from the road heading south.
The eastern road will eventually turn south, at which point you will be able to see Conflux Mountain directly in front of you, as shown above. At this point, continue heading directly south. As you approach the mountain you will come across a broken caravan behind some fencing on the left side of the road. Be sure to loot the Adventurer’s Corpse for an alchemy kit and some other randomly generated loot.
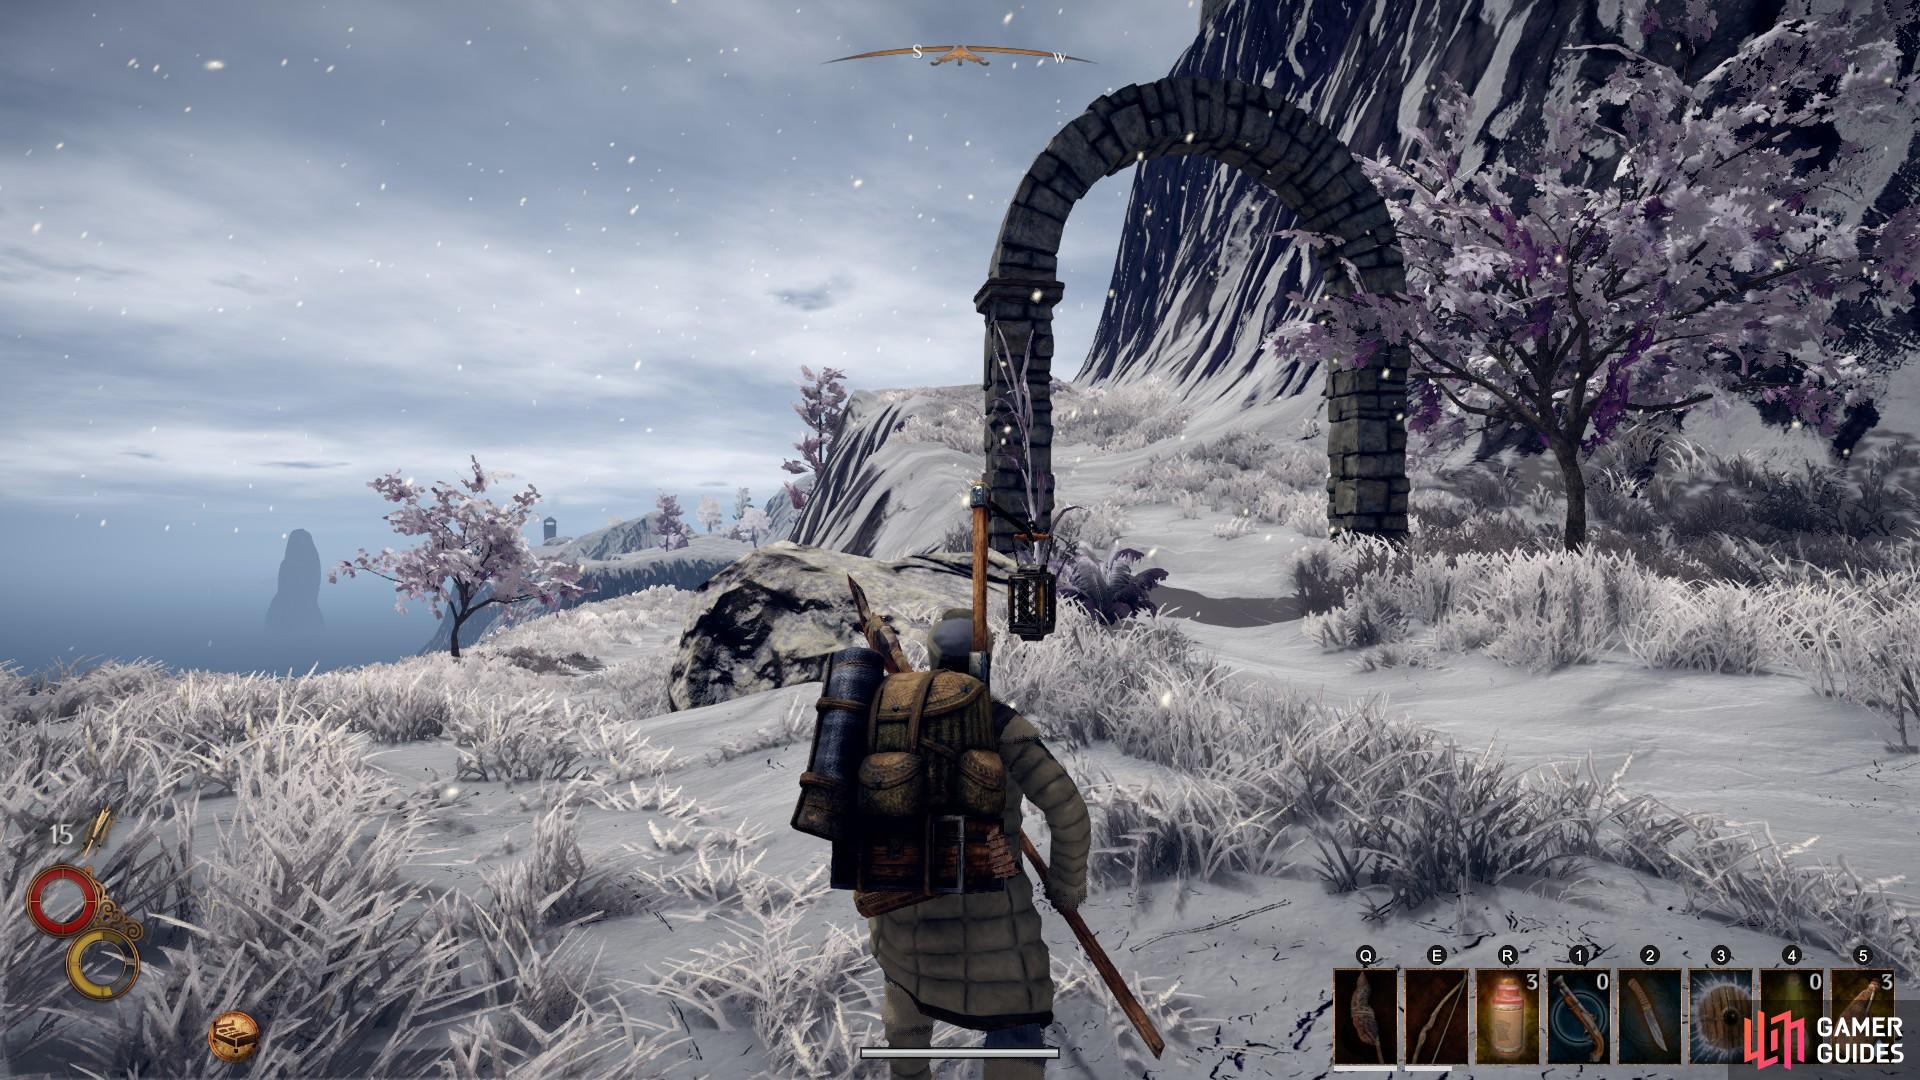
Now continue south east toward the base of the mountain. You will notice a slope leading to a stone archway. Walk up it until you encounter another stone archway, at which point you should turn left and follow the unmarked path.
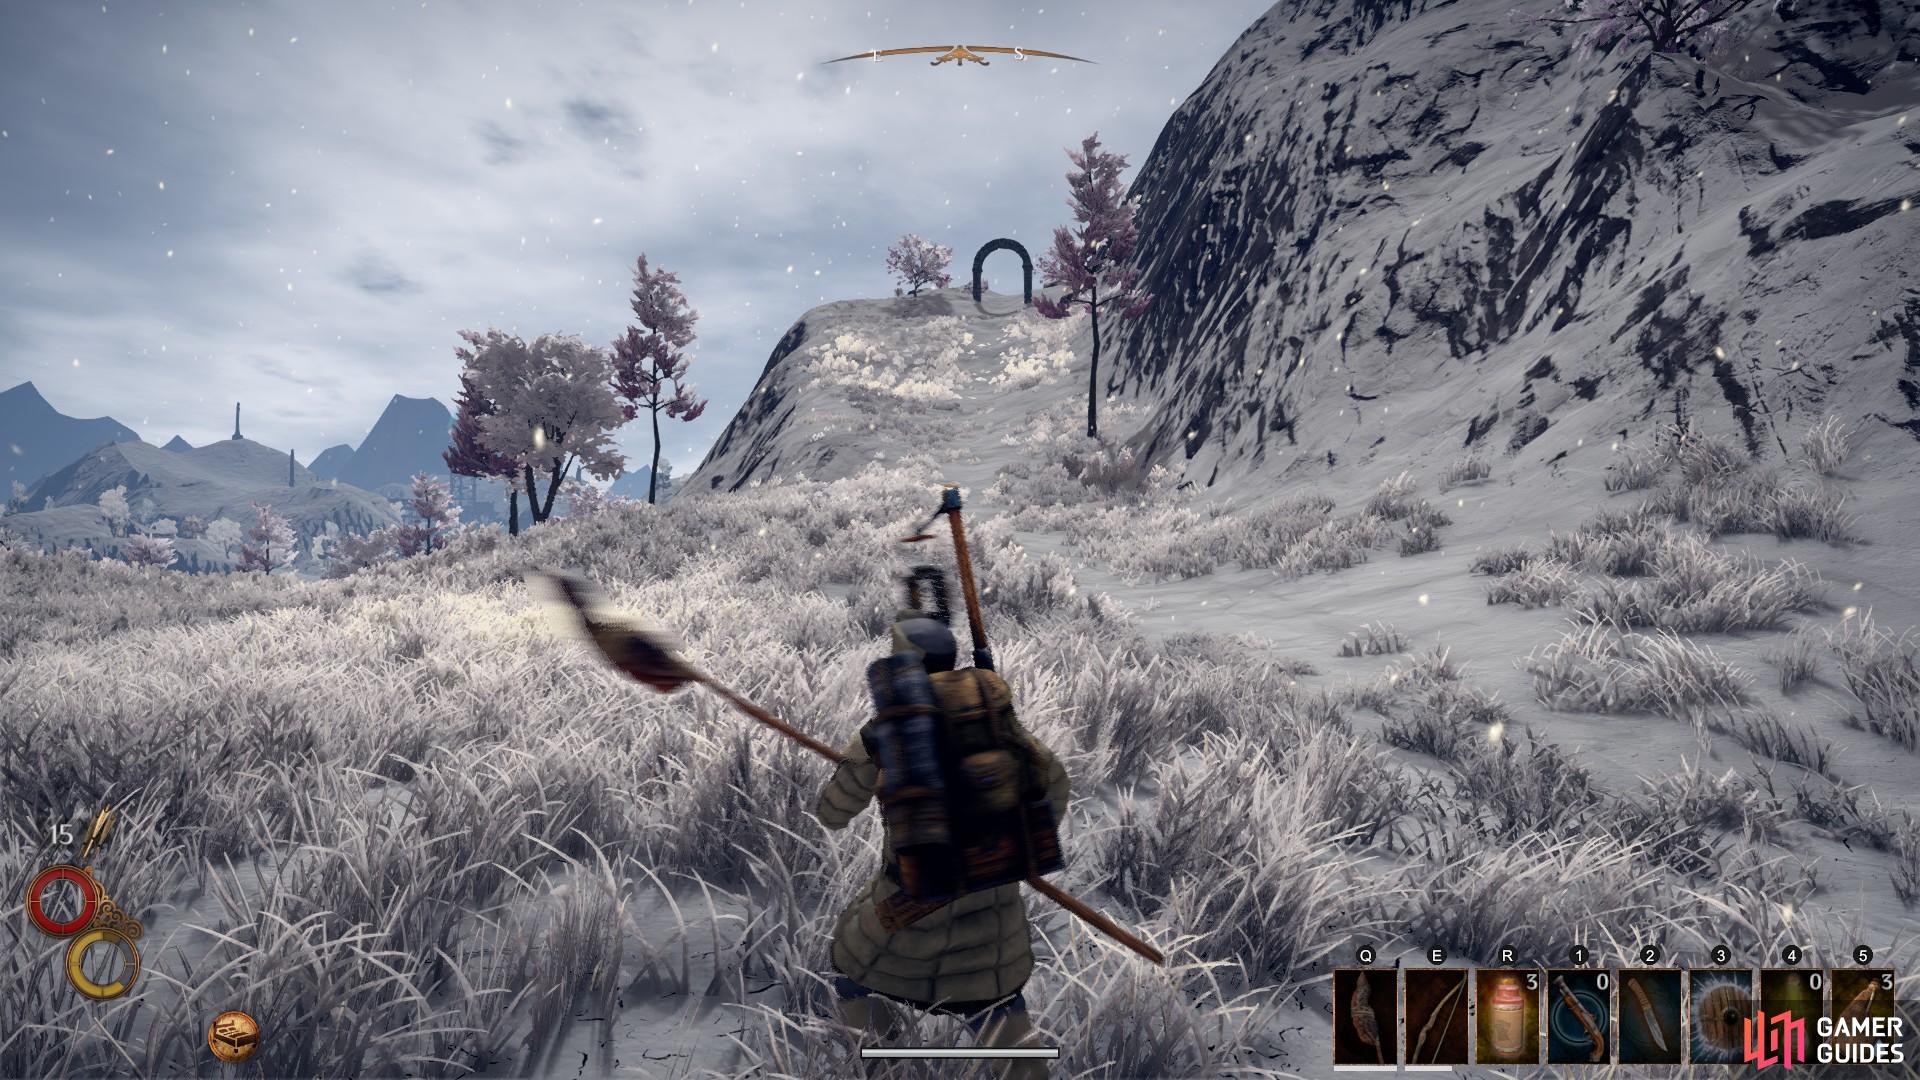
The first stone archway seen in the distance. Walk through it and up until you see the second.
The second stone archway, walk along the path to the left of it.
After passing through a third stone archway you will find some arrangements of stone, possibly the remnants of an ancient structure. Immediately to the north west you will see the entrance to the Blue Chamber’s Conflux Path, marked by two blue banners. This path allows for passage directly to the core of the mountain.
When you enter through the door you will find yourself in a room with a Blue Chamber Collective guard. The guard will not attack so you needn’t worry. Continue west into the mountain and jump down the ledge. Now take the first right and head north. When you reach the next split in the path turn right again, heading east. At the next junction, continue on east until you encounter three downward sloped pathways. At this point turn right and go directly south. At the bottom of the slope turn left and then right again.
Here you will find a chamber filled with mana veins. Mine some of the veins for mana stones if you wish, and loot the chest to the south.
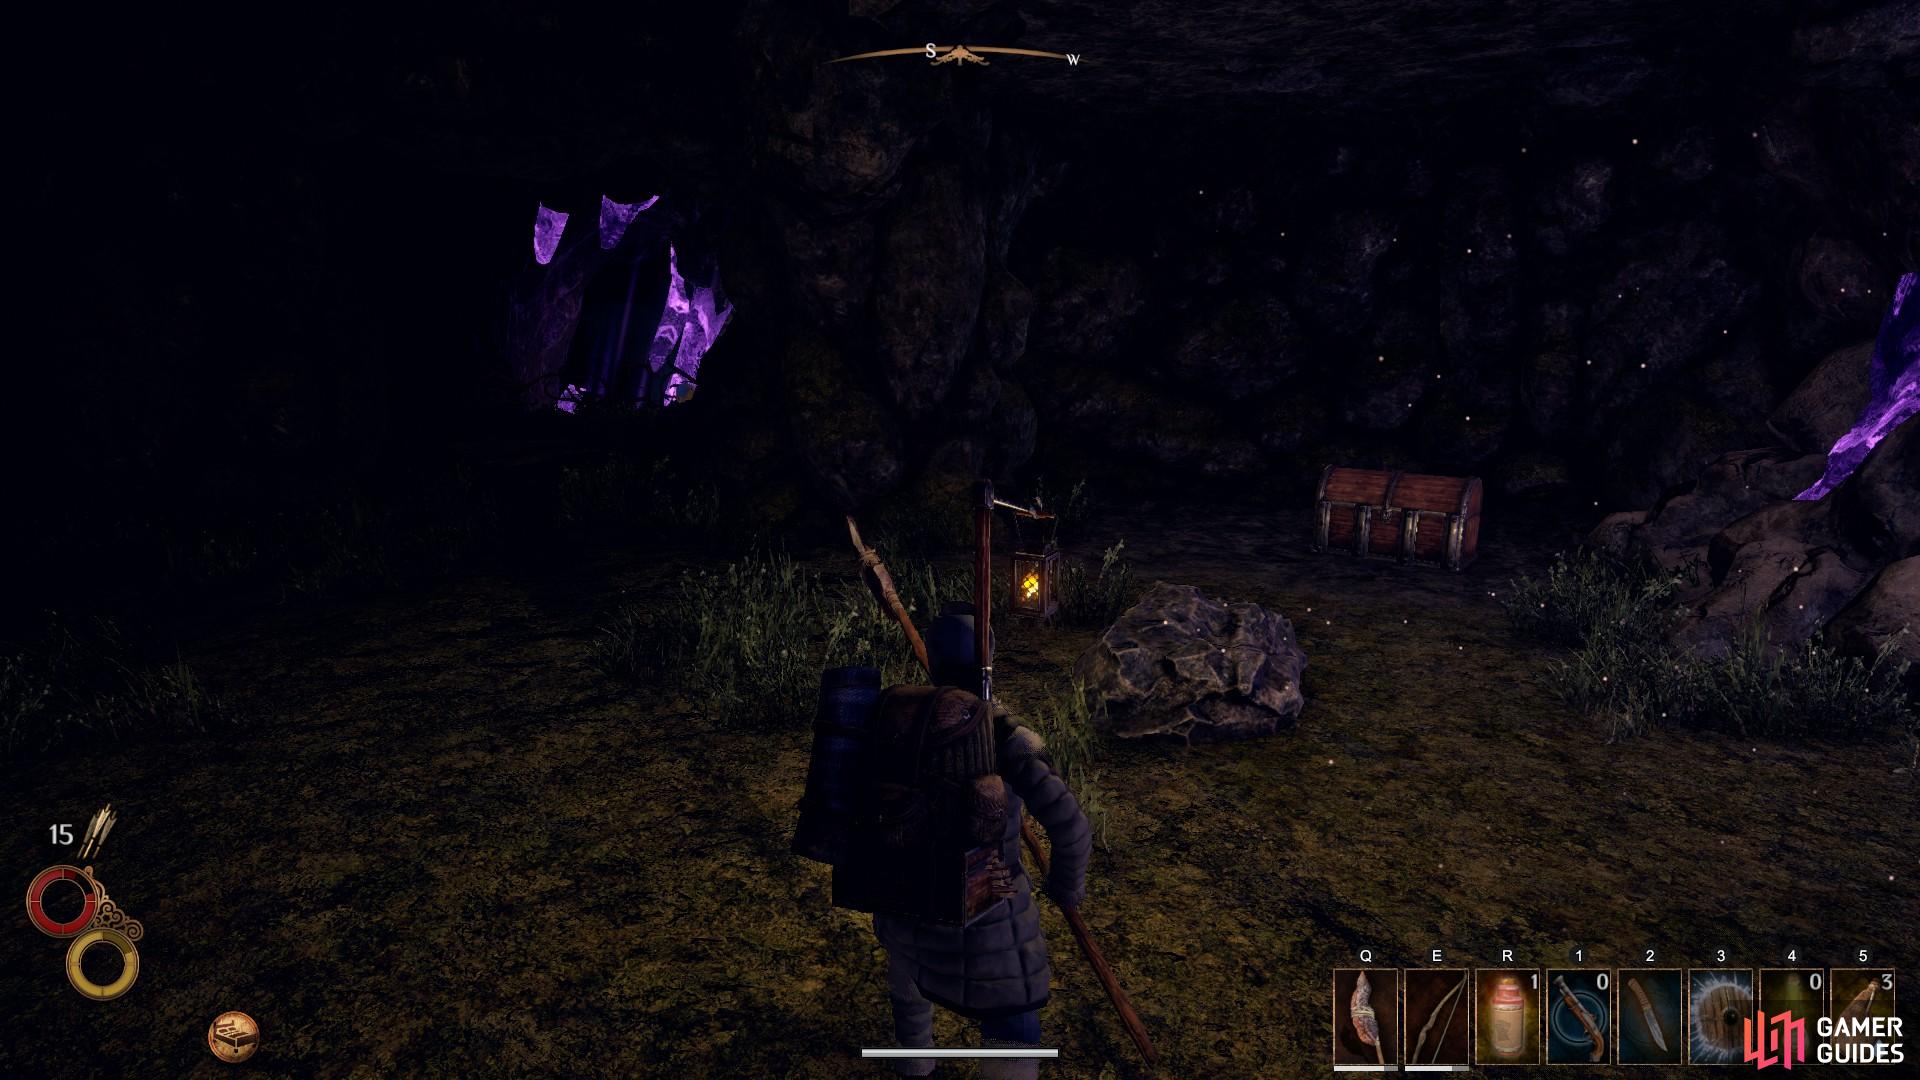
The chest as seen to the south west within the chamber.
The door to the west which can be found around the corner from the chest.
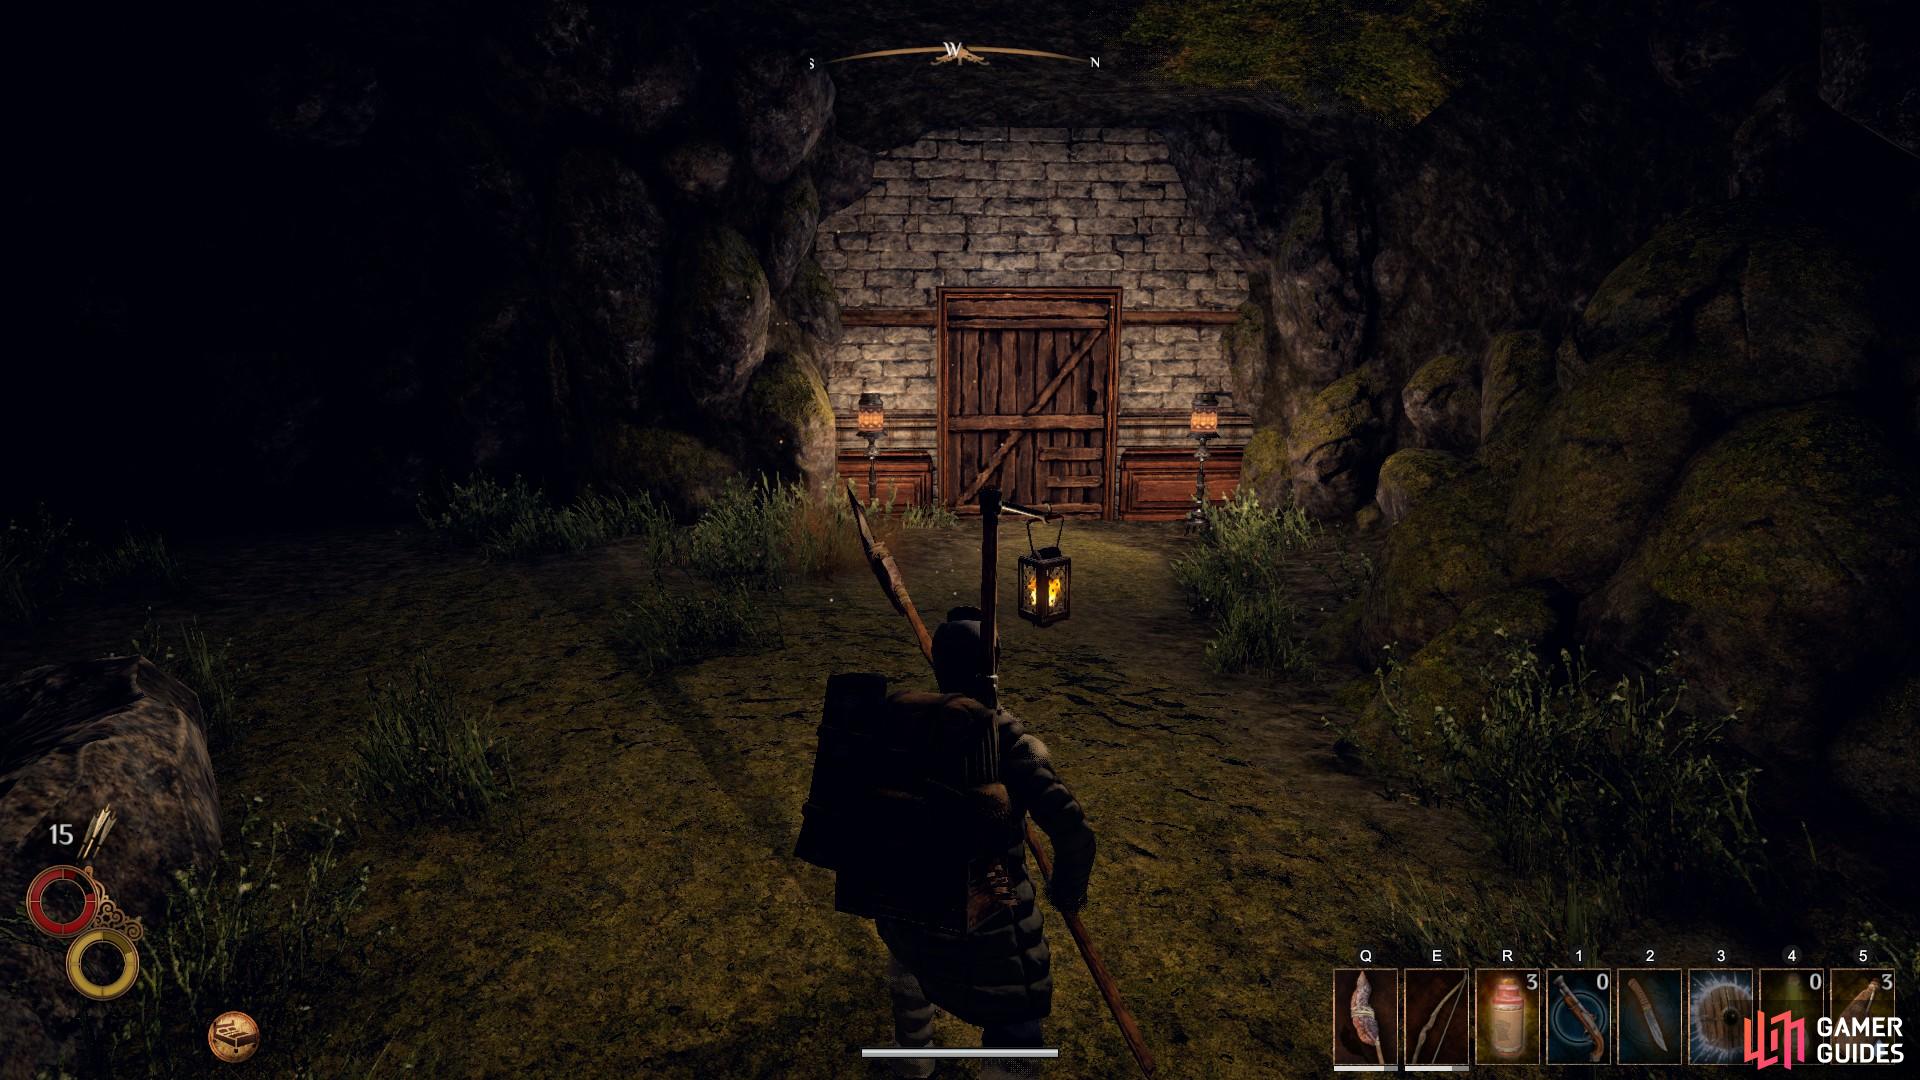
When you’re done looting turn east again. At the end of the chamber turn right until you see a wooden door, as shown above. Use it to enter the Conflux Chambers. Immediately as you enter from the door you will find a small area containing various mushroom varieties. Use them if you want to experiment with crafting or to restore basic needs.
When you’re done looting, turn left and then right, heading west along a narrow bridge. Be careful not to fall here; it is best to use a light source such as a lantern or torch. After passing over two bridges you will enter the core of the mountain. You can speak with the watcher in front of you for a little context as to what is going on here.
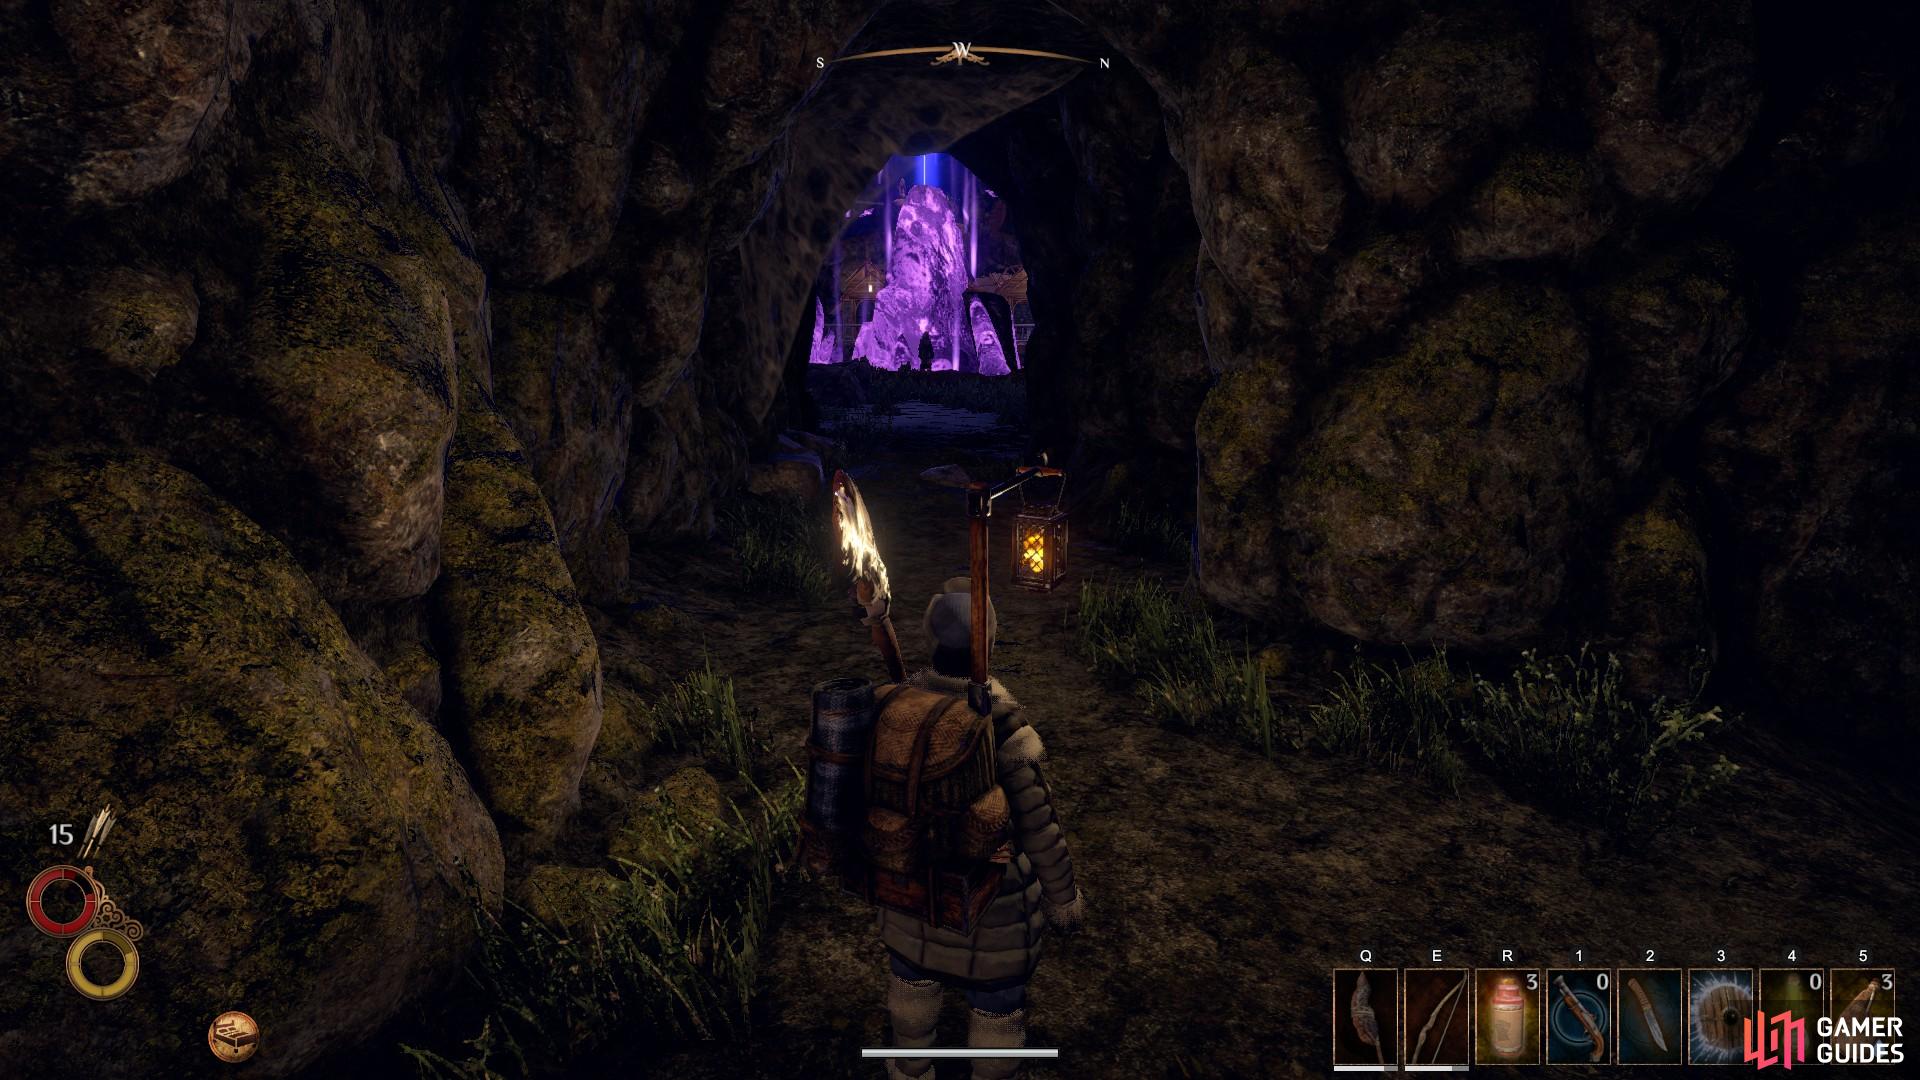
Speak with the watcher in the distance for some contextual information about the chamber.
When you’re done speaking with the watcher, turn right and head west up the sloped pathway. At the top, turn east and speak with the watcher at the edge of the cliff. The watcher will inform you that you must trade some of your health and stamina in exchange for mana. They mean this quite literally.
Interact with the flow of mana to specify the amount that you would like to trade. This will depend on what your combat preferences are. Naturally, if you are aiming for a mage build, you will want to have a fair bit of mana (+5 to +7). If you prefer melee combat but want access to a few minor spells, trade as little as you think you’ll need. For example, if you want to specialise as a spellblade, choosing +2 or +3 to mana will suffice for most spells.
Once you have specified the desired amount of mana, the First Watcher will speak with you and offer to train you in one of two spells:
– Reveal Soul: Can be used in combination with ‘Conjure’ to summon a ghost ally, or with ‘Spark’ to restore 50% of maximum mana.
– Sigil of Fire: Can be used in combination with ‘Spark’ to throw a fireball, with ‘Ring of Fire’ to set the sigil ablaze and inflict damage on those who walk over it, or with ‘Immolate’ to gain +30% fire damage at the expense of 0.3 fire damage per second.
The spell you choose will again depend on your preferences. After choosing, speak with the watcher again to learn the ‘Flamethrower’ spell for 50 silver.
When you’re done learning the spells the quest will complete. Turn west until you approach the Fourth Watcher. You can speak with them to purchase a few primarily mage-based items if you have the silver, or you can choose to take a boat which will transport you to a beach near to Cierzo.
No Comments