
Serena will join your party at the same time as her sister, Veronica. She could be considered your main healer, although that kind of loses some effect depending on whether you use Sylvando or Rab. Despite that, though, Serena does have some tremendous support for your party in other areas. She has two weapons she can use in the game, one-handed wands and spears. While spears do have some use for a short amount of time, Serena should be sticking with wands. The only reason to go with spears is because of hunting Metal Slimes and nothing more, since you’re not going to get much else out of that tree.
Serena in Dragon Quest XI
It should be mentioned that during the middle portion of the game, Serena’s skill trees and spell list will be expanded greatly. This expansion is only temporary and will shrink some once you reach the final portion of the game. Due to this expansion in the middle portion, though, you will likely need to change the focus on your Serena build.
| Categories | Total Skills | Total SP Needed |
|---|---|---|
| Wands | 15 | 195 |
| Harpistry | 15 | 203 |
| Spears | 15 | 201 |
Spells
Serena can be considered the healer of your group, but she is also a good buffer. She learns a variety of healing spells, but they are all single-target until level 35, which is when Serena learns Multiheal. This will put her a little behind both Rab and Sylvando, especially if you head straight for Hustle Dance. Despite this, though, she will probably be your main healer for a while, since it takes a while to get to Hustle Dance and the fact you get Serena earlier than the others. She also gets a bunch of support spells, like Squelch to get rid of poison, Buff/Kabuff to increase defense, and much more. Do not neglect the support spells with Serena, as they have a variety of uses.
Her offensive spells leave a little to be desired, since her Magical Might won’t be much, due to her healing abilities requiring Magical Mending. Also, her Whoosh line of spells only target a single group of enemies, so you’re better off leaving the damage to others. The Whack line of spells can prove useful, though, provided the enemy is susceptible to them. These might help against the more bigger enemies, although Serena tends to be on the slower side, so she’s almost always going last.
| Name | Effect | MP | Acquisition |
|---|---|---|---|
| Heal | Restores small HP to single ally | 3 | Default |
| Dazzle | May blind group of enemies | 3 | Default |
| Squelch | Cures single ally of Poison | 2 | Default |
| Buff | Increases defense of one ally | 3 | Default |
| Accelerate | Boosts Agility of a single ally | 2 | Level 13 |
| Whoosh | Deals light Wind damage to group of enemies | 5 | Level 14 |
| Fizzle | May prevent group of enemies from casting spells | 3 | Level 15 |
| Midheal | Restores medium HP to single ally | 6 | Level 16 |
| Acceleratle | Boosts Agility of all allies | 4 | Level 17 |
| Zing | Revives fallen ally with some HP; Doesn’t always work | 12 | Level 18 |
| Anathemetize | Lowers spell resistance of single enemy | 4 | Level 19 |
| Tingle | Cures all allies of Paralysis | 2 | Level 20 |
| Kabuff | Increases defense of all allies; Stacks twice | 6 | Level 23 |
| Whack | May instantly kill a single enemy | 5 | Level 24 |
| Moreheal | Restores large HP to single ally | 12 | Level 27 |
| Swoosh | Deals medium Wind damage to group of enemies | 10 | Level 28 |
| Multiheal | Restores medium-large HP to all allies | 32 | Level 35 |
| Kazing | Always revives single ally with some HP | 24 | Level 45 |
| Thwhack | May instantly kill all enemies | 10 | Level 49 |
| Fullheal | Restores all HP to single ally | 24 | Level 50 |
| Kerplunk | Kills Serena, while reviving/restoring all HP to allies | 32/All | Level 60 |
| Kathwack | May instantly kill all enemies (better than Thwhack) | 20 | Level 63 |
| Omniheal | Restores all HP to all allies (does not revive) | 64 | Level 66 |
| Kaswoosh | Deals heavy Wind damage to group of enemies | 20 | Event-based |
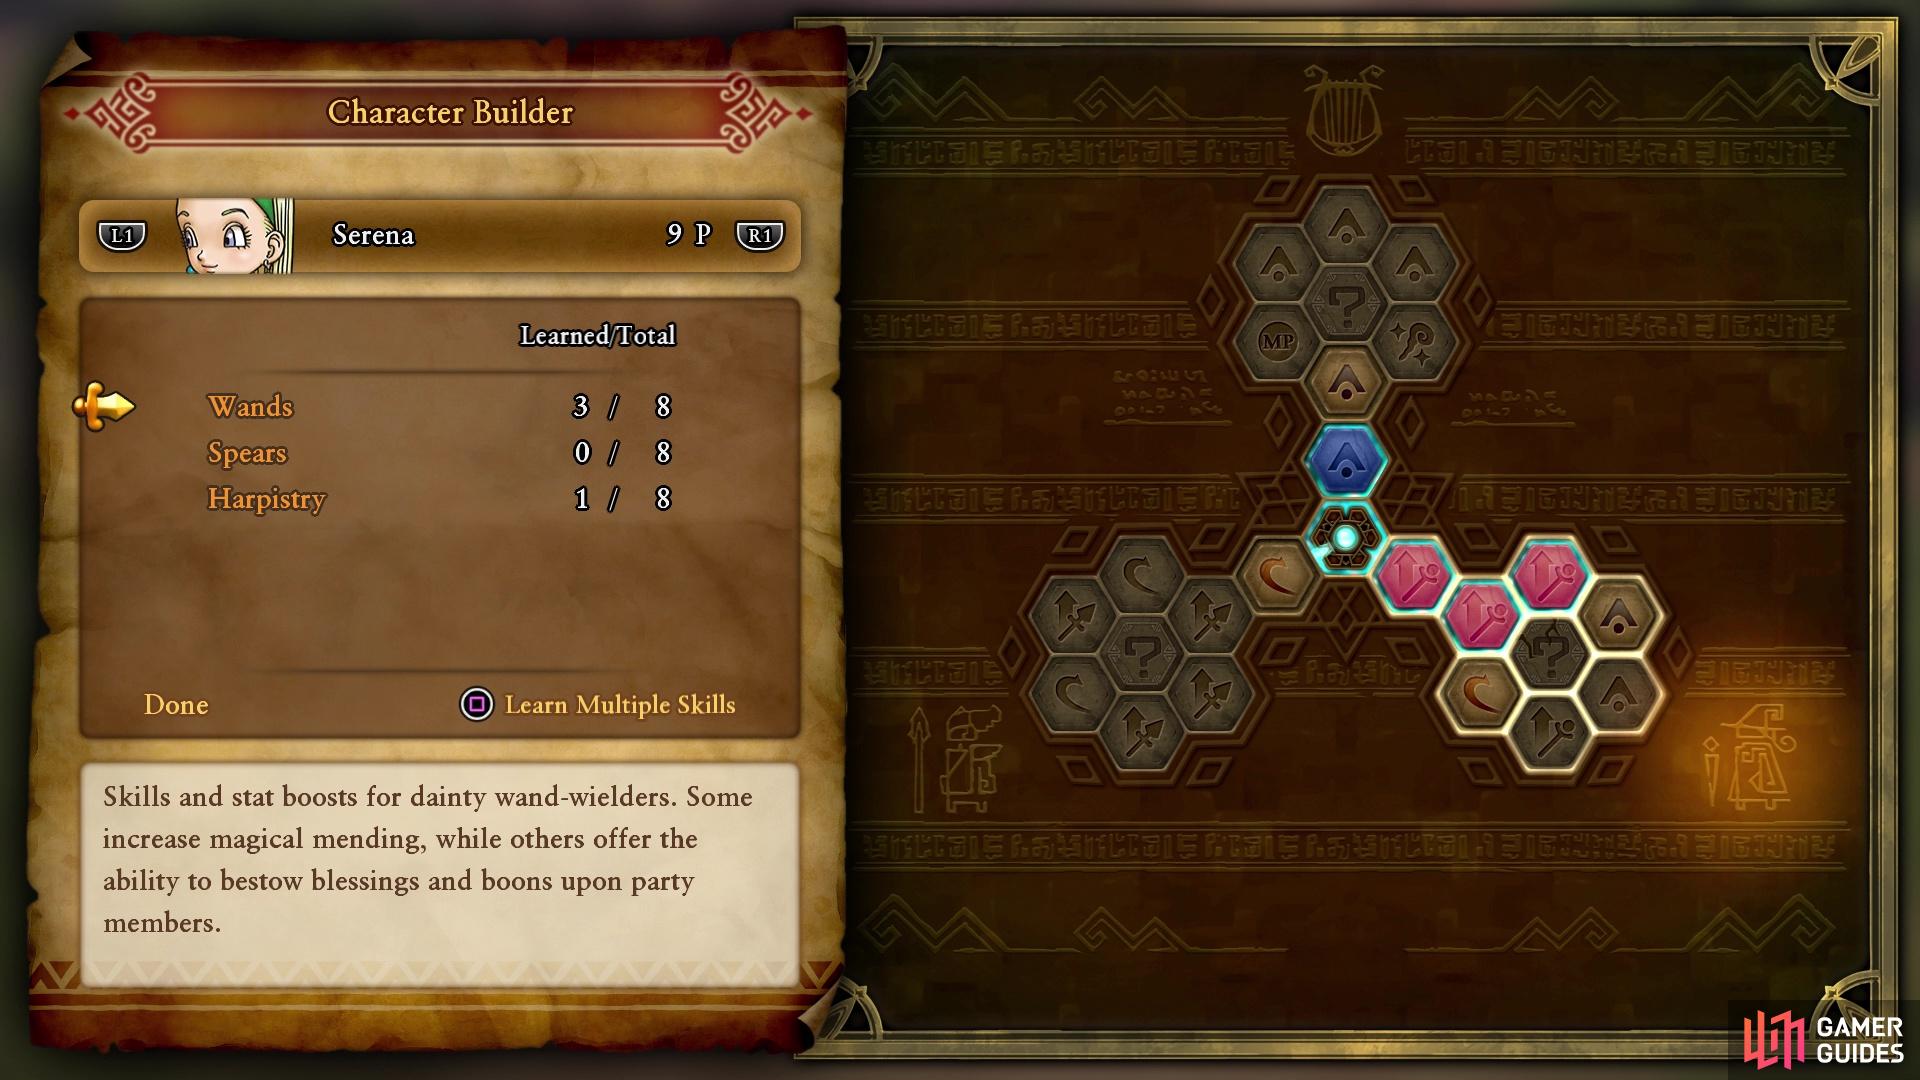
Serena’s initial skill tree
Wands
Wands is one of two weapons that Serena can use in the game and is probably her preferred one. All of the wands for Serena are one-handed, so she is able to use a shield with them. It is possible to learn Dual-Wielding with her, meaning you can equip two wands, but the lack of a defensive option for Serena means that it might be best to just stick with a single wand. Apart from that, the rest of the passives are your typical ones you will see in pretty much every tree, with an emphasis on Magical Mending and MP.
The highlight of the Wand tree is definitely Snap, Crackle, Poof, which allows you to make sure a single ally doesn’t get debuffed or have an ailment on them for four turns. Of course, if they already do have one on them, then this doesn’t cure them, but there are some fights where this comes in super handy. Once her tree opens up later in the game, Divine Intervention allows an ally to survive a killing blow, no matter their HP, with Alma Mater requiring them to have more than 50% HP in order for it to count. Grace of the Goddess is a nice fail-safe, as it applies an auto-revive buff for Serena, just in case something goes wrong. Lastly, Divine Restitution gives Serena a HP regeneration buff, while also deal some big damage to a group of enemies.
| Name | SP | Notes |
|---|---|---|
| MP Absorb When Wielding +2% | 3 | - |
| Magical Mending When Wielding +10 | 4 | - |
| Devil’s Delight | 8 | - |
| Magical Mending When Wielding +30 | 10 | - |
| Snap, Crackle, Poof | 13 | - |
| Alma Mater | 13 | - |
| Minor MP Recovery After Battle | 6 | - |
| Dual-Wielding | 13 | Secret Panel [?] |
| MP Absorb When Wielding +4% | 14 | - |
| Maximum MP When Wielding +30 | 16 | - |
| Divine Restitution | 20 | Secret Panel [?] |
| Moderate MP Recovery After Battle | 14 | - |
| Pep-Up Power-Up | 16 | - |
| Grace of the Goddess | 20 | Secret Panel [?] |
| Divine Intervention | 25 | Secret Panel [?] |
Harpistry
The Harpistry tree, at first glance when you get Serena, is a purely support one. You have various Hymns to get, which help protect your characters from those elements. There is nothing else, besides a few minor passives, in this tree, until it fully opens up later in the game. While the Hymns might seem very useful from the start, they do get a lot better once you learn the two Holier Hymns passives with the full tree. The only other ability in this tree is Doleful Dirge, allowing you to deal more elemental damage to an enemy, but the skill doesn’t always hit.
| Name | SP | Notes |
|---|---|---|
| Hymn of Fire | 8 | - |
| Hymn of Ice | 8 | - |
| Max MP +10 | 8 | - |
| Magical Mending +10 | 8 | - |
| Hymn of Air | 10 | - |
| Hymn of Earth | 10 | - |
| Hymn of Thunder | 12 | - |
| Hymn of Light | 14 | Secret Panel [?] |
| Minor MP Recovery After Battle | 14 | - |
| Maximum MP +20 | 16 | Grants 10SP for unlocking |
| Holier Hymns | 20 | Secret Panel [?] |
| Doleful Dirge | 25 | Secret Panel [?] |
| Magical Mending +20 | 14 | - |
| Magical Mending +30 | 16 | - |
| Holier Hymns | 20 | Secret Panel [?] |
Spears
Spears are a bit of an oddball for Serena, as they can be extremely useful early on in the game, but once you obtain Jade, there is pretty much no point to them. For this reason, it’s probably best to just avoid them, unless you plan on doing early Metal Slime hunting in Gallopolis and need Thunder Thrust for the critical hits. You’ll find a lot of similar abilities here to Jade’s tree, although there are others that are exclusive to Serena. Be Like Water and Counter Wait will allow Serena to evade and do a counterattack, which might be nice, but she’s likely not going to be doing a lot of damage with those counters. The odd choice of a skill in this tree is Kaswooshle, which is a strong wind-elemental spell.
| Name | SP | Notes |
|---|---|---|
| Cattle Prod | 3 | - |
| Attack When Wielding +10 | 4 | - |
| Deliverance | 7 | - |
| Critical Hit Rate When Wielding +2% | 9 | - |
| Party Pooper | 16 | - |
| Attack When Wielding +15 | 13 | - |
| Parry Chance When Wielding +4% | 6 | - |
| Thunder Thrust | 18 | Secret Panel [?] |
| Parry Chance When Wielding +5% | 14 | - |
| Attack Power When Wielding +20 | 16 | - |
| Be Like Water | 20 | Secret Panel [?] |
| Critical Hit Chance When Wielding +2% | 14 | - |
| Crushed Ice | 16 | - |
| Counter Wait | 20 | Secret Panel [?] |
| Kaswooshle | 25 | Secret Panel [?] |
Character Build
When you first get Serena in your party, you do have a bit of a choice to make, depending on whether you want her to focus solely on Wands or dabble in Spears for a bit. If you choose the latter, then your goal is to unlock Thunder Thrust and Party Pooper, the two best spear skills for Serena at the beginning. Once you get Jade, who is by far the better spear user, you can respec Serena to send her back on the Wands path. Your primary focus should be to stack her with Magical Mending for the first portion of the game, as that is needed for her healing spells.
In fact, you should send her down the Wands tree and grab Snap, Crackle, Poof, since it’s probably the best skill from her initial selection in all three initial trees. The Harpistry tree isn’t bad, as the skills there can come in handy, but they aren’t super useful until that tree opens up at the end of the game. Once you get to the second portion of the game, you will have a lot open to you, as well as the addition of possibly investing in some Magical Might.
You will gain access to all of the skill trees for Veronica, which is why Magical Might will come into handy. There’s really no need to invest in the Heavy Wand tree, though, since you’re not going to get much use out of it. However, the Vim tree is where you will be focusing on here, with both Channel Anger and Enchanting Echo being the big winners. You will also probably want to grab Hypnowhip, solely to make it viable to unlock the one Holier Hymns panel.
In the final portion of the game, once Serena’s trees open up all the way, you can go back to Magical Mending. You can grab the two Holier Hymns in the Harpistry tree, as well as all of the Hymns. You will also want to look at snatching all of the passives in the Wands tree, as well as Divine Restitution skill. Whenever you learn Omniheal and start using it regularly, there is really no need to worry about Magical Mending too much, since that spell will always heal your party to full.
No Comments