
Pastword
Once you reach Arboria in the main story, go into the town and down the stairs by the item shop. On the western side down there, you will find a blue Tockle that will give you the pastword.

The Tockle can be found behind the item shop in Arboria
Enemies
| Monsters | HP |
|---|---|
| Bamboozler | ~140 |
| Cheater Cheetah | ~375 |
| Crack-Billed Platypunk | ~130 |
| Foo Dog | ~110 |
| Grim Keeper | ~300 |
| Heedoo Voodoo | ~130 |
| King Slime | ~500 |
| Medislime | ~90 |
| Mushroom Mage | ~95 |
| Stump Grump | ~110 |
If you’ve been fighting everything up to this point in the game, then some of these enemies should be familiar to you. Despite possibly running into them earlier, the King Slimes are definitely one of the more annoying enemies, due to acting twice per round and just having a good bit of HP under their belt. Likewise, the Cheater Cheetah has a bit more HP than the other enemies, so it’s going to take a little more than a single attack or two to bring it down. The Heedoo Voodoo can summon a Toxic Zombie into the battle, which you have seen before in the caves underneath Octagonia. The Bamboozler, Foo Dog, and Grim Keeper are only found in this area, while the Heedoo Voodoo is only found in this Tickington area and one other.
Walkthrough
The book will deposit you straight into a dungeon, where you will see some arrows on the ground. Stepping on these will force you to move in the direction of the arrows until you stop. Move south and step on the southern of the two initial “conveyors” to reach the chest, which contains a Seed of Agility. Take the other conveyor to get back on the main path, then follow it to the end, using the stairs to descend to the next floor. Here, you will find Alena and her crew, who are looking for the Feverfew Seed. Speak to her companion at the far back to receive the quest, Fiery Feverfew Seeds.
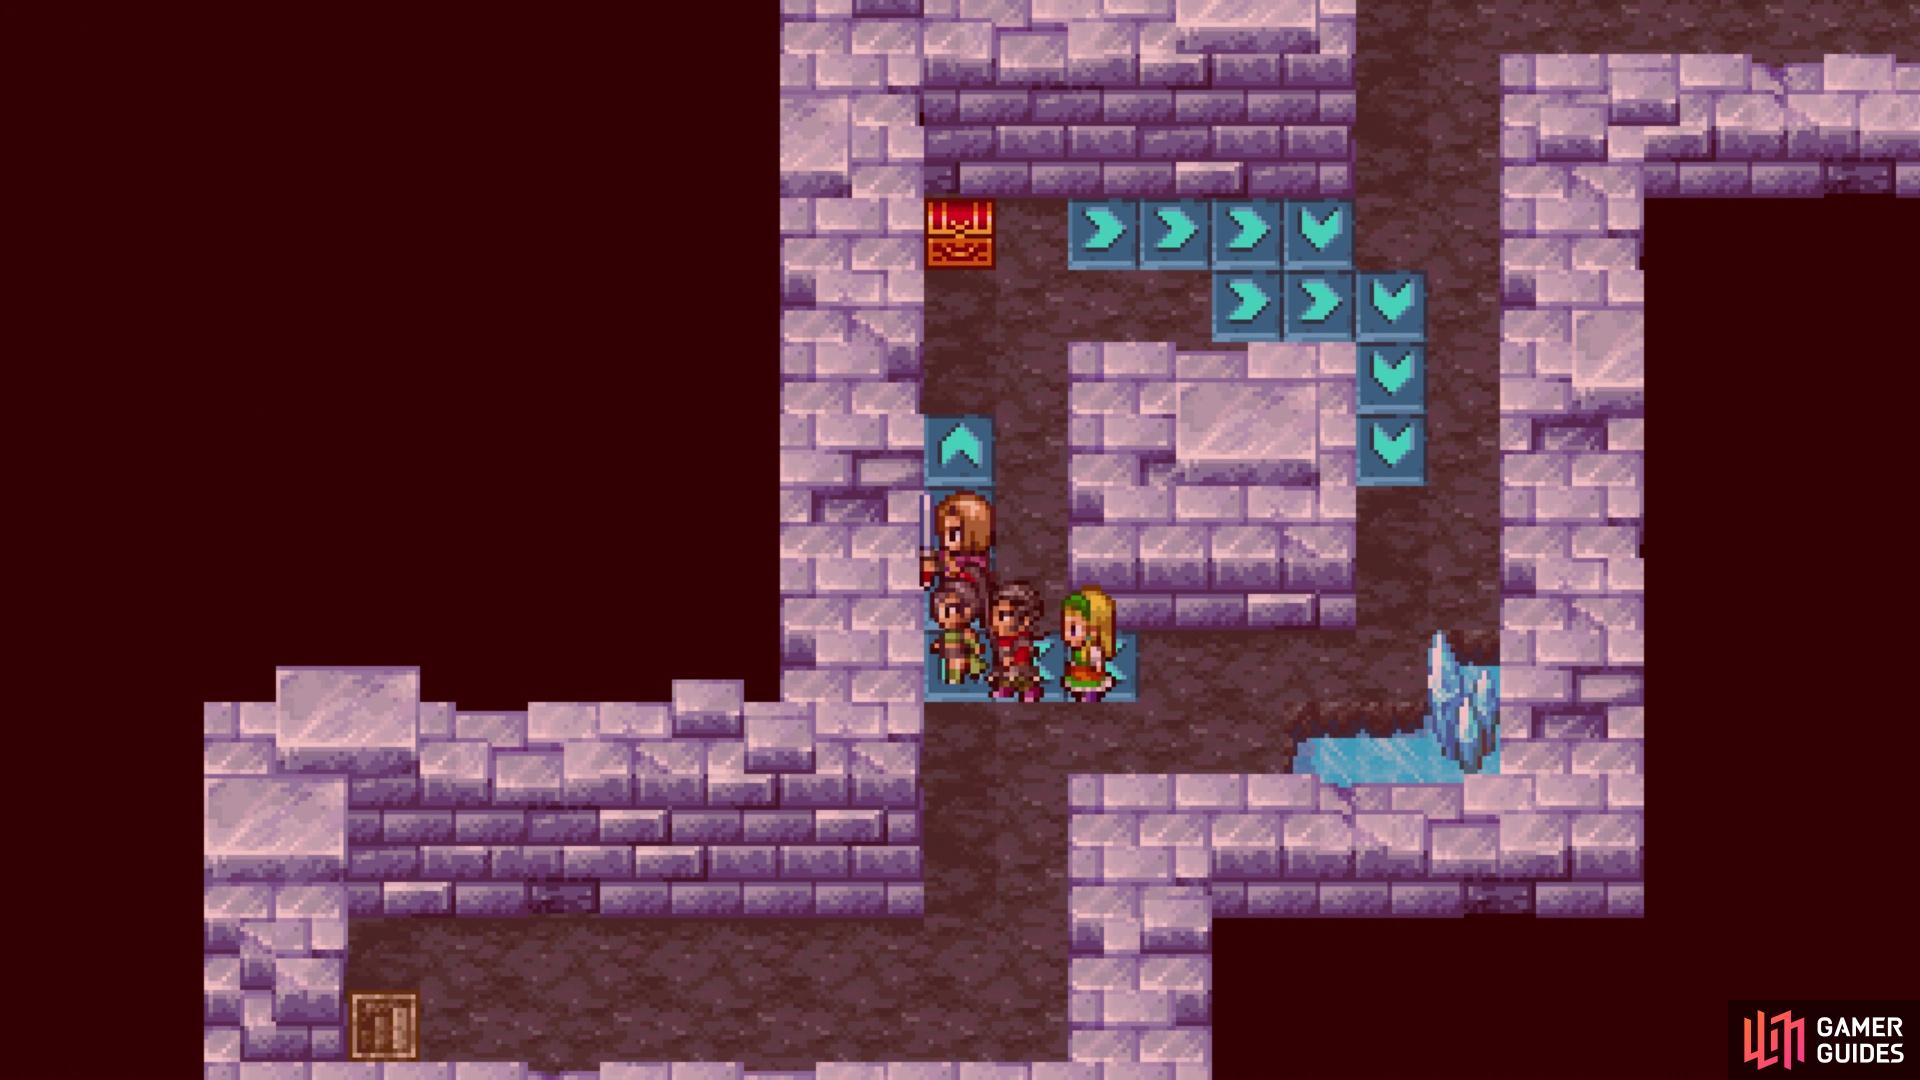
Once you step on any of the arrows, you’re stuck until the end of its path
This room will be a bit more puzzly in its nature, since there’s a lot of different paths to take with the conveyors. There are two along the western wall and you want to step on the left one, which will deposit you just above it. Carefully avoid the other conveyor here and open the chest in the upper left, for a Seed of Magic. Step on the conveyor next to you to be sent over to the eastern side of the room. There will be two conveyors to your southeast, so get on the western of the two, then step on the western of the two conveyors right to your left. This will put you into a position where you can head to the big doors, go through them and grab the chest inside that little room, which contains a Robe of Serenity.
Exit that room and go east a little bit, using the conveyor to reach the other chest you can see, which contains 800 gold. Use the conveyor to get out of there, then look to the southeast to spot two more. Step on the left one, then carefully move east and south until you reach some stairs. You should now be in a big room with a bunch more conveyors, as well as the creature making things hot, sitting in the middle. Move towards the northeastern corner and take the conveyor at the far right end there to get to the top of the room.
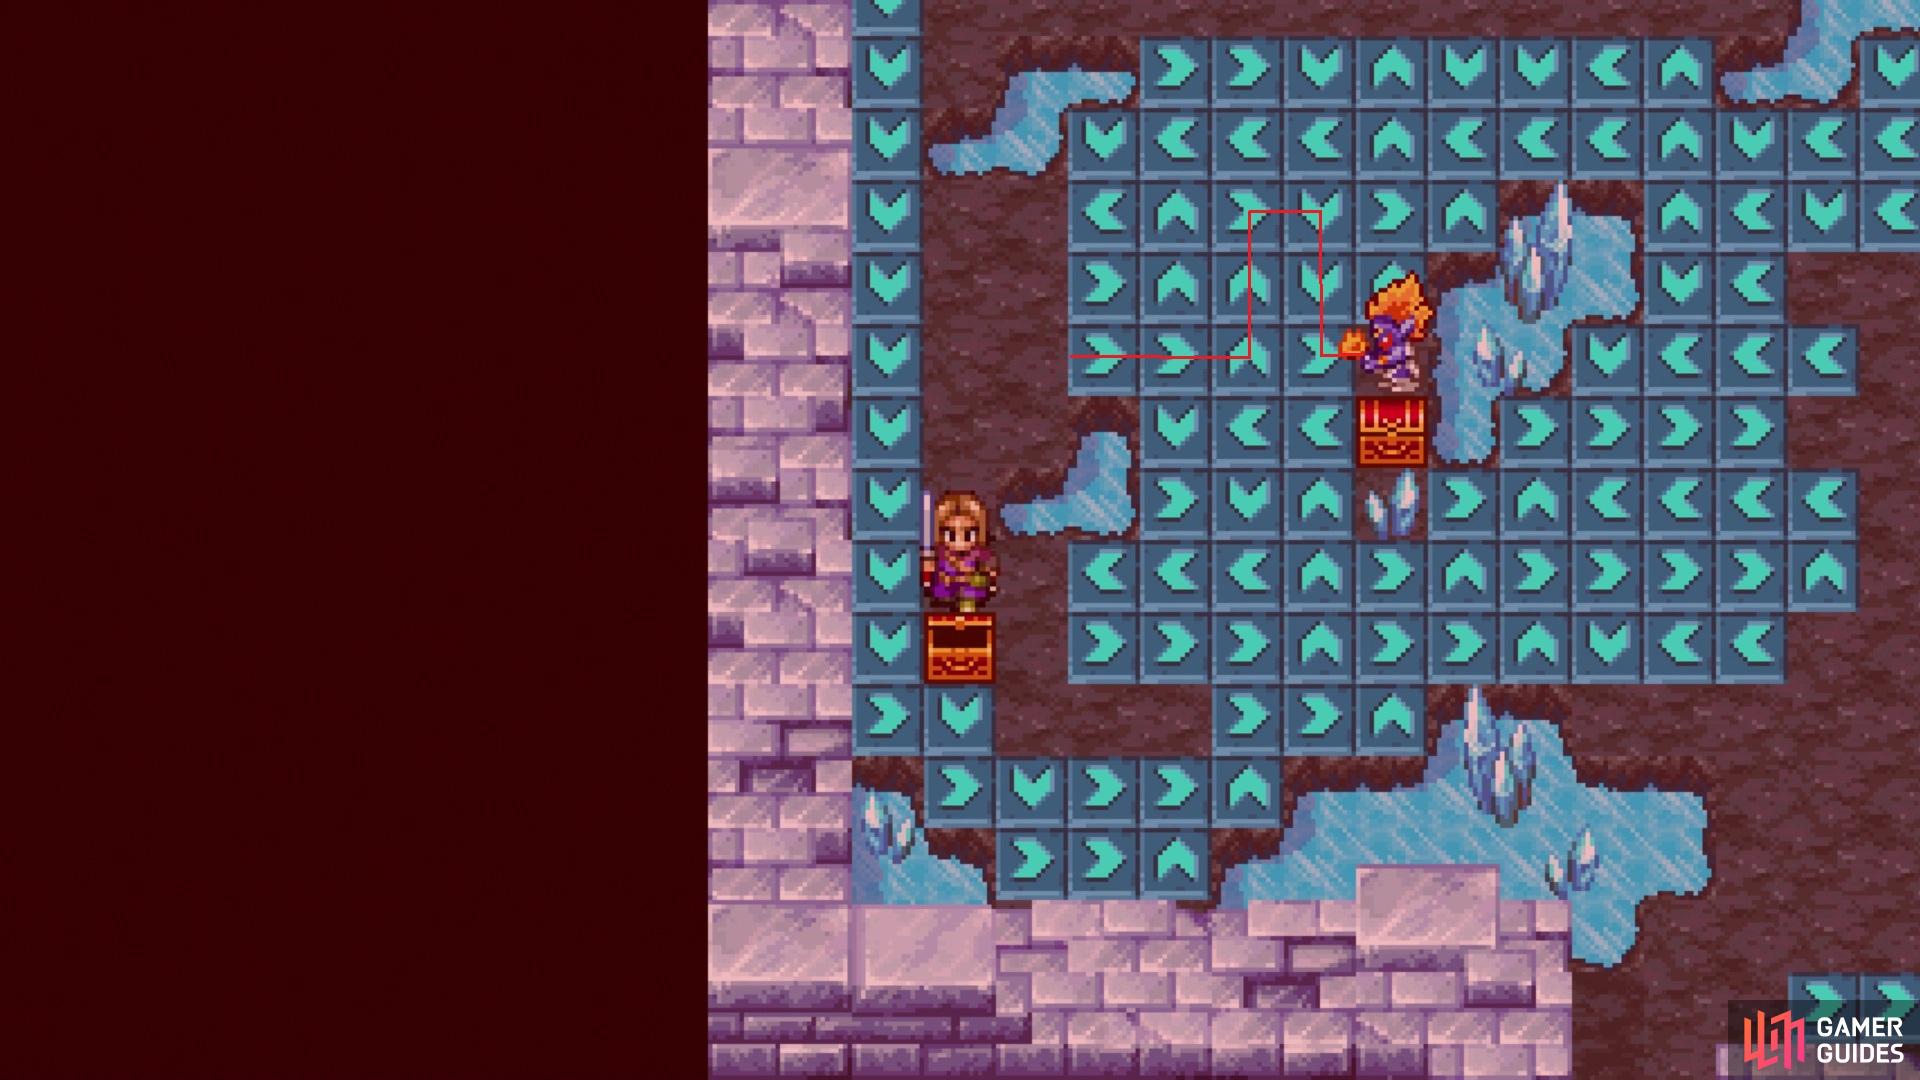
Step on the marked conveyor to reach the boss in the center
With the set of conveyors below you, step on the third one from the left side to be deposited on the left side of the room. Here, you can access the chest there, which is actually a Cannibox. Defeat it to be rewarded with a Seed of Skill. While still on this side of the room, look at the conveyors to your right. From the top, you will want to step on the fourth one from the top to reach the boss in the center of the room.
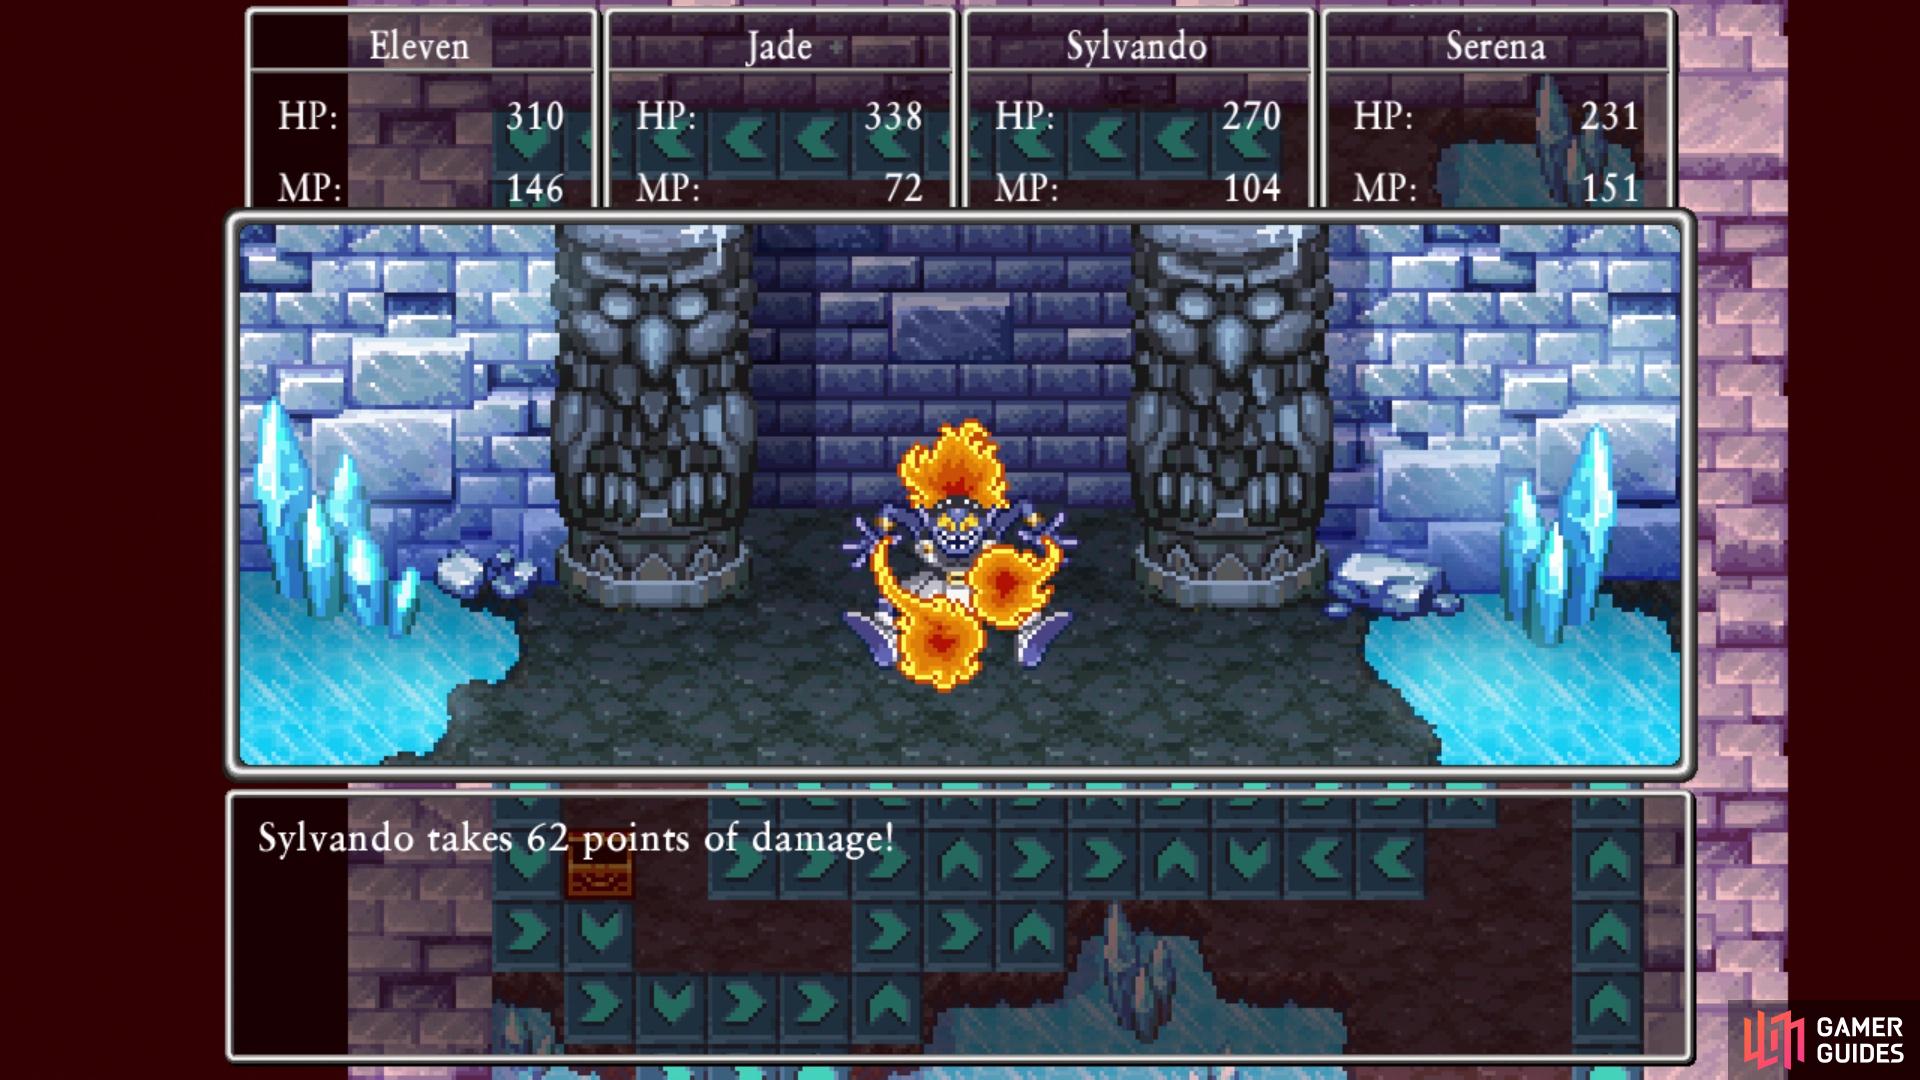
BOSS - Flamethrower
While you may run into some of these in the main game as normal enemies, this one is a boss version and has more HP, around 1300 or so. Overall, though, this shouldn’t be too hard a fight and it can be made easier by having some fire protection. If you have Serena in your active party and she has started diving into the Harpistry tree, Hymn of Fire will help protect you a little bit from some of the boss’ moves. The Flamethrower can act twice per turn, busting out moves like Kabuff, as an example. One of the boss’ more dangerous move is throwing a burning ball at a single character, which can deal in the range of 70+ damage.
You also have a breath-like attack, which can deal around the same damage as above, but to the entire party. Both Serena and Rab should have Multiheal at this point, and Sylvando should have Hustle Dance by now. Use these when necessary to heal up, especially if you see the party attack happen to you. As far as what moves to use, the standard Cutting Edge/Unbridled Blade for the Hero, and Multithrust with Jade.

The boss will use Kabuff to mitigate the physical damage done to it
The boss’ fire attacks can put a hurting on your characters
Once you bring down the boss, things will return to normal in the cave (you can’t open the chest next to the boss). Use Evac to return to the beginning of the cave, then make your way back to the second floor, reporting your success to the NPC who gave you the quest. Your reward for completing this is a Holy Talisman.
No Comments