
Gallopolis Region (Southwest Campsite Area)
| Items | Area |
|---|---|
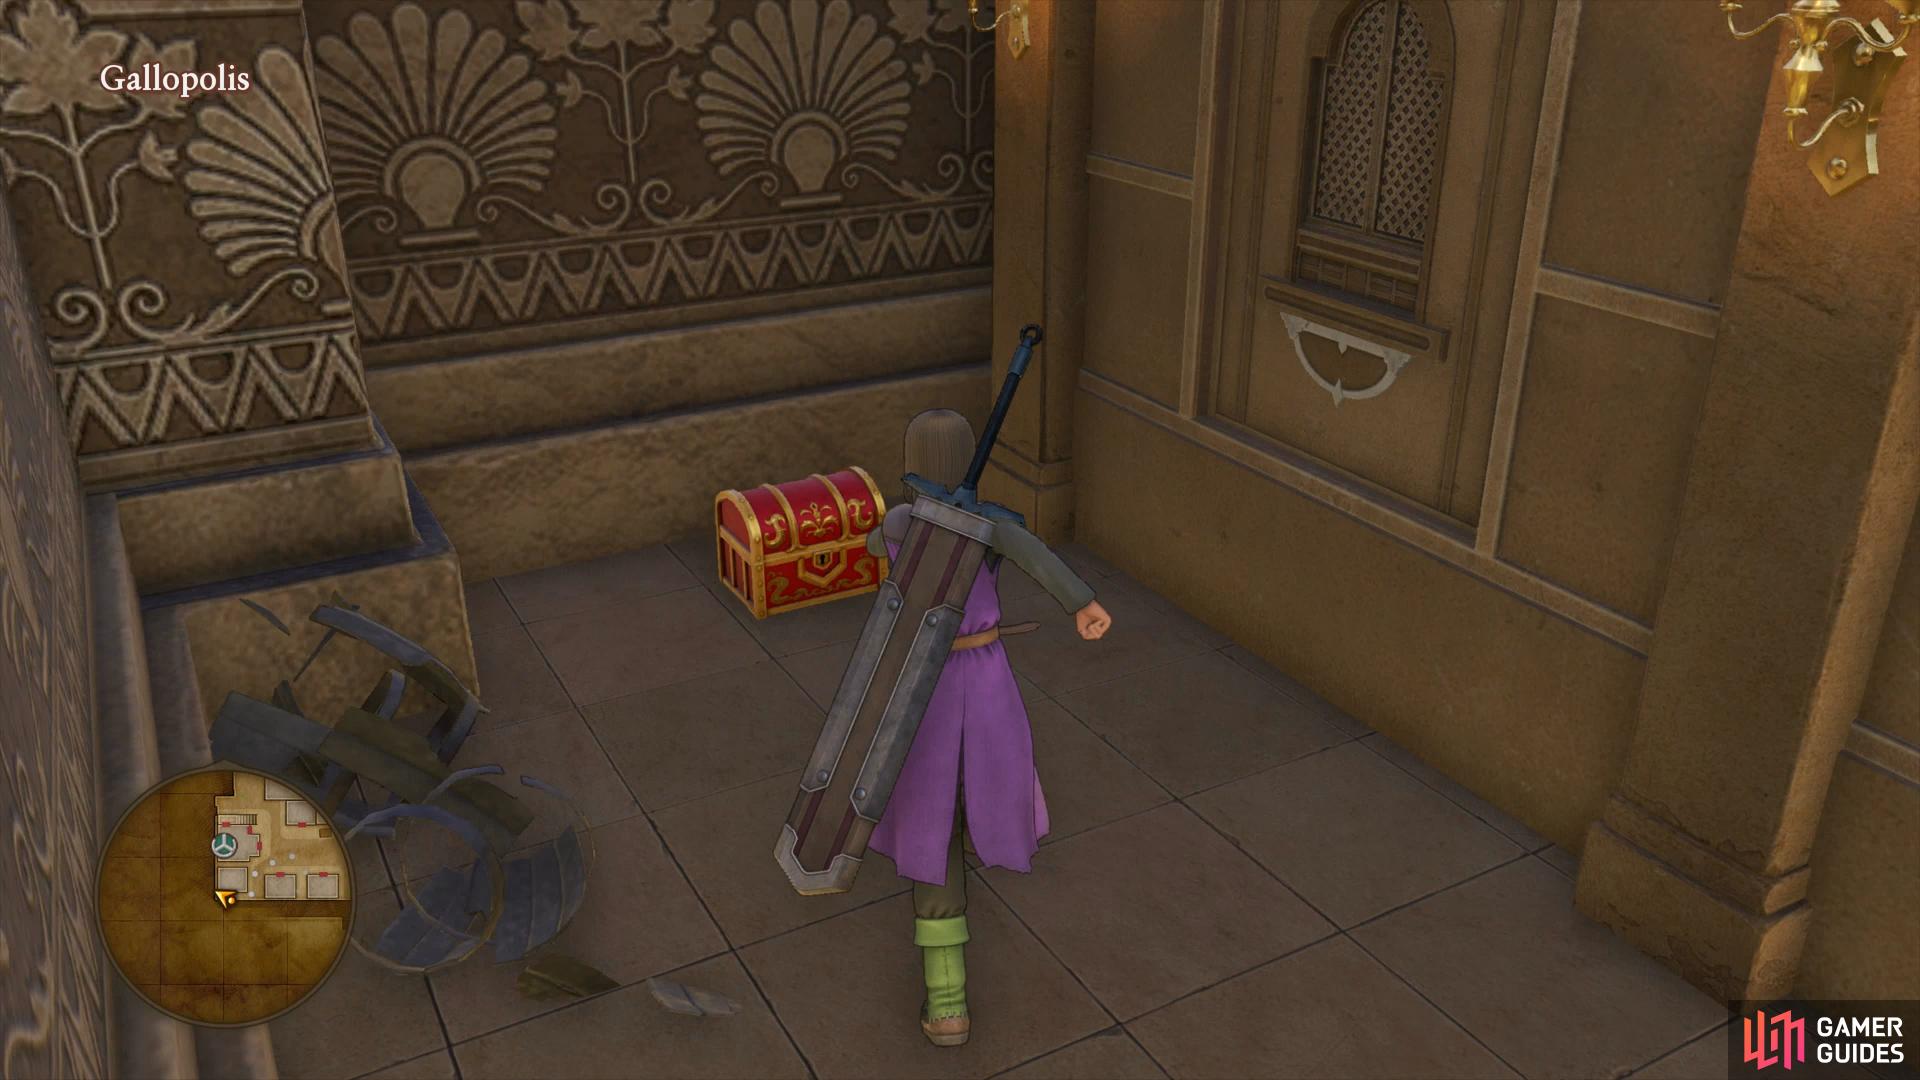
| Mini Medal | South of Gallopolis, chest |
| Sparkly Spots | Area |
|---|---|
| Witherwood | South of Gallopolis |
| Cottontop x2, Duneberry | South of Gallopolis, Flower gathering point |
| Copper Ore, Iron Ore, Gold Ore | South of Gallopolis, Ore gathering point |
| Small Scale | South of Gallopolis |
| Beast Bone | West of Gallopolis |
| Iron Ore | Southeast of Camp |
| Snakeskin | North of Southwest Campsite |
| Witherwood | East of Gallopolis |
| Monsters | Area |
|---|---|
| Metal Slime (Rare) | ~4 |
| Robber Rabbit | ~50 |
| Skullrider | ~48 |
| Brownie | ~71 |
| Chimaera | ~49 |
| Prestidigitator | ~51 |
| Cactiball | ~60 |
Upon entering the desert of Gallopolis, you’ll see the Sultanate in the distance. The desert is a large area with lots to see but for now you can only check the area out around the outside of the Sultanate. The monsters shouldn’t be too much to worry about but keep an eye on your HP when fighting Chimeras as they can belch fire on the party for respectable damage. You may have also spotted the Metal Slime entry, these can appear here but very rarely and only as part of another enemy group, you’ll never see them outside of battle. For that reason, it’s not worth taking the time to hunt them down and treat it more as a bonus if they do pop up.
From the entrance, keep to the dirt path and search alongside the large rock to your left to find the first Sparkly Spot containing a Witherwood. Head south from here to find a Flower gathering point near a worn down tree containing two Cottontops and a Duneberry. Make your way down to the area south of your location while keeping to the western edge to find a chest containing a Mini Medal. Check out the end of the path here to find an Ore gathering point contianing a Copper Ore, Iron Ore and a Gold Ore. There’s one final Sparkly Spot down here to find, just north of the Ore gathering point, this will contain a Small Scale.
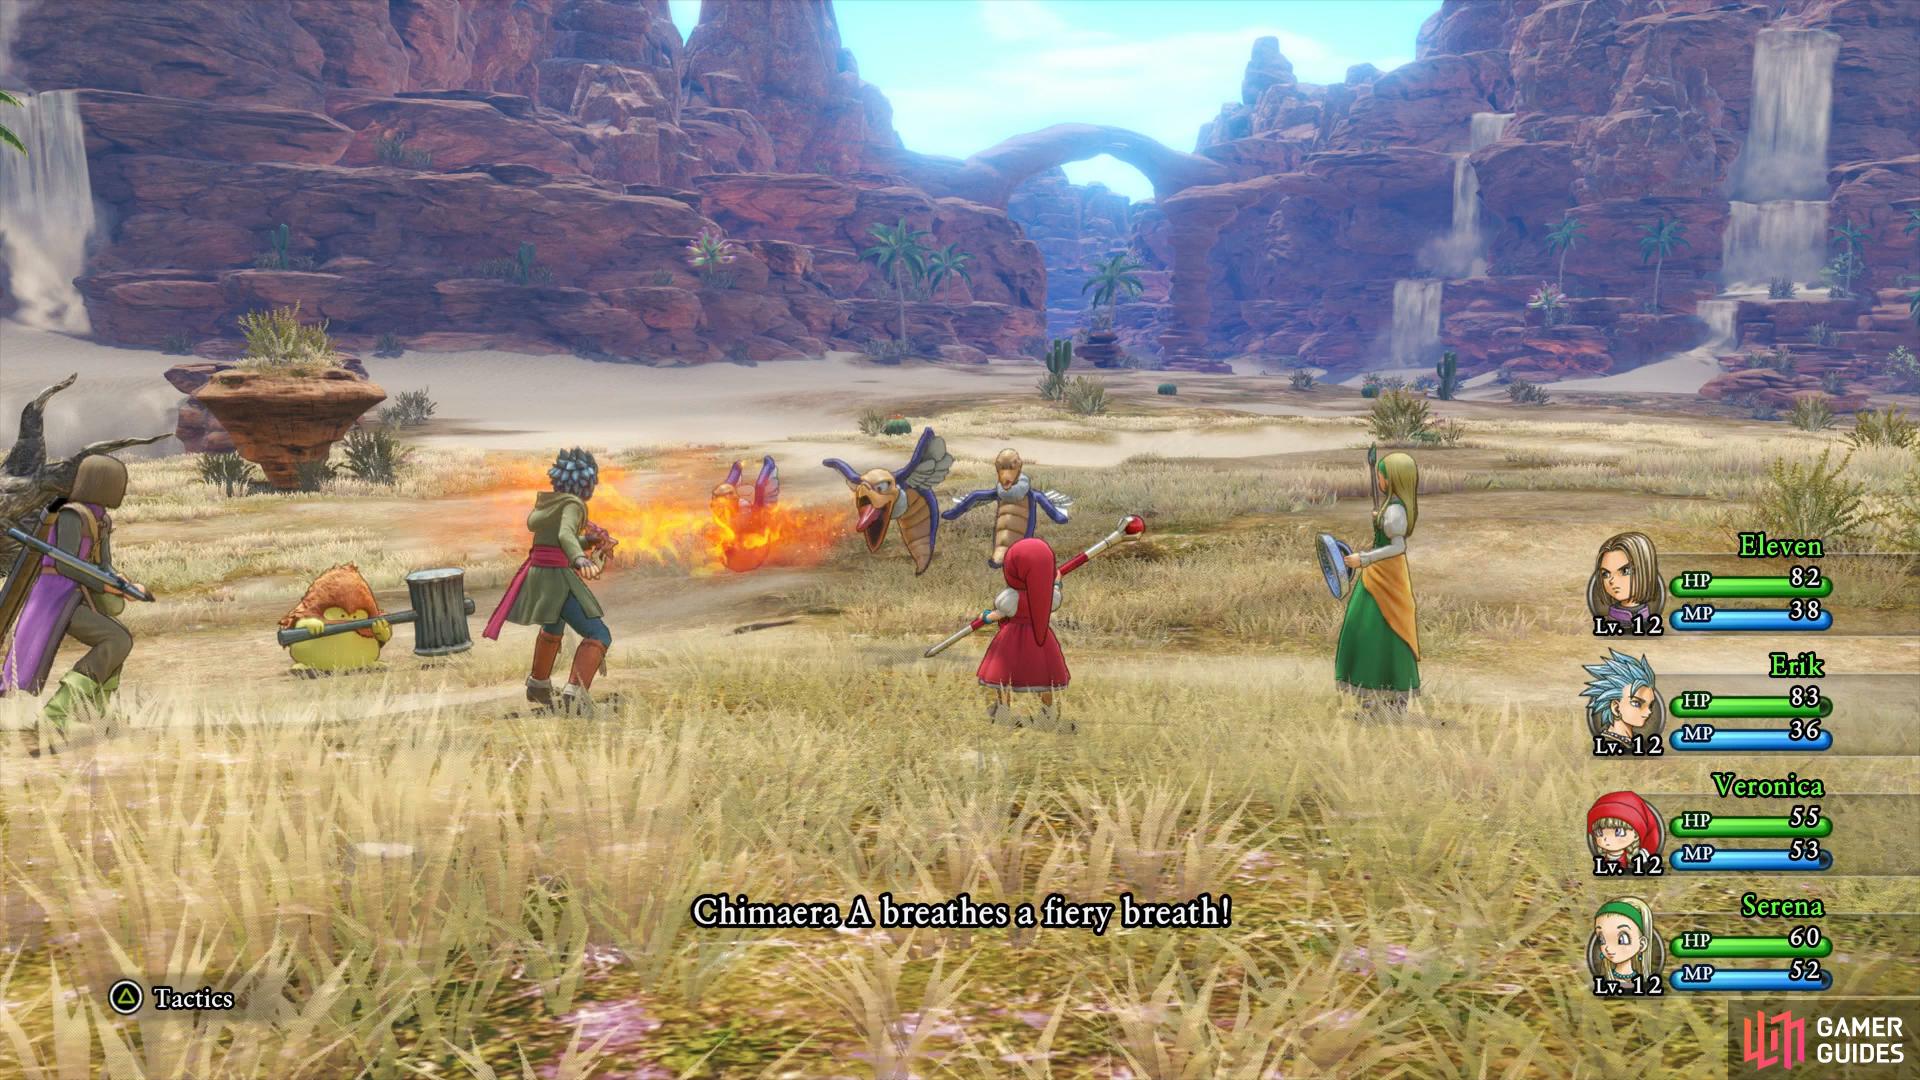
Beware of large groups of Chimaeras, their fiery breath is deadly
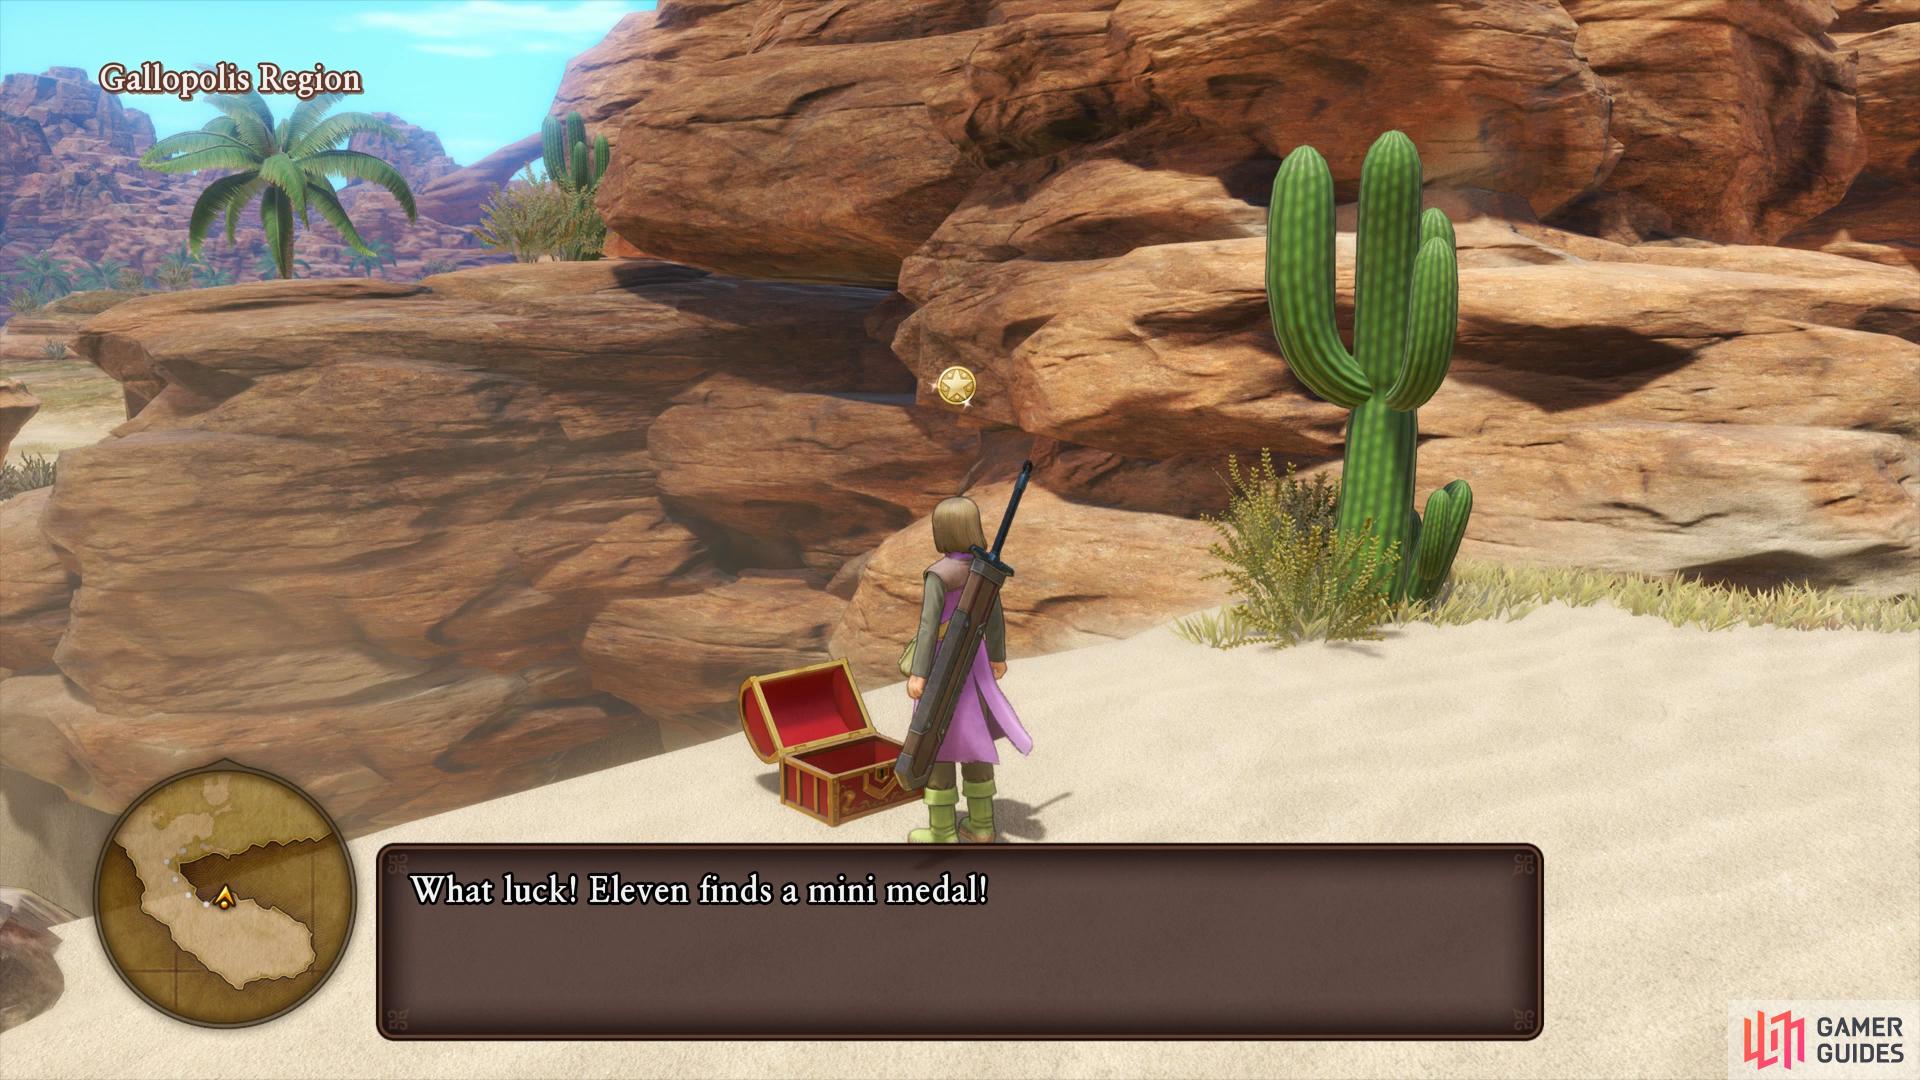
you’ll find a Mini Medal to the south of the city.
Return to the large open area now and begin heading northwest, you should be able to see a Sparkly Spot in the distance, head over and pick it up to obtain a Beast Bone. Continue through the west path and keep an eye on the south wall just before you reach the camp, there’s a Sparkly Spot containing an Iron Ore. Head over now and make use of the Camp, not only will this add it to your list of Zoom destinations but you can also recover your HP and MP. There’s new wares you can buy at the Merchant here but hold off now, you’ll soon be entering the next town with it’s own goods.
After resting and saving your game, head north from this Camp while keeping to the wall on your right, the next Sparkly Spot sits here containing a Snakeskin. You can’t proceed any further from here for now so make your way back to the east and head towards the entrance of town and stop. Make a quick stop east along the water to find the final Sparkly Spot for now, another Witherwood. With all of this out of the way for now, make your way over to the entrance and enter The Sultanate of Gallopolis.
The Sultanate of Gallopolis
| Items | Area |
|---|---|
| Hardy Hide | House west of Entrance, wardrobe |
| 15G | Entrance, barrel |
| Wayfarer’s Clothes | House west of Entrance, wardrobe |
| 17G | Alley west of Entrance, barrel |
| Mini Medal | Southwest corner, chest |
| Traveller’s Hood | Church, wardrobe |
| Angel Bell | Church, barrel |
| 7G | North of the Church, pot |
| 70G | House north of the Church, wardrobe |
| Horse Manure | Northwest corner, pot |
| Single Phial | East of Quest 07 giver, barrel |
| 6G | East of Quest 07 giver, barrel |
| Medicinal Herb | Upper area south of the Castle, pot |
| 4G | Upper area south of the Castle, pot |
| 21G | Northeast corner, pot |
| So You Want to Be a Witch | Inn, bookshelf |
| Turban | Inn, wardrobe |
| Medicinal Herb | Outside Armor shop, barrel |
| Finessence | Inside puff-puff house, pot |
| Softwort | Inside puff-puff house, barrel |
| Oasis Water | Outside Weapon shop, pot |
| Duneberry | Outside Item shop, barrel |
| Warmaline | Well, barrel |
| Sparkly Spots | Area |
|---|---|
| Narspicious | Well |
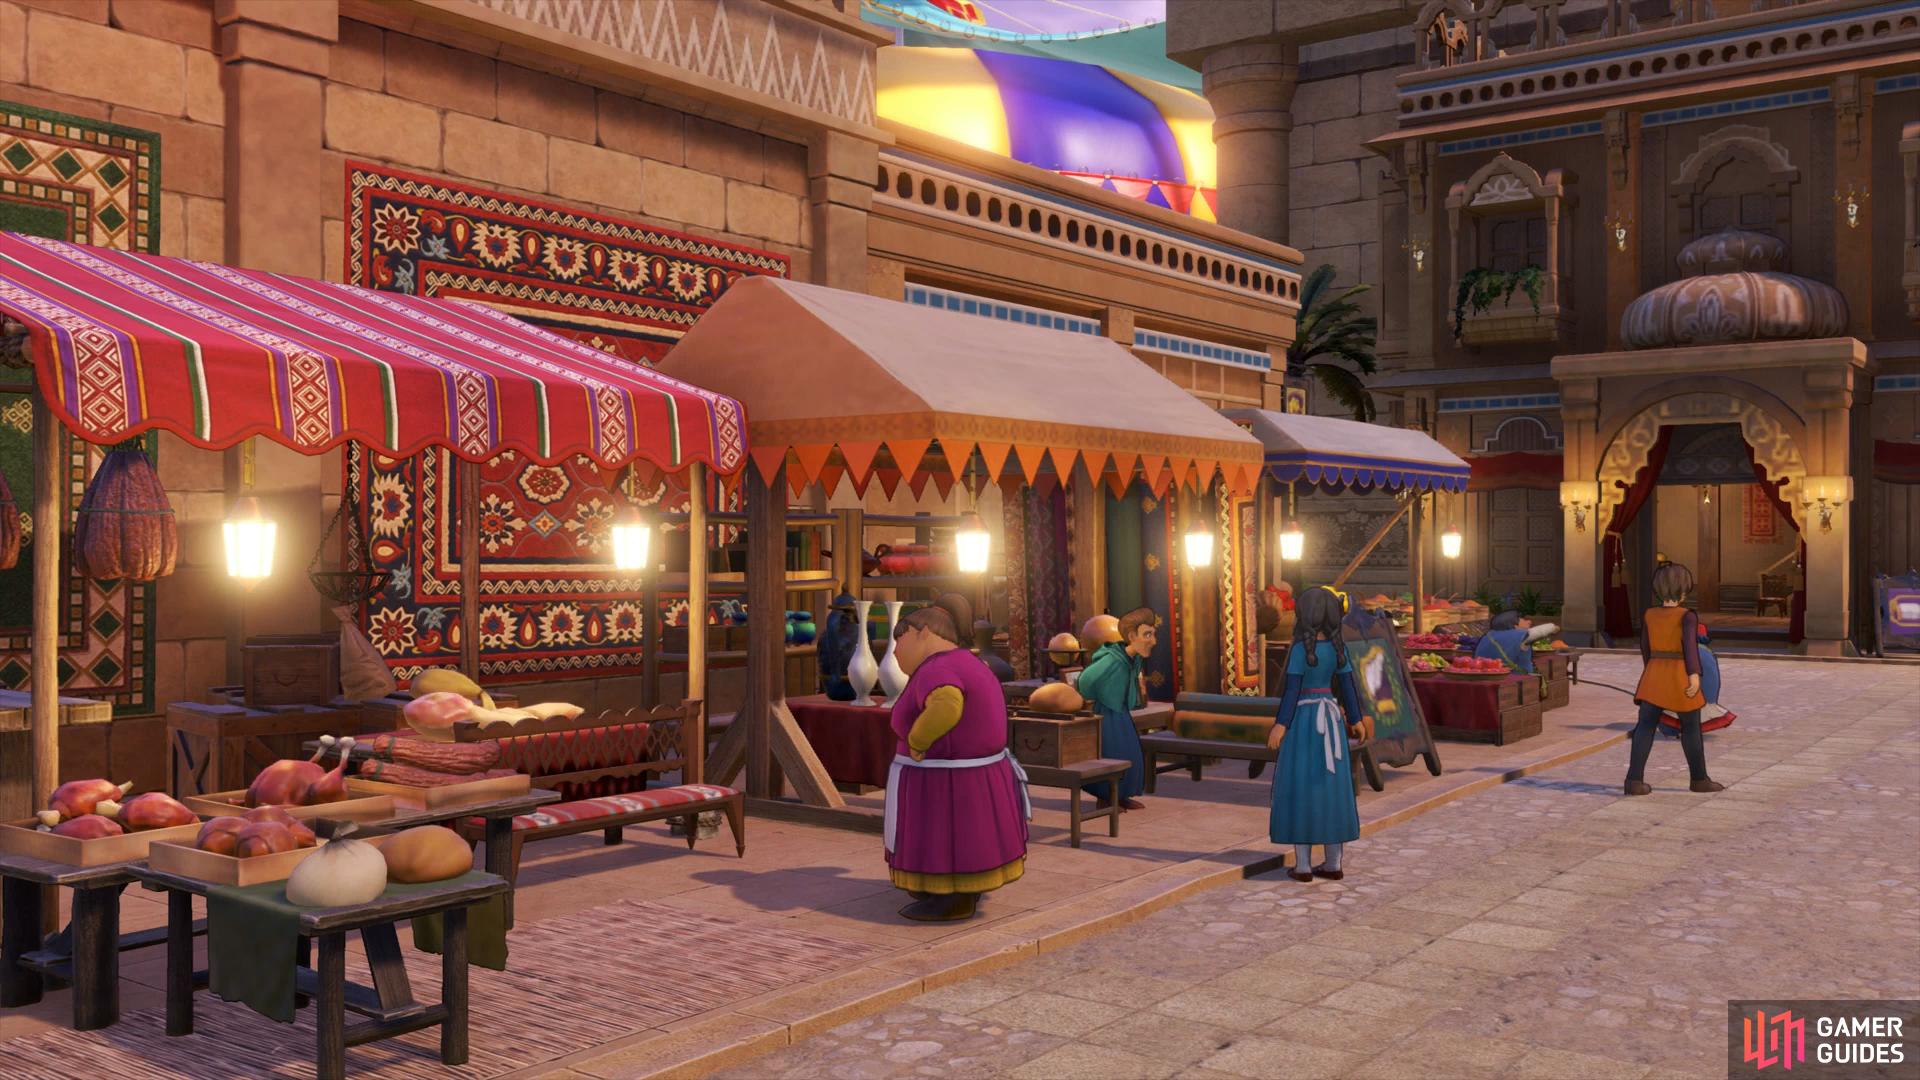
As the party enters Gallopolis they notice the huge crowds that have gathered here for the upcoming horse-racing festival. With that said, there’s a lot to explore and see here along with another two quests to undertake before you pay a visit to the Sultan.
From the entrance, head west into the first house and go upstairs to find a wardrobe with a Hardy Hide inside it. Exit the house and run in front of you to spot a pair of barrels next to the bazaar, one of which contains 15G. Check out the small house to the left of these barrels and head upstairs once more to find another wardrobe, this one contains some Wayfarer’s Clothes. Exit this house and look to the alley between the two houses in front of you to spot yet more barrels, you’ll obtain 17G from one of them. The next house to the west contains nothing of value apart from a lore book so head to the building in the southwest corner and search the south corner to find a chest containing a Mini Medal.
You can loot another Mini Medal in the south-west corner of the city

then search the wardrobe in the Church for a Traveller’s Hood which will alter the Hero’s appearance.
The Church is the next building along, head inside to save your game and then search the wardrobe on the first floor for the Traveller’s Hood, an accessory for the Hero only that will change his appearance to the disguise he was using earlier in the game. Head upstairs from here to loot a barrel containing an Angel Bell that will cure Confusion in battle. Leave the Church now and search in the corner to the north of it to find somme pots with 7G.
Continue up the west side of town, ignoring the first building for now and enter the next on your right to search the wardrobe upstairs for 70G. Leave the house and search the northwest corner of town for a pot containing Horse Manure (why would someone leave that there?). You’ll spot a quest giver to the right of you, head over to him and hear him out. The man is a painter that is looking for inspiration and wants your help in the matter. He’ll ask you to defeat a Spitzfire found in the Celestial Sands (northern) using the Pep Power Wild Side, a power that requires Erik, Serena and the Hero to be in a Pepped up state. The ability in question increases all of Erik’s stats and as you may expect, you’ll need to get lucky with Pep so it may take a while to complete it. Accept Quest 07 - A Walk on the Wild Side, you’ll be able to work on it a bit later.
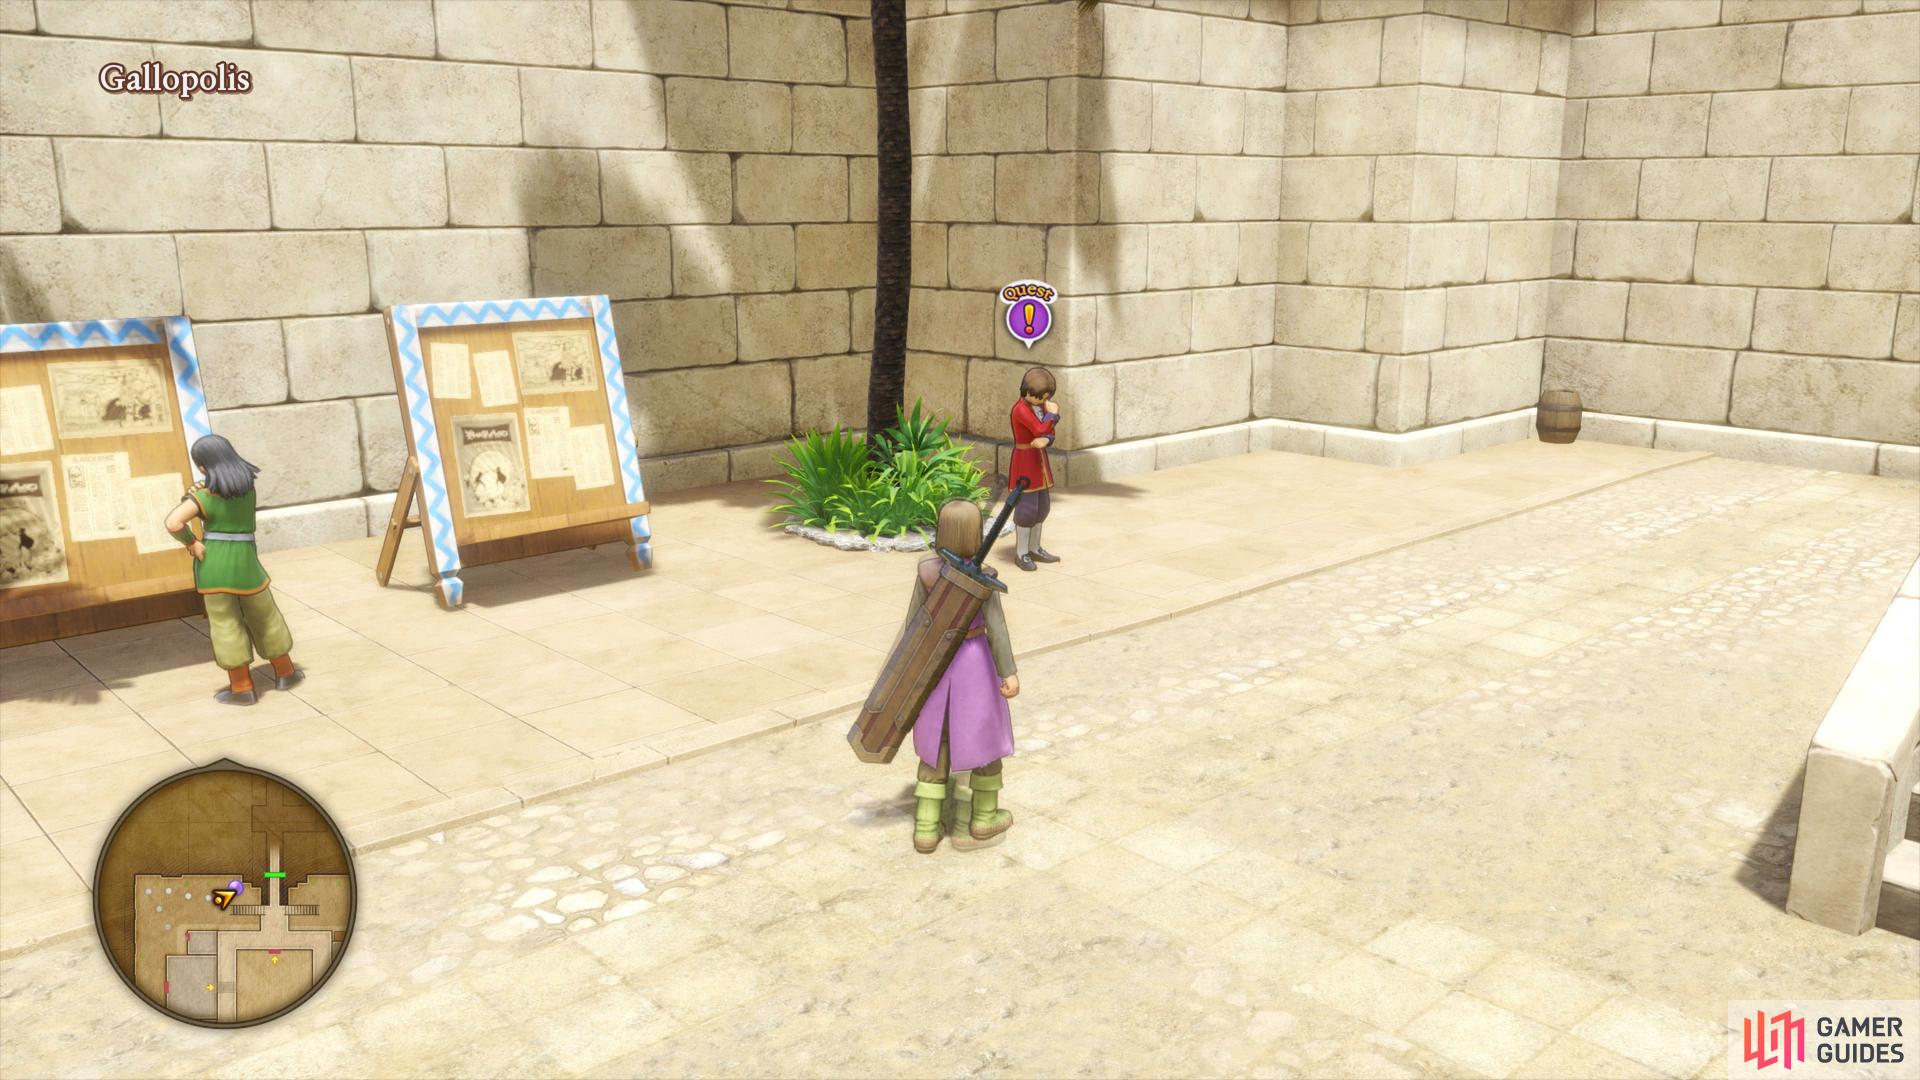
To the north-west you can find Quest 07
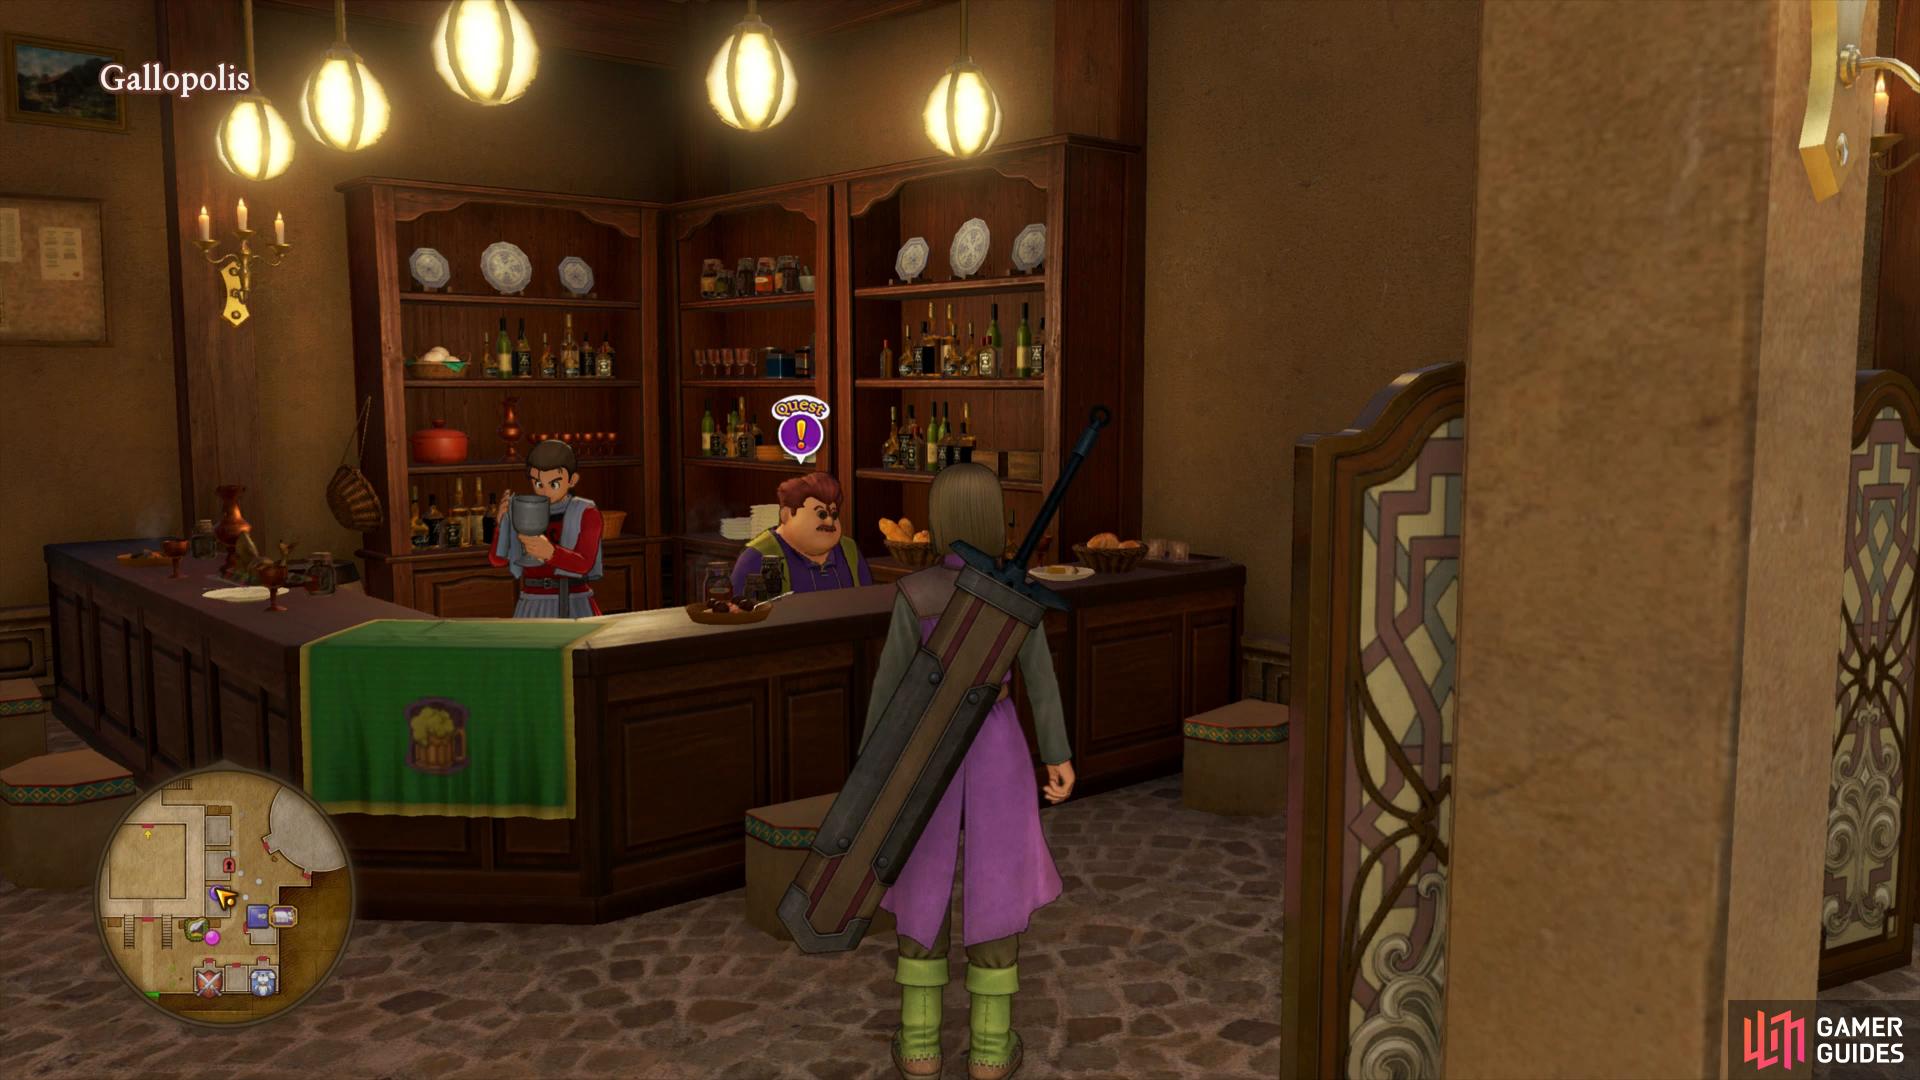
while you’ll find Quest 08 opposite the Inn.
To the east of this quest giver are some barrels, either side of the stairs, smash them to obtain a Single Phial and 6G. Climb the first set of stairs and search around up here for two pots containing a Medicinal Herb and 4G. Take the east stairs back down to cross over to the east side of town, searching the northeast corner for another pot containing 21G.
Head south from here and into the Tavern to find another man looking for assistance. This man wants you to help him improve his menu and requires you to get a Golden Globule from a Golden Globe, a Golden Cactiball found in the Gallopolis region. What makes this quest more difficult is the fact that you can’t encounter these enemies on the field, they’ll only rarely appear in battles with regular Cactiballs so you’ll need to keep fighting them until one pops up. Agree to help the man to begin Quest 08 - A Cactus Cutlet to Die For.
Make the Inn your next stop and search the bookshelf for a new Recipe Book, So You Want to Be a Witch. With this you’ll be able to craft an assortment of equipment for Serena and Veronica. Head upstairs and check in the back wardrobe for a Turban, this should be an upgrade over the Feathered Caps unless you’re using a +3 version of them (and even then you can +3 this Turban). Make use of the Inn if you need to and then exit to the south towards the Armor shop. Smash the barrels to the left of the door to find a Medicinal Herb before entering the shop itself.
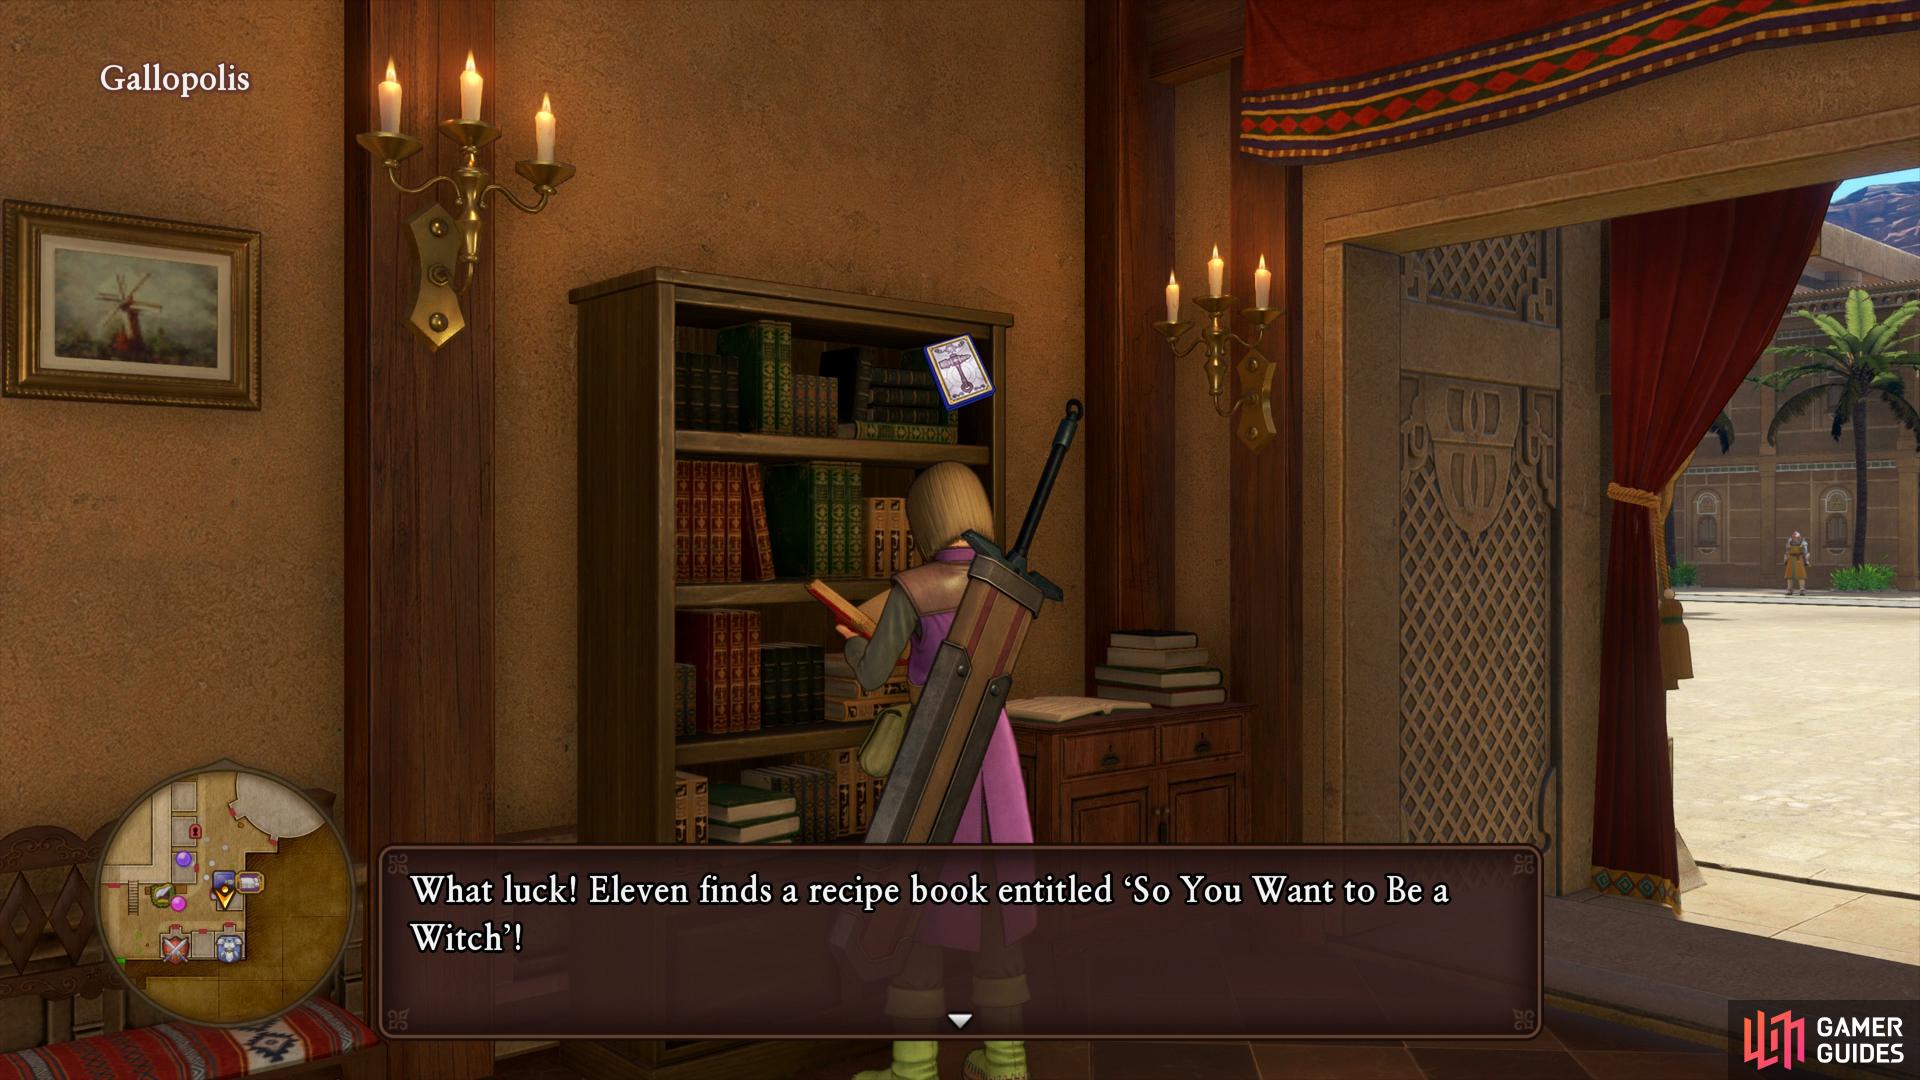
Search the bookshelf in the Inn for a Recipe Book to forge magical based equipment
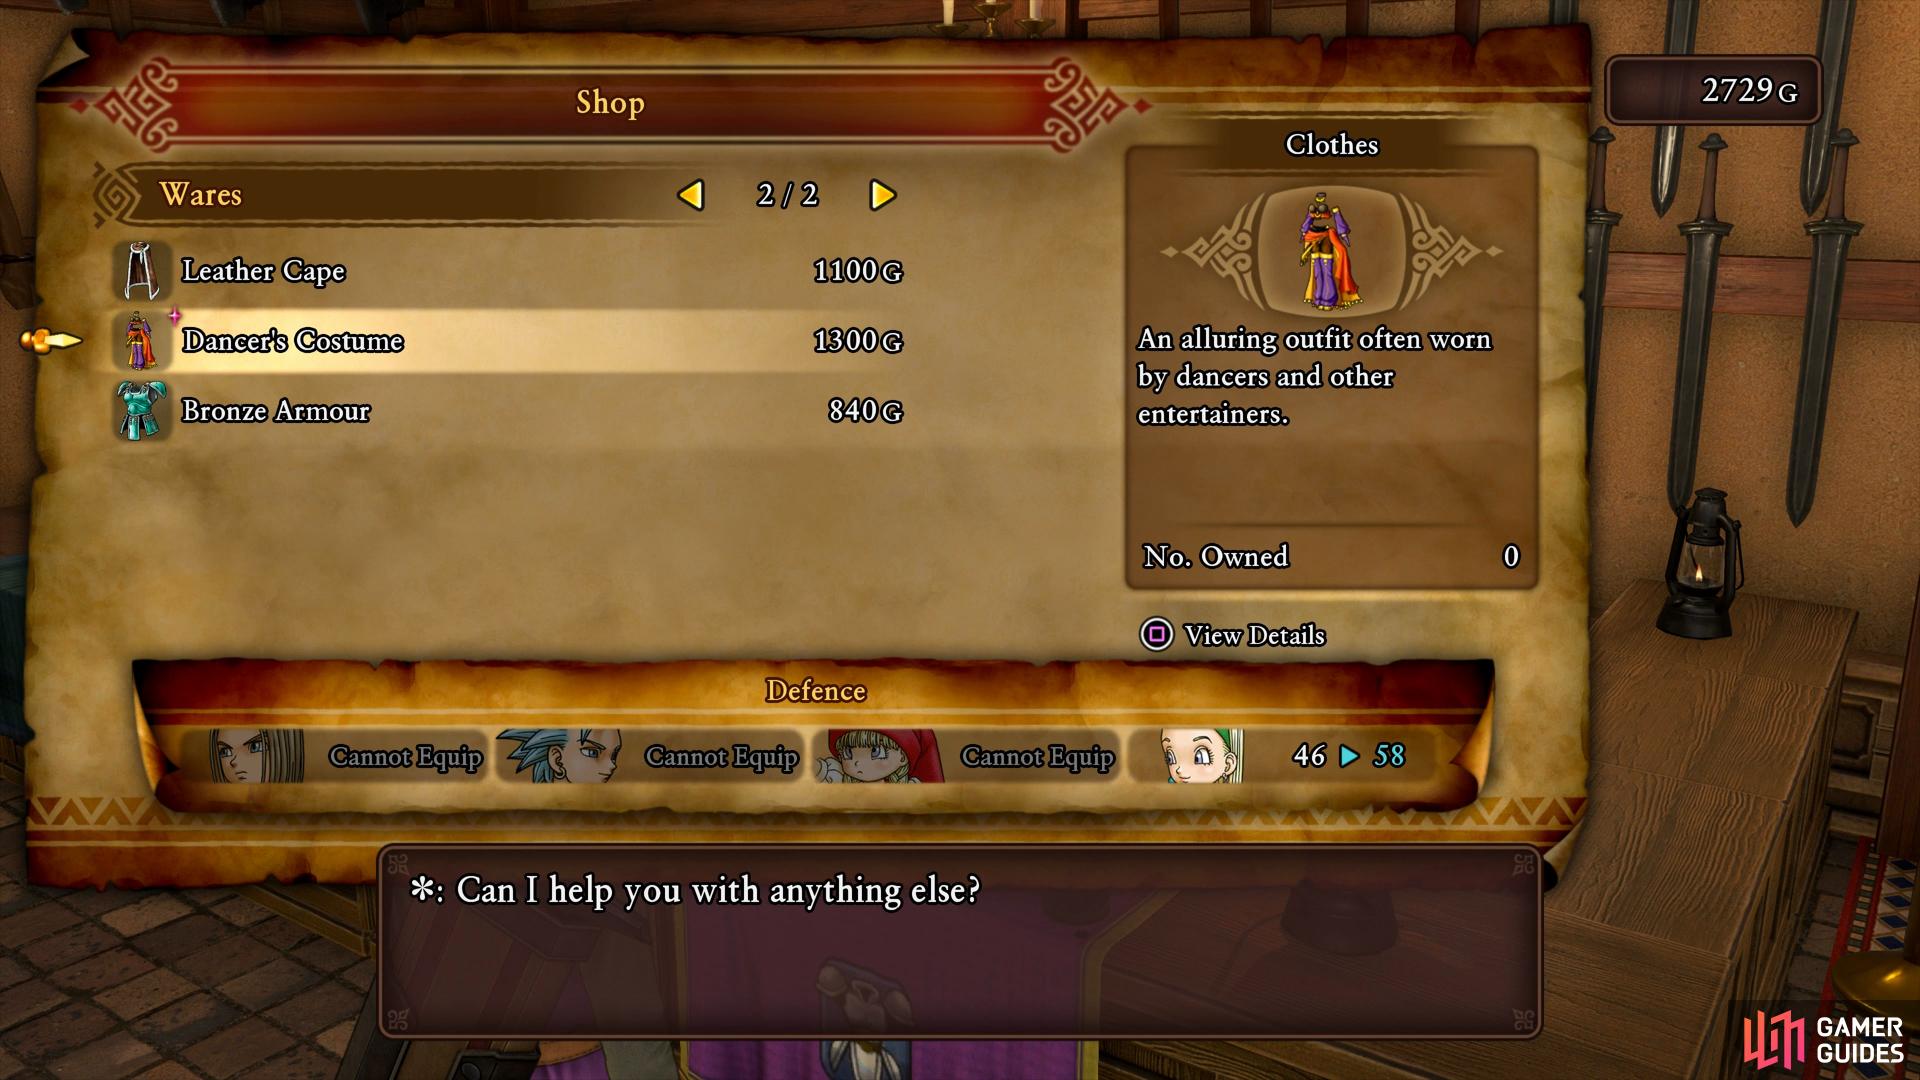
be sure to buy the Dancer’s Costume, this will alter Serena’s appearance.
The Armor shop itself has some interesting equipment starting with the Bunny Ears for the girls. This will increase both Magical Might and Magical Mending so is an excellent choice for them especially if you upgrade it further at the forge. The Leather Cape is a marginal upgrade for Erik so pass on that for now but the Dancer’s Costume is an upgrade for Serena along with the added bonus of changing her appearance too. Finally the Bronze Armor is a marginal increase for the Hero too, if you have excess gold feel free to purchase it but it’s better to pass on it for now. Speak to the girl outside the next building to accept your next puff-puff. She’ll open the door for you where you’ll find a Finessence in the pot and a Softwort in the barrel. Head up the stairs and examine the bed to be treated to a rather unique puff-puff.
Quickly leave the house and head into the Weapon shop now to check out the wares there. You may notice a new Wand and Heavy Wand for Veronica and Serena but hold off on them for now, you’ve just got a Recipe Book that will allow you to forge the next tier up of their weapons.
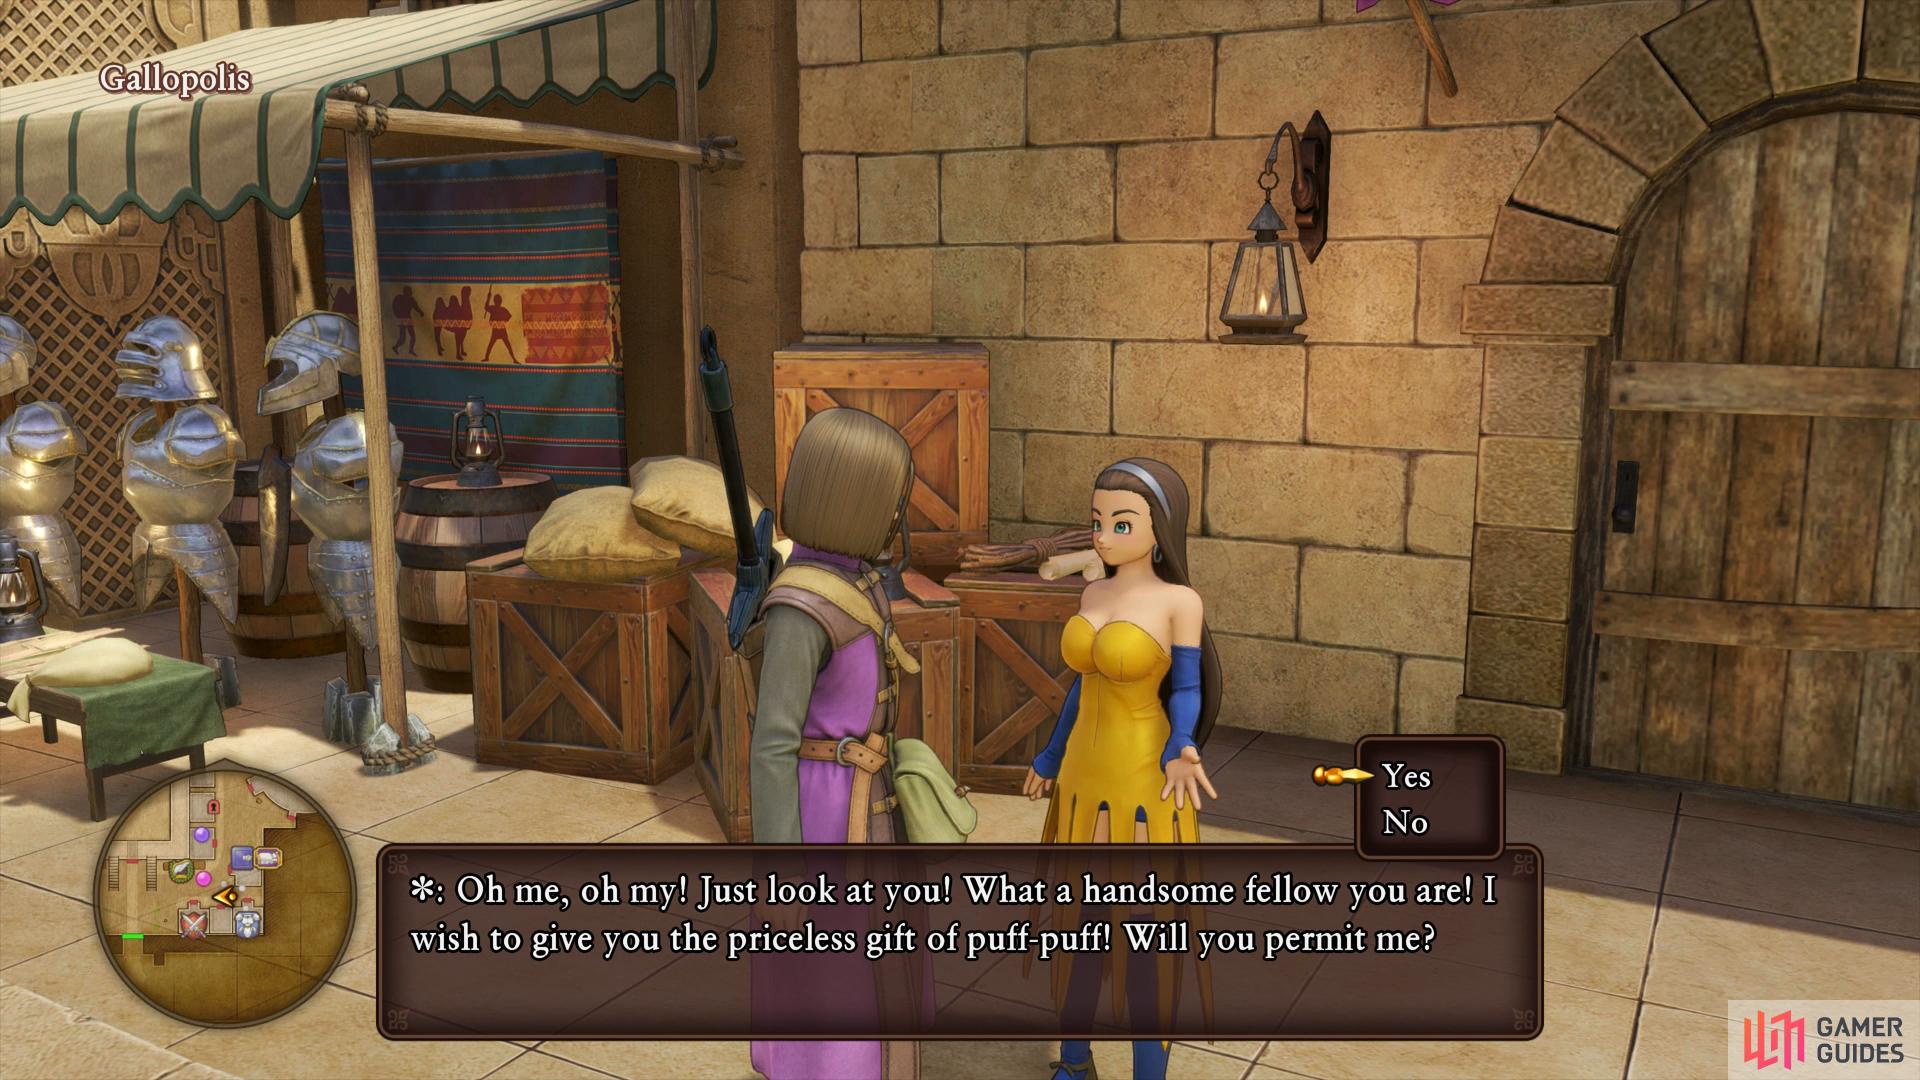
You’ll find the next girl offering a Puff-Puff in the middle of the two equipment shops.
To the side of the Weapon shop is a line of pots, inside you’ll obtain an Oasis Water. Likewise, outside the Item shop opposite you is a line of barrels, you’ll obtain a Duneberry from these. Finally, you’ll find a well outside the Weapon shop that you can climb into. There’s a locked door to the west but to the north you’ll find a Sparkly Spot containing a Narspicious While to the east you’ll find a Warmaline in the barrels. That should be everything for now so return to the surface and take the north exit to the palace.
The Sultan’s Palace
| Items | Area |
|---|---|
| Strong Antidote | 1F, west side, barrel |
| Strong Medicine | 1F, west side, pot |
| Grubby Bandage | 1F, east side, pot |
| Iron Broadsword | 1F, Prince’s Bedchamber, chest |
| Feathered Cap | 1F, Prince’s Bedchamber, wardrobe |
| Sleeping Hibiscus | 1F, Prince’s Bedchamber, pot |
| Concrete Earrings | 1F, Royal Bedchamber, chest |
| Oasis Water | 2F, southeast corner, pot |
| Kitty Litter | 2F, southeast corner, pot |
| 1500G | 2F, behind the Throne |
| Wakerobin | 2F, balcony, pot |
| Boxer Shorts | 1F, Royal Bedchamber, wardrobe |
| Fishnet Stockings | 1F, Royal Bedchamber, wardrobe |
The palace is not overly large and most of the items are in close proximity. To begin with, search the west side of the main room where you’ll find a pot and barrel with a Strong Antiodote and a Strong Medicine. If you run to the opposite side of this floor and search the eastern wall, you’ll find a pot containing a Grubby Bandage. There are also two rooms to check out on this floor, inside the Prince’s Bedchamber you’ll find a chest containing an Iron Broadsword. There’s also a wardrobe and pot that you can check in here to obtain a Feathered Cap and a Sleeping Hibiscus.
Head over to the other side of the floor to find the Royal Bedchamber where another chest awaits, this one contains Concrete Earrings, an accessory that will reduce the damage you take from Earth related attacks. Be sure to check both the wardrobes here, you’ll obtain some Boxer Shorts and some more Fishnet Stockings. That’s it for the first floor so head up the stairs to finally meet with the Sultan.
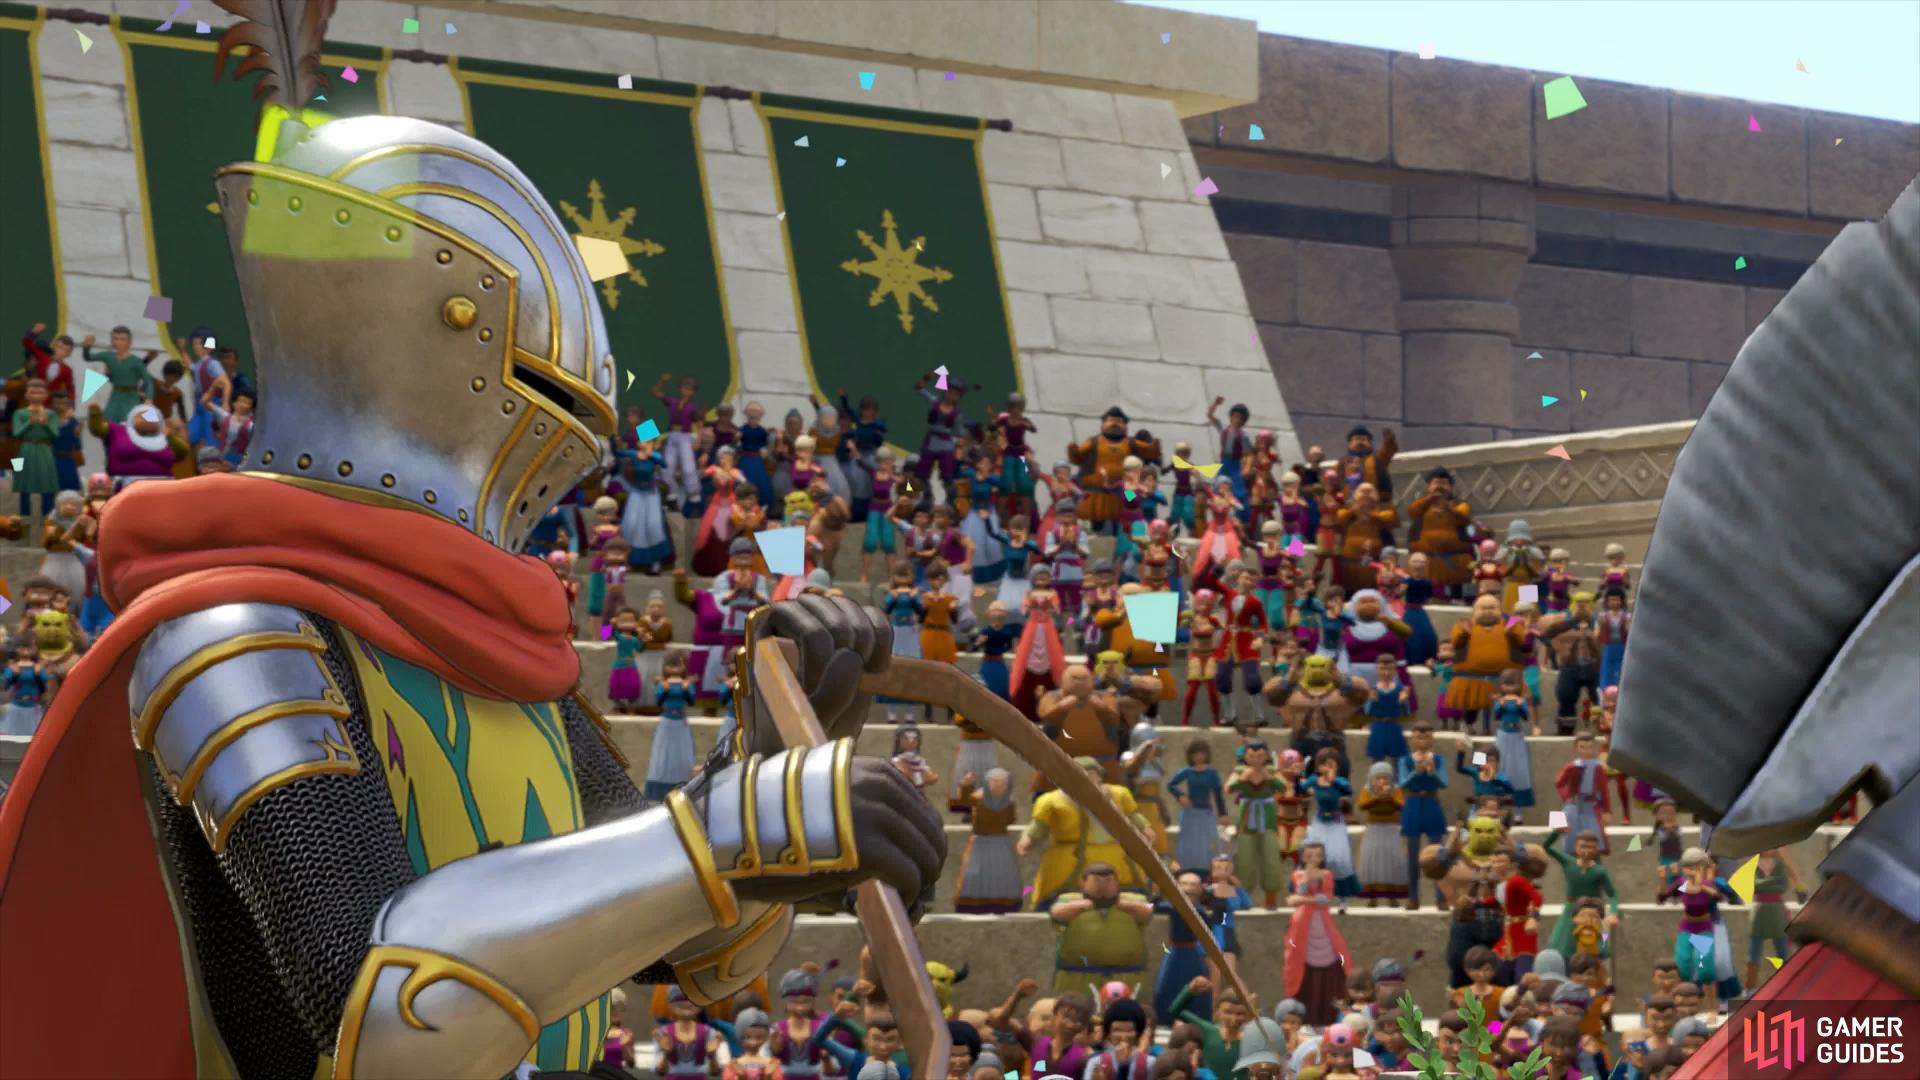
As the Sultan is practicing his speech for the forthcoming Sand National, the Prince (also named Faris) enters to let the Sultan know he has passed his Knight’s training. As Prince Faris leaves to get ready for the race he garners the attention of the party. Faris think’s he may be able to help get what we’re looking for but first, wishes to speak to you in his room. Before that however, there’s a few more treasures to loot. Start with breaking the pots in the southeast corner to obtain a Oasis Water and a Kitty Litter. Head over to the throne now and search behind it to discover a chest, inside you’ll snag a small fortune of 1500G. Finally, head out back and search the east corner for more pots to obtain a Wakerobin.
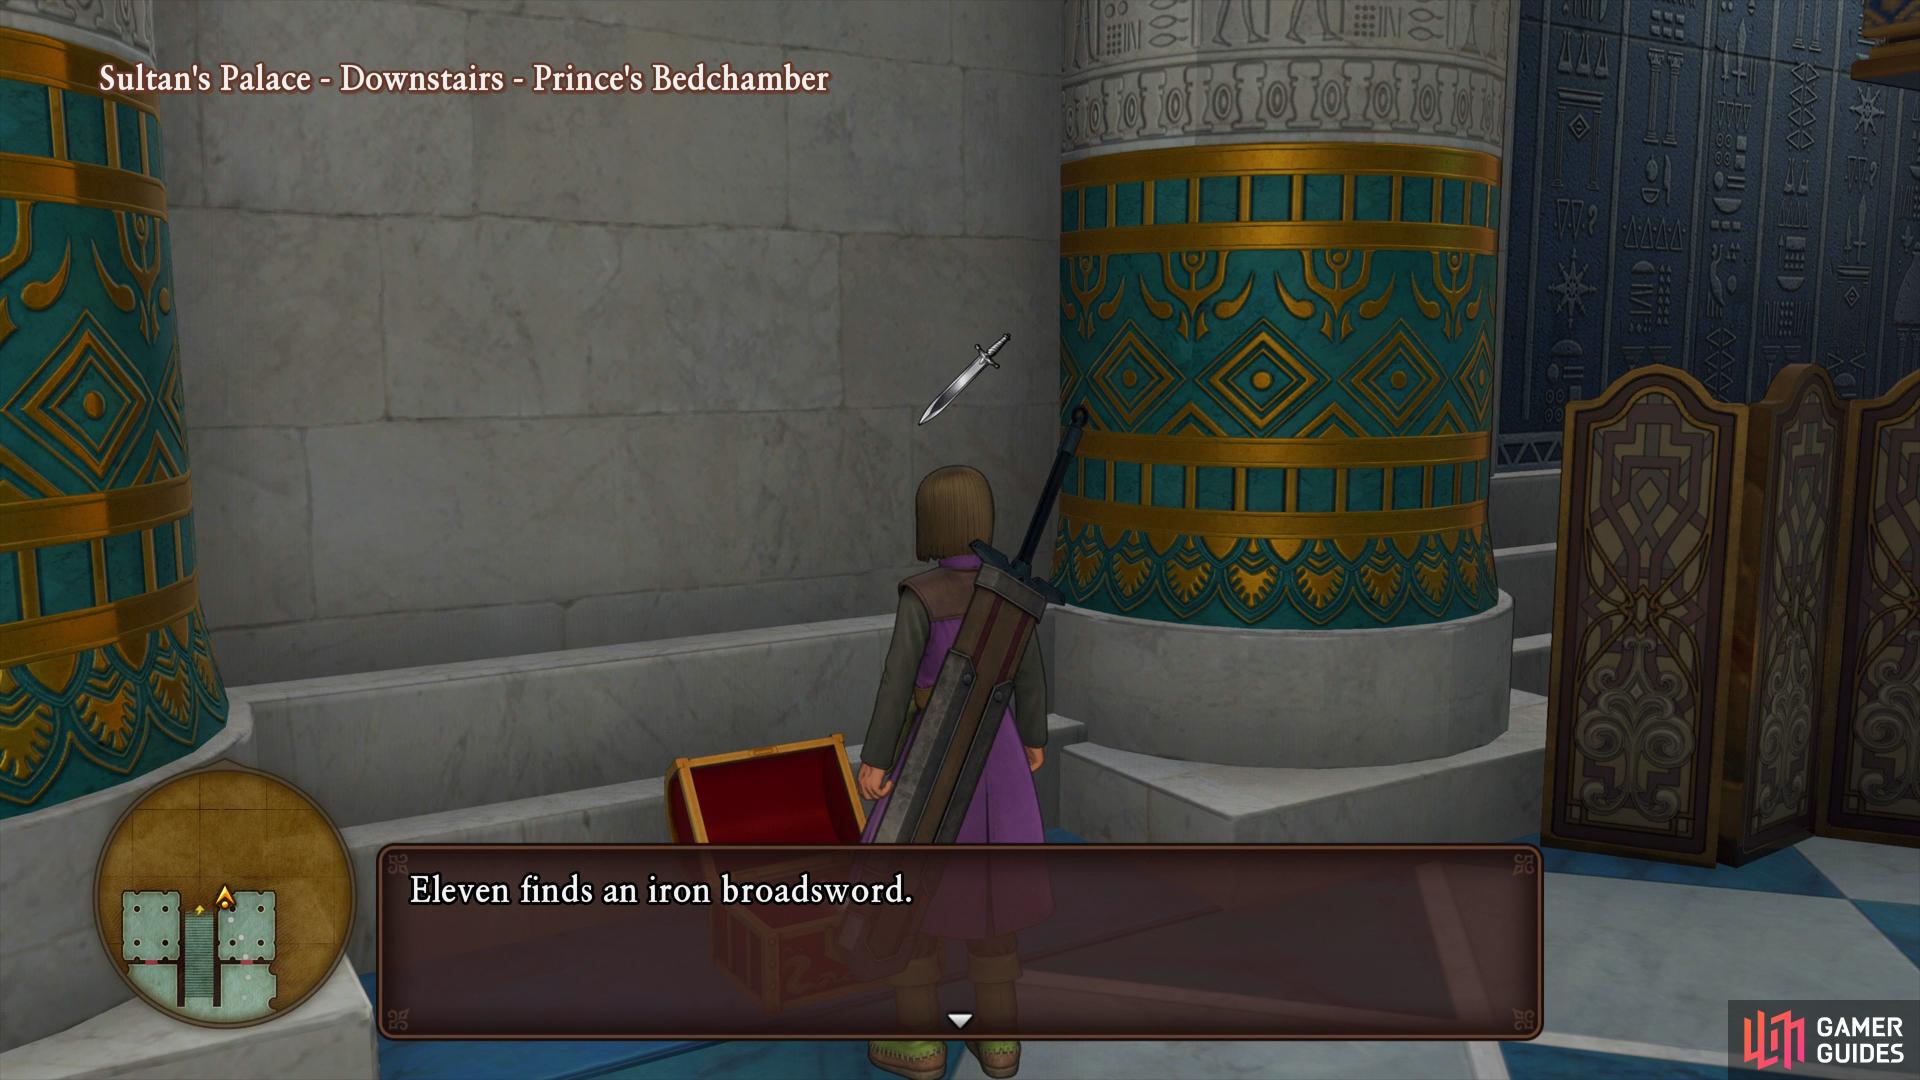
You can find an Iron Broadsword in the Prince’s Bedchamber
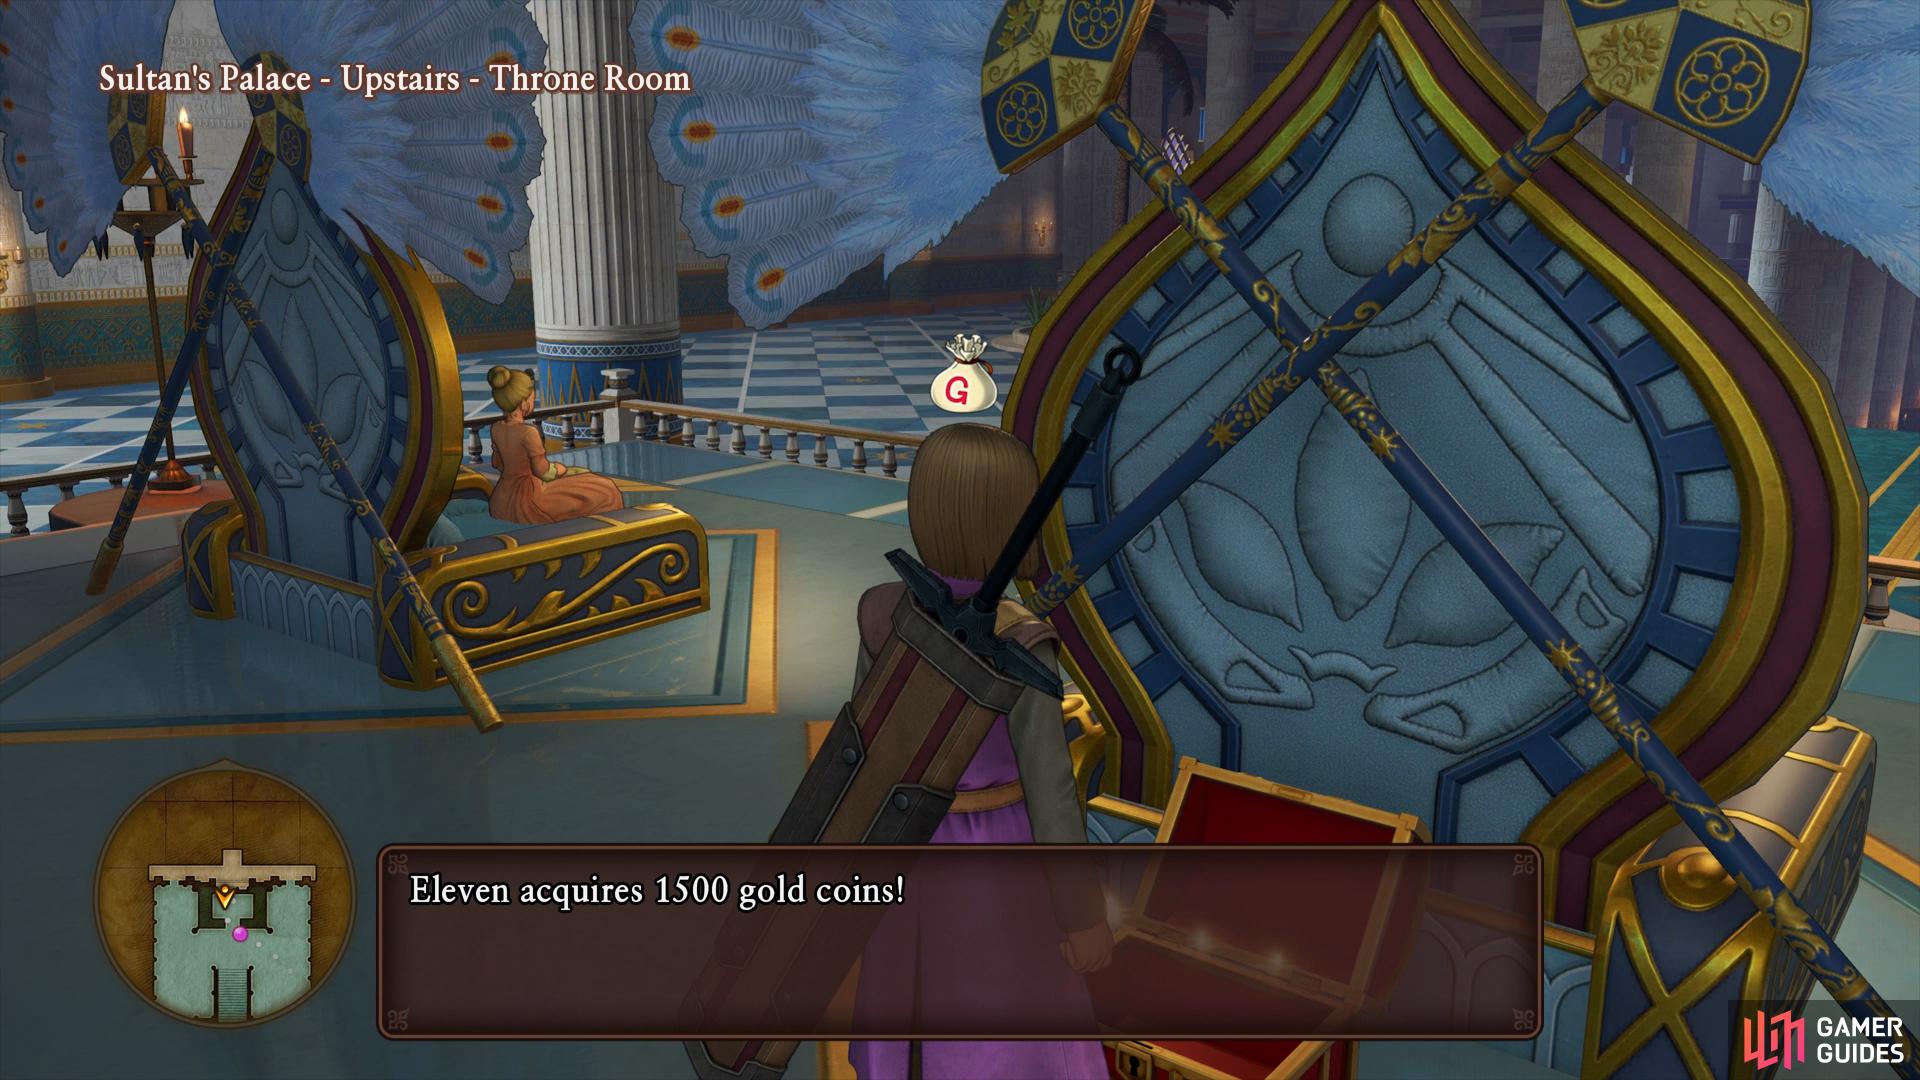
while you can net yourself a small fortune behind the Sultan’s throne.
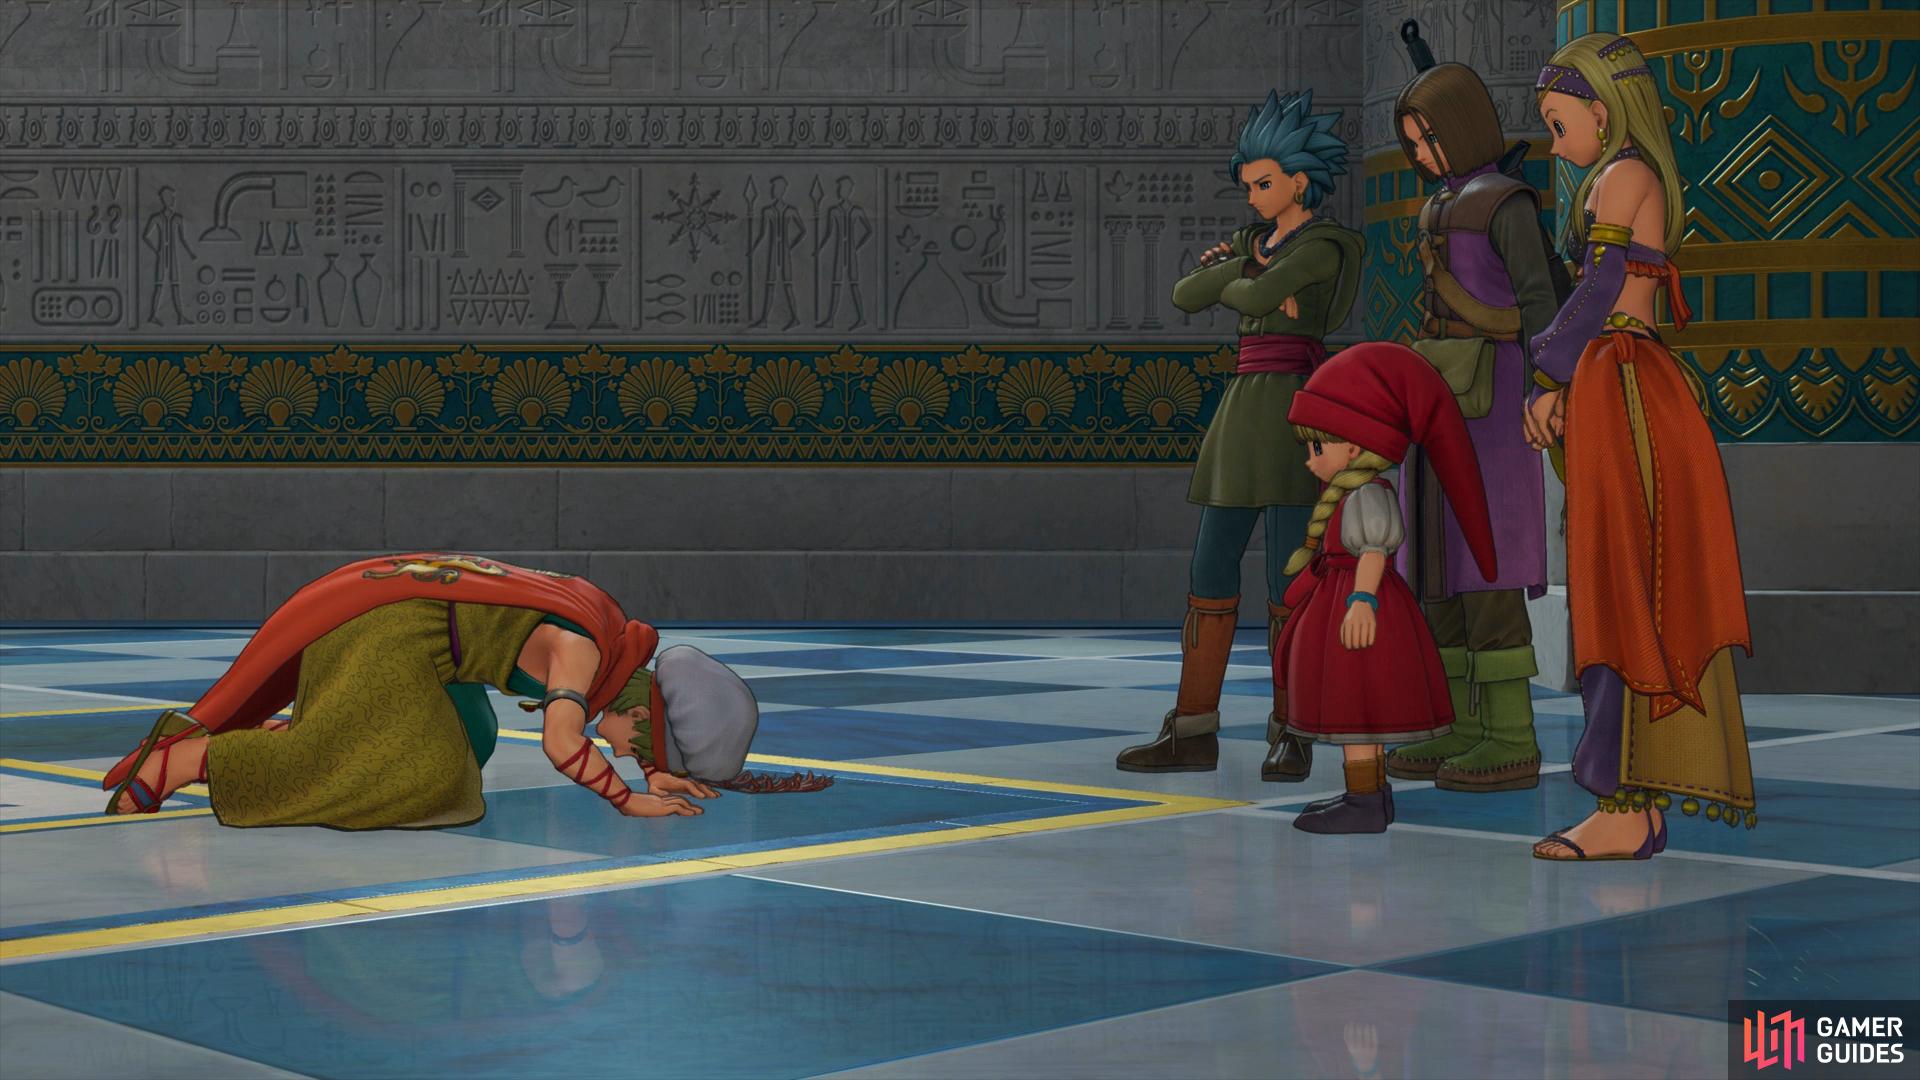
Return downstairs and head into the Prince Bedchamber once again and speak to him. As mentioned, the Rainbough is a national treasure and as such, can’t be simply handed over however the Prince would like to make a deal, remarking the Hero’s build. The only issue is, Prince Faris doesn’t want anyone to listen in on it and suggests you meet at the Circus show at night. Leave the Palace and make your way over to the Circus to meet up with the disguised Prince standing just outside.
As you watch the show, Prince Faris will let you in on his plight. It seems he needs to race in the Sand National tomorrow in honor of his birthday, problem is that he’s never rode a horse. His plan, then, is to use the Hero as a double and win the race for him, in return he will speak to his father with regards to the Rainbough. As the party reluctantly agree, you’ll need to meet Faris the next day at the Stables. The next morning, save your game if you wish and then head over to the Stables found on the west side of town and speak to Prince Faris within to let him know you’re ready. Wearing the Gallopolis Royal Family armor, head out the room and mount the horse, taking it through the paddock and to the race course to the north.
The Sand National
As everyone gathers to see the Prince in action, the entertainer Sylvando approaches the Hero, it seems he’s taken the place of an injured rider. Shortly after this you’ll get a tutorial on Horse Racing, which is a lot more simpler than you may think. You can dash with the [R2] button however that will use up your Stamina gauge. This can however be refilled by collecting the green swirls on the track. Finally, you can drift around corners with the [Square] button, this will help taking tight corners at high speeds. To perform well in Horse Racing you’ll need to try to maintain your boost, that means keeping to the track where you can to refill your Stamina.
As for the race itself, it’s not too difficult and you’ll be on the most basic of courses. Make sure you collect all the green winds and let go of the Dash if your Stamina gets too low and you should finish first with ease. Following the race you’ll swap with Prince Faris once more as he greets the citizens after. Sylvando crashes the party in the dressing room after as he discovers that the Hero raced instead of the Prince however before anything else can happen, the Sultan summons Faris to the Palace.


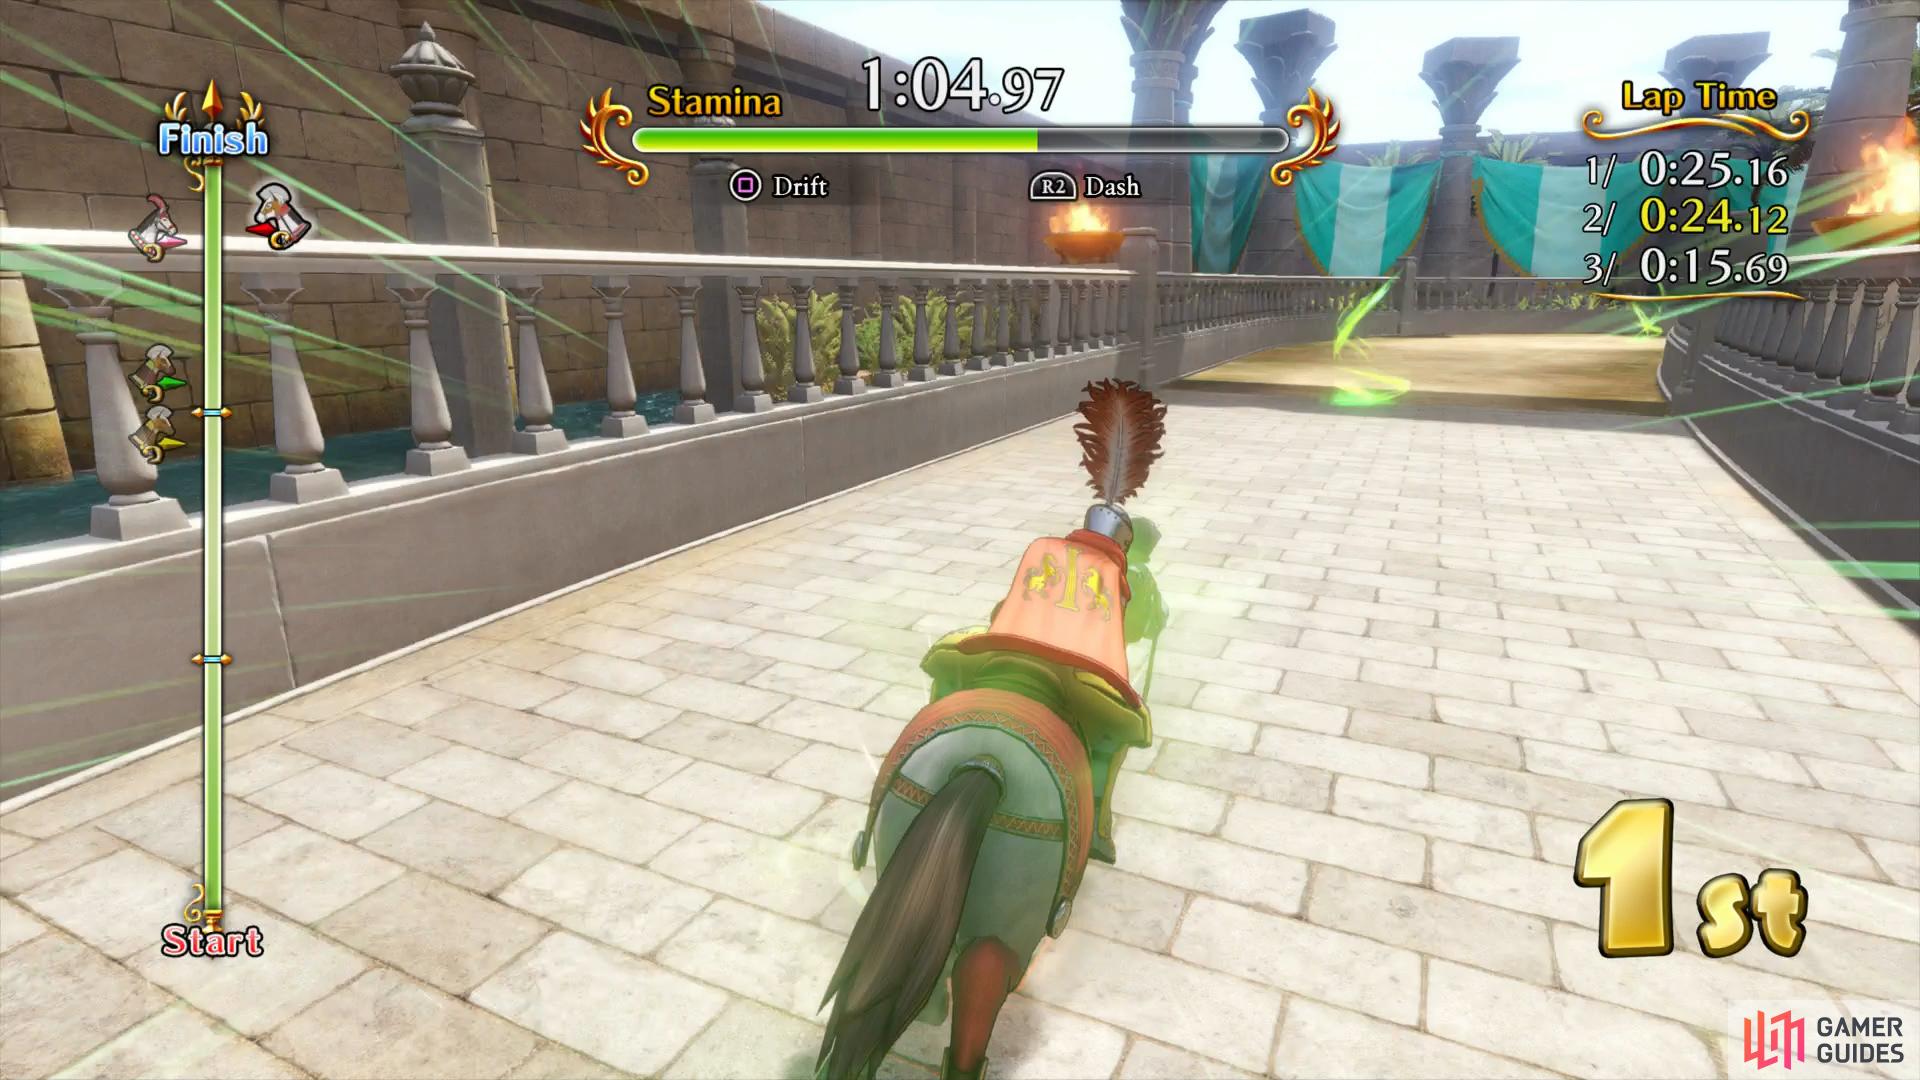
As long as you hit all the green swirls you should have no issues winning
the hapless Prince once again asks for your help with defeating the Slayer.
Back in control, return to the Palace and head straight for the Throne room. Just as Prince Faris is about to speak to his father regarding the Rainbough a soldier rushes in, the Slayer of the Sands has returned. The Sultan sends out Faris to kill it once and for all and as you may have guessed, Faris wants to talk to you in his room again. Head down and speak to him in his room to discover that he doesn’t even have any fighting experience, pleading with the Hero to help him capture the beast. Once again, reluctantly agree to help the hapless Prince and head out of the Palace to meet him at the entrance of town.
The soldiers don’t seem too impressed with the Prince’s decision to capture the Slayer of the Sands until he reveals the Hero’s party will take care of it. As you go to leave, Sylvando decides he wants to join your merry band to capture the beast.
Gallopolis Region
| Items | Area |
|---|---|
| Lamplight | Celestial Sands, East |
| Sparkly Spots | Area |
|---|---|
| Beast Bone | Celestial Sands, southeast |
| Duneberry | Celestial Sands, southeast |
| Glass Frit | Celestial Sands, Northwest |
| Wing of Bat (Night only) | Celestial Sands, East |
| Narspicious (Night only) | Celestial Sands, northeast |
| Wing of Bat | Celestial Sands, east |
| Yellow Eye | Pernicious Peninsula |
| Monsters | HP |
|---|---|
| Prestidigitator | ~51 |
| Haystack Needler | ~39 |
| Cactiball | ~60 |
| Golden Globe (Appears after accepting quest 08) | ~260 |
| Spitzfire | ~184 |
| Crabber Dabber Doo (Day only) | ~40 |
| Shade (Night only) | ~N/A |
| Restless Armor (Night only) | ~96 |
| Flython | ~63 |
You’re now free to explore the rest of the Gallopolis region with your destination being the Pernicious Peninsula to the northeast. To start with however, take the time to finish Quest 08 by fighting the Cactiballs in the area. You can find these close to the South Campsite. It may take a while to encounter one but rest assured, eventually you’ll run into a battle with a Golden Globe alongside, these monsters are a lot more durable than their regular counterparts so keep an eye on your HP as you take it down. You’ll receive the Globule needed upon the end of the battle, make a quick trip back to Gallopolis via Zoom to hand it in, as a reward you’ll obtain an Trickster. Use the Zoom spell once more to return to the Southwest Campsite to continue your journey.
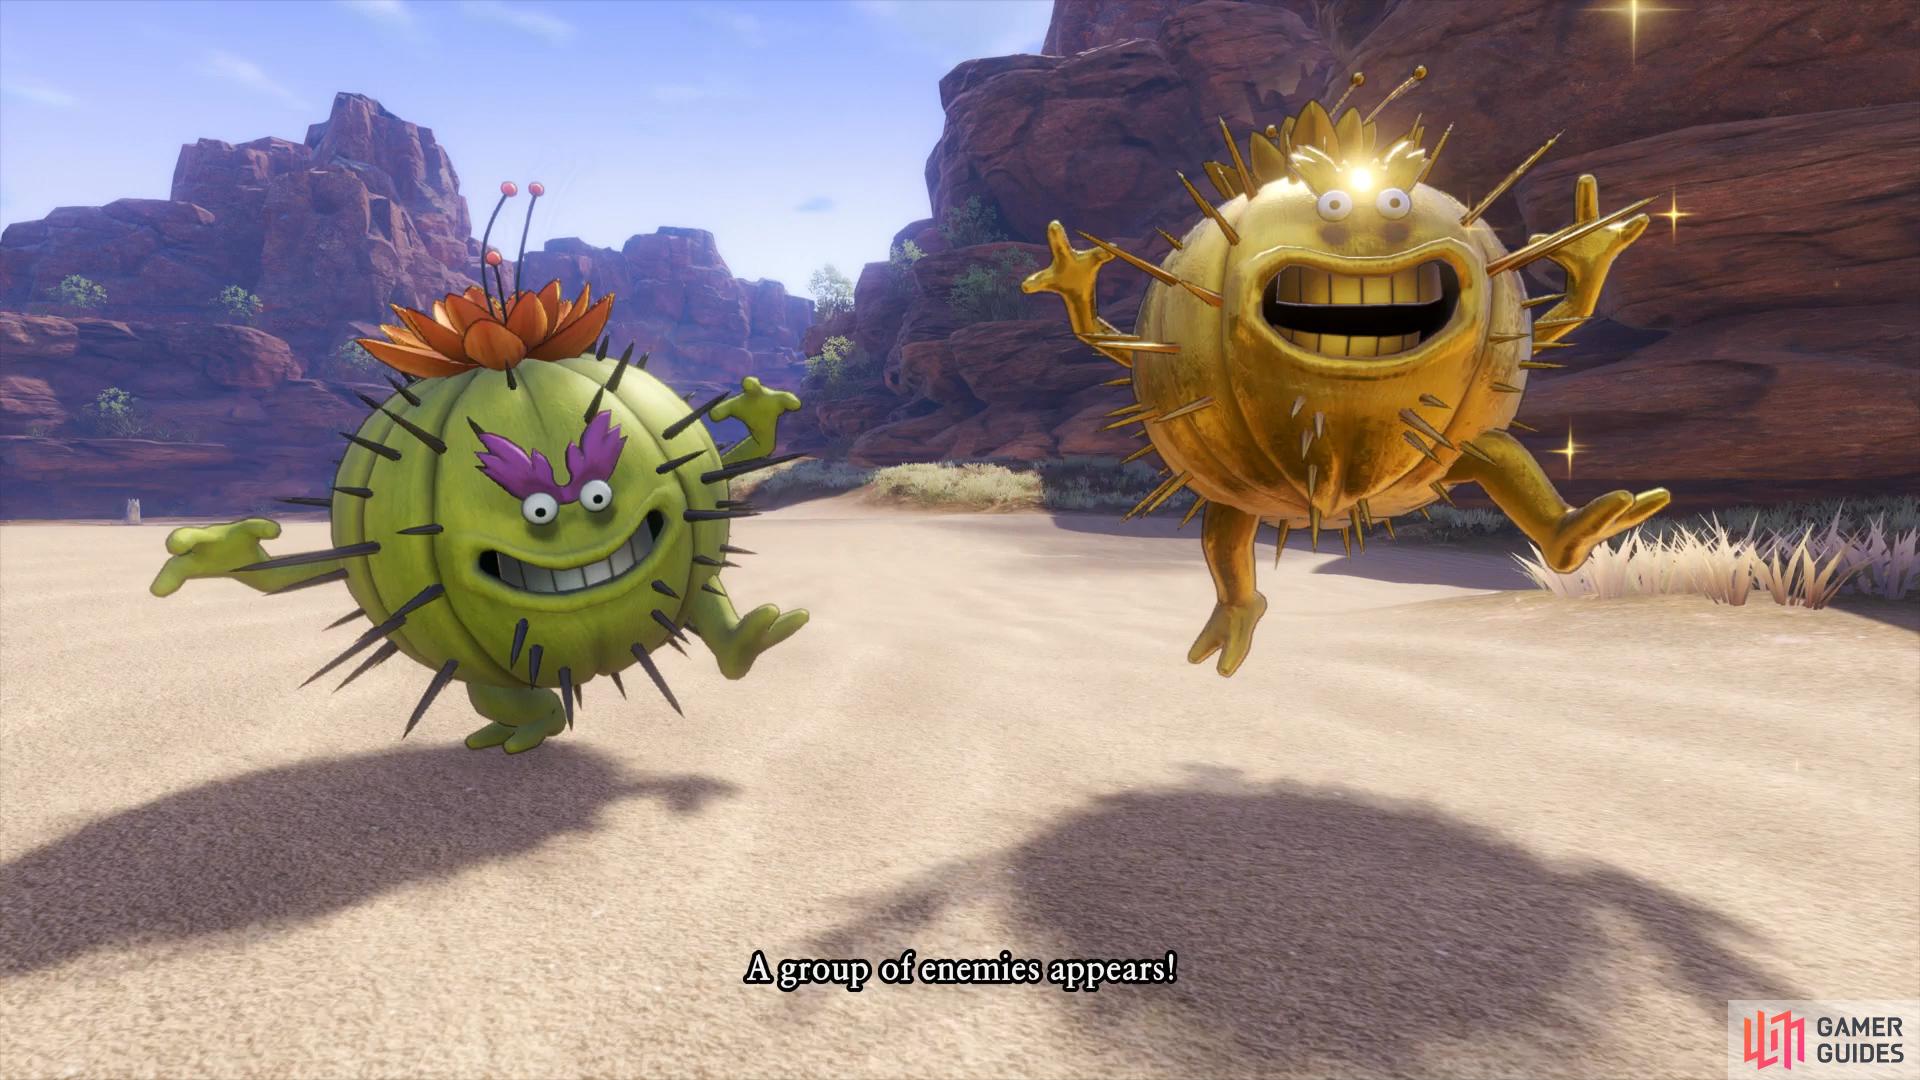
You’ll have to keep fighting Cactiballs until a Golden Globe shows up in a battle with them
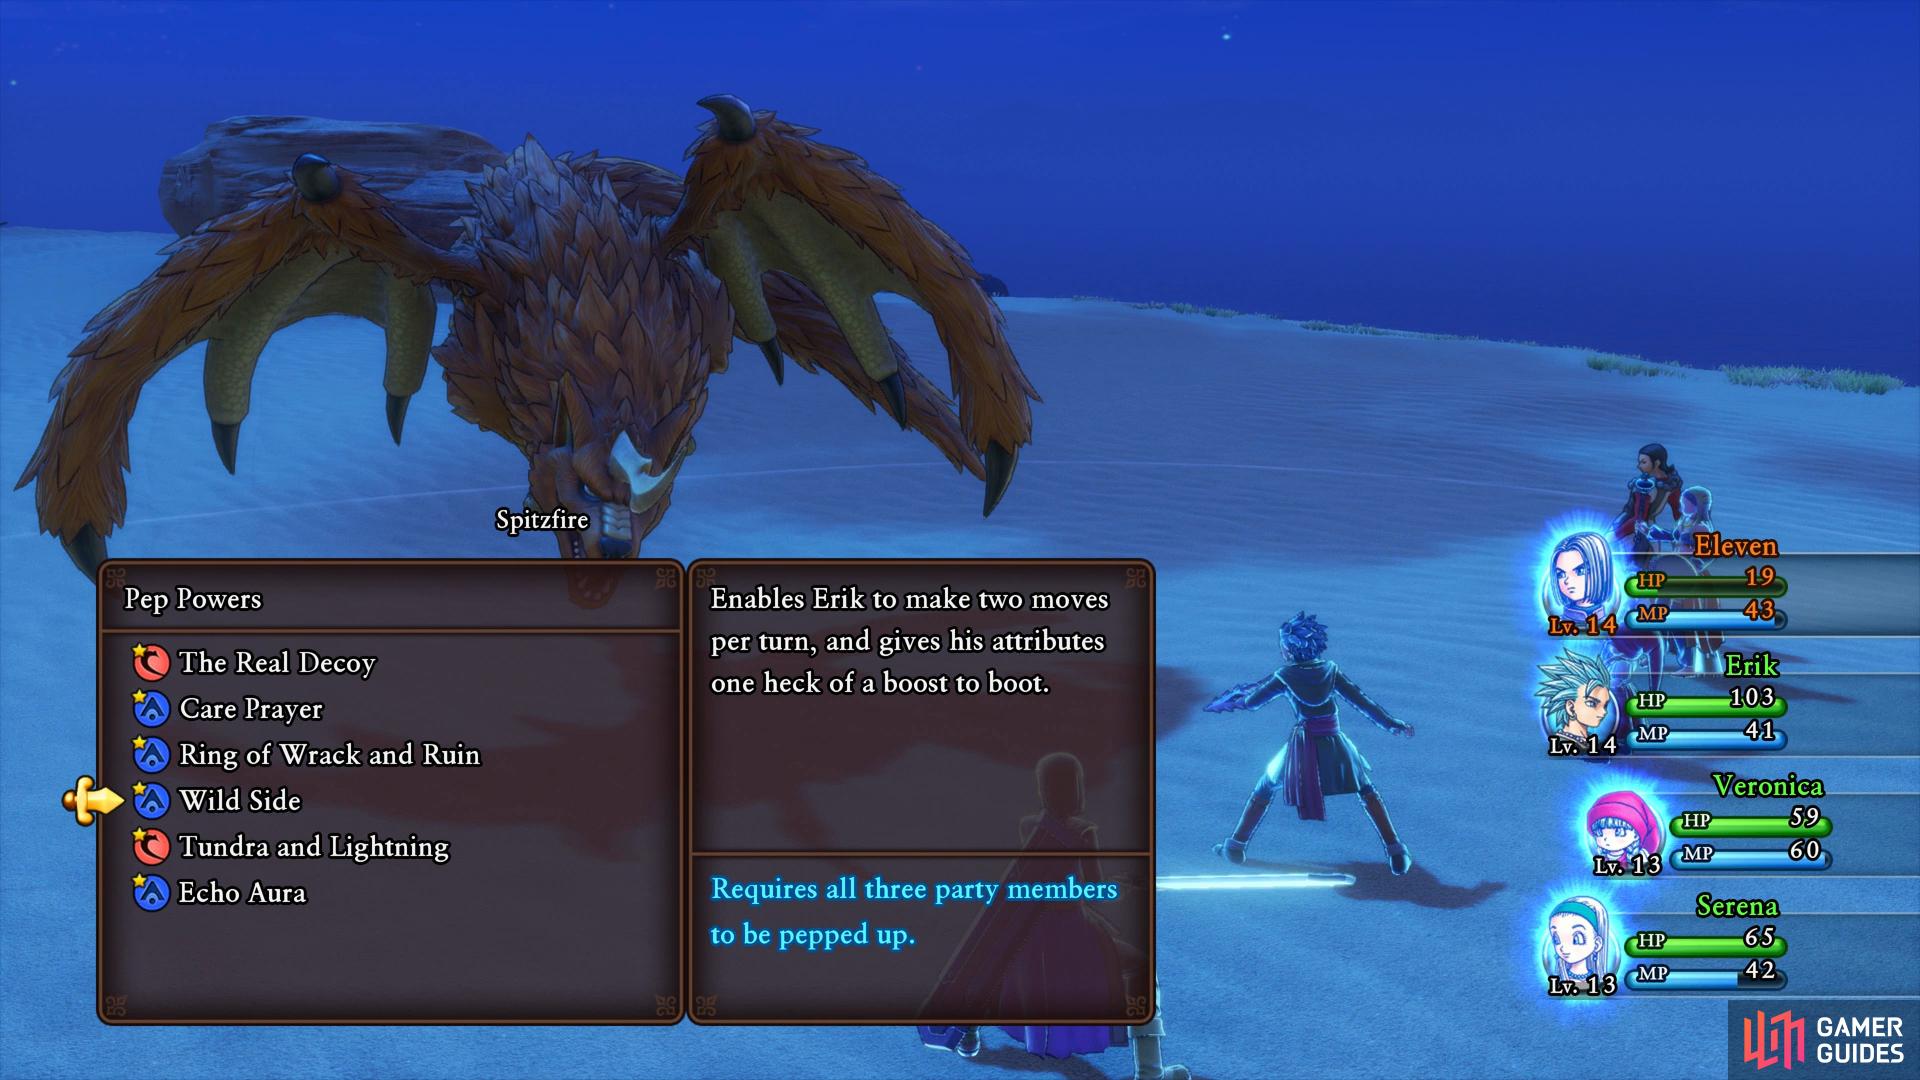
Once you have the required characters Pepped Up, unleash Wild Side before defeating the Spitzfire.
At the Campsite, take the time to visit the forge and look at the new recipes you got from Gallopolis. The Wizard Staff for Veronica is a must, this will give her a huge boost to her damage dealing capabilities. If you have any materials left over after it, go ahead and make the Lamp Post for Serena too. The Tricky Turban is useful for Veronica as it raises her Magical Might stat as is the Fizzle-Retardant Blouse, make both of these if you have the materials. Finally, make the Enchantress Gloves for Veronica, another piece of equipment that boosts her Magical Might.
With all of that forging out of the way, save your game and head north to the Celestial Sands Checkpoint. The guard on duty will notice who you are and let you pass into the larger area. In the Celestial Sands, you’ll come across the Spitzfire monsters needed for Quest 07. You’ll need to get into countless battles to attempt to have the Hero, Erik and Serena Pepped up all at the same time. Once you manage this, engage in a battle with a Spitzfire at night (this is important, it won’t register as complete otherwise) and use the Wild Side Pep power to defeat it, fulfilling the requirement in the process.
As with all new areas, there’s more items to find in the Celestial Sands. Start with keeping to the east wall as you continue north, you’ll see a Sparkly Spot containing a Beast Bone behind the large rock. Continue along this wall until you reach the water there for another Sparkly Spot containing a Duneberry. Head northwest from here to the outer edge of the nearby ruins to find your next Sparkly Spot containing a Glass Frit. Continue to the east, ignoring the campsite for now and searching the southeast corner near the water to discover a chest containing a Lamplight. If you used your only one of these on Veronica’s weapon then use this one on Serena’s weapon, it’s a nice upgrade especially at +3.
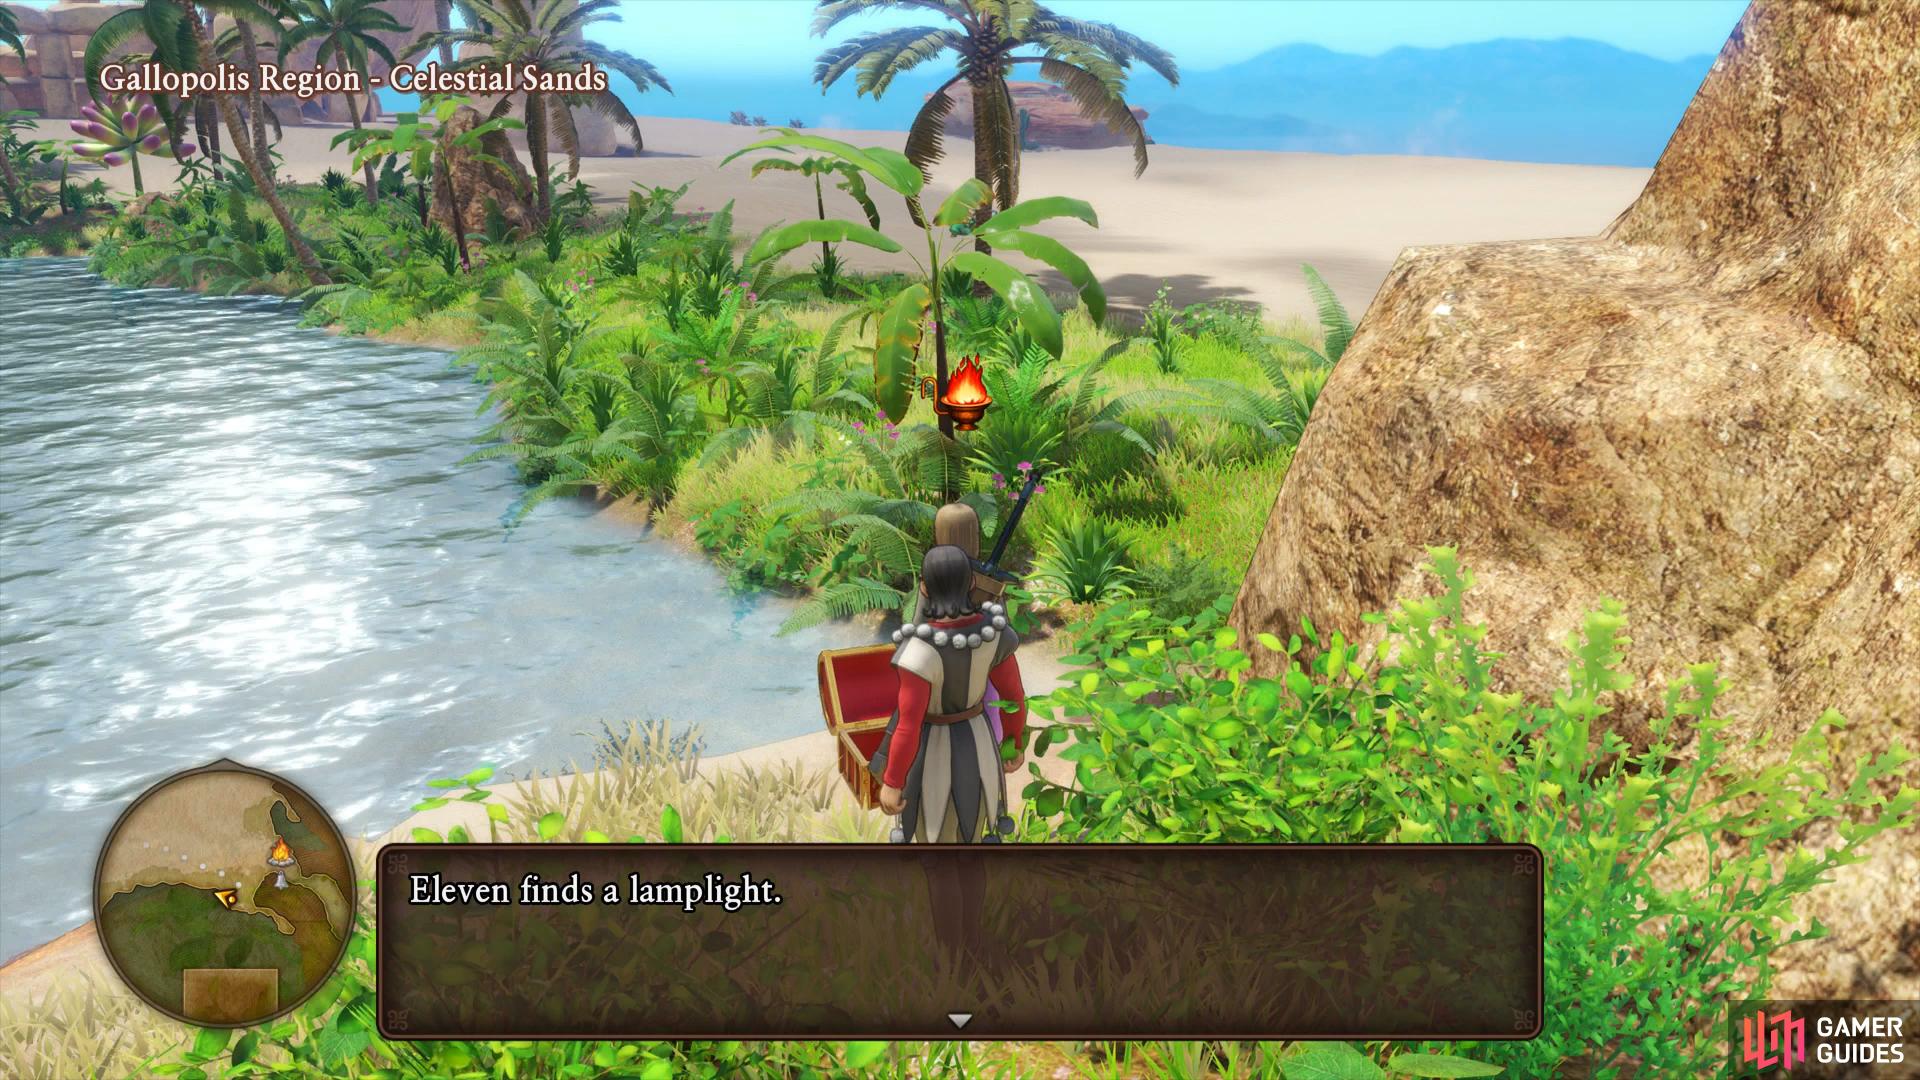
Search to the south of the North Camp to find a chest with a Lamplight, useful for Serena’s Wand
the Sparkly Spot north of Camp will only appear at night.
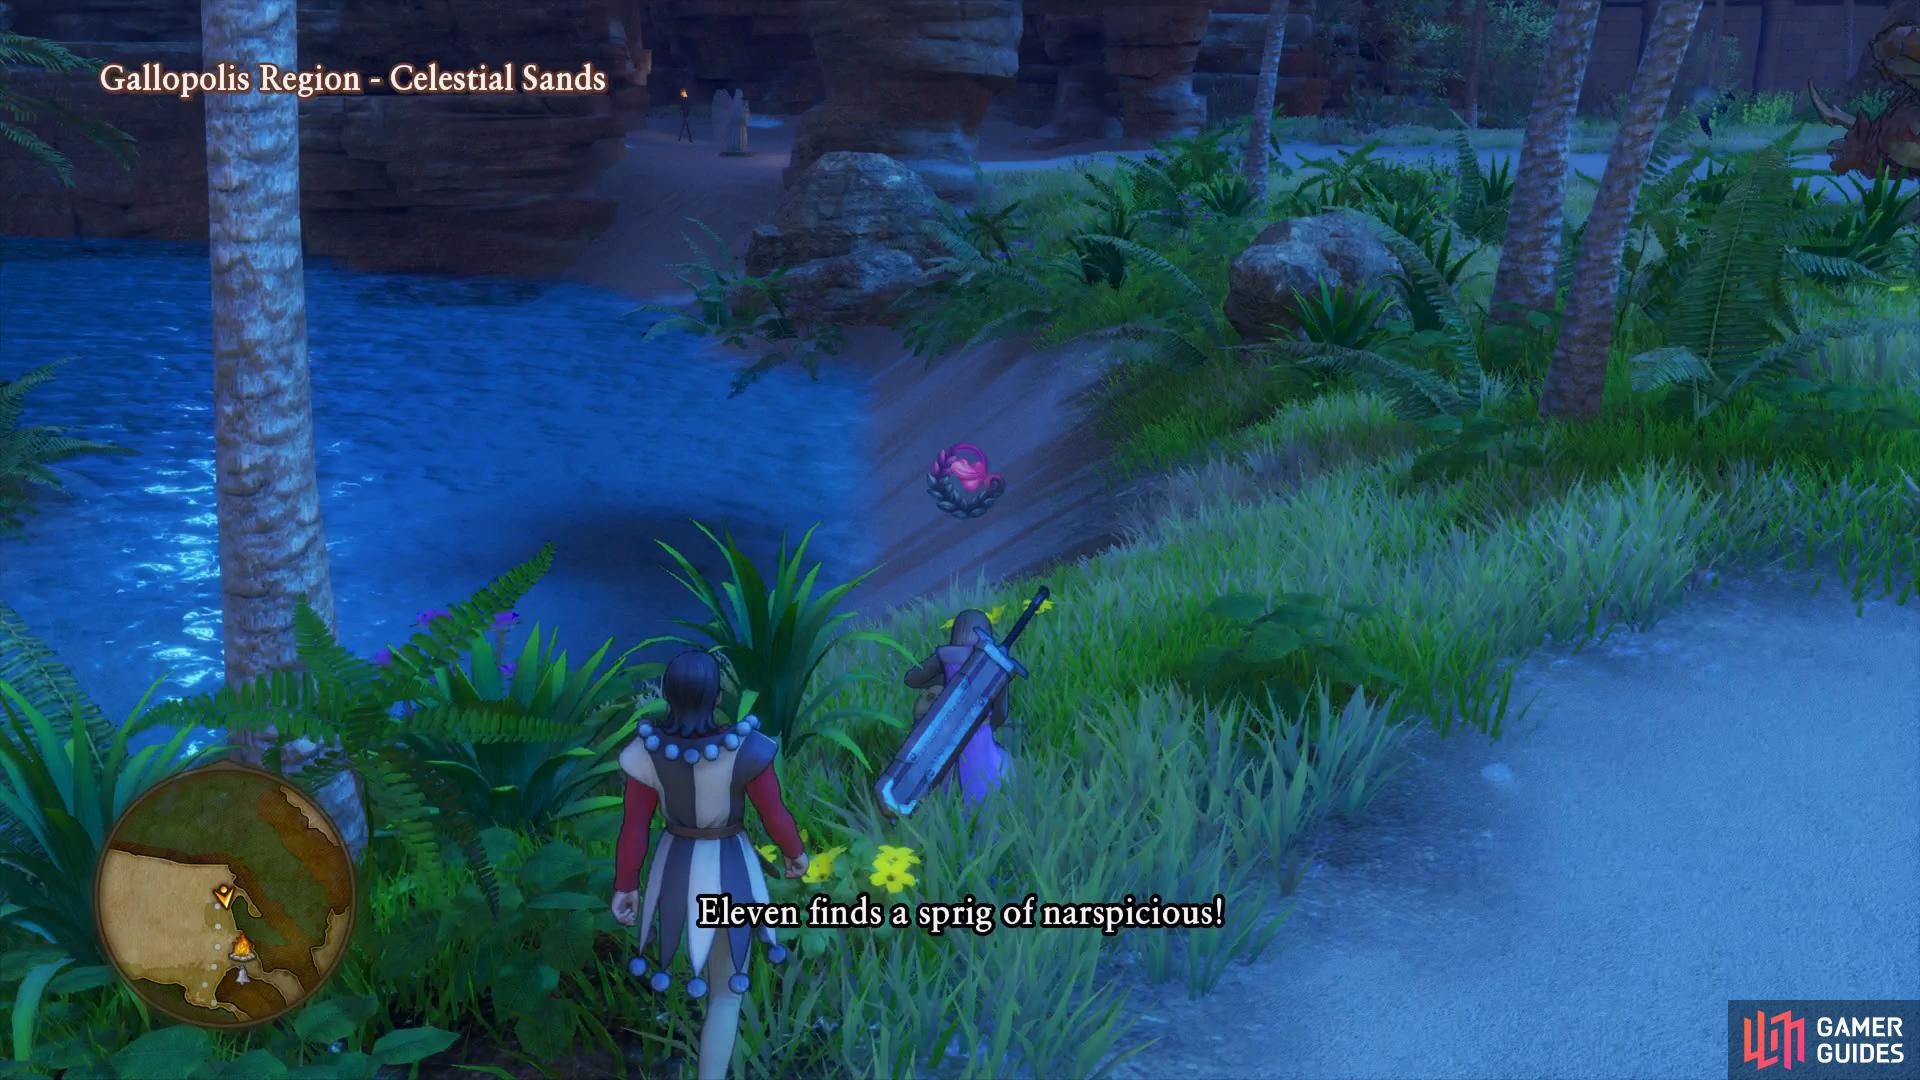
If it’s night then you’ll also find a Sparkly Spot at the end here containing a Wing of Bat (if not, at the next camp shift the time of day to night to obtain this). Finally, the camp itself is close by and if it’s night, you’ll find a Sparkly Spot to the north of it containing a Narspicious. With all of the items found and the conditions for Quest 07 complete, head over to the camp to meet up with Prince Faris. The party decides to rest here for the night to gather their strength for the upcoming battle. Sylvando attempts to learn more about the party without disclosing information himself.
The next day, Zoom back to Gallopolis to turn in Quest 07, for your troubles you’ll obtain another Recipe Book. With that done, Zoom back to the Northern Campsite and access the forge. To start with, make sure that both Veronica and Serena have their forged weapons here. You can also check out the new Recipe Book you just received for finishing the last quest, unfortunately you’ll have to wait until the next area to start finding the materials to craft the Fur related gear. When you’re ready, save your game and rest at the camp, choosing to keep it at night (there’s a few more night only Sparkly Spots to find).
Follow the path southeast from the Camp, battling the new monsters along the way but trying to limit your MP spending unless close to a level up. Once you start heading north again, look for a Sparkly Spot behind the first rock column to your left containing a Wing of Bat. Make sure you’re prepared before you set foot in the northern most area, the Pernicious Peninsula, as the Slayer of the Sands awaits.
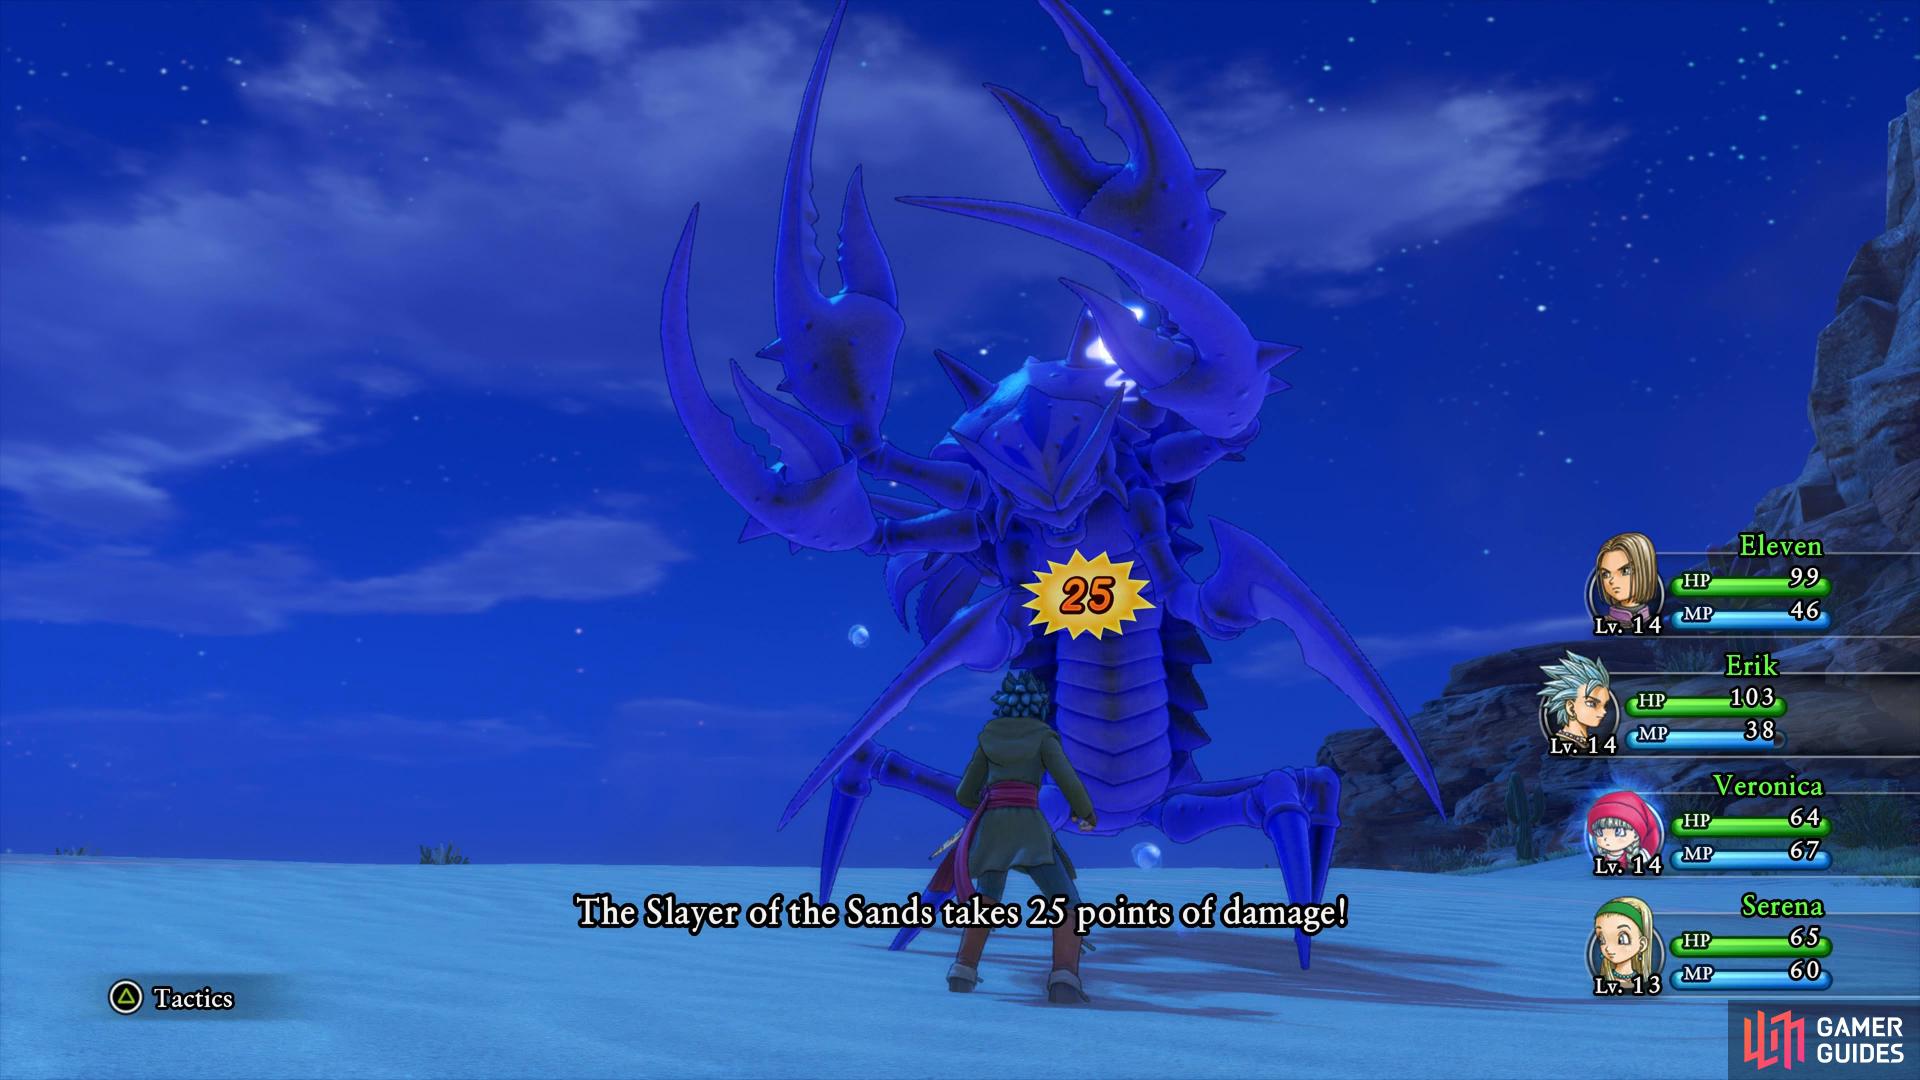
Boss: Slayer of the Sands
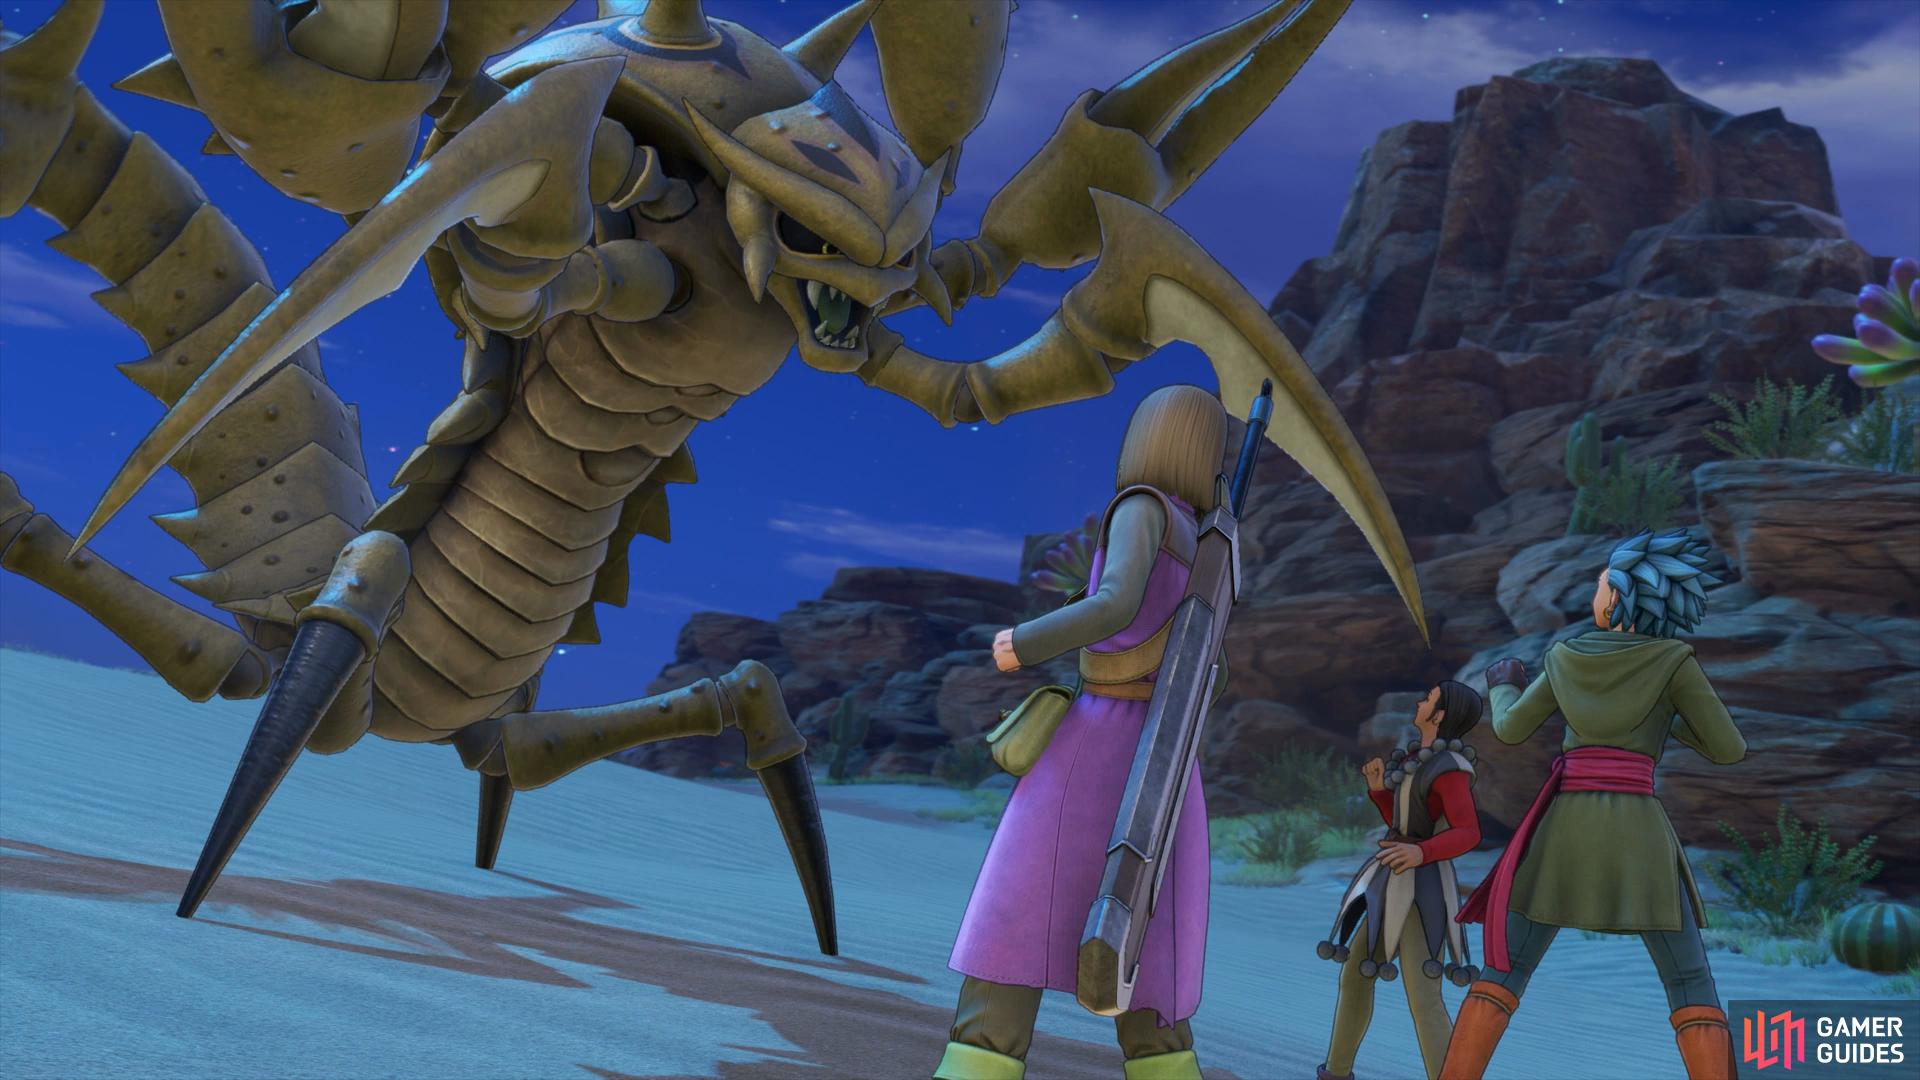
This will be your toughest battle yet as the Slayer of the Sands will attack twice per each combat round. It’s attacks hit hard, especially if it hits the same person on one round, Veronica being the most vulnerable with her low HP. On top of that, the scorpion can also lower everyone’s defense with Kasap and even confuse you. You’ll need to deal around 710 HP to defeat it so be prepared for a lengthy battle.
The difficulty of this battle will also hinge on how long you had to spend fighting battles to complete the two quests of this region, if you’re around Level 15 then you’ll have a much easier time. As with all boss battles, begin with debilitating the beast with Sap and Decelerate, this will give you much more breathing space. Leave Serena on Buff duty after that, especially making sure Veronica is Buffed at all times and counter any Kasap’s with a Buff spell to cancel it out.
The combo of Sleeper Hit followed by Pursecutter is as lethal as ever

confusion on Serena can turn the tide in the boss’ favor quickly, dedicate the Hero to healer duties if this happens.
As for attacking the creature, with the Hero concentrate on using Cutting Edge or Zap if you have them, the Slayer of the Sands is weak to Thunder first and foremost and slightly weak to both Fire and Wind making Frizz and Whoosh also useful for this battle. With Erik, make use of Sleeper Hit and if successful, follow up with Pursecutter for major damage. Veronica should just continue to bombard the beast with Frizz while keeping up Sap and Decelerate on it. If you’re fortunate to get some characters Pepped up, let loose with you most powerful available attack.
Once the beast falls, the Prince will come out of hiding to claim the credit, acknowledging that you saved him and promising to talk to his father about the Rainbough. Before you Zoom back to Gallopolis, head north to find the final item in this region, a Yellow Eye. As you head back to town, the Prince parades his capture to his father and the people of Gallopolis. Unfortunately, the beast is not quite incapacitated forcing the Prince to finally come clean about himself. As Sylvando saves the day, you’ll head to the Palace with the Prince, it turn’s out the national treasure has been sold to fund the Sand National! You do however get some indication of it’s whereabouts, Gondolia to the west and the Sultan will give you a letter to pass through the Checkpoint. Finally, Prince Faris will hand over the Crackshot Crossbow as thanks for all the help you’ve given him.
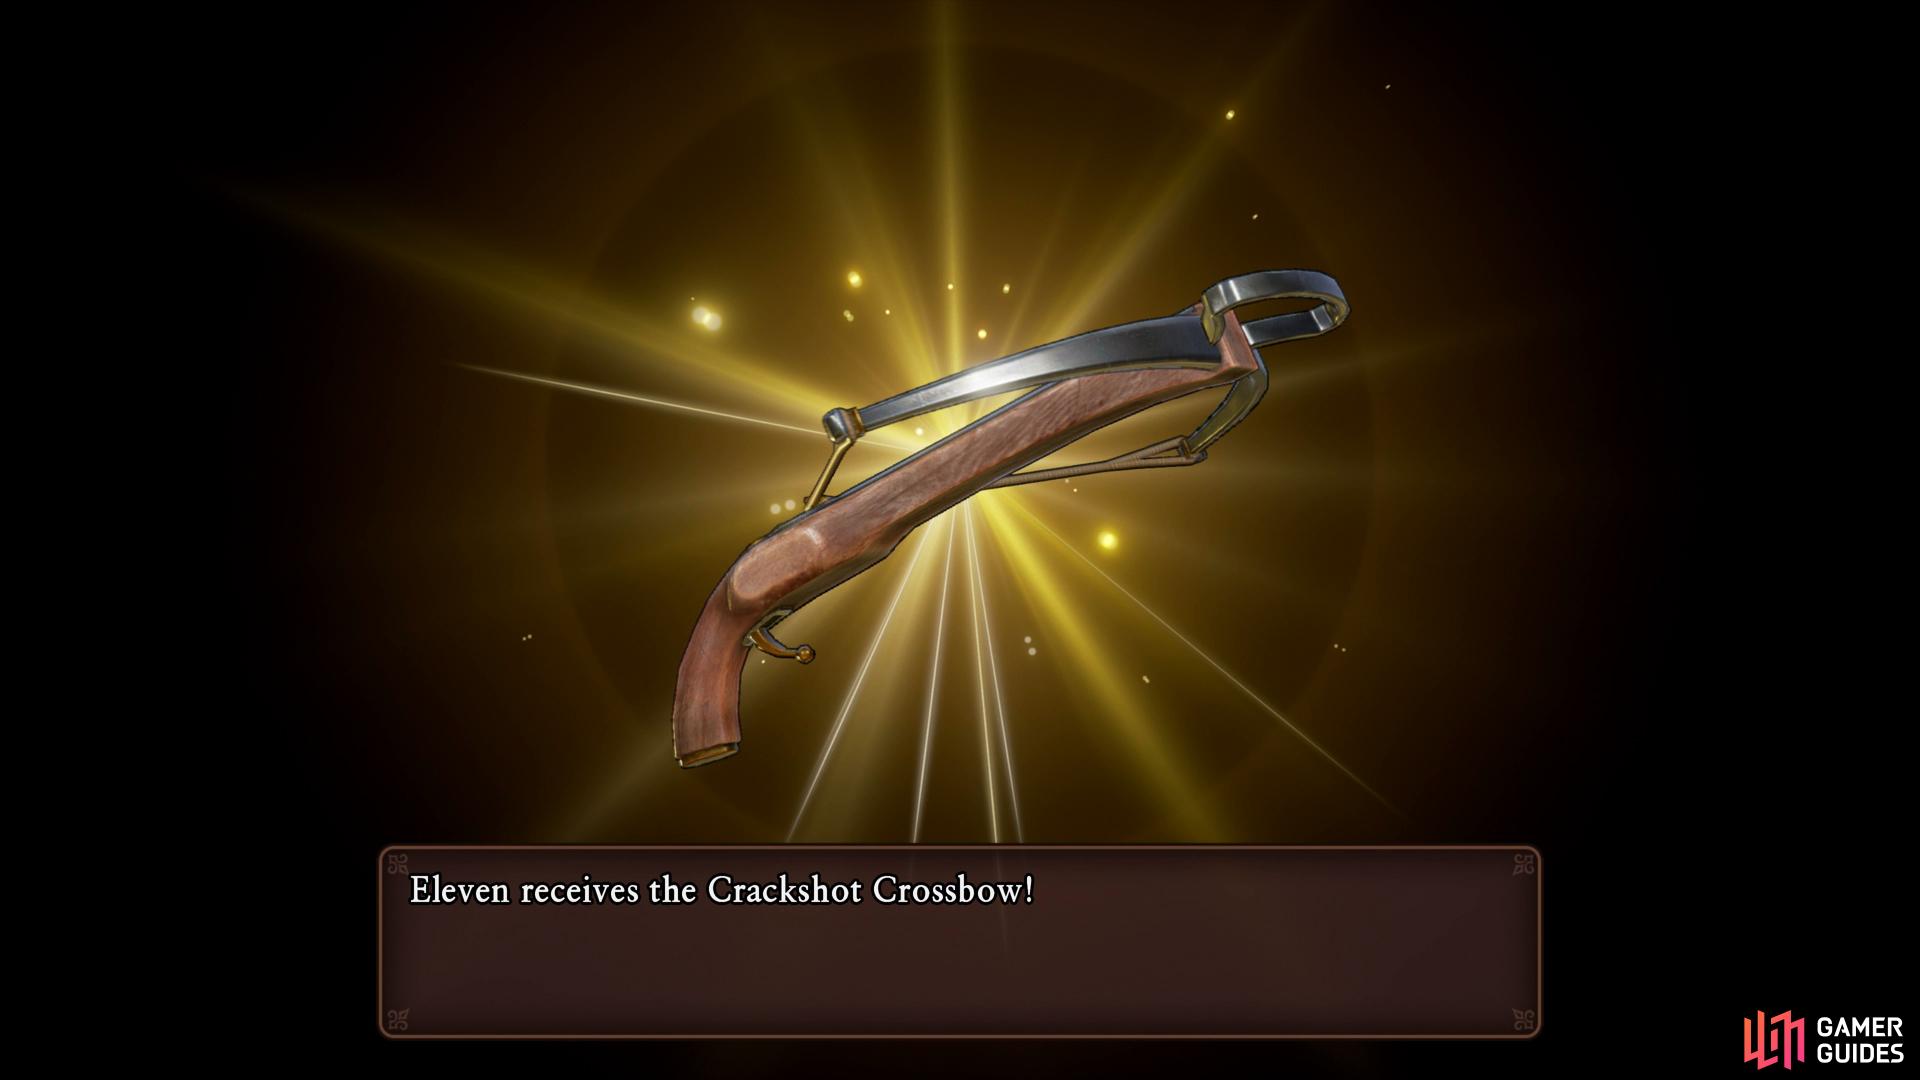
You’ll receive the Crossbow from Faris as thanks for helping him
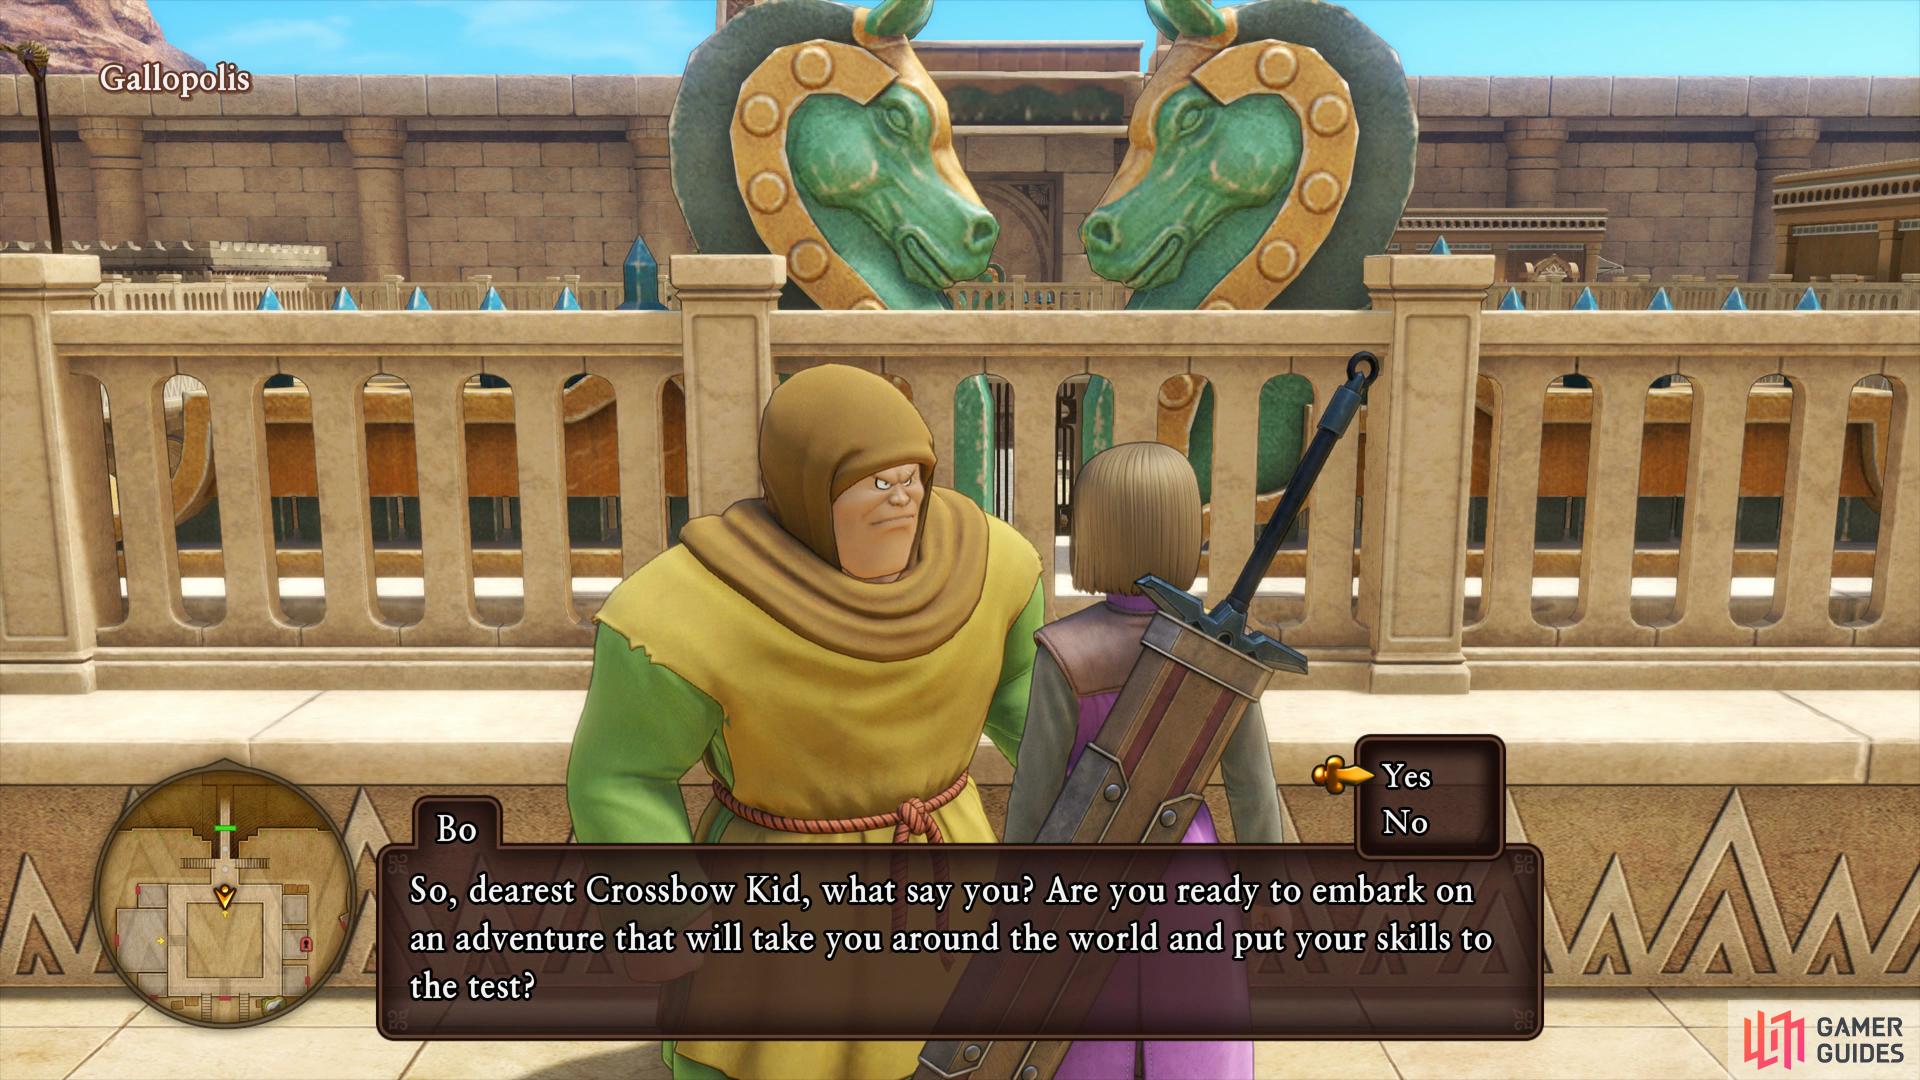
speak to Bo outside the Palace to begin the Crossbow Kid challenge.
Head out the Palace and speak to the man with the hood standing in front of you, a real Crossbow fanatic. He’ll introduce you to a new side activity you can take part in. All around Erdrea will be targets you can shoot with the Crossbow, shoot them all in a region and speak to his associate at a Camp in said region to receive a reward. Not only is this worthwhile, you’ll also be rewarded with a Trophy for getting every last target. This Walkthrough will detail them as you come across them but for information on all of the locations, see the Crossbow Kid section.
As you go to leave Gallopolis you’ll be stopped by Sylvando who decides to join the party and aid the Luminary on his quest. It’s all a bit sudden but at the end of it, you’ll find yourself with another party member. You’ll also get a short tutorial on how to change party members that will participate in battle, note that you can also change party members in battle as well, opening up all kinds of strategies.
You’re now free to leave Gallopolis and head west to Laguna Di Gondolia however there’s still a few matters we can see to before leaving. You can now head over to the Horse Racing track to take part in more races, this will reward you with some useful items so head over there now.
Horse Racing In Gallopolis
Speak to the man behind the counter to see the available Cups to you at this moment in time. You’ll only be able to do the Bronze Cup but you’ll see there is two difficulties available to you with different rewards from both. Start with the Bronze Cup on Easy to get a feel for it, make sure you nail the Boost Start and then concentrate on hitting all of the boosts on the course to keep your Stamina up while taking the inside corners. For completing the Bronze Easy Cup you’ll obtain some Slime Earrings. The Difficult version of the race will require you to hit most boosts if you want to stay in front, the course remains the same but your competitors are faster. Your reward for victory here is the Gold Bracer, a useful accessory for any melee character.

Take the shortcut to the right at turn 3 to win the Silver Cup easily
your reward is the appearance altering Gallopolitan Garb.
Completing these will unlock the Silver Cups for both difficulties. You’ll find yourself on a different course this time with one major difference, there’s a shortcut at turn 3 of the course. At turn 3 you can either go straight on or drift to the right to cut a massive section of the course out. Practice making this corner on the Easy difficulty as you go for the win, for winning Silver Easy you’ll obtain the Gallopolitan Garb, a unique piece of armor for the Hero that alters his appearance. The Silver Difficult race again requires perfection from you, you’ll have to make sure you nail the shortcut on every lap to stay out in front and make sure you don’t let your Stamina deplete completely to stand a chance, the reward for this is an Assassin. You can’t access any more Cups for now but you can repeat the previous Cups for Iron and Gold Ore should you wish too. There’s nothing left for you to accomplish in Gallopolis for now so exit the town.
Sylvando’s Playstyle

Sylvando is the latest person to join your merry band and he’s a useful addition. You’ll notice from his Character Builder that he has many different categories to invest in and that he’s proficient in Swords, Knives and Whips. Erik is better suited to Knives and Whips aren’t overly strong so it’s a good idea to make Sylvando your Swords user. He will come with some interesting spells such as Reheal which will regenerate HP over time, Oomph to raise an ally’s attack and Acceleratle to increase all allie’s speed. As you may see from this, Sylvando is a great support party member and should be treated as such.
Your first priority, regardless of what you do should be to unlock Hustle Dance, this is an incredible ability for a large majority of the game until Serena learns Multiheal (Lv 35) as it will heal the entire party for around 70HP (or more based on your Charm stat). In order to learn this you’ll have to take the path learning Tap Dance, Fuddle Dance and finally Hustle Dance. Once you’ve learnt that consider learning the Charm +40 ability, not only will this increase the power of Hustle Dance but there’s a bonus of 10 SP hidden behind that panel.
Gallopolis Crossbow Targets
Make sure you equip Sylvando with your best gear and then head out of town, putting Sylvando into your active party over Serena for now. Before you leave Gallopolis, let’s take the time to find the first set of targets for the Crossbow Kid challenge. There’s five to be found here and they’re relatively simple to find, start by heading southeast (on the map) from the entrance of Gallopolis to the first set of Palm Trees and look up to spot the first target hanging. Jump on a horse and continue southeast towards the entrance to the Hotto Steppe and look up at the cliff to spot the second target. Head directly west from this location until you hit the west cliff and face the archway to the west, you’ll spot a strange plant on the east cliff where the next target rests.

Make your way back to the Celestial Sands checkpoint and search above the tent to find the fourth target. The final target can be reached by heading north into the Celestial Sands and over to where the water is, in the south-west area of this water is the final target just above the water. Once you’ve hit all five targets, Zoom back to the South Campsite to find a Bodkin Bowyer behind the Goddess Statue, speak to him to obtain four Seed of Strengths.
With that out of the way, continue west towards the western checkpoint where you’ll spot the next quest giver. Speak to him to learn that as a gatekeeper he’s unable to see his sister in Gondolia. He wants you to deliver a letter from him instead, noting that she works in the bakery in the north-western part of town. Agree to help the man to begin Quest 09 - A Lovely Letter and then show your letter from the Sultan to the guard on duty to gain access to Gondolia.
No Comments