
Once you have full exploration of the Dundrasil Region, find the campsite there. South of that campsite will be a ruined building and inside that building will be the Tockle with the Pastword. This is the same building with the chest that has the Staff of Rapidity in the chest.
Walkthrough
This can be a challenging area, as it’s quite long and as you delve deeper into the dungeon, the enemies will begin getting a lot more challenging. Before diving into this place, it might be a good idea to get Hustle Dance for Sylvando, as it makes things a lot easier; you might also want Kabuff for Serena (she learns this at level 23). You will also want some MP-restoring items, although you will likely get some during your run through the place. Despite being a proper dungeon, you don’t really have to go out of your way to hunt for treasures, as the only one you’ll find contains a measly 40g. When you first choose to go into the mines, you will be put right into it. The first floor is a bit of a place where you want some guidance, since it’s not exactly straightforward.
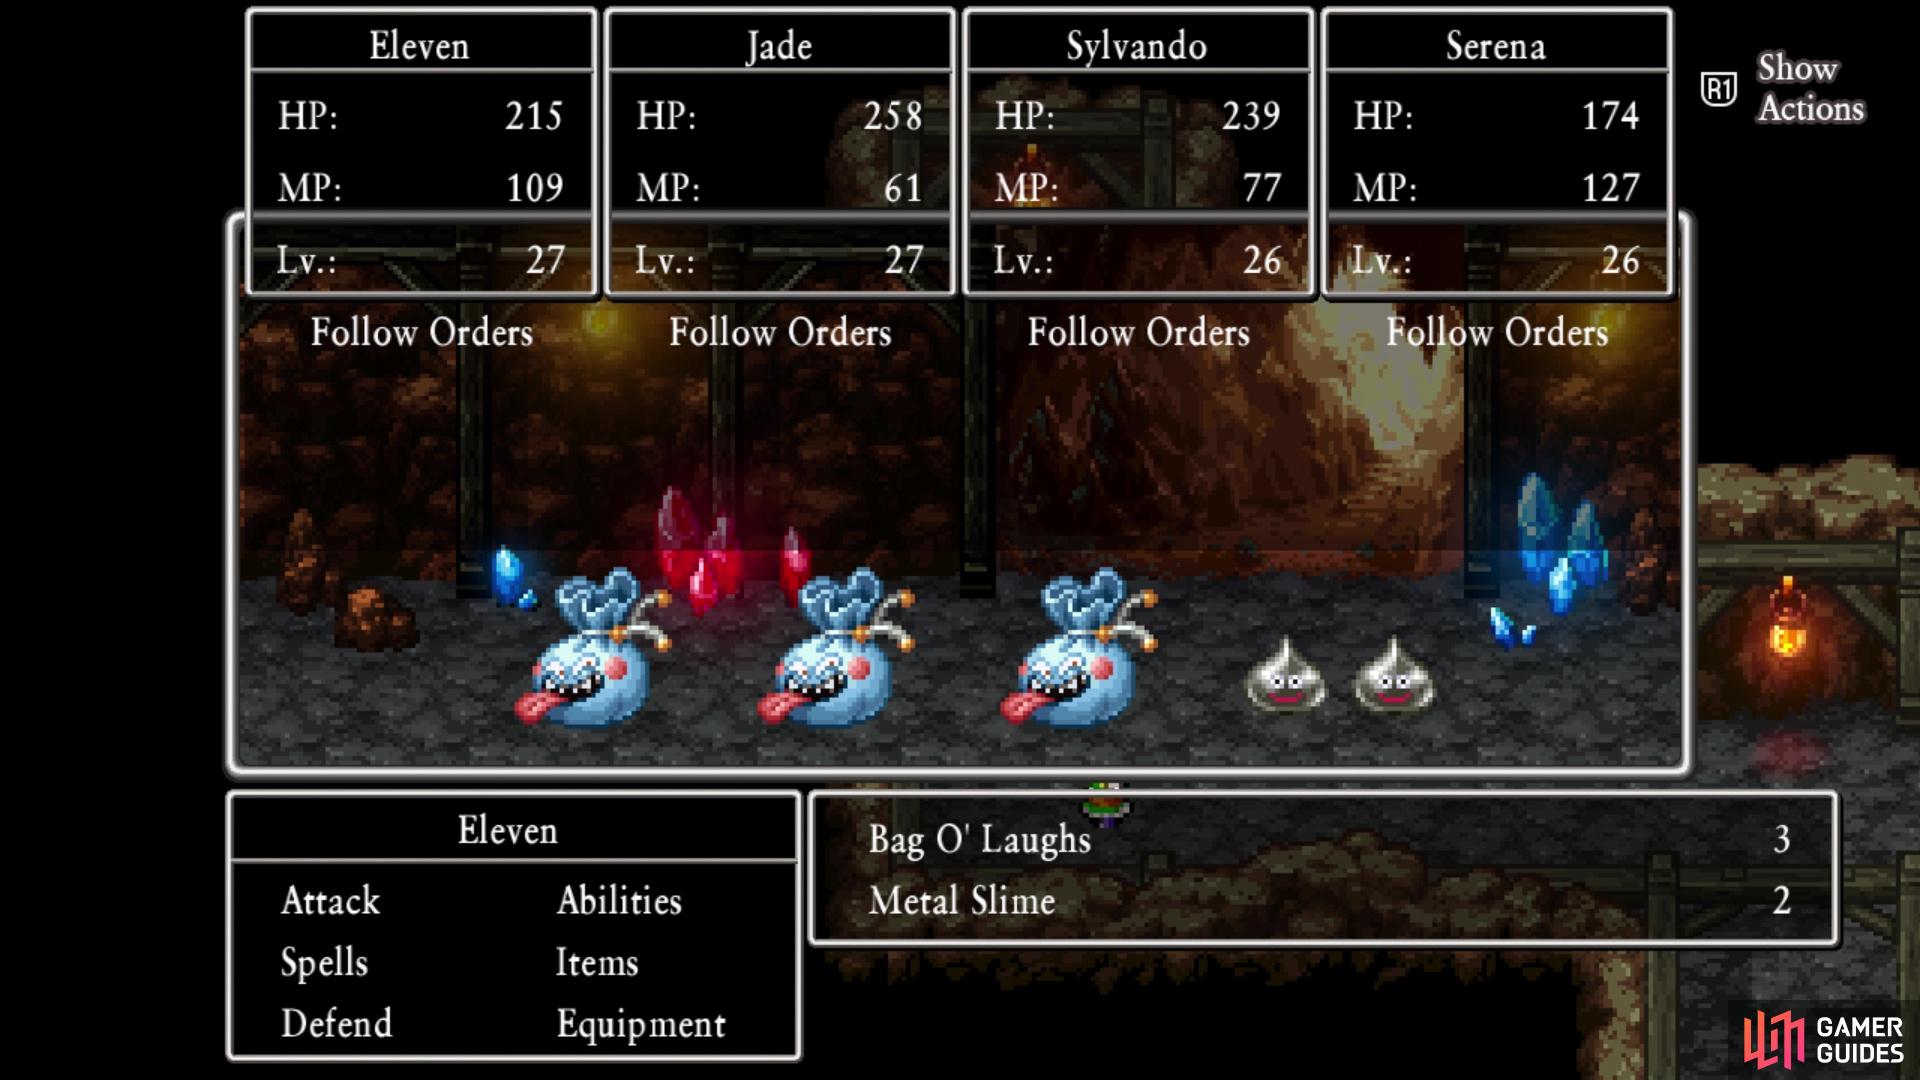
You can run into Metal Slimes in the mines
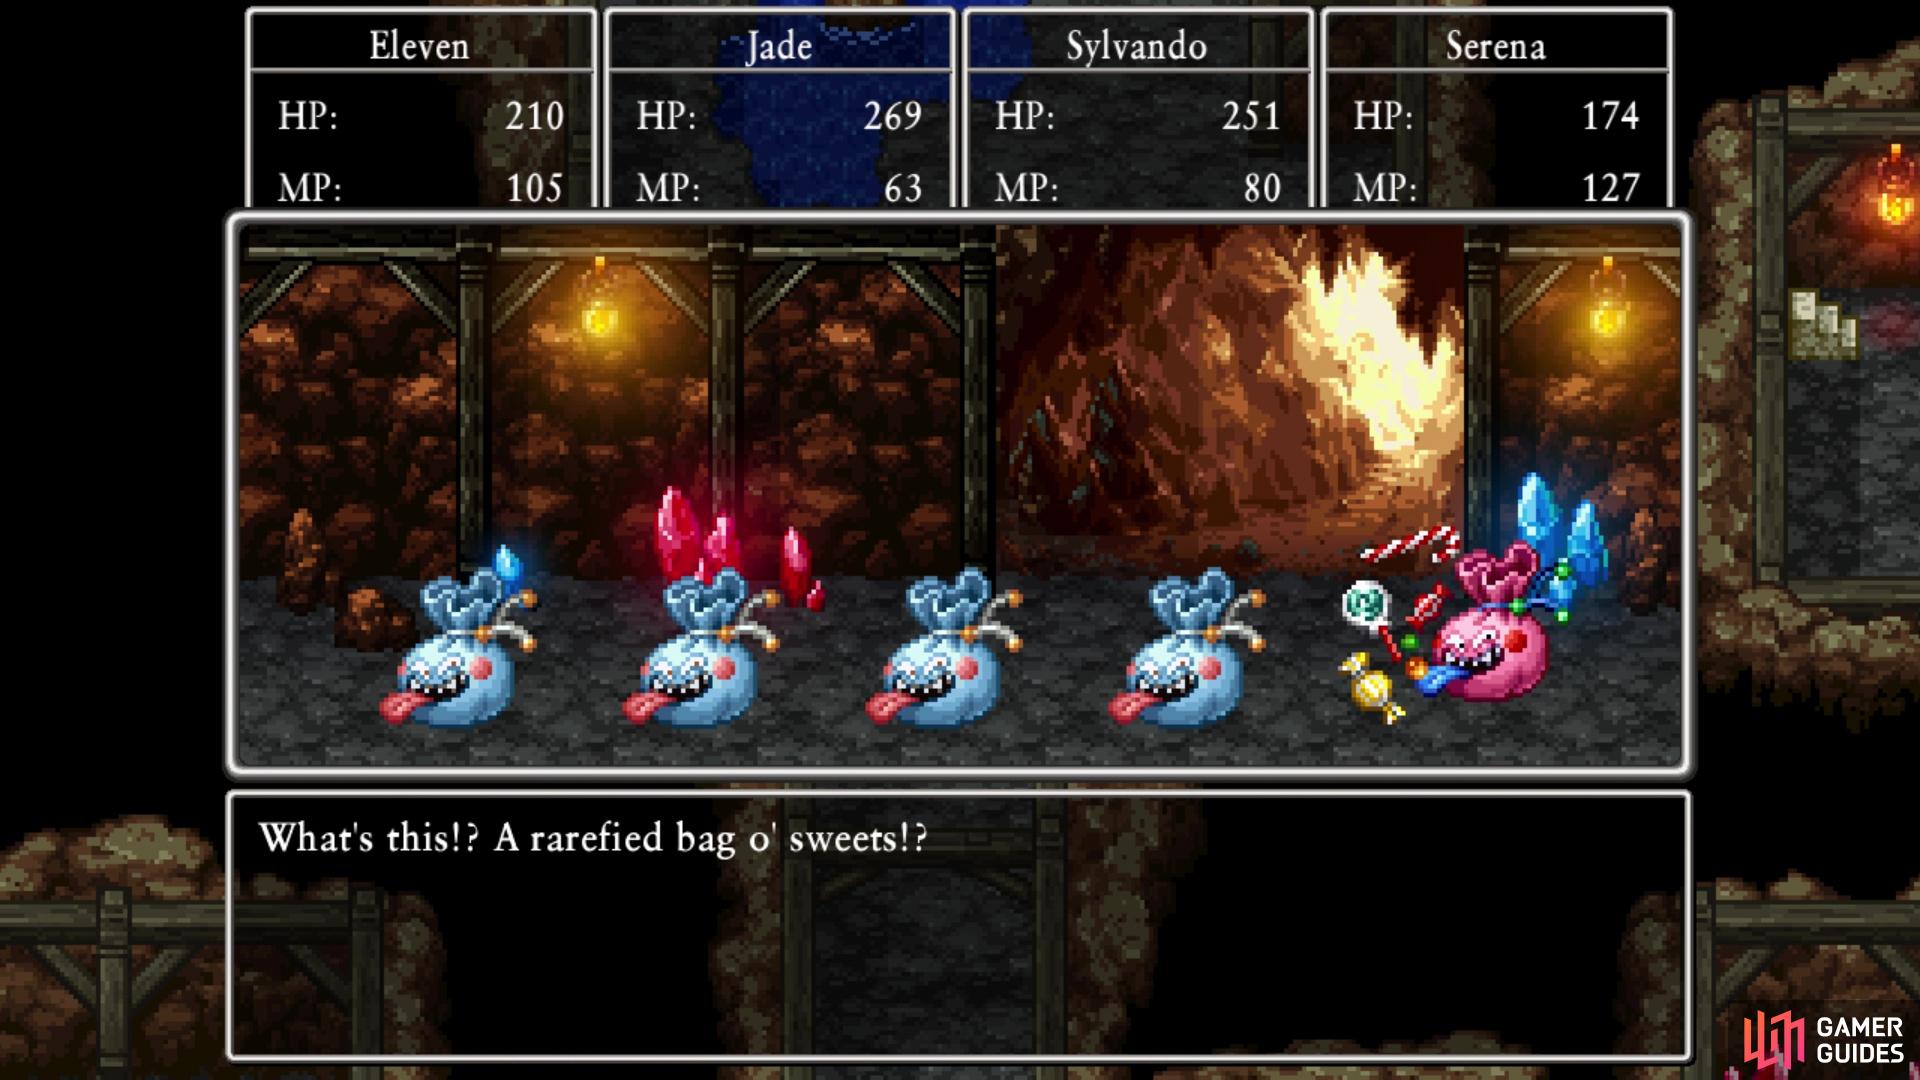
You might also find a Rarefied Bag o’ Sweets
At the beginning, go left and then up to run into a NPC who will give you the quest for this area, called Rainbow Rock Ruckus. He wants you to find out what’s causing the problems in the mines and take care of it. Basically, you will be going to the bottom and defeating a monster. Continue past the NPC and head left when you can, where you can find two barrels, one of which will yield 40g. Head to the right now and use the stairs to go down a level. On the second floor, go down and then to the right, where you should see some Bomboulders near the next set of stairs. As you get close enough to them, you will be forced into a battle. The Bomboulders, at least, can use Self-Destruct to deal damage to your entire, as well as Kerplunk to revive any other ones you defeated.
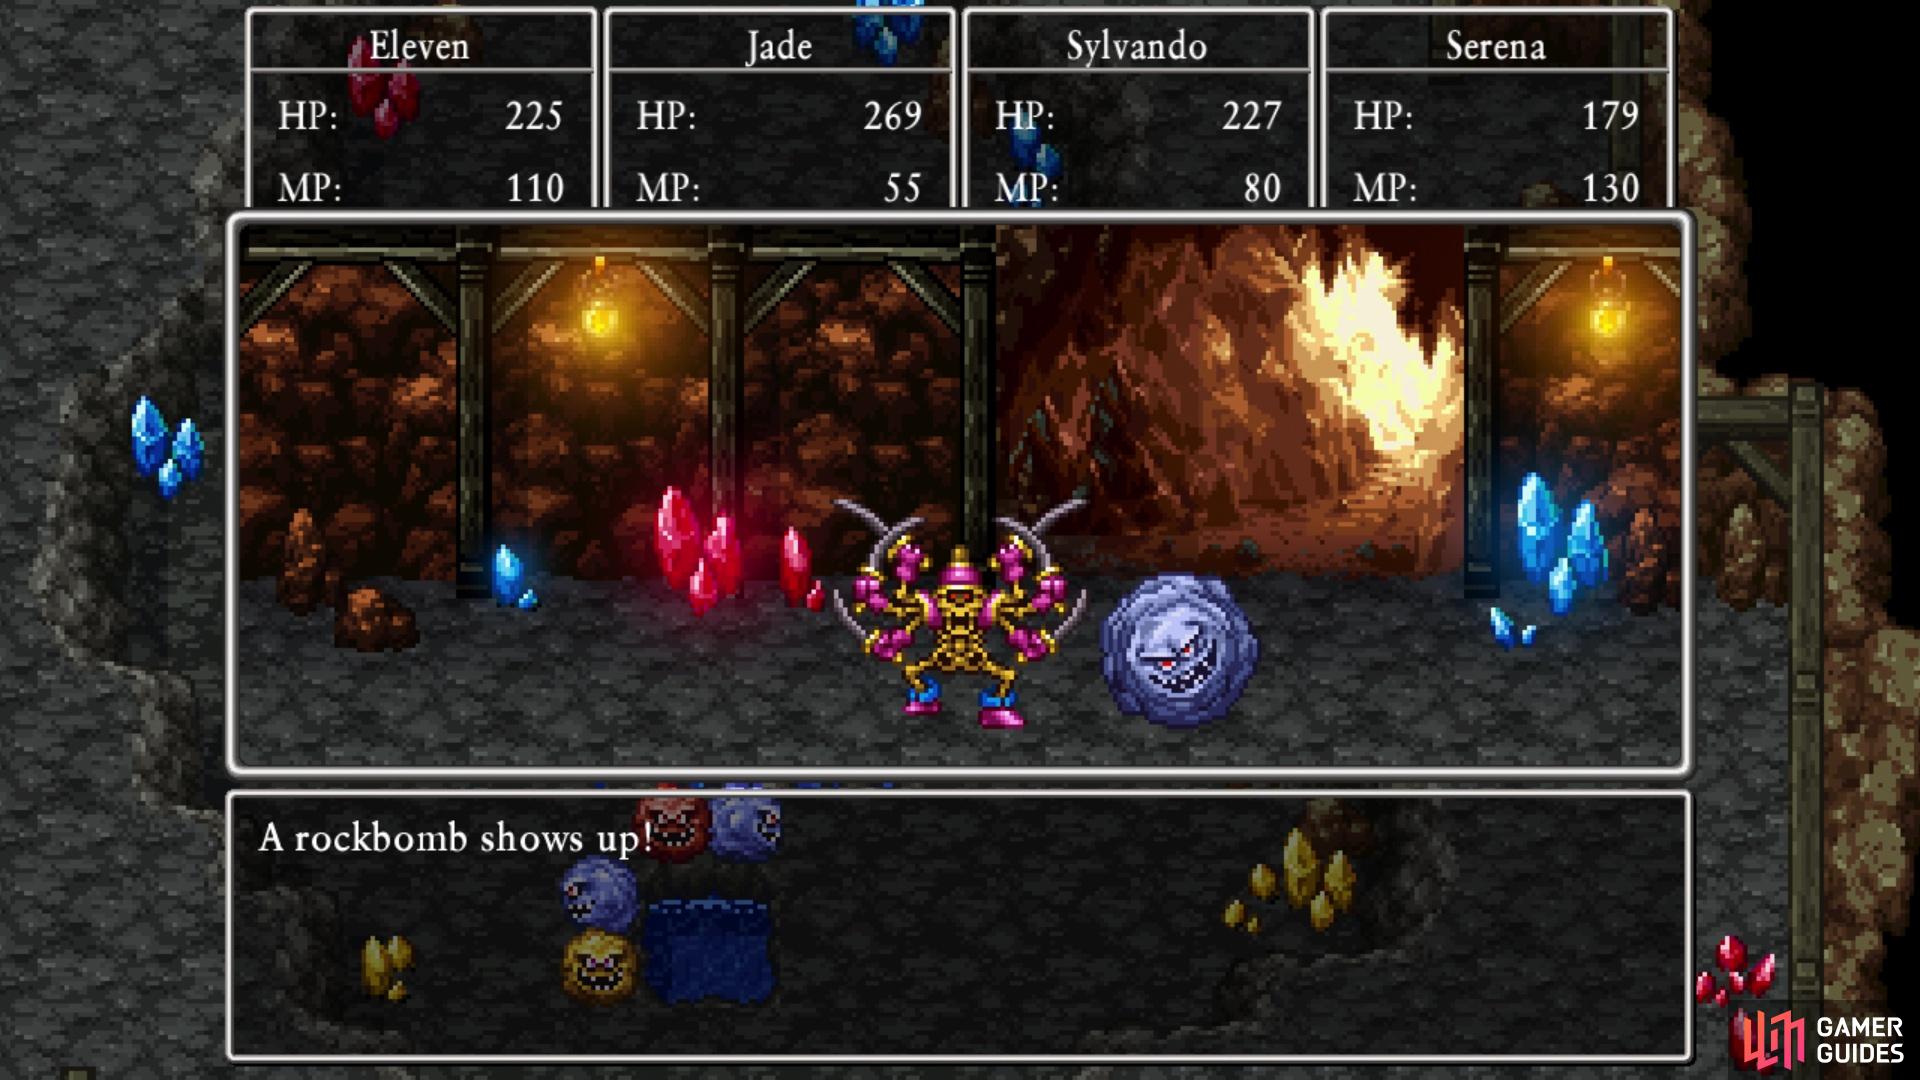
After taking out the Bomboulders, go down to the next level to find more in your path, which includes two other colors. The Rockbombs (blue) are a little weaker than the Bomboulders, and the Grinades (yellow) are the weakest of the trio. You don’t have to defeat them all, so you can stick to the upper path and ignore the Grinades at the bottom. Note that you will find all of these enemies during the main game, but these versions all have lesser HP than those, plus they can drop Single Phials and Magic Waters, which help if you’re using a lot of MP. The rest of the way to the bottom is linear and littered with more of the same enemies. Once you do reach the bottom, clear the rockbomb-type enemies in front of the demon, then get ready for a boss fight.
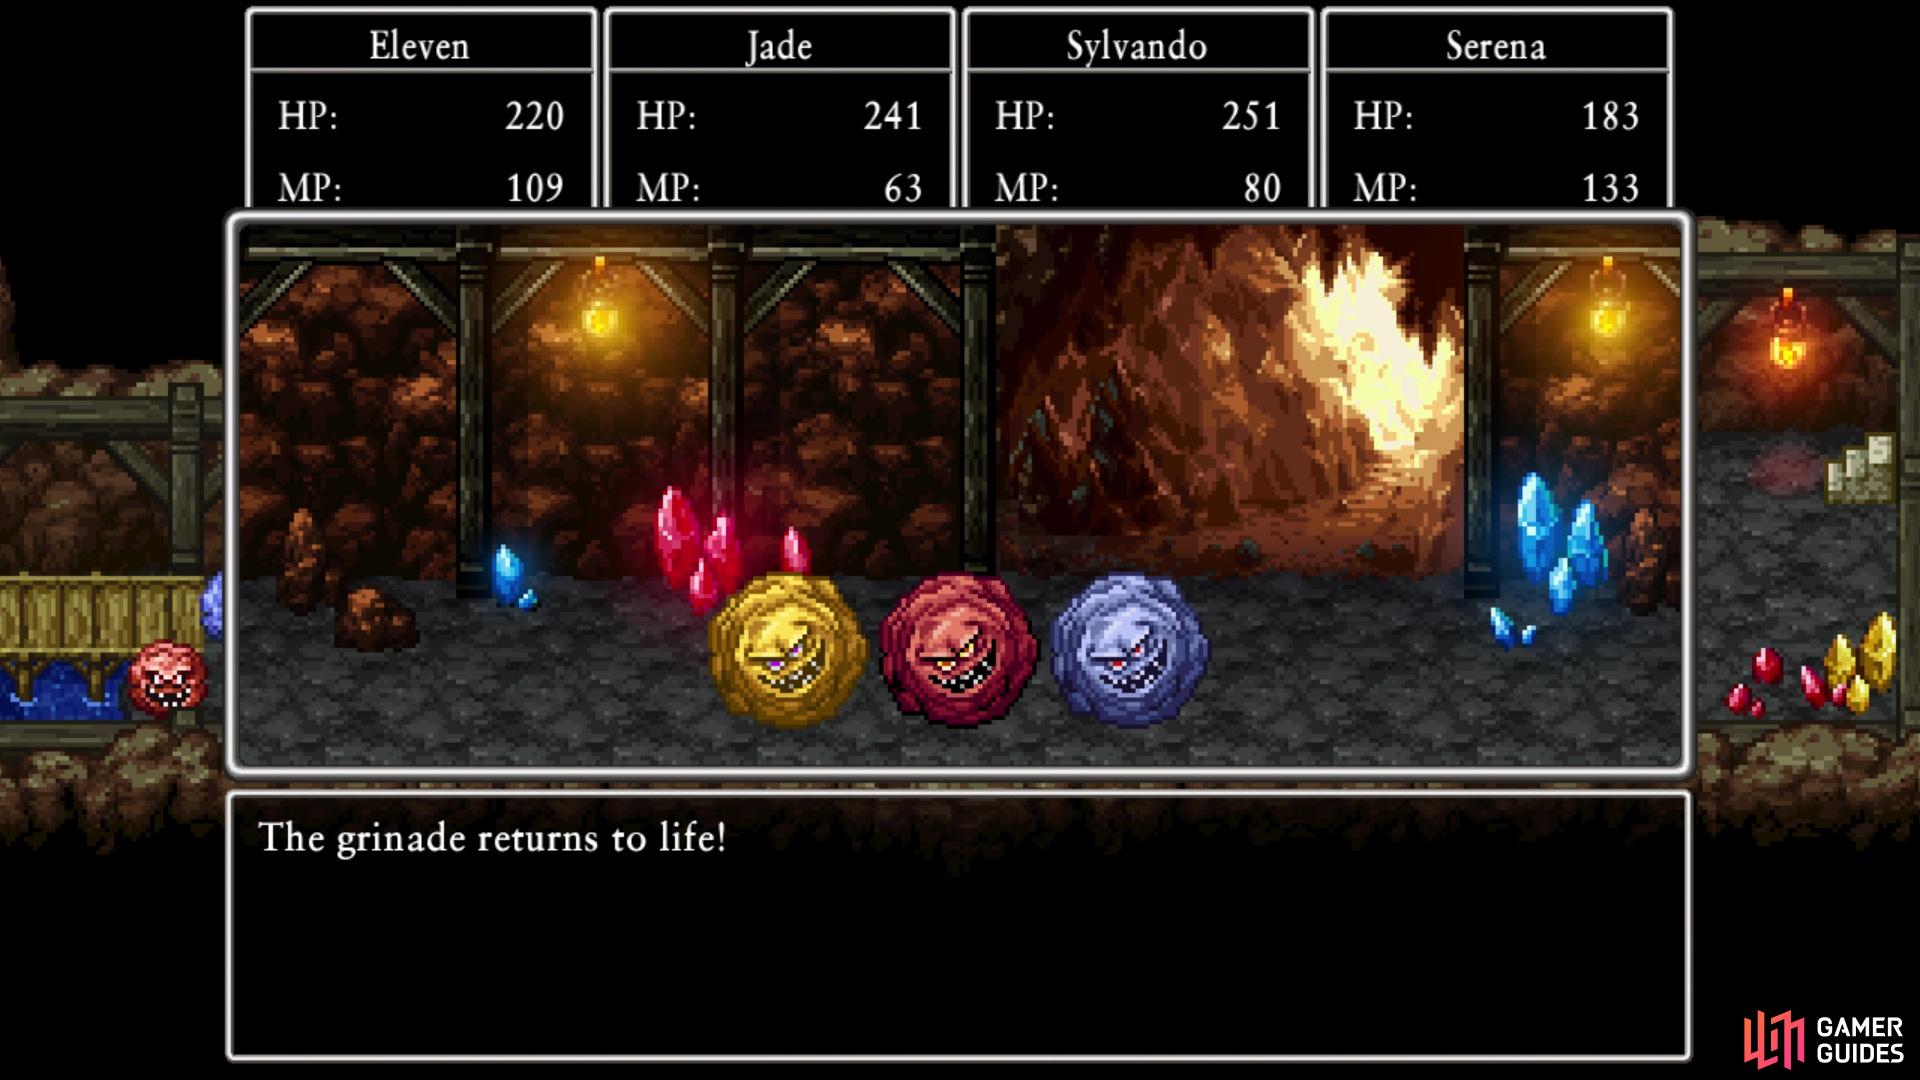
The Bomboulder can use Kerplunk to revive the others in battles
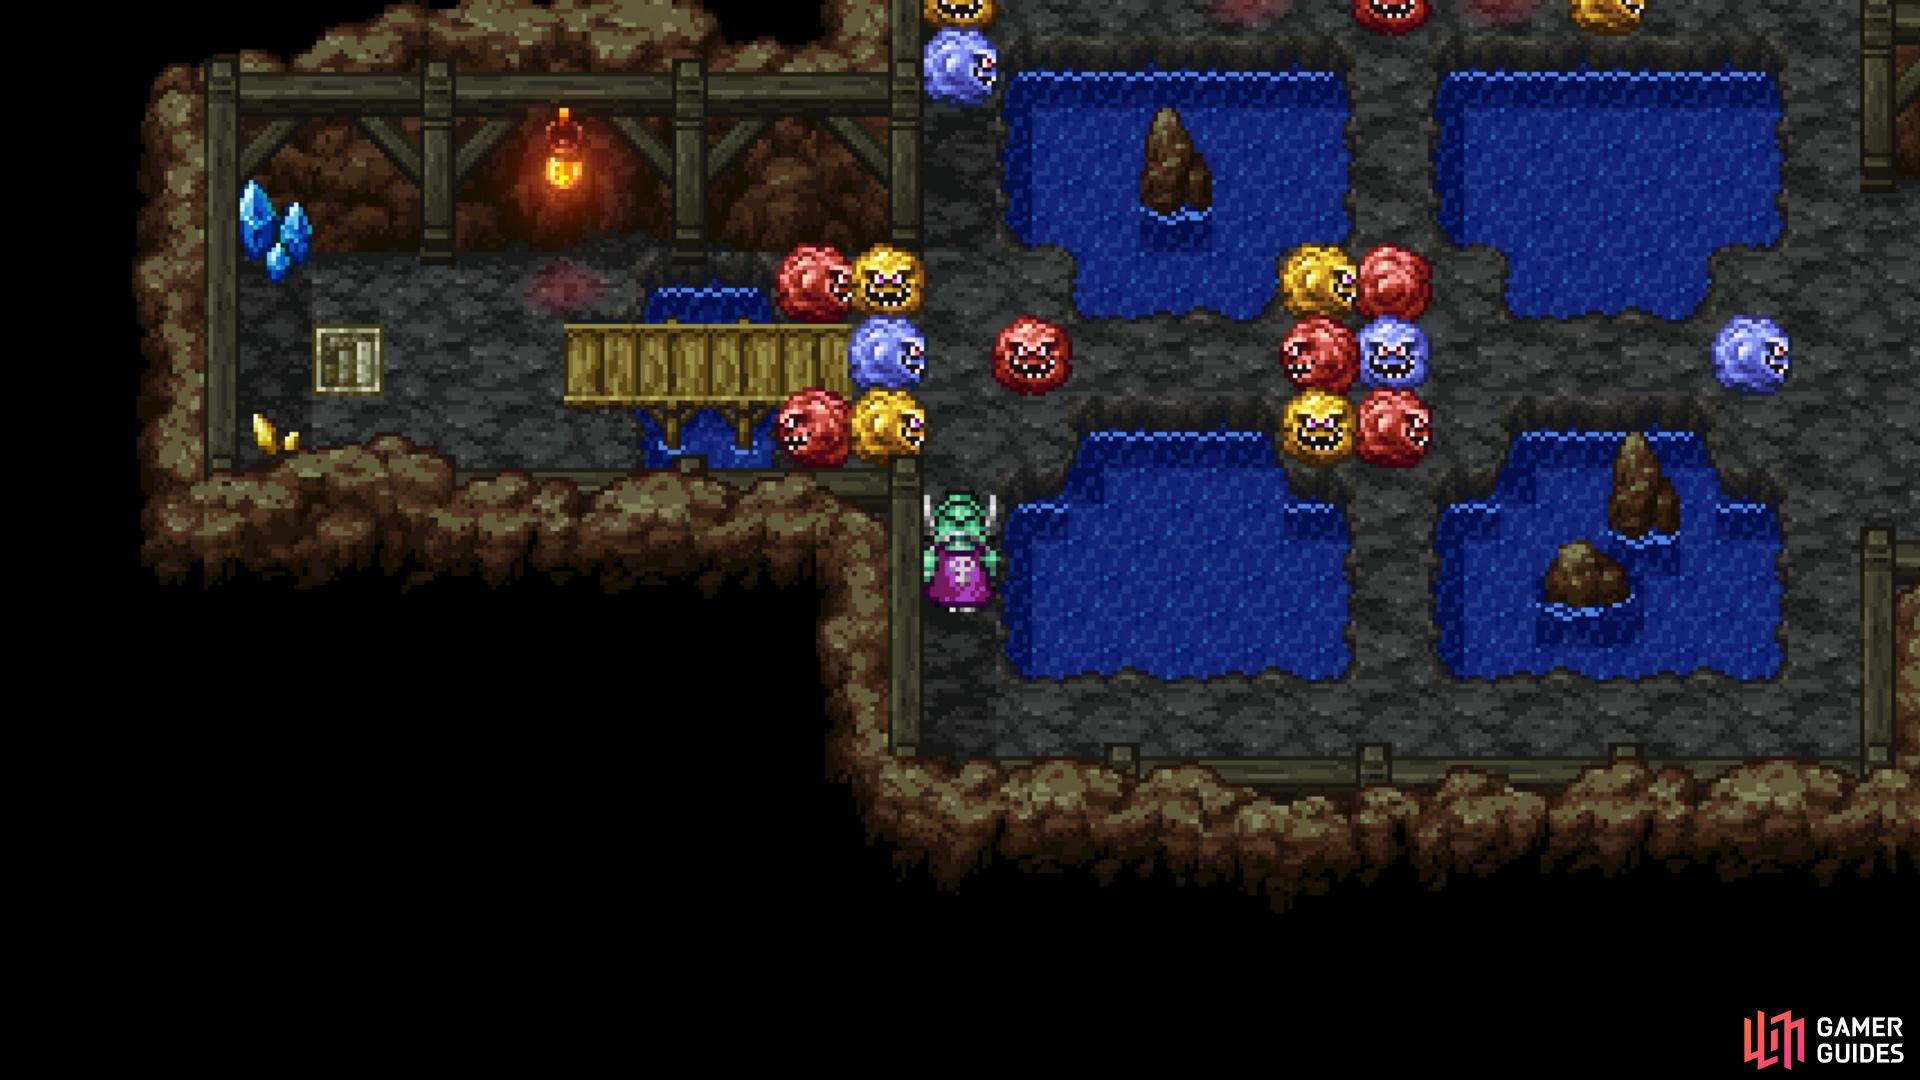
You will need to fight a lot of enemies in order to get to the bottom
BOSS - Maeve
Maeve can be a tough cookie, especially if you do this as soon as it becomes available. She can attack twice per round (not always), and will summon Rockbombs (the blue ones) during the battle. While they shouldn’t pose too much of a problem, as you should be concentrating on Maeve, they can be an annoyance. She can do a desperate attack, which is a critical hit, meaning you can’t really do anything about it. She also has a vicious slashing attack that hits a single character up to six times, which if you’re not properly ready, can deal a lot of damage. Maeve also might try to cast Heal, but this seems to always backfire and never comes out.
If you leveled Serena to level 23, then she will have Kabuff, which works wonders in this battle. Cast it twice and Maeve’s normal attacks should be doing a lot less damage; her critical attack will still hit for the full amount, as it bypasses any defenses. Maeve has around 1,000 HP, so you should have the Hero use Cutting Edge on her. Sylvando should use Oomph on him twice to increase the damage of Cutting Edge, which should hopefully be dealing enough damage to make the battle end a lot sooner. Serena should heal when necessary, and if you have Hustle Dance with Sylvando, then go with that, too. Veronica learns Frizzle at level 23, which helps a lot, plus Bang can help deal with the Rockbombs.
Maeve can summon Rockbombs to join her in the fight
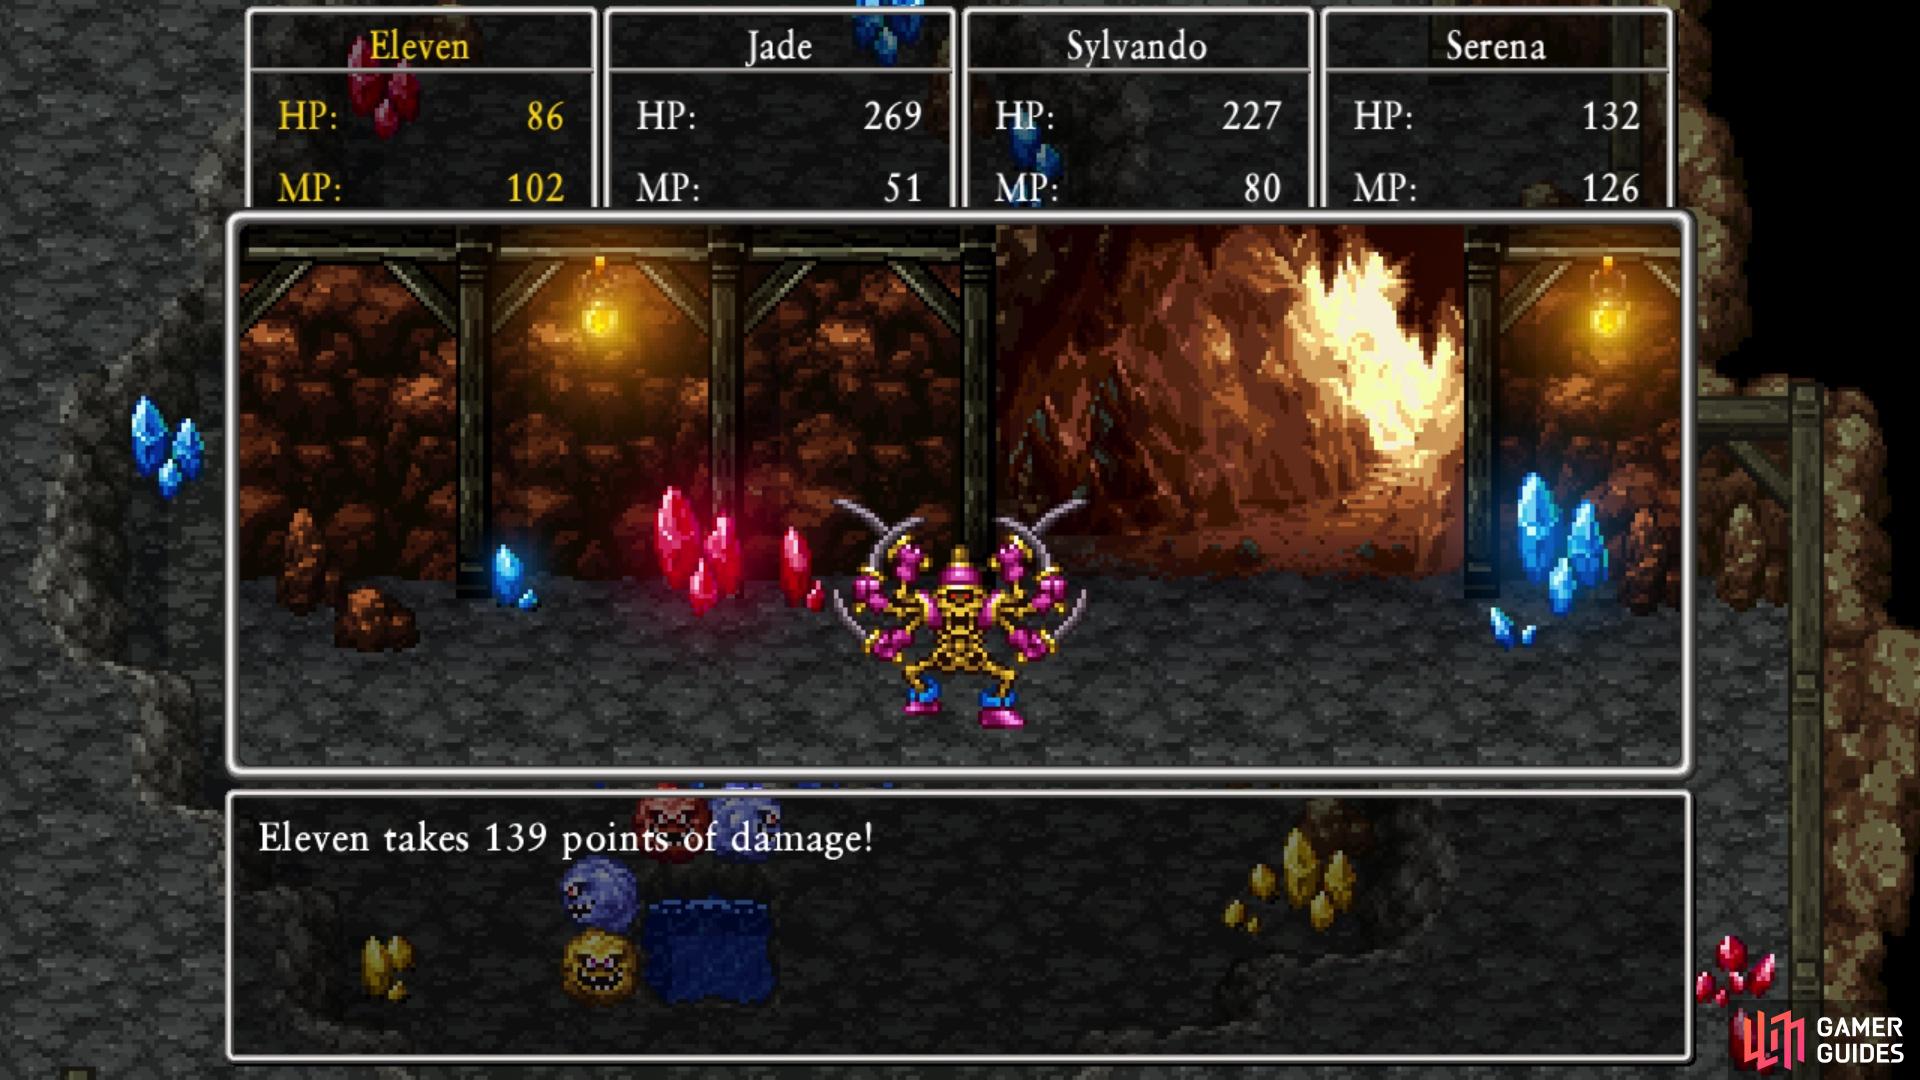
Her critical attack can deal a lot of damage to a single character
After defeating Maeve, listen to her story, then use Evac to head back to the beginning of the dungeon. Report back to the NPC who gave you the quest to finish and get your reward, which is a Cautery Sword.
No Comments