
Pastword
The Tockle for this one is located at the L’Academie de Notre Maitre des Medailles. Head inside the main building and you should see the principal’s office straight ahead. While facing the door to his office, go around to the left side to find the red Tockle.

The Tockle that leads you to the Neverglade is right next to Maxime’s office at the Medal Academy
Enemies
| Monsters | HP |
|---|---|
| Brownie | ~75 |
| Healslime | ~25 |
| Medislime | ~90 |
| Orc | ~105 |
| Slime Knight | ~70 |
| Metal Slime Knight | ~100 |
| Snooty Slime Knight (Rarefied) | ~610 |
| Jowler | ~450 |
| Great Sabrecat | ~75 |
| Hunter Mech | ~150 |
| Hypothermion | ~160 |
| Golem | ~185 |
| Firebird | ~90 |
| Silvapithecus | ~80 |
| Hellbound Horror | ~120 |
The majority of the enemies here are ones you’ve already seen, so there’s not much to say about them. Note that the Snooty Slime Knight is a Rarefied version of the normal Slime Knight, so it has a lot more HP and hits harder. The Jowler has quite a bit of HP for a normal enemy, and can hit pretty hard, too. If you’re doing this at the time you get this Pastword, then the Hunter Mech and Hypothermion will probably be new enemies. The latter can curse your party, as well as use Whack to instantly kill one. The last three enemies on the list are exclusive to this dungeon, so if you want their entries in the Bestiary, try to stick around until you encounter them. Firebirds can be annoying, as they tend to come in groups of four and can use Frizzle to deal around 60 damage to a single target.

Some enemies in the Neverglade are only found here
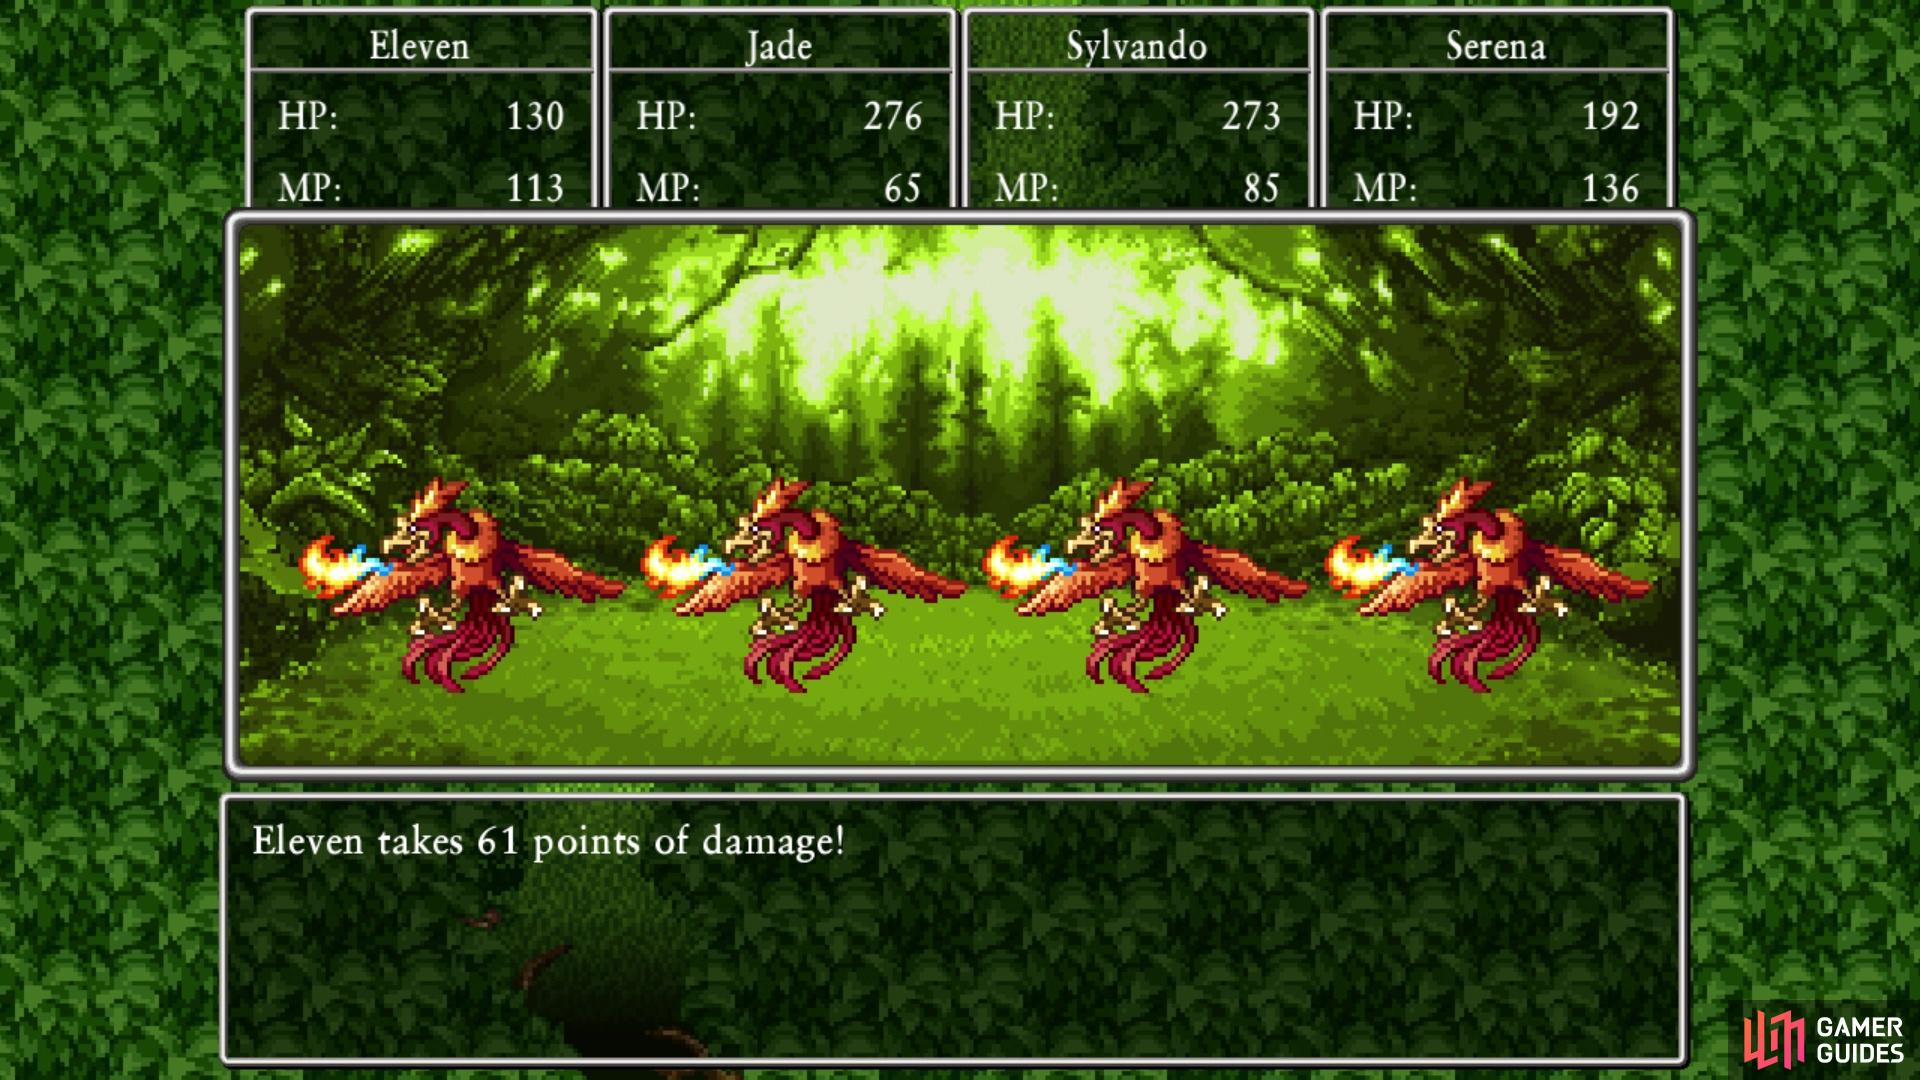
The Firebirds can use Frizzle to deal some decent damage
Walkthrough
Upon entering this area, you will be in a forest and there will be two NPCs on the ground right in front of you. Speak with the dwarf to find out that this forest leads for the Faerie Realm, but some flower has become a monster and started putting people to sleep. Now, the Neverglade is a bit of a maze, as some exits will lead to random spots or previously known screens. After speaking to the man and getting the quest, One of Doze Days, you can begin exploring the place. To begin, take the northern of the two exits on the first screen, where on the next one, you should see a cave off to the left. Check the drawer on the left side to find an Elfin Elixir, which can fully restore a character’s MP, so only use it in an emergency.
Exit the cave and return to the first screen, then take the eastern exit this time. Continue north, past the little bit of water and take the northernmost exit. You should see a chest on the main path, so open it for a Seed of Magic, then continue north. You should arrive at a campfire, which triggers a scene with Veronica. You will now be following Veronica after this, so take the two exits she’s standing next to to arrive at a field of flowers. Check the flower in front of the cave to begin a boss fight.
BOSS - Dazey
This flower can be a little annoying, as it can sometimes act twice in a single round. It can put your party to sleep with Sweet Breath, which can be troublesome if more than one character gets hit with it. If you have Sylvando in your party and he isn’t asleep, you can use his Sobering Slap to wake up any others. Likewise, Serena’s Snap, Crackle, Poof can also be used to help protect against it in the first place. Besides that skill, Dazey can also use a desperate attack that is nothing more than a critical hit. This can deals upwards of 170+ damage, so you want to make sure your health is at around 200+ at all times to avoid being downed at all.
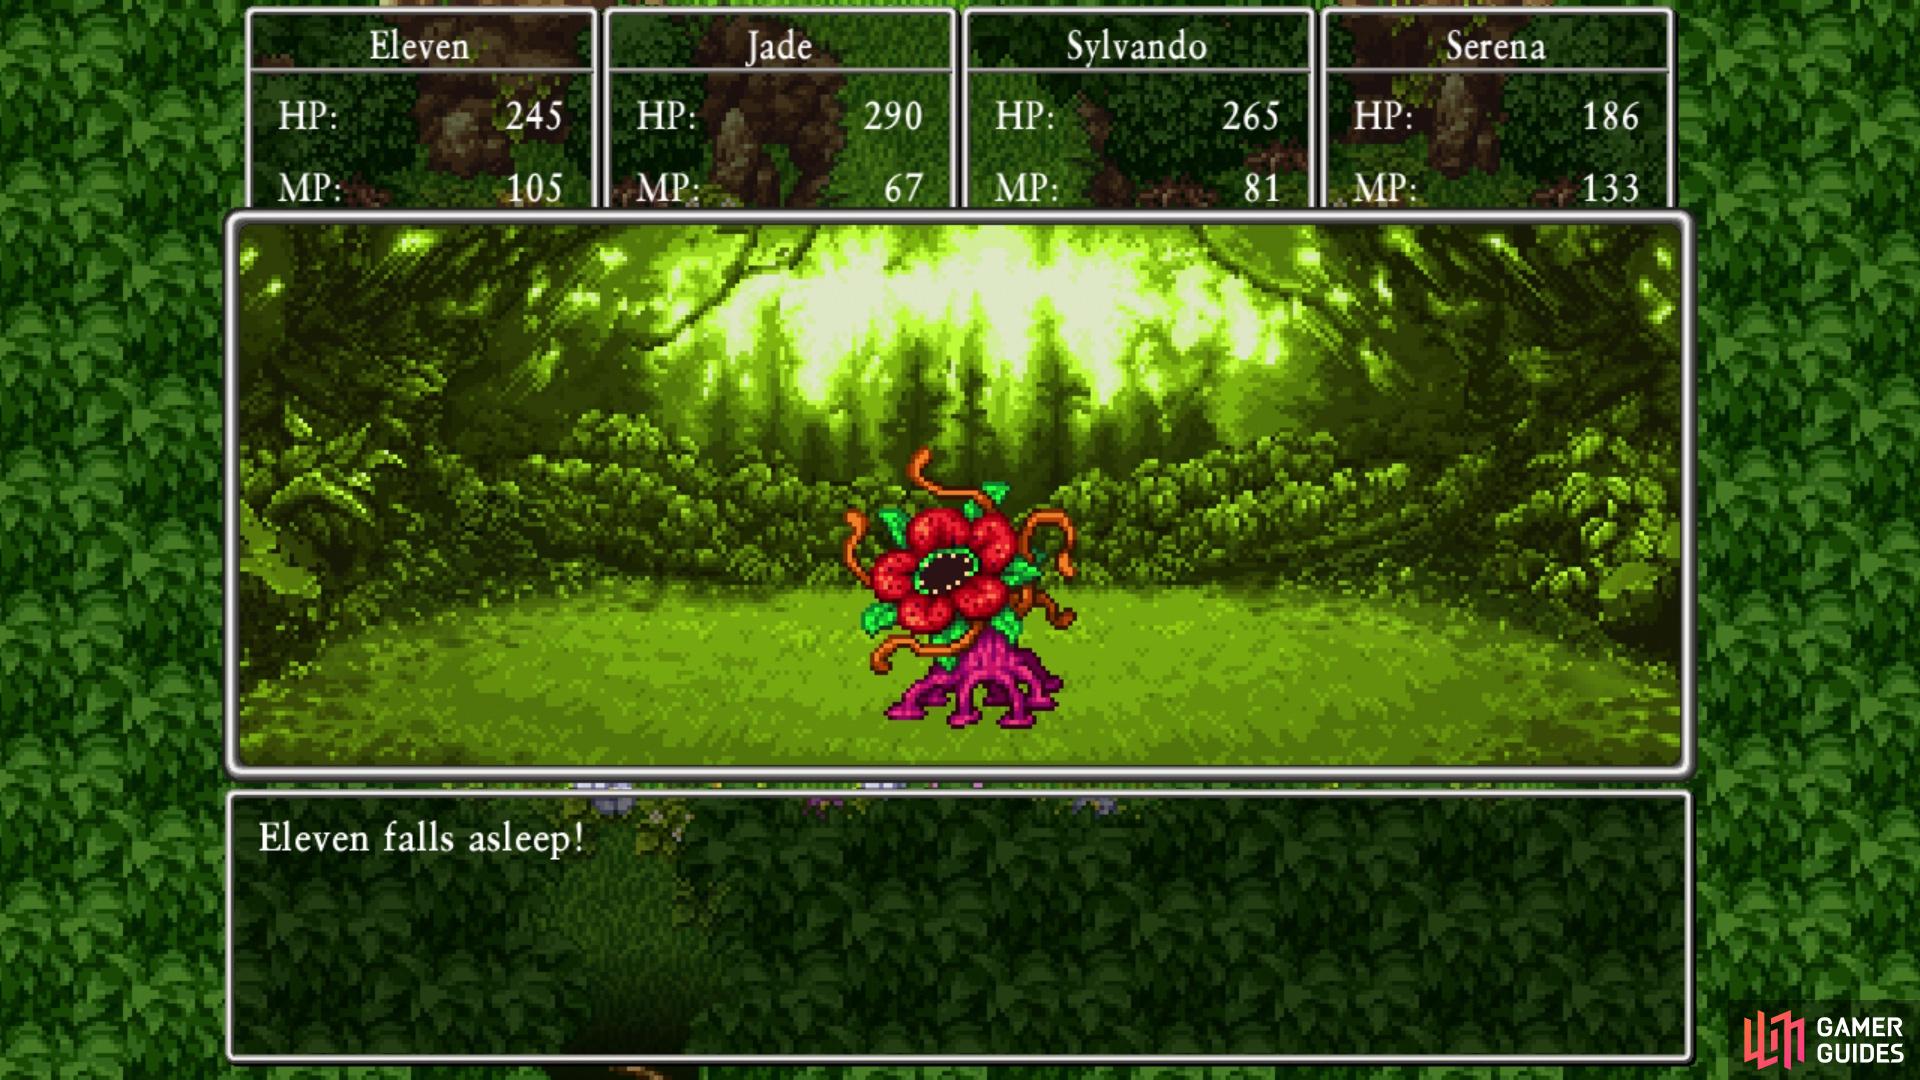
Dazey can put characters to sleep with Sweet Breath
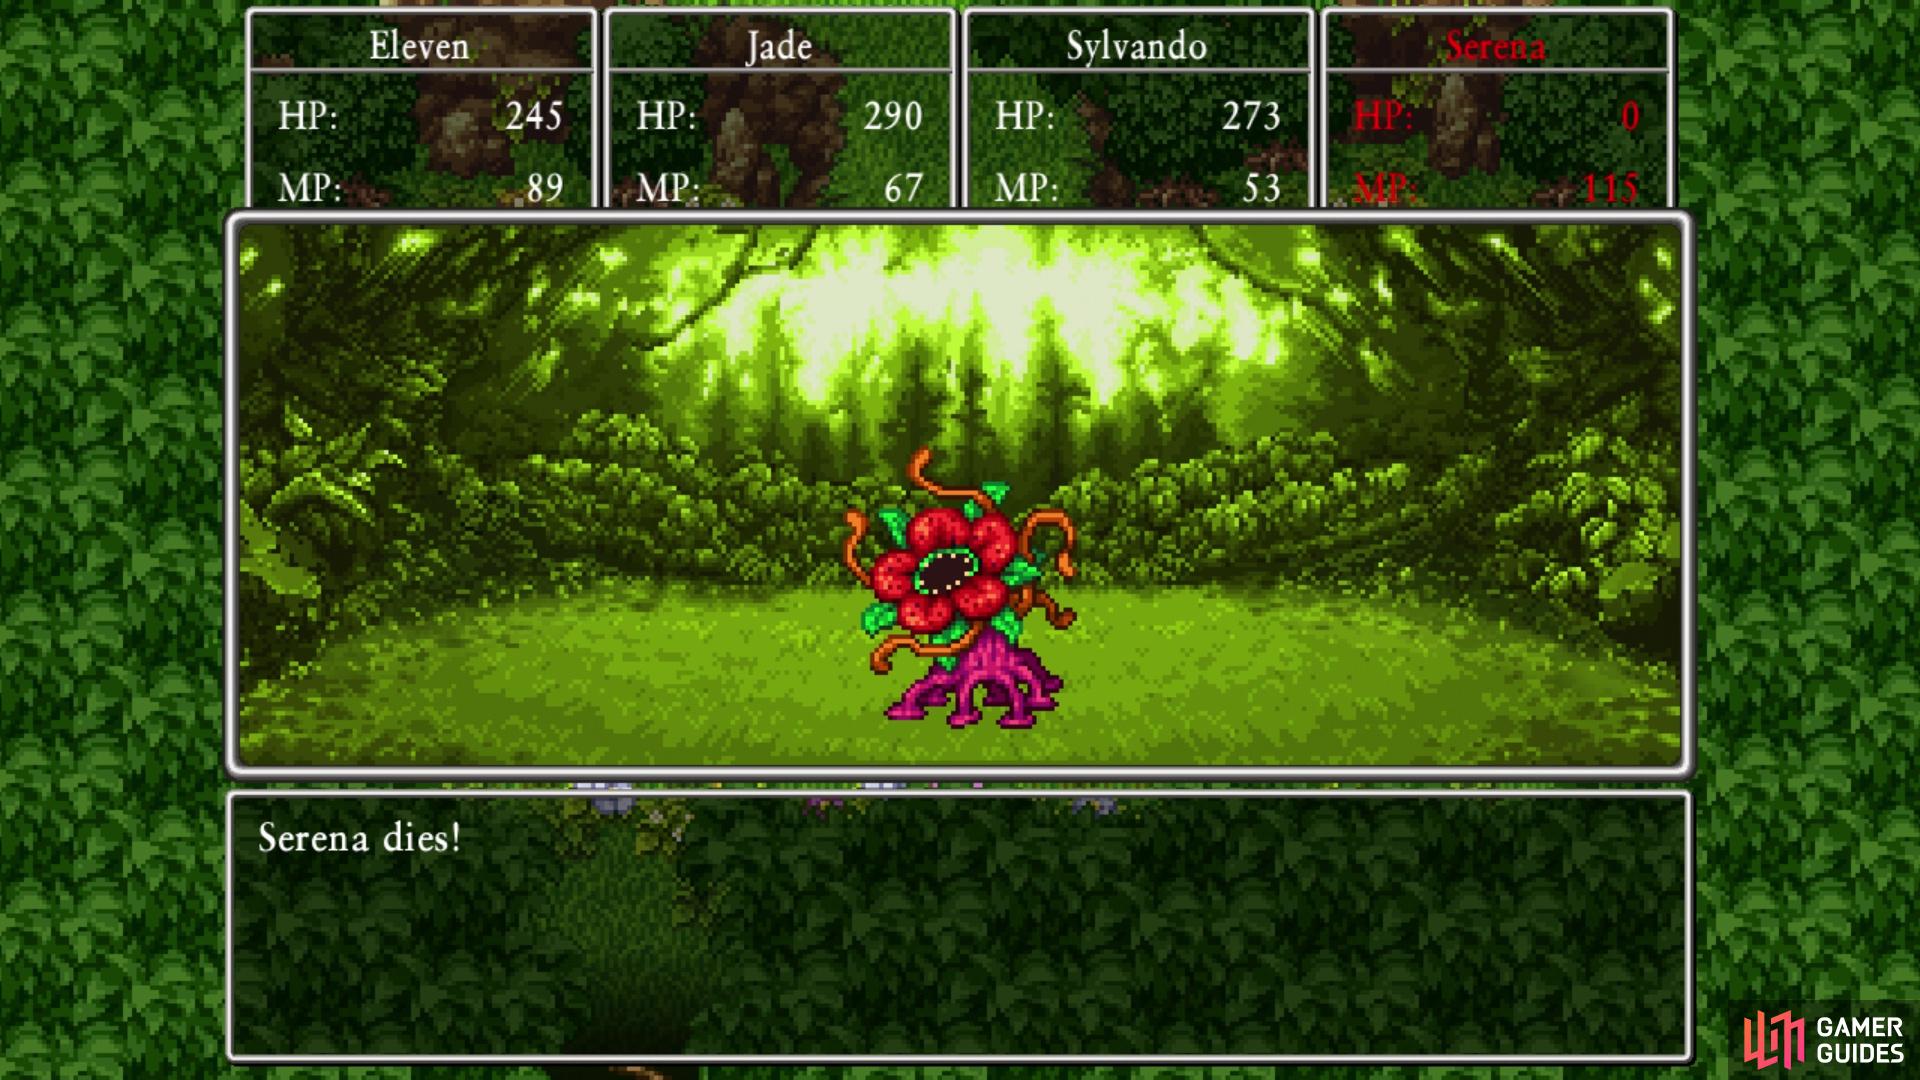
as outright kill them with Death Dance
Hopefully you have a few Yggdrasil Leaves in your inventory, but both Serena and Rab should have access to Zing. Of course, Dazey also can use Death Dance to try and instantly kill your entire party. This is pretty much pure RNG, so there’s not much you can do about it. Dazey also has access to Bang, which shouldn’t really be dealing that much damage to your characters at this point (around 25 to the entire party). By the time you have access to this area of Tickington, the Hero should have Unbridled Blade in his repertoire, although it’s not necessary, as Cutting Edge should be more than enough with the others. If you have Multithrust with Jade, then use that against the boss, otherwise you can just use normal attacks.
Once you bring down the boss, you will be transported back to the entrance, where you will receive your reward, a Papillon Pendant. Before leaving, though, there is one more chest to grab inside this little dungeon. Go east, north and north to arrive at the screen with the campfire, then turn around and go south to find a chest with 1500 gold coins. Return north, then go northwest, west and west once more to arrive back at the beginning to finish.
No Comments