
This page details the Elder Knowledge main story quest in Skyrim. Includes what happens when you talk to Esbern or Arngeir, where to find Urag gro-Shub in the College of Winterhold, where to find Septimus Signus, and how to find the Elder Scroll in the Dwemer city of Blackreach.
Elder Knowledge, Skyrim.
| Quest Info | Description |
|---|---|
| Objective | Recover an Elder Scroll to learn an Ancient Secret. |
| Quest Giver | Paarthurnax |
| Location(s) | Throat of the World, Sky Haven Temple or High Hrothgar, Septimus Signus’s Outpost, Alftand, Blackreach, Tower of Mzark. |
| Prerequisite | The Throat of the World |
| Next Quest | Alduin’s Bane |
| Concurrent | Discerning the Transmundane |
| Reward | None |
| Rec. Level | 18 |
Quest Overview
-
Accept the task from Paarthurnax. (Optional)
-
Talk to Esbern or Arngeir.
-
Read through the rare books provided by Urag gro-Shub.
-
Receive the necessary items from Septimus Signus.
-
Locate the ancient Dwemer city of Blackreach.
-
Claim the Elder Scroll.
How to Find the Elder Scroll in Blackreach
Speak to Esbern or Arngeir
The primary objective of this quest is to locate the Elder Scroll, but with no knowledge of where to begin searching, you’ll need to speak with Esbern or Arngeir to see if they might know anything about where to begin your search. You can actually speak with both if you really want to, but they’ll give you the same answer: you should travel to the College of Winterhold, where the mages may know more about where to find such a powerful and dangerous artefact.
If you started this quest immediately after speaking with Paarthurnax, you might as well go back down the mountain (or fast travel to High Hrothgar) and speak with Arngeir first. He’ll confirm that you need to try speaking with the mages at Winterhold. However, if you went to Esbern instead (or wanted to speak with both), be sure to ask Esbern to give you the Dragonslayer’s Blessing, which grants a 10% increase to critical hit chance against dragons for 5 days.
Travel to the College of Winterhold
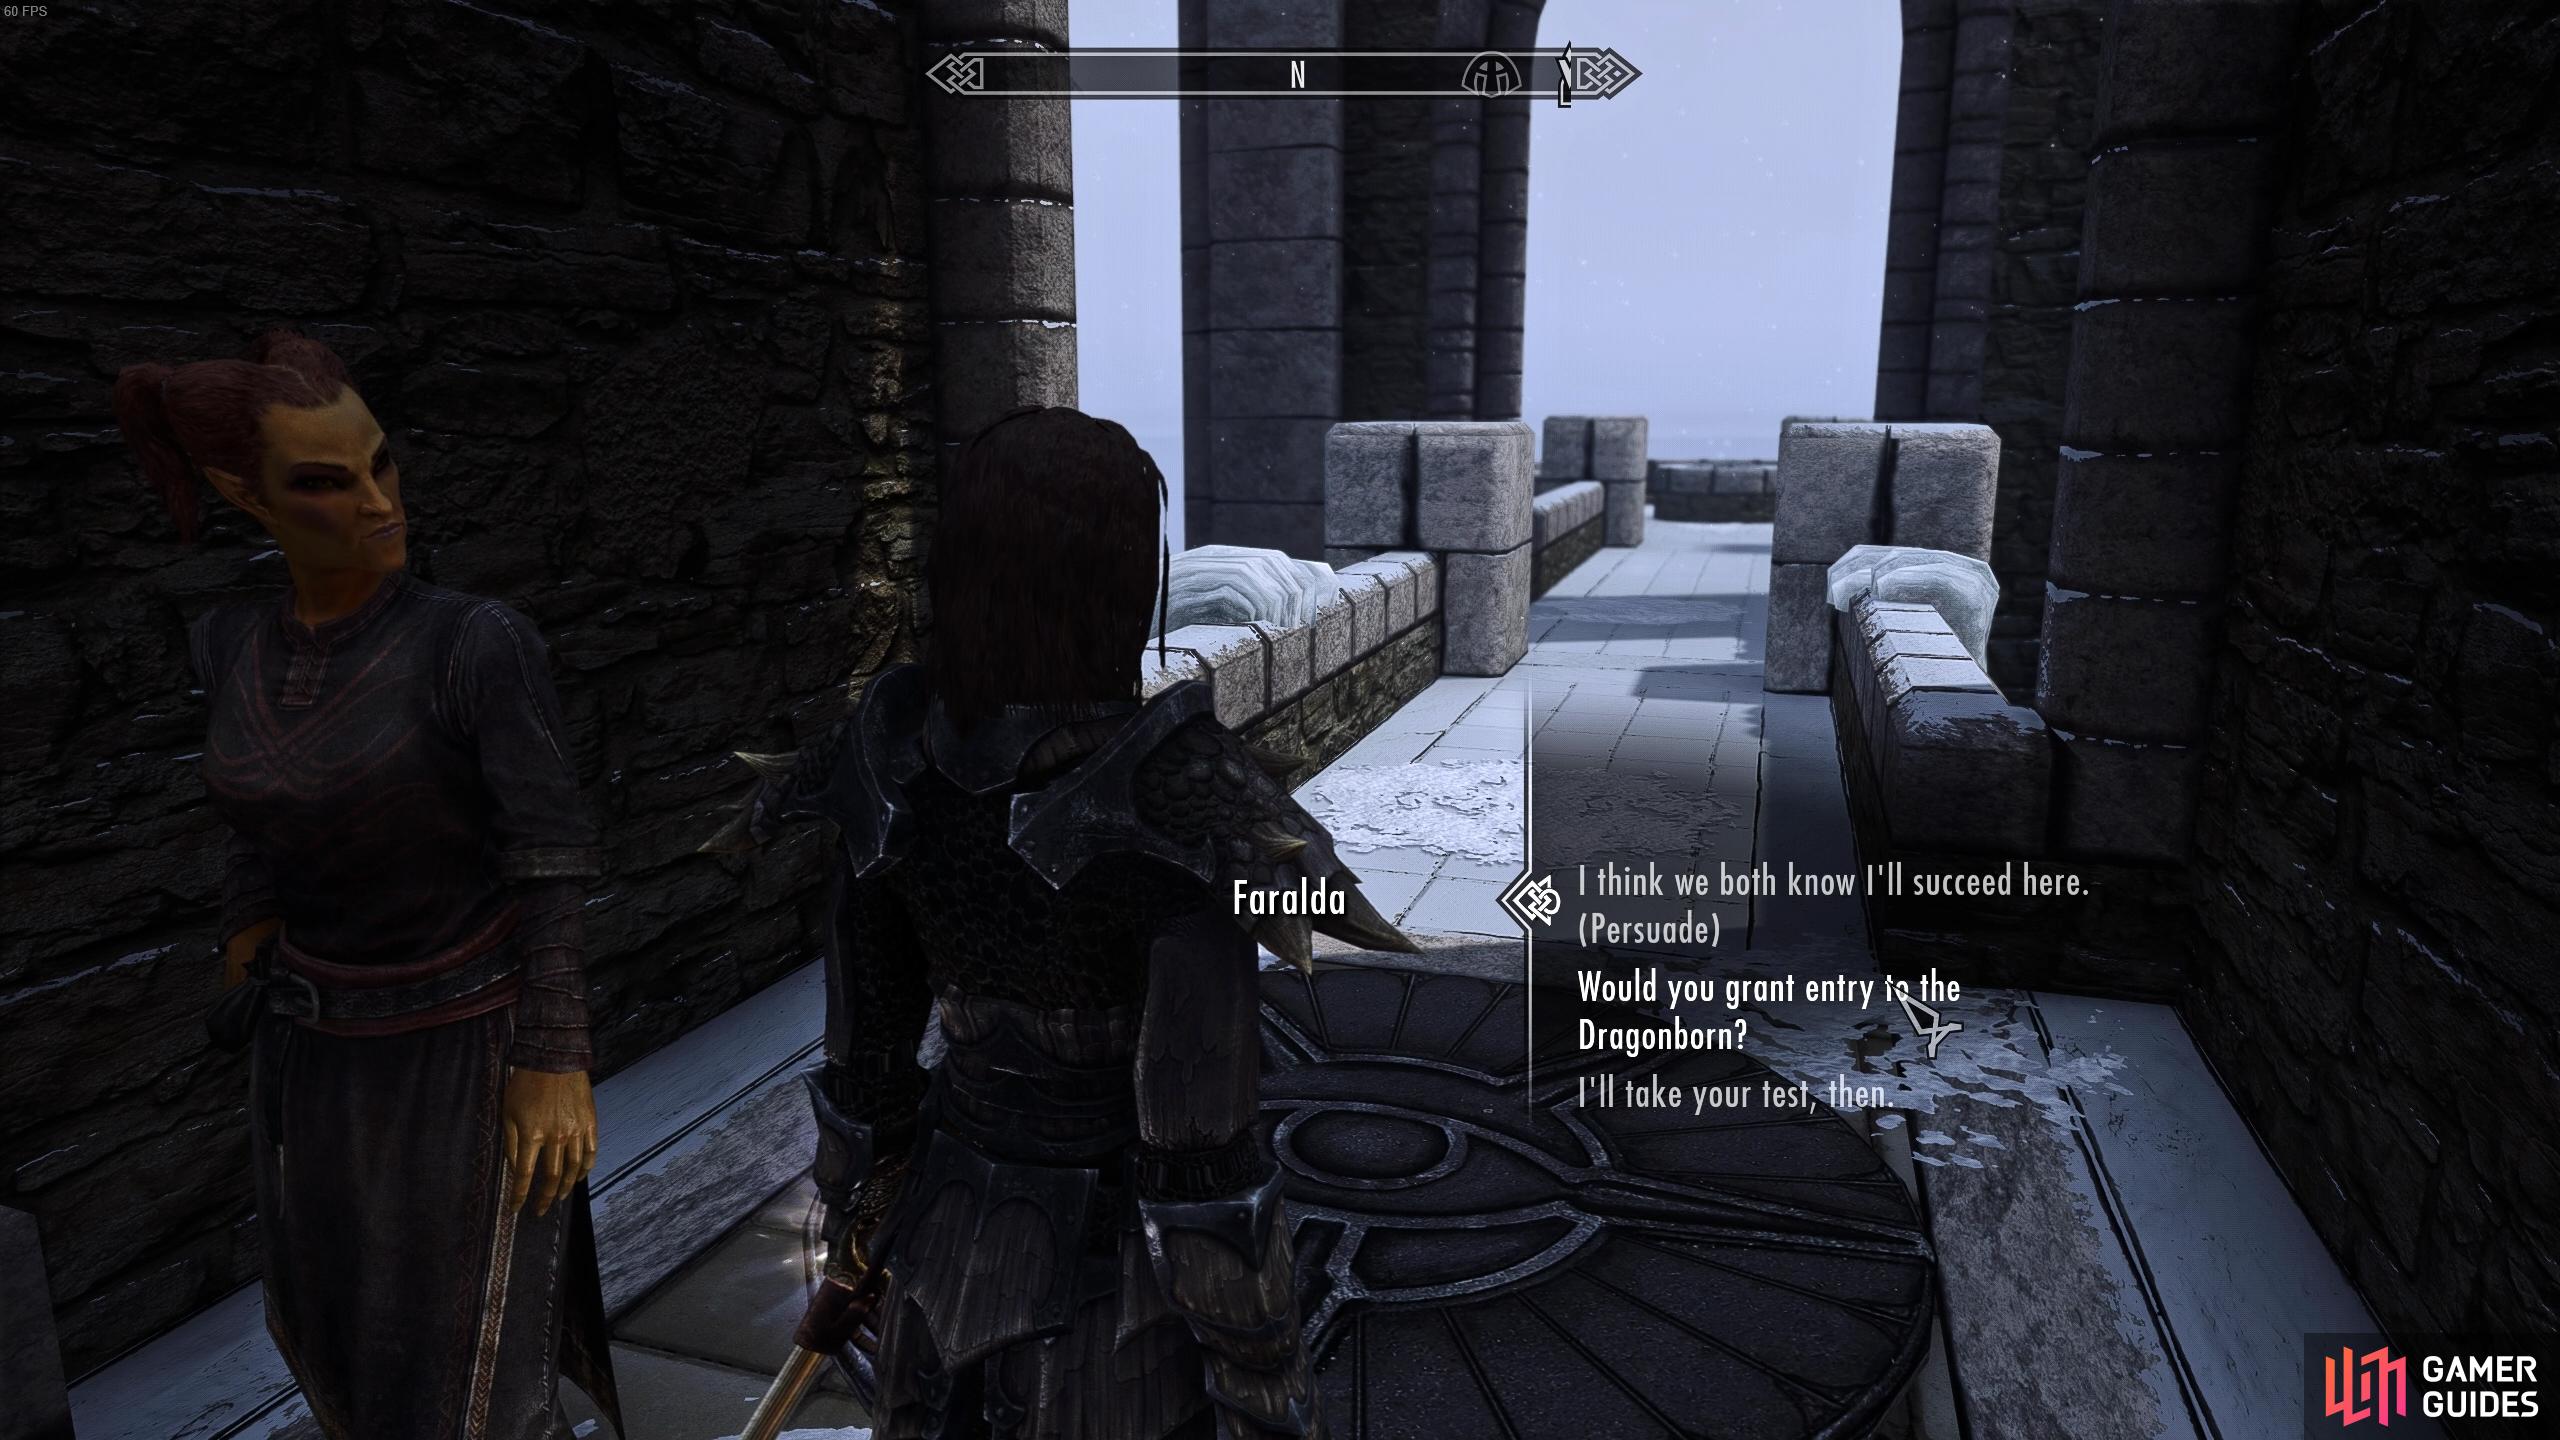
The College of Winterhold is located in the northeast of Skyrim, north of Windhelm. You can travel on foot or you can take a carriage, or if you’ve been there before, you can just fast travel there if you prefer. If you’re visiting for the first time, a mage named Faralda will greet you at the entrance to the college. She will insist that you demonstrate some affiliation with magic, or some other power, before you are granted access to the college grounds.
At this point you can simply cast a spell of any kind to demonstrate that you have magical abilities, but perhaps the easiest way to gain entrance is to use a shout, thereby revealing that you’re Dragonborn. Just try not to force push anyone off a cliff. Clear Skies is a good option here. Once you’ve shown that you’re worthy, Faralda will ask you to follow her into the college, but you don’t need to for this quest. Instead, you can run on ahead and enter through the main door, then turn right and enter The Arcanaeum.
Speak with Urag gro-Shub
Now that you’re in The Arcanaeum, you can speak with Urag gro-Shub, who is essentially the bookkeeper, to ask about the possible location of an Elder Scroll. He’ll be hostile to the suggestion at first, but once you tell him that you’re Dragonborn he’ll bring a couple of books for you to read: Ruminations on the Elder Scrolls, and Effects of the Elder Scrolls. Be sure to read both of these, and you can keep them with you from now on.
After reading the books, speak with Urag gro-Shub again and tell him that the Ruminations book is incomprehensible. He’ll tell you that it’s the work of Septimus Signus, who knows more about the Elder Scrolls than anyone currently alive. However, he hasn’t been seen for a long time, and the last place he was known to be is the ice fields, located north of Winterhold.
Where to Find Septimus Signus in the Ice Fields
So, Septimus Signus is the leading expert on Elder Scrolls, and the best person to speak with if you want to learn how where to find one. You’ll need to find and speak with him first, then, and to do so you should travel to the ice fields located north of Winterhold. Thankfully, his outpost is easy enough to find, but you’ll need to walk down to the shore from the heights of the college. Along the way, you’ll probably encounter sabre cats, wolves, and walruses. The cats in particular can inflict a lot of damage, so be sure to deal with them one at a time if you’re still relatively low level.
As you follow the quest marker you’ll eventually notice the outpost where Septimus Signus dwells. Once inside, jump down and speak with him. You’ll find that studying the Elder Scrolls has sent him a bit loopy, but he’s still sane enough to know that he can get something out of this for himself, too. In exchange for telling you where to find the Elder Scroll, he wants you to use a Dwemer machine located in Alftand in order to transcribe the Elder Scroll onto a lexicon, thereby allowing him to read it. This will form the main objective of the Discerning the Transmundane quest.
Explore Alftand, Blackreach and Find the Tower of Mzark
To reach the entrance of Alftand, you’ll need to travel southwest of Winterhold and locate the wooden platforms heading downward. This will lead to a cave entrance with the quest marker on it, so you’ll know that you’re in the right place once you see it. Once you’re inside, the path is fairly linear and you won’t encounter too many enemies initially. The first enemies that you encounter will be Dwarven Spider Workers. These will often pop out of holes on the walls at unexpected times, so you’ll need to be ready for combat at all times.
The spiders aren’t too difficult to defeat, especially on their own, but as you move through the dungeon you’ll begin to encounter some Dwarven Spheres. These are much more dangerous foes which can inflict a lot of damage, especially if you’re not well armored. If you find yourself in trouble while fighting them, be sure to use the space that you’ve already come through to run away and heal for a bit, then return to the fray to deal some damage. You should have plenty of space to keep a safe distance when you need to.
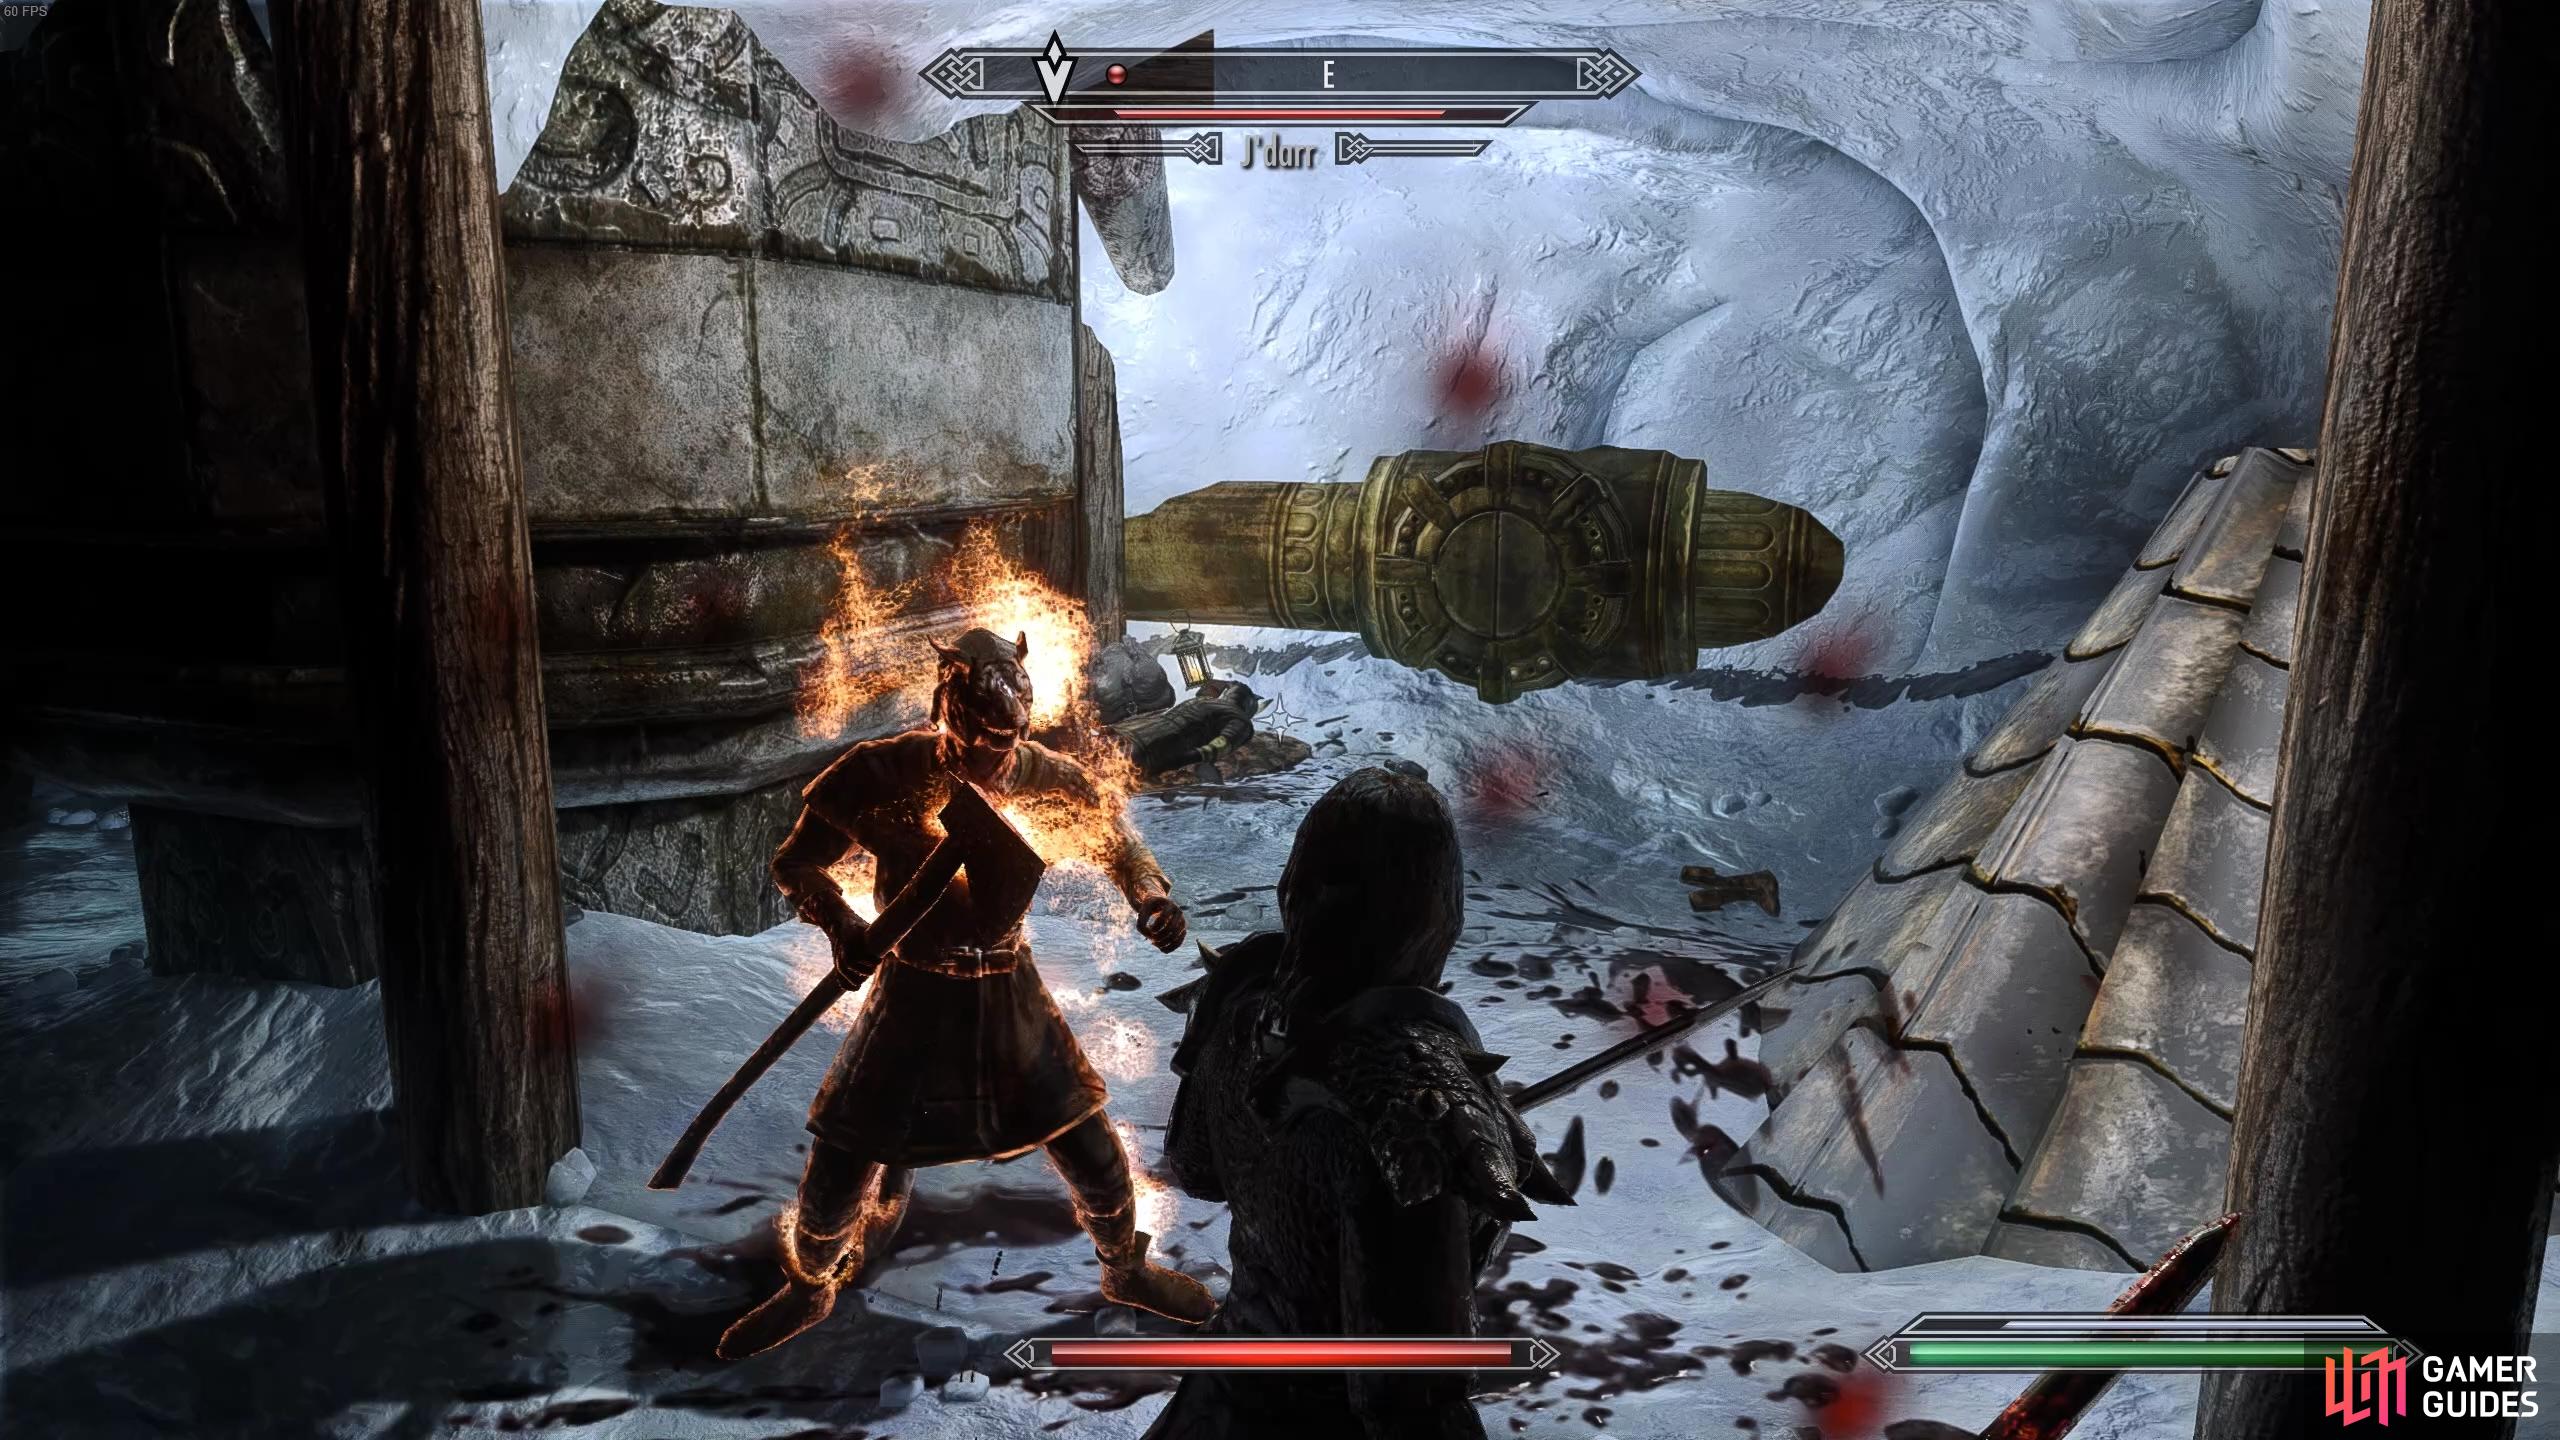
As you move through the dungeon you’ll find plenty of opportunities to loot. Much of the loot can be found out in the open, but some of it will be locked within chests. You’ll need a few lockpicks to access the chests, and some of them are of Expert and Master difficulty, but they can be worth the effort. You’ll also find a Khajit in the ruins who has been exploring them with his brother. The brother is dead and the Khajit is hostile, so you’ll need to kill him.
After killing the Khajit you’ll encounter a few more Dwarven Spiders and Spheres, eventually leading to a path which leads to the area above the walls that you just passed, dodging pistons. This path leads to the next part of the dungeon: the Alftand Animonculory.
Alftand Animonculory
When you enter the Animonculory you’ll encounter a Dwarven Spider and a Dwarven Sphere. After defeating them you can explore under the floor here (to the left) to find a dead caravan member, then head up the stairs to kill another spider. This next set of stairs has floor traps on it that will pop out a deadly spinning blade trap if you touch them. Beyond that you’ll end up in a wide area with a path going downwards.
Kill the spider on the left and get the chest in the cubby, then head down to the bottom. Pick the door down here and head inwards. There’s an expert locked gate in here that has a master chest behind it as well as a skillbook on lockpicking called The Locked Room. You’ll need to be a proficient lockpicker to get this, but don’t worry too much if you’re unable to. It’s not essential to the quest objective.
Whether you picked the lock or not, the next step is to jump down to the lower platform. Be careful to avoid the pistons here, as they can push you off the edge which can result in an instant death. You’ll find a chest and a spider above, then you can continue down. From this point on you’ll begin to encounter more and more Falmer enemies, some of which can inflict a great deal of magical damage. If you can spot them before they see you, try to kill them with ranged attacks to avoid the risk of falling off, or being caught on the path without much space to run.
Near the bottom of the spiral path you’ll find a flame trap. Avoid this and open the door. There are five more Falmer enemies beyond here, so be ready for a tough fight if you’re low level or under-geared. If they’re proving too much to handle, you can run back up the spiral path so they follow you, then try to push them off the edge with a shout, killing them instantly if they fall from high enough up. Once you’ve dealt with these five Falmer, you’ll eventually reach a torture room with three more.
You’ll see an exit to the glacier ruins here, but ignore this and keep going forward to the large open room. Here you’ll find three Falmer and a Dwarven Spider. If you struggled with those previously, try to kill these from range while you have the high ground. They may not be dead by the time that they reach you, but they’ll at least be weakened. Once they’re dead you can continue on the linear path, but be ready to avoid a tripwire which triggers a claw trap. Beyond this you’ll find the entrance to the Alftand Cathedral.
Once you’re in the Cathedral you’ll find a couple more Falmer and a spider. Kill these, loot, then make your hard save. You can now head up the steps to face the Dwarven Centurion. The fight with this enemy can be quite tough, but if you have a tank companion such as Lydia with you, it’ll make it much easier. As a companion tanks the Centurion, you can hit it from behind in quick succession. If you’re free to hit without the risk of being hit yourself, the fight shouldn’t last too long. However, if you’re here alone you’ll need to be more careful in this fight, especially if you’re wearing light armor.
This is a perfect opportunity to use your Fire Breath shout to inflict some damage over time on the Centurion. Alternatively, you can keep Unrelenting Force on hand to stagger the Centurion briefly if you find yourself in a tough spot. The good news is that most of the Centurion’s attacks are easy to avoid, but it will spam attacks if you remain in melee, which can amount to a great deal of damage in a short period of time if you’re not careful. You should be able to take a fair few hits if you have decent armor, otherwise you can rely on kiting and using ranged attacks to bring the Centurion down slowly.
Once the fight is done, be sure to loot the Centurion for the key. You’ll find a few chests in the room beyond, and once you’re beyond the gate you’ll encounter two humanoids named Sulla Trebatius and Umana. They’re here seeking treasure, and they will be hostile. If you wait long enough they’ll begin to fight each other, making it much easier for you to kill them. If you’re confident in your abilities you can just charge in and take them both on at the same time. Even if you choose the latter, they will likely fight each other throughout the fight. When both are dead, you can interact with the Dwarven mechanism which leads to Blackreach.
Blackreach
As you enter Blackreach, you’ll notice a Dwarven Sphere immediately ahead. You can try to sneak to the left and hit the lever to fire a volley of arrows in order to kill it, or just take it on normally. Either way, once it’s dead you can enter the building it was guarding: Sinderion’s Field Laboratory. In here you’ll find a bunch of useful alchemy ingredients, along with additional loot (including boots which allow you to carry even more loot!). In addition, you’ll find a Crimson Nirnroot in here, which activates the A Return to Your Roots quest when looted.
After thoroughly looting the laboratory, we’d recommend making a hard save here. If you want to fully explore Blackreach before you go on with the main quest, you’re going to encounter a few tough enemies, including more Dwarven Centurions, Frost Trolls, and even a dragon named Vulthuryol.

(1 of 3) Be sure to loot the Crimson Nirnroot to activate the A Return to Your Roots side quest.
How to Access the Elder Scroll
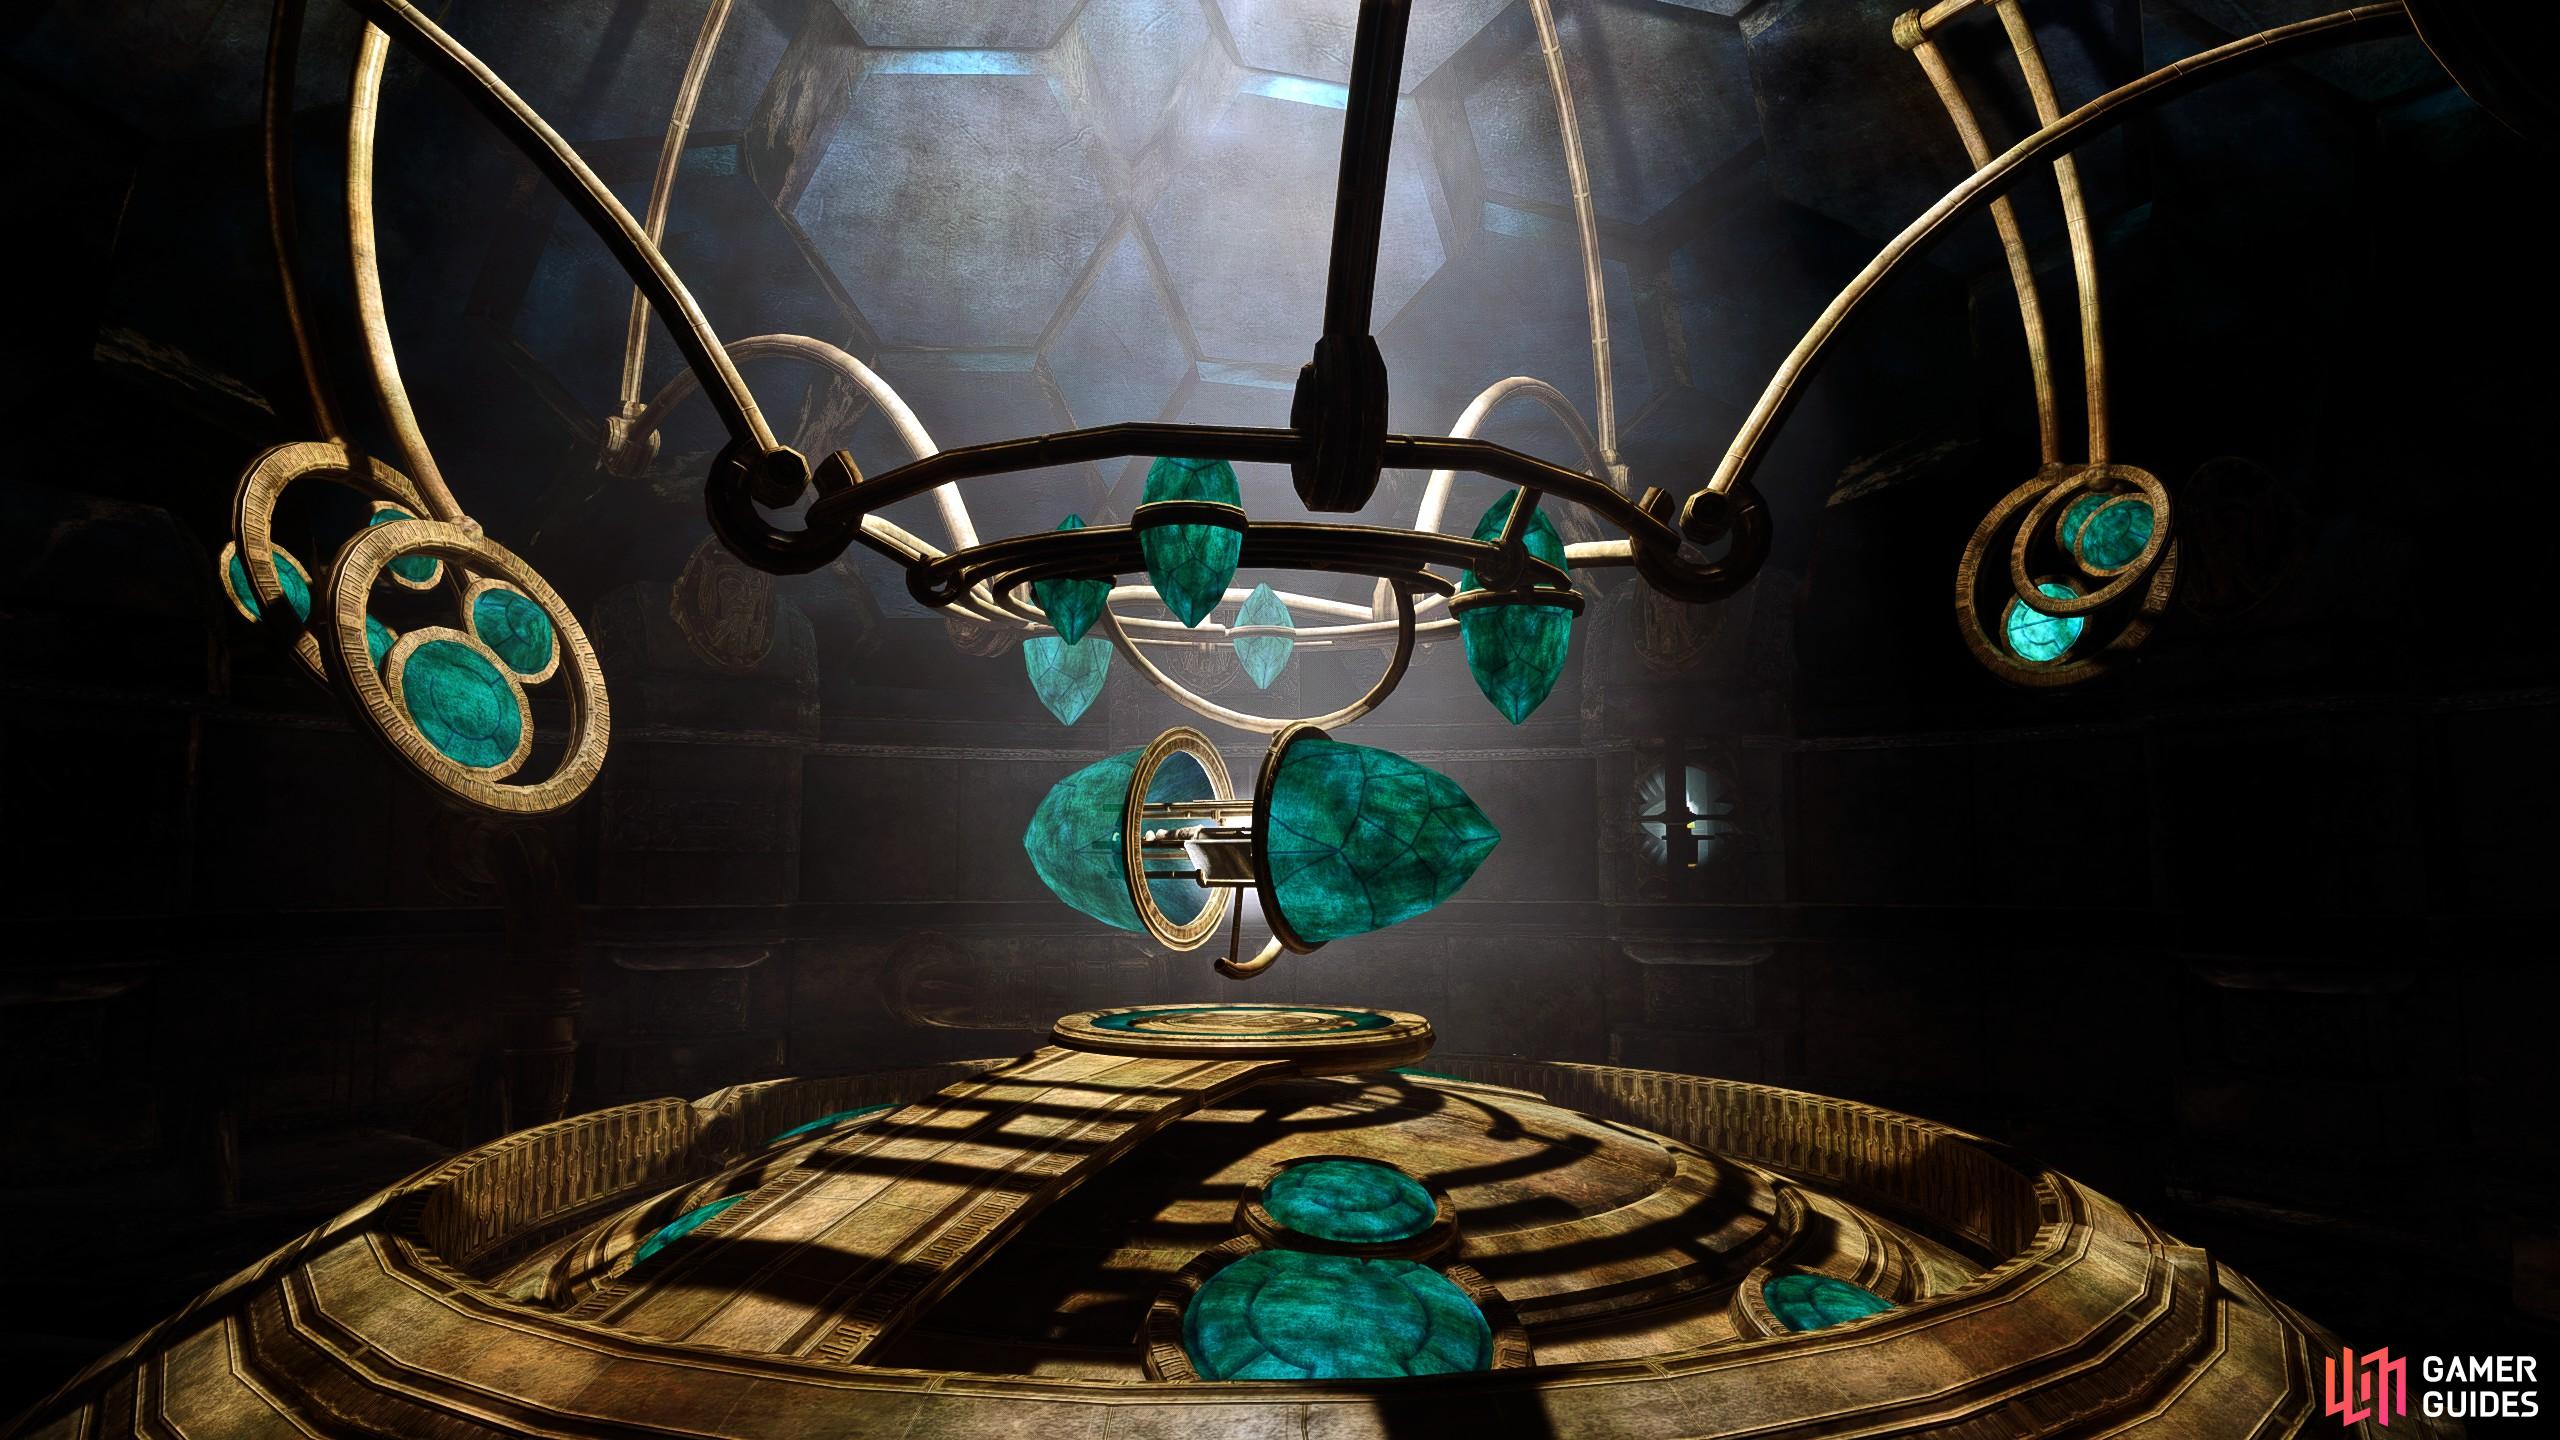
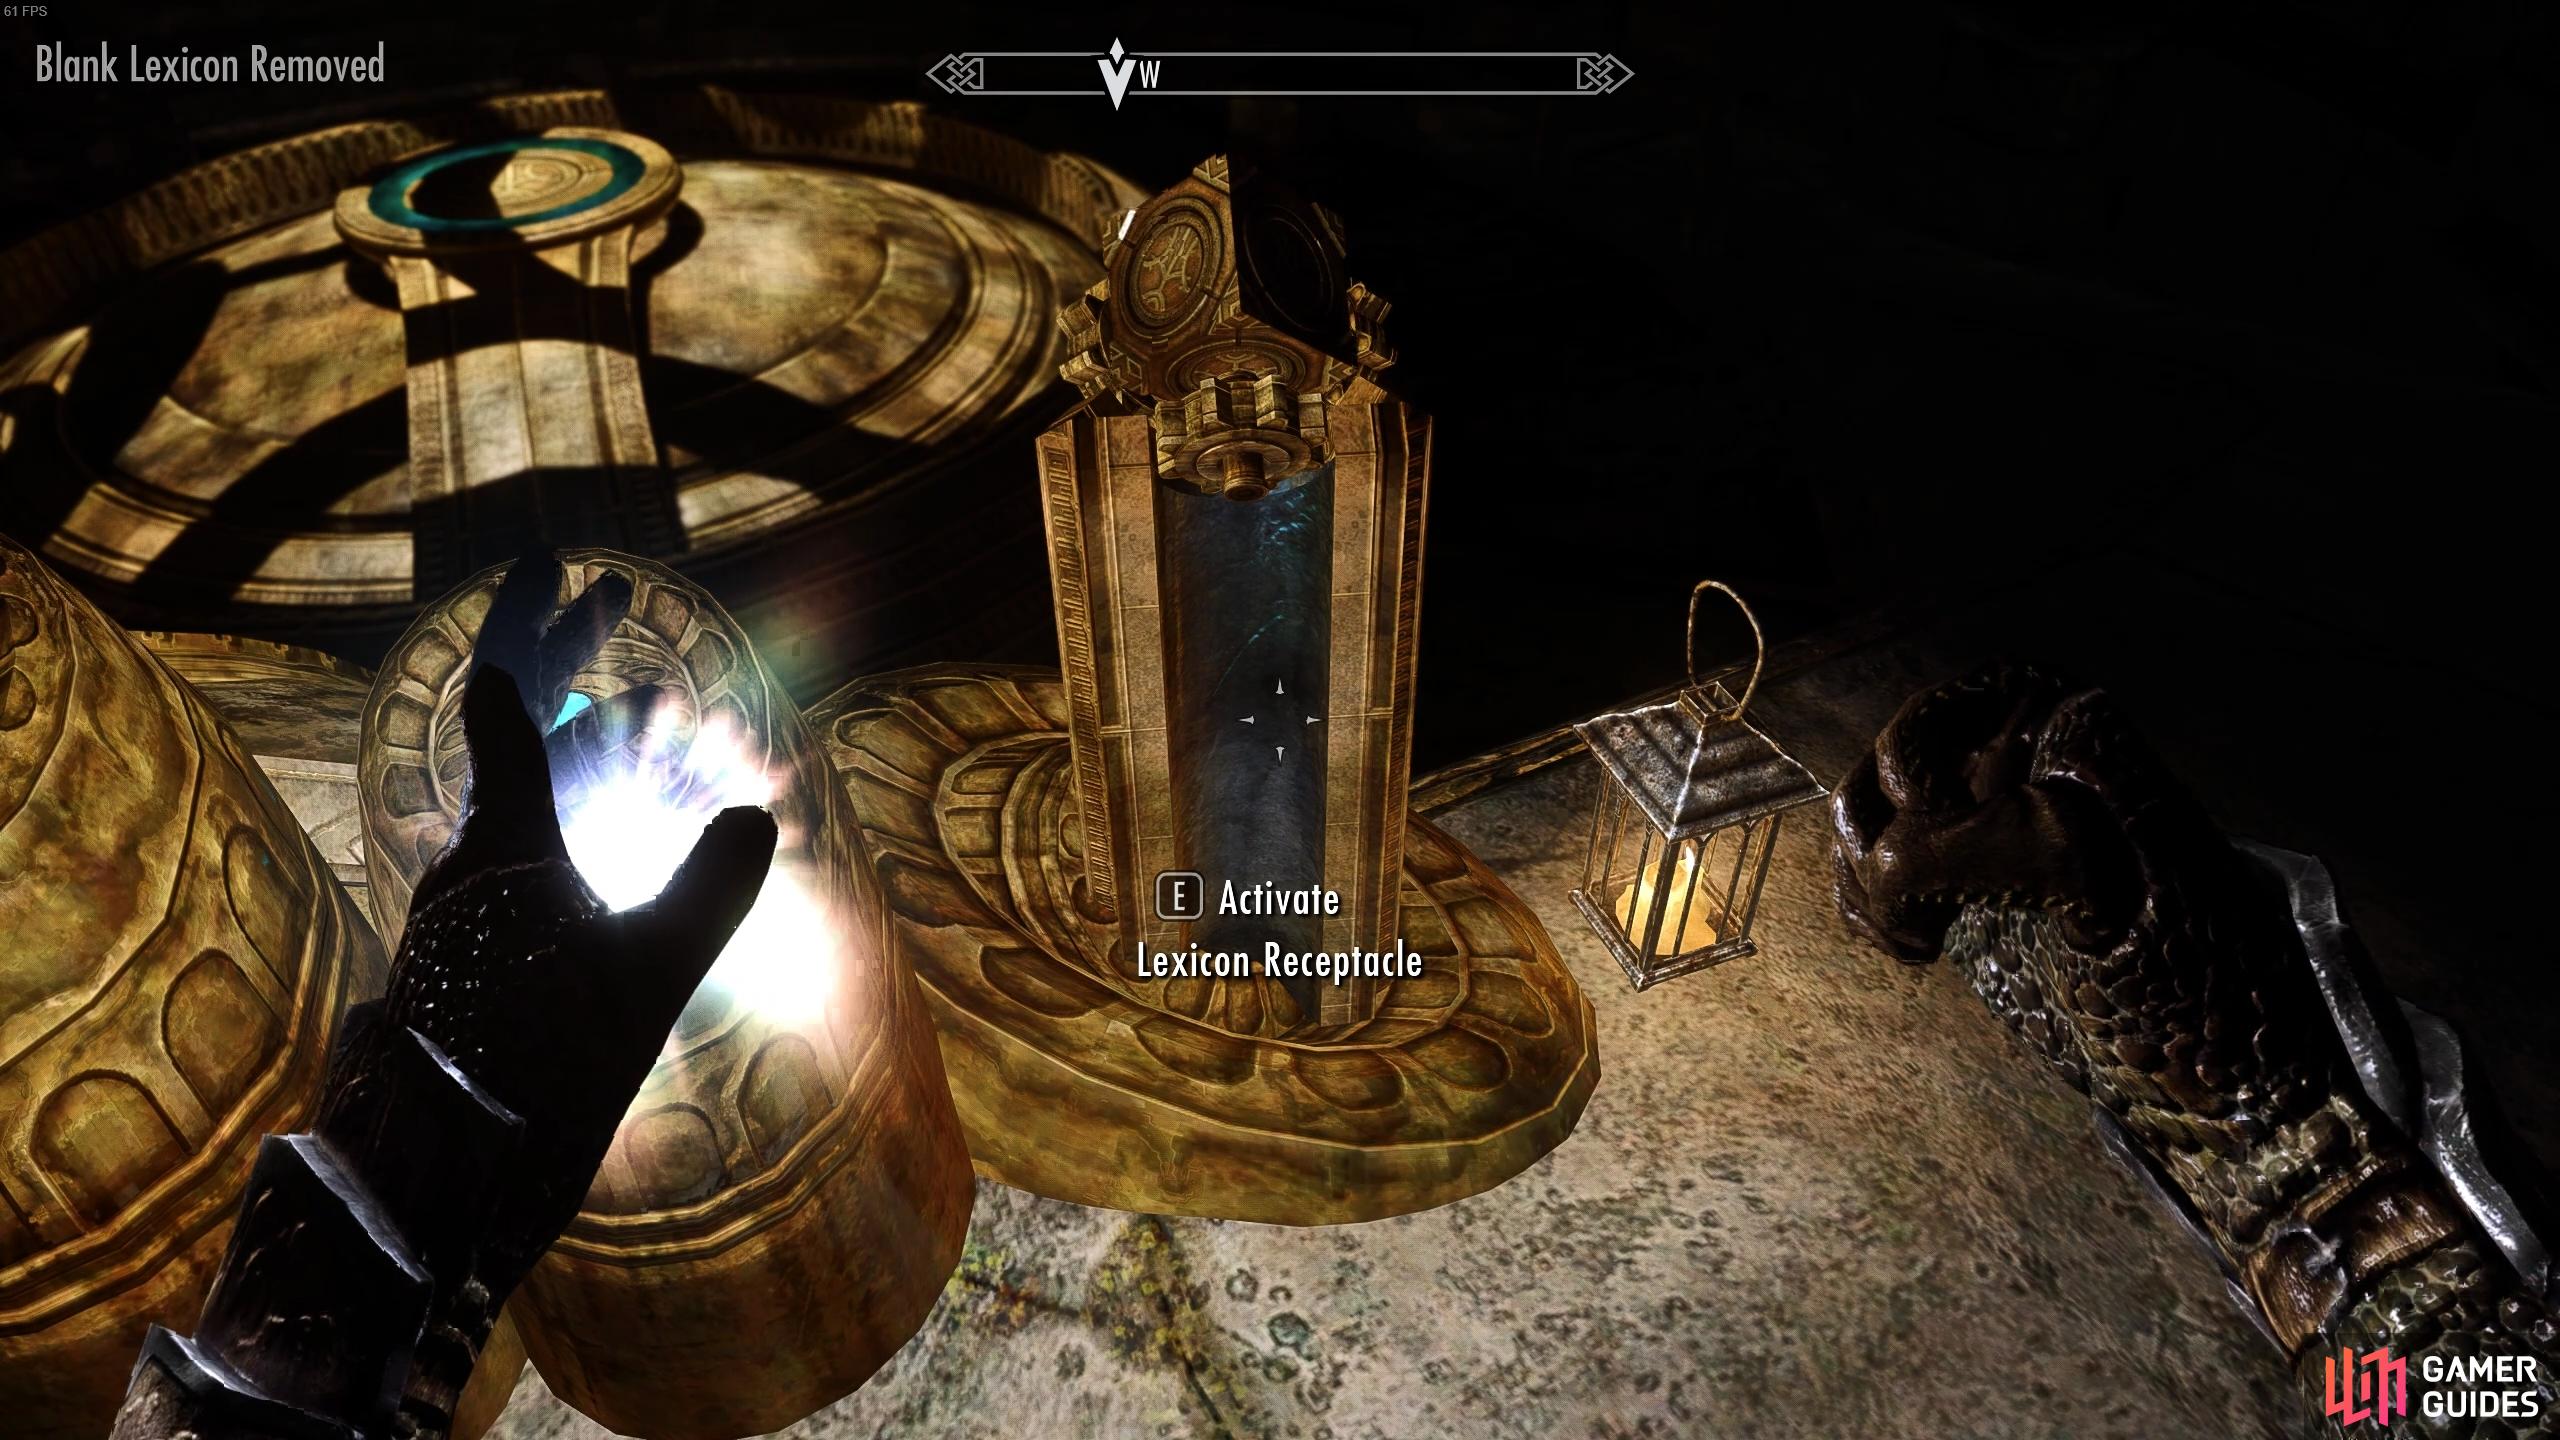
If you just want to find the Elder Scroll and get out of Blackreach at this point, just follow the path through the area, toward the quest marker. You’ll eventually reach a tower where you’ll find a lever. Use the lever to be transported to the Tower of Mzark, where the Elder Scroll can be found. To gain access to the Elder Scroll, you’ll first need to place the lexicon that Septimus Signus gave to you on the far right side of the mechanism where the buttons can be found, overlooking the sphere. When you place the lexicon, you’ll notice that buttons 3 and 4 (from left to right) become active.
To release the Elder Scroll from the Dwarven mechanism, you’ll need to press the third button twice, until you see button number two become active. Next, press button number two twice, until button number one becomes active. Now all you need to do is press button number one once, and the Elder Scroll will be presented to you. You’ll need to take the Elder Scroll from the pod that it was contained in, then take the Lexicon so that you can bring it back to Septimus Signus. This will be necessary to continue with the Discerning the Transmundane quest.


No Comments