
Wisplantern is an Account Item found in the Shrine Ruins.
“A flame-red berry. Prized as a good luck charm. (Account Item)”
| Carry | Rarity | Value |
|---|---|---|
| 99 |
Rarity 4 | 44z |
Where to Find Wisplanterns
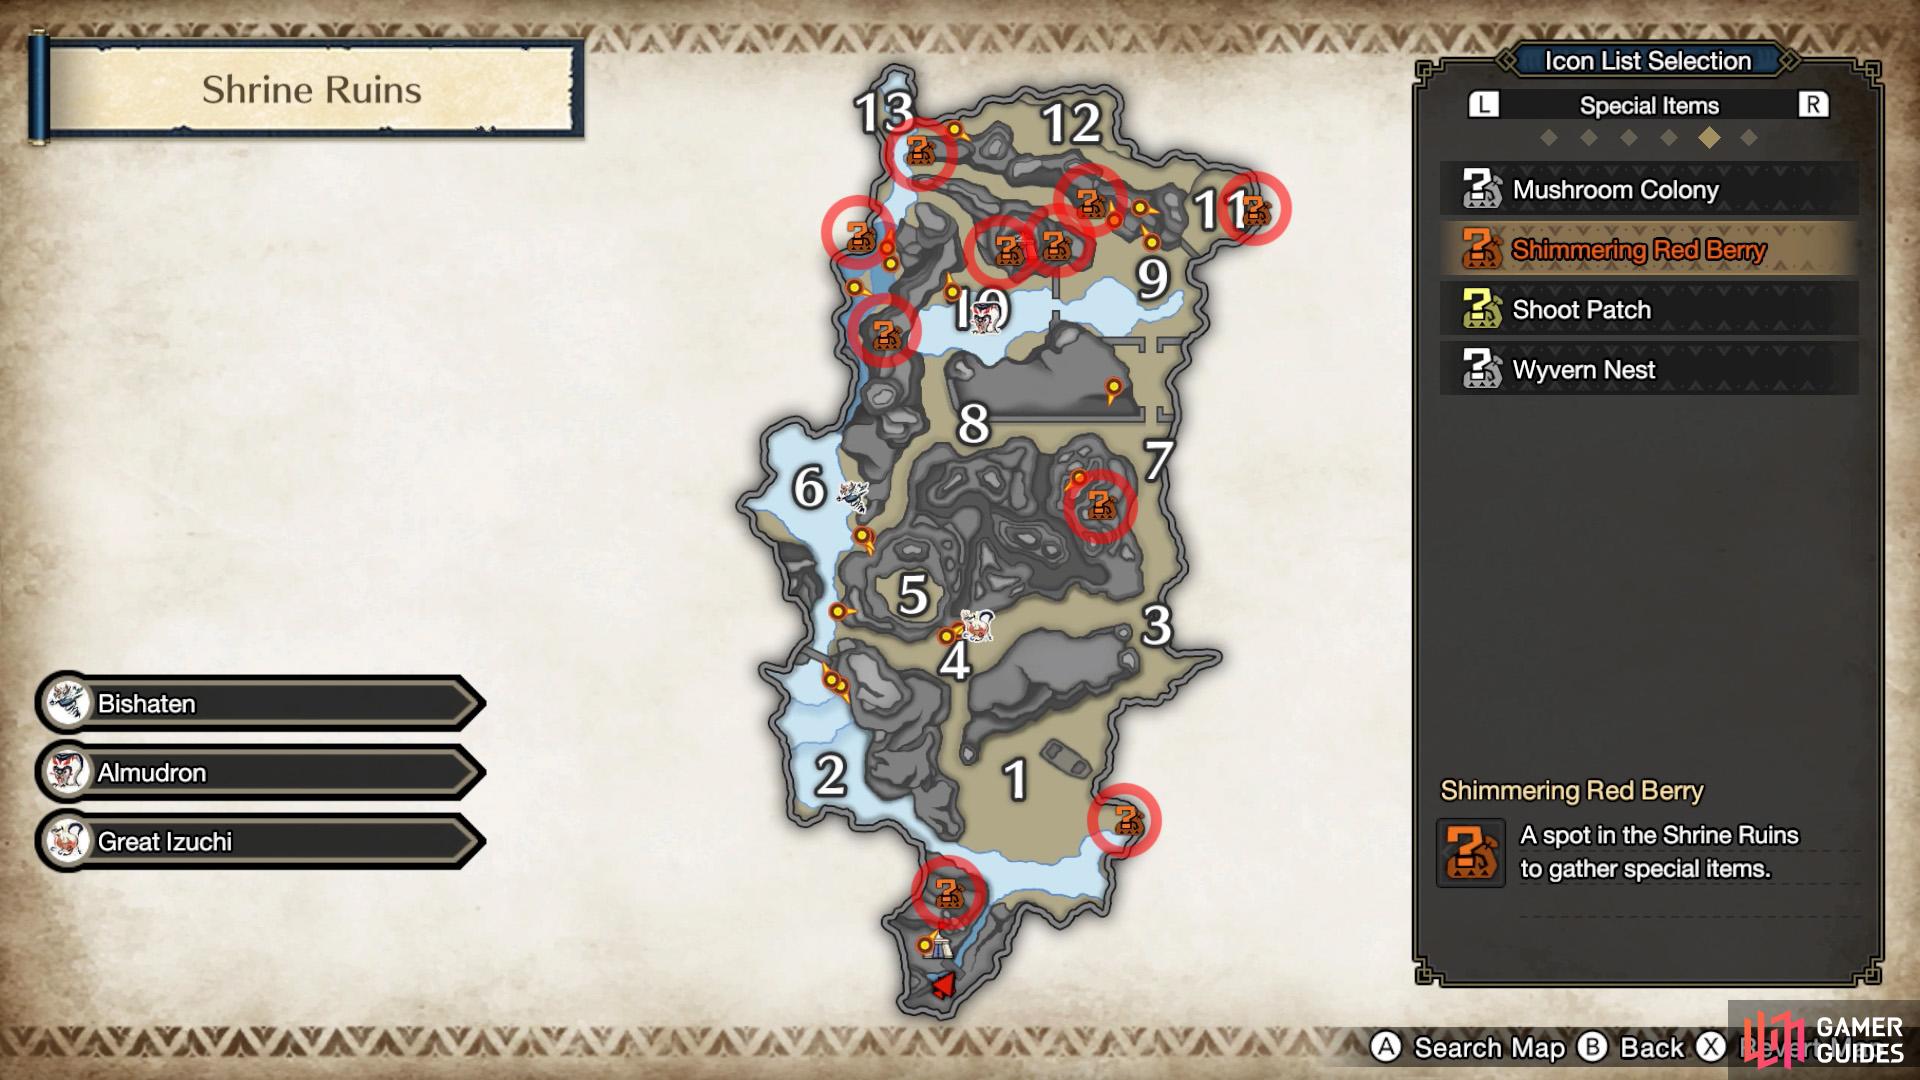
Wisplantern farming locations in the Shrine Ruins.
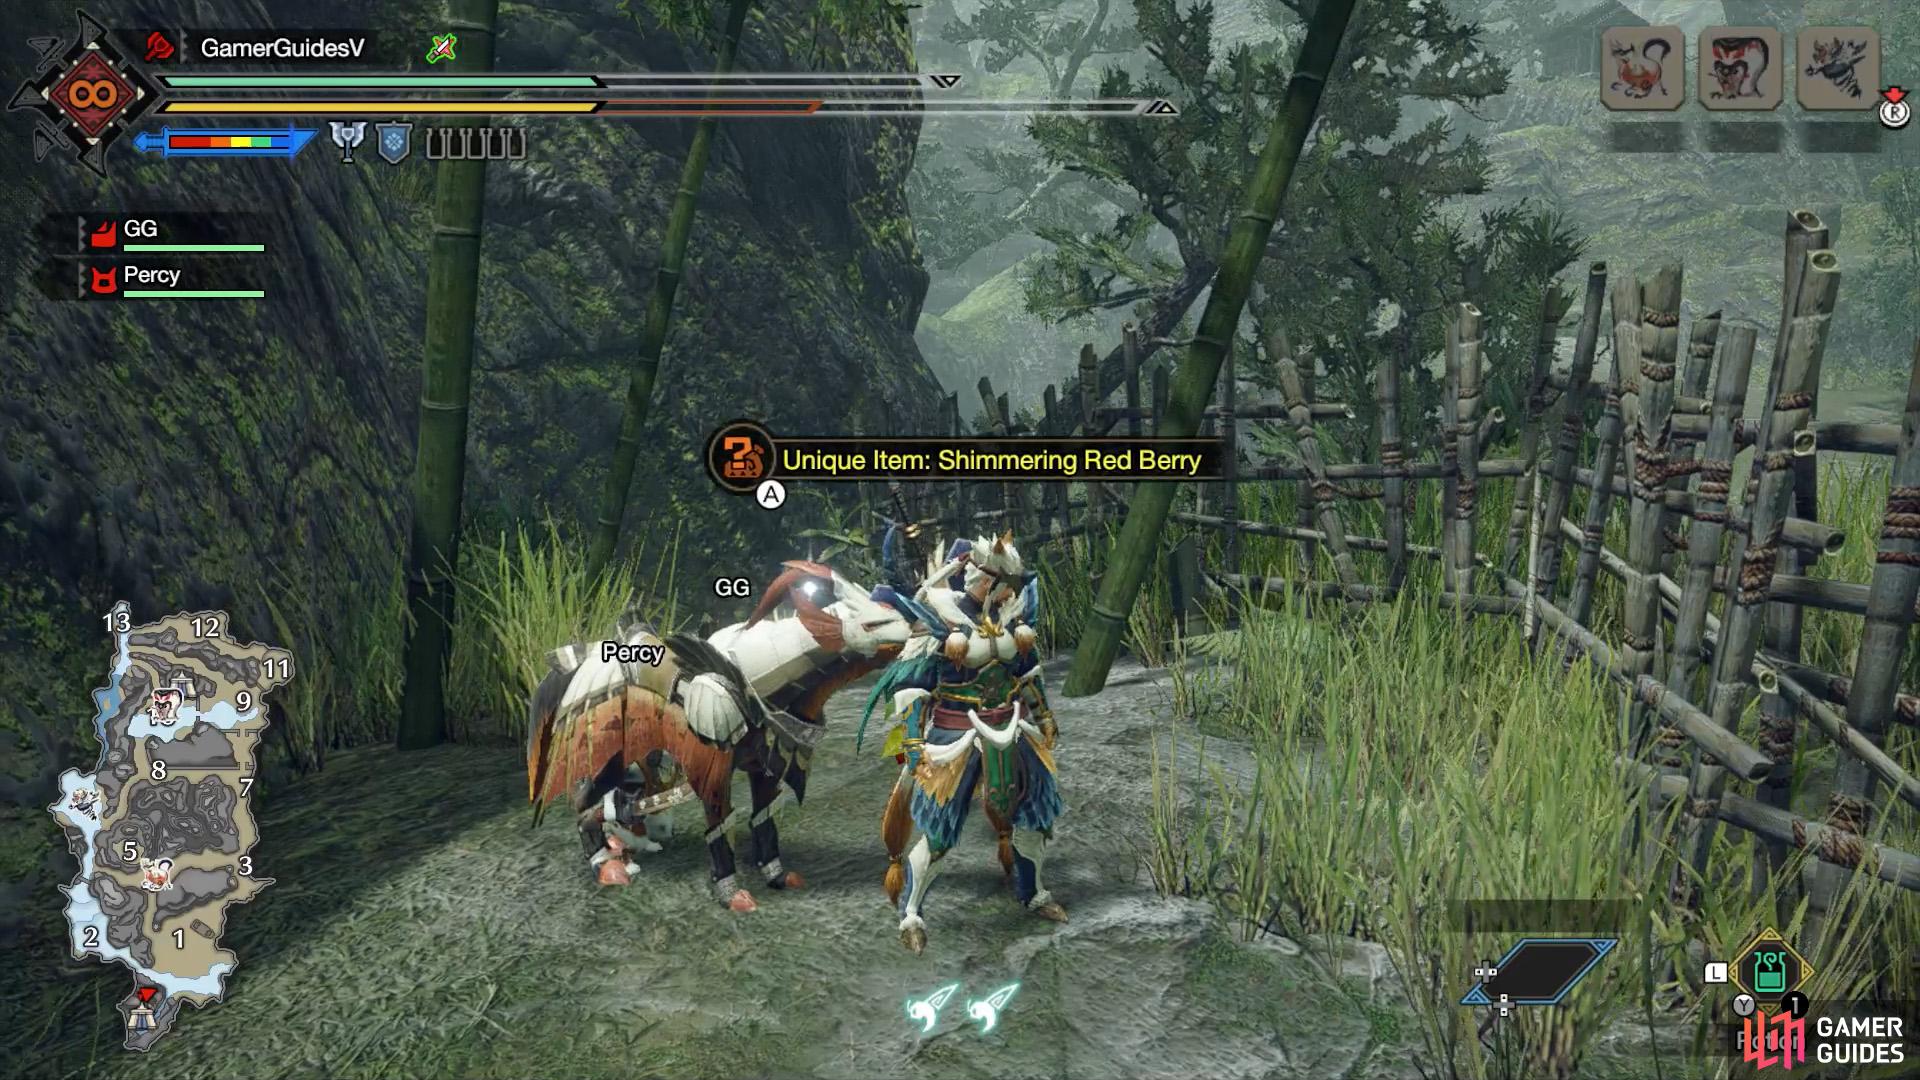
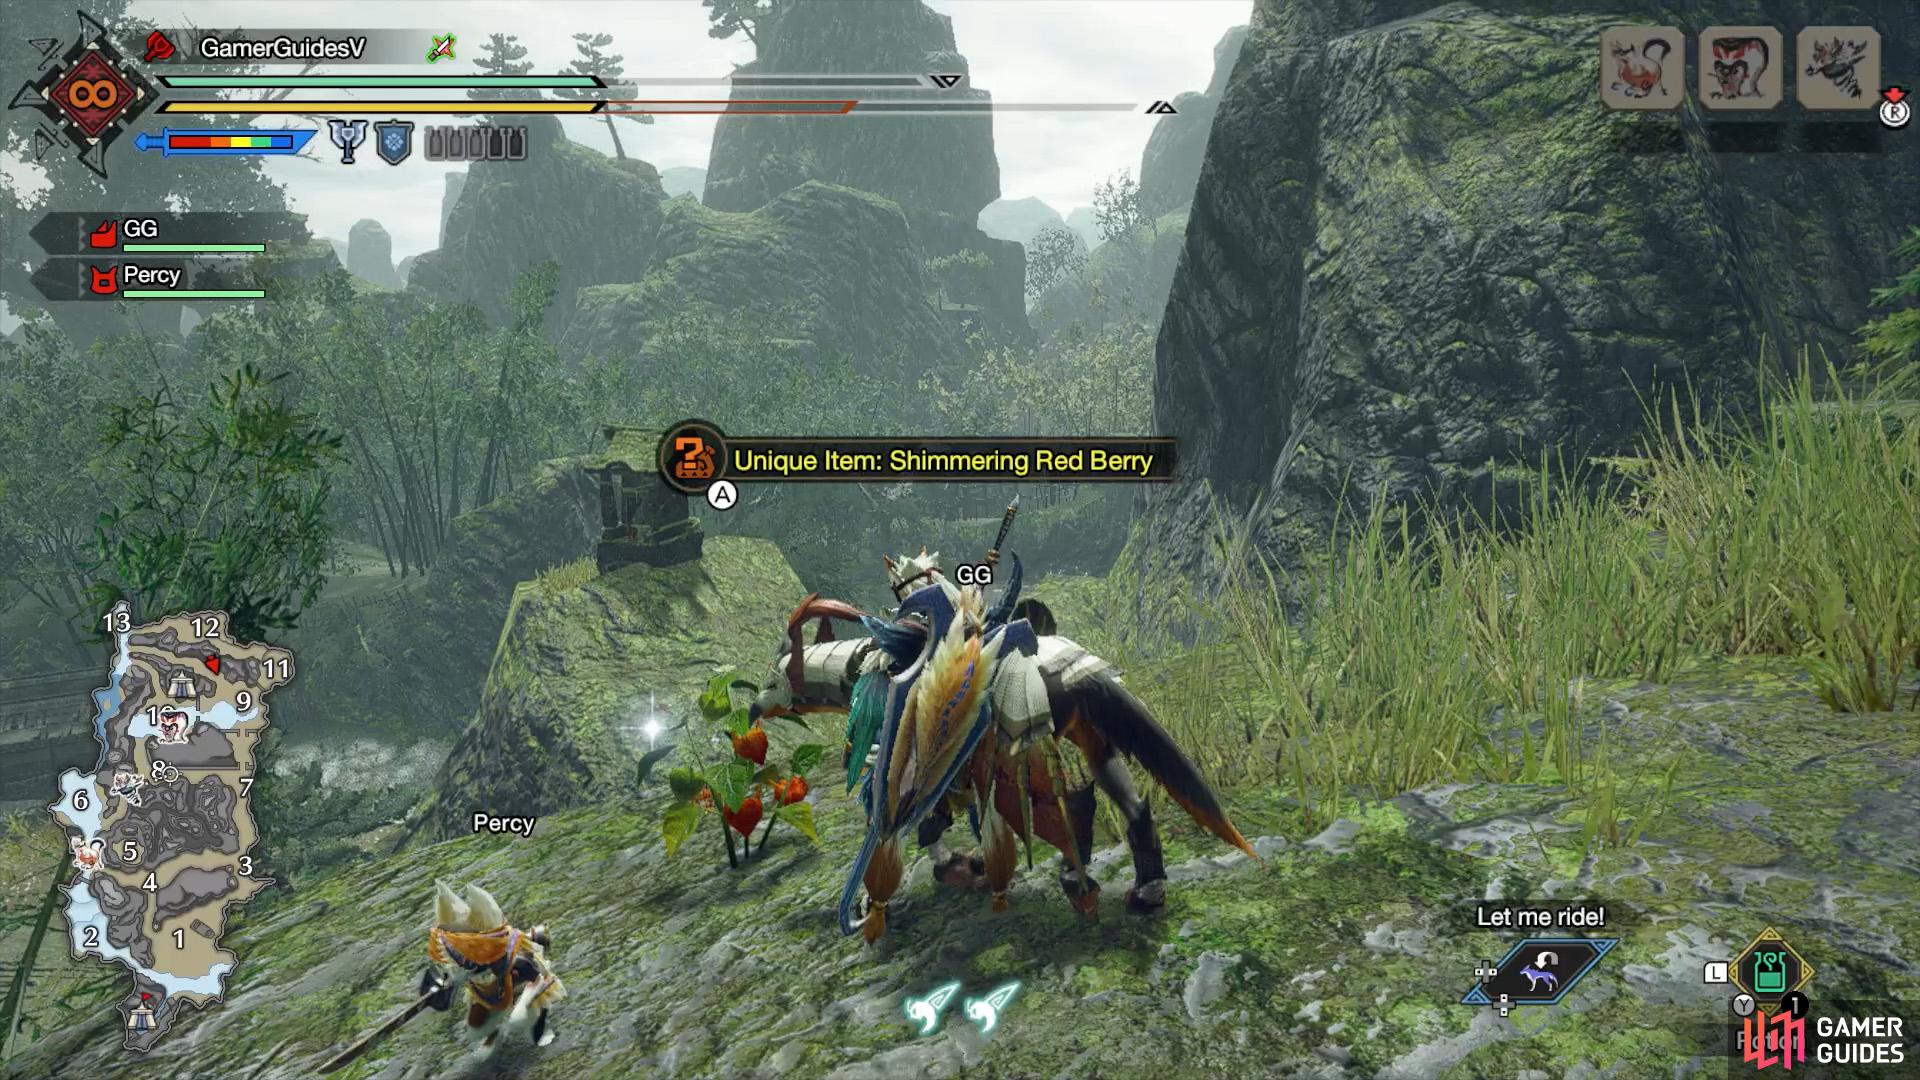
Wisplanterns can be found randomly by searching the Shimmering Red Berry spots in the Shrine Ruins. There are 10 of these, so you’ve got plenty of choice.
(1 of 5) 1: Ledge overlooking Area 1 battleground from the south; north of the main camp.
1: Ledge overlooking Area 1 battleground from the south; north of the main camp. You can use the great wirebug next to the main camp to fly up, then drop down north. Or you can walk along the side path to the right of the main camp (when facing the tent entrance).
2: Far east part of Area 1, north of the stream. From the main camp, you can follow the stream east, then take a left when the stream ends.
3: On a ledge overlooking the Area 7 battleground from the west. You can use your wirebugs to climb up the cliff halfway between the Area 3 and 7 battlegrounds. Or you can climb up the vines towards the south-east part of the central highlands, near the north part of Area 3, then walk north.
4: Near the top of the mountain overlooking the Area 10 battleground from the north. Right next to the Sub-Camp. If you haven’t unlocked the Sub-Camp, you can climb up from the west side, via the road that connects areas 10 and 13.
5: East side of the same mountain. If you’re at the top of the mountain, wiredash over the wall to the east, then carefully drop down. It’s between the Sub-Camp and a small altar.
6: On the highlands north-east from the previous node. You can climb up the cliff using your wirebugs. Or you can use a great wirebug at the north part of Area 9, then head west.
7: Far east part of Area 11, near the Wyvern Nest. From the previous node, you can use the great wirebugs located to the east to quickly reach Area 11.
8: Atop the highlands overlooking the Area 13 battleground from the east. Near a suspension bridge that leads to a relic. You can use a great wirebug halfway between the road connecting areas 12 and 13 as a stepping stone.
9: On a ledge next to the waterfall south from the Area 13 battleground. If you’re coming from the Area 13 battleground, face the top of the waterfall, then go right and drop down when you reach the wall.
10: Atop the highlands overlooking the Area 10 battleground from the west. What you can do, from the previous node, head south and use the east-facing great wirebug at the central island. As you’re flung towards Area 10, do a mid-air roll with  towards the right (south).
What Is Wisplantern Used For?
It’s an Account Items that’s automatically sold when a quest is over.
You need to collect 3 Wisplanterns to fulfil the Cultural Exchange request.
No Comments