
This page details everything you need to know about how the new banners system works in Mount & Blade II: Bannerlord. We’ll cover how to get banners, how to equip them, and the different types of banners, including their tiers.
How to Get Banners in Bannerlord
There are currently 45 banners available in Bannerlord, excluding the Dragon Banner which you can obtain by completing Assemble the Dragon Banner, and which grants you +5% increased damage against mounted troops. This isn’t a particularly special banner, but it does serve as a basic introduction to the banner system. The only way currently to obtain all of the other banners listed in the table below, is to loot them from the battlefield.
There’s a chance for each banner to drop from any battle that you fight. In general, the higher tier banners will drop from more difficult battles, and at present only AI nobles can wield tier I banners, clan leaders can wield tier II banners, and faction leaders can wield tier III banners. This means that you can expect to obtain a tier III banner only after defeating a faction leader on the battlefield, for example.
Although the AI has restrictions in terms of which type of character can wield specific types of banners, you don’t have to worry about this yourself. You can wield any tier of banner regardless of your position in Calradia, as can your companions in their role as captains.
How to Equip and Use Banners
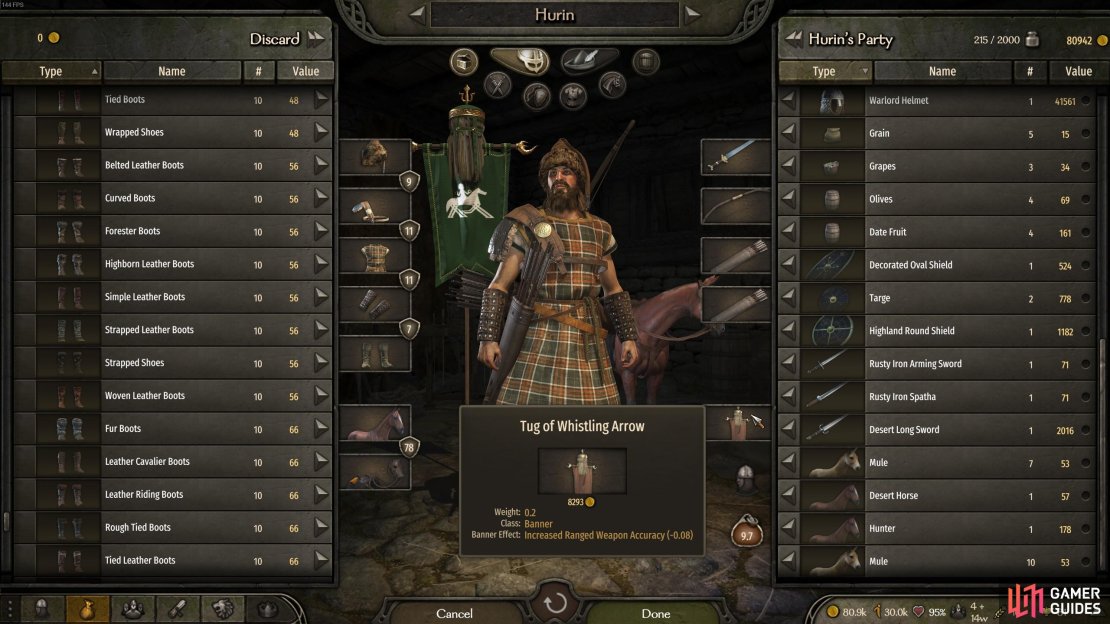
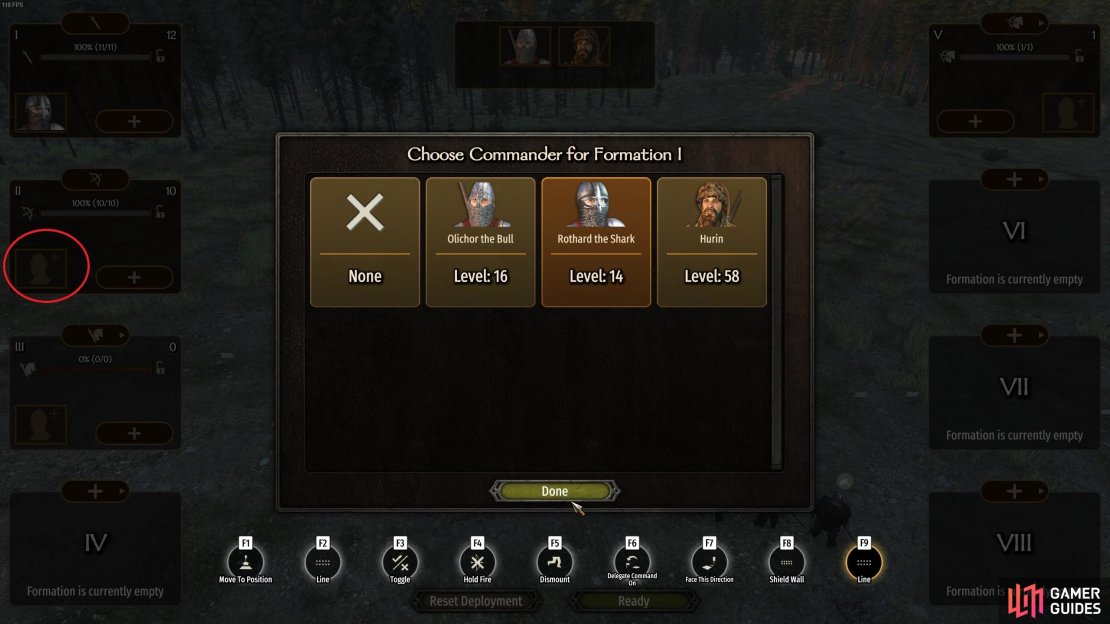
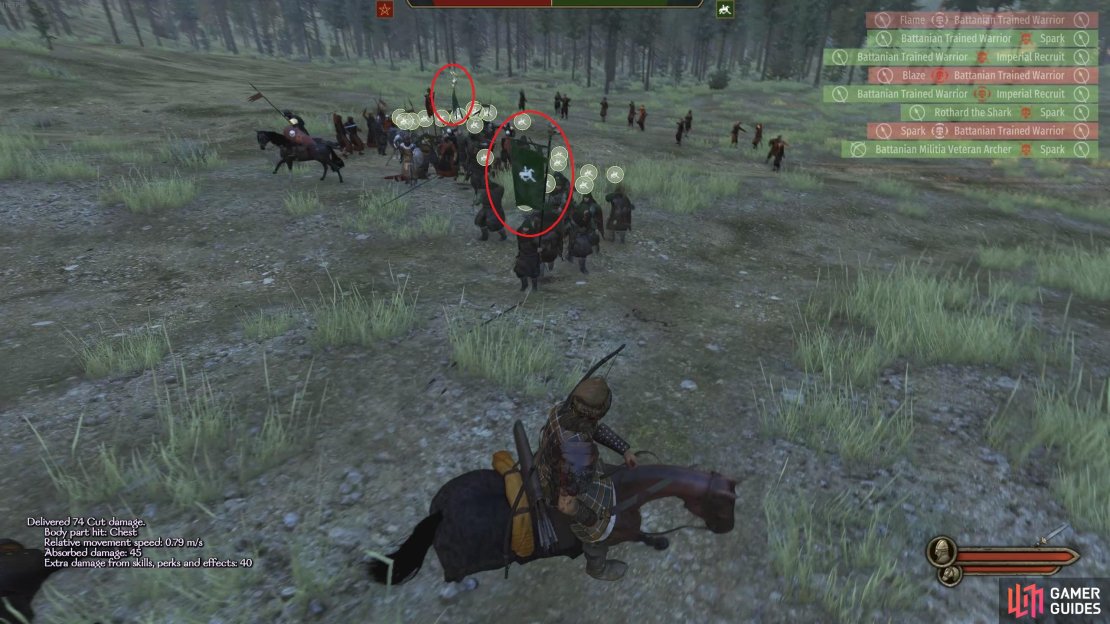
Once you have a banner in your inventory, whether it’s the Dragon Banner from the associated quest, or one of the banners listed below after looting it from a battle, you’ll need to select it from your inventory and drag it to the empty banner slot located just beneath where you slot your weapons. After placing the banner there, it should appear next to your character as shown in the screenshot below. You can do the same for any of your companions, who will then wield the banner in battle. You can assign one of your companions as the leader (or captain) of a specific group of troops just before a battle. The group that they lead will then benefit from the effects of the banner, and one of the troops in the group will visibly carry the banner into battle.
If all troop members of a group which was carrying a banner fall, you can pick up the banner yourself to buff allies in your own group.
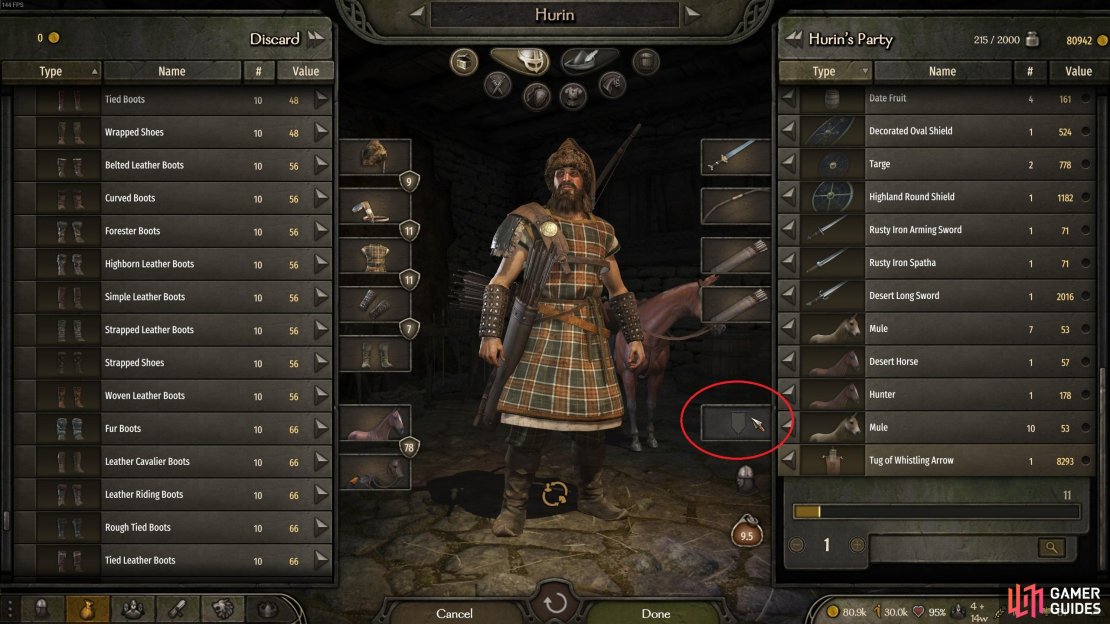
(1 of 4) You’ll find the slot for new banners just beneath the weapons slots.
All Banners, Tiers, and Effects
There are 15 types of banners currently available. These adjust base stats as percentages in various ways, such as increasing ranged damage, reducing received ranged damage, increasing melee damage against mounted troops, or increasing your movement speed, to list just a few examples. Each type of tier I banner has a tier II and tier III equivalent. For example, the tier II equivalent for the Archer’s Flag is the Bowman’s Flag, and the tier III equivalent is the Marksman’s Flag. Most of the banners increase the potency of their effects through the tiers ranging from 5%, to 8%, to 10%, although there are some exceptions as with the increased charge damage banners, which reach 20% at tier III with the Banner of the Knight.
If you want to obtain some of the higher tier banners, you’ll need to fight armies commanded by clan leaders or faction leaders.
| Banner | Tier | Effect |
|---|---|---|
| Archer’s Flag | I | Increased ranged damage by 5% |
| Banner of Desert Winds | I | Increased troop movement speed by 5% |
| Banner of Faris’ Falcon | I | Increased ranged weapon accuracy by 4% |
| Banner of Oaken Shields | I | Decreased taken shield damage by 10% |
| Banner of the Horseman | I | Increased charge damage by 10% |
| Close Shields Banner | I | Decreased taken ranged attack damage by 5% |
| Deer Bane Flag | I | Increased damage against mounted troops by 5% |
| Phalanx Standard | I | Decreased taken ranged attack damage by 5% |
| Scout’s Flag | I | Increased troop movement speed by 5% |
| Spear Bracing Banner | I | Increased damage against mounted troops by 5% |
| Standard of Duty | I | Decreased morale shock by 5% |
| Standard of Fury | I | Increased melee damage by 5% |
| Stone Banner | I | Decreased taken melee attack damage by 5% |
| Tug of the Roaming Horse | I | Increased mount movement speed by 5% |
| Tug of Wooden Arrow | I | Increased ranged weapon accuracy by 4% |
| Banner of Emir’s Hawk | II | Increased ranged weapon accuracy by 6% |
| Banner of Iron Shields | II | Decreased taken shield damage by 15% |
| Banner of Shifting Sands | II | Increased troop movement speed by 8% |
| Banner of the Squire | II | Increased charge damage by 15% |
| Boar Bane Flag | II | Increased damage against mounted troops by 8% |
| Bowman’s Flag | II | Increased ranged damage by 8% |
| Fulcum Standard | II | Decreased taken ranged attack damage by 8% |
| Iron Banner | II | Decreased taken melee attack damage by 8% |
| Ranger’s Flag | II | Increased troop movement speed by 8% |
| Shield Wall Banner | II | Decreased taken ranged attack damage by 8% |
| Spear Wall Banner | II | Increased damage against mounted troops by 8% |
| Standard of Courage | II | Decreased morale shock by 8% |
| Standard of Rage | II | Increased melee damage by 8% |
| Tug of Bone Arrow | II | Increased ranged weapon accuracy by 6% |
| Tug of the Boundless Horde | II | Increased mount movement speed by 8% |
| Banner of Dust Devils | III | Increased troop movement speed by 10% |
| Banner of Steel Shields | III | Decreased taken shield damage by 20% |
| Banner of Sultan’s Eagle | III | Increased ranged weapon accuracy by 8% |
| Banner of the Knight | III | Increased charge damage by 20% |
| Horse Bane Flag | III | Increased damage against mounted troops by 10% |
| Locked Shields Banner | III | Decreased taken ranged attack damage by 10% |
| Marksman’s Flag | III | Increased ranged damage by 10% |
| Pike Wall Banner | III | Increased damage against mounted troops by 10% |
| Standard of Discipline | III | Decreased morale shock by 10% |
| Standard of Wrath | III | Increased melee damage by 10% |
| Steel Banner | III | Decreased taken melee attack damage by 10% |
| Strider’s Flag | III | Increased troop movement speed by 10% |
| Testudo Standard | III | Decreased taken ranged attack damage by 10% |
| Tug of the Endless Steppe | III | Increased mount movement speed by 10% |
| Tug of Whistling Arrow | III | Increased ranged weapon accuracy by 8% |
No Comments