
1) Getting Up to Speed
Scribe Rothchild will show off his pretty orange map and bring you up to speed. If you didn’t destroy Raven Rock, you’ll discover that the Brotherhood-with Liberty Prime-took the liberty to destroy it for you. You’ll also be informed that-contrary to expectations-the Enclave is not in disarray. Your job? Head to the Rockland Car Tunnel (west of the Dunwich Building) and meet Paladin Tristan.
2) The Rockland Car Tunnel
Enter Rockland Car Tunnel and, from the entrance head west, then north, stopping to loot a small room to the right, as it contains five ammo boxes and some low-quality weapons. Down the hallway to the north is another room to the right which contains some food items. Continue north, then turn east and head through a doorway to reach the car tunnel itself, which you should follow to the north to find Paladin Tristan. Despite being friendly, he’ll tell you surprisingly little besides the fact that you’re attacking an Enclave Relay Station. If you loot around, you can stand to gain quite a bit of booty-there’s Enclave crates, a safe, gun cabinets, grenade boxes, and the bodies of several Enclave Soldiers with their gear still on them. When you’re ready to continue on, however, head through a door way to the north-east and follow the hallway beyond to the north to reach a door leading to the Satellite Relay Station.
3) A Prime Target
The same rules apply here that applied to the siege on Project Purity: let the big robot kill everything while you follow behind. You’re more likely to be injured by a stray explosive lobbed by Liberty Prime than by any Enclave Soldier. Liberty Prime will assault the Relay Station, and for a while it seems that Liberty Prime is going to take care of this mission all by itself… Until the Enclave plays its hand. I’m surprised nobody in the Brotherhood bothered to wonder if the Enclave wasn’t retreating because the Enclave wasn’t defeated? Anyways, mourn the loss of Liberty Prime, loot the bodies, then head up a ramp to the north, north-east, climb onto the ledge around the building to the west, go through hole Liberty Prime made, and enter the Satellite Facility.
4) Upstairs
This area will be your largest fight with the Enclave since Project Purity, and this time you don’t have a giant robot around to do all the work for you. On that note, however, you do have a squad of Brotherhood Paladins, who will hold up fairly well. Clear the room you enter into, then go through a doorway to the south to reach a sewer system. Continue south, sack a room to the west, then return to the sewer system and follow it to the west, then south to reach a door, beyond which you’ll find a multi-leveled room crawling with Enclave forces. Crush them, and continue up some stairs until… well, frankly until you run out of stairs to climb. Kill some more Enclave Soldiers in a room to the east, then go through a door to the west.
5) Downstairs
Head west into a tunnel, then turn south, ignoring a room to the west, and instead going through another door to the south to reach another stairy room. Head down these stairs, killing any Enclave Soldiers you find until you reach the bottom. To the north-west you’ll find some beds you can rest in, if you need to recover some lost health. Near these beds, on a metal shelf you can find an Enclave Helmet and two Laser Rifles. Continue through a doorway to the south to reach another sewer, turn west past some yellow crates, then turn north to reach heavy Enclave resistance at a barricade. Break on through, then continue beyond it to the west, then north, through a doorway, and up some more stairs, looting ammo boxes masquerading as Enclave crates alogn the way.
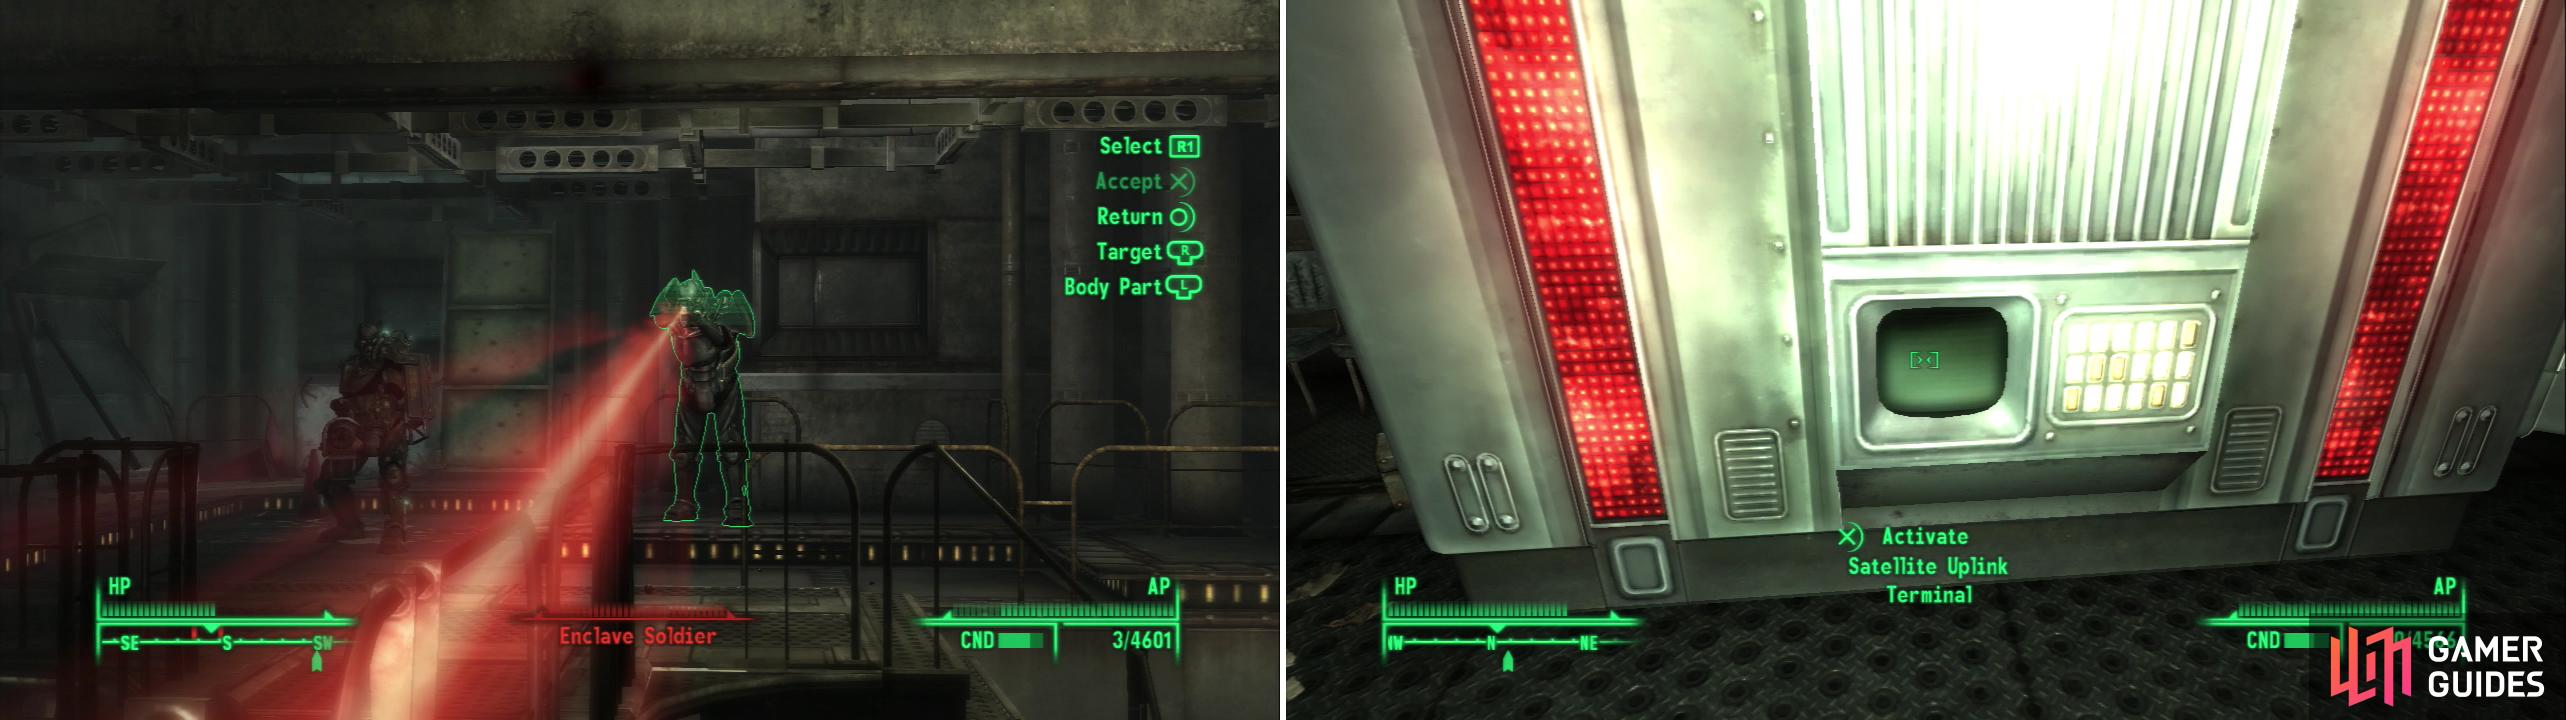
Fight your way through the Enclave defenders (left) and find the data you’re looking for on the Satellite Uplink Terminal (right).
6) Downloading the Telemetry Data
At the top of the stairs head north, then turn west into a larger room. Play bullet chicken with a handful of Enclave Soldiers using four electronics pillars as props. When the Enclave are dead, loot some more ammo boxes and go west through a door, continuing west, then north, and going through another door. In the room beyond you’ll find plenty of impressive-looking electronics, as well as the “Satellite Uplink Terminal”. Activate it and select the “Download Telemetry Data to User Device” option to complete your mission. To the north you’ll find a first aid box. Go through a door to the west, then up some stairs to the north, smite a Mark VII Turret, go up more stairs to the east, destroy another turret, and continue up a final flight of stairs to the west. Here you’ll find a door to the Capital Wasteland, which will exit on some cliffs north of the Rockland Car Tunnel.
7) Breaking the Bad News
Now it’s time to go back and talk to Scribe Rothchild, who is understandably upset that the robot he worked most of his life to rebuild is now slag. Hand the Enclave data over, then go hunt down Elder Lyons. The Elder whines, then refers you back to Paladin Tristan, and the quest “Death From Above” ends, and “Shock Value” begins.


No Comments