
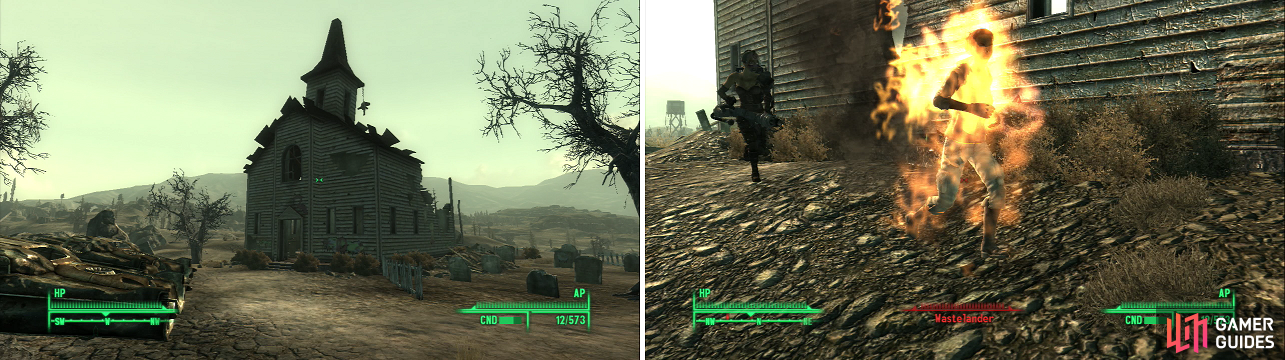
This church looks serene enough from afar (left), but as usual in the Wasteland, looks can be deceiving (right)
1) Raider Church
Book - Lying, Congressional Style
Book - Pugilism Illustrated
Fast travel to Jury Street Metro, stand outside the Gold Ribbon Grocer and look south-west. You should see a church in the distance. When you approach the door you’ll see a burning Wastelander run around the corner and die. Kill the Raider with the Flamer nearby and head into the church, taking care to disarm the trip wire in the doorway. More Raiders will appear outside and approach the church. Deal with them and loot the church. On the podium you’ll find a copy of Lying, Congressionaly Style , as well as plenty of ammo and items scattered about, including a Mini Nuke. In the corner by a sink you’ll find a copy of Pugilism Illustrated .
2) Book Hunting
Book - Nikola Telsa and You
Book - U.S. Army: 30 Handy Flamethrower Recipes
Head south from the church and search the ruined buildings. In the back of one you’ll find a safe [Hard] with, among other things, a Stealth Boy inside. In the house south of the one with the safe you’ll find a copy of N ikola Tesla and You on a shelf. Now only one more thing to do before we head south some more. Follow the road between the buildings east to find a truck, in the back of which are some containers, ammo boxes, and a copy of U.S. Army: 30 Handy Flamethrower Recipes . Head south, south-west until you find the VAPL-84 Power Station.
3) VAPL-84 Power Station
Near VAPL-84 you’ll find a truck, inside of which are metal boxes and some items on the floor, the best of which is a Mini Nuke. There also tends to be Yao Guai wandering around. Head south, south-west to find Tenpenny Tower. You really can’t miss it on the horizon. Get close enough to discover it, but we’re not here to stay just yet. First, however, we’ve got some books to grab.
4) Willy’s Grocer
Book - Tales of a Junktown Jerky Vendor
Book - Tumbler’s Today
East, south-east of Tenpenny Tower (past a red rocket statue) you’ll find Willy’s Grocer. It’s got a nice little haul of Nuka-Colas, Tin Cans, Beer, and a copy of Tales of a Junktown Jerky Vendor on the counter. All of this is guarded by a few Radroaches. There’s also a safe [Hard] behind the counter. Leave the Grocer and head south into a ruined building. Go up a ramp to the north or go upstairs and drop down on the level with the skeleton by the wooden shelves. Near the skeleton are some Stimpaks, a Scoped .44 Magnum, and an ammo box [Average]. There’s also a copy of Tumblers Today on the shelf. Now head north-west to return to Tenpenny Tower.
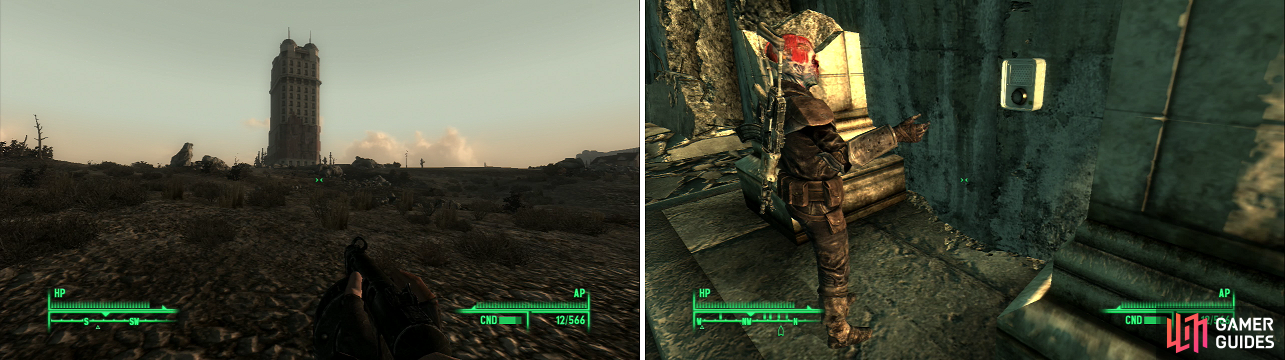
Tenpenny Tower dominates the skyline of the western Wasteland (left), but it isn’t open to everyone (right).
5) No Zombies Allowed!
Outside of Tenpenny Tower you’ll find an angry Ghoul named Roy Phillips. He want to get into Tenpenny Tower-Mr. Tenpenny doesn’t want zombies inside-the Ghoul and a security guard argue over an intercom. Roy Phillips leaves after threatening the Tenpenny folks, leaving you free to activate the security intercom and recieve a wave of abuse directed at Roy. Don’t insult the security guard, or you’ll be paying 100 Caps to get in. Say you’re here to see Mr. Tenpenny and succeed at a Speech challenge to get in for free.
Once inside you’ll be threatened by Chief Gustavo. Talk to Gustavo and offer to take care of his Ghoul problem. You can try to work something out to get the Ghouls a place in Tenpenny Tower… but let’s just say that’s not entirely healthy for the Tenpenny residents. As snotty as they tend to be, they can at least be talked into cooperating, which is more than can be said for Roy Phillips. Offer to take care of his Ghoul problem. He’ll offer for 500 Caps, succeed at a Speech check to get him to raise it to 700 Caps. He will also give you a Chinese Assault Rifle, some 5.56 Ammo, and tell you the Ghouls are in the Warrington Metro Tunnels.
This conversation starts the quest “Tenpenny Tower” . You can talk to people outside, and barter with Gustavo, who has some armor, weapons, and ammo to sell. He’ll head inside and sit behind a desk in the lobby, which is where he’ll spend most of his time when he’s not being a butt-nutter by the intercom outside. We should really explore Tenpenny Tower fully before we go to the Warrington Station.
6) Stuff to Do, People to See
Schematic - Dart Gun
You can steal Allistair Tenpenny’s Suite Key from Gustavo, if you wish. You can also steal Tenpenny Resident’s Keys from nearly every named person living in Tenpenny… hell, there’s all kinds of stealing to do here. The person to talk to in this area is Herbert “Daring” Dashwood, a character from the same GNR show as Argyle the Ghoul. If you tell him the fate of Argyle he’ll give you Dashwood’s Safe Key. You can buy the Schematic - Dart Gun from Lydia Montenegro, which you might as well. You can also take a trip to the Metro Access & Generator, where you’ll find a few Tin Cans and some other loot, as well as a locked door [Very Hard] leading to the Warrington Station. When you’re done stealing head up stairs to find the door to the Tenpenny Suites.
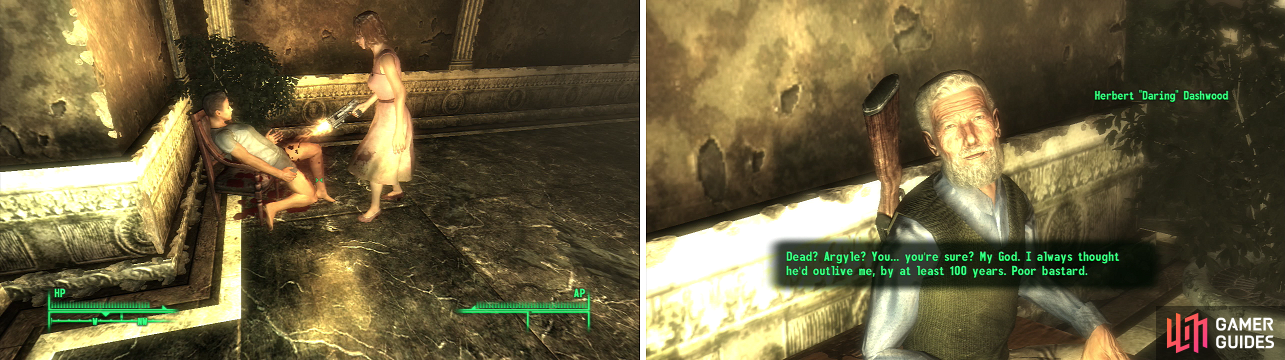
Millicent Wellington is one woman you do not want to cross (left). Herbert “Daring” Dashwood is willing to reward you for news about Argyle’s demise (right).
7) The Stash of Dashwood
Book - Tales of a Junktown Jerky Vendor
Book - Schematic - Bottlecap Mine
These apartments are typically better off than the ones downstairs. In the one in the north-east corner you’ll find a copy of Tales of a Junktown Jerky Vendor on a desk near a Love Letter. Take the Love Letter-if you show it to Millicent Wellington, she’ll be understandably upset… then she’ll proceed to murder her husband and his lover. Nobody else in Tenpenny Tower seems to care. In the north-western corner you’ll find Dashwood’s Suite, which has significantly more goodies inside than most of the other apartments. Years of Wasteland exploration paid off. In his safe are 50 Caps, some drugs, a Mini Nuke, a Stealth Boy, five Stimpaks, and the Schematics - Bottlecap Mine . You should also check out his “Exploration Database”, which is interesting, if nothing else. In the south east corner is Michael Hawthorne’s suite, which has plenty of alcohol inside. In the Wellington suite, in the south-west, you’ll find a locked safe [Average]. Head back down to the lobby and take the elevator up to the Penthouse Suites.
8) Penthouse Suites
Book - Lying, Congressional Style
You can use Speech to get your way past Tenpenny’s Guard, or wait for him to walk around to pick the locked door… or steal the key to the door on the table next to him. In his suite you’ll find a copy of Lying, Congressional Style on a desk. When you’re done looting take the door to the outside to find Tenpenny on his balcony. Talk to the old bugger and fast travel down to the ground, the RobCo Facility is close enough, and it saves us the bother of walking back through Tenpenny Tower. Now it’s time to find the Warrington Trainyard, which is to the west.
9) Warrington Trainyard
Book - Duck and Cover!
West of Tenpenny Tower you’ll find a number of houses with some minor loot in them. On a bookshelf in one of the houses you’ll find a copy of Duck and Cover! , hidden under another, more useless book. Keep heading west to find the Warrington Trainyard. There will be Ghouls, and you’ll catch some Rads. Search the metal structures for some ammo boxes, and a Sniper Rifle. On one of the metal walkways you can jump onto you’ll find some skeletons with a Missile Launcher, some grenade boxes, and drugs nearby. When you’ve searched around head into the WarringtonTunnels.
10) Warrington Tunnels
Head east into the train tunnel, grabbing the Assault Rifle and 5.56 rounds by the skeleton. Follow the tunnel south east and kill some Ghouls, until you find a door to the north. Go through the rooms to the north, killing Ghouls and looting until you find a tunnel leading east, north-east. The tunnel will connect to another tunnel leading north and south. Head south to catch some Rads and find a locked door [Average] leading to a storage closet full of goodies. Now go north until you find a door leading to the Warrington Station.
11) Warrington Station
Head east until you’re accosted by a Ghoul named Michael Masters. He’ll tell you that Roy is planning to kill the residents in Tenpenny Tower. Don’t threaten to kill him as he won’t respond friendly-like. Up the stairs to the east you’ll find a few things to rob, and to the south you’ll find access to the Capital Wasteland via the Warrington Station, but the area you need to explore is on the lower level to the east. Head through the first door to the right, continuing until you find a room where Roy Phillips and Bessie Lynn are. Bessie doesn’t have much of anything interesting to say, so talk to Roy.
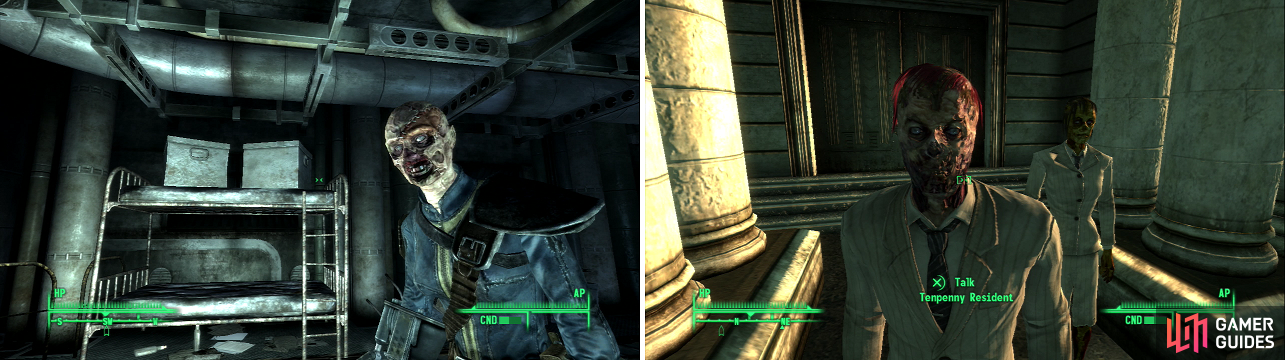
The Ghoul Mask might be a useful (if hideous) bit of headgear (left) but if you help Roy, the future residents of Tenpenny Tower will be somewhat more Ghoulish (right).
12) Roy’s Revenge
Roy’s plan is to get past the subway access door leading to Tenpenny Tower and get to the Metro Access & Generator, which connects to Tenpenny Tower. If you try to do things peacefully and talk the residents of Tenpenny Tower into letting the Ghouls in, Roy will go ahead and let the Feral Ghouls kill them anyways. If you want to help Roy out with his plan to kill all the Tenpenny Residents, steal the “Key to Tenpenny Generator Room” from Chief Gustavo and head around to the back of Tenpenny Tower to find a door leading to the Metro & Generator Access area. Once inside, either hack the DCTA Emergency Access Terminal [Easy], or shoot one of the generators behind the fence. By doing it Roy’s way, he’ll reward you with the Ghoul Mask , which isn’t very helpful defensively (and it’s certainly not pretty!), but it will keep Ghouls from attacking you.
13) Shotgun Diplomacy
Book - Big Book of Science
Book - Dean’s Electronics
Book - Pugilism Illustrated
Since Roy isn’t on the level with us and wants to kill all the Tenpenny folks anyways, we might as well just eliminate him, as the lesser of two evils. Kill Roy, Bessie, and Michael, then loot around in this room for a variety of toys. Between two metal boxes you’ll find a Nuka-Cola Quantum, and in a wooden crate on a shelf you’ll find a copy of Pugilism Illustrated . Head out a door to the north, down some stairs to the east, and into a small store room to the north. You’ll find a copy of Dean’s Electronics on a metal shelf. Now there’s just one last thing to get, in the room with the door to the Metro Access & Generator you’ll find a Big Book of Science on the desk. Head back to where you first met Michael in the west, then exit to the Capital Wasteland.


14) Lucky’s
Book - Pugilism Illustrated
You’re now at the Warrington Station south-west of Tenpenny Tower. Head south-west to find a red brick building. Inside is a bunch of loot guarded by one Scavenger. Steal the Scavenger’s stuff or kill them if they are causing you too much trouble. In one of the freezers in the back is a Nuka-Cola Quantum. In a plastic bin you’ll find several missiles. Behind the counter is a copy of Pugilism Illustrated . And there’s a terminal [Hard] you can use to access a safe [Hard]. Inside the safe is a Stealth Boy. Last but not least grab the Lucky Shades off the mannequin in the north-west corner of the store. They’re not anything amazing, but with +1 Damage Resistance and +1 Luck… it’s not bad. Besides, unless you’re wearing a helmet, what else are you going to put on your face? Now go back to Tenpenny Tower and talk to Gustavo for your reward.
No Comments