
1) Find Wernher
Turn on Wernher’s Distress Signal and fast travel to SatCom Array NN-03d, or somewhere nearby and head north to find the broadcast tower Wernher is using. When you get close enough Wernher will get attacked by several Pitt Raiders. Help him (or not) and afterwards he’ll talk to you. Long story short, he needs your help to seize some cure to heal his people and overthrow the ruler of the Pitt, Ashur. To do this, you will need to disguise yourself as a slave by interrupting a slave deal over to the west. You’ll notice some of the Pitt Raiders have some new Raider armor on them, unique to the Pitt. It’s not unique in the grand scheme of things, but new garb is always welcome, even if most of it is just edited Leather Armor and Metal Armor.
2) Dressing the Part
Head west until you find the Train Tunnel, around which several Slavers are waiting with their slaves safely chained up. There are several ways to handle this. First, kill everybody around and grab the Slave Pen Key off of Ramsey. Second, steal the key from Ramsey, although once the slaves get out you’ll have to kill the Slavers. Third, pick the lock to the slave pen, which also involves having to kill the Slavers once you’re done. Lastly, buy the slaves off of Ramsey. Why pay when you can save some good money by killing a few Slavers? And since you’re going to have to kill them all anyways if you don’t pay… deal with it in the most logical way. Note that you don’t have to actually SAVE the slaves, just as long as you get a slave outfit off of one of them. Once obtained, loot the shacks nearby, one of which contains three ammo boxes. Head off to the east to find Wernher, who followed you here all sneaky-like.
3) Preparing for the Pitt
Now Wernher implores you to get what supplies you need and follow him to the train tunnel. As he so points out, you’ll never reach the Pitt without his directions. So much the worse for the Pitt, right? You can talk to Wernher and learn more about the Pitt now, but as for his advice, you should do the exact opposite. Go back home and drop off EVERYTHING you have on you. Your drugs, your caps, weapons, ammo. Everything that can be stashed should be stashed… save the Tattered Slave Outfit or Worn Slave Outfit you got from the slaves earlier. Make sure to remove your rads and detoxify yourself, should you need to. You won’t be making a trip home for a while, best to set out strong, no? You also will want to make a “safety” save game, as The Pitt can be, in my experience, somewhat glitchy. It would be a good idea to keep a save back in the Capital Wasteland at all times in case something goes horribly wrong… either a glitch, you catch too many rads, break the quest, or run into some other sort of complication. This way you’ll lose a few hours of gaming, instead of a few dozen hours. Last Warning.
Once you’re ready fast travel back to the Train Tunnel and talk to Wernher, who is wating in the Pitt Tunnel, near a hand cart. To go to the Pitt activate the Hand Cart, where the game will warn you that you will not be coming back to the Capital Wasteland until The Pitt is completed. When you’re ready select the “Travel to The Pitt.” option.
4) Pitt Train Yard
When you arrive you’ll discover the Pitt Train Yard. Wernher will see people approaching and decide to do the talking. Follow him and Wernher will have a short chat with a Pitt Raider before opening fire. Since you’re wisely unarmed, run into the truck bed to the west of Wernher and let him settle things with his Scoped .44 Magnum, of which he’s more than capable of. Once they’re dead follow Wernher. You may be tempted to grab their loot, but trust me, you won’t need it, and it won’t do you any good to take it yet.
Follow Wernher to a locked chain gate, which he will open. Now he’ll talk to you, and tell you that you’ll be stripped when you enter The Pitt. You can ask him to give you a concealed knife or handgun, but if they detect anything on you, this will be stripped too. Besides, with Iron First, we should be doing 20 or so damage with our fists. It’s not great, but it’ll be much better than the Switchblade or the .32 Pistol Wernher will give you, and it’s enough to get started in The Pitt.
5) The Pitt Bridge
Head north-east until you find The Pitt Bridge. This bridge is covered with useless cars and landmines. One explosion here could cause a chain reaction and be very bad for you. There are also some Wildmen in the building nearby you’ll want to avoid, so it would be a good time to put your stealth shoes on. Be wary of landmines and bear traps as you cross the bridge intially. Shortly on a Mole Rat will run out, being pursued by some Vicious Dogs. Let nature run its course. You can either kill the Vicious Dogs, or avoid them. Continue north and stay hidden. Near the end of the bridge will be a platform spanning the bridge spires, on top of which a Pitt Raider keeps guard. Him and his Sniper Rifle. You really don’t need to get him shooting at you. If crossing the bridge sounds like a chore… too bad. Don’t try to swim across the river, because you’ll suffer around 300 Rads per second (before resistance) if you get wet. It’s nice to know some things in Pittsburgh haven’t changed.
6) Pitt Justice
As you cross the bridge some Pitt Slaves will run out and promptly get themselves blown up by the various mines lying around. Also, when you reach the northern end of the bridge, you can turn east to find a sidewalk running along the bridge. Follow it south, up a metal ramp, and you’ll eventually reach the catwalk upon which the Pitt Raider with the Sniper Rifle lurks… you know, if you want revenge, or even just to rid yourself of this potential nuisance. There’s a bed up there, so you can recover from whatever damage you took.
7) Mex’s Shakedown
Turn east down a new road and approach a fenced area. The guards will open the gate an a bastard named Mex will come forward to deal with you. If you’re dressed up as a slave, he’ll check you for any… contraband you may have on you, and if you’re dressed up as something else… well, lets just say trying to be clever will just get you beaten up and enslaved. If you, say, punch Mex a few times until his head explodes, nab his weapon, then shoot his buddies and head into The Pitt… you’ll get beaten up and enslaved. So, just accept your new lot as a “slave” and head through the gate to Downtown. If you lost anything to Mex, you’ll be able to get it back when you’re done with The Pitt. Until then, it’s going to remain in the care of Mex. It’s a wonder they didn’t question you about the.. you know… the Pip-Boy on your arm? Ah well.
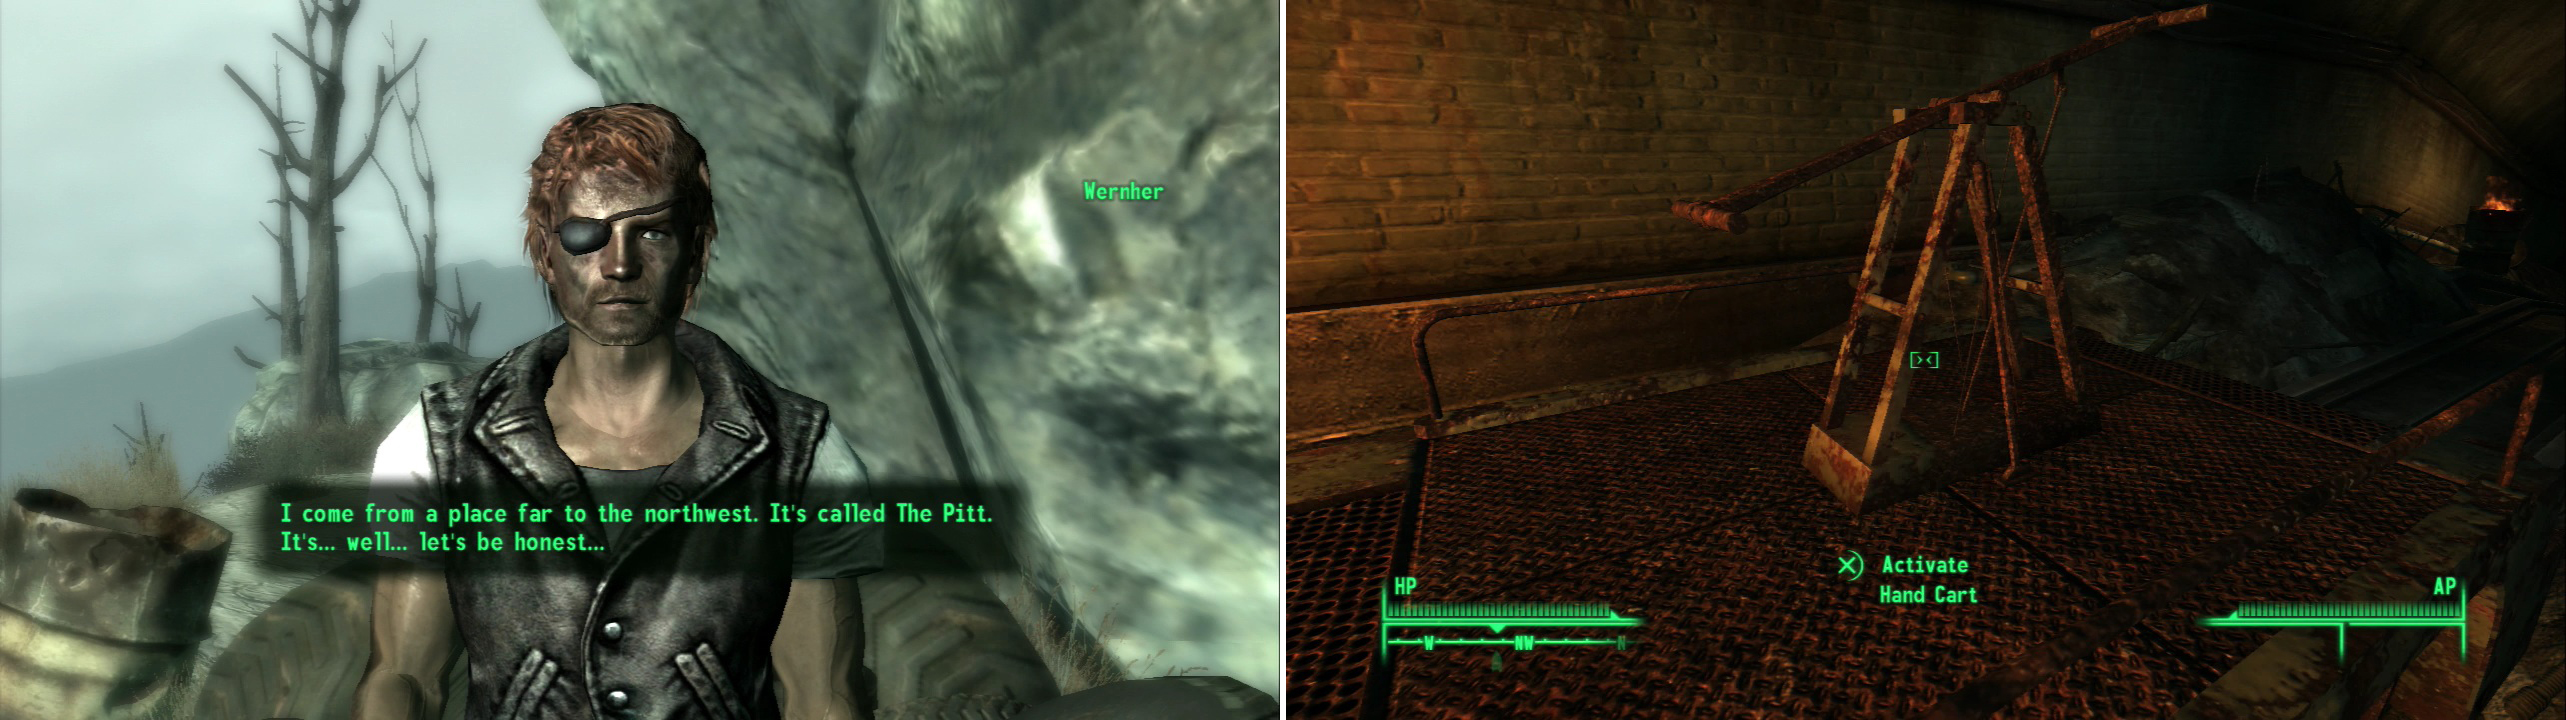
Follow Wenher’s Distress Signal to find… well, Wernher, who will tell you about his troubled homeland (left). Once you’ve obtained the proper attire of a slave, enter the train tunnel and travel to The Pitt (right).
4) Pitt Train Yard
When you arrive you’ll discover the Pitt Train Yard. Wernher will see people approaching and decide to do the talking. Follow him and Wernher will have a short chat with a Pitt Raider before opening fire. Since you’re wisely unarmed, run into the truck bed to the west of Wernher and let him settle things with his Scoped .44 Magnum, of which he’s more than capable of. Once they’re dead follow Wernher. You may be tempted to grab their loot, but trust me, you won’t need it, and it won’t do you any good to take it yet.
Follow Wernher to a locked chain gate, which he will open. Now he’ll talk to you, and tell you that you’ll be stripped when you enter The Pitt. You can ask him to give you a concealed knife or handgun, but if they detect anything on you, this will be stripped too. Besides, with Iron First, we should be doing 20 or so damage with our fists. It’s not great, but it’ll be much better than the Switchblade or the .32 Pistol Wernher will give you, and it’s enough to get started in The Pitt.
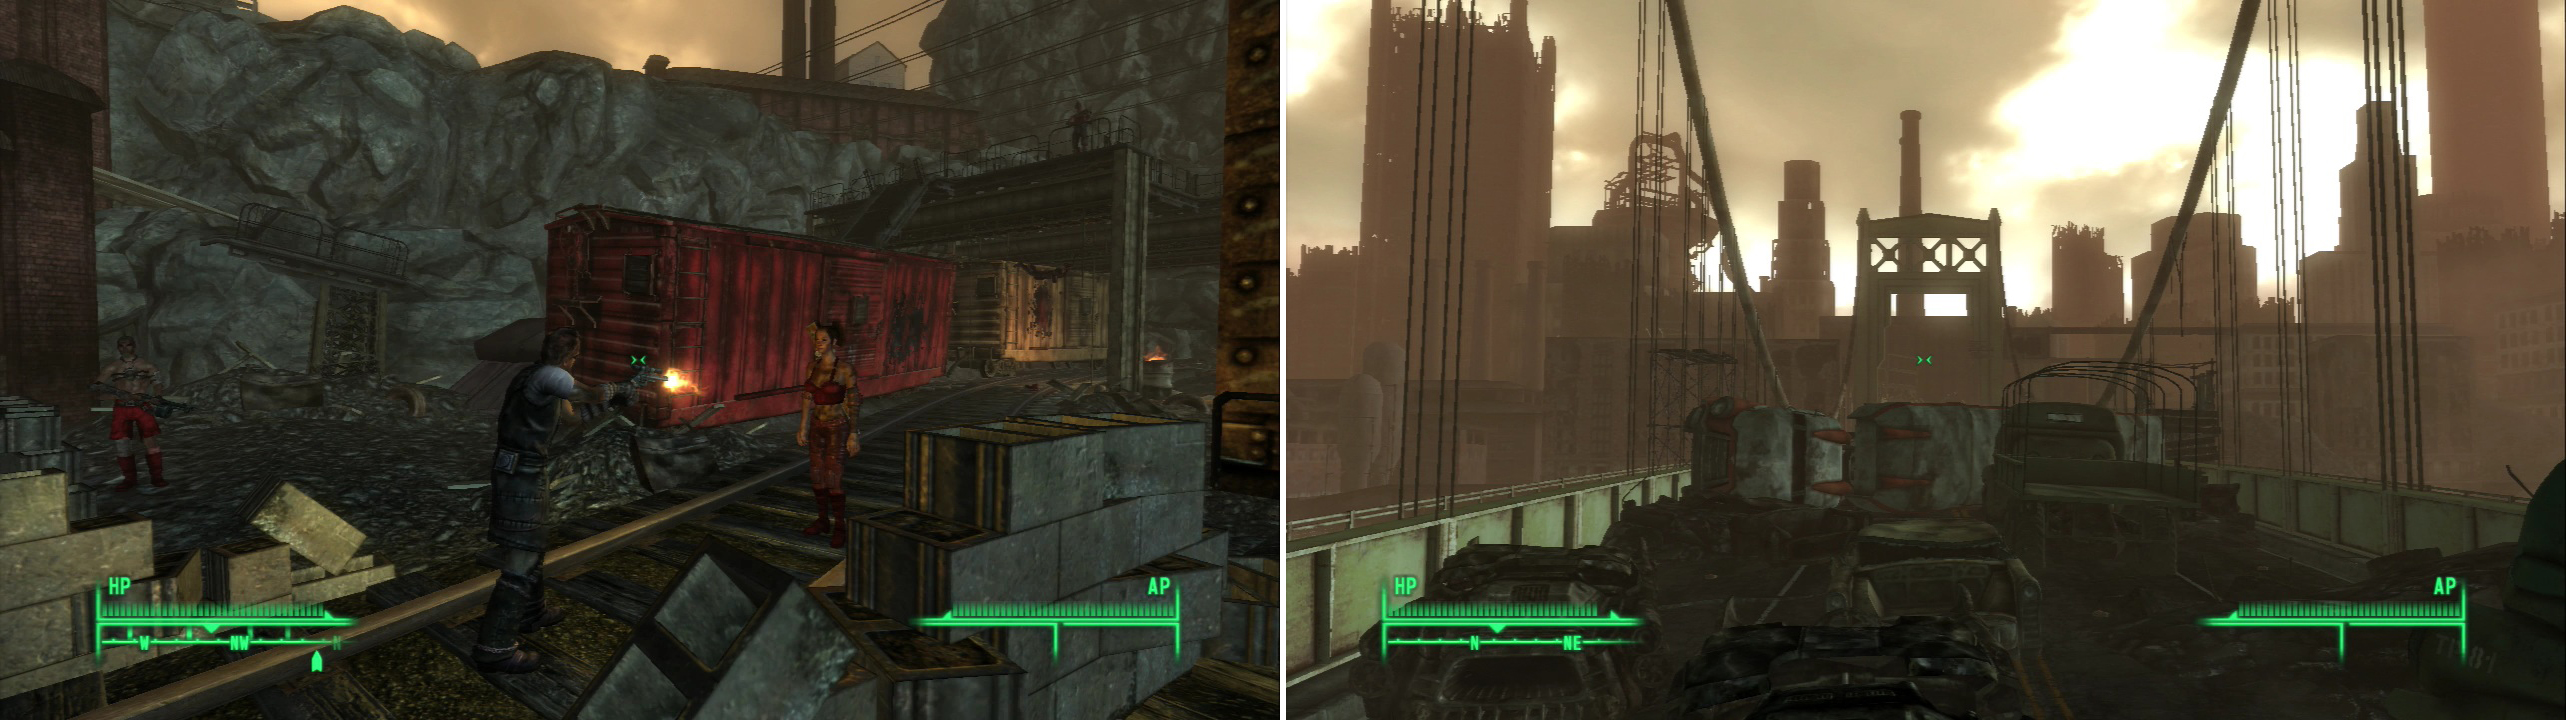
Wernher will help you get past the welcoming Pitt Raiders, but the rest is up to you (left). You first obstacle is the bridge (right).
5) The Pitt Bridge
Head north-east until you find The Pitt Bridge. This bridge is covered with useless cars and landmines. One explosion here could cause a chain reaction and be very bad for you. There are also some Wildmen in the building nearby you’ll want to avoid, so it would be a good time to put your stealth shoes on. Be wary of landmines and bear traps as you cross the bridge intially. Shortly on a Mole Rat will run out, being pursued by some Vicious Dogs. Let nature run its course. You can either kill the Vicious Dogs, or avoid them. Continue north and stay hidden. Near the end of the bridge will be a platform spanning the bridge spires, on top of which a Pitt Raider keeps guard. Him and his Sniper Rifle. You really don’t need to get him shooting at you. If crossing the bridge sounds like a chore… too bad. Don’t try to swim across the river, because you’ll suffer around 300 Rads per second (before resistance) if you get wet. It’s nice to know some things in Pittsburgh haven’t changed.
6) Pitt Justice
As you cross the bridge some Pitt Slaves will run out and promptly get themselves blown up by the various mines lying around. Also, when you reach the northern end of the bridge, you can turn east to find a sidewalk running along the bridge. Follow it south, up a metal ramp, and you’ll eventually reach the catwalk upon which the Pitt Raider with the Sniper Rifle lurks… you know, if you want revenge, or even just to rid yourself of this potential nuisance. There’s a bed up there, so you can recover from whatever damage you took.
7) Mex’s Shakedown
Turn east down a new road and approach a fenced area. The guards will open the gate an a bastard named Mex will come forward to deal with you. If you’re dressed up as a slave, he’ll check you for any… contraband you may have on you, and if you’re dressed up as something else… well, lets just say trying to be clever will just get you beaten up and enslaved. If you, say, punch Mex a few times until his head explodes, nab his weapon, then shoot his buddies and head into The Pitt… you’ll get beaten up and enslaved. So, just accept your new lot as a “slave” and head through the gate to Downtown. If you lost anything to Mex, you’ll be able to get it back when you’re done with The Pitt. Until then, it’s going to remain in the care of Mex. It’s a wonder they didn’t question you about the.. you know… the Pip-Boy on your arm? Ah well.


No Comments