
1) Downtown
Assuming you dressed as a slave, you’ll enter Downtown rather uneventfully. Right ahead a Pitt Raider will be questioning some slaves about the recent breakout. He’ll soon lose his patience and wax them all. Lovely. Continue north to find a pit where some slaves are working. One slave named Nola will heal you if you talk to her. Don’t get involved in too much looting just yet, as most of the junk you pick up will just weigh you down. And, since, you know, there’s no way to stash anything you find, you might as well just leave anything besides ammo, drugs, Caps, and useful arms and armor alone.
2) Meeting Midea
Continue north and you’ll get the chance to keep going north to the Mill, or go east down an alley, where a slave named Midea will talk to you, telling you to meet her at her house. Continue east, then north to find an open area between the buildings. To the south you’ll find Kai, who’ll offer you some food that you’d probably be better off not eating. To the north you’ll find Midea’s Quarters.

However you make it in, meeting Midea-the leader of the slaves-should be your first priority (left). Everett controls access to the Steelyard, and will reward you as you bring back more ingots (right).
3) Suicide Steelyard Mission
Midea will tell you about some plan or another she has, but in the mean time you’ve gotta blend in. This obviously means taking part in a suicide mission to gather Ingots in the Steelyard. She’ll tell you about Trogs, and tell you that Marco in the Mill can get you a weapon, should you need it. A Pitt Raider named Jackson will show up and interrupt you. If you listen to their conversation, you’ll overhear that you need to collect 10 ingots… after reporting to the foreman in the Mill. If you wish you can talk to Midea some more after Jackson leaves. You know, if you get in trouble for not working.. why is Midea exempt? Anyways, she’ll mention that “the cure is the only thing that hasn’t been infected.” This clearly shows that the cure is something living, or else how could it be infected? Just something to think about.
4) Milly’s Request
Head back out into Downtown and head back south to the pit where the slaves were toiling. On your way you’ll run into a purple-haired slave named Milly, who will ask you if you’ve seen someone named Wild Bill. She’ll tell you that he went out into the Steelyard, and ask you to keep an eye out for him while you’re there. Head north from the pit to find a slave working on a bus named Adan, who has given in to some sort of stoic philosophy about his lot as a slave. Pussy. Head into the Mill.
5) The Mill
Head west past the conspiring slaves, turning north past a fence-covered pit. One slave off to the side named “Brand” will chat with you, asking where you’re from. Succeed at a Speech challenge and he’ll reveal that he’s a rat. You can tell him all sorts of things about the little conspiracy you have going on, for which he’ll give you two Stimpaks per tip. Considering your current situation, however, it just doesn’t seem like a good idea (logically) to help somebody who might foil your plan… especially since a lot of the tip-offs rat you out as well. Anyways, head north past a Pitt Raider named “Bone”, and turn east when you run out of north.
6) Armed and Ready
Go up some stairs to the right and into a room, where you’ll find Marco. He’ll rather openly admit he’s making illict weapons. Ask him for a weapon and you’ll get yourself an Auto Axe, which is all the weapon you’ll need for the Pitt, especially if you’re not quite so strong with the Unarmed skill. Once done head out of Marco’s room to find a Pitt Slave lying on the ground, obviously in pain. A Guard will show up to harass him ineffectually. Click on the slave and either heal him, or put him out of his misery. If you heal him the Guard will thank you… in a fashion.
7) Abandoned Area
Now that we’re done messing around in the Mill, head back to the fence-covered pit and go up some stairs to the west to meet Everett. He will talk to you when you get close, and command you to follow. He’ll lead you into the Abandoned Area, introduce you to Trogs, and be generally optimistic about your life expectancy. He’ll tell you to grab at least ten ingots, and promise to slip a little something your way if you do.
Following are step-by-step locations to the 100 Ingots spread across the Steelyard. You don’t have to collect all 100-any ten will do, but for every ten you’ll get some unique item from Everett… and, you know, the achievements/Trophies that go with it.
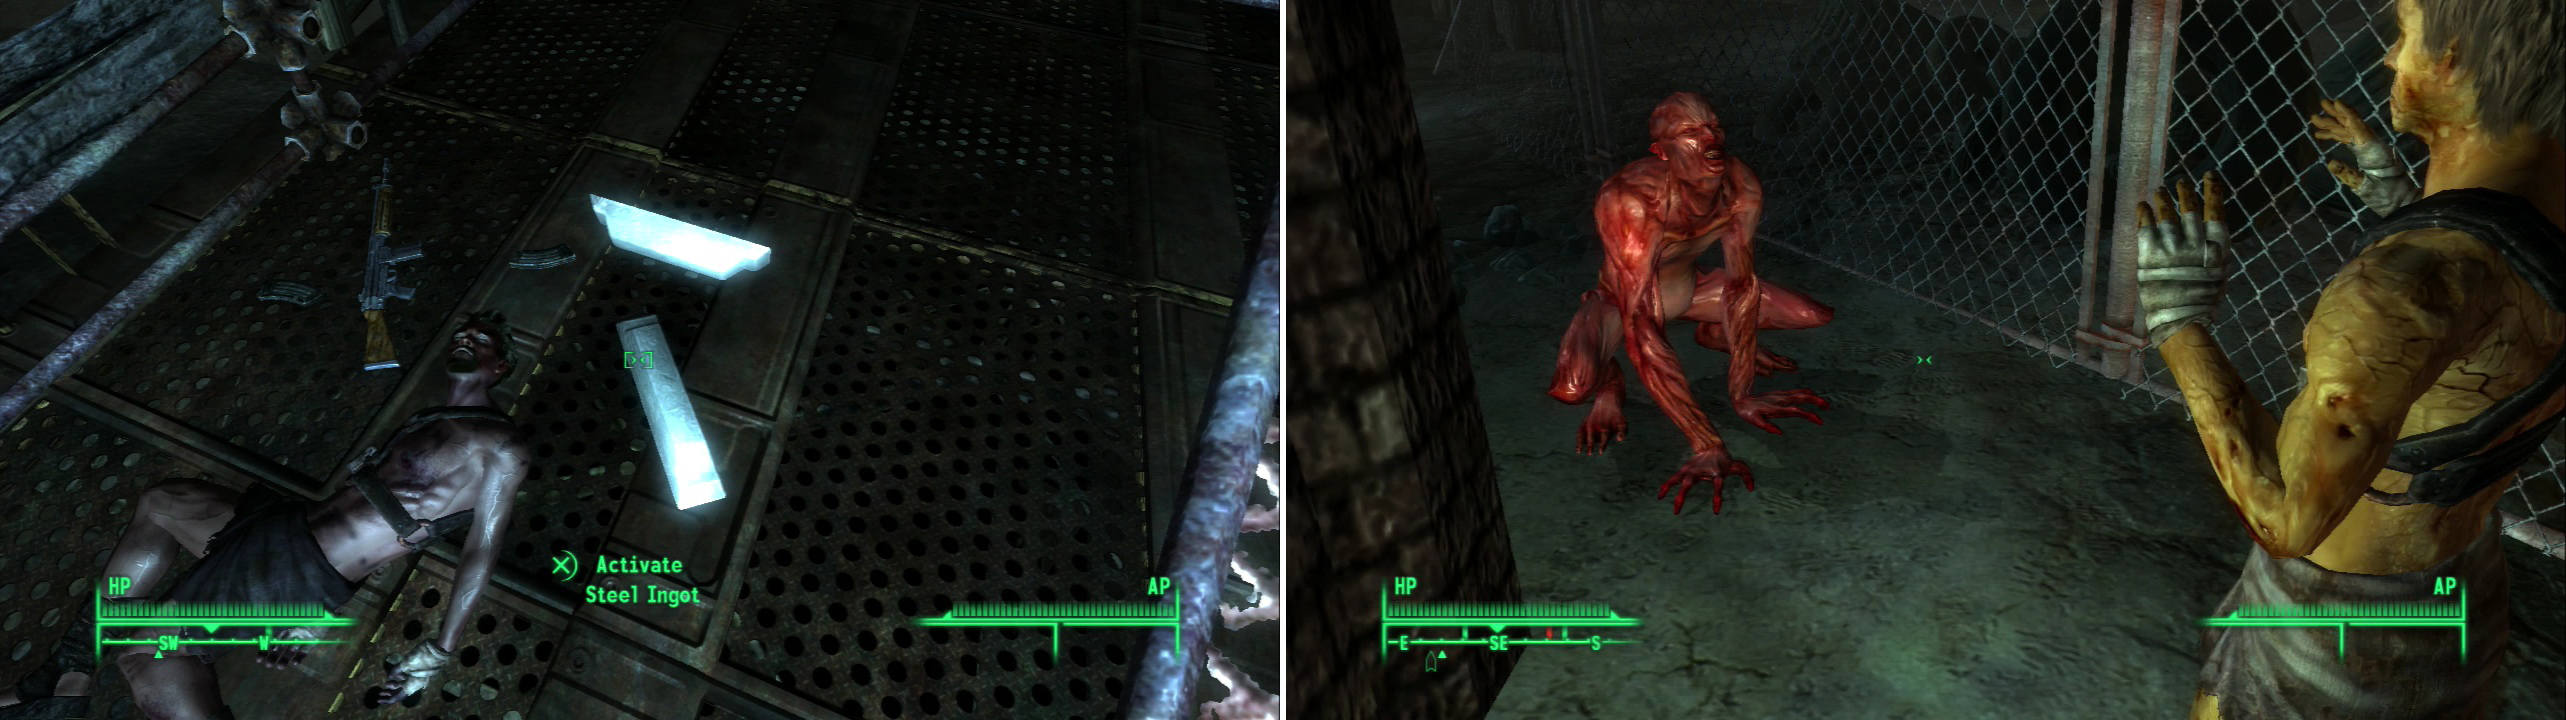
Gather Steel Ingots is the name of the game-the more you find, the better you’ll be rewarded (left). Trogs were once humans who-through a special mix of post-war radiation and the native pollution of The Pitt-transformed into hideous beasts (right).
8) Steelyard
The Steelyard is filled with Trogs and, near the elevated blast furnace, Wildmen. Still neither present too much of a threat, although you may want to kill nearby Trogs just to get them out of the way so they don’t harass you while you’re looking for Ingots. We’ll grab all the Ingots outside before we explore any buildings. Unlike in the previous areas, it’s suggested that you pick up everything you find, as you will doubtlessly want to leave this place behind after your first visit. If you fill up, find a container in which you can stash your loot until you return.
Ingots 1-2: Right ahead of you will be a dead Pitt Slave with an Assault Rifle, a Baseball Bat, and two Steel Ingots. At least you won’t be unarmed, although in our case, we may just be more dangerous while unarmed, eh? Go south to find a fence, where some Trogs will be waiting. Since they can’t do much about you yet, take the time to shoot them with the newly-found Assault Rifle. Why wait until they can fight back?
Ingots 3-4: Head west up a ramp and onto the top of a bus. From there, jump south into a truck bed. In the back of the truck are two more Ingots.
Ingots 5-6: Jump from this truck bed into the next, middle truck bed to find two more Ingots.
Ingots 7-9: Cross into the third truck bed and drop into a dumpster to the west. In the dumpster are three more Ingots, along with the body of another Pitt Slave.
Ingots 10-11: Head north along the train tracks until you find an “Automated Maintence” terminal [Hard]. Activate it and start up the four Protectrons, who will help shoot down any Trogs, especially the buggers on top of the trains. You’ll bypass a door leading to the Supply Plant as you go. Continue north until rubble blocks your progress. You’ll see a pile of gore near a dead Pitt Slave, along with two more precious Ingots. As you pick up the 10th Ingot you’ll gain the Auto Axpert Perk, which increases your Auto Axe damage by 25%.
Ingots 12-13: Now turn west and jump on the half-buried half-overturned red boxcar nearby. Travel south and jump from the red boxcar to a yellow boxcar. Follow the train south until you find two more Ingots on top of a yellow boxcar.
Ingots 14-16: From here head east over an improvised wooden bridge onto a red boxcar, and jump into the back of a truck. Inside you’ll find three more Ingots.
Ingots 17-18: Leave the train tracks behind and head back south, going up some stairs just west of the dumpsters we visited earlier. Go up a wooden ramp onto a ledge and travel north over a broken fence between the fence and a building turning west to find two more Ingots near some garbage cans.
Ingots 19-20: Go back south along the edge of the building and take some stairs to the west to reach the interior of the building. On a shelf you’ll find two more Ingots, two packs of RadAway, and two first aid boxes. We now have enough Ingots to get two items from Everett.
Ingots 21-22: Head out of the building and continue south a short ways. Turn west and run alongside the fence near the building you were just in until you find an open gate to the north. Go search the pile of tires near the building to find two more Ingots hiding between the tires and building.
Ingots 23-24: Go up the stairs over the tires and you’ll find another dead Pitt Slave at the top of the stairs. Go on the roof and turn west, staying on the lower portion. Follow the roof to its western end, then find a lower roof portion to the west. Drop down onto it to find two more Ingots on a large metal shelf nearby.
Ingots 25-26: Drop off the metal shelves onto the floor near the building and search the metal shelves where you found the last two Ingots. On a lower shelf are two more. We’ve now found a quarter of all the Ingots.
Ingots 27-30: Head around the building to the north until you come to an alley to the west. Keep going west until you discover two Wildmen fighting some Trogs. Let the battle resolve and step in to steal victory from the survivors. Jump inside a nearby cart to find four Ingots, an ammo box, and a first aid box. Everett now owes us three items.
Ingots 31-32: Continue north as far as you can and follow a building to the east until restrained by a fence. Turn south until you find a dead Pitt Slave with a Combat Shotgun, some Shotgun shells, and two Ignots near him.
Ingots 33-34: Return to the stairs you went up earlier, which led over the tires where we found two previous Ingots. East of the dead slave is a wooden ramp connecting to a fallen support. Traverse it and grab two more Ingots along the way.
Ingots 35-36: Kill the feasting Trog in the clearing between the buildings nearby and drop down into the central area. Near a pile of gore will be two more Ingots and a first aid box.
Ingots 37-38: Head up some stairs to the south to get back onto the roof you were previously on and turn west to reach the end of the roof. To the south-west you will spy another truck bed. Jump into it and claim two more Ingots.
Ingots 39-41: Jump out of the truck and head east down a ramp. You’ll start catching rads as you go, and at the end of the ramp is a dead Pitt Raider with two ammo boxes and three Ingots near his body. Put on the Gamma Shield Armor (if for nothing else than for the free Rad Resistance. And save your game before heading north into the radiation. We can now trade for our fourth item.
Ingots 42-44: These are rads we don’t need to catch. Save your game and explore the area filled with radioactive barrels in detail (this is where we killed the Trogs earlier, just after we found the Assault Rifle). Mark the location of the three Ingots and reload as to obtain them quickly. Or just tough it out and take the Rads. There’s also a dead Pitt Slave with an Assault Rifle in there, if you just need another one.
Ingots 45-46: Head west along a fence, past some stairs, then turn to follow the fence when it turns south, then west again when you get the chance. Keep going west past end of the building to the south, past two open gates to the north until your westward progress is terminated by a building. At this point turn south until you find some stairs to the west. Ascend the stairs to reach a roof, where you’ll find Wild Bill’s body. On him is a Head Wrap, the note “Note from Wild Bill”, and Wild Bill’s Sidearm . Grab what you want, and take the two Ingots near his body.
Ingots 47-48: Go up another flight of stairs to find a Wildman abode. Kill the two Wildmen and grab the Ingots near the fridge. There are also two mine boxes and a grenade box on top of the shack. There are also beds inside, should you need to sleep.
Ingots 49-50: Head along a walkway to the east, opposite the shack. Follow the railing over and around a pipe. Note that when you cross to the eastern side of the pipe some Trogs will appear along the perpendicular pipe to the north and proceed to become a bother. Follow the path until you come to a building, where you’ll proceed up some stairs to the buildings’ roof. You’ll notice that the pipe you were following turns east. Get on the roof and jump onto the pipe and follow it east. Near the end of the pipe you’ll find two Ingots, mixed in with some gore. We now have half the Ingots, and Everett needs to come up with five items.
Ingots 51-54: Follow the pipe back west and get back on the building to the north we were briefly atop earlier. Once back on this roof, head west until you find some stairs running up to the south. Take them to reach another, higher roof. Instead of going south over a wooden ramp, turn west and go between a building and a tower where you’ll find several pipes connected to domes. Search the north-western corner of this roof area to find a Trog chowing down on a Pitt Slave. Near the slave are two first aid boxes and four Ingots.
To collect all the ingots in the Steelyard you’ll have to drop down of some roofs and take a bit of damage (left). Steel Ignots and other treasures lurk in all sorts of hidden places (right).
Ingots 55-58: Head south until you hit a fence, then follow it east. There’s a bit of painful backtracking we have to do. Fall off the roof to the east to land on another, much lower roof. Don’t be surprised if you blow out both of your legs doing this. You are now on a roof to the south of where the Wildman shack with the beds is. Look below you to the east to find another railing running east, parallel to a pipe. Drop down on that railing and head east, with some large towers looming to the right. Search the concrete landing between each of the towers, which make natural cubbys. In one you’ll find two ammo boxes and a first aid box. In the cubby adjacent to the fence that terminates your progress eastward you’ll find a dead Pitt Slave with an Auto Axe and four Ingots nearby. Be wary of the Trogs which will spawn behind you when you approach.
Ingots 59-60: Head back north and jump off the railing onto a parallel pipe. From the pipe drop down within the fenced area and head west until you reach the wall. Near the wall behind some pipes you will find another dead Pitt Slave with two Ingots nearby. Everett now owes us six rewards.
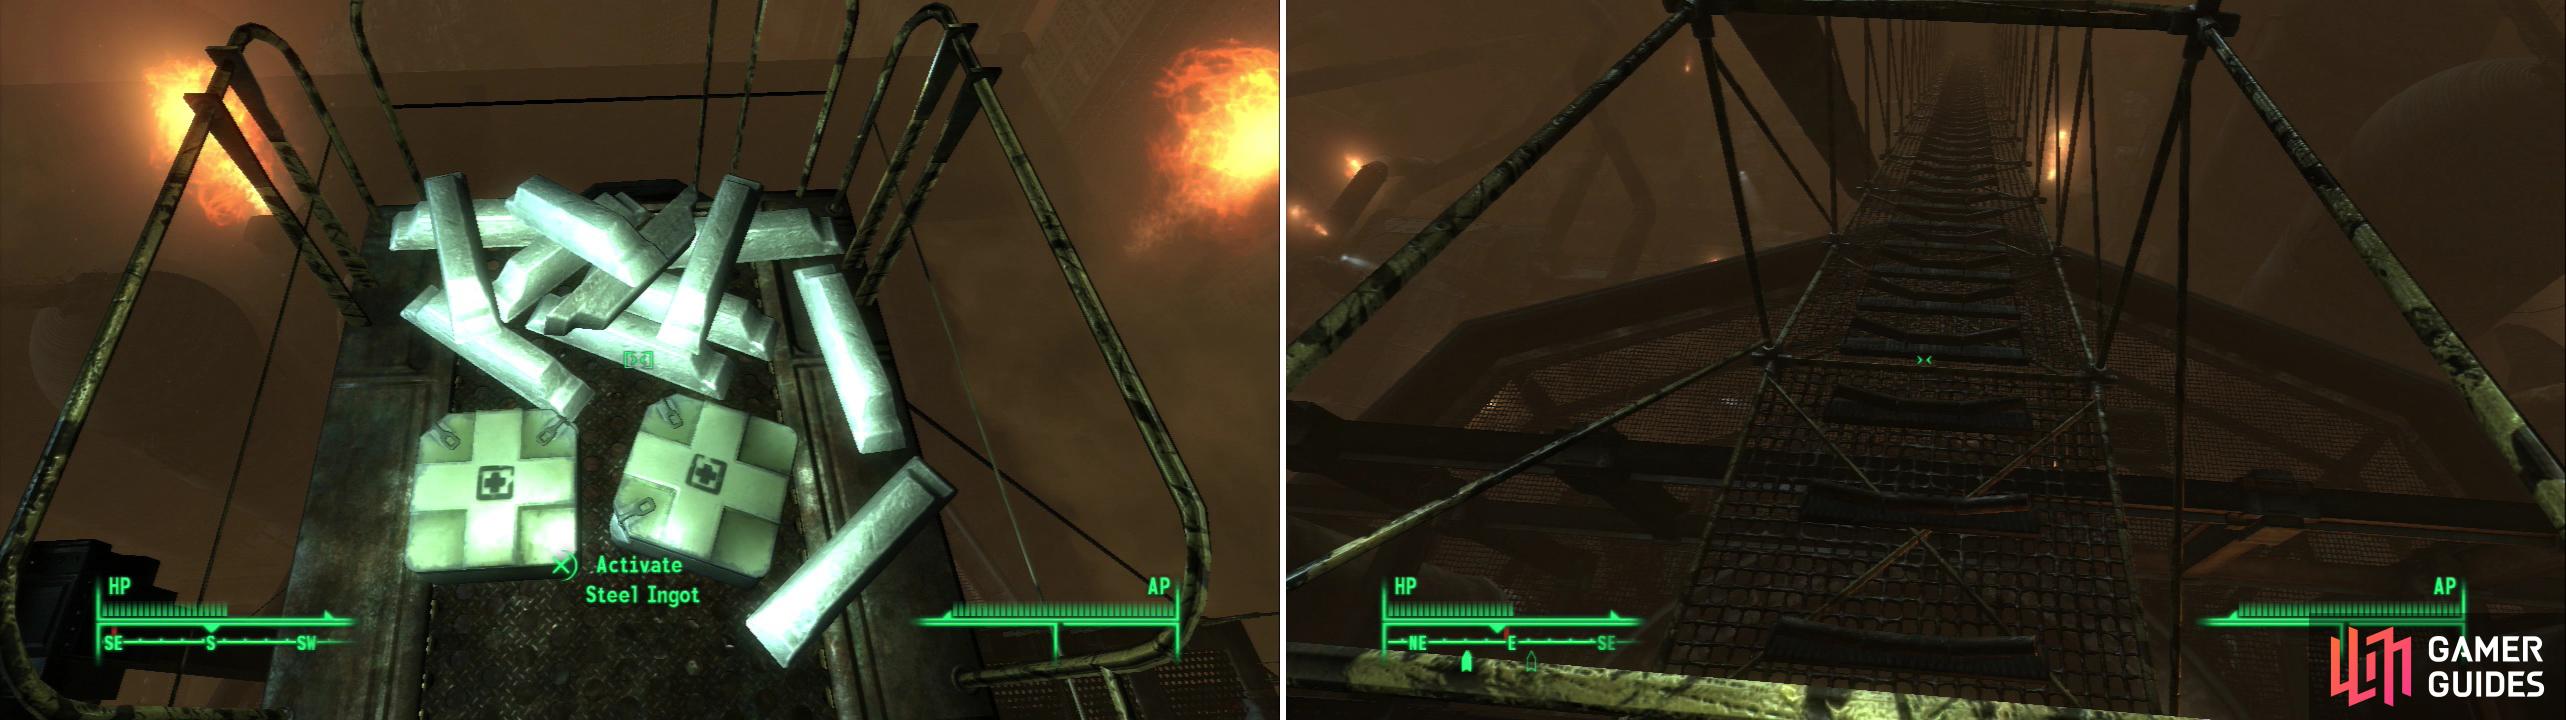
Reach the highest extant part of the Steelyard to score a whopping twelve Steel Ingots (left). Once you’re done looting, climb down a ramp to score even more ingoty goodness (right).
Ingots 61-72: Return east and jump on some machinery to find a wooden ramp running over the fence. Go back to the otherside of the fence and walk up the stairs back past Wild Bill and up into the Wildman shack and take a well-deserved rest on one of the beds. Continue until you reach where we left off, taking some stairs up to a tower and continue until you reach a large circular grate landing.
This place is crawling with Wildmen, and a leveled Turret. Try to sneak your way around to the west and find the “Turret Control System” Terminal [Average]. If you turn a Mark VII Turret on the Wildmen, you won’t have a Wildman problem for long. Once done head up some stairs near the turret terminal and continue until you reach the top. Once on top you’ll find no less than a dozen Ingots and two first aid boxes. For reaching the highest point in The Pitt, Everett now owes us a seventh item.
Ingots 73-79: Predictably some Trogs will crawl out of the woodwork… or steelwork, as the case may be, to bother us on our way back down. Go down to the next landing, where the railing forms a square. Go to the eastern side of this level to find an area with no railing over-looking a long ramp. Drop down onto the ramp and make your way down until you reach the bottom. Turn north and jump out onto a balcony that is otherwise inaccessible. On this balcony you’ll find another seven Ingots.
Ingots 80-82: Jump down onto the roof below and make your way to the Supply Plant, where the majority of the rest of the Ingots await. Ignore the inaccessible door to the north and head over to the east, where you’ll find a “Turret Control System” Terminal [Average] near a door. You can activate the turret to fire on some Wildmen and Trogs while they fight… or not. Either way head through the radioactive tunnel ahead ahead and grab the three Ingots on the floor in the room beyond.
Ingots 83-90: Head through another radioactive tunnel to the north, stopping to loot the shelves at the end before turning west into a room, dealing with whatever Trogs are in the way. Head down some stairs until you come to a fork in the metal walkway. Go east into a shelter where you’ll find another “Turret Control System” Terminal [Average] which you can hack to bring a Turret to bear on the Trogs below. Grab the Frag Grenades and loot the first aid box before going to the ground floor.
Once on the ground floor head north past a couch and up some stairs. Disarm the tripwire in front of the bed and loot around before continuing through some doors to the west. Keep going until you reach a shelf between two doorways with some Rad Away, Rad-X, a grenade box, and two first aid boxes. You can also hack the nearby Automated Maintence terminal if you want some Protectron backup. Head through the northern-most door and follow a tunnel laden with carts. None of the carts have any Ingots in them, but at the end of the tunnel, past some Trogs, you’ll find eight of them behind a dead Wildman, on top a pile of debris. We are now due for nine items, and only ten more Ingots elude us…
Ingots 91-96: Go back out of the tunnel and go through the southern door now. You’ll come to a locked door [Average] with a bunch of skeletons outside. There are Bobbypins strewn about the floor, so grab them and pick the lock. Read the terminal to find out what happened… or not… and grab the drugs and ammo lying around. And, of course, the six Ingots.
Ingots 97: Leave the utility closet and head through the door to the south. Turn east and go up some stairs, stopping just long enough to loot the table at the top of the stairs. Go through a door to the north and search the beside table to find another Ingot. You can also hit a nearby electrical switch to activate a pitching machine. Be sure to grab the unique Auto Axe off the bed, the cleverly named Man Opener , then head to the eastern side of the room, looting as you go. Kill two Trogs chowing on some gore and head into the tunnels to the south. It would be wise not to cause any explosions along the way, since these tunnels are filled with gas. Flip an electrical switch to open the door back to the entrance room and leave the Supply Plant.
Ingots 98-100: Finally, head back to the Abandoned Area. Doubtlessly the Trog that was hanging out around here earlier has found its way down to harass you. When you reach the door to the Mill turn to the south and go down some stairs. Go through a rent fence and turn east, where you’ll find two carts. The upright cart contains the final three Ingots, which just proves that the Pitt Slaves and Raiders are lazy. We now have all the Ingots. Rejoice in your achievement/trophy, and more importantly, go have a chat with Everett about the rewards he owes us…


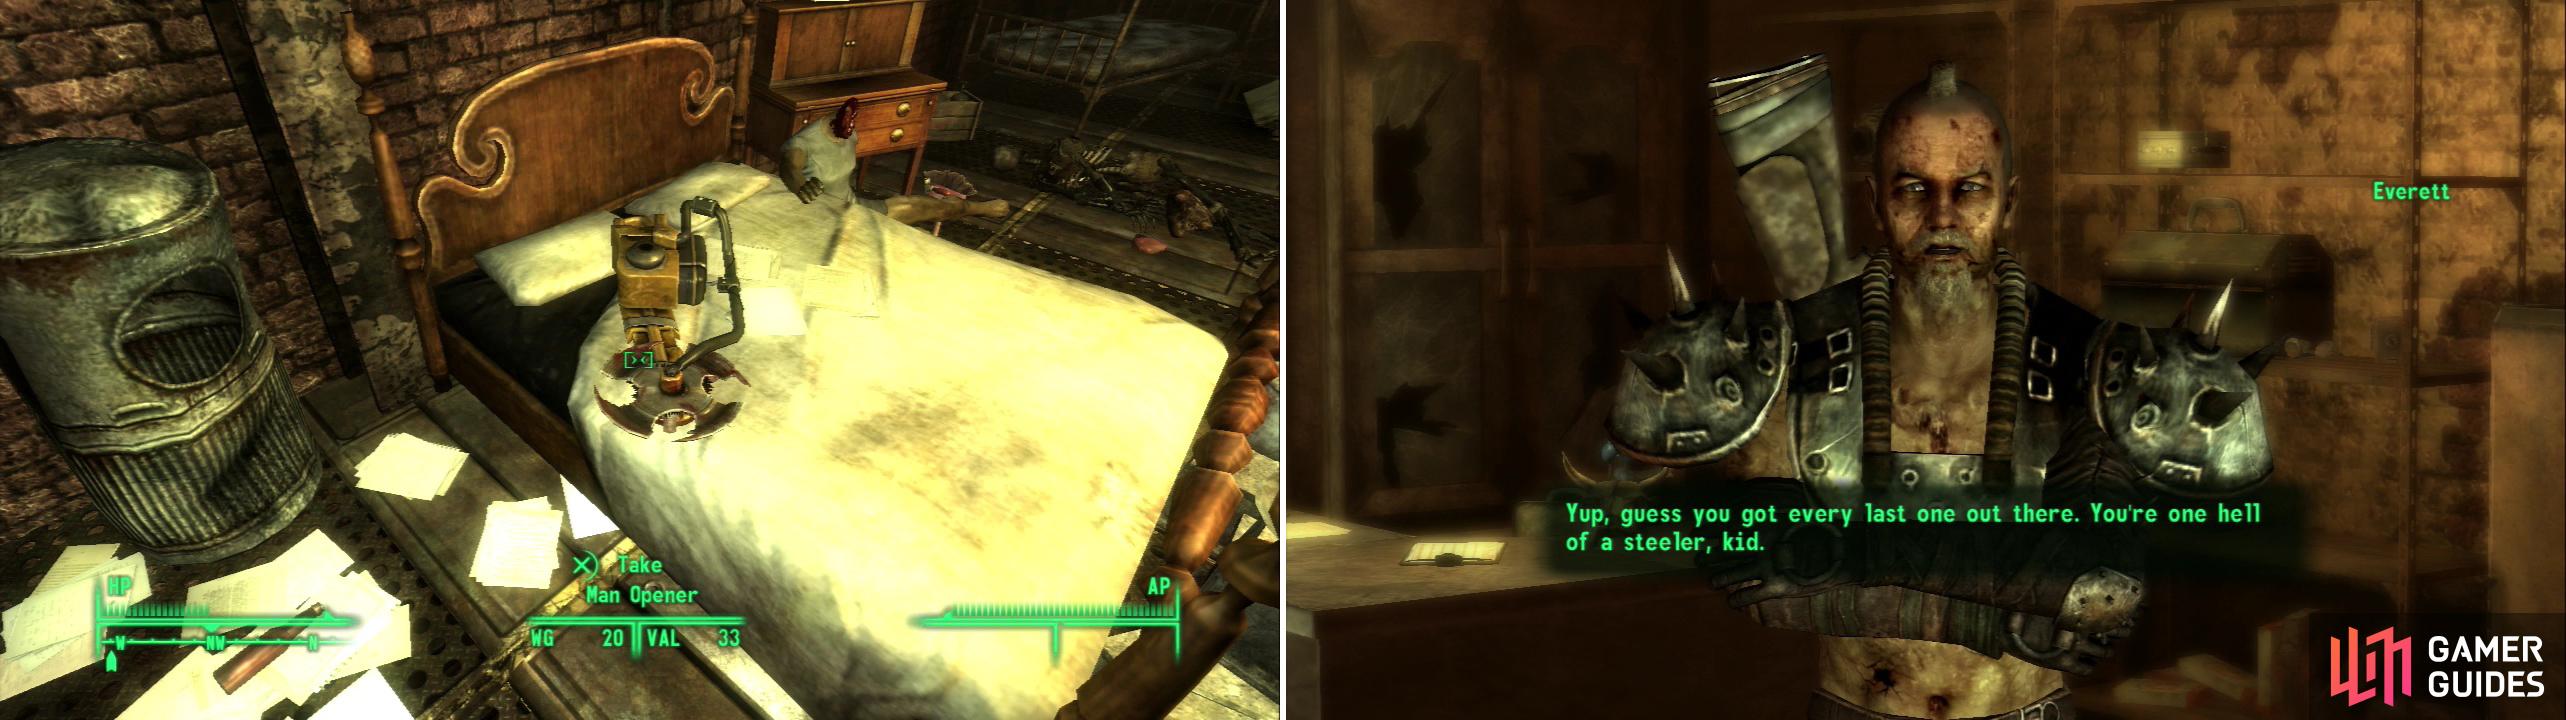
The Man Opener does everything the Auto-Axe does, but better! (left) Once you’ve collected all 100 Steel Ingots, return to Everett to score a prodigious amount of unique gear (right).
9) Everett’s Reward(s)
Everett will give you a reward for every ten Ingots you bring him. These are either weapons or armor, and range from interesting but useless, to useful… within the Pitt. Sure none of it is essential, but it is nice to have, and will make life easier for the rest of this expansion. The rewards, along with a brief description, can be found below.
10 Ingots - Laborer Outfit: A more useful version of the Slave Outfits you’ve been wearing.
20 Ingots - Filtration Helmet: A handy helmet with fair Damage Resistance (for its weight) and Rad Resistance.
30 Ingots - Steel Knuckles: The most powerful knuckles in the game. They make our Unarmed attacks even stronger. They don’t deal any more damage than Spiked Knuckles do, but they attack much faster in V.A.T.S., which of course means more chances to land a Paralyzing Palm strike.
40 Ingots - Metal Master Armor: A unique suit of armor that is about as protective as Gamma Shield Armor, but with Unarmed and Energy Weapons bonuses, instead of Radiation Resistance.
50 Ingots - Metal Blaster: A very powerful unique Laser Rifle, expensive to maintain, especially far from home. It’s still a good gun, dealing twice as much damage as a normal Laser Rifle. It does, however, suffer from “Terrible Shotgun Syndrome”, meaning it’s horribly inaccurate at any meaningful range. You won’t be sniping with this gun.
60 Ingots - Bombshell Armor: Unique Ordinance Armor with bonuses to Big Guns and Explosives . Gals can wear it for that genuine “Tank Girl” look.
70 Ingots - Leather Rebel: Unique Paingiver Armor, it has good Damage Reduction for its weight. While not as protective as Metal Master Armor , it also doesn’t have an Agility penalty, so that helps to balance it out.
80 Ingots - The Mauler: A unique Auto Axe which is about 20% stronger than the Man Opener .
90 Ingots - Perforator: A unique Infiltrator (a type of gun found only in The Pitt) the Perforator is about 10% more powerful than the standard Infiltrator and more accurate at longer ranges. On the downside, it fires more slowly, both in and out of V.A.T.S.
100 Ingots - Tribal Power Armor: Not as protective as other suits of Power Armor, it compensates by having a +15 bonus to Actions Points, which is a very, very nice boost.
10) Upward Social Mobility
Now it’s time to return to Midea. On your way back you’ll witness a slave getting chased down by a Pitt Raider. Report back to Milly and tell her about Bill. If you lie and say Bill’s okay you’ll get six Stimpaks, if you lie and invent a story about Bill’s death Milly will (eventually) faint from the gory details you concoct. If you tell the truth you’ll get six Stimpaks. Anyways, make your way to Midea, who will tell you about the next phase of her plan: Armed and armored as you are now, there’s really nothing in the Pitt you aren’t a match for. Which is good because your next challenege is to fight a series of pit fights. Or is that Pitt fights? Either way, head outside after talking to Midea to hear Ashur talk. He will make a rather philanthropic speech. You’ll be volunteered, and after Ashur leaves you’ll be charged with signing up for the fights with one Faydra, in the Mill.
No Comments