
Fly the Ragnarok into Lunatic Pandora to assault the structure
wherein you’ll shortly find yourself confronted by Raijin and Fujin.
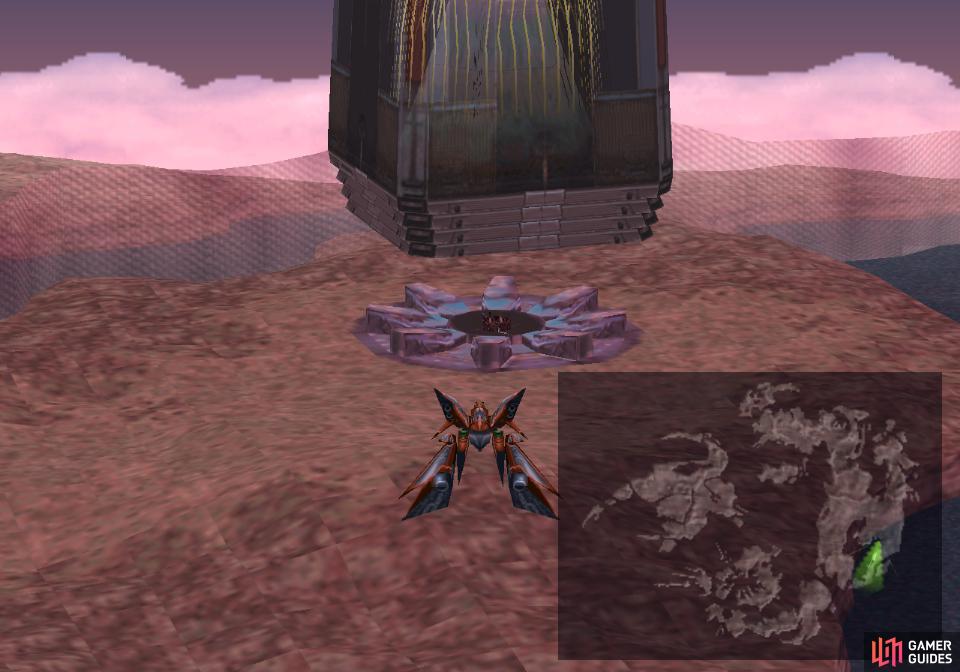
When you’re ready to take the fight to Adel and Ultimecia, fly the Ragnarok into Lunatic Pandora, which can be found hovering over Tear’s Point in Esthar. After the scenes that follow (did Ragnarok ROAR when it grappled with the building?!), you should prepare for an upcoming fight. You’d do well to make sure every character was immune to Confuse, Silence and Darkness. The enemy can also inflict Poison and Slow, but Auto-Haste should take care of the latter and in the grand scheme of things, Poison isn’t terribly dangerous. Having Siren’s Treatment ability and Recover/Revive are also useful if you want to have access to healing without expending spell stocks. Making yourself immune or resistant to wind and thunder is also recommended.
When you’re prepared, exit the Ragnarok (ride down the elevator and go through the door on the right, then head up) and head towards the bottom of the screen to encounter your favorite Seifer lackeys.
Boss - Fujin and Raijin
| Fujin | |
|---|---|
| Lv: | 1-43 |
| HP: (Lv10) | 8,000 |
| HP: (Lv20) | 11,000 |
| HP: (Lv30) | 14,000 |
| HP: (Lv43) | 17,900 |
| Weaknesses: | Poison (150% damage) |
| Resistances: | Wind (Absorbs) |
| Status Resistances: | Immune to most status effects; Darkness 60% – Drain 30% – Haste 0% – Reflect 90% – Regen 0% – Sleep 50% – Slow 60% – The End 0% |
| EXP: | – |
| AP: | 10 |
| Draw (Lv1-19): | Aero, Cure, Life |
| Draw (Lv20-29): | Aero, Cura, Life |
| Draw (Lv30+): | Aero, Curaga, Full-Life, Tornado |
| Mug: | Megalixir |
| Drop: | Megalixir |
| Raijin | |
|---|---|
| Lv: | 1-43 |
| HP: (Lv10) | 10,000 |
| HP: (Lv20) | 15,000 |
| HP: (Lv30) | 20,000 |
| HP: (Lv43) | 26,500 |
| Weaknesses: | Poison (150% damage) |
| Resistances: | Thunder (Absorbs) |
| Status Resistances: | Immune to most status effects; Darkness 60% – Drain 30% – Haste 0% – Reflect 90% – Regen 0% – Sleep 50% – Slow 60% – The End 0% |
| EXP: | – |
| AP: | 10 |
| Draw (Lv1-19): | Protect, Shell, Thunder |
| Draw (Lv20-29): | Protect, Shell, Thunder, Thundara |
| Draw (Lv30+): | Protect, Shell, Thundara, Thundaga |
| Mug (Lv1-19): | Power Wrist |
| Mug (Lv20+): | Power Wrist, Str Up x2 |
| Drop: | Str Up x2-6 |
Fujin and Raijin are back, and given that Seifer’s goals and yours are incompatible, conflict here is unavoidable. The two have come to fight this time, and they’re much, much stronger now than they were back in Balamb. That said - and yes, you’ll be seeing this a few times going forward - they’re not up to par with some of the optional bosses you may have fought. If you completed all the side quests in the game and obtained Eden, you should find these two rather easy… at least compared to the likes of Ultima Weapon. Raijin can hit fairly hard at higher levels, and Fujin has some nasty attacks and debuffs, but at worst their HP are within easy range of a limit break, and for a low-level party they can barely withstand a few strong regular attacks.
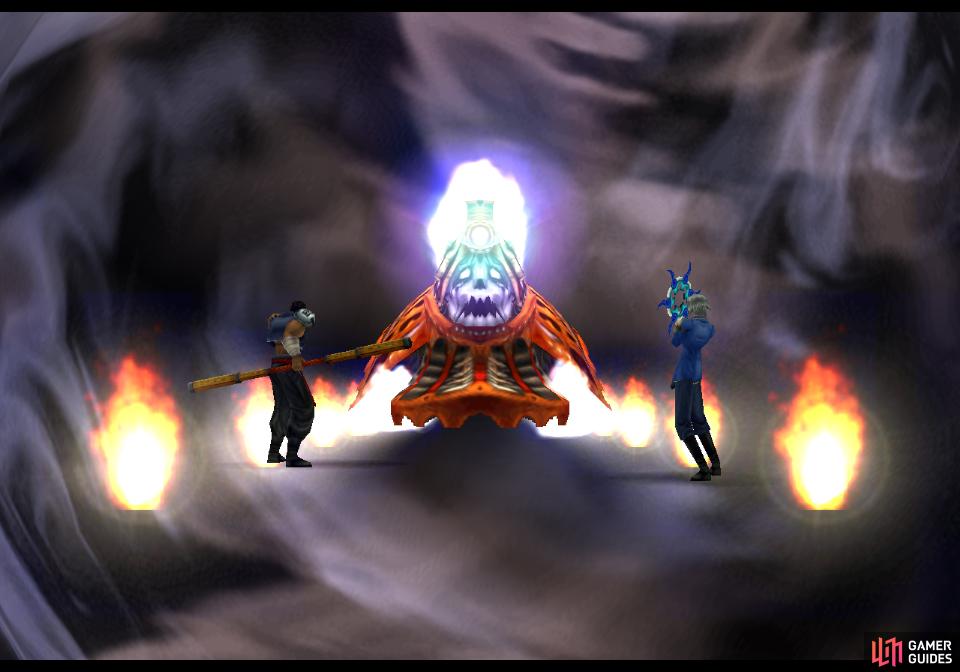
Raijin is a melee brute who starts out rather weak
but after buffing with Aura he’ll do significantly more damage.
Raijin is a melee brute, as ever, and while he doesn’t start out doing much damage, shortly into the fight he’ll cast Aura on himself. In his case, this greatly increases his attack power, and around this time he’ll start spamming more powerful physical attacks. If your level is low and HP are high this shouldn’t be much of an issue, but combined with Fujin’s buffs - and her dreaded Sai attack - Raijin can be quite capable of finishing off weakened party members.
Fujin, as ever, is the real threat. She brings numerous debuffs to the table, including Confuse, Pain (Blind, Poison and Silence) and Slow. Confuse is by far the most dangerous, but being debilitated by Blind and Silence aren’t ideal, either, so adjust your Status Defense accordingly. She can also buff herself and Raijin with Haste and Regen, and isn’t above casting offensive spells like Meteor or Tornado. The worst thing you have to watch out for is her Sai attack, which will reduce a character’s HP to 1. She’s not shy about spamming it, so either draw Cure/Cura/Curaga from her to heal, use Recover, or an X-Potion. Worst case scenario, you can draw Life/Full-Life from Fujin if necessary.
While a low-level party with high Strength probably doesn’t need much in the way of finesse, Fujin and Raijin do have some weaknesses you can exploit. They’ll both take 150% damage from poison, so junctioning Bio to your Elemental Attack will cause your regular attacks to deal extra damage. They’re also both vulnerable to Blind, Sleep and Slow, although they’re somewhat resistant to each. Drain will also serve to leech HP from them as you attack, and a combination of Bio on Elemental Attack and Drain on Status Attack might be one of the better options at your disposal. Summoning Doomtrain is also likely to inflict various debuffs on them, perhaps to the point of all but ending the fight outright.
You don’t need to worry about mugging them, as their drops are either the same (in Fujin’s case you’re getting a Megalixir either way) or inferior (low-level Raijin can be mugged for a Power Wrist, while at higher levels he’s got around a 1-in-3 chance to yield 2x Str Up items - he’ll otherwise drop 3-6 Str Up items.) Hopefully you shouldn’t need to worry about drawing magic at this stage in the game, but if for whatever reason you do, high-level (30+) Fujin can be exploited for Full-Life stocks.
Thrash Seifer’s minions, then exit the screen by heading down. In the next screen, head up and to the left, and on the following screen you’ll see some familiar Galbadian Soldiers down from your location. Head down and you’ll have another encounter with Biggs and Wedge. This place is just packed full of boss fights! Except… no, it appears they’re done with their careers in the Galbadian Army, and after all they’ve been through, can you blame them?
When they’re gone, go upstairs and use a Save Point, then exit to the left to return to the Y-shaped tubes you may have explored earlier, when Lunatic Pandora passed over Esthar. Stick to the right-most tube, enter the 02 elevator at the end and ride down to the elevator hub room. Head left and enter elevator 01 to ride down into the teal tunnels of Lunatic Pandora, then exit by heading right and up. Use a Save Point in the next screen and prepare for yet another boss battle. For real this time.
The next bosses uses no status effects and has no preferred elemental attacks. In fact, it’s dangerous regardless of your party’s power due to the ever annoying attacks that reduce a character’s HP to 1. It can do this to the entire party, so ensure everybody has a means to quickly recover their HP, either via the Recover command, items or magic. Junctioning Thundaga to your Elemental Attack will substantially increase your offensive output against the upcoming foe. You might also want to have the Mug command handy, if you want to score some choice loot.

As you venture through Lunatic Pandora, you’ll meet your old friends Biggs and Wedge, who’ve had enough with the Galbadian army.
Though beaten, Raijin and Fujin aren’t above throwing another obstacle in your way.
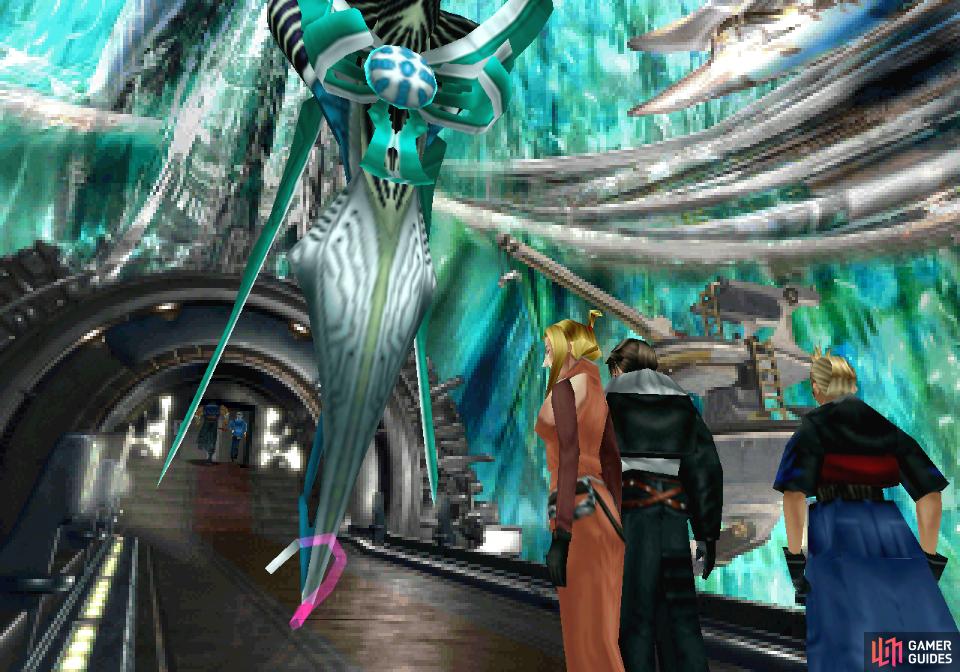
Boss - Mobile Type 8
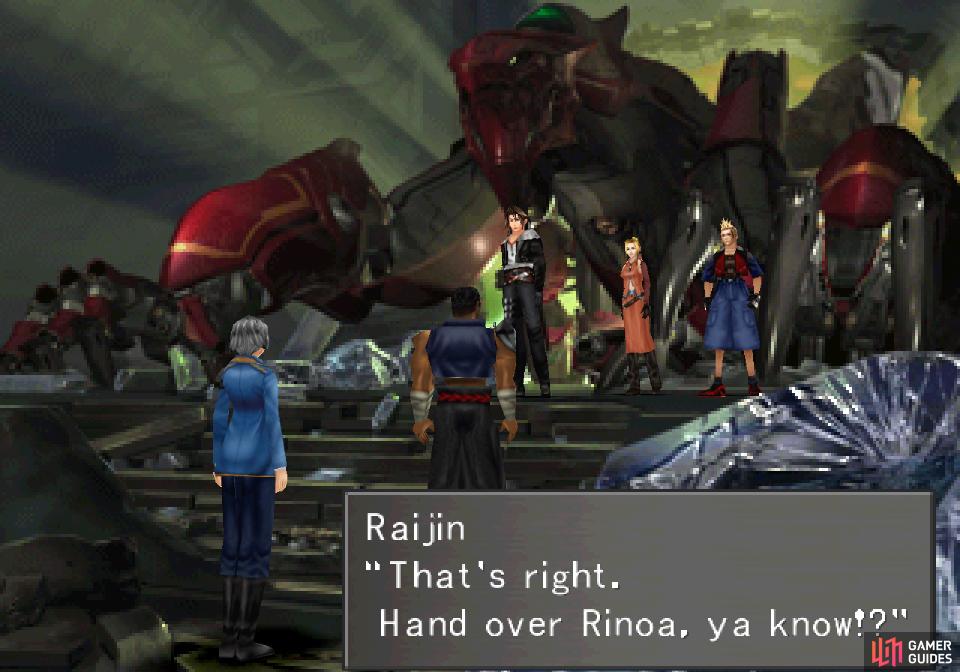
When you’re ready, continue up through a circular opening and you’ll encounter Raijin and Fujin again. They’ve learned their lesson from your last encounter, at least to the point where they’re no longer willing to fight you themselves. They’re still belligerent, however, as they’ll sic some robot on you… hey! It’s that thing that ejected you from Lunatic Pandora on your first visit! Payback time!
| Mobile Type 8 | |
|---|---|
| Lv: | 1-41 |
| HP: (Lv10) | 34,000 |
| HP: (Lv20) | 38,000 |
| HP: (Lv30) | 42,000 |
| HP: (Lv41) | 46,400 |
| Weaknesses: | Thunder (200% damage) |
| Resistances: | – |
| Status Resistances: | Immune to most status effects; Reflect 0% – Regen 0% – The End 0% |
| EXP: | -- |
| AP: | 40 |
| Draw: | Dispel, **Eden**, Regen, Ultima |
| Mug: | Laser Cannon x2-4 |
| Drop: | Laser Cannon x1-4 |
| Left Probe | |
|---|---|
| Lv: | 1-41 |
| HP: (Lv10) | 6,000 |
| HP: (Lv20) | 7,000 |
| HP: (Lv30) | 8,000 |
| HP: (Lv41) | 9,100 |
| Weaknesses: | – |
| Resistances: | Gravity (immune) |
| Status Resistances: | Immune to most all status effects |
| EXP: | – |
| AP: | – |
| Draw (Lv1-19): | Cure Esuna |
| Draw (Lv20-29): | Cura, Esuna |
| Draw (Lv30+): | Curaga, Esuna |
| Mug: | Vit Up x2-4 |
| Drop: | – |
| Right Probe | |
|---|---|
| Lv: | 1-41 |
| HP: (Lv10) | 6,000 |
| HP: (Lv20) | 7,000 |
| HP: (Lv30) | 8,000 |
| HP: (Lv41) | 9,100 |
| Weaknesses: | – |
| Resistances: | Gravity (immune) |
| Status Resistances: | Immune to most all status effects |
| EXP: | – |
| AP: | – |
| Draw (Lv1-19): | Cure Demi |
| Draw (Lv20-29): | Cura, Demi |
| Draw (Lv30+): | Curaga, Demi |
| Mug: | Str Up x2-4 |
| Drop: | – |

In its “Mobile Weaponry Attack Mode”, Mobile Type 8 will perform weak melee attacks
but counter all aggression with Twin Homing Lasers.
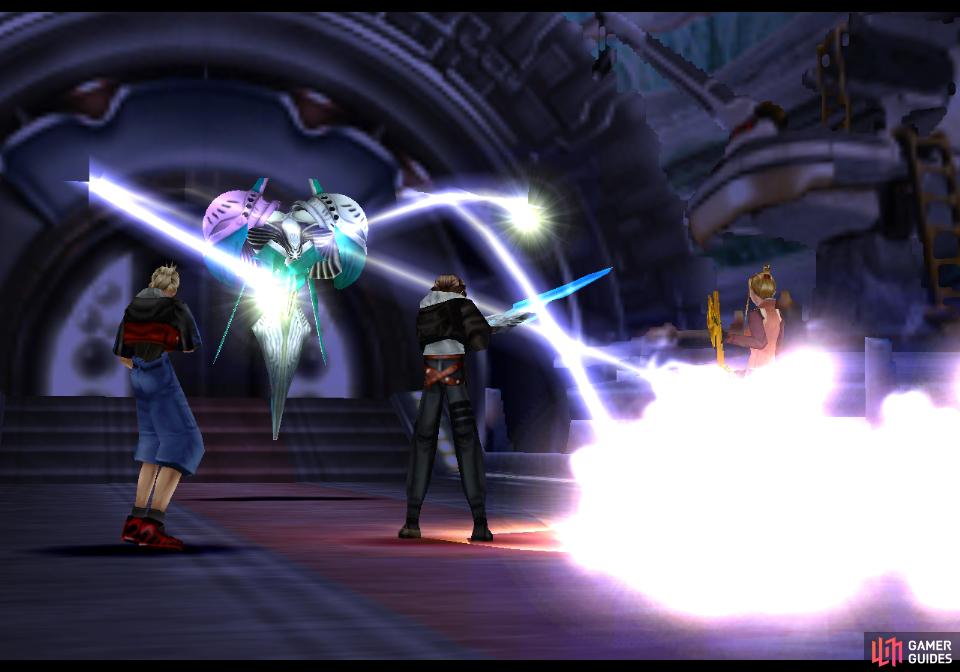
This boss fight is actually a bit complicated (compared to other boss fights, at least), as Mobile Type 8 has two modes, one being significantly more dangerous than the other. When its “Mobile Weaponry Attack Mode” is “ON”, its two probes - which are normally attached to its… shoulders? will become dormant, leaving Mobile Type 8 to weakly lash out with some tentacles. Its probes will, however, counterattack all attacks against Mobile Type 8 with Twin Homing Lasers.
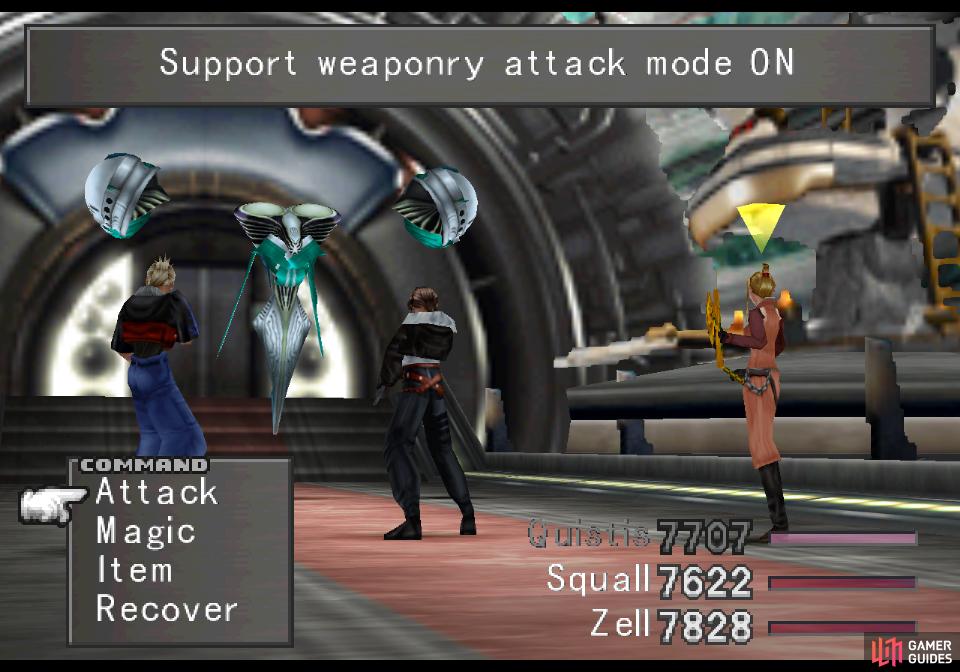
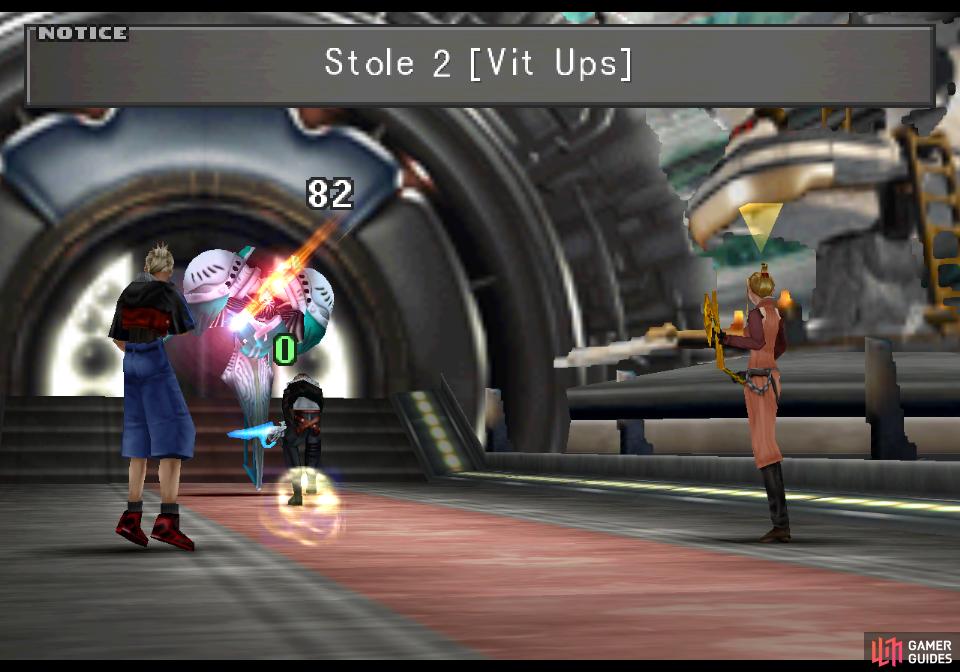
When its “Support Weaponry Attack Mode” is “ON” the probes will detach from its shoulders and Mobile Type 8 will start unleashing its more devastating attacks. The probes are highly resistant to damage (255 Vit and 255 Spr) so they’re generally best ignored - especially when they’re deployed, as they’ll counterattack all aggression against themselves with Homing Laser - but won’t respond to attacks against Mobile Type 8. There is a catch, however, as both probes can be mugged for Str Up (Right Probe) and Vit Up (Left Probe) items, although you’ve only got about a 1/8 chance of successfully stealing each attempt, so this may take a few tries.
This can be a bit of a problem, given Mobile Type 8’s offense in its “Support Weaponry Attack Mode”. When you see it switch to this mode, be prepared to heal, as it’ll invariably release its Corona attack, knocking the entire party to 1 HP. After a pause (during which its probes may attack) it’ll follow up with Megiddo Flame, which will hit the entire party for around 2,000 damage. Not only do you need to heal quickly, you need to heal a good amount - a light healing won’t get you out of danger. Once again, Recover is fantastic for this, but X-Potions or Curaga will also suffice.
The probes should be ignored, save for stealing, given their durability, and the fact that they don’t need to be defeated to win the fight. That being the case, Mobile Type 8 should be your target. It’s immune to almost all status effects, but receptive enough to physical damage, and you can further boost the damage you deal by junctioning Thundaga to Elemental Attack, as Mobile Type 8 receives double damage from thunder. Mobile Type 8 has enough HP to survive most limits, but a sustained assault should bring it down before long. Unlike some late-game foes, Mobile Type 8’s base HP are high and it’s HP growth is fairly low, so if you’re a low-level party you won’t see much benefit
Steal items from the probes if you’ve got the gumption, attack Mobile Type 8, and save your healing for after Mobile Type 8 switches to “Support Weaponry Attack Mode” and uses its Corona attack. Repeat this cycle and you should win the fight easily enough, just be wary about being overly aggressive, as if you queue an attack when Mobile Type 8 switches modes you can end up caught in an unexpected Homing Laser counterattack after being hit by Corona.
Keep up the pressure (Aura + limit breaks work well, as always) and Mobile Type 8 should fall before long. After the battle, return back to the Save Point and save your game.
This is it, the point of no return. If you continue deeper into Lunatic Pandora, you won’t have a chance to return to the world as you know it. If you have any side quests to do, now is the absolute last time to do so. Make sure you’ve got all the cards you want (again, save for perhaps Odin, which you can deal with later). Speaking of Odin, if you want Giglamesh, now’s your last chance to go back and acquire Odin. If you don’t have Odin at the start of the next boss fight, you’re not getting Giglamesh. Then again, Giglamesh can interfere in battles, and all but ruins Angelo Search, so… keep that in mind when making your decision.
Warning - Point of No Return
Obligatory scary red box. This is the point of no return. Once you continue to the next boss fight, there’s no going back to the way the world used to be. When you imminently hit disc 4 you won’t be able to go back to any civilized areas, so you can’t, say, pick up new cards created via the Queen of Cards quest. You can still travel about the world map, however, and the following areas/quests will still be open to you:
-
The Magical Lamp can still be used, the Diablos GF can be acquired.
-
The Tomb of the Unknown King can be visited, the Brothers GF can be acquired.
-
The Centra Ruins can still be visited, the Tonberry and Odin GFs can be acquired.
-
All the Chocobo Forests can be entered.
-
Tear’s Point can be visited, Solomon’s Ring, and hence, the Doomtrain GF can be acquired.
-
Cactuar Island can be visited, the Cactuar GF can be acquired.
-
Deep Sea Research Center can be visited, the Bahamut and Eden GFs can be acquired.
-
The Obel Lake quest can be completed in disc 4.
-
The UFO quest can be completed in disc 4.
-
The Queen of Cards can be met in disc 4, but since you can’t travel to civilized areas, you won’t be able to continue her quest. The region she’s in and the trade rules she uses can still influence some games, however.
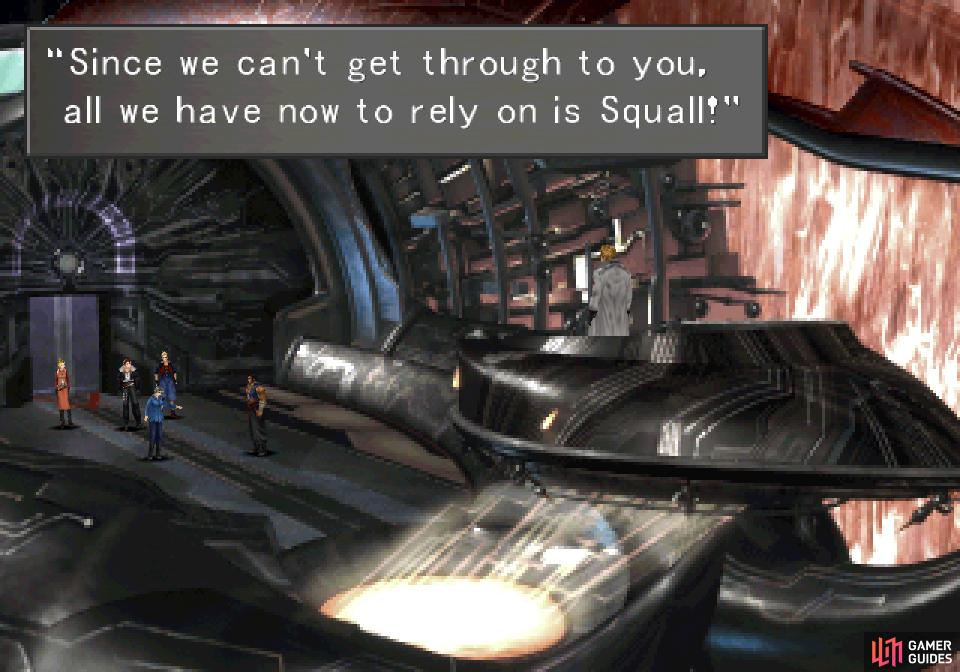
When you’re resolved to see things through to the bitter end, continue past where Mobile Type 8 was to find Fujin and Raijin holding Ellone captive, with Seifer overseeing the affair. Turns out his friends have seen enough, however, and Fujin finds her voice long enough to try to reason with Seifer. All in vain, however, as Seifer is intent on forcing another confrontation in pursuit of his vacuous “dream”.
Boss - Seifer
| Seifer | |
|---|---|
| Lv: | 1-45 |
| HP: (Lv10) | 10,000 |
| HP: (Lv20) | 17,000 |
| HP: (Lv30) | 24,000 |
| HP: (Lv45) | 34,500 |
| Weaknesses: | Poison (150% damage) |
| Resistances: | Gravity (immune) |
| Status Resistances: | Immune to most status effects; Drain 30% – The End 0% |
| EXP: | – |
| AP: | 40 |
| Draw (Lv1-19): | Blizzard, Fire, Thunder |
| Draw (Lv20-29): | Blizzara, Fira, Thundara |
| Draw (Lv30+): | Aura, Blizzaga, Firaga, Thundaga |
| Mug: | Hero, Holy War |
| Drop: | Hero, Holy War |
Seifer has never been much of a threat, and he doesn’t break that trend here. He’s got relatively weak melee attacks, Firaga and Flare at his disposal, but when he’s wounded he can use a new attack, Bloodfest, to damage the entire party. Compared to Raijin and Fujin and Mobile Type 8, however, he’s not all that dangerous. His offense is more versatile, however, for what that’s worth.
If you want to end things quickly and you’re a high level (30+), draw Aura from Seifer, cast it on yourself, and trounce him with limits. If not, just attack him normally until he falls. Junctioning Bio to your Elemental Attack will speed things up, and a powerful, low-level party will have an especially easy time, as Seifer may only be able to withstand two or three melee attacks.
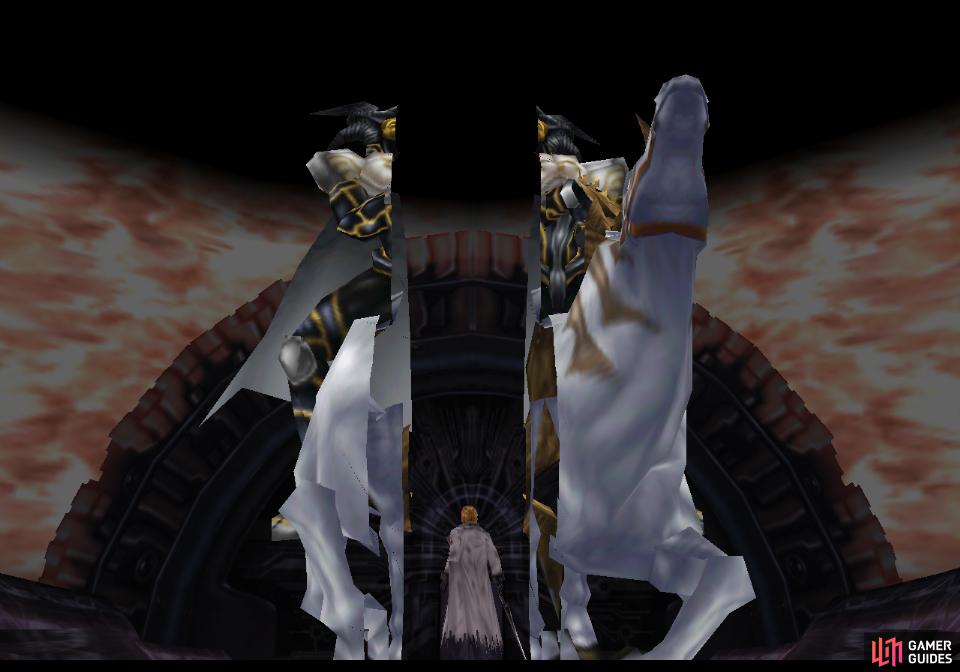
If you have Odin in your party, he’ll make an appearance and challenge Seifer, but the incompetent GF only manages to hand Seifer his only victory in the game.
After some time, Giglamesh will arrive and succeed where Odin failed.
Of particular note is the role Odin plays in this fight. If you have him, he’ll show up presumably to finish off Seifer the way he usually dispatches foes… except things don’t quite go his way. The only fight Seifer will ever win, it seems. Wait a while and a new GF will show up - Giglamesh - who apparently benefited from Odin’s demise. Giglamesh will set Seifer straight and end the battle for you. That’s right, if you’re patient and have Odin going into the fight (and can withstand Seifer’s assault) you don’t even have to participate in the fight.
You can draw Blizzard, Fire and Thunder (-ara/-aga) from Seifer, and you can steal a Hero (90%) or Holy War (10%), but he drops the same items at the same rate, so there’s no point in stealing.
After the battle ends, watch the scenes that follow and disc 3 will end in ignominious fashion. You’ll be given an option to save, and if you’re on the original PS1, you’ll need to swap discs. All in all, an odd spot to end a disc… but when you’re ready, continue on with Lunatic Pandora - Part 3.
No Comments