
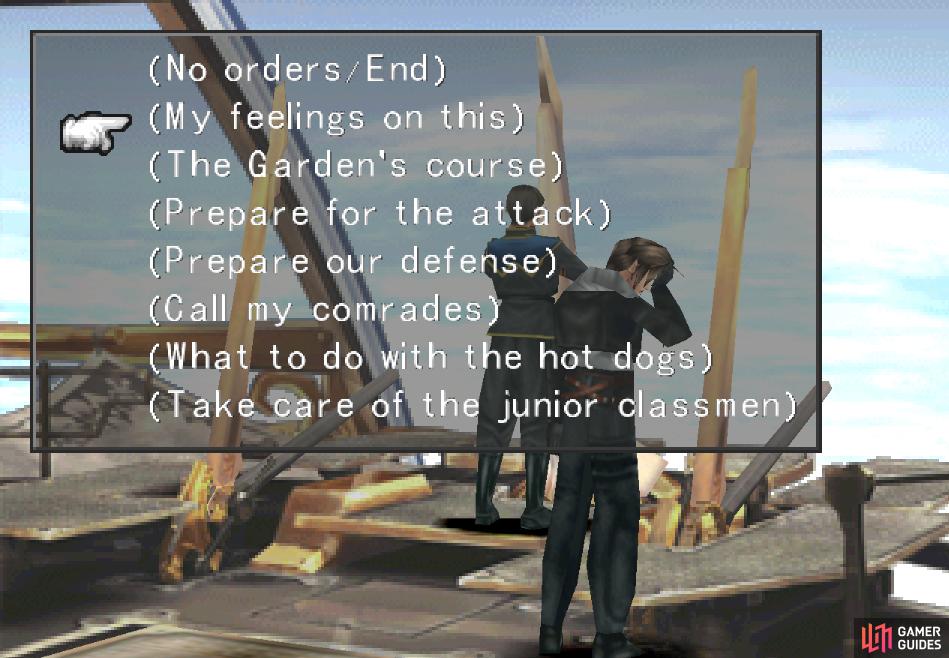
Return to Balamb Garden and fly towards the lurking Galbadia Garden to start the engagement, which requires Squall to give some orders. What you’re supposed to say is Prepare for the attack, Prepare our defense and Take care of the junior classmen, but whatever you neglect will be covered by Dr. Kadowaki. Mentioning anything else is unnecessary and may get you scolded, but the hot dog line is almost too good to resist… That said, there’s no real consequence for anything, so say what you wish.
Defending the Quad
When you’re done, ride down the elevator and Irvine will whine. Talk to Quistis and form a squad of three (sans Zell and Rinoa), ride the elevator down to the 2nd floor, disperse some SeeDs to their assigned positions by talking to them, then exit to the hallway to the left. Catch a kid (MG Junior Classman) walking down the hallway before he leaves and he’ll give you a Cottage, if you fail, you can exit to the right and return to try again. When you’re ready, return to the elevator and ride down the the 1st floor lobby.
When you’re on the 1st floor, exit to the left and enter the Quad - it’s literally the only place you can go, every where else being blocked off by people. Head downstairs and talk to Zell, who is evasive about what he’s been doing. He’ll continue with his odd behavior by asking for your ring, which Squall uncharacteristically hands over without much fuss. Go to exit the Quad and Squall will be called to the bridge, where you’ll be treated to some more video - and a glimpse of your rival. Galbadia will launch the first strike, attacking with, of all things, motorcycle troops. How any of them survive impact is beyond belief. Must have shock-absorbing jockstraps on or something.
In any event, you’ll find yourself in control of the Quad team - including Zell, Rinoa, and whomever you didn’t pick for Squall’s team earlier. Switch out your junctions and head down and to the left to the lower Quad screen, and continue left until, near the end of the screen, Zell will waste time on Rinoa’s obsession with Squall. Exit to the left and Rinoa will once again find herself cast in the role of a damsel who needs to be rescued.
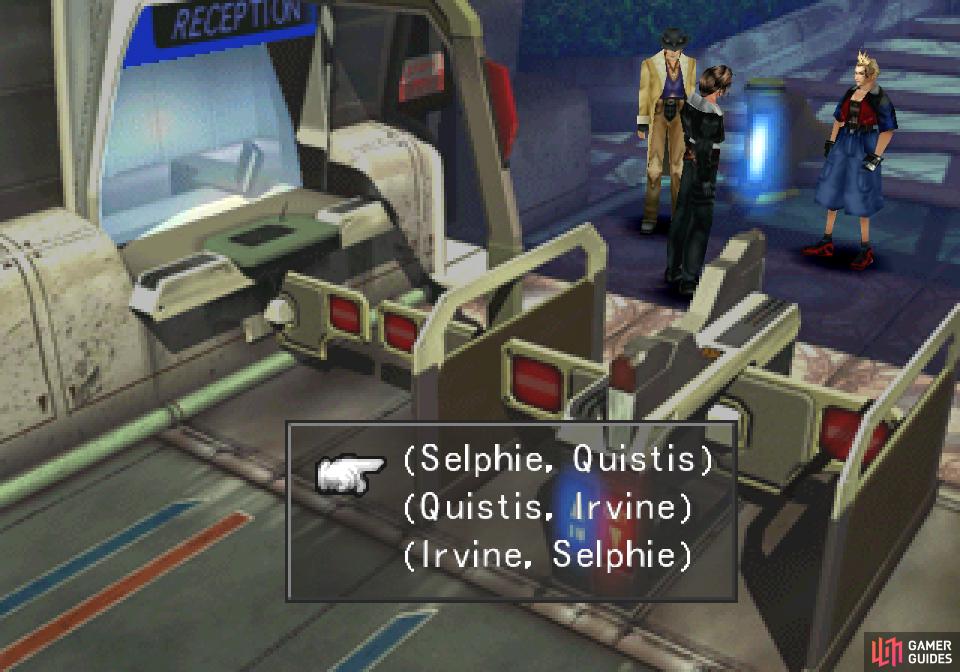
When you’re back in control, leave the Quad, return to the lobby, then follow Squall and company to the gate, where Squall will have to alter his important plans so he can save Rinoa. Again. Pick a team (your options are any combination of Irvine, Quistis and Selphie) then re-equip your junctions on this party, return to the 2nd floor and head towards your old classroom on the right side of the hall. Witness another scene detailing the Galbadian army’s profligate and downright silly tactics, after which Squall’s team will face off against four Paratroopers.
Pick a party
then dispatch some paratroopers
Paratrooper Problems
These guys aren’t that tough - even at the highest levels their HP top out at under 5,000, so you should frankly be able to cut one of them down each attack. You can steal Remedies from them, and can draw Aero, Esuna and Water, of which only Esuna may be remotely useful, as they’re fond of casting status affecting spells. Aside from that they’ll use Demi and the odd sword slash. Once they’re defeated, head down and to the right to talk to a SeeD consoling some chicken-wuss kids, after which you’ll be called back to the bridge.
Navigate the mayhem and make your way back to the elevator, return to the bridge, where Kadowaki and Irvine will collectively suggest you turn the tables on Galbadia Garden and counterattack. Rinoa is a bit of a complication, however, and your teammates will callously suggest you abandon your responsibilities as the leader of Balamb Garden - and all the SeeDs and students depending on you - in order to personally save Rinoa.
After Squall is badgered into abandoning his responsibilities as a leader in order to save Rinoa, ride down to the 2nd floor, where you’ll be pestered by a student who failed to keep track of a ward she was looking after. Why weren’t all the kids evacuated before this battle, anyways? Exit to the left, then head up the hallway to find the kid throwing a tantrum again. Talk to him and send him to the woman down the hall, whereupon you’ll be ambushed by a Galbadian Paratrooper who was wise enough not to abandon his combat mech.
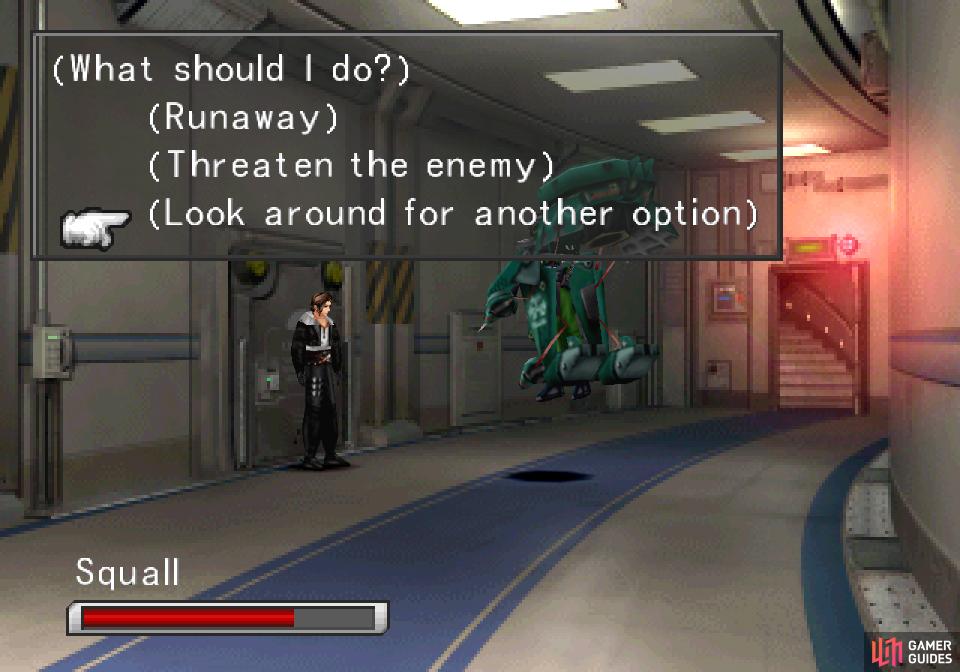
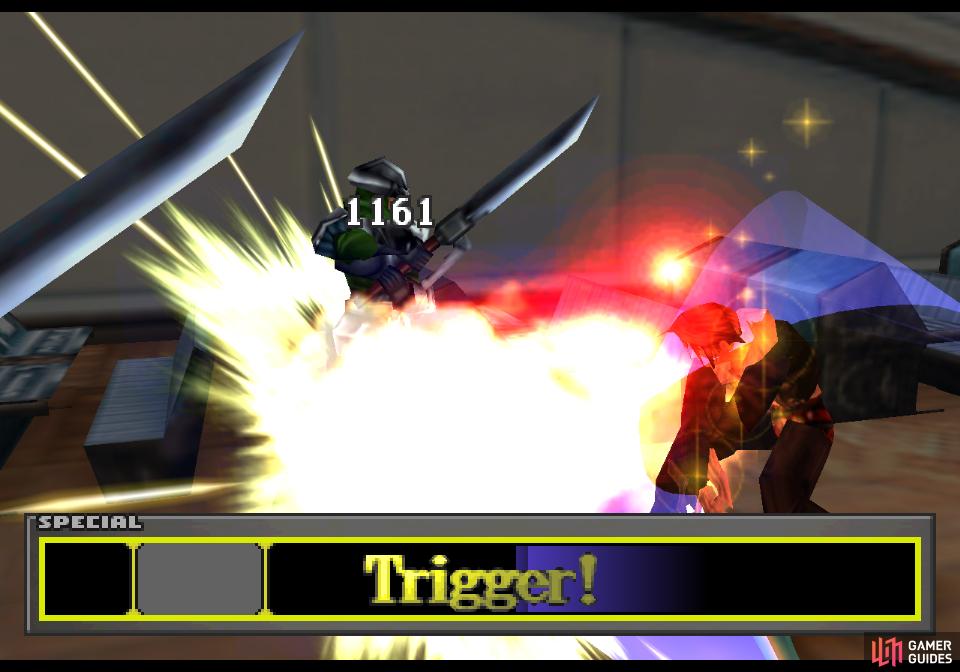
After he scores some cheap shots you’ll find yourself backed up near an emergency door. Press the [X] button and you’ll get some options; pick Look around for another option, press [X] again, then pick Press the button for the emergency exit. When the Paratrooper subsequently attacks you’ll both go flying outside and this minigame will really get started.
You’ll have to duke it out with the Paratrooper while his mech flies around over the battlefield on auto-pilot. Really some of the best instances of game graphics layers atop CG video backgrounds in gaming history. In any event, this is essentially a game of rock-paper-scissors, as you both have three options at your disposal. Blocking (default [SQUARE]) will block most of the damage you take, but there’s an element of timing to it. Kick (default [X]) is fast, but deals little damage and punch (default [CIRCLE]) deals hefty damage, but is slow. You can generally just watch your enemy and respond according; if you see him rearing back to punch, block, if he blocks, wait for him to start letting his guard down and punch. If he doesn’t seem to be doing anything… give him a kick just to be sure! Be wary that blocking and punching both have a delay, and blocking has a duration, while punching can be interrupted. If you run out of HP (lower left bar on the screen) you’ll fall off and die, but can continue from where you talked to the kid in the hallway. If you’re still finding it difficult you can opt to start with an extra 200 HP, negating the cheap shots the Paratrooper landed in the hallway.
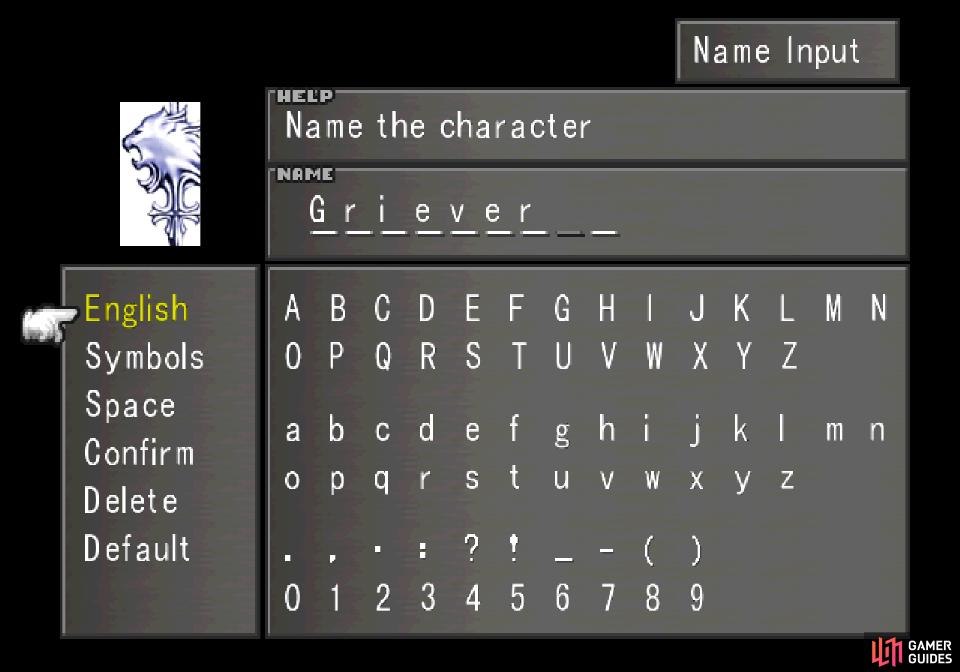
Name the beast on Squall’s ring
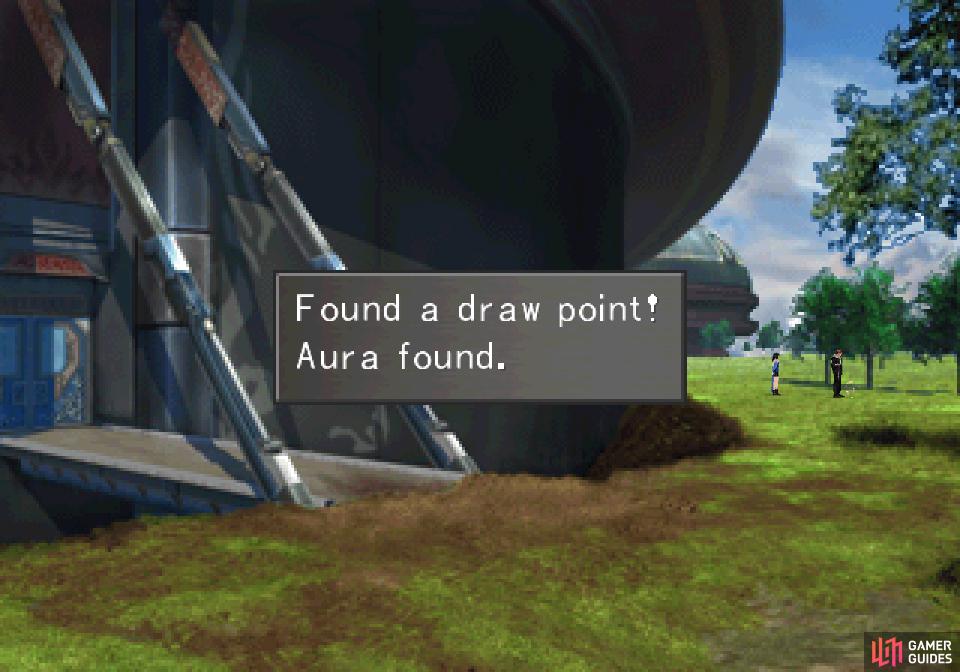
then score an Aura draw point.
Once you successfully knock the Paratrooper off, Squall will somehow learn to pilot the Galbadian mech and rescue Rinoa, who must have some serious arm strength, given how long she was hanging there, in spite of all the… you know, ramming. When you reach the ground run to the left until you’re near a door leading into Galbadia Garden’s interior, and after Rinoa babbles at you some more, name the L I O N on your ring (default name: Griever), after which Squall will even comment on how contrived this all is. Respond to Rinoa however you will - it doesn’t matter what you say - then head up along the right side of the screen to find an Aura draw point near some trees. Grab as many as you can, then enter Galbadia Garden.
Fortunately you’ll find the rest of your party waiting for you. After some more chatter you’ll be able to pick your party. Choose your team, change out junctions, use the Save Point nearby, and get ready for the real fighting to begin.
![Claim the Card Key [1] from a student](/assets/guides/163/ff8_war_of_the_gardens_card_key_1.jpg)
Claim the Card Key [1] from a student
then use said key to unlock the hockey rink.
Finding Card Keys
The doors at the end of the hallway are locked, but both exits to the left and right have merit. Since all the interesting doors to the left are currently locked, however, you’ll need to exit to the right, first. To the right you’ll find another hallway, where you’ll again need to exit to the right, ascend some stairs, then talk to Fujin and Raijin, who are too tired to bother with a fight. Poor loyal puppies.
Exit to the left, then enter a classroom to the right to find a cowardly student, who surrenders the Card Key [1] to you. He also tells you about two other students who also have card keys, which you’ll presumably need to get to Edea.
![Another student will hand over the Card Key [2]](/assets/guides/163/ff8_war_of_the_gardens_card_key_2.jpg)
Another student will hand over the Card Key [2]
which unlocks the door to the elevator.
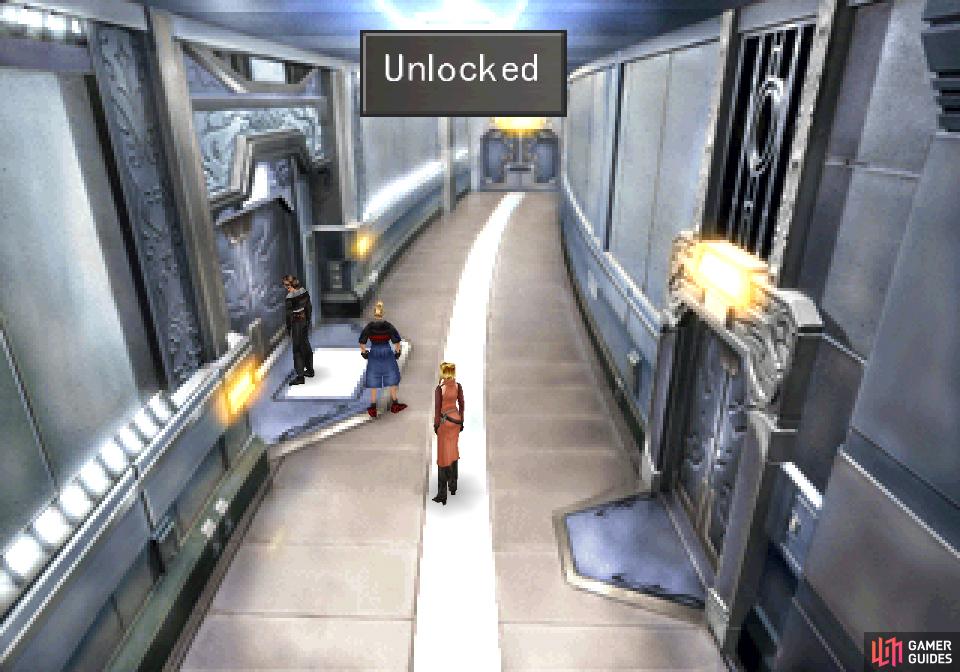
Return to the Save Point, then exit to the left to reach a hallway. Approach the doors to the left to unlock it with your shiny new card key, beyond which you’ll find the formerly inaccessible hockey rink. Head up to the next screen and use a Protect draw point near the upper goal, if you wish. Exit through a door at the top of the screen to reach the hallway beyond, where you’ll find locked doors at either end of the hallway. Both are locked, so continue through a doorway to the right to reach a classroom where another student waits. Talk to him and he’ll hand over Card Key [2] with little fuss.
Exit the classroom and head down to the bottom of the hallway to unlock a door with your new card key, which will lead to another hallway - the hallway just to the left of the Save Point, in fact (although you’ll have to exit to the Save Point hallway by heading down again). It’s a nice little shortcut, at least.
Backtrack to the Save Point, then make your way to the right again, go upstairs to reach Fujin and Raijin, and continue upstairs past them to find an elevator, which will submit to your new card key. Head down and to the left and jump off a ledge to reach a basketball court, where you’ll find a Shell draw point, if you want to make use of it. Whatever the case, continue to the left to return to the interior of the garden, then head down through another screen to reach another hallway. Ignore the stairs to the right and exit by heading down, then continue down another (brief) screen to reach a lobby dominated by some odd, three-headed beast.
It’s content to ignore you if you keep your distance, but you decidedly don’t want to do that, as this is a fight you should aspire to win. First, however, circle around the chamber to find a Save Point. Save your game, make sure your Mag-J is high, and ensure you have an empty slot in your magic inventory, as there are some spells you definitely don’t want to miss out on here. Make sure you have Mug equipped, and if you want extra protection for this fight, equip Blind, Berserk and Silence to your Status Defense and boost your resistances to wind and thunder as much as possible. As for status attacks and elemental attacks of your own, in the former case Drain is the only status effect that has any purchase, and while the beastie ahead isn’t weak to any elements, he absorbs thunder and negates wind, so avoid those.
When your preparations are made, venture forth and challenge this beast, Cerberus.
Boss - Cerberus
| Cerberus | |
|---|---|
| Lv: | 1-30 |
| HP: (Lv10) | 8,000 |
| HP: (Lv20) | 9,000 |
| HP: (Lv30) | 10,000 |
| Weaknesses: | – |
| Resistances: | Thunder (absorbs), Wind (immune), Gravity (immune) |
| Status Resistances: | Immune to most status effects; Drain 20% – The End 0% |
| EXP: | – |
| AP: | 30 |
| Draw: (Lv1-19) | Double, Quake |
| Draw: (Lv20+) | Double, Quake, Triple |
| Mug: | Spd-J Scroll |
| Drop: | G-Mega Returner x8 |
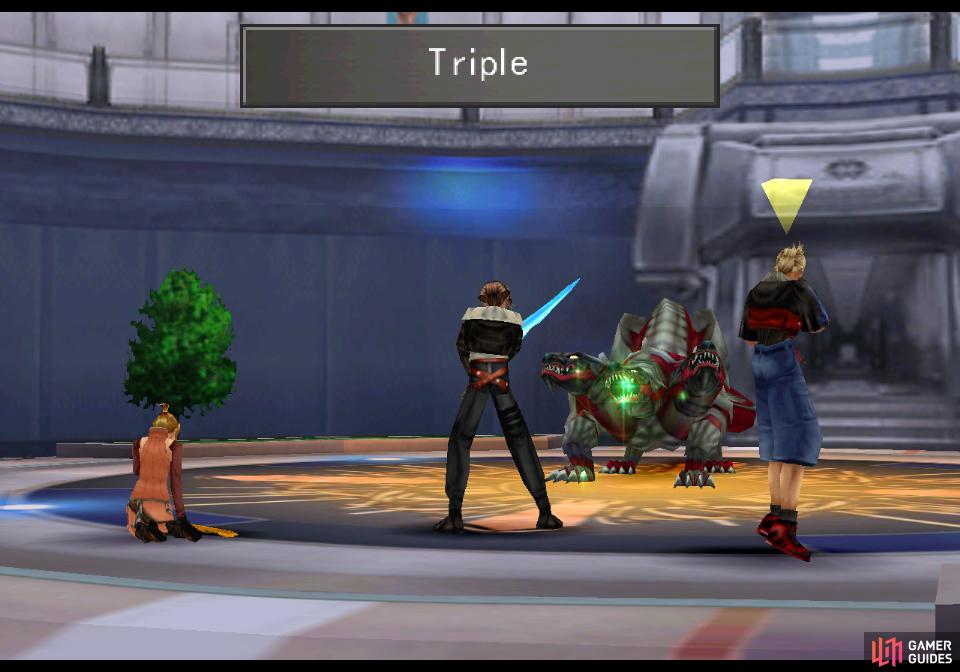
If two heads are better than one, then three must be sublime! Cerberus is pretty much a one-trick boss, but it’s a pretty good trick - he’ll cast Triple near the outset of the fight, then blast you with spells like Aero and Thundaga, along with the odd physical attack. If you attack him yourself, he may counterattack with spells like Blind, and if he catches you buffing up, he’ll use Dispel to keep you under control. Keep in mind that with Triple in effect, he’ll cast each spell three times.
That said, Cerberus isn’t a terribly challenging foe. He caps out at level thirty, and at his strongest he’s got 10,000 HP… although his Magic score can reach over 200, which is impressively high for such a level. That said, if you have decent spells junctioned to Strength (enough to get your Strength near 100), a single limit break can potentially defeat Cerberus. You’ll also make your life easier if your thunder and wind resistances are high, as that accounts for the vast majority of Cerberus’s offense.
Along with the aforementioned elemental attacks, Cerberus will also use Blind and Silence, sometimes as counters, other times unprovoked. You can’t draw Esuna from Cerberus, so if you get afflicted you’ll need to use items or dip into your own spell reserves to cure yourself, although you could always have just junctioned those spells to your Status Defense before the fight started.
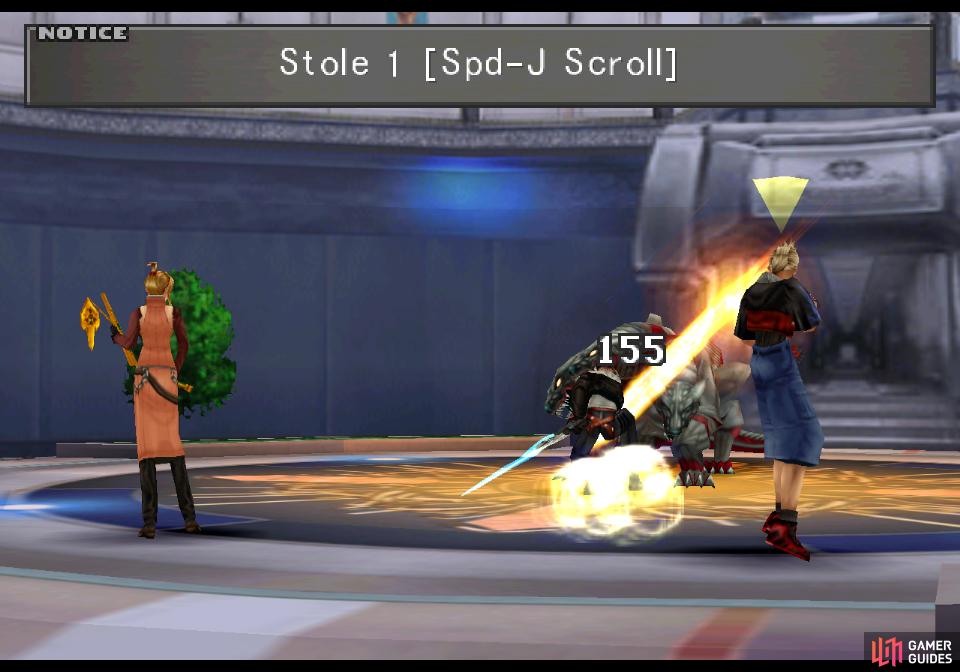
Steal a Spd-J Scroll from Cerberus

then finish the beast off
Speaking of Cerberus’s spells, at levels 1-19 you can draw Double and Quake from him, but at level 20+ you can also draw Triple, which is a very potent spell for junctioning into Str-J (4th), Mag-J (2nd), Spd-J (1st), Eva-J (2nd), Hit-J (1st) and Luck-J (3rd). Suffice to say, if you can stock up on this potent spell, you’re encouraged to do so, as it’ll be a great long-term junction for your Magic stat, freeing up Ultima to do other things… like Str-J! You can also steal a rare Spd-J Scroll from Cerberus, which can be used to teach a GF… well, the Spd-J ability. Not super necessary, as there are three GFs that can learn this ability natively (Pandemona and Cerberus being two of them) but if you don’t want to wait until the end of the game to have three characters with this ability… well, here’s your chance to get it early.
Draw Triple if you can, steal a Spd-J Scroll if you wish, then dispatch Cerberus to earn a whopping 30 AP, the Cerberus card and acquire Cerberus as a new GF. Things are getting crowded in that GF list, eh?
GF - Cerberus
You know the drill - new GF, time to talk about this critter and find it a home. Cerberus is the first GF to natively possess the ability to learn ST Def-Jx4, although there’s a bit of a grind to get there. You first must learn Spr-J, then ST Def-J, ST Def-Jx2 to finally unlock ST Def-Jx4. All told this will cost a whopping 460 AP, so it’s not something you’ll be doing before you’ve completed Galbadia Garden. Once you get back to Kashkabald Desert, sure, but it’ll be a long-term project.
In addition, Cerberus can learn Str-J, Mag-J, Spr-J, Spd-J, and Hit-J, giving him a variety of redundant and rare stat junctions. His Spd+20% and Spd+40% abilities are also somewhat rare, if not terribly useful in the long run. He also has - or can learn - Ability x3 (handy if you didn’t amass Rosetta Stones in D-District Prison) and the uncommon Expendx2-1 ability, which will allow you to expend only one spell stock when casting a spell while under the effect of Double. You’ll get other GFs with this ability in the future, but for now, if you for some reason stuck to the mage archetype, this ability will help you conserve spells. Given how powerful physical attacks and limits are in this game, however… well, it’s probably not the best choice, all things considered.
With that out of the way, who gets Cerberus? It’s finally time for the long-suffering Quezacotl-user to get a new GF, as it’ll finally give them Ability x3 (if they still need it) and allow them to eventually learn ST Def-Jx4, leaving the Shiva-user out as the only character without such an ability lined up (assuming you followed the guide’s advice earlier and used the Status Guard item on one of the Ifrit-user’s GFs). Also, it doesn’t hurt to spread Spd-J and Hit-J to another character, which the Shiva-user doesn’t need at this point. If you want your entire party to have Spd-J, go ahead and use the Spd-J Scroll you got on one of the Ifrit-user’s GFs, as you won’t find another source for it for quite a while.
Cerberus Card
As for Cerberus’s card… well, it refines into 100x Lightweight items. These can later be refined into an Accelerator, which teaches a GF the Auto-Haste ability. Hopefully you already used the Kiros card to this effect, in which case… well, you really don’t need another Accelerator. Otherwise Lightweights can be refined into Haste spells, which… aren’t exactly hard to come by, either. Since Cerberus’s card numbers aren’t all that great - it has a strong left face (A), but none of its other sides are really suited for play against Level 7 Boss cards. It’s really not much use for Card Mod or for play, so… yeah. Guess it can just take up space?
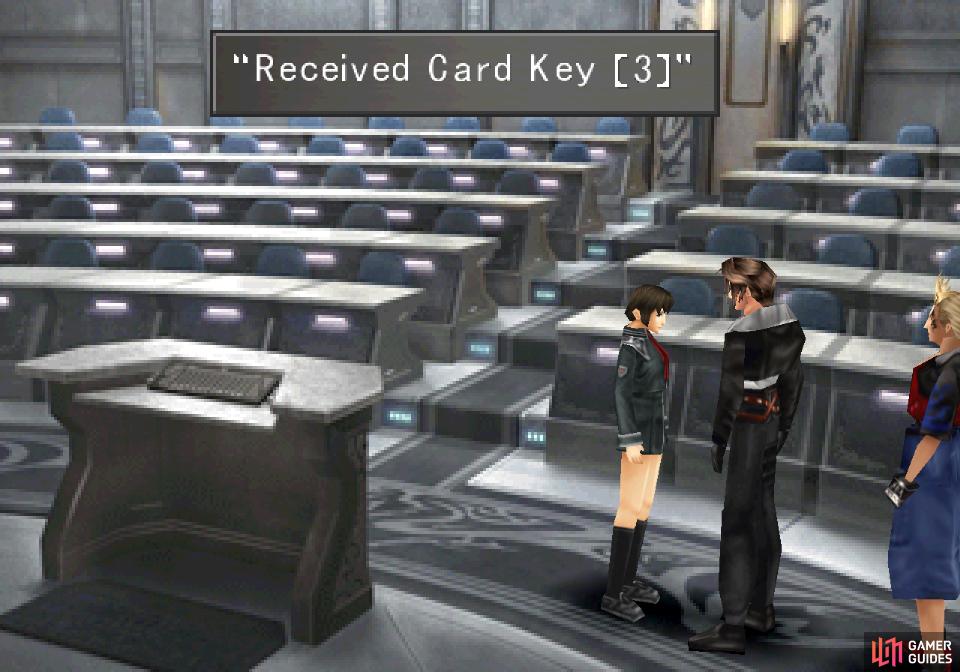
The Final Card Key
Now that you’ve tamed Cerberus, it’s time to seek out Edea and her lap dog. Use the Save Point, rest up, heal, save your game, all that good stuff, then exit to the left (southwest?) to reach yet another hall. Go through a door to the left to find the final student, who hands over the Card Key [3] item along with some encouragement. With this car key in hand, return to the lobby where you fought Cerberus and exit via the top-most (northwestern) hallway, then head up the stairs to the right. Once you’re atop the stairs, exit to the left, then use your newfound card key on the previously-sealed elevator.
Ahead of you are Seifer and Edea, and fortunately there’s a generous Save Point nearby. Nice of them to let you use it and all, and since they’re being so generous, you might as well take advantage of their kindness to prepare for the fights ahead.
First up, make sure you have Mug equipped, and that your mugging character has a low enough Strength stat that they’re not likely to kill your upcoming foes off before robbing them. Other than that, make sure your resistance to fire and ice are all as high as possible. Seifer will again stick to fire magic, while Edea will randomly use fire and ice spells. As for status effects, junction Death to Status Defense, and if you have the ability to do more, junction Silence, too. Better yet, if you can spare Pain, junction that to protect yourself from both Silence and Curse, both of which may come up. If you can make yourself immune to fire, ice and Death, you’ll be in stellar shape for the upcoming battle.
Seifer will take additional damage from poison, so junctioning Bio to your Elemental Attack will boost the damage he sustains. Edea has no such elemental weakness, but she’s highly vulnerable to Sleep and Slow (well, and Darkness, too, but what’s the point?), the former of which is quite effective at mitigating her offense. Both Seifer and Edea are susceptible to Drain, should you desire some supplemental healing.
So, to recap: ensure you have Mug on a character with low Strength. Junction Firaga and Blizzaga to Elemental Defense, Death and possibly Pain (or failing that, Silence) to Status Defense, and Sleep to Status Attack. When you’re ready to fulfill your destiny as a SeeD, approach Seifer and Edea.
Boss - Seifer
Like the previous fight, you’ll first square off against Seifer, then Edea. Why they don’t decide to work together is odd, but if they want to make things easier, by all means.
| Seifer | |
|---|---|
| Lv: | 1-31 |
| HP: (Lv10) | 4,000 |
| HP: (Lv20) | 7,000 |
| HP: (Lv31) | 10,300 |
| Weaknesses: | Poison (150% damage) |
| Resistances: | – |
| Status Resistances: | Immune to most status effects; Darkness 99% – Drain 0% – Reflect 0% – Regen 0% – Silence 99% – Sleep 99% – The End 0% |
| EXP: | – |
| AP: | 20 |
| Draw: (Lv1-19) | Dispel, Fire, Haste, Thunder |
| Draw: (Lv20-29) | Dispel, Fira, Haste, Thundara |
| Draw: (Lv30+) | Dispel, Firaga, Haste, Thundaga |
| Mug: | Mega Phoenix x8 |
| Drop: | Mega-Potion x8 |
Seifer’s stronger than ever, but that’s not really saying much - he’ll still top out at level 31, possessing between roughly 4,000 and 10,000 HP, depending on your level. Suffice to say, that can be depleted with a single limit break. Seifer’s other stats aren’t much more impressive, the only high stat being Spirit, and you don’t need to rely on spells to harm him, anyways.
Aside from his melee attack, Seifer will use fire magics
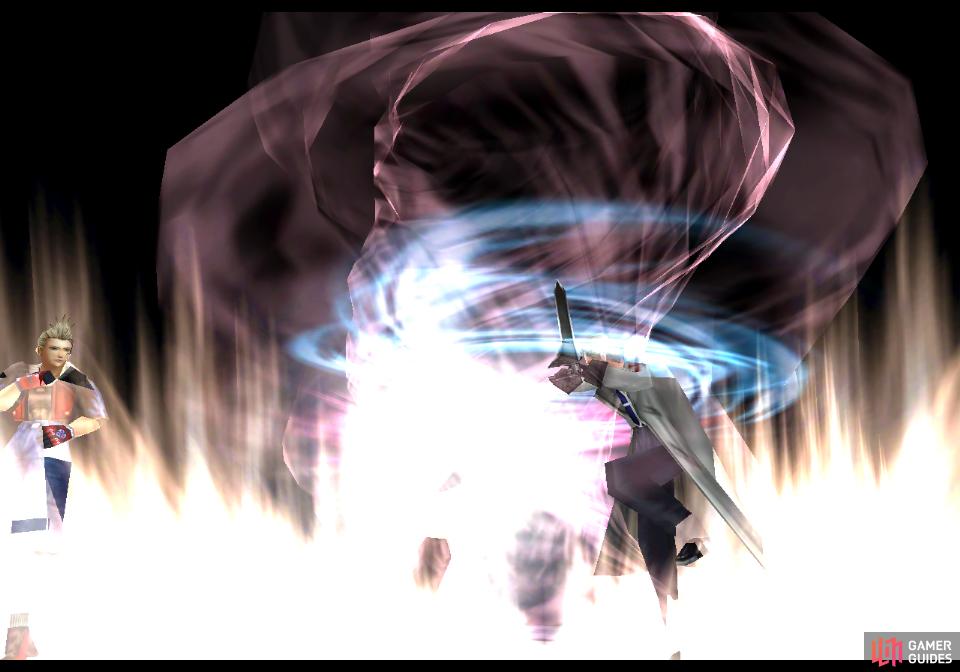
and his Demon Slice attack, neither of which should be terribly threatening.
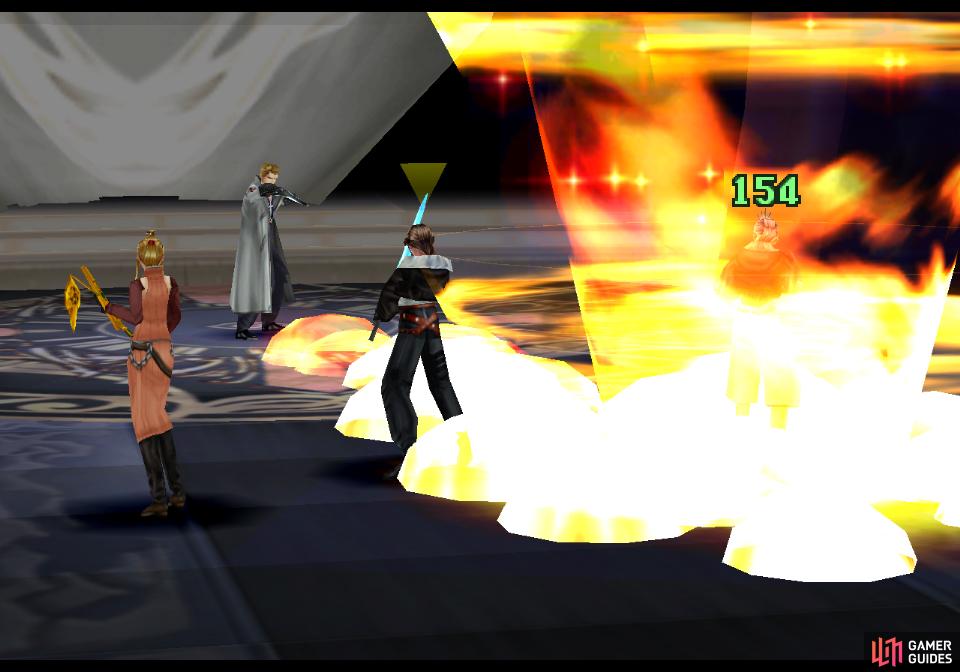
Being real honest with you here… it’s kind of hard to lose to Seifer. If you followed this guide, you’ll steamroll Seifer without much trouble. Heck, as long as you didn’t forget to equip your GFs this shouldn’t be much of a fight. He’ll typically alternate between a weak sword slash and casting Fira, the former of which will deal little damage and the latter of which may actually heal you, if you junctioned Firaga to Element Defense earlier. He can also use his Demon Slice attack, which deals substantially more damage than his normal attack, but still nothing to be too worried about.
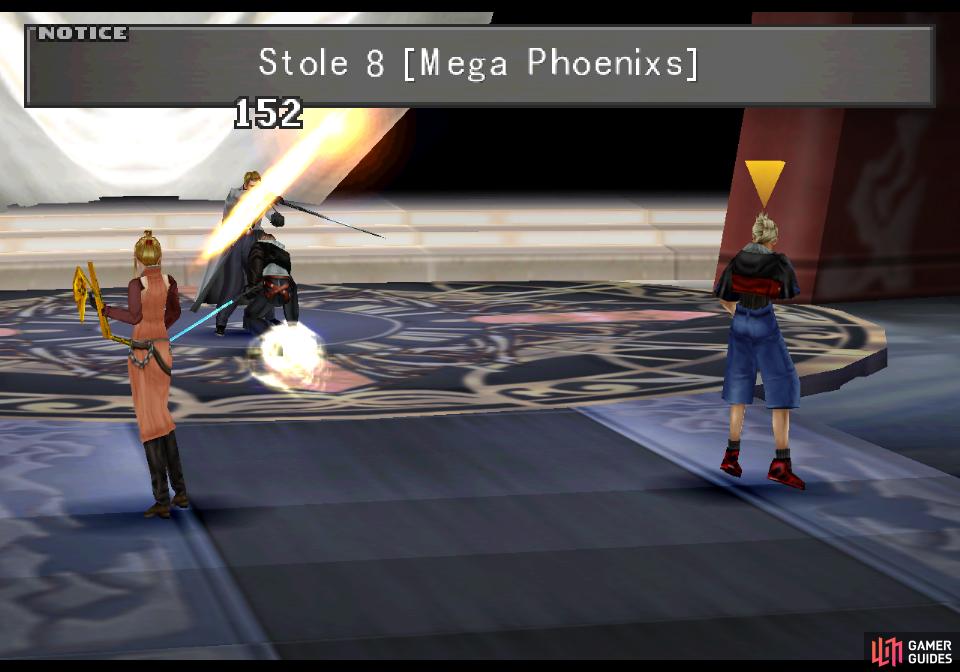
Steal eight Mega Phoenixes from Seifer

then put him down
Seifer is weak to the poison element (not the status), so if you have Bio junctioned to Elemental Attack you’ll deal more damage. Otherwise, he’s susceptible to Drain, but highly resistant or outright immune to other status effects, save a few beneficial ones like Reflect and Regen. You can draw Dispel, Fire/Fira/Firaga, Haste and Thunder/Thundara/Thundaga from him, and defeated normally he’ll drop eight Mega-Potion items. You can Mug him for eight Mega Phoenix items, however, which is definitely the way to go.
Smack Seifer around, and when he falls, Edea will use her magic to escape… or move to an arena more to her liking? Either way, return to the Save Point, save your game, heal if necessary (hah…) and generally get ready to continue the fight. You shouldn’t need to change any junctions or anything - if you prepared as directed earlier, you’ll be ready for the next encounter, too.
Boss - Edea
Cross the walkway to return to the elevator and ride it down to the second floor, exit the screen near the elevator to reach the hallway beyond, then exit to the right to reach the circular hallway above the lobby where you (should have) fought Cerberus earlier. Exit to the bottom right to reach the theater and approach the elevated speaker’s platform and Rinoa will show up if she’s not already with you. Her purpose isn’t immediately apparent, but you’ve little time to contemplate this development, as Edea will soon make a dramatic entrance (what took her so long?), after which her lapdog will arrive (how did he get here?!).
Apparently Seifer hasn’t had enough of a beating yet, and he’s determined to protect Edea even beyond his abilities.
| Seifer | |
|---|---|
| Lv: | 1-32 |
| HP: (Lv10) | 3,000 |
| HP: (Lv20) | 5,000 |
| HP: (Lv32) | 7,400 |
| Weaknesses: | Poison (150% damage) |
| Resistances: | – |
| Status Resistances: | Immune to most status effects; Drain 0% – Haste 0% – Reflect 0% – Regen 0% – Slow 10% – Sleep 99% – The End 0% |
| EXP: | – |
| AP: | 20 |
| Draw: (Lv1-19) | Dispel, Fire, Haste, Thunder |
| Draw: (Lv20-29) | Dispel, Fira, Haste, Thundara |
| Draw: (Lv30+) | Dispel, Firaga, Haste, Thundaga |
| Mug: | Hero |
| Drop: | Holy War |
Fittingly, Seifer isn’t at full strength this time around, having notably fewer HP and a stunted arsenal of moves with which to deploy against you. A good thumping will do that, eh? We would try to be objective and say something cautionary like “this doesn’t mean he’s not a push-over”, but… let’s be honest, if you beat him earlier, you’ll trounce him again. His offensive stats (Strength + Magic) aren’t significantly altered to justify extra caution - in fact, his Strength is lower this time around, and since he only uses Fira (which you should be immune - or at least highly resistant to) he’s really got no chance. This is a fight meant only to show off Seifer’s dogged determination, nothing more.
That doesn’t mean you can’t profit off of him, though. First, you can draw Fire and Thunder from him (as well as the -ara/-aga versions as he levels) as well as Dispel and Haste, if any of those strike your fancy. You can steal a Hero or Holy War from him, or just obtain either as drops - you’ve got about a 90% chance of getting a Hero, and a 10% chance of getting a far superior Holy War. Whether it’s worth farming for the Holy War we’ll leave up to your judgment.
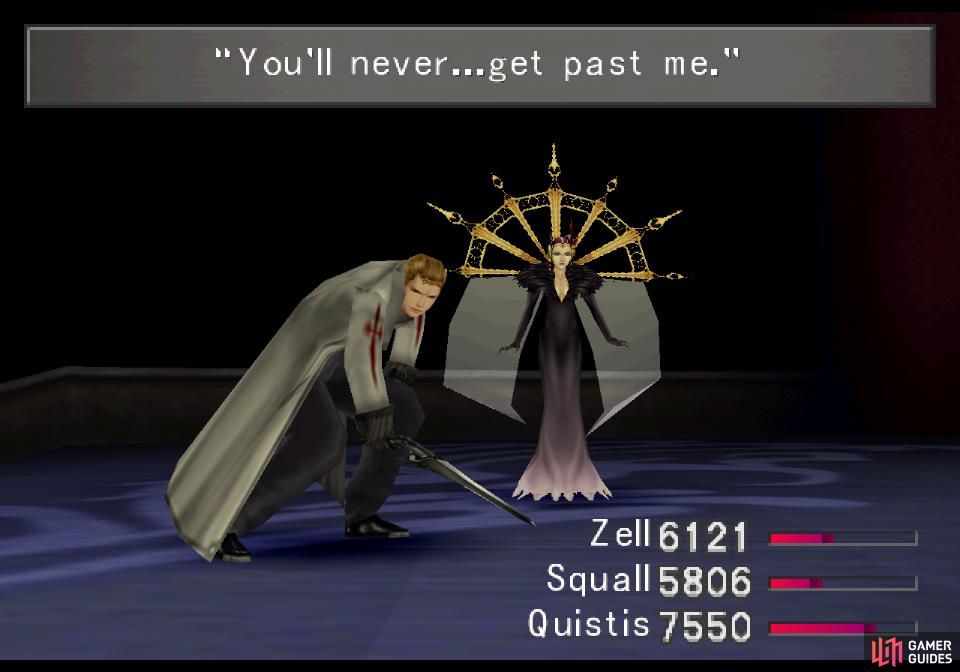
Once you crush Seifer, Edea will grow tired of Seifer’s antics and deign to face you herself.
| Edea | |
|---|---|
| Lv: | 1-32 |
| HP: (Lv10) | 5,000 |
| HP: (Lv20) | 10,000 |
| HP: (Lv32) | 16,000 |
| Weaknesses: | – |
| Resistances: | – |
| Status Resistances: | Immune to most status effects; Darkness 20% – Drain 0% – Haste 0% – Reflect 0% – Regen 0% – Sleep 20% – Slow 10% – The End 0% |
| EXP: | – |
| AP: | 30 |
| Draw: | Alexander, Blizzaga, Demi, Esuna |
| Mug: | Royal Crown |
| Drop: | Force Armlet |
Edea is much stronger this time around, employing a variety of spells including Blizzaga, Firaga and Thundaga. If you’re resistant to - or better yet, if you absorb - fire, ice and thunder damage, you’ll be in great shape for this fight. In fact, if you are immune or absorb fire, ice and thunder damage Edea can only defeat you with her Death spell, and if you’re immune to Death as well, she can’t beat you on her own. She also has a Maelstrom attack, but this reduces your HP by 50%, so while it may bring you into dangerous territory if you’re not immune to fire and ice, it can’t kill you.
Edea’s Maelstrom will reduce your HP by half
If your elemental resistances are high enough, Edea will find victory elusive
In addition to that she can cast Dispel, Reflect, Silence and Slow, the former of which will hinder your buffs, Reflect can stymie any offensive magics of your own, and the others are annoying debuffs. If you have Auto-Haste you’ll be immune to Slow, which leaves only Silence to protect against, which you can achieve via Status Defense junctions. You can also draw Esuna from Edea, meaning if she can’t kill you outright via elemental damage or the Death spell, you can keep yourself free of nasty status effects that way.
Simply put, if you followed the advice given earlier and made yourself immune to fire, blizzard, thunder, Death and possibly Silence, Edea is incredibly easy to defeat.
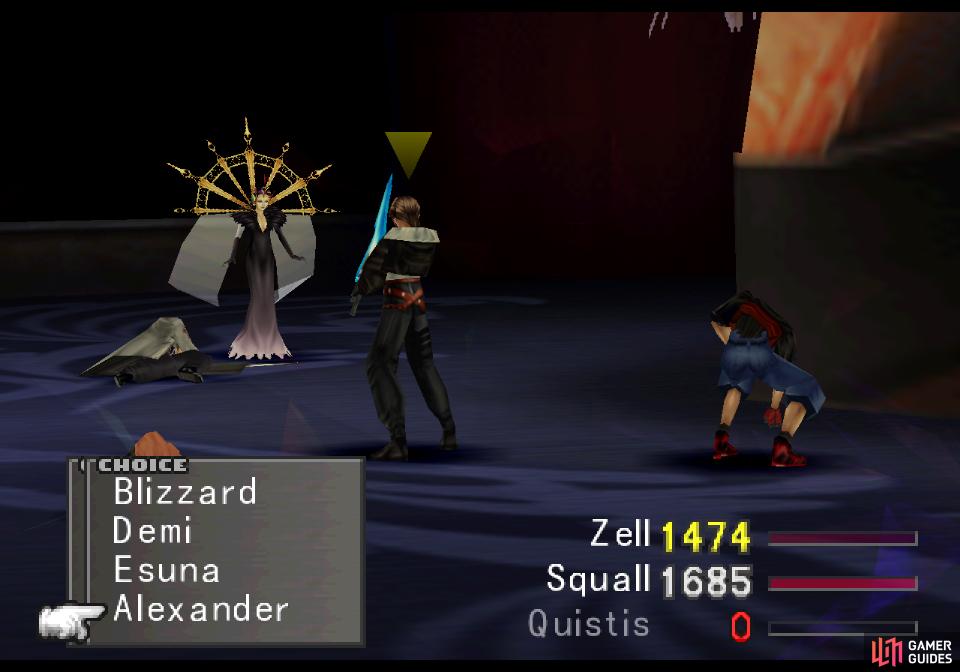
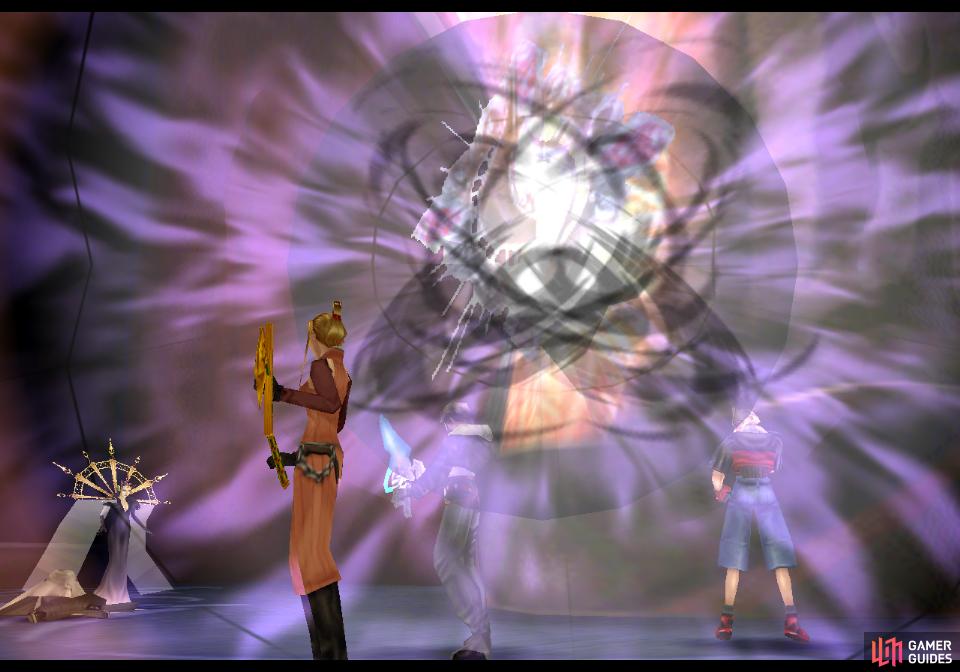
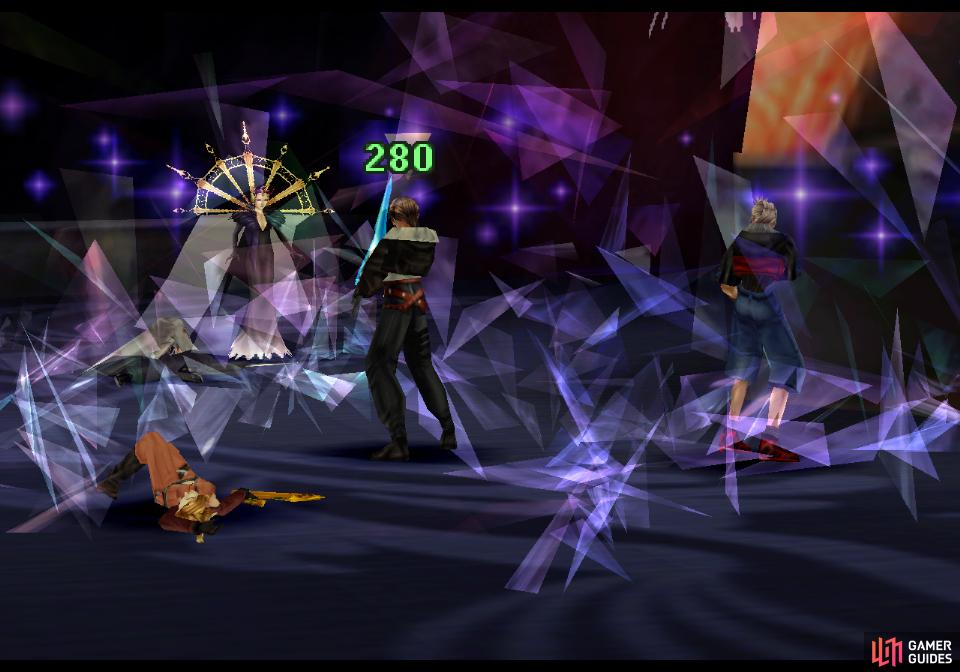
The first thing you should do in this fight is draw the Alexander GF from Edea. After this, draw Demi from her and cast it on her for some cheap damage (assuming she hasn’t protected herself with Reflect yet), then just go to work attacking her. If she brings your HP low with Maelstrom, resort to limit breaks (provided the self-same Maelstrom doesn’t inflict the curse status - a nasty side effect it has), which will put her down in short order.
She’s not weak to any elements, but she is susceptible to darkness, sleep and slow, the former of which… well, won’t really affect her at all. If you junction Sleep to your Status Attack, there’s a good chance you’ll keep her incapacitate throughout much of the fight, making it a fine tactic to employ to make this battle even easier.
If you’re not terribly threatened by Edea, you can consider attempting to Mug her for a Royal Crown, which teaches the lovely Mag+60% ability to a GF. Alternatively, if you simply defeat her normally she’ll drop a Force Armlet. This item is required for Rinoa’s Shooting Star weapon, and aside from a lucky drop form X-ATM092, this is one of the few chances you’ve had to obtain one (the next best way of getting one is by fighting level 30+ Ochus in the forests near Timber, which have a 5% chance of dropping one - rather tedious). That said, you’ll be able to buy Force Armlets soon enough, and while Royal Crowns will also become easy enough to obtain via as-of-yet unobtained refining abilities, it’ll take longer to get that. We opt to go for the Royal Crown to teach a final GF the Mag+60% ability, although even that seems like overkill considering you (hopefully) have Ultima, Triple or Pain to junction to Magic.
After the battle is won, Edea will snap back to her senses, Seifer will receive succor from an unexpected source, and Rinoa will damsel again. Watch the scenes that follow and disc 2 will finally end.
No Comments